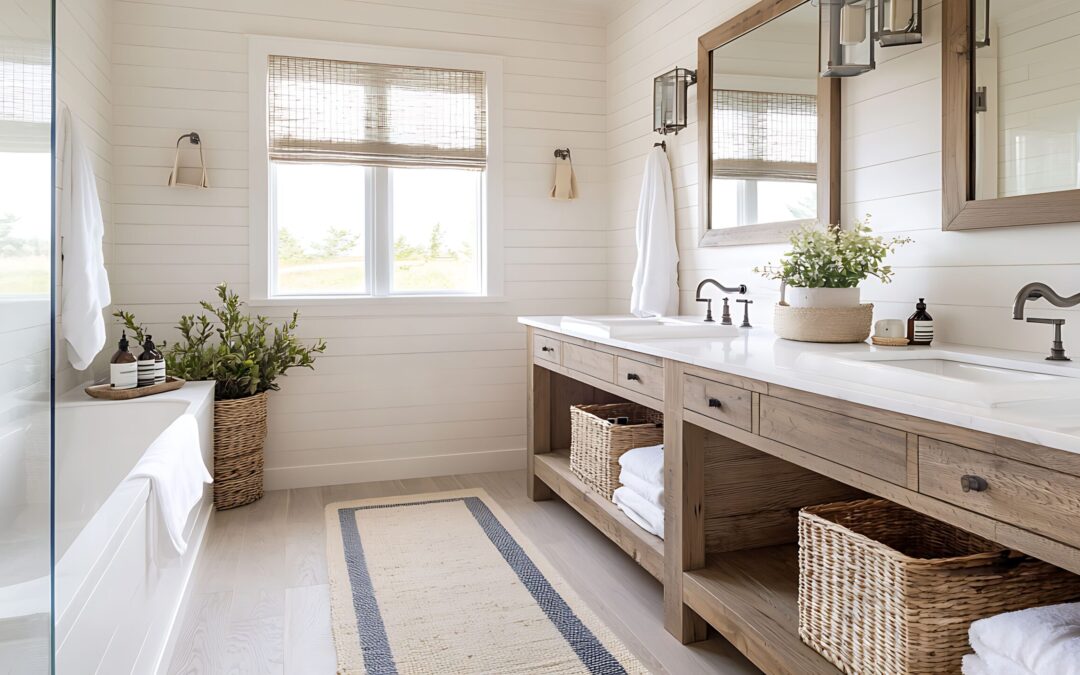
This post is all about Bathroom Vanity Organiser Under Sink.
A bathroom vanity organiser under the sink can make an incredible difference in how your bathroom looks and functions. It’s often one of the most overlooked spaces in the home, yet it has the potential to completely transform your daily routine when organised thoughtfully.
In this post, we’ll explore practical ways to maximise your under-sink storage using smart organisers that are functional, stylish, and easy to maintain. You’ll learn how to choose the right setup for your space, how to style it cohesively with your bathroom design, and useful maintenance habits to keep it looking fresh. As someone who appreciates good design and functionality, I know how satisfying it feels to open a cabinet and see everything in its place. It makes every day feel just that bit easier.
This post is all about Bathroom Vanity Organiser Under Sink.
Why You Need a Bathroom Under-Sink Vanity Organiser
A bathroom should be both beautiful and functional, but the space beneath the sink often becomes a tangle of bottles, cleaning products, and random items. It’s an awkward area to work with; the pipes, limited height, and narrow space don’t naturally lend themselves to order. That’s where a bathroom vanity organiser under the sink can really shine.
With the right system, you can transform that cluttered cupboard into a practical, easy-to-maintain part of your home. Drawer inserts, tiered shelves, and adjustable racks make it possible to use every bit of space efficiently. Each item has its place, which means getting ready in the morning feels calmer, and cleaning in the evenings is less of a chore.
It’s not just about functionality, though. A well-organised vanity looks intentional; it reflects the kind of attention to detail that elevates your bathroom design. When everything is tidy, visible, and within reach, you’ll notice your entire bathroom feels lighter, more spacious, and more inviting.
Types of Bathroom Under-Sink Vanity Organisers
The key to finding the right bathroom vanity organiser under the sink is choosing a system that suits your space, habits, and style. Not every bathroom has the same layout, so flexibility and practicality are essential. Below are a few of the most reliable types of organisers to consider, along with ideas for how to make them work for you.
Pull-Out Drawers and Sliding Shelves
If you’re constantly bending down and rummaging through the back of your vanity, pull-out drawers are a fantastic upgrade. They bring everything within reach and help you make use of the full cabinet depth. Sliding shelves also work beautifully in narrow spaces, letting you divide your storage without wasting vertical room.
Both options are easy to maintain and perfect for everyday products like skincare, cleaning sprays, or extra hand towels. Look for coated metal or plastic designs that can stand up to bathroom humidity.
Stackable Bins and Containers
For those who like flexibility, stackable bins are one of the most versatile ways to use vertical space. They’re great for separating categories, like haircare, dental items, or spare soap, while keeping the space tidy and easy to rearrange.
Clear or lightly frosted bins make it simple to see what’s inside at a glance, while a consistent colour palette helps everything look cohesive. This is often the simplest and most affordable bathroom vanity organiser under-sink setup to start with.
Adjustable or Expandable Racks
Every under-sink space has its quirks, pipes, uneven shelves, and varying heights. Adjustable racks make it easy to create order around these challenges. The best ones can expand or contract to suit your cabinet’s shape and let you optimise every centimetre.
They’re particularly useful if you store a mix of tall bottles, smaller containers, and cleaning products. You’ll be surprised by how much extra space appears once everything is layered in a way that works with, not against, your plumbing.
Hanging Baskets and Tension Rods
When floor or shelf space is limited, turning to vertical solutions is a clever move. A few hanging baskets on the inside of your cabinet doors can hold smaller bits and pieces like brushes, face cloths, or spare toothpaste. Tension rods are also handy for hanging spray bottles, freeing up your organisers for other items.
This approach is minimal yet effective, giving your under-sink area a clean, uncluttered look without overcrowding it with too many containers.
How to Choose the Right Bathroom Vanity Organiser Under Sink
Finding the perfect bathroom vanity organiser under sink isn’t just about fitting things into boxes; it’s about creating a system that genuinely works for your space and your routine. Every bathroom is different, and the best organisers are the ones that combine practicality with a bit of personality. Here’s what to keep in mind when choosing the right setup.
1. Measure Your Space Carefully
Before buying anything, take a few minutes to measure the width, depth, and height of your vanity cabinet, including the area around the pipes. This helps you avoid the common mistake of buying organisers that look great but don’t fit properly. Leave some room for flexibility; not every corner needs to be filled, and keeping a little open space will make everything easier to access.
2. Work Around Plumbing and Fixtures
Pipes and fittings can make under-sink storage feel like solving a puzzle. Adjustable or tiered organisers are ideal for this because they allow you to build around those awkward shapes instead of fighting them. A wire rack or expandable shelf that fits neatly under or beside pipes can make a big difference in how efficiently the space functions.
3. Choose the Right Materials
Bathrooms naturally deal with moisture, so durability matters. Metal racks are sturdy and resist warping, while acrylic and plastic bins are lightweight and easy to clean. If you prefer a softer, more organic look, bamboo or natural-fibre baskets are stylish alternatives, just make sure they’re sealed to resist humidity.
Think about how materials will look within your overall bathroom style, too. A modern bathroom might suit clear acrylic or matte finishes, while a more natural space looks great with light wood tones or woven textures.
4. Balance Practicality with Aesthetics
A clean, unified look helps your bathroom feel more composed. Try sticking with one or two materials or colours throughout your under-sink setup; it keeps the space calm and cohesive. At the same time, make sure each element serves a clear purpose. A beautifully styled arrangement that doesn’t function well will only frustrate you in the long run.
A bathroom vanity organiser under sink should make everyday life easier while still complementing the overall aesthetic of your space. The most satisfying systems are the ones that blend seamlessly into your bathroom’s look without drawing attention to the storage itself.
5. Think Long-Term Maintenance
It’s easy to set up an organiser once; the real challenge is keeping it practical over time. Choose storage that’s easy to remove and clean, and consider adding labels if you share the space with others. This helps everyone keep things consistent and prevents that slow creep of clutter from returning.
Step-by-Step: Organising Under Your Bathroom Sink
Once you’ve chosen the right bathroom vanity organiser under sink, the next step is putting it all together in a way that feels intuitive and easy to maintain. This process doesn’t need to be overwhelming. With a bit of planning and the right approach, you can turn even the most cluttered cupboard into a tidy, functional space. Here’s a simple guide to get it done.
1. Clear Everything Out
Start with a blank slate. Take everything out from under the sink and spread it on the floor or countertop. You’ll probably be surprised by what’s accumulated over time: half-used bottles, empty packaging, and products you forgot you owned. Clearing the space fully helps you see what you’re working with and makes cleaning easier later on.
2. Clean Thoroughly
Give the area a good wipe-down before putting anything back. Use a mild cleaning solution to remove dust, spills, or any residue from leaks. If you notice water damage or surface stains, now’s the time to address them. A clean base ensures your chosen bathroom vanity organiser under sink will stay fresh and last longer.
3. Sort and Declutter
Group similar items together: toiletries, cleaning supplies, first-aid essentials, and so on. Check expiry dates and let go of anything you haven’t used in months. Be realistic about what belongs in the bathroom; not everything needs to live under the sink. Decluttering at this stage ensures you’re only organising what matters.
4. Plan Your Layout
Before reinstalling products, plan where everything should go. Keep frequently used items near the front and less-used ones towards the back or on upper layers. This is where your organisers come into play; assign drawers, bins, or shelves based on category and frequency of use.
Think vertically here; using stackable bins or tiered shelves makes the most of the height and keeps things accessible. For awkward spots around pipes, smaller baskets or custom-fit racks work beautifully.
5. Install Your Organisers
Now comes the fun part, setting everything in place. Install your chosen organisers, making small adjustments as you go to maximise the layout. Don’t overcrowd; it’s better to have a little breathing space between containers so you can easily see and reach what you need.
Slide-out drawers should move smoothly, and bins should be easy to remove for restocking or cleaning. The aim is to make your under-sink setup effortless to upkeep, not something you’ll need to overhaul again in a few weeks.
6. Label and Maintain
Labels might feel unnecessary, but they make a world of difference, especially in shared bathrooms. They keep everyone accountable and make it simple to return items to their proper place. Maintenance then becomes something that naturally fits into your routine instead of feeling like another chore.
Styling Tips: Make It Look as Good as It Functions
An organised space is always satisfying, but when it also looks beautiful, it elevates your entire bathroom. The goal with your bathroom vanity organiser under sink isn’t only to hide clutter, it’s to create a sense of calm and cohesion that reflects your personal style. With a few thoughtful styling choices, your under-sink space can feel just as refined as the rest of your bathroom.
1. Keep the Colour Palette Consistent
A consistent look instantly makes everything appear more polished. Choose organisers in similar tones or materials, for example, all white, clear acrylic, or natural bamboo. Neutral colours tend to blend seamlessly with most bathroom designs and make the space feel calmer. If your bathroom already has a distinctive colour scheme, choose accents that complement it subtly.
2. Use Matching Containers or Labels
Even small details like matching labels or uniform containers make a big difference visually. If you’re using different-sized bins, keep them within the same design family for harmony. Simple printed or handwritten labels on clear containers look tidy and help you stay organised over time.
Adding this level of consistency doesn’t just please the eye; it also creates mental clarity. When you open the cabinet, everything looks intentional, and you instantly know where things belong.
3. Add Subtle Decorative Touches
It’s easy to assume that a space under the sink shouldn’t be styled, but a little thought can go a long way. A soft cloth liner, a textured basket, or even a small plant (artificial works well) can add character without taking up valuable storage space. These details bring warmth and style without being excessive.
Just remember, function always comes first. Decorative touches should enhance your system, not complicate it. A bathroom vanity organiser under sink should make life simpler, not require constant readjustment.
4. Prioritise Accessibility and Balance
The best interiors feel effortless because every element is placed with purpose. Keep daily essentials front and centre while reserving the back or higher levels for items you use less often. Balance your layout so neither side of the vanity feels overcrowded. A neat visual flow makes a huge difference in perception, even in a small space.
If you have drawers, line them with grip mats to keep contents from sliding, and use small dividers to prevent items from mixing. Little details like this make your setup not only look better but also feel more thought-out.
5. Keep It Light and Open
An overpacked under-sink area can quickly lose its appeal. Leave some breathing space so your storage looks light and functional rather than crammed. Transparent organisers work well for this because they make the area feel less cluttered and help reflect light, brightening what’s often a shadowed part of the bathroom.
Even subtle lighting, like an adhesive LED strip along the top edge of your vanity interior, can make your bathroom feel more luxurious while highlighting your beautifully styled storage.
Maintenance Tips for Long-Lasting Organisation
Once your bathroom vanity organiser under sink is set up and looking great, the key is keeping it that way. A well-organised space doesn’t have to be high-maintenance; it just needs simple, consistent habits that make upkeep feel effortless. With the right approach, your storage will stay tidy, functional, and visually appealing for the long haul.
1. Do a Quick Monthly Check
Set aside a few minutes each month to do a quick refresh. Rotate products, check for anything that’s expired or nearly empty, and wipe down your organisers if needed. This prevents clutter from slowly creeping back and helps you stay mindful of what you actually use.
Small, regular checks are more effective than complete overhauls every few months. It’s far easier to remove one or two unnecessary items than to tackle a full clean-out later.
2. Wipe Surfaces Regularly
Moisture, dust, and small leaks can build up unnoticed under the sink. Give the area a quick wipe weekly or whenever you’re doing your general bathroom cleaning. This keeps your bathroom vanity organiser under sink looking fresh and helps prevent mould or mildew from forming.
Opt for mild cleaning products to protect your organisers and any natural materials like bamboo or woven baskets from damage.
3. Revisit Your System Seasonally
As routines change, so do your storage needs. The products you reach for in summer might not be the same ones you use in winter. Every few months, take a minute to review whether your current setup still makes sense. Swap items around if needed, for example, move sun care products toward the back and bring out hydrating skincare for the cooler months.
This simple habit ensures your storage always works with your lifestyle rather than against it.
4. Label for Clarity
A well-labelled system practically maintains itself. Clear labelling not only keeps you organised but also helps anyone else in your household know exactly where things belong. It takes seconds to put something back correctly, which means less clutter overall.
You don’t need to go overboard; simple, consistent labels in a neutral font or handwriting style are all that’s needed for a cohesive, functional look.
5. Be Flexible
Even the best bathroom vanity organiser under sink setup might evolve over time. Stay flexible with how you use it. Maybe you add an extra bin for guests’ toiletries or remove a drawer you no longer need. The goal is not perfection but practicality, a system that continues to adapt to your daily life.
If you ever notice that keeping things tidy feels harder than it should, that’s your cue to simplify. A great organisation system supports your habits, not the other way around.
Recommended Products
If you’re ready to upgrade your storage, choosing the right bathroom vanity organiser under sink products can make all the difference. You don’t need to spend a fortune; the best organisers are those that fit your space, withstand moisture, and align with your decorating style. Below are some product categories worth looking into, along with what to keep in mind when shopping.
1. Pull-Out Storage Systems
These are brilliant for anyone with deep vanity cupboards. Look for sturdy, smooth-glide drawers that can handle frequent use. Wire or acrylic pull-out organisers are both practical and stylish, and they make it easy to reach items stored at the back.
For a cohesive look, consider matching your drawer style to other hardware in your bathroom; brushed metal or matte finishes work especially well in modern spaces.
2. Tiered or Adjustable Racks
Expandable and stackable racks are some of the best investments you can make for maximising vertical space. They’re designed to fit around pipes and uneven surfaces, making them especially handy for older vanities or tight spaces. Choose models made from stainless steel or coated metal to resist humidity and extend their lifespan.
This kind of bathroom vanity organiser under sink is also perfect for renters since it’s easy to install and remove without any drilling.
3. Stackable Bins and Baskets
Clear or uniform storage bins make your setup instantly look organised. Acrylic, plastic, or woven baskets are all excellent options, just choose one material type to maintain a consistent aesthetic. Stackable bins add vertical height and make it simple to separate categories, from cleaning products to personal care.
Consider purchasing a few smaller containers instead of one large one; it gives you more flexibility to rearrange as your needs change.
4. Door-Mounted Organisers
Often overlooked, the inside of your vanity doors can add a surprising amount of extra storage. Door-mounted organisers or baskets are ideal for smaller items, things like hair styling tools, wipes, or hand towels. They’re a simple way to keep frequently used items close at hand while freeing up shelf space for bulkier products.
If you’re after a minimalist touch, look for low-profile wire or mesh styles that don’t overpower the cabinet’s design.
5. Lazy Susans or Turntables
Compact rotating organisers are perfect for smaller vanities or tight corners. They keep your items accessible with a quick spin, which helps maintain that clutter-free feel without having to dig around. Transparent or lightly frosted designs are best for bathrooms, as they blend in and make the space feel more open.
A bathroom vanity organiser under the sink like this adds an element of convenience that’s particularly useful in busy households. It’s thoughtful, practical, and surprisingly space-efficient.
Creating a tidy, functional bathroom doesn’t have to involve a full renovation. Often, all it takes is a well-thought-out bathroom vanity organiser under sink to make a noticeable difference. When everything has its place, your mornings feel calmer, your space feels bigger, and your bathroom takes on a more polished, intentional look.
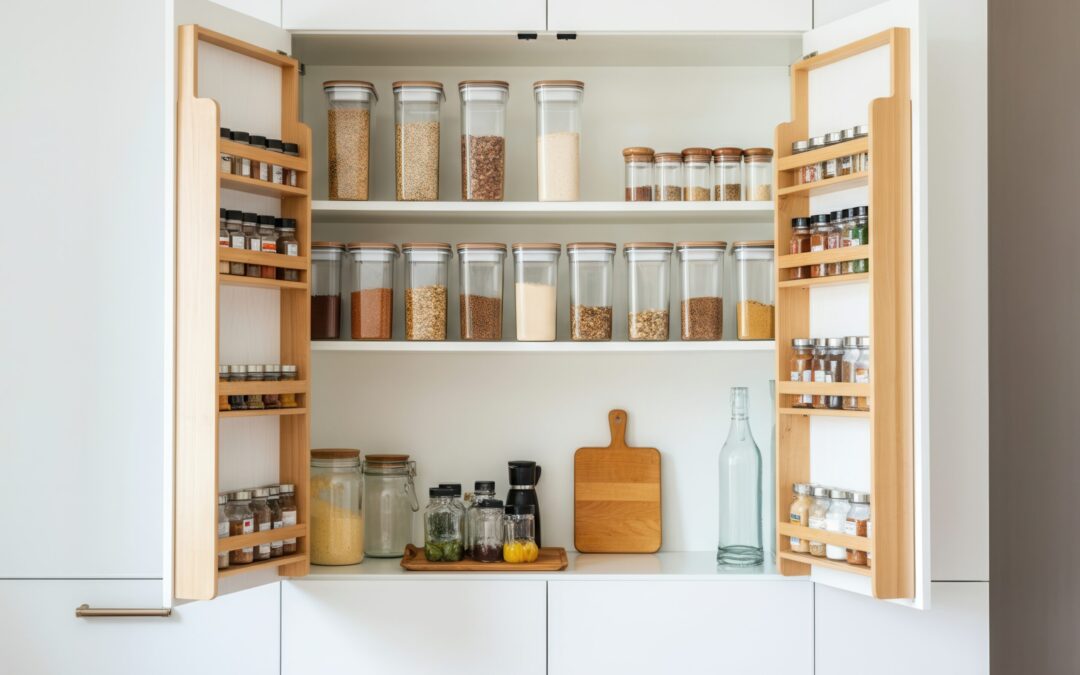
This post is all about Kitchen Pantry Door Storage.
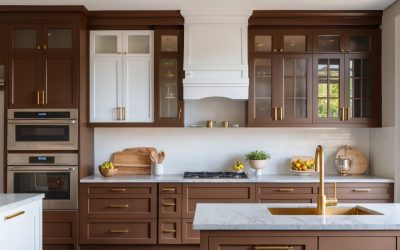
A well‑designed kitchen makes everyday life easier, and that’s exactly where kitchen pantry door storage comes in. It’s one of those clever interior design tricks that turns overlooked space into something functional, organised, and effortlessly stylish.
In this guide, we’ll explore creative ways to use your pantry door for storage, not just for functionality, but also for design harmony. You’ll learn practical ideas for different kitchen styles, expert tips on how to choose and style your setup, and a few insider design tricks that make all the difference. Whether your kitchen is compact or spacious, these ideas will help you find more room and create a cleaner, more cohesive space that feels like your own.
This post is all about Kitchen Pantry Door Storage.
Why Kitchen Pantry Door Storage Matters
The great thing about kitchen pantry door storage is that it’s one of the easiest ways to reclaim usable space without changing the basic layout of your kitchen. It’s efficient, cost‑effective, and instantly rewarding. Most people underestimate how much vertical space a standard pantry door provides, yet that’s exactly where some of your most frequently used items could live.
From a design perspective, it’s not just about squeezing in a few extra shelves. It’s about creating a more intuitive kitchen, one where function meets form. A well‑designed door storage system naturally streamlines your cooking routine by keeping essentials within reach while visually decluttering countertops and cupboards. That interplay between ease and order makes a noticeable difference, especially in smaller kitchens or open‑concept layouts where every detail contributes to the overall look and flow of the space.
If you’re short on storage or simply want your pantry to look and feel more intentional, start by assessing your door. Think about what you access most: spices, condiments, snacks, or cleaning supplies, and imagine how they could be arranged vertically, rather than stashed away in a deep shelf. It’s a small adjustment that often creates a big impact.
Types of Kitchen Pantry Door Storage Solutions
The key to creating effective kitchen pantry door storage is matching the right type of organiser to your space and lifestyle. There isn’t a one‑size‑fits‑all approach here; what works well in a busy family kitchen might not be ideal for a small apartment. Let’s look at a few reliable solutions that blend functionality with style.
1. Over‑the‑Door Racks and Organisers
For most kitchens, over‑the‑door racks are the easiest entry point into door storage. They’re simple to install, usually with no drilling required, and they make excellent use of the door’s height. You’ll find them in a variety of materials, from sleek chrome to matte black finishes, which means they can blend seamlessly with nearly any interior style.
If you’re tight on pantry shelf space, these racks can hold anything from spices and snacks to smaller cooking oils or jars. They’re especially handy for renters who can’t make permanent changes, but still want functional, attractive pantry door storage.
2. Custom Door Shelving
If you’re after something more built‑in and cohesive, custom door shelving is a smart investment. These can be designed to match your cabinetry, giving your pantry a polished, integrated look. Custom setups also tend to handle heavier items, such as canned goods or glass jars, without wobbling or warping over time.
From an interior design perspective, custom shelving allows you to maintain consistency in colour, finish, and overall kitchen aesthetic. It’s also a chance to get creative: you can play with shelf depths, mix open racks with bins, or even add discreet built‑in lighting for a soft glow when you open the door.
3. Hanging Baskets and Hooks
Sometimes, a simple solution is all you need. Hanging baskets or hooks on the inside of your pantry door are perfect for frequently used items, small produce bags, cleaning gloves, or lightweight kitchen tools. Wire baskets offer a more open, airy look, while woven styles can add warmth and texture to your kitchen pantry door storage setup.
If you like a natural, lived‑in aesthetic, this approach is both functional and visually appealing. It’s also easy to adjust or rearrange as your storage needs change.
4. Magnetic or Pegboard Systems
For those who prefer a clean, modern, or industrial design style, magnetic and pegboard setups can be game‑changers. Magnetic panels are excellent for holding metal spice tins or small tools, while pegboards create a flexible system that can be rearranged whenever you want to refresh your layout.
What’s great about these systems is how customisable they are. You can add shelves, hooks, or small containers as needed, all while keeping a sleek, minimalist profile that suits contemporary kitchens perfectly.
When you choose the type that best fits your space, you set the foundation for a pantry that truly works for you. The next step is refining which design will complement your kitchen’s layout and overall aesthetic.
How to Choose the Right Pantry Door Storage for Your Kitchen
Selecting the right kitchen pantry door storage solution depends on more than just the available space; it’s about how you use your kitchen day‑to‑day and what kind of look you want to achieve. A well‑chosen setup should feel like it belongs, not simply like an add‑on. Here’s how to make that decision with intention and confidence.
1. Start by Measuring and Assessing Your Space
Before buying or installing anything, measure your pantry door’s height and width carefully. Check how much clearance you have when the door opens fully, especially if it swings near cabinets or appliances. These small details determine how deep your shelves or baskets can be without causing frustration later on.
If you’re working with a sliding or French pantry door, you’ll have to get a little creative. In those cases, look for slim, low‑profile organisers or interior‑mounted systems that don’t interfere with door movement.
2. Define the Purpose of Your Door Storage
Think about what items you reach for every day. Are you looking to organise spices, snacks, or baking supplies? Maybe you need a home for cleaning products or reusable grocery bags. Defining the purpose will help you choose the right structure: narrow spice racks for small containers, deeper wire shelves for snacks, or hooks for lightweight tools.
The beauty of kitchen pantry door storage is that it can adapt to meet your exact needs. When you treat the door as another functional part of your design, it becomes an organiser that helps you move through your kitchen more efficiently.
3. Consider Weight and Durability
It’s tempting to load every inch of your new pantry door with jars and cans, but keep balance in mind. Check the weight limits of your chosen storage system and avoid overloading. Over‑the‑door racks and hanging baskets are intended for lighter items, while custom shelving can handle heavier products more comfortably.
Choosing durable materials, like metal with a powder‑coated finish or sturdy wood, ensures your investment lasts. And since kitchen environments can get humid, particularly near cooking areas, opting for moisture‑resistant finishes can help maintain your system’s appearance over time.
4. Align with Your Kitchen’s Overall Style
Even functional storage deserves to look good. Think about your kitchen’s colour palette, hardware, and overall style. Matte black racks blend seamlessly into modern designs, while natural wood tones complement rustic or transitional interiors. Clear acrylic bins can also add a more streamlined, contemporary touch.
Your kitchen pantry door storage doesn’t have to stand out; it should flow naturally with the rest of your space. Done right, it becomes an understated design element that quietly enhances both practicality and aesthetics.
Once you’ve narrowed down your options, it’s time to focus on the fun part, styling. The next section will dive into how to add personality and polish to your pantry door system while keeping it functional and well-organised.
Design and Styling Tips for a Cohesive Look
Good kitchen pantry door storage isn’t just about adding shelves and baskets; it’s about creating visual harmony. The best storage setups look intentional, as if they were always part of your kitchen’s design, not something you attached later. This section focuses on how to style your pantry door so it feels both functional and aesthetically refined.
1. Keep It Cohesive with Colour and Material
Start by aligning your storage materials with your kitchen’s existing finishes. If you have warm wood cabinetry, consider natural wood or woven baskets to tie the look together. In a modern space with clean lines and cooler tones, you might lean toward matte metal, acrylic, or glass containers for a streamlined effect.
This simple attention to tone and texture keeps your pantry door storage from looking like a random collection of organisers. Instead, it becomes a natural extension of your design story.
2. Label Everything (But Keep It Subtle)
Labels aren’t just functional; they can also add a touch of design polish. Simple, uniform labelling gives your pantry a clean, professional look and helps everyone in the household keep things organised.
Use minimal typography or clear adhesive labels for a modern, uncluttered aesthetic. Chalkboard tags or handwritten labels can soften the look if you prefer something more casual.
3. Mix Open and Closed Storage
Balance is key when it comes to door organisation. Open shelves keep frequently used items within easy reach, while small bins or baskets can hide less attractive essentials, like refills, packets, or snacks.
If you want to maintain visual calm, stick to three or four container styles that coordinate but don’t perfectly match; this creates visual interest without looking busy. Remember, your kitchen pantry door storage should support both order and beauty.
4. Add Lighting for Function and Ambience
A bit of lighting can elevate even the simplest setup. Battery‑powered LED strips or motion‑activated puck lights can instantly make your pantry feel more luxurious. Not only do they make it easier to see what’s on each shelf, they also highlight your organisation system, subtly turning a practical feature into a design detail.
Lighting is particularly useful if your pantry is in a darker corner of the kitchen. When thoughtfully placed, it adds both visibility and warmth, making the space feel more inviting.
A well‑styled pantry door not only saves space but also enhances your kitchen’s overall look. It’s one of those small improvements that quietly elevates how a space feels to live in. Next, we’ll go over how to keep everything functional and tidy in the long run.
Maintenance and Organisation Tips
Once your kitchen pantry door storage is set up and looking great, keeping it organised is the real key to making it last. The goal isn’t perfection; it’s creating a system that stays functional and easy to maintain. With a few small habits, you can keep your pantry door as tidy as the day you installed it.
1. Declutter Regularly
Every few months, take a few minutes to reassess what’s hanging on the door. Items have a way of drifting into spaces simply because there’s room for them. Start by removing everything and giving the shelves or baskets a quick wipe‑down. Then, only put back what you actually use.
This periodic reset keeps your pantry door storage purposeful and prevents it from becoming another overstuffed corner of your kitchen.
2. Group Similar Items Together
Organisation works best when it’s intuitive. Keep breakfast items together, spices in one zone, and cleaning supplies in another. Grouping similar products reduces visual clutter and makes it easier to maintain the layout you worked hard to create.
If you’re using bins or baskets, label them so that every item has a clear home. Over time, these small details make the system effortless to keep up with.
3. Avoid Overloading Shelves
As practical as kitchen pantry door storage is, it still has its limits. Too much weight can strain hinges or cause racks to sag over time. Keep heavier products, like large jars or cans, on your main pantry shelves, and use the door for lightweight items.
Evenly distributing weight not only protects the door but also preserves its smooth operation, which adds to the longevity of your setup.
4. Refresh the Look Seasonally
A little refresh can go a long way in keeping your pantry door inspiring. Swap out bins, update labels, or add new shelf liners for a quick change. This can be as simple as introducing different materials, like woven textures in summer or dark metal finishes in winter, to subtly update your kitchen’s appearance without a full redesign.
This small maintenance step not only keeps the space feeling fresh but also makes you more likely to stay organised.
Maintaining a clean and organised kitchen pantry door storage system doesn’t need to be a chore. With mindful upkeep and a clear structure, your pantry will continue to serve as both a design feature and a functional space for everyday living.
Budget-Friendly vs. Custom Solutions
One of the great things about kitchen pantry door storage is its flexibility; you can create a stylish, organised system on just about any budget. Whether you prefer simple DIY upgrades or want a fully integrated custom design, there’s a smart solution that fits your space, aesthetic, and lifestyle.
1. Budget-Friendly and DIY Options
If you’re starting small or working within a modest budget, there are plenty of ways to make a big impact without spending much. Over‑the‑door racks, adhesive hooks, or adjustable baskets can all transform your pantry door in a single afternoon.
These ready‑made options are ideal if you rent your home or simply want an affordable, low‑commitment way to test how door storage works for your routine. Many of these systems can be adjusted or layered over time, which makes them both cost‑effective and adaptable.
To make a DIY approach feel polished, stick to a cohesive colour scheme and consistent container style. It’s not about how much you spend, it’s about thoughtful design choices that make even simple materials look intentional.
2. Semi-Custom Systems
Semi‑custom options are a great middle ground. You can purchase modular storage components, like adjustable shelving systems or pegboard panels, and configure them to your exact space. Many brands now offer kits that can be mixed and matched, giving you the flexibility of customisation without the price tag of a fully bespoke installation.
Visually, semi‑custom systems also elevate your pantry’s look. Choose finishes and details that echo your kitchen hardware for a coordinated feel without needing professional carpentry.
3. Custom-Built Door Storage
If long‑term quality and seamless aesthetics are your priorities, investing in custom pantry door storage can be well worth it. A professional design allows you to match cabinetry finishes exactly, optimise every inch of usable space, and accommodate heavier or specialty items with ease.
Custom builds also open creative opportunities; hidden lighting, built‑in pullouts, or even soft‑close shelving can make your pantry door feel like a true design feature. While the upfront cost is higher, the end result often adds both daily convenience and long‑term value to your kitchen.
When choosing between budget, semi‑custom, or fully custom solutions, think about your long‑term goals. If your home is temporary or frequently updated, a modifiable system is likely the best fit. If you’re designing your forever home, a tailored, built‑in approach can be an investment that continues to pay off for years.
What makes kitchen pantry door storage so satisfying is how transformative it can be without requiring a full renovation. With a bit of planning, you can reinvent one of the kitchen’s most overlooked surfaces into something both useful and beautiful. Whether you choose simple over‑the‑door baskets or a custom-built-in system, every well-organised inch adds to your kitchen’s comfort and flow.
This post is all about Bathroom Vanity Organiser Under Sink. A bathroom vanity organiser under the sink can make an incredible difference in how your bathroom looks and functions. It’s often one of the most overlooked spaces in the home, yet it has the...
This post is all about Kitchen Pantry Door Storage. A well‑designed kitchen makes everyday life easier, and that’s exactly where kitchen pantry door storage comes in. It’s one of those clever interior design tricks that turns overlooked space into something...
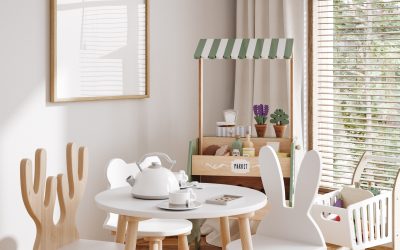
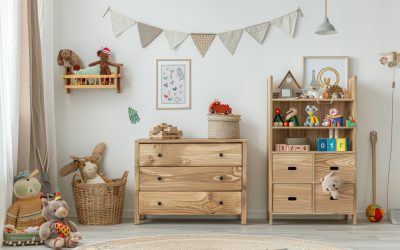
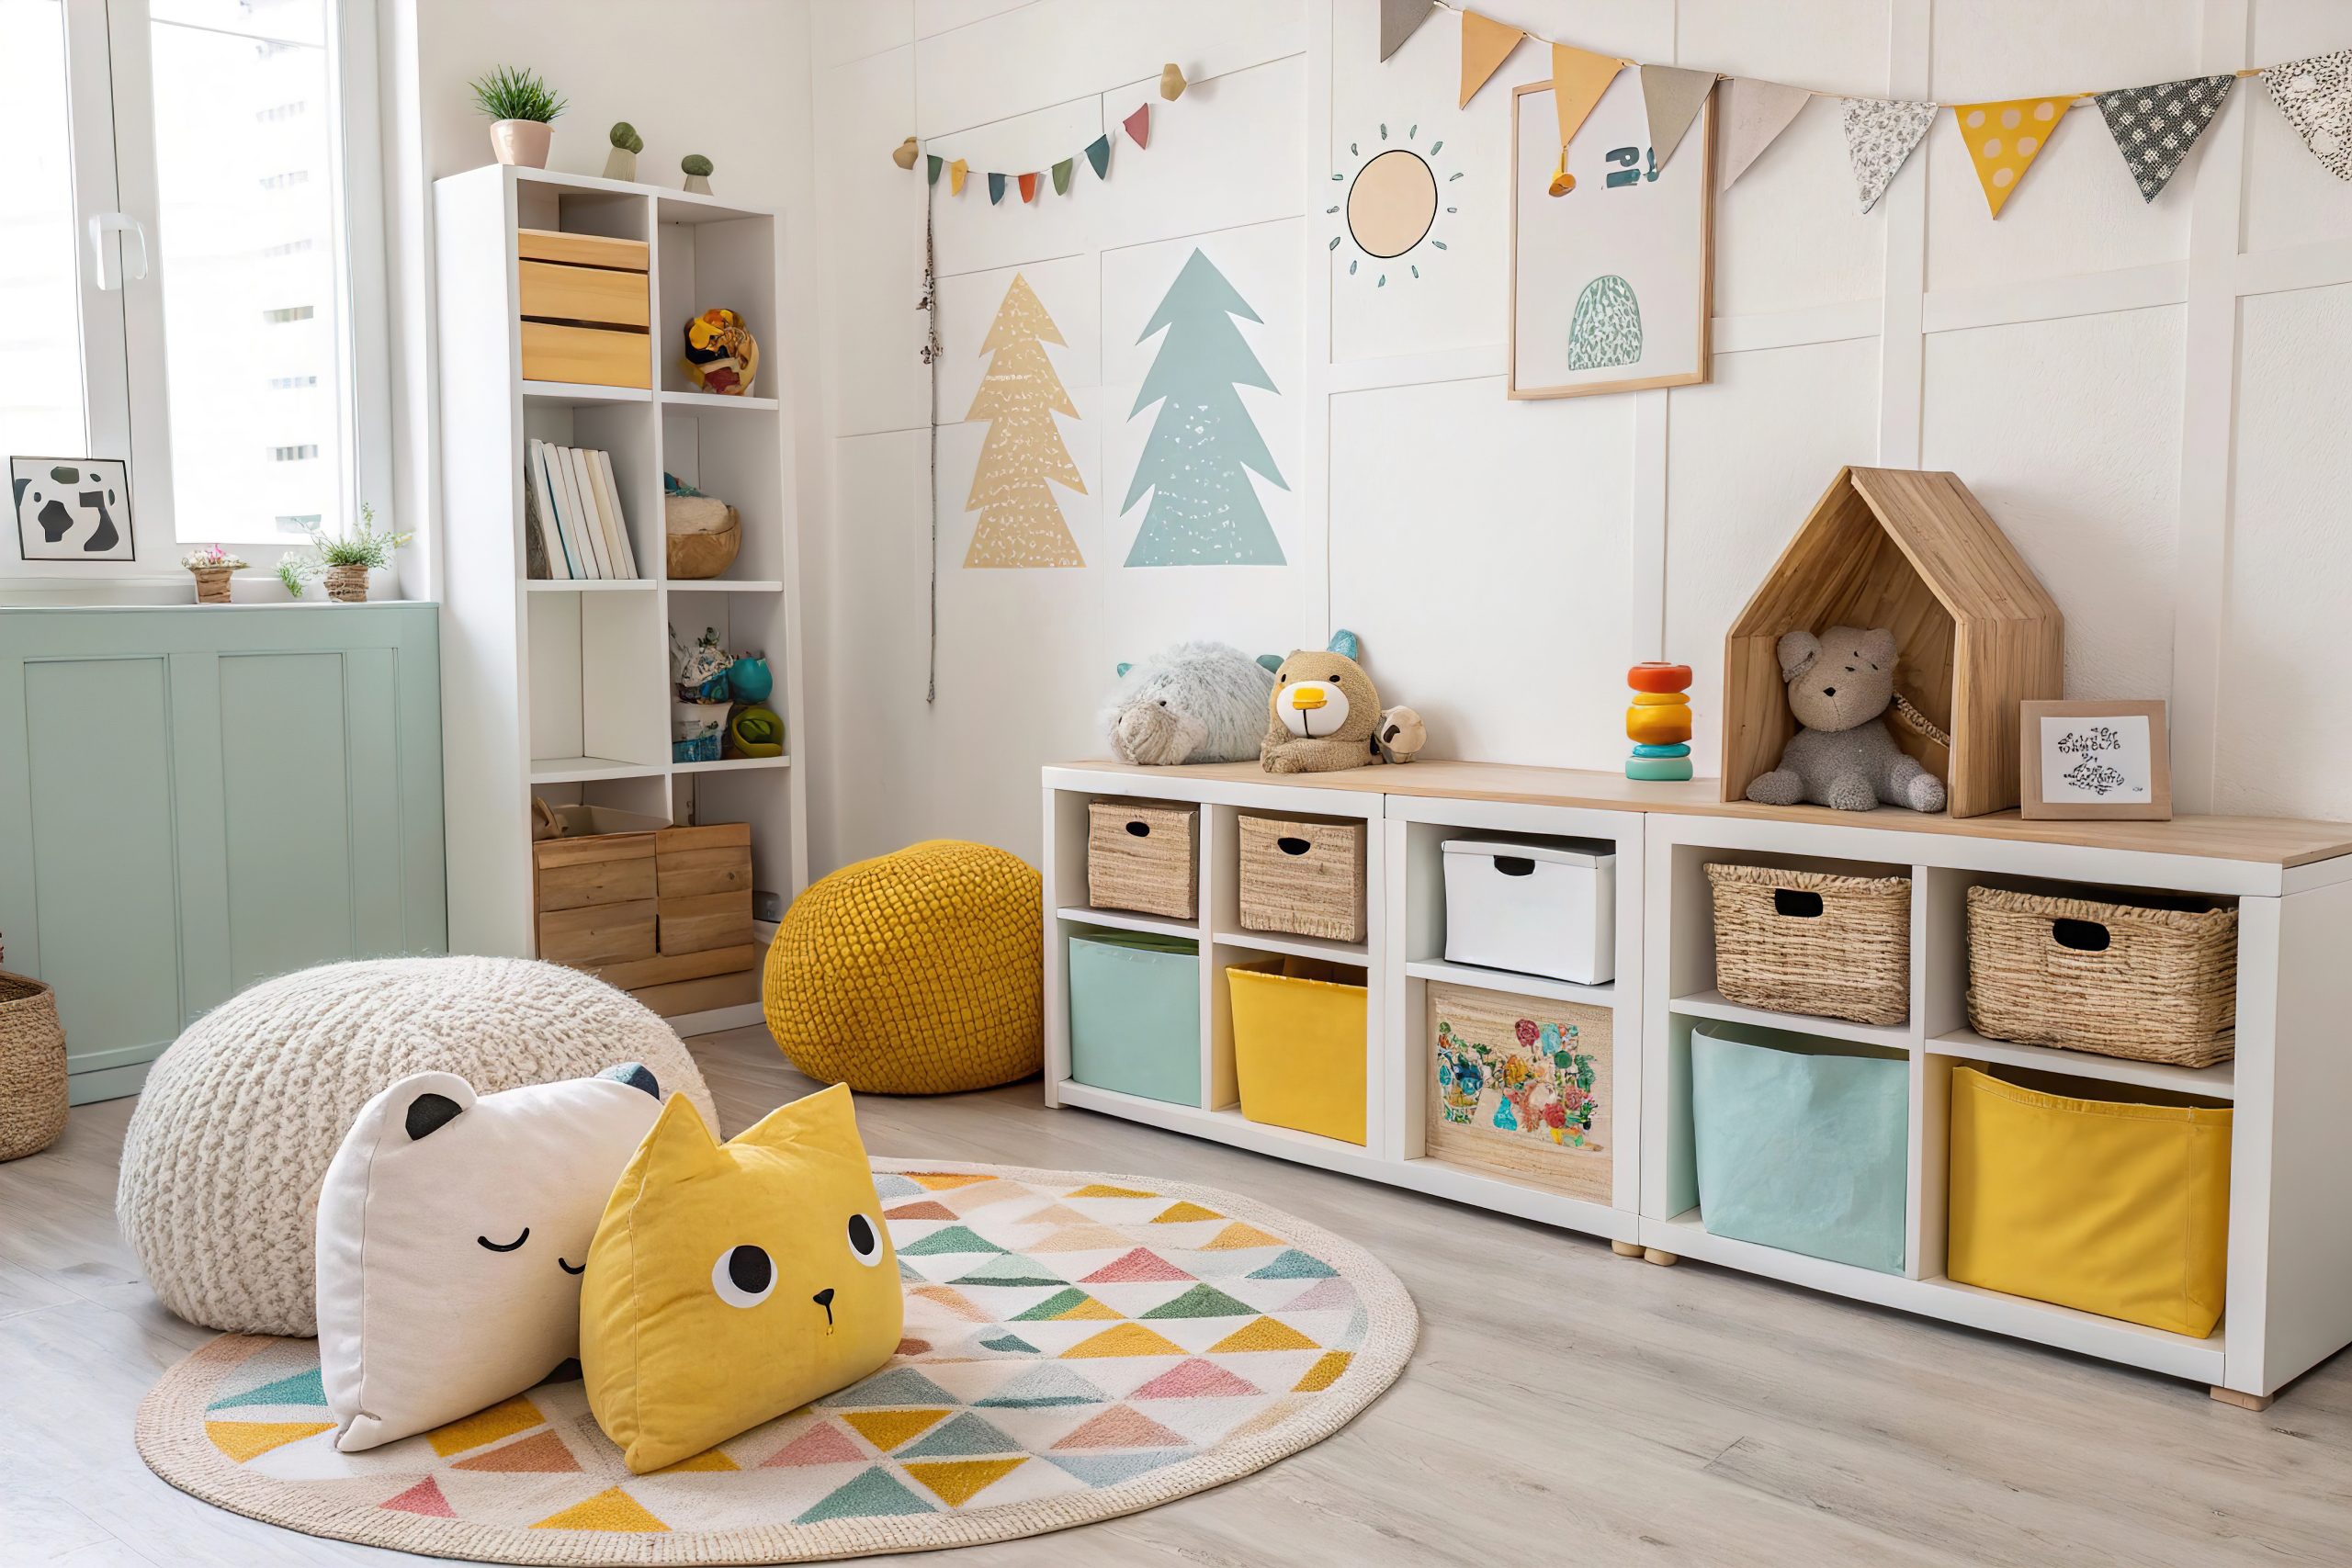
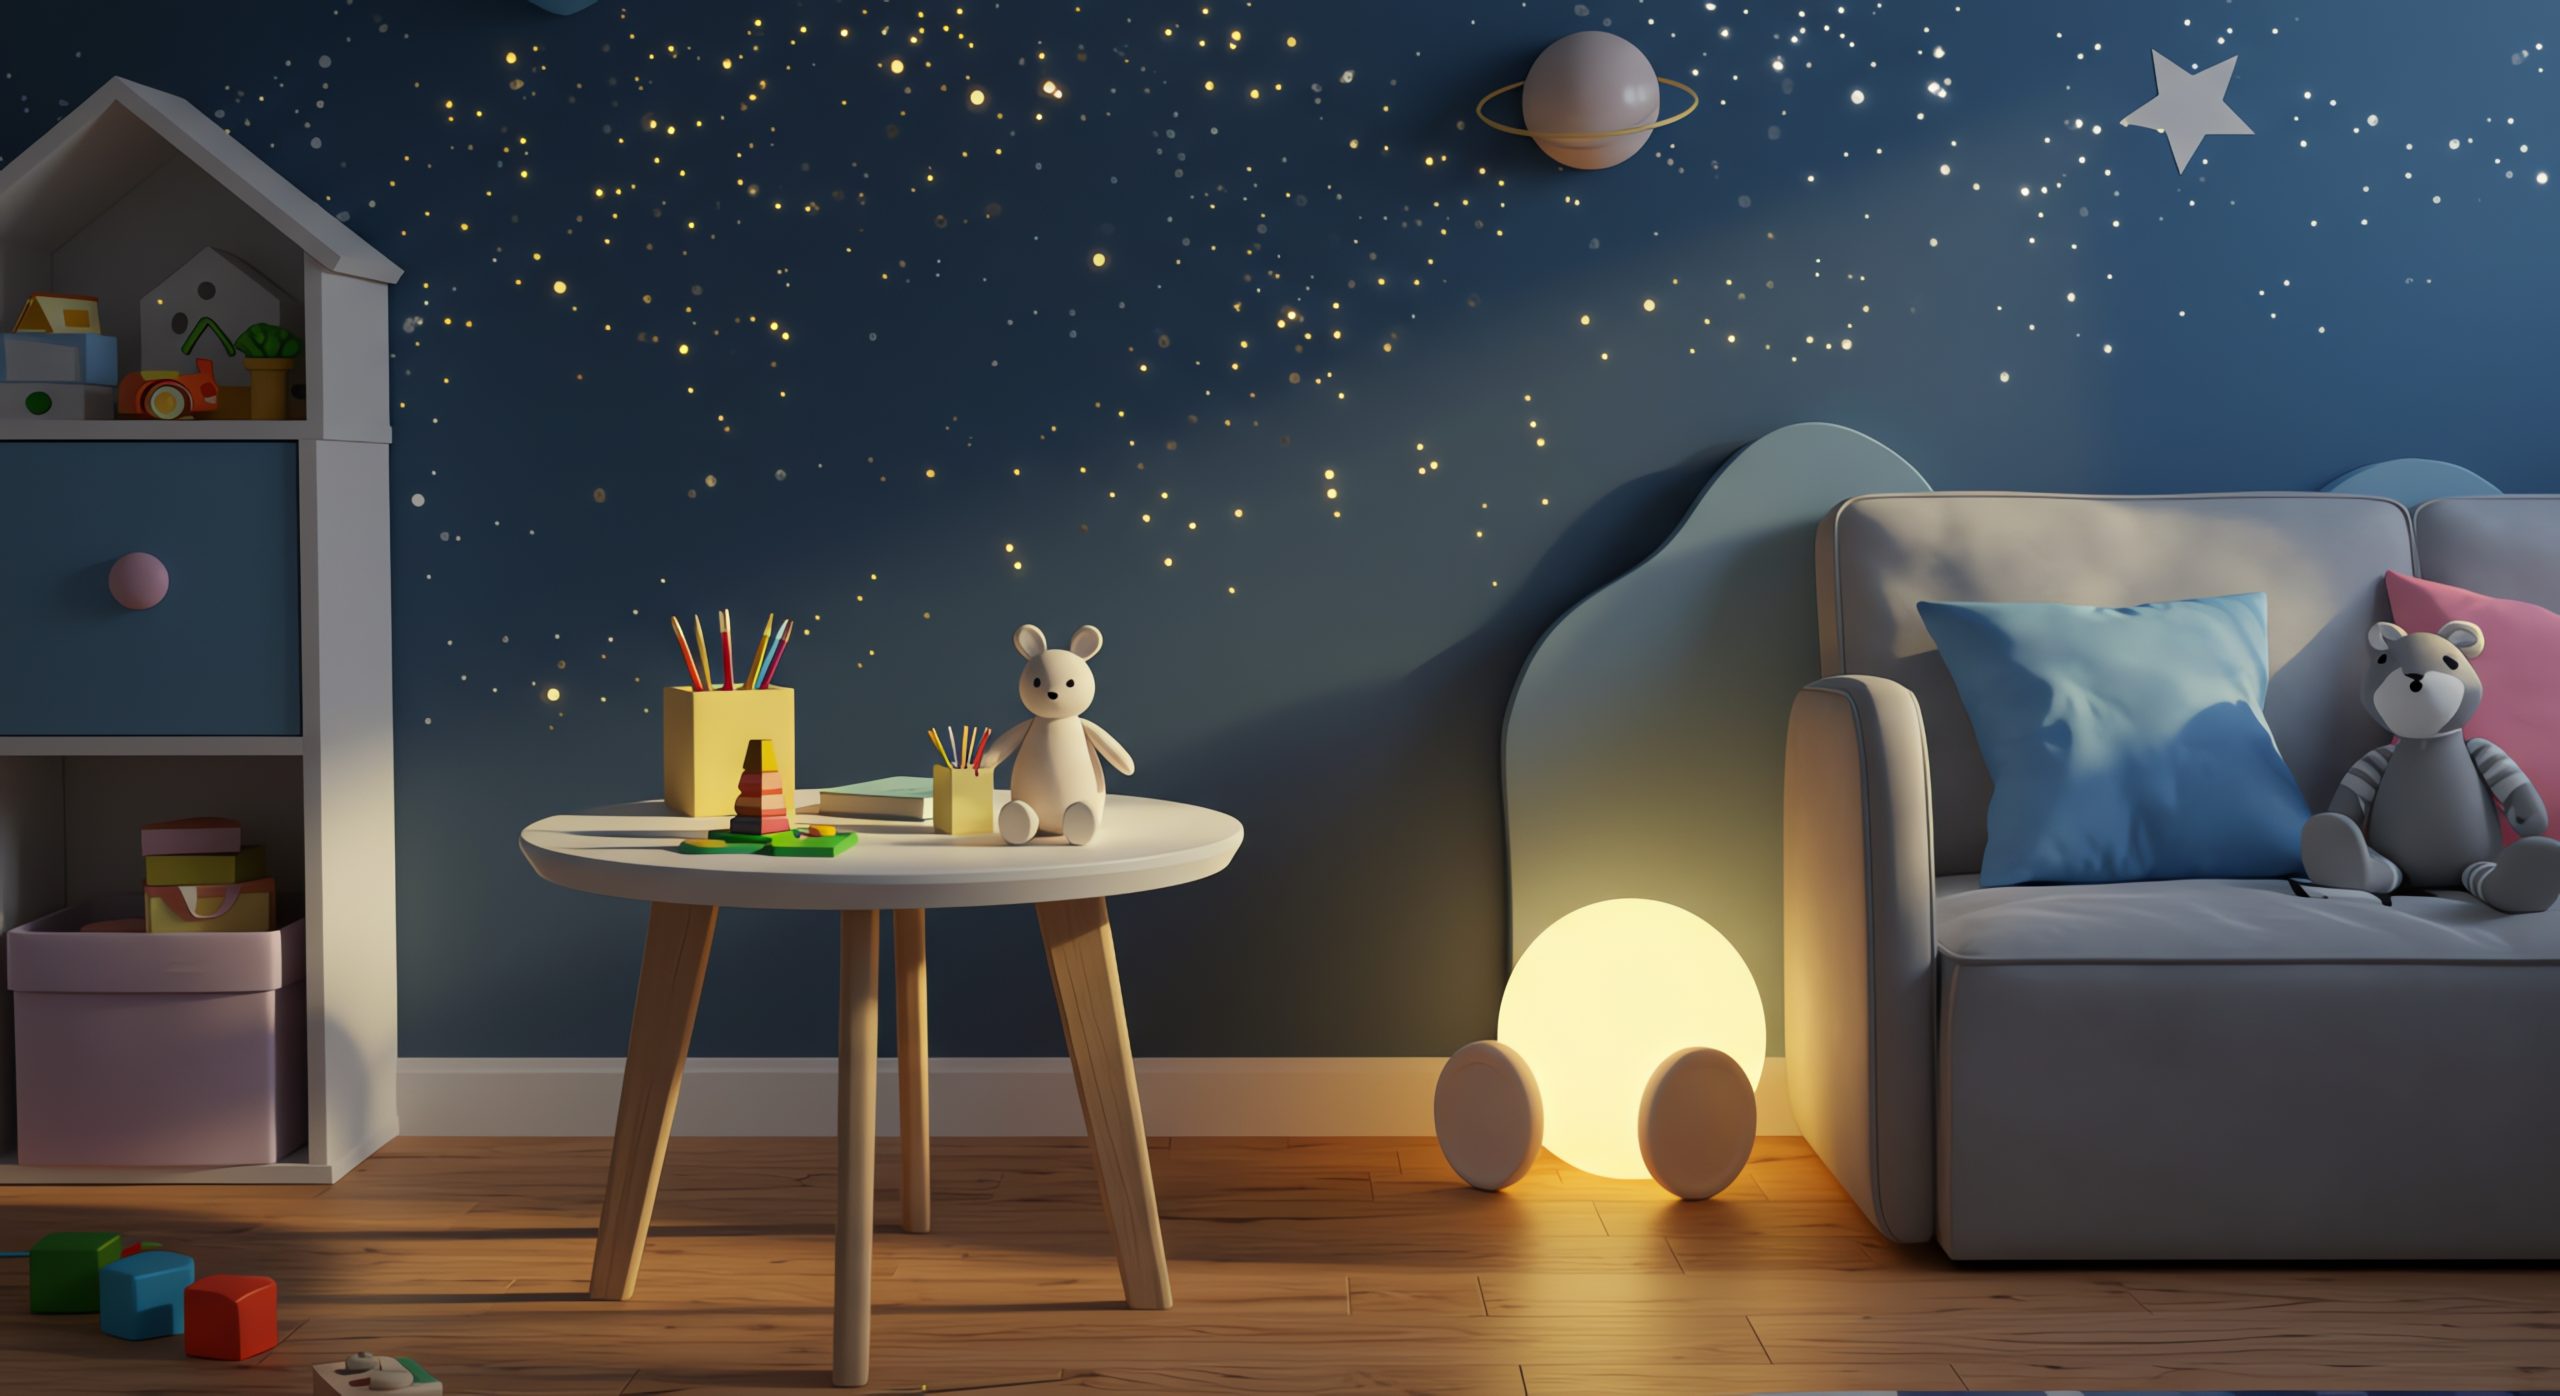
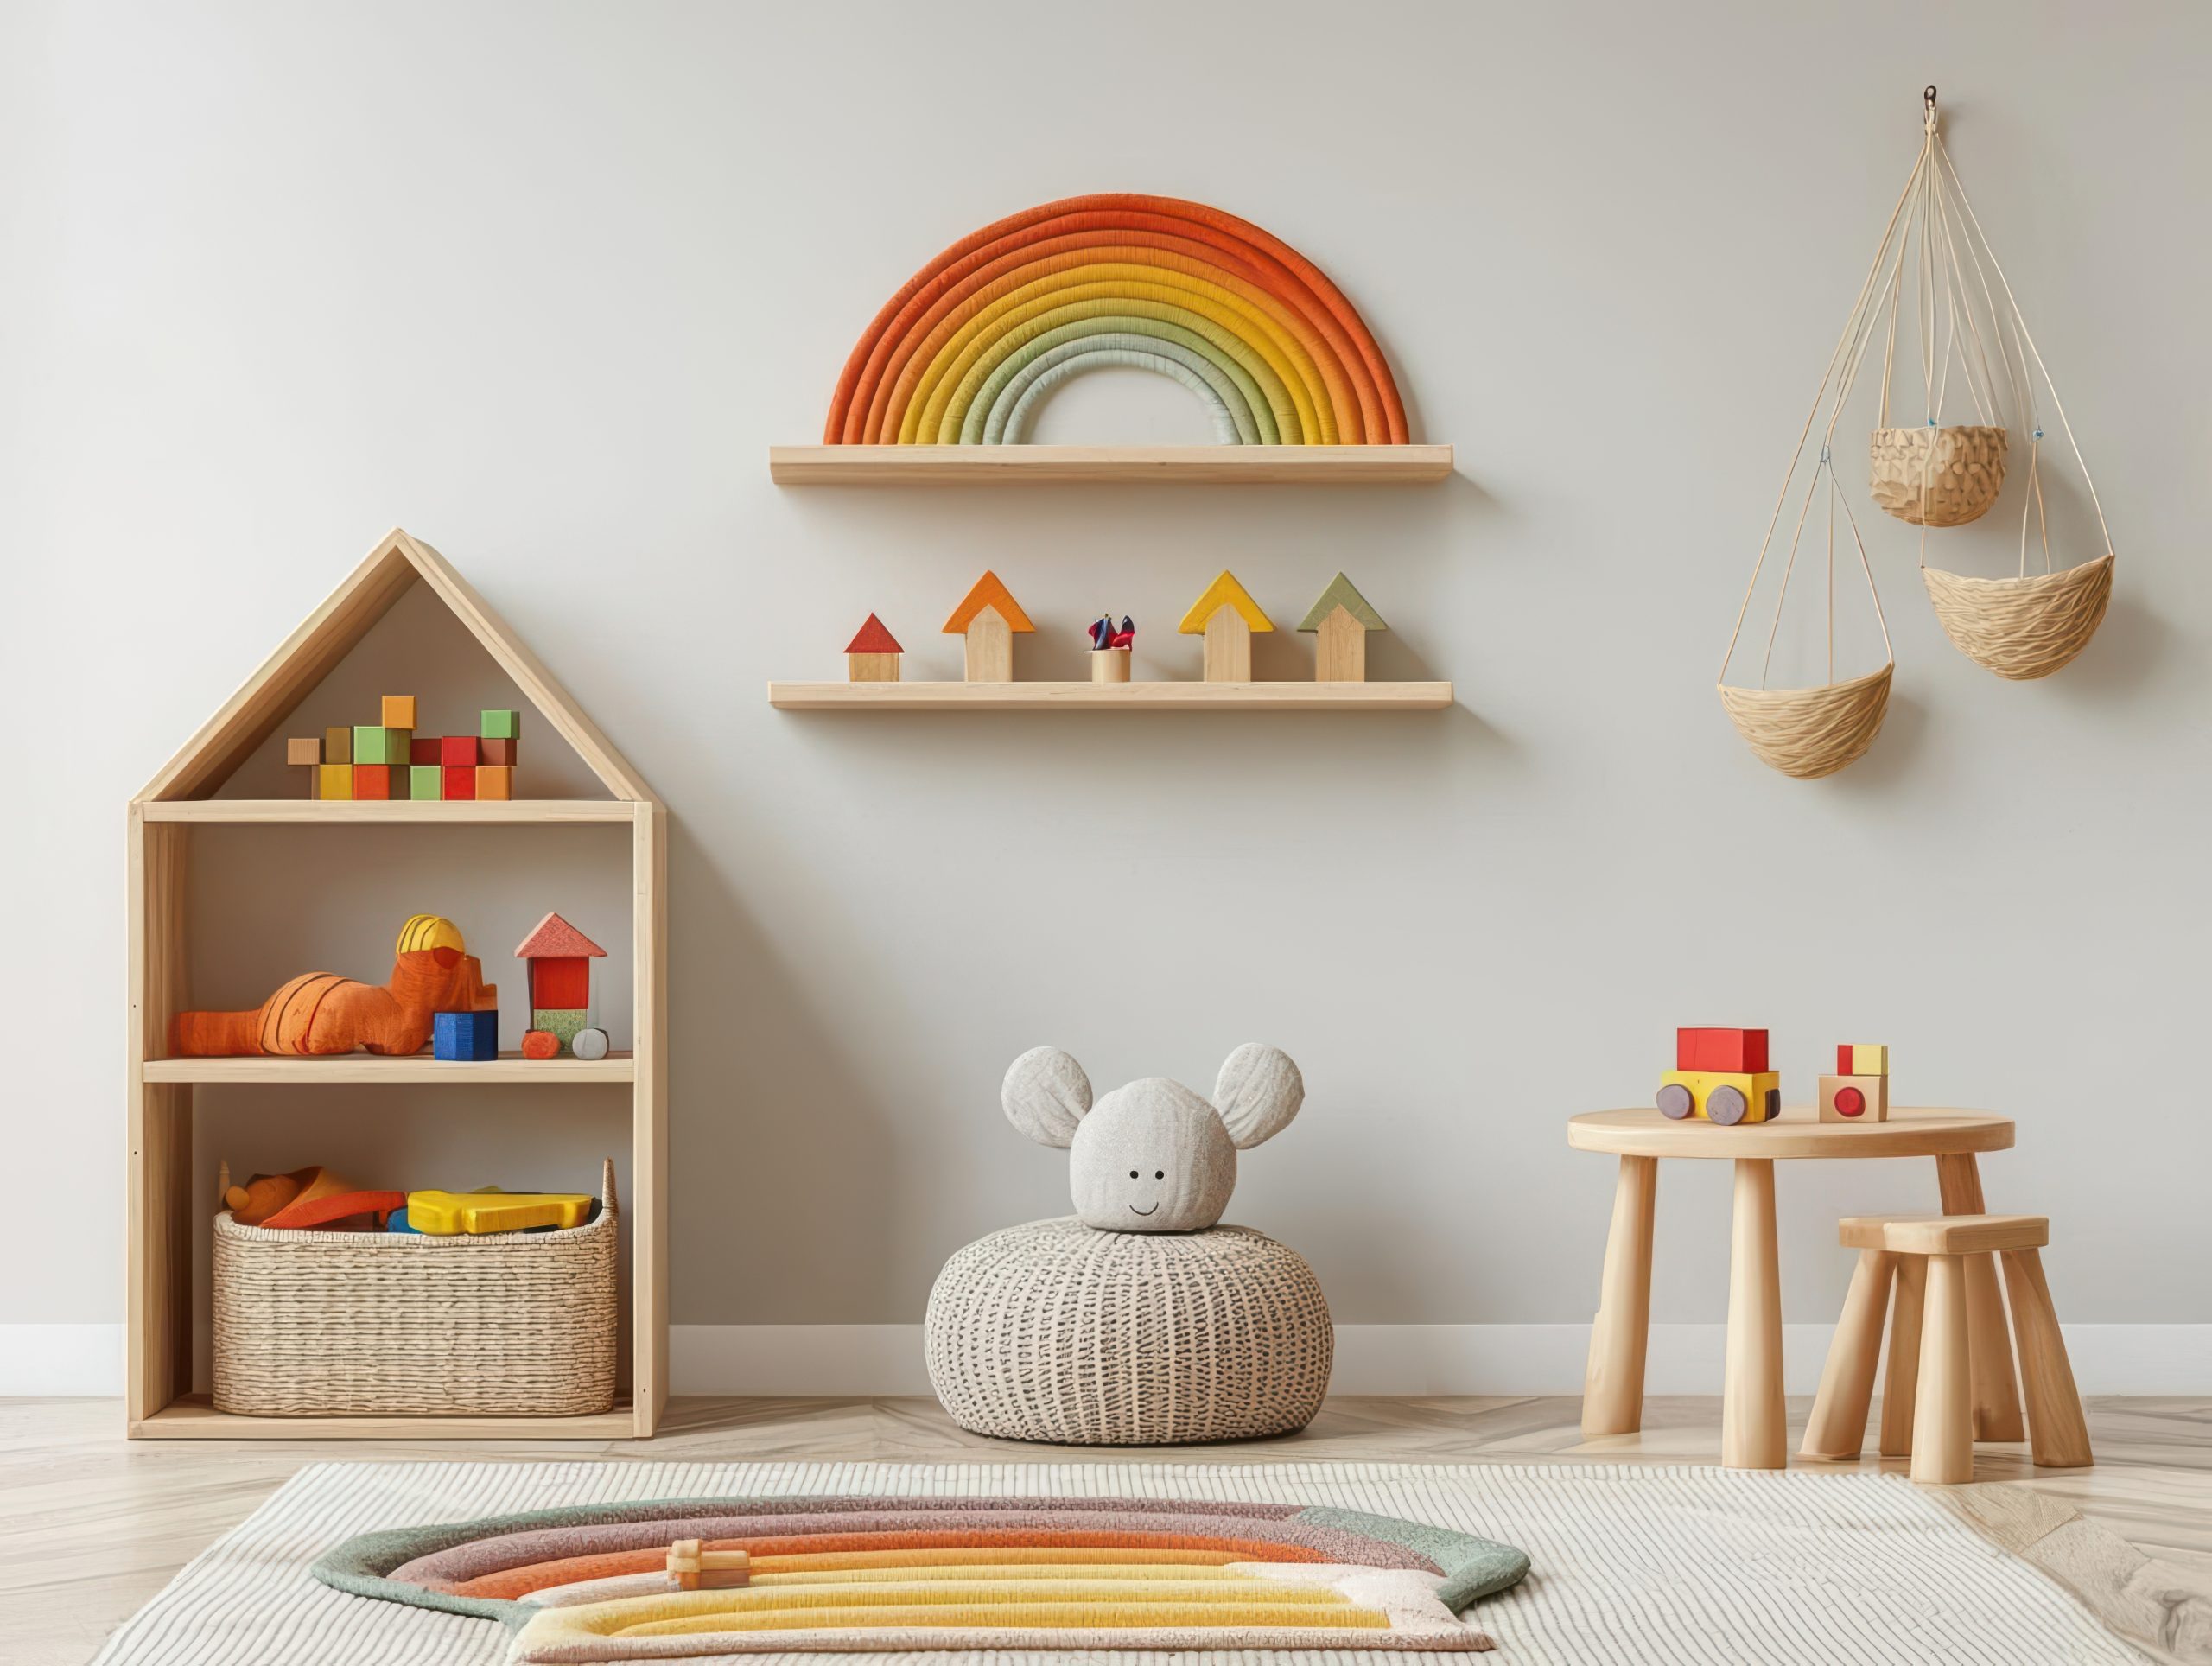
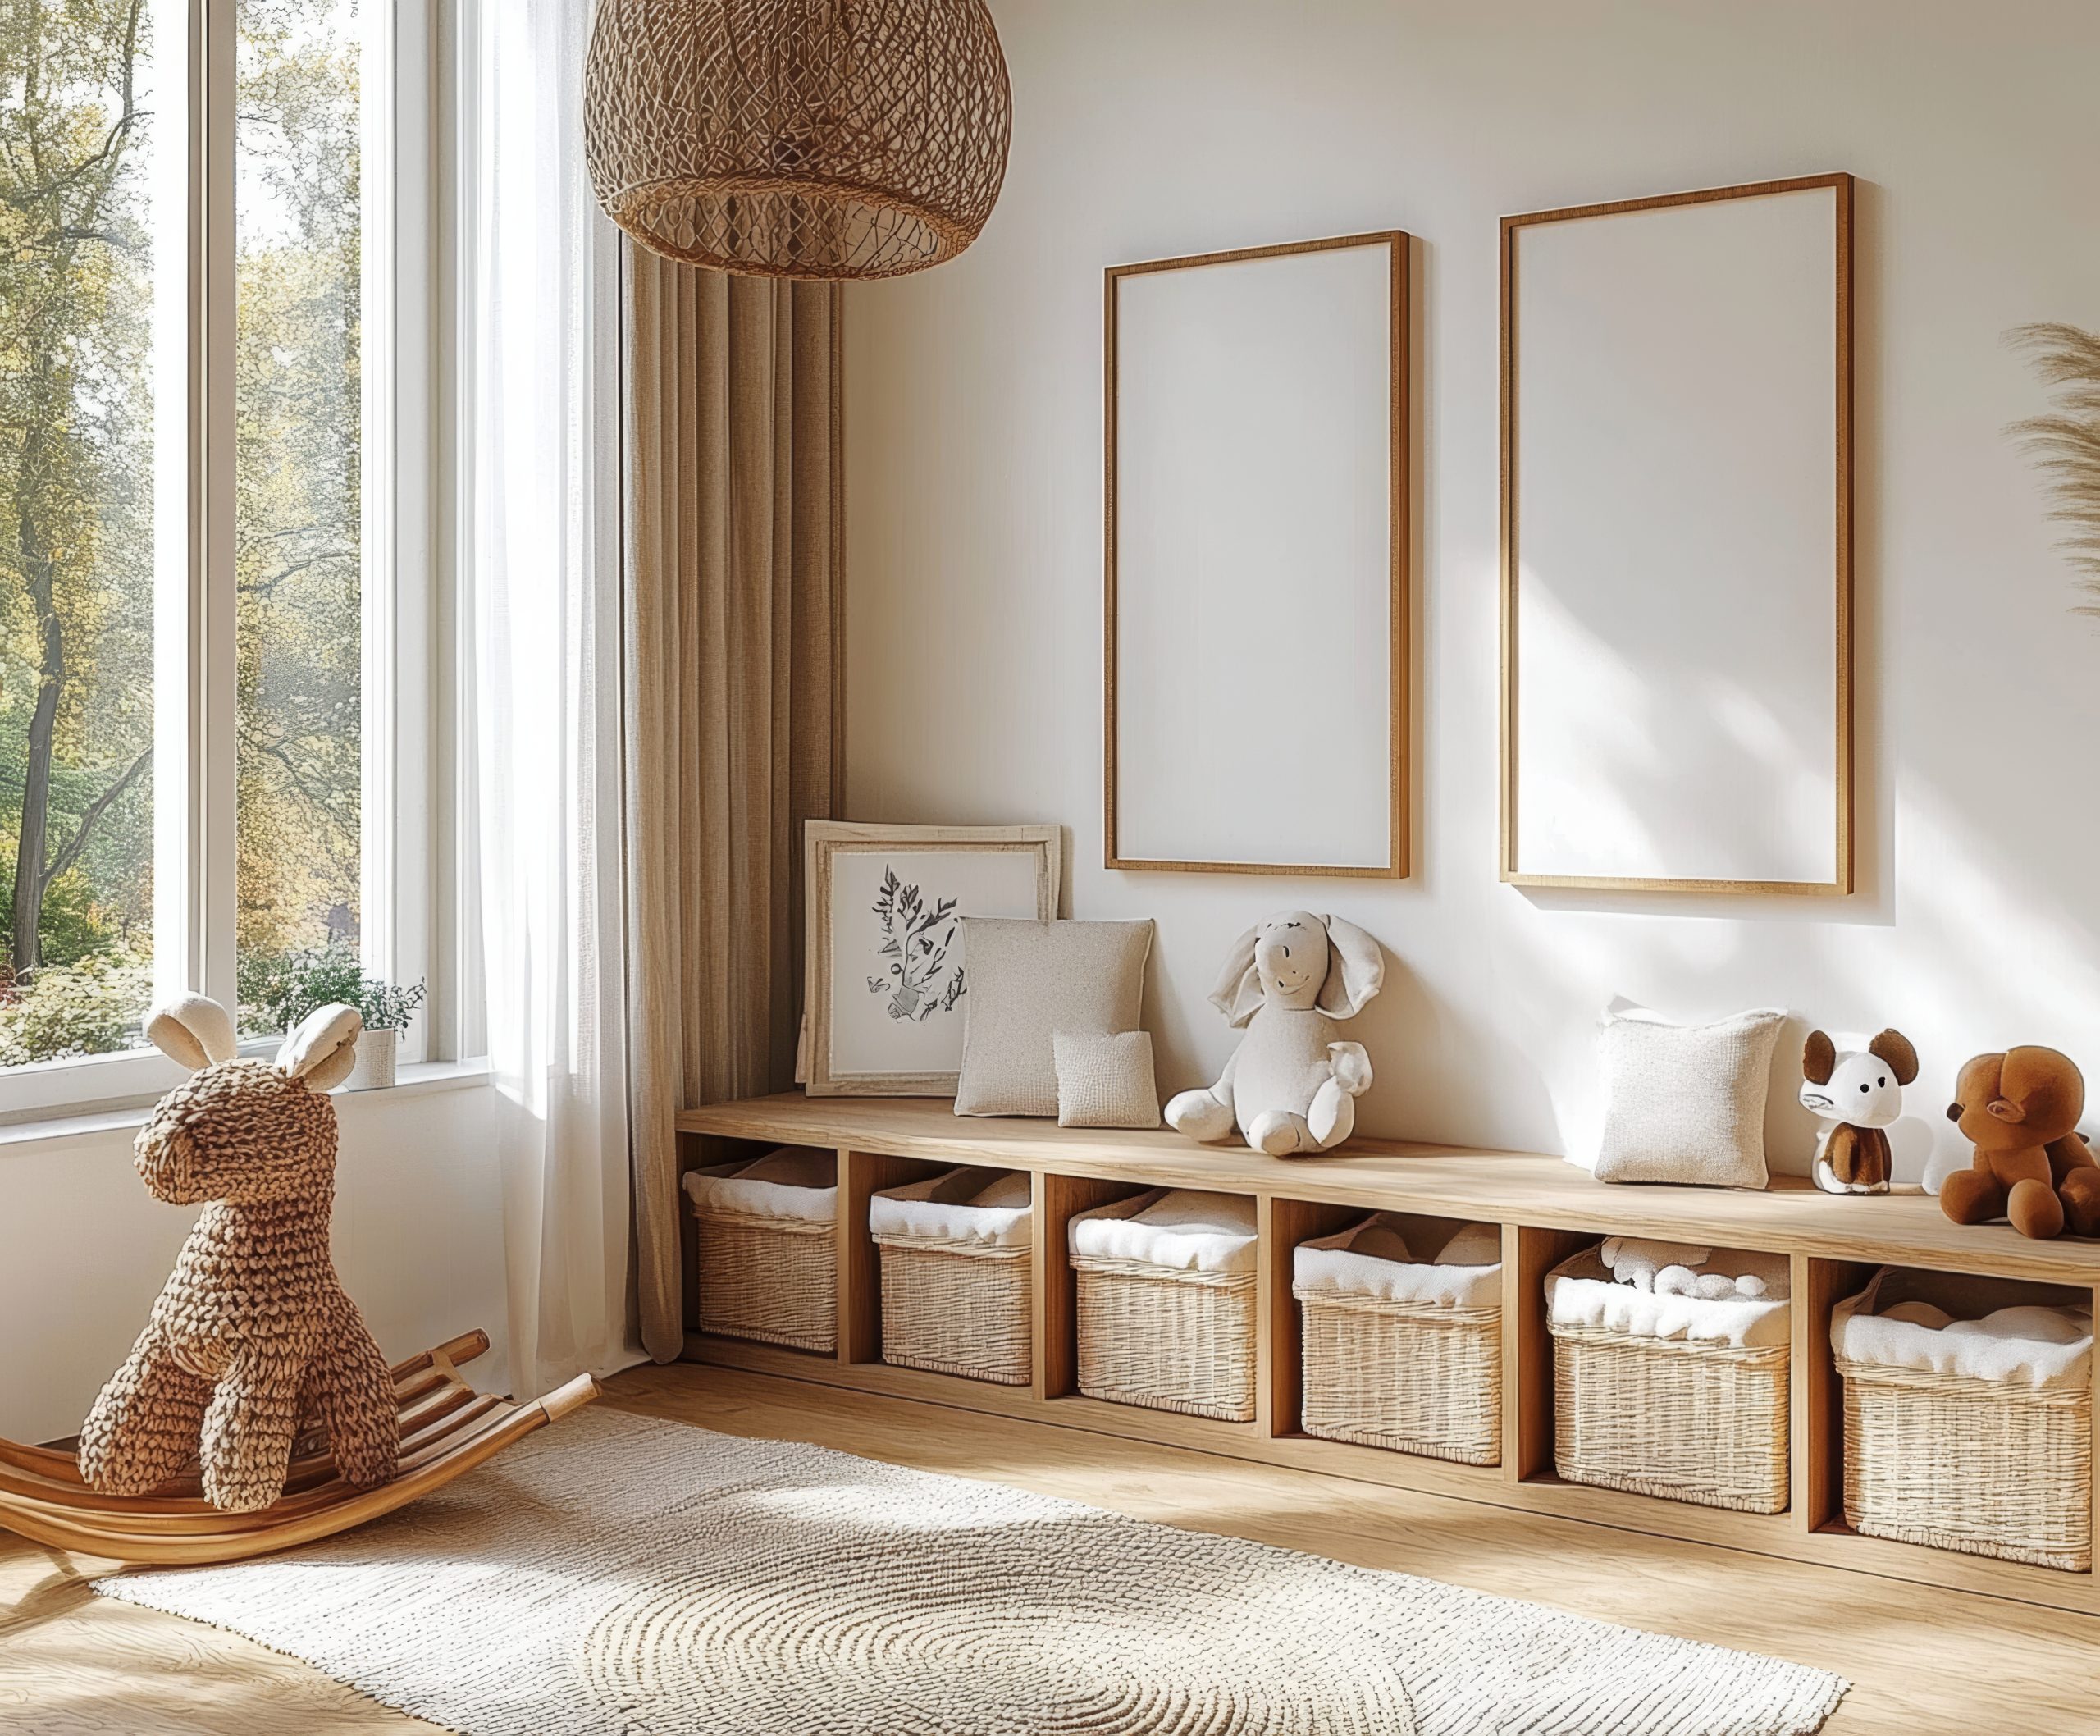
Creating a functional kids' toy room requires thoughtful planning that balances organisation with imagination. A well-designed play space not only keeps toys contained but also fosters creativity, independence, and development. Whether you're working with a dedicated...
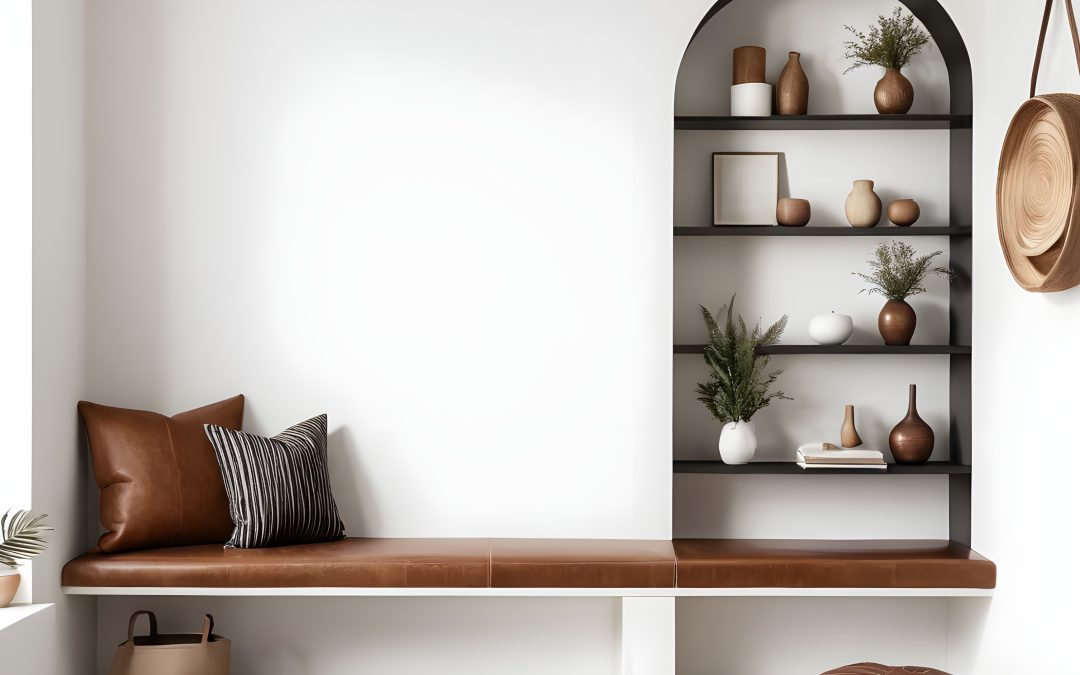
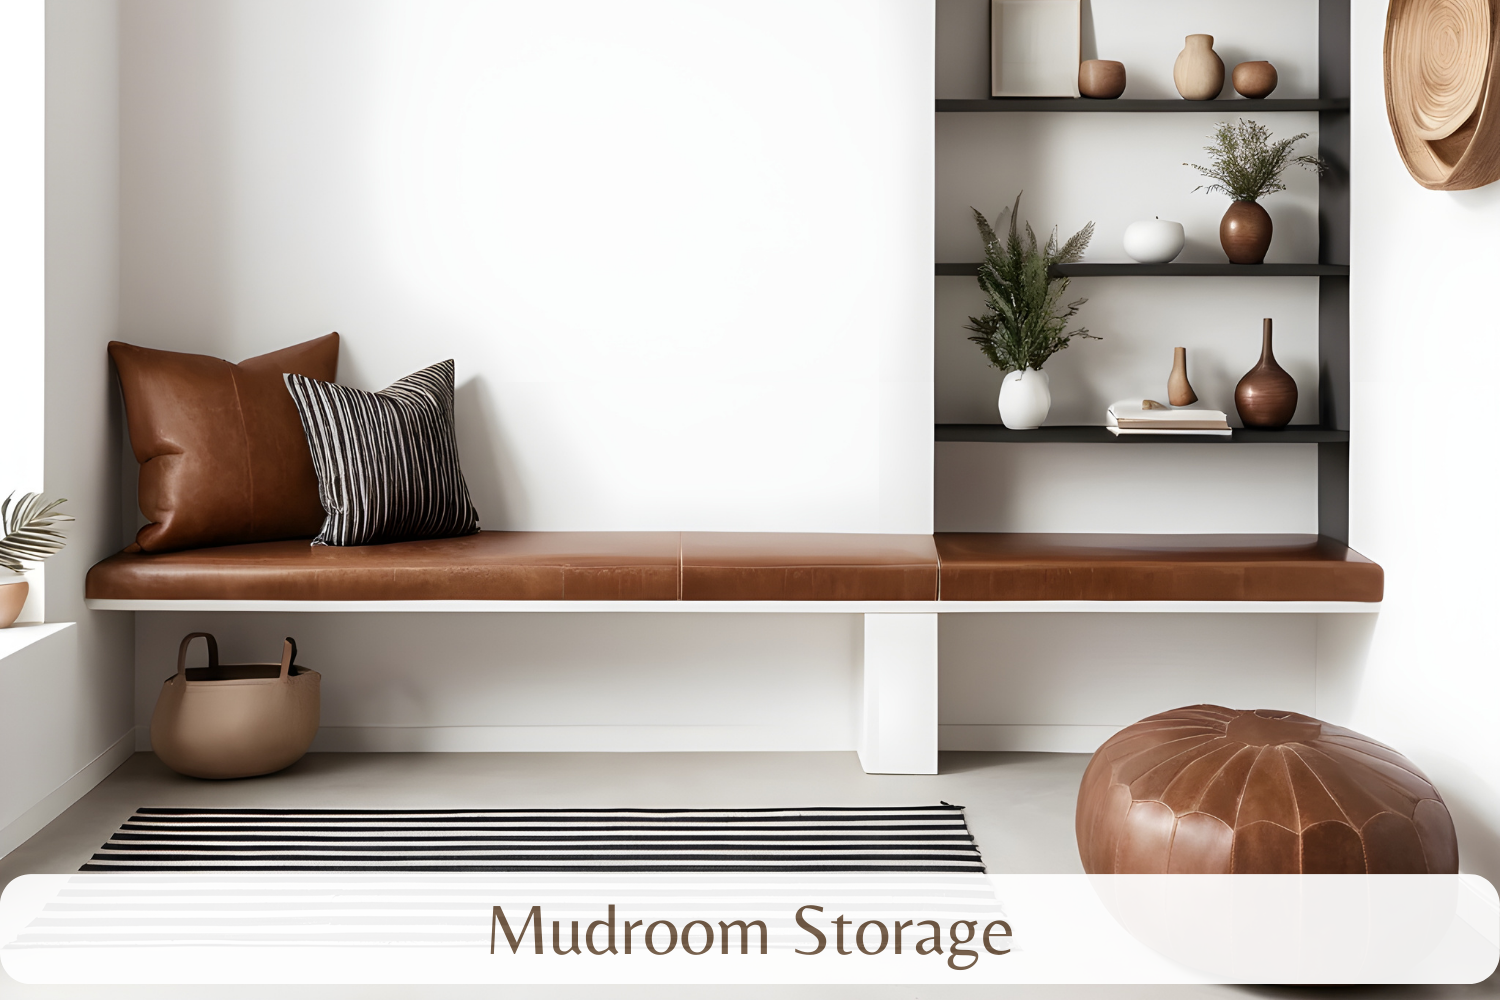
Looking for the best mudroom storage ideas for the space you have? Read along for the best tips! Let's be honest, the mudroom is often the hardest-working space in the house. It's the first line of defense against the chaos of the outside world, the drop zone for...
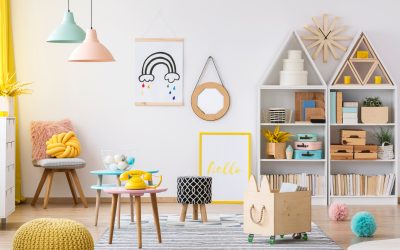
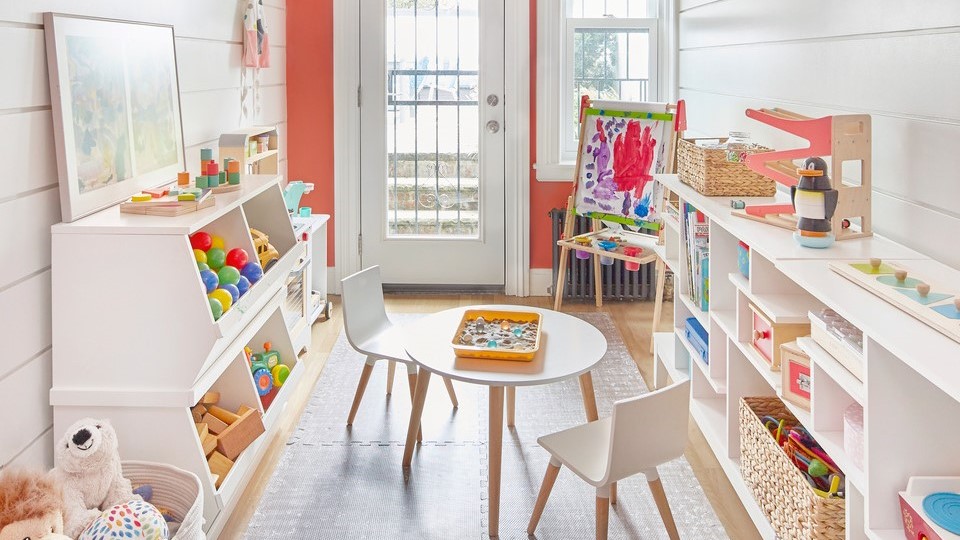
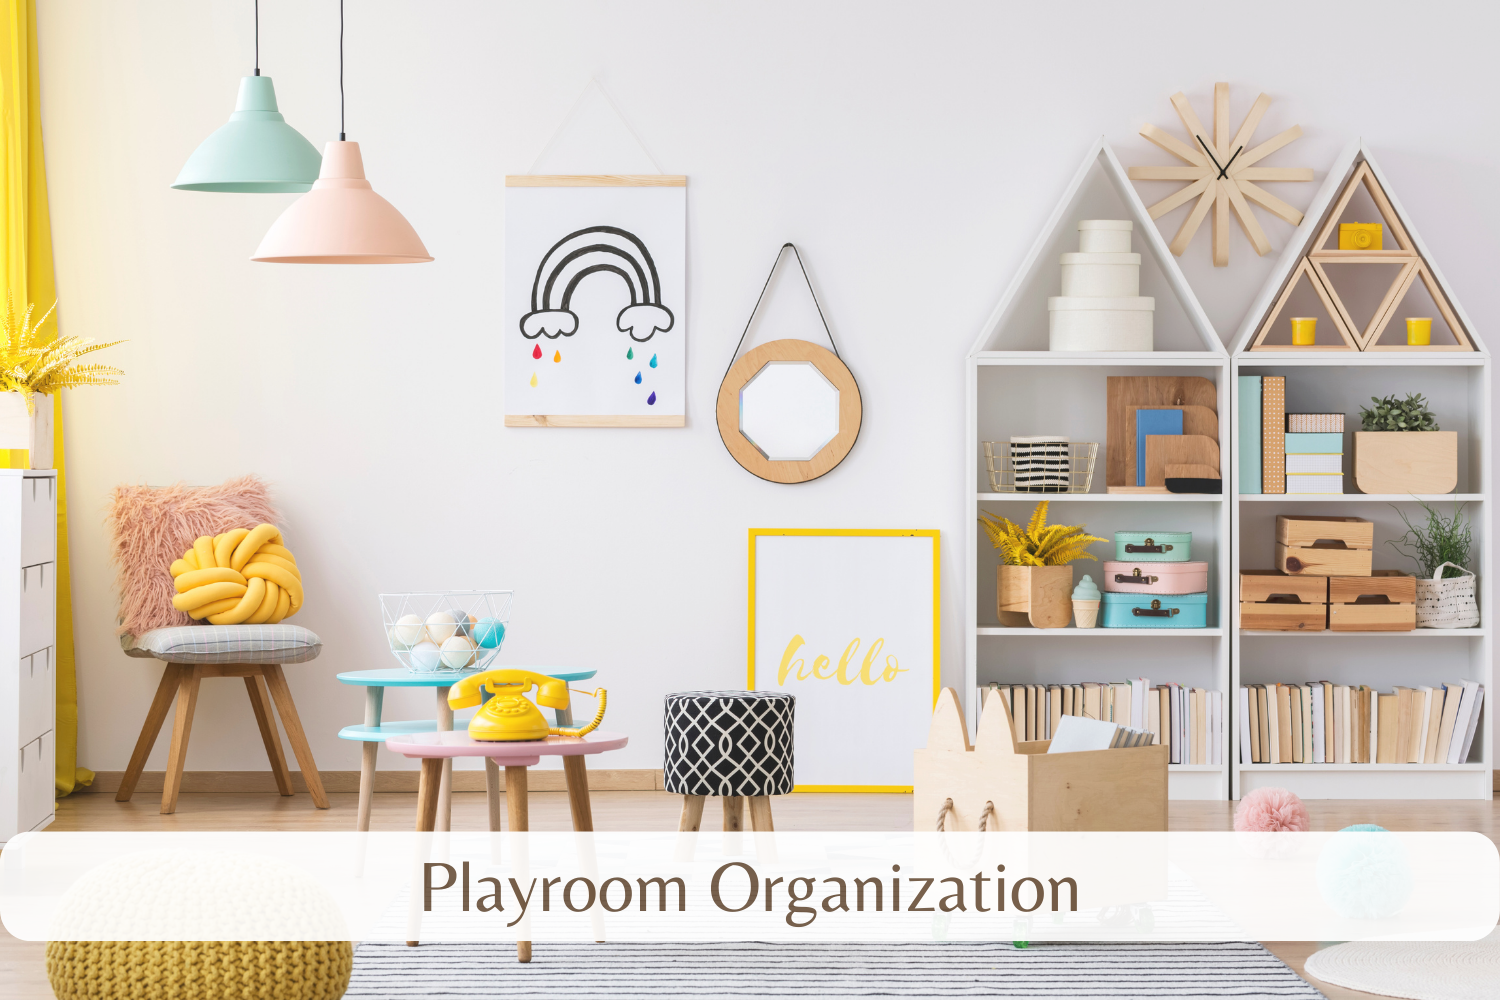
Best playroom organization ideas to keep your house organized. Let's be honest, keeping a playroom organized can feel like a never-ending battle, especially for busy families. Toys seem to multiply overnight, and what starts as a tidy space quickly transforms into a...
This post is all about Kids Room Storage. Is your child's room more of a toy explosion than a peaceful space? You're not alone! The never-ending cycle of toy piles, scattered clothes, and misplaced art supplies can turn any parent into a decluttering machine. This...
This post is all about Kitchen organisation ideas. Is your kitchen more chaos than cooking? We get it! The heart of the home often becomes a battleground of overflowing drawers, mismatched containers, and countertops buried under clutter. It's frustrating and...
This post is all about how to arrange living room furniture with tv and fireplace. I have always enjoyed helping people figure out how to arrange living room furniture with TV and a fireplace, because it is one of those design challenges that almost every home...
Rustic minimalist interior design is one of those styles that feels immediately grounding. I’ve always been drawn to interiors that feel calm, warm, and intentional, and this approach delivers exactly that without feeling overdesigned or sterile. It strips a space...
I have always been drawn to how modern dining room drapes can completely shift the look and feel of a space, often more than people expect from something as simple as window treatments. In this post, I am sharing practical and design‑focused ideas to help...
This post is all about Dark Dining Room Ideas. There’s something undeniably captivating about a dark dining room. The depth, the mood, the quiet confidence, it all creates a sense of intimacy that lighter spaces sometimes struggle to achieve. Designing with darker...
This post is all about Bathroom Vanity Organiser Under Sink. A bathroom vanity organiser under the sink can make an incredible difference in how your bathroom looks and functions. It’s often one of the most overlooked spaces in the home, yet it has the...
This post is all about Modern Minimalist Interior Design Living Room. A modern minimalist interior design living room is more than just a trend; it’s a reflection of how we live today. Clean lines, open spaces, and thoughtful details come together to create...
This Post Is All About Bedroom Ideas For Girls Designing a space that feels personal and full of character starts here, and these bedroom ideas for girls are the perfect inspiration. Whether you’re refreshing a cosy nook or planning a complete makeover, finding the...
Creating a functional kids’ toy room requires thoughtful planning that balances organisation with imagination. A well-designed play space not only keeps toys contained but also fosters creativity, independence, and development.
Whether you’re working with a dedicated room or carving out a corner of your living space, the principles of effective toy room design remain consistent: accessible storage, defined activity areas, and systems that grow with your child.
1. Planning Your Kids Toy Room: The Essentials
Before purchasing storage containers or deciding on a colour scheme, take time to evaluate your specific needs. The most successful kids’ toy room designs begin with thoughtful planning.
Assess your available space – Measure your area and note any architectural features that could impact your design
Observe play patterns – Watch how your child interacts with their toys and what activities they gravitate toward
Consider traffic flow – Allow adequate movement space between activity zones
Plan for flexibility – Design a kids’ toy room that can evolve as interests change
Establish a realistic budget – Prioritise essential organisational elements before decorative features
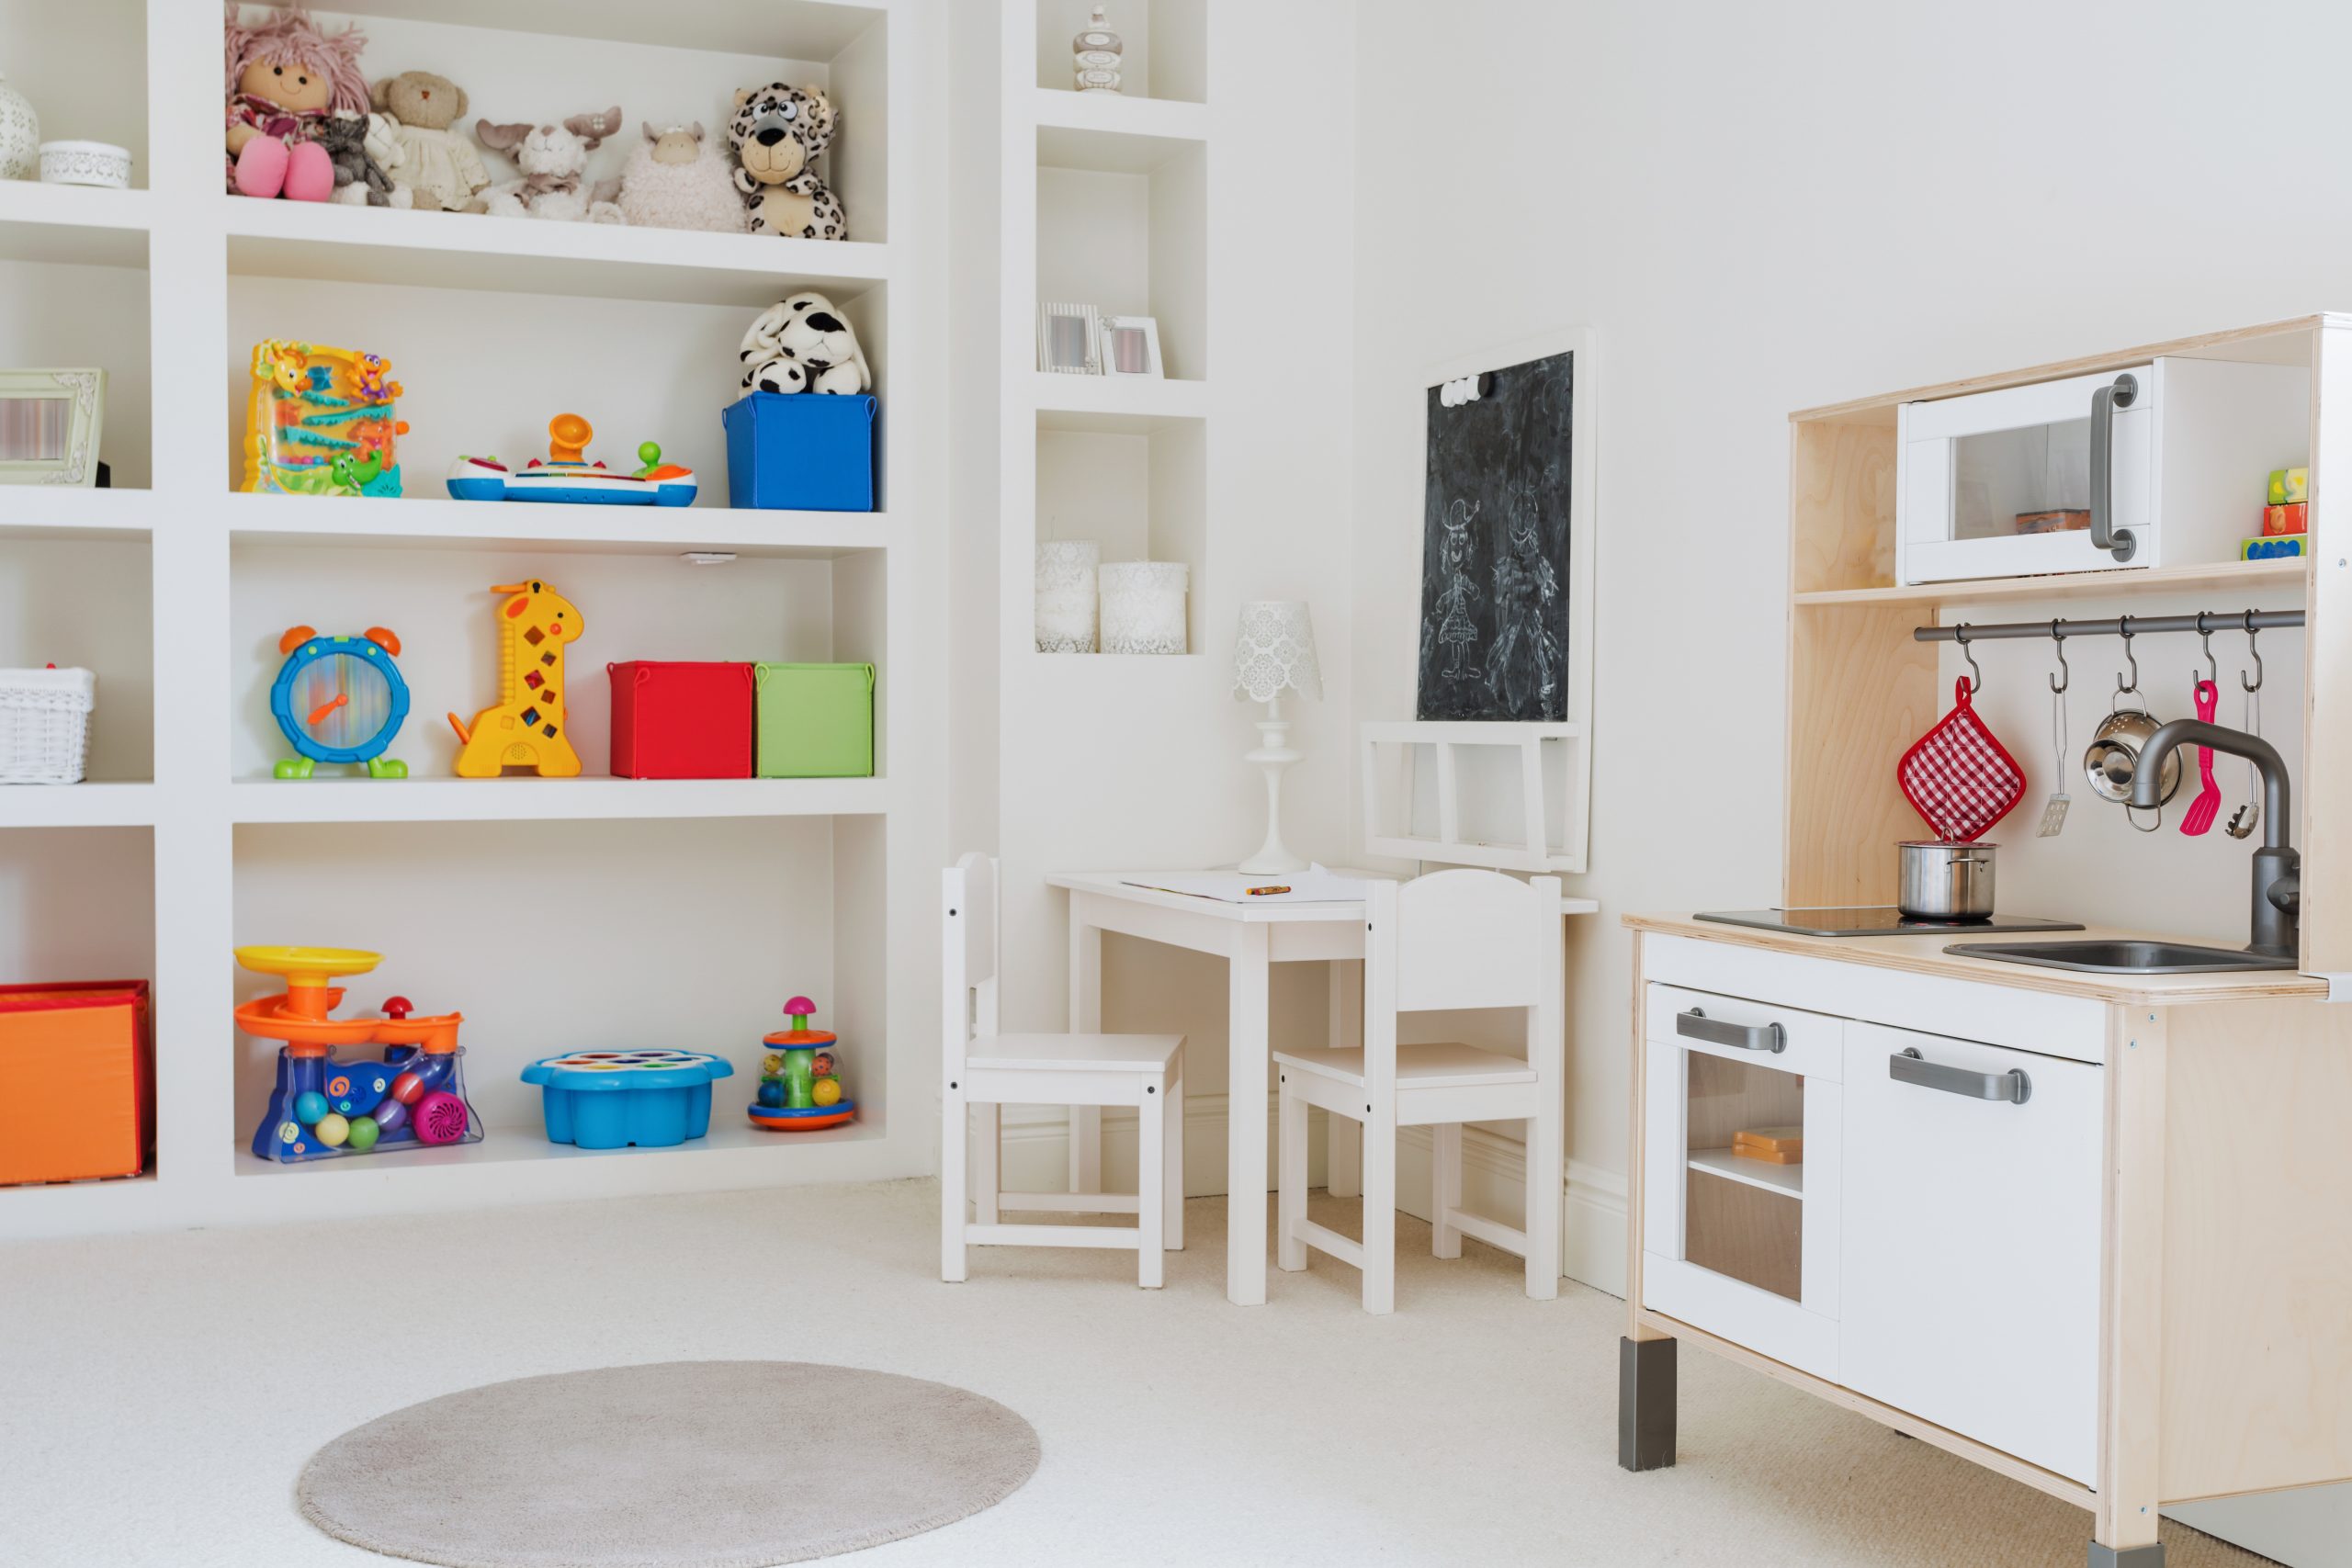
The most effective kids’ toy room designs balance visual appeal with practical functionality. Begin by dividing your space into activity zones based on how your child plays. A reading corner, building zone, creative area, and active play space create natural divisions that help children understand where different activities take place.
Pro tip: Before purchasing new storage solutions, take inventory of what toys need organising. Categories often include building blocks, creative supplies, books, pretend play items, and active toys.
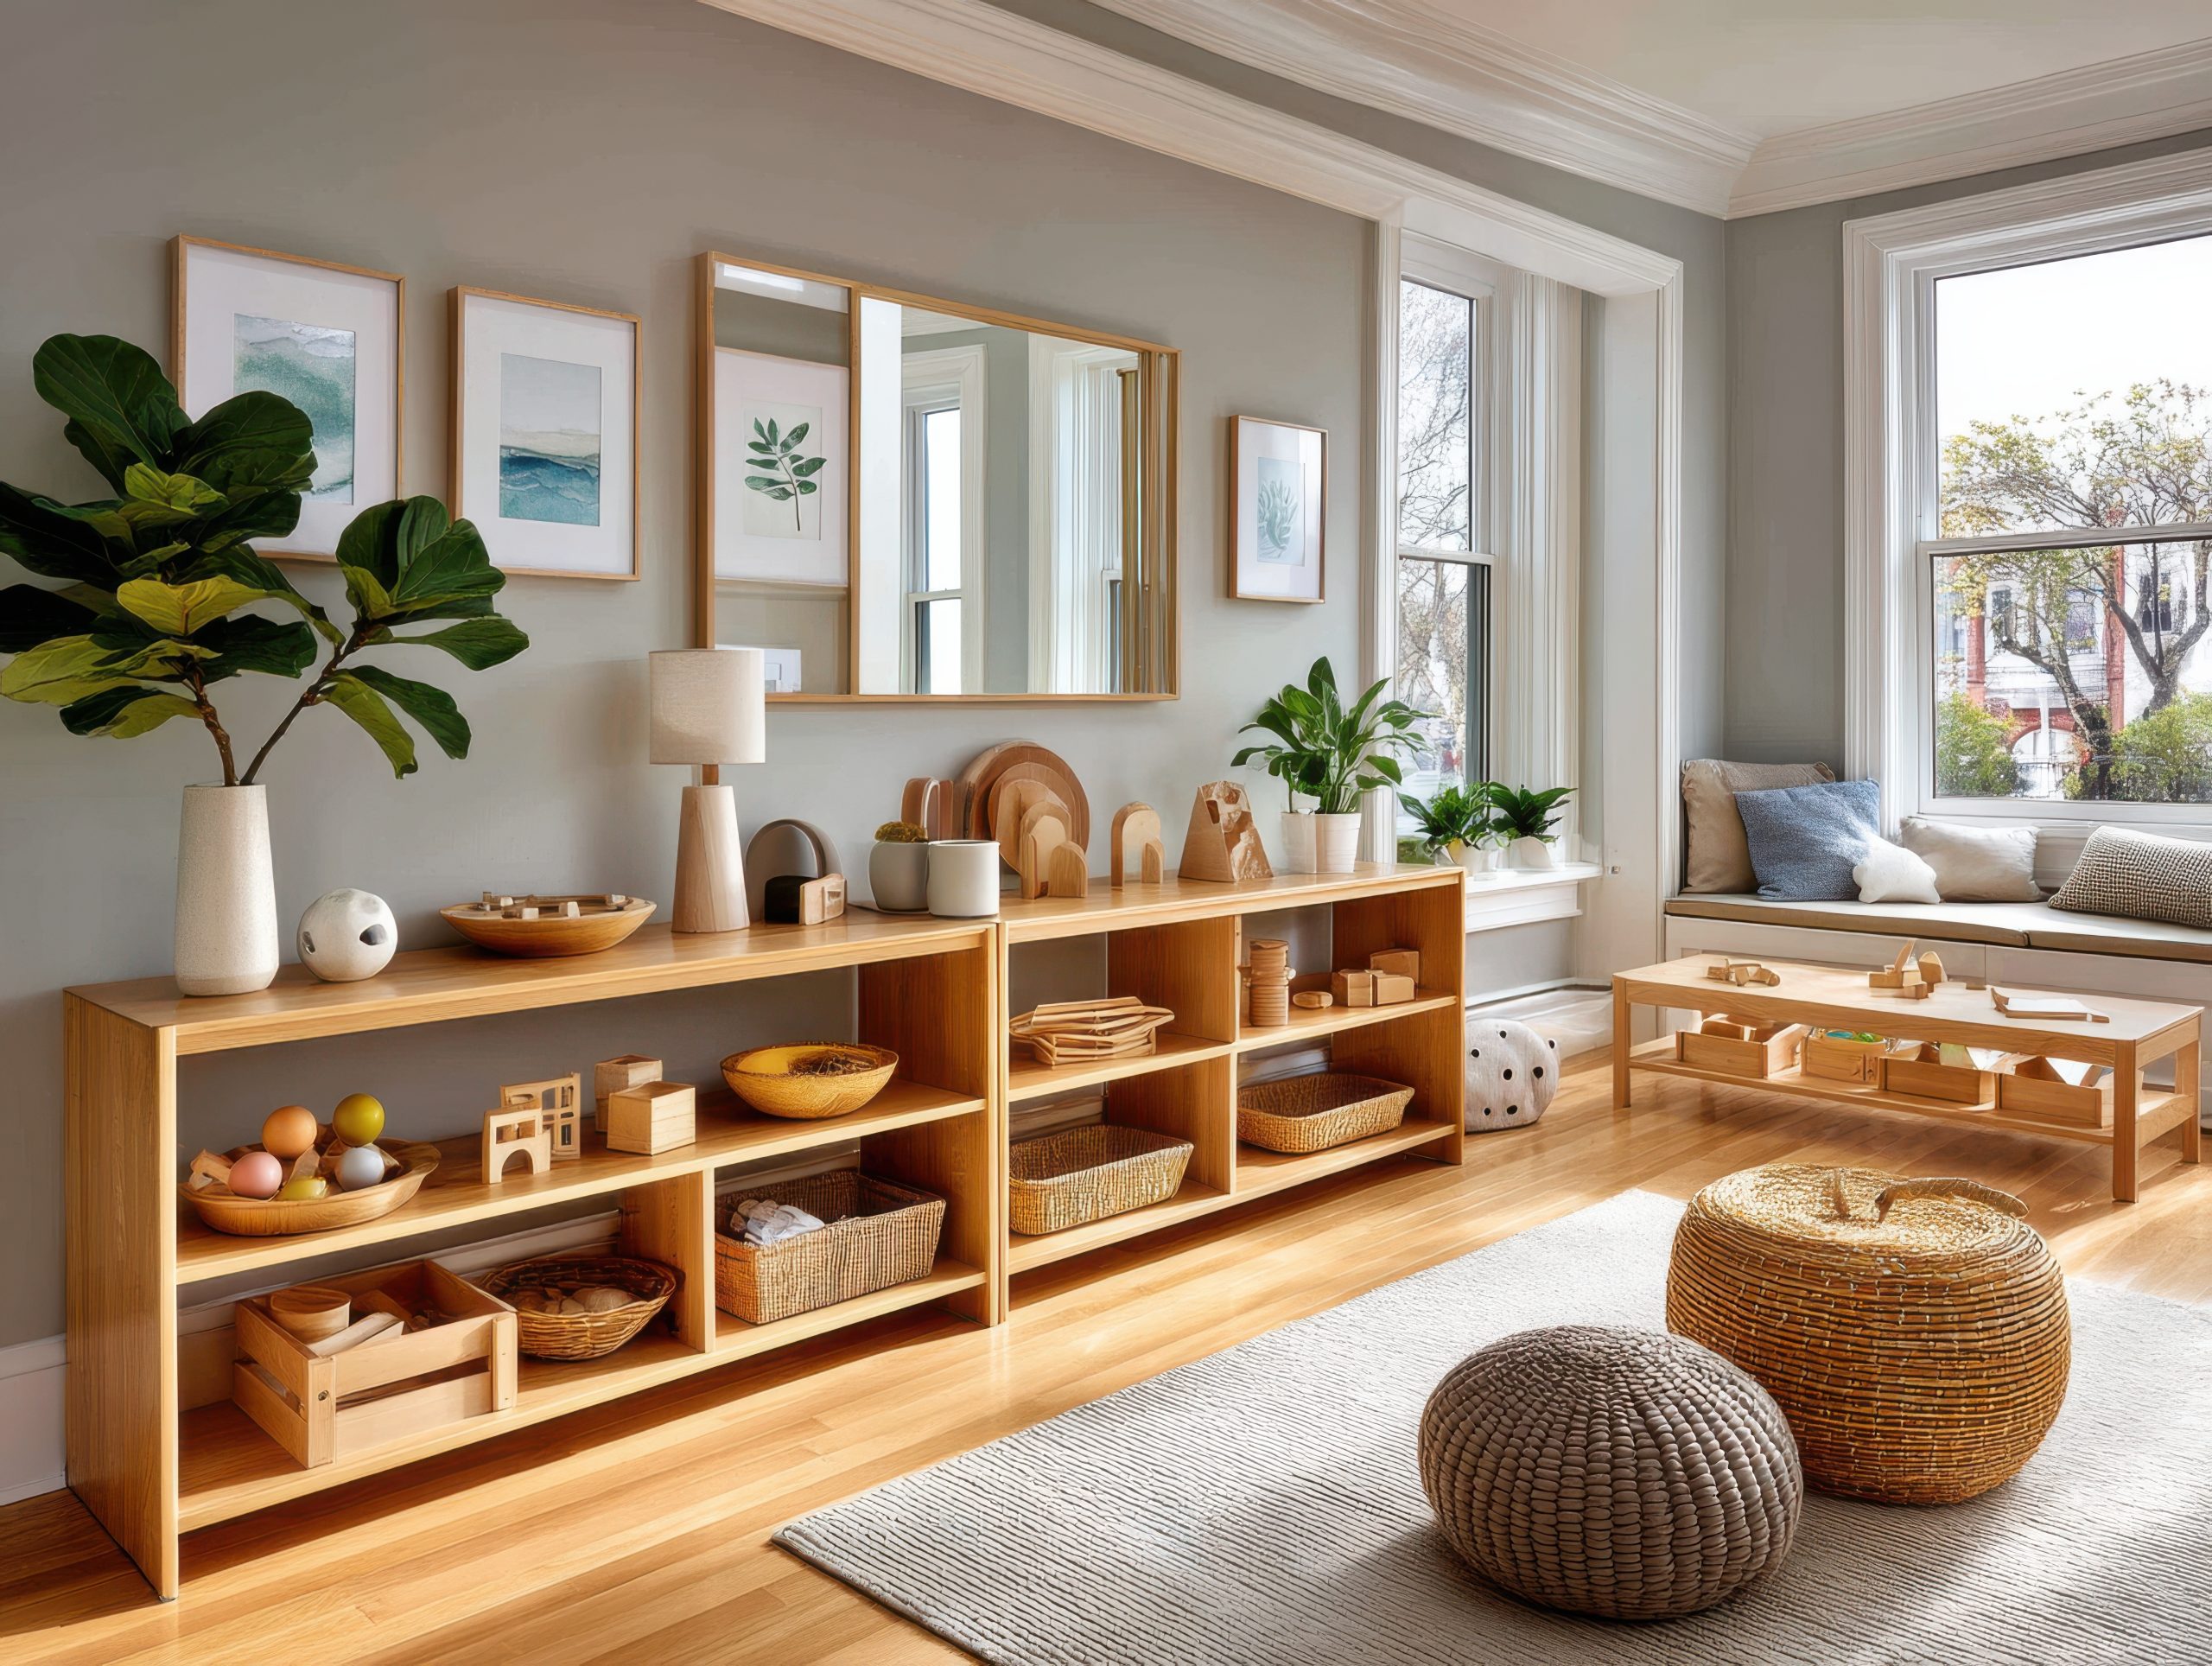
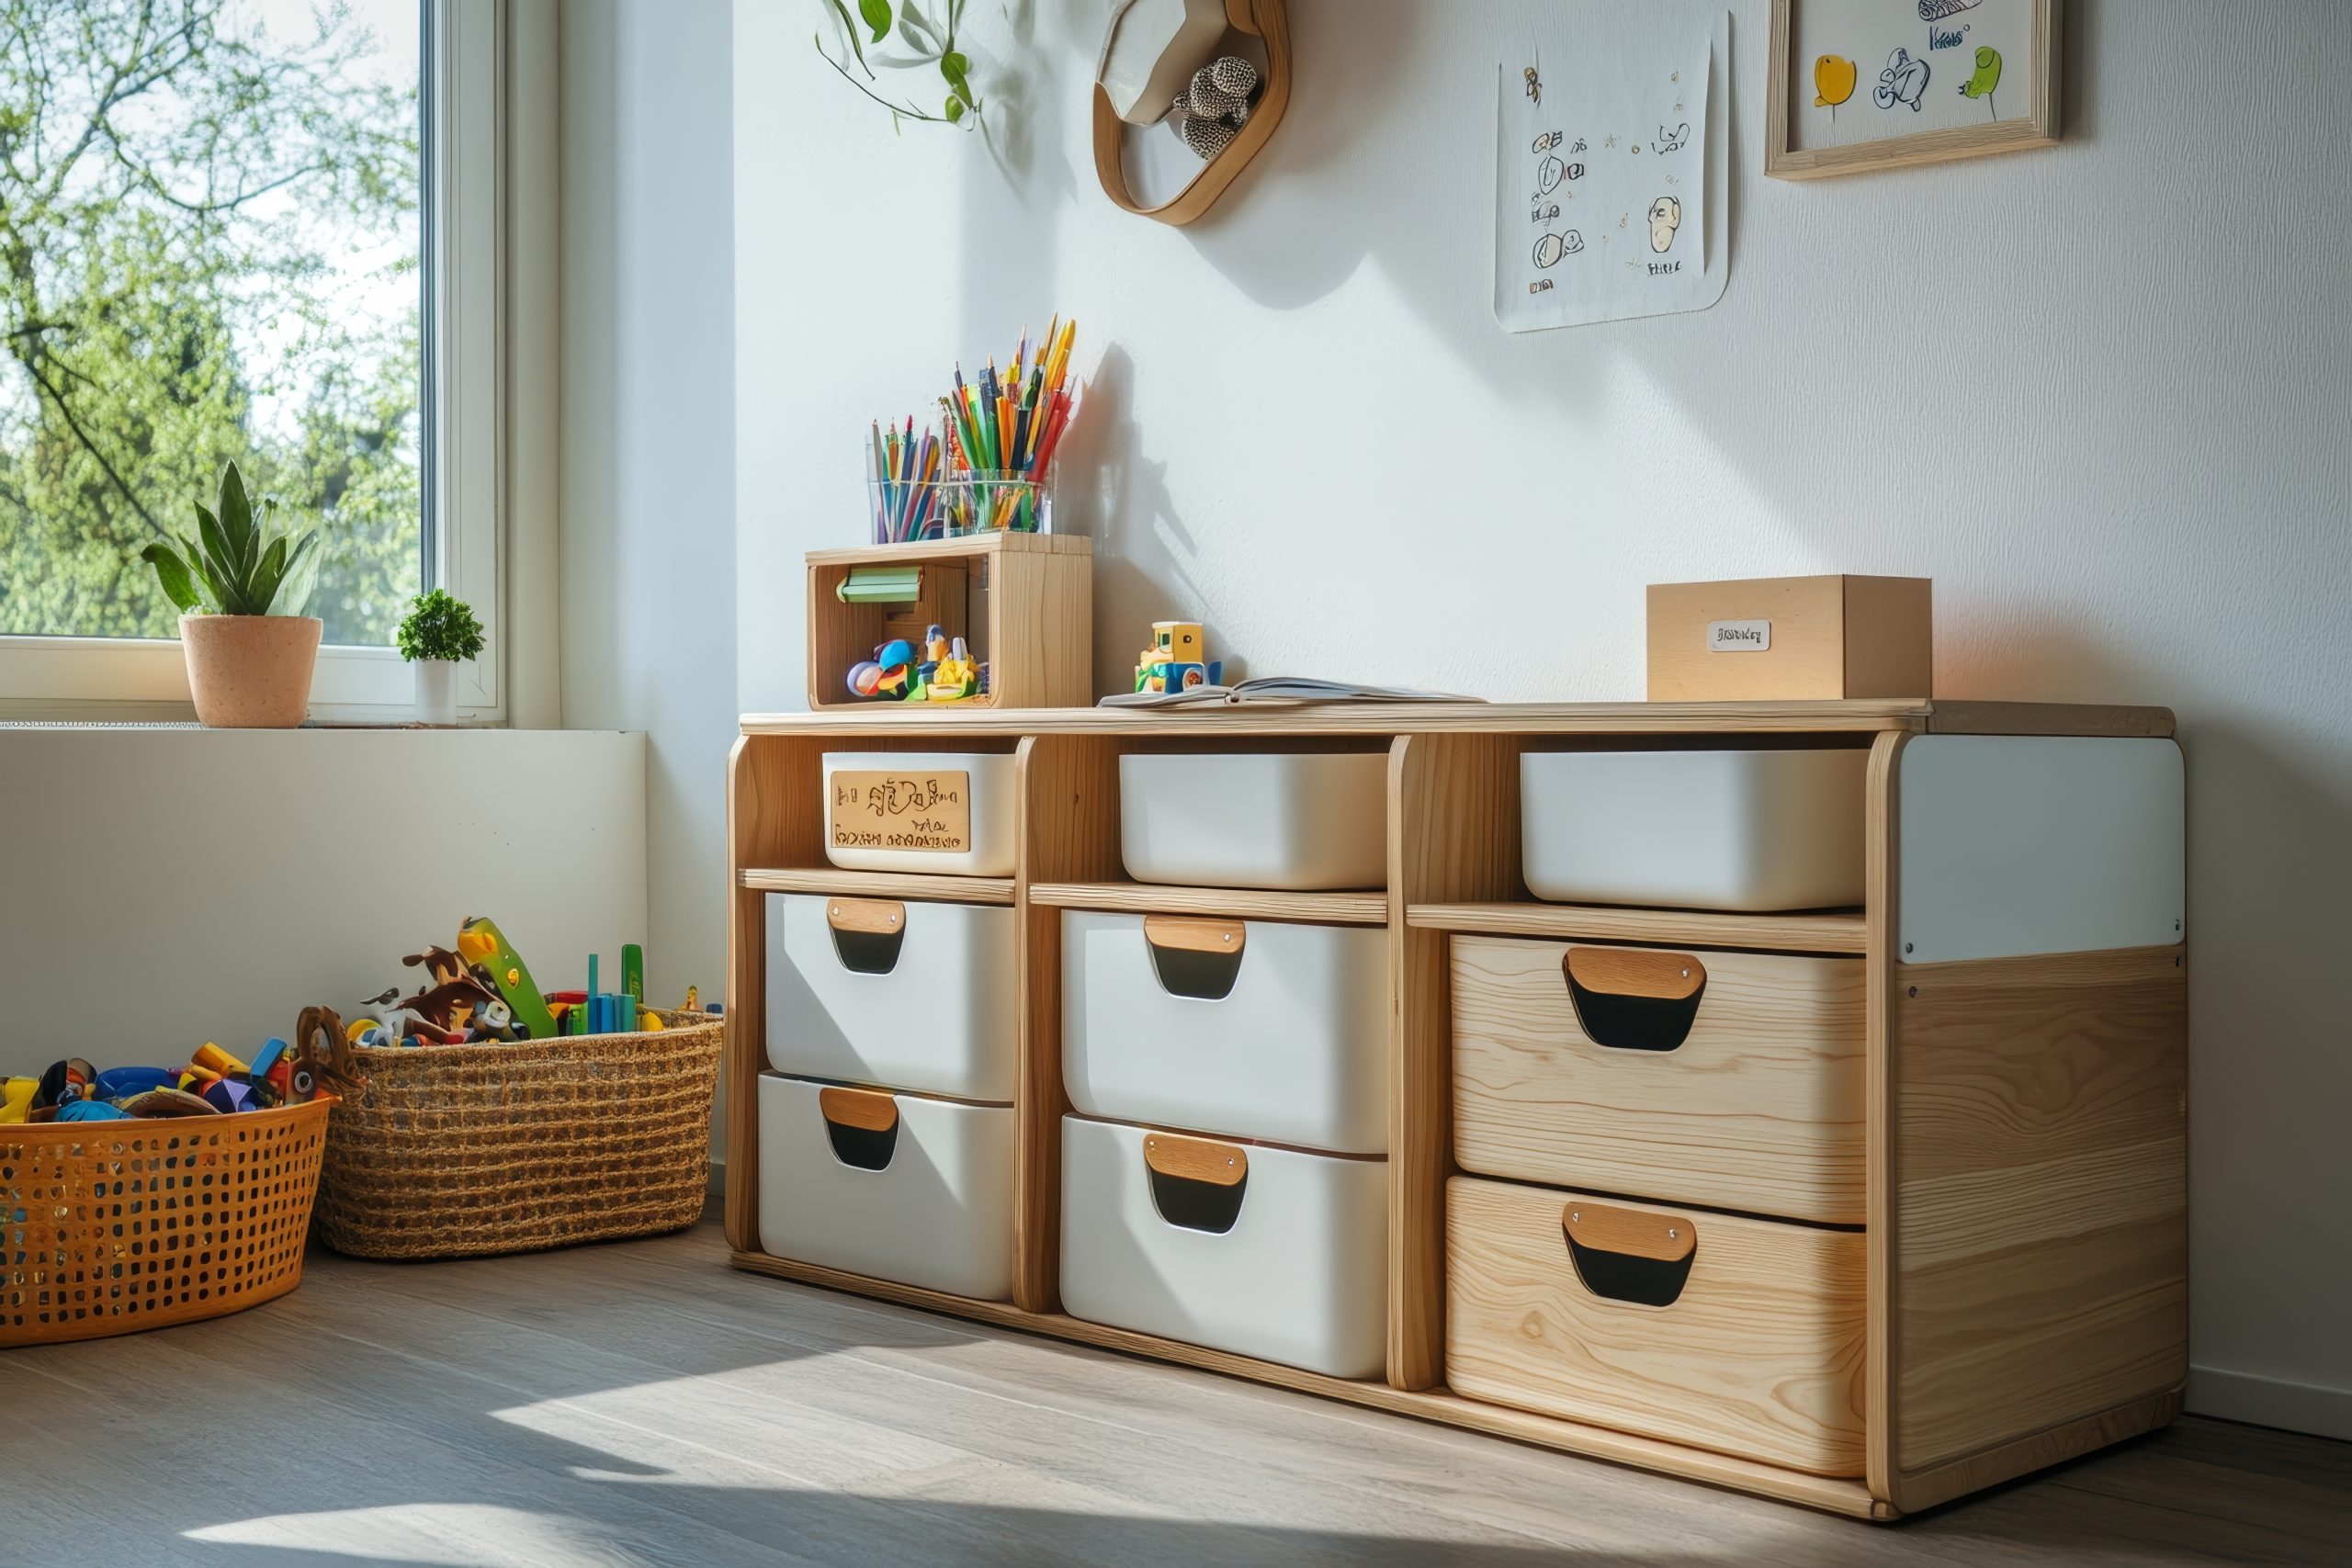
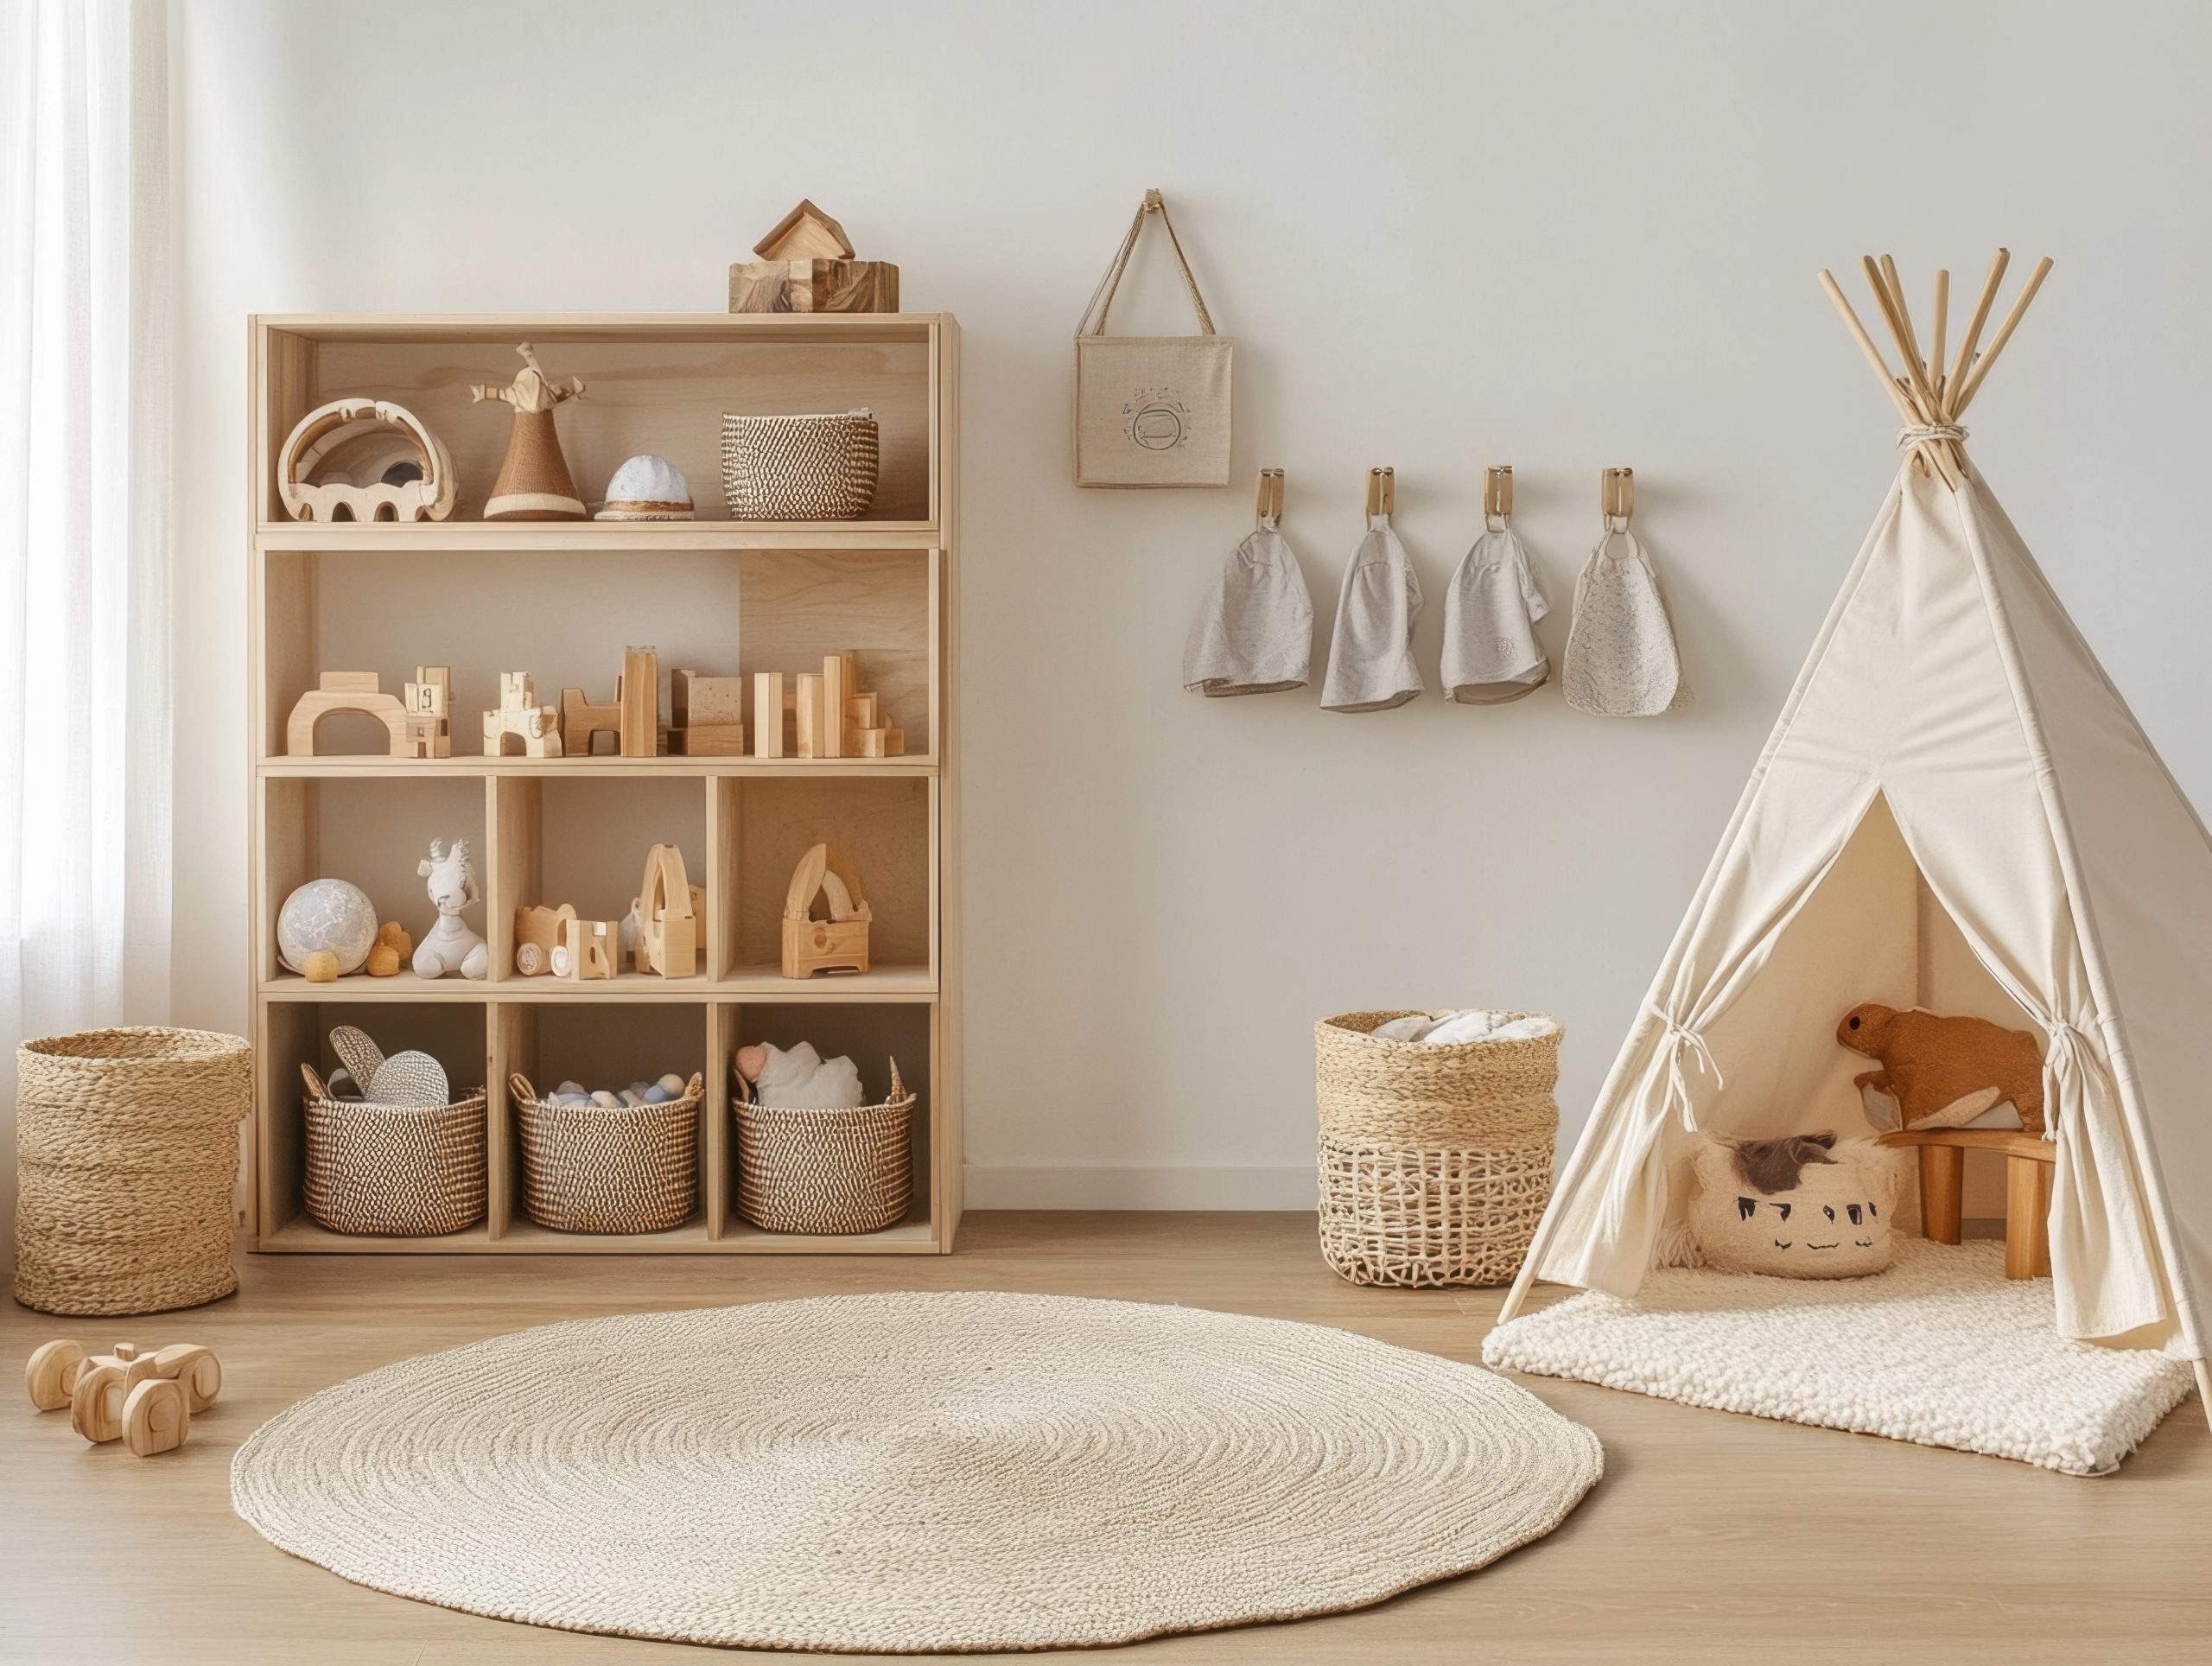
2. Storage Solutions That Grow With Your Child
The foundation of any successful kids’ toy room is appropriate storage. Effective toy organisation systems should be both accessible to children and visually appealing.
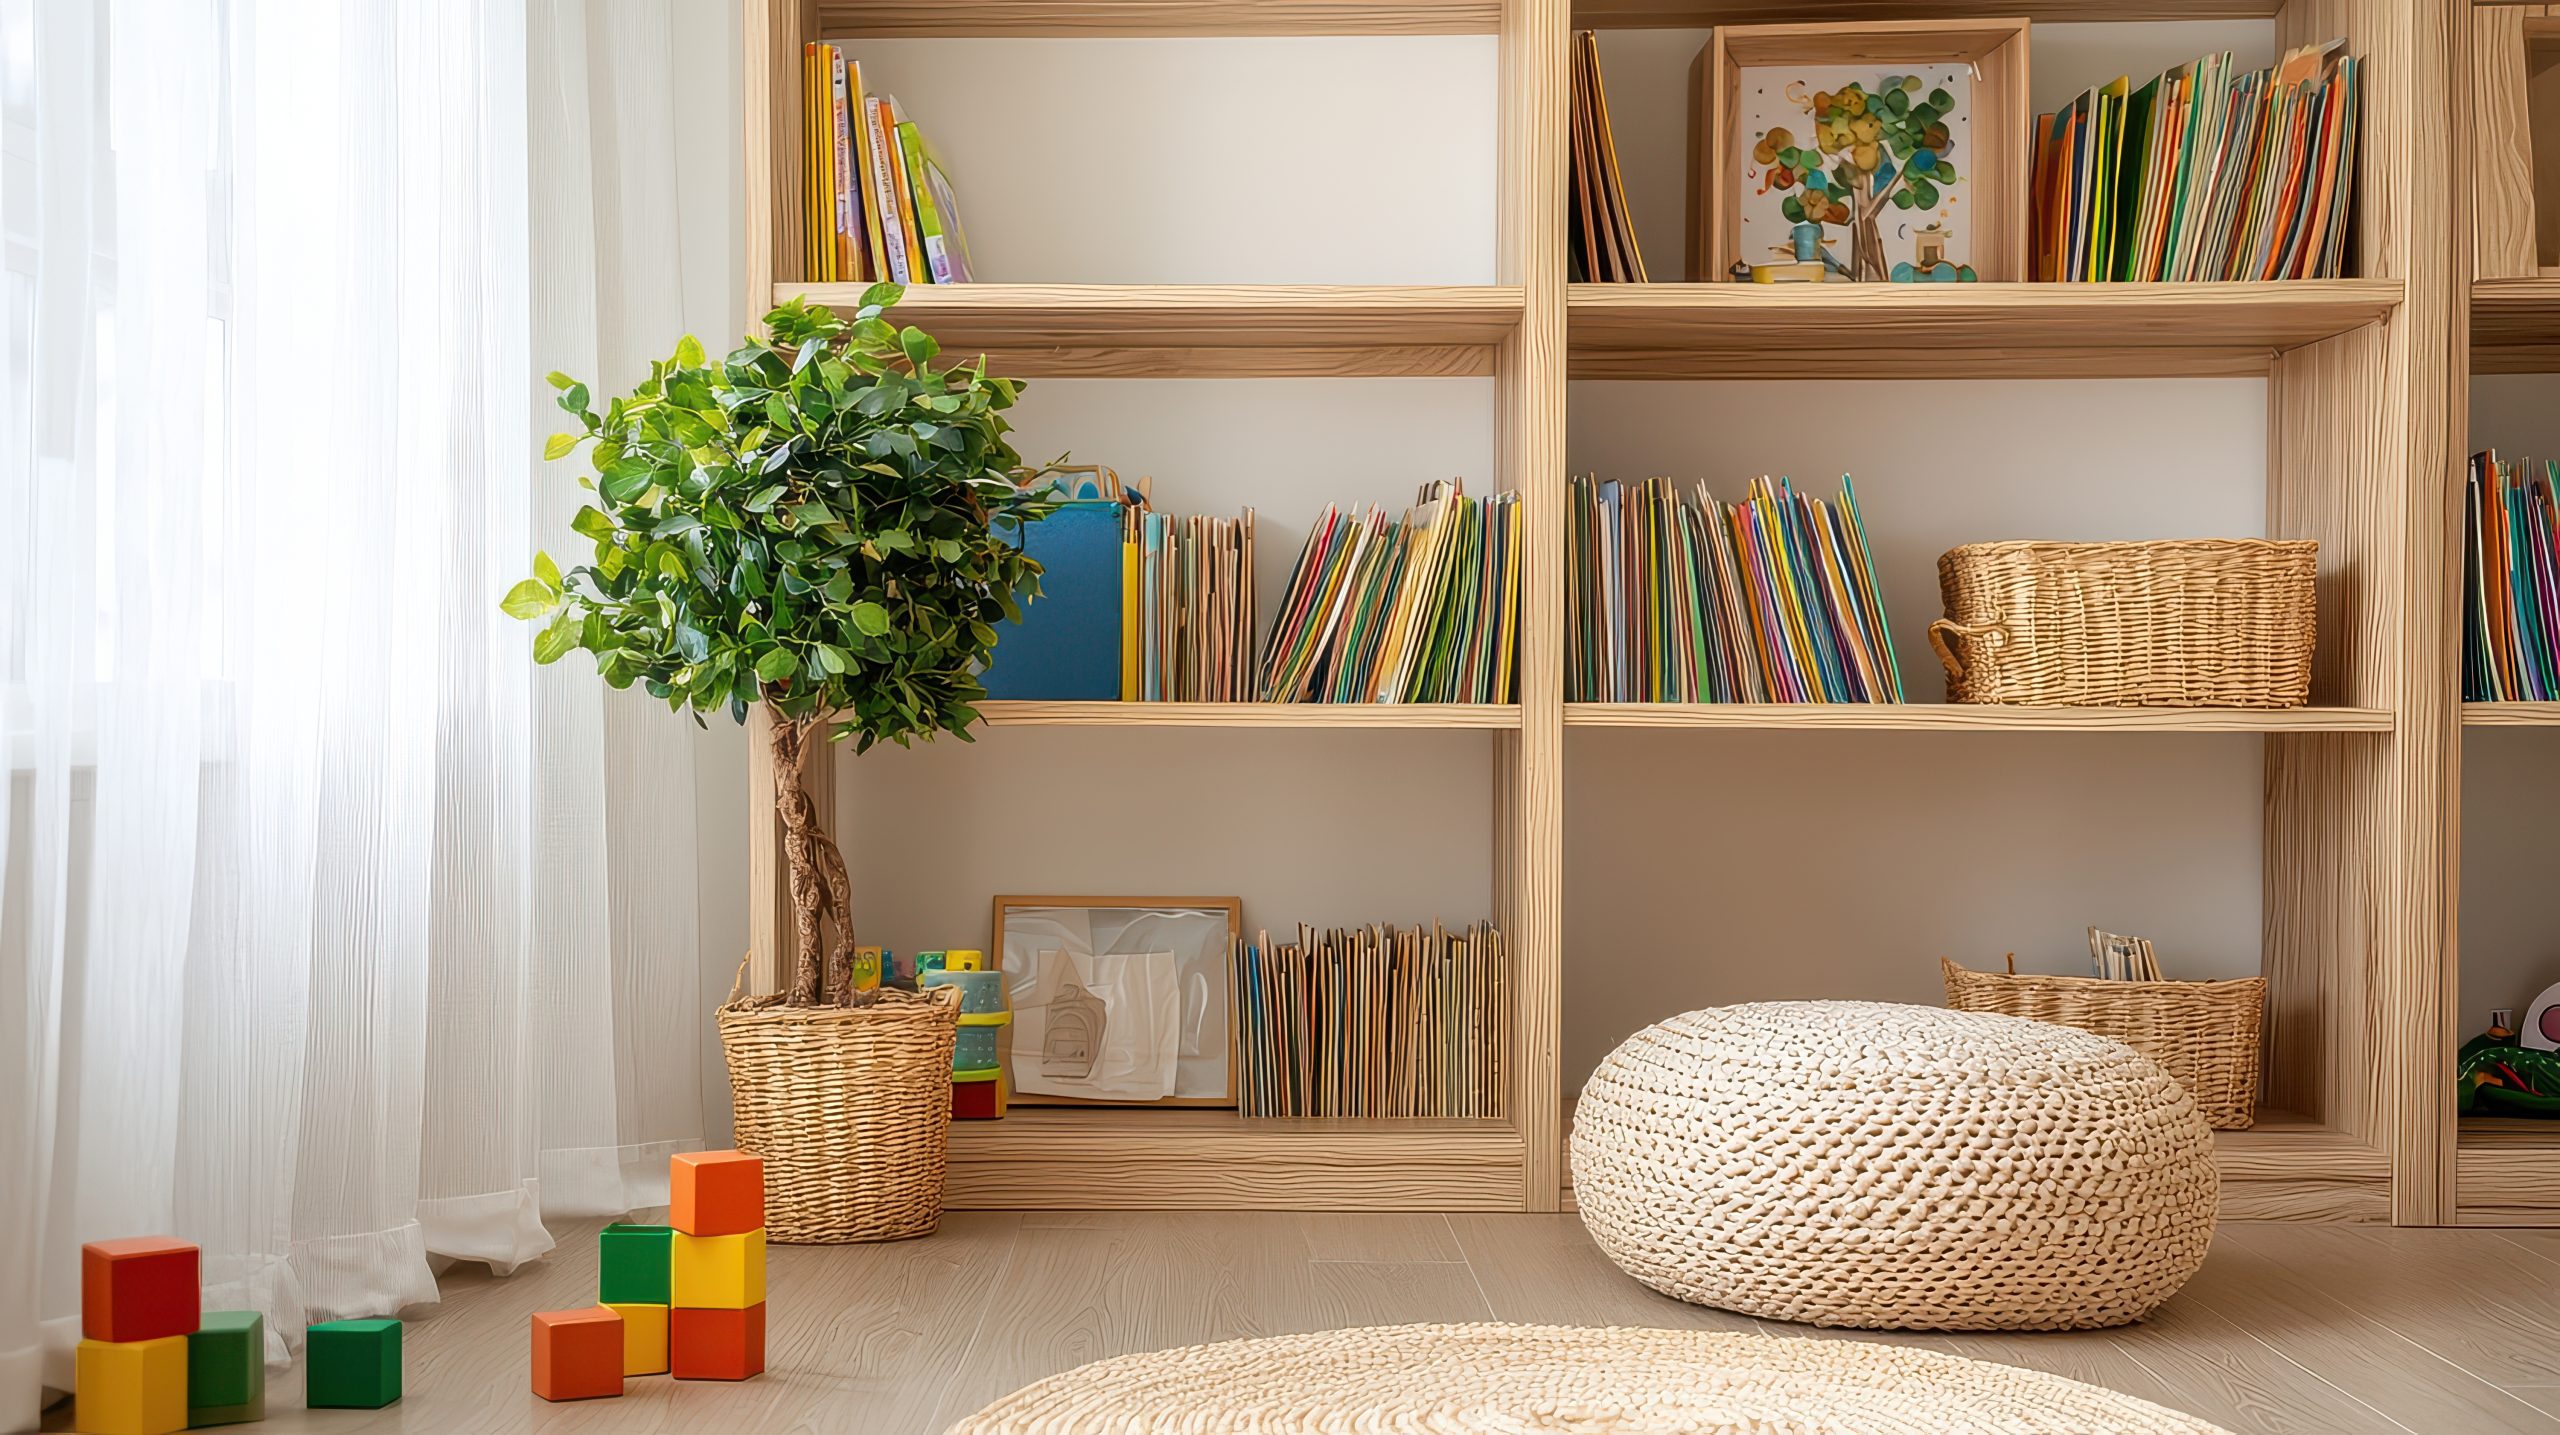
Open shelving works particularly well for frequently used items and can double as display space in your kids’ toy room. Consider these options for different toy categories:
Low, open shelves for daily-use toys that encourage independent access
Closed cabinets for items that require adult supervision or create visual clutter
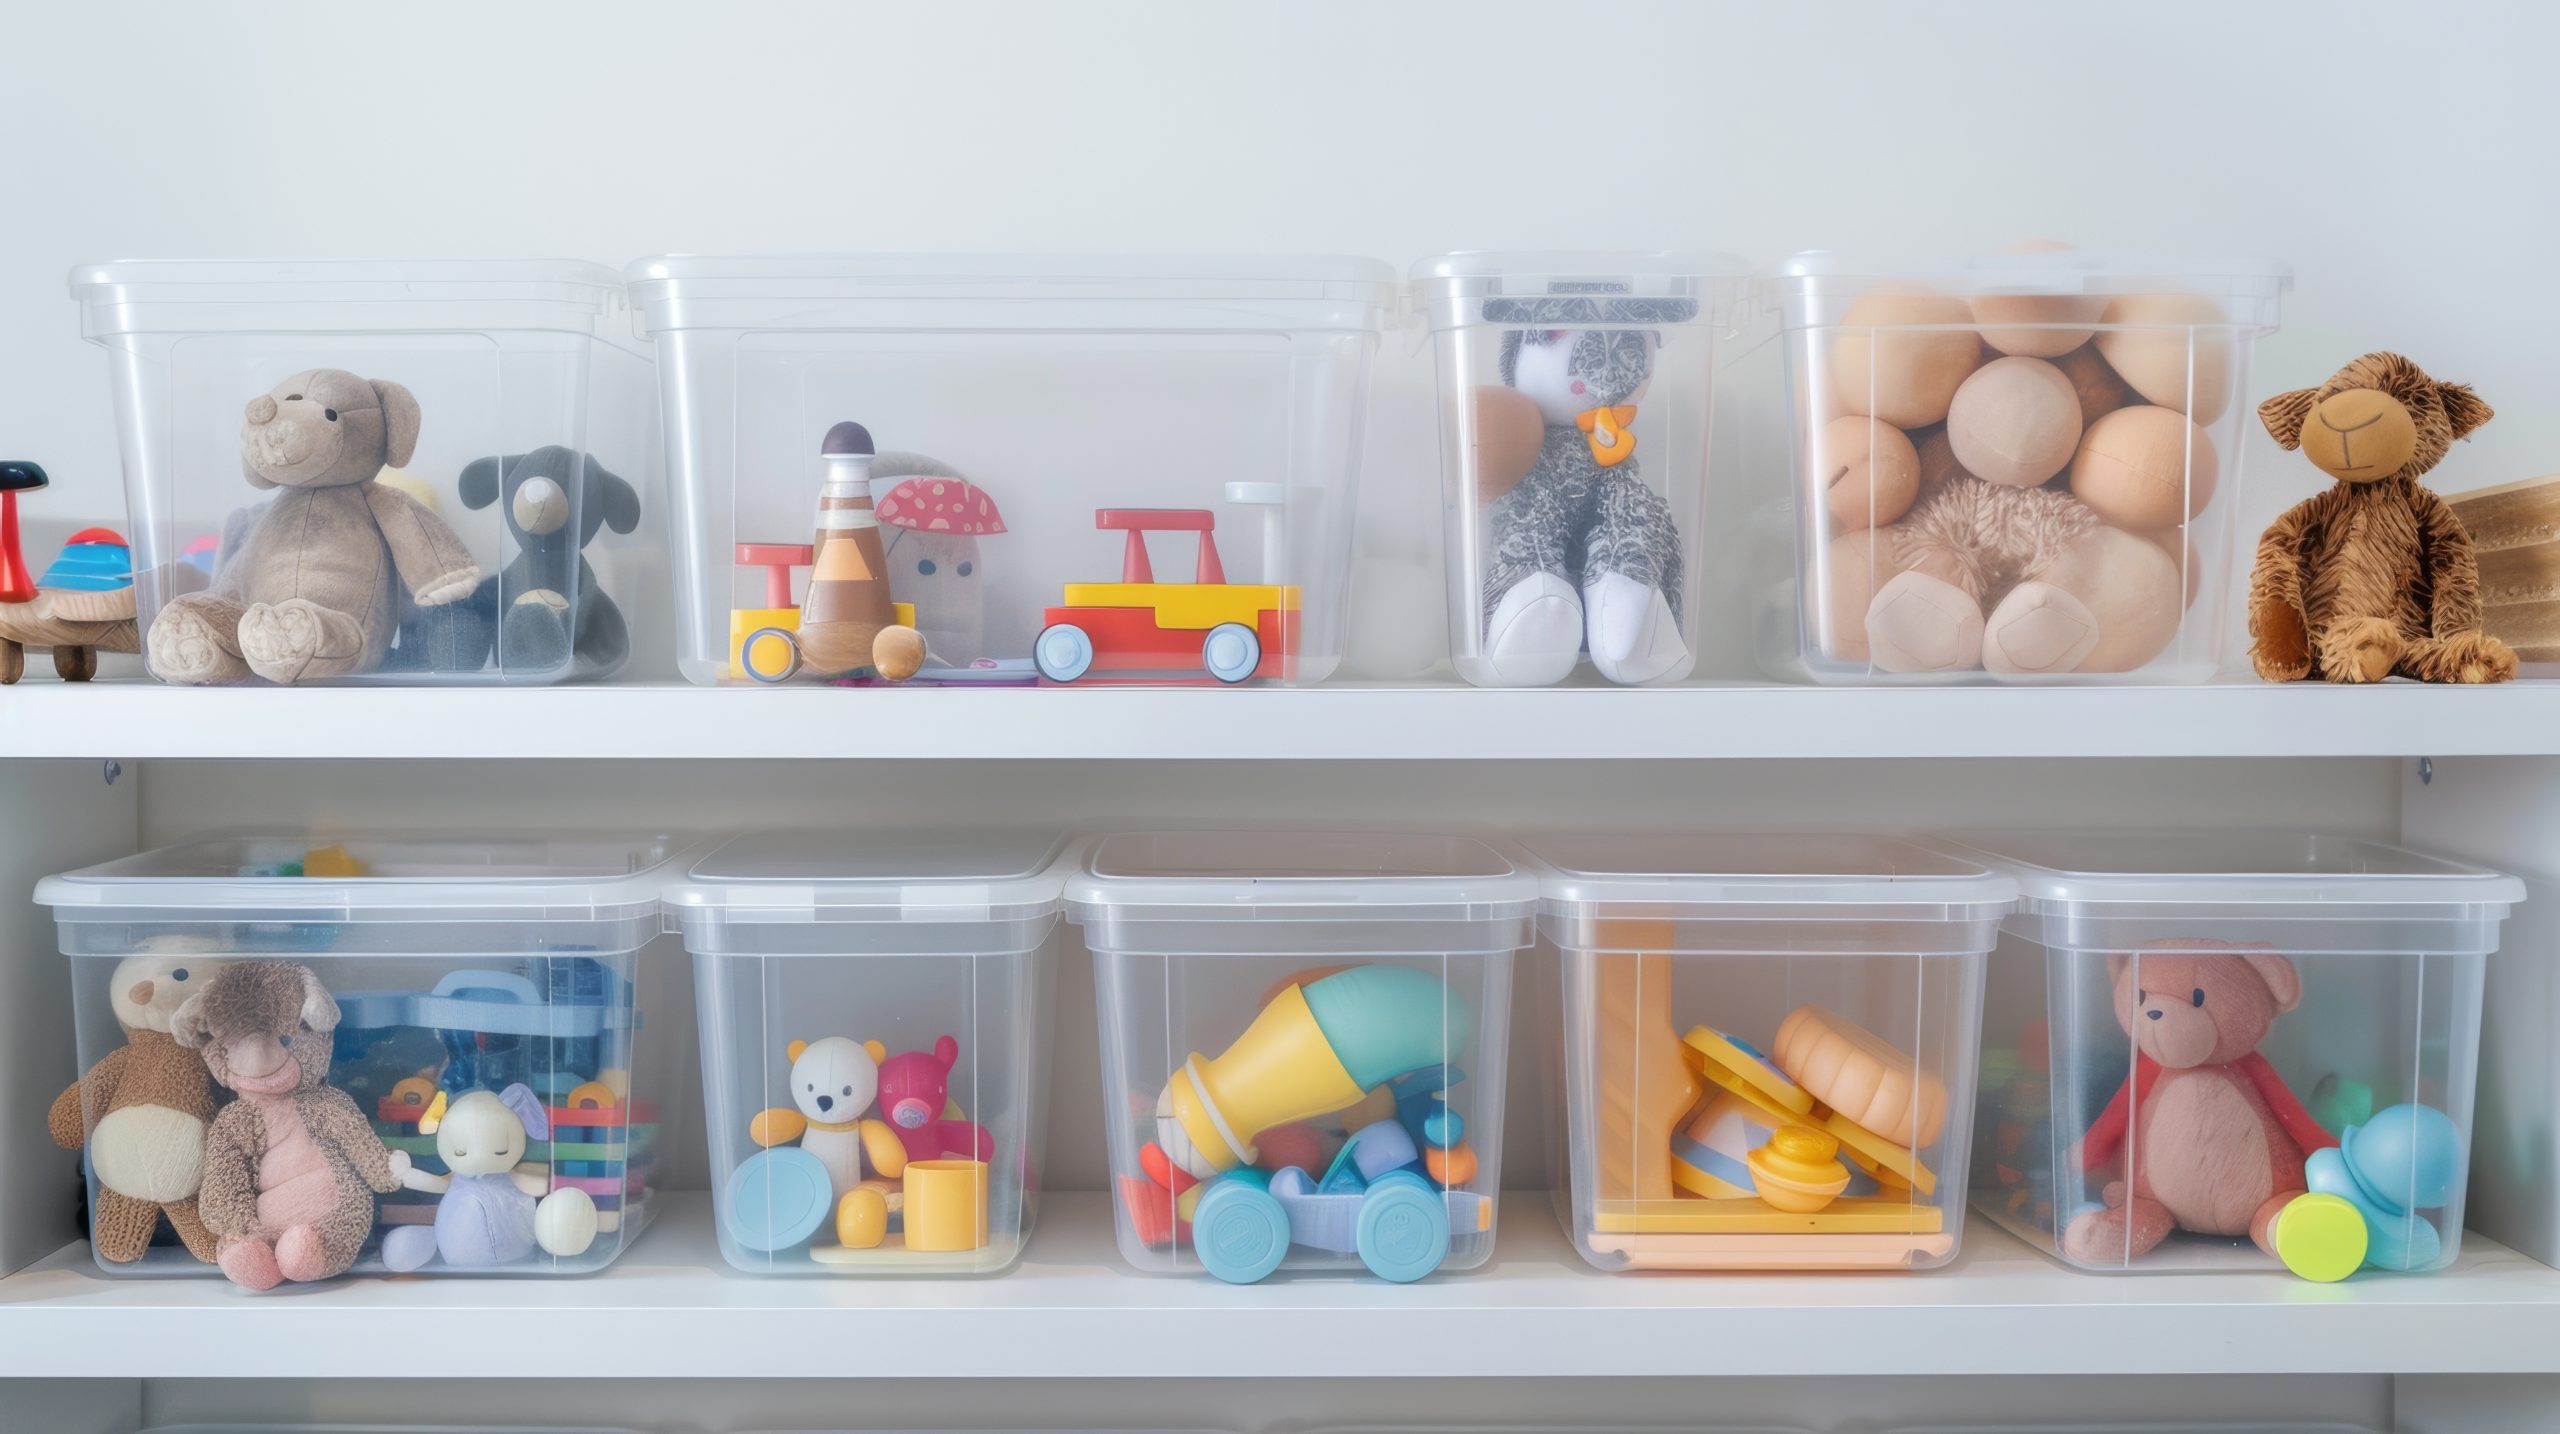
Clear bins for collections like building blocks or toy vehicles
Soft baskets for stuffed animals and dress-up clothes
Book displays that show covers rather than spines for young readers
What makes a kids’ toy room truly functional is a labelling system appropriate for your child’s age. For pre-readers, use picture labels with corresponding images on bins. As children grow, transition to written labels that they can read independently.
Pro tip: Modular storage systems allow your kids’ toy room to evolve as your child grows. Choose pieces that can be reconfigured or repurposed rather than age-specific furniture with limited longevity.
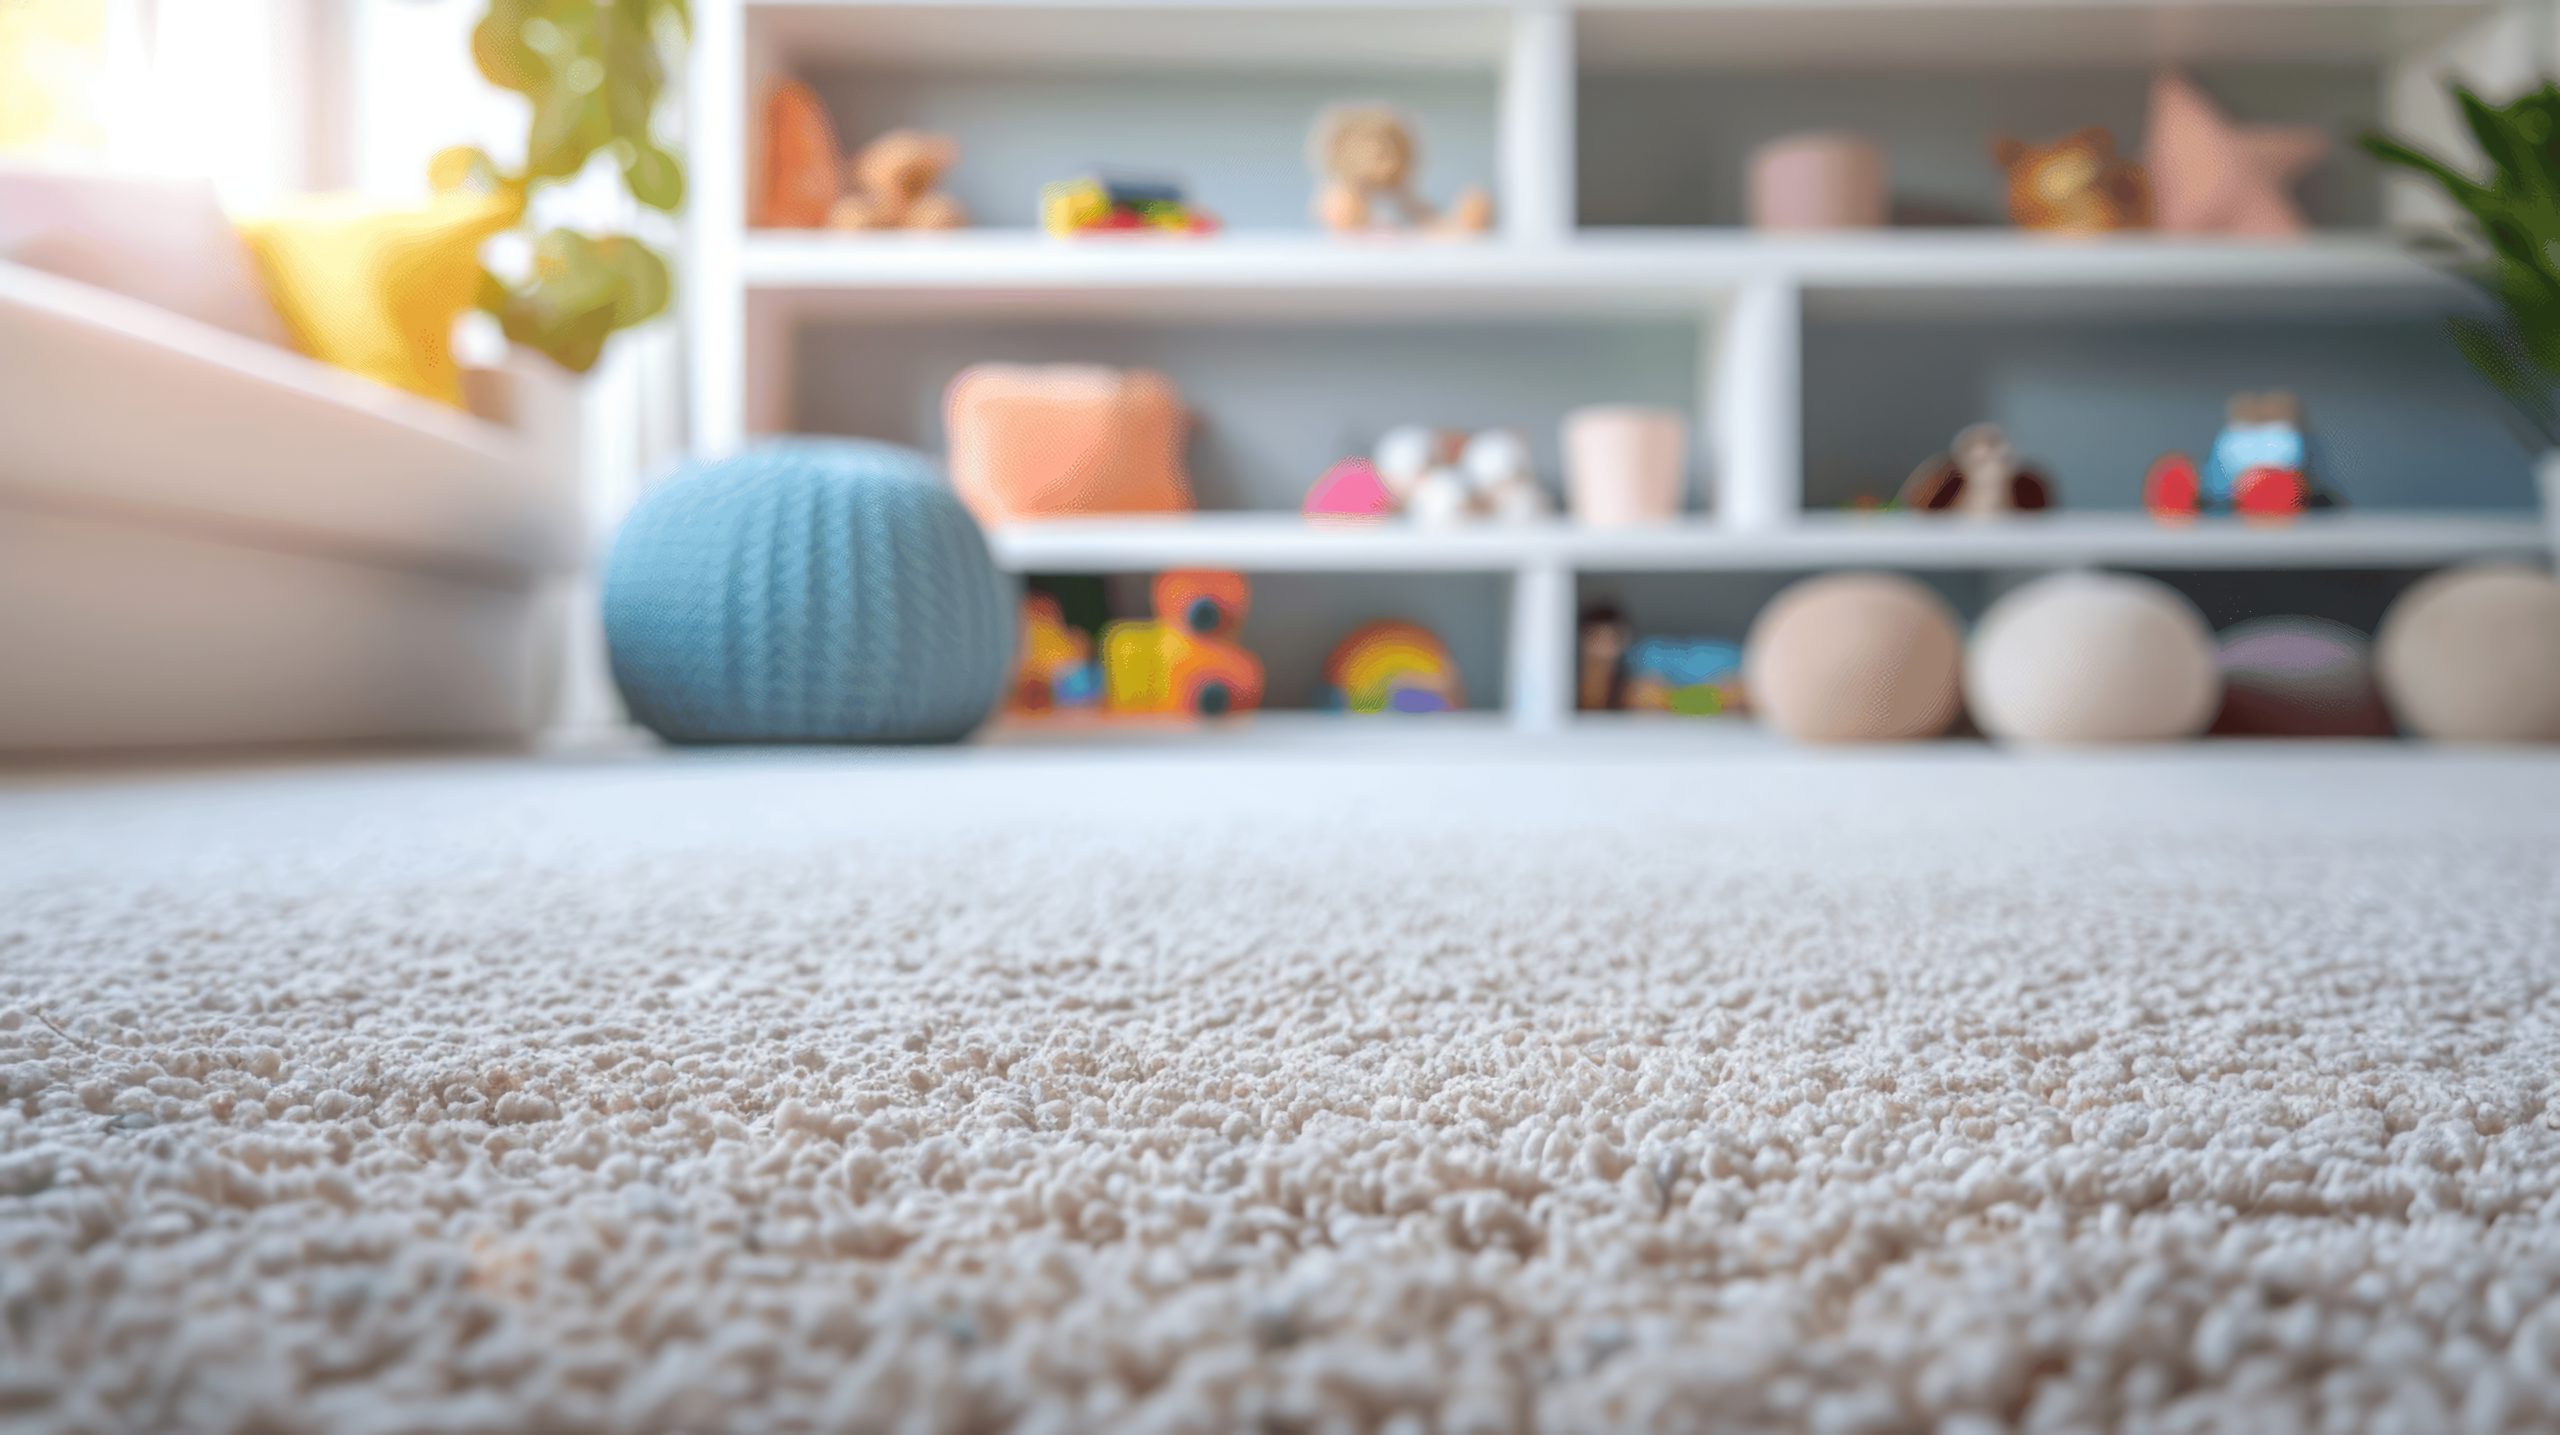
3. Flooring and Surface Considerations
The physical foundation of your kid’s toy room deserves careful consideration. Flooring needs to withstand creative messes, active play, and frequent cleaning.
Ideal flooring options for a kids’ toy room include:
Luxury vinyl planks – Waterproof, durable, and available in attractive designs
Low-pile carpeting – Offers comfort for floor play while being relatively easy to clean
Large washable area rugs – Provide comfort over hardwood or tile
Interlocking foam tiles – Create cushioned areas for active play
Laminate flooring – Offers durability at a lower price point than hardwood
Wall surfaces in a kids’ toy room should balance aesthetics with practicality. Consider washable paint in a satin or semi-gloss finish that allows for wiping away inevitable marks. Magnetic paint or chalkboard sections create interactive areas that contain creative expression in designated spaces.
Pro tip: In multi-purpose spaces, use area rugs to define the kids’ toy room zone within a larger room. This creates a visual boundary that helps children understand where playthings belong.
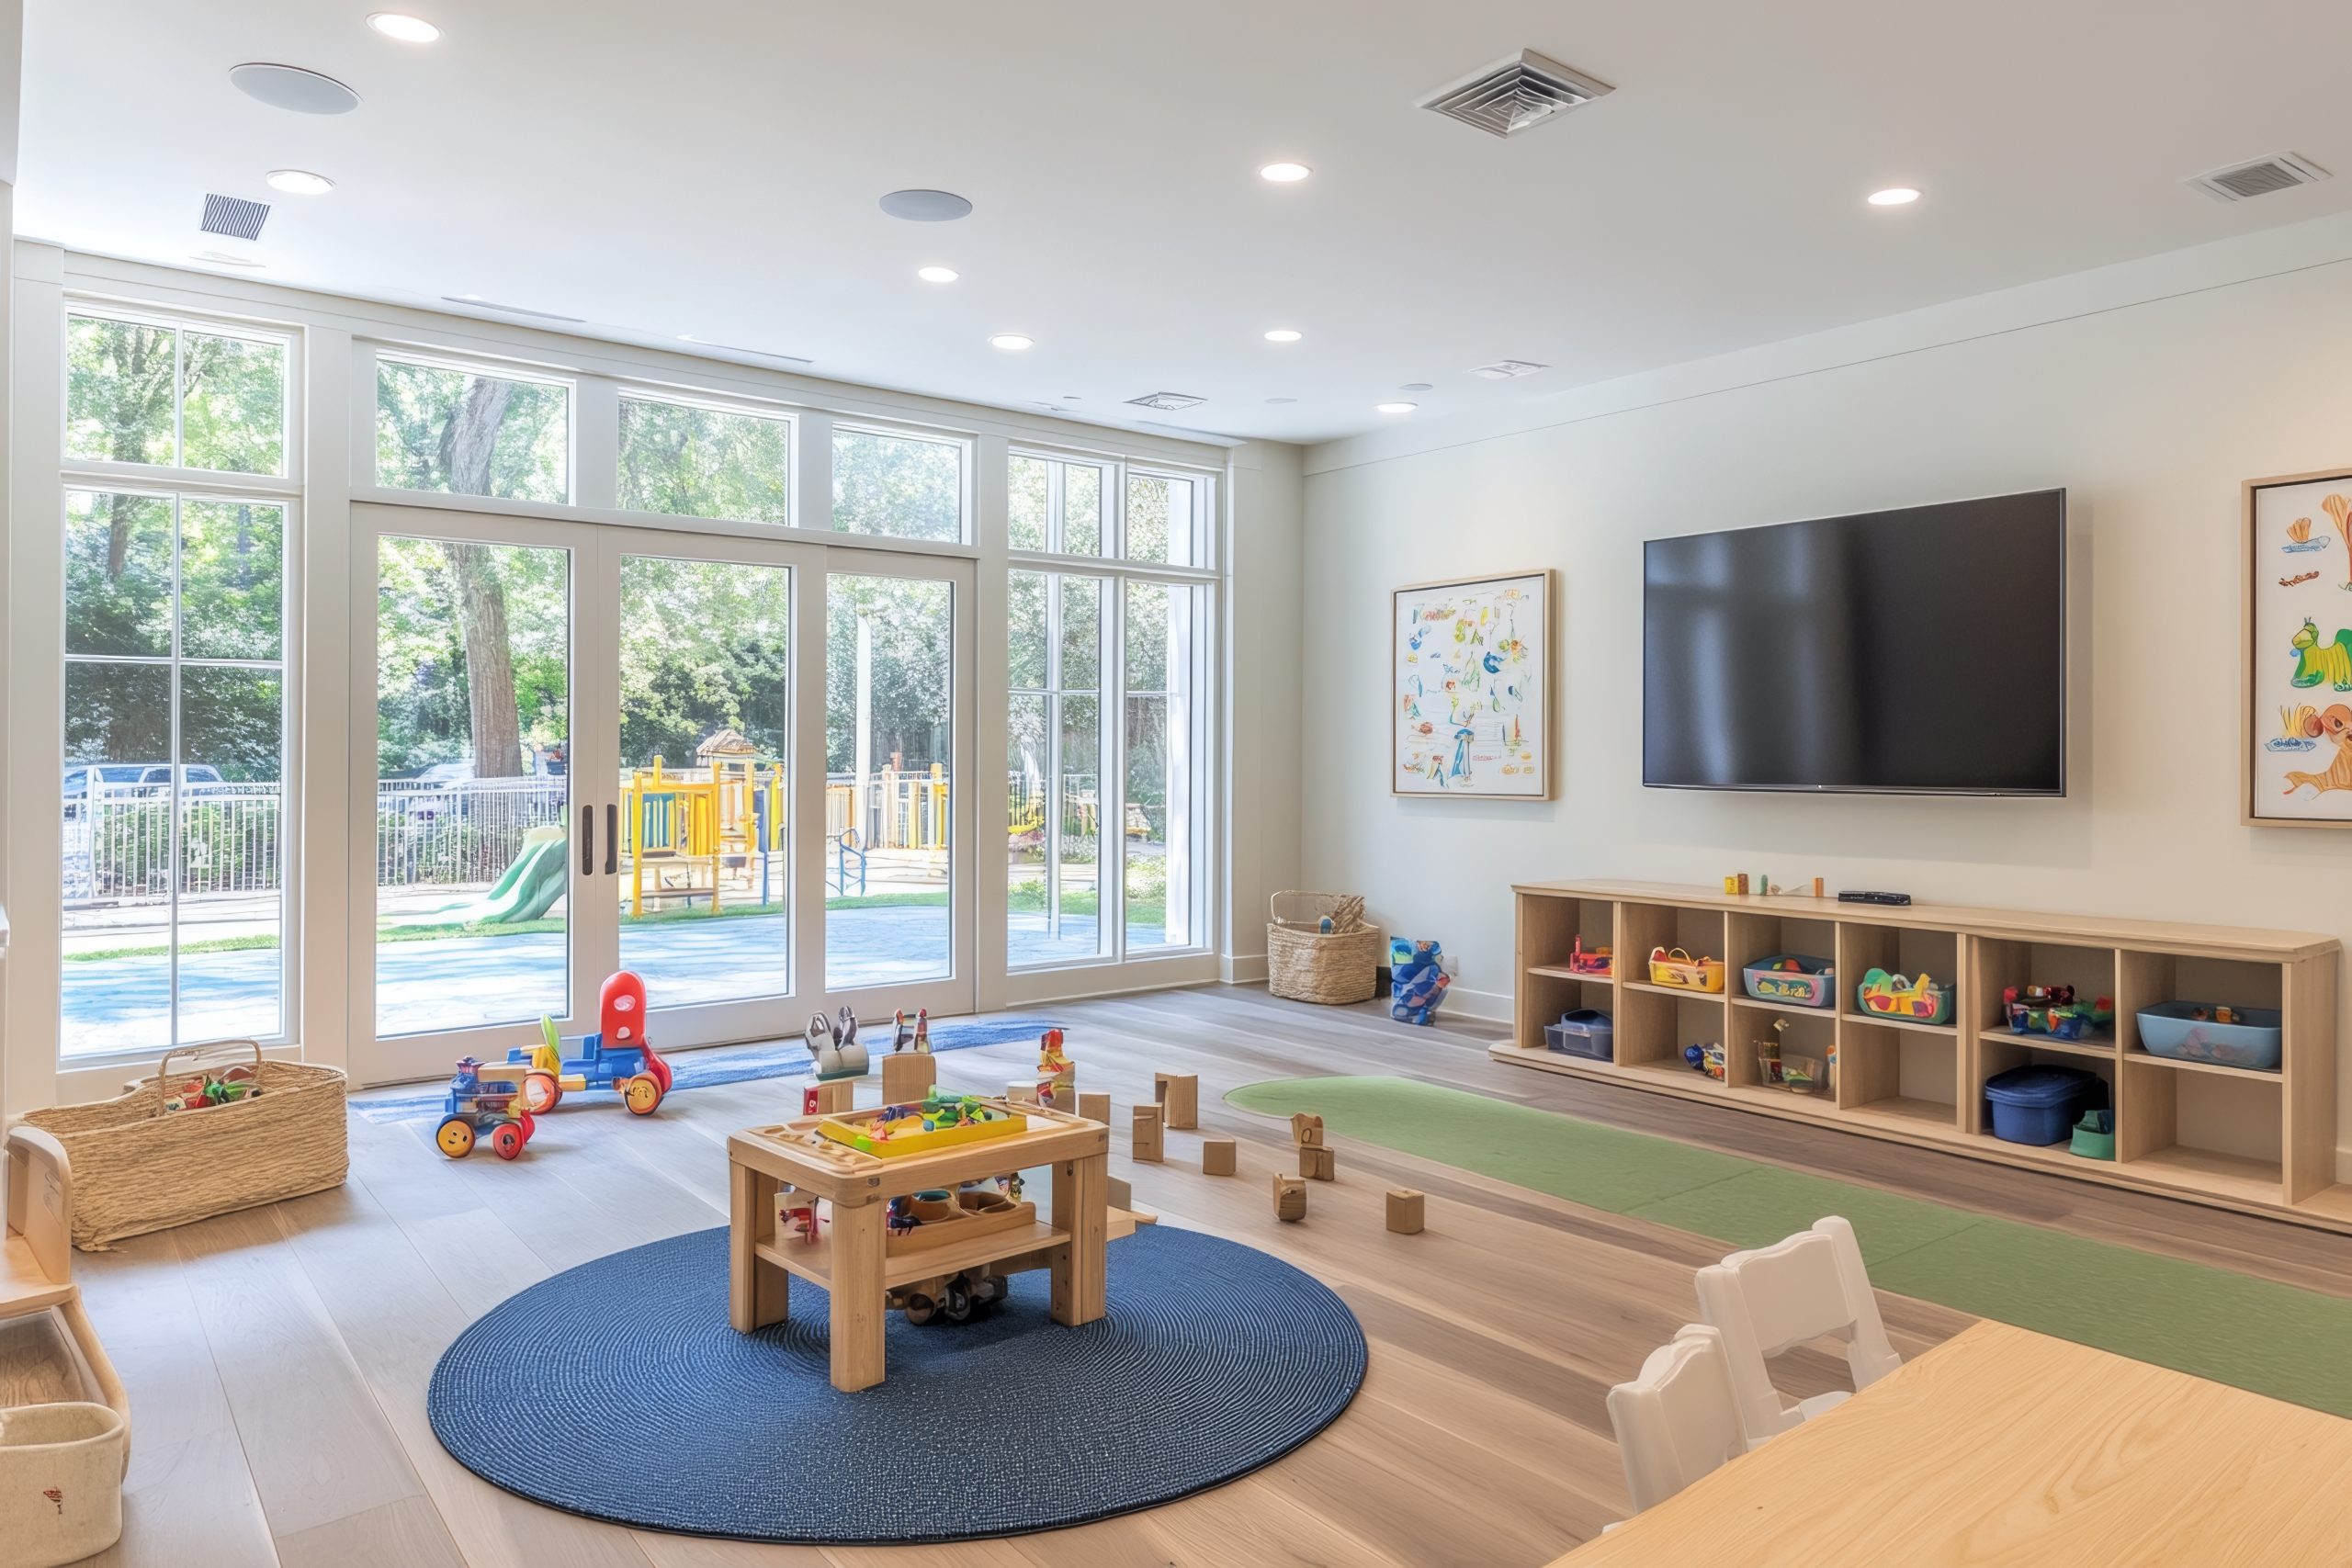
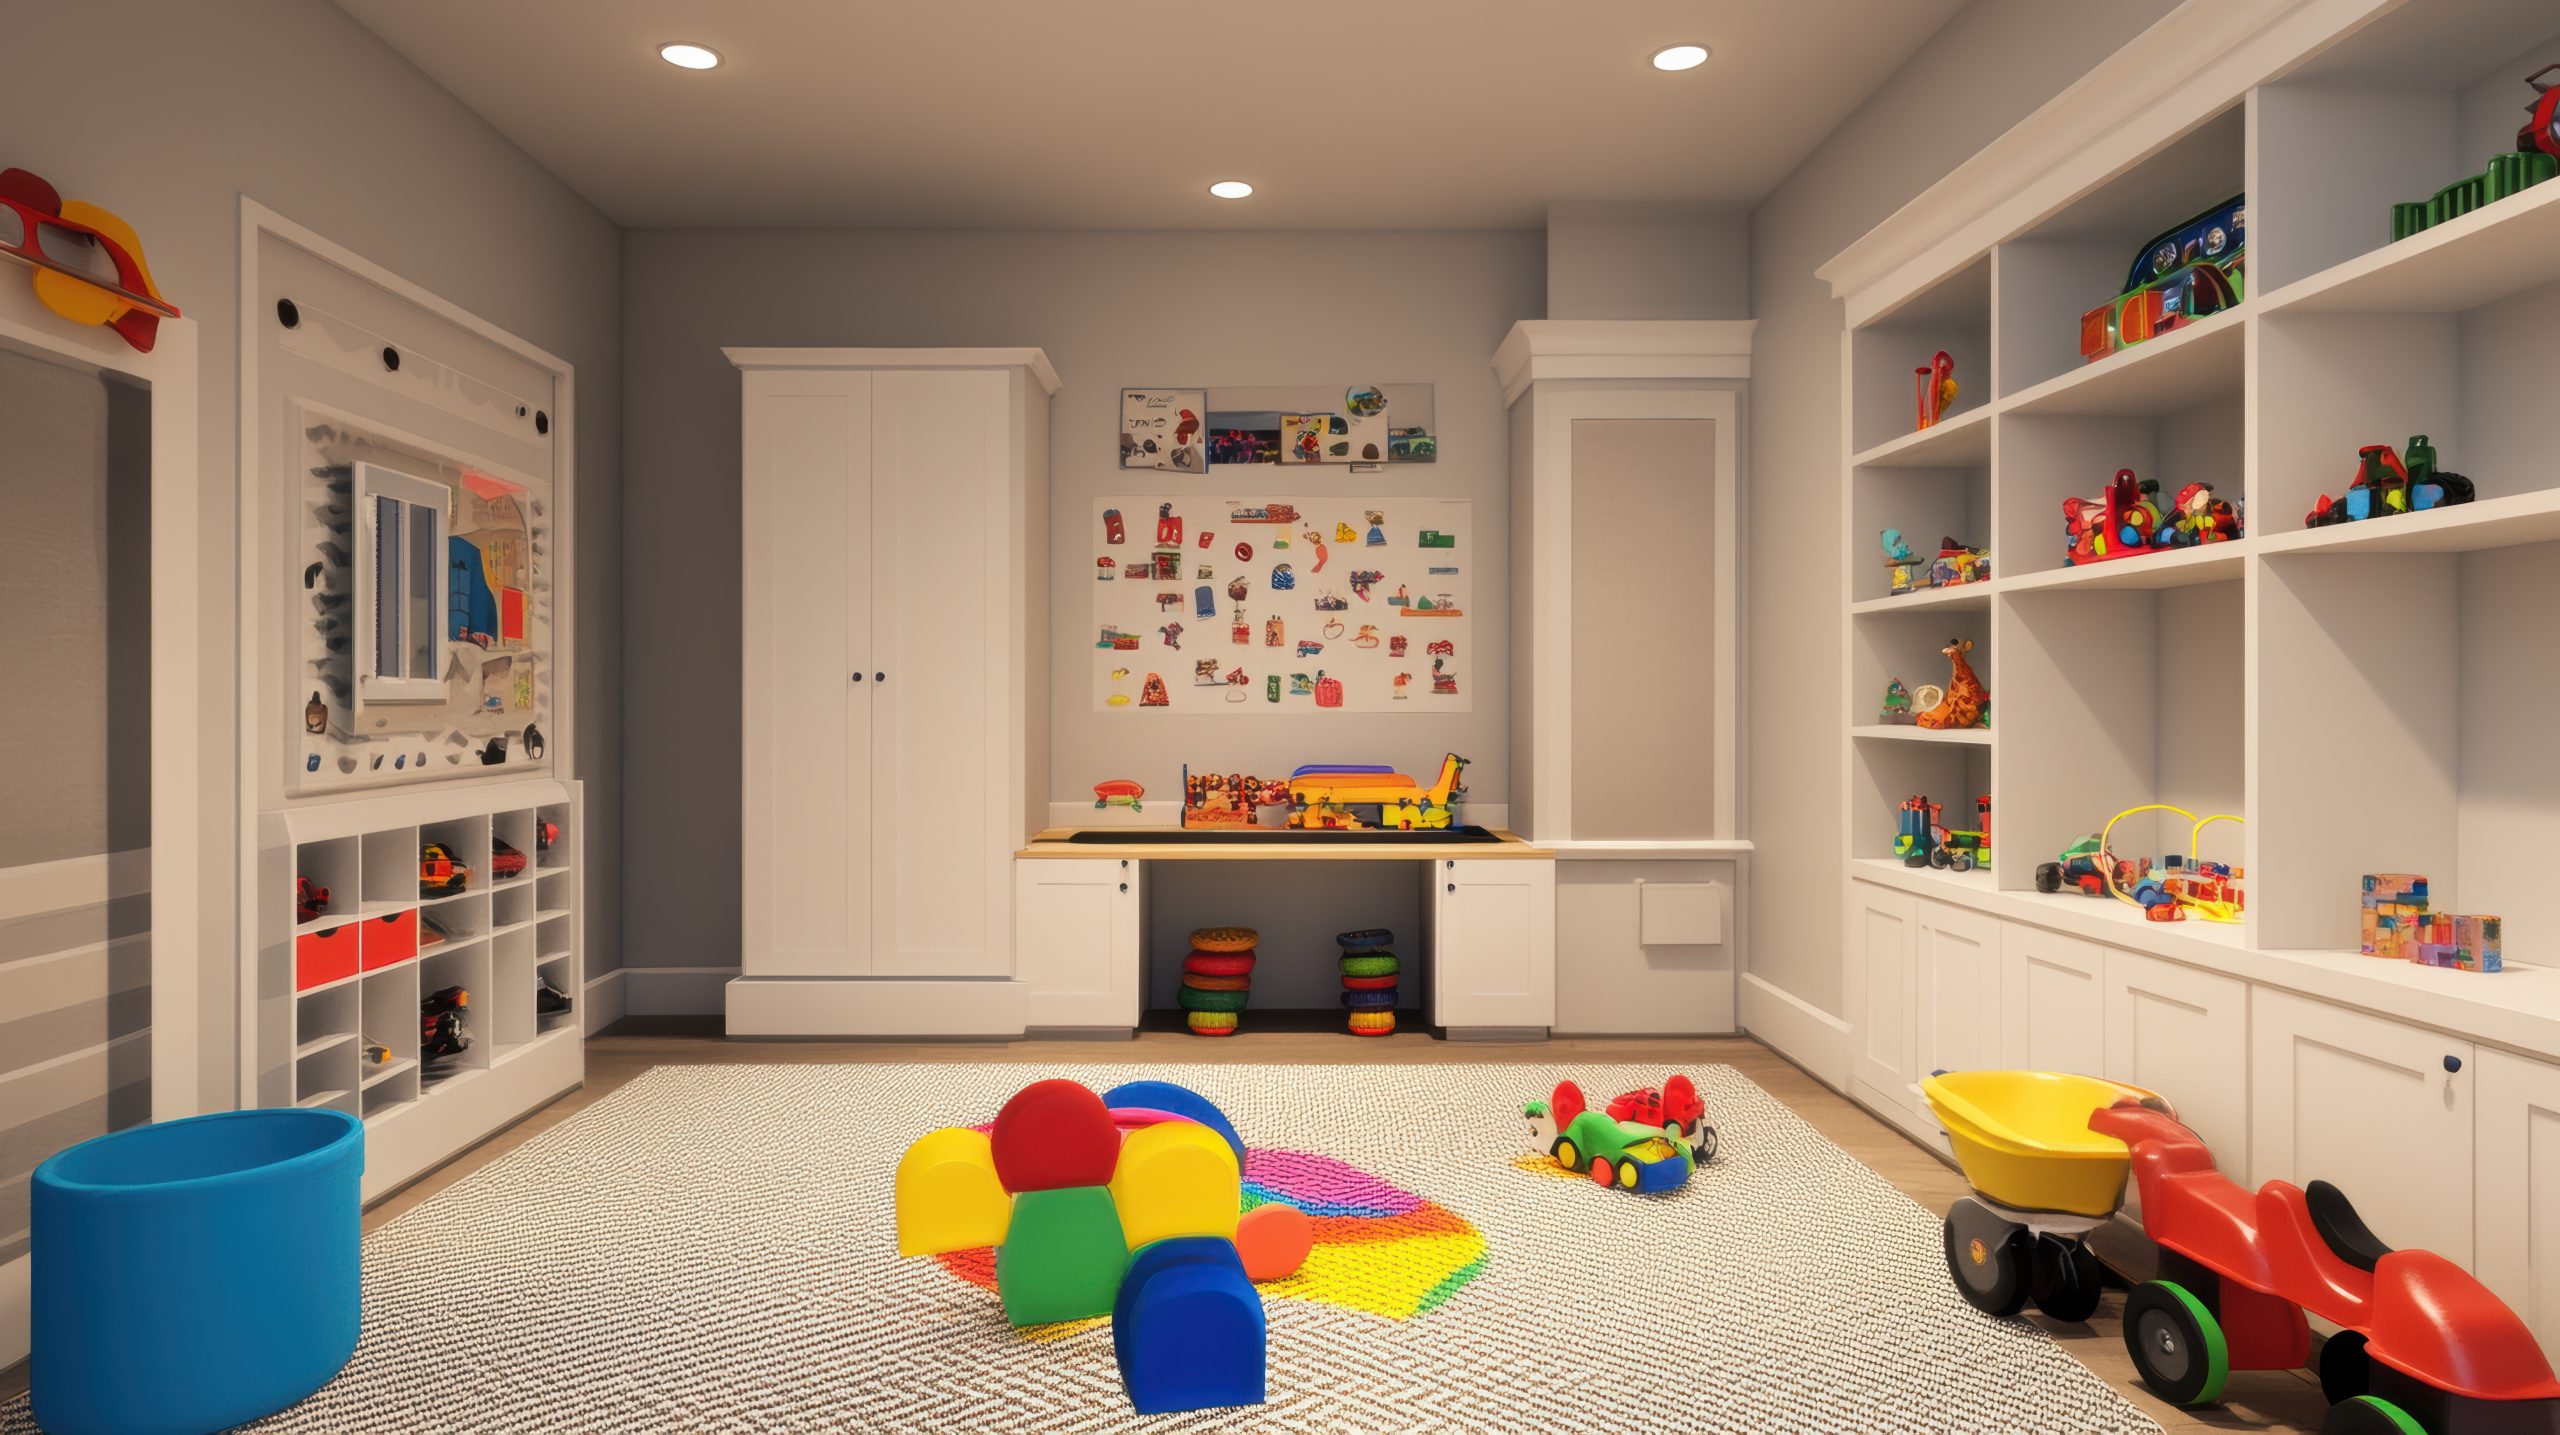
4. Creating Activity Zones in Your Kids’ Toy Room
A well-designed kids’ toy room incorporates distinct areas that support different types of play. Each zone should include appropriate storage, surfaces, and materials specific to the activity.
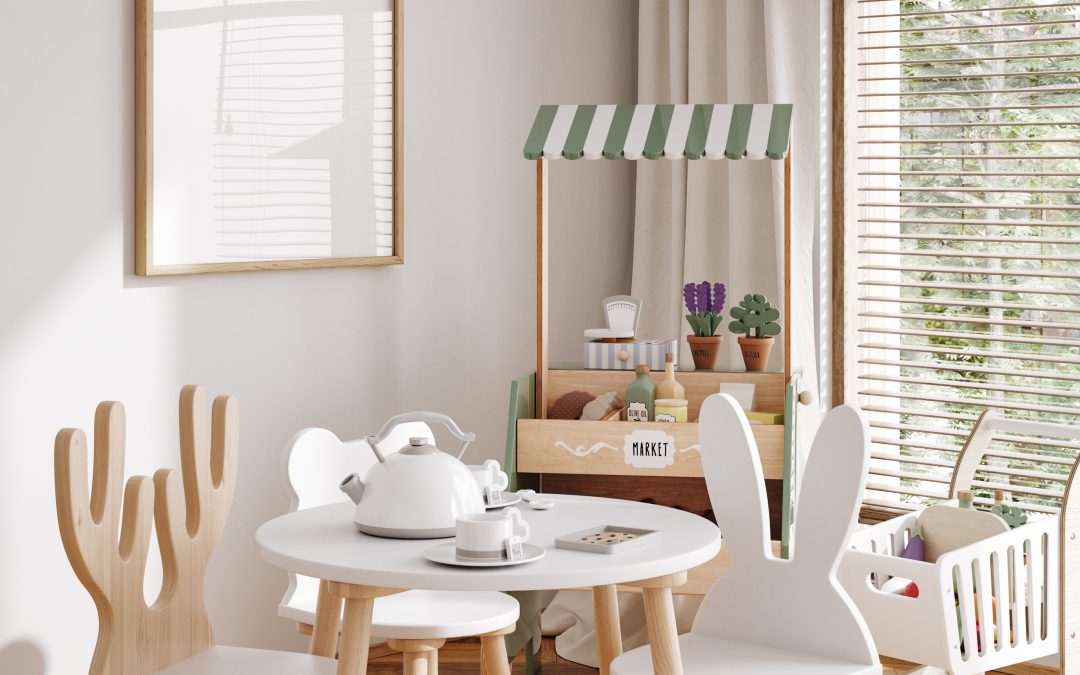
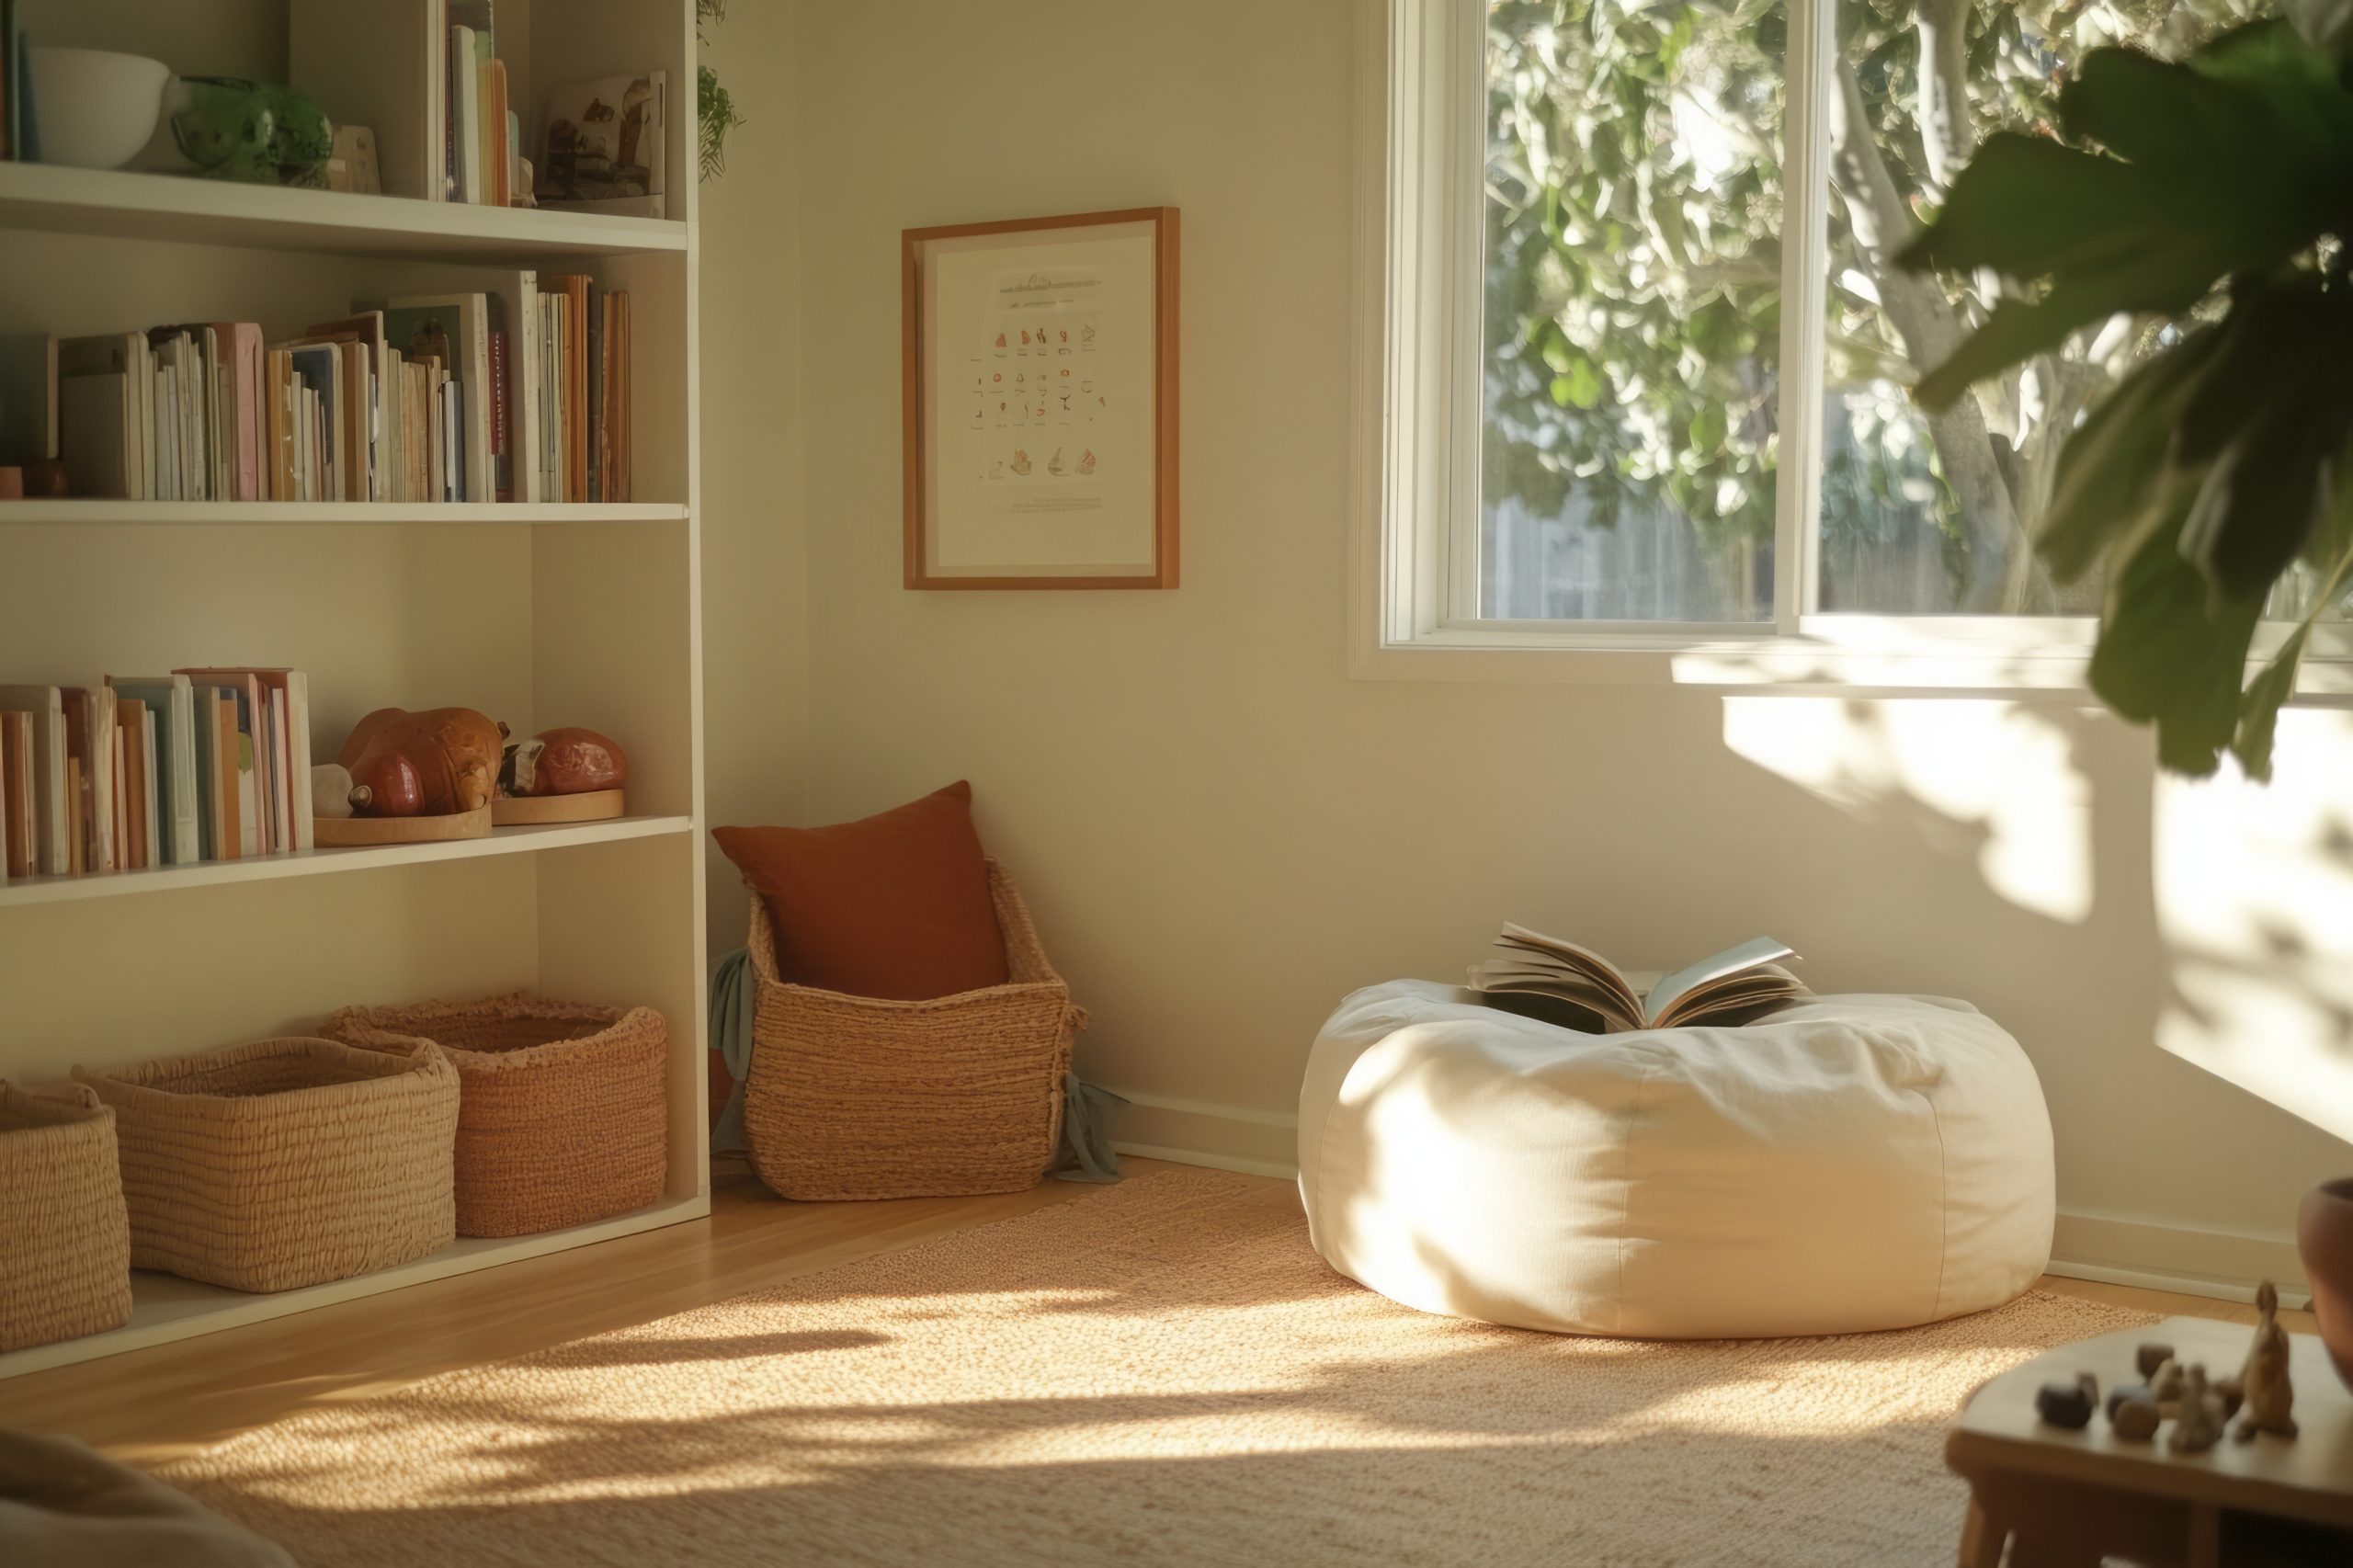
Reading Nook Essentials
Create a cosy reading corner in your kids’ toy room with:
Comfortable seating (child-sized armchair, floor cushions, or bean bags)
Good lighting (preferably natural light supplemented with task lighting)
Forward-facing book displays that highlight covers
Soft textiles that invite settling in with a book
Art and Craft Corner Setup
Dedicate a creative space in your kids’ toy room with:
A washable work surface at an appropriate height
Organised supplies in accessible containers
Display space for completed artwork
Adequate lighting for detail work
Protective covering for surfaces if needed
Building and Construction Zone
Support constructive play in your kids’ toy room with:
Clear containers organised by piece type or set
Flat building surfaces (LEGO tables, play mats)
Display shelves for completed constructions
Comfortable floor space for larger structures
Pro tip: When designing zones in your kid’s toy room, consider acoustic properties. Place quieter activities like reading further from active play areas to allow simultaneous use by multiple children.
5. Display and Rotation Systems
A thoughtfully designed kids’ toy room includes intentional display areas that showcase special items and children’s creations. These displays serve multiple purposes: highlighting achievements, inspiring creativity, and creating visual interest in the space.
Effective display solutions for a kids’ toy room include:
Gallery wall systems with easily changeable frames for rotating artwork
Floating shelves at child height for displaying collections or creations
Shadow boxes for three-dimensional items or special collections
Wire systems with clips for frequently changing displays
Museum-style display stands for showcasing current building projects
Implementing a toy rotation system keeps your kids’ toy room fresh and engaging while preventing overwhelm. Consider storing approximately one-third of toys out of sight, rotating them every few weeks to maintain interest while keeping the volume of visible toys manageable.
Pro tip: When designing your kids’ toy room, create a dedicated “display zone” where children can showcase their current projects without fear of them being dismantled or put away during cleanup time.
6. Lighting Your Kids’ Toy Room
Proper lighting transforms a kids’ toy room from functional to inspirational. A well-lit play space supports different activities while creating atmosphere and visual interest.
Consider these lighting elements for your kids’ toy room:
Natural light – Position activity areas near windows when possible
Overhead lighting – Provide even, ambient illumination throughout the space
Task lighting – Add directed light for reading corners and craft areas
Decorative lighting – Incorporate string lights or novelty fixtures that enhance the room’s theme
Night lighting – Install dim options for evening transitions or nighttime comfort
The most effective kids’ toy room lighting plans include multiple sources at different heights. This layered approach creates a warm environment while ensuring adequate brightness for different activities.
Pro tip: In a kids’ toy room, consider cord management and safety features when selecting lighting. Wall-mounted options eliminate floor cords, while LED fixtures provide brightness without heat concerns.
7. Small Space Solutions
Not every home can accommodate a dedicated kids’ toy room, but even small spaces can incorporate organised play areas with strategic planning.
Maximise limited space with these kids’ toy room solutions:
Vertical storage – Utilise wall space with tall bookcases and mounted organisers
Under-bed storage – Choose beds with built-in drawers or use rolling containers underneath
Door-hanging organisers – Use over-door systems for small toys or supplies
Dual-purpose furniture – Select ottomans with storage, desks with shelving, or benches with bins
Corner solutions – Maximise overlooked corner spaces with custom shelving or activity stations
When creating a kids’ toy room in a shared space, clearly define boundaries using area rugs, bookcases as room dividers, or designated cabinets that close when playtime ends.
Pro tip: In apartments or small homes, create a “portable kids toy room” concept using dedicated containers that can be moved between spaces as needed, maintaining organisation while adapting to space limitations.
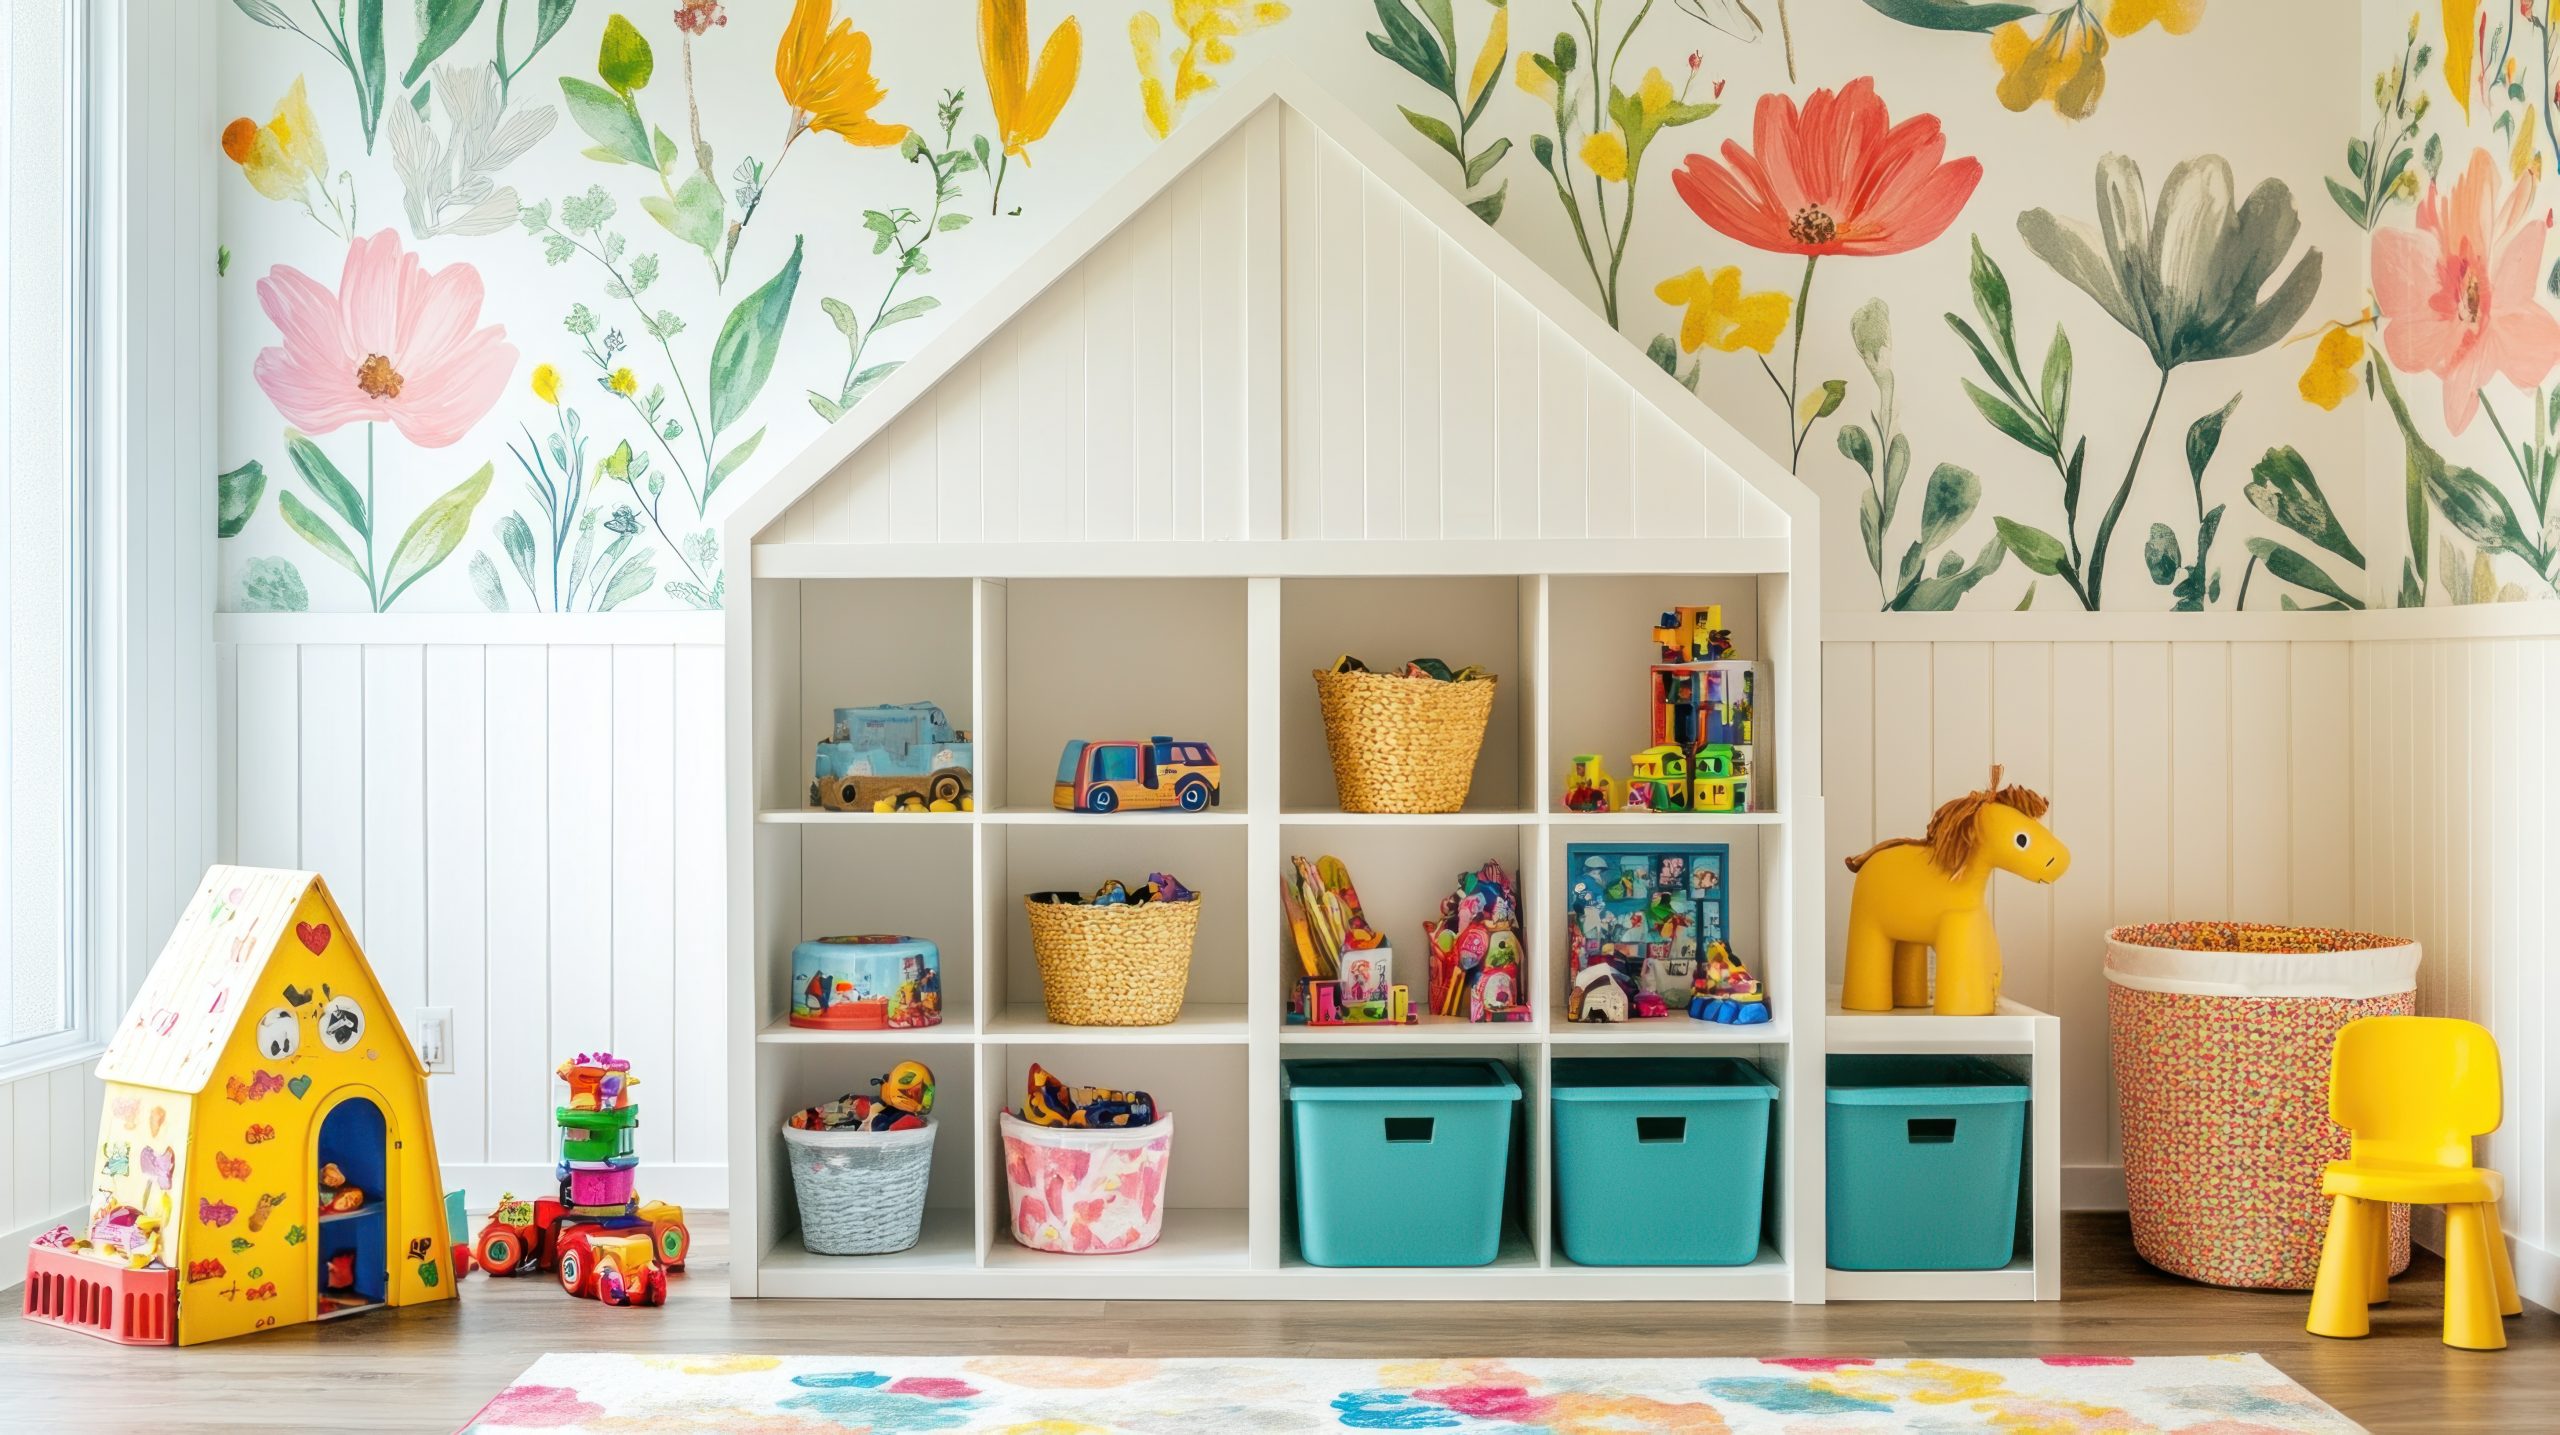
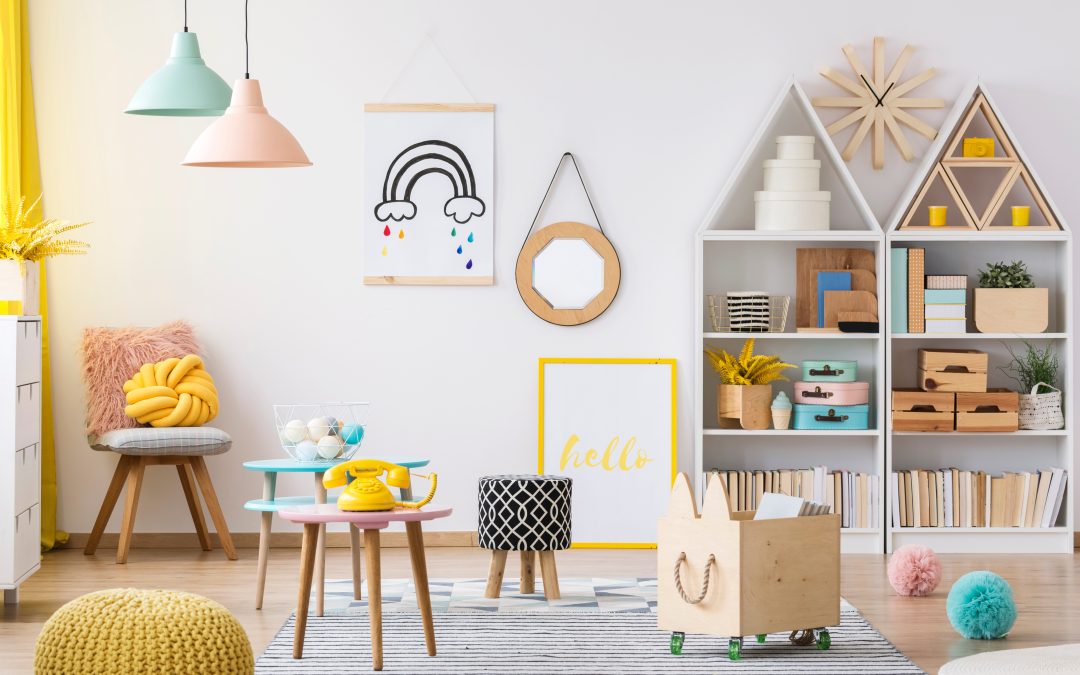
8. Theme and Décor Ideas That Inspire Play
Aesthetics matter in a kids’ toy room—not just for visual appeal, but because thoughtful design can stimulate imagination and engagement. The most successful play spaces balance personality with functionality.
When selecting a theme for your kids’ toy room, consider:
Longevity – Choose concepts that can evolve as your child grows
Neutrality – Select base elements that work with changing interests
Flexibility – Incorporate themes through easily-changed accessories rather than permanent fixtures
Child input – Involve children in age-appropriate decisions to increase their ownership of the space
Colour psychology – Understand how different hues affect mood and behaviour
A well-designed kids’ toy room often uses colour strategically rather than overwhelmingly. Consider a neutral base palette with colourful accents that can be updated. This approach creates a visually calm environment while still offering personality and interest.
Pro tip: Rather than character-specific themes that may quickly fall out of favour, consider concept-based themes for your kids’ toy room, such as nature, adventure, or creativity, that can adapt as interests evolve.
9. Organisation Systems That Work
Creating a kids’ toy room is one achievement; maintaining it is another. Successful play spaces incorporate systems that make ongoing organisation manageable for both parents and children.
Effective kids’ toy room maintenance strategies include:
Consistent categories – Group similar items together in logical categories
Clear visual systems – Use consistent colours, labels, or symbols for different toy types
Appropriate independence – Design storage that children can manage without assistance
Regular reset times – Establish daily quick-cleanup and weekly deeper organisation routines
One-in-one-out policy – Maintain toy volume by removing items when new ones enter the rotation
Labelling deserves special attention in any kids’ toy room organisation system. For younger children, use picture labels that clearly show what belongs where. As children develop reading skills, transition to word labels that support literacy development.
Pro tip: In a well-designed kids’ toy room, incorporate a “halfway house” basket for items that need parental help to put away. This teaches responsibility while acknowledging developmental capabilities.
10. Real Family Examples: Kids Toy Rooms That Work
While every family’s needs differ, examining successful kids’ toy room solutions provides valuable inspiration. The following examples demonstrate how core principles adapt to different situations.
Small Space Solution
A 6×8-foot dedicated area transformed into a complete kids’ toy room by:
Using full-height wall storage
Implementing a fold-down activity table
Creating vertical display systems
Utilising under-furniture storage
Employing a strict rotation system to limit visible toys
Shared Sibling Space
A kids’ toy room designed for multiple ages incorporating:
Colour-coded storage for each child
Height-appropriate activity zones
Lockable storage for materials needing supervision
Flexible furniture arrangement for varying play styles
Designated personal spaces within the shared room
Budget Transformation
An impressive kids’ toy room created with limited funds by:
Repurposing existing furniture with paint
Using inexpensive plastic bins with custom labels
DIY wall organisation systems
Strategic lighting upgrades
Creative use of wall space for both storage and play
Pro tip: The most successful kids’ toy room designs prioritise organisational infrastructure first, with decorative elements added after the functional systems are established.
Conclusion
Creating an effective kids’ toy room involves balancing practical organisation with spaces that inspire creativity and independent play. The most successful designs consider not just current needs but how the space will evolve as children grow.
Key takeaways for designing your kids’ toy room include:
Start with clear zones based on your child’s play patterns
Prioritise accessible, intuitive storage systems
Create visual calm through thoughtful design choices
Implement maintenance routines that grow with your child
Allow flexibility for changing interests and developmental needs
Remember that a well-designed kids’ toy room serves multiple purposes: containing toy clutter, supporting development through appropriate play opportunities, and creating an environment where children can exercise independence and creativity.
By applying these principles, you can create a kids’ toy room that works for your unique space, budget, and family needs, transforming toy chaos into an organised, inspiring environment that benefits both children and parents.
Looking for the best mudroom storage ideas for the space you have? Read along for the best tips!
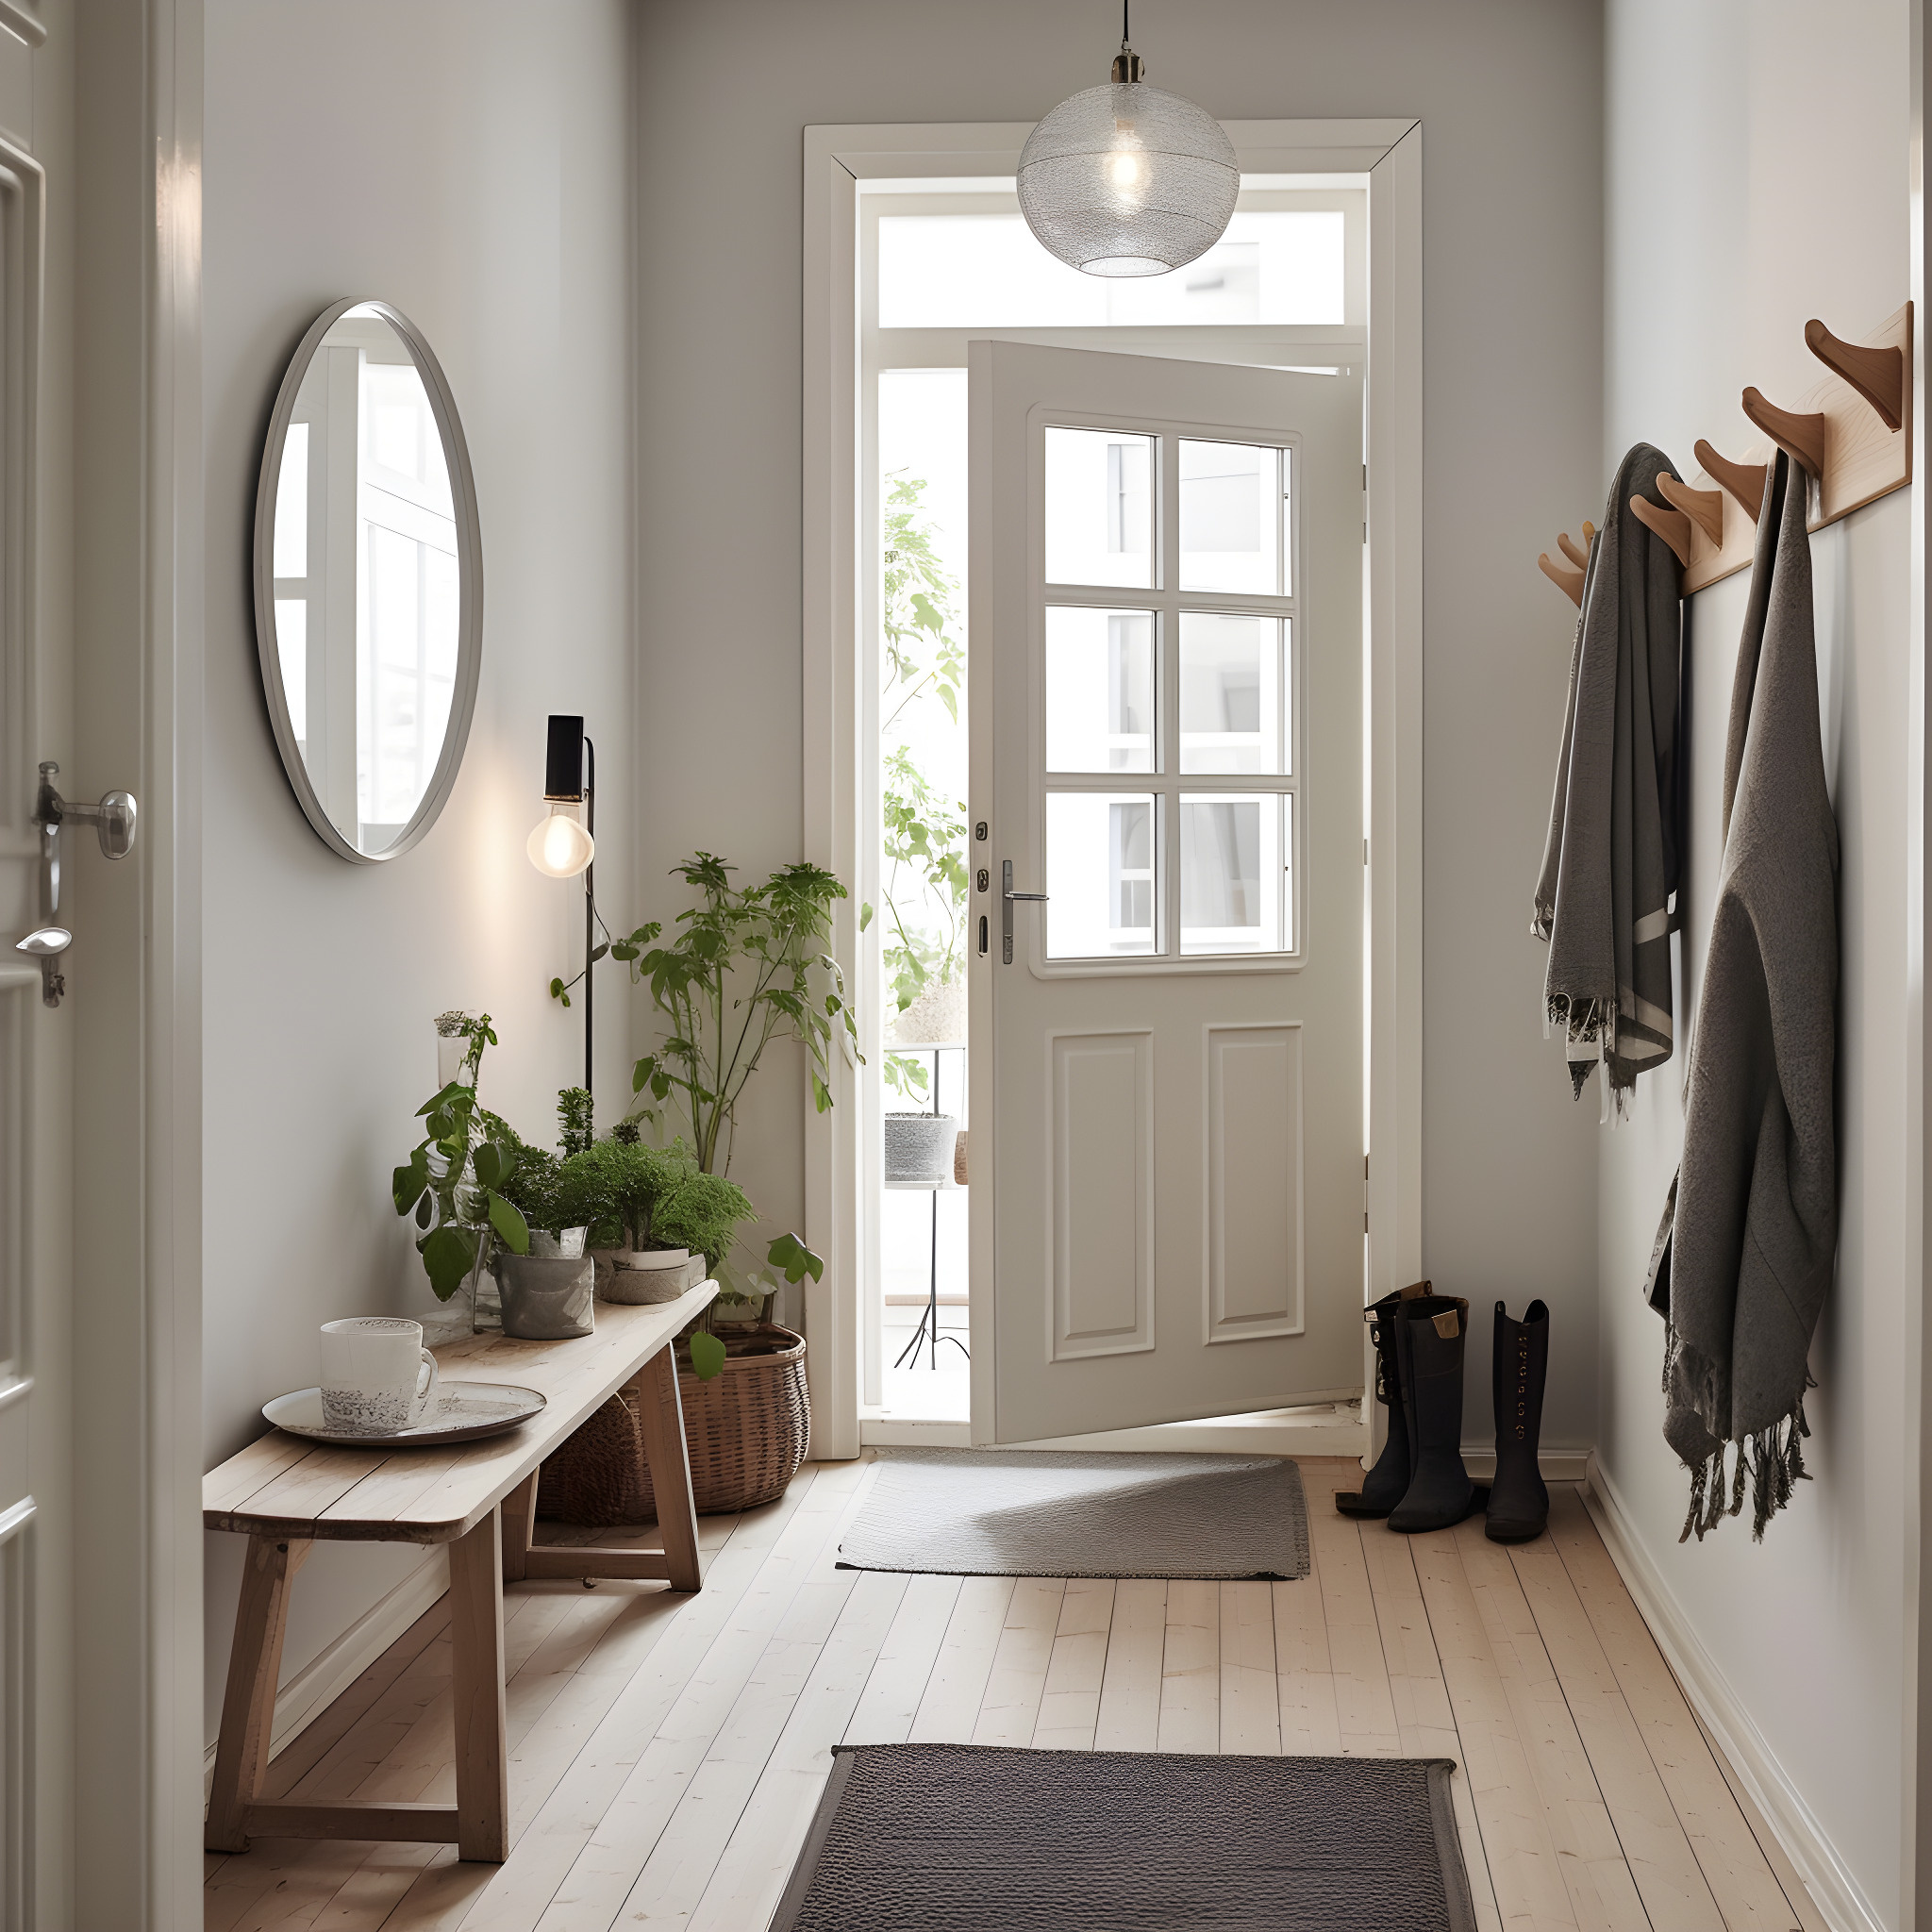
Let’s be honest, the mudroom is often the hardest-working space in the house. It’s the first line of defense against the chaos of the outside world, the drop zone for everything from backpacks and sports gear to muddy boots and wet umbrellas. But what happens when this crucial space becomes overwhelmed?
A cluttered mudroom can quickly turn into a source of stress, making it difficult to find what you need and keep things organised. That’s why effective mudroom storage is so essential, regardless of the size of your entryway.
This post will explore clever mudroom storage ideas for every space size, helping you transform your mudroom from a chaotic dumping ground into a functional and stylish hub.
Best Mudroom Storage Hacks!
Tiny Mudrooms – Making the Most of Every Inch
Micro Mudroom Magic: Storage Solutions for the Smallest Entries
Dealing with a tiny entryway or a narrow hallway that has to function as your mudroom? Don’t despair! Even the smallest of spaces can be optimised with clever mudroom storage solutions. The key is to think vertically and utilize every available inch. Forget sprawling furniture; in these micro mudrooms, we’re focusing on compact and multi-functional pieces that maximise storage without sacrificing precious floor space. Effective mudroom storage in these tiny areas is less about having a designated “room” and more about creating a system that works within your limited square footage. Let’s explore some ingenious ideas to transform your miniature entryway into a storage powerhouse.
Wall-Mounted Coat Racks with Tiny Shelves: In a tiny mudroom, wall space is your best friend. Install a sturdy wall-mounted coat rack with a small shelf above. This provides a spot for coats, jackets, and bags, while the shelf can hold keys, mail, or small decorative items.
Over-the-Door Shoe Organisers: Maximise vertical space and keep shoes off the floor with an over-the-door shoe organiser. These are inexpensive, easy to install, and can hold a surprising number of pairs. They’re a game-changer for mudroom storage in tight spaces.
Vertical Shoe Racks: If you have a sliver of wall space, a slim, vertical shoe rack can be a lifesaver. These racks keep shoes organised and prevent them from cluttering the floor, which is crucial for maintaining a sense of order in a tiny mudroom.
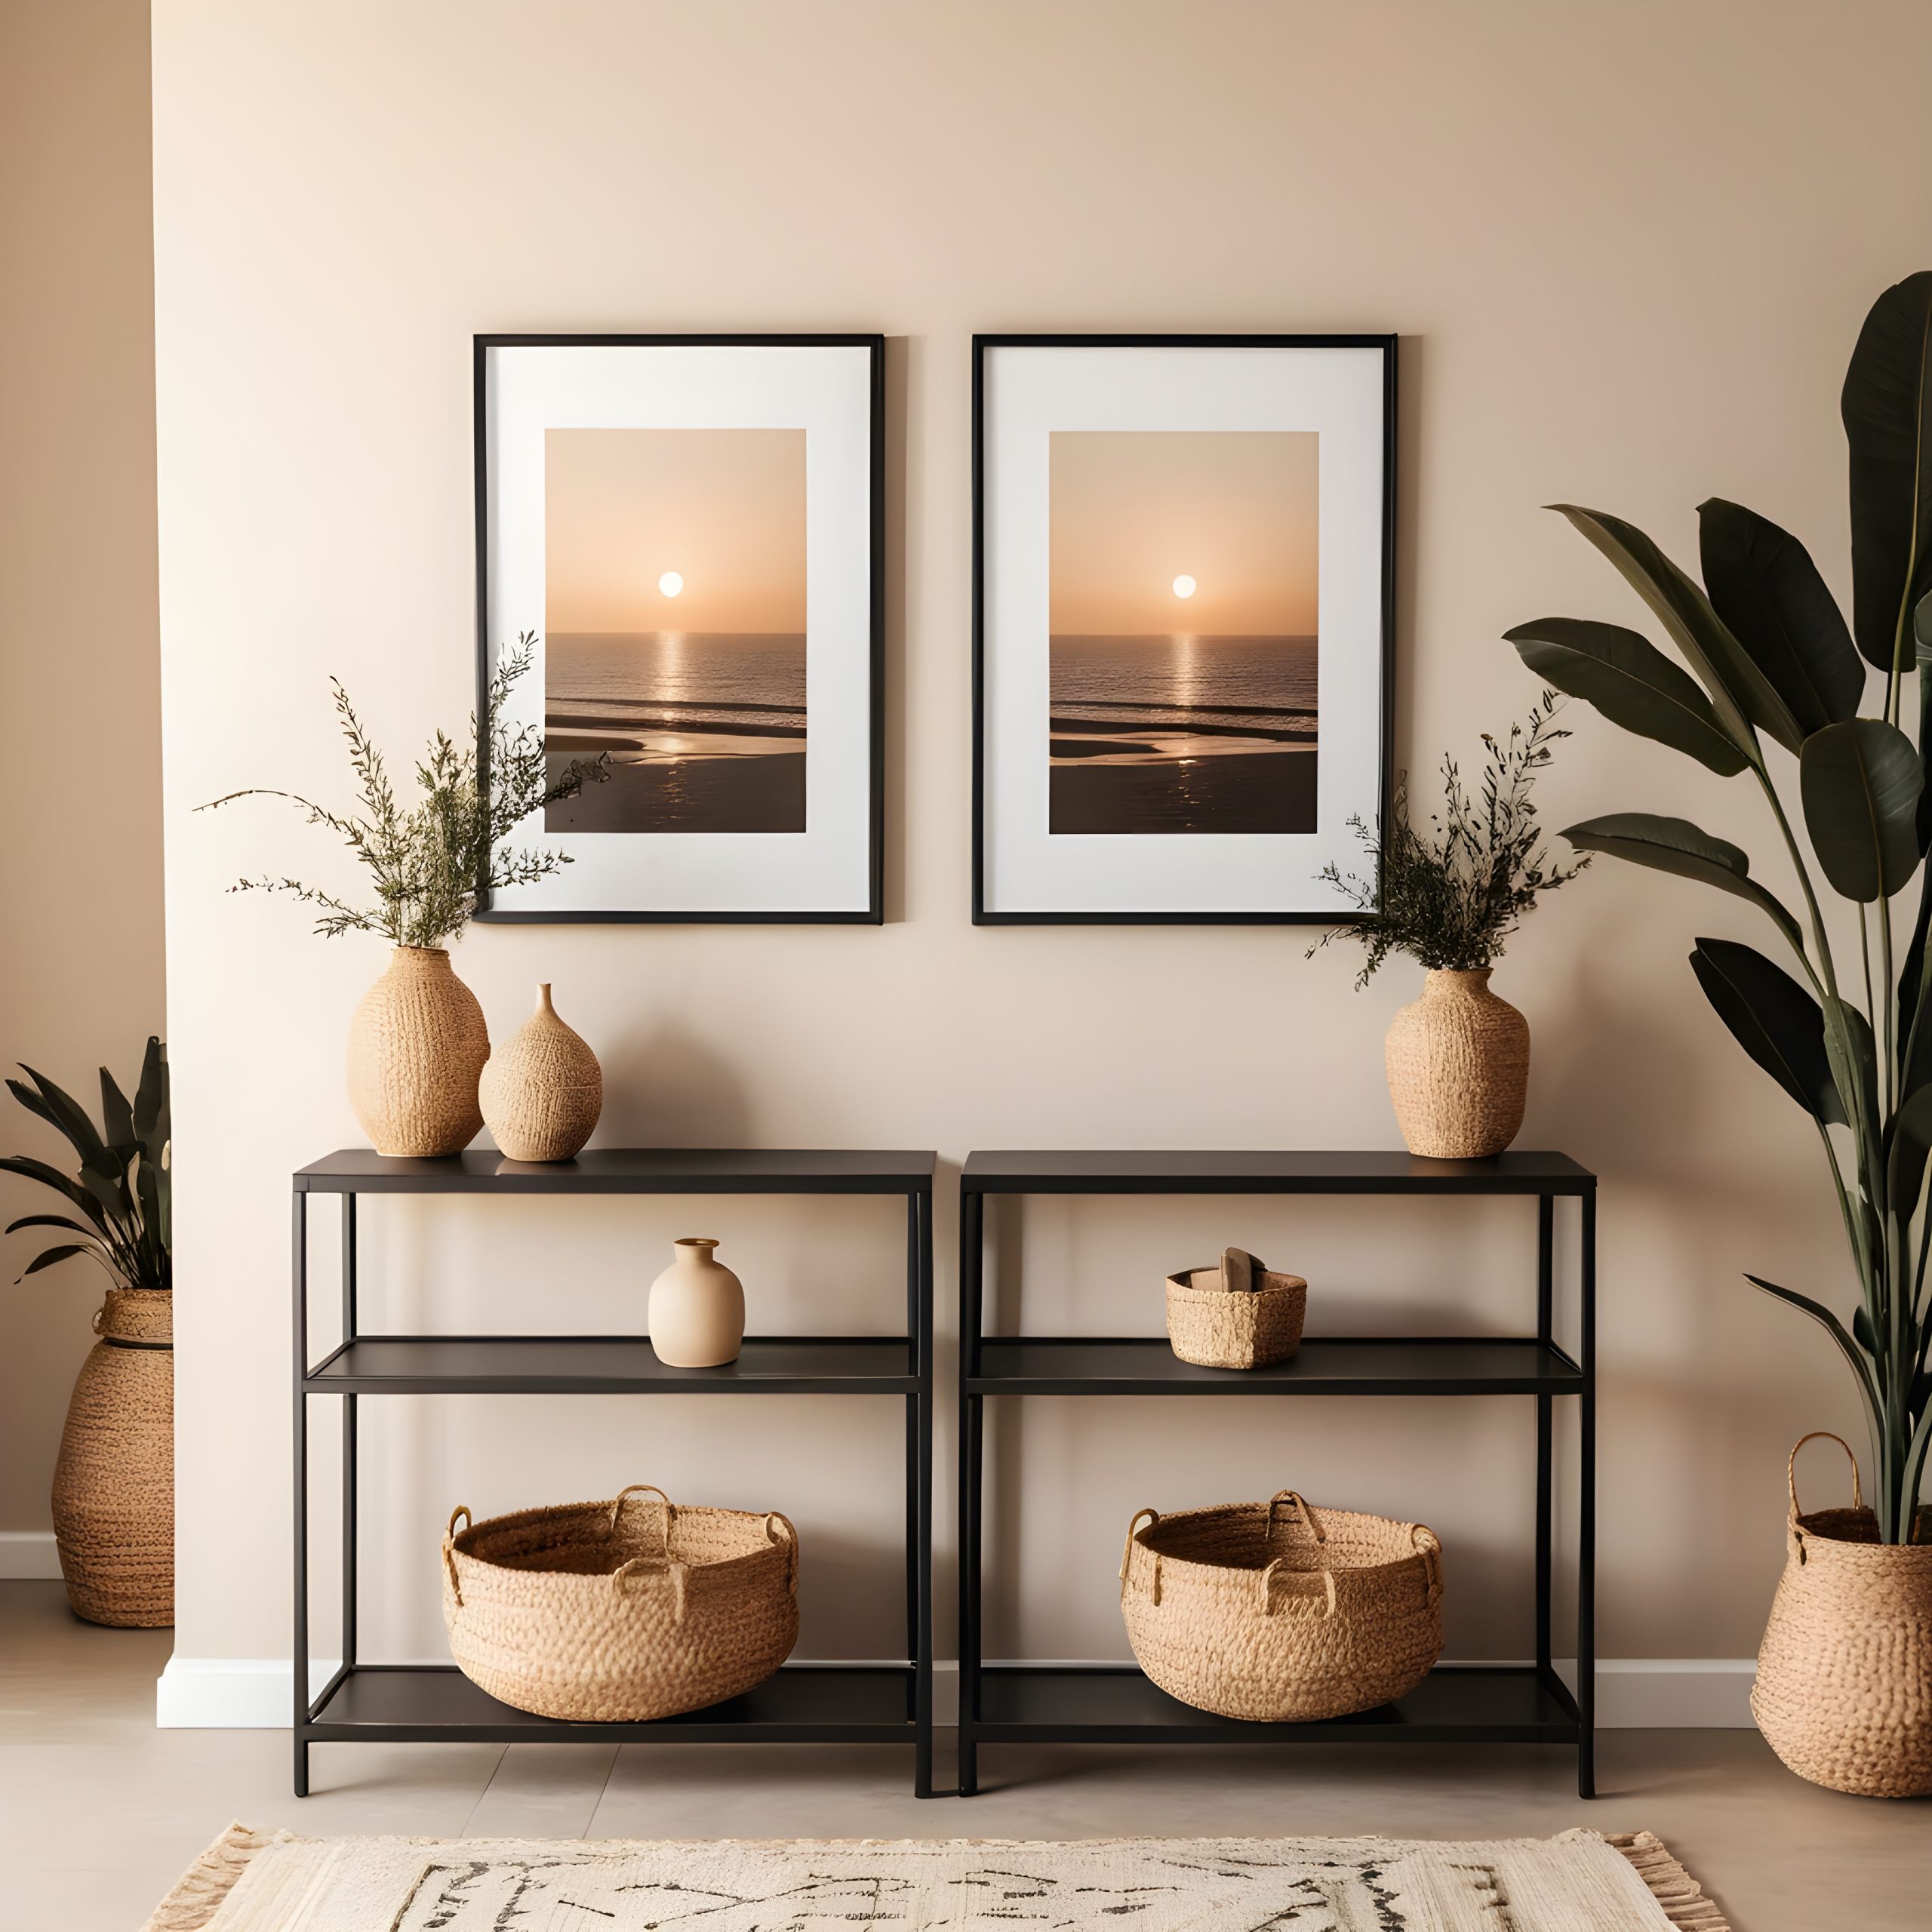
Narrow Console Tables with Drawers: A narrow console table placed against the wall can serve as a landing strip for keys and mail, while drawers provide hidden storage for gloves, scarves, and other small essentials. This adds valuable mudroom storage without overwhelming the space.
Small Mudroom Storage – Verticality is Key
Small Space, Big Impact: Vertical Mudroom Storage Solutions
If you have a small, dedicated mudroom, you have a bit more room to work with than a tiny entryway, but maximising space is still crucial. Vertical mudroom storage solutions are your secret weapon in these areas. Think upwards and utilise the full height of your walls to create ample storage without making the space feel cramped. By incorporating tall shelving, wall-mounted organisers, and other clever vertical storage ideas, you can transform your small mudroom into an organised and functional zone. Let’s explore some effective strategies for maximising vertical space in your small mudroom.
Tall, Narrow Shelving Units: Opt for tall, narrow shelving units that reach the ceiling. These provide ample storage for everything from shoes and boots to baskets and bins filled with hats, gloves, and scarves. This type of mudroom storage keeps items organised and easily accessible while maximising vertical space.
Wall-Mounted Cubbies: Install wall-mounted cubbies to create designated spaces for each family member. These cubbies can hold backpacks, sports equipment, and other everyday essentials, keeping them off the floor and organised. This personalised mudroom storage solution is especially helpful for families with children.
Pegboards for Flexible Storage: Pegboards offer incredibly versatile mudroom storage. Use them to hang coats, bags, hats, and even small tools. The adjustable pegs allow you to customise the configuration to fit your specific needs, making it a highly adaptable storage solution.
Narrow Mudrooms – Long and Lean Storage Champions
Long and Lean: Storage Solutions for Narrow Mudrooms
Narrow mudrooms, often found in hallways or corridors, present a unique set of challenges. While they may lack width, their length offers an opportunity for clever mudroom storage solutions. The key is to embrace the long, lean layout and maximise storage along the wall without obstructing the flow of traffic. By incorporating long, narrow furniture pieces and utilising wall space strategically, you can create a highly functional and organised mudroom, even in a limited space. Let’s explore some effective storage ideas for narrow mudrooms.
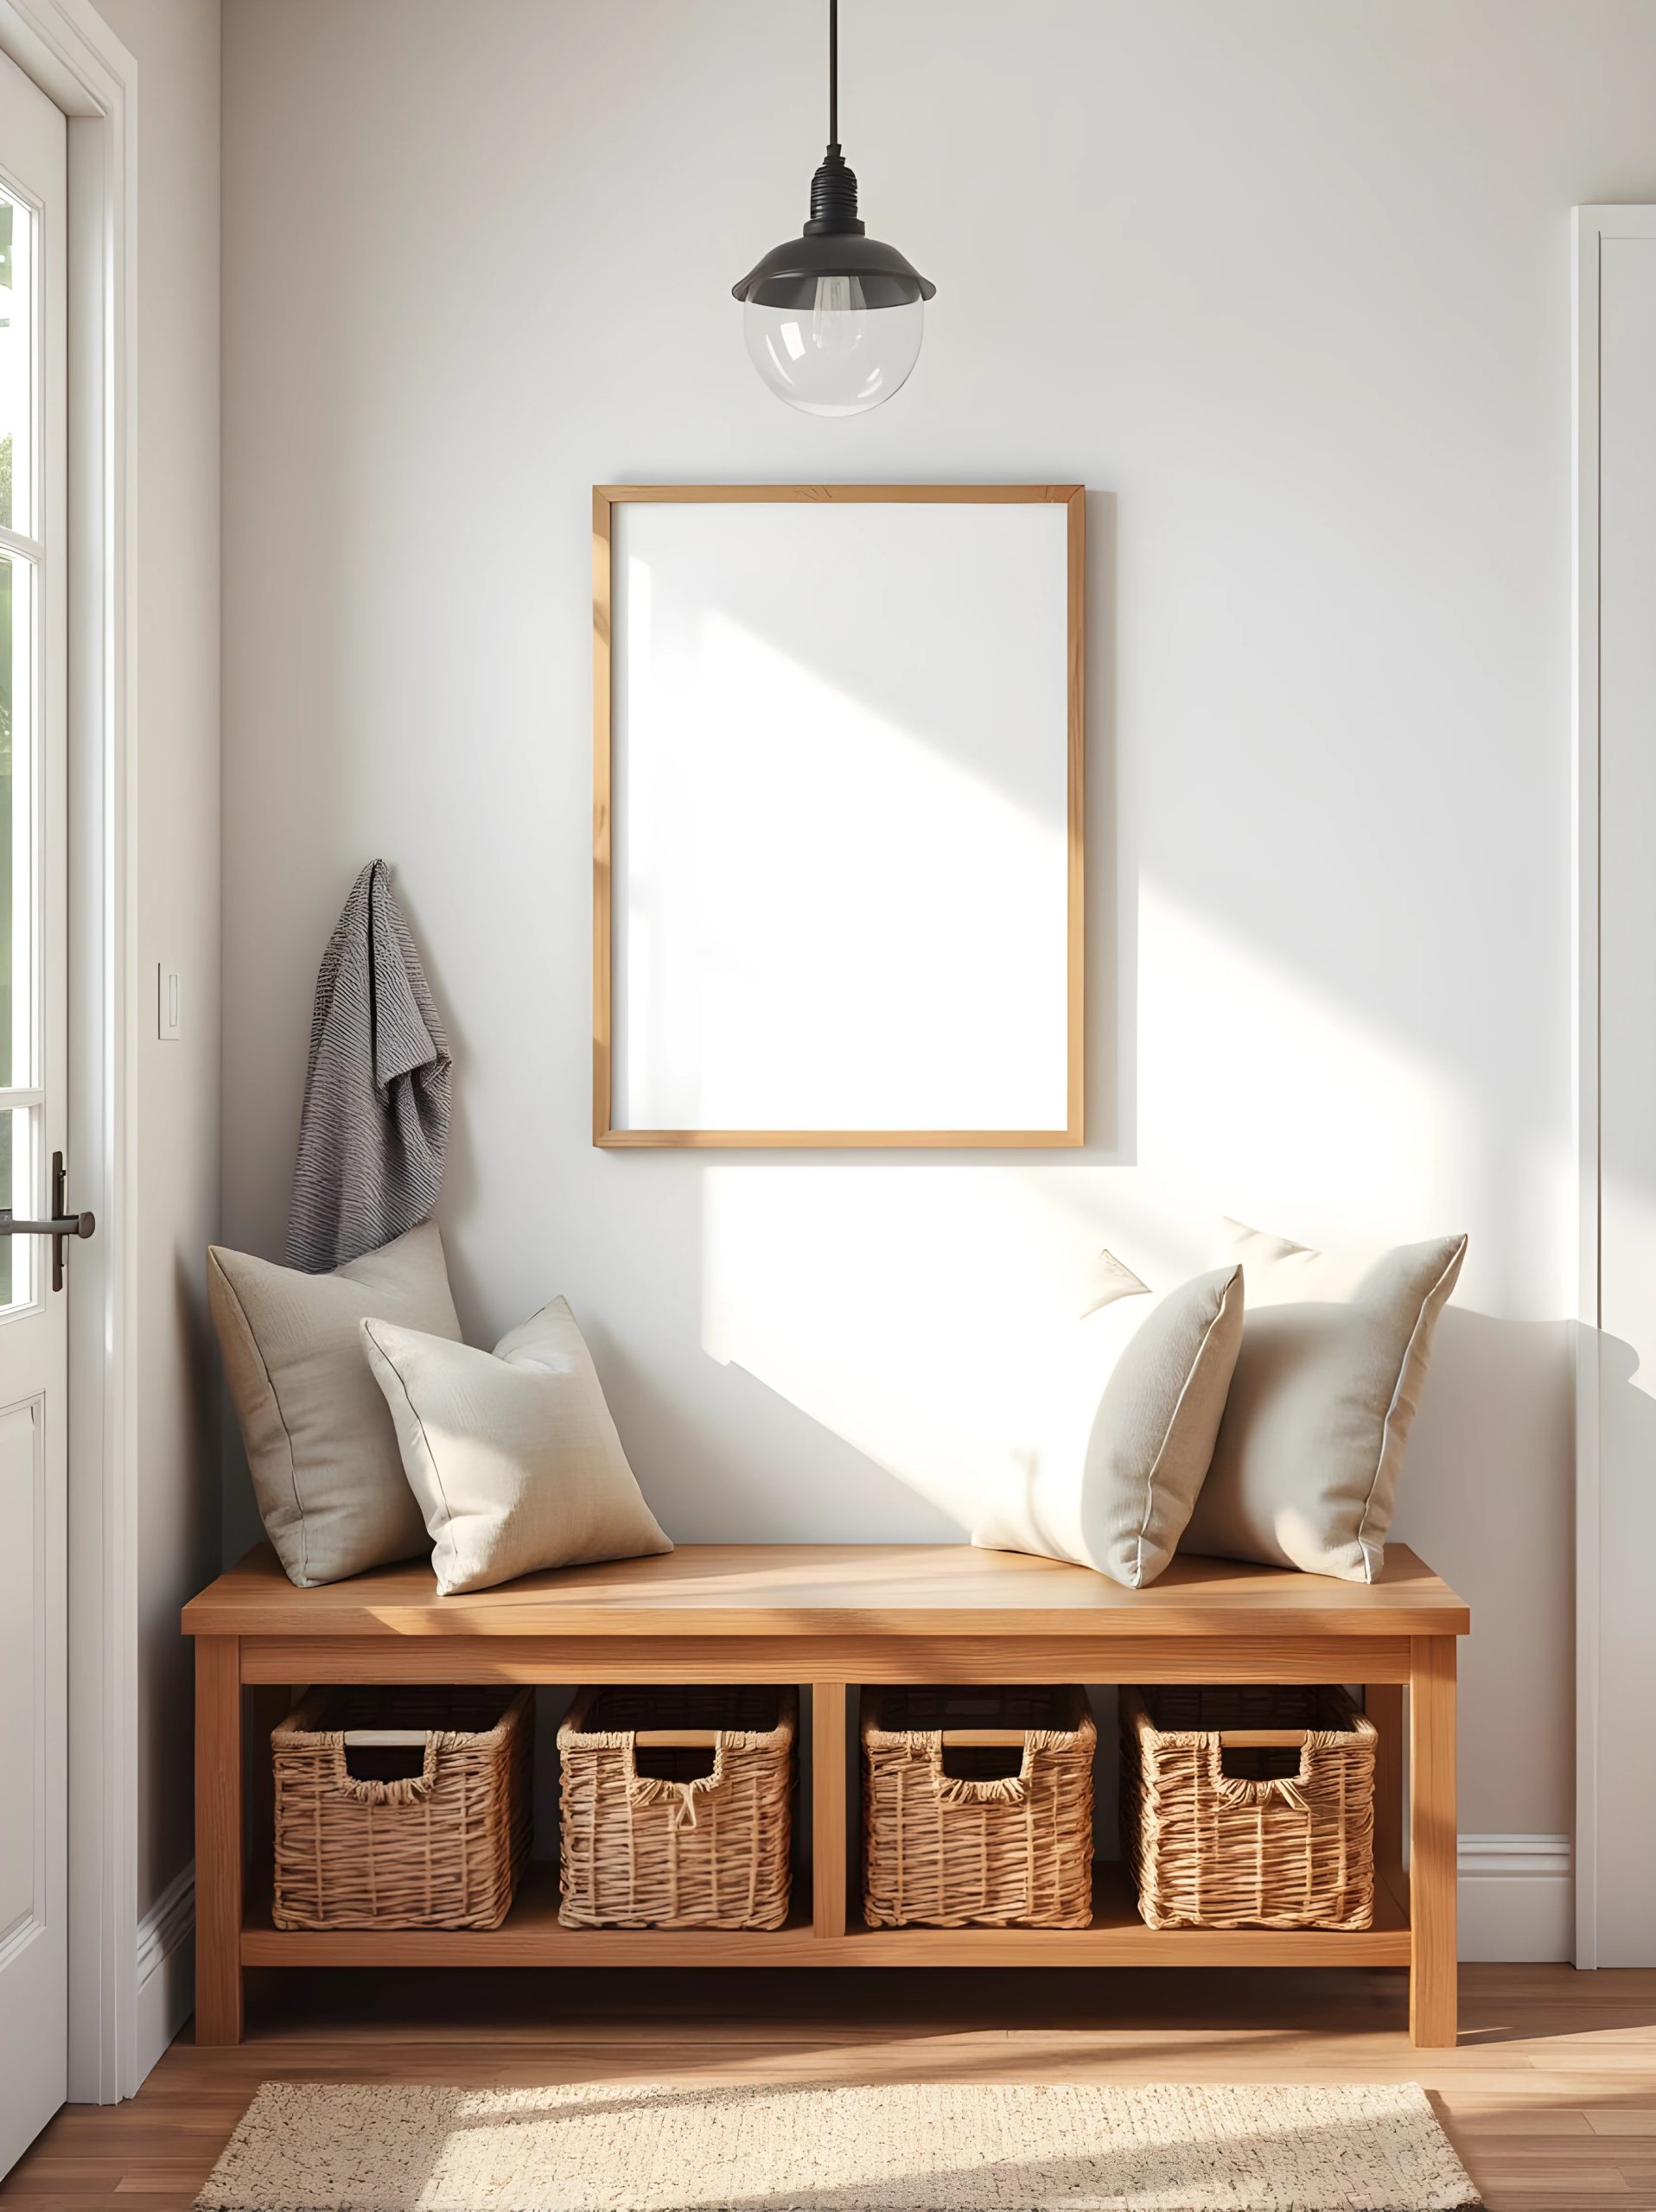
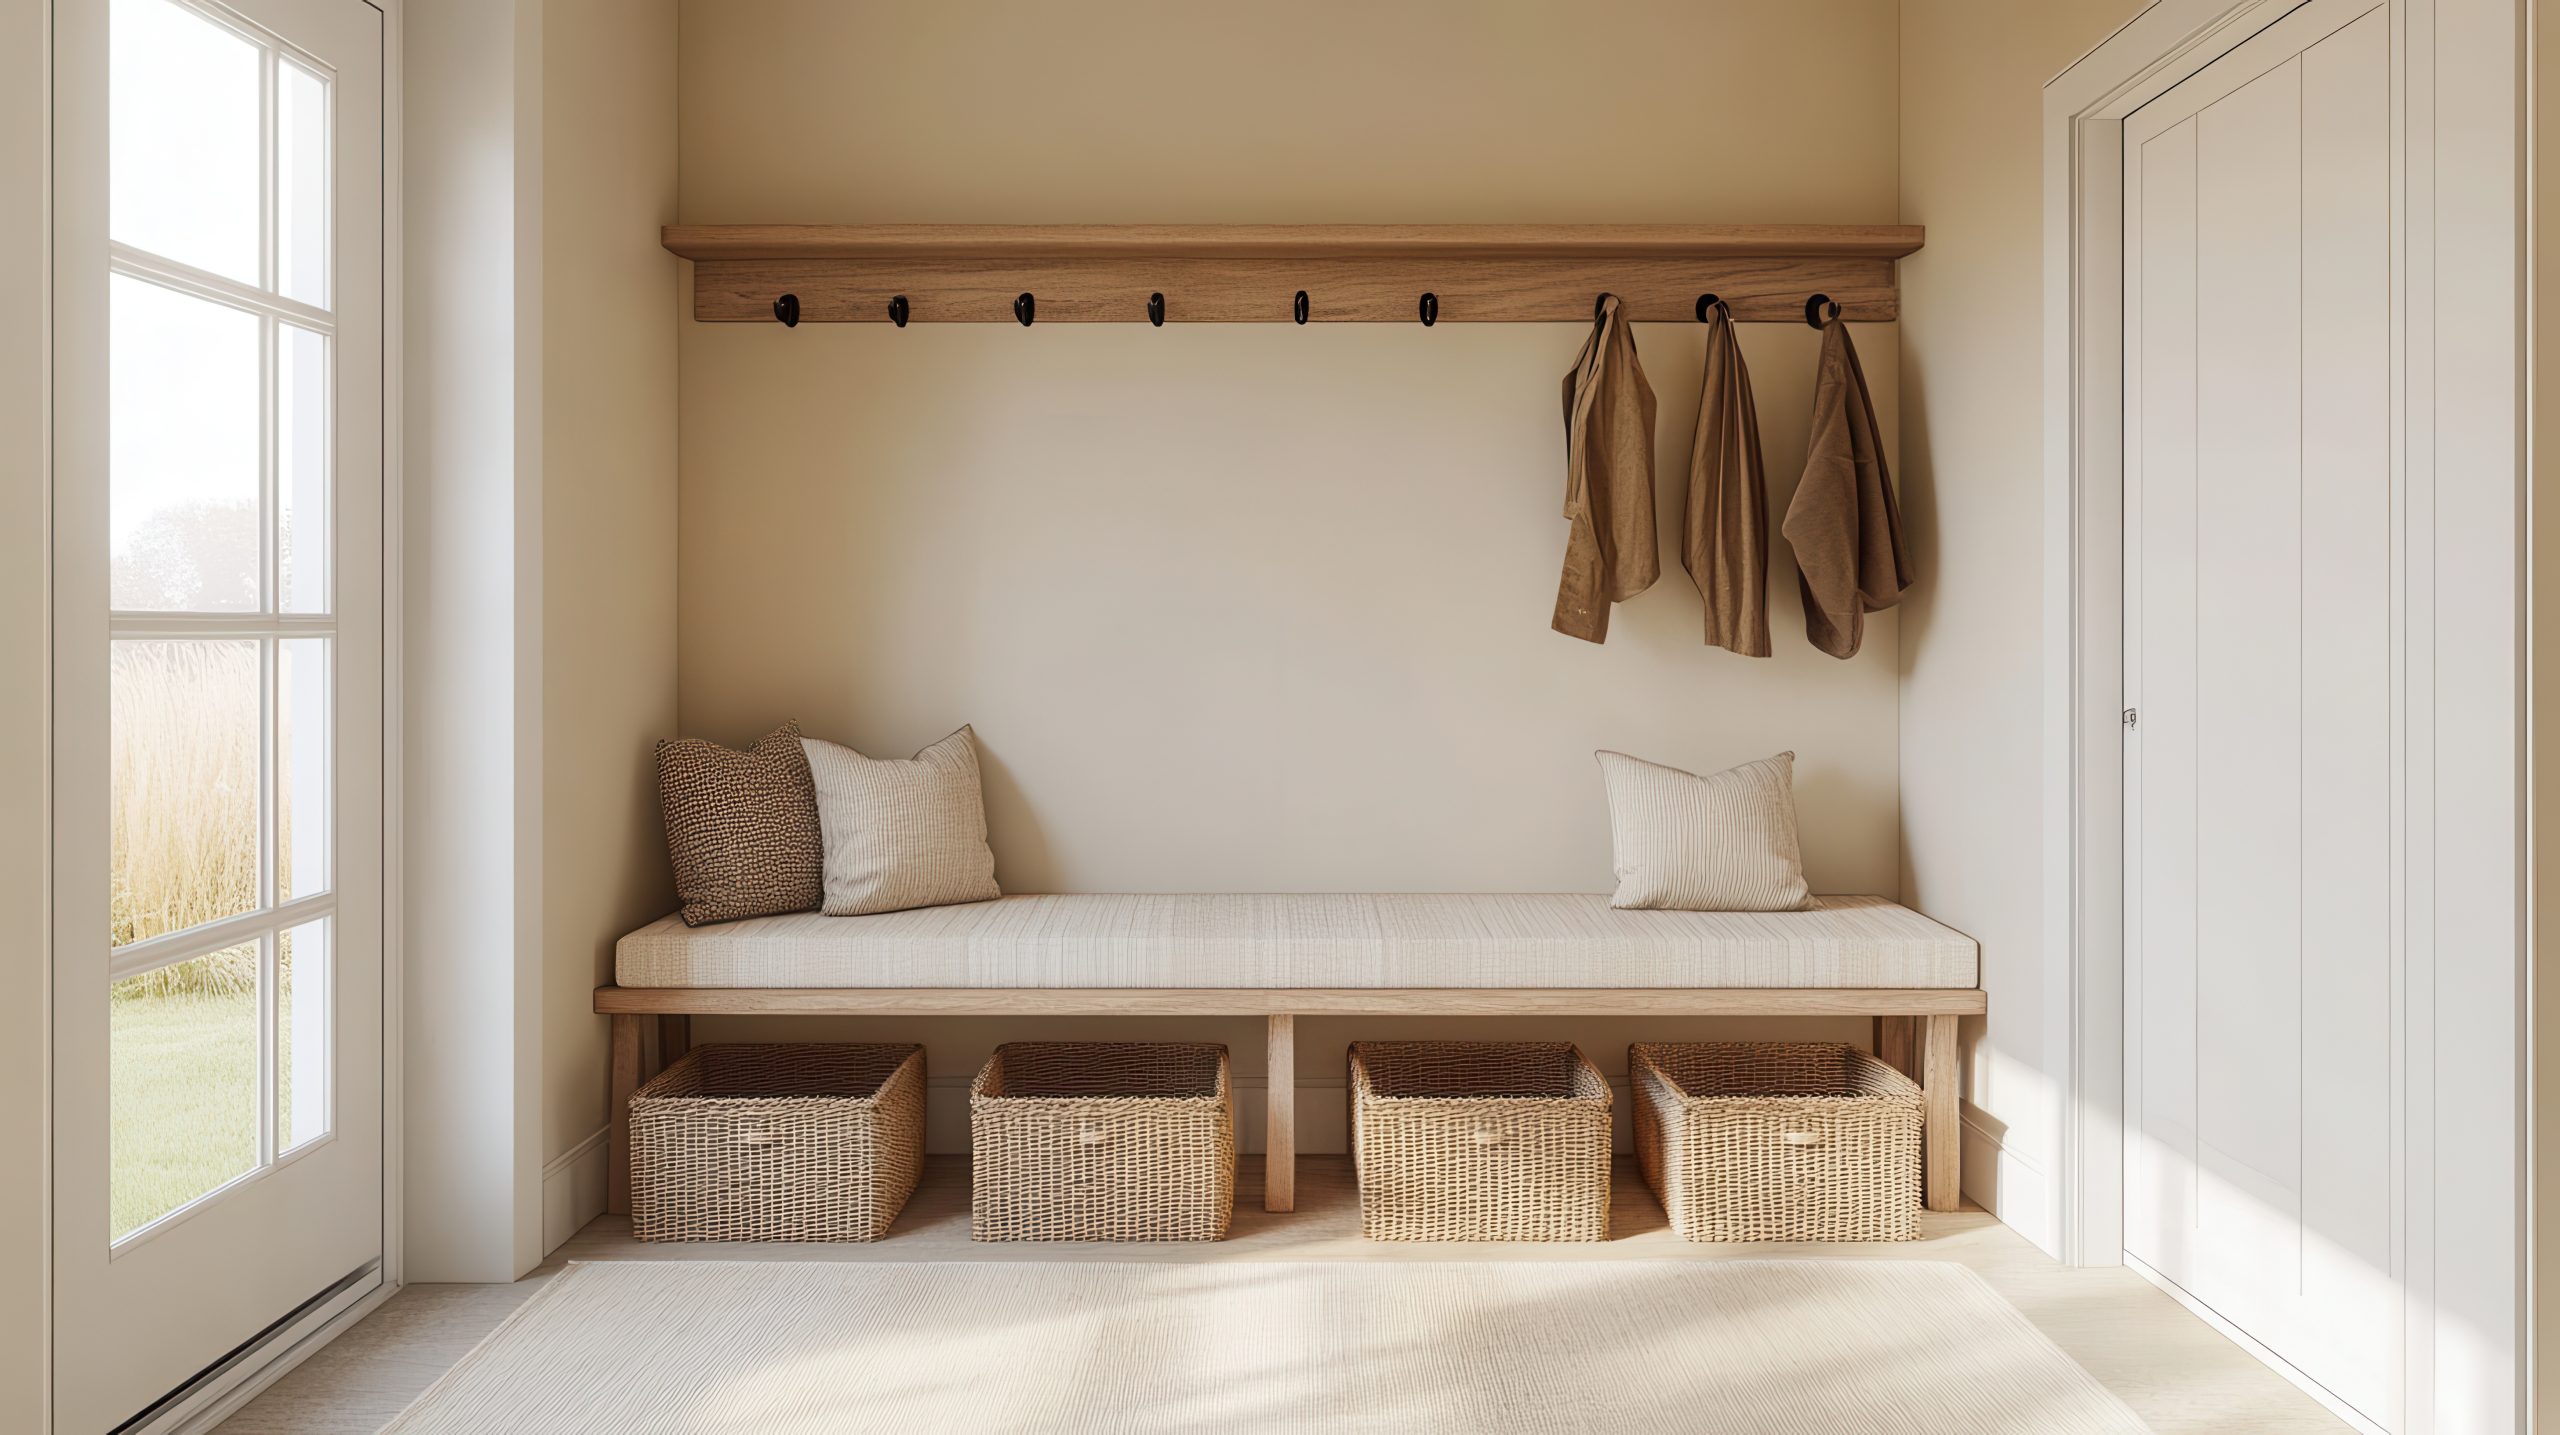
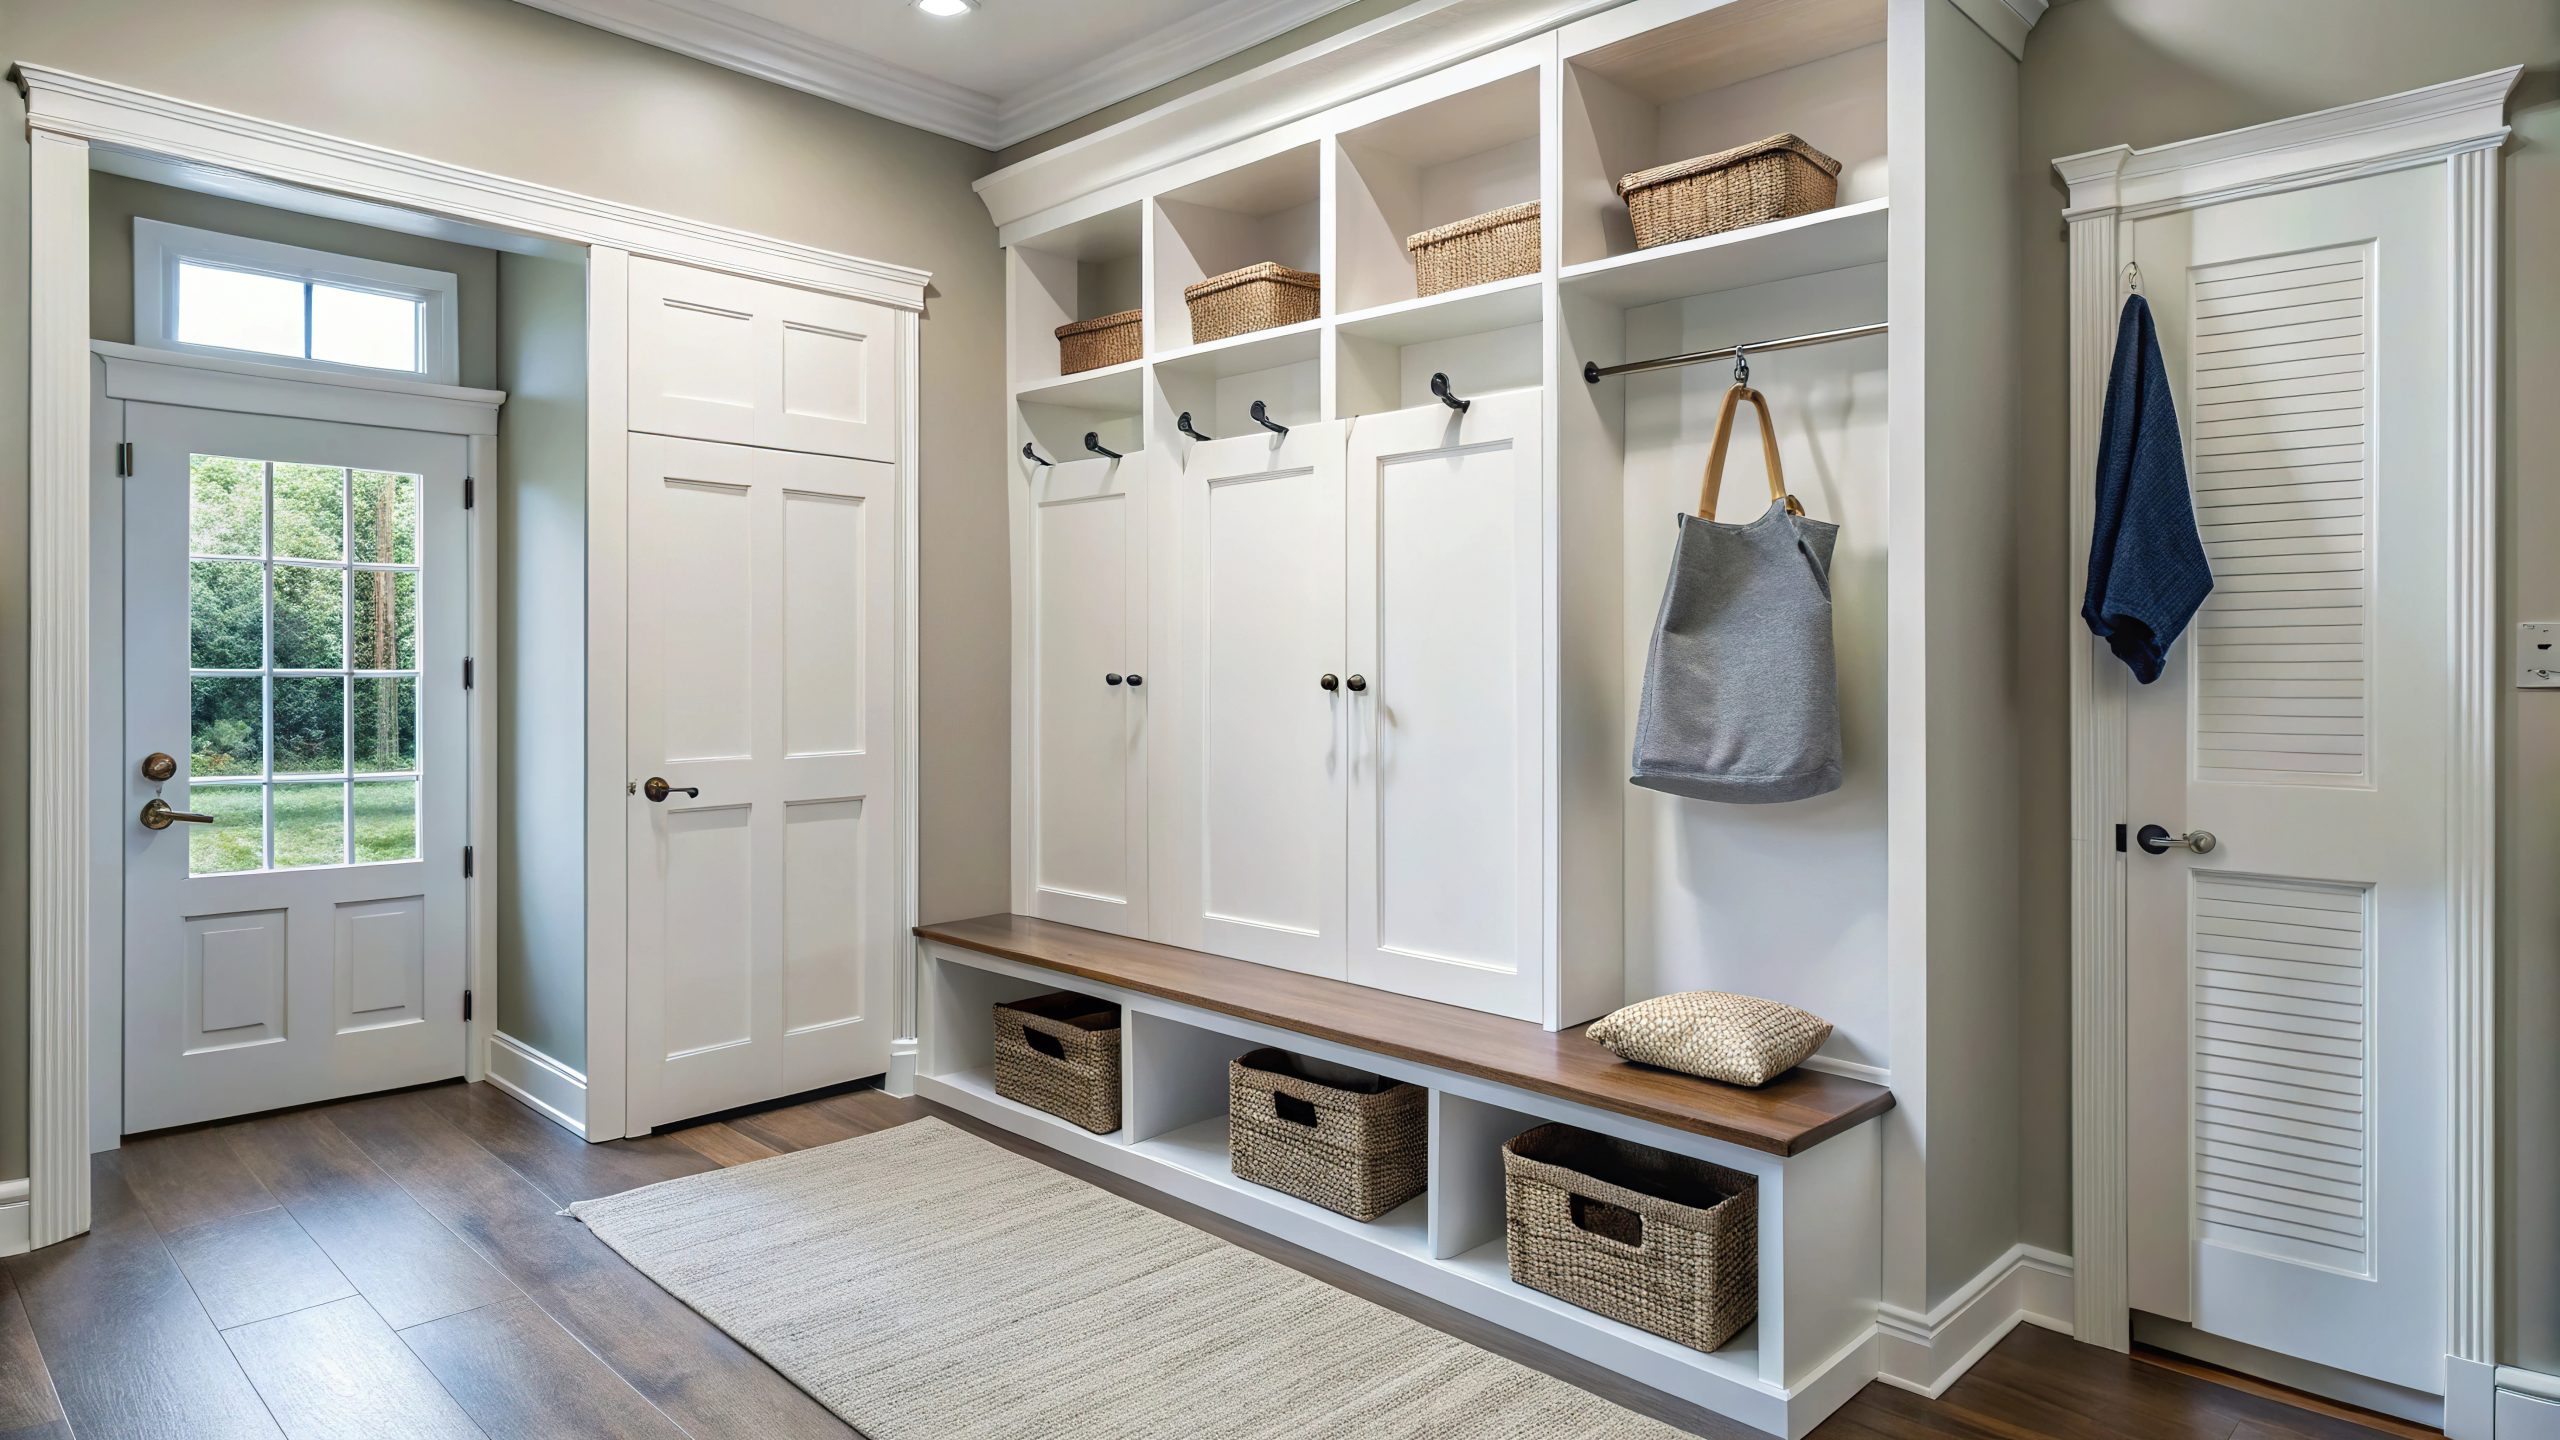
Long Benches with Storage Underneath: A long bench placed along one wall provides a convenient place to sit and put on or take off shoes. Choose a bench with built-in storage underneath to maximise mudroom storage capacity. This can be in the form of drawers, cubbies, or a hinged lid for easy access to stored items.
Slim Console Tables with Drawers: Similar to the bench idea, a slim console table with drawers offers a surface for keys and mail while providing hidden storage for smaller items. Opt for a table with a shallow depth to avoid encroaching on the walkway. This adds valuable mudroom storage without making the space feel cramped.
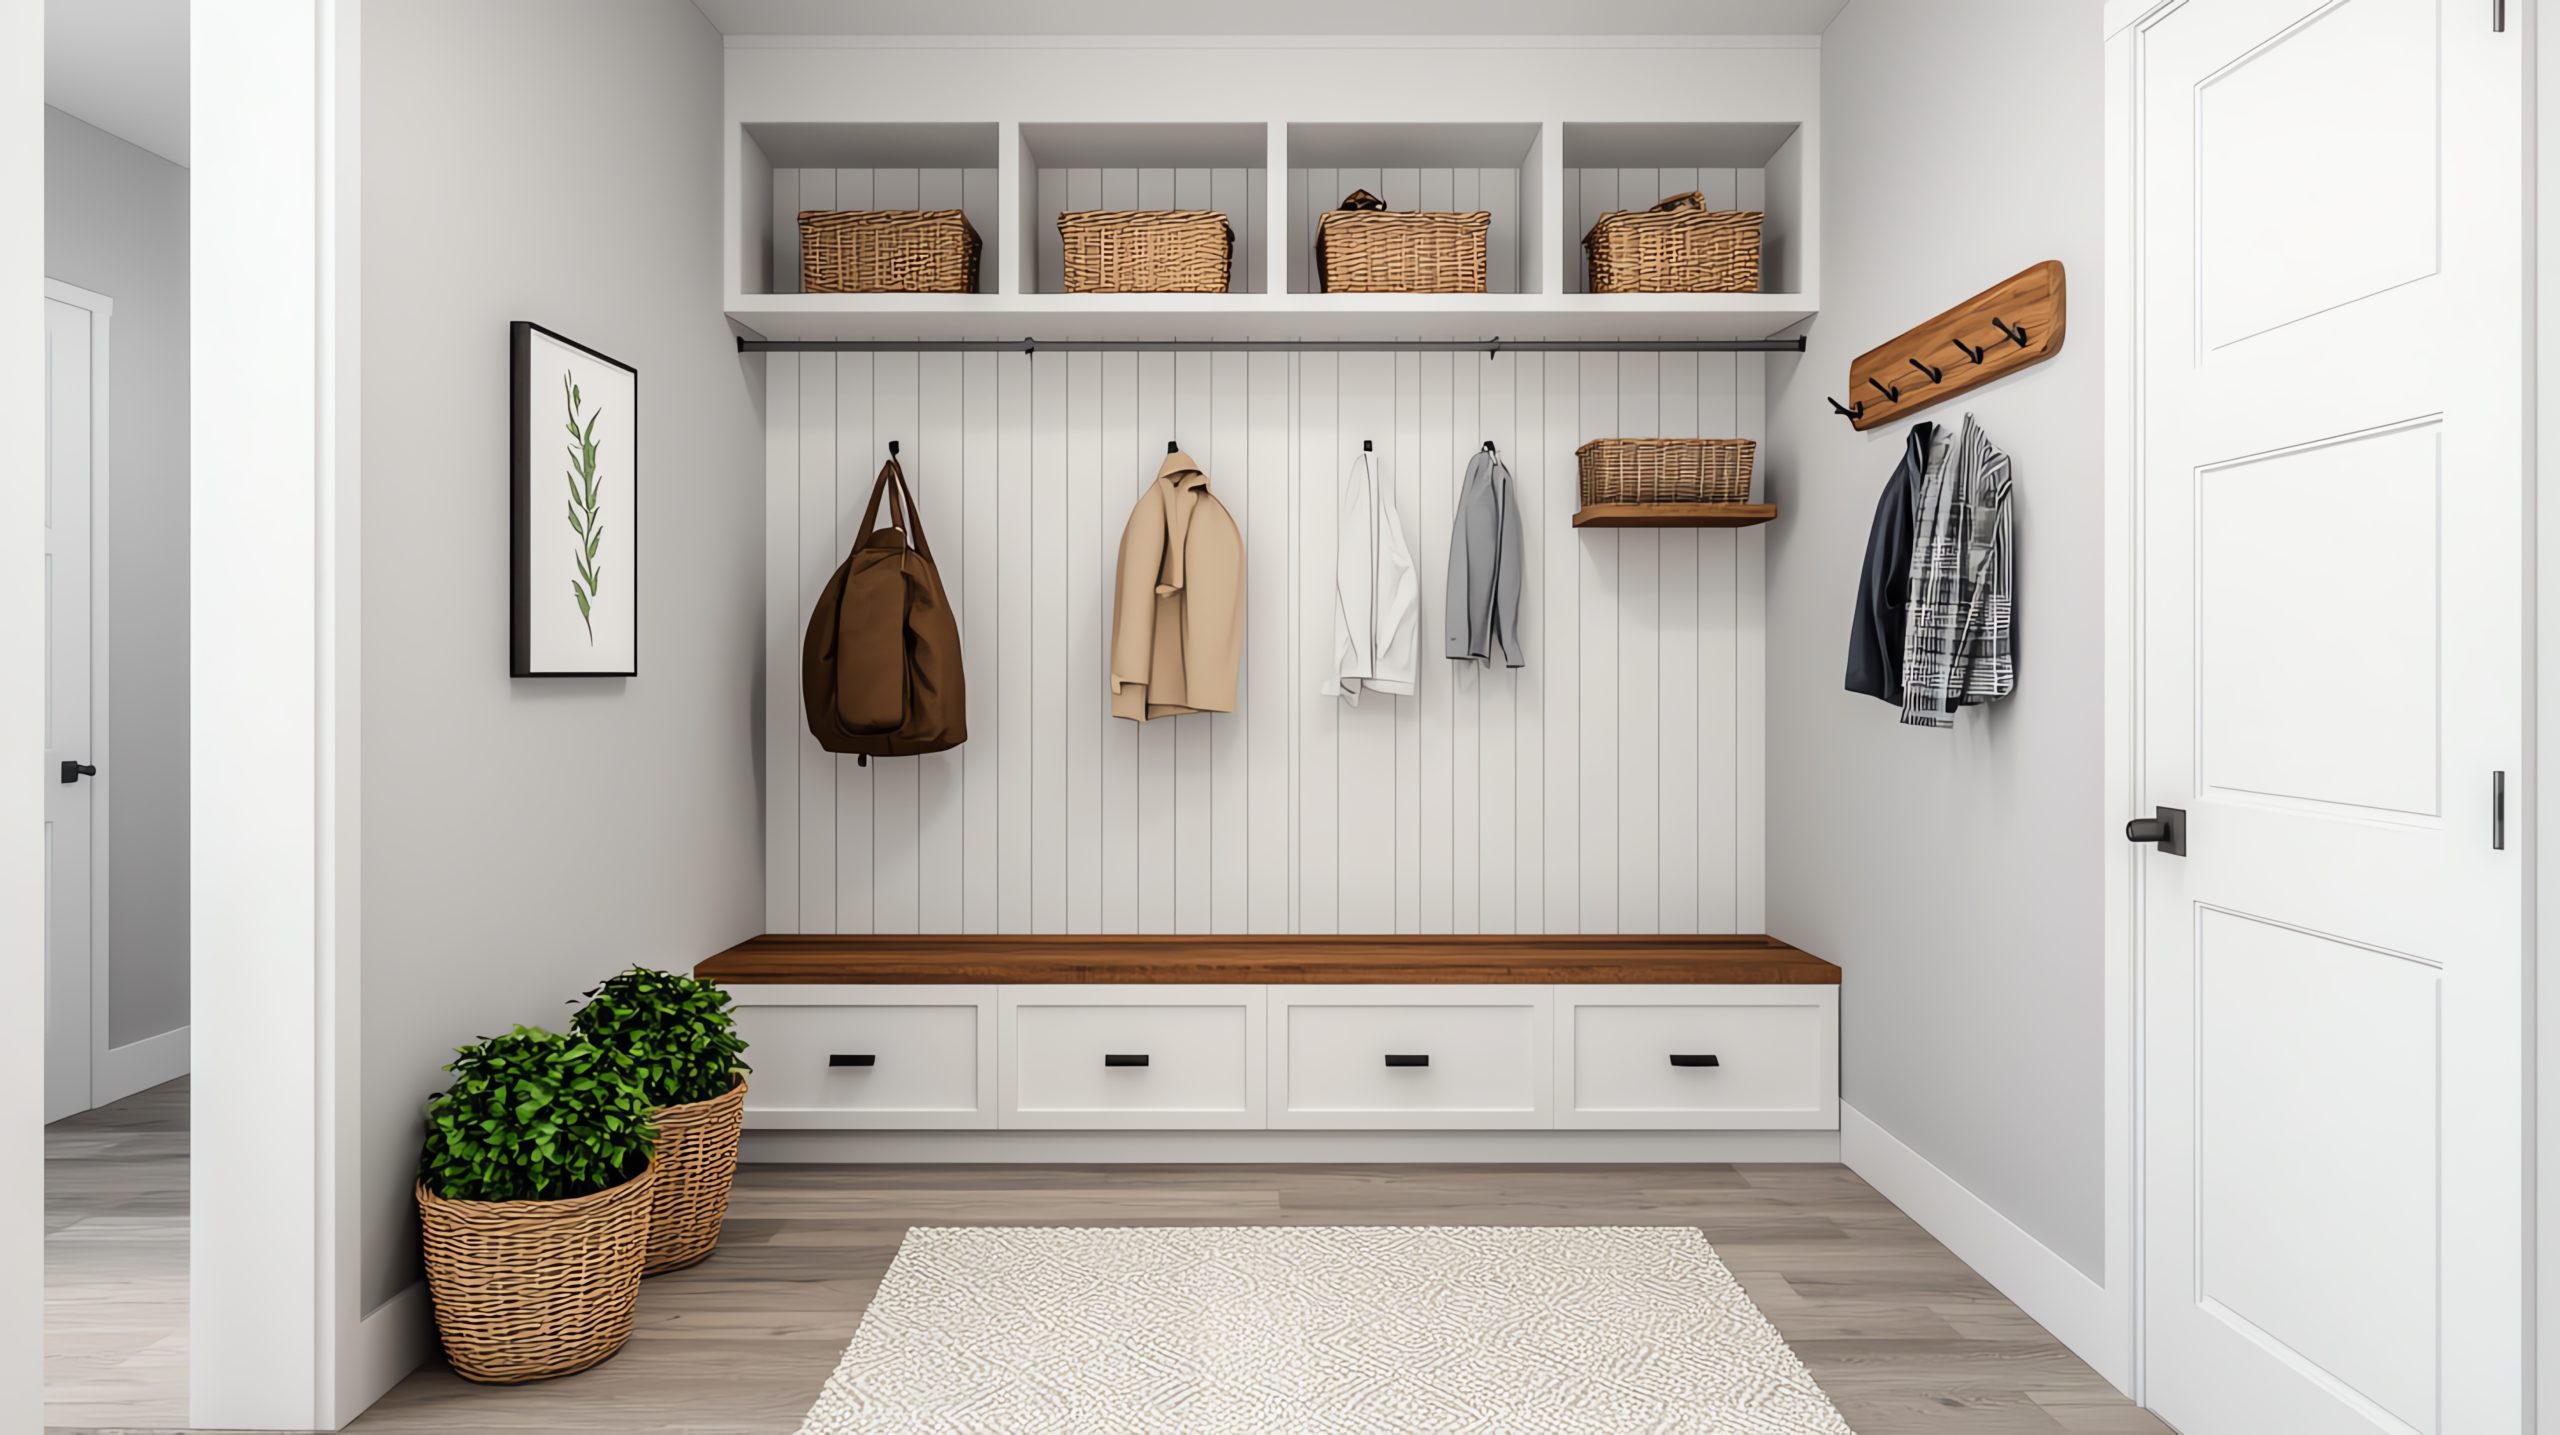
Wall-Mounted Hooks and Shelves Running the Length of the Wall: Maximise wall space by installing hooks and shelves along the entire length of the wall. This provides ample hanging space for coats, bags, and hats, while shelves can hold baskets, bins, and other storage containers. This creates a continuous mudroom storage solution that utilises the narrow space effectively.
Medium Mudroom Storage – Balancing Form and Function
The Goldilocks Zone: Mudroom Storage for Medium Spaces
Medium-sized mudrooms offer a sweet spot for balancing both form and function. You have enough space to incorporate more substantial storage pieces without overwhelming the area. This allows for greater flexibility in design and the opportunity to create a truly personalised mudroom that caters to your family’s specific needs. The key is to choose mudroom storage solutions that are both practical and stylish, creating a space that is both organised and visually appealing. Let’s explore some inspiring ideas for medium-sized mudrooms.
Cubby Systems with Drawers and Baskets: Cubby systems are a fantastic way to provide designated storage for each family member. Combine open cubbies with drawers and baskets for concealed storage of smaller items. This creates a versatile mudroom storage solution that keeps belongings organised and easily accessible.
Coat Racks with Shoe Storage Benches: A dedicated coat rack combined with a shoe storage bench offers a classic and practical mudroom storage solution. The coat rack provides ample hanging space for coats and jackets, while the bench offers a place to sit and put on or take off shoes, with storage underneath for keeping footwear tidy.
Free-Standing Storage Units: Free-standing storage units, such as wardrobes or cabinets, offer versatile mudroom storage options. Choose units with a combination of shelves, drawers, and hanging rods to accommodate a variety of items. These units can be easily moved or reconfigured as needed, providing flexibility in your mudroom design.
Large Mudrooms – Zoned for Organisation
Divide and Conquer: Zoned Storage for Large Mudrooms
Large mudrooms offer the luxury of space, allowing you to create distinct zones for different activities and storage needs. This is where you can truly optimise functionality and create a highly organised and efficient mudroom. Think about the various functions your mudroom serves – storing outerwear, organising sports equipment, managing pet supplies, etc. – and designate specific zones for each. This zoned approach to mudroom storage will transform your large mudroom into a well-oiled machine. Let’s explore some ideas for creating dedicated zones in your spacious mudroom.
Designated Areas for Coats, Shoes, Bags, Sports Equipment, etc.: Divide your large mudroom into specific areas for different categories of items. For example, create a coat closet or designated wall area for outerwear, a shoe storage zone with shelves or cubbies, a separate area for bags and backpacks, and a dedicated space for sports equipment. This zoned approach to mudroom storage makes it easy to find what you need and keeps everything organized.
Individual Lockers or Cubbies for Each Family Member: Consider installing individual lockers or cubbies for each family member. This provides personalised mudroom storage space and encourages responsibility for keeping belongings tidy. Each person can have their own designated area for coats, shoes, backpacks, and other personal items.
A Drop Zone for Mail and Keys: Create a designated drop zone near the entryway for mail, keys, and other small items. This could be a small table with a drawer, a wall-mounted organiser, or a designated basket or tray. This prevents these items from getting lost or cluttering other areas of the mudroom.
Extra-Large Mudrooms – The Ultimate Mudroom Dream
Mudroom Envy: Storage Solutions for Extra-Large Spaces
An extra-large mudroom is the ultimate dream for those who crave organisation and functionality. With ample space, you can incorporate luxurious features and create a truly customised mudroom that caters to every need. Think beyond basic storage and consider incorporating elements like seating areas, built-in organisers, and even dedicated pet washing stations. The possibilities are endless when it comes to mudroom storage in an extra-large space. Let’s explore some inspiring ideas for creating the mudroom of your dreams.
Mudroom Islands: A mudroom island provides additional storage, a countertop for folding laundry or organising items, and a central hub for managing household tasks. Include drawers, cabinets, and open shelving to maximise storage capacity.
Built-in Seating Areas: Incorporate a comfortable seating area with built-in benches and cushions. This provides a convenient place to put on and take off shoes, as well as a relaxing spot to read or chat. Include storage underneath the benches for shoes, boots, and other items.
Walk-in Closets: A walk-in closet within the mudroom provides ample storage for seasonal outerwear, sports equipment, and other bulky items. Include shelves, hanging rods, and drawers to organise everything efficiently.
Dedicated Laundry Areas: Integrate a laundry area within the mudroom for added convenience. This allows you to manage laundry tasks efficiently and keeps dirty clothes contained within a designated area.
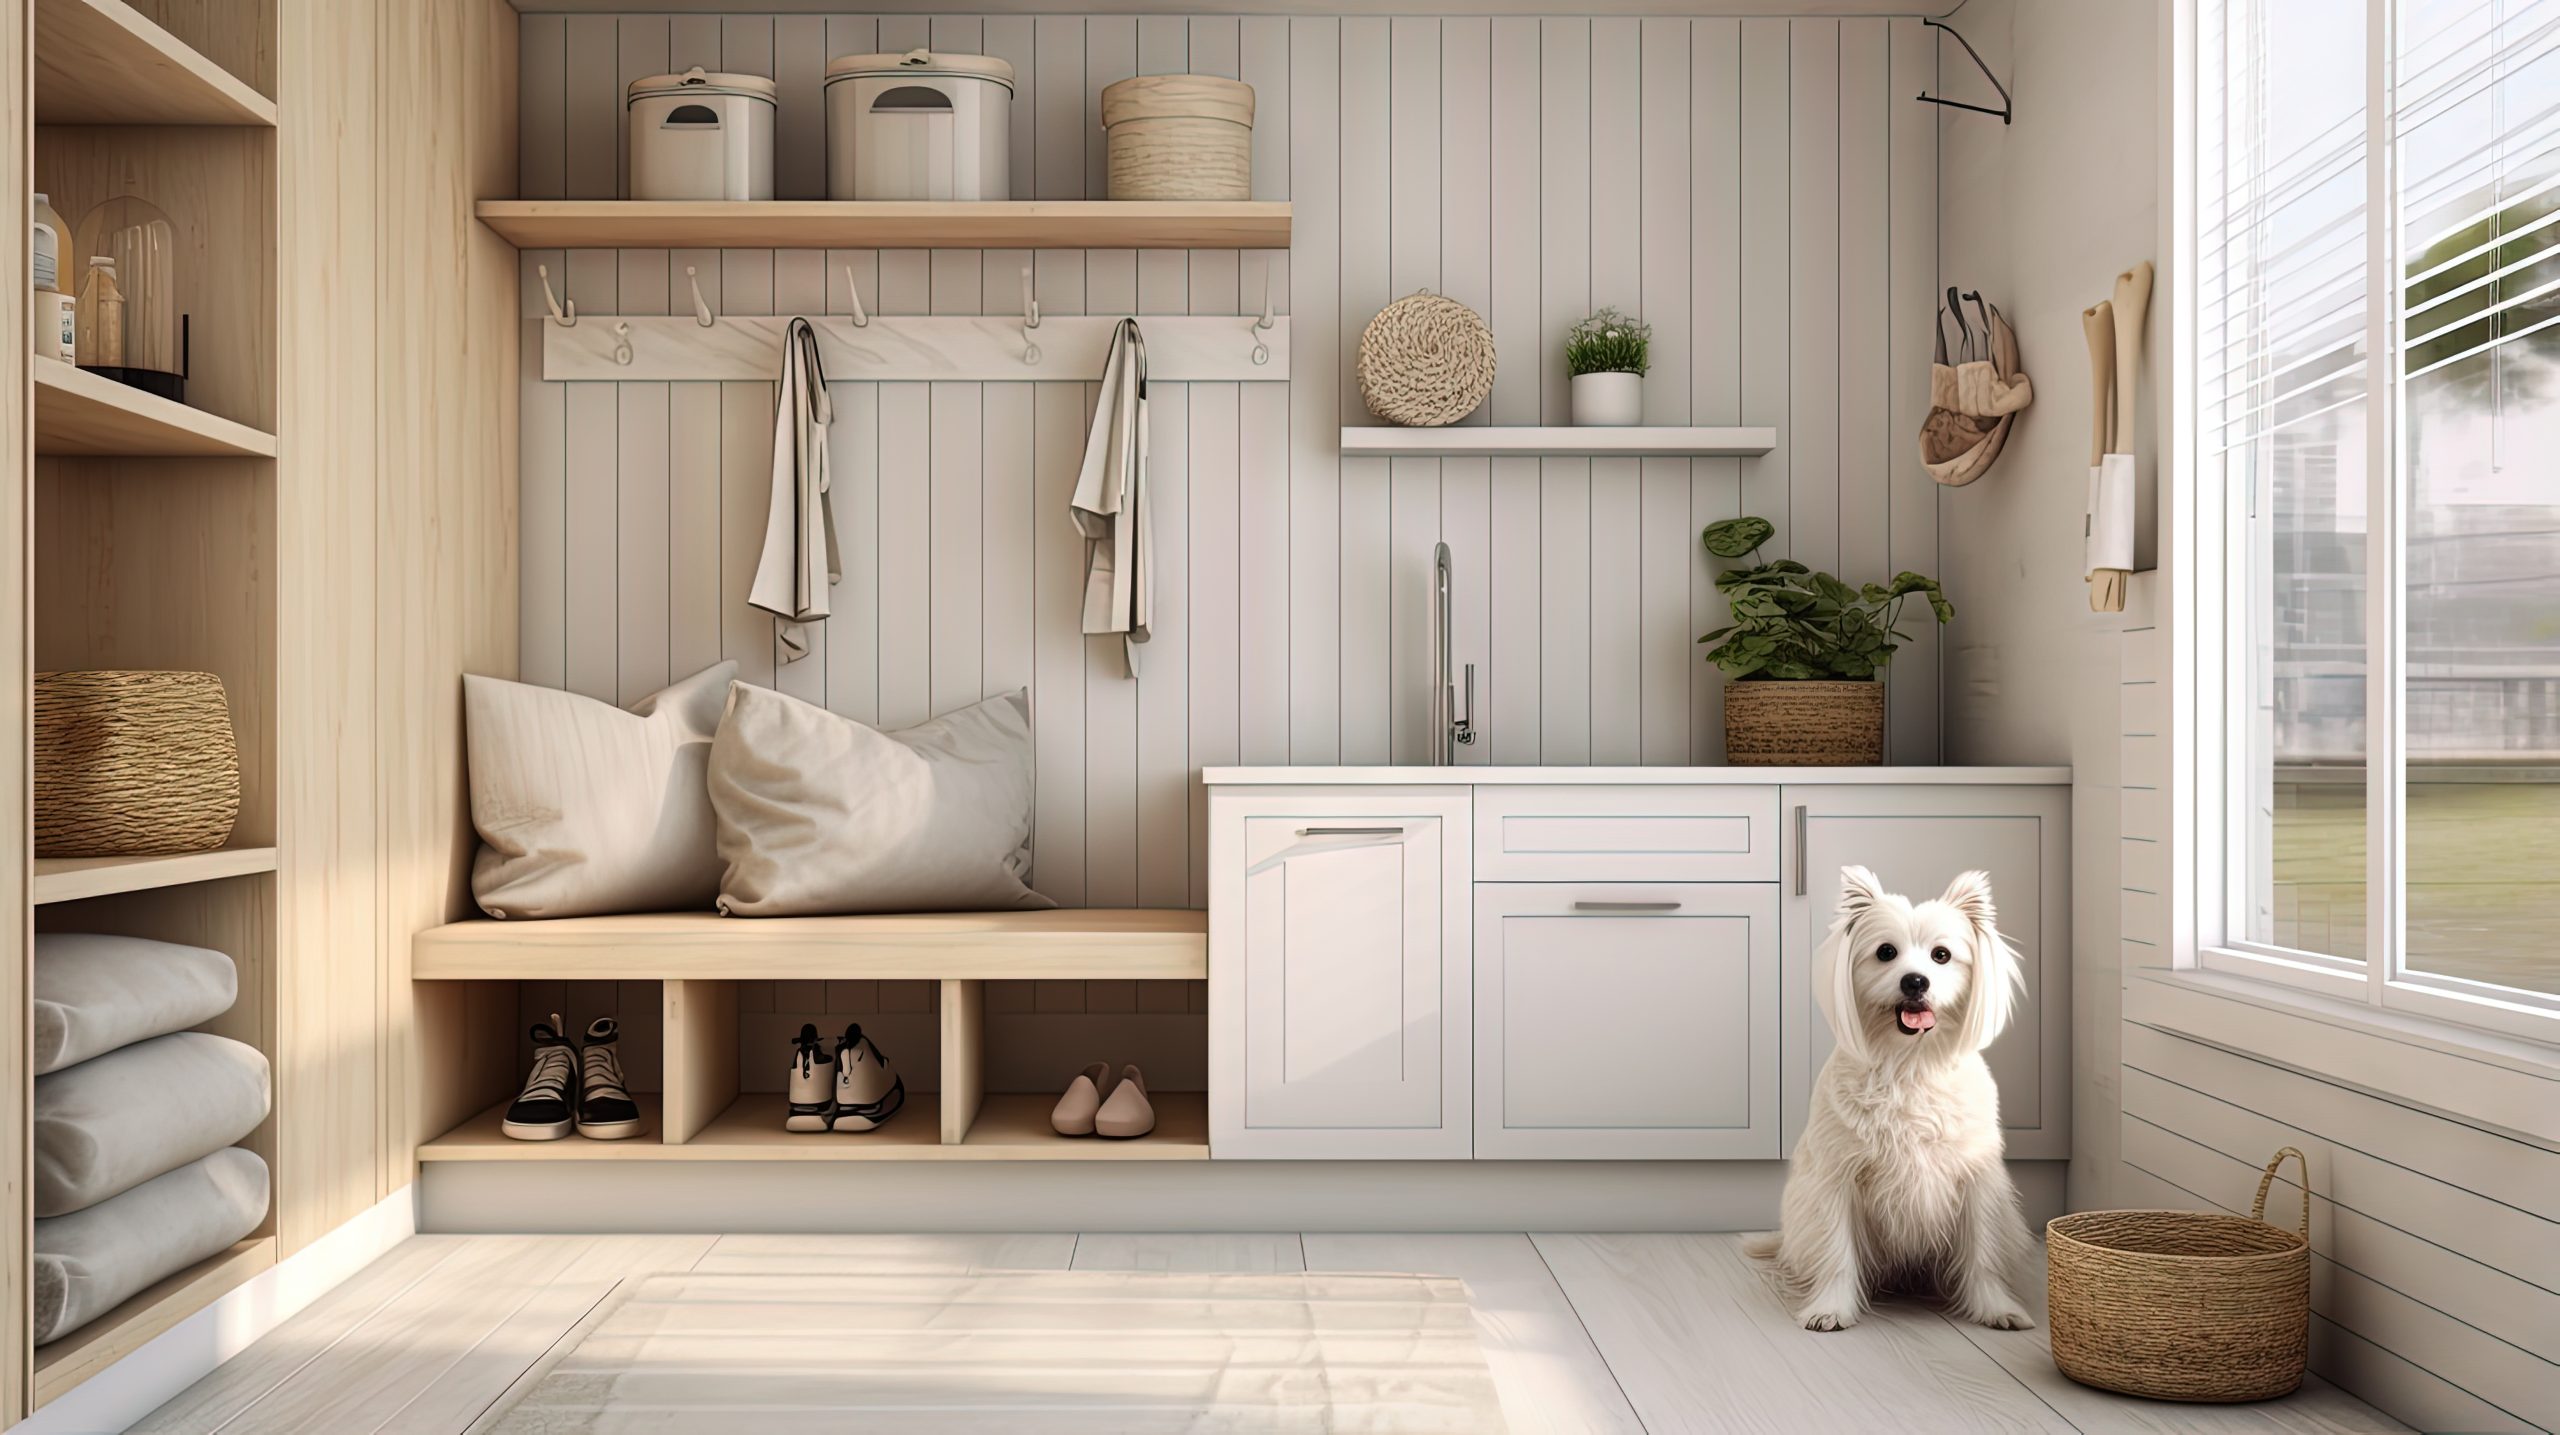
Pet Washing Stations: For pet owners, a dedicated pet washing station within the mudroom is a luxurious and practical addition. This keeps muddy paws contained and makes it easy to clean up after your furry friends.
Creating a functional and stylish mudroom doesn’t have to break the bank. With a little creativity and some DIY ingenuity, you can implement effective mudroom storage solutions on a budget. Repurposing existing items, building simple organisers, and adding personalised touches can transform your mudroom without requiring a major investment. Let’s explore some budget-friendly DIY mudroom storage hacks.
Repurposed Crates and Pallets: Give old crates and pallets a new life by transforming them into rustic storage solutions. Sand them down, paint them, and stack them to create shelving units, shoe racks, or cubbies.
DIY Coat Racks: Create a unique and personalised coat rack using reclaimed wood, metal pipes, or even repurposed branches. This adds a touch of character to your mudroom while providing functional storage.
Customised Storage Bins: Decorate plain storage bins with fabric, paint, or stencils to add a pop of colour and personality to your mudroom. Label each bin clearly to keep items organised and easy to find.
Upcycled Jars and Containers: Use upcycled jars and containers to store small items like gloves, scarves, and dog leashes. Decorate them to match your mudroom’s décor and attach labels for easy identification.
DIY Shoe Storage Solutions: Create a simple shoe rack using PVC pipes, wooden planks, or even repurposed rain gutters. This keeps shoes off the floor and organised without requiring expensive shoe storage furniture.
A well-organised mudroom, regardless of its size, can significantly impact the overall functionality and flow of your home. By implementing these clever mudroom storage ideas, you can transform your entryway from a chaotic catch-all into a stylish and efficient space. Whether you’re working with a tiny entryway or a spacious mudroom, there are solutions to fit every need and budget.
Best playroom organization ideas to keep your house organized.
Let’s be honest, keeping a playroom organized can feel like a never-ending battle, especially for busy families. Toys seem to multiply overnight, and what starts as a tidy space quickly transforms into a chaotic landscape of building blocks, dolls, and art supplies.
But don’t worry, achieving and maintaining playroom organization isn’t an impossible dream. This post is packed with practical playroom organization ideas designed to make cleanup quick, easy, and even fun for both kids and parents. Get ready to transform your playroom from a source of stress into a haven of fun and creativity!
Best Playroom Organization Tips!
Declutter Before You Organize
The First Step: Decluttering Your Playroom
Before diving into bins, baskets, and labels, there’s one crucial step that will make all your playroom organization efforts significantly more effective: decluttering. It might seem counterintuitive to add another task to your to-do list but trust us, this is the foundation of successful playroom organization. A clutter-free space is much easier to organize and maintain in the long run. So, how do you tackle the mountain of toys?
Start by sorting through everything. Be honest with yourself – are there toys your children have outgrown? Are there broken toys that can’t be repaired? Are there duplicates or toys that rarely get played with? Create three piles: one for donating, one for selling (if you’re feeling ambitious), and one for discarding. This process not only improves playroom organization but also teaches children valuable lessons about letting go and appreciating what they have. Once you’ve decluttered, you’ll have a much clearer picture of what needs to be organized and what storage solutions will work best for your family.
Zoning for Defined Play Areas
Create Zones for Different Activities
Now that you’ve decluttered and have a clearer view of your play space, it’s time to implement one of the most effective playroom organization ideas: zoning. Zoning involves dividing your playroom into designated areas for different types of play. This not only helps with playroom organization by containing specific toys in their designated areas, but it also encourages more focused and imaginative play.
Think about the types of activities your children enjoy. Do they love building elaborate structures with blocks? Do they have a passion for arts and crafts? Is there a budding bookworm in the family? Based on their interests, you can create zones such as a building block area, an arts & crafts station, a reading nook, a dress-up corner, or a board game area.
Clearly defining these zones makes it easier for children to find what they’re looking for and, more importantly, makes cleanup a breeze. When it’s time to tidy up, they know exactly where each toy belongs, reducing the overwhelming feeling and making playroom organization a much less daunting task. For example, all the building blocks go back to the block area, art supplies return to the art station, and books go back to the reading nook. This simple strategy can dramatically improve the overall playroom organization and create a more harmonious and functional play space.
Storage Solutions: Bins, Baskets, and Beyond
Clever Storage Solutions for Maximum Playroom Organization
With your playroom zoned and ready for action, it’s time to tackle the next essential element of playroom organization: storage. Choosing the right storage solutions can make or break your efforts to maintain a tidy and functional play space. The key is to select options that are both practical and accessible for little hands.
Bins, baskets, and containers are your best friends when it comes to playroom organization. Clear bins are particularly helpful as they allow children to easily see what’s inside, eliminating the need to rummage and create a mess. For younger children, labelling bins with both pictures and words can further enhance playroom organization and encourage them to put things away independently. Categorise toys by type – building blocks, dolls, cars, art supplies – and assign a designated bin or basket for each category. This makes it simple for children to find what they’re looking for and just as easy to put away when they’re finished. Consider using different coloured bins for different zones to add an extra layer of visual organization to your playroom. Beyond bins and baskets, explore other storage options like drawers, cubbies, and hanging organizers to maximize space and keep everything neatly tucked away. Remember, effective storage is the backbone of a successful playroom organization.
Vertical Space: Reaching New Heights of Organization
Utilizing Vertical Space for Efficient Playroom Organization
When it comes to playroom organization, don’t forget to look up! Utilizing vertical space is a game-changer, especially in smaller playrooms. Walls offer valuable real estate for storage and can significantly enhance your playroom organization efforts.
Install wall shelves to display books, showcase favourite toys, and store smaller items in attractive baskets or containers. Choose shelves that are sturdy and appropriately sized for the items you plan to store. Floating shelves are a great option for a modern look, while traditional bookcases offer ample storage space. For younger children, ensure that lower shelves are within easy reach so they can access their toys independently. Consider using wall-mounted organizers for art supplies, dress-up clothes, or even sports equipment. These organizers not only maximize vertical space but also keep items neatly contained and off the floor, contributing to a more organized and functional playroom. By thinking vertically, you can free up valuable floor space for play and create a more visually appealing and efficiently organized playroom.
Furniture that Works as Hard as You Do
Choosing the Right Furniture for Playroom Organization and Functionality
The furniture you select for your playroom can play a significant role in its overall organization. Opt for pieces that not only look good but also work hard to maximize storage and functionality. This is a key element of effective playroom organization.
Multi-purpose furniture is a must-have for any well-organized playroom. Look for ottomans with hidden storage compartments, benches with built-in drawers, or play tables with storage underneath. These clever pieces provide valuable storage space while also serving their primary function. A storage bench, for example, can provide seating while also concealing toys, blankets, or games. A play table with drawers can store art supplies, building blocks, or other small toys, keeping them within easy reach during playtime. When selecting furniture, consider the size and layout of your playroom. Choose pieces that are appropriately scaled and don’t overwhelm the space. Child-sized furniture is also a great option, as it allows children to access their toys and belongings independently, fostering a sense of ownership and responsibility in maintaining playroom organization.
Toy Rotation: Keeping it Fresh and Engaging
Toy Rotation: A Secret Weapon for Playroom Organization and Engagement
Even the most organized playroom can start to feel stale if children are constantly surrounded by the same toys. This is where toy rotation comes in – a brilliant strategy for both playroom organization and keeping kids engaged and excited about their toys.
The concept is simple: instead of having all toys available at all times, store a portion of them away in labelled bins or boxes. Every few weeks or months, swap out the toys, bring out the stored toys and put away the ones that have been in regular rotation. This not only reduces the visual clutter in the playroom, contributing to a more organized and less overwhelming environment, but it also reintroduces toys that may have been forgotten, sparking renewed interest and extending their lifespan. Toy rotation is a fantastic way to manage the sheer volume of toys many children accumulate, making playroom organization more manageable and playtime more exciting. It also encourages more focused play, as children are presented with a smaller, more curated selection of toys at any given time. This simple strategy can be a game-changer for maintaining a tidy and engaging playroom.
Cleanup Strategies: Making it Easy and Fun
Easy Cleanup Strategies for a Stress-Free Playroom
Maintaining playroom organization isn’t just about having the right storage solutions; it’s also about establishing routines and strategies that make cleanup a manageable and even enjoyable part of the day. After all, even the most organized playroom will eventually succumb to the inevitable tide of toys if cleanup isn’t a regular practice.
One of the most effective playroom organization strategies is to establish designated cleanup times. This could be before dinner, before bedtime, or any other time that works well for your family’s schedule. Making cleanup a regular part of the routine helps children understand that it’s an expected part of playtime. But cleanup doesn’t have to be a chore. In fact, it can be an opportunity for fun and learning! Try turning cleanup into a game. Set a timer and see how quickly everyone can put their toys away. Play some upbeat music to make it more energetic. Or create a reward system for a consistently tidy playroom. Visual cues can also be incredibly helpful for playroom organization, especially for younger children. Label bins and shelves with pictures and words so children know exactly where each toy belongs. Colour coding can also be a fun and effective way to help children identify where things go. By making cleanup a regular, engaging activity, you can maintain playroom organization and teach children valuable life skills at the same time.
Creating and maintaining a well-organized playroom is a worthwhile investment for any busy family. Effective playroom organization not only reduces stress and clutter but also fosters a more positive and productive play environment for children.
By implementing these playroom organization ideas – from decluttering and zoning to utilizing clever storage solutions and establishing consistent cleanup routines – you can transform your playroom from a chaotic mess into a haven of fun and creativity. Remember, a well-organized playroom benefits the entire family, creating a more harmonious and enjoyable home environment.