by Kesaa Interiors | DECOR & DIY, DESIGN GUIDES, Kids & Nursery, Room-by-Room Guides, ROOMS, Storage & Organisation
Creating a functional kids’ toy room requires thoughtful planning that balances organisation with imagination. A well-designed play space not only keeps toys contained but also fosters creativity, independence, and development.
Whether you’re working with a dedicated room or carving out a corner of your living space, the principles of effective toy room design remain consistent: accessible storage, defined activity areas, and systems that grow with your child.

1. Planning Your Kids Toy Room: The Essentials
Before purchasing storage containers or deciding on a colour scheme, take time to evaluate your specific needs. The most successful kids’ toy room designs begin with thoughtful planning.
- Assess your available space – Measure your area and note any architectural features that could impact your design
- Observe play patterns – Watch how your child interacts with their toys and what activities they gravitate toward
- Consider traffic flow – Allow adequate movement space between activity zones
- Plan for flexibility – Design a kids’ toy room that can evolve as interests change
- Establish a realistic budget – Prioritise essential organisational elements before decorative features
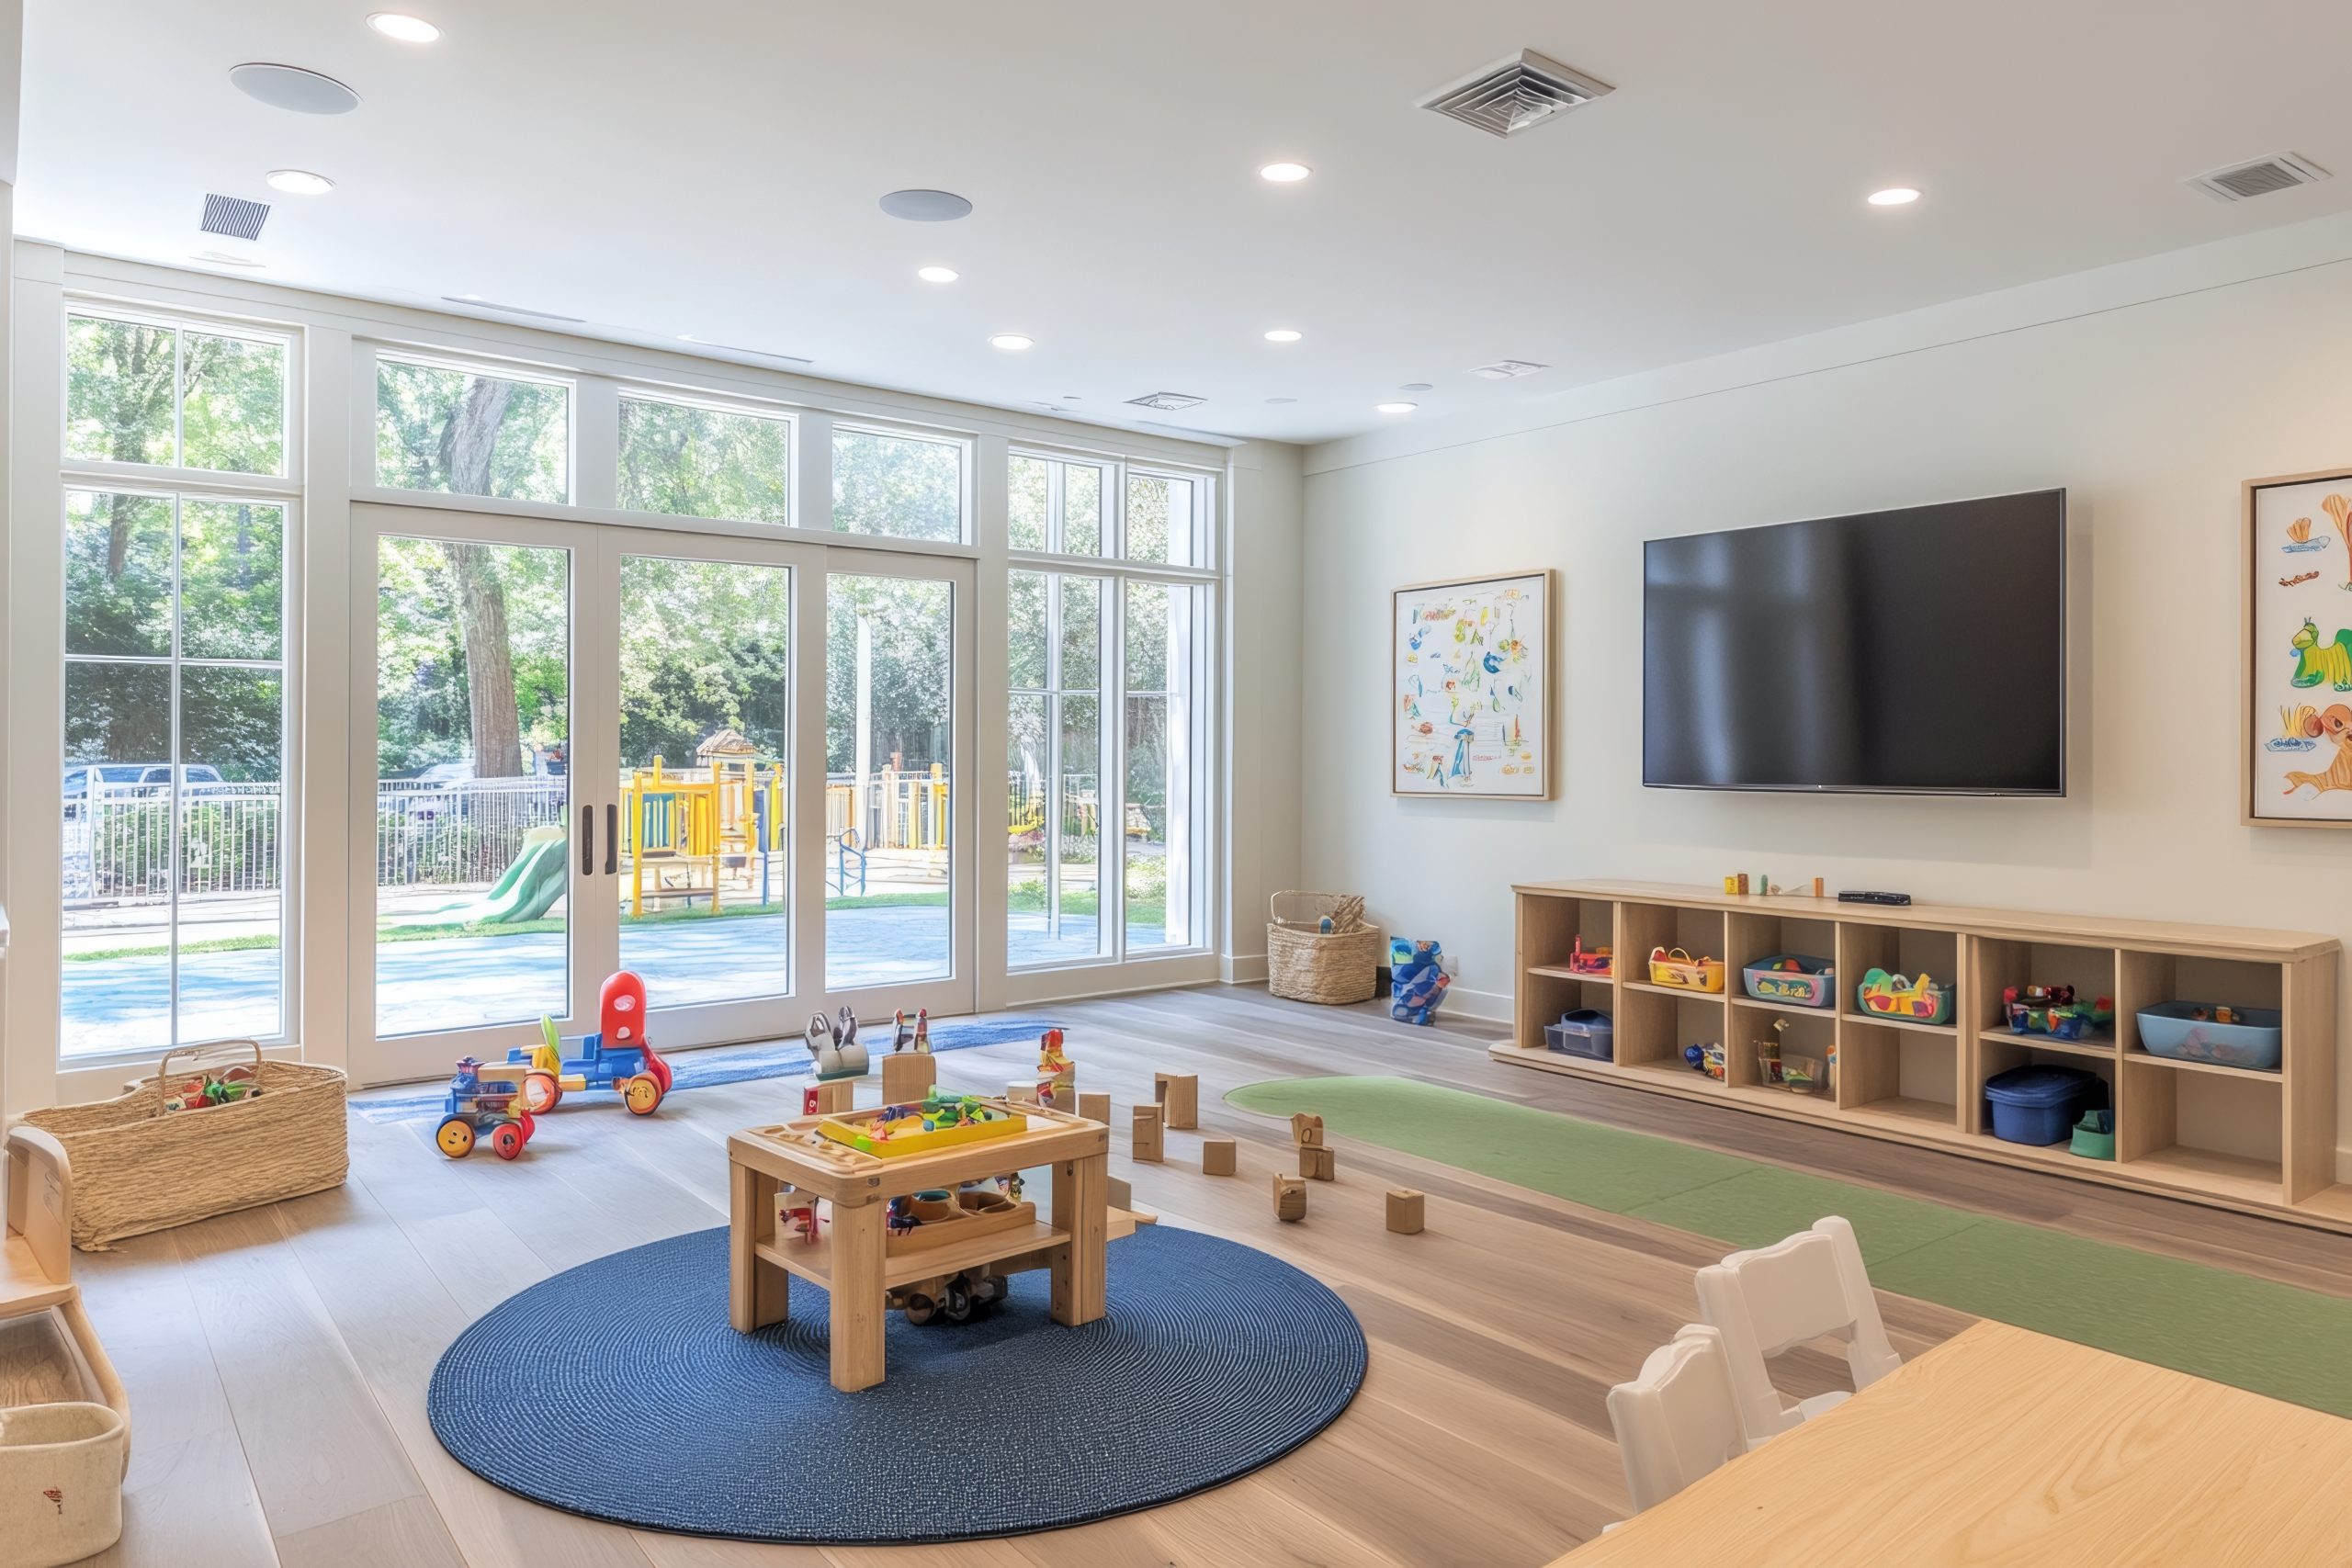
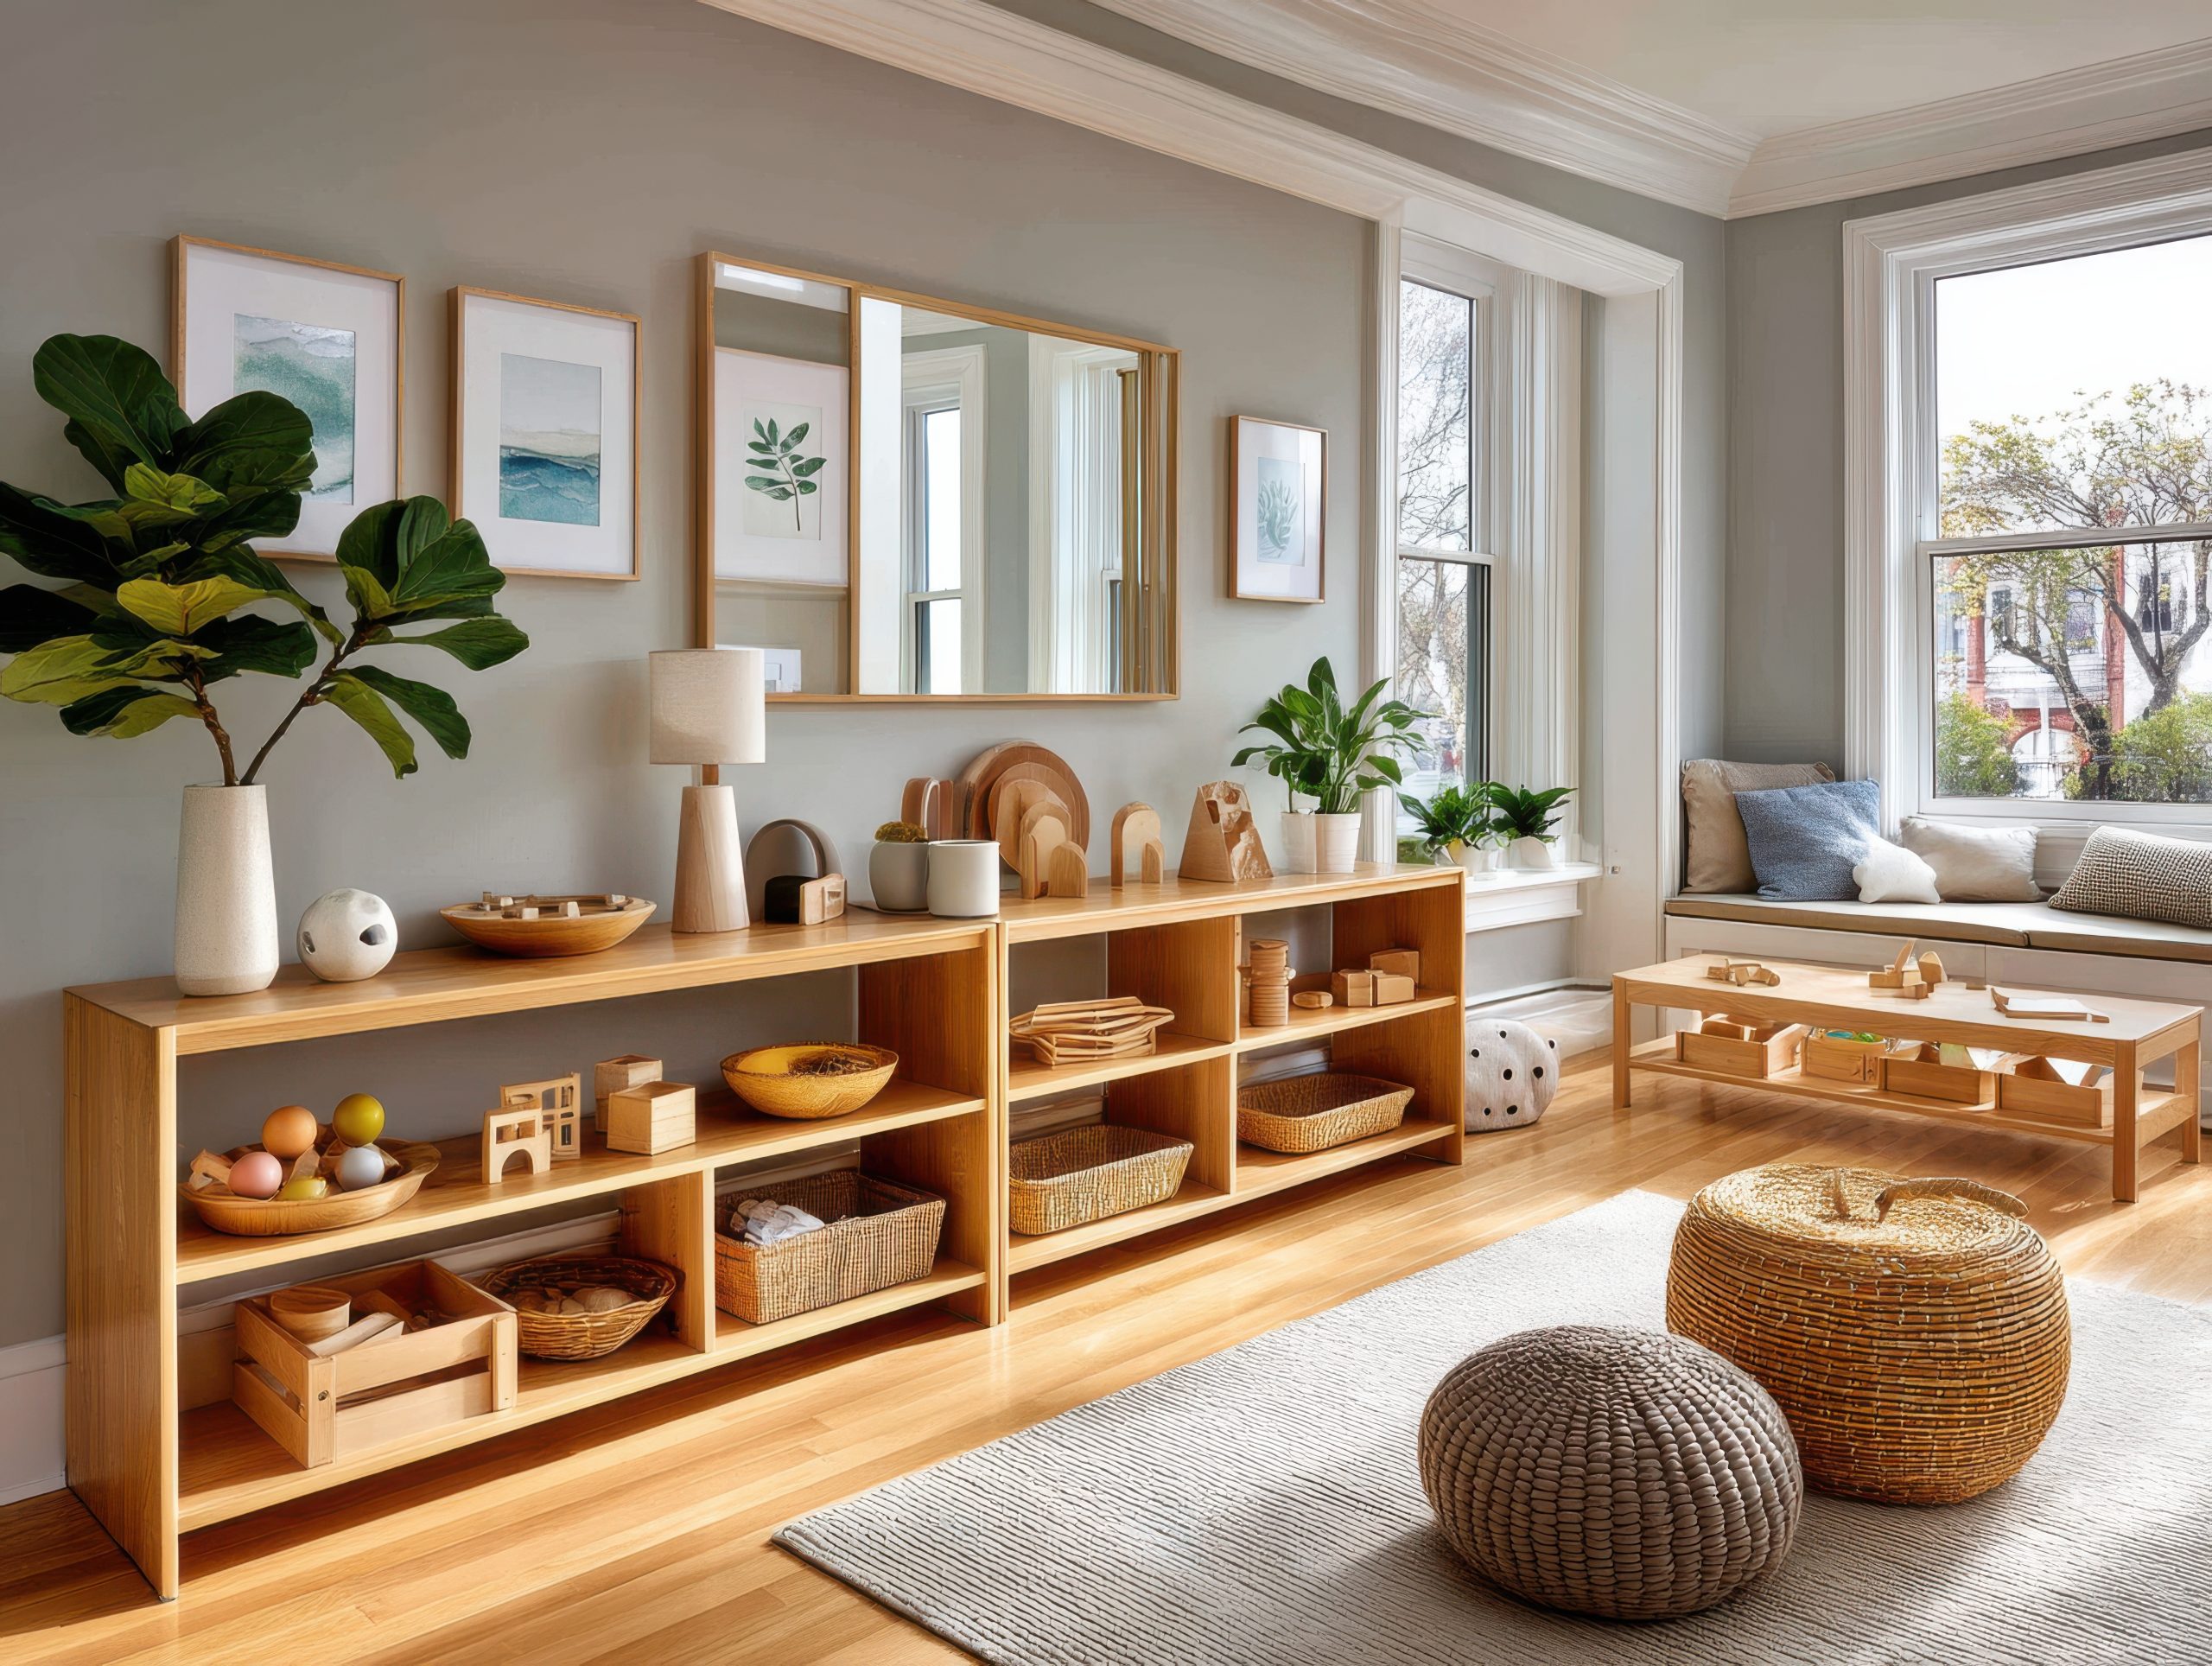
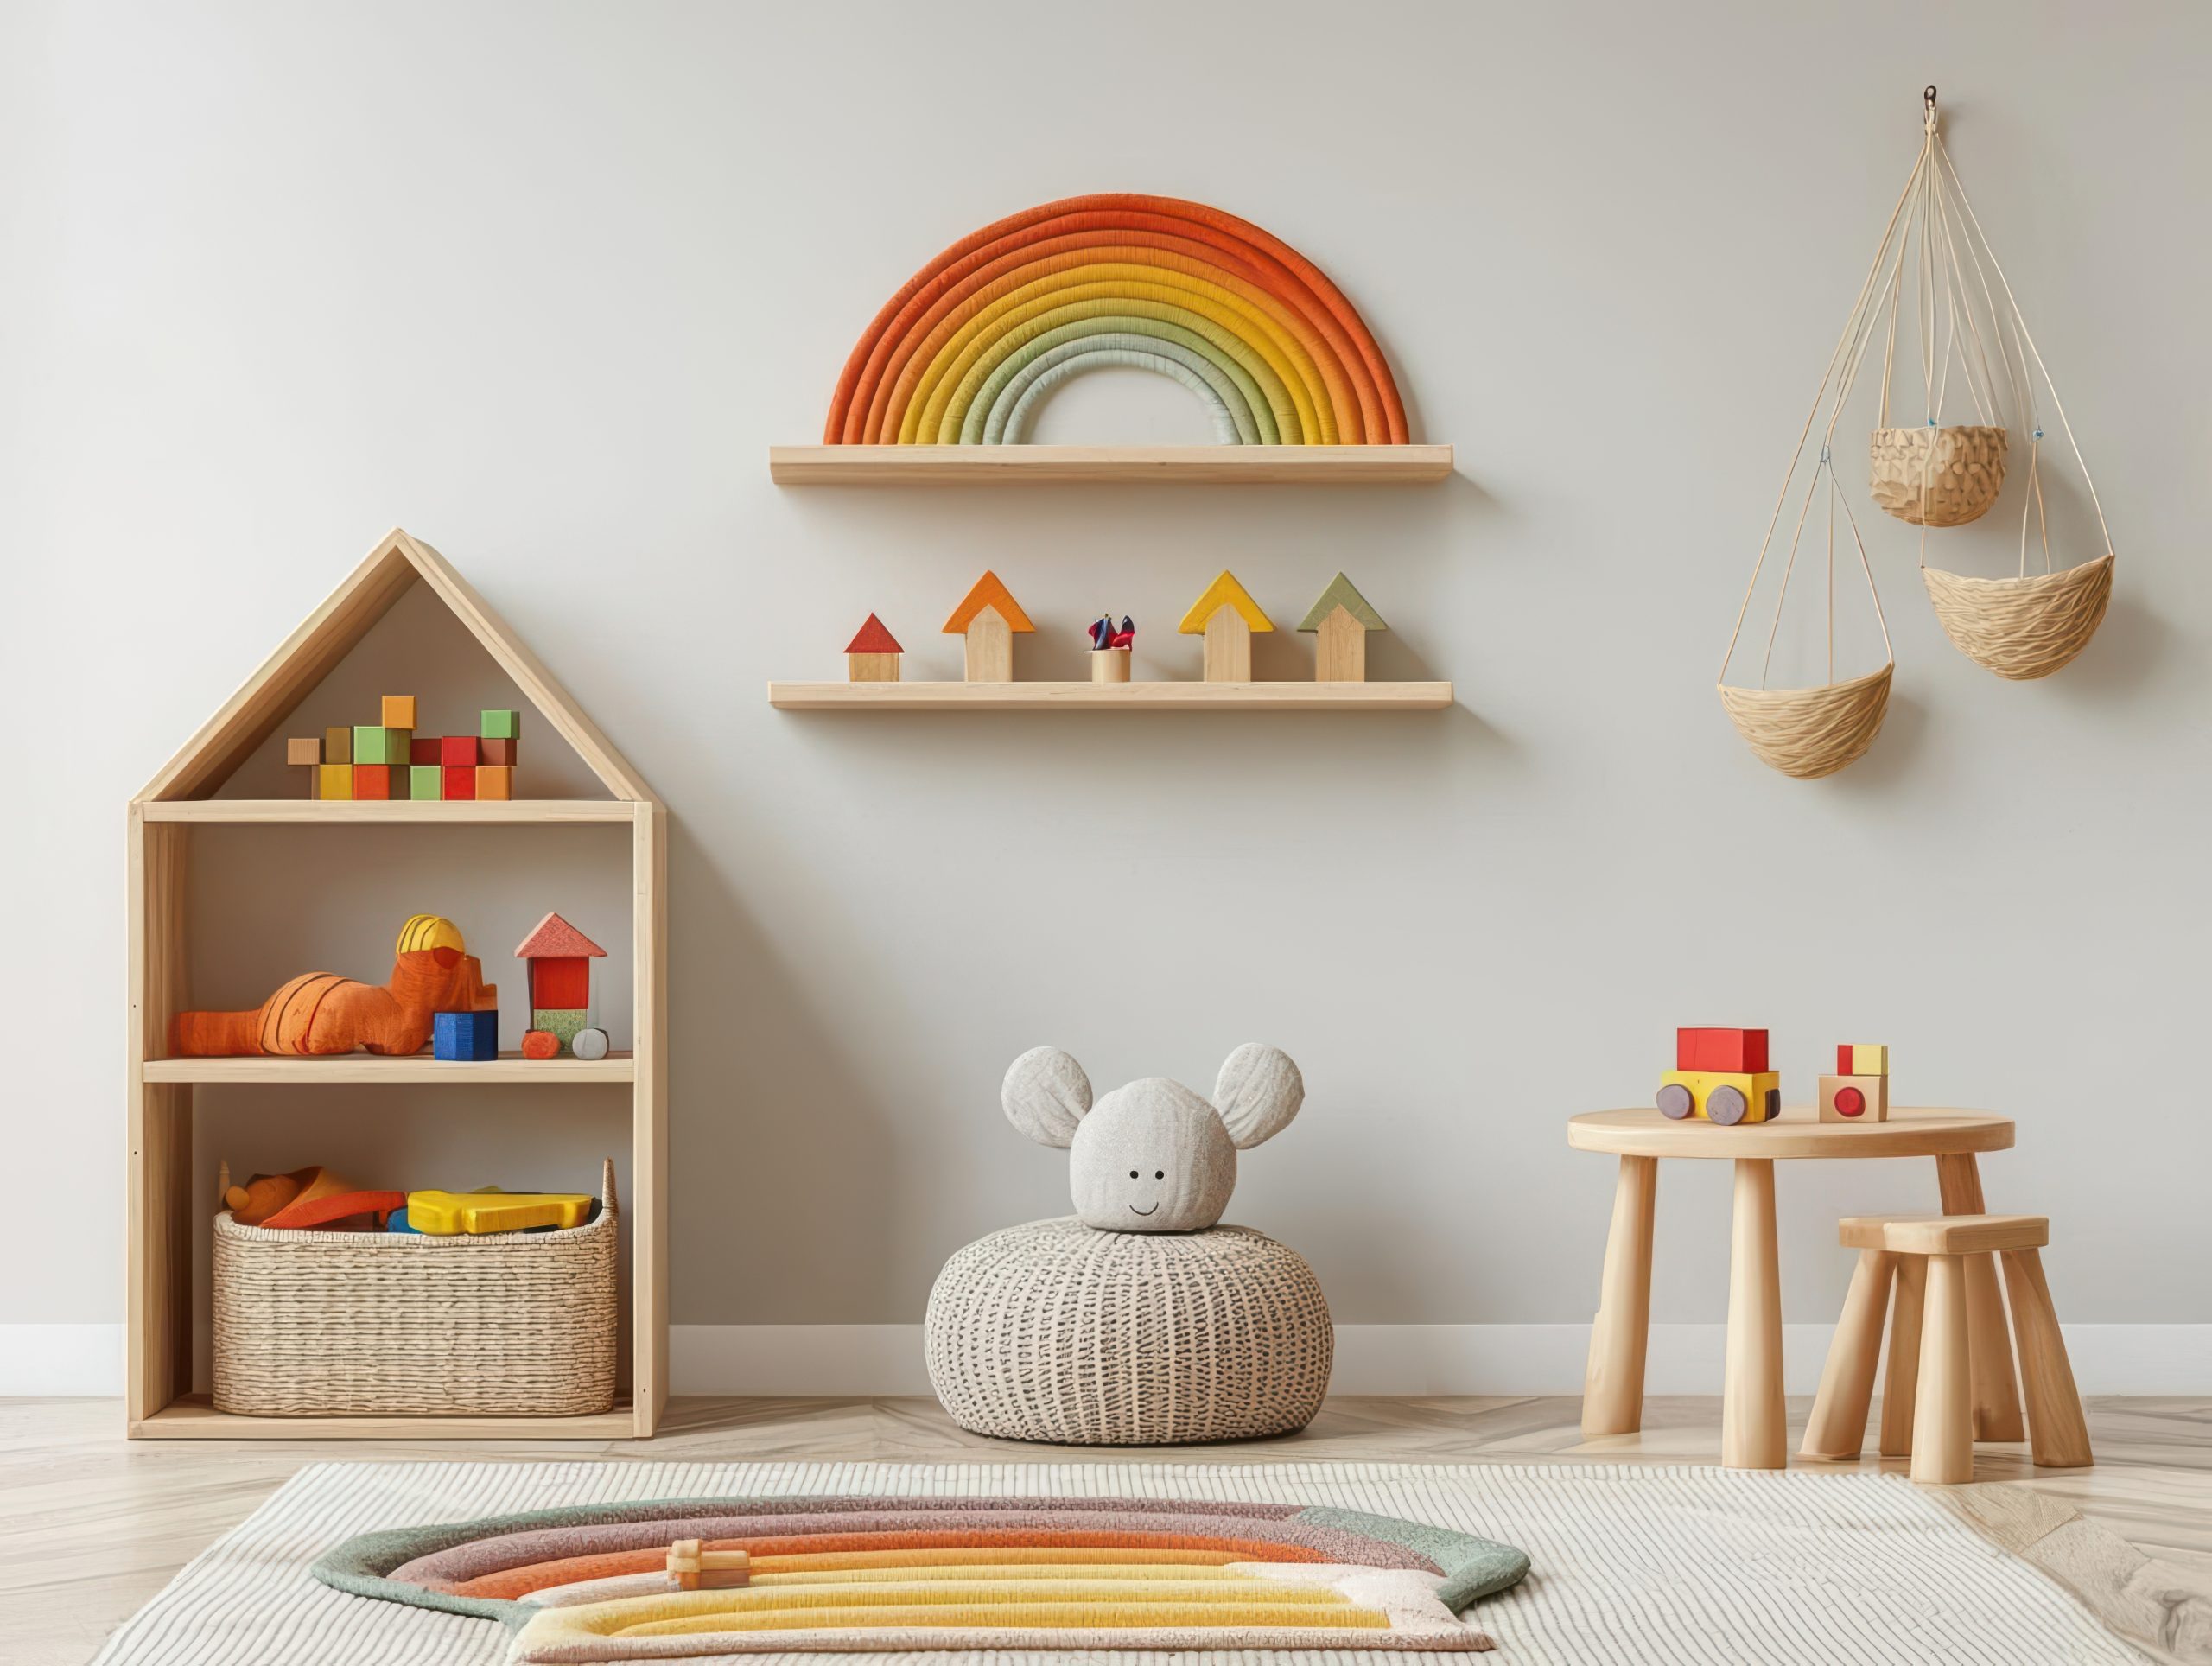
The most effective kids’ toy room designs balance visual appeal with practical functionality. Begin by dividing your space into activity zones based on how your child plays. A reading corner, building zone, creative area, and active play space create natural divisions that help children understand where different activities take place.
Pro tip: Before purchasing new storage solutions, take inventory of what toys need organising. Categories often include building blocks, creative supplies, books, pretend play items, and active toys.
2. Storage Solutions That Grow With Your Child
The foundation of any successful kids’ toy room is appropriate storage. Effective toy organisation systems should be both accessible to children and visually appealing.
Open shelving works particularly well for frequently used items and can double as display space in your kids’ toy room. Consider these options for different toy categories:
- Low, open shelves for daily-use toys that encourage independent access
- Closed cabinets for items that require adult supervision or create visual clutter
- Clear bins for collections like building blocks or toy vehicles
- Soft baskets for stuffed animals and dress-up clothes
- Book displays that show covers rather than spines for young readers
What makes a kids’ toy room truly functional is a labelling system appropriate for your child’s age. For pre-readers, use picture labels with corresponding images on bins. As children grow, transition to written labels that they can read independently.
Pro tip: Modular storage systems allow your kids’ toy room to evolve as your child grows. Choose pieces that can be reconfigured or repurposed rather than age-specific furniture with limited longevity.
3. Flooring and Surface Considerations
The physical foundation of your kid’s toy room deserves careful consideration. Flooring needs to withstand creative messes, active play, and frequent cleaning.
Ideal flooring options for a kids’ toy room include:
- Luxury vinyl planks – Waterproof, durable, and available in attractive designs
- Low-pile carpeting – Offers comfort for floor play while being relatively easy to clean
- Large washable area rugs – Provide comfort over hardwood or tile
- Interlocking foam tiles – Create cushioned areas for active play
- Laminate flooring – Offers durability at a lower price point than hardwood
Wall surfaces in a kids’ toy room should balance aesthetics with practicality. Consider washable paint in a satin or semi-gloss finish that allows for wiping away inevitable marks. Magnetic paint or chalkboard sections create interactive areas that contain creative expression in designated spaces.

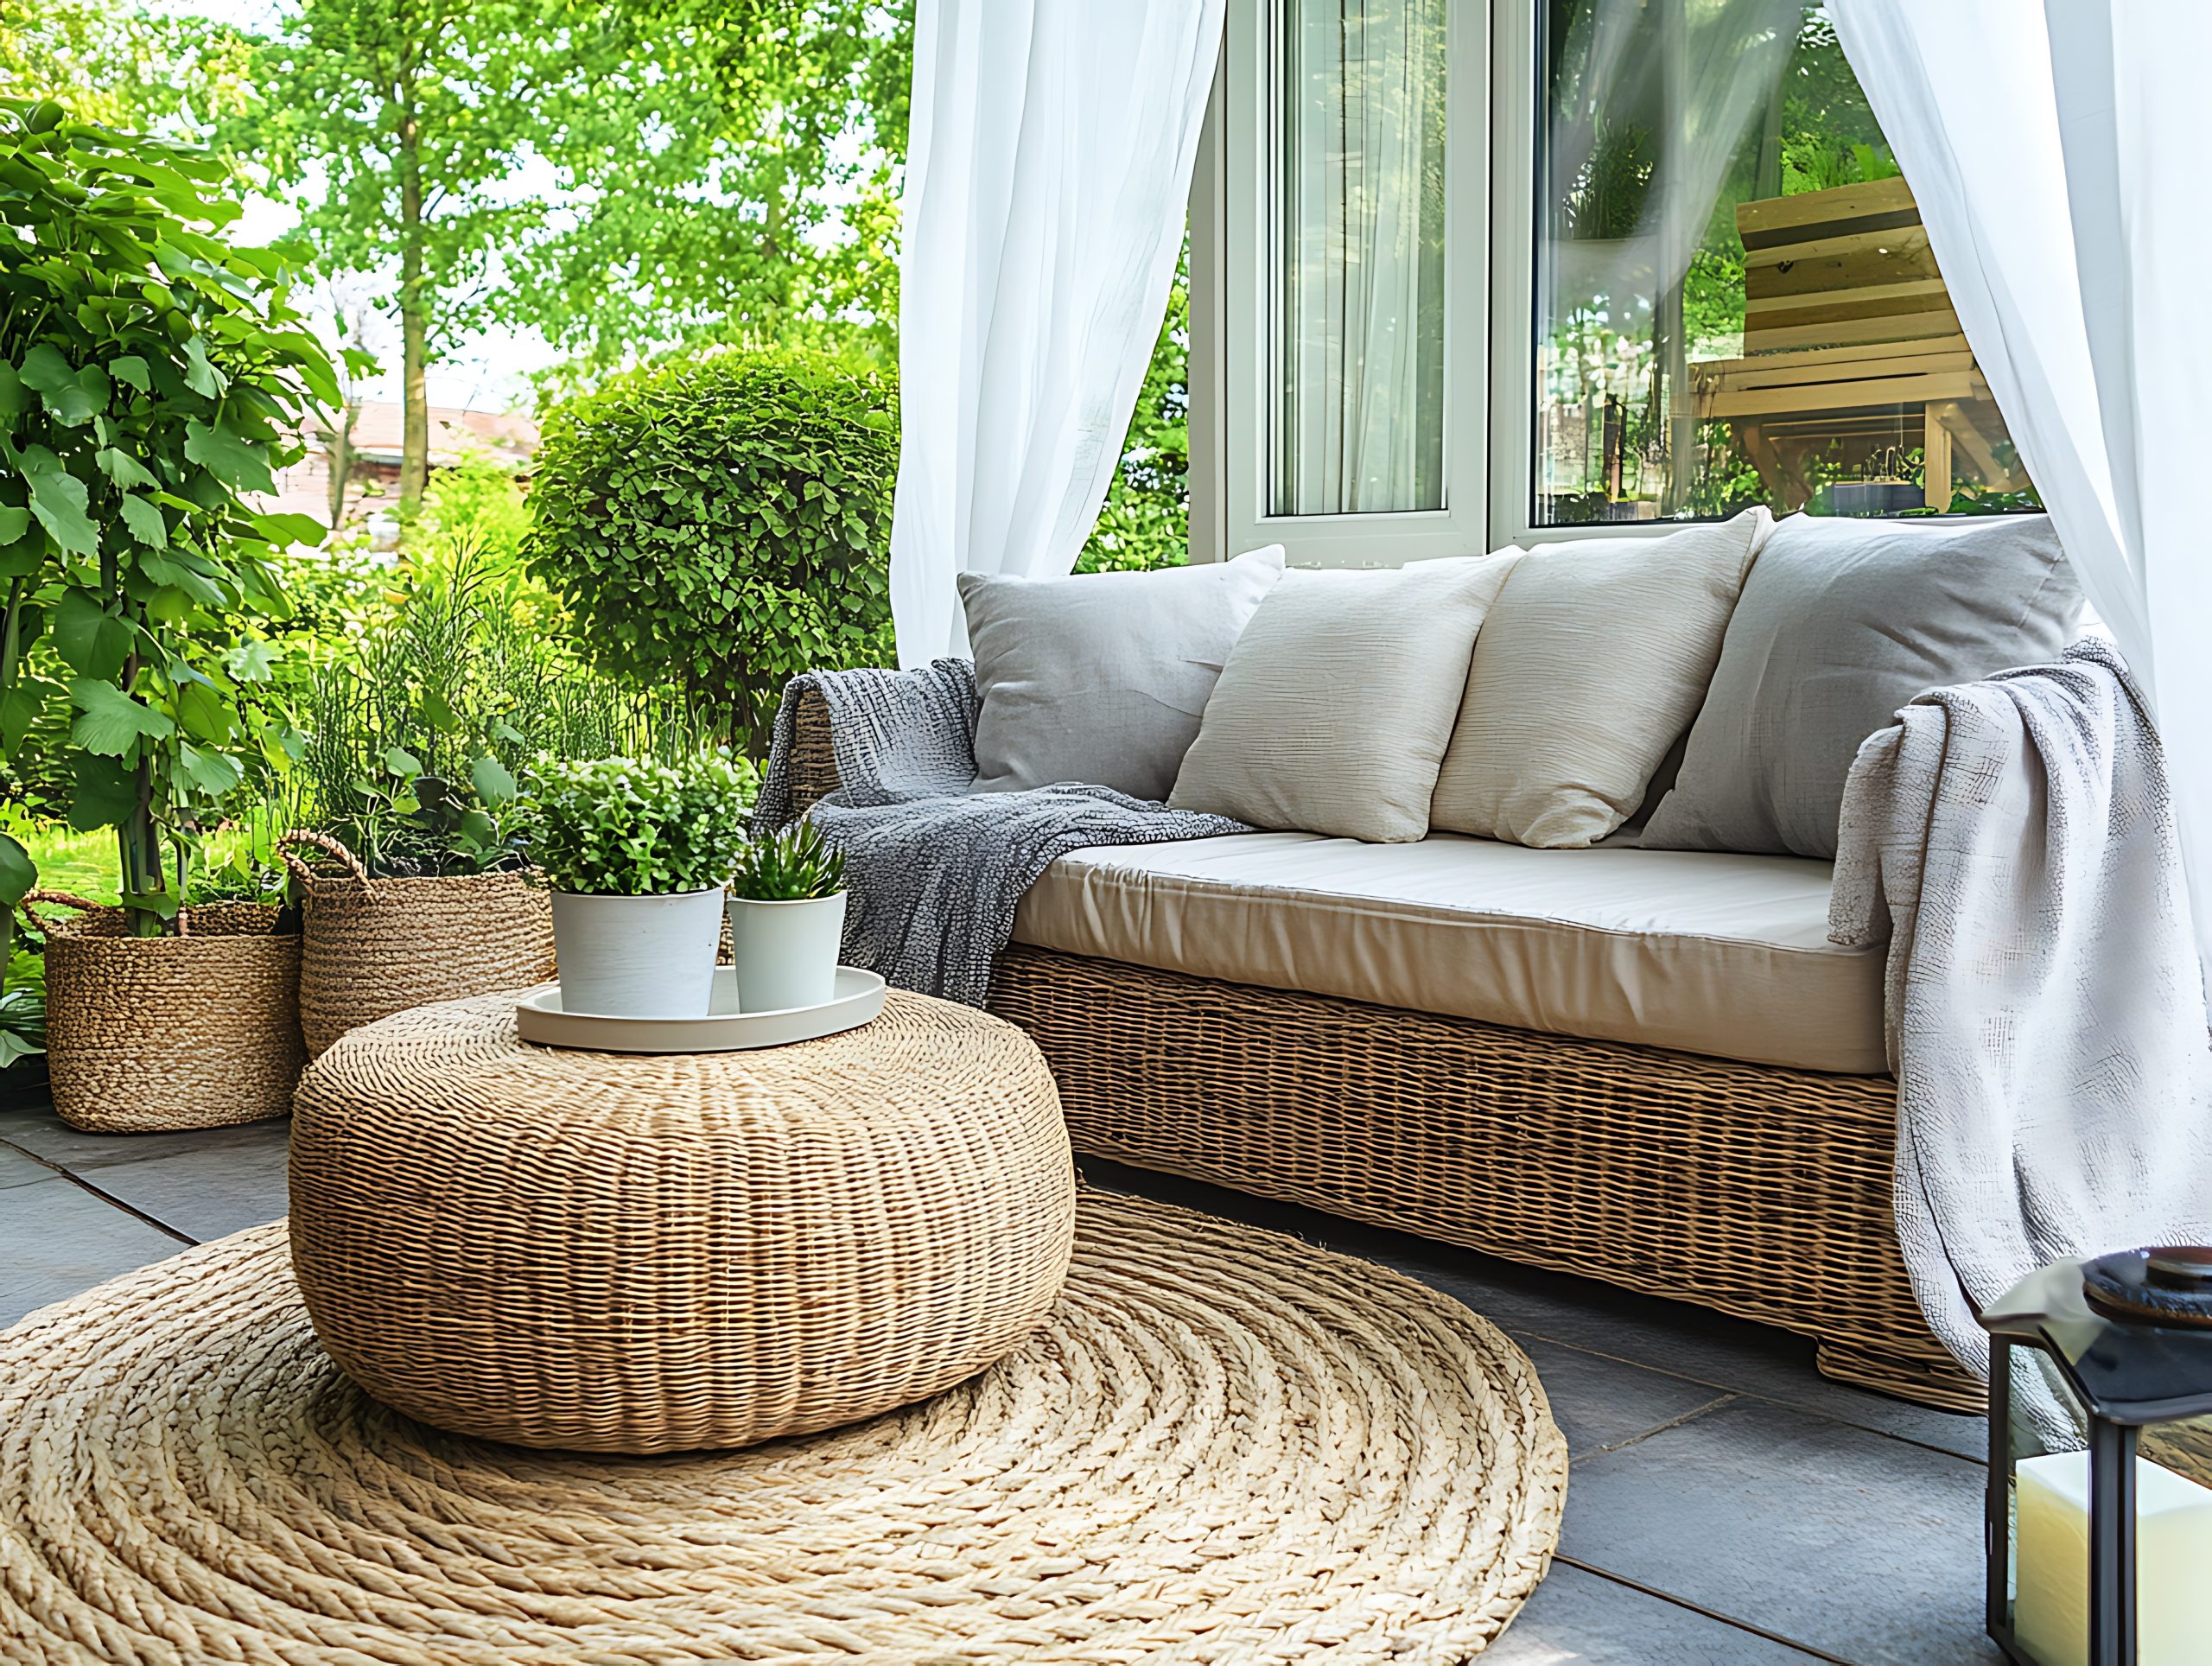
Pro tip: In multi-purpose spaces, use area rugs to define the kids’ toy room zone within a larger room. This creates a visual boundary that helps children understand where playthings belong.
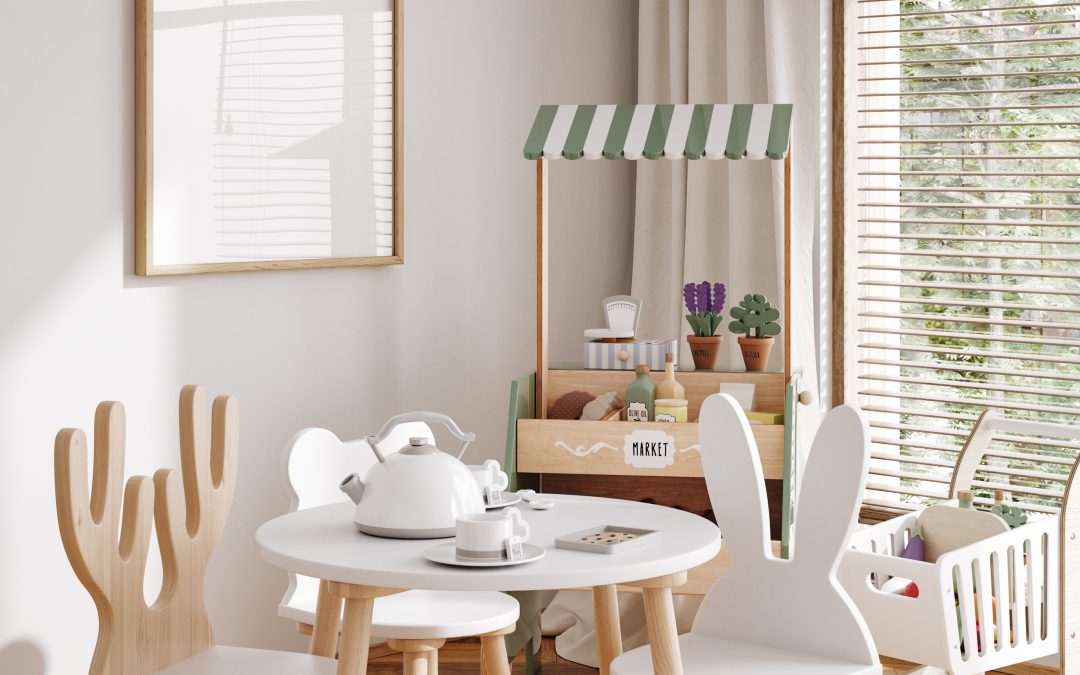
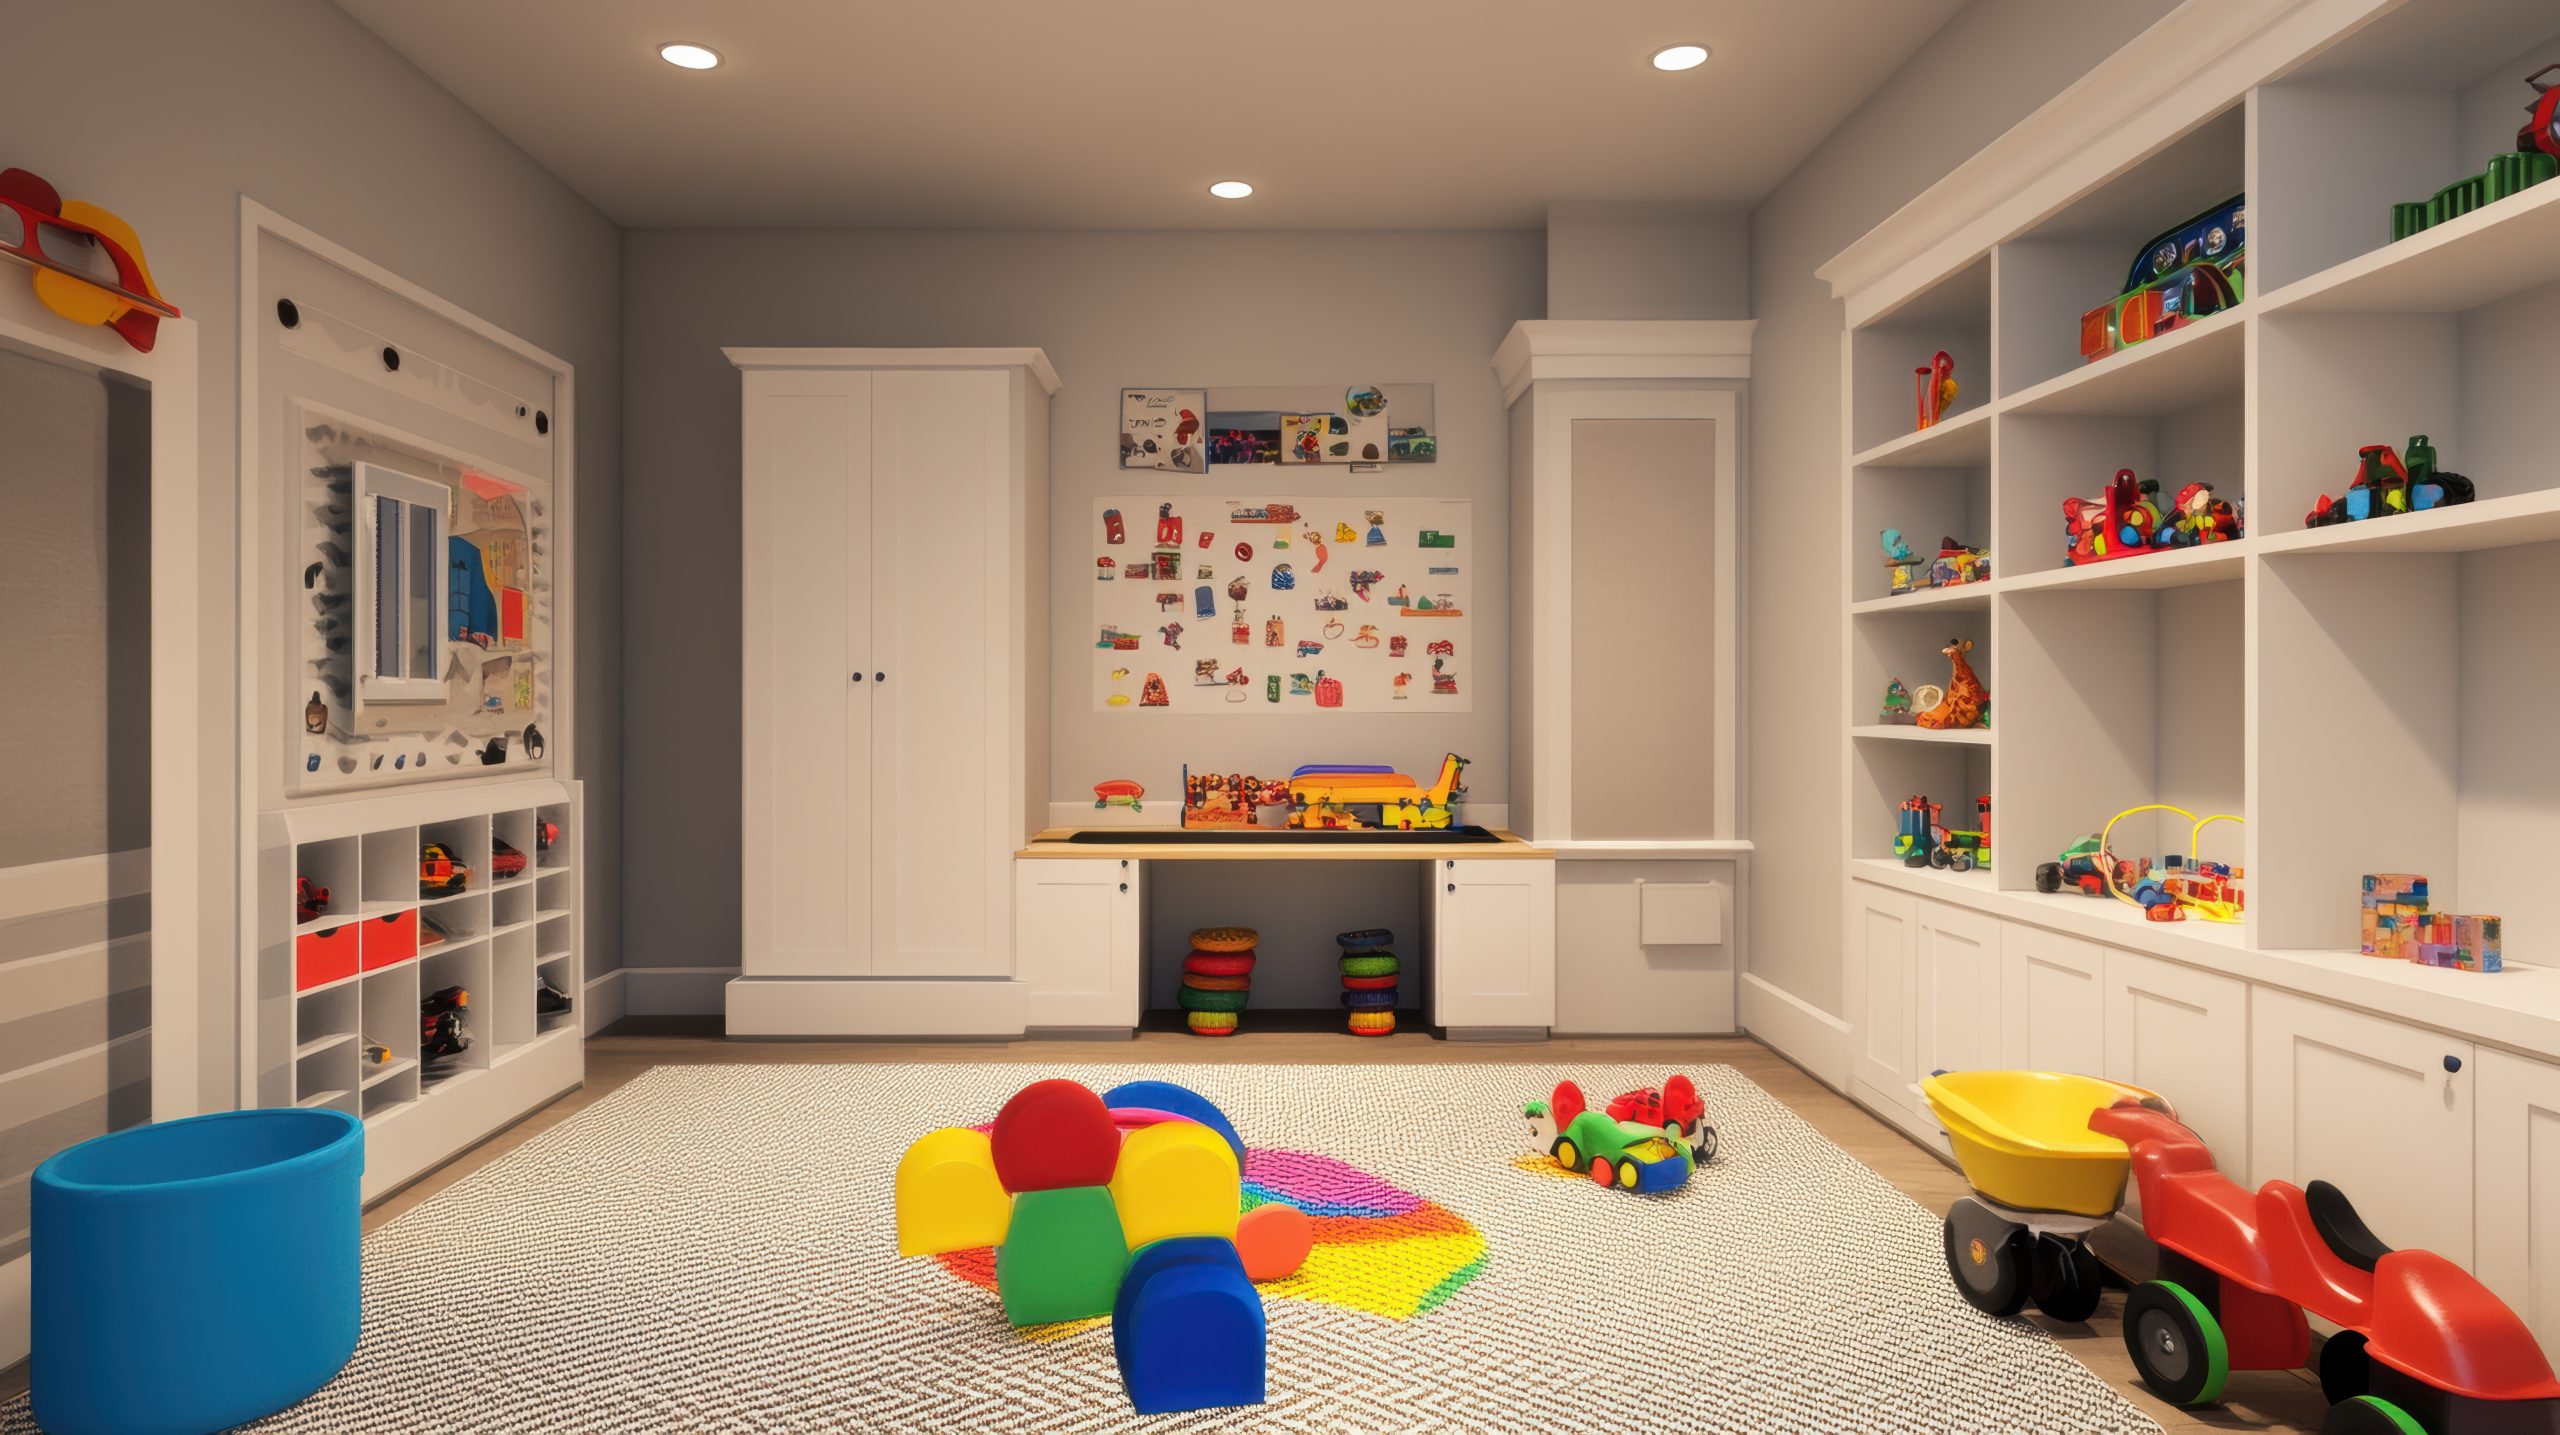
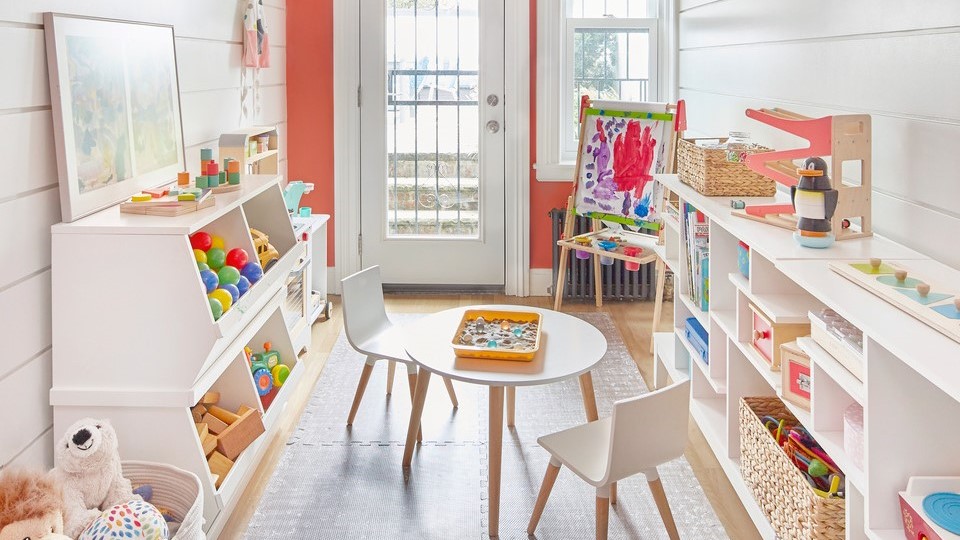
4. Creating Activity Zones in Your Kids’ Toy Room
A well-designed kids’ toy room incorporates distinct areas that support different types of play. Each zone should include appropriate storage, surfaces, and materials specific to the activity.
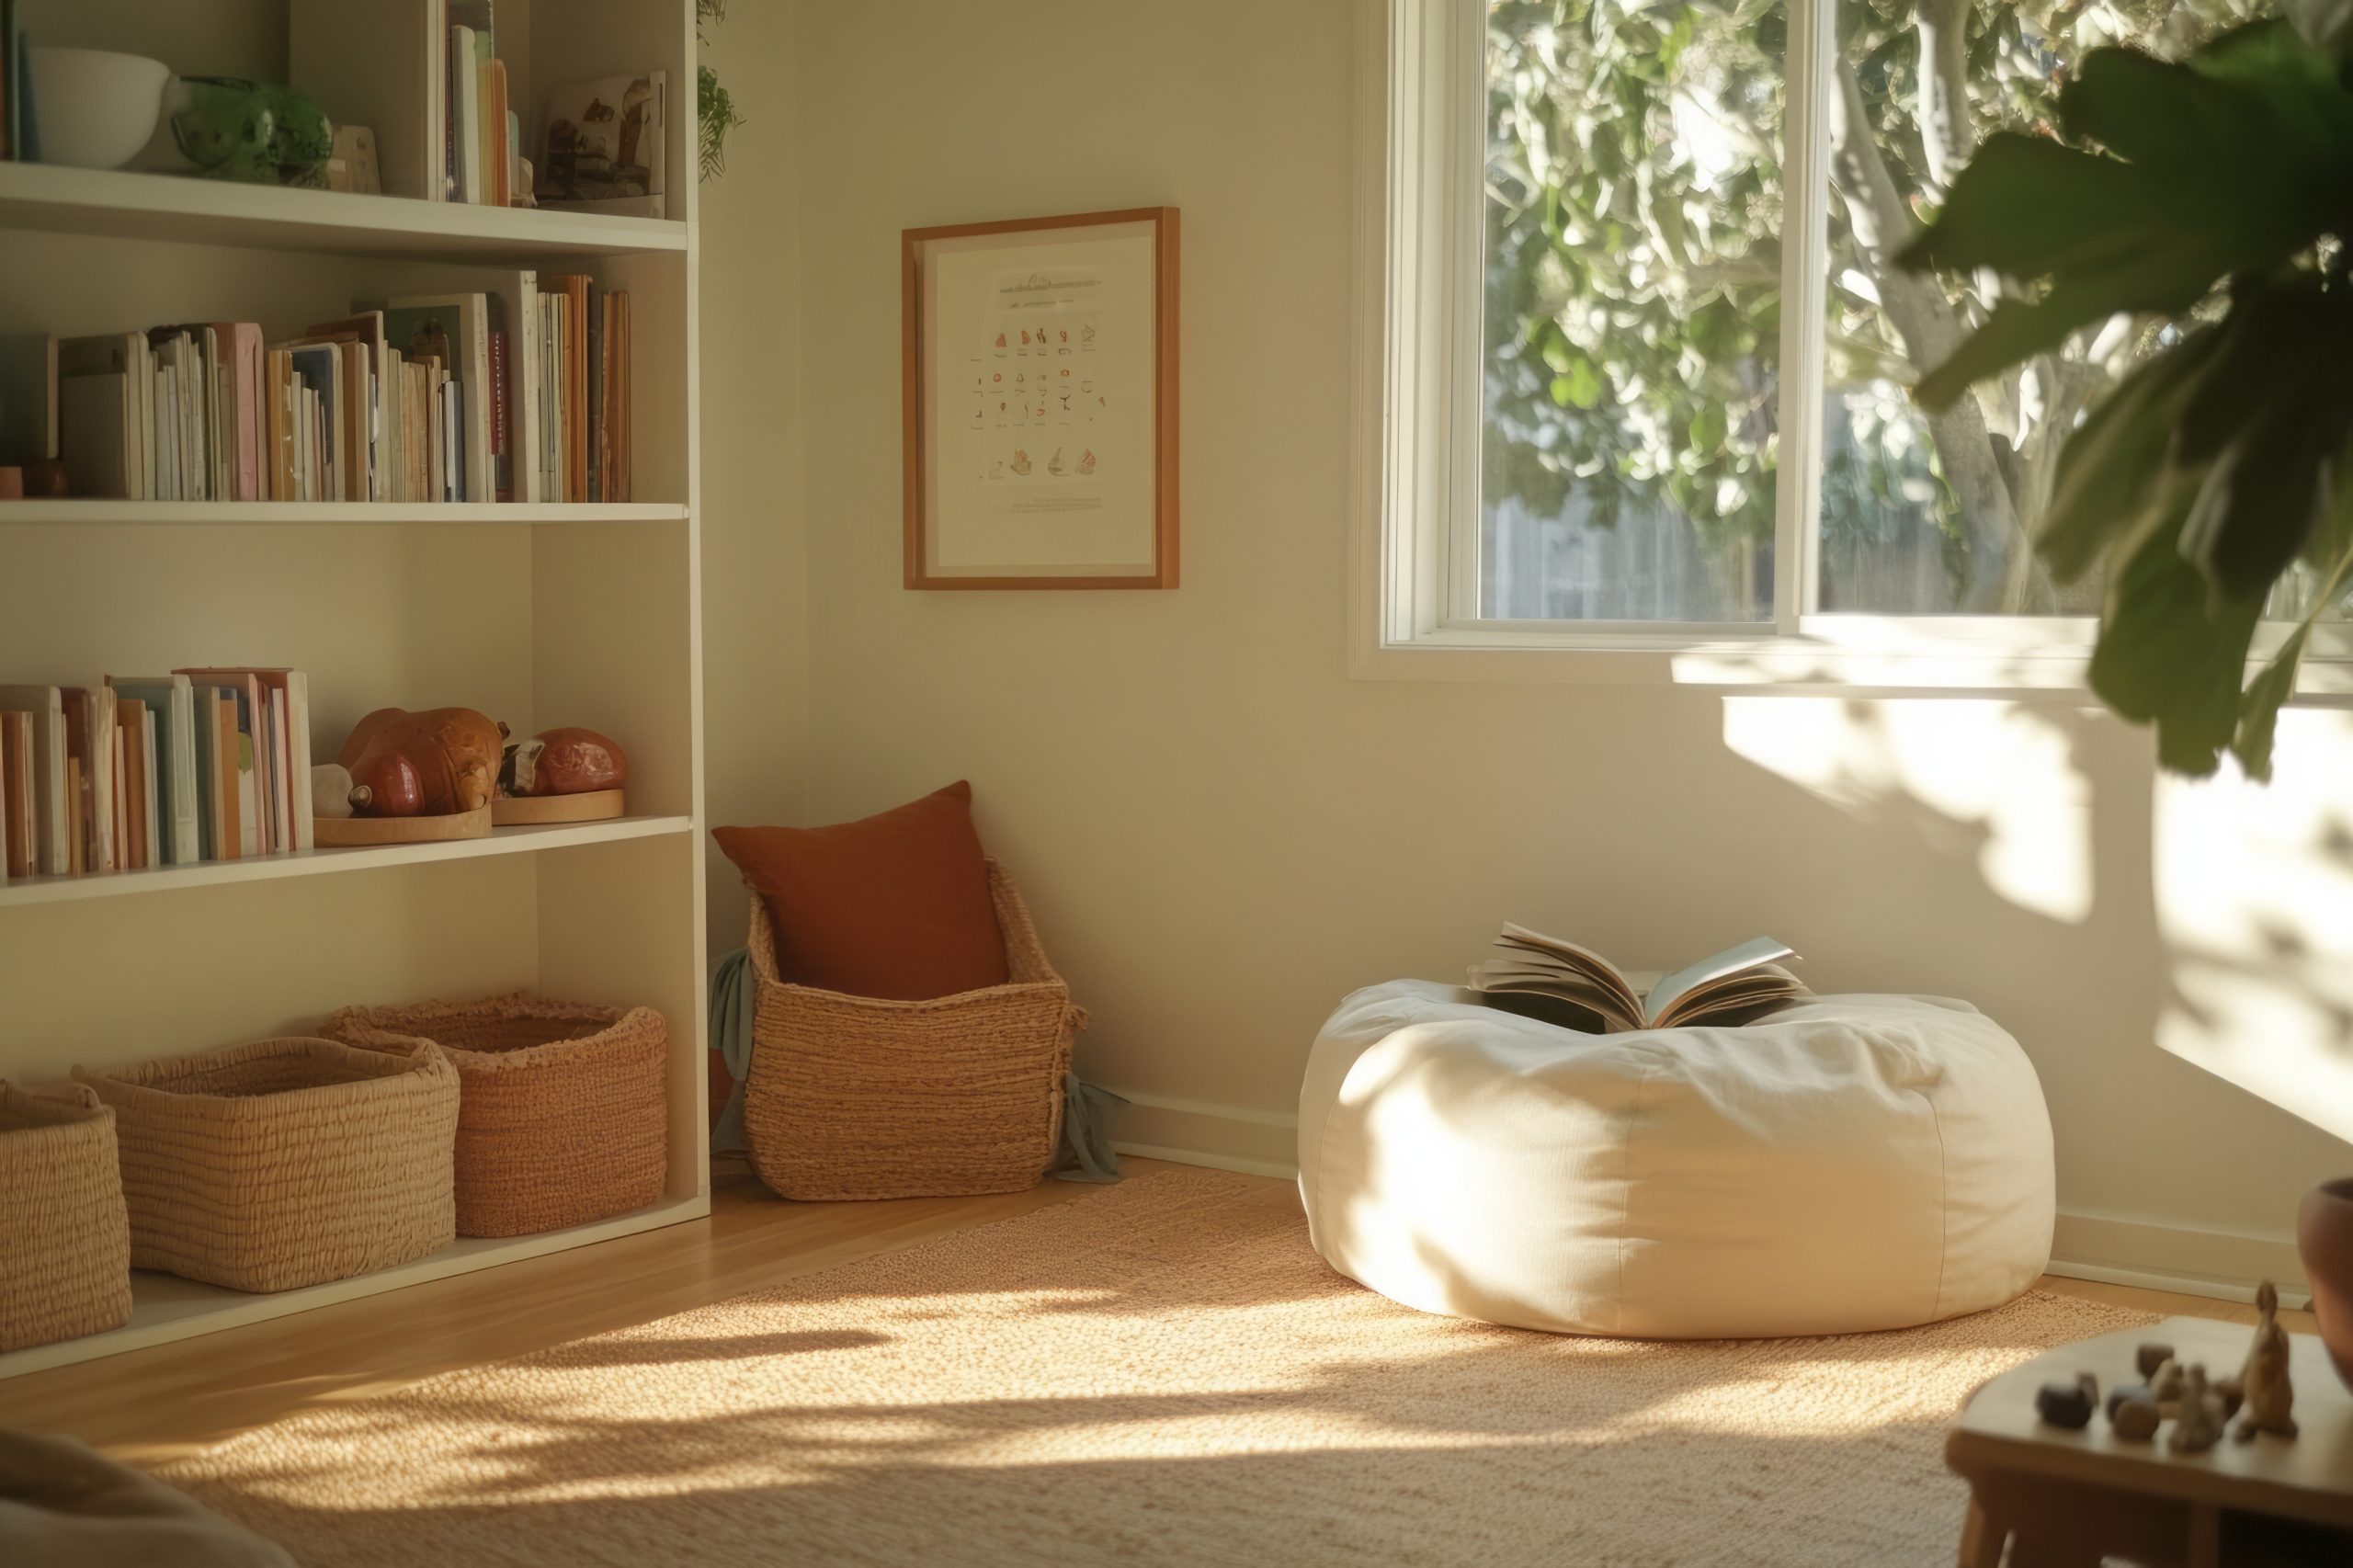
Reading Nook Essentials
Create a cosy reading corner in your kids’ toy room with:
- Comfortable seating (child-sized armchair, floor cushions, or bean bags)
- Good lighting (preferably natural light supplemented with task lighting)
- Forward-facing book displays that highlight covers
- Soft textiles that invite settling in with a book
Art and Craft Corner Setup
Dedicate a creative space in your kids’ toy room with:
- A washable work surface at an appropriate height
- Organised supplies in accessible containers
- Display space for completed artwork
- Adequate lighting for detail work
- Protective covering for surfaces if needed
Building and Construction Zone
Support constructive play in your kids’ toy room with:
- Clear containers organised by piece type or set
- Flat building surfaces (LEGO tables, play mats)
- Display shelves for completed constructions
- Comfortable floor space for larger structures
Pro tip: When designing zones in your kid’s toy room, consider acoustic properties. Place quieter activities like reading further from active play areas to allow simultaneous use by multiple children.
5. Display and Rotation Systems
A thoughtfully designed kids’ toy room includes intentional display areas that showcase special items and children’s creations. These displays serve multiple purposes: highlighting achievements, inspiring creativity, and creating visual interest in the space.
Effective display solutions for a kids’ toy room include:
- Gallery wall systems with easily changeable frames for rotating artwork
- Floating shelves at child height for displaying collections or creations
- Shadow boxes for three-dimensional items or special collections
- Wire systems with clips for frequently changing displays
- Museum-style display stands for showcasing current building projects
Implementing a toy rotation system keeps your kids’ toy room fresh and engaging while preventing overwhelm. Consider storing approximately one-third of toys out of sight, rotating them every few weeks to maintain interest while keeping the volume of visible toys manageable.
Pro tip: When designing your kids’ toy room, create a dedicated “display zone” where children can showcase their current projects without fear of them being dismantled or put away during cleanup time.
6. Lighting Your Kids’ Toy Room
Proper lighting transforms a kids’ toy room from functional to inspirational. A well-lit play space supports different activities while creating atmosphere and visual interest.
Consider these lighting elements for your kids’ toy room:
- Natural light – Position activity areas near windows when possible
- Overhead lighting – Provide even, ambient illumination throughout the space
- Task lighting – Add directed light for reading corners and craft areas
- Decorative lighting – Incorporate string lights or novelty fixtures that enhance the room’s theme
- Night lighting – Install dim options for evening transitions or nighttime comfort
The most effective kids’ toy room lighting plans include multiple sources at different heights. This layered approach creates a warm environment while ensuring adequate brightness for different activities.

Pro tip: In a kids’ toy room, consider cord management and safety features when selecting lighting. Wall-mounted options eliminate floor cords, while LED fixtures provide brightness without heat concerns.
7. Small Space Solutions
Not every home can accommodate a dedicated kids’ toy room, but even small spaces can incorporate organised play areas with strategic planning.
Maximise limited space with these kids’ toy room solutions:
- Vertical storage – Utilise wall space with tall bookcases and mounted organisers
- Under-bed storage – Choose beds with built-in drawers or use rolling containers underneath
- Door-hanging organisers – Use over-door systems for small toys or supplies
- Dual-purpose furniture – Select ottomans with storage, desks with shelving, or benches with bins
- Corner solutions – Maximise overlooked corner spaces with custom shelving or activity stations
When creating a kids’ toy room in a shared space, clearly define boundaries using area rugs, bookcases as room dividers, or designated cabinets that close when playtime ends.
Pro tip: In apartments or small homes, create a “portable kids toy room” concept using dedicated containers that can be moved between spaces as needed, maintaining organisation while adapting to space limitations.
8. Theme and Décor Ideas That Inspire Play
Aesthetics matter in a kids’ toy room—not just for visual appeal, but because thoughtful design can stimulate imagination and engagement. The most successful play spaces balance personality with functionality.
When selecting a theme for your kids’ toy room, consider:
- Longevity – Choose concepts that can evolve as your child grows
- Neutrality – Select base elements that work with changing interests
- Flexibility – Incorporate themes through easily-changed accessories rather than permanent fixtures
- Child input – Involve children in age-appropriate decisions to increase their ownership of the space
- Colour psychology – Understand how different hues affect mood and behaviour
A well-designed kids’ toy room often uses colour strategically rather than overwhelmingly. Consider a neutral base palette with colourful accents that can be updated. This approach creates a visually calm environment while still offering personality and interest.
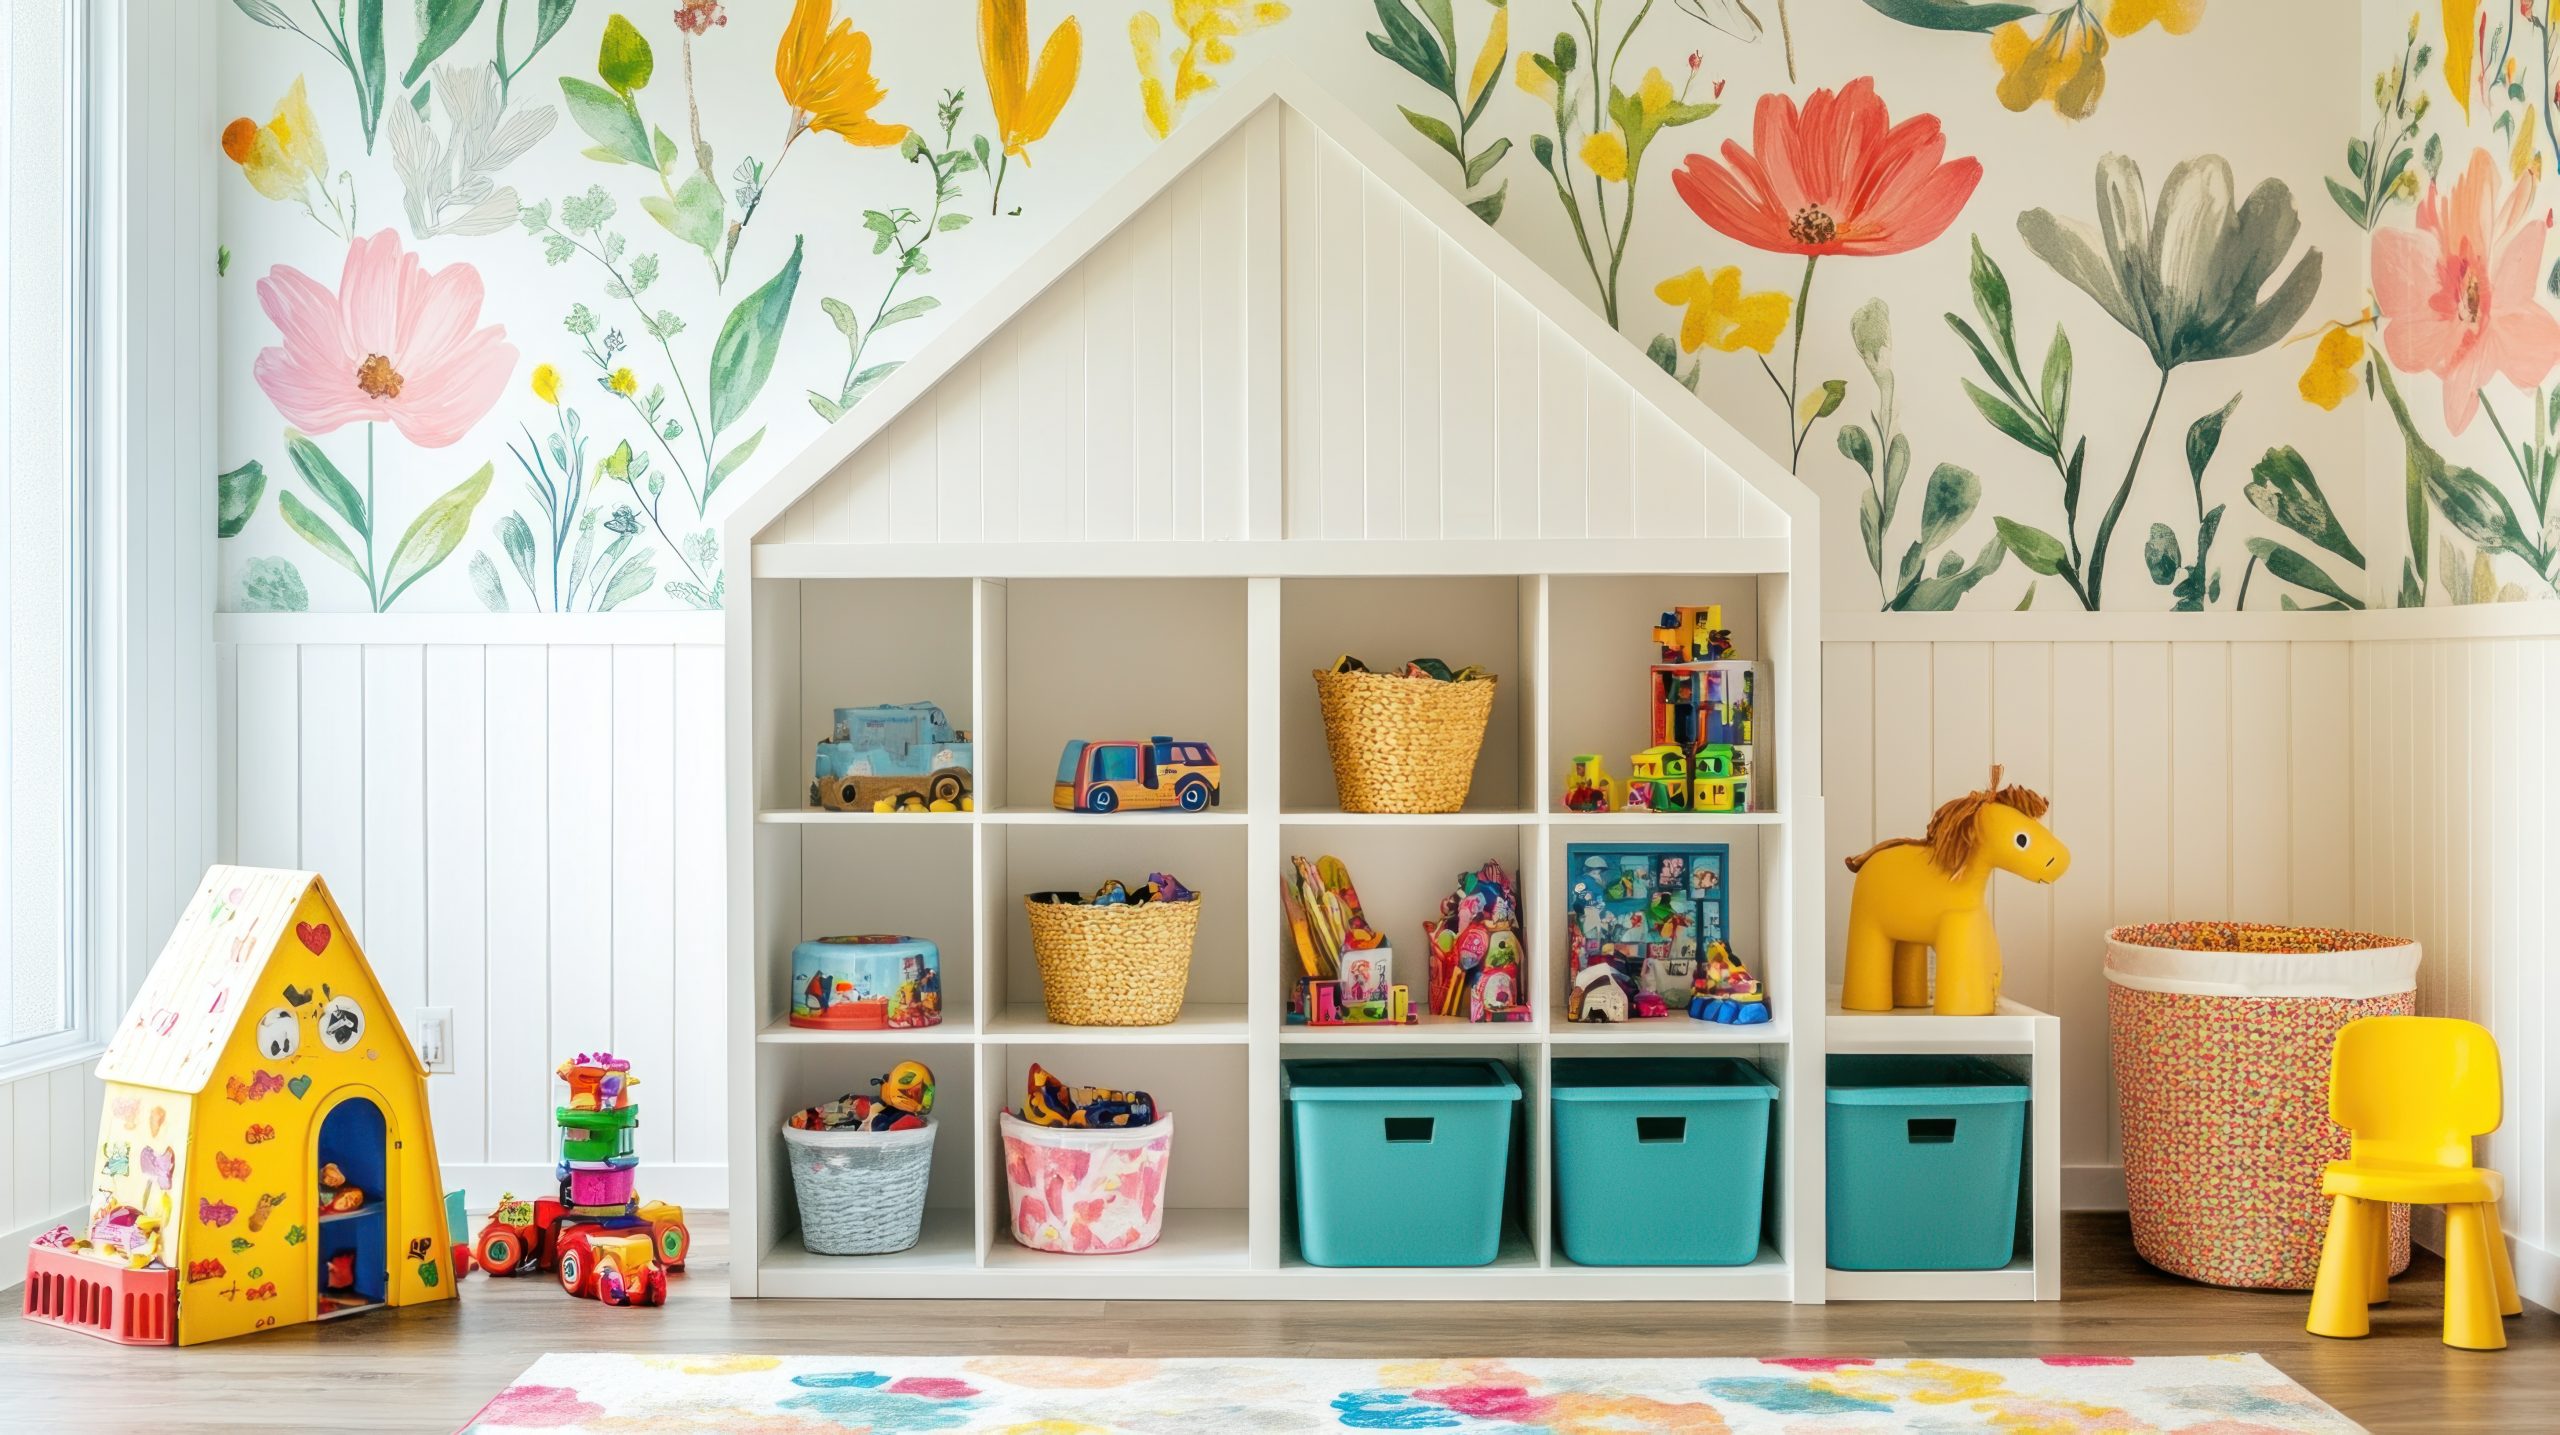
Pro tip: Rather than character-specific themes that may quickly fall out of favour, consider concept-based themes for your kids’ toy room, such as nature, adventure, or creativity, that can adapt as interests evolve.
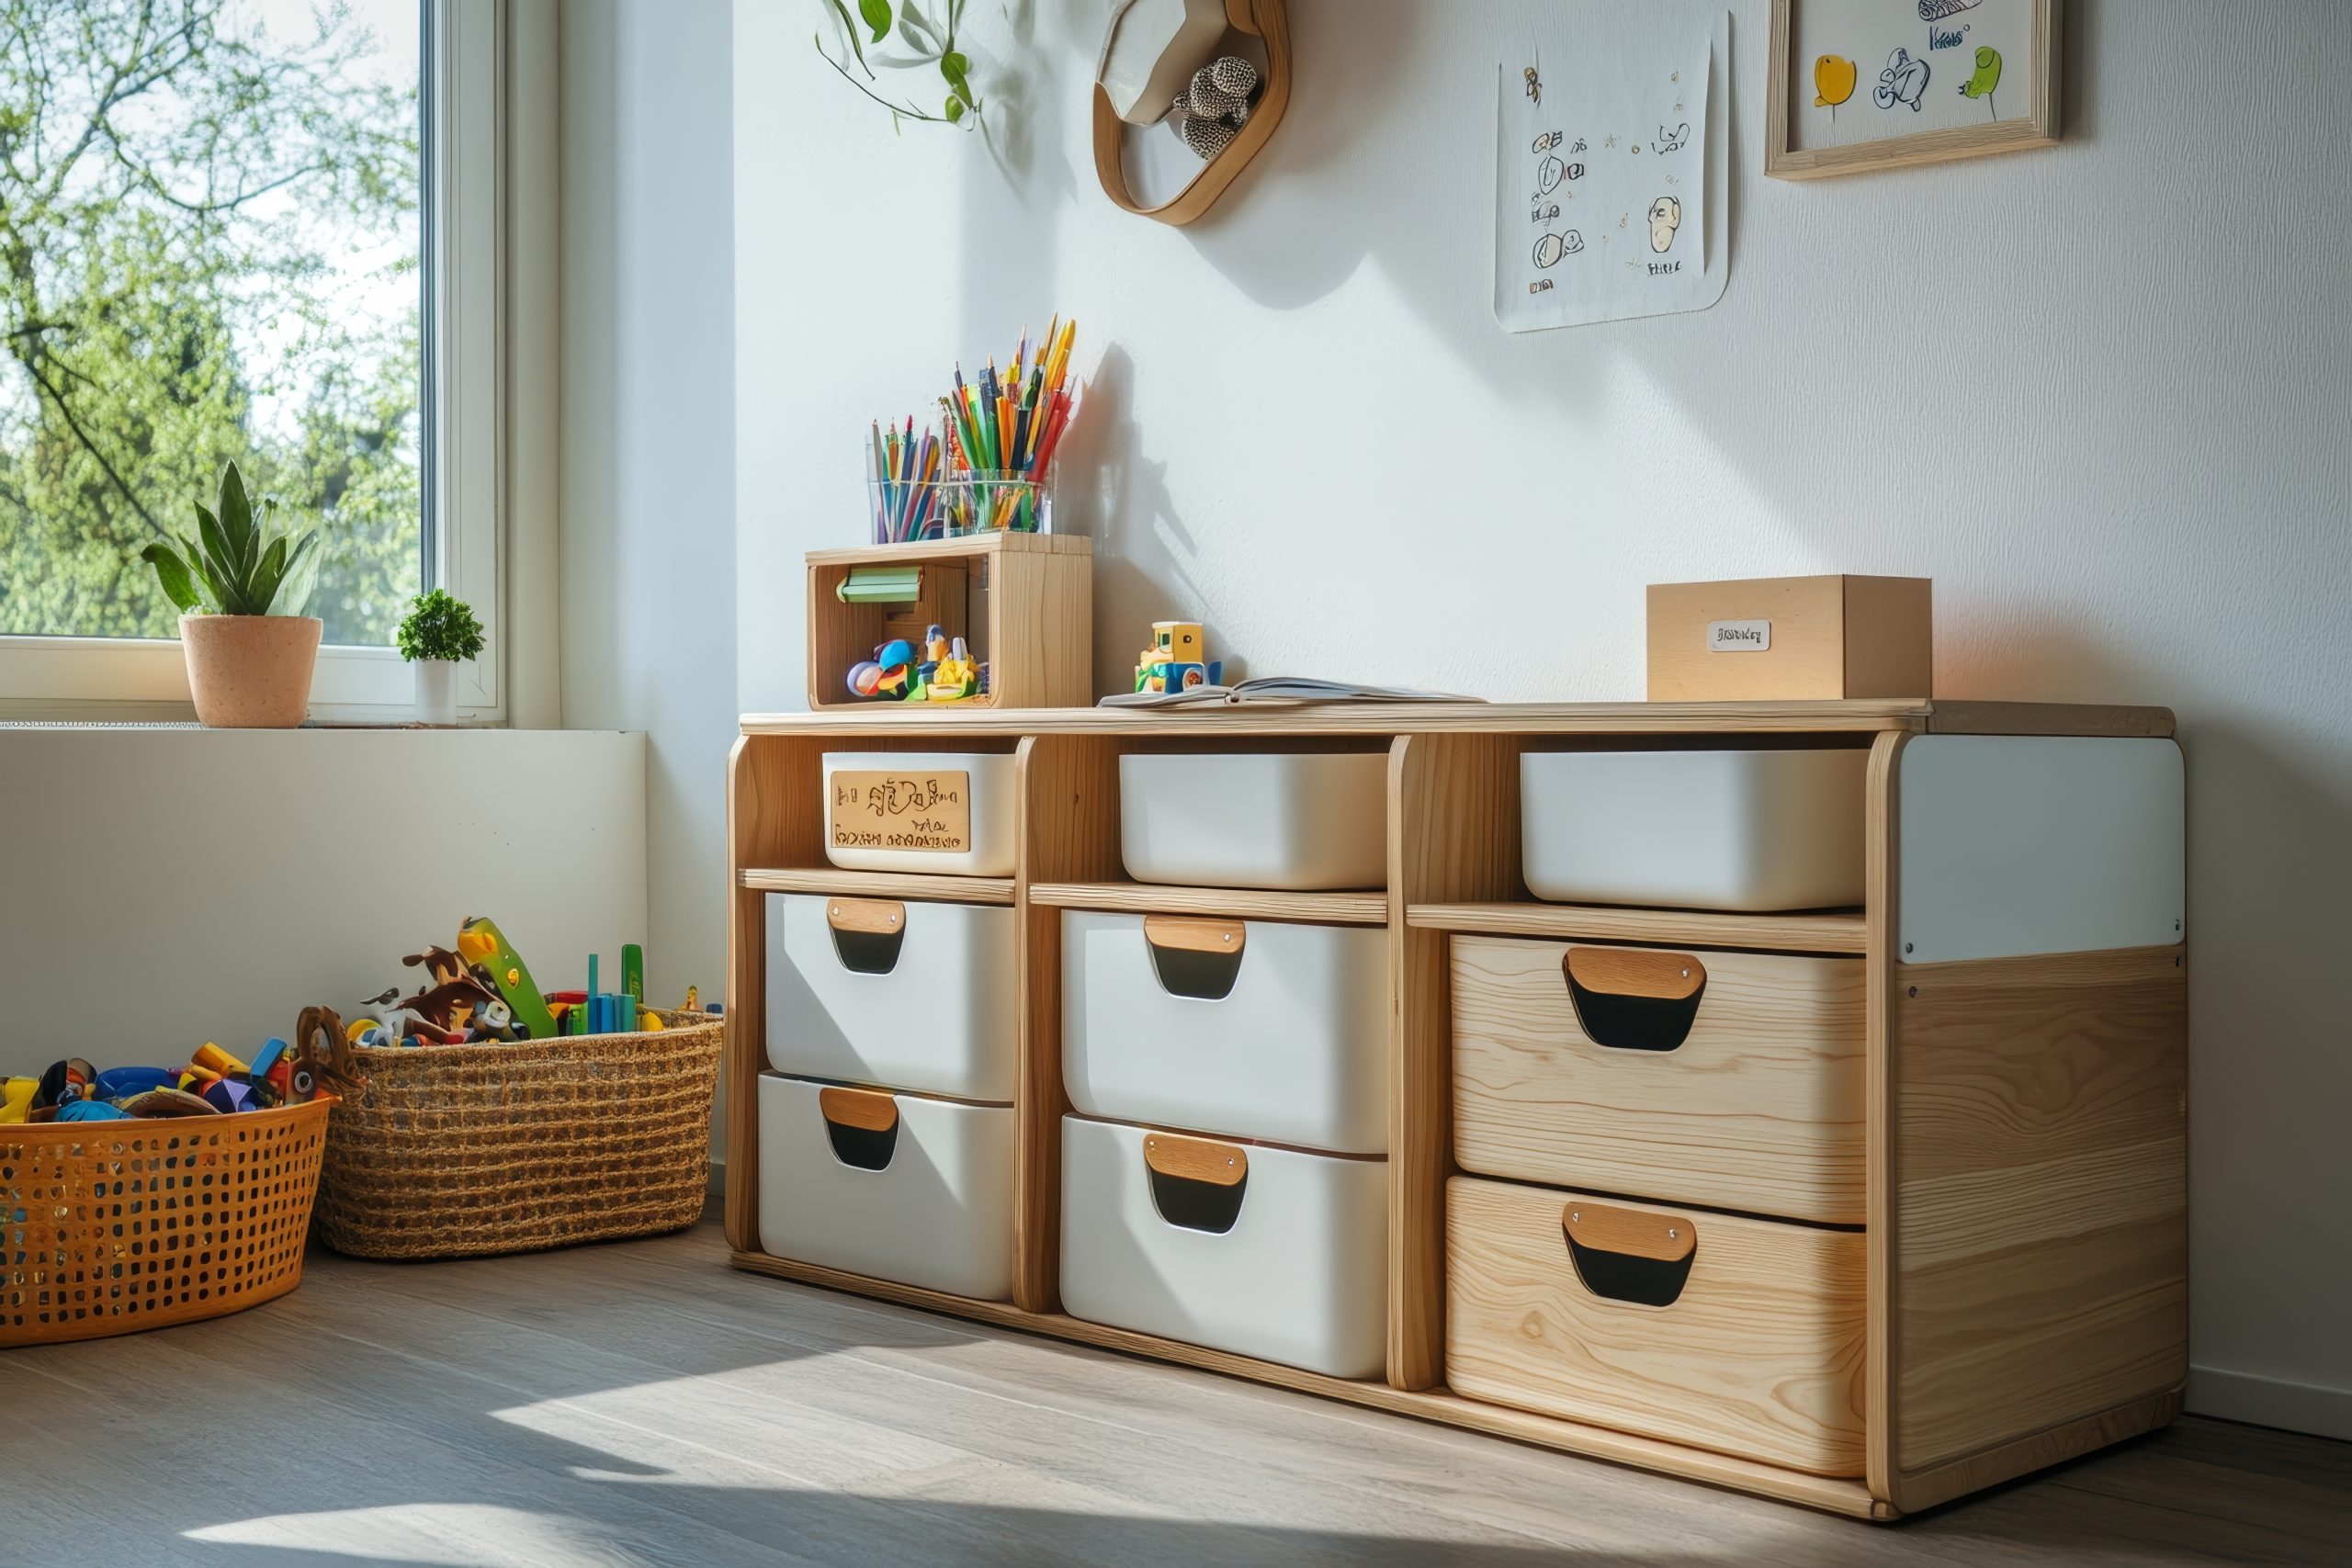
9. Organisation Systems That Work
Creating a kids’ toy room is one achievement; maintaining it is another. Successful play spaces incorporate systems that make ongoing organisation manageable for both parents and children.
Effective kids’ toy room maintenance strategies include:
- Consistent categories – Group similar items together in logical categories
- Clear visual systems – Use consistent colours, labels, or symbols for different toy types
- Appropriate independence – Design storage that children can manage without assistance
- Regular reset times – Establish daily quick-cleanup and weekly deeper organisation routines
- One-in-one-out policy – Maintain toy volume by removing items when new ones enter the rotation
Labelling deserves special attention in any kids’ toy room organisation system. For younger children, use picture labels that clearly show what belongs where. As children develop reading skills, transition to word labels that support literacy development.
Pro tip: In a well-designed kids’ toy room, incorporate a “halfway house” basket for items that need parental help to put away. This teaches responsibility while acknowledging developmental capabilities.
10. Real Family Examples: Kids Toy Rooms That Work
While every family’s needs differ, examining successful kids’ toy room solutions provides valuable inspiration. The following examples demonstrate how core principles adapt to different situations.
Small Space Solution
A 6×8-foot dedicated area transformed into a complete kids’ toy room by:
- Using full-height wall storage
- Implementing a fold-down activity table
- Creating vertical display systems
- Utilising under-furniture storage
- Employing a strict rotation system to limit visible toys
Shared Sibling Space
A kids’ toy room designed for multiple ages incorporating:
- Colour-coded storage for each child
- Height-appropriate activity zones
- Lockable storage for materials needing supervision
- Flexible furniture arrangement for varying play styles
- Designated personal spaces within the shared room
Budget Transformation
An impressive kids’ toy room created with limited funds by:
- Repurposing existing furniture with paint
- Using inexpensive plastic bins with custom labels
- DIY wall organisation systems
- Strategic lighting upgrades
- Creative use of wall space for both storage and play
Pro tip: The most successful kids’ toy room designs prioritise organisational infrastructure first, with decorative elements added after the functional systems are established.
Conclusion
Creating an effective kids’ toy room involves balancing practical organisation with spaces that inspire creativity and independent play. The most successful designs consider not just current needs but how the space will evolve as children grow.
Key takeaways for designing your kids’ toy room include:
- Start with clear zones based on your child’s play patterns
- Prioritise accessible, intuitive storage systems
- Create visual calm through thoughtful design choices
- Implement maintenance routines that grow with your child
- Allow flexibility for changing interests and developmental needs
Remember that a well-designed kids’ toy room serves multiple purposes: containing toy clutter, supporting development through appropriate play opportunities, and creating an environment where children can exercise independence and creativity.
By applying these principles, you can create a kids’ toy room that works for your unique space, budget, and family needs, transforming toy chaos into an organised, inspiring environment that benefits both children and parents.

by Kesaa Interiors | Bathroom, DECOR & DIY, ROOMS, Small Space Hacks
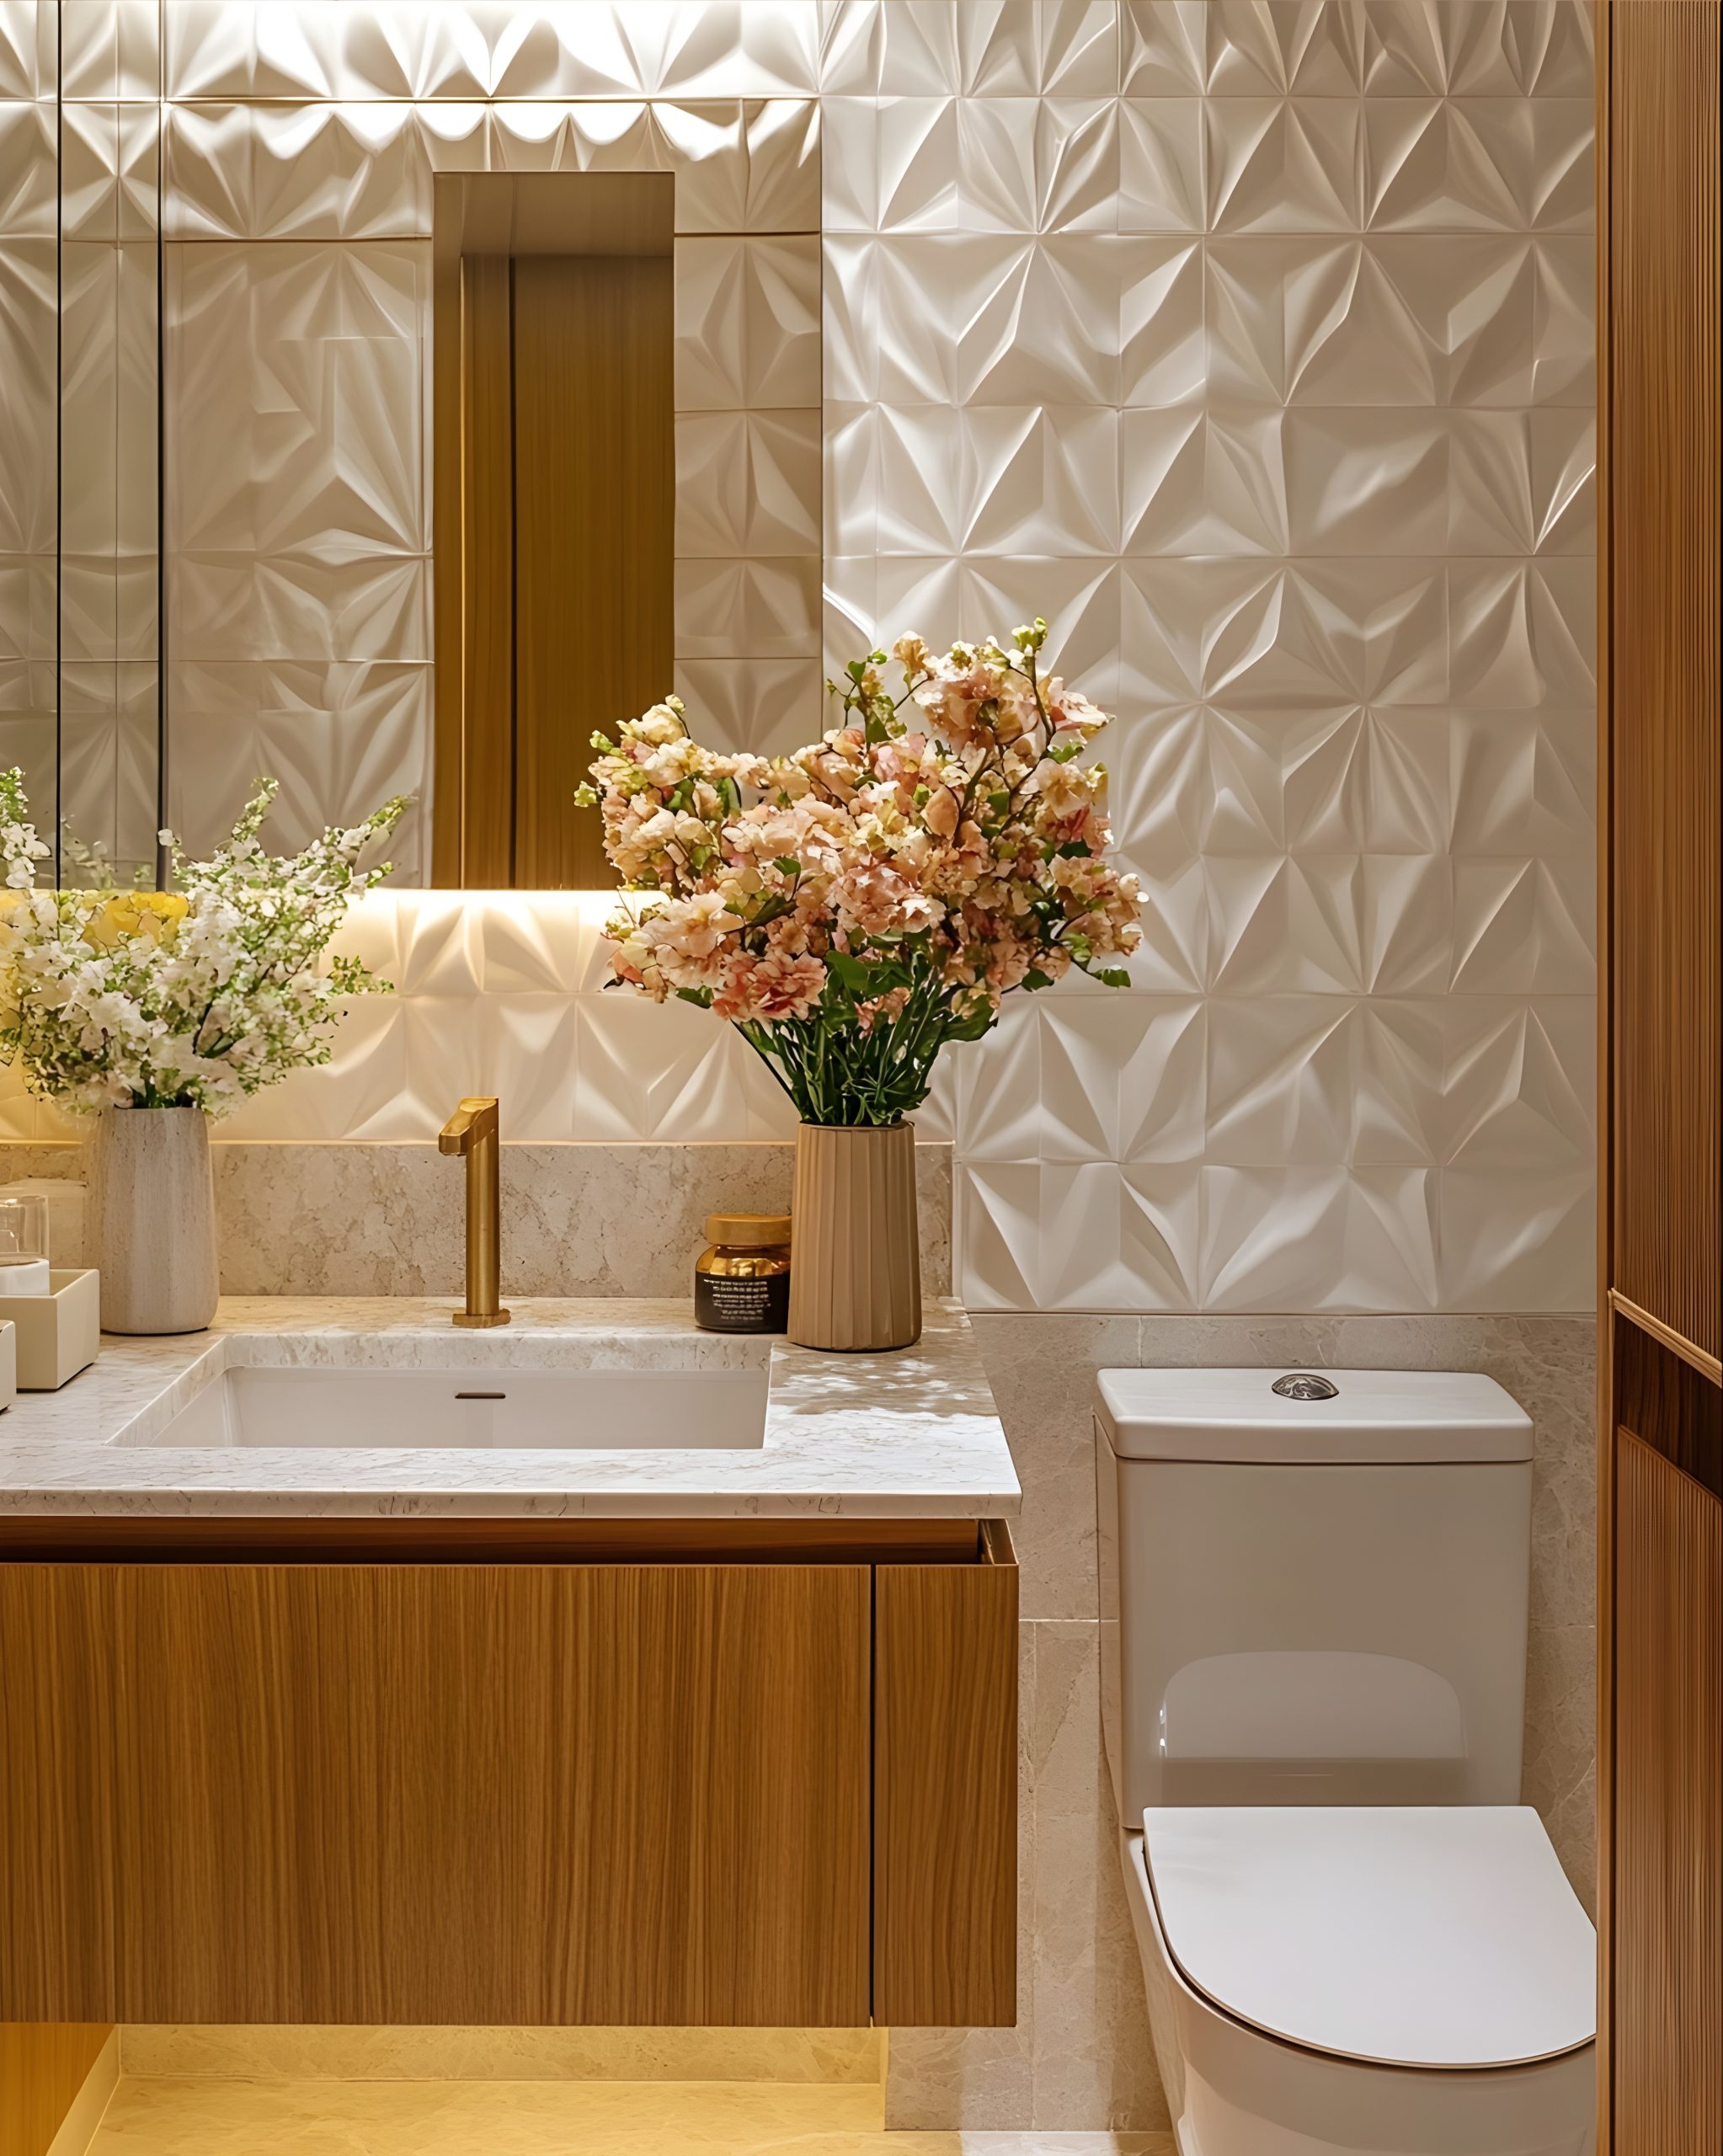
Are you looking for the best small bathroom makeover ideas? Read along to discover 13 tips and tricks!
If you’re like me, you know that small bathrooms can be a bit of a design challenge. But don’t worry, I’ve got some great small bathroom makeover ideas that can really transform your space.
Whether you’re dealing with a cramped layout or just want to refresh the look, these tips will help you make the most of every square inch. Let’s dive in and explore some practical and stylish solutions that can turn your small bathroom into a cosy and functional oasis.
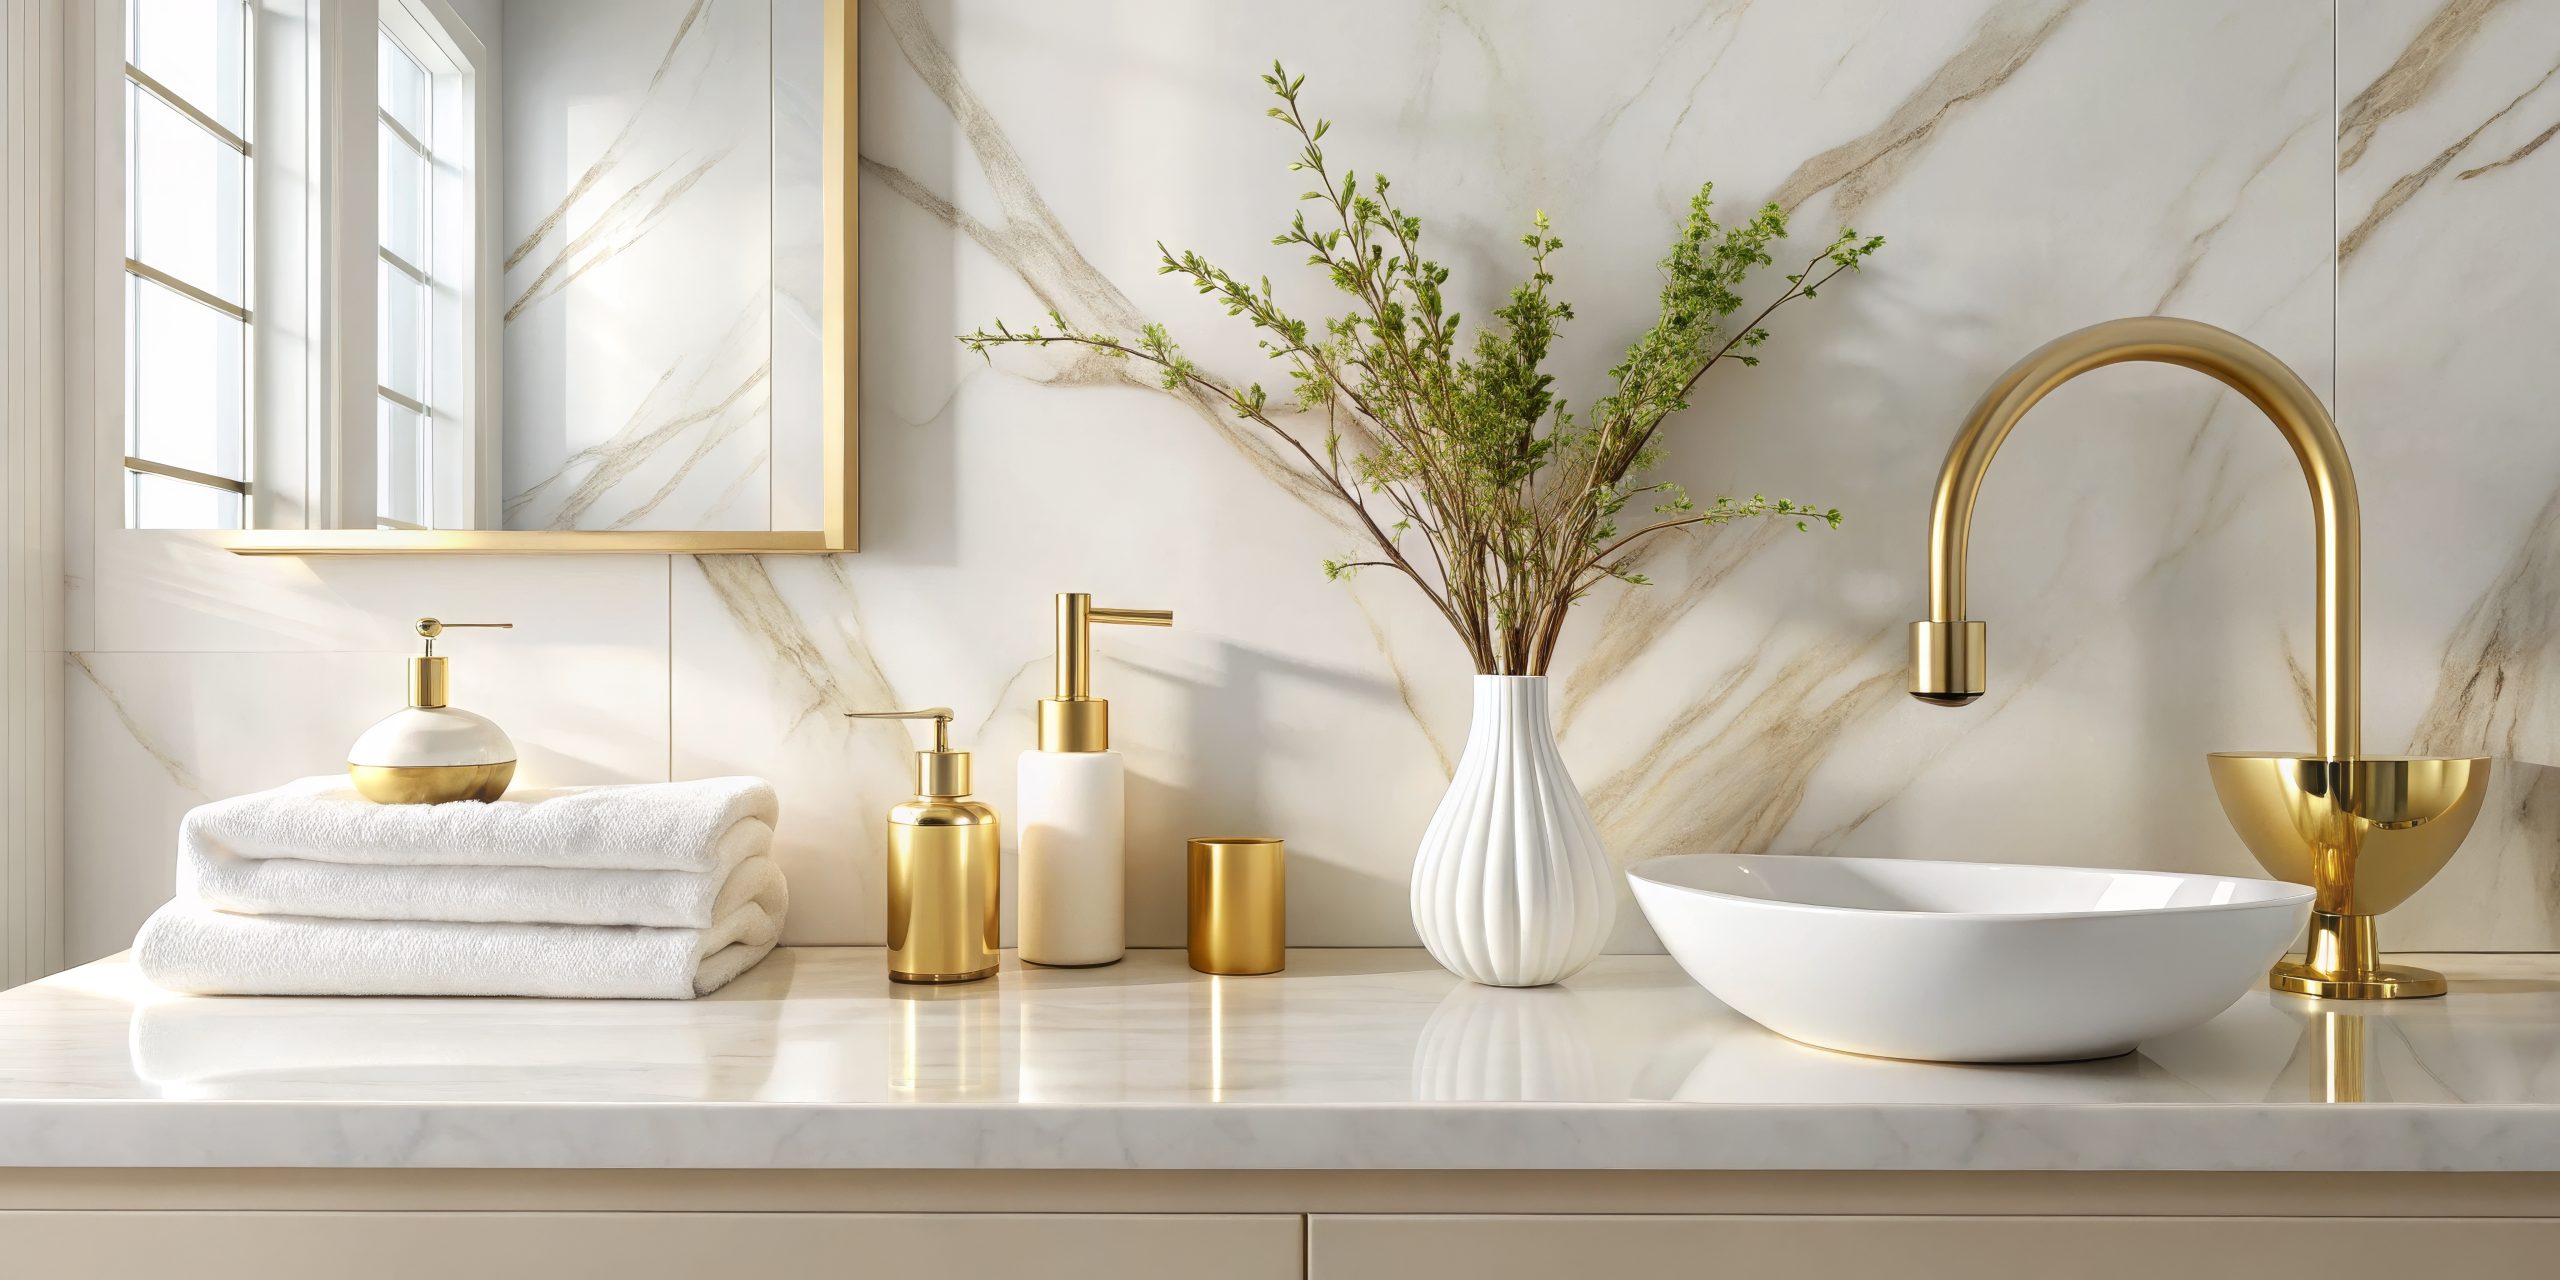
Best Small Bathroom Makeover Ideas!
1. Optimise Vertical Space
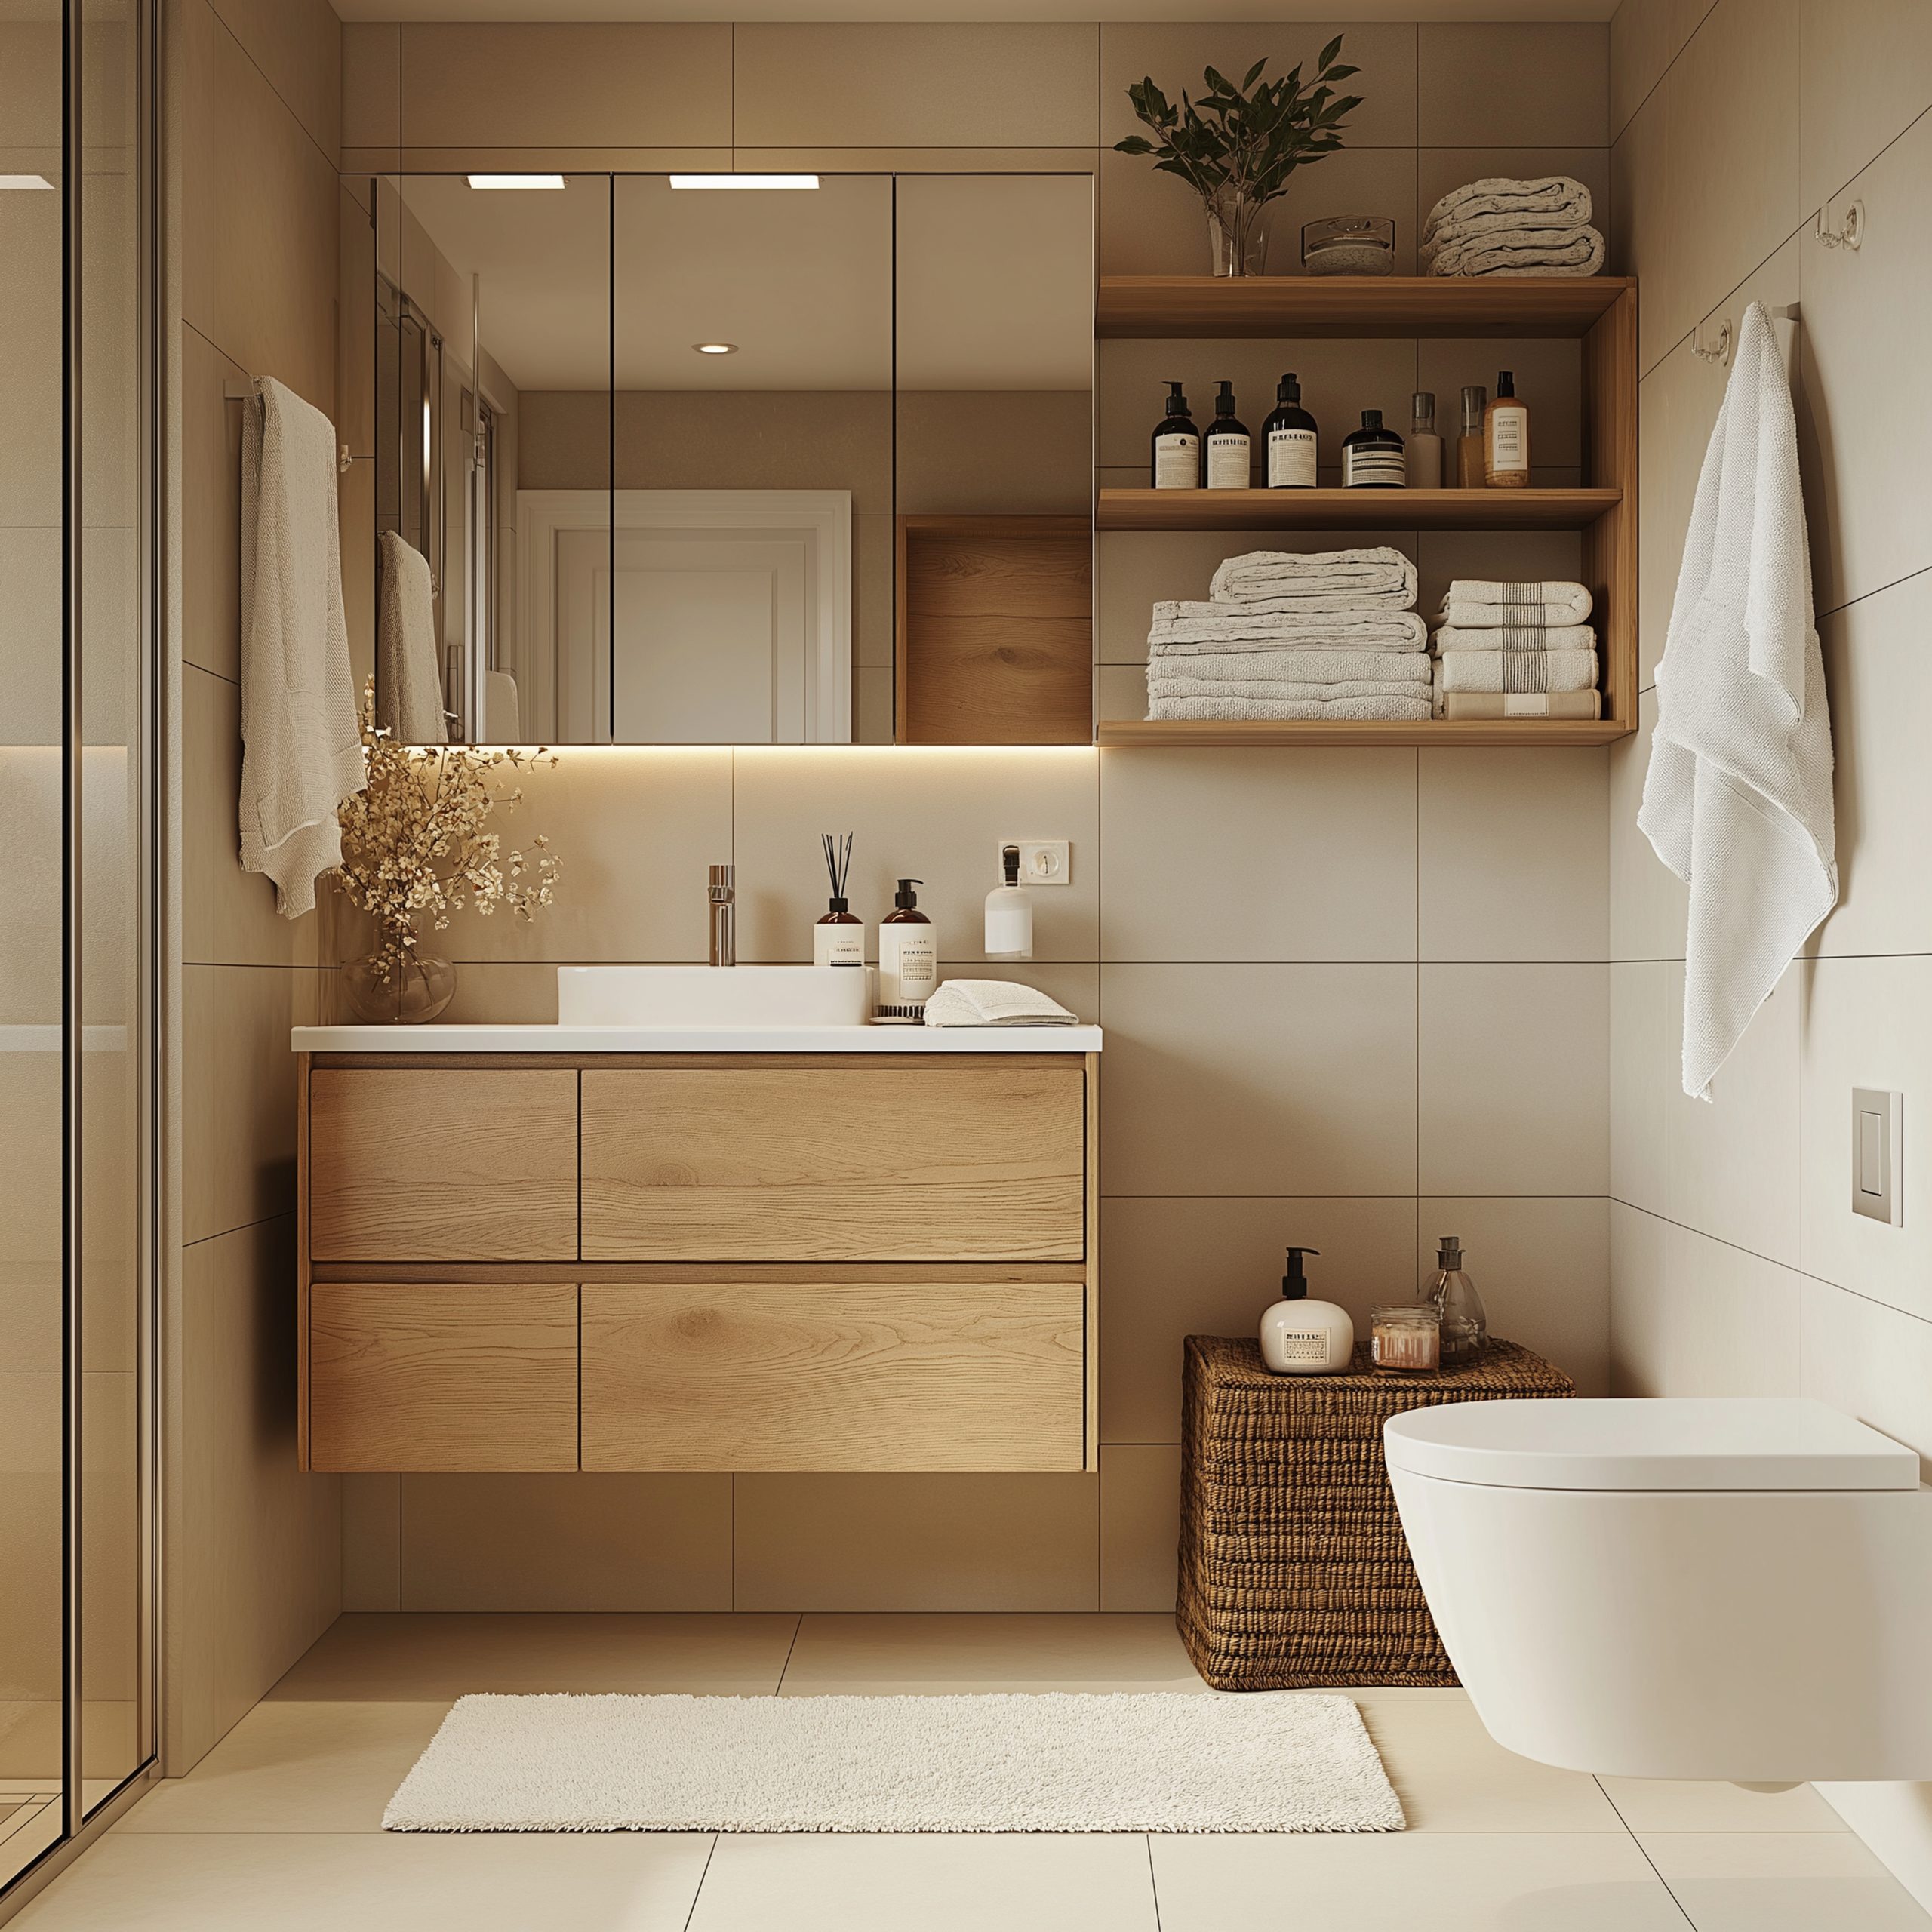
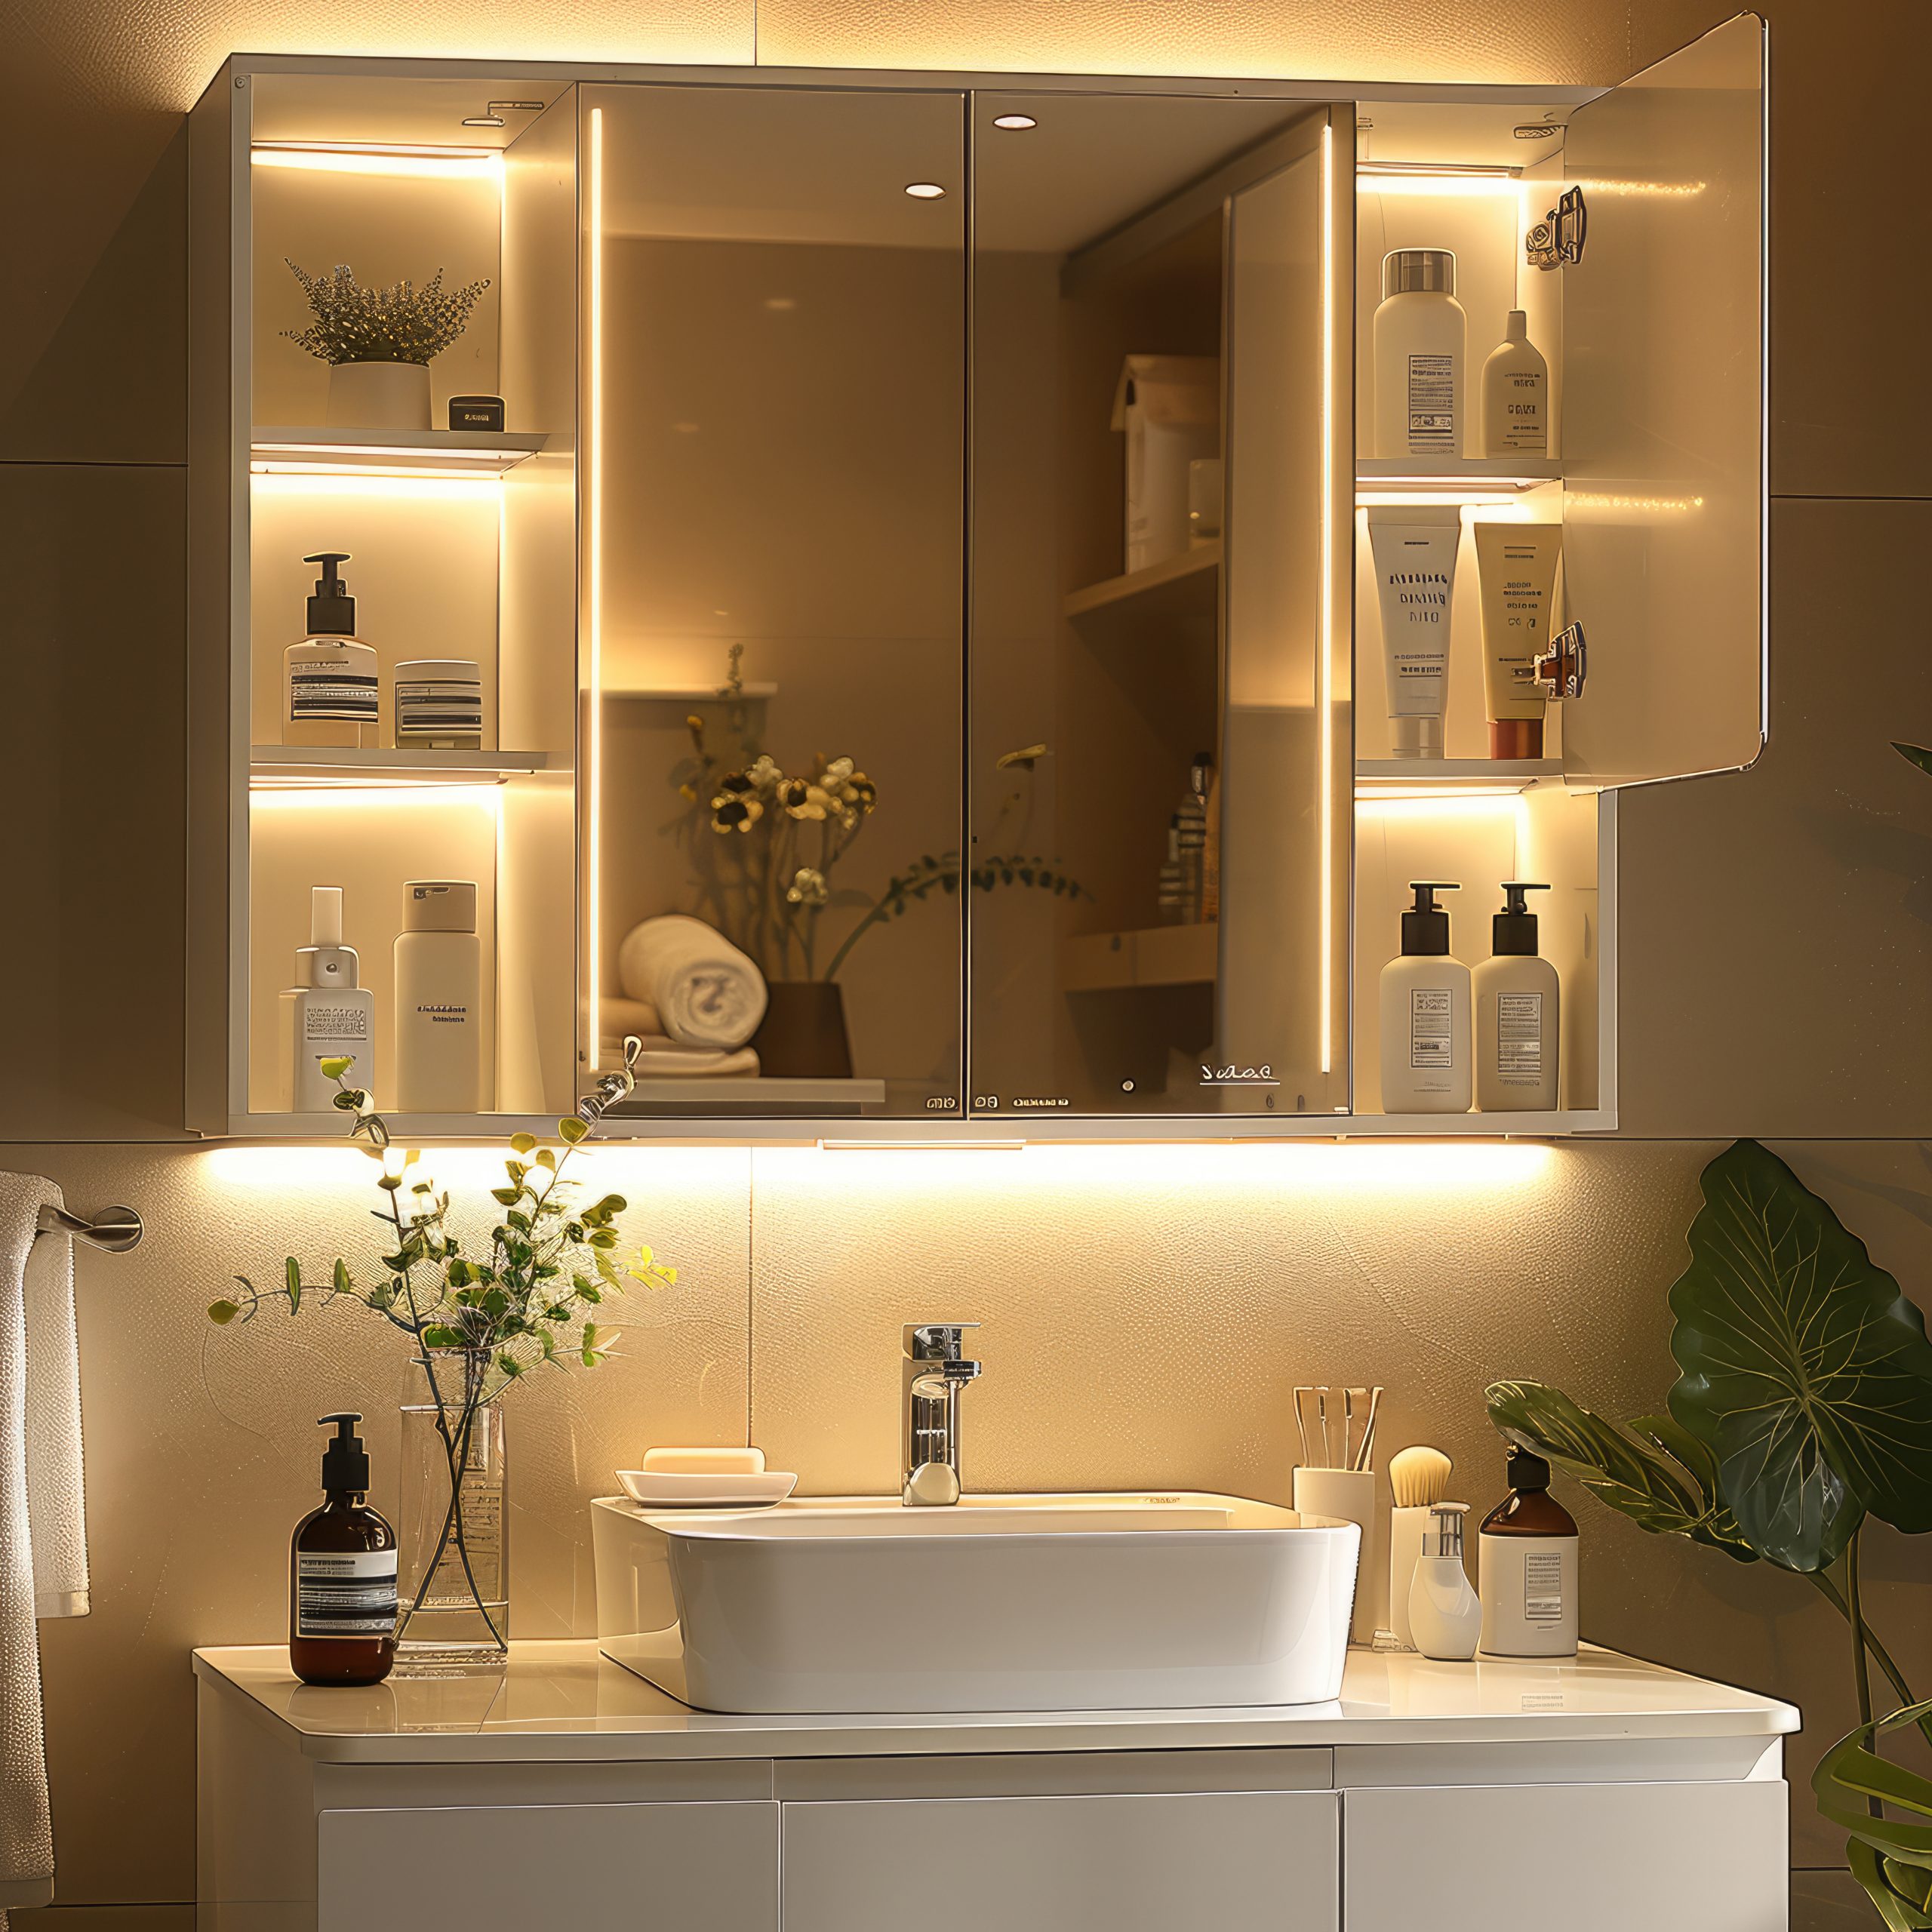
One of my favourite small bathroom makeover ideas is to think vertically. When floor space is limited, the walls become your best friend. By utilising vertical space, you can keep your bathroom organised and spacious. Tall shelving units are a great option for storing towels, toiletries, and decorative items. These can be placed in corners or above the toilet to maximise space. Wall-mounted cabinets are another excellent choice, especially when placed above the toilet or sink to keep essentials within reach. Opt for cabinets with mirrored fronts to add functionality and style.
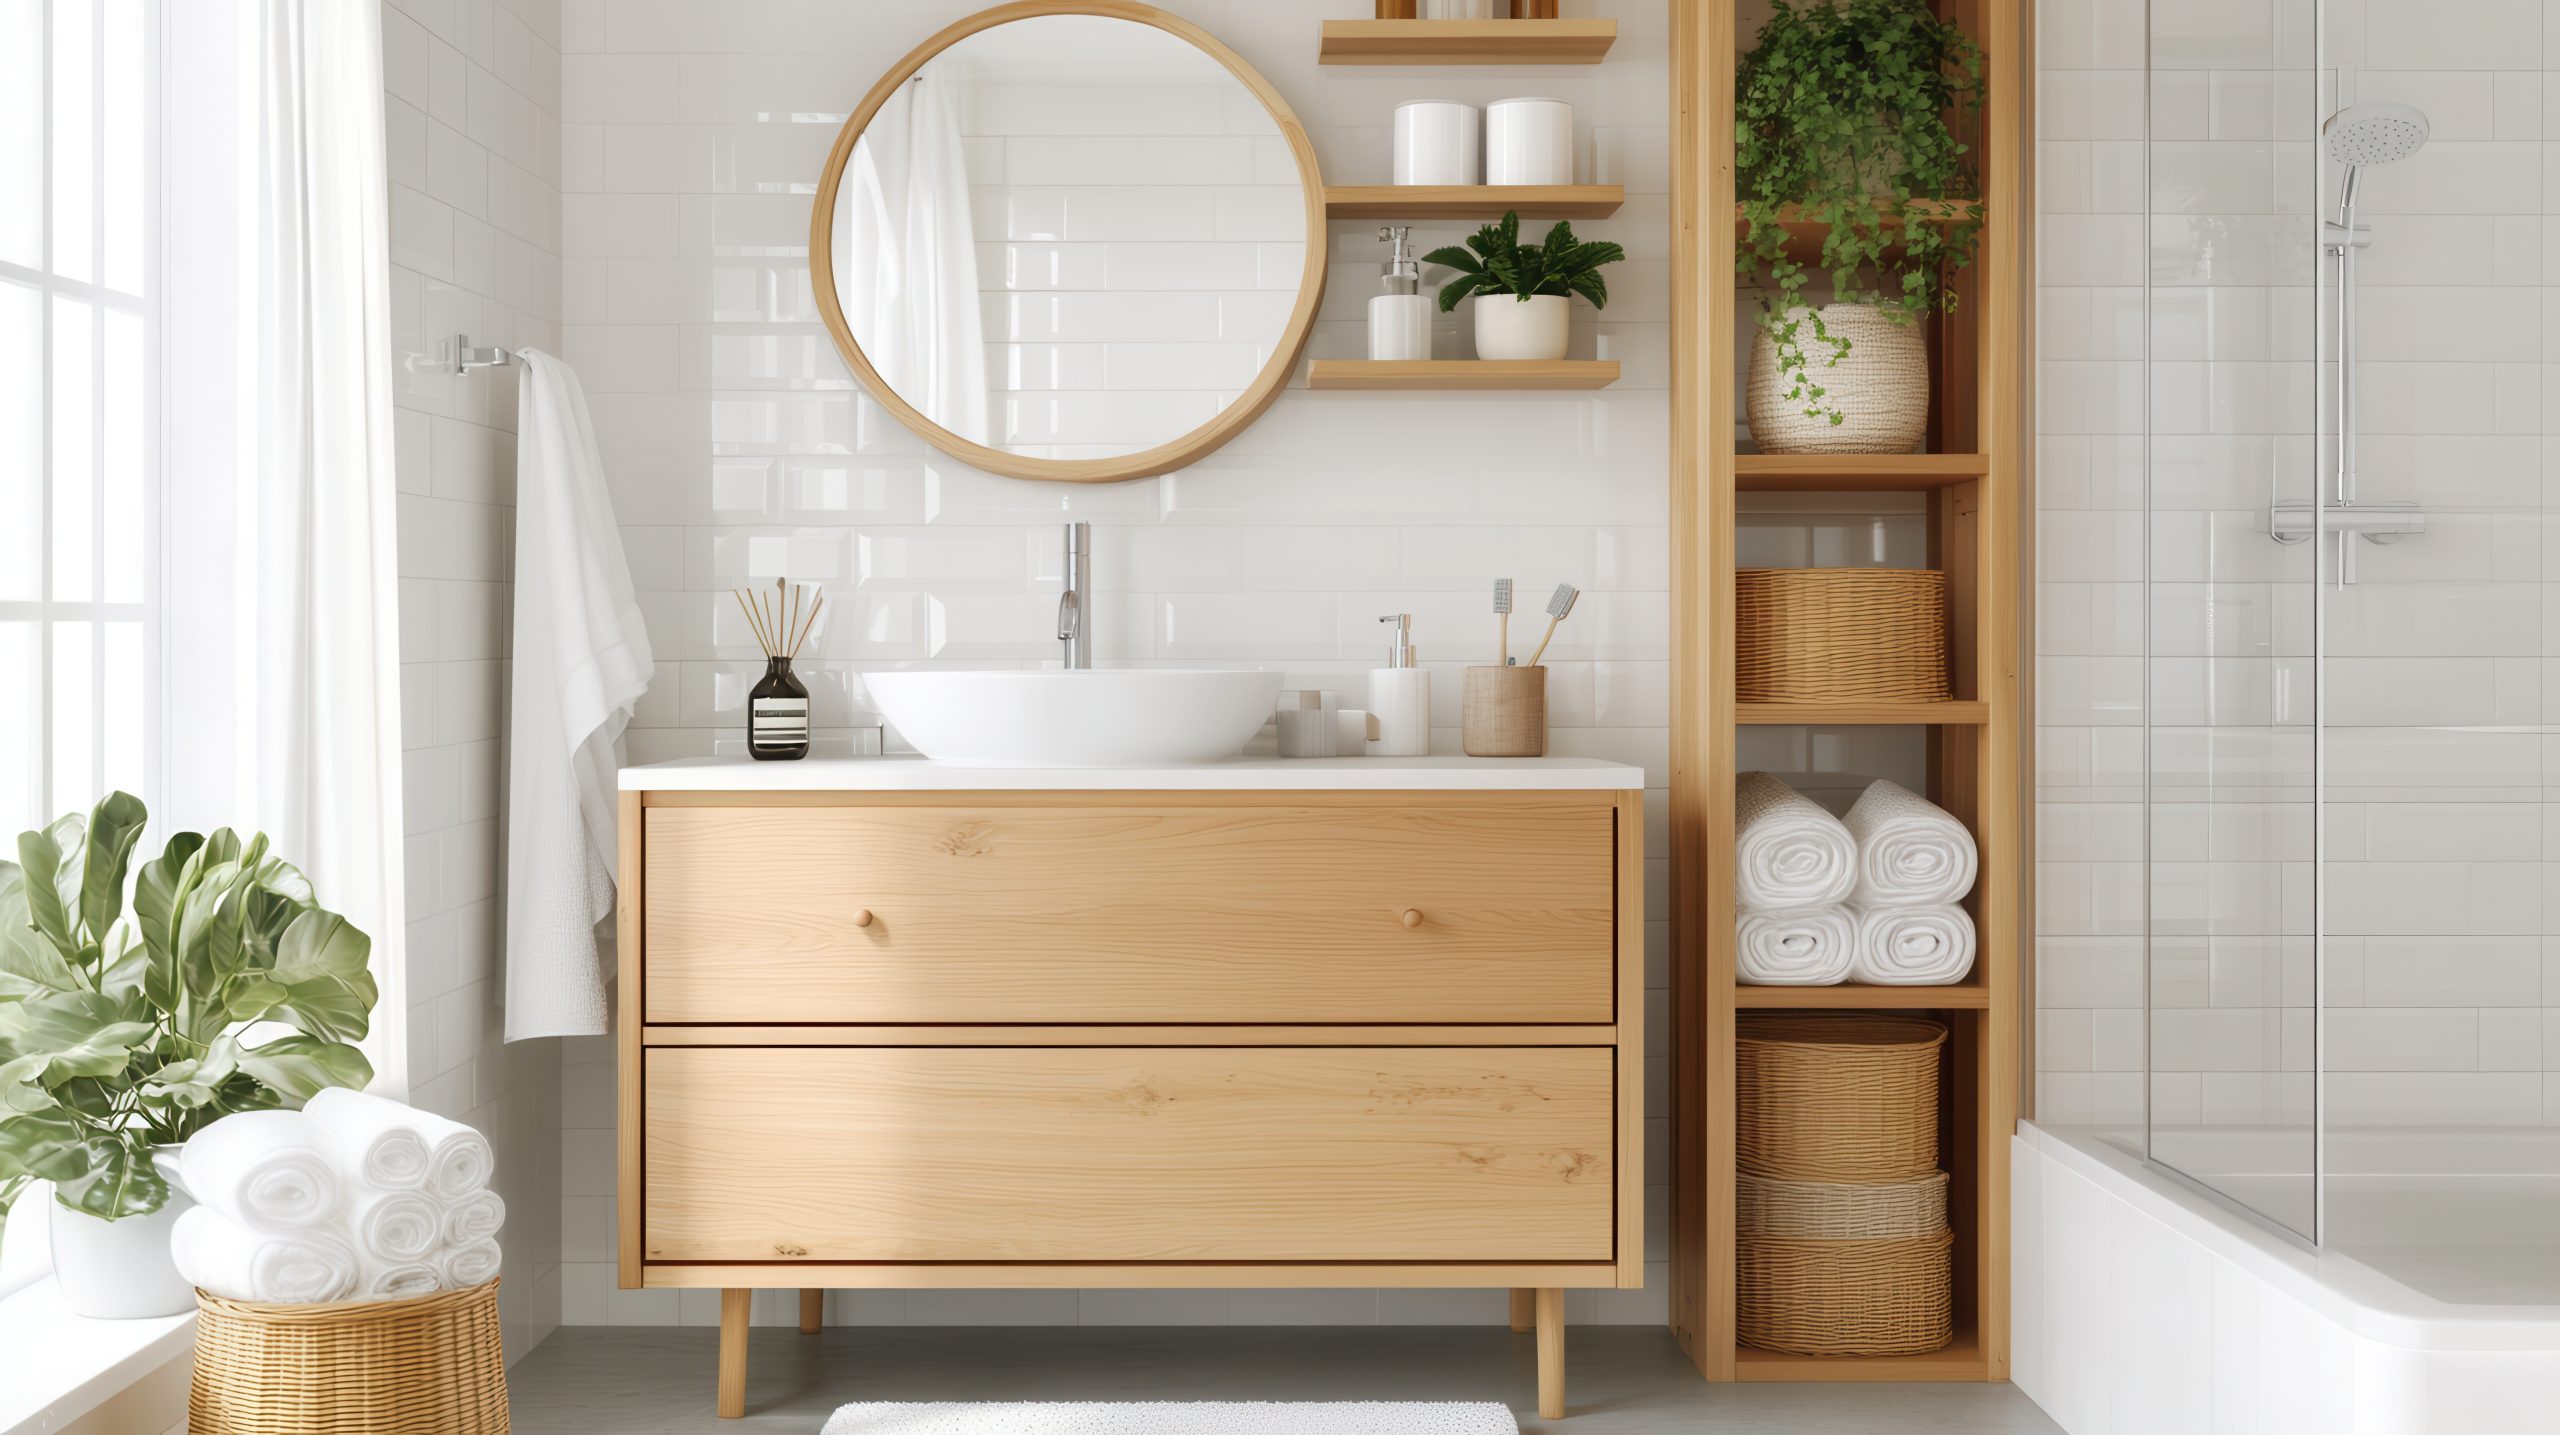
Hooks and racks are perfect for hanging towels, robes, or even baskets for additional storage. Consider using adhesive hooks for a no-drill solution that won’t damage your walls. By looking up and utilising the vertical space, you’ll discover a whole new world of possibilities for your small bathroom. Plus, it gives you a chance to display some cute decor items or plants, adding a touch of personality to the space.
2. Light and Bright Colour Schemes
Alright, let’s talk colour. One of the simplest small bathroom makeover ideas is to go for a light and bright colour scheme. Light colours can really open up a space and make it feel larger than it actually is. Soft whites, pastels, or light greys work wonders in small spaces, reflecting light and creating an airy atmosphere. These shades can make your bathroom feel fresh and inviting, like a little retreat.
To add some personality without overwhelming the space, consider incorporating accent colours through accessories like towels, rugs, or shower curtains. Reflective surfaces, such as glossy finishes on tiles or paint, can further enhance the brightness and openness of the room. By carefully selecting your colour palette, you can create a cohesive and visually appealing space that feels much larger than it is.
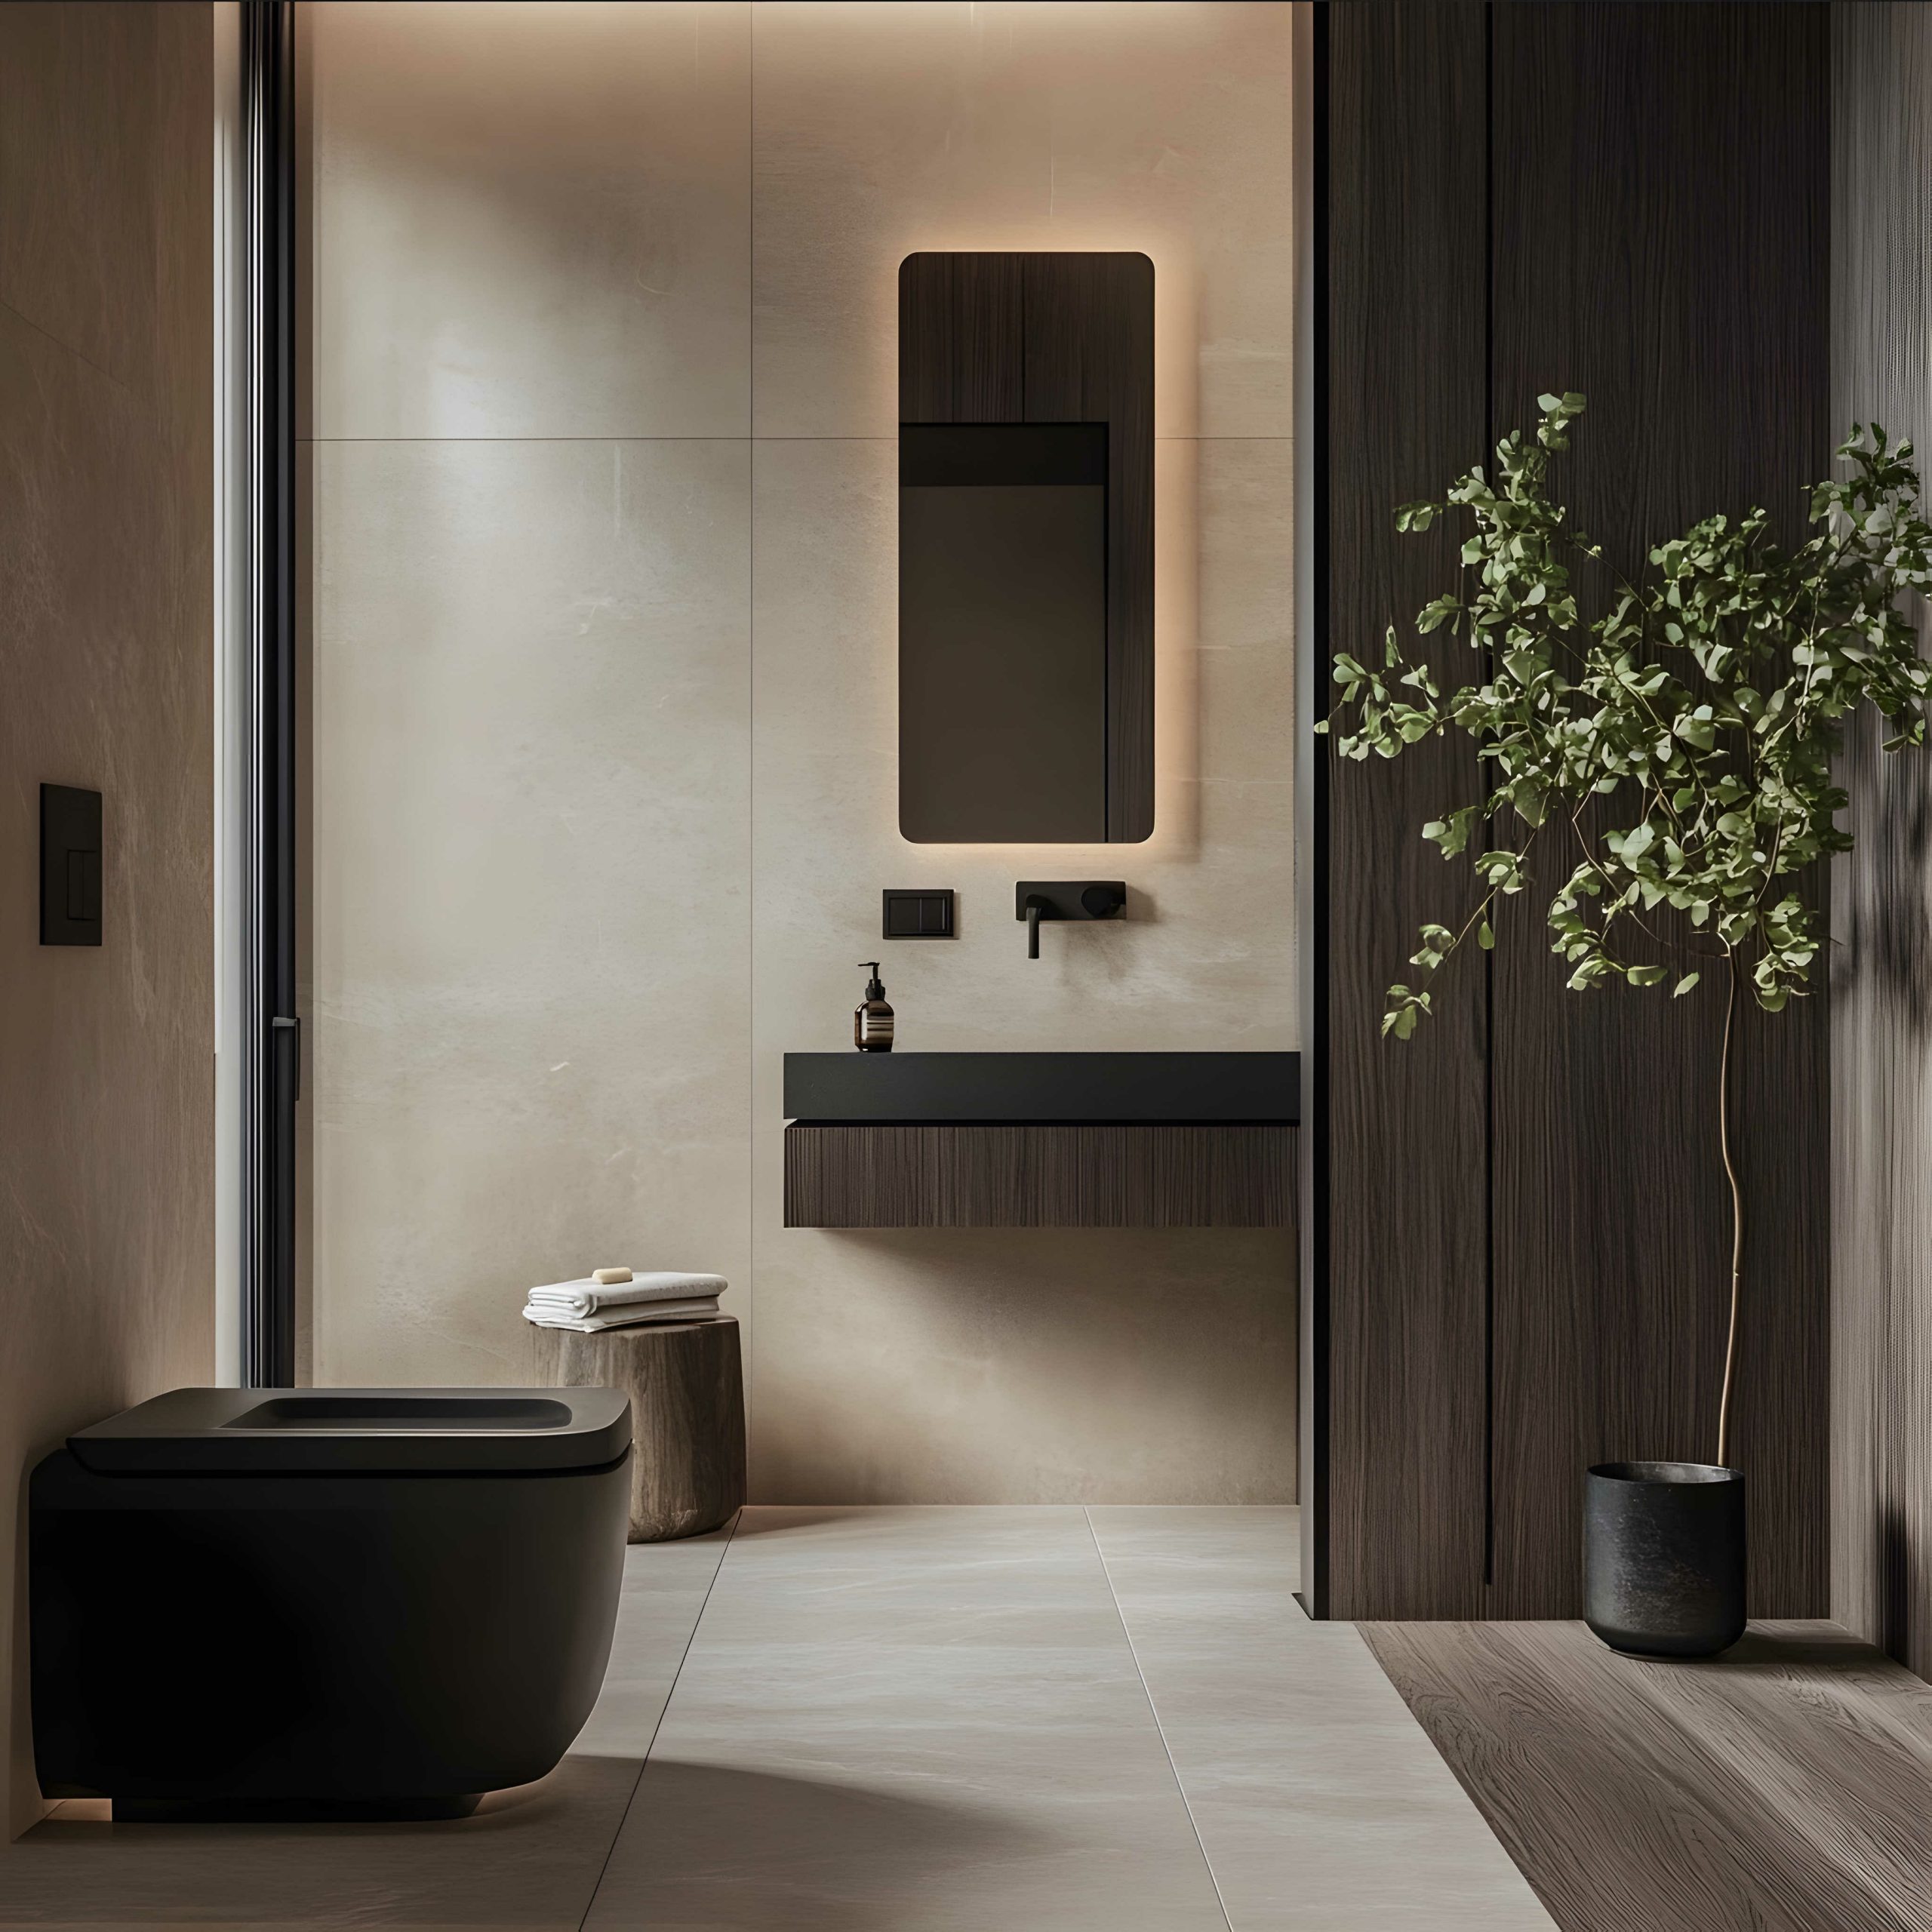
3. Mirrors to Create an Illusion of Space
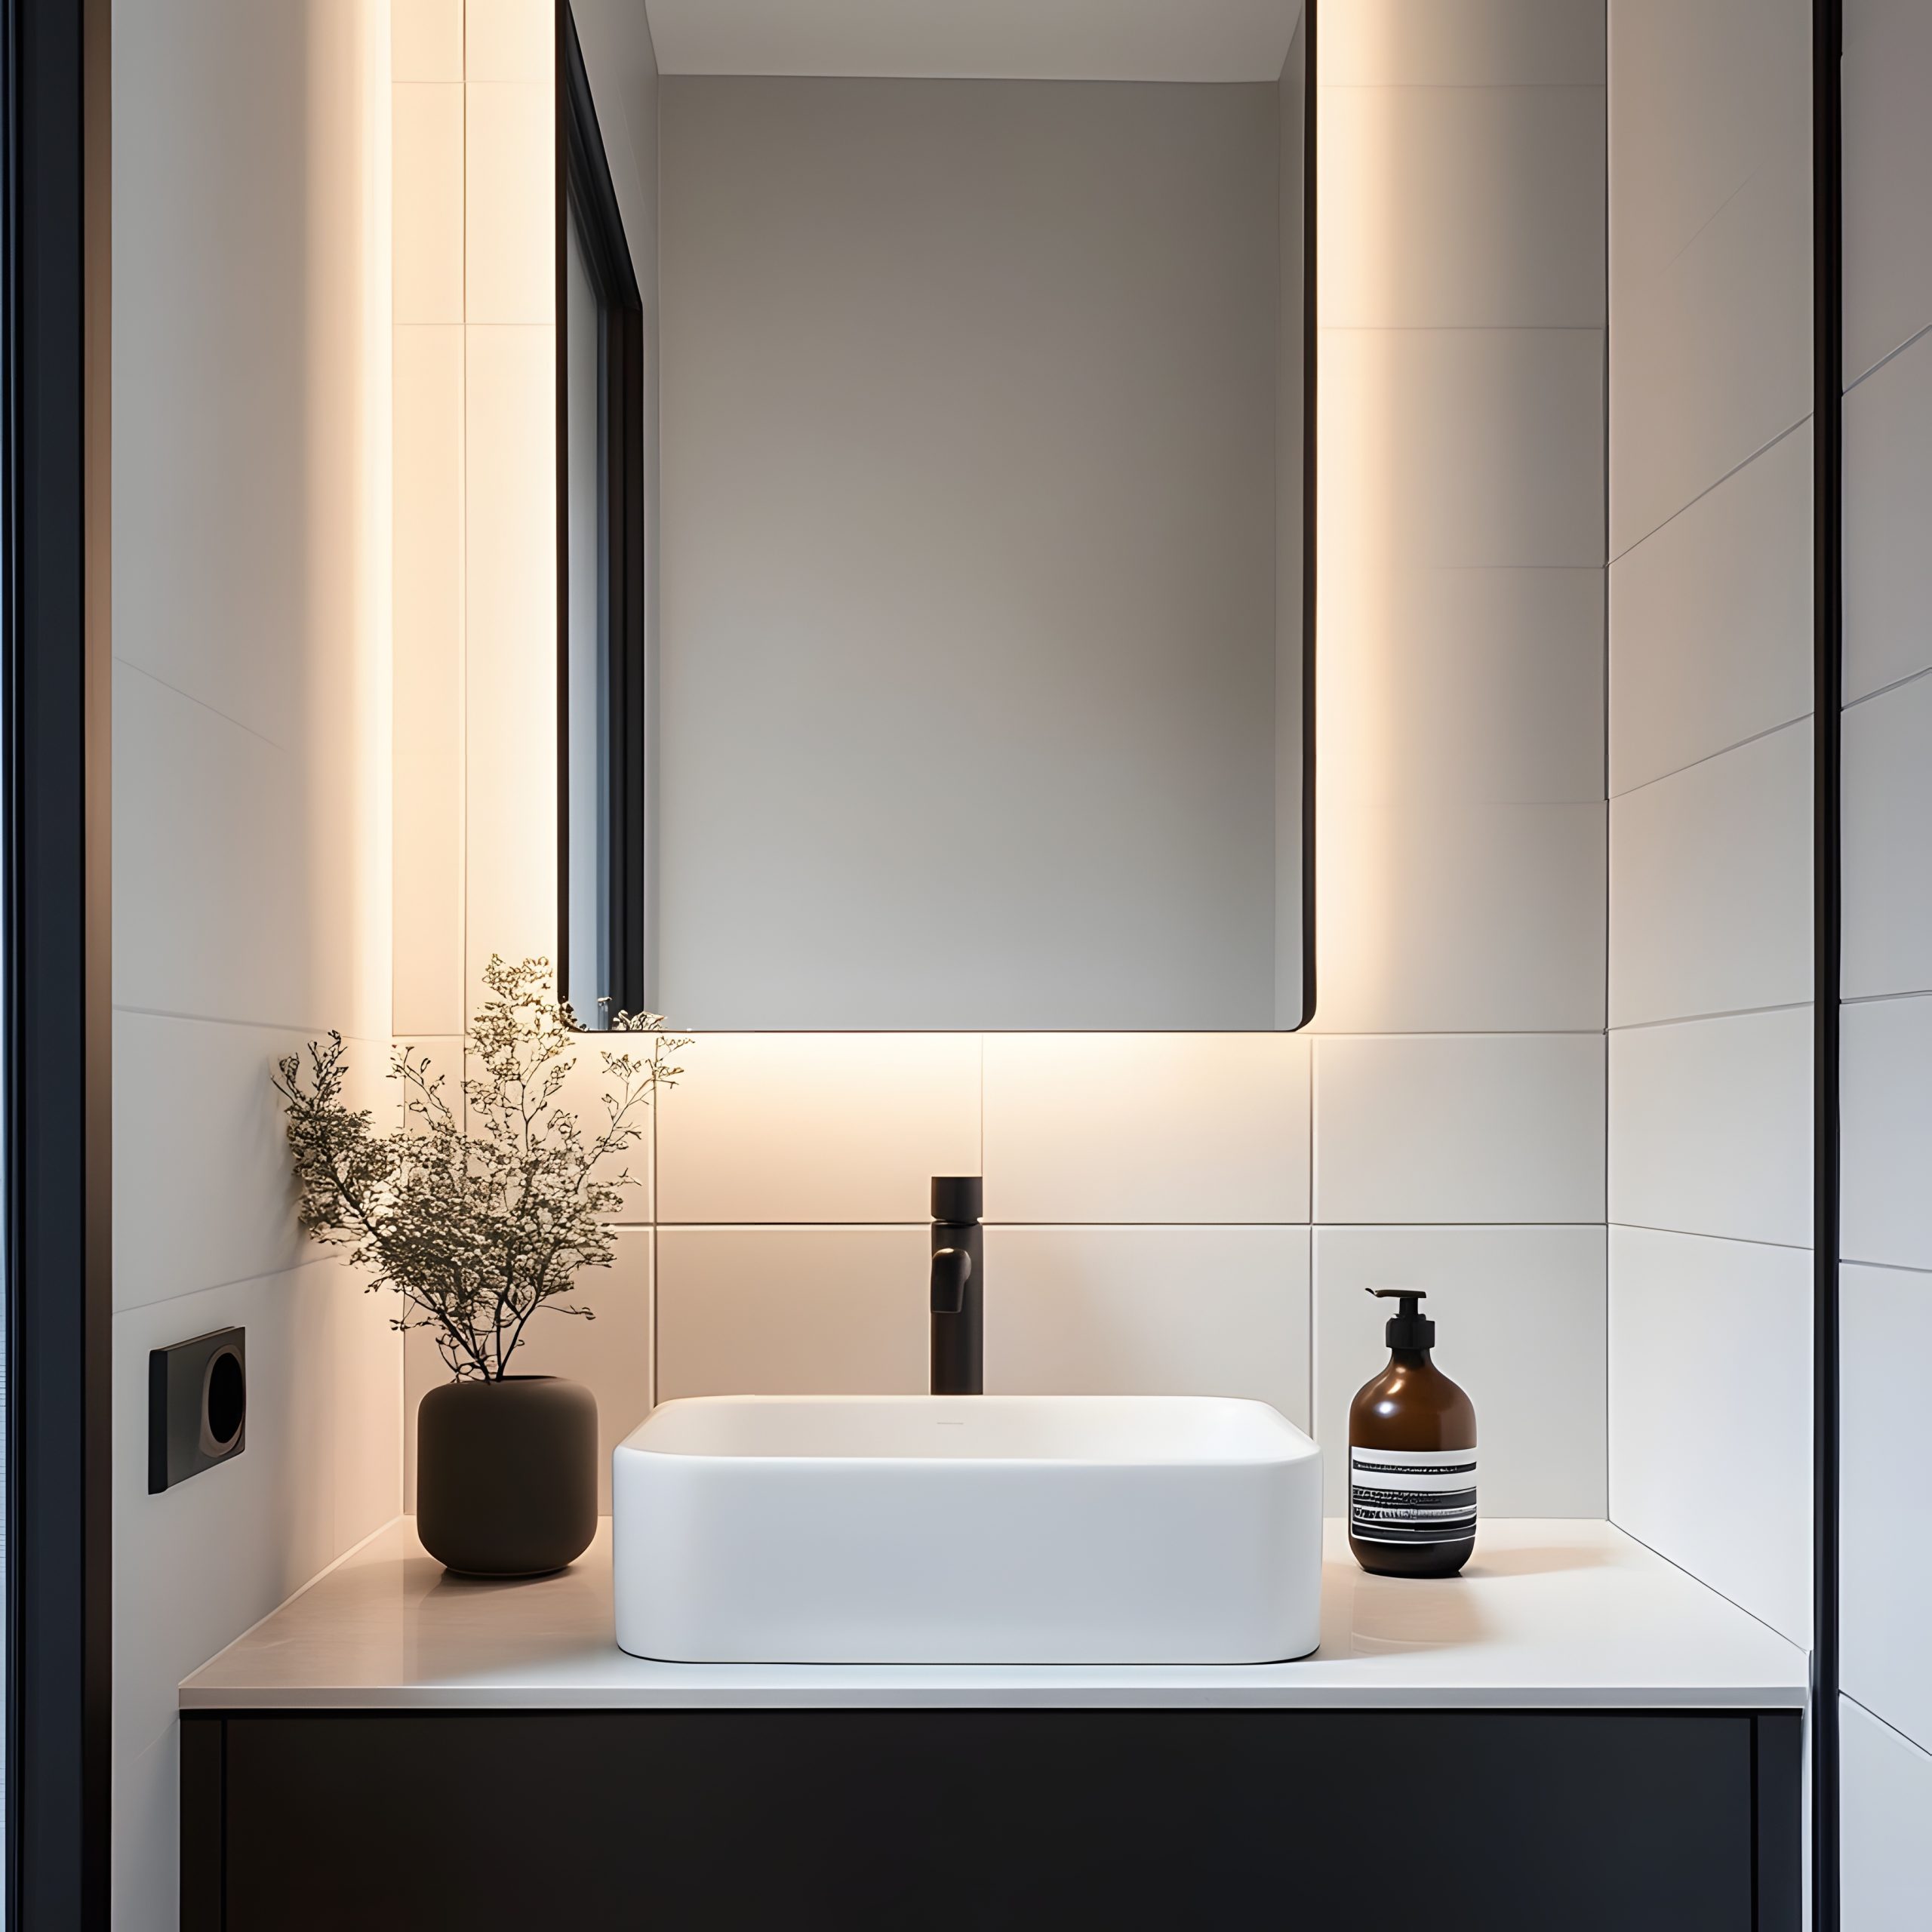
Now, mirrors are a game-changer when it comes to small bathroom makeover ideas. A well-placed mirror can do wonders by reflecting light and creating the illusion of more space. Consider placing a large mirror above the sink to double the visual space. Mirrored cabinets are also a great option, providing storage while enhancing the room’s depth. Decorative mirrors in different shapes and styles can add personality and serve as a focal point.
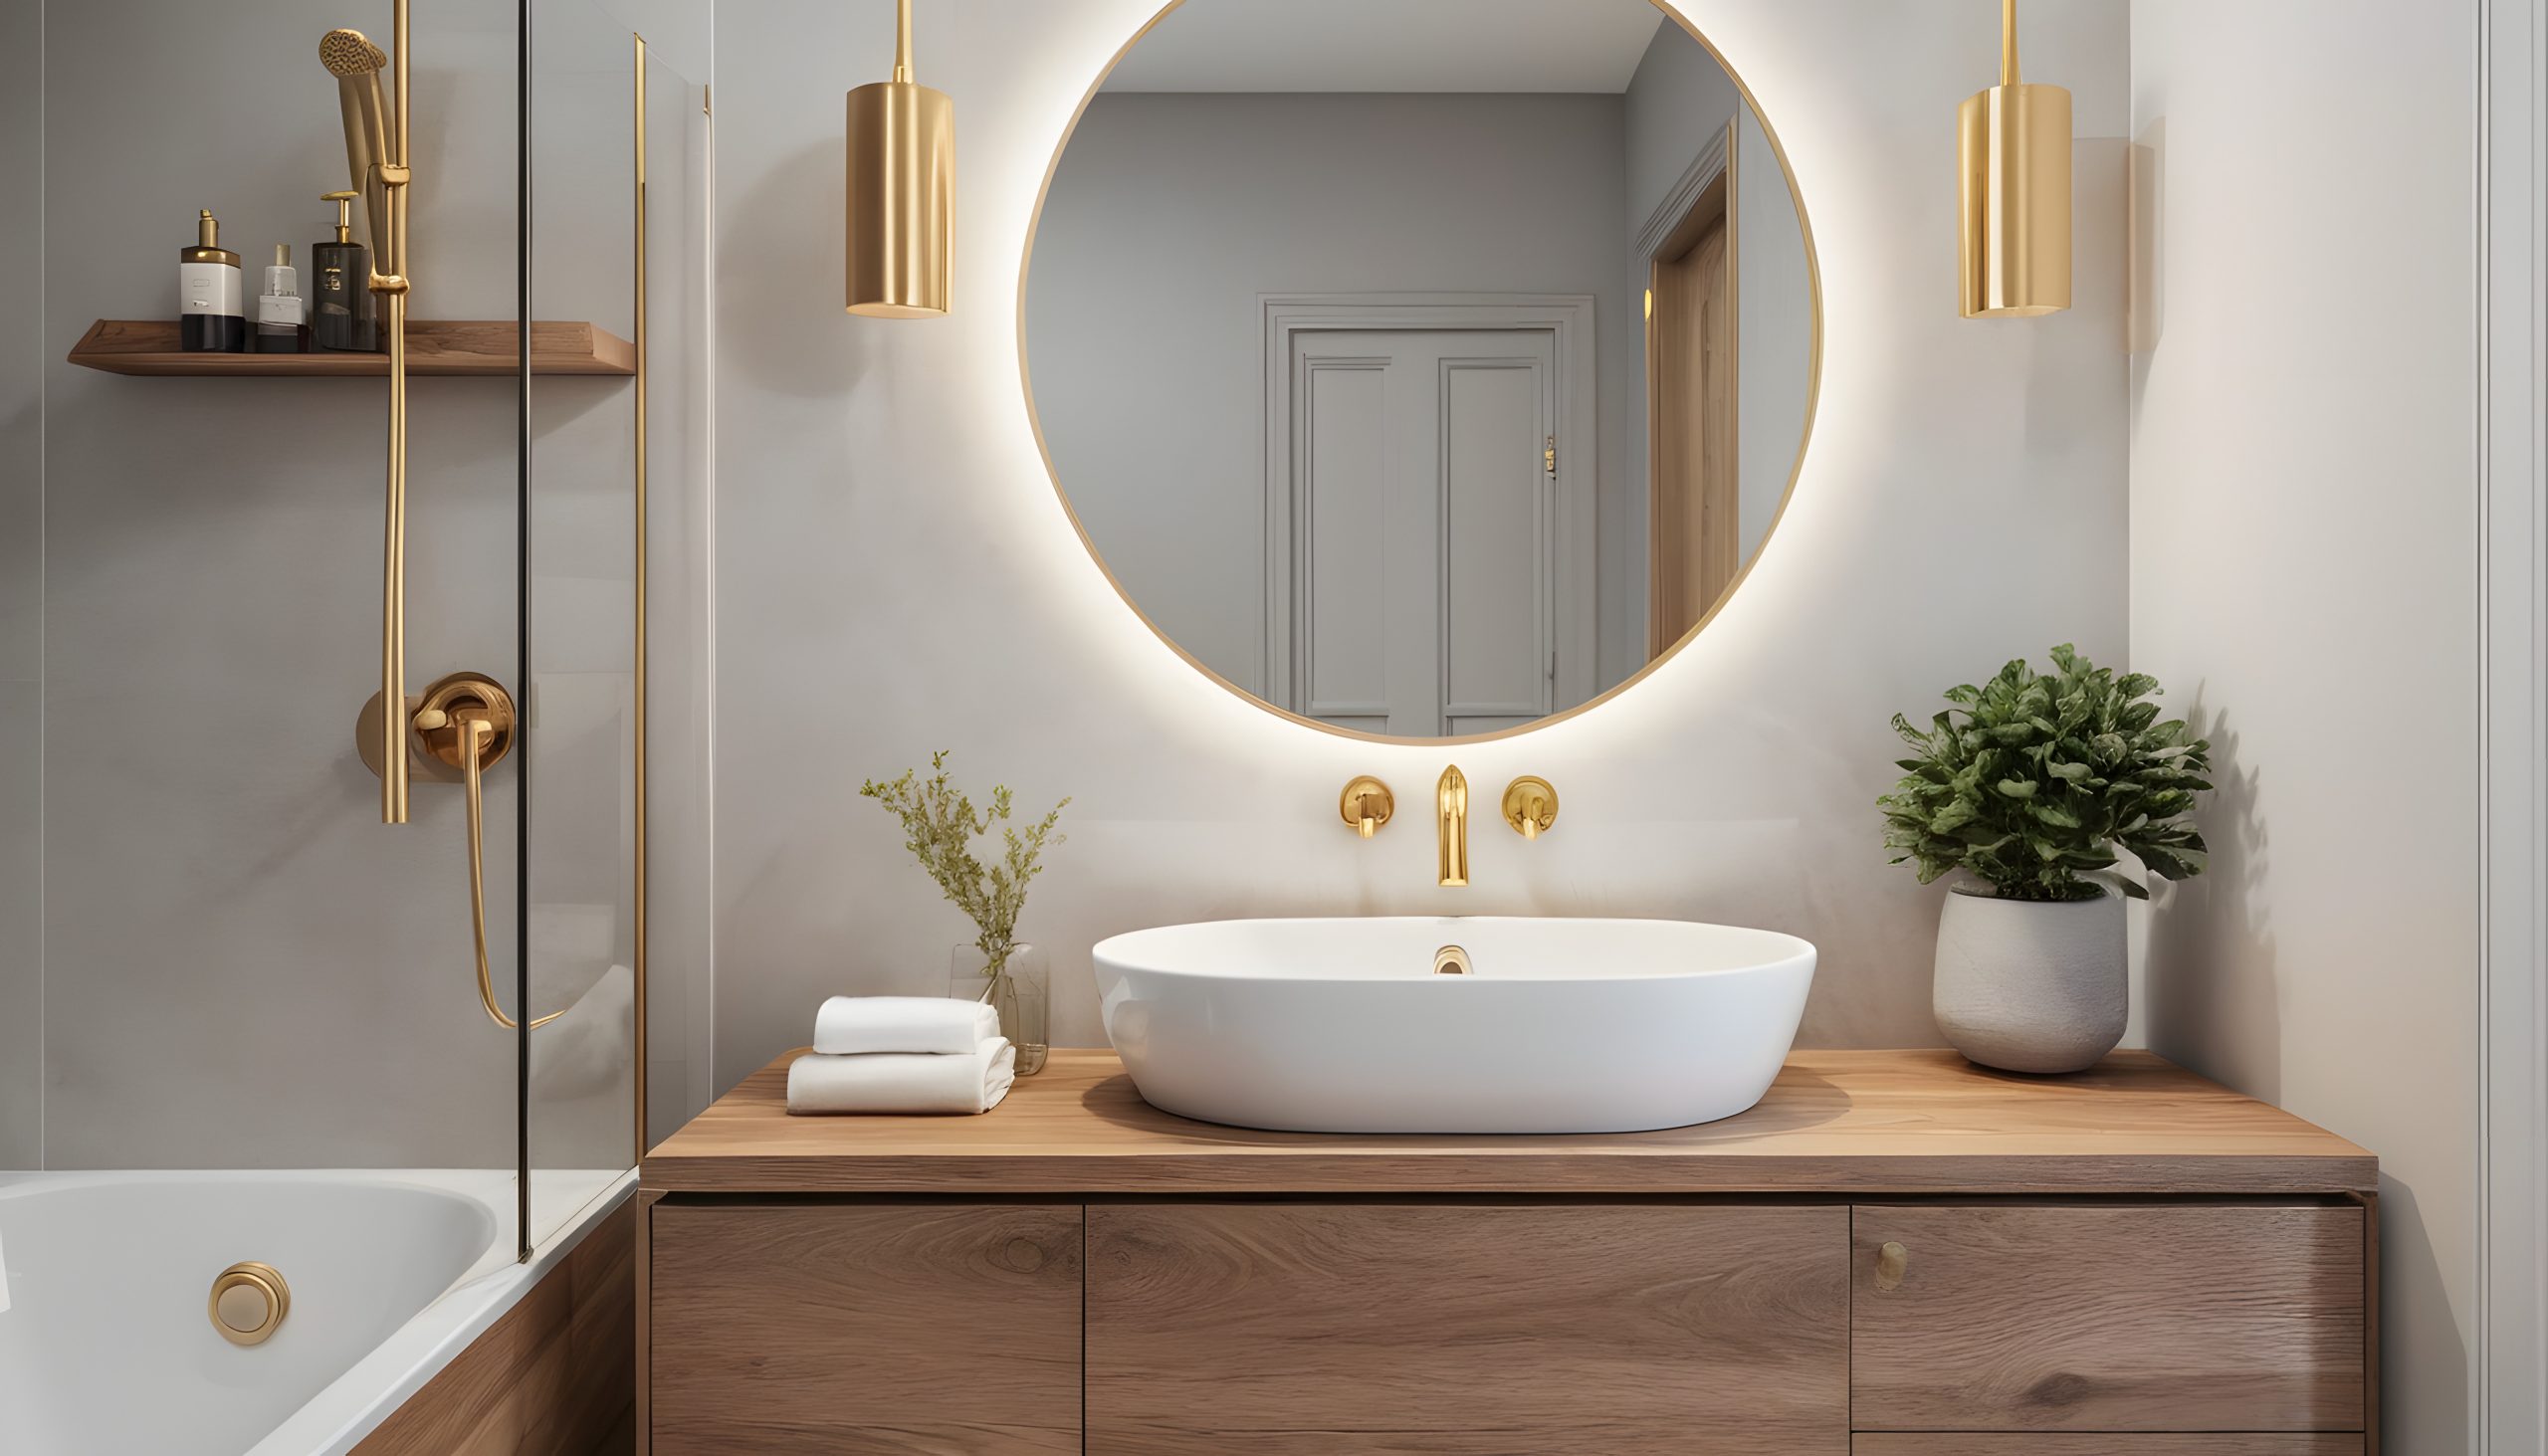
Mirrors not only make your bathroom feel larger, but also add a touch of elegance and sophistication. They can reflect natural light, brightening up the space and making it feel more open. By strategically placing mirrors, you can create a sense of depth and dimension, transforming your small bathroom into a more spacious and inviting area.
4. Compact and Multifunctional Fixtures
When space is tight, every inch counts. That’s why compact and multifunctional fixtures are key in small bathroom makeover ideas. Look for sinks, toilets, and bathtubs that are designed to save space. Compact sinks and toilets can free up valuable floor space, making the room feel less cramped. Vanities with built-in storage are a lifesaver, keeping your bathroom clutter-free and organised.
Consider utilising corners for sinks or storage to maximise space. Corner fixtures can be a great solution for awkward layouts, allowing you to make the most of every inch. By choosing fixtures that serve multiple purposes without sacrificing style, you’ll be amazed at how much more functional your bathroom can become. It’s all about finding the right balance between form and function.
5. Sliding Doors for Space Efficiency
If you’re dealing with a door that swings into your already small bathroom, consider switching to a sliding door. It’s one of those small bathroom makeover ideas that can make a big difference. Sliding doors save space by eliminating the need for door clearance, allowing you to use the area more efficiently. They also add a sleek, modern touch to your bathroom, enhancing its overall aesthetic.
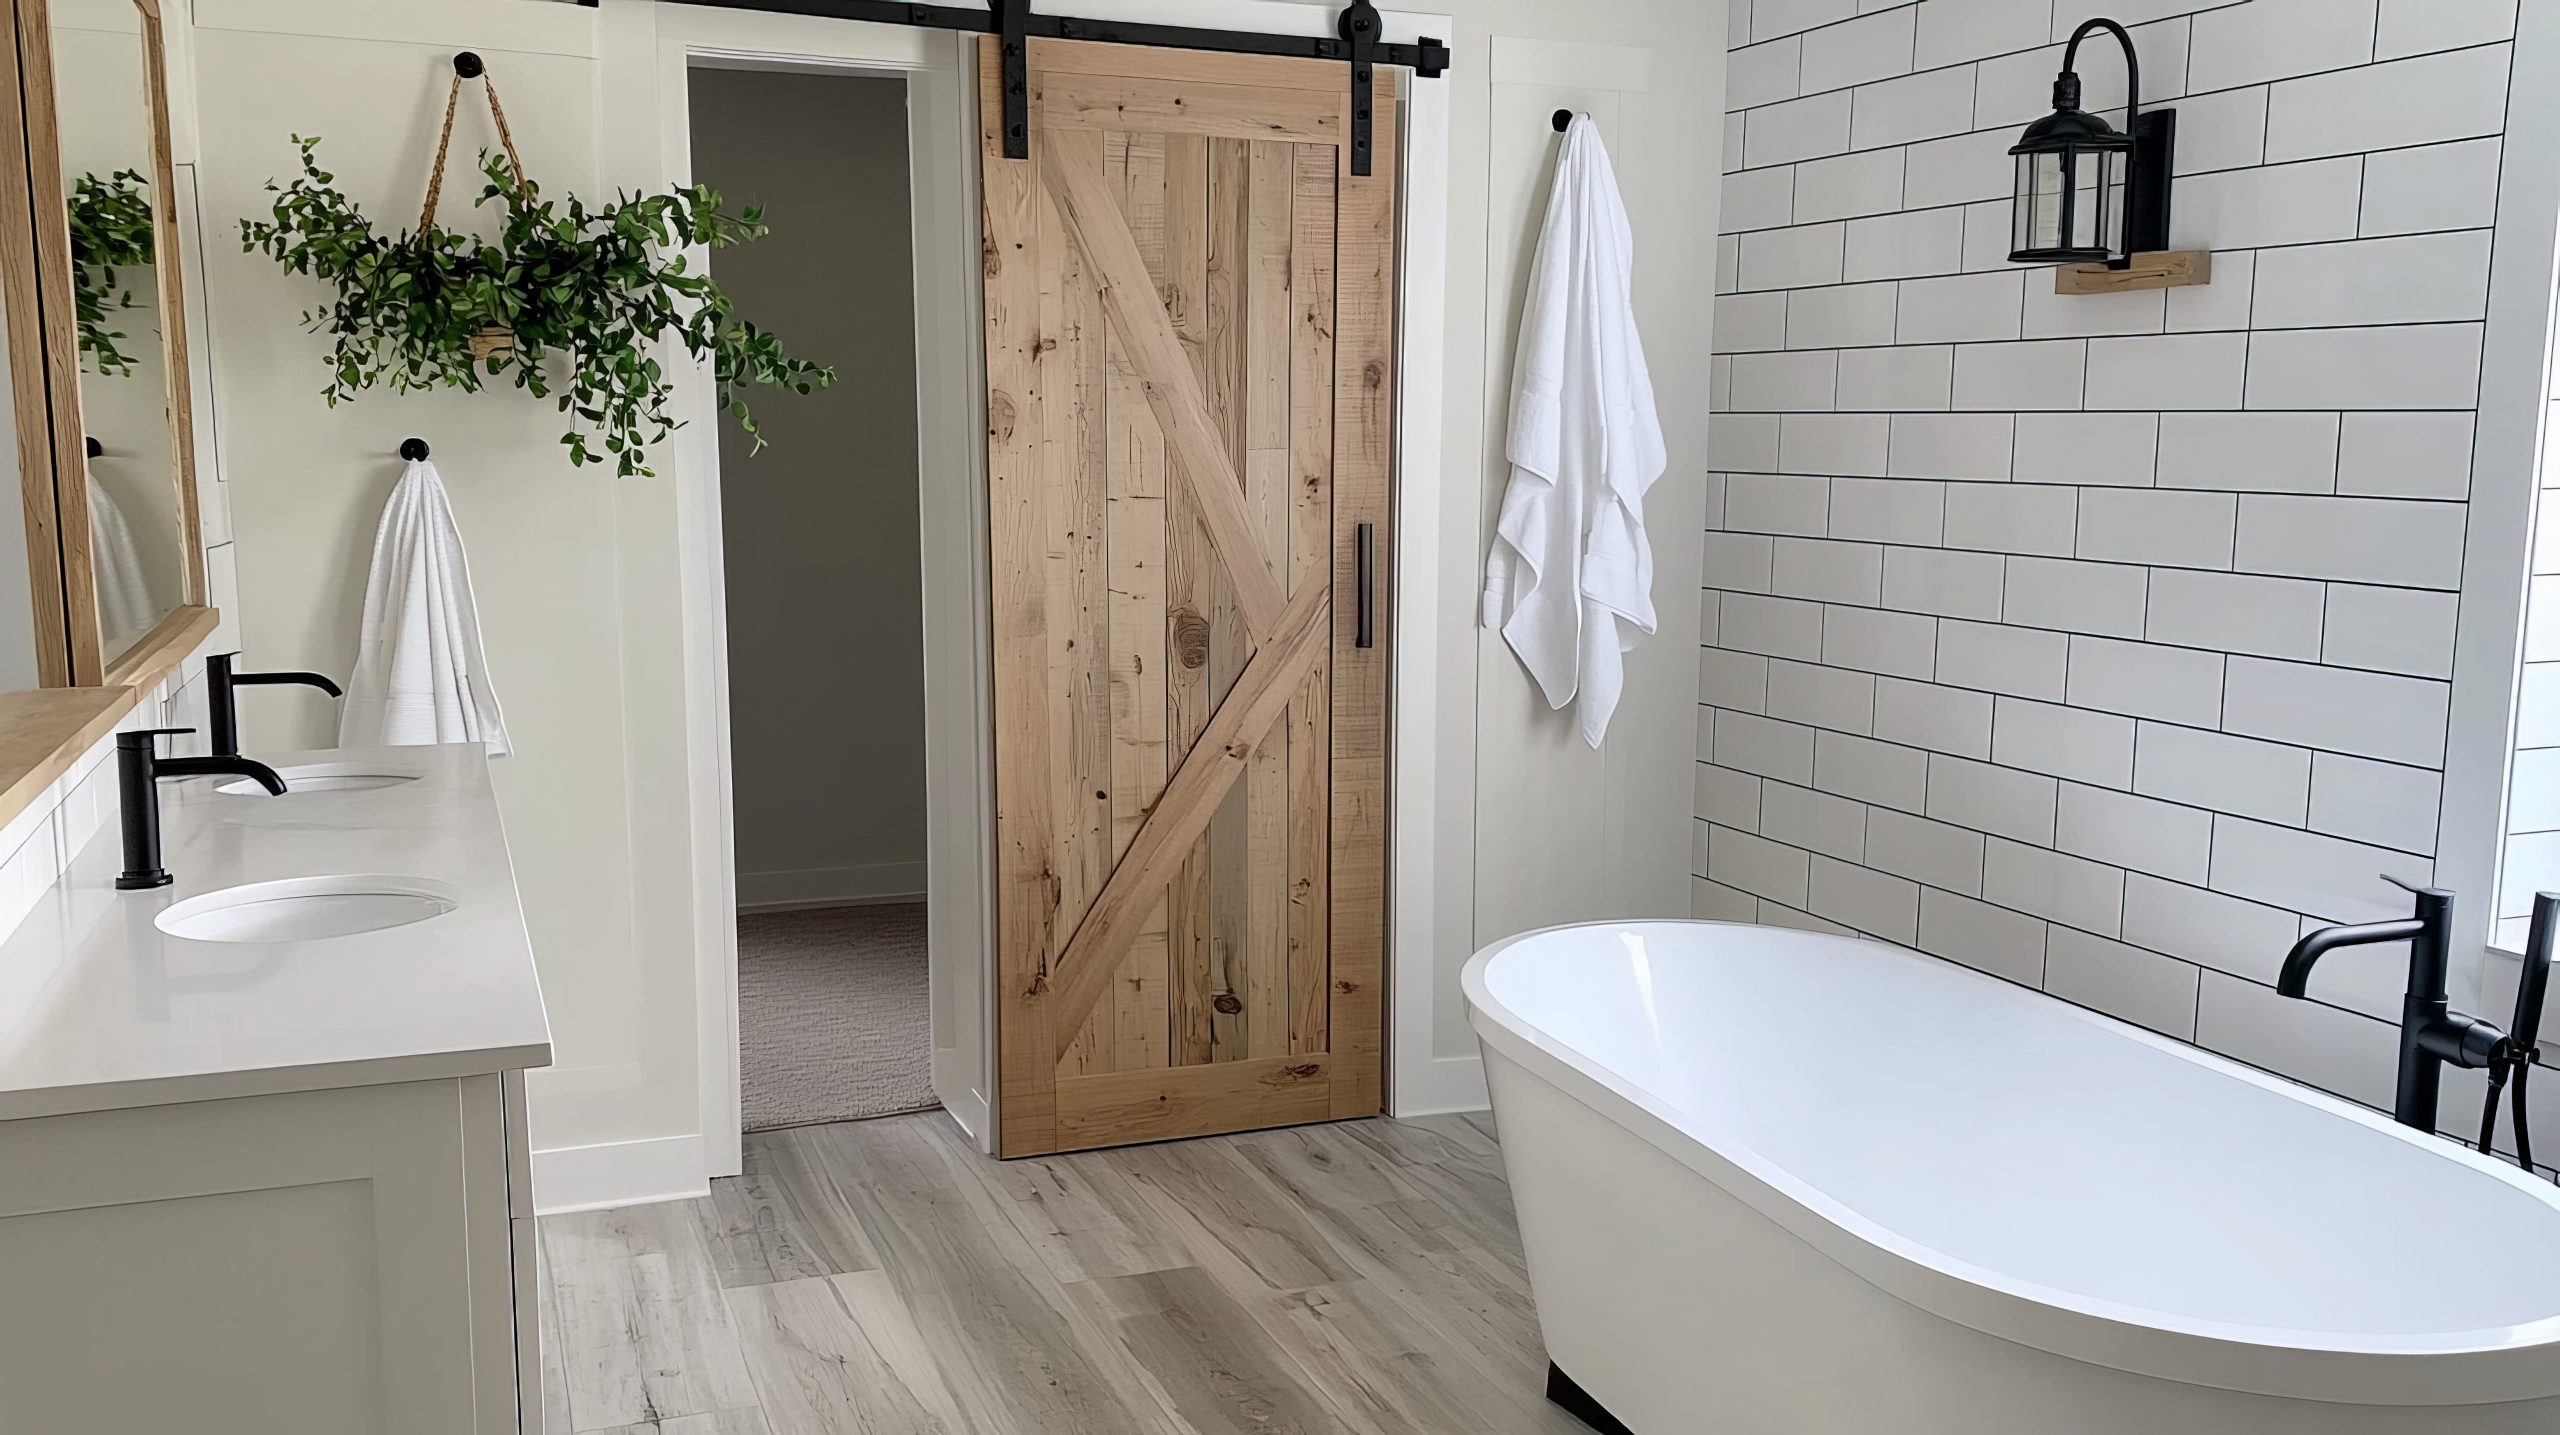
There are various design options to choose from, such as barn doors, pocket doors, or glass sliders. Each style offers its own unique charm and can complement your bathroom’s decor. Sliding doors not only improve space efficiency but also add a touch of flair to your design. It’s a practical solution that opens up the room and makes it feel less cramped.
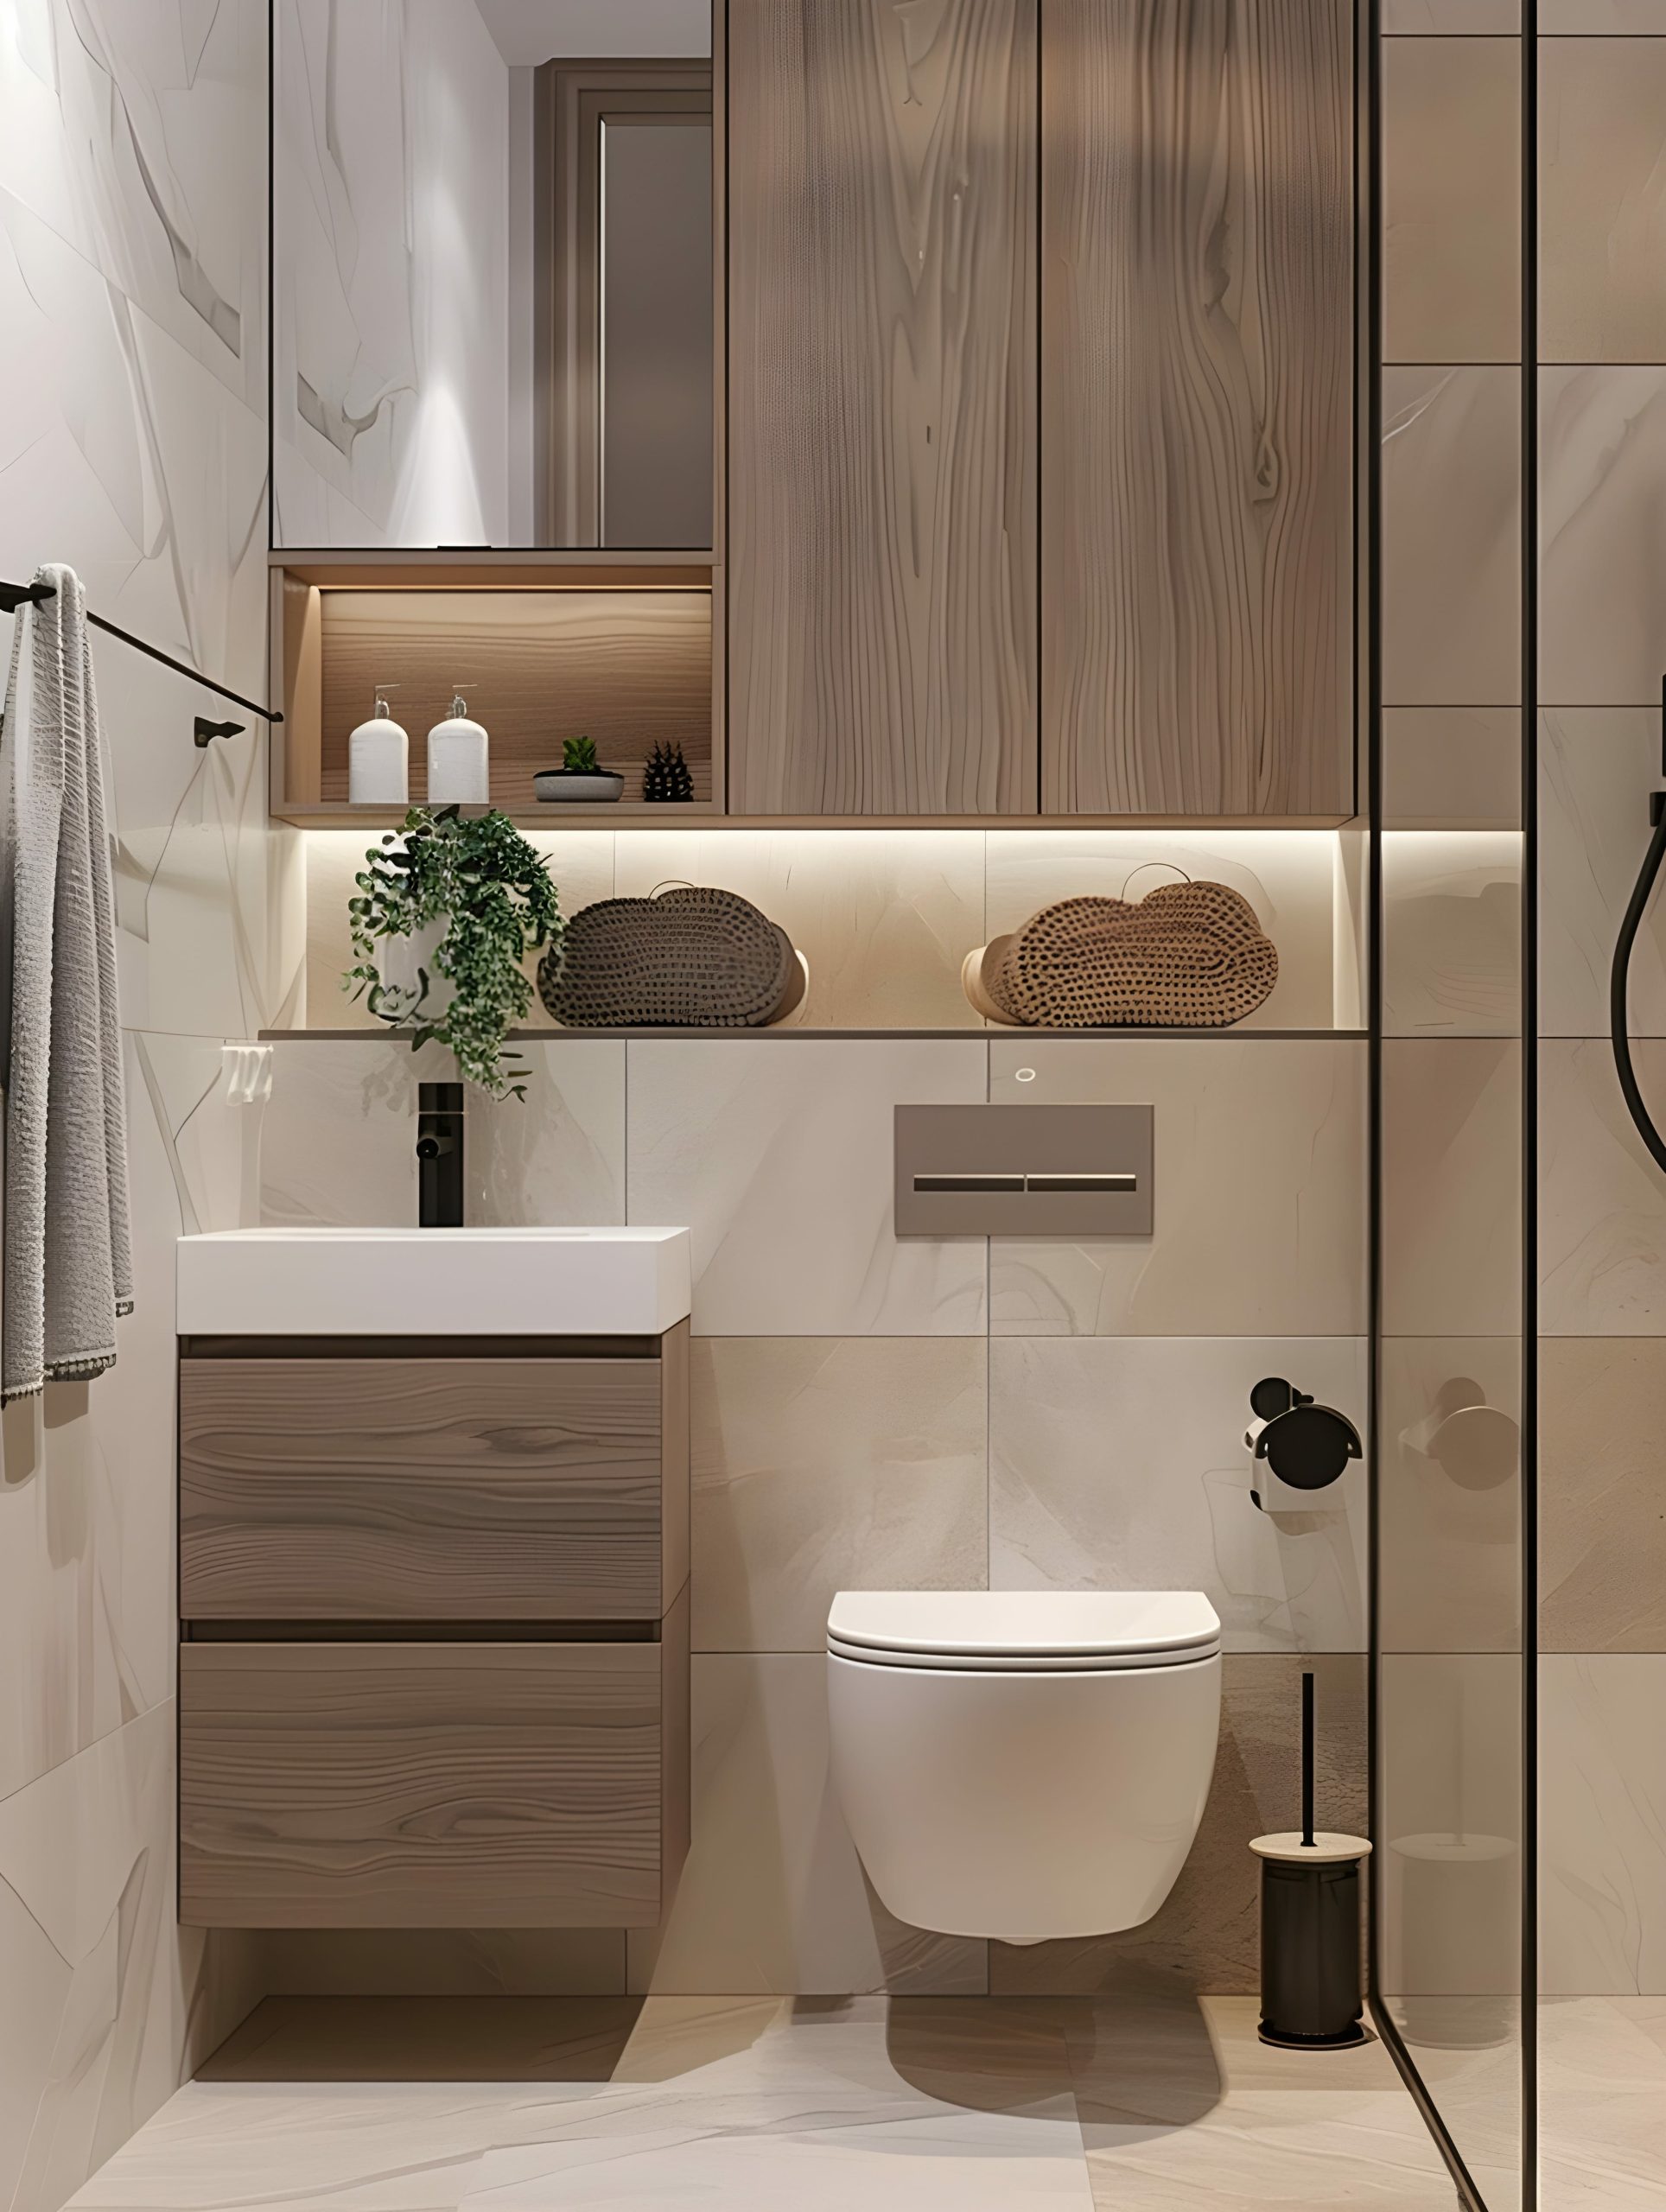
6. Clever Storage Solutions
Let’s face it, storage is always a challenge in small bathrooms. But with some clever small bathroom makeover ideas, you can keep everything organised and within reach. Recessed shelves built into walls are a great way to save space and store toiletries. Built-in niches in the shower provide convenient storage without the need for bulky caddies.
Baskets and organisers can help keep items tidy and accessible. Consider using stackable bins or drawer organisers to maximise storage space. The goal is to have a place for everything, so your bathroom feels calm and clutter-free. By implementing these storage solutions, you can create a more functional and efficient space that meets your needs.
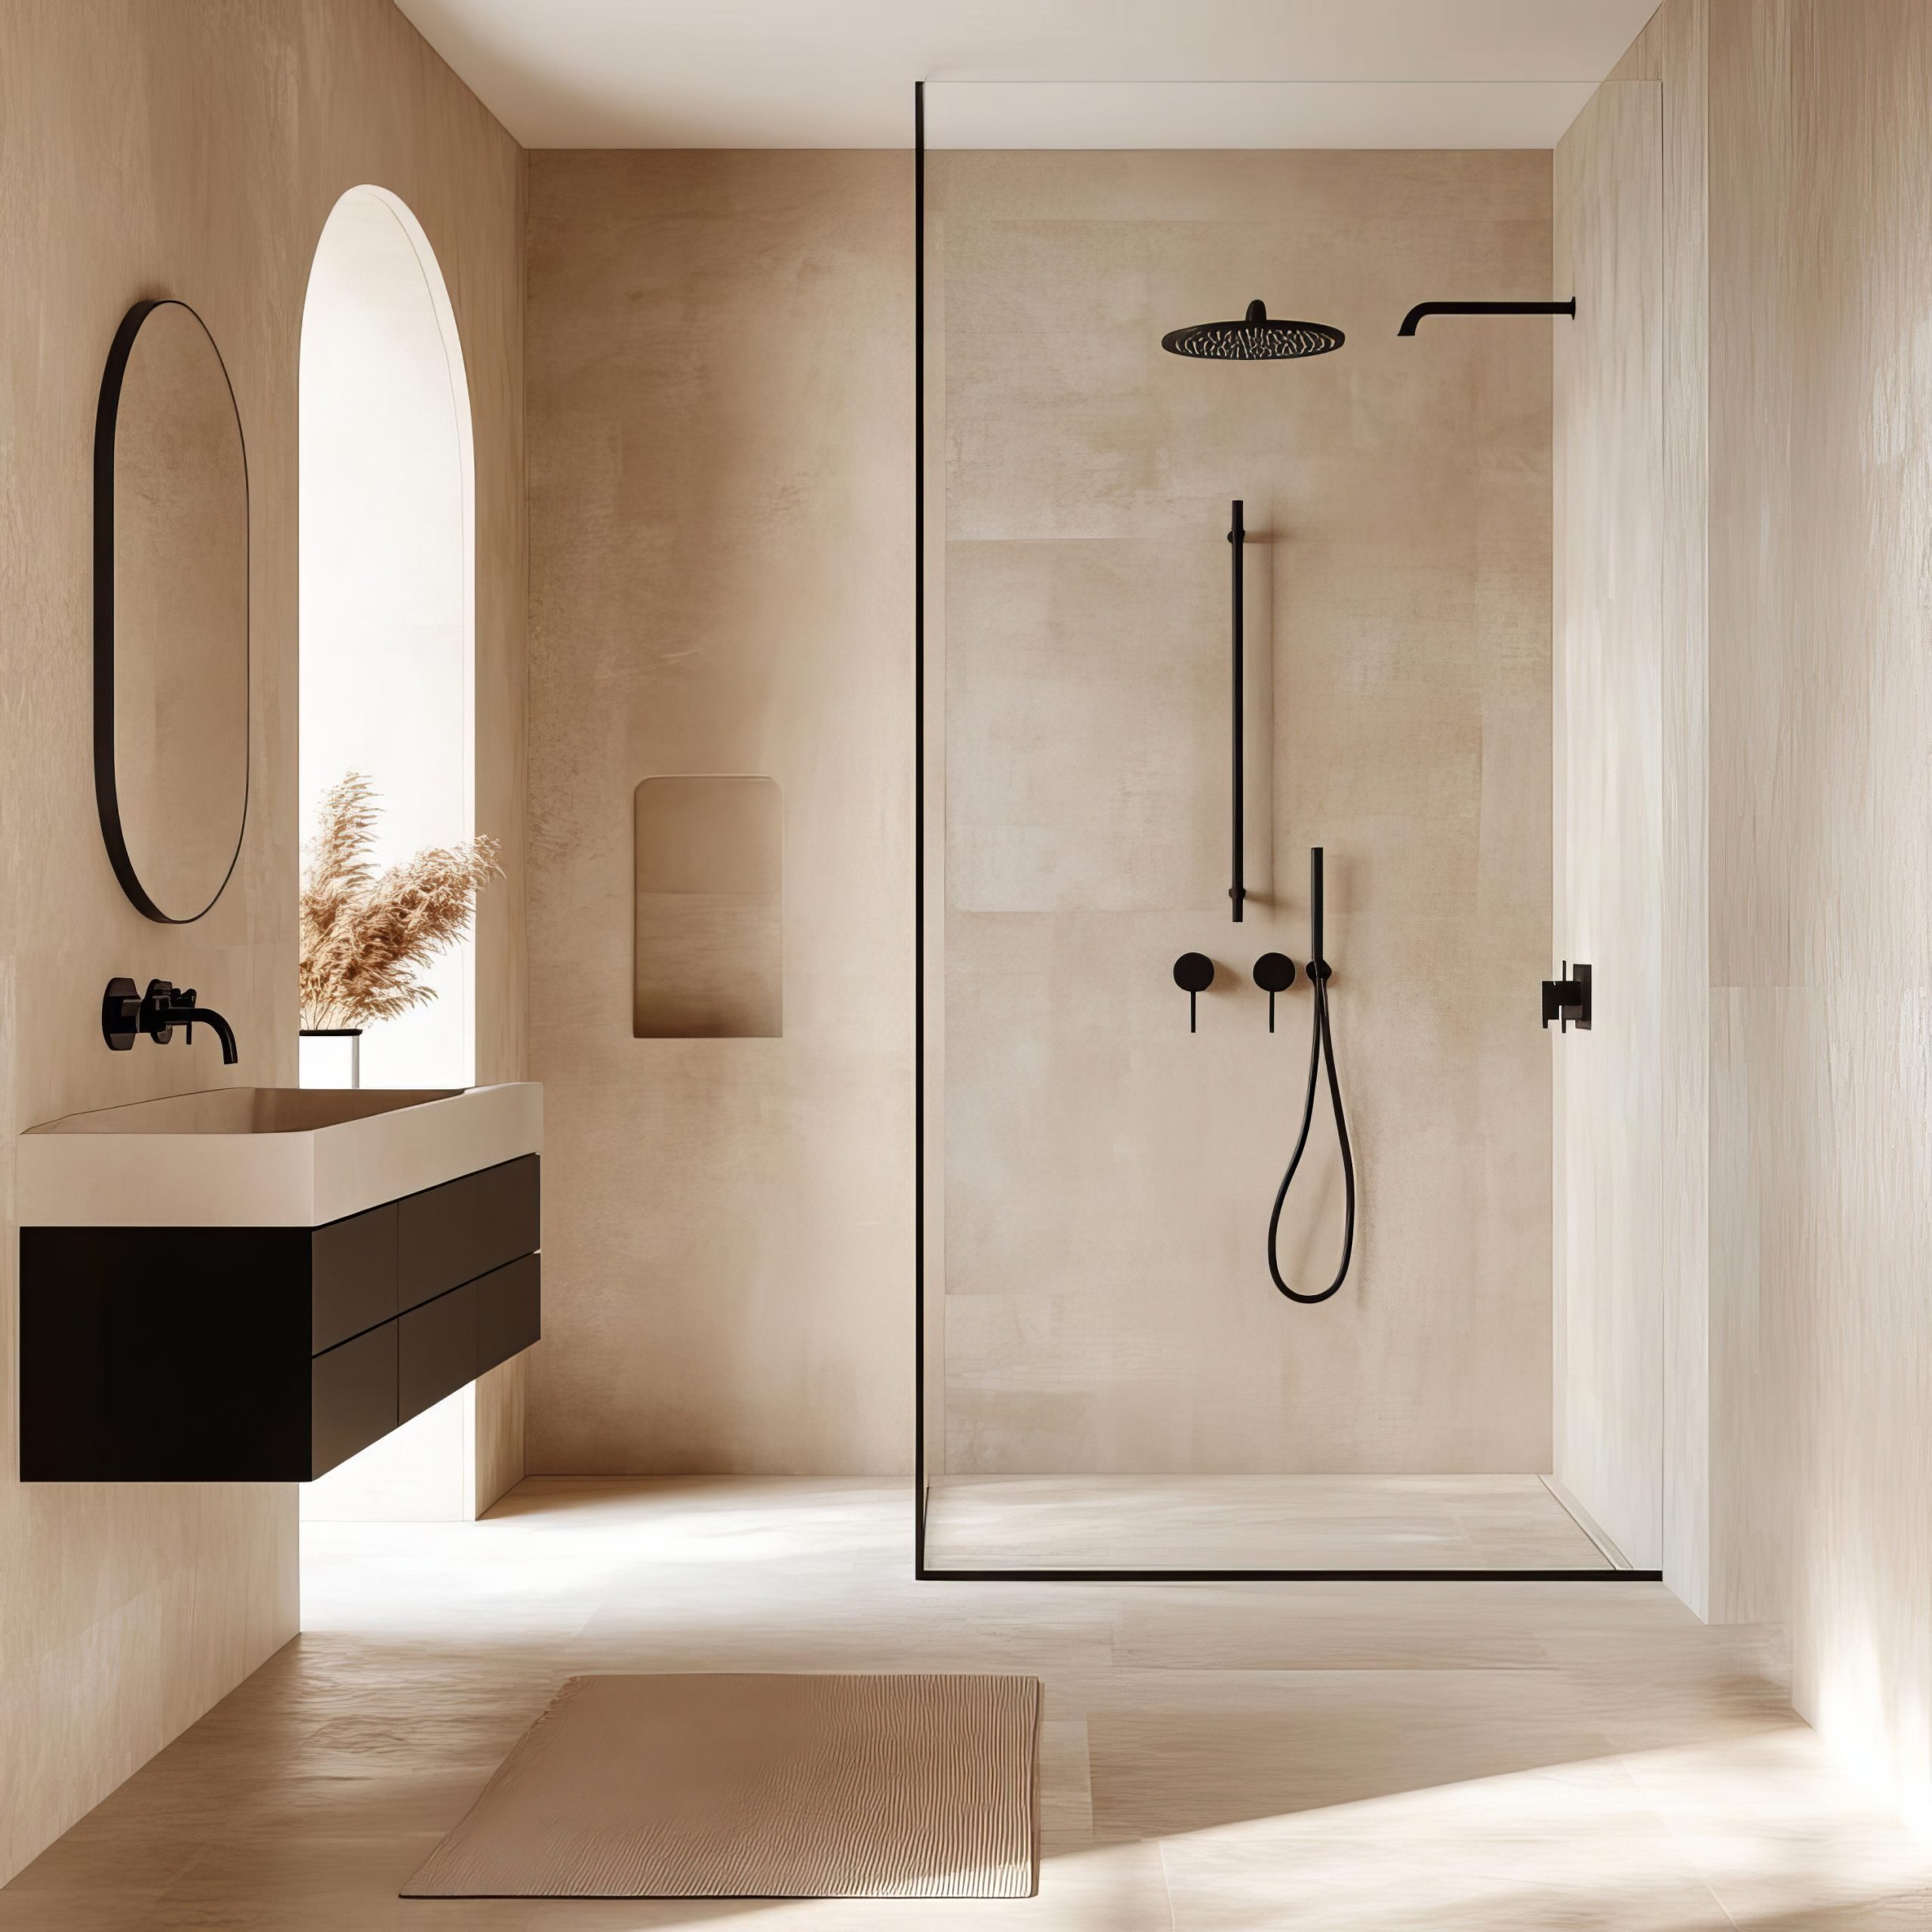
7. Use Glass and Transparent Materials
Incorporating glass and transparent materials is another fantastic small bathroom makeover idea. Glass shower doors, for instance, can make the room feel more open compared to a traditional shower curtain. They allow light to flow freely, enhancing the overall sense of space and airiness in your bathroom. Glass shelves can add a modern touch without crowding the space, providing a sleek and stylish storage solution.
Transparent accessories, such as clear containers or acrylic organisers, can create a seamless look and keep your bathroom looking tidy. These materials not only enhance the visual appeal of your bathroom but also contribute to a more open and inviting atmosphere. By using glass and transparent materials, you can create a sense of continuity and flow, making your small bathroom feel larger and more cohesive.
8. Statement Lighting Fixtures
Lighting can completely transform a space, and that’s especially true in small bathrooms. One of my favourite small bathroom makeover ideas is to incorporate statement lighting fixtures. Pendant lights hung above the vanity can add a chic and stylish touch, while wall sconces on either side of the mirror provide balanced lighting. LED strips under cabinets or around mirrors can create ambient light, enhancing the overall atmosphere.
The right lighting can add both function and flair, brightening up the room and serving as a focal point. It not only illuminates the space but also adds a touch of elegance and sophistication. By choosing unique and eye-catching lighting fixtures, you can elevate the design of your bathroom and create a more inviting and visually appealing space.
9. Incorporate Natural Elements
Bringing in natural elements is a great way to add warmth and texture to your small bathroom. Consider adding low-maintenance plants like ferns or snake plants, which thrive in humid environments. These little touches of greenery can make the space feel more inviting and fresh, creating a calming and relaxing atmosphere.
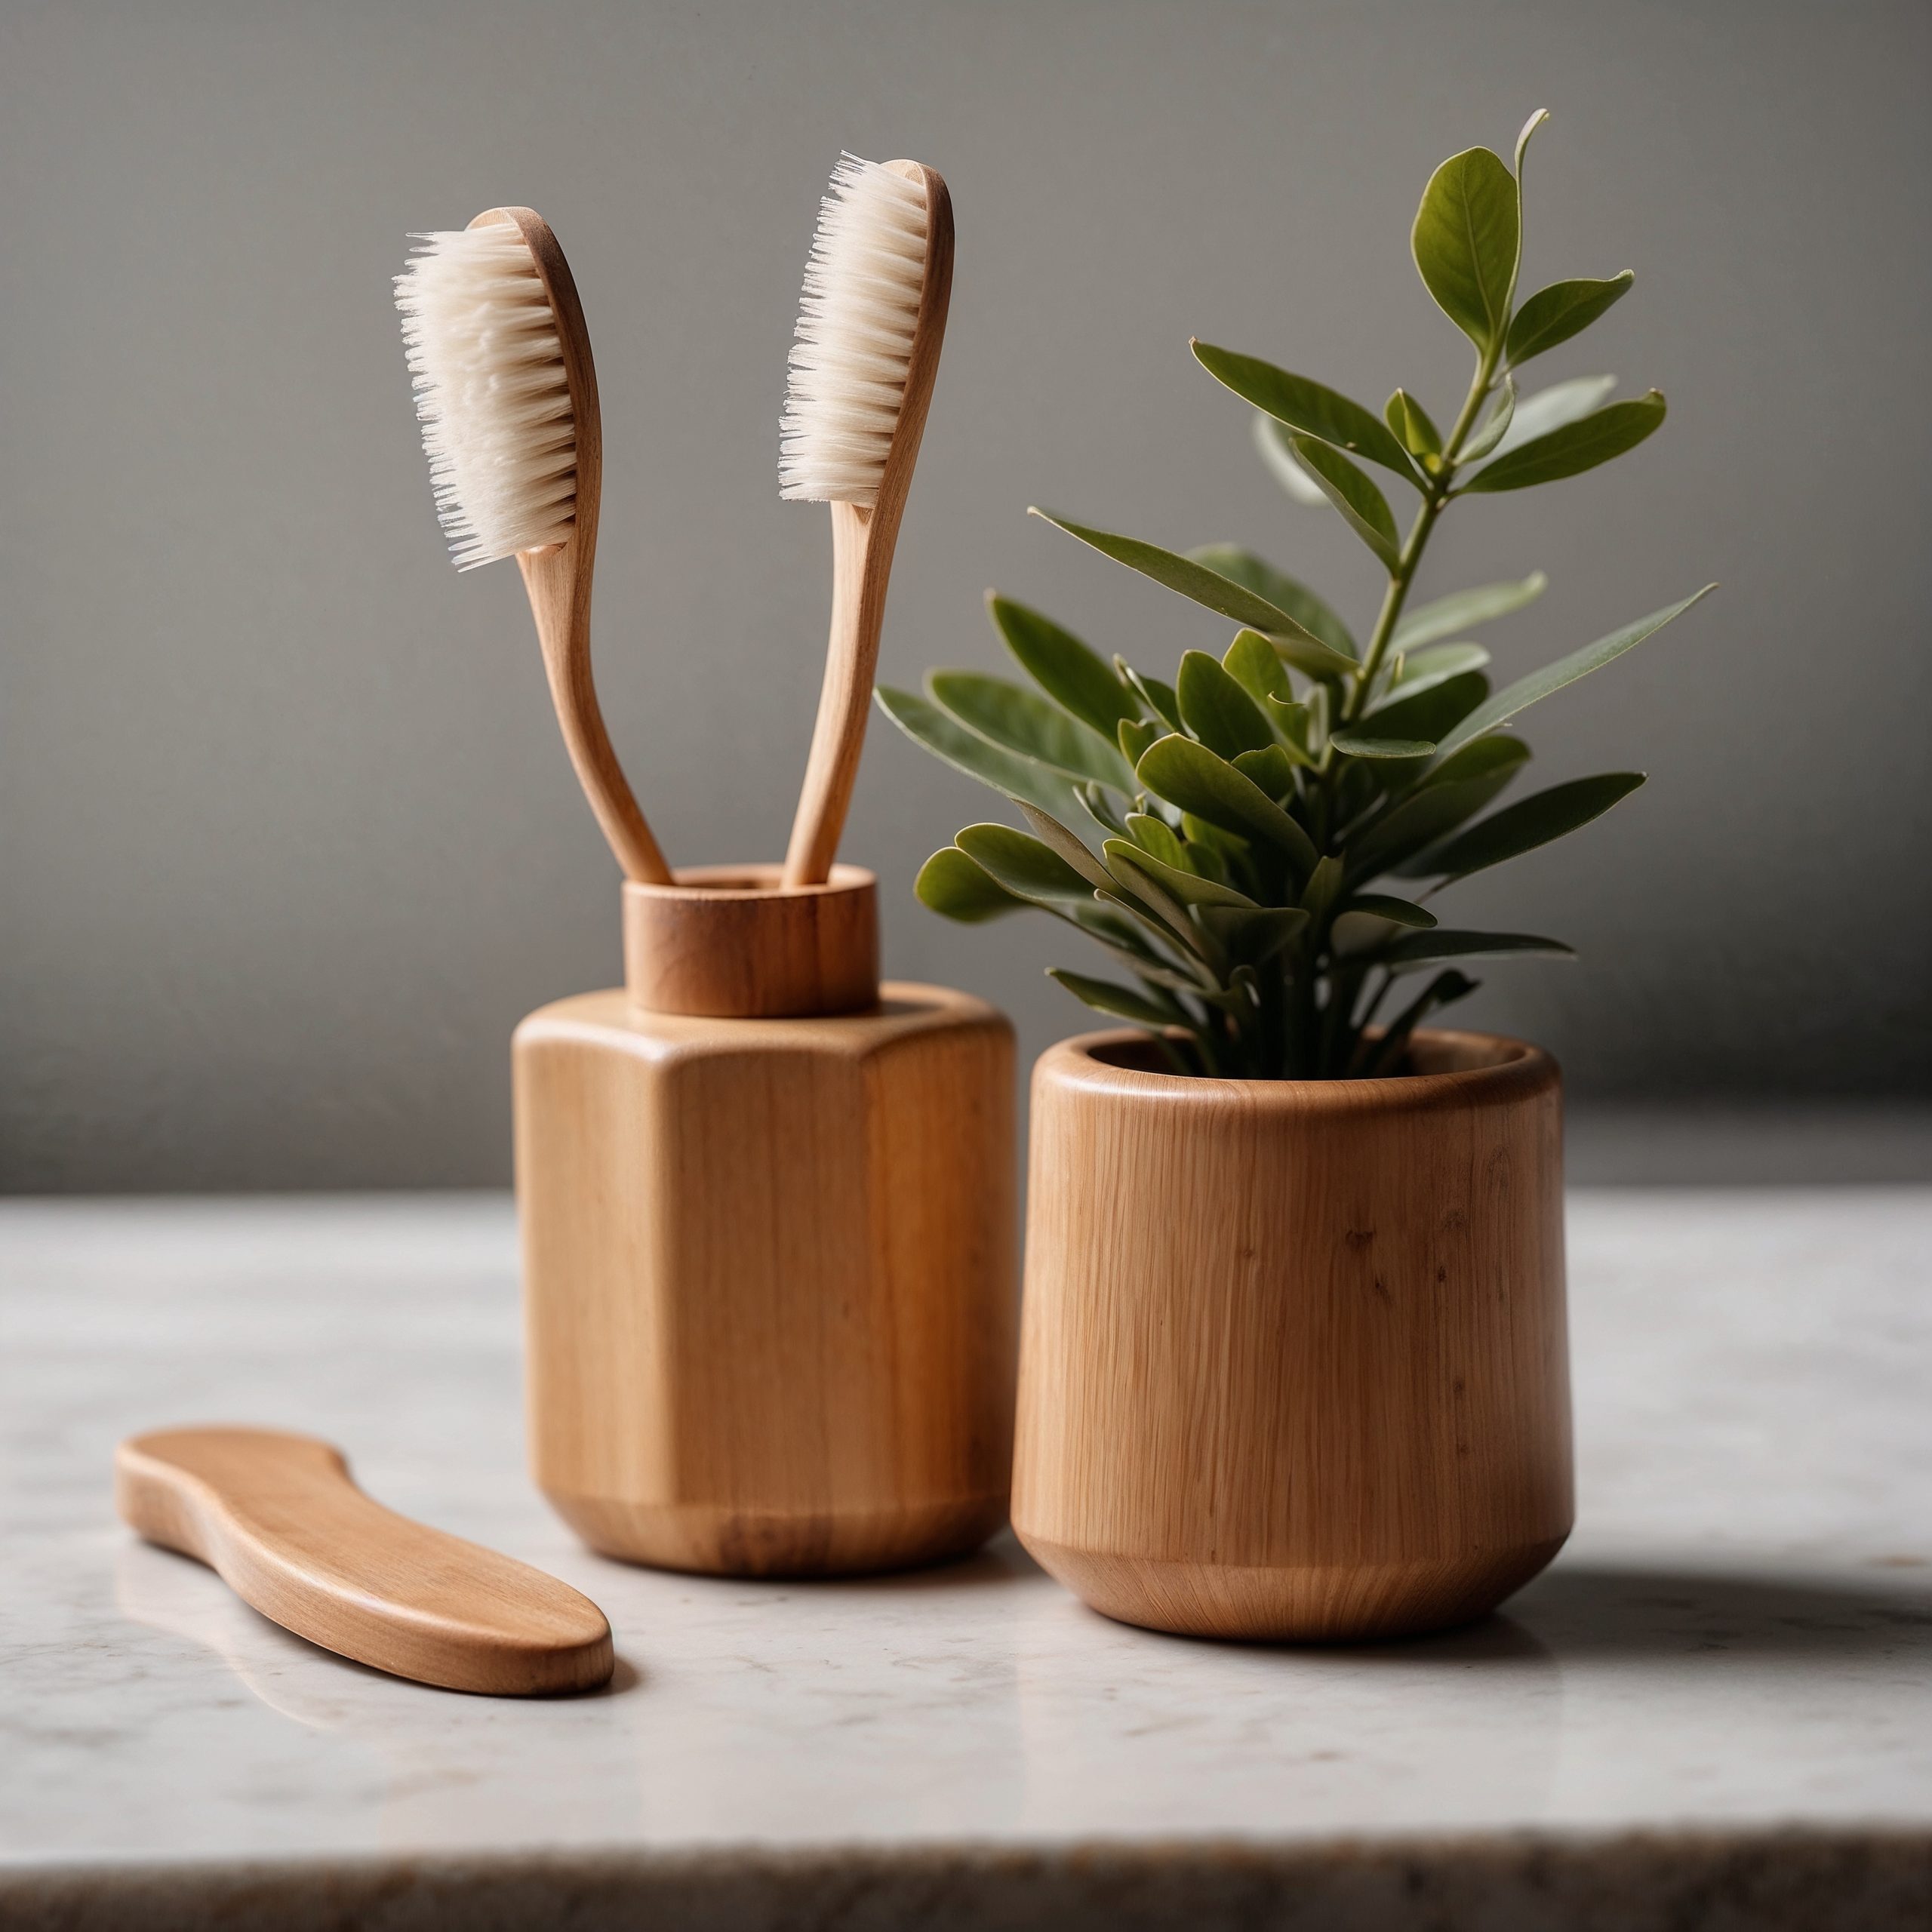
Incorporating natural materials, such as wood or stone, can add an organic and earthy feel to your bathroom. Use wooden accessories, like soap dishes or toothbrush holders, to add warmth and texture. Woven baskets can also provide additional storage while adding a rustic touch. By incorporating natural elements, you can create a more harmonious and balanced space that feels connected to nature.
10. Creative Use of Tiles
Tiles are a fantastic way to add character and style to your small bathroom. One of the best small bathroom makeover ideas is to get creative with tile patterns and textures. Consider using tiles to create a focal point, like an accent wall or a striking backsplash. You can play with different shapes, such as hexagons or subway tiles, to add visual interest.
Experiment with geometric or mosaic patterns to create a unique and personalised look. Textured tiles can add depth and dimension, making your bathroom feel more dynamic and visually appealing. The right tile design can make your bathroom feel unique and personalised, while also being practical and easy to clean. By getting creative with tiles, you can transform your small bathroom into a stylish and inviting space.
11. Minimalist Design Approach
When it comes to small spaces, less is often more. Adopting a minimalist design approach is one of the most effective small bathroom makeover ideas. Focus on decluttering and keeping only the essentials. Choose fixtures and decor with clean lines and simple forms to create a sense of openness and simplicity.
Stick to a neutral colour palette for a cohesive and serene look. This approach not only makes the space feel larger but also creates a calming and peaceful environment. By eliminating unnecessary distractions and focusing on the essentials, you can create a bathroom that feels open and airy, providing a sense of tranquillity and relaxation.
12. Add Personal Touches
Even in a small bathroom, there’s room for personal touches that reflect your style. Consider adding artwork, decorative items, or even a unique shower curtain that speaks to your personality. These small bathroom makeover ideas allow you to infuse the space with your own flair without overwhelming it.
Choose a few well-chosen pieces that add character and charm to your bathroom. Whether it’s a piece of art that you love or a decorative item that holds sentimental value, these personal touches can make your bathroom feel uniquely yours. By adding elements that reflect your personality, you can create a space that feels warm and inviting.
13. Smart Technology Integration
Finally, let’s talk about integrating smart technology into your small bathroom. This is one of those small bathroom makeover ideas that can really enhance convenience and efficiency. Consider automated lighting with motion sensors for hands-free operation. Smart mirrors with built-in lighting and defogging features can add a touch of luxury and modernity.
Bluetooth speakers can provide entertainment while you shower, making your bathroom experience more enjoyable. These tech-savvy additions can make your bathroom more functional and efficient, all while saving space and adding a touch of luxury. By incorporating smart technology, you can create a modern and innovative bathroom that meets your needs.
Incorporating these small bathroom makeover ideas can truly transform your space, making it both functional and stylish. Don’t be afraid to experiment and personalise your bathroom to reflect your unique taste and needs.
by Kesaa Interiors | DECOR & DIY, DESIGN GUIDES, Furniture & Layout Guides, Living Room, ROOMS, Small Space Hacks
Looking for tips to take your cozy living room decor in your small apartment to the next level? You have come to the right place!
Living in a small apartment doesn’t mean you have to sacrifice style or comfort. In fact, creating cozy living room decor in a small apartment can be a really fun challenge! It’s all about making smart choices and getting creative with your space.
I’m excited to share some of my favorite tips and tricks for maximizing every square inch and creating a stylish and inviting living room, perfect for those of us dealing with limited square footage. Get ready to transform your small space into a cozy haven!
The Best Cozy Living Room Decor for Small Apartment!

Furniture that Fits Your Footprint
When it comes to cozy living room decor for a small apartment, choosing the right furniture is absolutely crucial. It’s easy to get carried away with a beautiful sofa or a comfy armchair, but if it’s too big for your space, it’s going to make your living room feel cramped and cluttered. Here’s how to choose furniture that will make your small living room feel bigger and more inviting:
-
Scale is Key: Before you even start looking at furniture, grab a measuring tape and get to work! Seriously, measuring your living room is the first and most important step in creating cozy living room decor for a small apartment. This will help you determine the maximum size of furniture you can comfortably fit without overwhelming the space. Think apartment-sized sofas, loveseats instead of large sectionals, and slimline chairs. For example, a standard sofa might be 84 inches long, but a loveseat is typically around 60 inches, saving you valuable floor space. Choosing appropriately scaled furniture is the foundation for successful cozy living room decor in a small space.
-
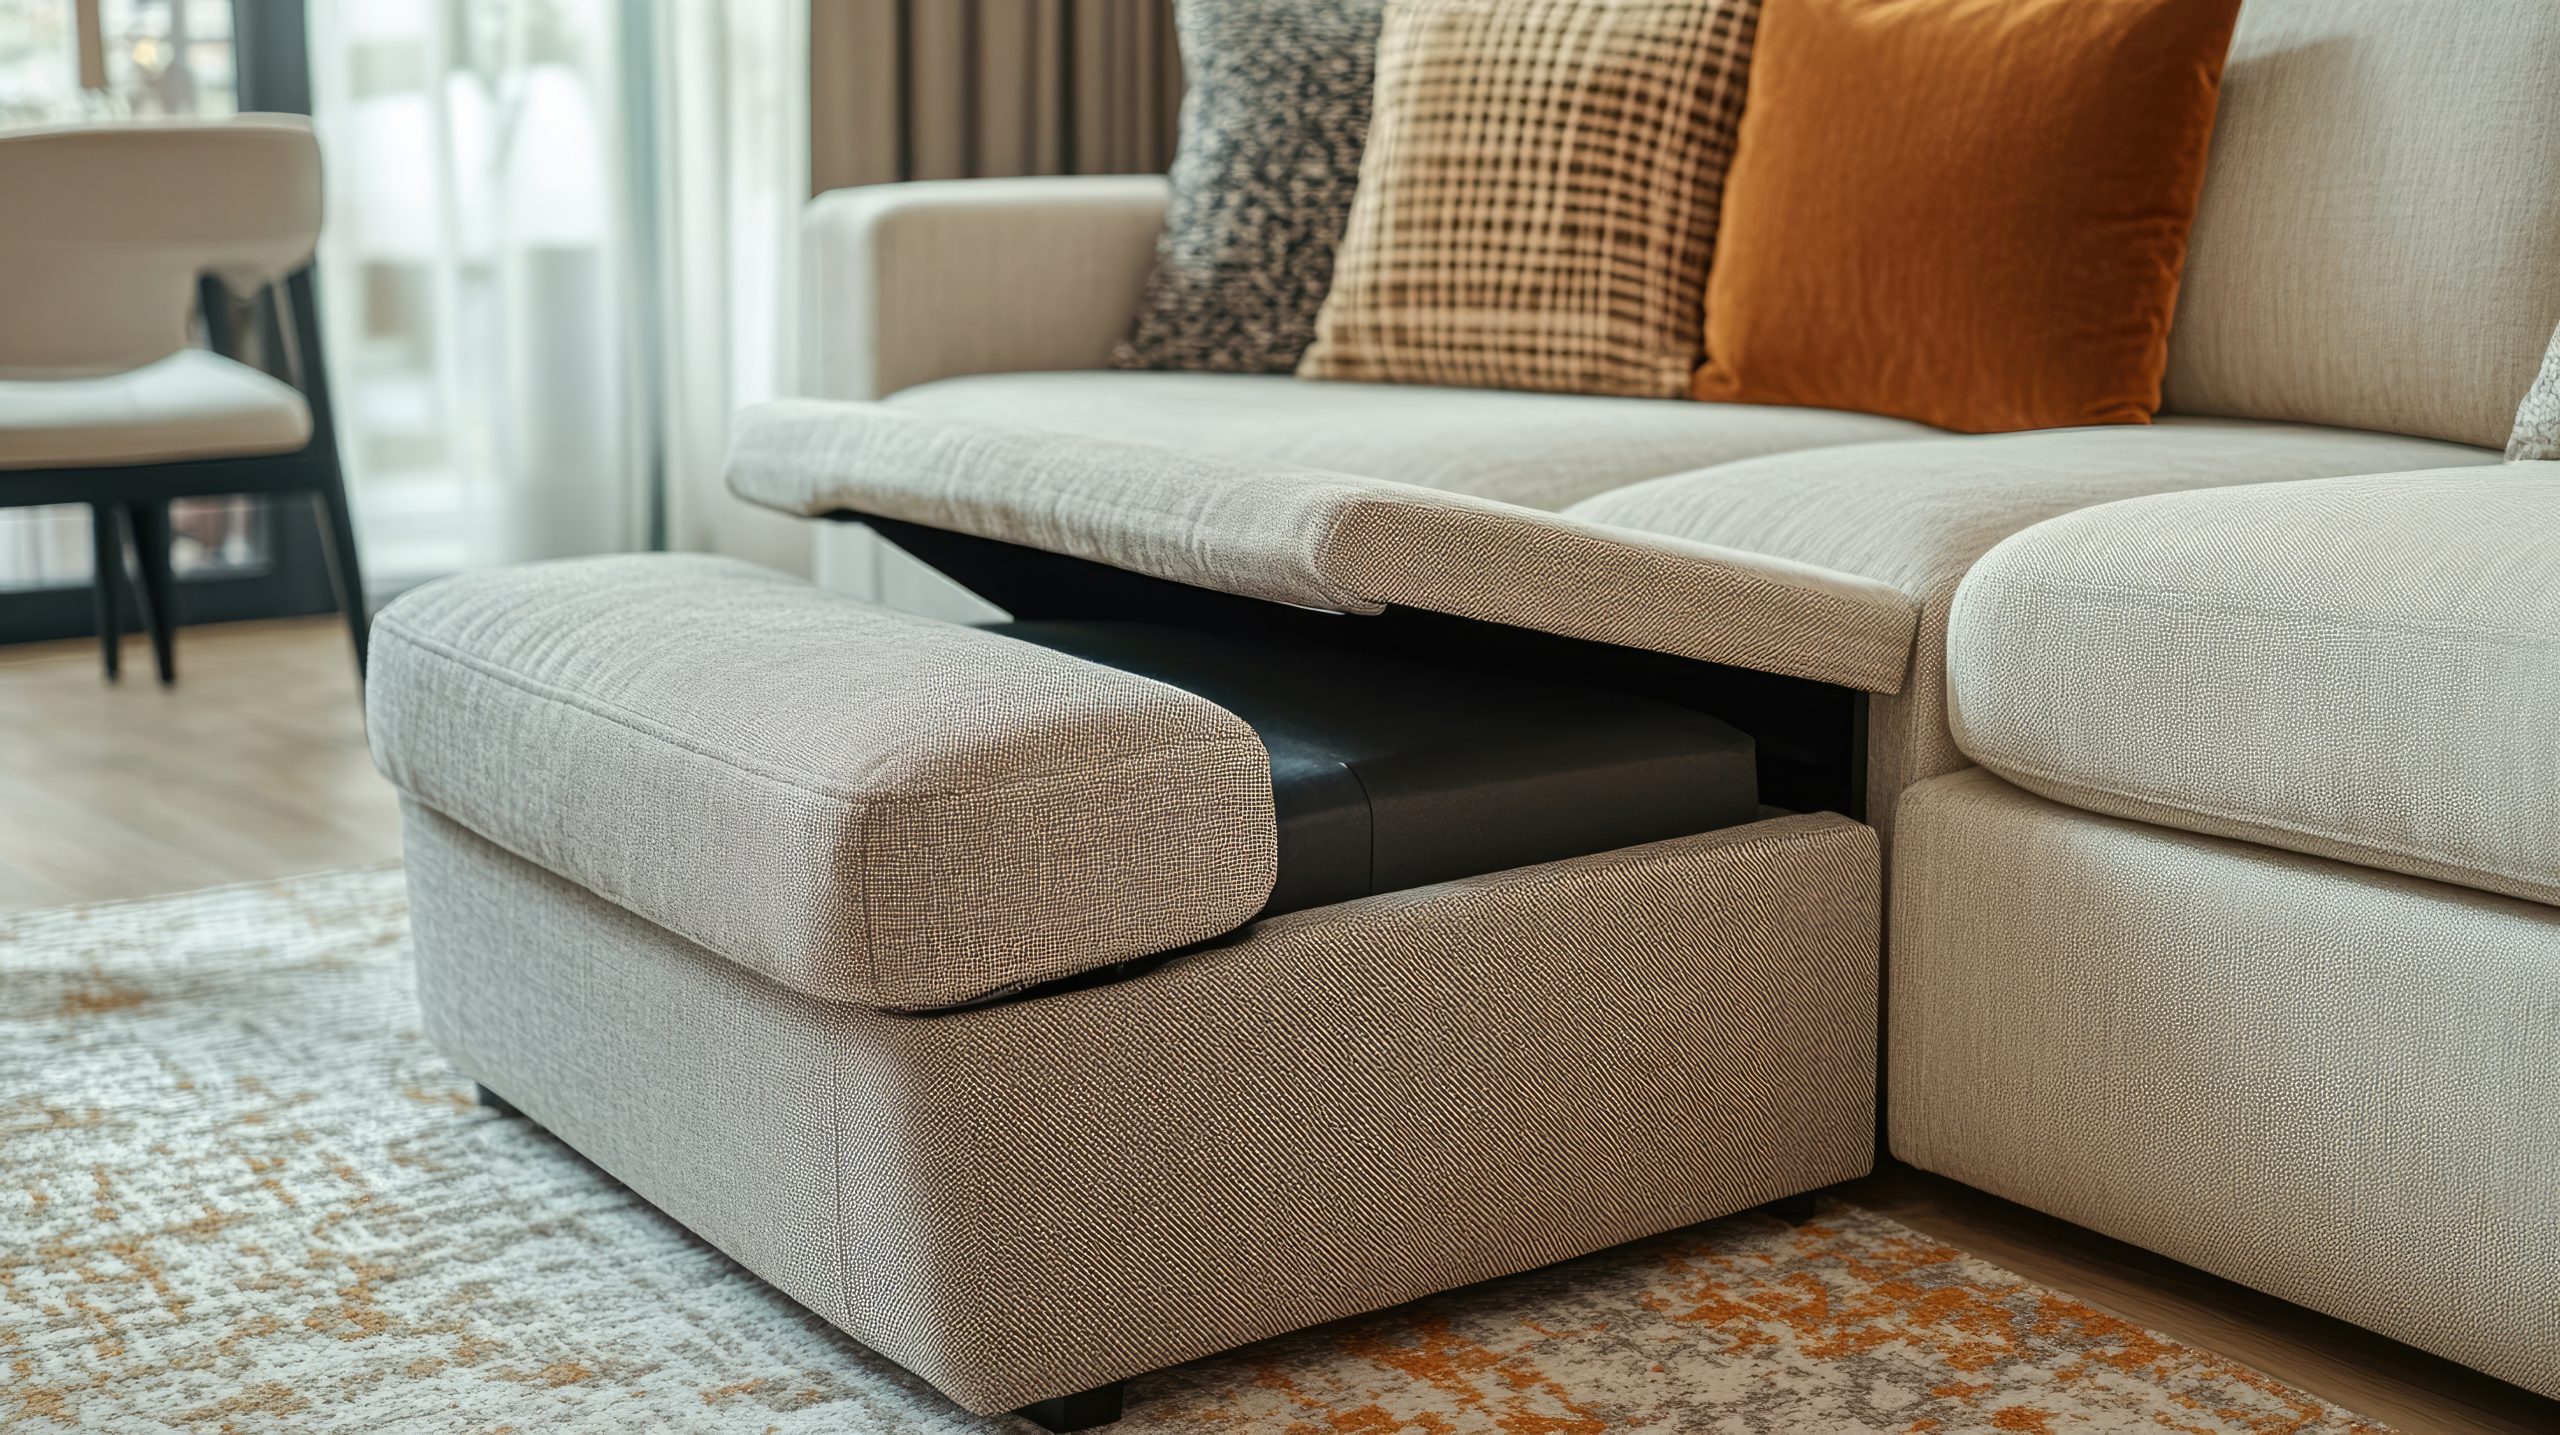
Multi-Functional Marvels: In a small apartment, every piece of furniture needs to pull its weight. Look for pieces that serve double duty, like a sofa bed with built-in storage underneath for bedding. This is a game-changer for overnight guests! An ottoman with a hidden compartment for blankets and pillows is another great way to sneak in extra storage without sacrificing style. A coffee table that lifts to become a dining table is another fantastic option for maximizing functionality in a small apartment living room, especially if you don’t have a separate dining area. Think creatively about how each piece can serve multiple purposes.
-
Measure Twice, Buy Once: I can’t stress this enough – measure your space before you buy any furniture! It’s so much easier to measure than to try and squeeze a too-large sofa through your apartment door, trust me! Creating a simple floor plan sketch can also be incredibly helpful when planning your living room decor. You can even use online tools or apps to create a virtual floor plan and experiment with different furniture arrangements.
-
Leggy Looks: Furniture with legs creates a sense of airiness and visual space, which is essential in a small living room. The light can flow underneath the furniture, making the room feel less cluttered and more open. When you’re aiming for cozy living room perfection, consider opting for sofas, armchairs, and coffee tables with raised legs. Even a small elevation can make a big difference in how spacious your living room feels. Think sleek, tapered legs for a modern look, or ornately carved legs for a more traditional feel.
- Vertical Space is Your Best Friend: Don’t forget to look up! In a small living room, vertical space is prime real estate. Tall, narrow bookshelves or wall-mounted units are a great way to add storage and display decorative items without taking up valuable floor space. Styling these shelves with a mix of books, plants, and personal items can really elevate your living room decor. Consider using wall-mounted shelves to display artwork or create a mini indoor herb garden – it’s a great way to add personality and functionality to your space.
-
Clear the Clutter: Less is definitely more in a small space. Be mindful of how much furniture you bring into your living room. Avoid overcrowding the space, and focus on a few key pieces that are both functional and stylish. A minimalist approach can work wonders for creating a cozy living room in a small apartment. Regularly decluttering and getting rid of items you no longer need or use will help keep your living room feeling open and inviting. Consider incorporating stylish storage solutions, like baskets and decorative boxes, to keep clutter at bay. A clutter-free space is key to achieving a truly cozy and relaxing atmosphere.
Creating a Cozy Atmosphere with Textiles
Textiles are the secret weapon for creating a truly cozy living room, especially in a small apartment. They add warmth, texture, and personality, transforming a plain space into a welcoming haven. When considering cozy living room decor, small apartment style, think beyond just functionality – textiles offer a powerful way to enhance the ambiance and express your personal style.
-
Texture is King: In a small living room, texture is paramount. It adds depth and dimension, fooling the eye and making the space feel larger and more inviting. Think beyond smooth surfaces and incorporate a variety of tactile elements. A chunky knit throw draped over the arm of your sofa instantly adds a sense of warmth and comfort. Plush velvet cushions invite you to sink in and relax. A soft, shaggy rug underfoot creates a luxurious and inviting feel. Don’t be afraid to mix and match different textures – a nubby wool throw paired with a smooth velvet cushion creates a dynamic and interesting look. Consider the seasons too – lighter, breathable linens for summer and heavier wools and faux furs for winter can enhance the cozy factor.
-
Natural Beauty: Natural materials like wool, cotton, and linen are not only soft and comfortable against the skin, but they also offer inherent breathability, which is crucial in a small apartment. These materials also bring a touch of organic elegance to your living room decor. A chunky hand-knit wool throw draped over the back of your sofa adds a touch of rustic charm, while a crisp linen cushion introduces a sense of understated sophistication. Look for natural fiber rugs like jute or sisal to add texture and warmth underfoot.
-
Color Psychology: Color has a profound impact on mood and atmosphere. For a cozy living room decor in a small apartment, lean towards warm, inviting colors that create a sense of intimacy and comfort. Soft neutrals like cream, beige, and gray provide a calming backdrop, while earthy tones like terracotta, olive green, and warm brown evoke a sense of groundedness and tranquility. Rich jewel tones like emerald green, sapphire blue, or ruby red can add a touch of opulence and warmth without overwhelming the space. Consider using a color palette of two or three complementary colors to create a cohesive and harmonious look.
-
Layering for Depth: Layering textiles is a designer’s trick for adding visual interest and depth to a small living room. Start with a base layer, like a rug, and then build upon it with throws, cushions, and even curtains. Don’t be afraid to mix and match different patterns and textures – a geometric patterned rug paired with a solid-colored throw and a textured cushion creates a dynamic and inviting look. Layering also allows you to easily change the look and feel of your living room by swapping out different textiles with the seasons or your changing tastes.
-
Rugs Define the Space: In a small apartment, a rug is essential for visually defining the living area and adding warmth underfoot. Choose a rug that is large enough to anchor the main furniture pieces, such as the sofa and armchairs, but not so large that it overwhelms the room. Ideally, the front legs of your furniture should rest on the rug, creating a sense of connection and cohesion. A rug can also introduce a pop of color or pattern to your cozy small living room decor, tying the space together and adding personality.
Lighting Up Your Small Space
Lighting is a critical element in any cozy living room decor for a small apartment. It sets the mood, enhances functionality, and can even make the space feel larger. Here’s how to light up your small living room for maximum coziness:
-
Natural Light is Your Friend: Natural light is a precious commodity in a small apartment. Maximize it by keeping window treatments light and airy. Sheer curtains or blinds allow natural light to filter through while still providing privacy. Avoid heavy drapes or blinds that block light and make the space feel smaller. Consider using mirrors strategically to reflect natural light deeper into the room.
-
Layered Lighting Magic: Creating a warm and inviting atmosphere relies on layered lighting. Combine ambient lighting (general overhead lighting), task lighting (for reading or working), and accent lighting (to highlight specific features) for a well-lit and functional space. A floor lamp next to your reading chair provides focused light for reading, while a table lamp on a side table creates a soft, ambient glow. Pendant lights over the coffee table add a touch of style and provide focused light for conversations or games. Dimmer switches allow you to adjust the brightness of your lighting to suit different moods and activities.
-
Light and Bright Color Schemes: Light and bright wall colors can significantly impact how spacious your small living room feels. Opt for shades of white, cream, or light gray to create a neutral backdrop that reflects light and makes the space feel open and airy. You can then add pops of color with your textiles and accessories. A light and airy color scheme is essential for successful cozy living room decor in a small apartment.
-
Statement Lighting Fixtures: A statement light fixture can be the jewelry of your living room, adding personality and style without taking up valuable floor space. Choose a fixture that complements your overall decor and provides adequate lighting for the space. A unique pendant light over the coffee table or a stylish chandelier can become a focal point and elevate the entire room. Consider the scale of the fixture – a large, oversized fixture can overwhelm a small space, while a smaller, more delicate fixture can add a touch of elegance without feeling overpowering.
- Mirror, Mirror on the Wall: Mirrors are a small space decorator’s best friend. They reflect light, creating the illusion of more space and making your living room feel larger and brighter. A large statement mirror above the sofa can visually double the size of the room, while a gallery wall of smaller mirrors adds a touch of eclectic style and reflects light from multiple angles. Consider placing a mirror opposite a window to maximize natural light reflection.
Decorative Touches for a Stylish Space
Decorative touches are what truly personalize your space and make it feel like home. In a small apartment, it’s important to be selective and intentional with your decor choices to avoid cluttering the space. Here’s how to add style and personality to your cozy living room decor:
-
Curated Collections: Resist the urge to fill every surface with decorative objects. Instead, choose a few carefully curated pieces that you truly love and that reflect your personal style. This could include a collection of vintage books, a grouping of framed family photos, a few treasured travel souvenirs, or a small display of handcrafted pottery. Grouping similar items together creates a more impactful visual statement than scattering individual items around the room. Consider using trays or decorative bowls to display smaller items and keep surfaces looking organized.
-
Focal Point Focus: Every living room needs a focal point – a visual anchor that draws the eye and gives the space a sense of purpose. In a small living room, the focal point can be a fireplace, a piece of statement art, a gallery wall, a large window with a beautiful view, or even a striking piece of furniture. Once you’ve identified your focal point, arrange your furniture and decor to highlight it. For example, if your focal point is a fireplace, arrange your seating area to face it.
-
Decluttering is Key: Clutter is the enemy of coziness, especially in a small apartment. Regularly declutter your living room, getting rid of anything you no longer need, use, or love. A clutter-free space feels more open, airy, and inviting. Invest in stylish storage solutions, such as baskets, decorative boxes, and ottomans with hidden storage, to keep clutter contained and out of sight. Make decluttering a regular habit to maintain a sense of calm and order in your living room.
-
Greenery Brings Life: Plants add a touch of life and vibrancy to any space, and they’re especially beneficial in a small living room. They can help to purify the air, improve indoor air quality, and create a more calming and inviting atmosphere. Choose low-maintenance plants that thrive in indoor environments, such as snake plants, pothos, or spider plants. Place plants strategically around the room to add pops of color and texture. A tall, leafy plant in a corner can visually expand the space, while a small succulent on a coffee table adds a touch of natural beauty.
-
Personal Touches: The most important decorative touches are the ones that reflect your personality and make your space feel like home. Don’t be afraid to display items that have special meaning to you, whether it’s a collection of vintage postcards, a framed concert ticket, or a handmade quilt from your grandmother. These personal touches are what truly make your space unique and special.
Making the Most of Vertical Space
In a small apartment, maximizing vertical space is essential for creating a functional and stylish living room. Think upwards and utilize every inch of wall space to your advantage. Here’s how to make the most of your vertical real estate:
-
Think Vertical: Train your eye to look up! Before adding furniture or decor, consider how you can utilize the vertical space in your living room. This might involve installing shelves, hanging artwork, or using tall furniture to draw the eye upwards and create the illusion of height.
-
Floating Shelves: Floating shelves are a versatile and stylish way to add storage and display decorative items without taking up valuable floor space. Install them above the sofa, next to the TV, or in any other awkward corner. Use floating shelves to display books, plants, framed photos, or small decorative objects. Arrange items in a visually appealing way, leaving some negative space to avoid a cluttered look.
-
Bookcase Bliss: Tall, narrow bookcases are a classic way to maximize storage and display books, decorative objects, and even small plants. They can also add a touch of elegance and sophistication to your living room. Choose a bookcase that complements your existing furniture and decor. Arrange books and objects in a visually appealing way, mixing horizontal and vertical stacks to create visual interest.
-
Wall-Mounted Magic: Explore other wall-mounted options beyond shelves and bookcases. Hanging planters can add a touch of greenery without taking up floor space. Wall-mounted sconces provide ambient lighting and free up valuable surface area on tables and shelves. Hanging artwork or a large mirror can create a focal point and add personality to your space. Consider mounting your TV on the wall to also free up space on a media console.
-
Vertical Stripes: Incorporating vertical stripes, whether in wallpaper, rugs, or curtains, can visually elongate the room and make your ceilings appear higher. This is a subtle but effective trick for maximizing visual space in a small living room. Choose a stripe pattern that complements your existing decor and doesn’t overwhelm the space. Vertical stripes can add a touch of classic elegance or a more modern, graphic feel, depending on the color and width of the stripes.
By following these tips and focusing on maximizing space, incorporating cozy textiles, layering lighting, adding personal touches, and utilizing vertical space, you can transform your small apartment living room into a stylish and inviting sanctuary. Remember, cozy living room decor for a small apartment is all about creating a space that feels comfortable, personal, and perfectly suited to your needs and aesthetic.
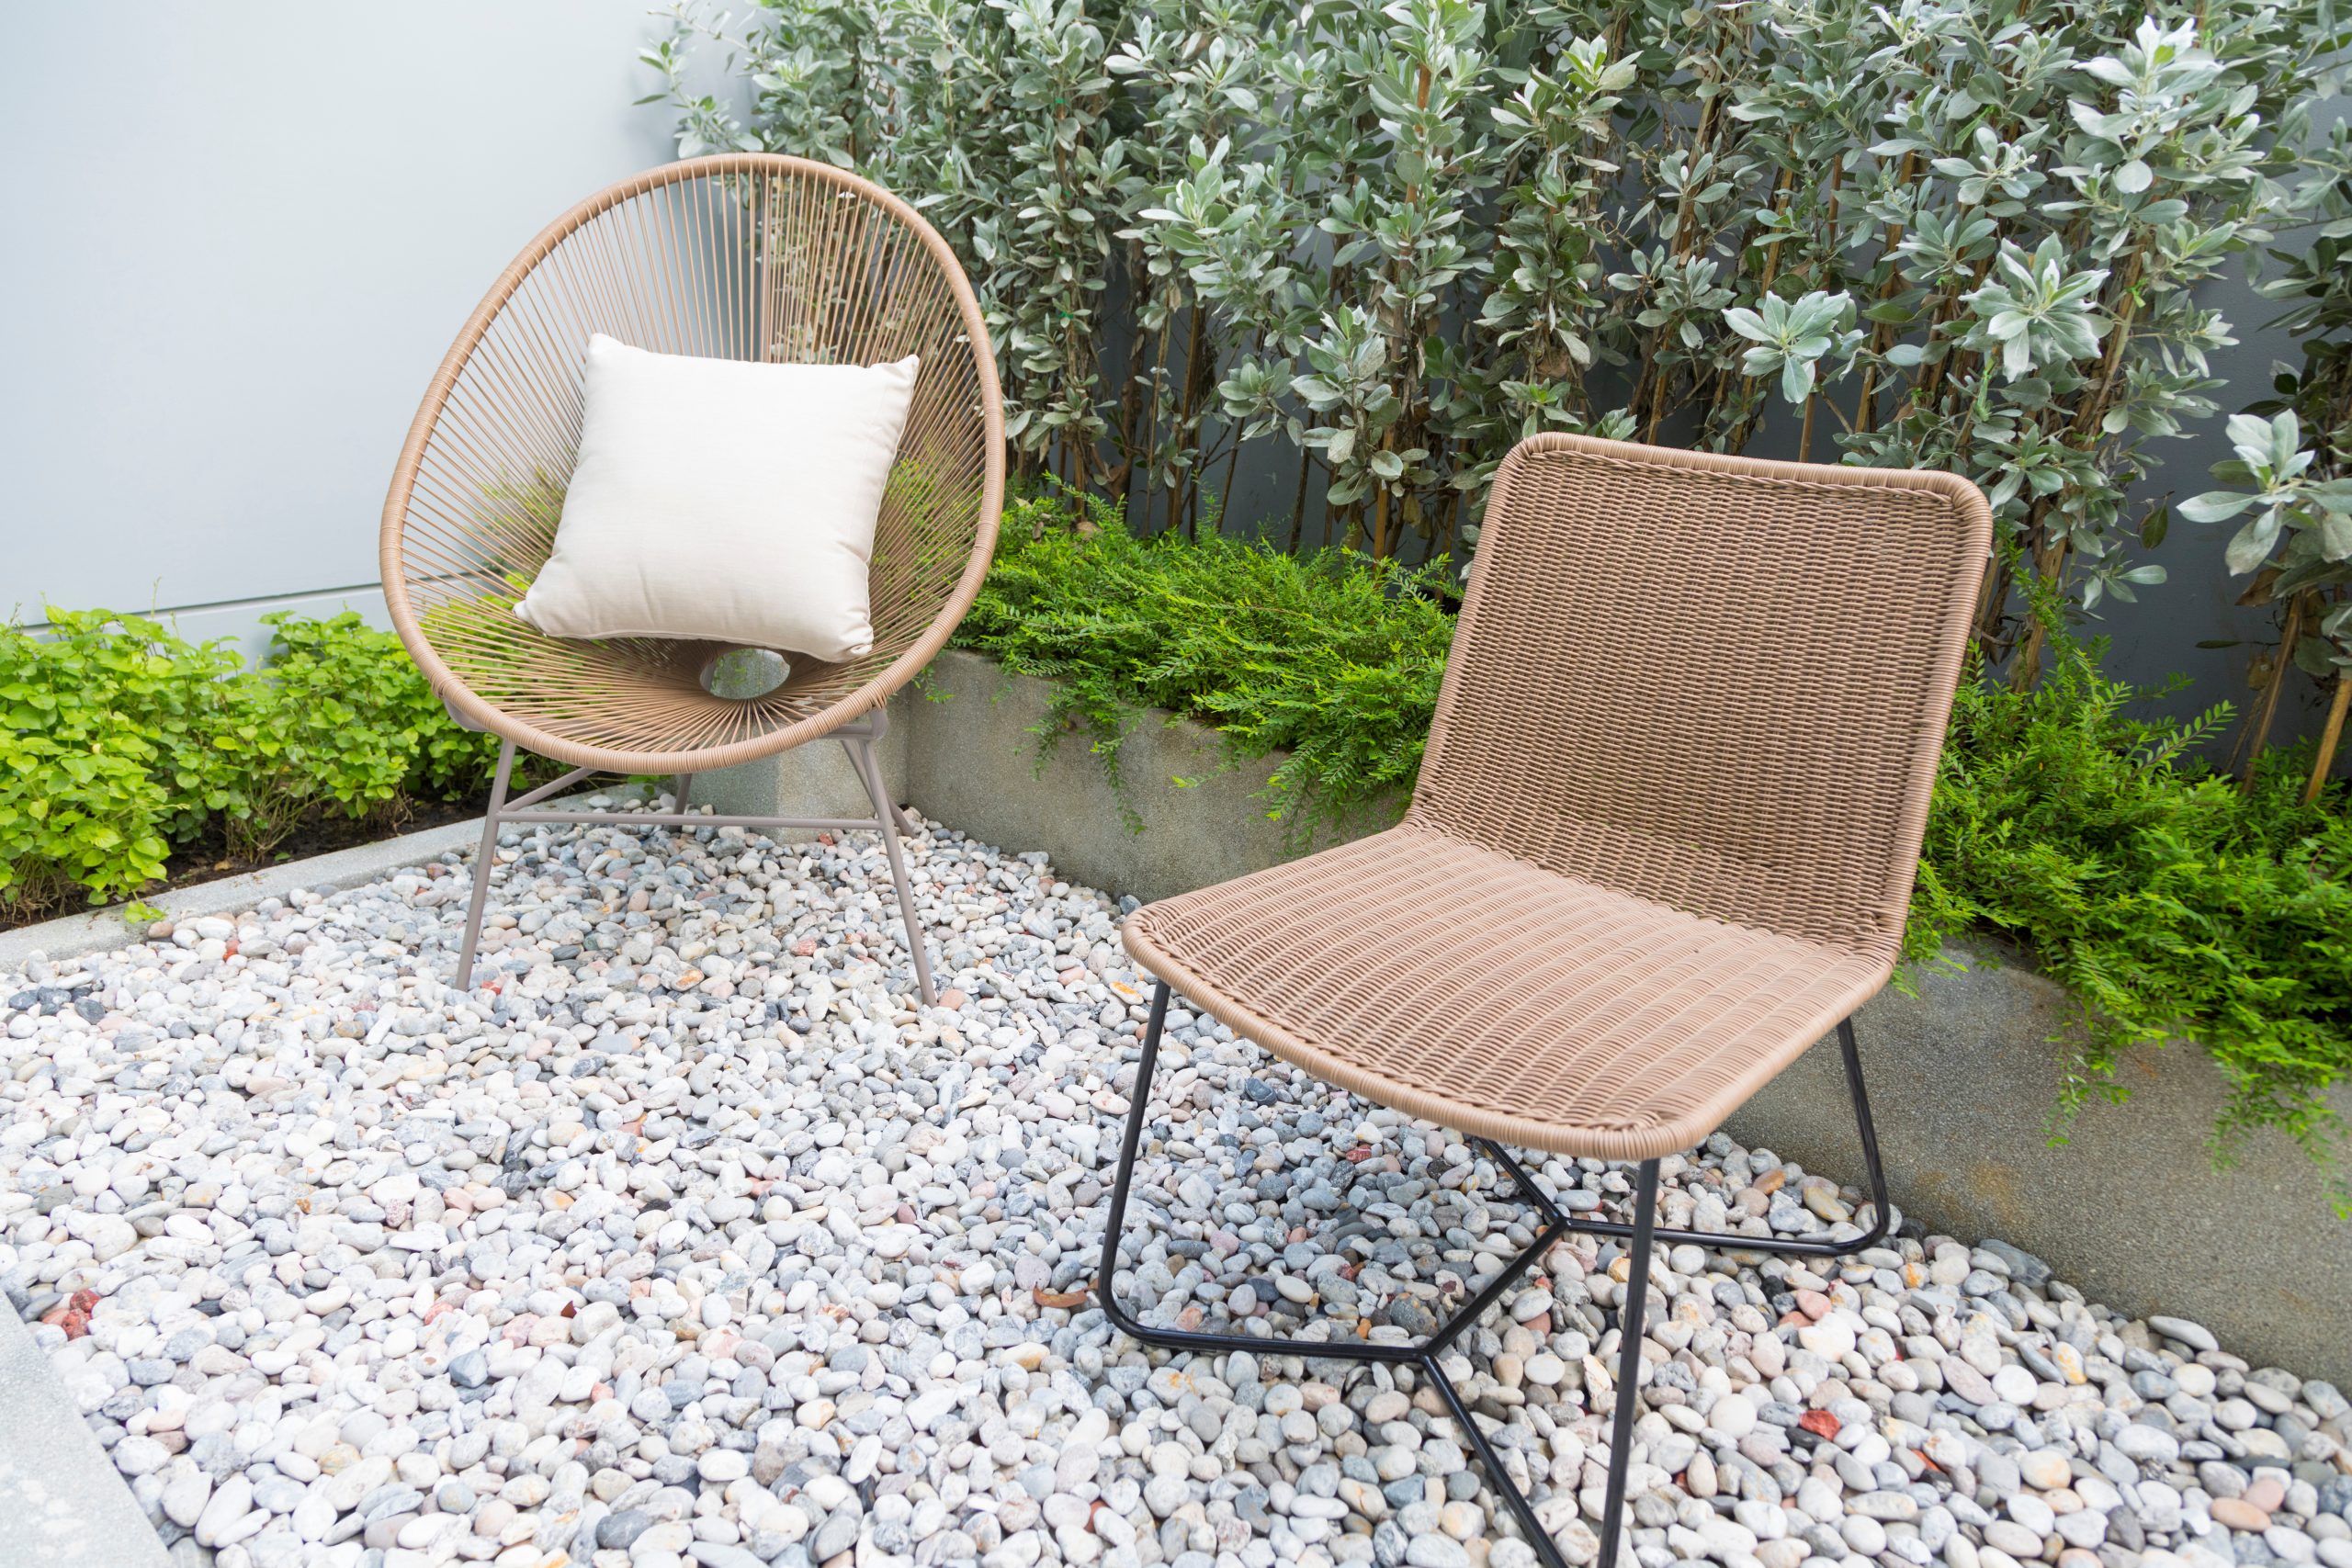
by Kesaa Interiors | Backyard & Patio, Budget Decorating, DECOR & DIY, ROOMS
This blog post is all about the best small patio ideas on a budget.

Dreaming of lazy afternoons lounging on your patio, surrounded by greenery and the gentle hum of summer? You don’t need a sprawling backyard or a bottomless bank account to create the perfect outdoor oasis.
Even the smallest patio can become a haven with a little creativity and some savvy small patio ideas on a budget. This post is packed with inspiration and practical tips to help you transform your tiny outdoor space into the patio of your dreams without emptying your wallet.
Best Small Patio Ideas on a Budget!
1: Maximizing Space: Clever Layout & Furniture Choices
Smart Strategies for a Spacious Small Patio
Let’s be honest, when you’re working with a small patio, every square inch counts. But limited space doesn’t have to mean limited style or functionality. With a few clever layout choices and the right furniture, you can make your small patio feel surprisingly spacious.
Vertical Gardening: Greenery that Grows Up, Not Out
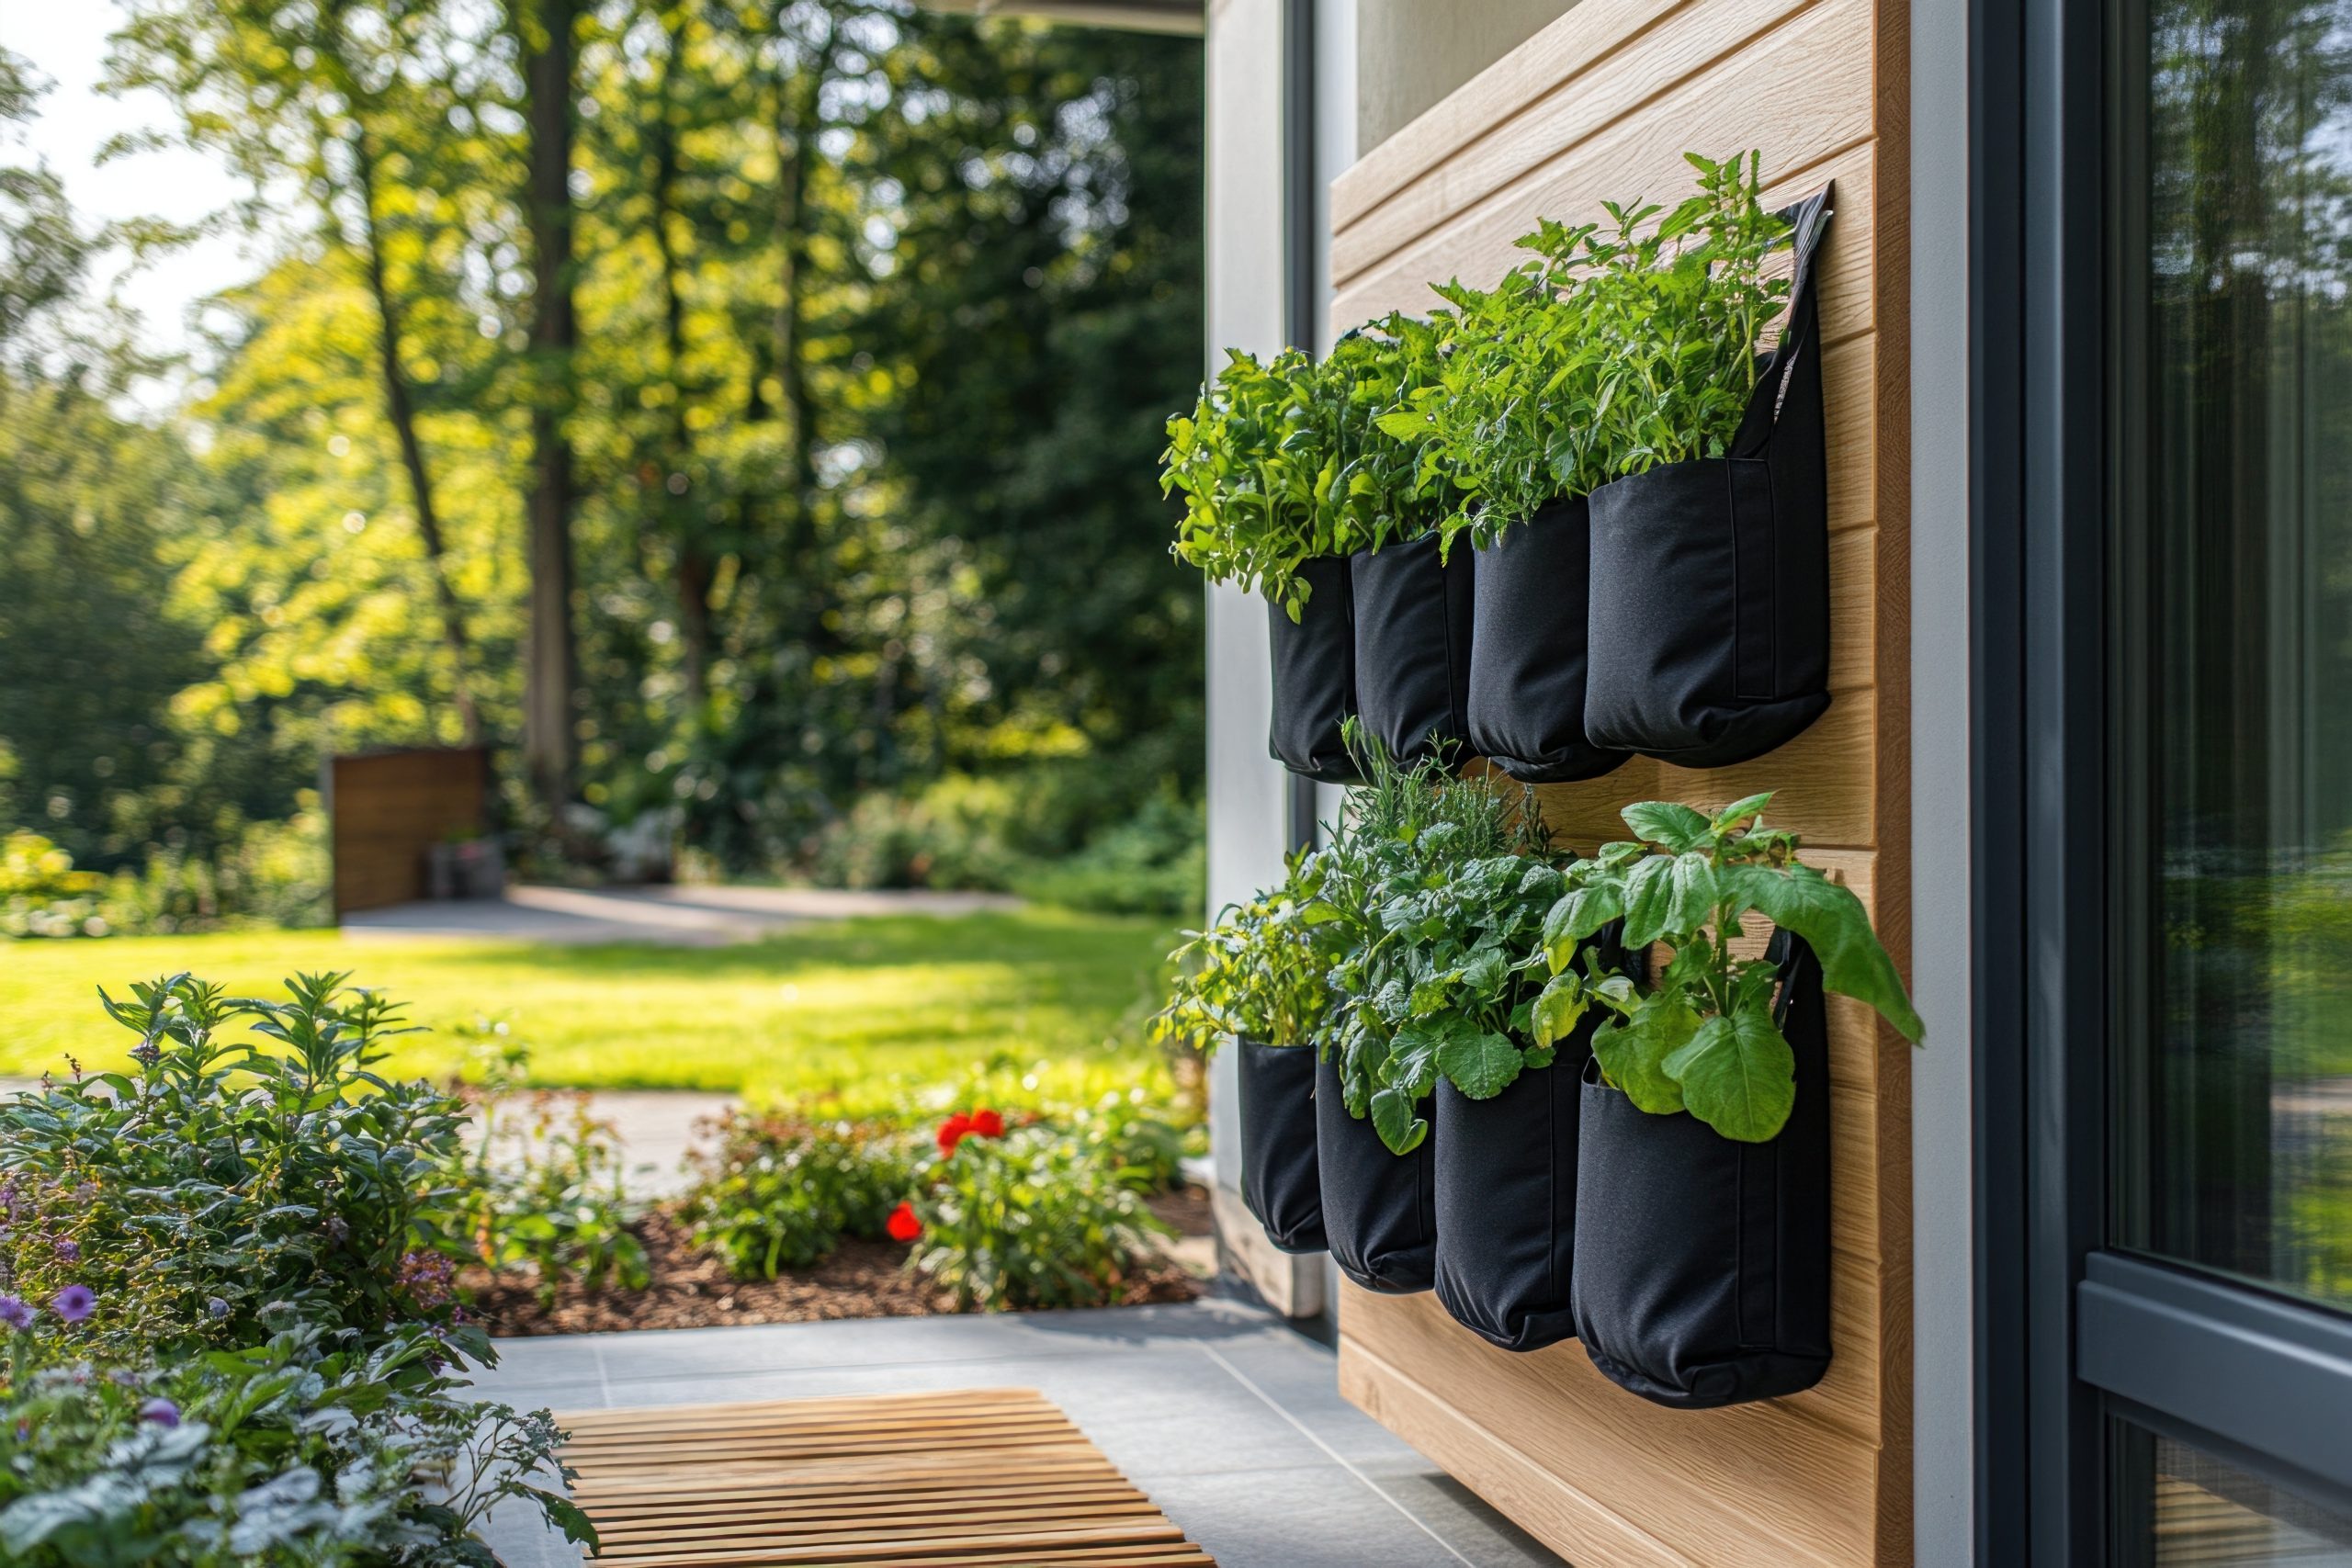
One of the best small patio ideas on a budget is to embrace vertical gardening. Think up, not out! Wall-mounted planters, hanging baskets, and trellises are your best friends when space is at a premium. They add a lush, vibrant feel without taking up valuable floor space. Imagine a wall bursting with colorful flowers or a cascade of fragrant herbs – instant ambiance and a touch of garden magic, all while maximizing your square footage.
Double-Duty Furniture: Storage Solutions that Seat
When it comes to small patio ideas on a budget, furniture that pulls double duty is a game-changer. Look for pieces with built-in storage, like benches with compartments underneath or ottomans that open up to reveal hidden storage space. These clever solutions provide a place to stash cushions, gardening tools, or other outdoor essentials, keeping your patio clutter-free and maximizing usable space.
Folding & Stackable Wonders: Flexibility for Your Small Space
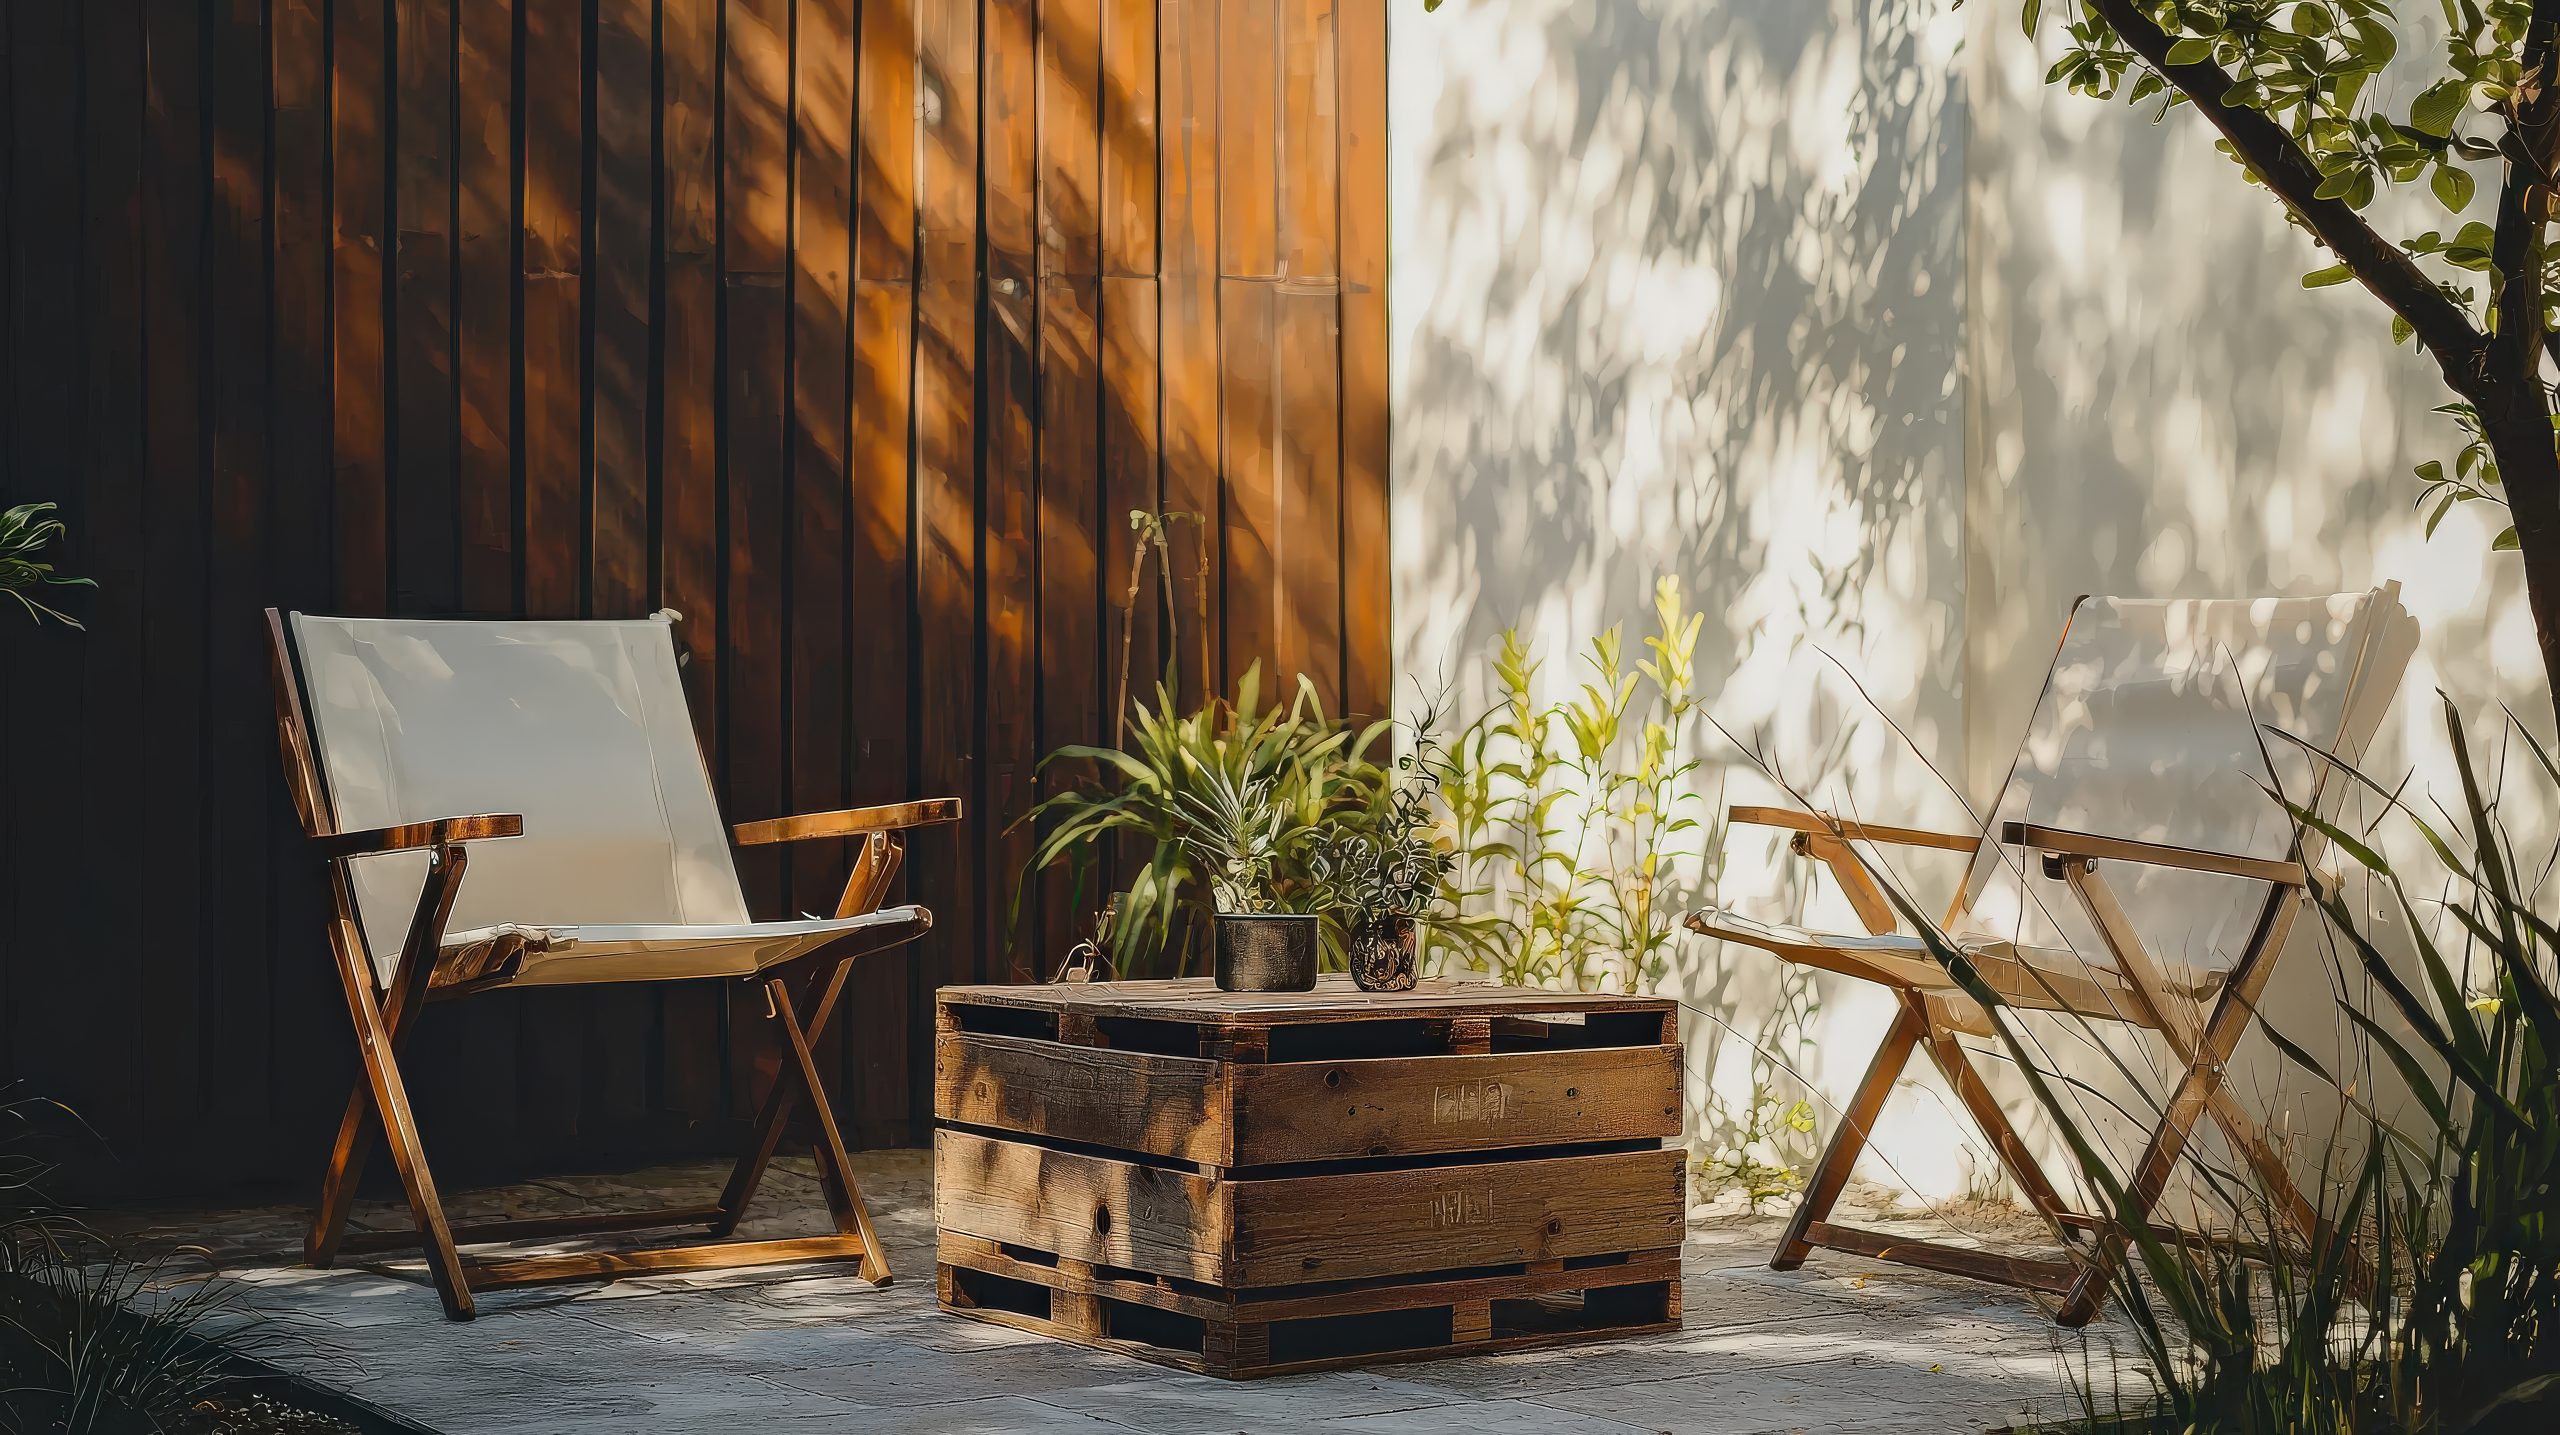
Folding chairs and stacking tables are the unsung heroes of small patio design. They offer incredible flexibility, allowing you to easily adapt your space to different needs. Need extra seating for a gathering? Unfold those chairs! Want more room to move around? Simply fold them up and tuck them away. This is a key element of styling small patio ideas on a budget, as it allows you to avoid investing in bulky furniture that might overwhelm the space.
2: Budget-Friendly Flooring: Grounding Your Space Without Breaking the Bank
Affordable Flooring Options for Your Patio
The right flooring can completely transform the look and feel of your patio. But patio flooring can be expensive, right? Wrong! There are plenty of budget-friendly options that don’t compromise on style or durability. Let’s explore some fantastic small patio ideas on a budget for underfoot elegance.
Paving Stones: Classic Charm on a Budget
Paving stones offer a timeless and versatile look that can complement any patio style. They’re relatively inexpensive, especially if you opt for concrete pavers, and they’re easy to install yourself, saving you even more money. Plus, they come in a variety of shapes, sizes, and colors, allowing you to create a custom look that reflects your personal taste.
Gravel Pathways: Easy Installation and Versatility
Gravel is another excellent budget-friendly flooring option for small patios. It’s incredibly easy to install – simply lay down a weed barrier and spread the gravel evenly. Gravel also offers excellent drainage, making it a practical choice for areas prone to rain. And with a wide range of colors and textures available, from smooth pea gravel to crushed granite, you can easily find a gravel that complements your patio design.
Decking Tiles: Instant Style Upgrade
If you’re looking for a quick and easy way to upgrade your patio flooring, decking tiles are a fantastic option. These interlocking tiles are typically made of wood, composite materials, or even recycled plastic, and they can be installed directly over existing concrete or other surfaces. They provide a warm and inviting feel underfoot and can instantly elevate the look of your patio. Plus, they’re surprisingly affordable, making them a great choice for small patio ideas on a budget.
3: DIY Decor: Adding Personality with a Personal Touch

Creative & Affordable DIY Patio Decor Ideas
Injecting your personality into your patio decor doesn’t have to mean maxing out your credit card. Some of the most charming and unique decor pieces are often the ones you create yourself. These small patio ideas on a budget will unleash your inner artist and save you money in the process.
Upcycled Planters: Giving New Life to Old Containers
Before you toss out those old tin cans, chipped teacups, or worn-out watering cans, consider their potential as unique planters. A little paint, some decoupage, or even just a simple cleaning can transform these discarded items into charming homes for your favorite plants. This is a fantastic way to add a touch of whimsy and personality to your patio while embracing sustainable small patio ideas on a budget.
Painted Furniture: A Fresh Coat for a Fresh Look
Don’t underestimate the transformative power of a fresh coat of paint. That old metal bistro set or wooden bench can be given a new lease on life with a vibrant color or a chic, distressed finish. This is one of the easiest and most affordable small patio ideas on a budget, and it can completely change the look and feel of your outdoor space.
String Art & Wall Hangings: Adding Artistic Flair
Bring a touch of handmade charm to your patio with DIY string art or wall hangings. These projects are surprisingly easy to create, even for beginners, and they offer endless possibilities for customization. Use colorful string to create geometric patterns, inspirational quotes, or even simple silhouettes. These personalized touches will add character and warmth to your patio without breaking the bank.
4: Lighting Magic: Creating Ambiance on a Dime
Budget-Friendly Lighting Ideas for Your Patio
Lighting plays a crucial role in setting the mood and ambiance of your patio. It can transform your outdoor space from a simple seating area into a magical evening retreat. And the best part? Creating a captivating atmosphere doesn’t require expensive fixtures. These small patio ideas on a budget will illuminate your space beautifully.
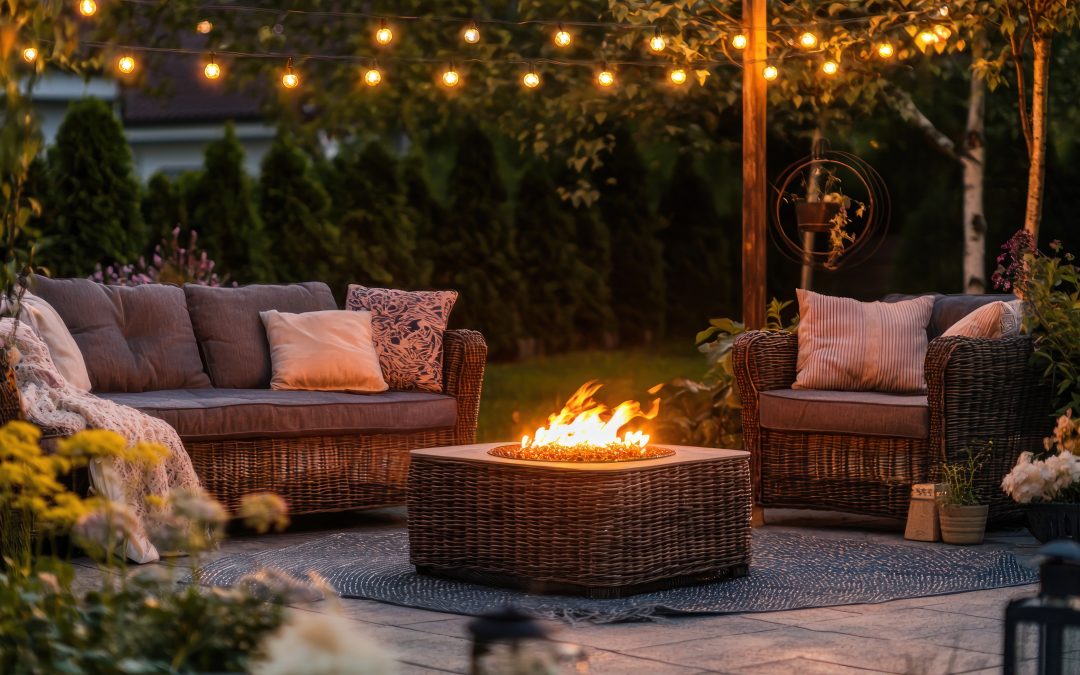
String Lights: Festive and Functional
String lights are a classic choice for patio lighting, and for good reason. They’re affordable, easy to install, and instantly add a touch of whimsy and charm. Drape them across your patio, wrap them around trees or railings, or hang them from a pergola for a magical, twinkling effect. Whether you choose classic Edison bulbs, colorful globe lights, or twinkling fairy lights, string lights are a surefire way to create a warm and inviting atmosphere.
Solar Lanterns: Harnessing the Power of the Sun
Solar lanterns are a practical and eco-friendly way to light up your patio. They come in a variety of styles, from rustic metal lanterns to colorful glass globes, and they require no wiring or electricity. Simply place them in a sunny spot during the day, and they’ll automatically illuminate your patio at night. This is a fantastic option for small patio ideas on a budget, as it saves you money on electricity bills while adding a touch of sustainable style.
Candlelight and Citronella: Setting the Mood
For a truly magical ambiance, nothing beats the warm glow of candlelight. Place candles in hurricane lanterns or decorative holders for a touch of romance and elegance. For a practical twist, opt for citronella candles, which not only provide beautiful light but also help keep pesky mosquitoes at bay. This simple addition can create a cozy and inviting atmosphere for those relaxing evenings outdoors.
5: Textiles & Soft Furnishings: Adding Comfort and Style
Cozying Up Your Patio on a Budget
Textiles and soft furnishings are the key to creating a comfortable and inviting patio. They add warmth, texture, and personality to your outdoor space, making it feel like an extension of your home. And you don’t have to spend a fortune to achieve this cozy, welcoming vibe. These small patio ideas on a budget will help you create a stylish and comfortable outdoor retreat.
Outdoor Rugs: Defining Spaces and Adding Warmth
An outdoor rug can instantly transform your patio, defining different areas and adding a touch of warmth and comfort underfoot. Choose a rug that’s specifically designed for outdoor use, as these are typically made from durable, weather-resistant materials. From vibrant patterns to neutral tones, there’s an outdoor rug to suit every style and budget. This is a simple yet effective way to enhance the look and feel of your small patio while staying within budget.
Throw Pillows & Cushions: Comfort and Color
Adding throw pillows and cushions to your patio furniture is an easy and affordable way to boost comfort and add a pop of color. Choose weather-resistant fabrics that can withstand the elements, and don’t be afraid to mix and match patterns and textures for a playful and eclectic look. These small additions can make a big difference in the overall comfort and style of your patio.
Curtains & Drapes: Privacy and Shade
If you’re looking for a way to add privacy and shade to your small patio, consider hanging outdoor curtains or drapes. These can be hung from a pergola, awning, or even a simple curtain rod attached to your house. Choose lightweight, weather-resistant fabrics that allow for airflow while providing some protection from the sun and prying eyes. This is a stylish and functional way to enhance your patio and create a more intimate and secluded space.
6: The Thrill of the Hunt: Secondhand Finds & Upcycling
Unearthing Treasures for Your Patio
Creating a stylish patio doesn’t require buying everything brand new. In fact, some of the most unique and charming pieces can be found secondhand. Embracing the thrill of the hunt for pre-loved treasures is not only eco-friendly but also one of the smartest small patio ideas on a budget.
Thrift Store Gems: Finding Hidden Patio Treasures
Local thrift stores, flea markets, and online marketplaces are treasure troves of potential patio furniture and decor. You can often find hidden gems, like vintage planters, quirky garden statues, or even a charming bistro set, all at a fraction of the cost of new items. With a little patience and a keen eye, you can score some amazing deals and give these pre-loved pieces a new life on your patio.
Upcycling Furniture: Giving Old Pieces New Purpose
That old wooden chair or metal side table might look destined for the landfill, but with a little creativity and some DIY magic, it can be transformed into a stylish addition to your patio. A fresh coat of paint, some new hardware, or even a simple sanding and staining can work wonders. Upcycling furniture is a sustainable and budget-friendly way to add character and personality to your outdoor space.
Repurposing Materials: Creative Uses for Everyday Items
Think outside the box and look for creative ways to repurpose everyday items into patio decor. Old pallets can be transformed into vertical gardens or quirky wall art. Mason jars can become charming candle holders or hanging planters. Even old tires can be repurposed into colorful planters or whimsical seating. The possibilities are endless, and this is a fantastic way to add unique and personal touches to your patio while embracing small patio ideas on a budget.
7: Small Patio Style Guide: Three Budget-Friendly Looks
Curating Your Dream Patio Aesthetic
Now that we’ve covered the practical aspects of creating a budget-friendly patio, let’s talk style! Whether you prefer a bohemian oasis, a modern minimalist retreat, or a cozy rustic escape, you can achieve your dream patio aesthetic without breaking the bank. These small patio ideas on a budget will inspire you to create a space that reflects your personal style.
Bohemian Oasis: Relaxed Vibes and Global Inspiration
Create a relaxed and eclectic bohemian vibe with colorful textiles, vibrant patterns, and an abundance of plants. Think globally inspired accents, like Moroccan lanterns, woven tapestries, and patterned throw pillows. Layer textures and colors for a rich and inviting atmosphere. Upcycled furniture and thrifted finds fit perfectly into this eclectic style, adding to the bohemian charm without straining your budget.
Modern Minimalist: Clean Lines and Simple Elegance
For a sleek and sophisticated look, embrace modern minimalism. Choose furniture with clean lines and a neutral color palette. Focus on functionality and simplicity, avoiding clutter and unnecessary embellishments. A few carefully chosen plants and minimalist decor pieces can add a touch of personality without overwhelming the space. This style is perfect for small patios, as it creates a sense of spaciousness and tranquility.
Cozy Rustic: Natural Charm and Warmth
Embrace the warmth and charm of rustic style with natural materials, warm colors, and vintage accents. Think weathered wood, wrought iron, and cozy textiles. Incorporate elements like reclaimed wood furniture, vintage planters, and string lights for a touch of rustic charm. This style creates a welcoming and inviting atmosphere, perfect for relaxing evenings outdoors.
8: Plants & Greenery: Bringing Life to Your Patio
Budget-Friendly Ways to Add Greenery
Plants are essential for creating a vibrant and inviting patio. They add life, color, and texture to your outdoor space, transforming it into a relaxing oasis. And you don’t need to spend a fortune on expensive landscaping to achieve a lush and verdant patio. These small patio ideas on a budget will help you bring the beauty of nature to your doorstep.
Potted Plants: Versatile and Affordable
Potted plants are a versatile and affordable way to add greenery to your patio. Choose a variety of sizes and shapes to create visual interest, and don’t be afraid to mix and match different types of plants. From flowering annuals to lush tropical foliage, there’s a potted plant to suit every style and budget. Plus, potted plants are easy to move around, allowing you to change up the look of your patio whenever you like.
Herbs & Vegetables: Edible Landscaping
Why not combine beauty and practicality by growing herbs and vegetables on your patio? A small herb garden or a few tomato plants in pots can add a touch of freshness and flavor to your outdoor space. Plus, you’ll have the added bonus of fresh herbs and vegetables right at your fingertips. This is a fantastic way to maximize space and create a functional and beautiful patio on a budget.
Propagating Plants: Multiplying Your Greenery for Free
One of the smartest small patio ideas on a budget is to propagate your existing plants. Taking cuttings from your favorite plants and rooting them in water or soil is a simple and free way to expand your plant collection. This is a sustainable and budget-friendly way to add more greenery to your patio without spending a dime.
9: Maintaining Your Budget-Friendly Patio: Tips & Tricks
Keeping Your Patio Looking Great on a Budget
Creating a beautiful patio is just the first step. Maintaining it and keeping it looking its best is equally important. And just like creating your patio, maintaining it doesn’t have to be expensive. These small patio ideas on a budget will help you protect your investment and keep your outdoor space looking great for years to come.
Cleaning & Care: Protecting Your Investment
Regular cleaning and care are essential for prolonging the life of your patio furniture and decor. Wipe down furniture regularly to remove dirt and grime, and sweep or hose down your patio flooring to keep it clean. For wooden furniture, apply a sealant or stain every year or two to protect it from the elements. These simple maintenance tasks can prevent costly repairs and replacements down the road.
Seasonal Updates: Refreshing Your Patio Throughout the Year
Keep your patio looking fresh and inviting by making seasonal updates. Swap out cushions and throws for different colors and patterns to reflect the changing seasons. Add festive decorations for holidays and special occasions. These small updates can make a big difference in the overall look and feel of your patio without requiring a major investment.
Long-Term Savings: Investing Wisely for the Future
While it’s tempting to opt for the cheapest options upfront, sometimes investing a little more in higher-quality materials can save you money in the long run. Durable, weather-resistant furniture and flooring may cost more initially, but they’ll last longer and require less maintenance, ultimately saving you money on replacements and repairs. Consider this when planning your small patio ideas on a budget for long-term value.
Creating your dream patio doesn’t require a massive budget or a sprawling backyard. As we’ve explored throughout this post, even the smallest of patios can be transformed into a stylish and functional outdoor oasis with a little creativity and some savvy small patio ideas on a budget. From upcycled planters and thrifted furniture to DIY lighting solutions and clever space-saving strategies, there are countless ways to personalize your patio and make it your own without emptying your wallet.
by Kesaa Interiors | DECOR & DIY, DESIGN GUIDES, DIY Projects, Furniture & Layout Guides, Home Office, ROOMS
Want to know how to create the perfect ergonomic home office? You have come to the right place!
With more and more of us embracing the work-from-home lifestyle, the need for a dedicated and productive workspace has never been greater. But simply having a desk and chair isn’t enough. To truly thrive while working remotely, you need an ergonomic home office – a space designed to support your physical well-being and boost your productivity.
This post will guide you through creating an ergonomic home office that not only feels fantastic but looks stunning too. We’ll cover everything from choosing the right furniture to incorporating stylish décor, ensuring your workspace is a haven of both comfort and inspiration.
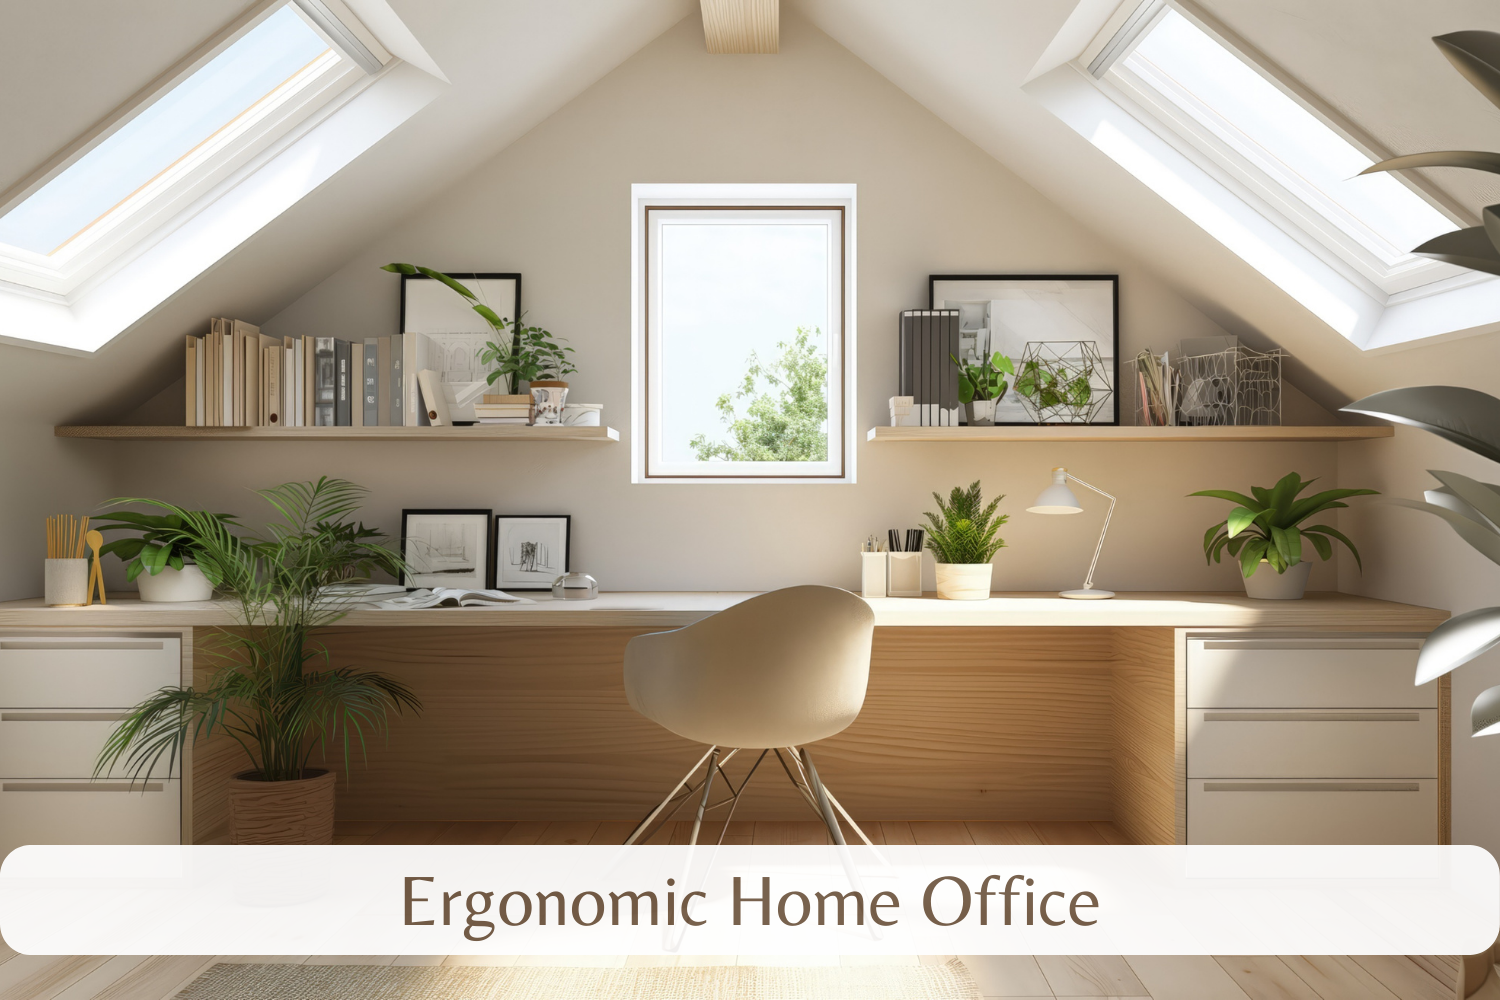
Best Ergonomic Home Office Tips!
Location, Location, Location: Choosing the Right Spot for Your Ergonomic Home Office
Creating the perfect ergonomic home office starts with selecting the right location. Where you choose to set up shop can significantly impact your focus, comfort, and overall productivity. Consider these key factors when deciding on the optimal spot for your ergonomic home office:
- Natural Light: Positioning your ergonomic home office near a window allows you to harness the power of natural light. Natural light not only reduces eye strain but also boosts mood and energy levels, contributing to a more positive and productive work experience.
- Noise Levels: Minimize distractions by choosing a location that’s relatively quiet. If your home is bustling with activity, consider a room away from high-traffic areas or invest in noise-cancelling headphones to maintain focus in your ergonomic home office.
- Privacy: A dedicated workspace free from interruptions is crucial for concentration. If possible, select a room with a door that can be closed to create a private and productive ergonomic home office environment. Even a strategically placed room divider can help establish a sense of separation and minimize distractions.
Space Planning: Maximizing Your Home Office Footprint for an Ergonomic Setup
Once you’ve chosen the perfect location for your ergonomic home office, it’s time to optimize the space itself. Careful planning is essential for creating a functional and comfortable work environment. Here’s how to maximize your home office footprint:
- Measure and Map: Before purchasing any furniture, meticulously measure your available space. This will help you determine the appropriate size and scale of furniture pieces, ensuring a comfortable fit and avoiding a cramped or cluttered ergonomic home office. Sketching a floor plan can be invaluable in visualizing the layout and optimizing traffic flow.
- Designated Zones: Consider dividing your ergonomic home office into distinct zones for different activities. For example, you might have a primary work zone centered around your desk, a secondary zone for reading or brainstorming, and a storage zone for files and supplies. This helps maintain organization and promotes efficient workflow.
- Traffic Flow: Ensure there’s ample space to move around comfortably within your ergonomic home office. Avoid placing furniture in a way that obstructs pathways or creates tight squeezes. Easy movement contributes to a more comfortable and less stressful work environment.
- Future Growth: While planning your ergonomic home office layout, anticipate future needs. Consider whether you might need to accommodate additional equipment, storage, or even another workspace down the line. Planning for potential expansion can save you headaches and remodeling efforts in the future.

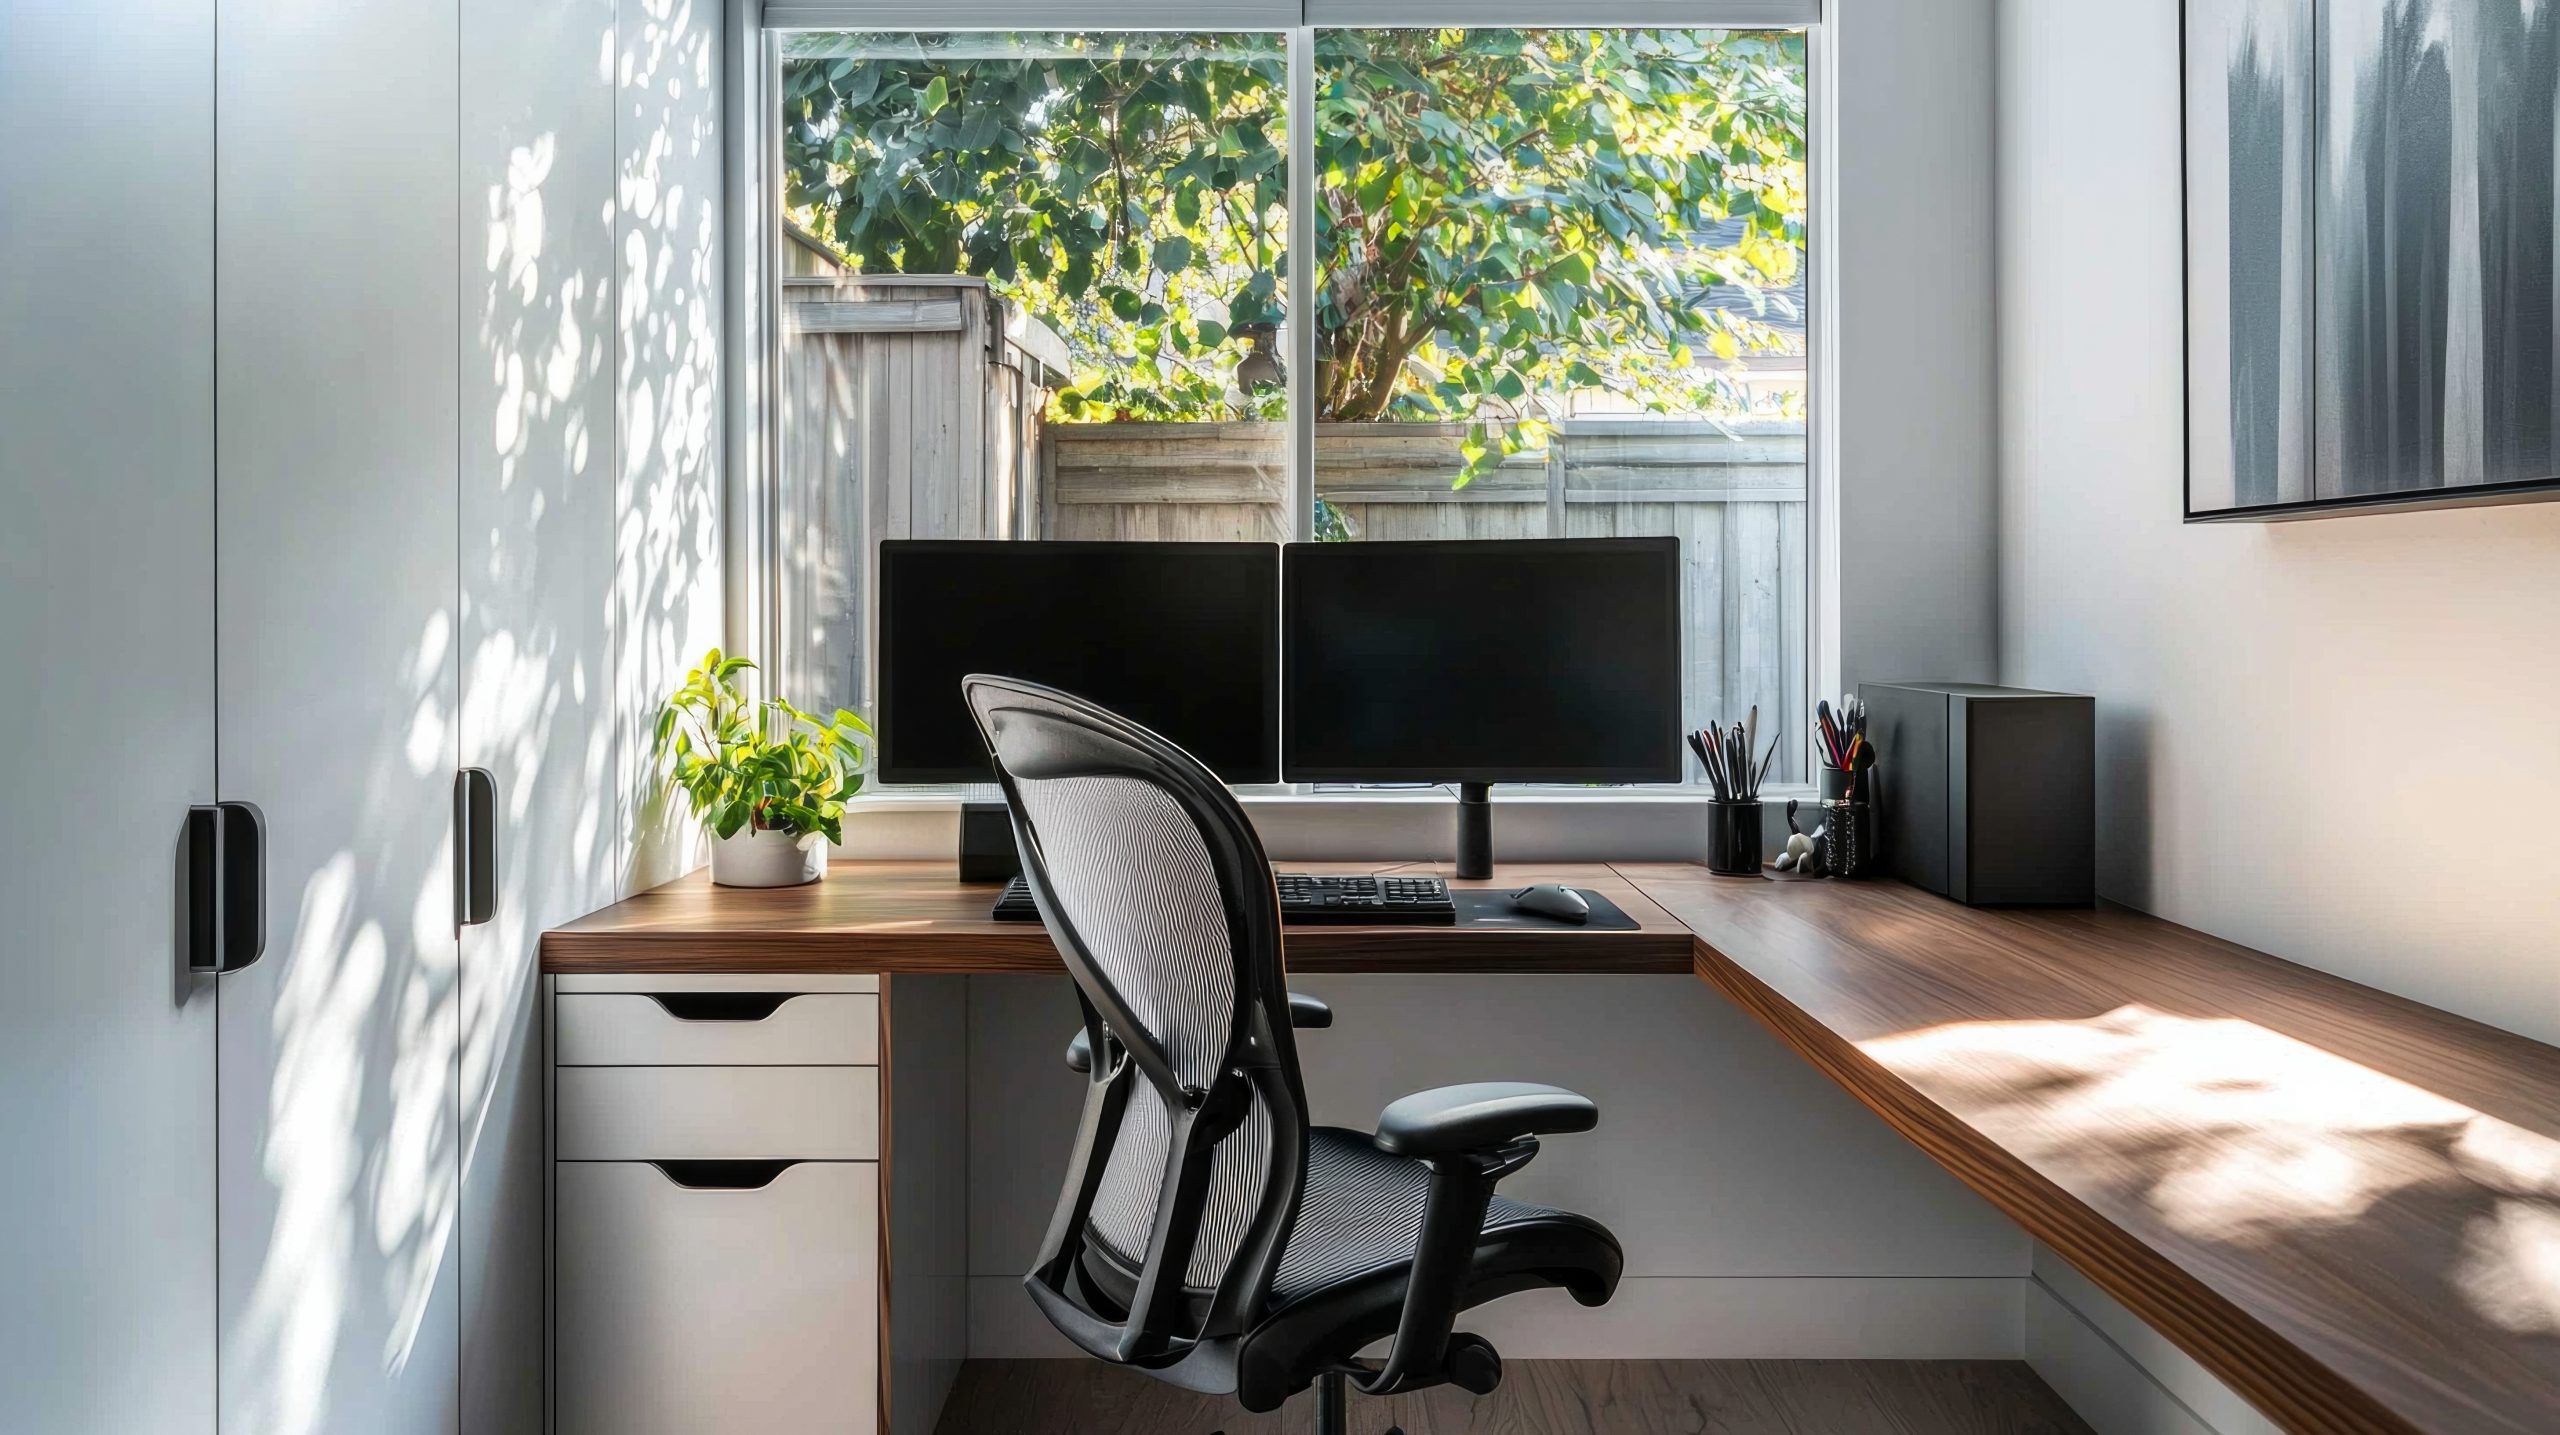
The Ergonomic Chair: Your Throne of Productivity in Your Ergonomic Home Office
Investing in a high-quality ergonomic chair is arguably the most crucial step in creating a truly ergonomic home office. You’ll be spending a significant amount of time seated, so a chair that supports your body and promotes good posture is essential for your long-term health and well-being. Look for these key features when choosing your new chair:
- Adjustable Height: The ability to adjust the seat height is paramount. Your feet should rest flat on the floor with your knees bent at a 90-degree angle. An adjustable height ensures proper posture and reduces strain on your legs and back.
- Lumbar Support: Adequate lumbar support is crucial for maintaining the natural curve of your spine. Look for a chair with adjustable lumbar support that can be customized to fit your individual needs. This helps prevent back pain and promotes a healthy posture while working in your home office.
- Armrests: Adjustable armrests are another important feature. They should allow your arms to rest comfortably at your sides with your elbows bent at a 90-degree angle. This reduces strain on your shoulders and neck.
- Seat Depth and Width: The seat should be deep enough to support most of your thighs while leaving a small gap behind your knees. The width should allow you to sit comfortably without feeling restricted.
- Material and Breathability: Choose a chair with breathable fabric to prevent overheating and discomfort during long work sessions. Consider materials like mesh or high-quality fabric upholstery.

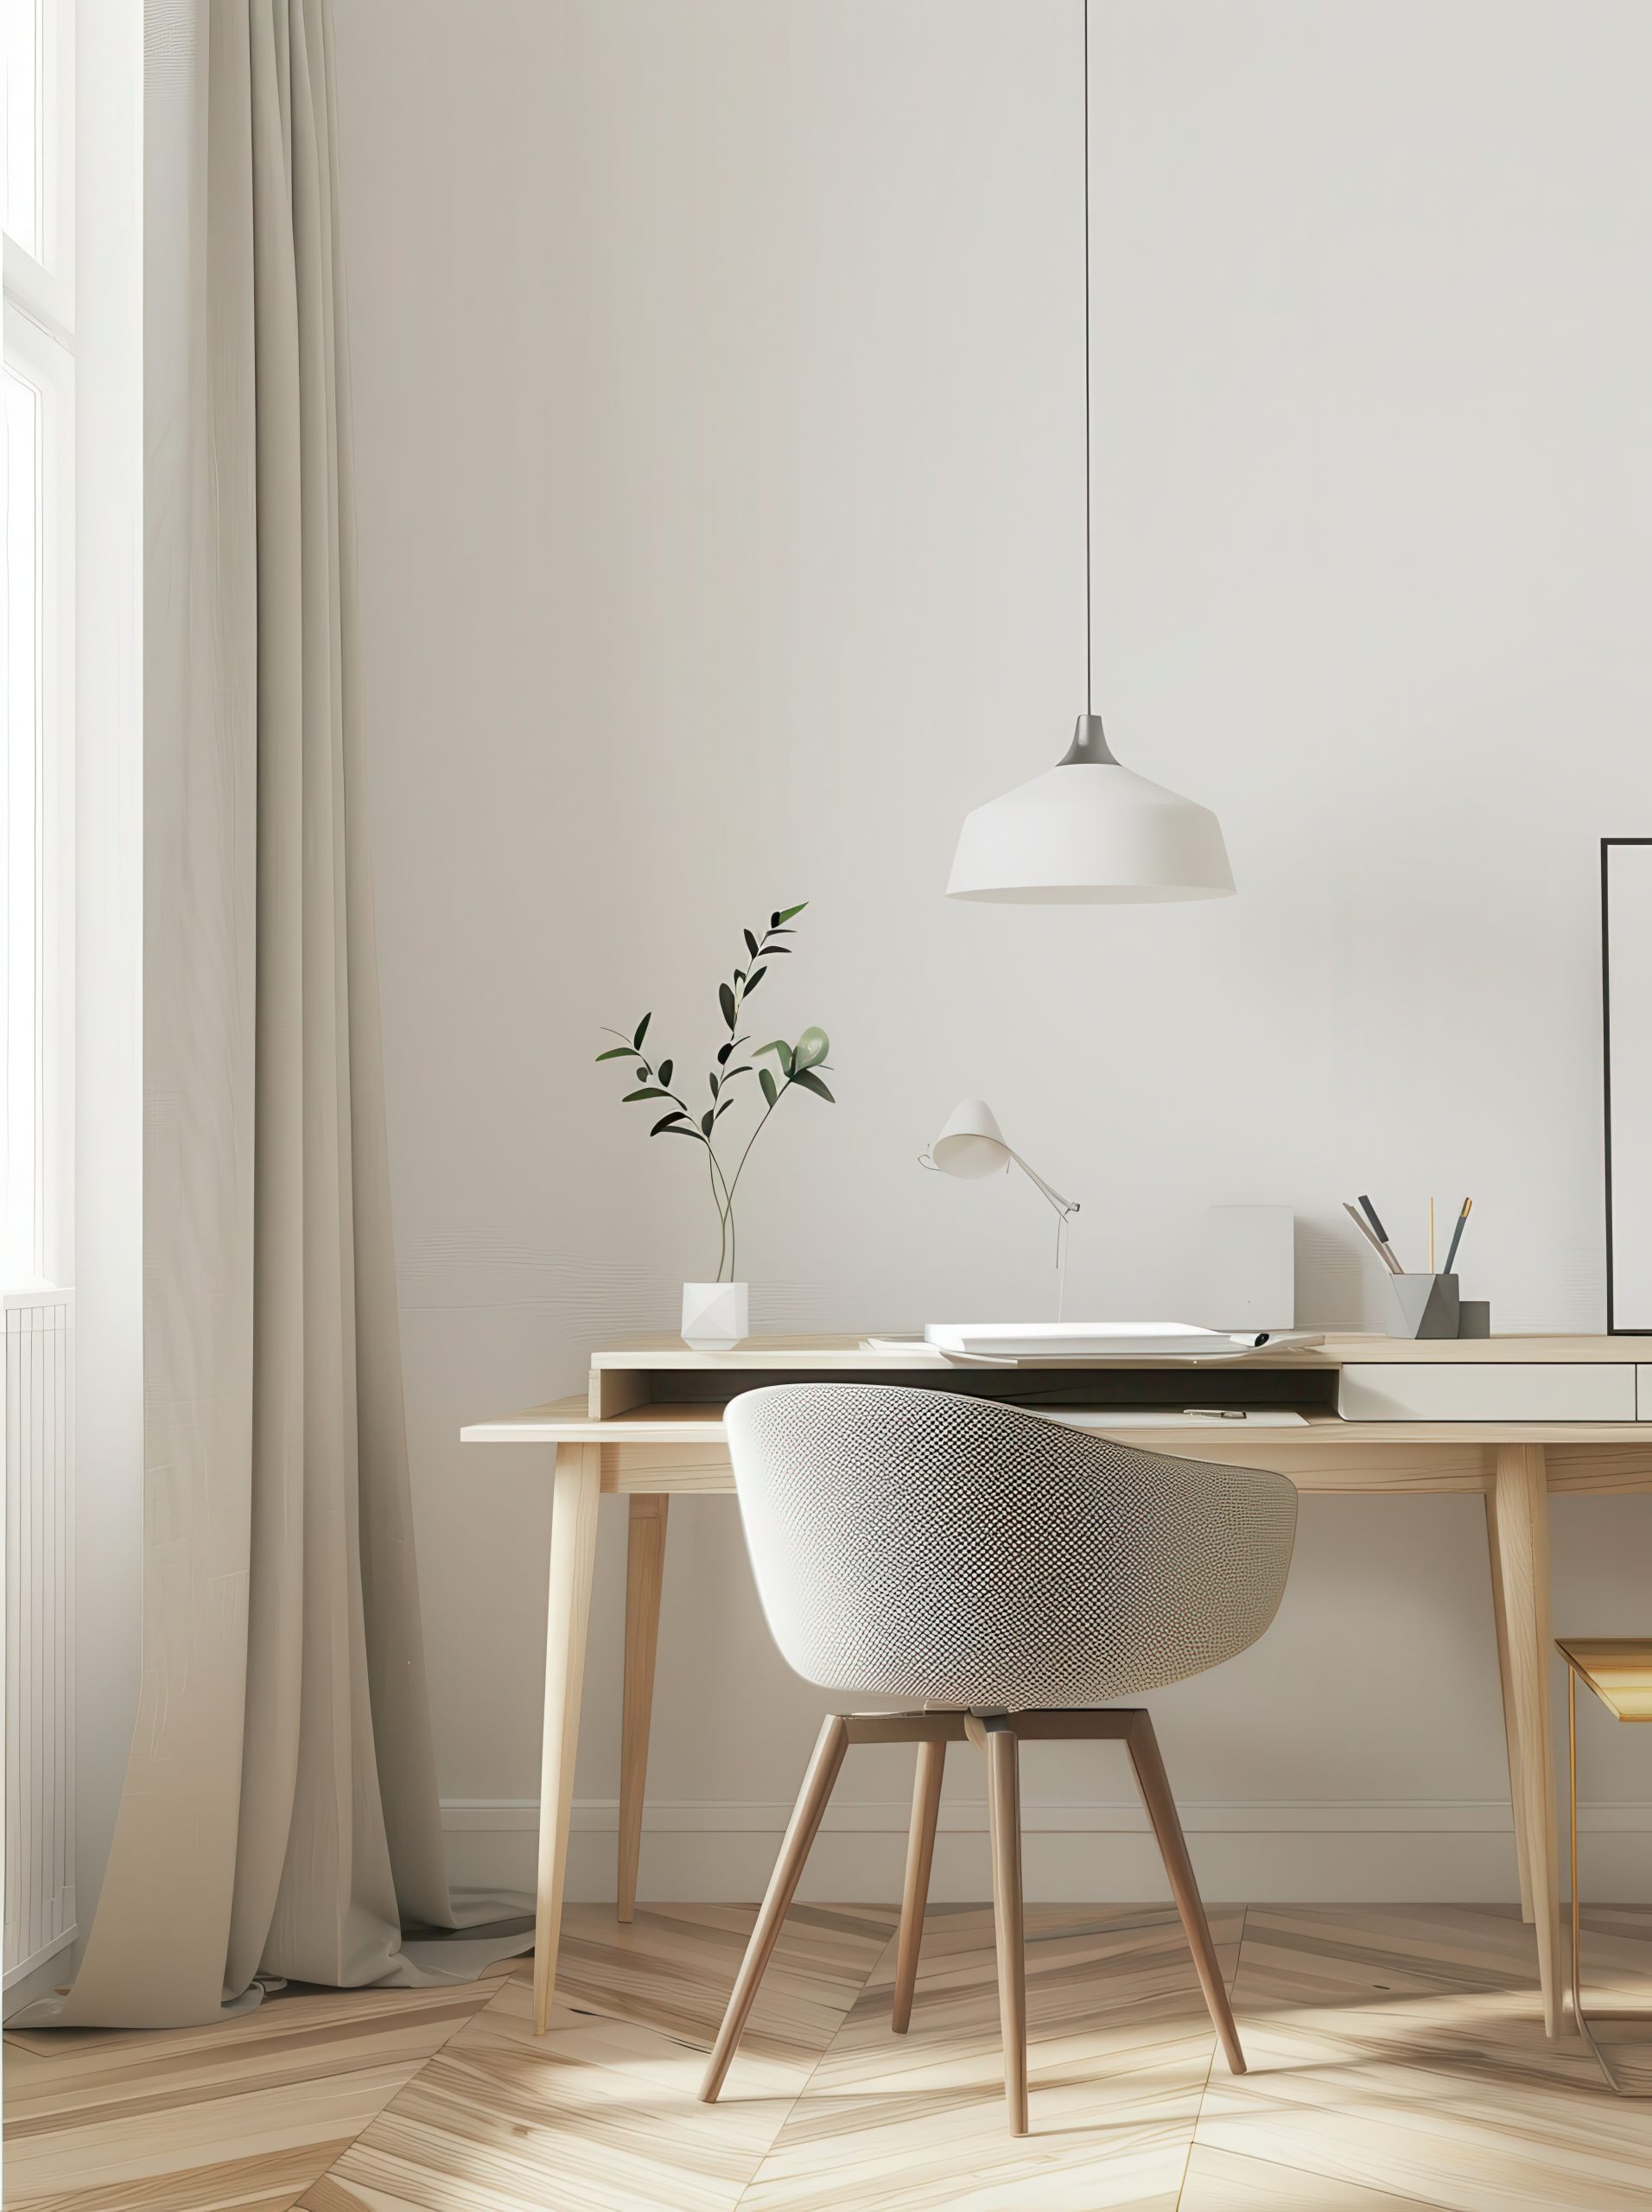
Desk Duty: Selecting the Perfect Desk for Your Ergonomic Home Office
The right desk is just as important as the right chair in your ergonomic home office setup. It provides the foundation for your workspace and significantly impacts your comfort and productivity. Here’s a breakdown of different desk types and how to choose the perfect one for your needs:
- Standing Desks: Standing desks have gained immense popularity for their health benefits. They allow you to alternate between sitting and standing, promoting better circulation, reducing back pain, and boosting energy levels. If you opt for a standing desk, ensure it’s height-adjustable to accommodate both sitting and standing positions within your home office.
- Adjustable Height Desks (Sit-Stand Desks): These desks offer the best of both worlds, allowing you to seamlessly transition between sitting and standing throughout the day. They are a great investment for creating a truly flexible and ergonomic home office.
- Traditional Desks: If you prefer a traditional desk, ensure it’s the correct height for your stature. Your elbows should be at a 90-degree angle when typing, and your wrists should be straight. Consider using a keyboard tray to achieve the optimal ergonomic position in your ergonomic home office.
- Desk Size and Shape: Choose a desk size and shape that accommodates all your essential equipment and provides ample workspace. Consider an L-shaped desk for maximizing corner space or a U-shaped desk for a more expansive work area within your home office.
- Material and Style: Select a desk material and style that complements your overall home office décor. Options range from classic wood to modern glass and metal.
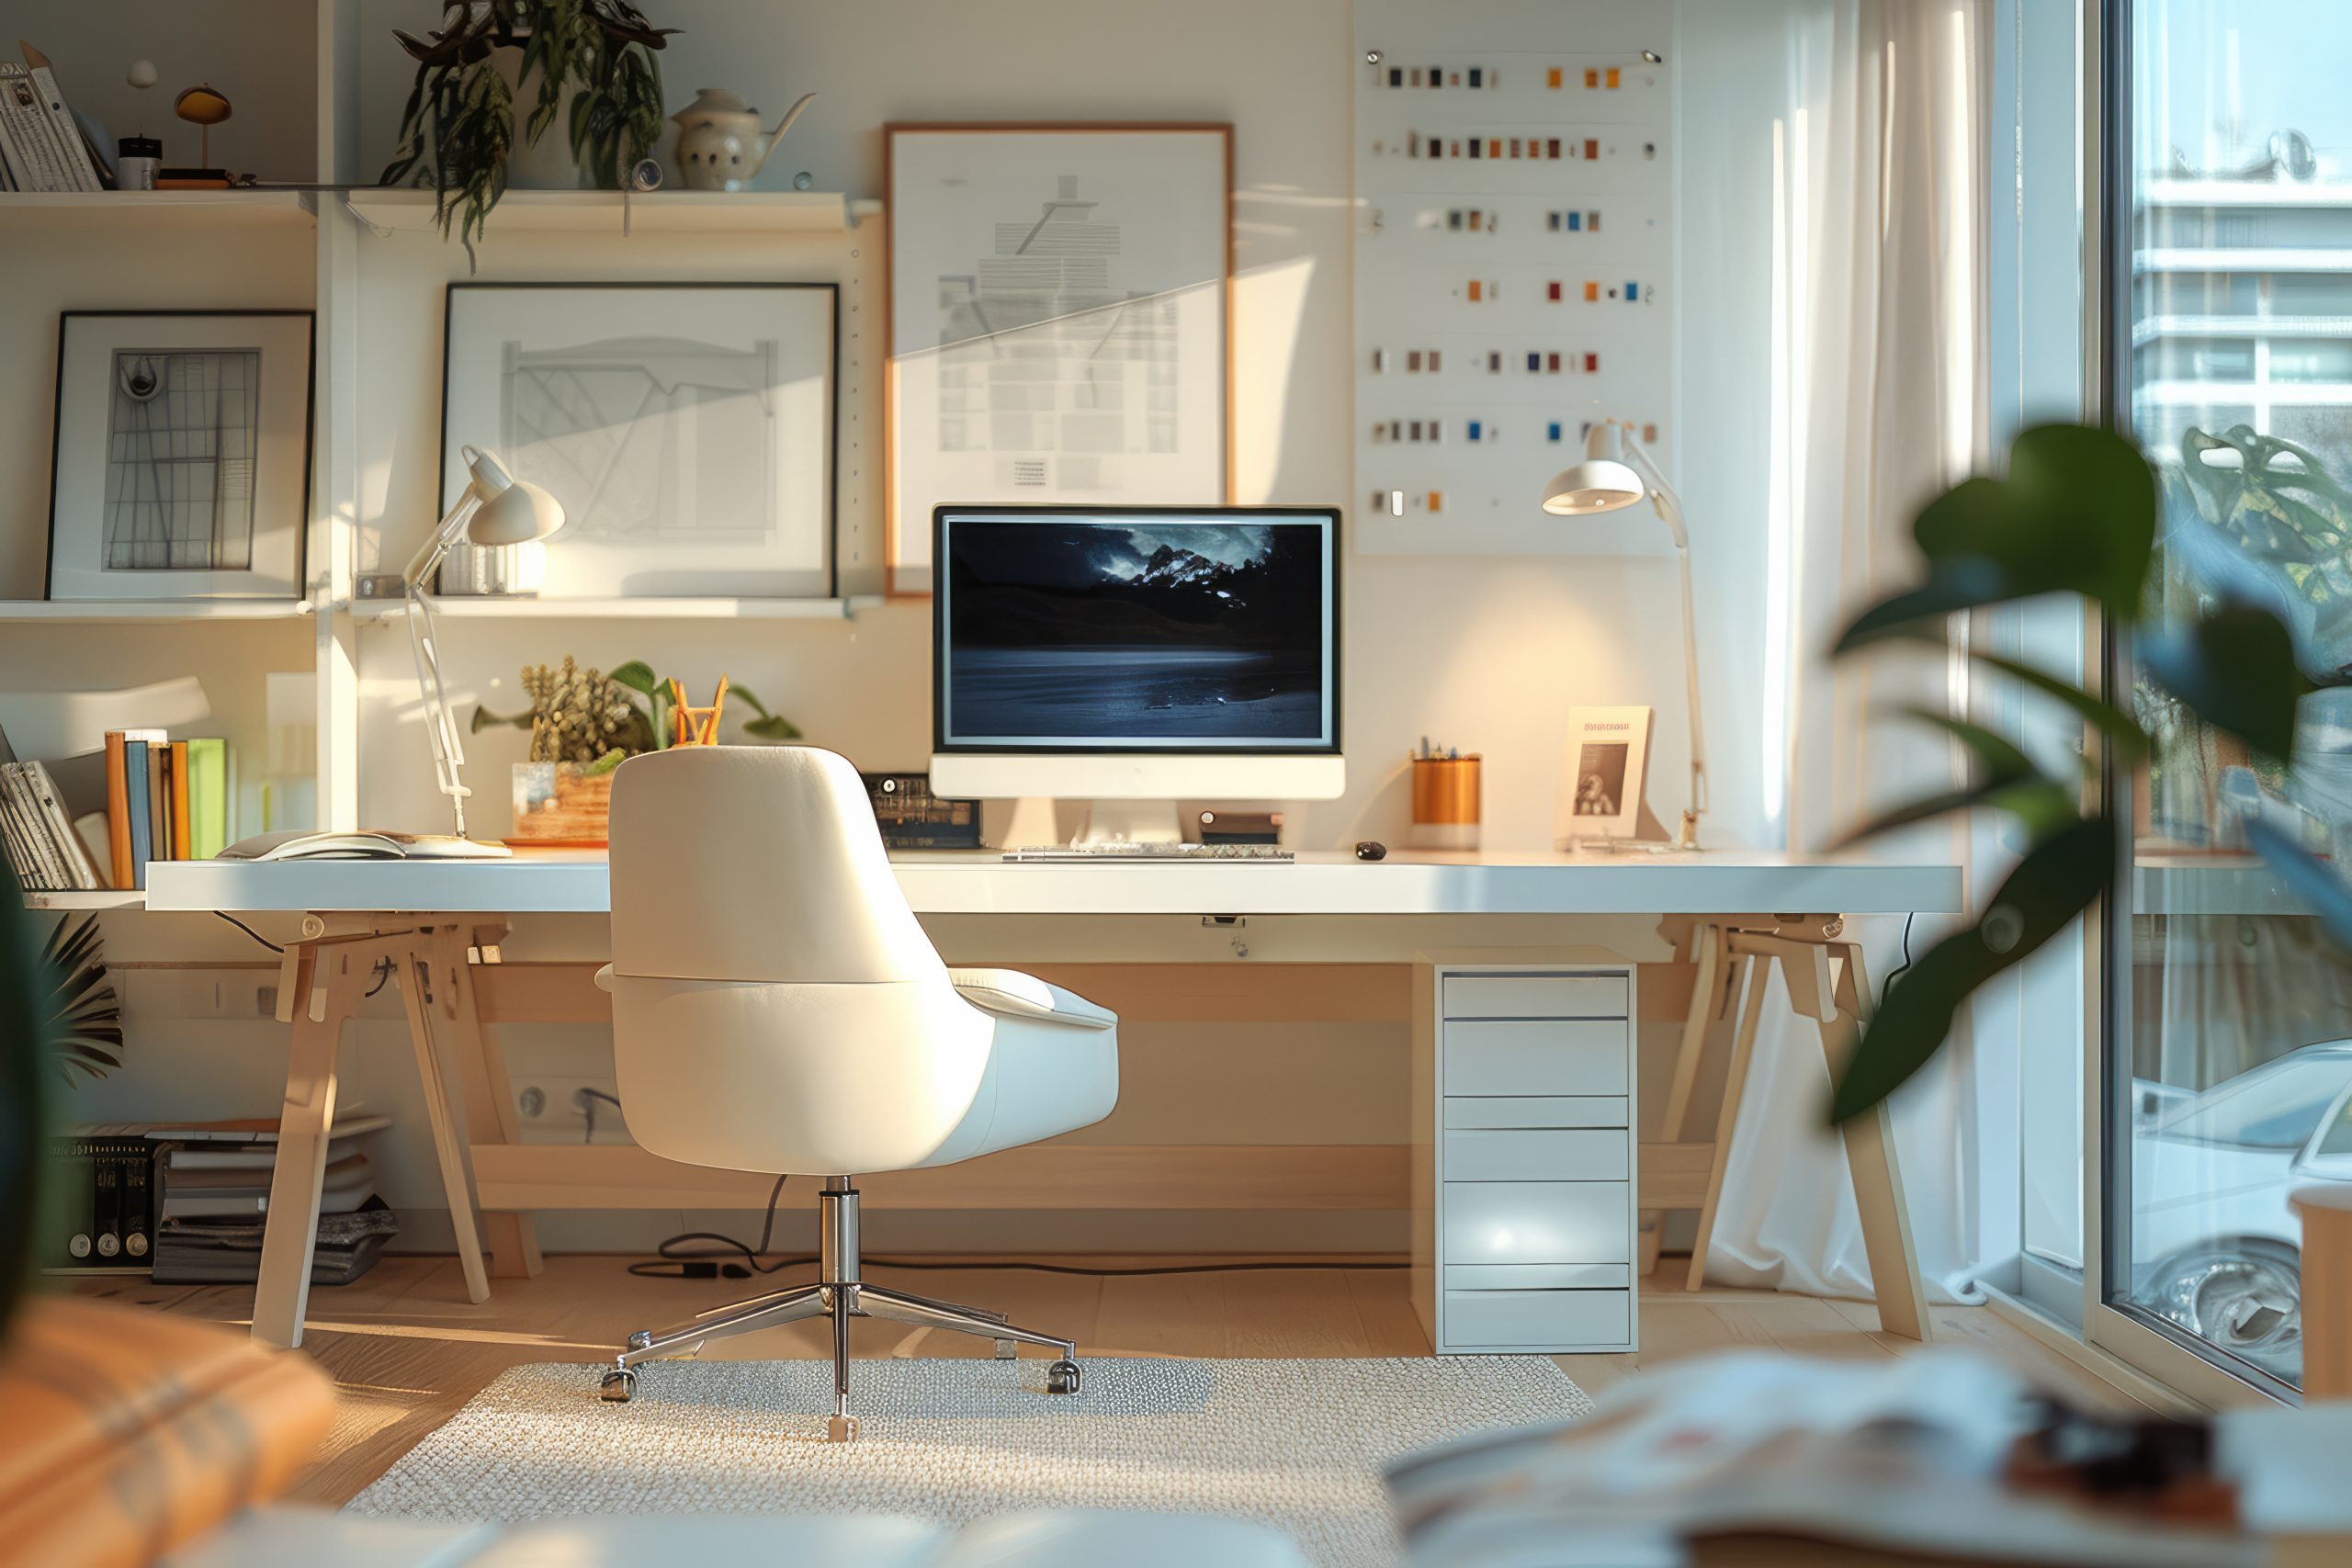
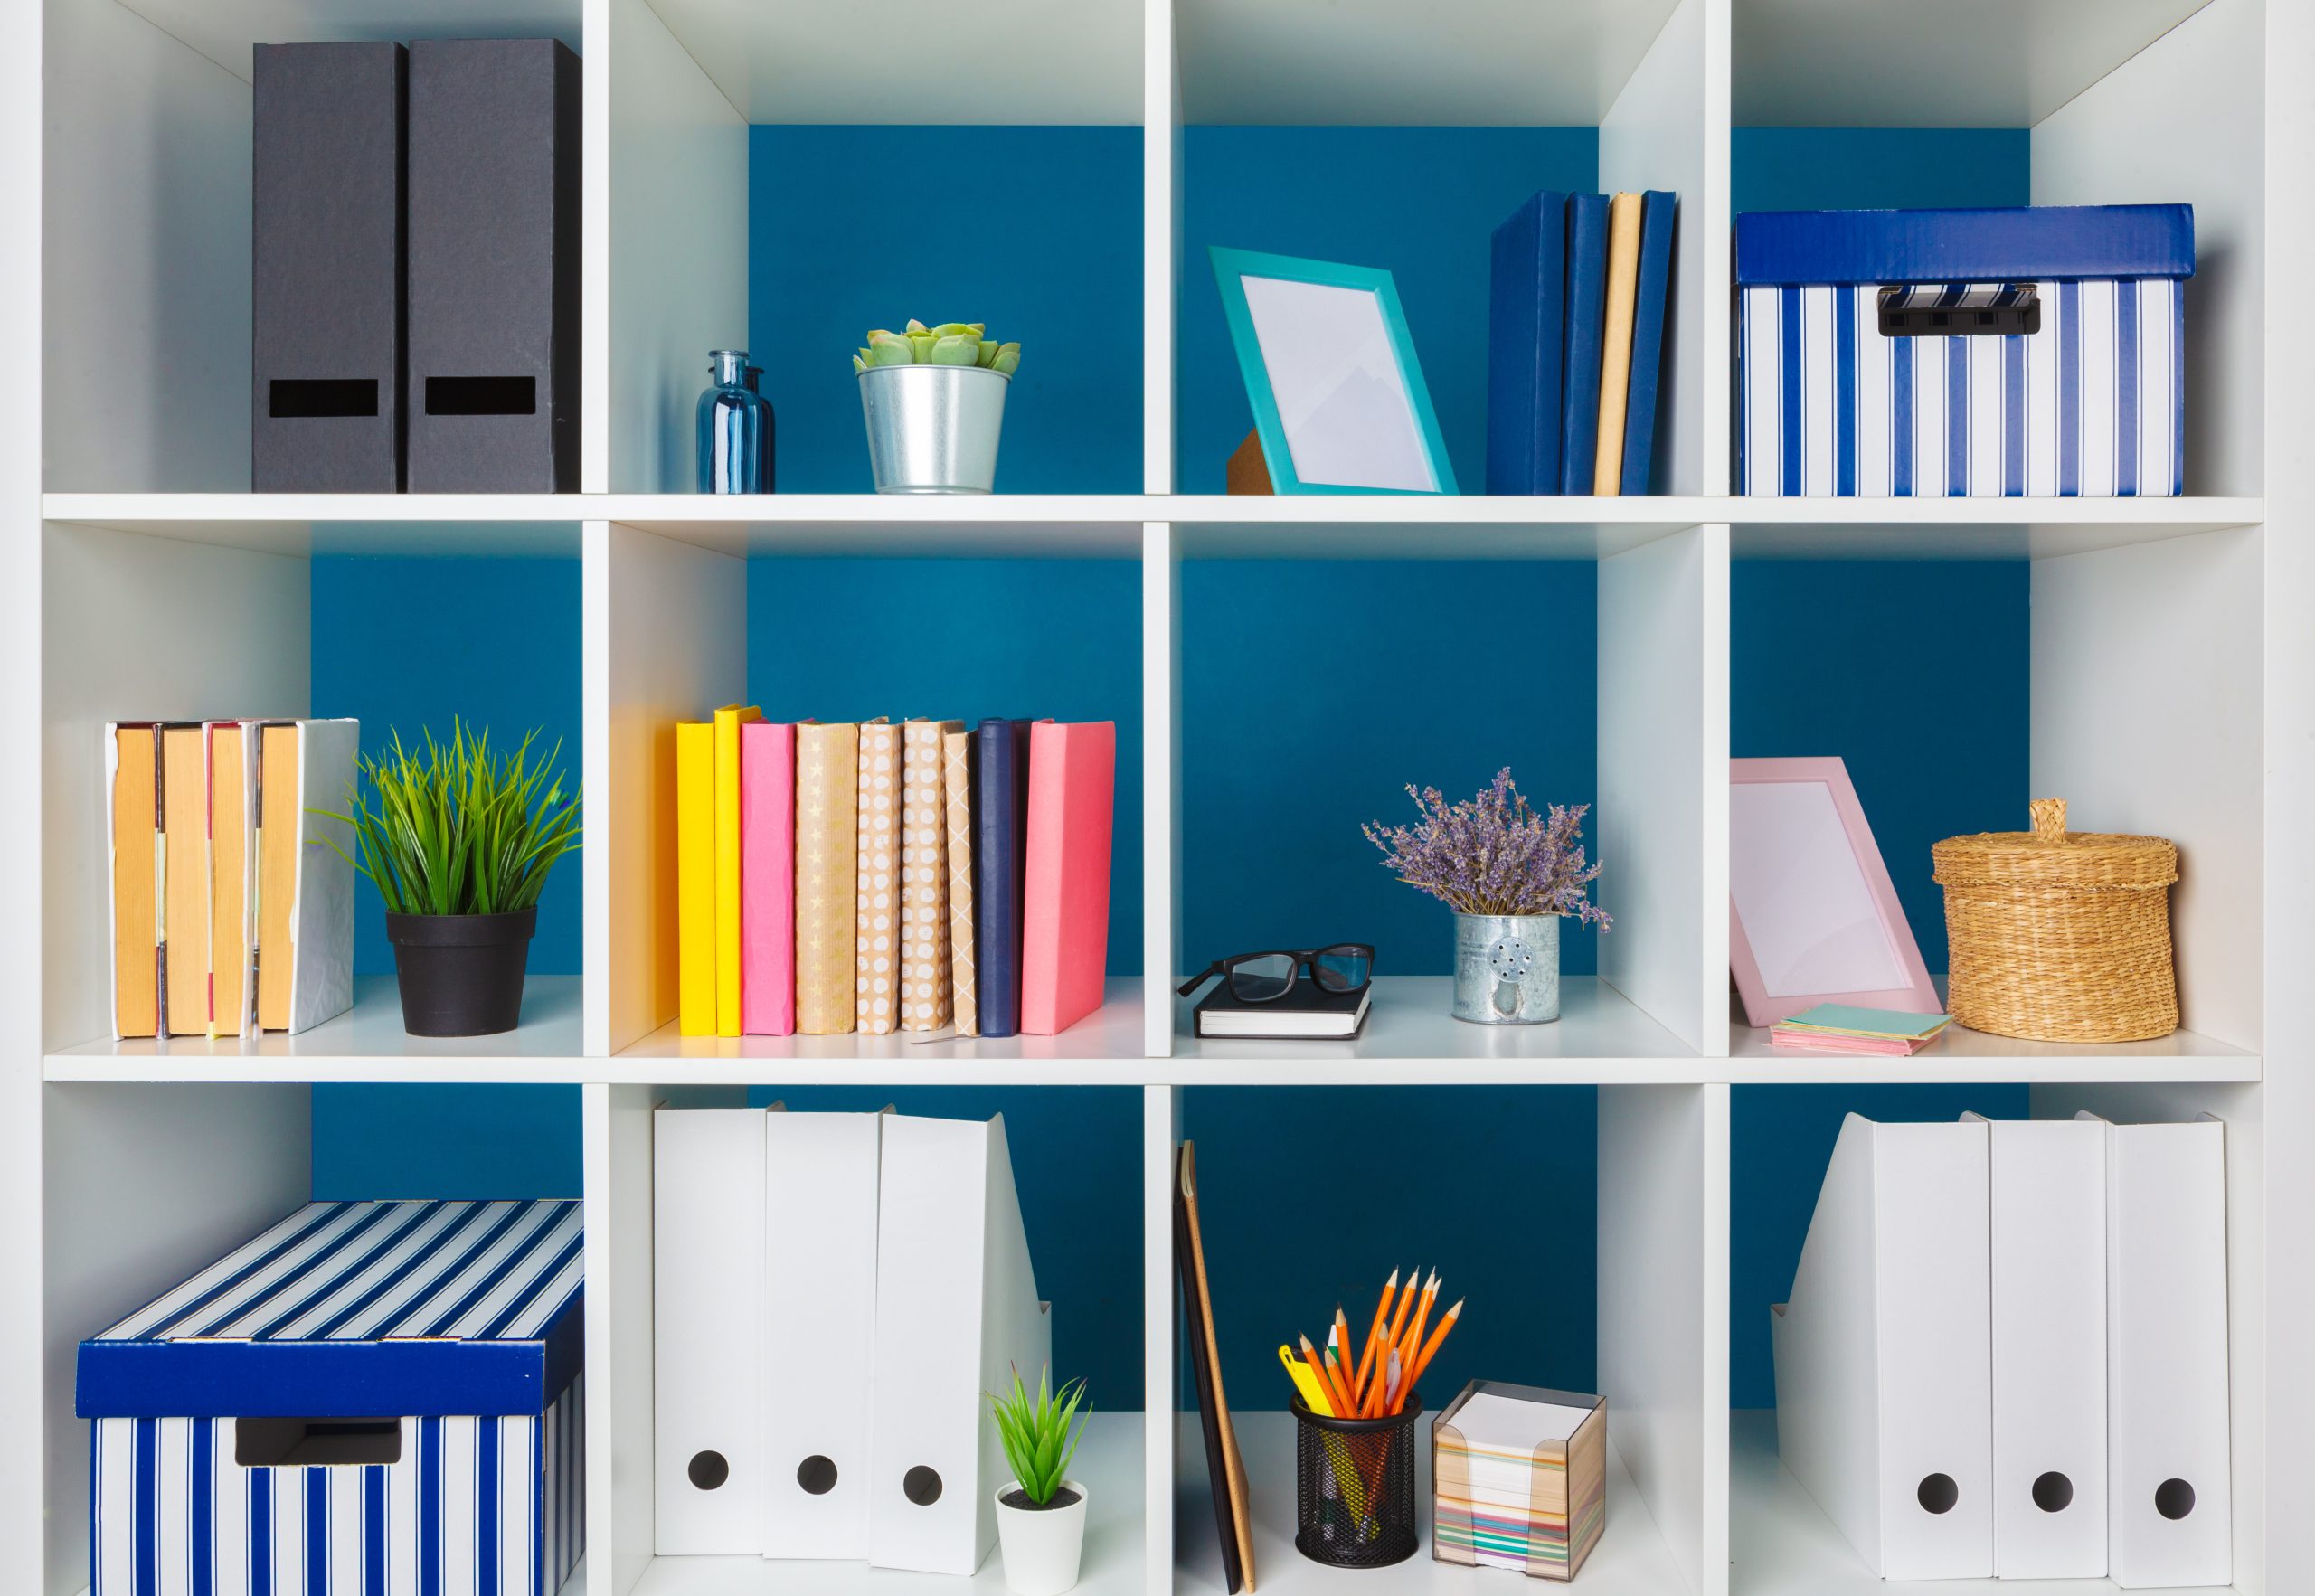
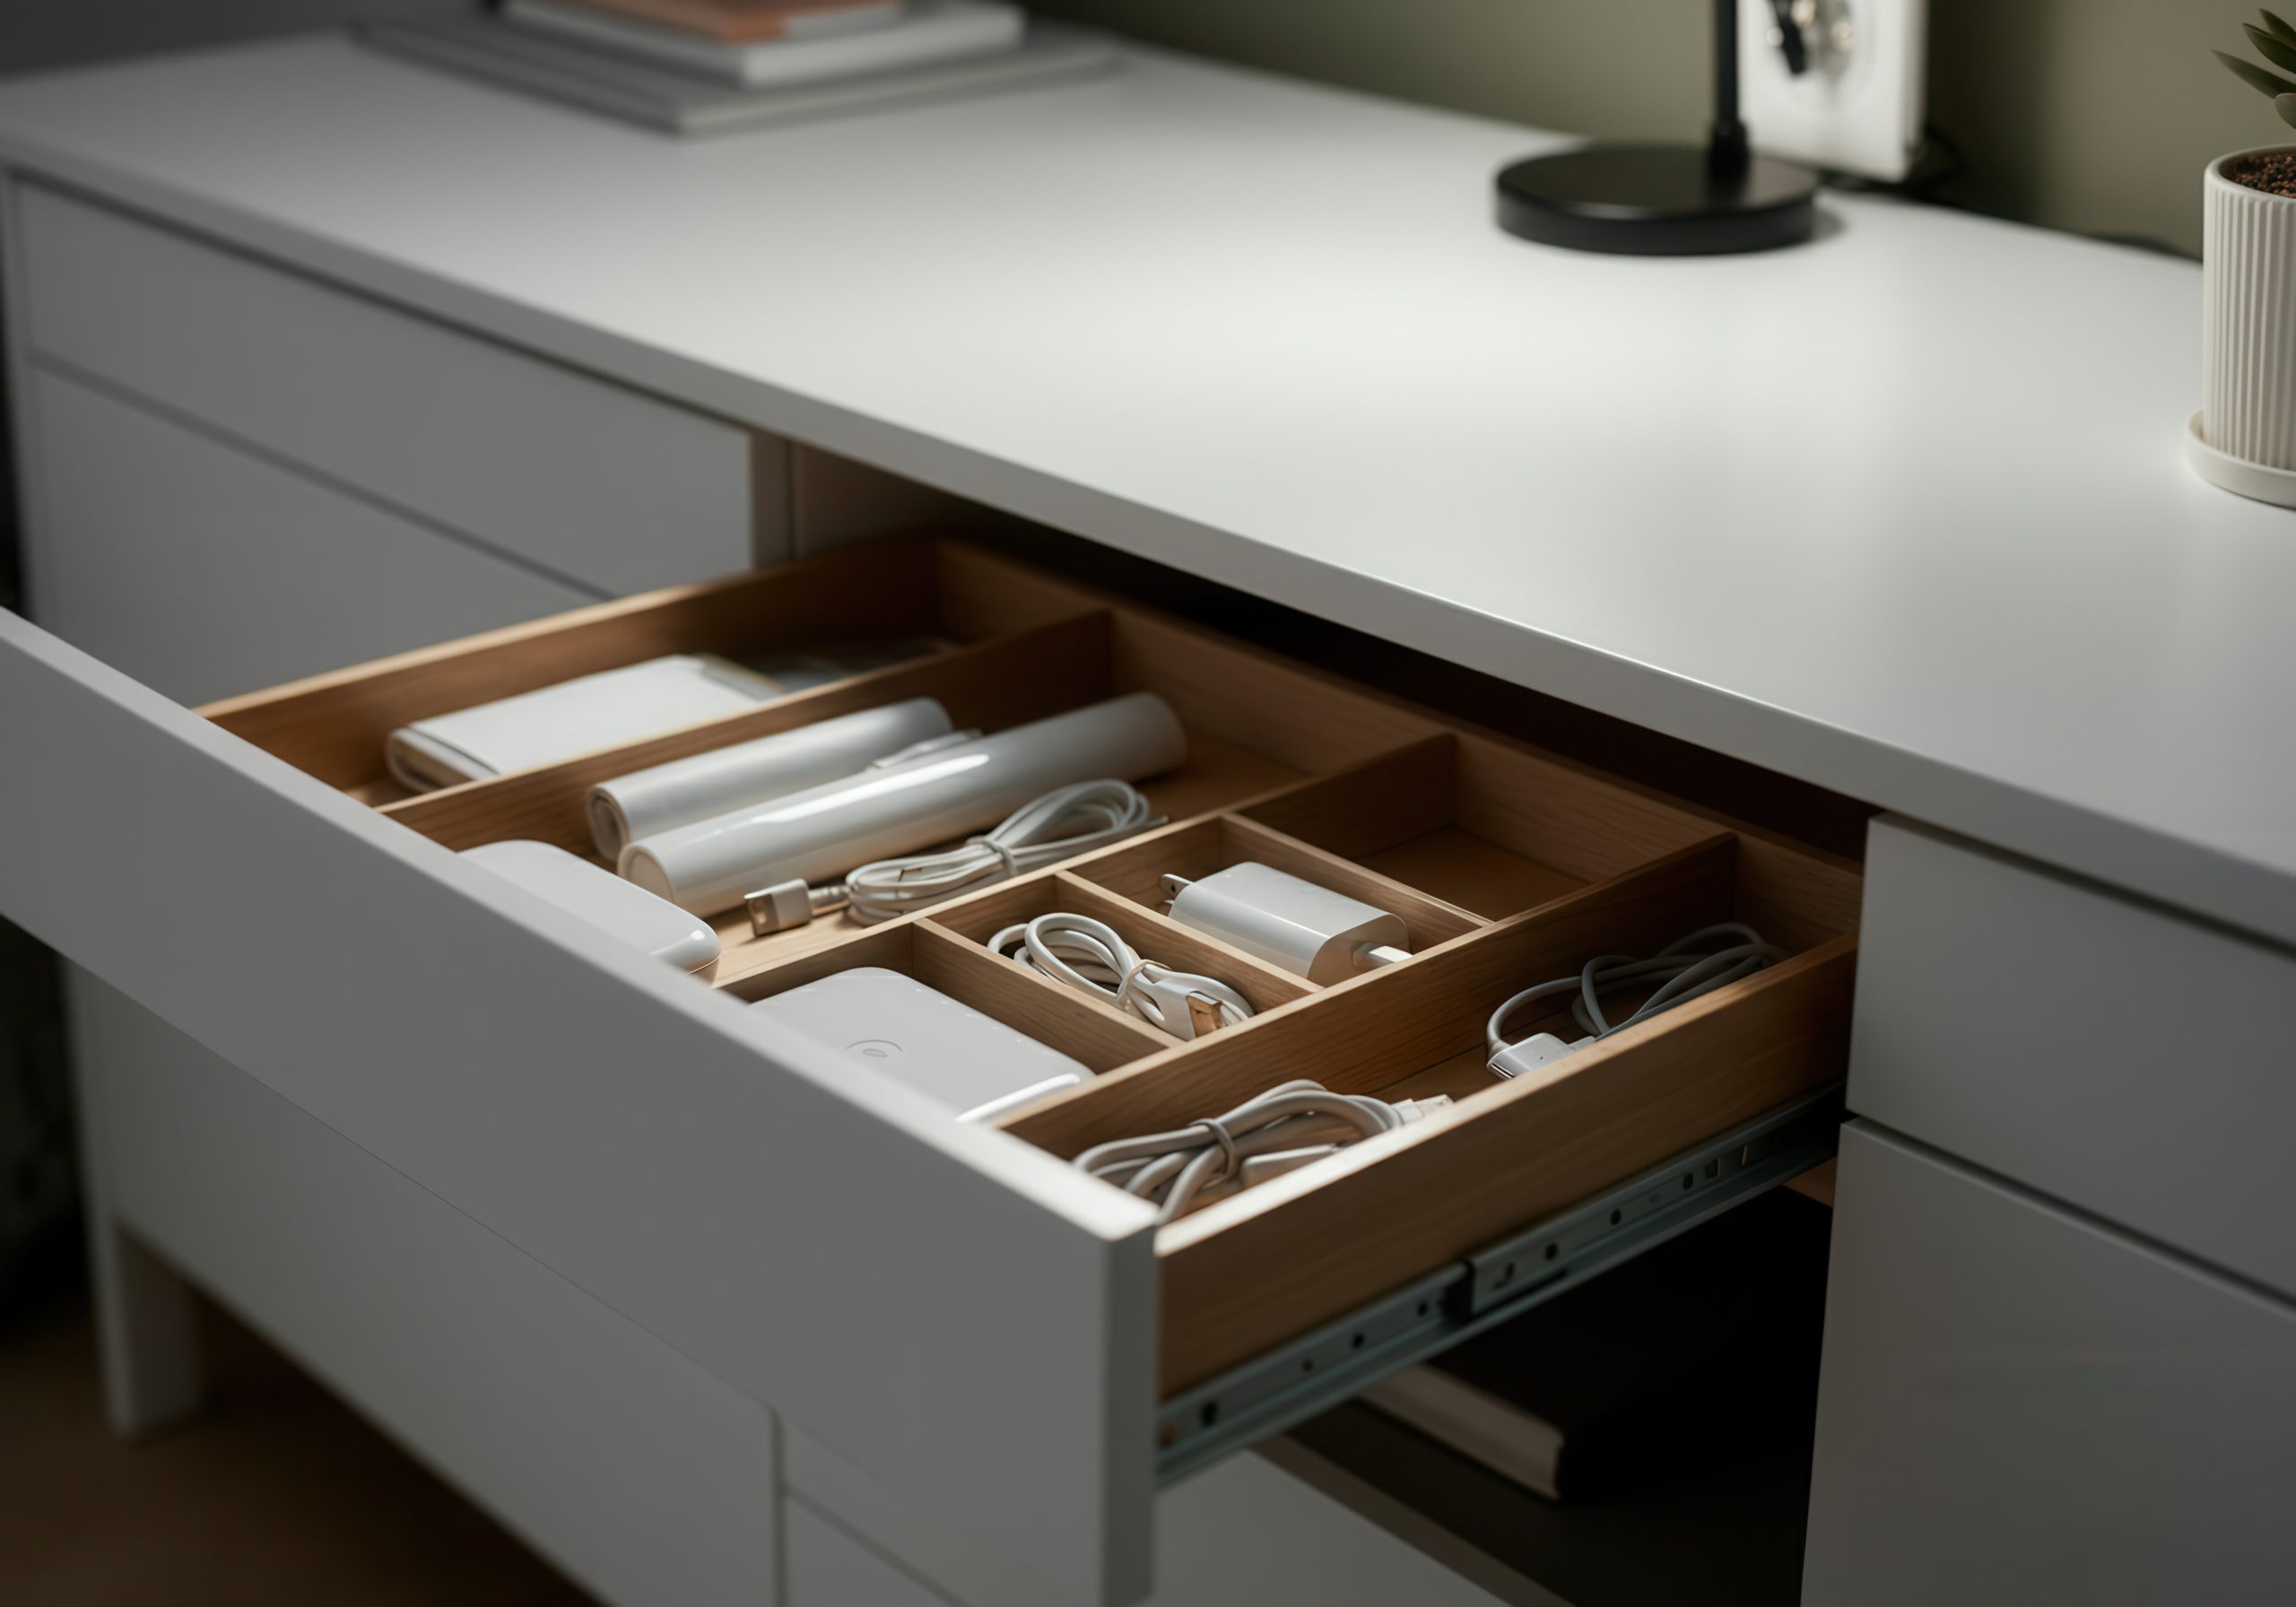
Storage Solutions: Taming the Clutter Monster in Your Ergonomic Home Office
A clutter-free workspace is essential for a productive and ergonomic home office. Disorganization can lead to distractions, stress, and wasted time. Implement these storage solutions to keep your home office tidy and efficient:
- Vertical Storage: Maximize vertical space with shelves, drawers, and filing cabinets. This keeps items off your desk surface, freeing up valuable workspace and contributing to a cleaner, more home office environment.
- Desk Organizers: Utilize desk organizers for pens, pencils, paperclips, and other small items. This keeps your desktop tidy and prevents clutter from accumulating.
- Cable Management System: Implement a cable management system to keep cords and wires organized and out of sight. This not only improves the aesthetics of your home office but also prevents tripping hazards.
- Hidden Storage: Utilize hidden storage solutions, such as ottomans with storage compartments or drawers under your desk, to maximize space and maintain a clean, minimalist look in your home office.
- Labeling: Labeling drawers, shelves, and boxes makes it easy to find what you need quickly, saving you time and reducing frustration in your home office.
- Regular Decluttering: Schedule regular decluttering sessions to purge unnecessary items and maintain an organized and efficient home office.
Monitor Placement: Protecting Your Precious Eyesight in Your Ergonomic Home Office
Correct monitor placement is crucial for preventing eye strain, neck pain, and headaches, all of which can significantly impact your productivity and well-being in your ergonomic home office. Follow these guidelines for optimal monitor placement:
- Arm’s Length Distance: Position your monitor an arm’s length away from your eyes. This reduces eye strain and allows for a comfortable viewing distance.
- Eye Level or Slightly Below: The top of your monitor should be at or slightly below eye level. This prevents you from craning your neck upwards, which can lead to discomfort and pain. Proper monitor placement is a cornerstone of a truly ergonomic home office.
- Center Your Monitor: Center your monitor directly in front of you to avoid twisting your neck or body. This promotes a neutral posture and reduces strain.
- Angle for Glare Reduction: Angle your monitor slightly upwards to minimize glare from overhead lights or windows. Glare can cause eye strain and make it difficult to focus, hindering your productivity.
- Multiple Monitors: If you use multiple monitors, arrange them in a slight curve around you to maintain a comfortable viewing angle for each screen in your setup.
Keyboard and Mouse: Small Adjustments, Big Impact on Your Ergonomic Home Office
While seemingly minor, the positioning of your keyboard and mouse plays a significant role in your overall comfort and the ergonomics of your home office. Incorrect placement can lead to wrist pain, carpal tunnel syndrome, and other repetitive strain injuries. Follow these tips for optimal keyboard and mouse positioning:
- Keyboard Placement: Position your keyboard directly in front of you, ensuring your elbows are bent at a 90-degree angle and your wrists are straight. Avoid reaching or twisting to access your keyboard. This central placement is key for working efficiently.
- Mouse Placement: Place your mouse next to your keyboard, close enough to avoid reaching. Keep your wrist straight and avoid resting your wrist on hard surfaces.
- Ergonomic Keyboard and Mouse: Consider investing in an ergonomic keyboard and mouse. Ergonomic keyboards are designed to promote a more natural wrist position, while ergonomic mice reduce strain on your hand and wrist. These are valuable additions to any ergonomic home office.
- Mouse Pad with Wrist Support: A mouse pad with wrist support can provide additional cushioning and help maintain a neutral wrist position.
- Micro-breaks: Take frequent micro-breaks to stretch your hands and wrists. Even short breaks can help prevent stiffness and discomfort.

Lighting: Illuminating Your Workspace for Productivity in Your Ergonomic Home Office
Proper lighting is essential for a productive and comfortable home office. Poor lighting can lead to eye strain, headaches, and fatigue, hindering your ability to focus and work effectively. Follow these tips to optimize your home office lighting:
- Natural Light is King: Maximize the use of natural light by positioning your desk near a window. Natural light is not only beneficial for your eyesight but also boosts mood and productivity. It’s a key element of a truly ergonomic home office.
- Layer Your Lighting: Combine natural light with artificial light sources for optimal illumination. Use a combination of ambient lighting (general lighting for the room), task lighting (focused light for specific tasks), and accent lighting (decorative lighting to enhance the ambiance) to create a balanced and comfortable lighting scheme in your home office.
- Task Lighting: A desk lamp with an adjustable arm is ideal for task lighting. Position the lamp so it illuminates your work surface without creating glare on your monitor.
- Avoid Harsh Overhead Lighting: Harsh overhead lighting can cause glare and shadows, leading to eye strain. Opt for softer, diffused lighting or use a dimmer switch to control the intensity.
- Color Temperature: Choose light bulbs with a color temperature that promotes focus and productivity. Cool white or blue light is generally recommended for workspaces, while warm white light is better suited for relaxation areas. Consider the impact of color temperature when designing your ergonomic home office.
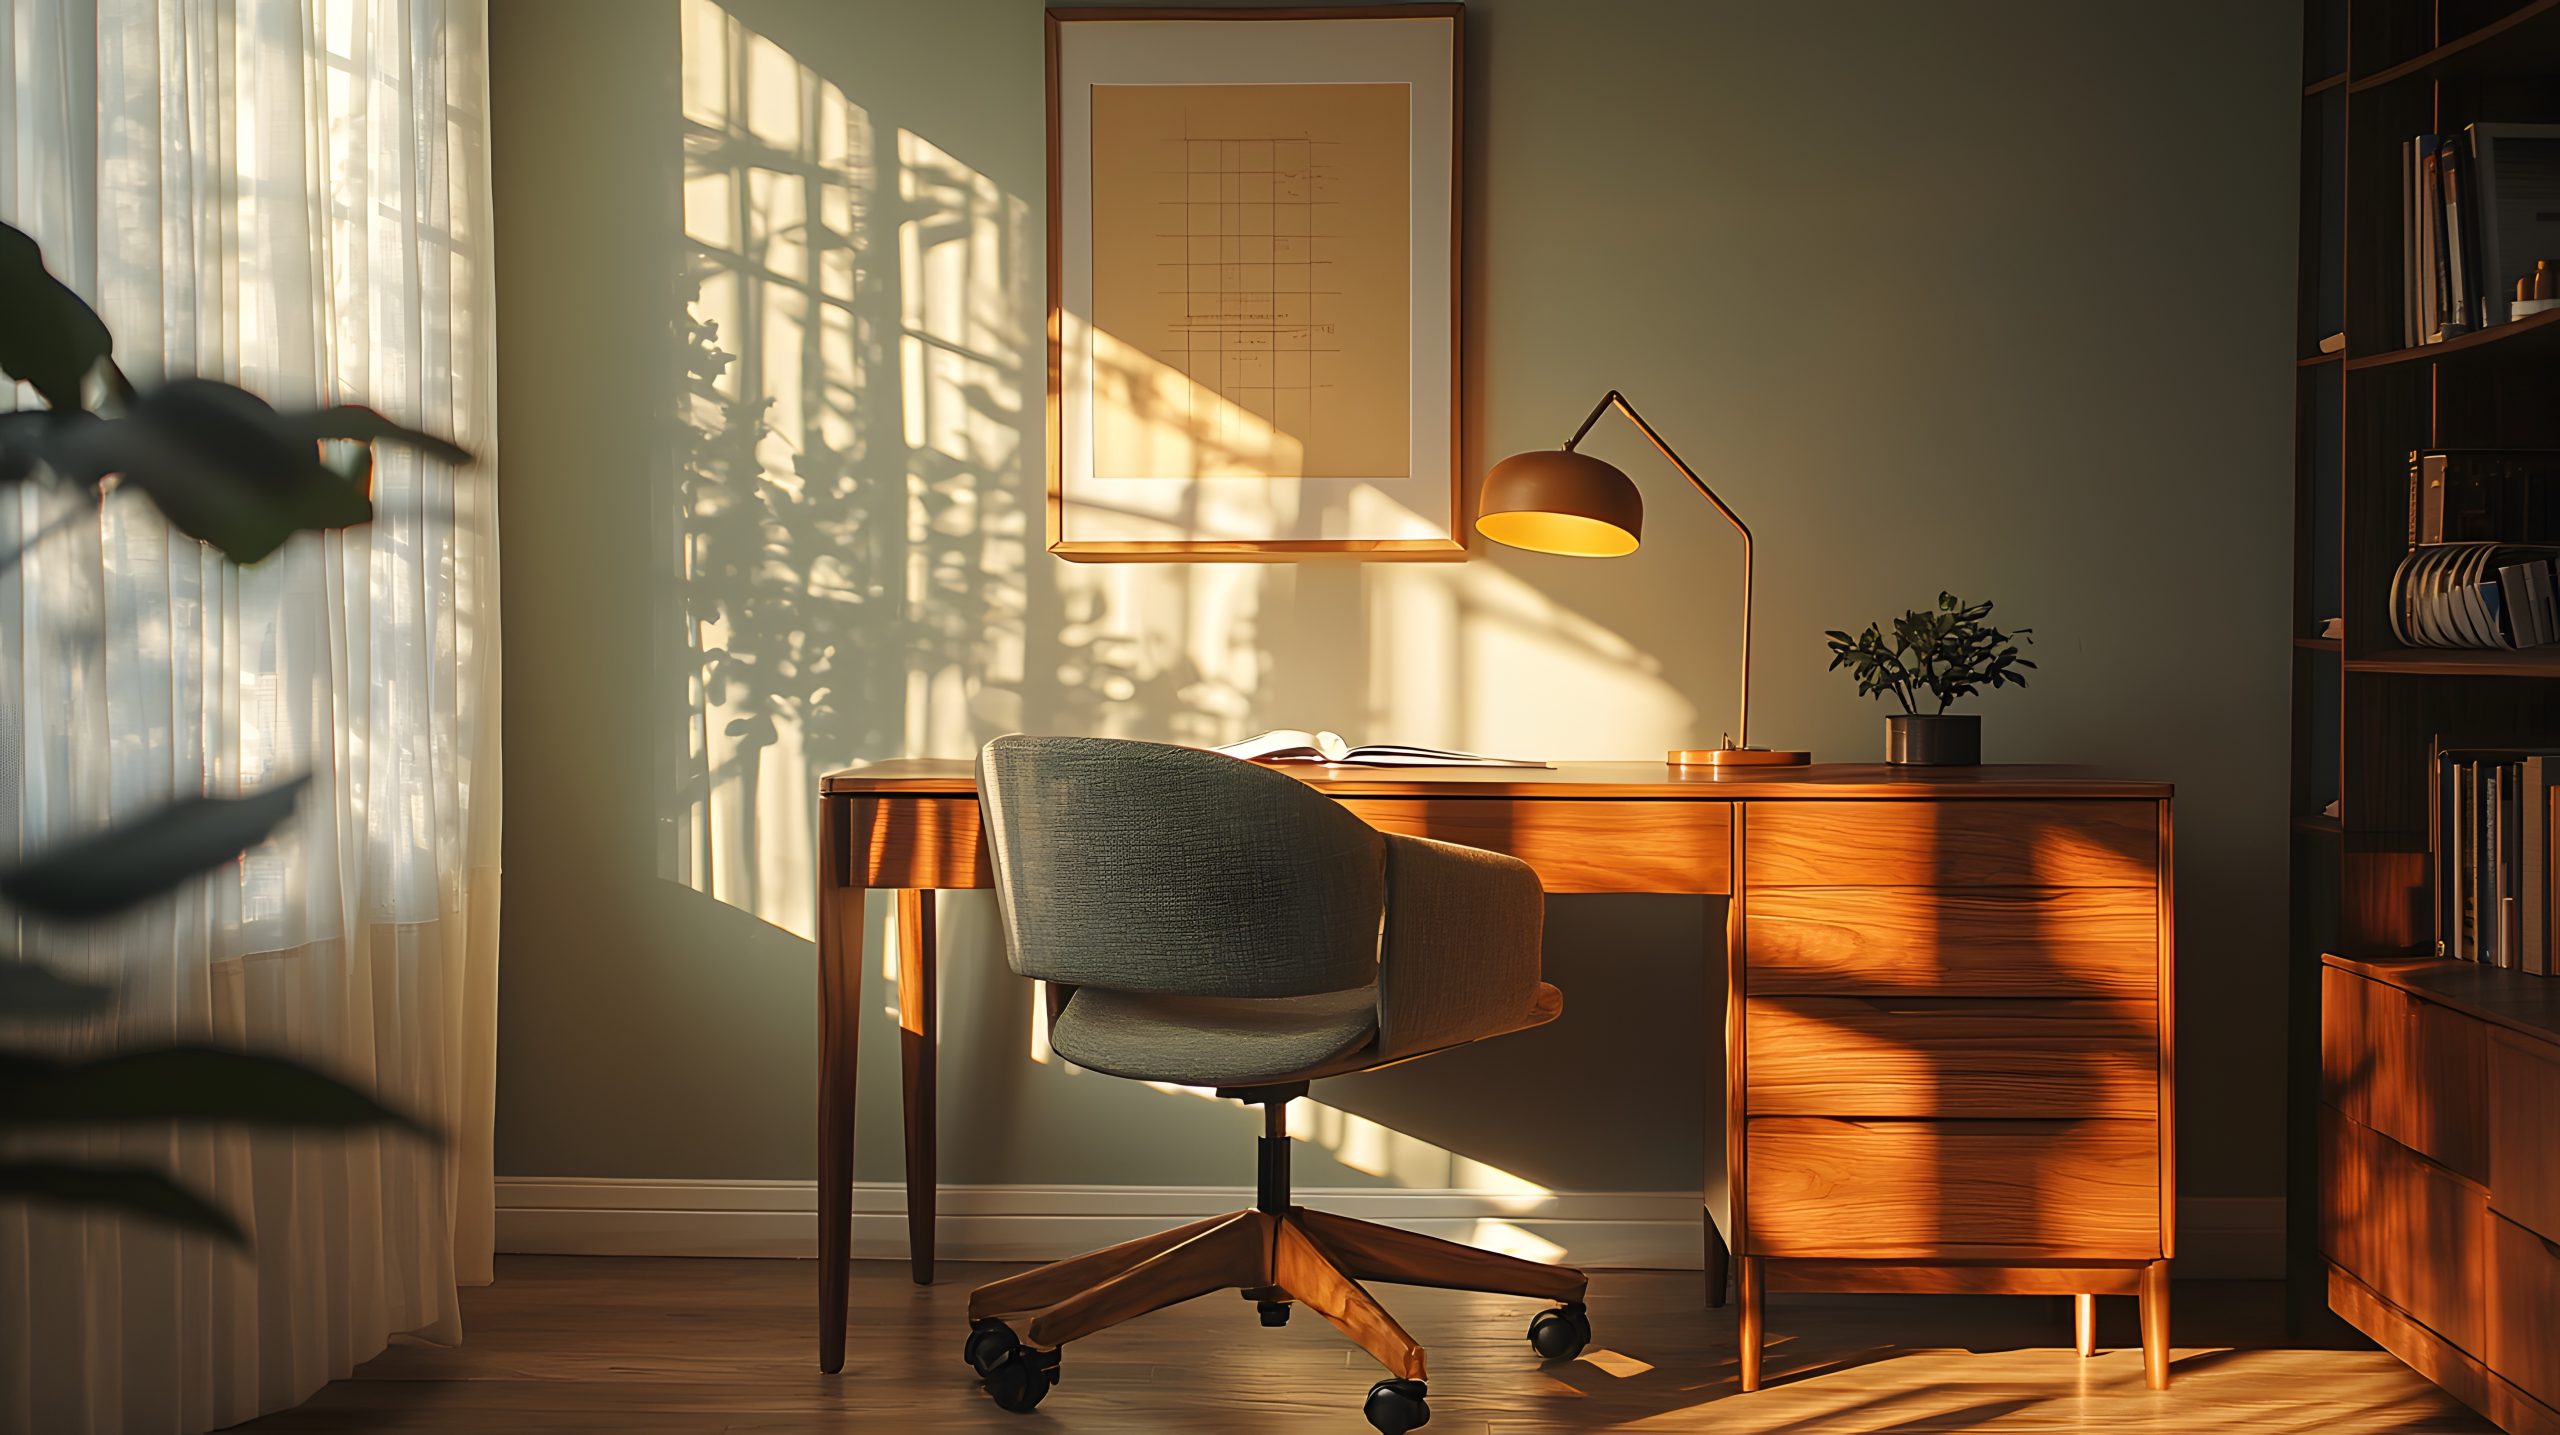
Styling Your Space: Infusing Personality into Your Ergonomic Home Office
Creating an ergonomic home office doesn’t mean sacrificing style. In fact, a visually appealing and inspiring workspace can boost your mood, creativity, and productivity. Here’s how to infuse personality into your home office while maintaining functionality:
- Color Psychology: Consider the impact of color on mood and productivity. Blues and greens are known for their calming and focusing effects, while yellows and oranges can spark creativity. Incorporate these colors strategically into your ergonomic home office design.
- Plants: Introduce plants into your workspace to bring life and vibrancy to your home office. Plants not only purify the air but also create a more calming and inviting atmosphere.
- Artwork and Accessories: Personalize your space with artwork, photographs, and decorative accessories that reflect your interests and style. These personal touches can make your home office feel more inviting and inspiring.
- Textiles: Add warmth and texture with rugs, curtains, and cushions. Choose fabrics and patterns that complement your overall design scheme.
- Wall Decor: Utilize wall space to display artwork, inspirational quotes, or even a vision board. This can add personality and motivation to your home office.
- Balance: Strive for a balance between functionality and aesthetics. While incorporating decorative elements, ensure they don’t clutter your workspace or interfere with your workflow.
Cable Management: Hiding the Digital Jungle in Your Ergonomic Home Office
Tangled cables and wires can quickly turn a tidy home office into a chaotic mess. Effective cable management not only improves the aesthetics of your workspace but also prevents tripping hazards and makes it easier to clean. Implement these strategies to tame the digital jungle:
- Cable Ties and Clips: Use cable ties or clips to bundle cords together and keep them organized. This prevents them from tangling and creates a cleaner look.
- Cable Trays and Sleeves: Conceal cables under your desk or along walls using cable trays or sleeves. This keeps them out of sight and creates a more streamlined appearance.
- Wireless Devices: Whenever possible, opt for wireless devices such as keyboards, mice, and printers. This minimizes the number of cables cluttering your home office.
- Designated Power Strip: Use a designated power strip to plug in all your electronic devices. This keeps cords organized and makes it easier to manage power consumption.
- Labeling: Label your cables to identify which device they belong to easily. This is especially helpful if you need to troubleshoot or disconnect a specific device.
- Regular Maintenance: Regularly check your cable management system and make adjustments as needed. This prevents cables from becoming tangled and maintains a tidy home office space.
Maintenance: Keeping Your Ergonomic Haven in Tip-Top Shape
Creating an ergonomic home office is an ongoing process, not a one-time event. Regular maintenance is essential for ensuring your workspace remains comfortable, functional, and conducive to productivity. Here are some key maintenance tips:
- Regular Breaks: Take frequent breaks throughout the day to stretch, move around, and rest your eyes. This helps prevent stiffness, fatigue, and eye strain, all crucial for maintaining a truly ergonomic home office. Set reminders to ensure you take breaks regularly.
- Cleaning and Dusting: Regularly clean and dust your workspace to maintain a healthy and hygienic environment. Dust can accumulate on keyboards, monitors, and other surfaces, impacting both the aesthetics and functionality of your home office.
- Equipment Check-ups: Periodically check your equipment for wear and tear. Ensure your chair, desk, keyboard, and mouse are functioning properly and providing adequate support. Addressing issues promptly helps maintain the ergonomics of your home office.
- Re-evaluate Your Setup: As your needs and work habits evolve, re-evaluate your ergonomic home office setup. Make adjustments to your chair, desk, monitor placement, and other elements to ensure they continue to support your comfort and productivity.
- Organization: Regularly declutter and organize your workspace to prevent clutter from accumulating. A tidy and organized ergonomic home office promotes focus and efficiency.

Creating an ergonomic home office that is both functional and aesthetically pleasing is an investment in your well-being and productivity. By implementing the tips outlined in this post, you can transform your workspace into a haven of comfort and inspiration.
by Kesaa Interiors | DECOR & DIY, ROOMS, Small Space Hacks, Storage & Organisation
Looking for the best mudroom storage ideas for the space you have? Read along for the best tips!
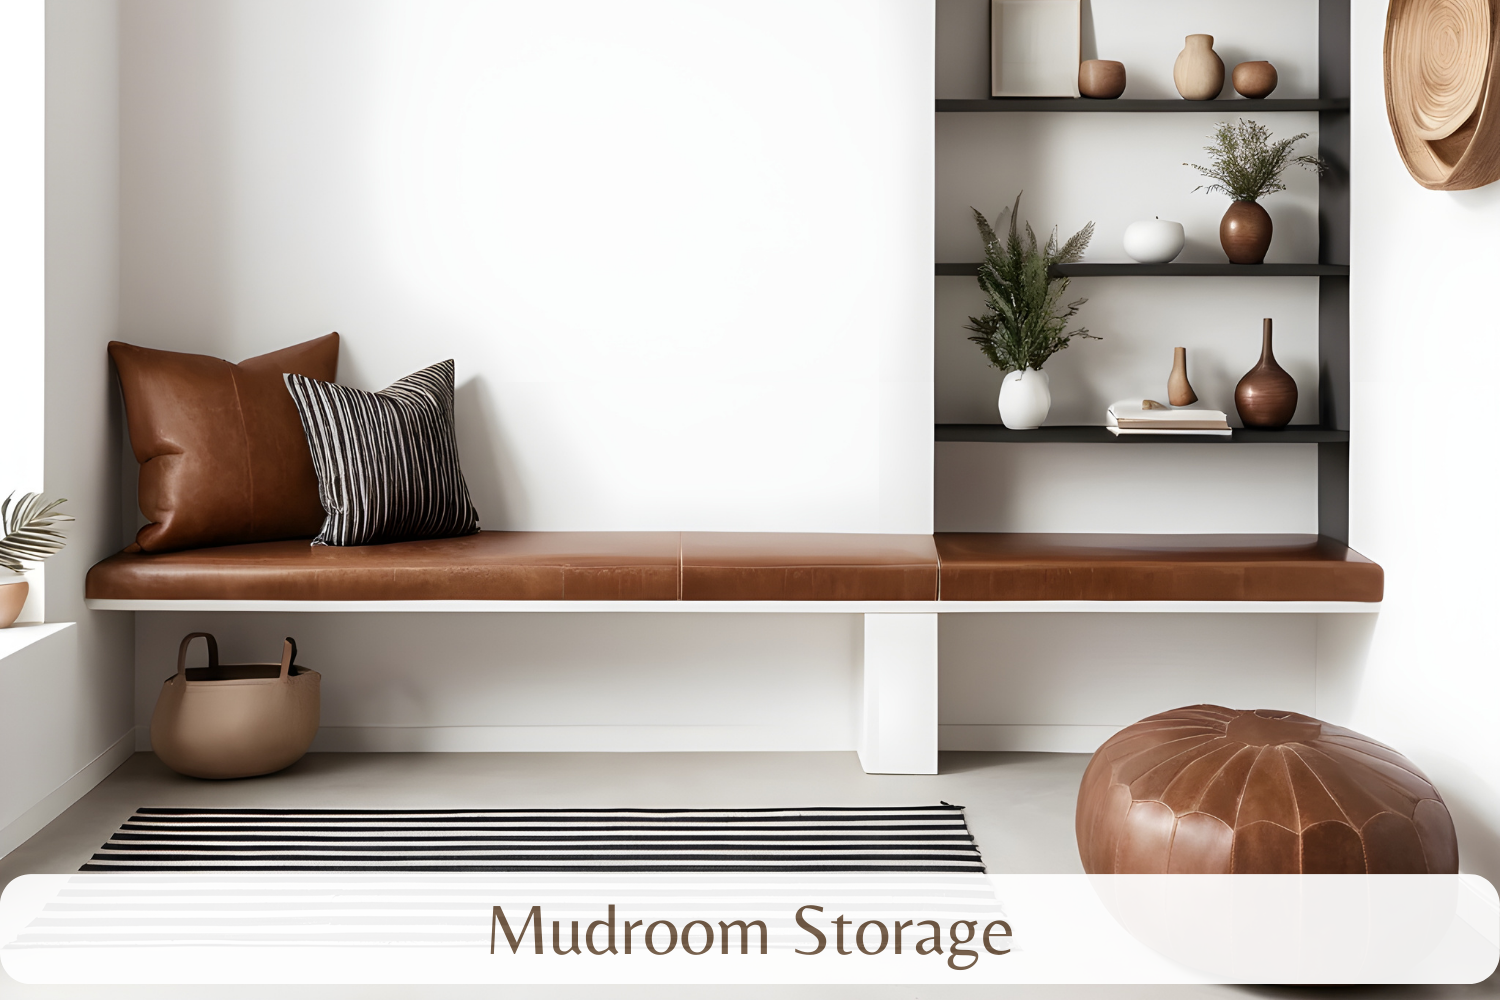
Let’s be honest, the mudroom is often the hardest-working space in the house. It’s the first line of defense against the chaos of the outside world, the drop zone for everything from backpacks and sports gear to muddy boots and wet umbrellas. But what happens when this crucial space becomes overwhelmed?
A cluttered mudroom can quickly turn into a source of stress, making it difficult to find what you need and keep things organised. That’s why effective mudroom storage is so essential, regardless of the size of your entryway.
This post will explore clever mudroom storage ideas for every space size, helping you transform your mudroom from a chaotic dumping ground into a functional and stylish hub.
Best Mudroom Storage Hacks!
Tiny Mudrooms – Making the Most of Every Inch
Micro Mudroom Magic: Storage Solutions for the Smallest Entries
Dealing with a tiny entryway or a narrow hallway that has to function as your mudroom? Don’t despair! Even the smallest of spaces can be optimised with clever mudroom storage solutions. The key is to think vertically and utilize every available inch. Forget sprawling furniture; in these micro mudrooms, we’re focusing on compact and multi-functional pieces that maximise storage without sacrificing precious floor space. Effective mudroom storage in these tiny areas is less about having a designated “room” and more about creating a system that works within your limited square footage. Let’s explore some ingenious ideas to transform your miniature entryway into a storage powerhouse.
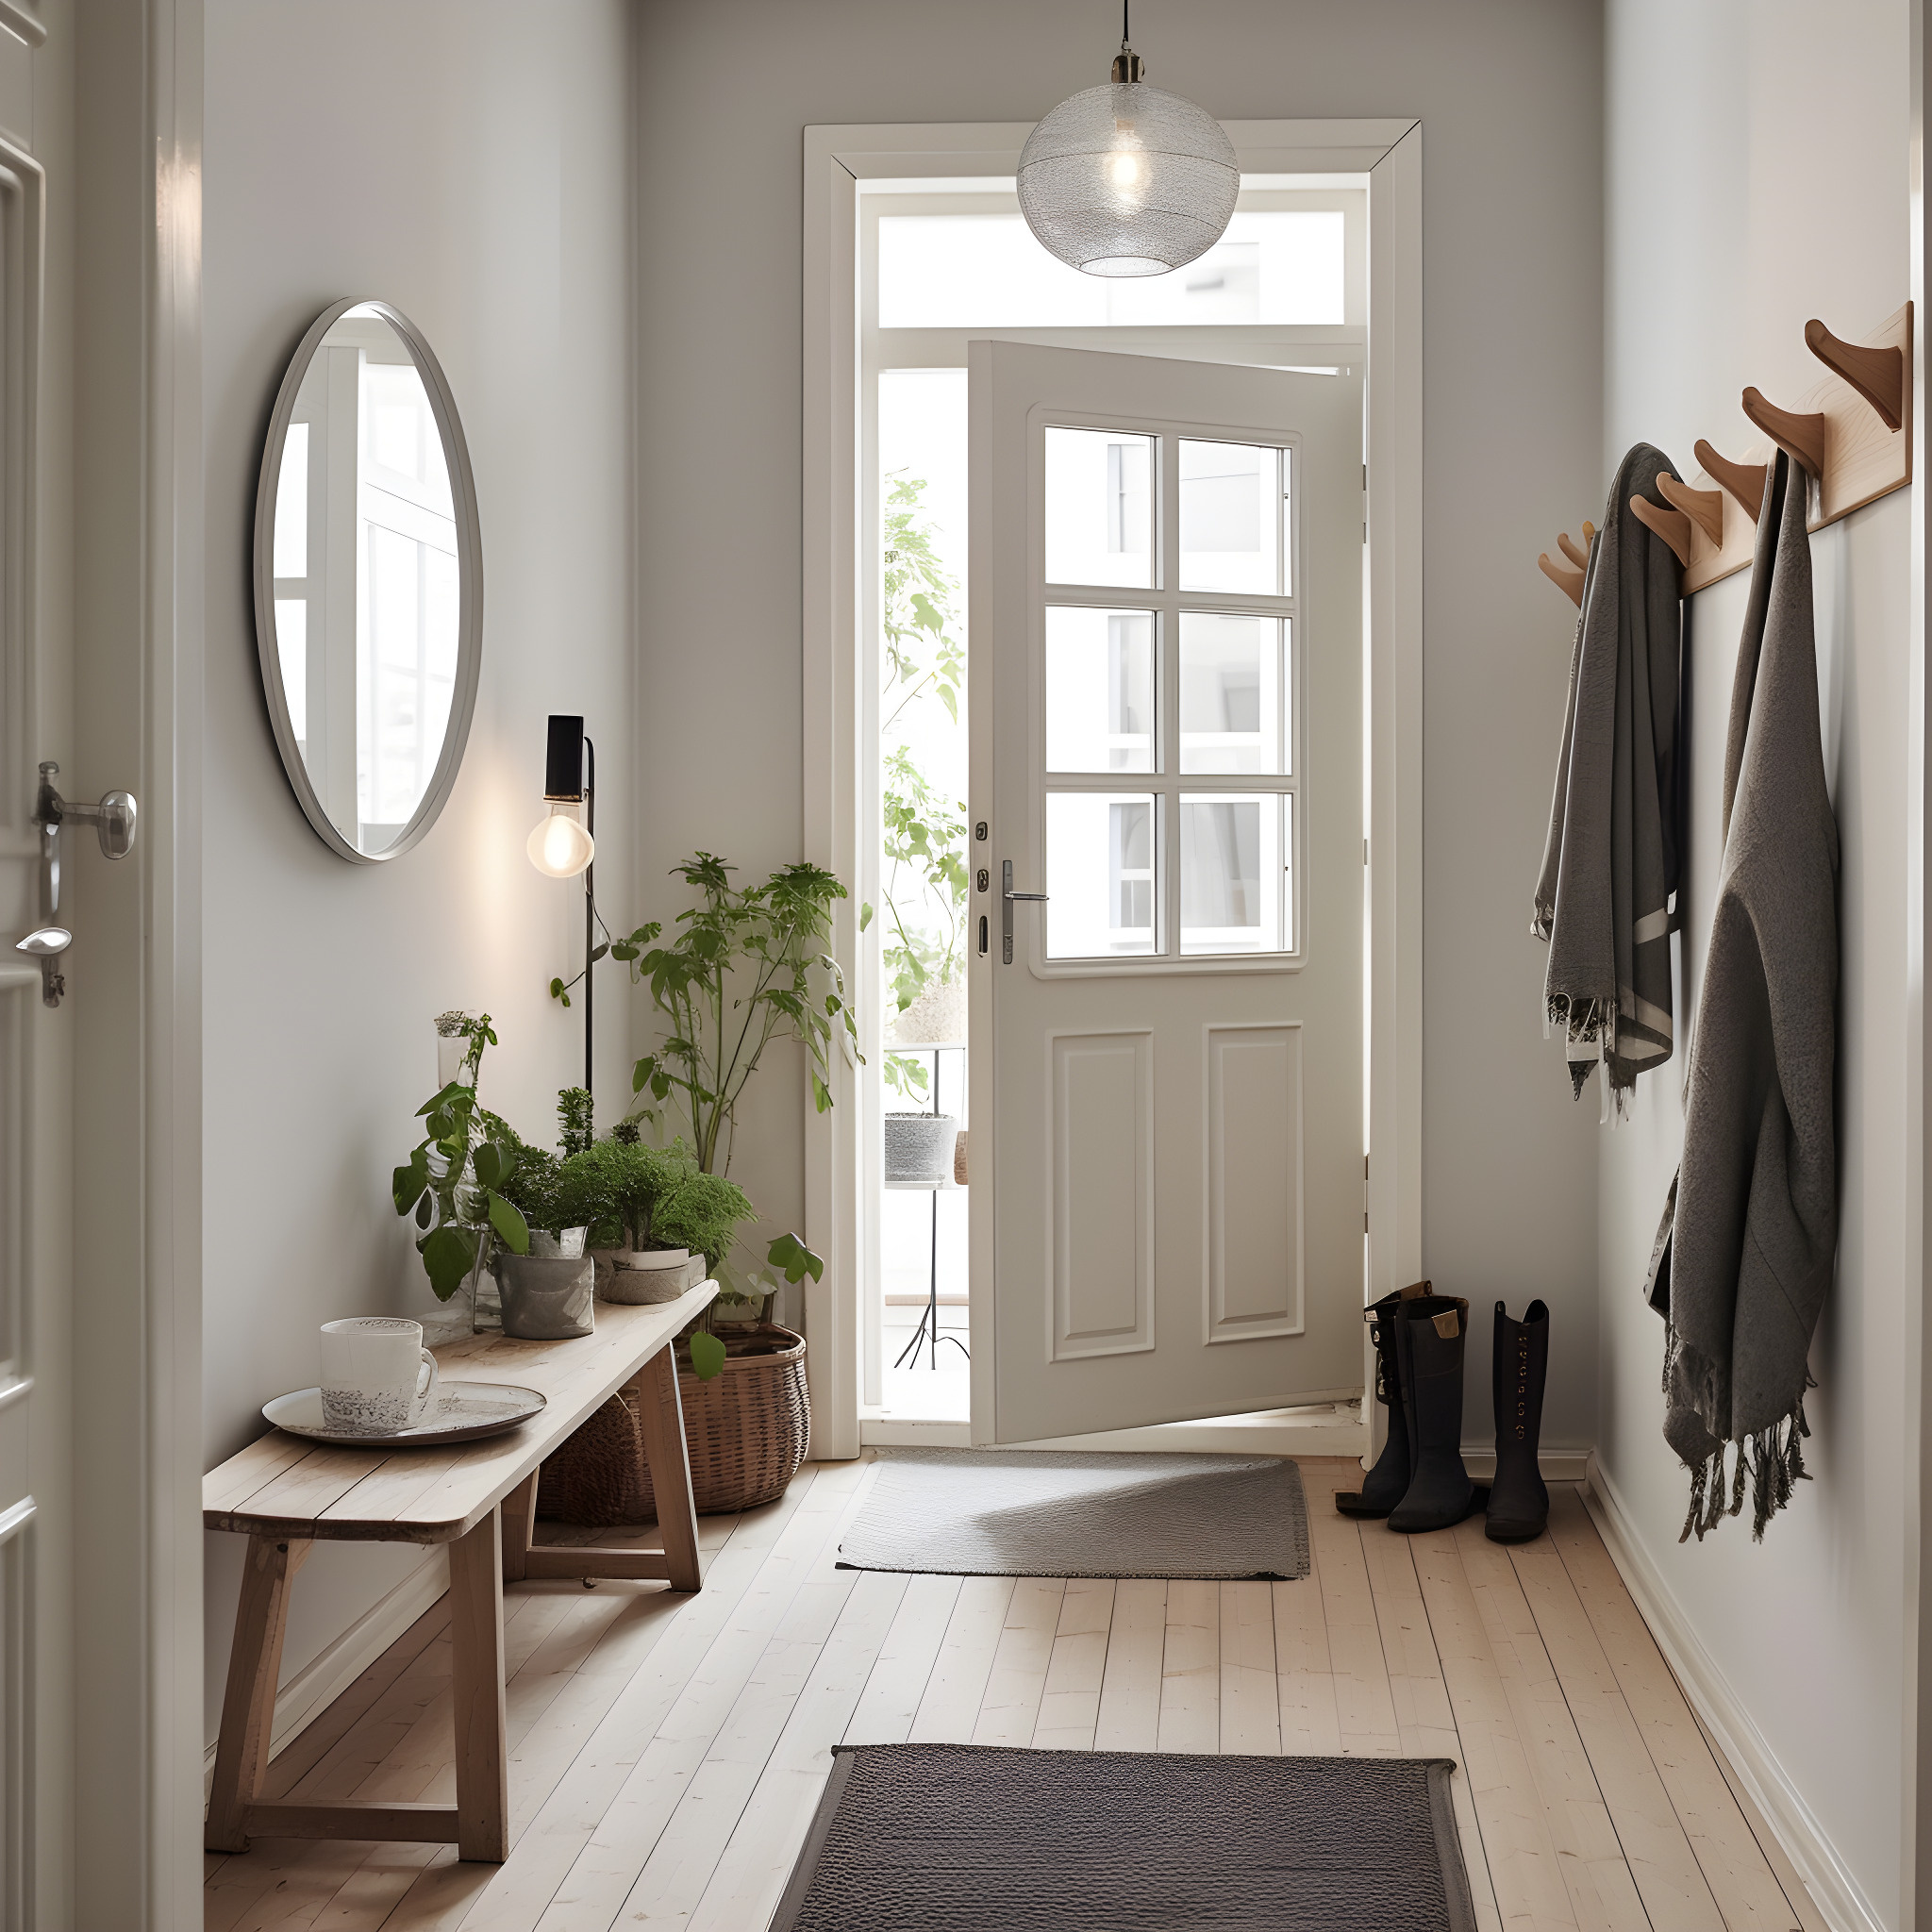
-
Wall-Mounted Coat Racks with Tiny Shelves: In a tiny mudroom, wall space is your best friend. Install a sturdy wall-mounted coat rack with a small shelf above. This provides a spot for coats, jackets, and bags, while the shelf can hold keys, mail, or small decorative items.
-
Over-the-Door Shoe Organisers: Maximise vertical space and keep shoes off the floor with an over-the-door shoe organiser. These are inexpensive, easy to install, and can hold a surprising number of pairs. They’re a game-changer for mudroom storage in tight spaces.
-
Vertical Shoe Racks: If you have a sliver of wall space, a slim, vertical shoe rack can be a lifesaver. These racks keep shoes organised and prevent them from cluttering the floor, which is crucial for maintaining a sense of order in a tiny mudroom.
-
Narrow Console Tables with Drawers: A narrow console table placed against the wall can serve as a landing strip for keys and mail, while drawers provide hidden storage for gloves, scarves, and other small essentials. This adds valuable mudroom storage without overwhelming the space.
Small Mudroom Storage – Verticality is Key
Small Space, Big Impact: Vertical Mudroom Storage Solutions
If you have a small, dedicated mudroom, you have a bit more room to work with than a tiny entryway, but maximising space is still crucial. Vertical mudroom storage solutions are your secret weapon in these areas. Think upwards and utilise the full height of your walls to create ample storage without making the space feel cramped. By incorporating tall shelving, wall-mounted organisers, and other clever vertical storage ideas, you can transform your small mudroom into an organised and functional zone. Let’s explore some effective strategies for maximising vertical space in your small mudroom.
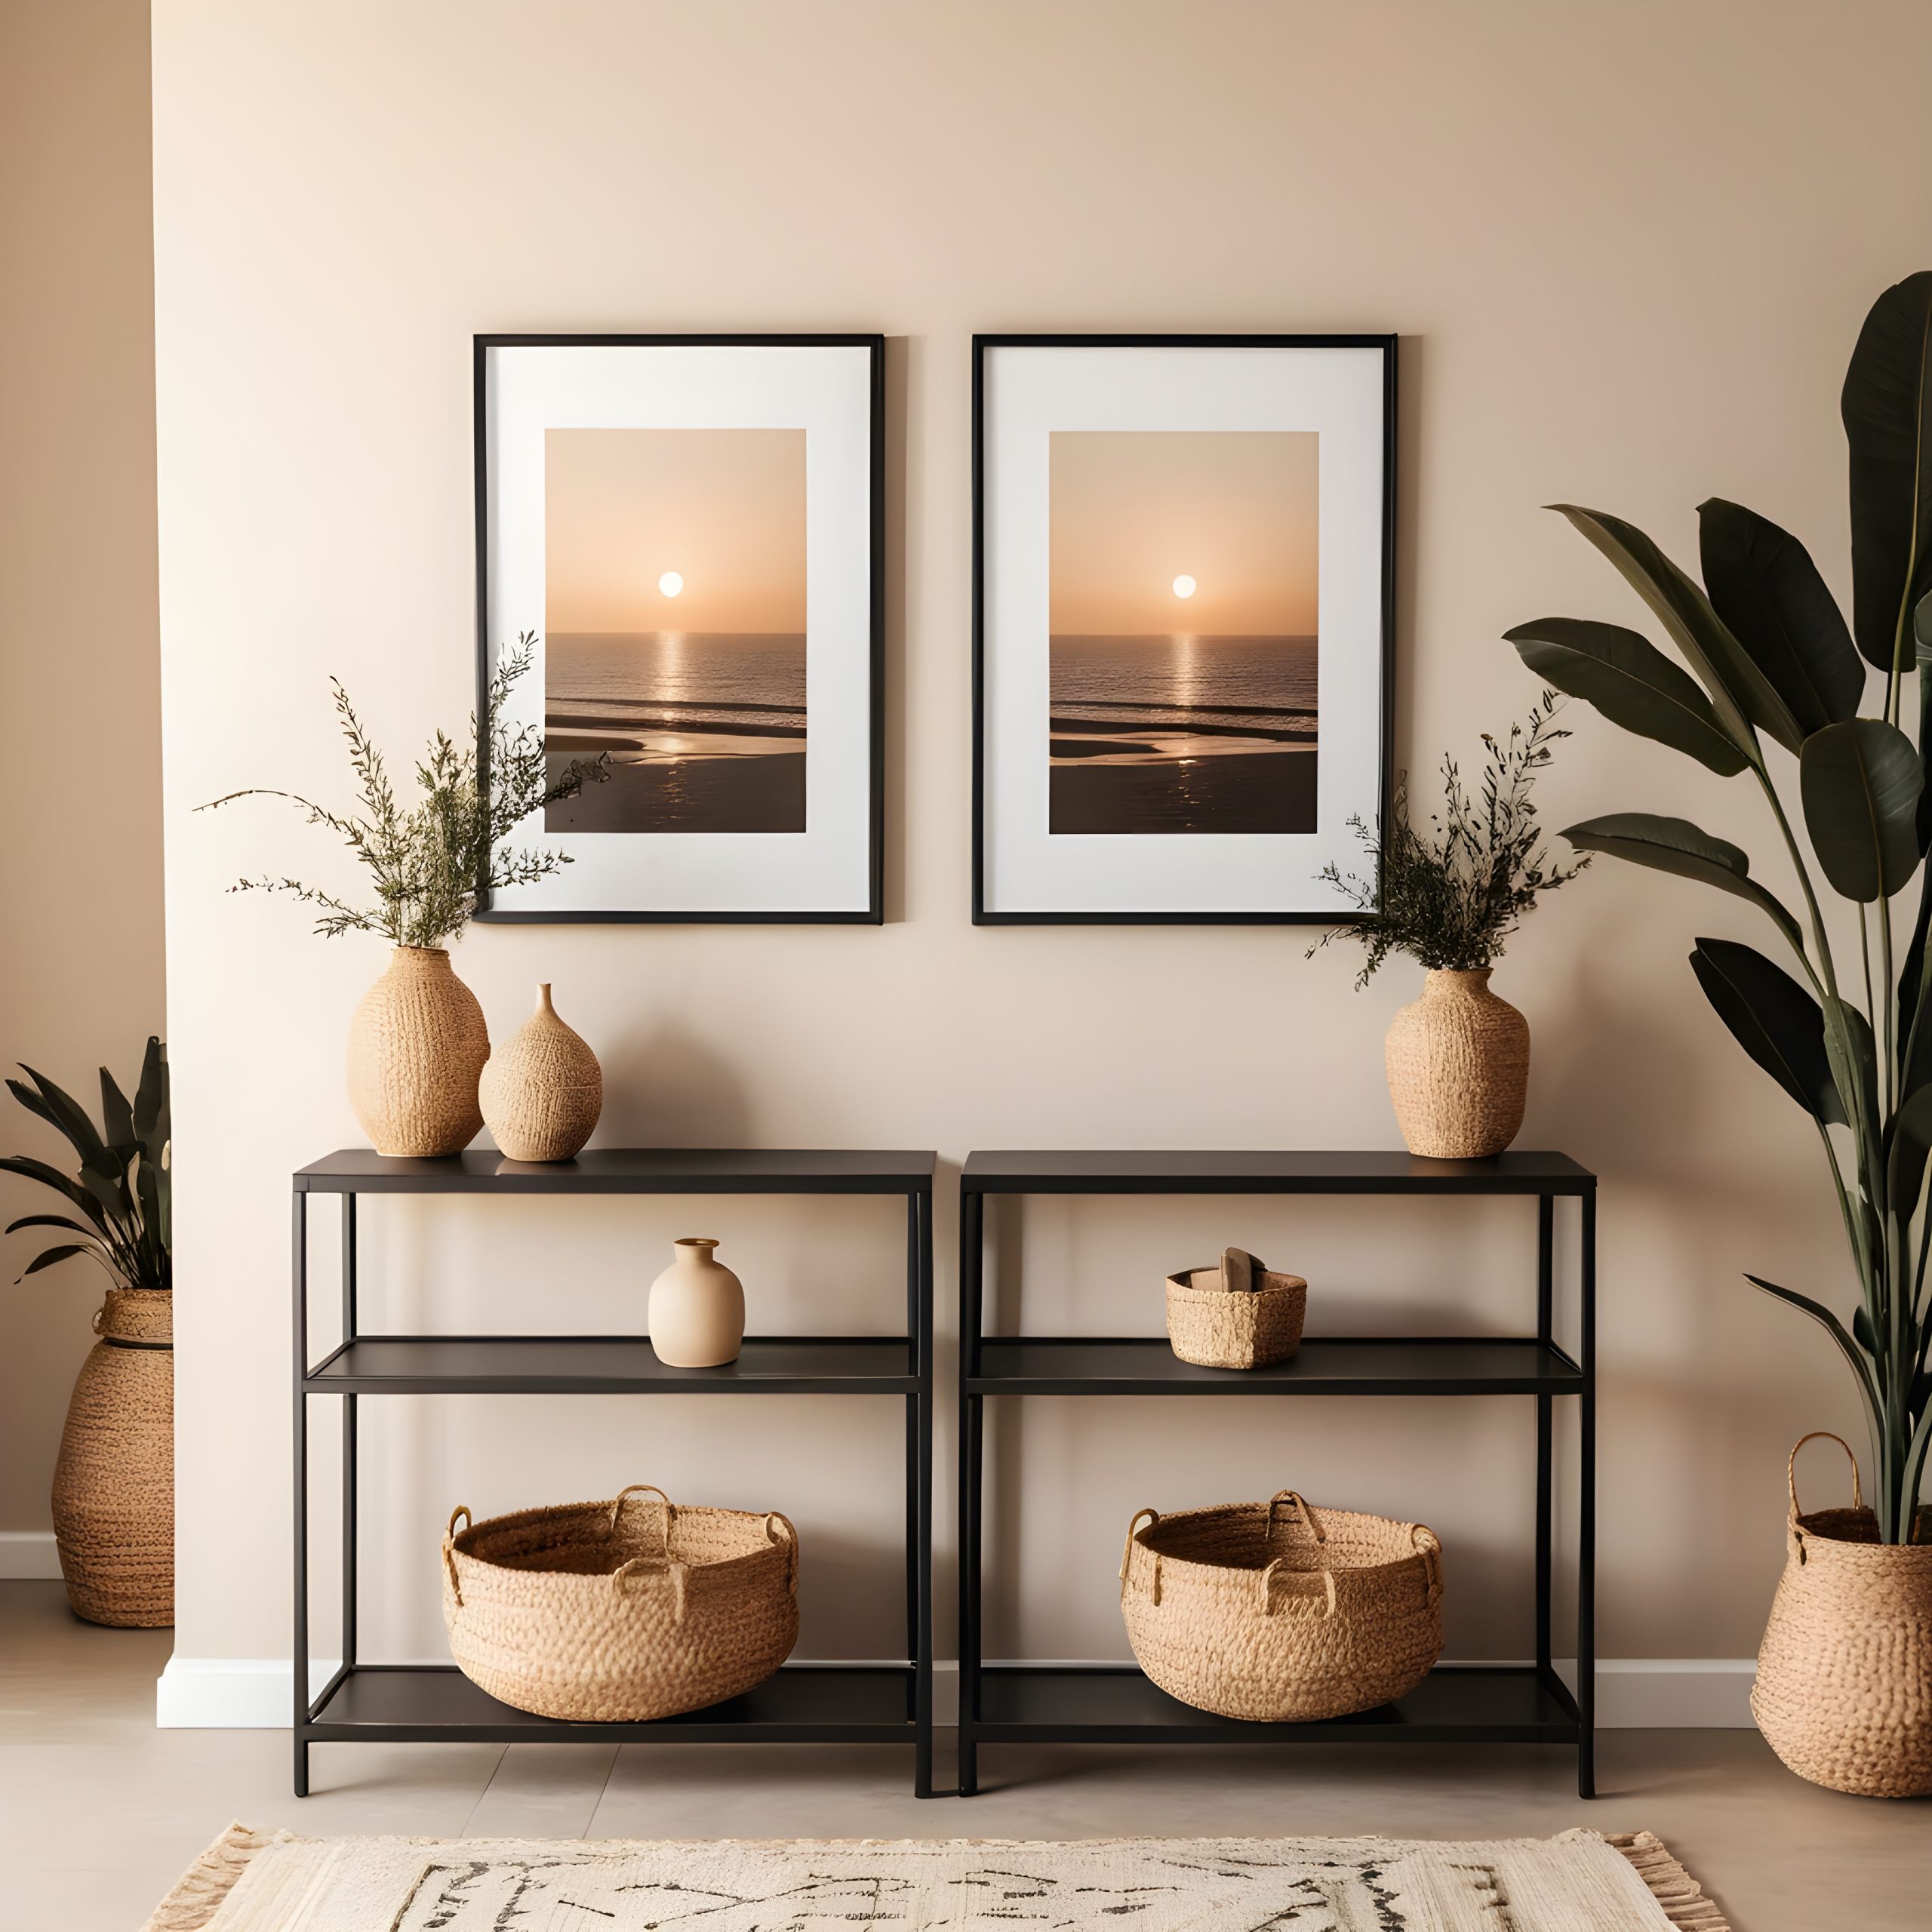
-
Tall, Narrow Shelving Units: Opt for tall, narrow shelving units that reach the ceiling. These provide ample storage for everything from shoes and boots to baskets and bins filled with hats, gloves, and scarves. This type of mudroom storage keeps items organised and easily accessible while maximising vertical space.
-
Wall-Mounted Cubbies: Install wall-mounted cubbies to create designated spaces for each family member. These cubbies can hold backpacks, sports equipment, and other everyday essentials, keeping them off the floor and organised. This personalised mudroom storage solution is especially helpful for families with children.
-
Pegboards for Flexible Storage: Pegboards offer incredibly versatile mudroom storage. Use them to hang coats, bags, hats, and even small tools. The adjustable pegs allow you to customise the configuration to fit your specific needs, making it a highly adaptable storage solution.
Narrow Mudrooms – Long and Lean Storage Champions
Long and Lean: Storage Solutions for Narrow Mudrooms
Narrow mudrooms, often found in hallways or corridors, present a unique set of challenges. While they may lack width, their length offers an opportunity for clever mudroom storage solutions. The key is to embrace the long, lean layout and maximise storage along the wall without obstructing the flow of traffic. By incorporating long, narrow furniture pieces and utilising wall space strategically, you can create a highly functional and organised mudroom, even in a limited space. Let’s explore some effective storage ideas for narrow mudrooms.
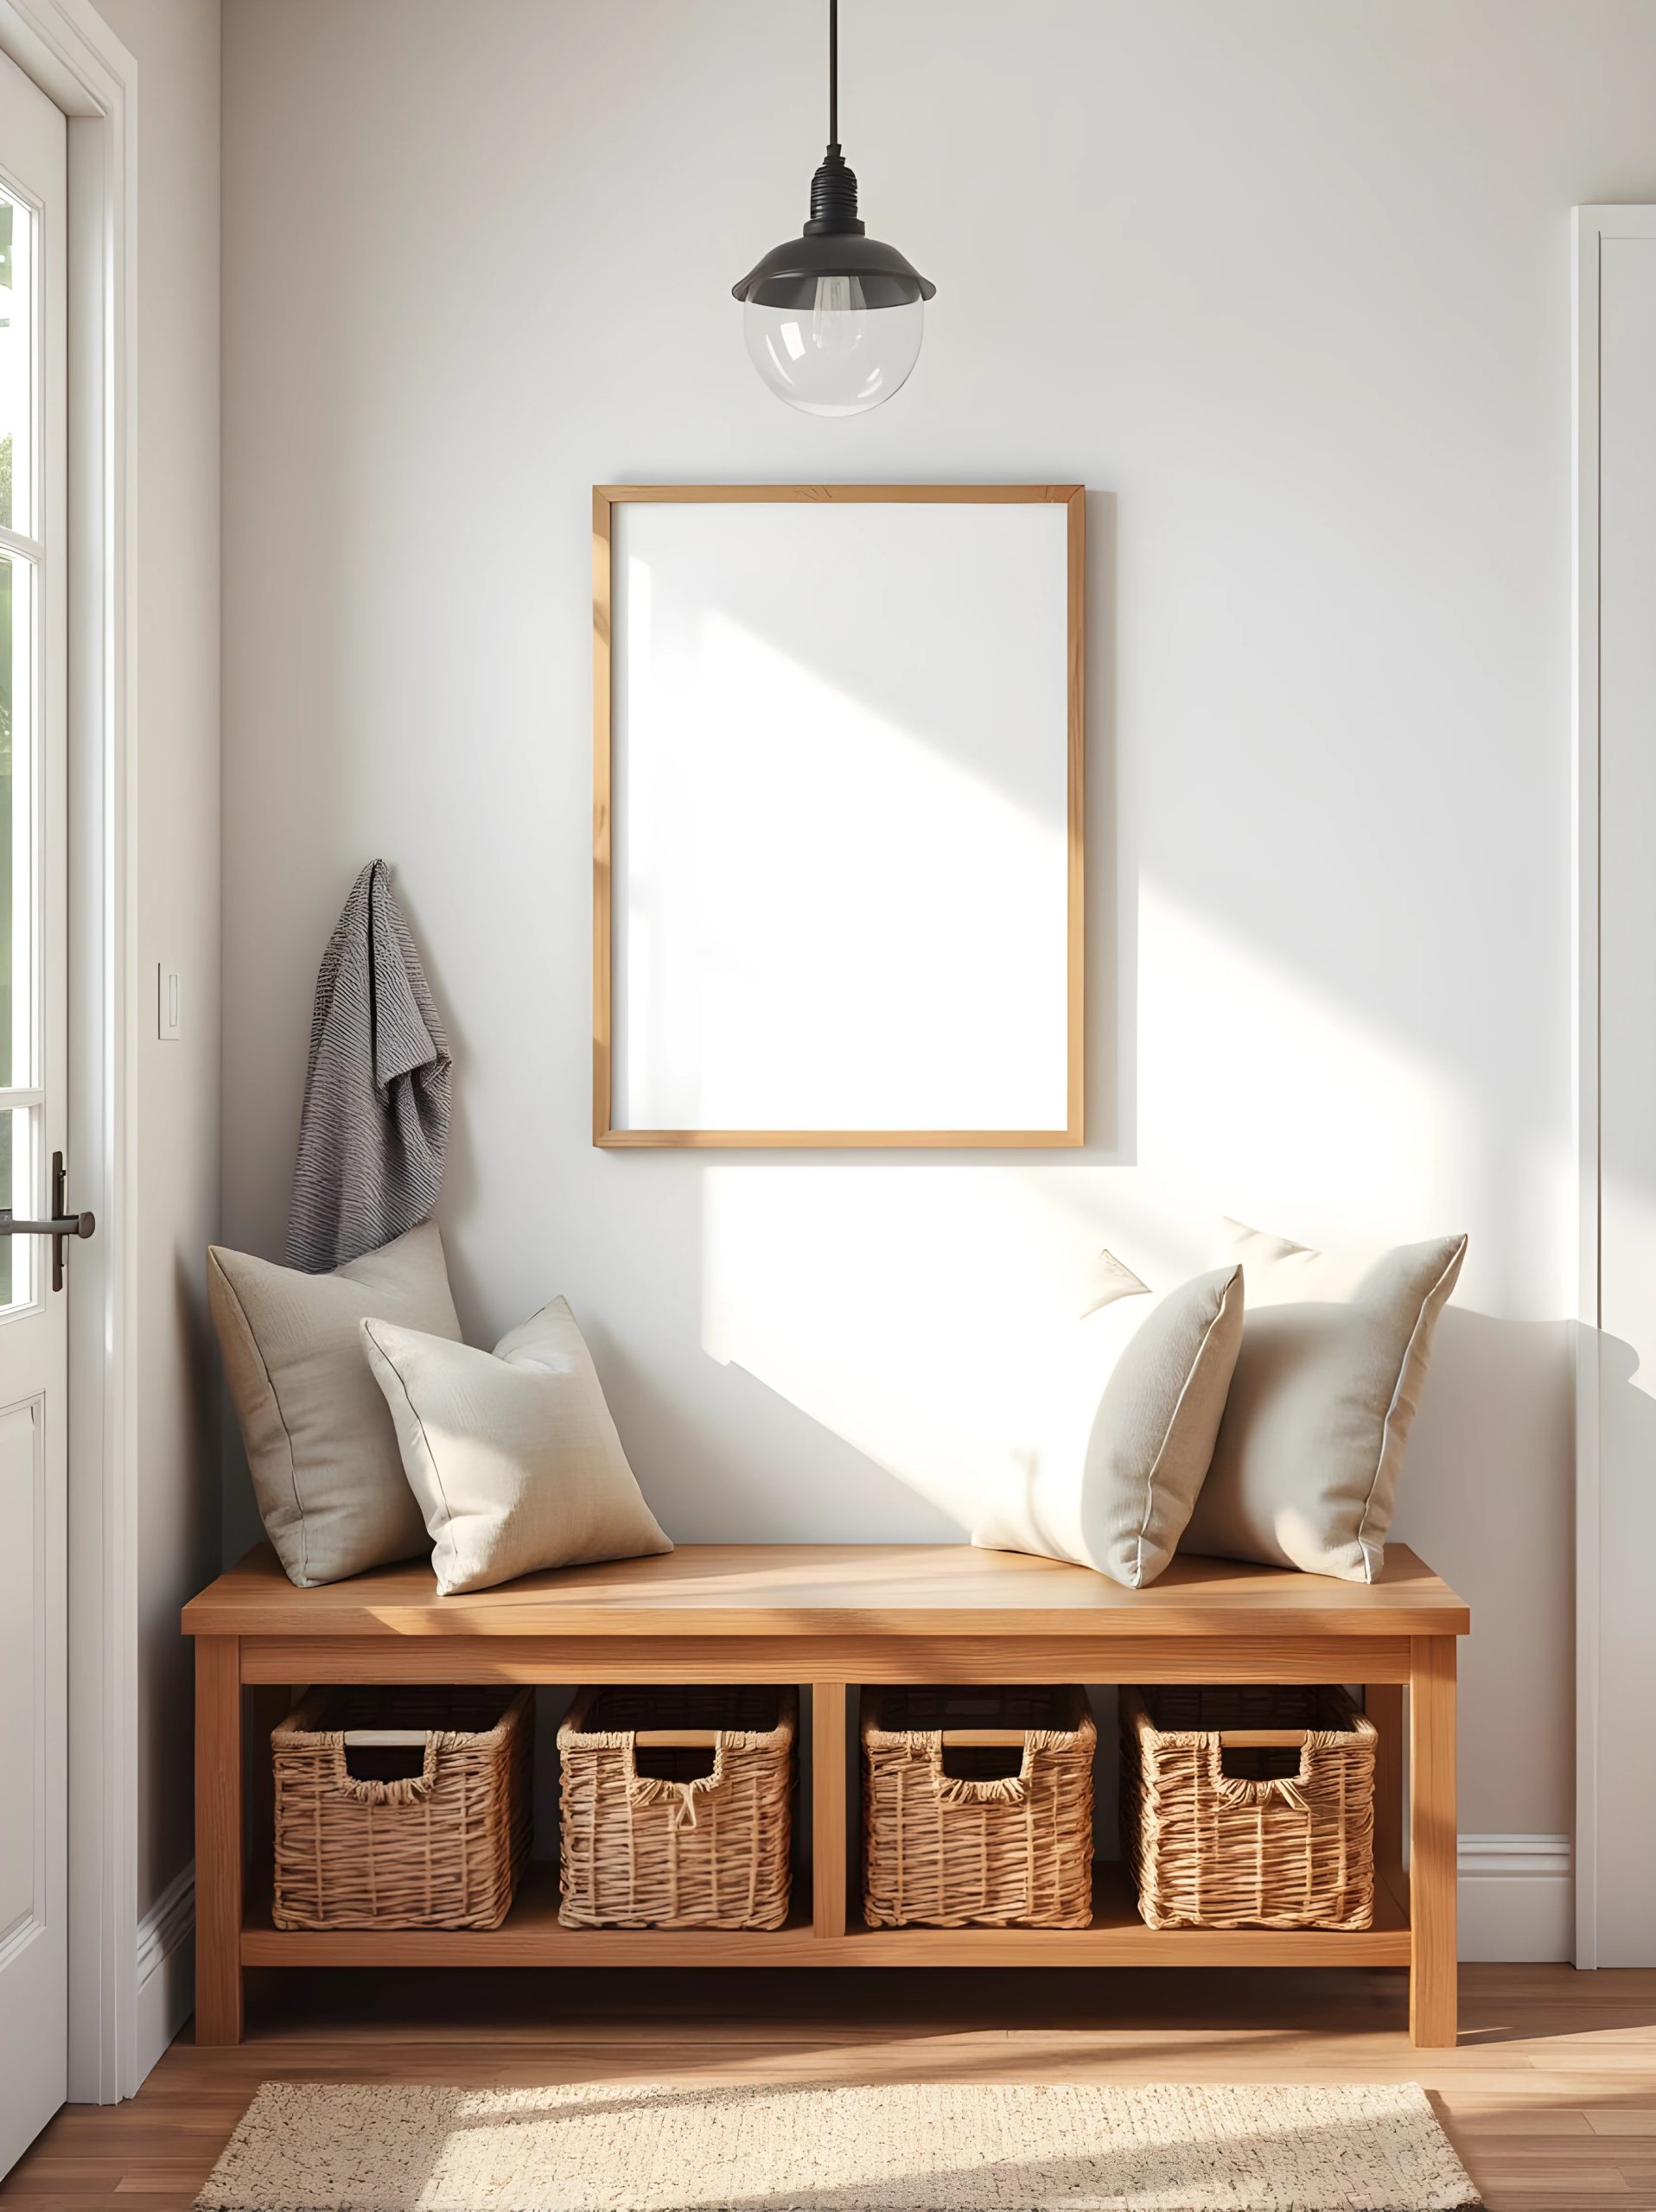
-
Long Benches with Storage Underneath: A long bench placed along one wall provides a convenient place to sit and put on or take off shoes. Choose a bench with built-in storage underneath to maximise mudroom storage capacity. This can be in the form of drawers, cubbies, or a hinged lid for easy access to stored items.
-
Slim Console Tables with Drawers: Similar to the bench idea, a slim console table with drawers offers a surface for keys and mail while providing hidden storage for smaller items. Opt for a table with a shallow depth to avoid encroaching on the walkway. This adds valuable mudroom storage without making the space feel cramped.
-
Wall-Mounted Hooks and Shelves Running the Length of the Wall: Maximise wall space by installing hooks and shelves along the entire length of the wall. This provides ample hanging space for coats, bags, and hats, while shelves can hold baskets, bins, and other storage containers. This creates a continuous mudroom storage solution that utilises the narrow space effectively.
Medium Mudroom Storage – Balancing Form and Function
The Goldilocks Zone: Mudroom Storage for Medium Spaces
Medium-sized mudrooms offer a sweet spot for balancing both form and function. You have enough space to incorporate more substantial storage pieces without overwhelming the area. This allows for greater flexibility in design and the opportunity to create a truly personalised mudroom that caters to your family’s specific needs. The key is to choose mudroom storage solutions that are both practical and stylish, creating a space that is both organised and visually appealing. Let’s explore some inspiring ideas for medium-sized mudrooms.
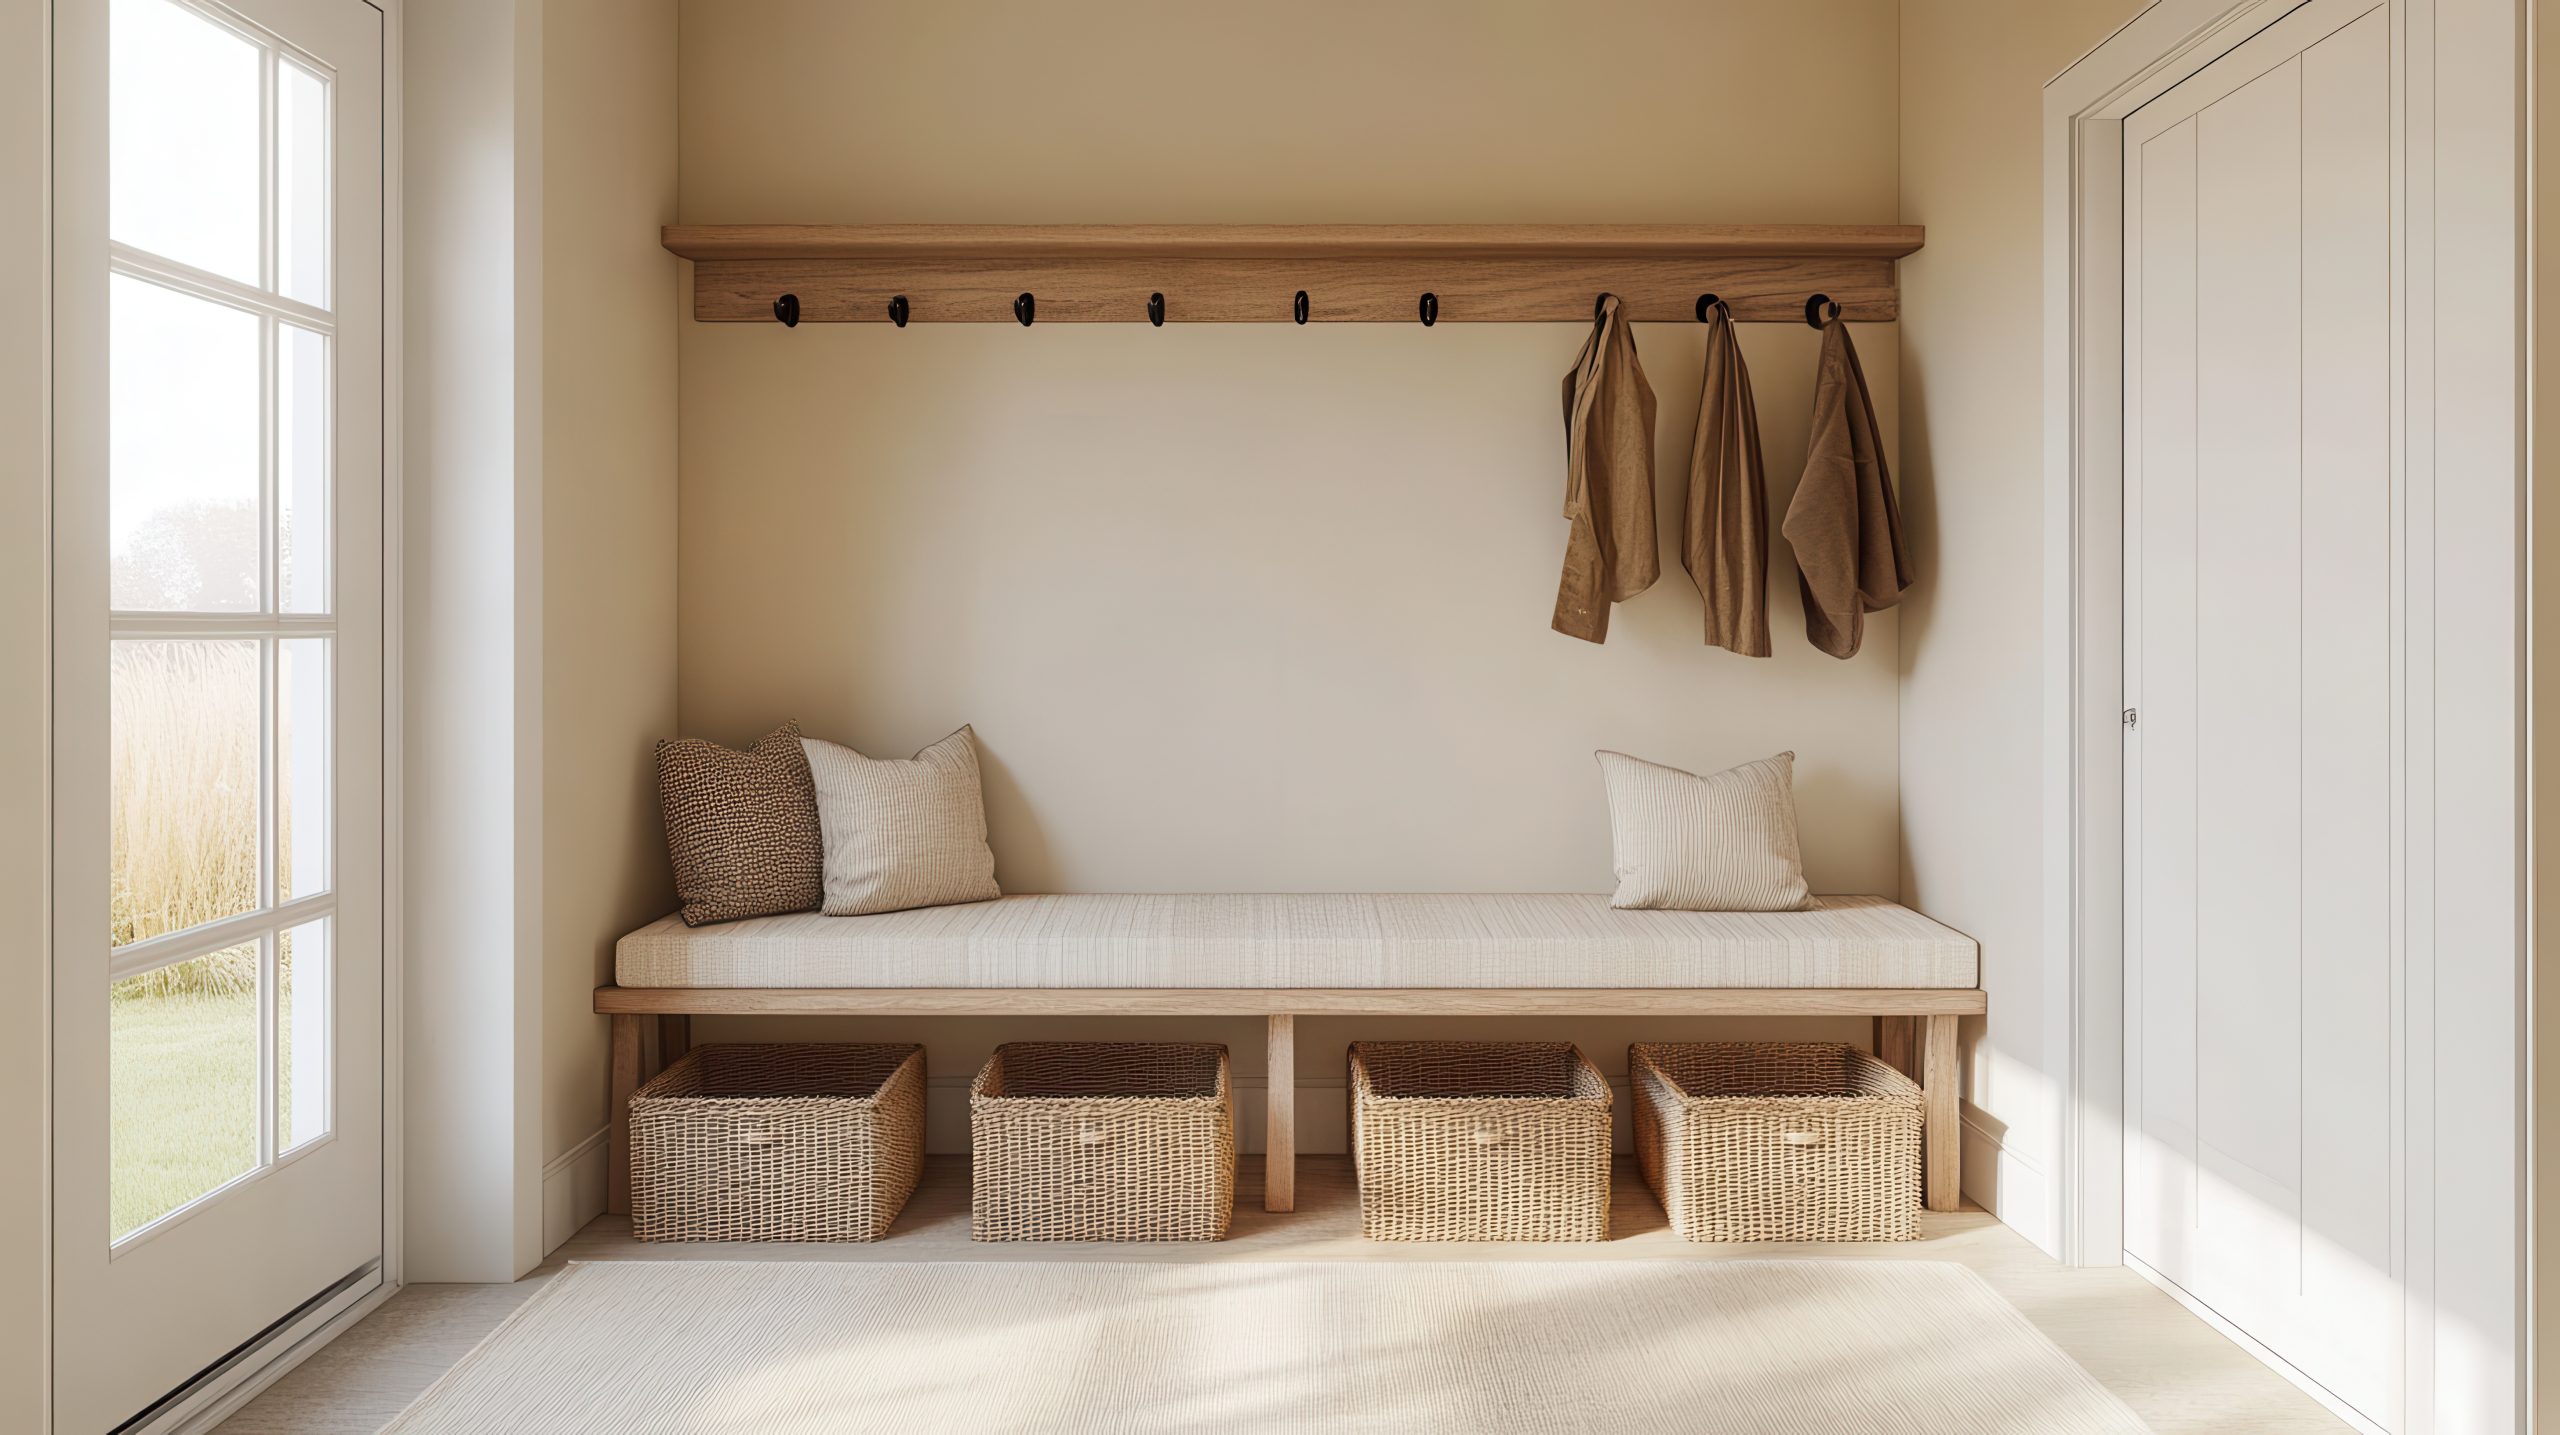
-
Cubby Systems with Drawers and Baskets: Cubby systems are a fantastic way to provide designated storage for each family member. Combine open cubbies with drawers and baskets for concealed storage of smaller items. This creates a versatile mudroom storage solution that keeps belongings organised and easily accessible.
-
Coat Racks with Shoe Storage Benches: A dedicated coat rack combined with a shoe storage bench offers a classic and practical mudroom storage solution. The coat rack provides ample hanging space for coats and jackets, while the bench offers a place to sit and put on or take off shoes, with storage underneath for keeping footwear tidy.
-
Free-Standing Storage Units: Free-standing storage units, such as wardrobes or cabinets, offer versatile mudroom storage options. Choose units with a combination of shelves, drawers, and hanging rods to accommodate a variety of items. These units can be easily moved or reconfigured as needed, providing flexibility in your mudroom design.
Large Mudrooms – Zoned for Organisation
Divide and Conquer: Zoned Storage for Large Mudrooms
Large mudrooms offer the luxury of space, allowing you to create distinct zones for different activities and storage needs. This is where you can truly optimise functionality and create a highly organised and efficient mudroom. Think about the various functions your mudroom serves – storing outerwear, organising sports equipment, managing pet supplies, etc. – and designate specific zones for each. This zoned approach to mudroom storage will transform your large mudroom into a well-oiled machine. Let’s explore some ideas for creating dedicated zones in your spacious mudroom.
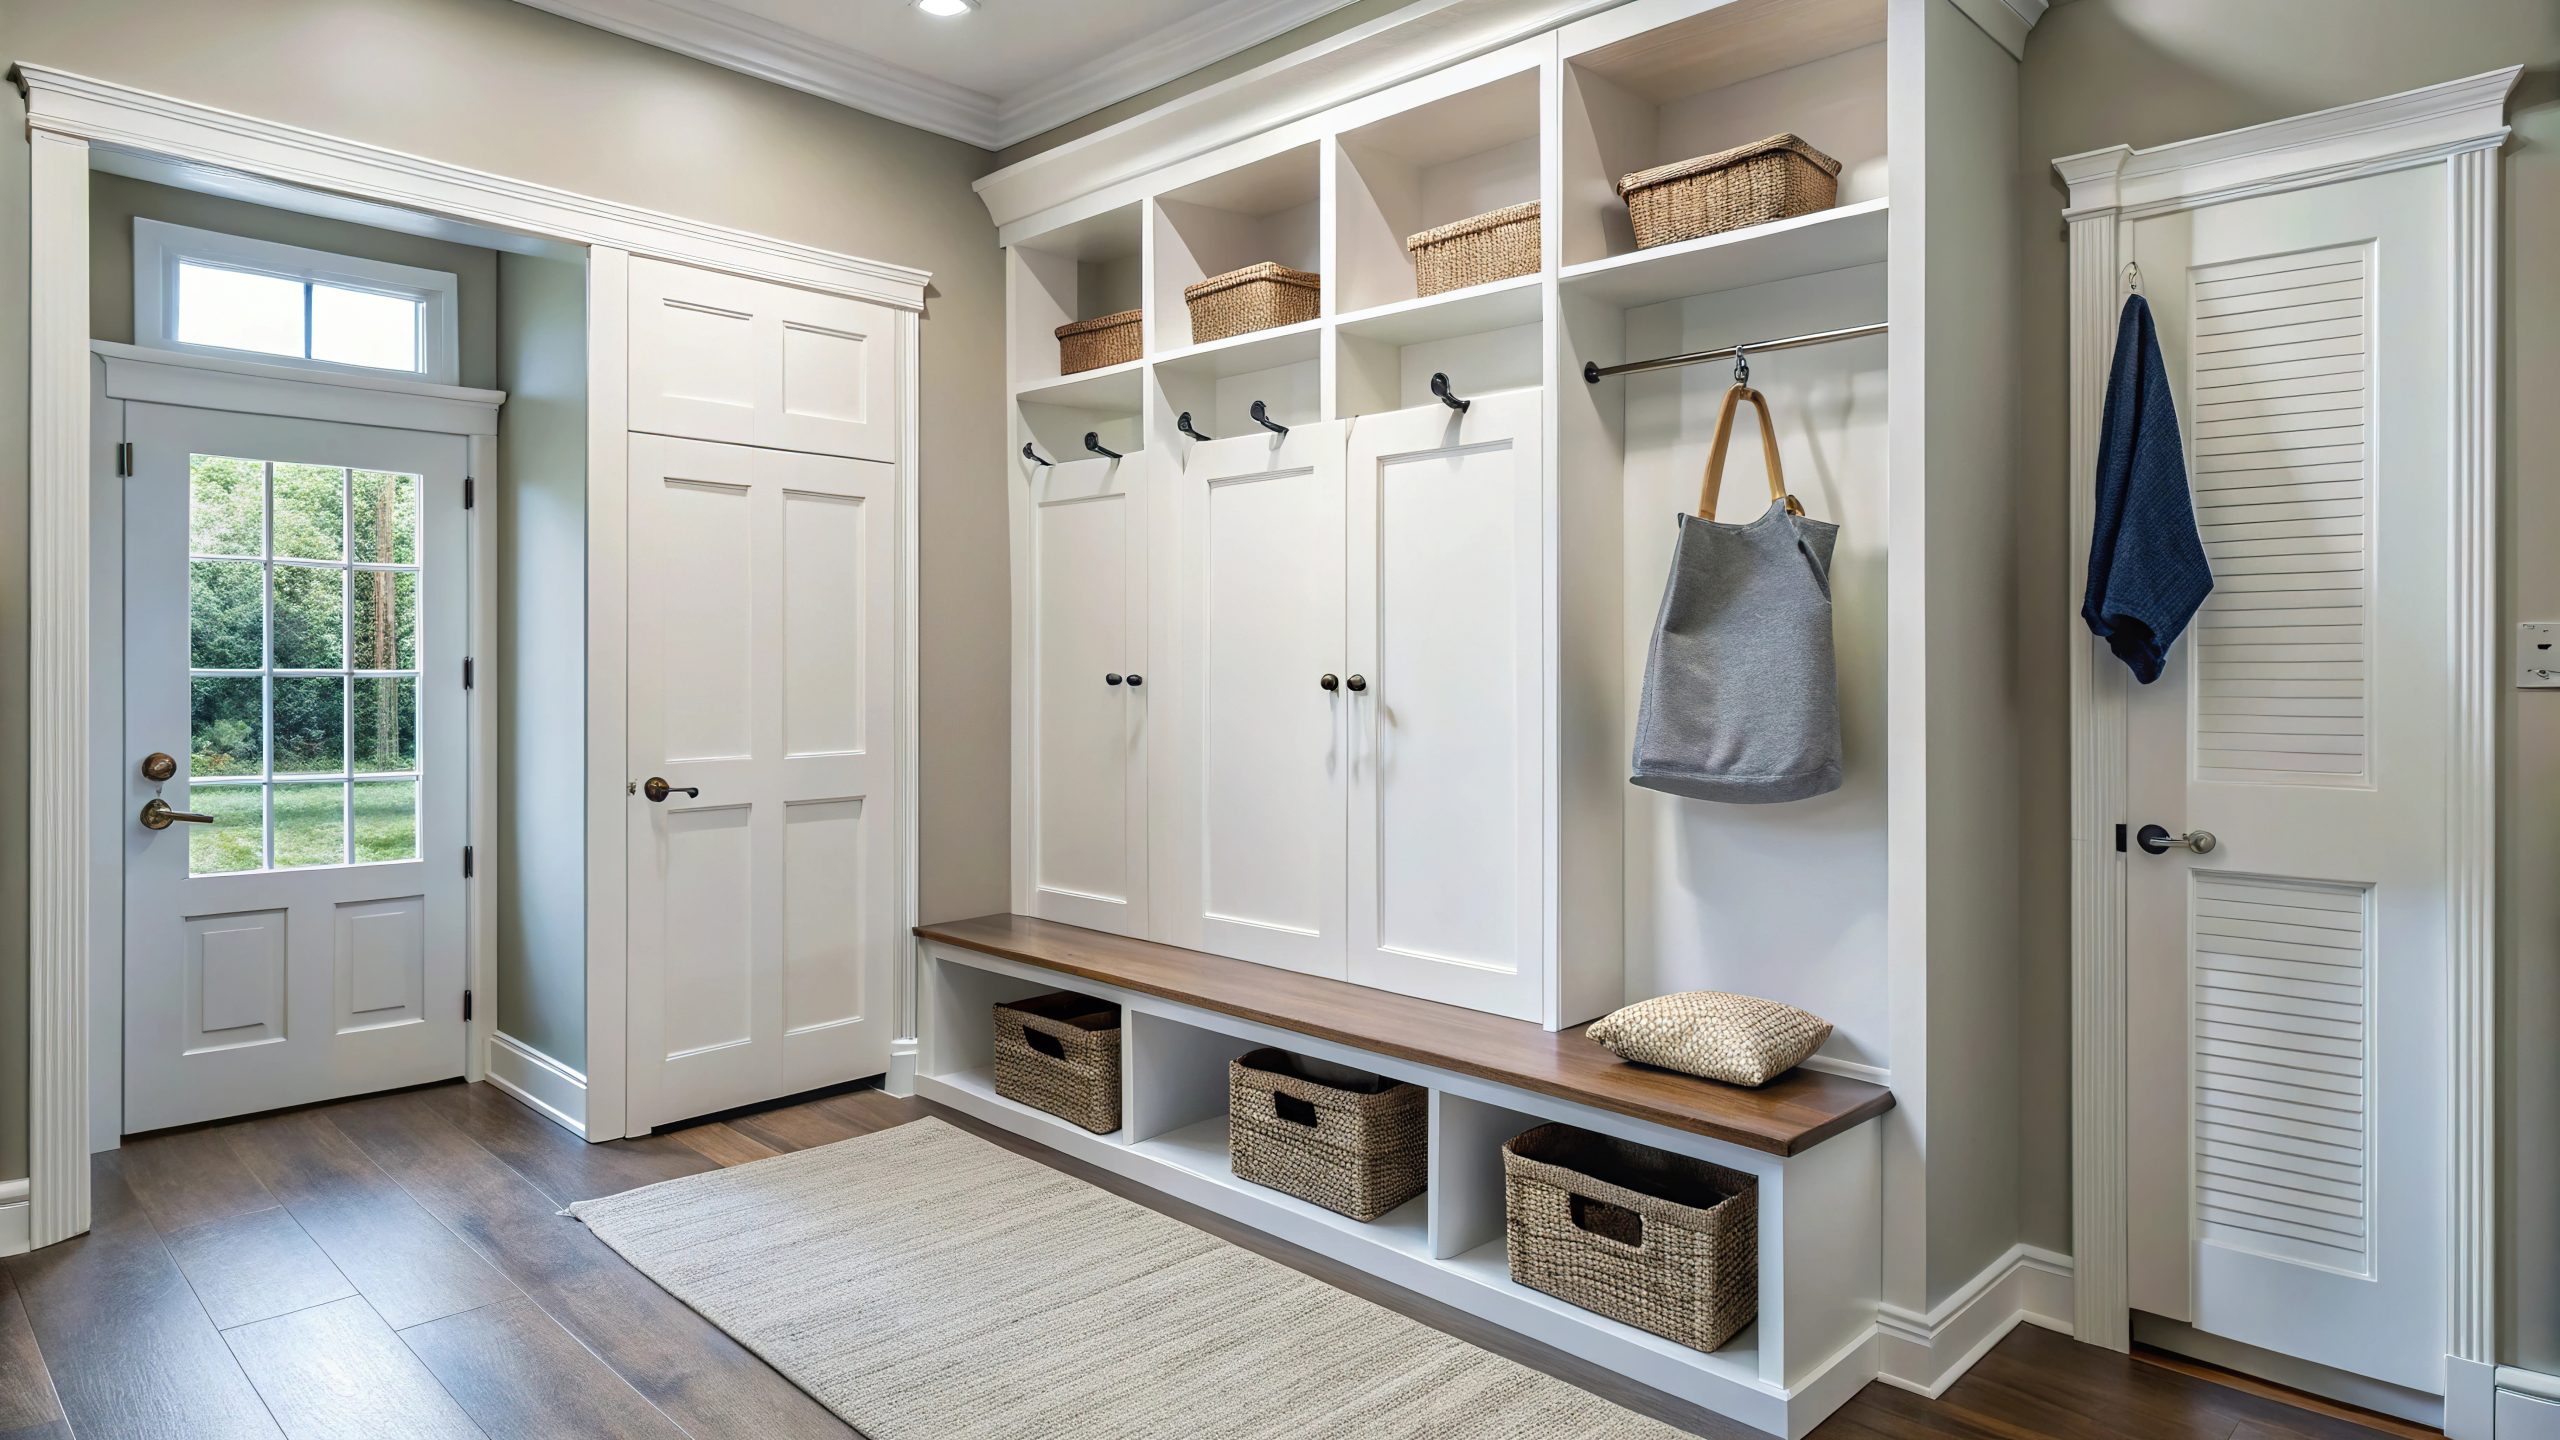
-
Designated Areas for Coats, Shoes, Bags, Sports Equipment, etc.: Divide your large mudroom into specific areas for different categories of items. For example, create a coat closet or designated wall area for outerwear, a shoe storage zone with shelves or cubbies, a separate area for bags and backpacks, and a dedicated space for sports equipment. This zoned approach to mudroom storage makes it easy to find what you need and keeps everything organized.
-
Individual Lockers or Cubbies for Each Family Member: Consider installing individual lockers or cubbies for each family member. This provides personalised mudroom storage space and encourages responsibility for keeping belongings tidy. Each person can have their own designated area for coats, shoes, backpacks, and other personal items.
-
A Drop Zone for Mail and Keys: Create a designated drop zone near the entryway for mail, keys, and other small items. This could be a small table with a drawer, a wall-mounted organiser, or a designated basket or tray. This prevents these items from getting lost or cluttering other areas of the mudroom.
Extra-Large Mudrooms – The Ultimate Mudroom Dream
Mudroom Envy: Storage Solutions for Extra-Large Spaces
An extra-large mudroom is the ultimate dream for those who crave organisation and functionality. With ample space, you can incorporate luxurious features and create a truly customised mudroom that caters to every need. Think beyond basic storage and consider incorporating elements like seating areas, built-in organisers, and even dedicated pet washing stations. The possibilities are endless when it comes to mudroom storage in an extra-large space. Let’s explore some inspiring ideas for creating the mudroom of your dreams.
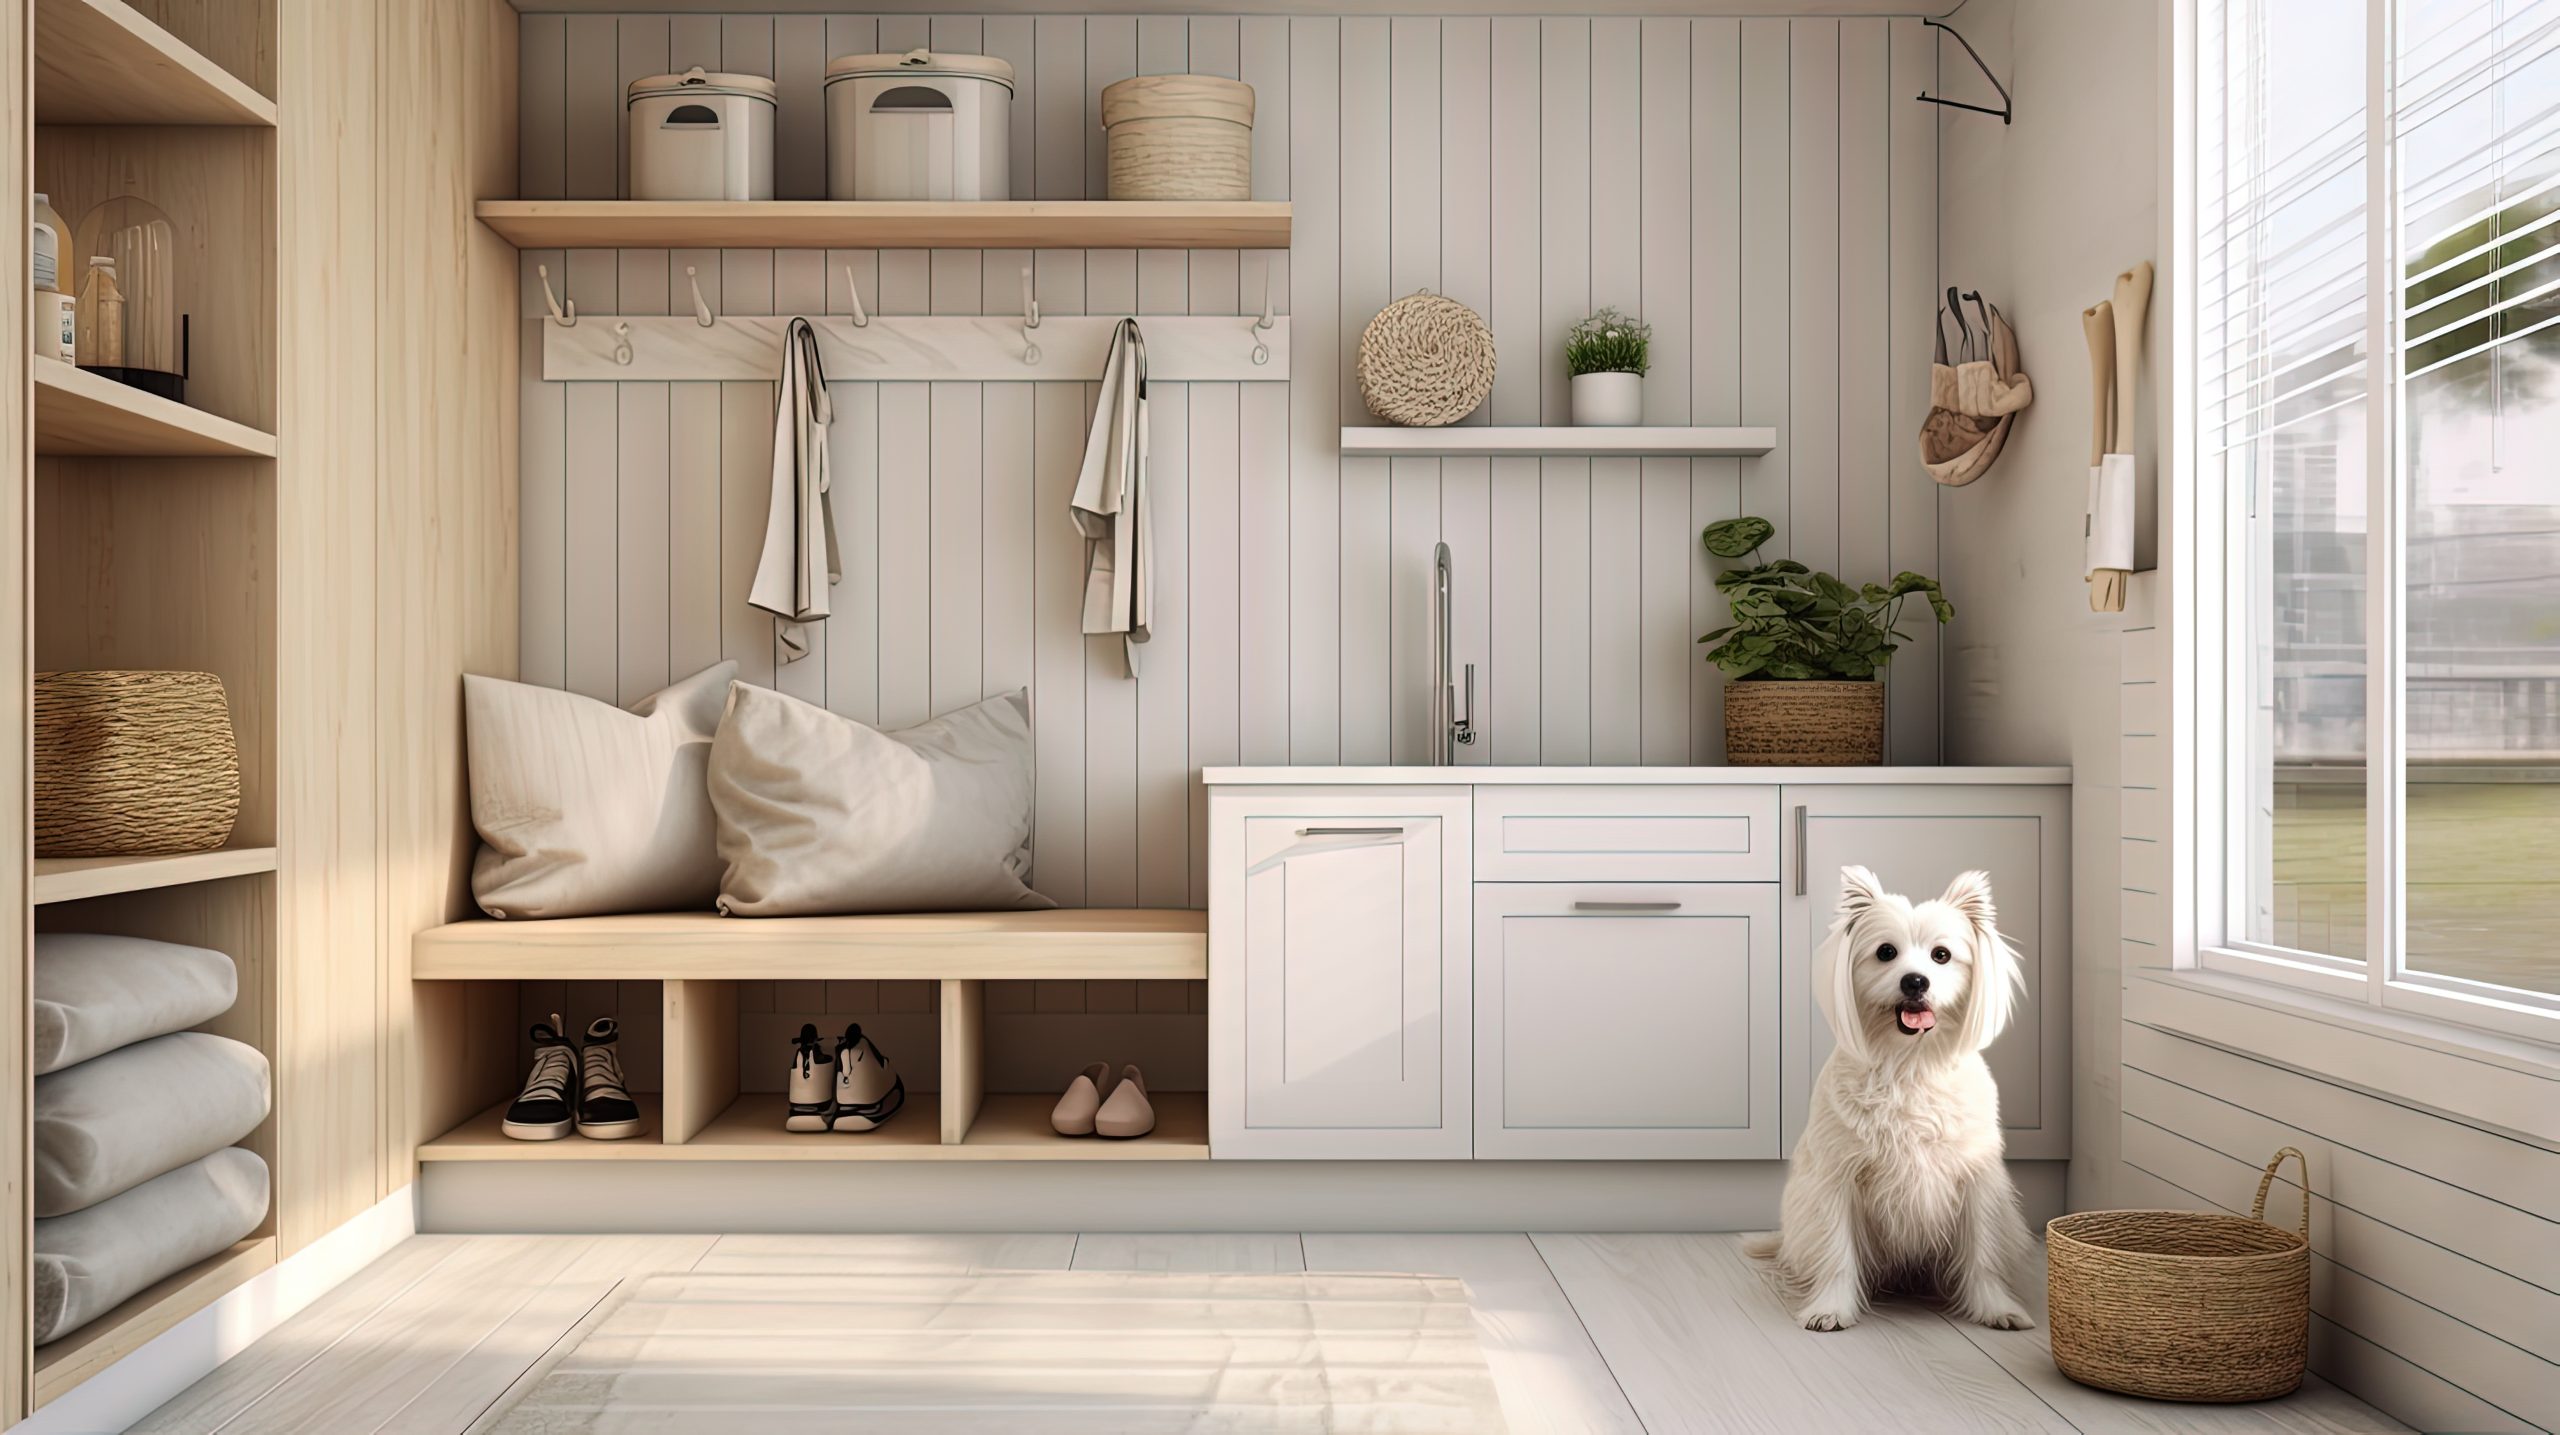
-
Mudroom Islands: A mudroom island provides additional storage, a countertop for folding laundry or organising items, and a central hub for managing household tasks. Include drawers, cabinets, and open shelving to maximise storage capacity.
-
Built-in Seating Areas: Incorporate a comfortable seating area with built-in benches and cushions. This provides a convenient place to put on and take off shoes, as well as a relaxing spot to read or chat. Include storage underneath the benches for shoes, boots, and other items.
-
Walk-in Closets: A walk-in closet within the mudroom provides ample storage for seasonal outerwear, sports equipment, and other bulky items. Include shelves, hanging rods, and drawers to organise everything efficiently.
-
Dedicated Laundry Areas: Integrate a laundry area within the mudroom for added convenience. This allows you to manage laundry tasks efficiently and keeps dirty clothes contained within a designated area.
-
Pet Washing Stations: For pet owners, a dedicated pet washing station within the mudroom is a luxurious and practical addition. This keeps muddy paws contained and makes it easy to clean up after your furry friends.
DIY Mudroom Storage Hacks – Budget-Friendly Brilliance
DIY Mudroom Magic: Budget-Friendly Storage Hacks
Creating a functional and stylish mudroom doesn’t have to break the bank. With a little creativity and some DIY ingenuity, you can implement effective mudroom storage solutions on a budget. Repurposing existing items, building simple organisers, and adding personalised touches can transform your mudroom without requiring a major investment. Let’s explore some budget-friendly DIY mudroom storage hacks.
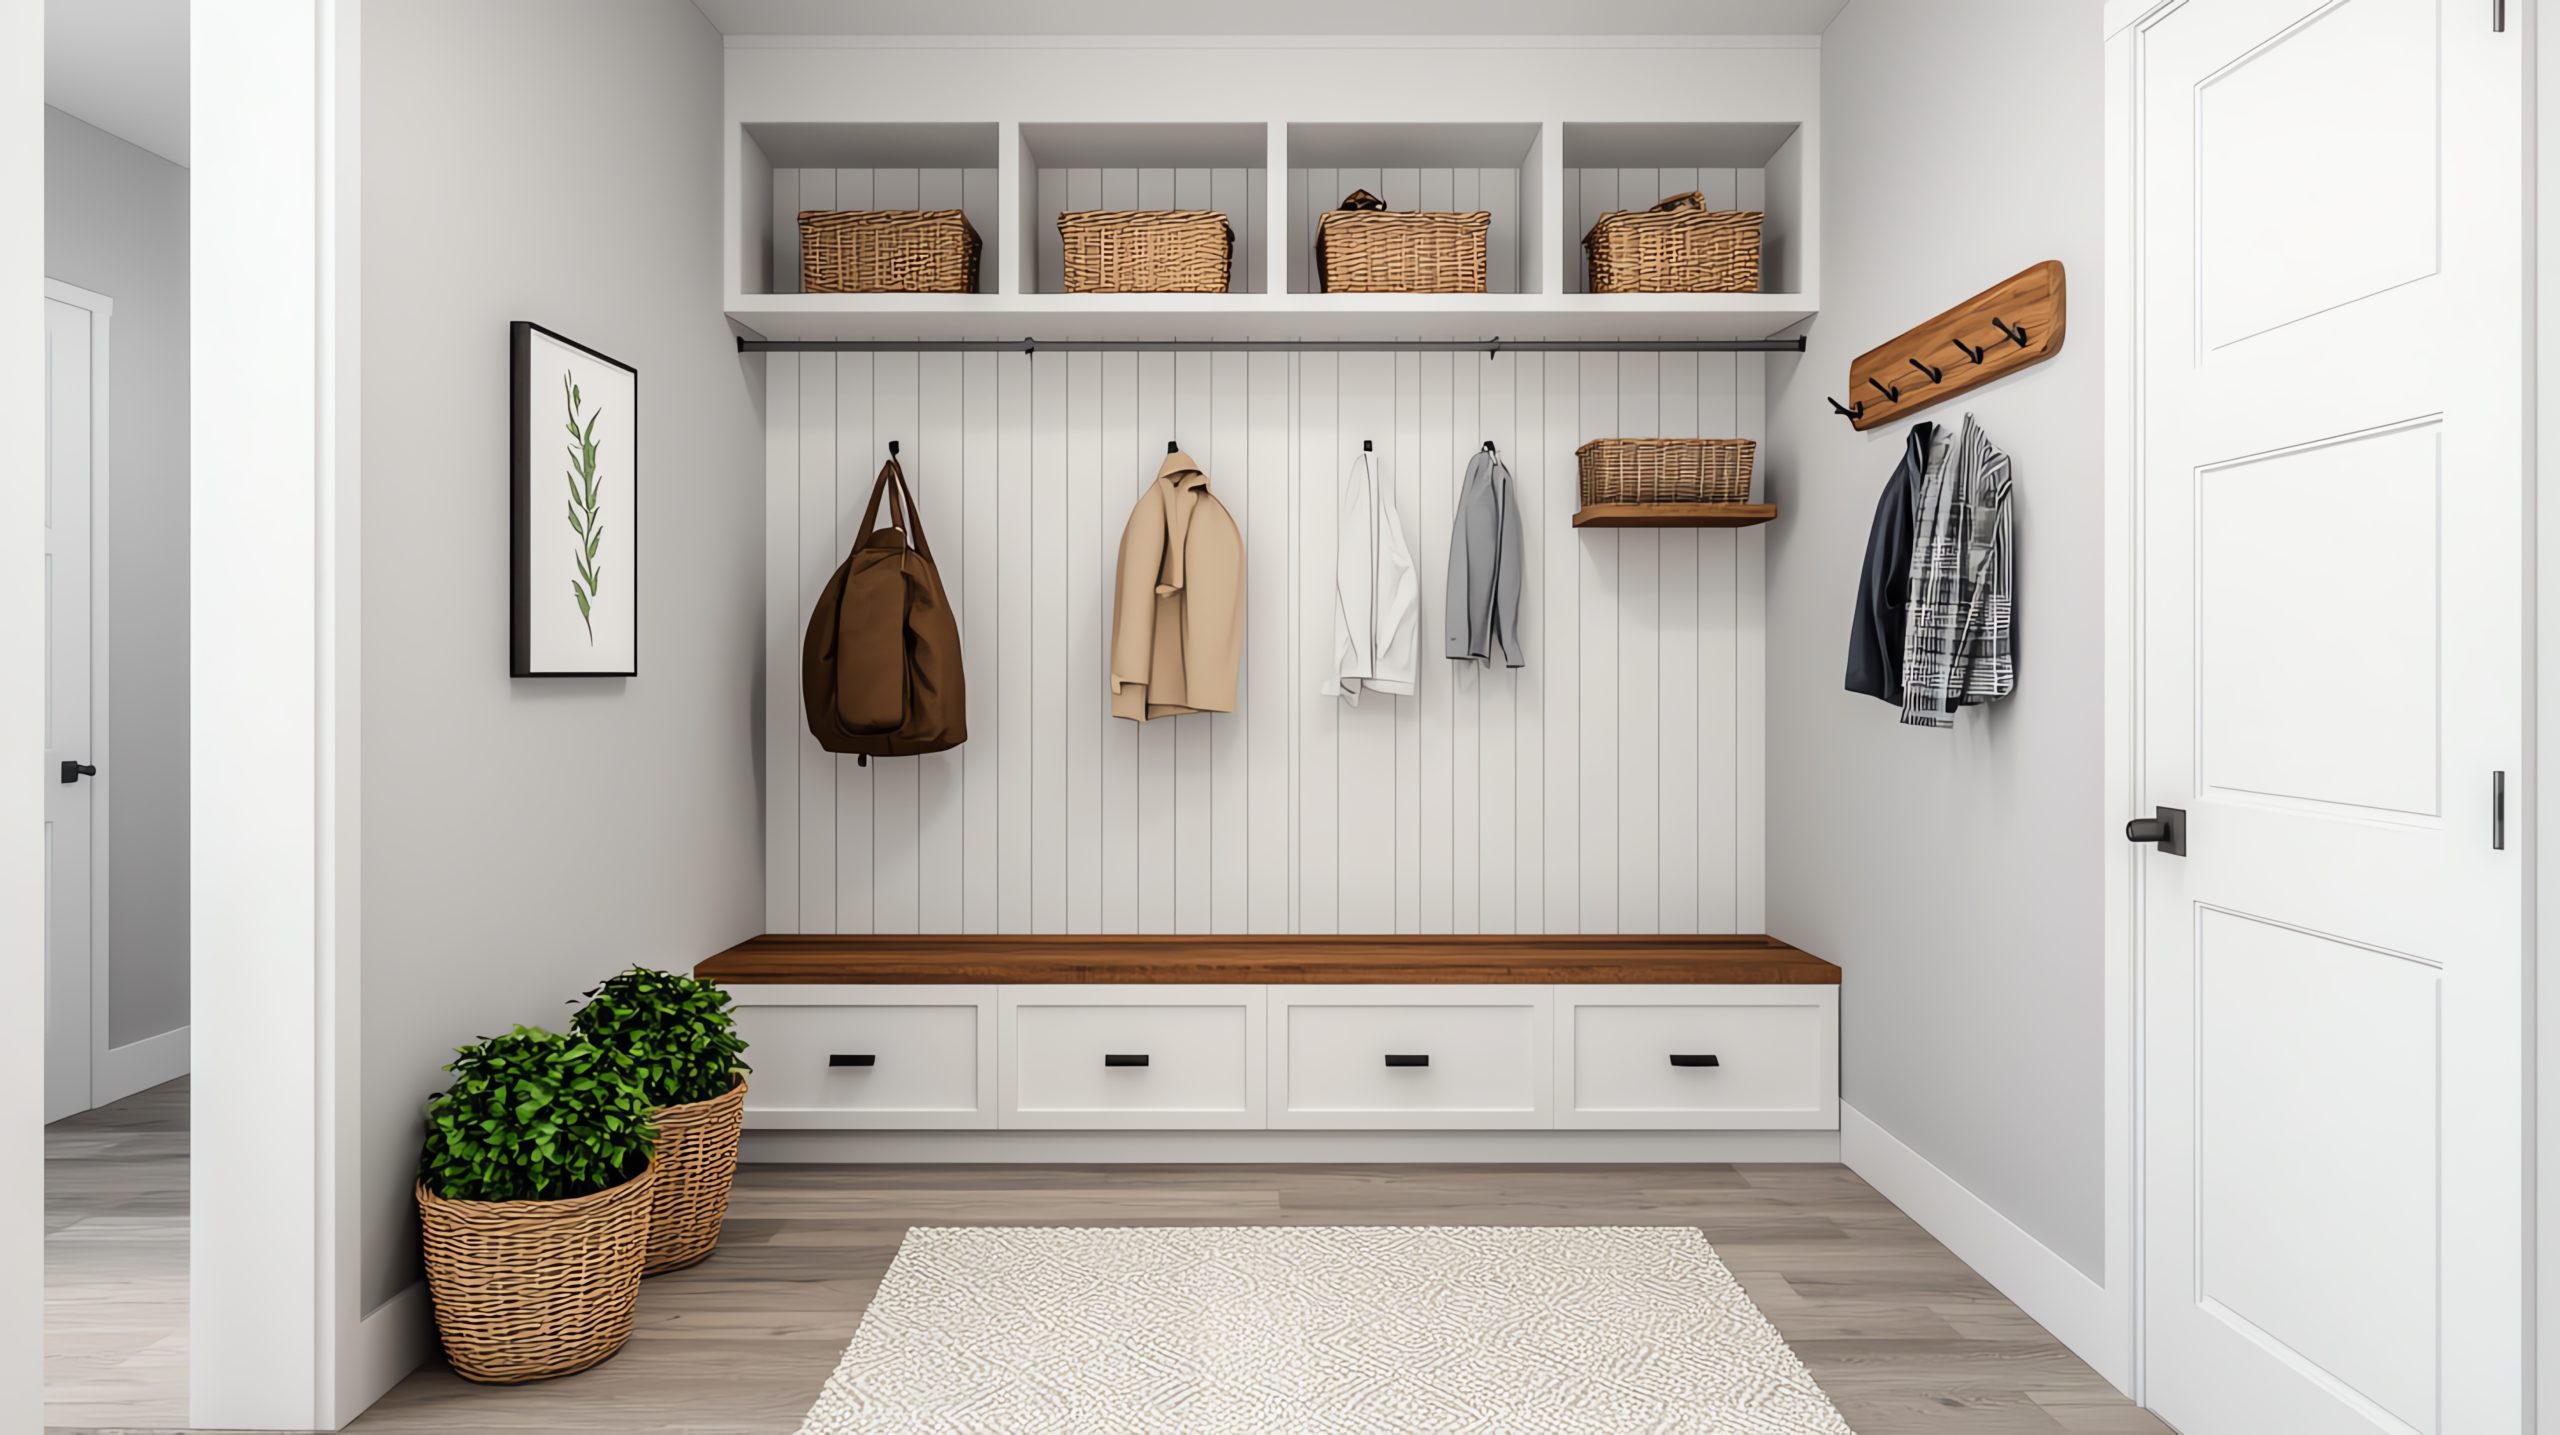
-
Repurposed Crates and Pallets: Give old crates and pallets a new life by transforming them into rustic storage solutions. Sand them down, paint them, and stack them to create shelving units, shoe racks, or cubbies.
-
DIY Coat Racks: Create a unique and personalised coat rack using reclaimed wood, metal pipes, or even repurposed branches. This adds a touch of character to your mudroom while providing functional storage.
-
Customised Storage Bins: Decorate plain storage bins with fabric, paint, or stencils to add a pop of colour and personality to your mudroom. Label each bin clearly to keep items organised and easy to find.
-
Upcycled Jars and Containers: Use upcycled jars and containers to store small items like gloves, scarves, and dog leashes. Decorate them to match your mudroom’s décor and attach labels for easy identification.
-
DIY Shoe Storage Solutions: Create a simple shoe rack using PVC pipes, wooden planks, or even repurposed rain gutters. This keeps shoes off the floor and organised without requiring expensive shoe storage furniture.
A well-organised mudroom, regardless of its size, can significantly impact the overall functionality and flow of your home. By implementing these clever mudroom storage ideas, you can transform your entryway from a chaotic catch-all into a stylish and efficient space. Whether you’re working with a tiny entryway or a spacious mudroom, there are solutions to fit every need and budget.
