by Kesaa Interiors | Beginner Design Guides, DESIGN GUIDES, How-To Guides, Style Guides
This post is all about different interior themes.
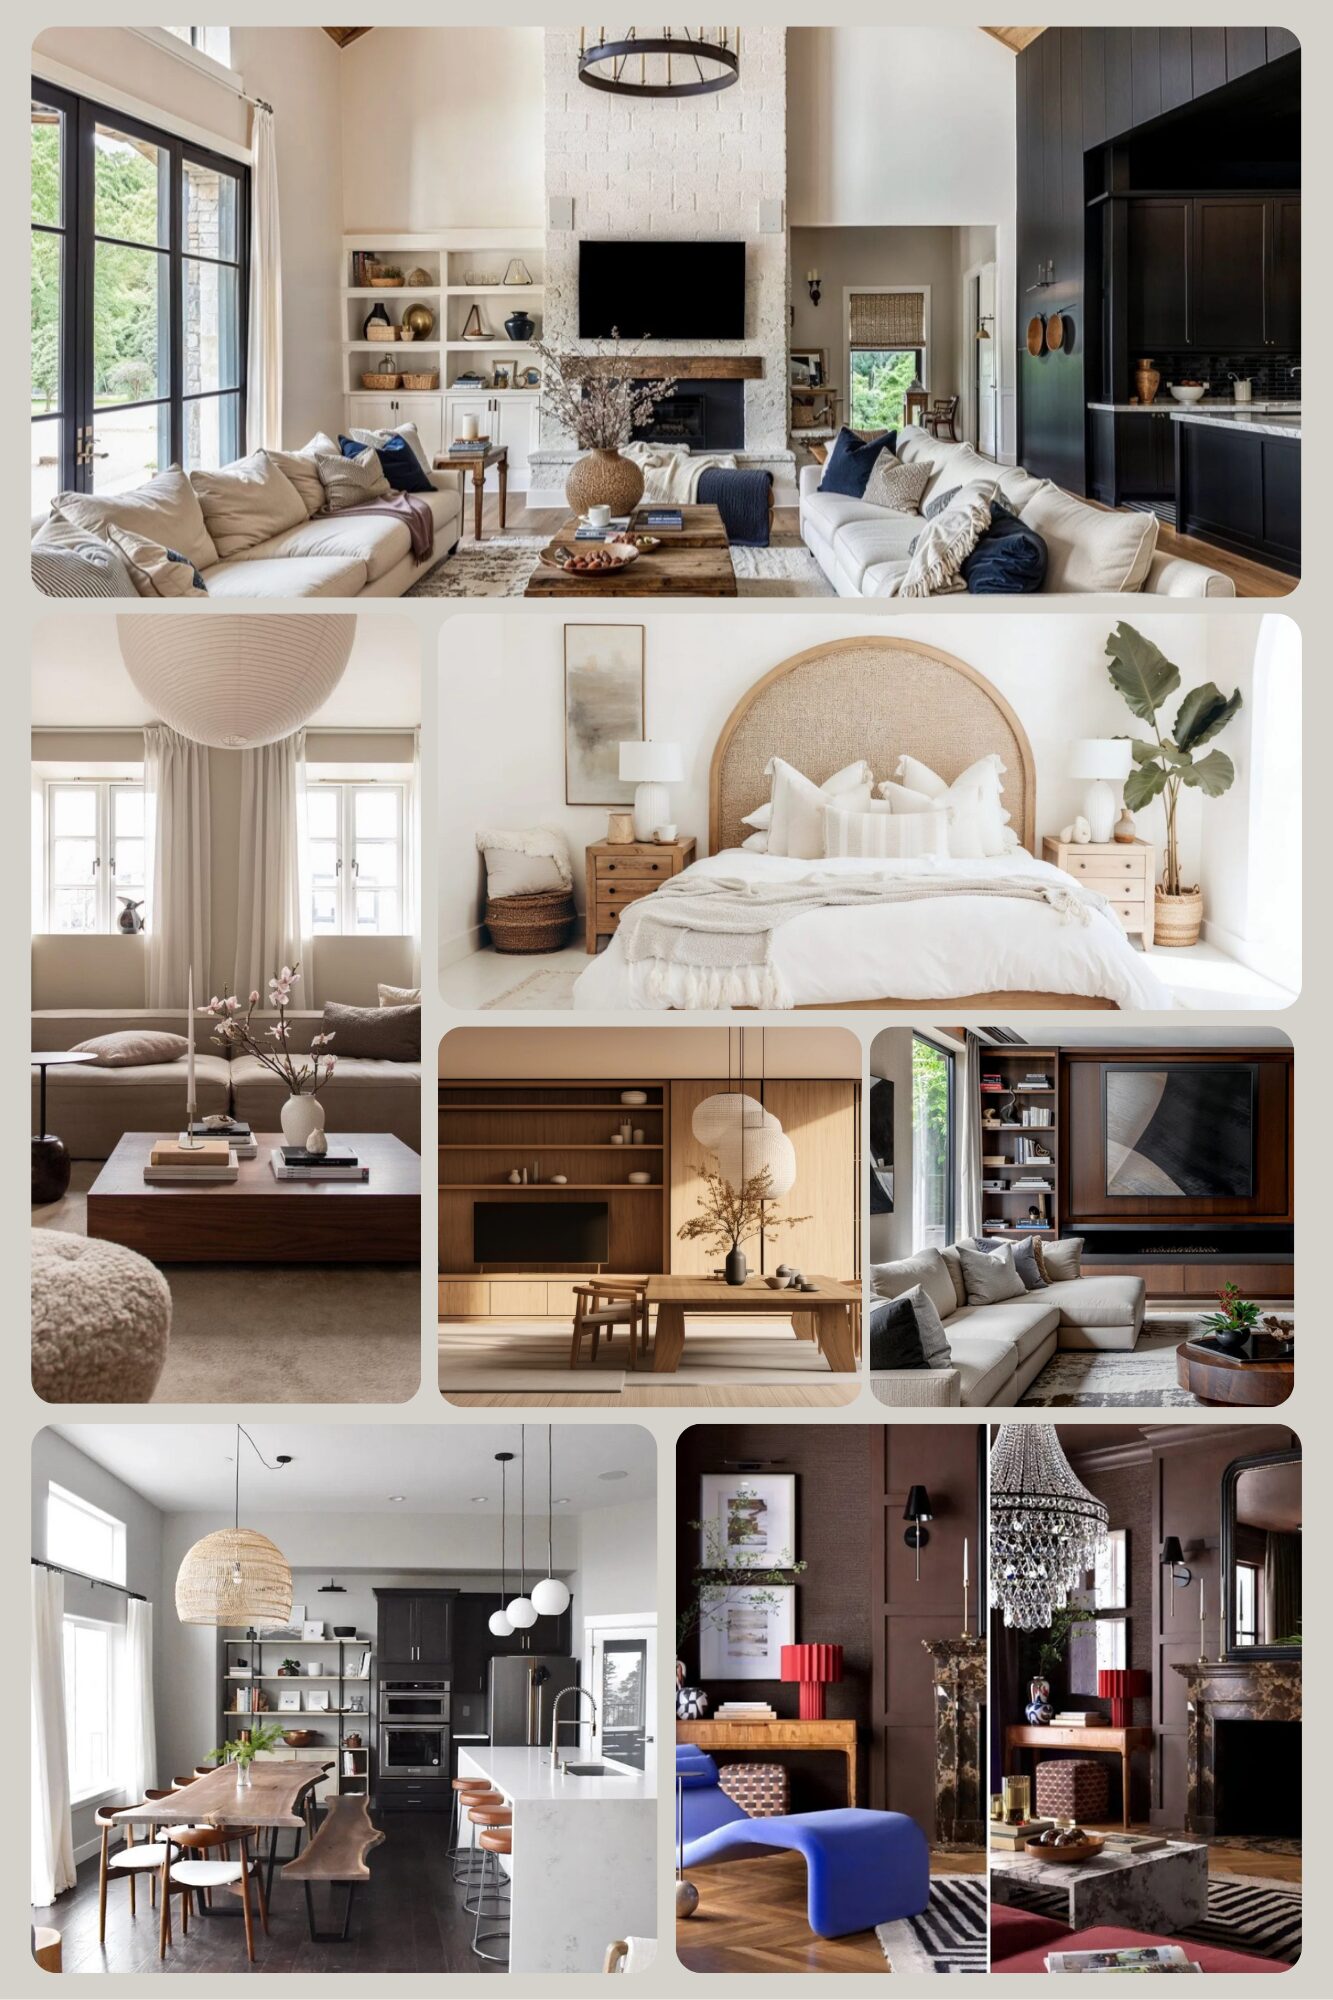
Exploring different interior themes is one of the most exciting parts of designing or refreshing a home. Every style tells a story, through colours, materials and the atmosphere it creates.
Choosing a style that truly fits your space can be overwhelming, especially when there are so many influences to draw from. This guide breaks down 11 different interior themes, clearly defining what makes each one unique and how to capture the essence of every style in your own home. Whether you’re drawn to clean, modern lines or layered, rustic warmth, this post is designed to help you translate that vision into a space that feels authentic and cohesive.
This post is all about Different Interior Themes.
The Importance of Understanding Different Interior Themes
Before diving into specific styles, it’s worth pausing to understand why knowing about different interior themes really matters. Your home’s design is more than just how it looks; it shapes how a space feels and how you interact with it every day.
When you understand the defining features of different interior themes, you can make more intentional design decisions. It becomes easier to identify what resonates with you, avoid mismatched choices, and create a space that feels cohesive and well thought out. Without this understanding, decorating can easily turn into a mix of trends that don’t quite work together.
Design knowledge gives you confidence. You start to recognise what makes a room calming, what introduces warmth, and how elements like texture, scale, and colour can completely change how a space feels. Over time, this awareness helps you move from simply copying styles to creating rooms that truly reflect your personality and lifestyle.
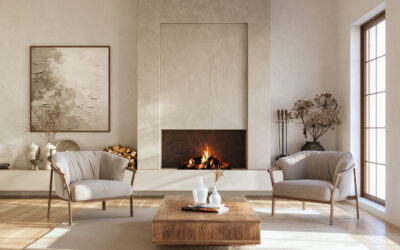
1. Modern Minimalist
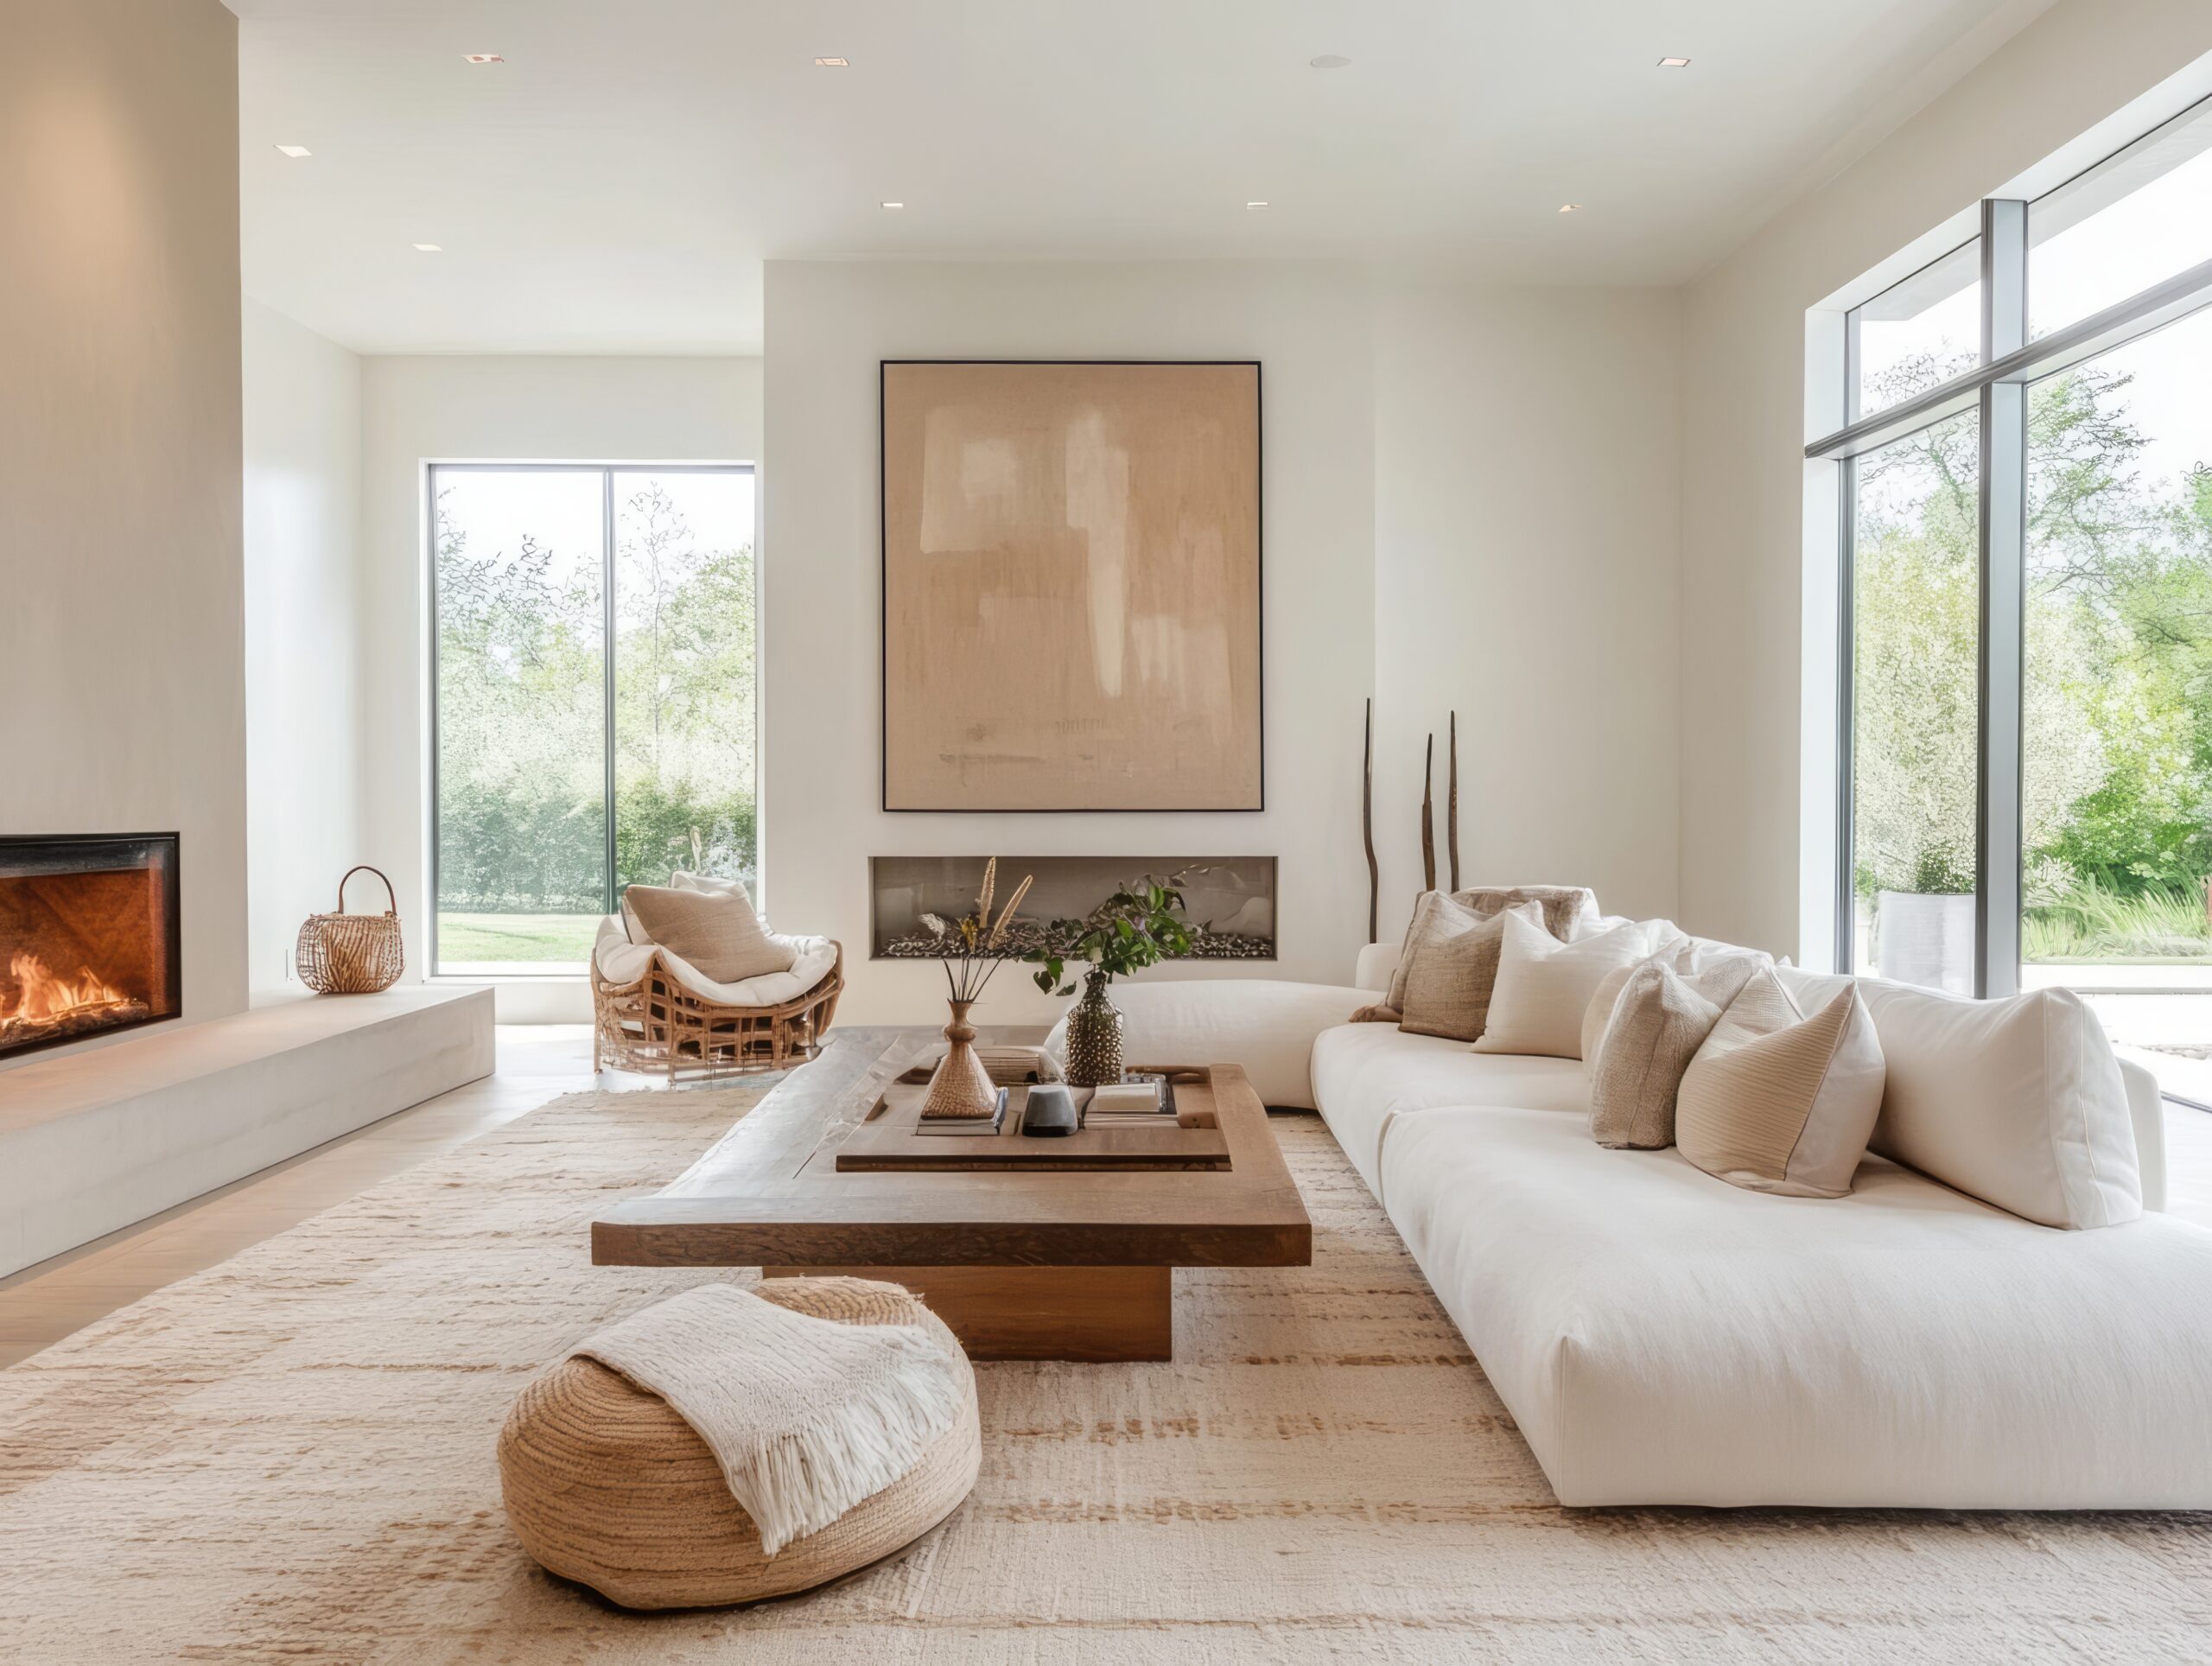
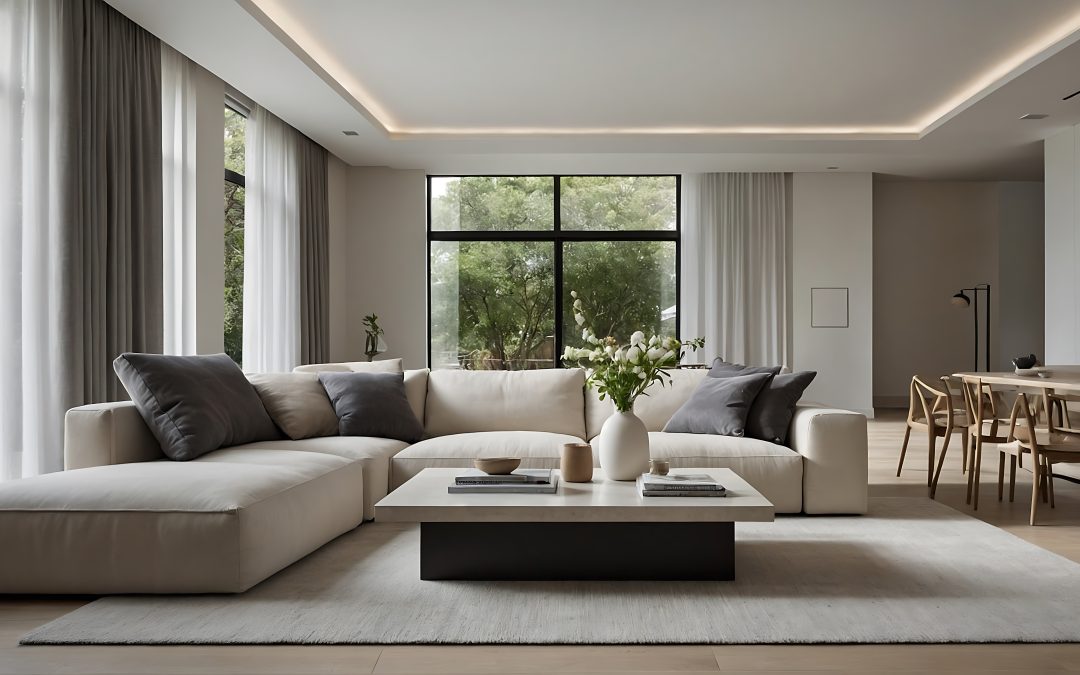
Sleek, simple and functional, the modern minimalist theme is one of the most recognised among the different interior themes seen in contemporary homes. It focuses on clarity and calm, using only what’s necessary to create a balanced, uncluttered space.
What Defines This Theme
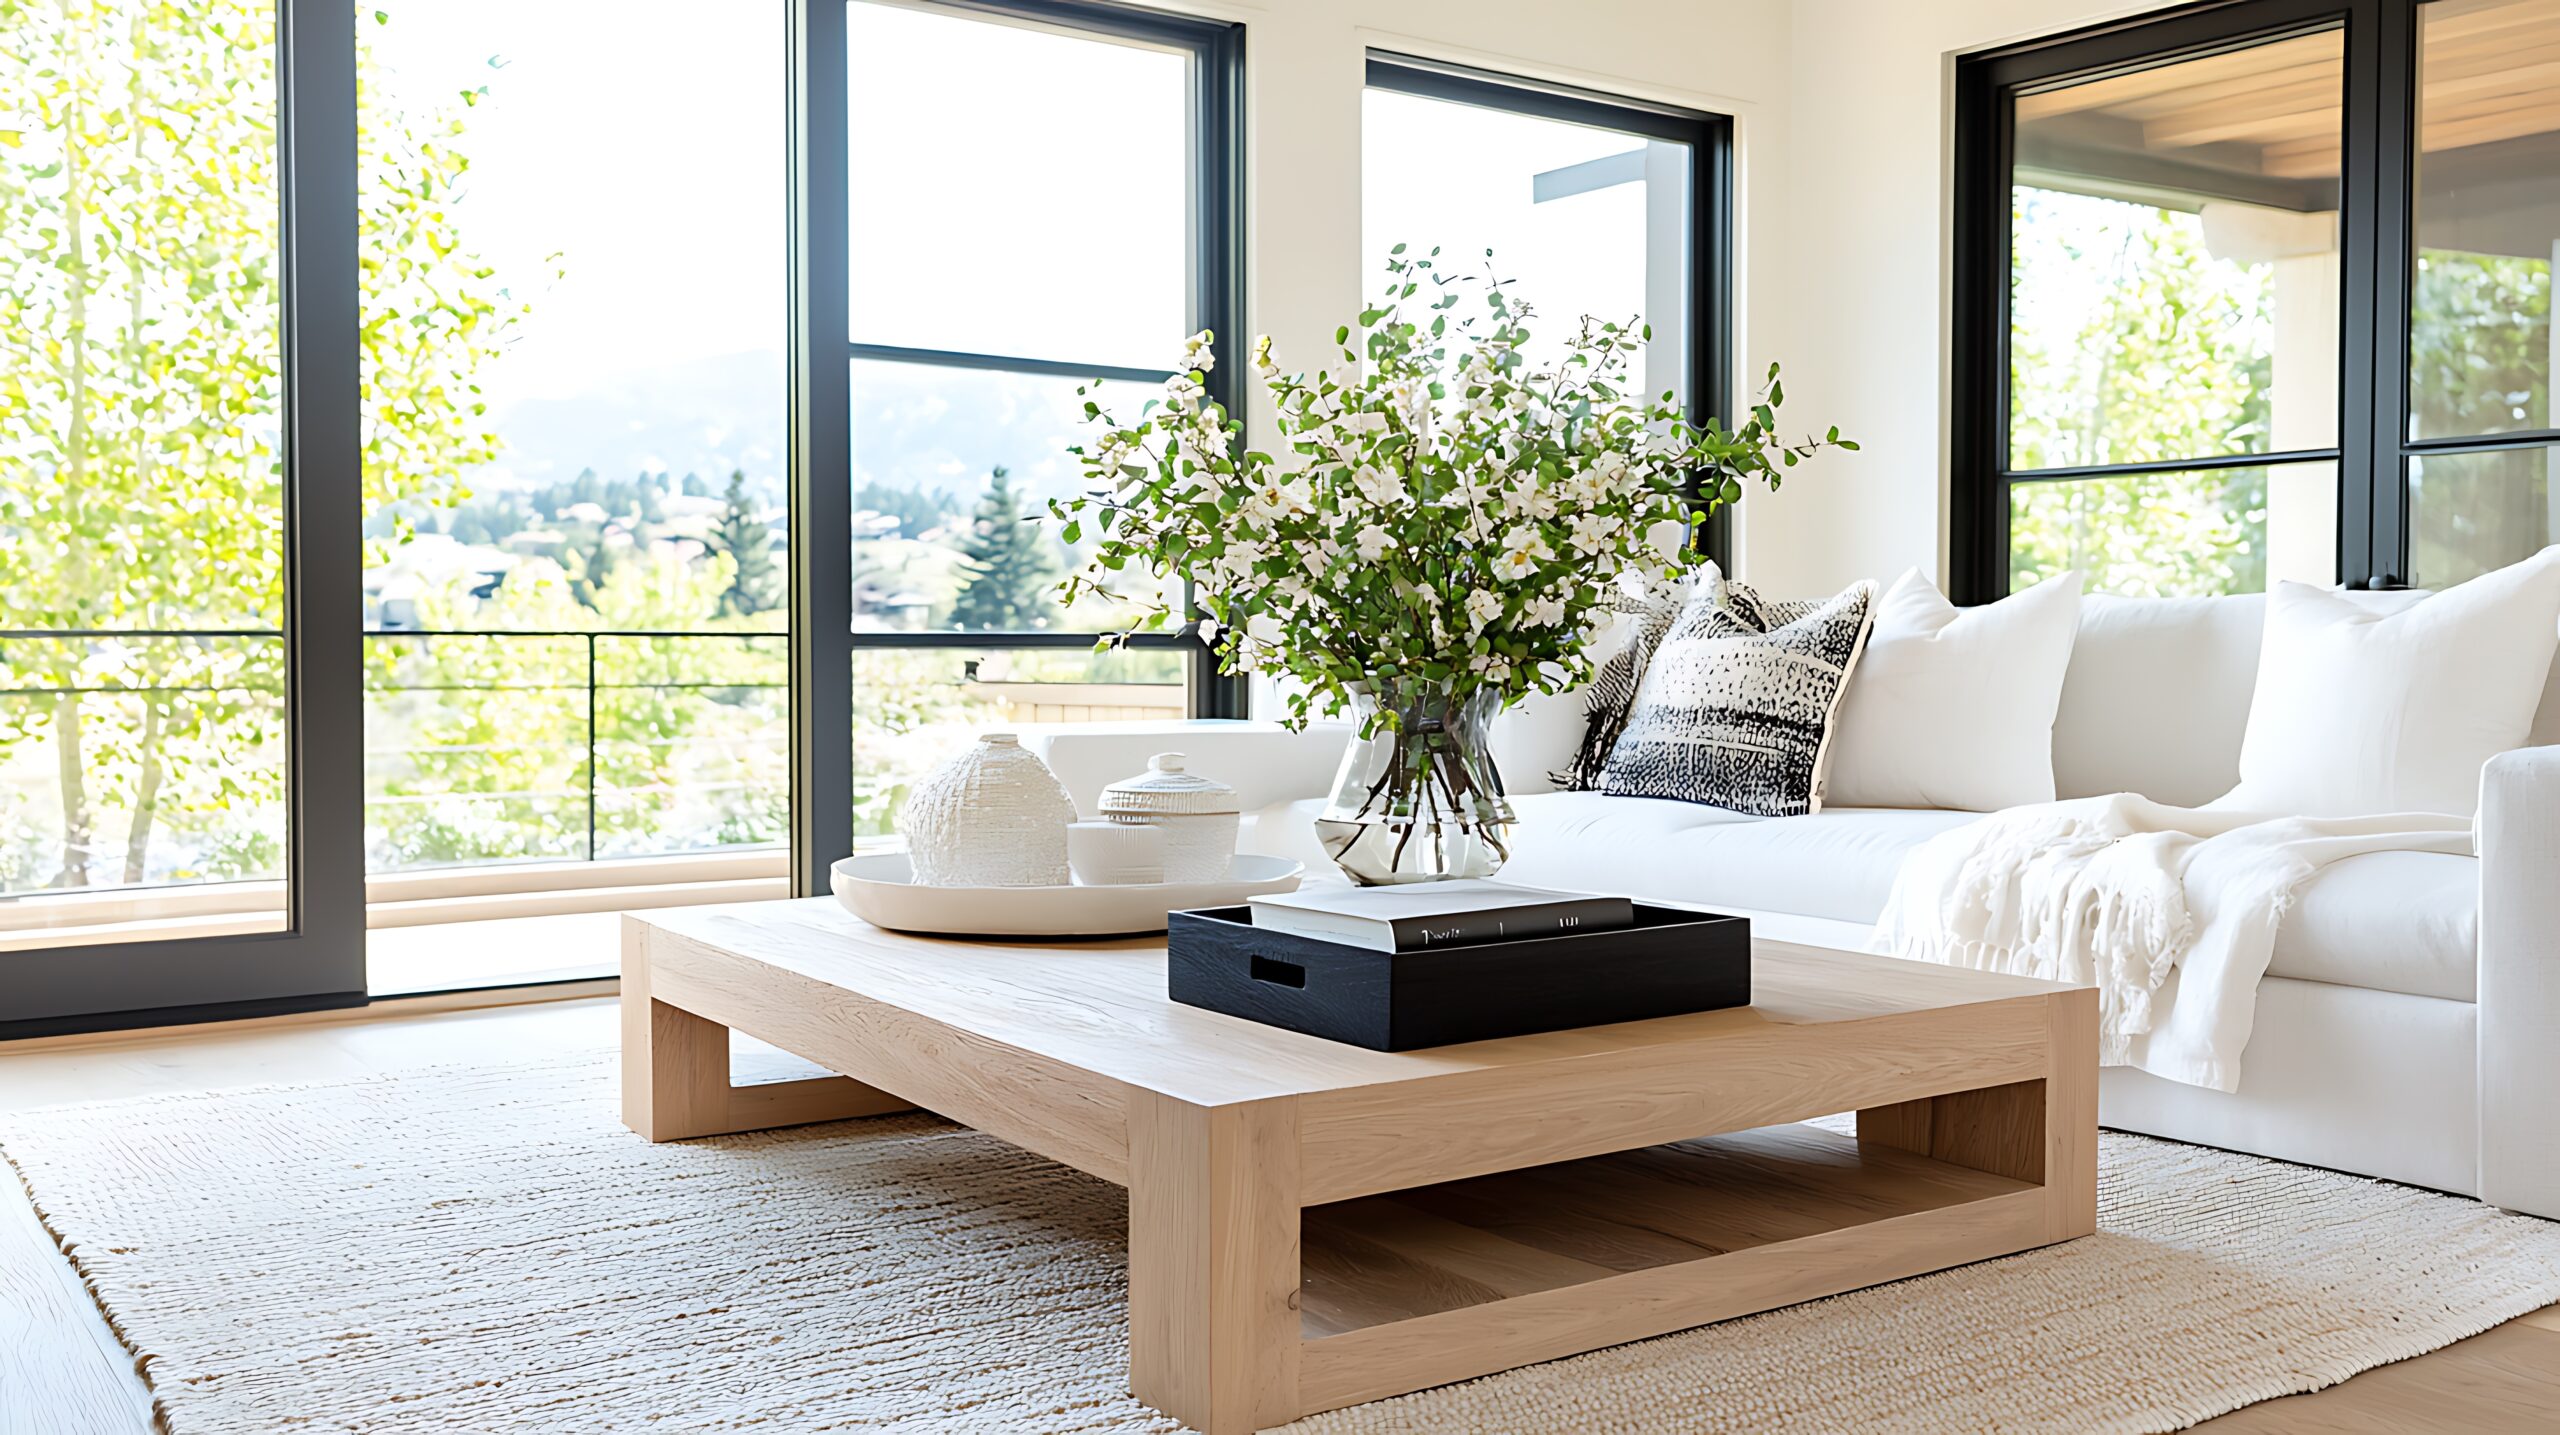
Modern minimalism celebrates open space and understated design. You’ll often see crisp white walls, smooth surfaces, and restrained colour palettes. Every element has a purpose, and the overall goal is to eliminate visual noise.
How to Nail Modern Minimalism
- Keep the palette simple: Stick to three core colours, typically neutrals, with the occasional accent tone.
- Invest in quality essentials: Choose well-made pieces that stand out for their simplicity.
- Embrace negative space: Don’t feel the need to fill every wall or surface; empty space is part of the design.
- Incorporate texture: Add depth through subtle textures like linen, timber or stone.
By focusing on restraint and careful curation, this theme brings a sense of calm and order to your home. Among all the different interior themes, modern minimalism encourages the idea that less can indeed be more when every detail is considered.
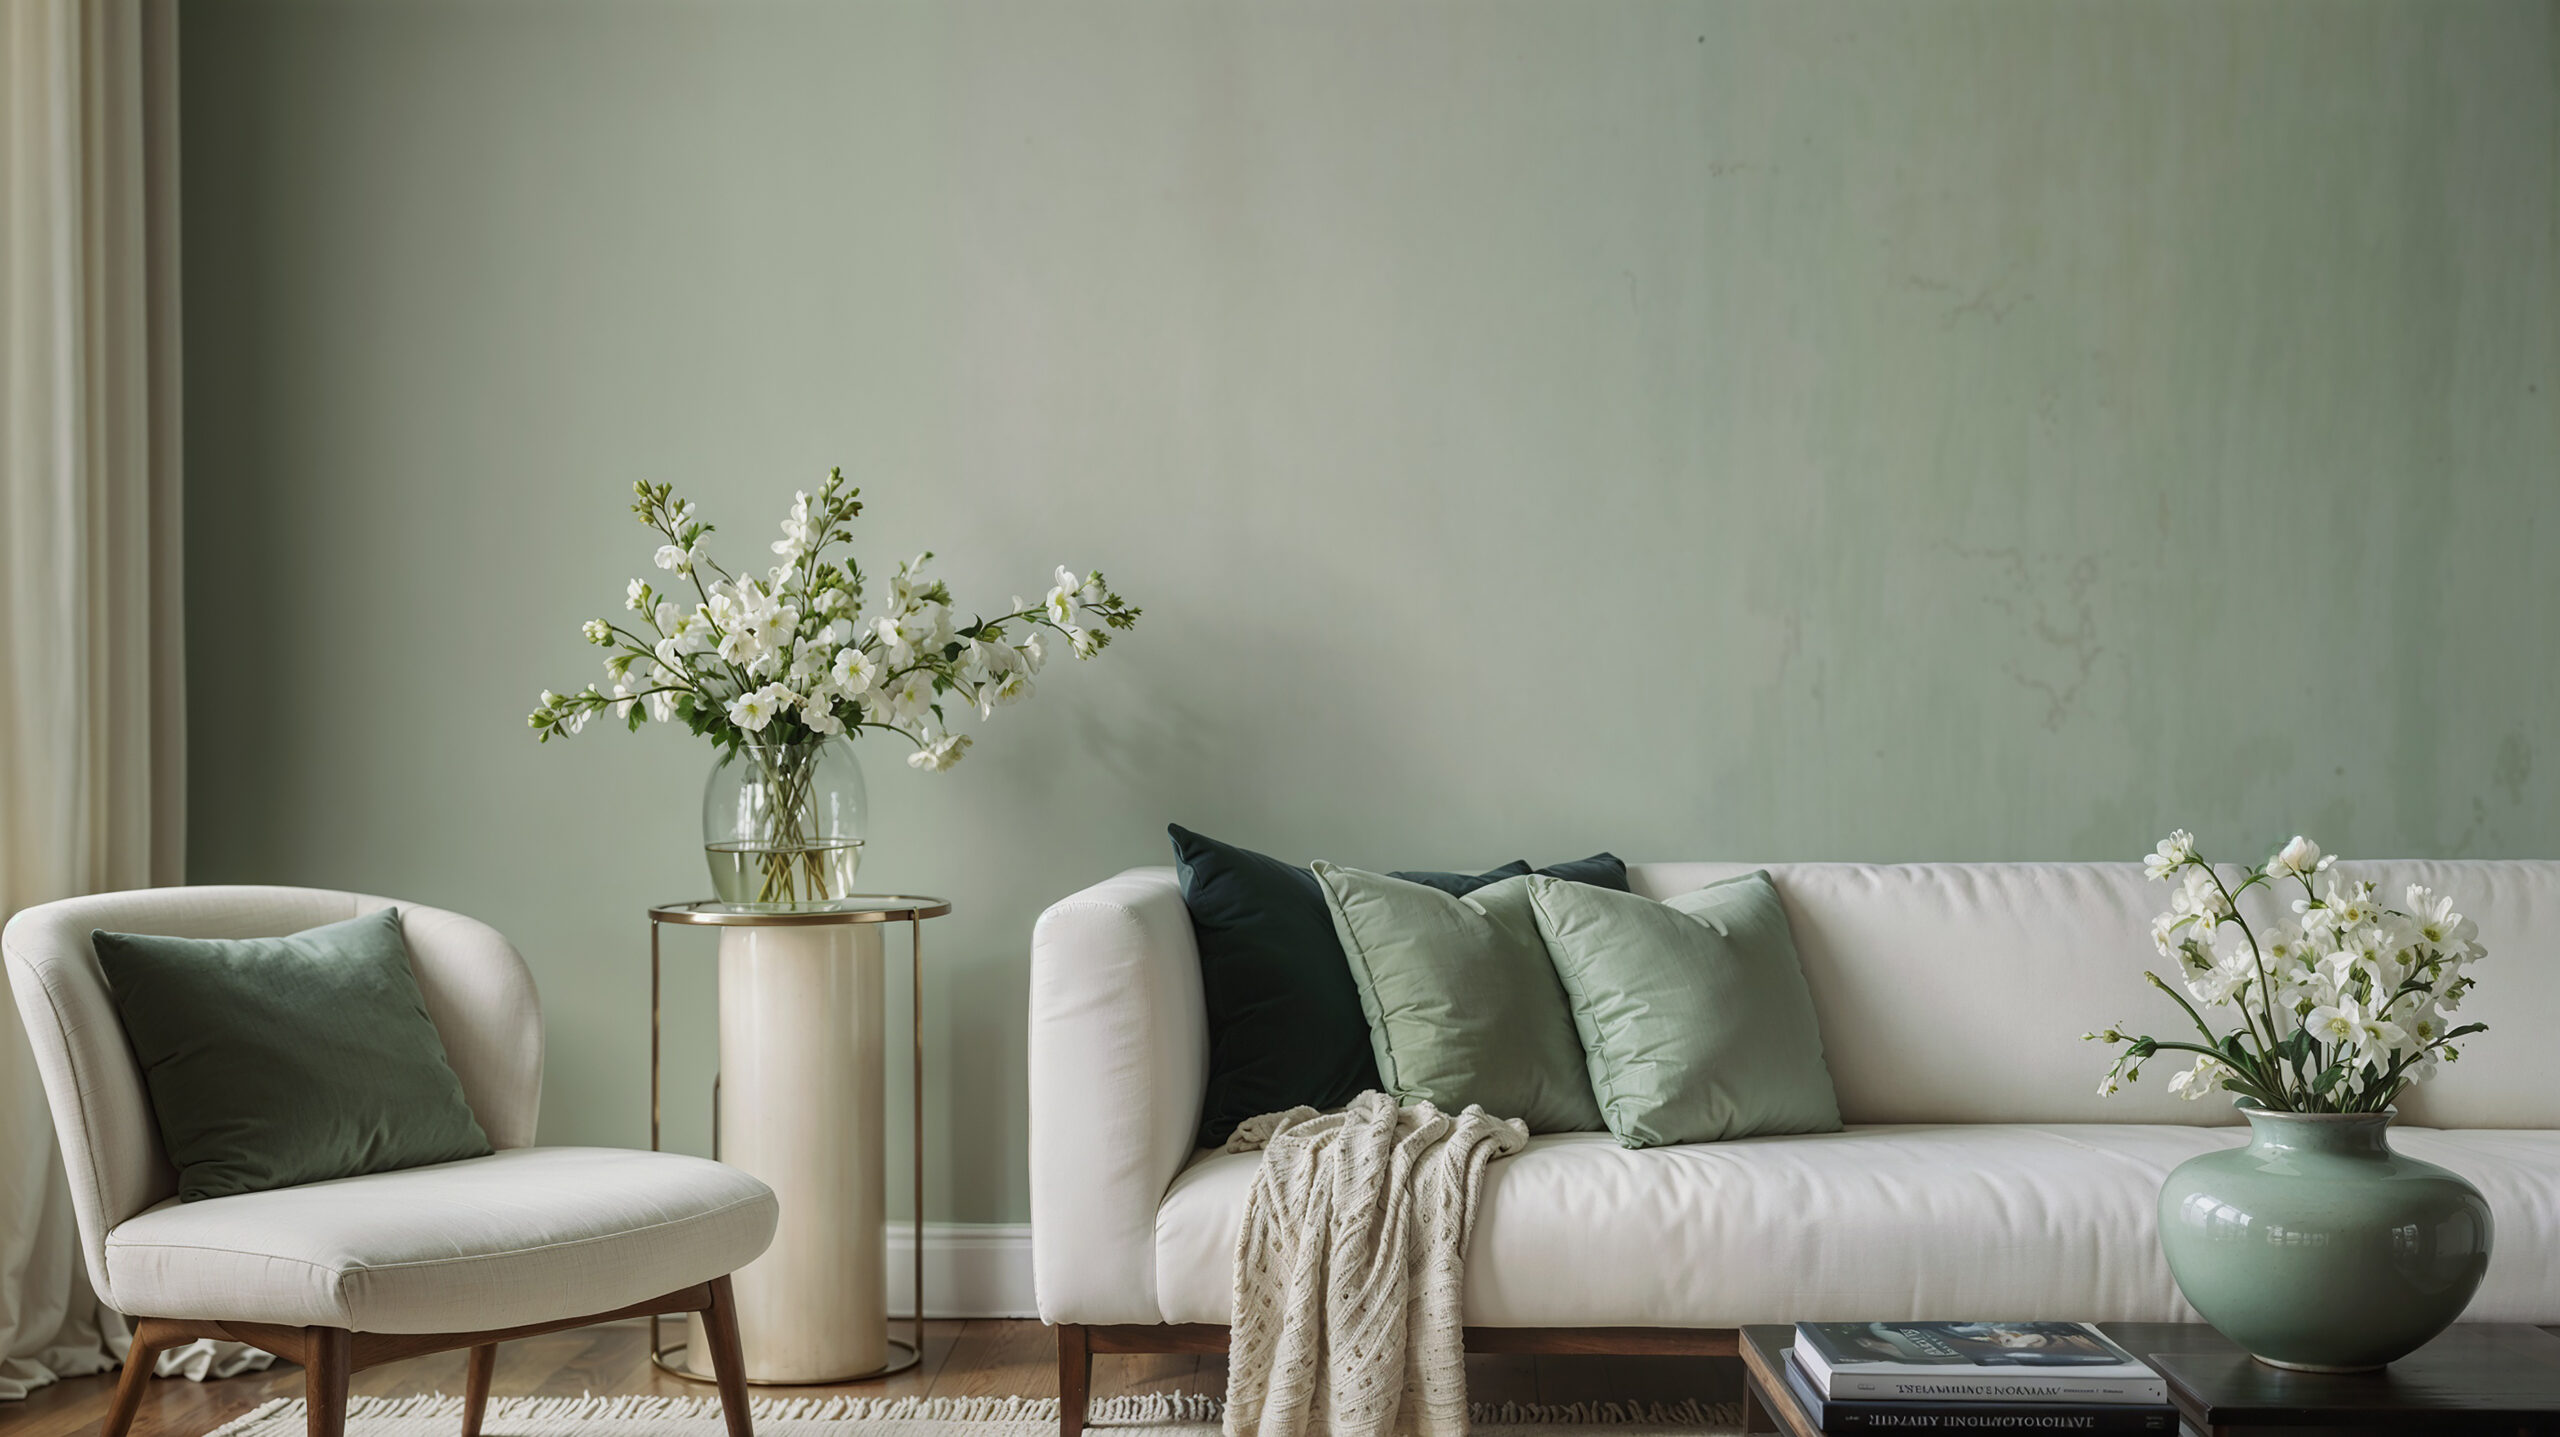
2. Scandinavian
Rooted in simplicity and comfort, Scandinavian design is one of the most timeless and versatile among the different interior themes. Known for its bright spaces and clean lines, it strikes a beautiful balance between function and warmth, creating rooms that feel both airy and inviting.
What Defines This Theme
The Scandinavian theme grew out of a lifestyle that values practicality, nature, and calm. Think white or soft neutral walls, pale timber accents, and plenty of natural light. It’s minimalist, but not stark; each room is carefully layered to feel homely rather than cold. Linen, wool, and rattan are staple materials, while greenery and subtle decor add a sense of life.
How to Nail Scandinavian Style
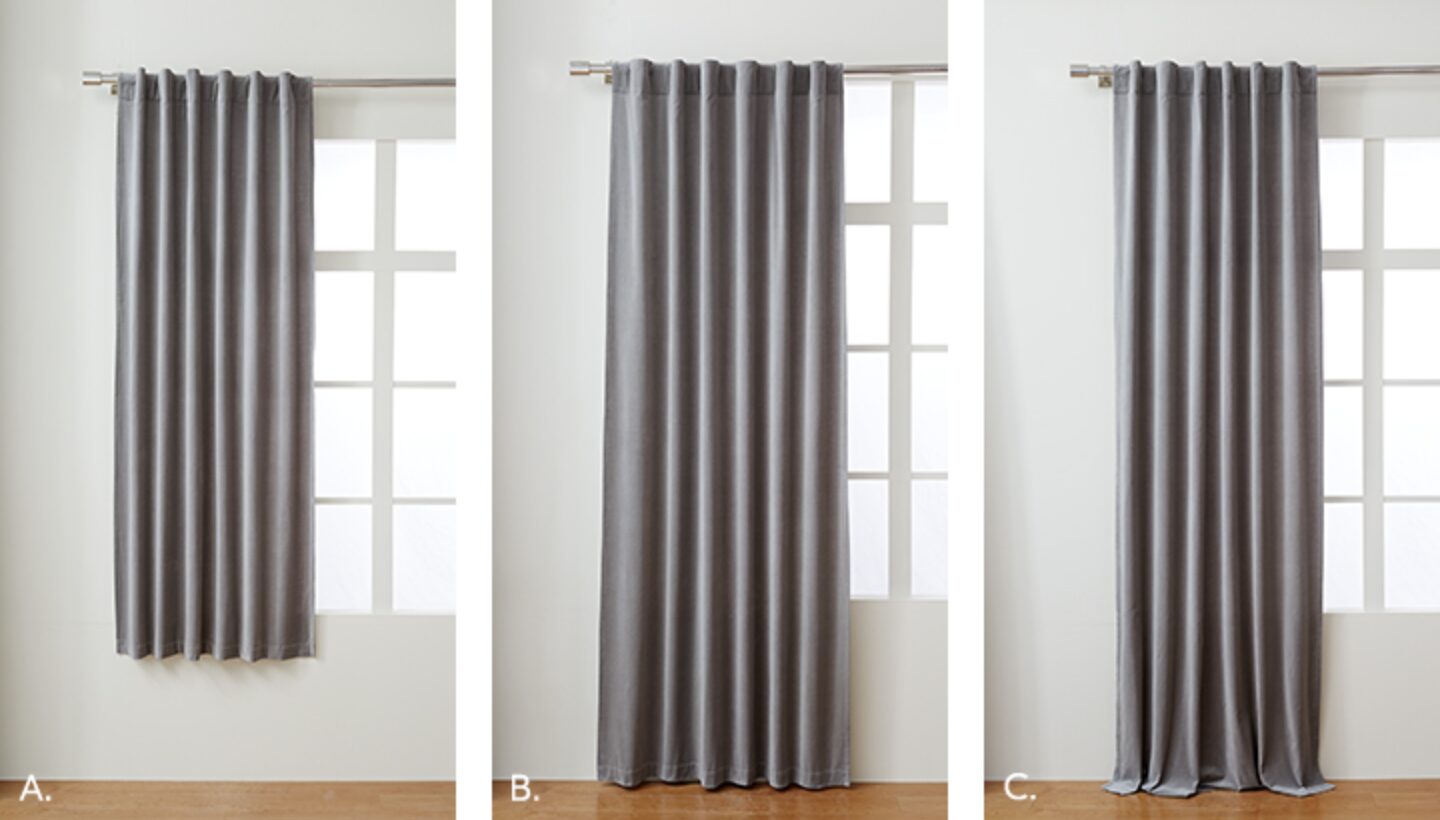
- Start with light: Emphasise natural light wherever possible, use sheer curtains or leave windows uncovered.
- Balance warmth and simplicity: Combine sleek furniture with cosy textiles like knitted throws or sheepskin rugs.
- Stick to natural materials: Prioritise timber, wool, and cotton over synthetics for that organic, refined feel.
- Add a touch of greenery: Indoor plants soften the clean lines and bring in a bit of the outdoors.
What makes this style stand out among the different interior themes is its effortless combination of minimalism and comfort. Scandinavian interiors remind us that beauty often comes from simplicity, natural textures, and thoughtful design choices that make a space feel calm yet lived in.
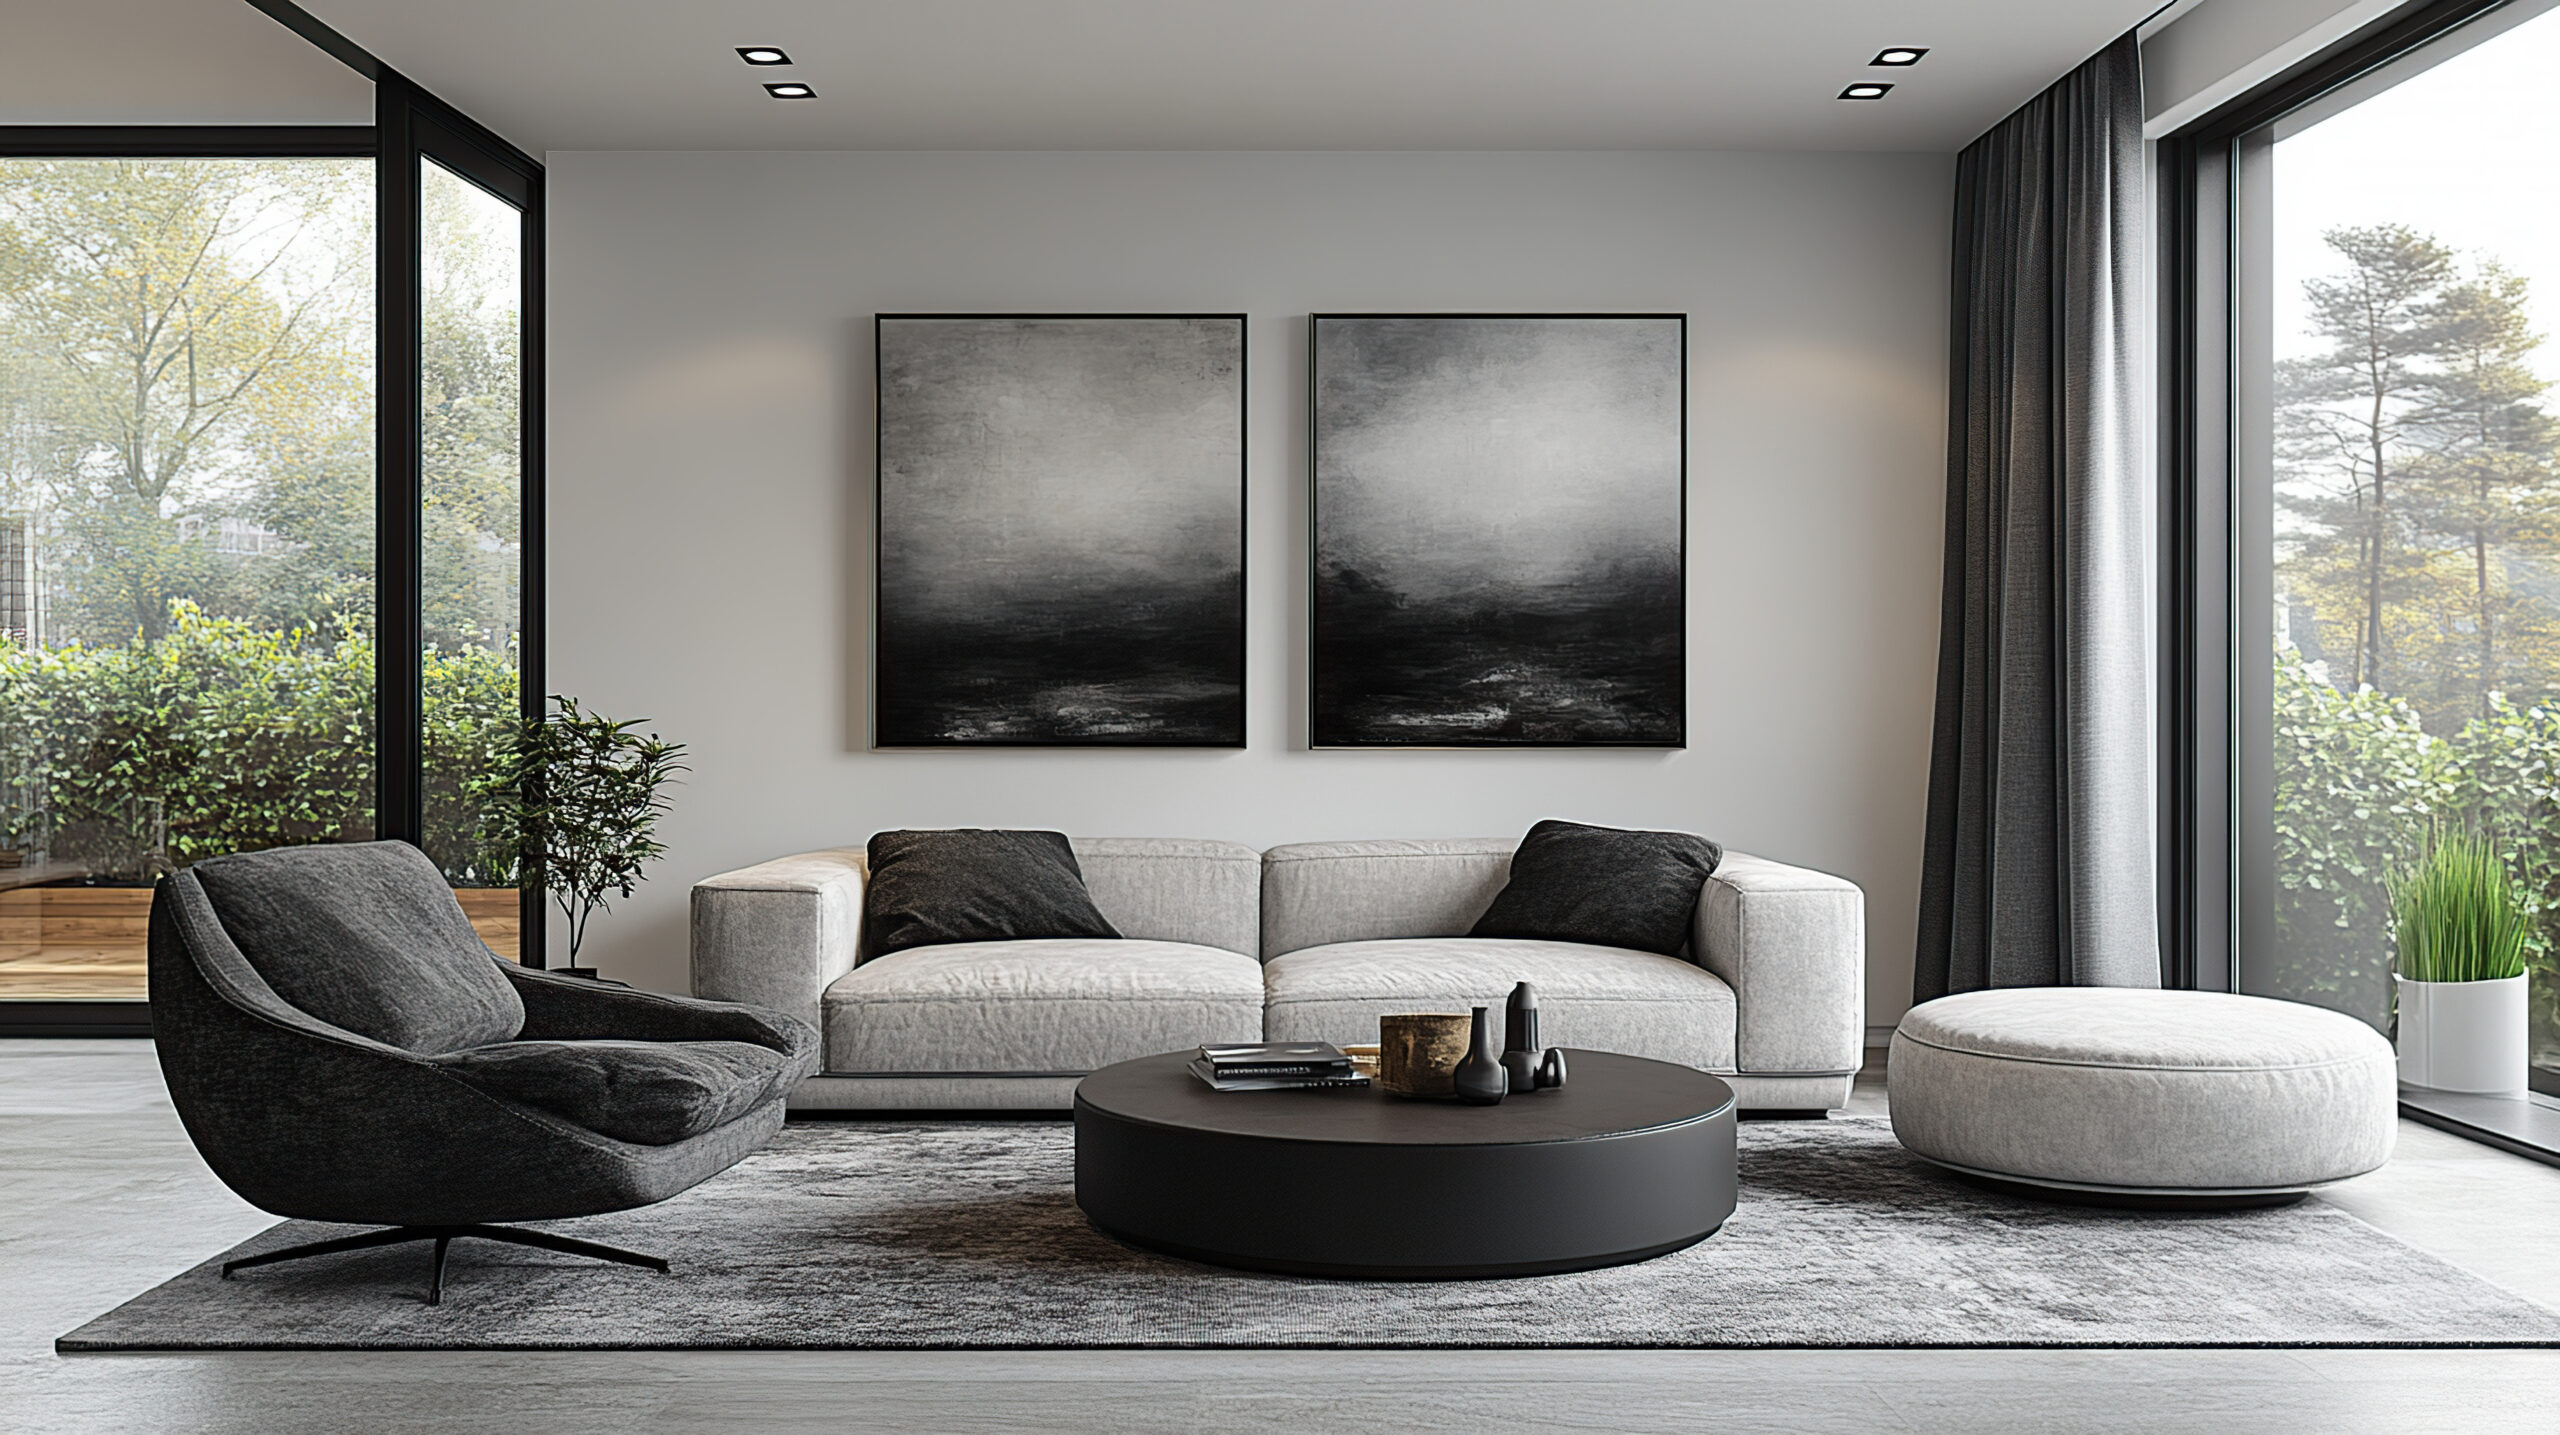
3. Industrial
Bold, raw and full of character, the industrial style has become one of the most distinctive among the different interior themes. Originally inspired by converted warehouses and lofts, this look celebrates the beauty of exposed materials and a no-fuss approach to design.
What Defines This Theme
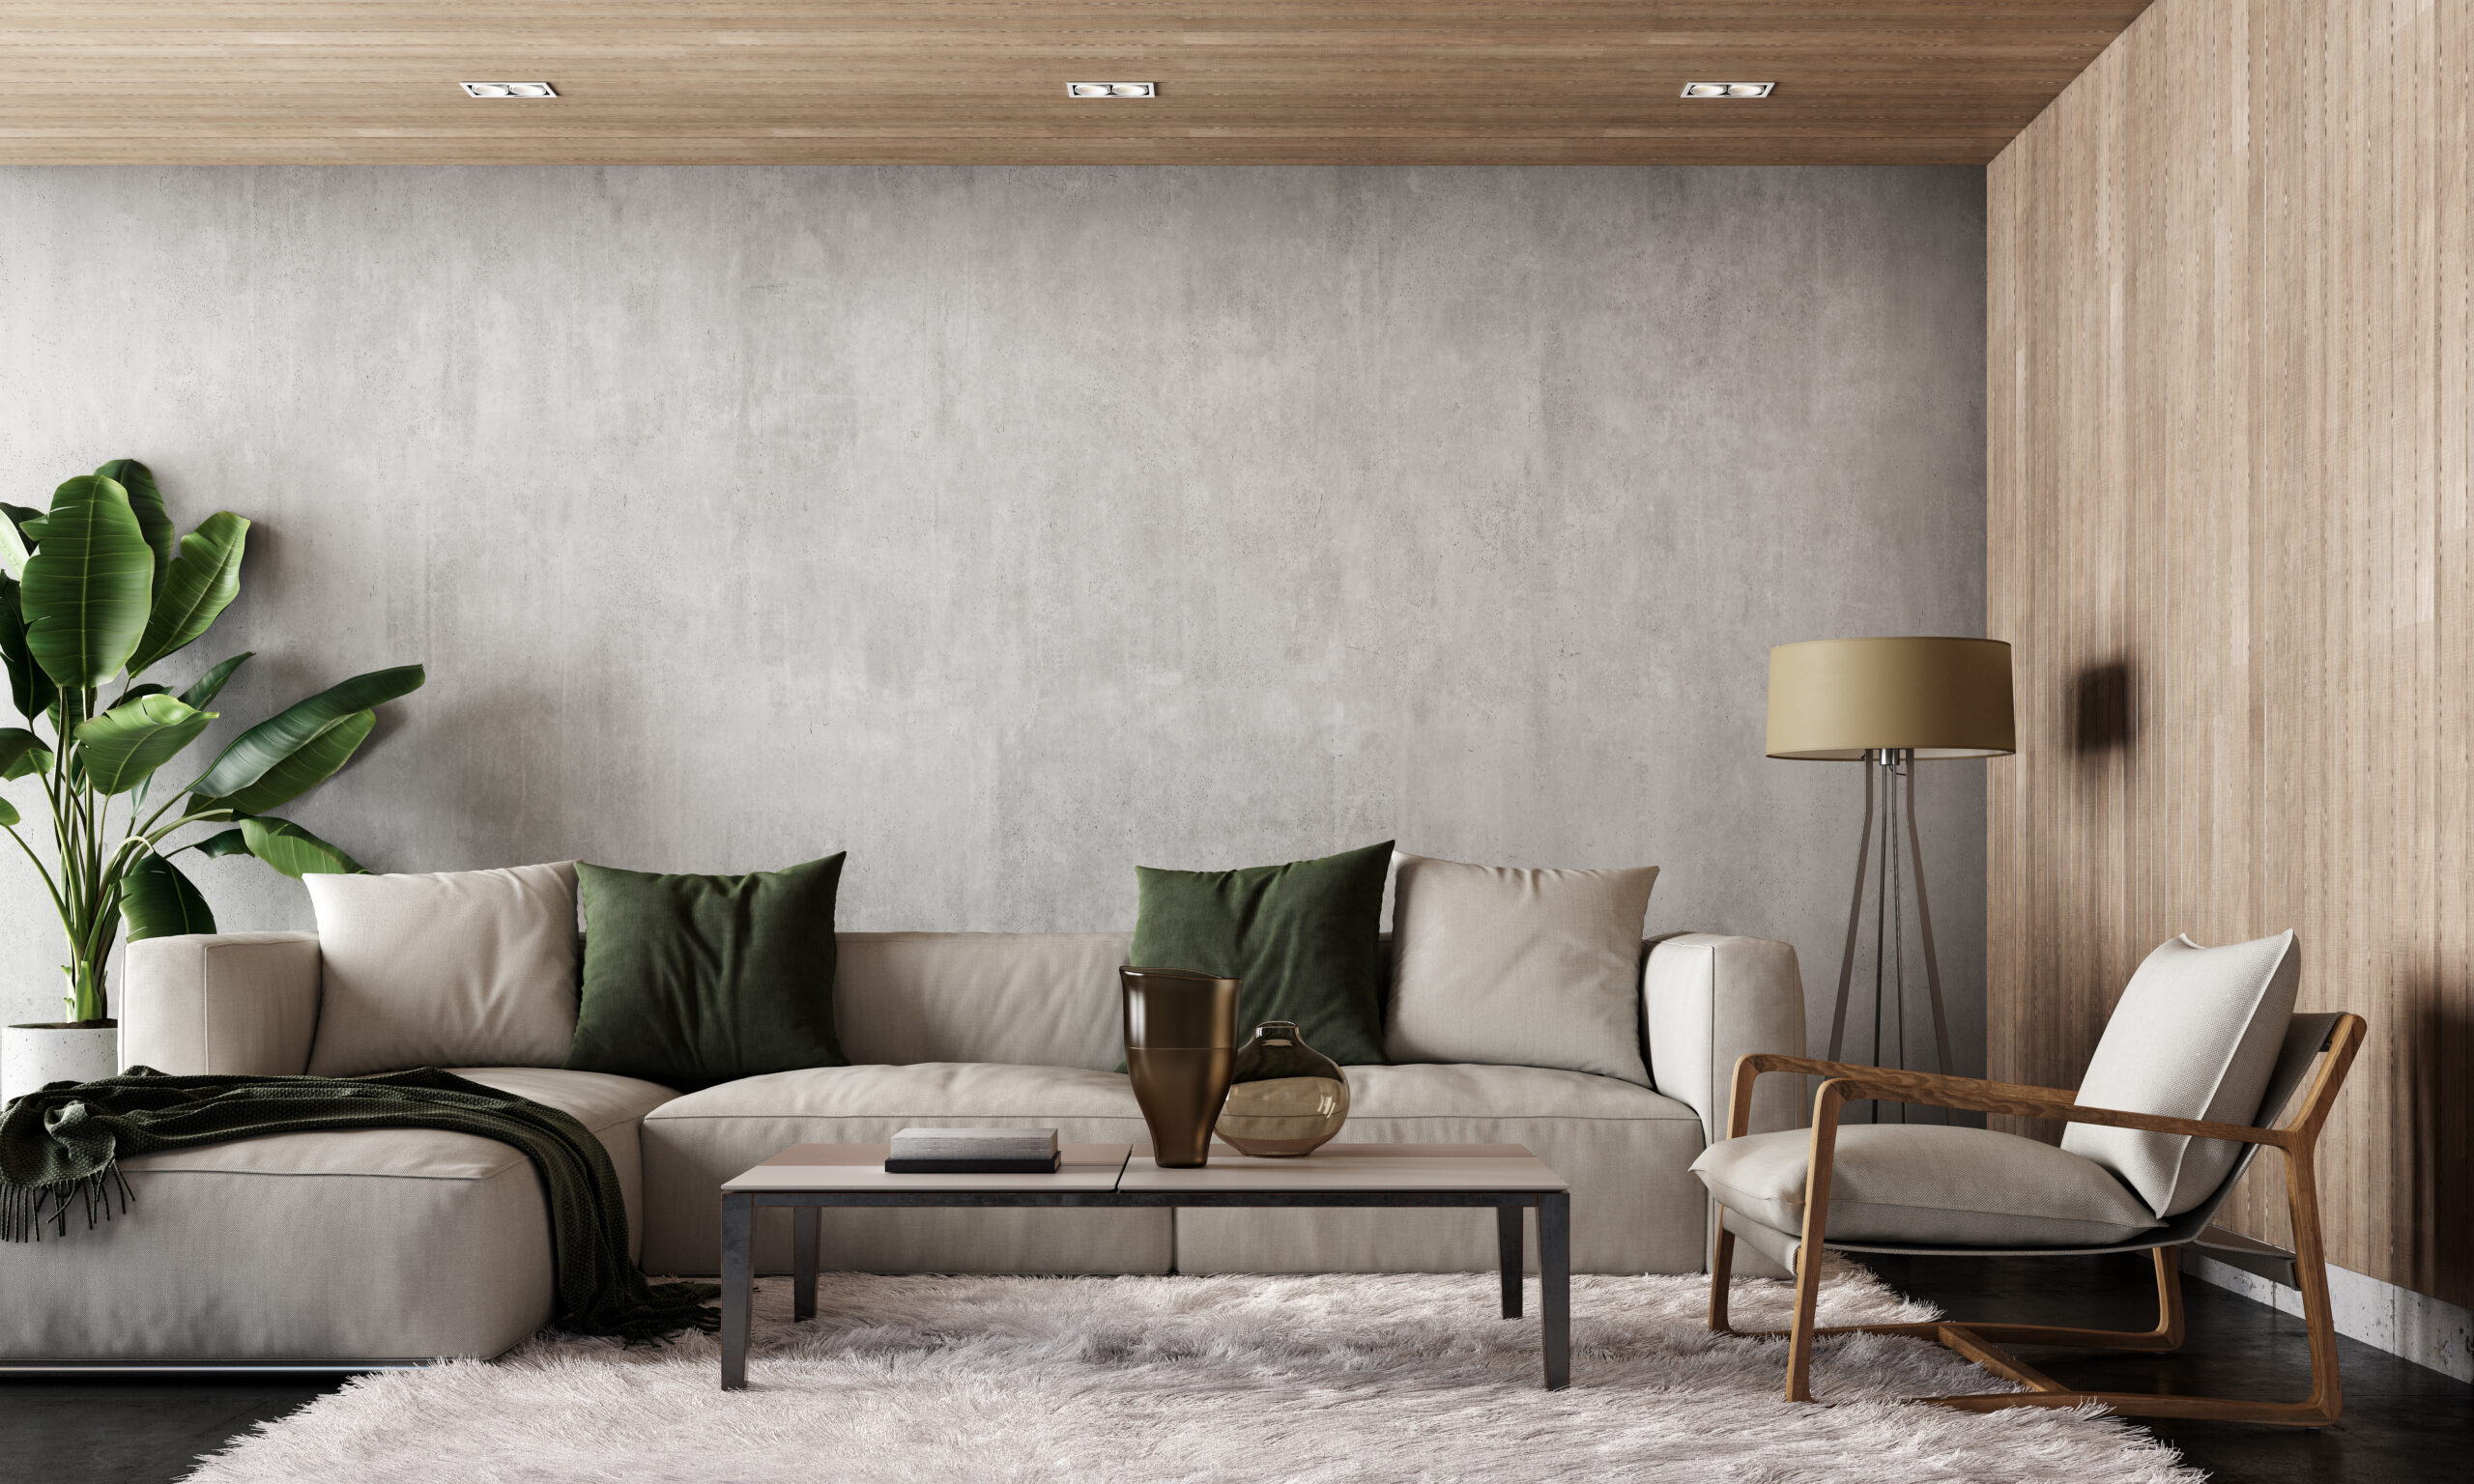
Industrial interiors showcase what often lies beneath the surface, exposed brick walls, visible pipes, concrete floors and steel details. It’s a theme built on contrast: rough textures paired with sleek finishes, and vintage pieces set against modern elements. The colour palette is typically muted, featuring greys, browns and black tones that ground the space with an urban edge.
How to Nail Industrial Style
- Highlight raw materials: Celebrate imperfections; exposed beams, brick walls or concrete benchtops should be visible rather than hidden.
- Mix old and new: Combine vintage furniture or factory-style lighting with modern décor for balance.
- Keep the palette simple: Stick to earthy, neutral tones, then add warmth through wood or leather accents.
- Go for an open layout: Industrial design thrives in open, uncluttered spaces that let materials shine.
Among the different interior themes, industrial style stands out for its authenticity and timeless appeal. It embraces a sense of honesty in design; nothing is overly polished, yet every detail feels deliberate. The result is a space that’s bold, lived in, and effortlessly cool.
4. Bohemian (Boho)
Free-spirited, colourful and full of texture, the Bohemian style is one of the most expressive among the different interior themes. It’s for those who love a relaxed, layered look that feels personal and lived in, rather than carefully curated.
What Defines This Theme
Boho interiors celebrate individuality. The aesthetic draws influence from global design, mixing patterns, cultures and eras with ease. Expect rich textiles, woven furnishings, and lots of greenery. The palette ranges from earthy neutrals to vibrant jewel tones, often mixed together to create a collected, laid-back atmosphere.
How to Nail Bohemian Style
- Layer with intention: Mix rugs, throws, and cushions in varied prints and textures to create depth.
- Embrace imperfection: Let your decor evolve naturally. Mismatched, handcrafted pieces add character.
- Show personality: Include items that mean something to you, such as travel finds or vintage treasures.
- Add natural elements: Rattan, jute, and macramé work beautifully with lush indoor plants.
What makes Boho so beloved among the different interior themes is its freedom; there are no strict rules. The goal is to craft a space that reflects who you are and what you love. Each layer tells a story, blending comfort, creativity and a touch of wanderlust in the most effortless way.
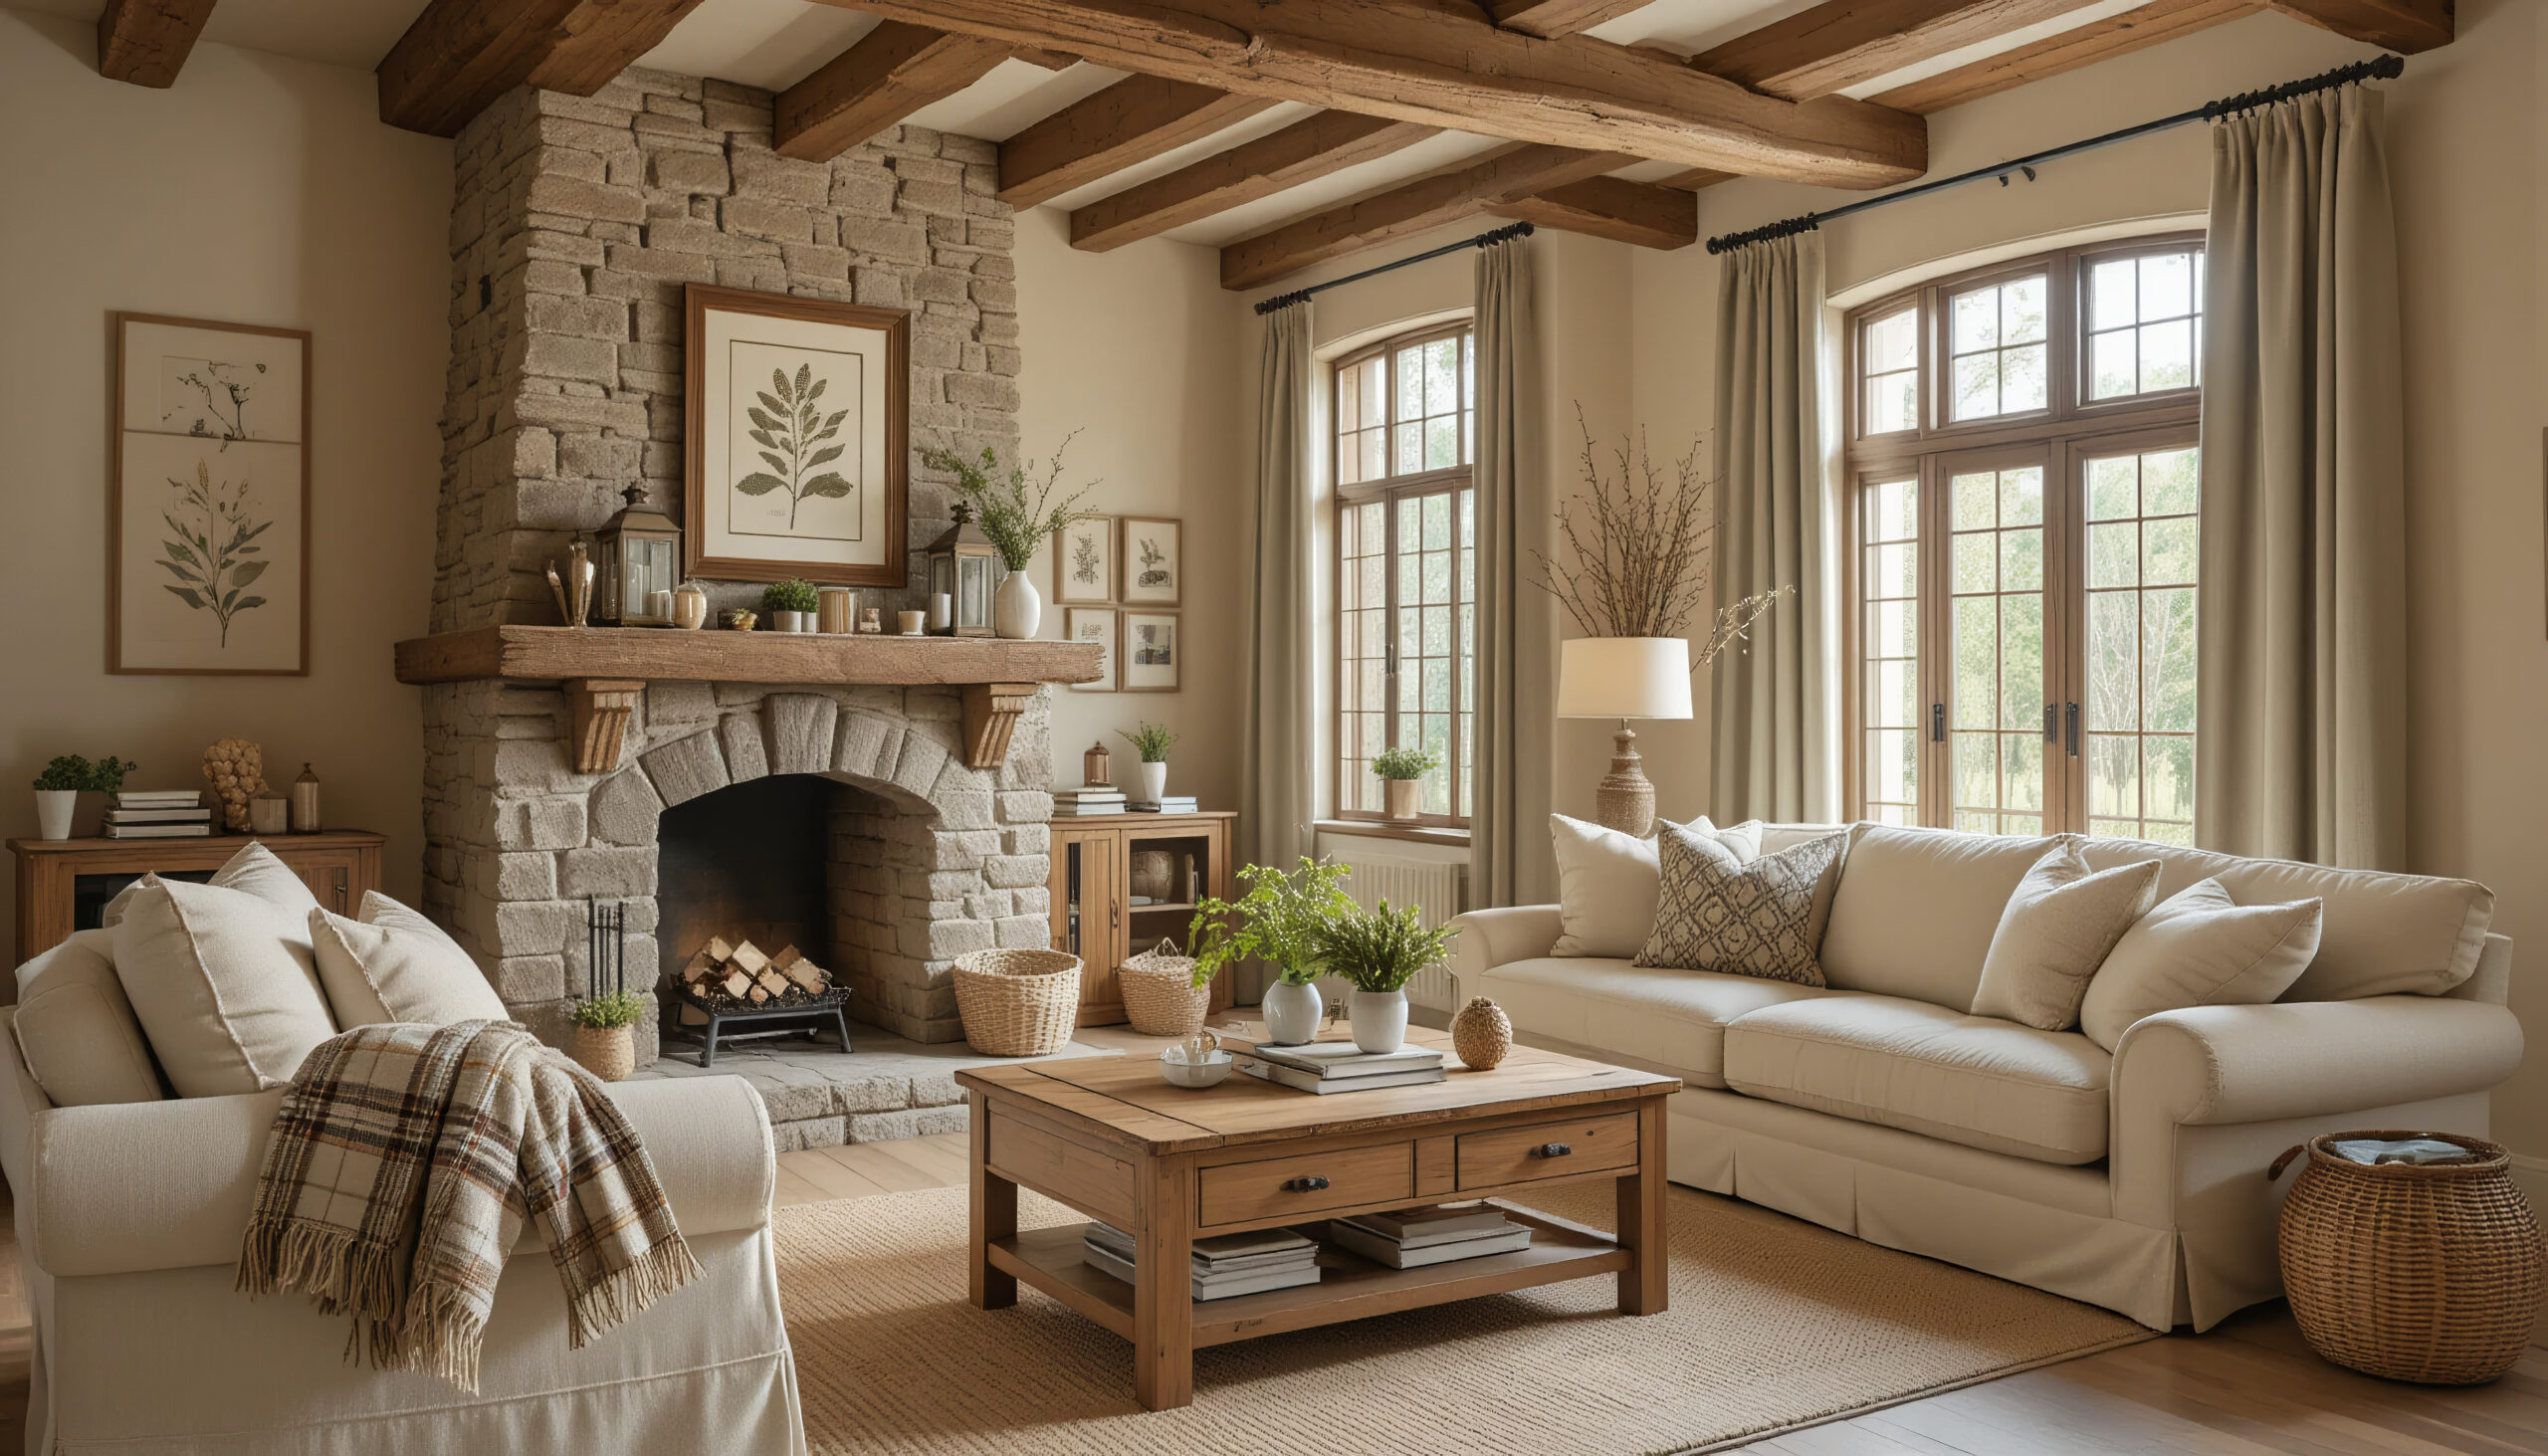
5. Farmhouse (Modern Farmhouse)
Warm, welcoming and full of charm, the farmhouse style is one of the most comforting among the different interior themes. It combines rustic character with modern touches, creating spaces that feel timeless yet fresh.
What Defines This Theme
Farmhouse interiors are all about warmth and simplicity. They celebrate natural materials, think reclaimed timber, soft fabrics, and handwoven details. The traditional elements, like vintage doors, shiplap walls, and exposed beams, are often balanced with contemporary furniture or lighting to keep things feeling current. The colour palette is neutral and inviting, featuring shades of white, cream, beige and soft grey, often accented with black for definition.
How to Nail Farmhouse Style
- Mix old and new: Blend antique or rustic pieces with modern fixtures, a weathered dining table with sleek pendant lights, for example.
- Focus on comfort: Choose plush seating and relaxed textiles; the room should feel lived in and inviting.
- Highlight natural materials: Timber beams, linen curtains, and jute rugs all help bring that earthy texture to the forefront.
- Keep colours soft: Stick with warm neutrals, and add contrast through darker metal finishes or natural wood tones.
Among the different interior themes, modern farmhouse stands out for its ability to feel grounded without being heavy. It evokes a sense of home, lived-in, layered, and effortlessly welcoming, while still maintaining a refined edge.
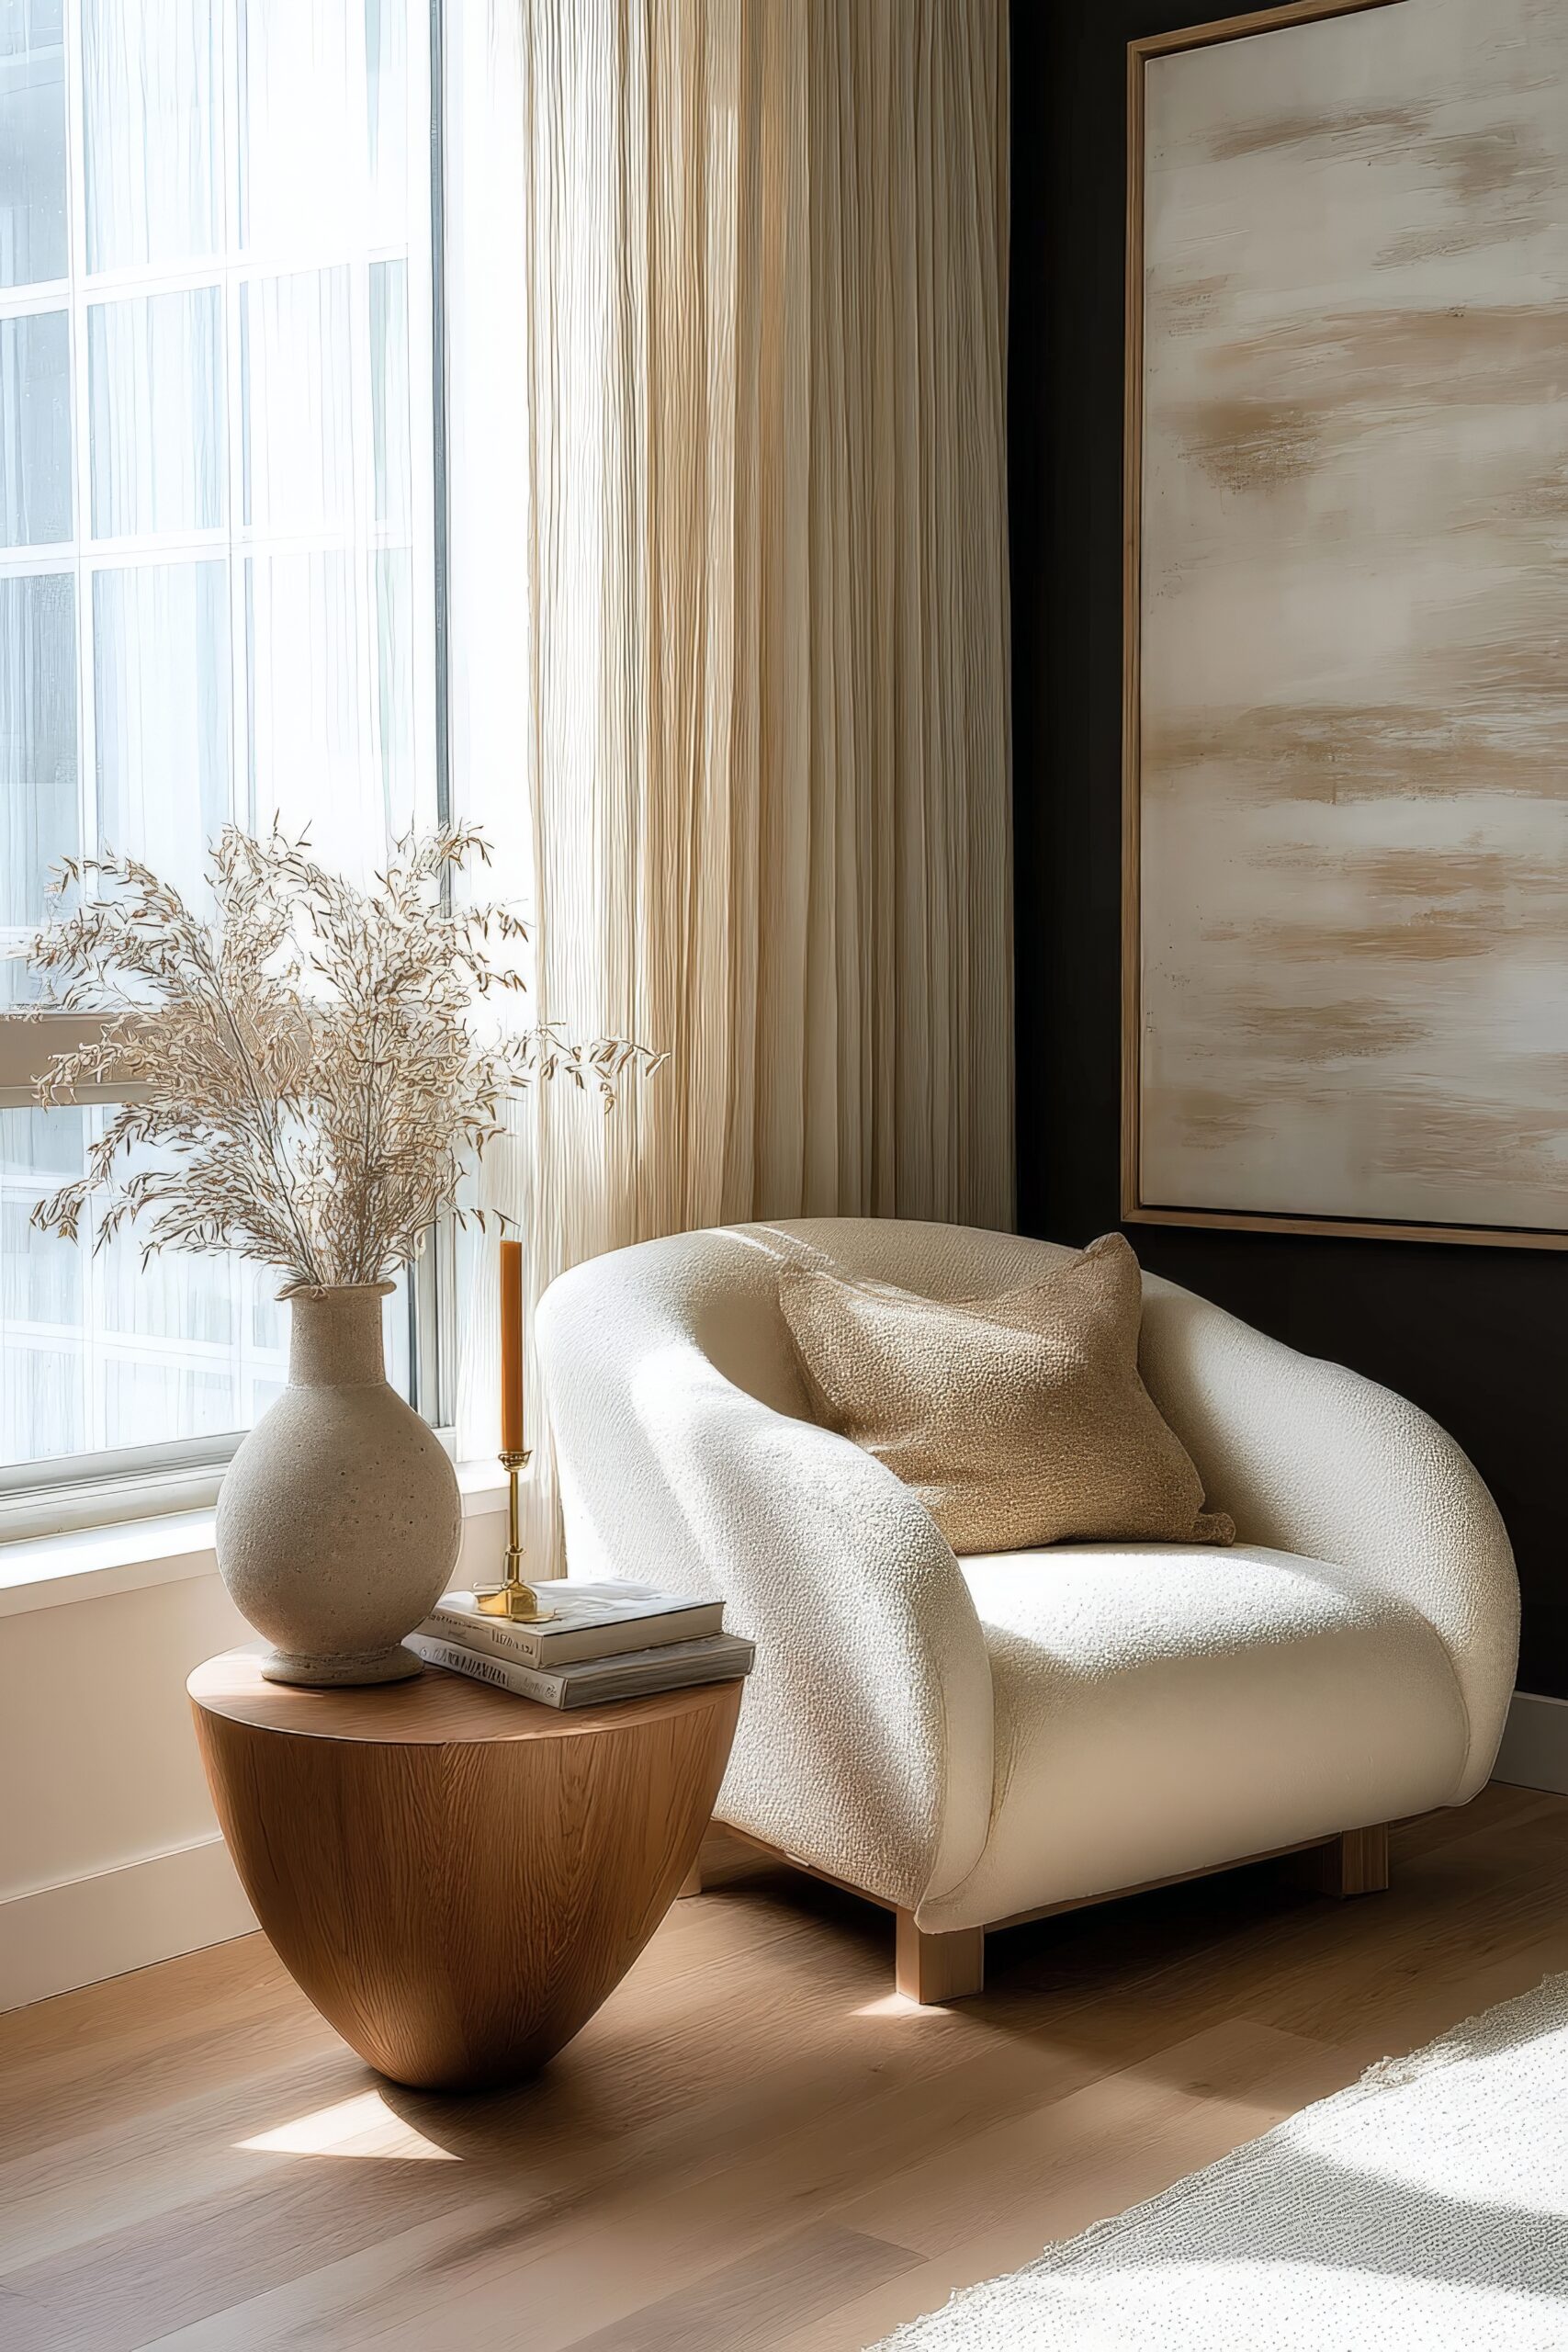
6. Mid-Century Modern
Effortlessly cool and undeniably timeless, Mid-Century Modern is one of the most recognisable of the different interior themes. Its appeal lies in the simplicity of form, the warmth of natural materials, and the sense of optimism it brings to a space.
What Defines This Theme
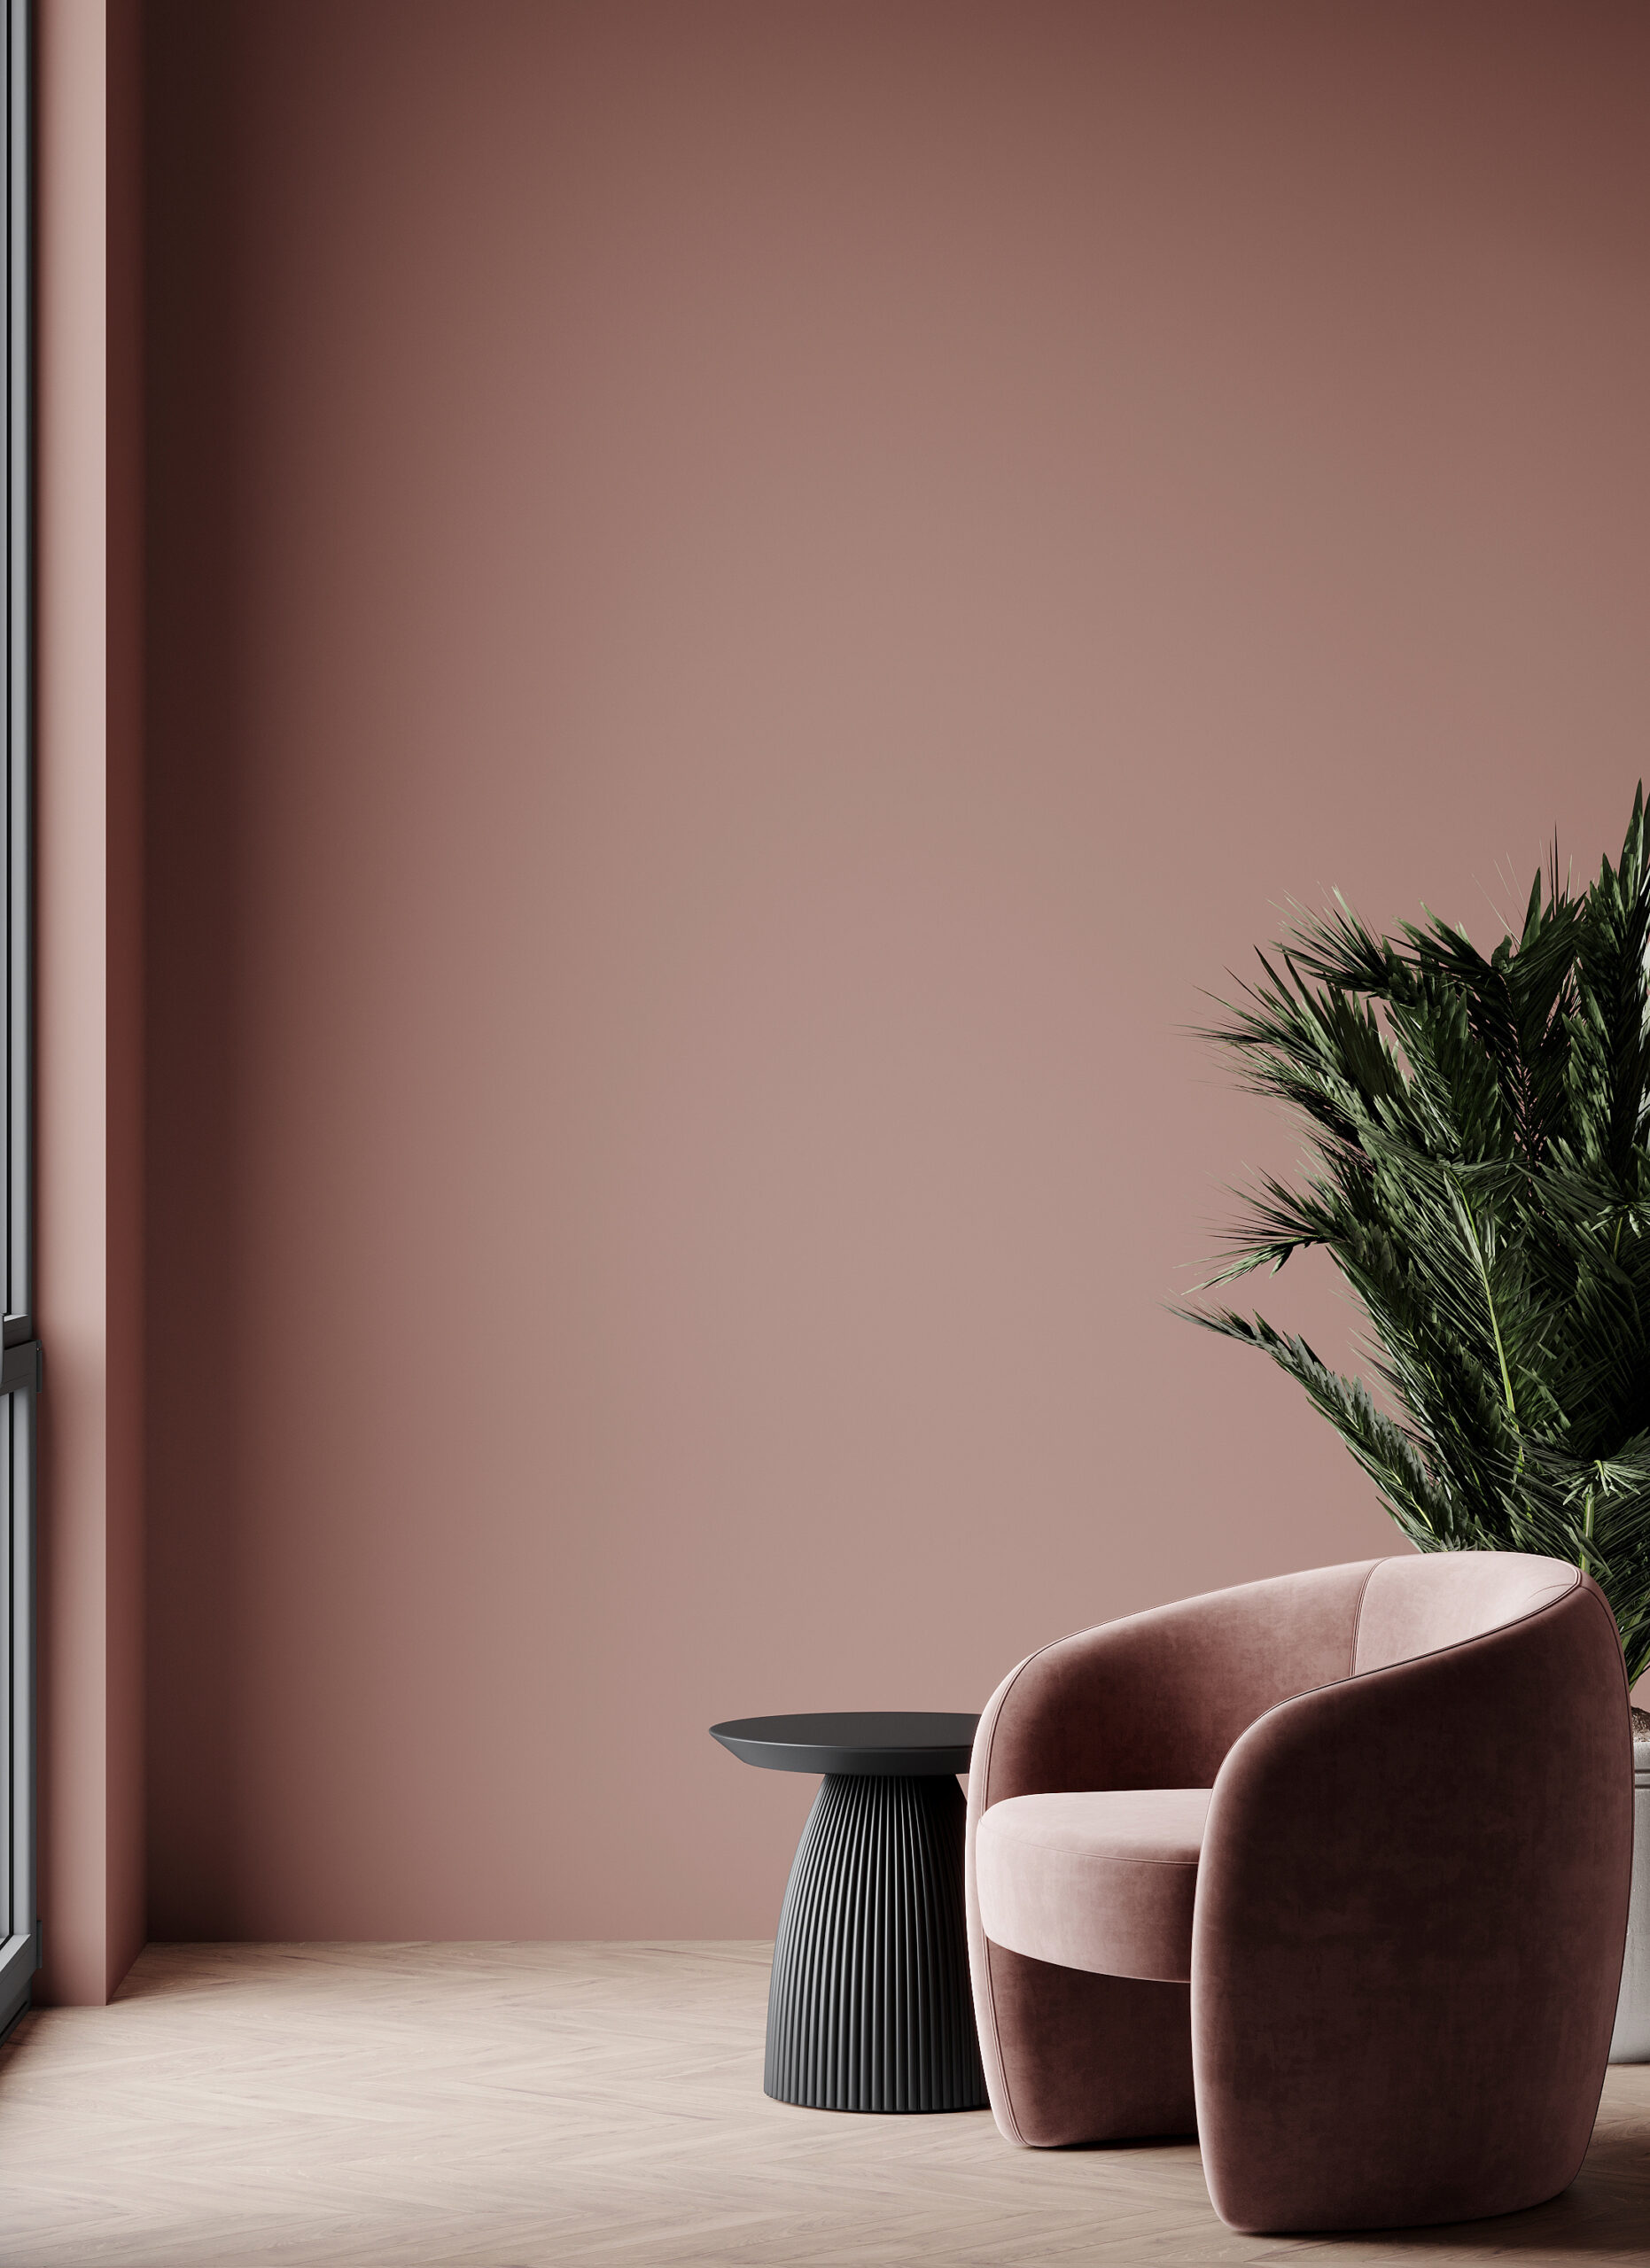
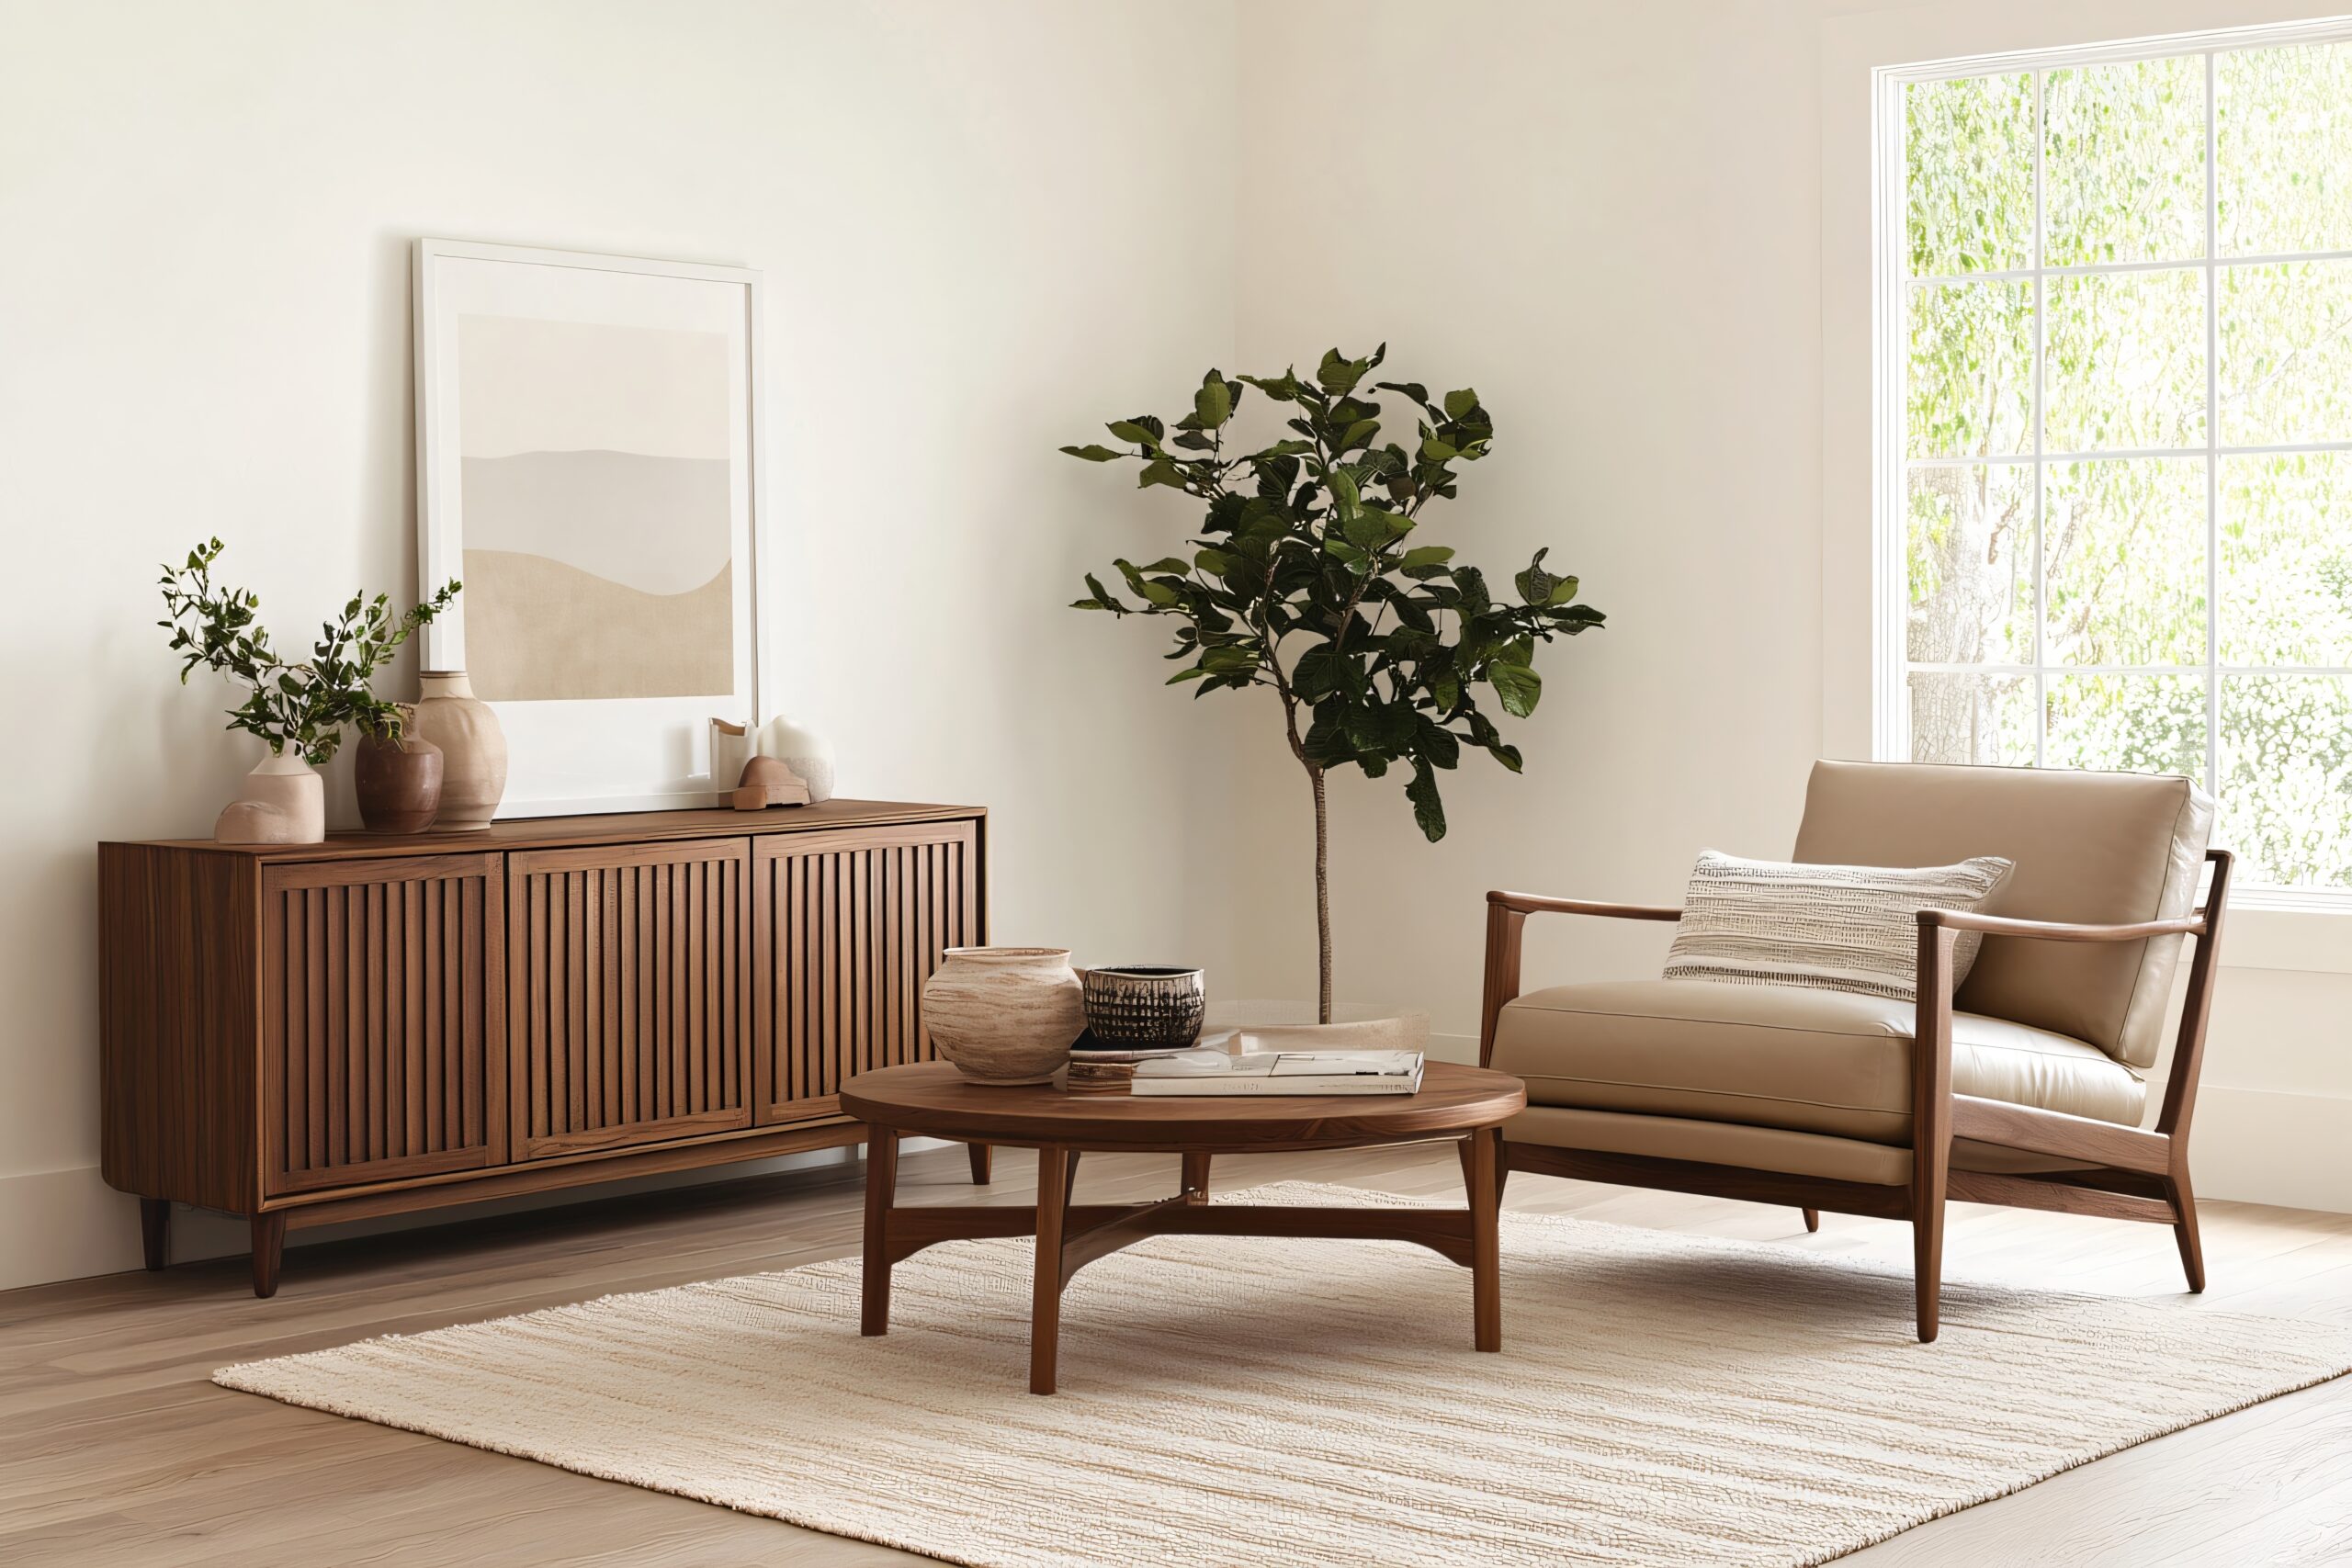
Emerging in the mid-20th century, this style focuses on functionality, clean lines, and organic shapes. Furniture often features tapered wooden legs, smooth curves, and minimal ornamentation. Colour palettes mix earthy tones with bold accents; mustard, teal, or burnt orange are common choices. This theme also embraces an indoor-outdoor connection, with open layouts and large windows that invite natural light.
How to Nail Mid-Century Modern Style
- Choose iconic shapes: Look for furniture with sleek, simple lines. Think statement chairs, sideboards, and low coffee tables.
- Mix playful and practical: Keep decor minimal but allow one or two standout pieces to take centre stage.
- Incorporate wood tones: Teak, walnut and oak are key materials that give warmth and authenticity.
- Add a pop of colour: Accent cushions or artwork in retro hues bring the space to life without overwhelming it.
Among the different interior themes, Mid-Century Modern remains a favourite for its nostalgic charm and enduring versatility. It captures the essence of great design: balanced, thoughtful, and always fresh, no matter the decade.
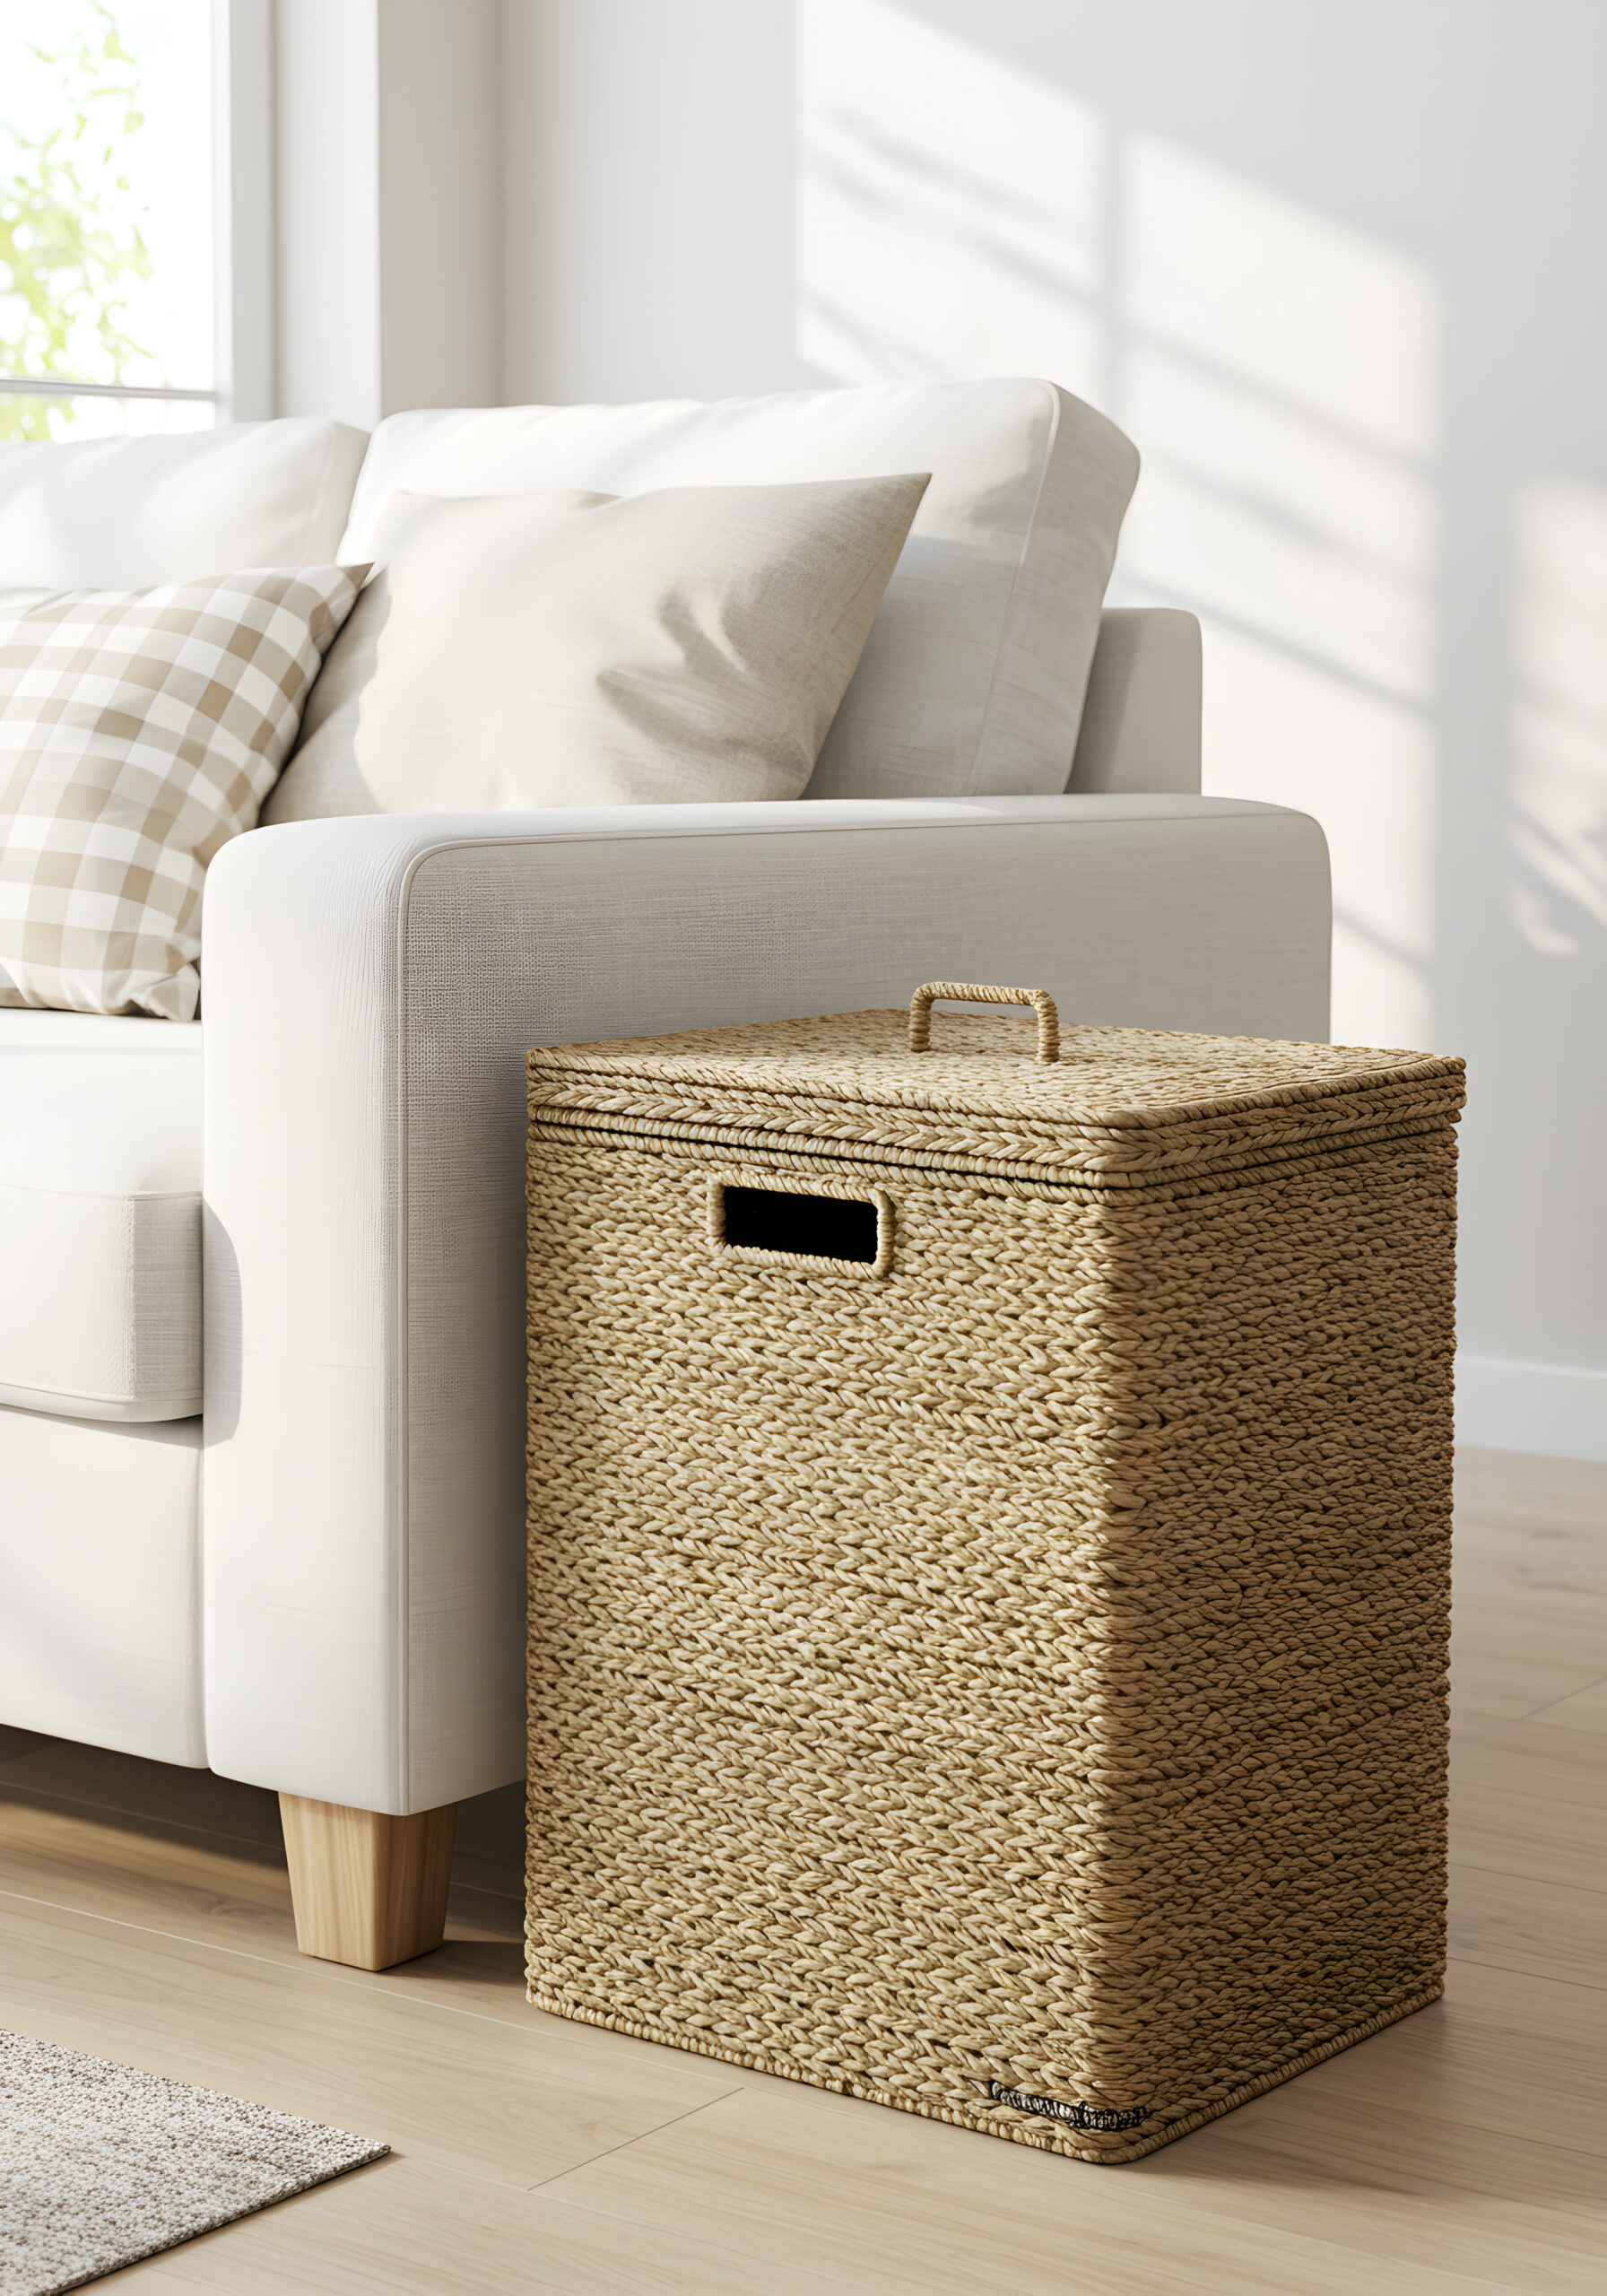
7. Coastal
Light, relaxed, and effortlessly breezy, the coastal style is one of the most refreshing among the different interior themes. Inspired by seaside living, it brings the calm and simplicity of the coast into the home, making every day feel like a breath of fresh air.
What Defines This Theme
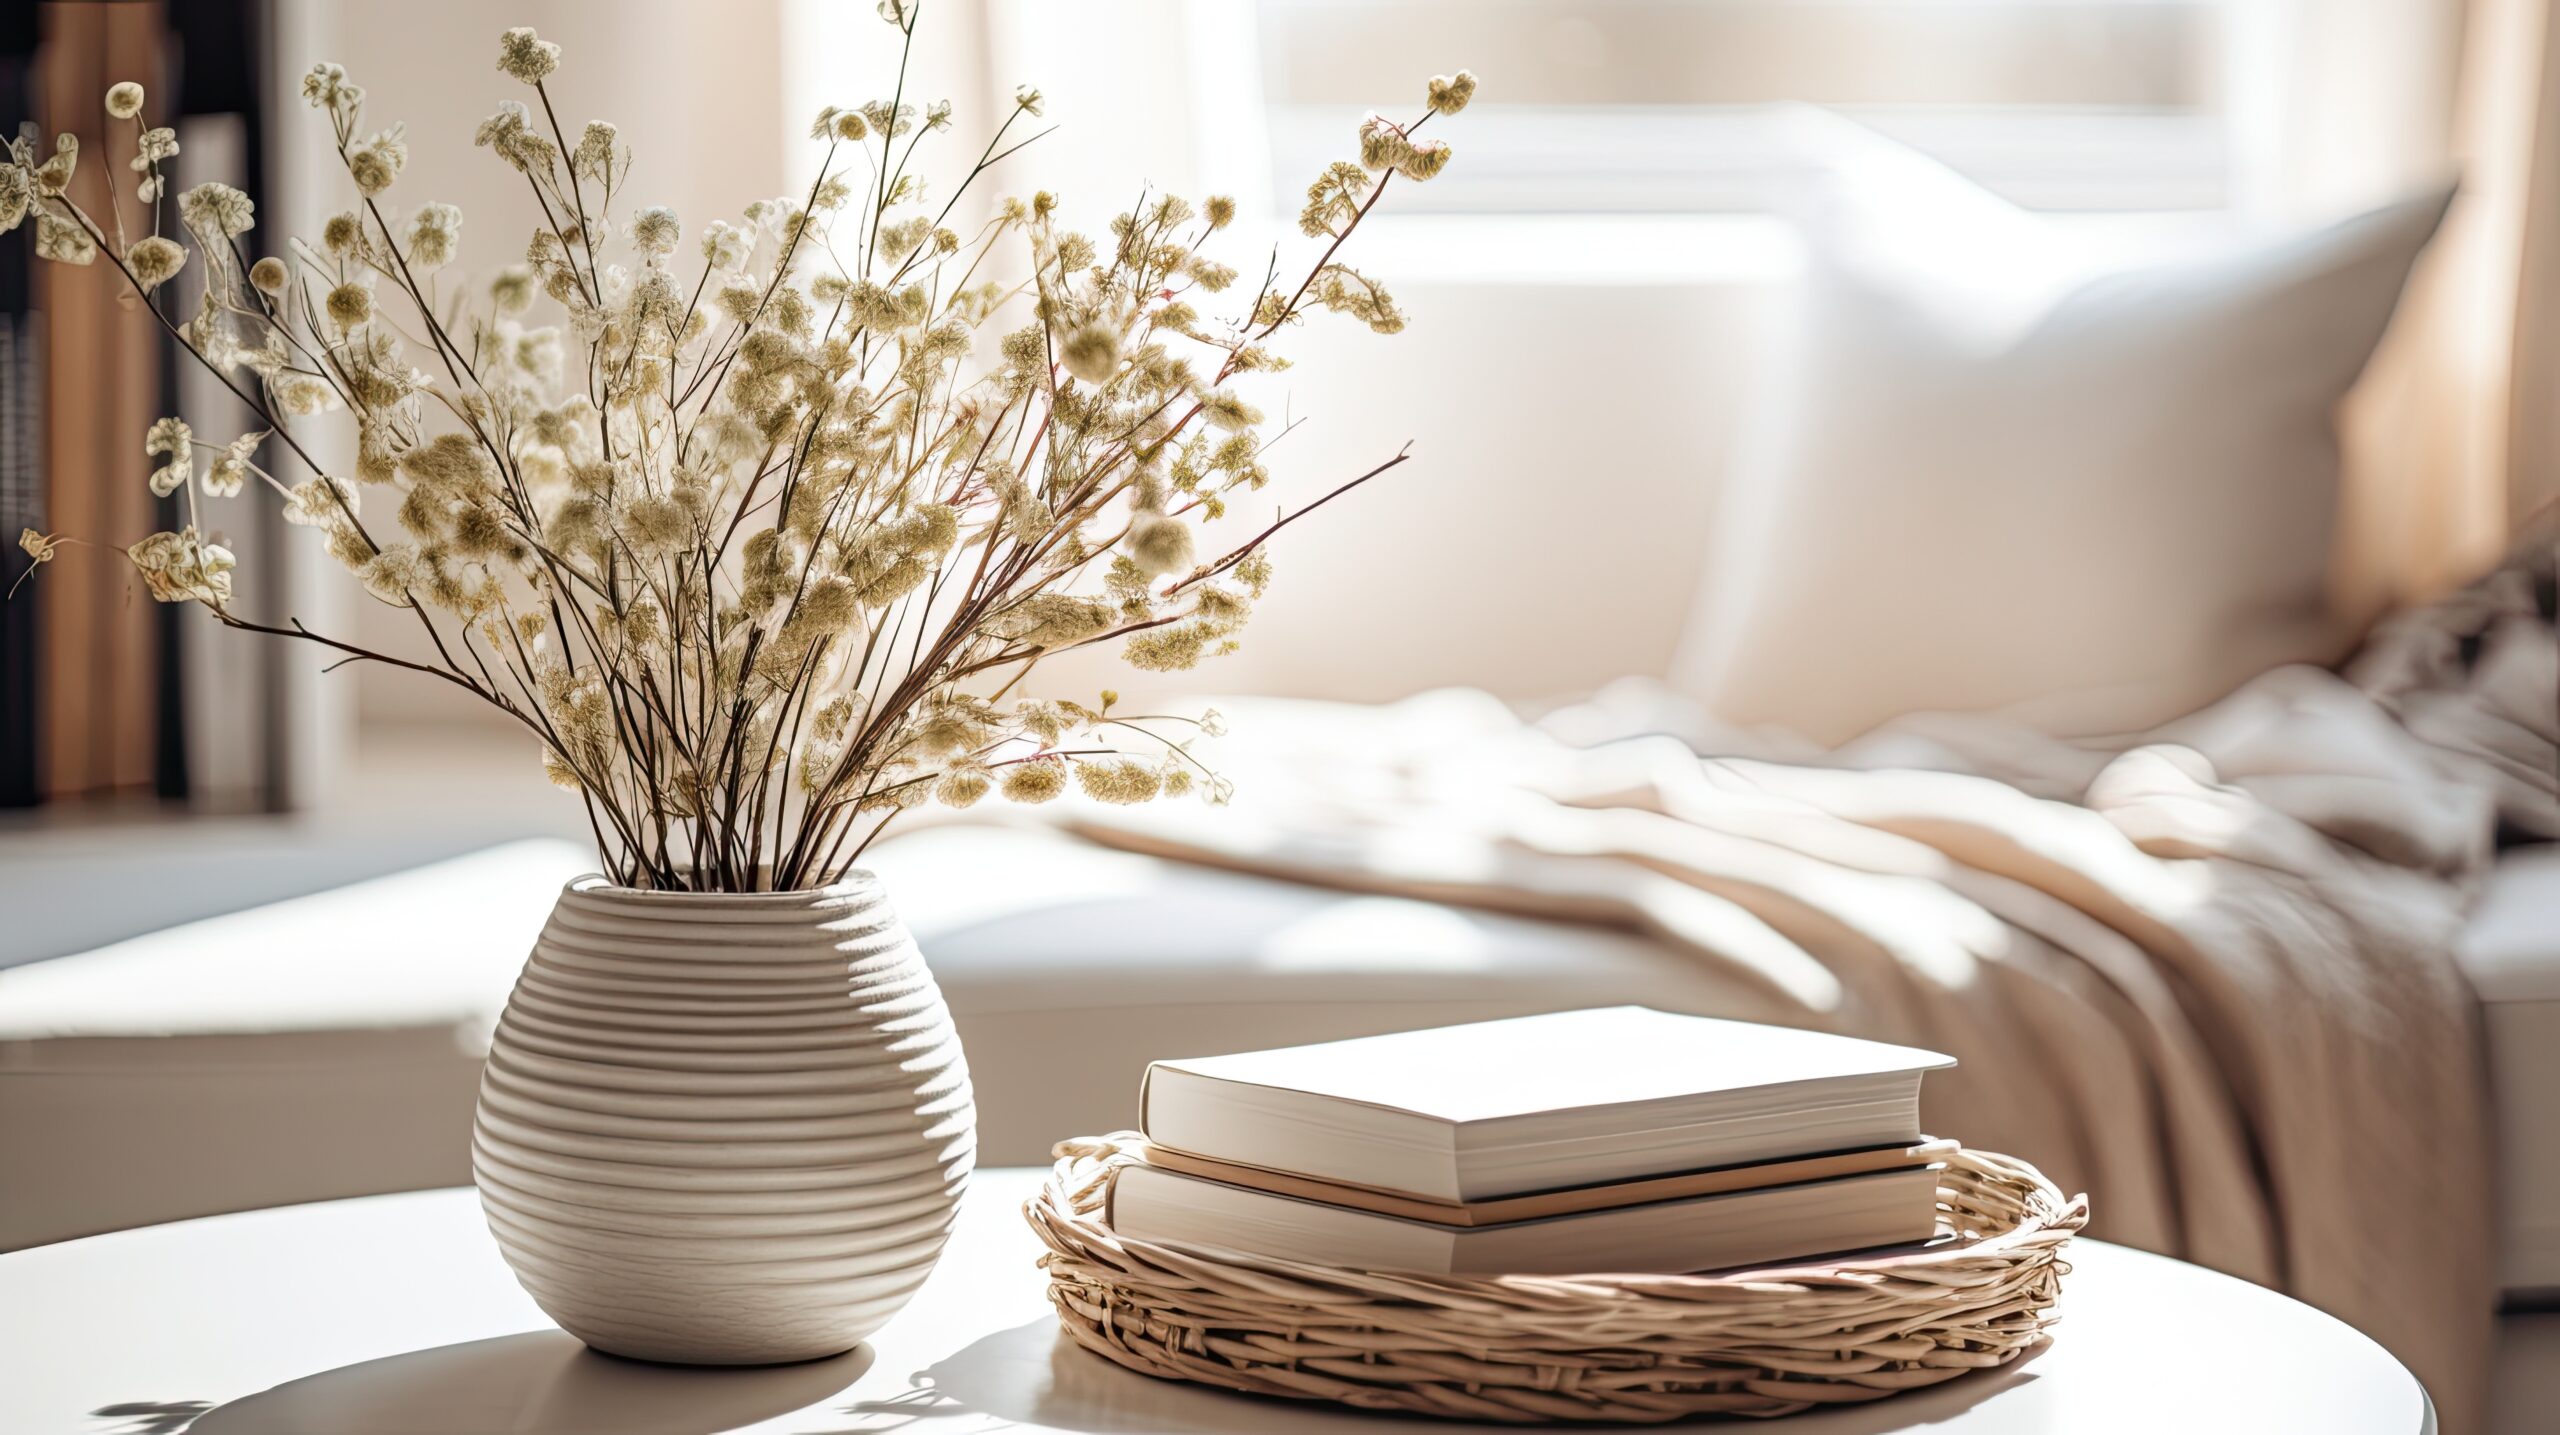
The coastal theme focuses on light, space, and natural textures. Its palette is soft and soothing with crisp whites, sandy neutrals, and gentle shades of blue at its core. Furniture often features clean lines and lightweight materials, while decor includes elements like woven baskets, linen cushions, and driftwood accents. It’s not about filling a room with nautical motifs, but rather capturing that relaxed, sunlit feeling of the shoreline.
How to Nail Coastal Style
- Let in natural light: Keep windows uncovered or use light linen curtains to enhance the brightness and openness.
- Use soft, natural colours: Whites, beiges, and blues create that fresh, coastal atmosphere.
- Incorporate texture: Think jute rugs, woven pendants, and raw timber details.
- Keep it uncluttered: Simplicity is key; choose pieces that feel easy and intentional, not overwhelming.
Among the different interior themes, coastal design stands out for its laid-back elegance and timeless charm. It’s the perfect approach if you love interiors that feel calm, unpretentious, and inspired by nature’s beauty.
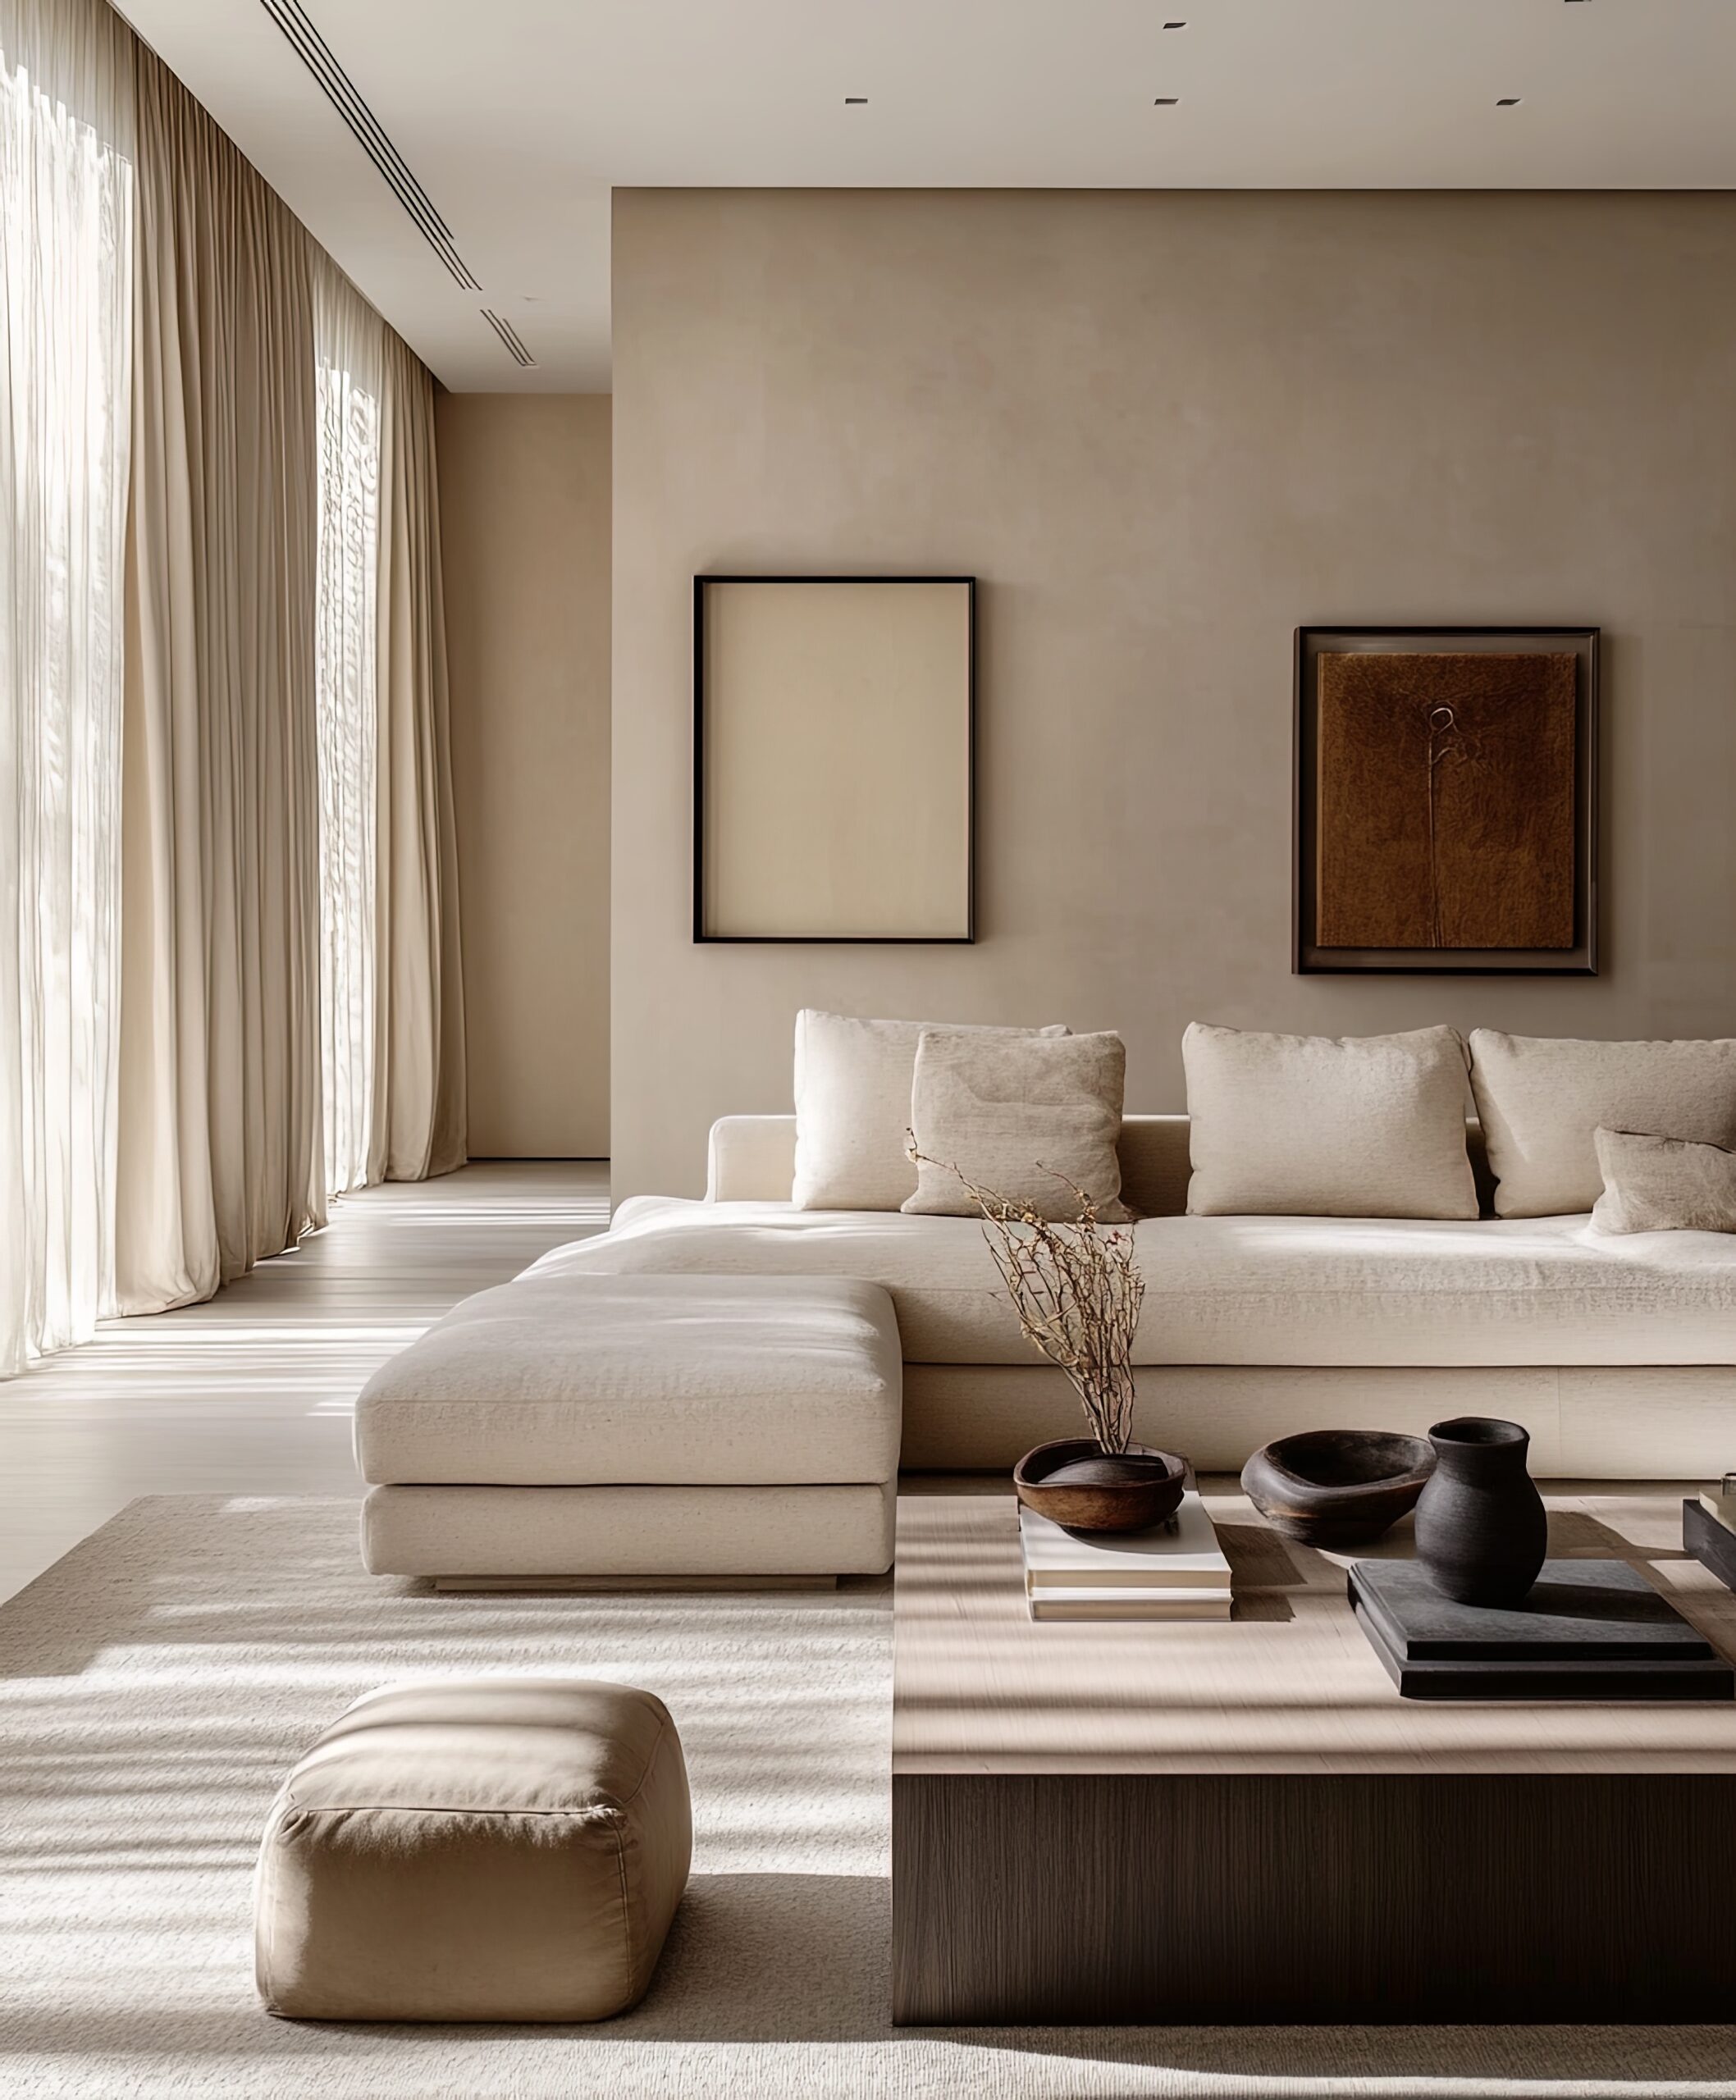
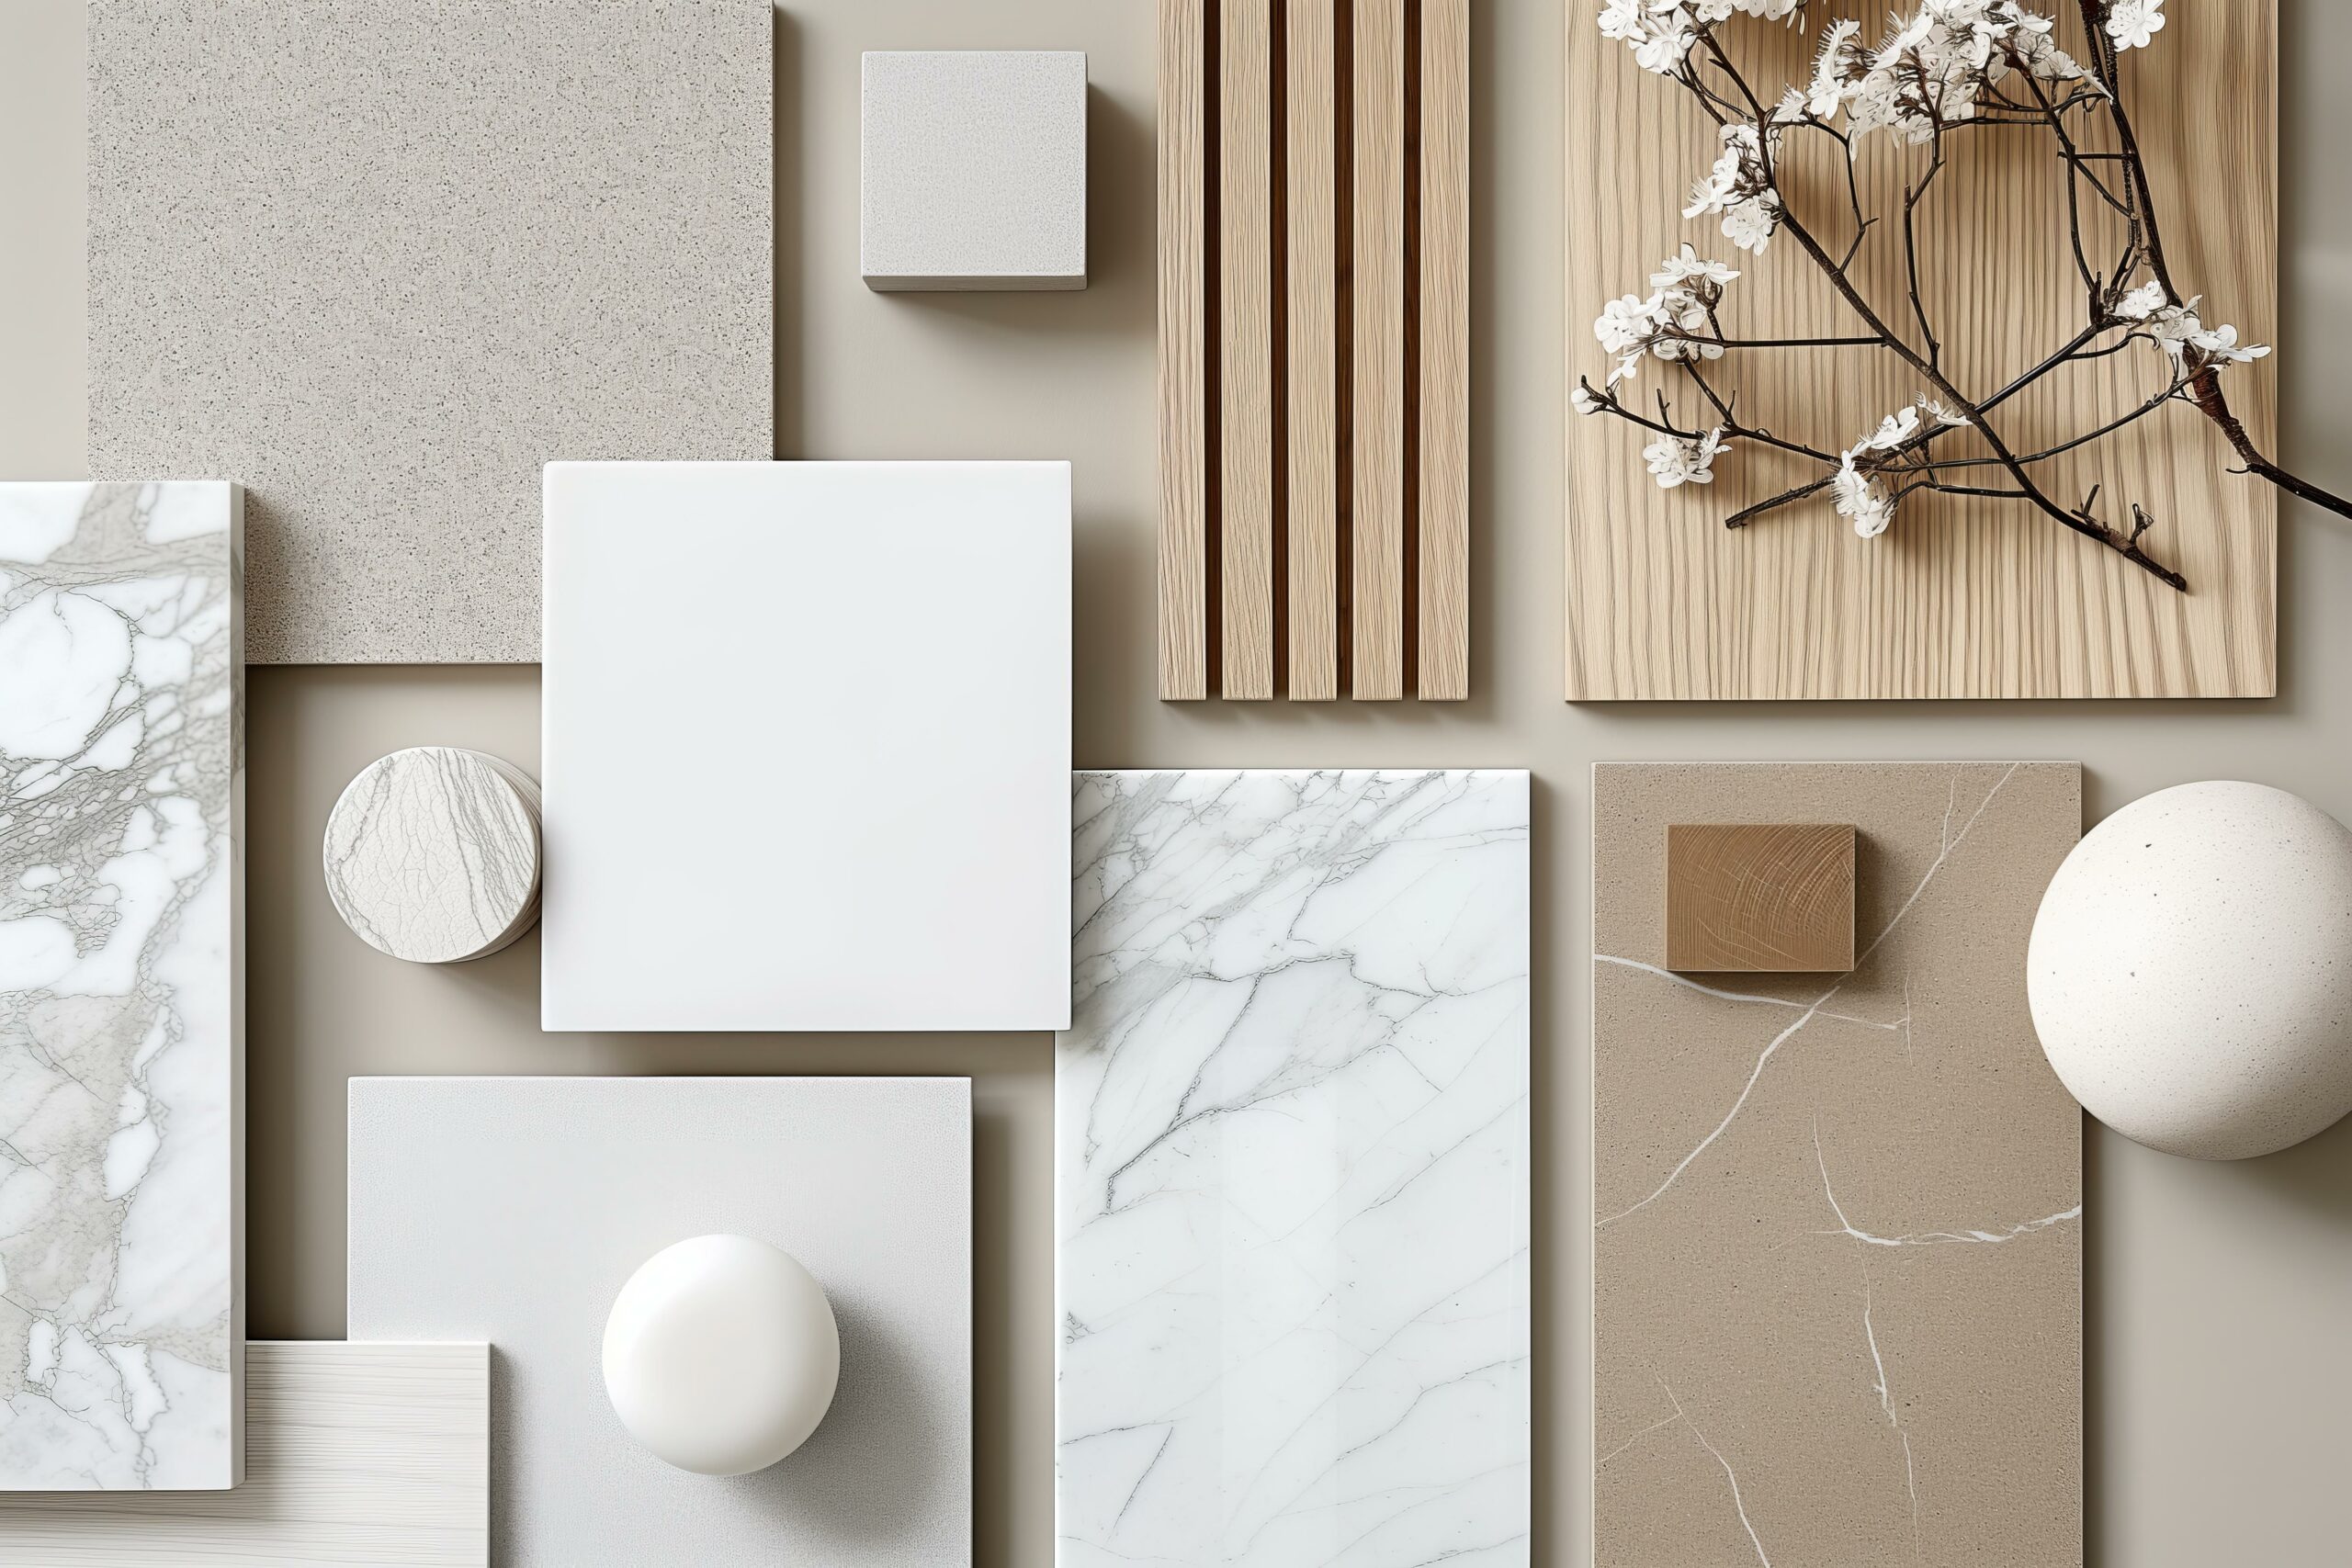
8. Japandi
Minimal, warm, and deeply intentional, Japandi style is one of the most elegant and harmonious among the different interior themes. It blends the simplicity of Japanese design with the cosiness of Scandinavian interiors, resulting in spaces that feel calm, balanced, and beautifully understated.
What Defines This Theme
Japandi design centres on the idea of wabi-sabi, finding beauty in imperfection, combined with Scandinavian functionality. The look is refined but not cold, natural but never overly rustic. Expect muted earth tones, sleek furniture with organic shapes, and a focus on craftsmanship and quality. Every piece serves a purpose, and clutter is kept to a minimum.
How to Nail Japandi Style
- Keep it simple: Choose essential furniture and decor, leaving plenty of negative space for visual calm.
- Layer natural materials: Mix light timbers, ceramics, linen, and stone for soft contrast and warmth.
- Stick to muted tones: Neutral hues like beige, taupe, grey, and soft black define the palette.
- Embrace craftsmanship: Prioritise quality materials and well-made pieces that last.
Among the different interior themes, Japandi resonates for its serenity and purpose. It invites you to slow down, appreciate the details, and create a home that feels grounded, thoughtful, and timeless.
9. Art Deco
Elegant, bold and full of glamour, Art Deco is one of the most expressive and luxurious among the different interior themes. Emerging in the early 20th century, it’s a style that celebrates opulence, symmetry, and statement design.
What Defines This Theme
Art Deco is instantly recognisable for its geometric patterns, rich colours and metallic finishes. Think gold, brass, marble, and lacquered wood paired with plush fabrics like velvet or silk. Statement lighting, curved edges, and architectural details are all signatures of this look. The overall effect is sophisticated and dramatic; every element feels intentional and confident.
How to Nail Art Deco Style
- Play with geometry: Choose furniture and decor with angular lines or bold shapes for instant visual impact.
- Go bold but balanced: Mix deep jewel tones with metallic highlights; emerald, navy, and gold work beautifully together.
- Incorporate luxe materials: Velvet, glass, marble, and brass add texture and elegance.
- Add statement pieces: A sculptural lamp, ornate mirror, or chandelier can become the centrepiece of the room.
Among the different interior themes, Art Deco stands apart for its glamour and precision. It’s perfect for anyone who appreciates the artistry of design and wants to make their space feel both sophisticated and full of character.
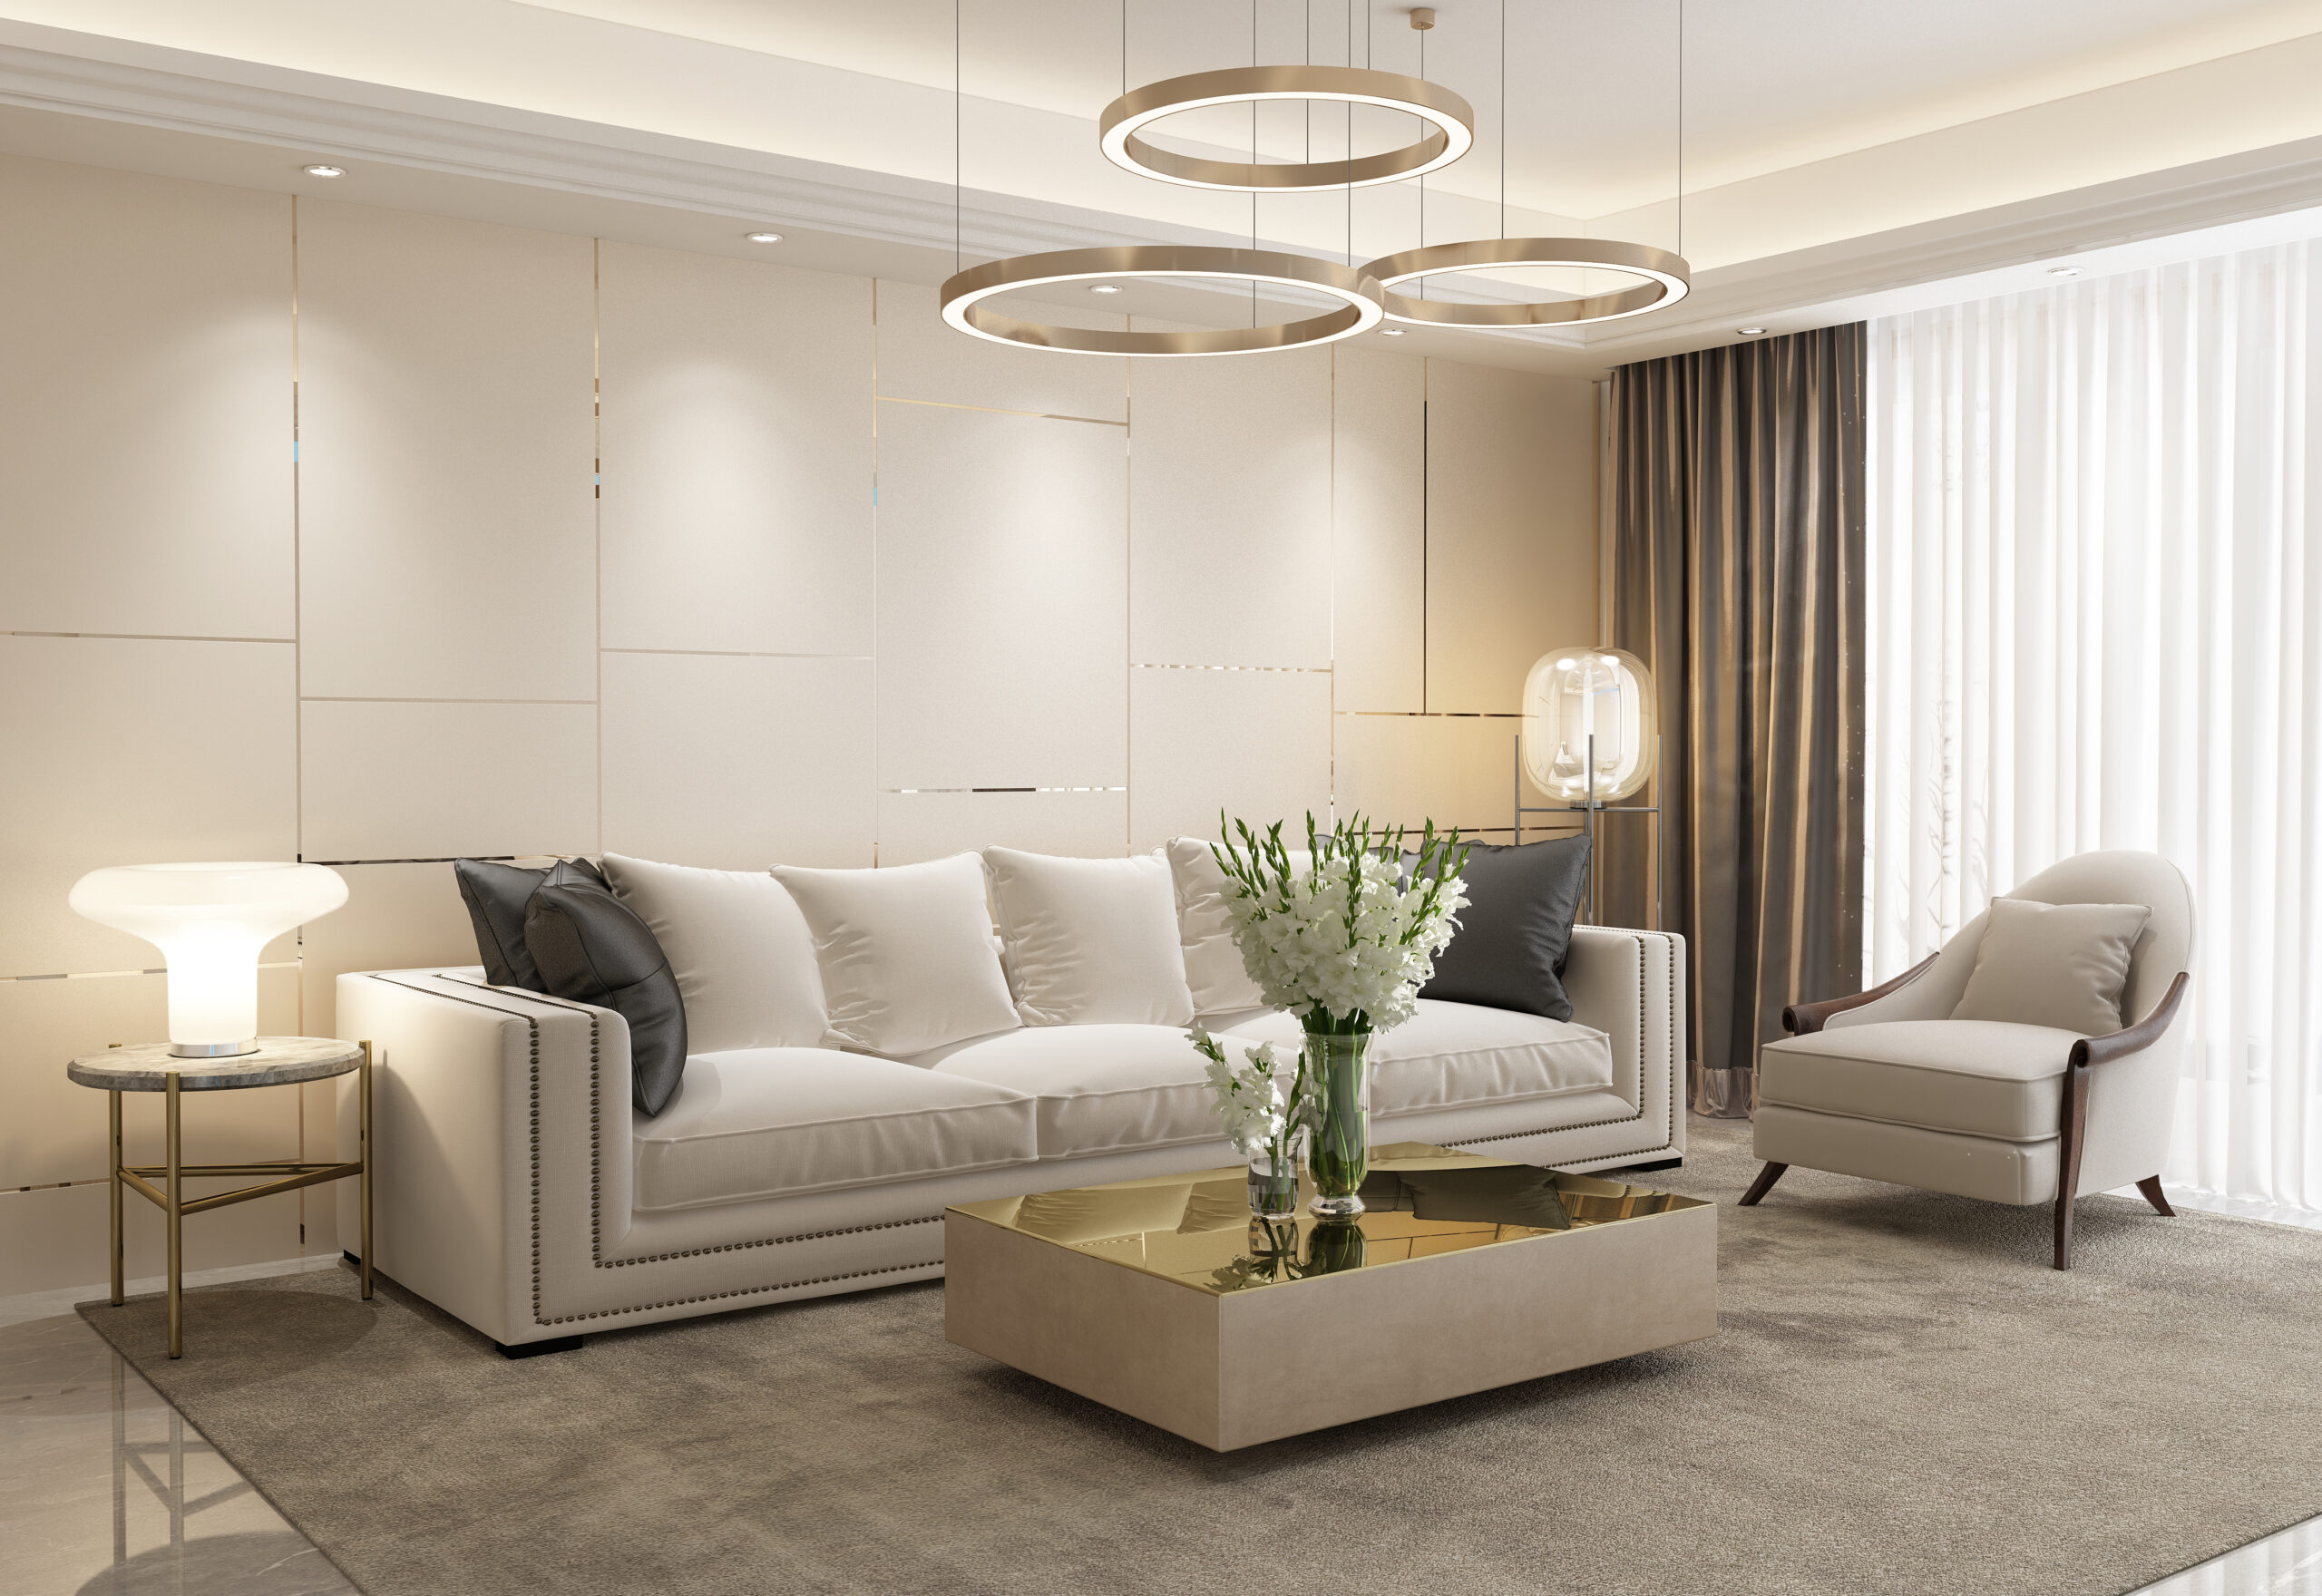
10. Traditional
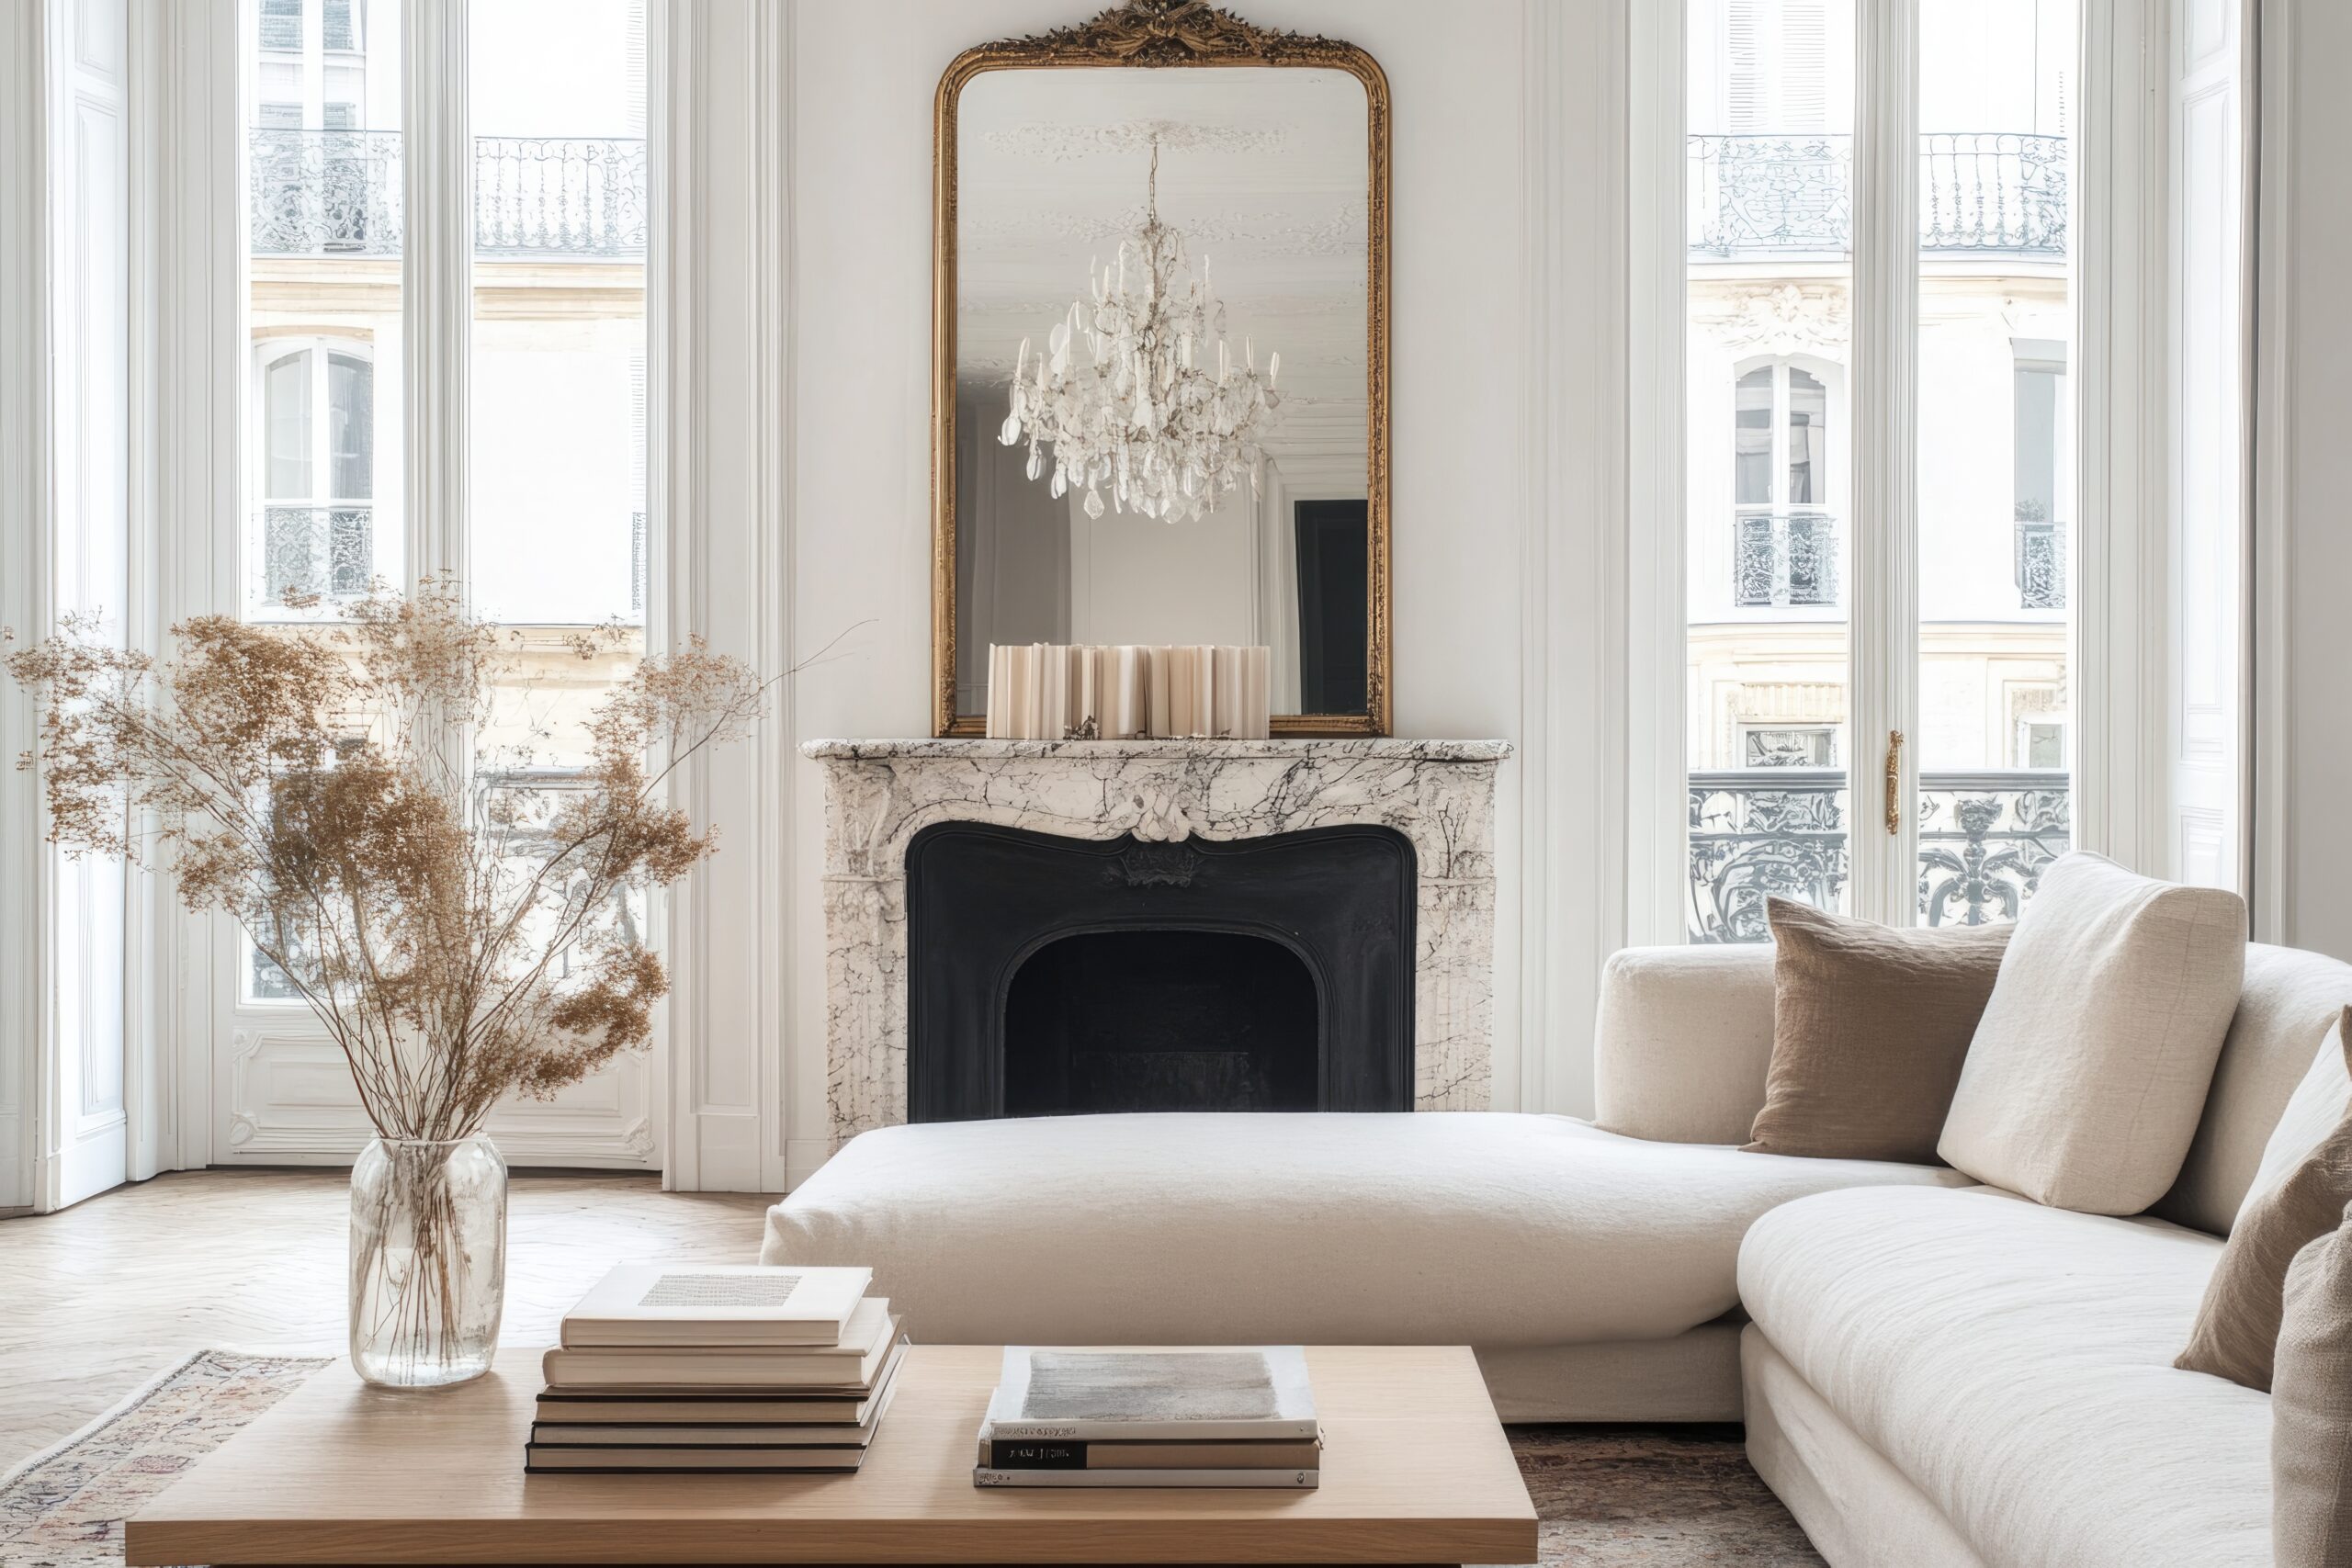
Timeless, refined, and full of character, the traditional style remains one of the most enduring among the different interior themes. It draws inspiration from classic European interiors, offering a sense of structure, symmetry, and elegance that never goes out of style.
What Defines This Theme
Traditional design focuses on balance and harmony. You’ll often see rich wood tones, detailed mouldings, and furnishings with graceful lines. Patterns like damask, florals, and stripes are common, complemented by warm, muted colours, think creams, soft golds, and deep blues or greens. Accessories and decor pieces are chosen purposefully, creating a polished yet inviting atmosphere.
How to Nail Traditional Style
- Keep symmetry in mind: Arrange furniture and decor in balanced pairs for a cohesive, graceful layout.
- Choose classic materials: Polished timber, brass details, and quality upholstery define this look.
- Embrace layering: Use rugs, curtains, and cushions to add richness and depth without overwhelming the space.
- Mix patterns thoughtfully: Coordinate prints with similar tones or motifs to maintain a sense of harmony.
Among the different interior themes, traditional design shines for its enduring beauty and sense of comfort. It feels intentional and complete, celebrating craftsmanship and a timeless approach to decorating that always feels just right.
11. Eclectic
Vibrant, personal, and full of character, the eclectic style is one of the most creative among the different interior themes. It’s all about mixing influences, eras, and textures in a way that feels cohesive yet never overly planned, a curated expression of individuality through design.
What Defines This Theme
Eclectic interiors combine seemingly contrasting elements while still maintaining visual harmony. Colours, patterns, and materials can vary widely, but there’s always a unifying thread, whether that’s a consistent colour palette, a particular texture, or a common design feature. The goal isn’t randomness; it’s balance through contrast. Spaces often feel layered, collected, and full of story.
How to Nail Eclectic Style
- Find a common thread: Use a repeating colour, shape, or texture to tie different elements together.
- Mix with purpose: Combine modern and vintage pieces, but edit carefully to avoid visual clutter.
- Layer thoughtfully: Rugs, artwork, cushions, and lighting can all work together to add dimension and interest.
- Show personality: Showcase decor that reflects who you are. Books, art, and treasures collected over time give your space unmistakable character.
Among the different interior themes, eclectic design is the one that breaks the rules gracefully. It allows personal taste to take centre stage while still feeling cohesive and balanced. Done well, it creates a space that feels meaningful, dynamic, and entirely your own.
How to Choose Your Interior Theme
Once you’re familiar with the variety of different interior themes, the next step is narrowing down which one (or combination) feels right for your home. This process isn’t about following strict rules; it’s about discovering your personal aesthetic and how you want your space to function.
Start by paying attention to what you’re naturally drawn to. Browse photos of interiors, visit showrooms, or take note of textures and colours that make you feel comfortable. If you lean toward simplicity, a modern minimalist or Japandi theme might suit you. If you love character and warmth, perhaps farmhouse or eclectic fits better.
It’s also helpful to think about lifestyle and practicality. A family home may benefit from durable materials and cosy textures, while an apartment might suit cleaner lines and open layouts. Don’t be afraid to blend influences; many of the most interesting spaces borrow from multiple styles while keeping a cohesive feel through colour or texture.
Taking time to explore how different interior themes align with your taste and lifestyle will make decorating less overwhelming and far more rewarding. It ensures every choice you make feels deliberate, harmonious, and true to how you want your home to feel.
Exploring these different interior themes offers so much more than just design inspiration. It’s about finding a style that reflects how you want to live, the colours, textures, and layouts that make your home feel uniquely yours. Each theme has its own mood, purpose, and personality, from the calm of Japandi and Scandinavian styles to the expressive energy of Bohemian and Eclectic spaces.
by Kesaa Interiors | Beginner Design Guides, DESIGN GUIDES, Furniture & Layout Guides, Living Room, Room-by-Room Guides, ROOMS
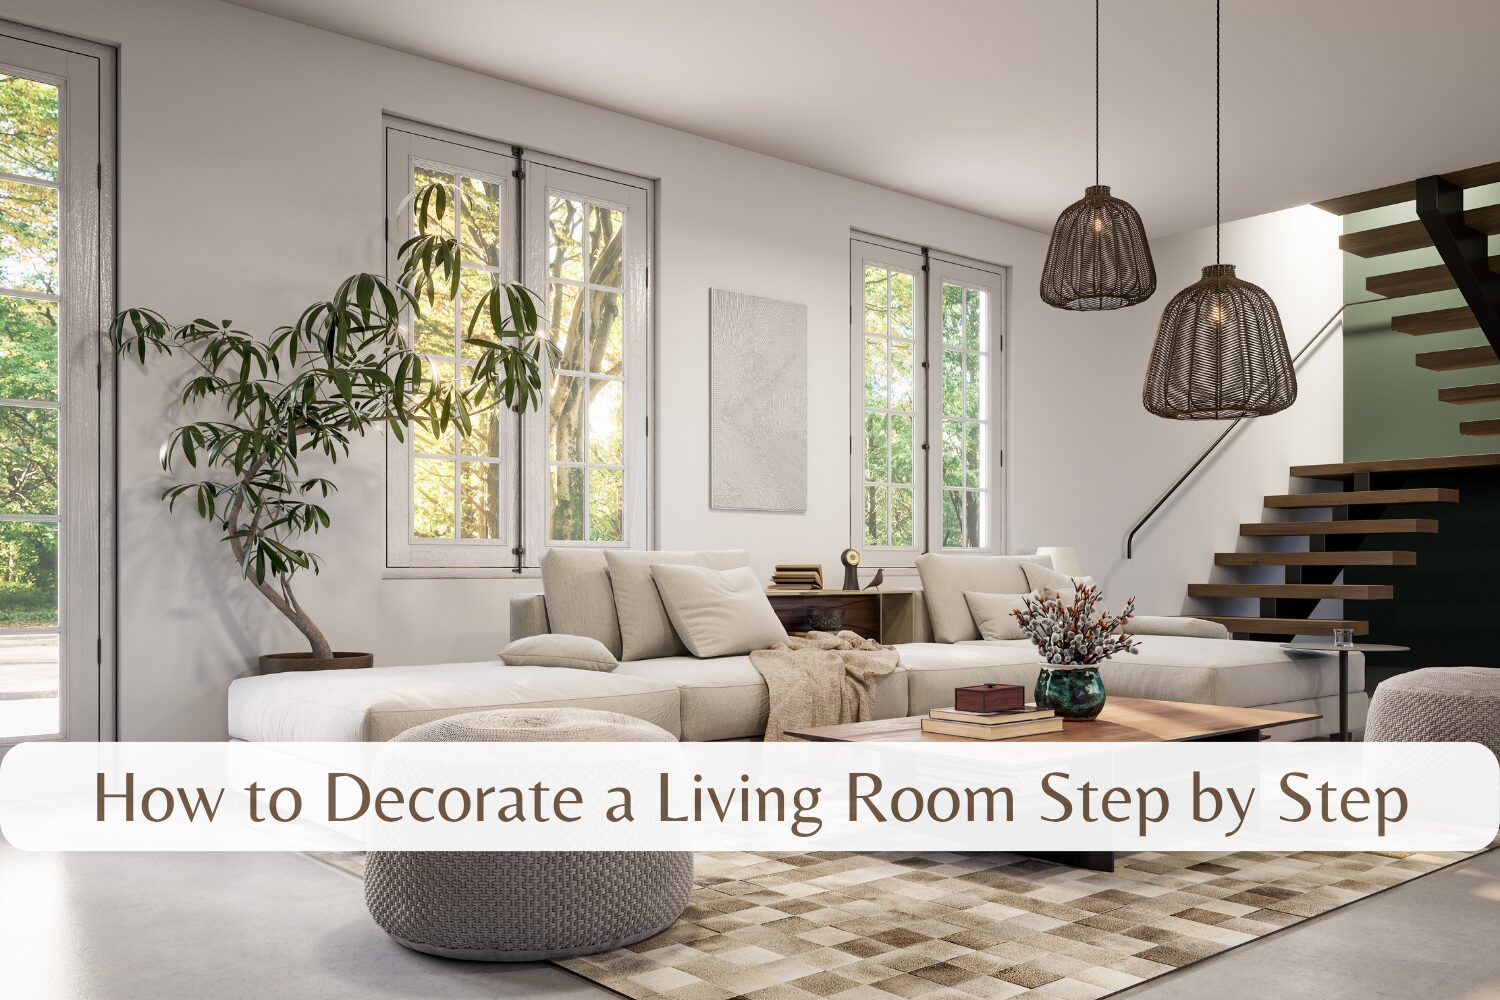
This post is all about How to decorate a living room step by step.
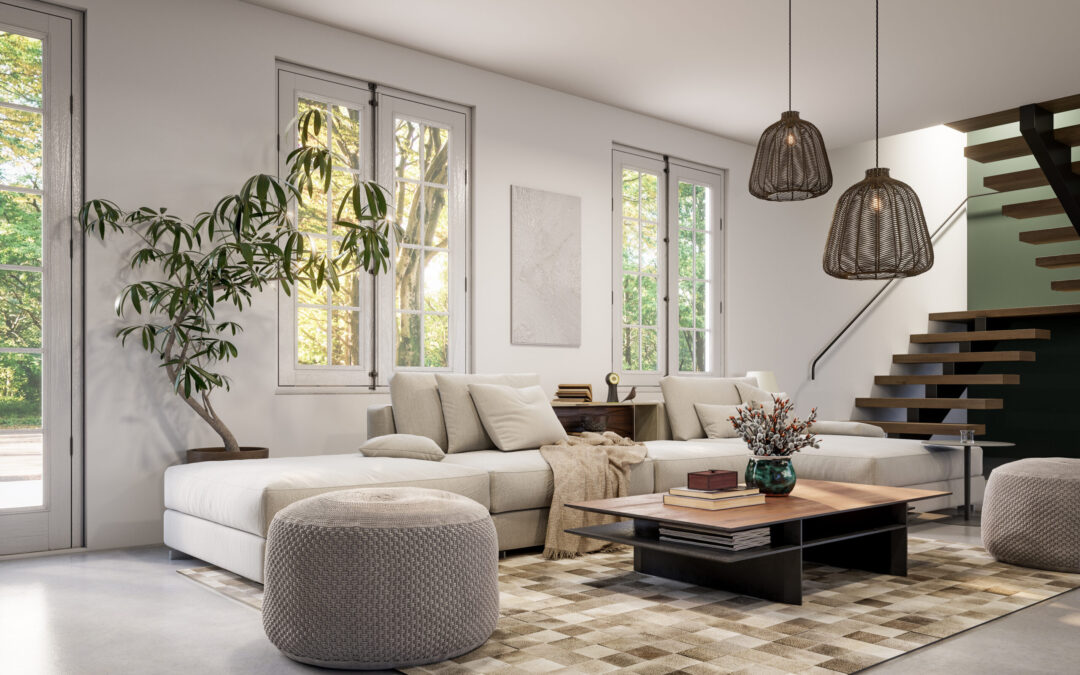
The living room is where life happens. It’s where we unwind after long days, gather with friends, and create countless memories. Yet for many homeowners, decorating this central space feels overwhelming. I’ve spent over a decade helping people transform their living rooms. I’ve learned that the key isn’t having an unlimited budget or innate design talent—it’s following a clear, systematic approach.
Learning how to decorate a living room step by step removes the guesswork and helps you make confident decisions. Instead of randomly buying pieces that might not work together, you’ll develop a cohesive plan that reflects your lifestyle and personality. This guide breaks down the entire process into manageable phases, from initial planning to those final styling touches that pull everything together.
Whether you’re starting with an empty room or refreshing an existing space, these steps will help you create a living room that’s both beautiful and functional. No design degree required—just a willingness to follow the process and trust your instincts along the way.
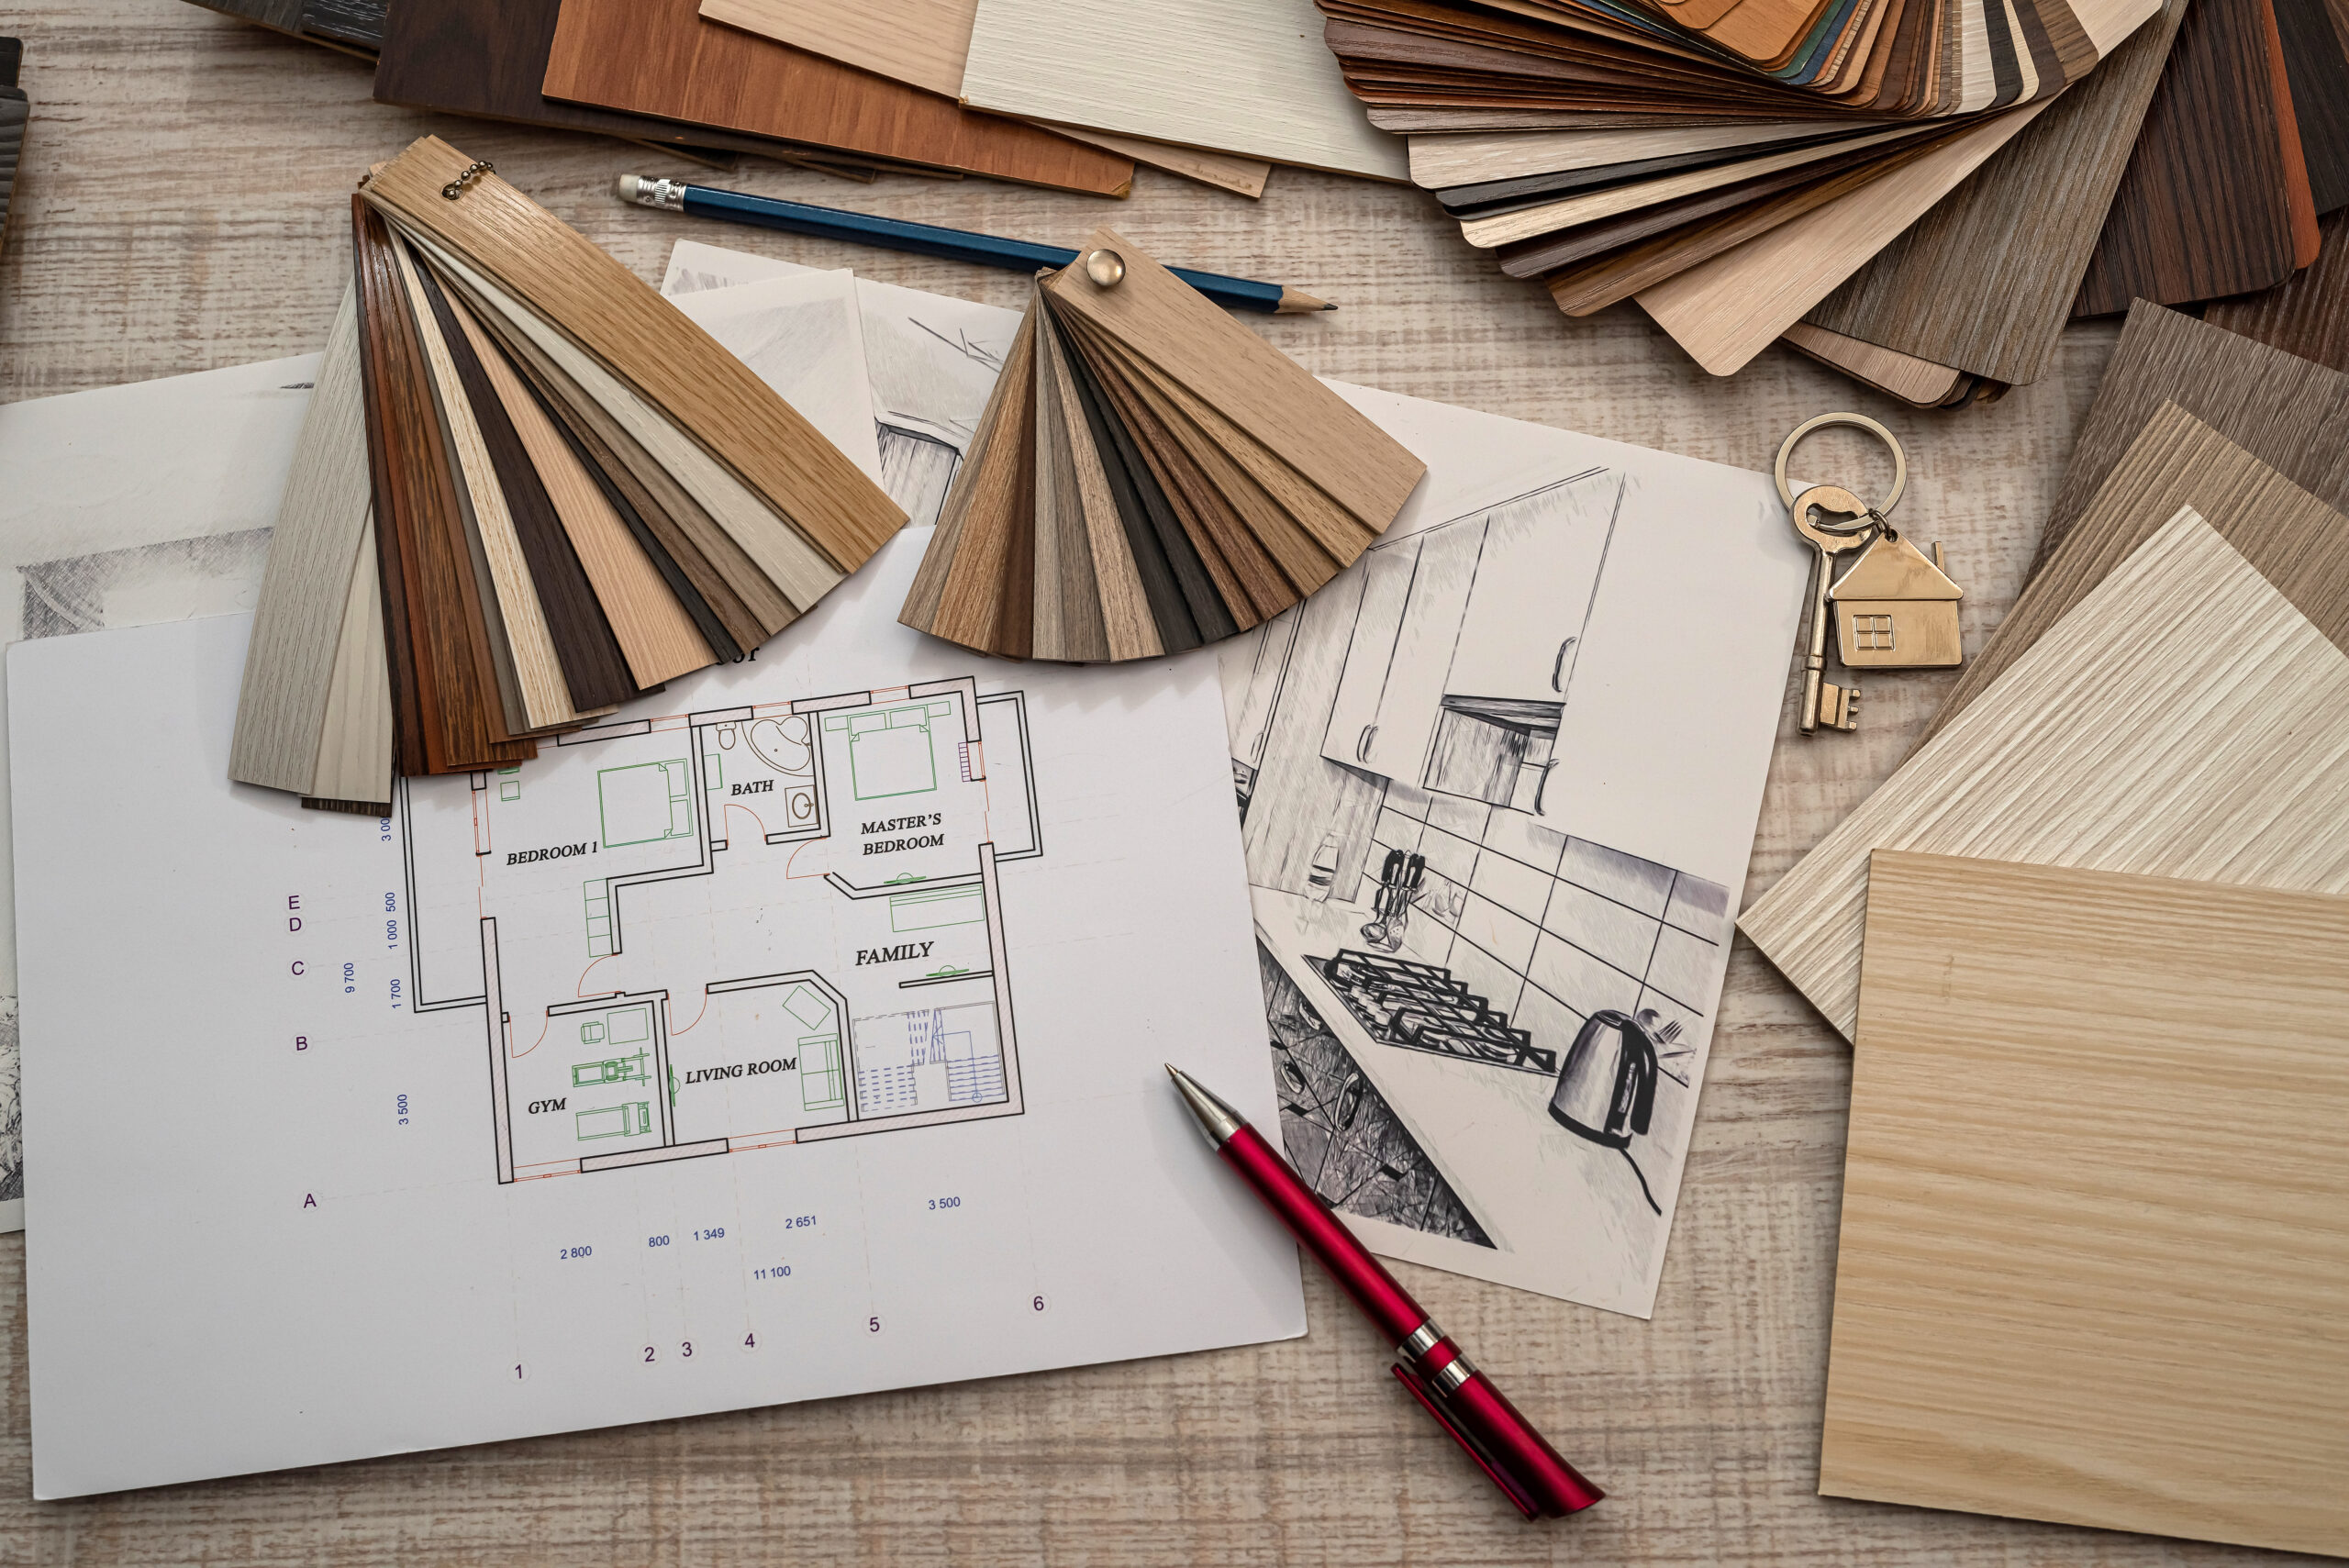
Step 1: Assess Your Space and Set Clear Goals
Before choosing a single paint colour or furniture piece, you need to understand what you’re working with. This foundational step often gets skipped, but it’s crucial for decorating a living room that actually works for your life.
Taking Stock of Your Space
Start by grabbing a measuring tape and a notebook. Document every dimension—wall lengths, ceiling height, window and door placements—and note where your electrical outlets and cable connections are located. These practical details will guide every decision you make later.
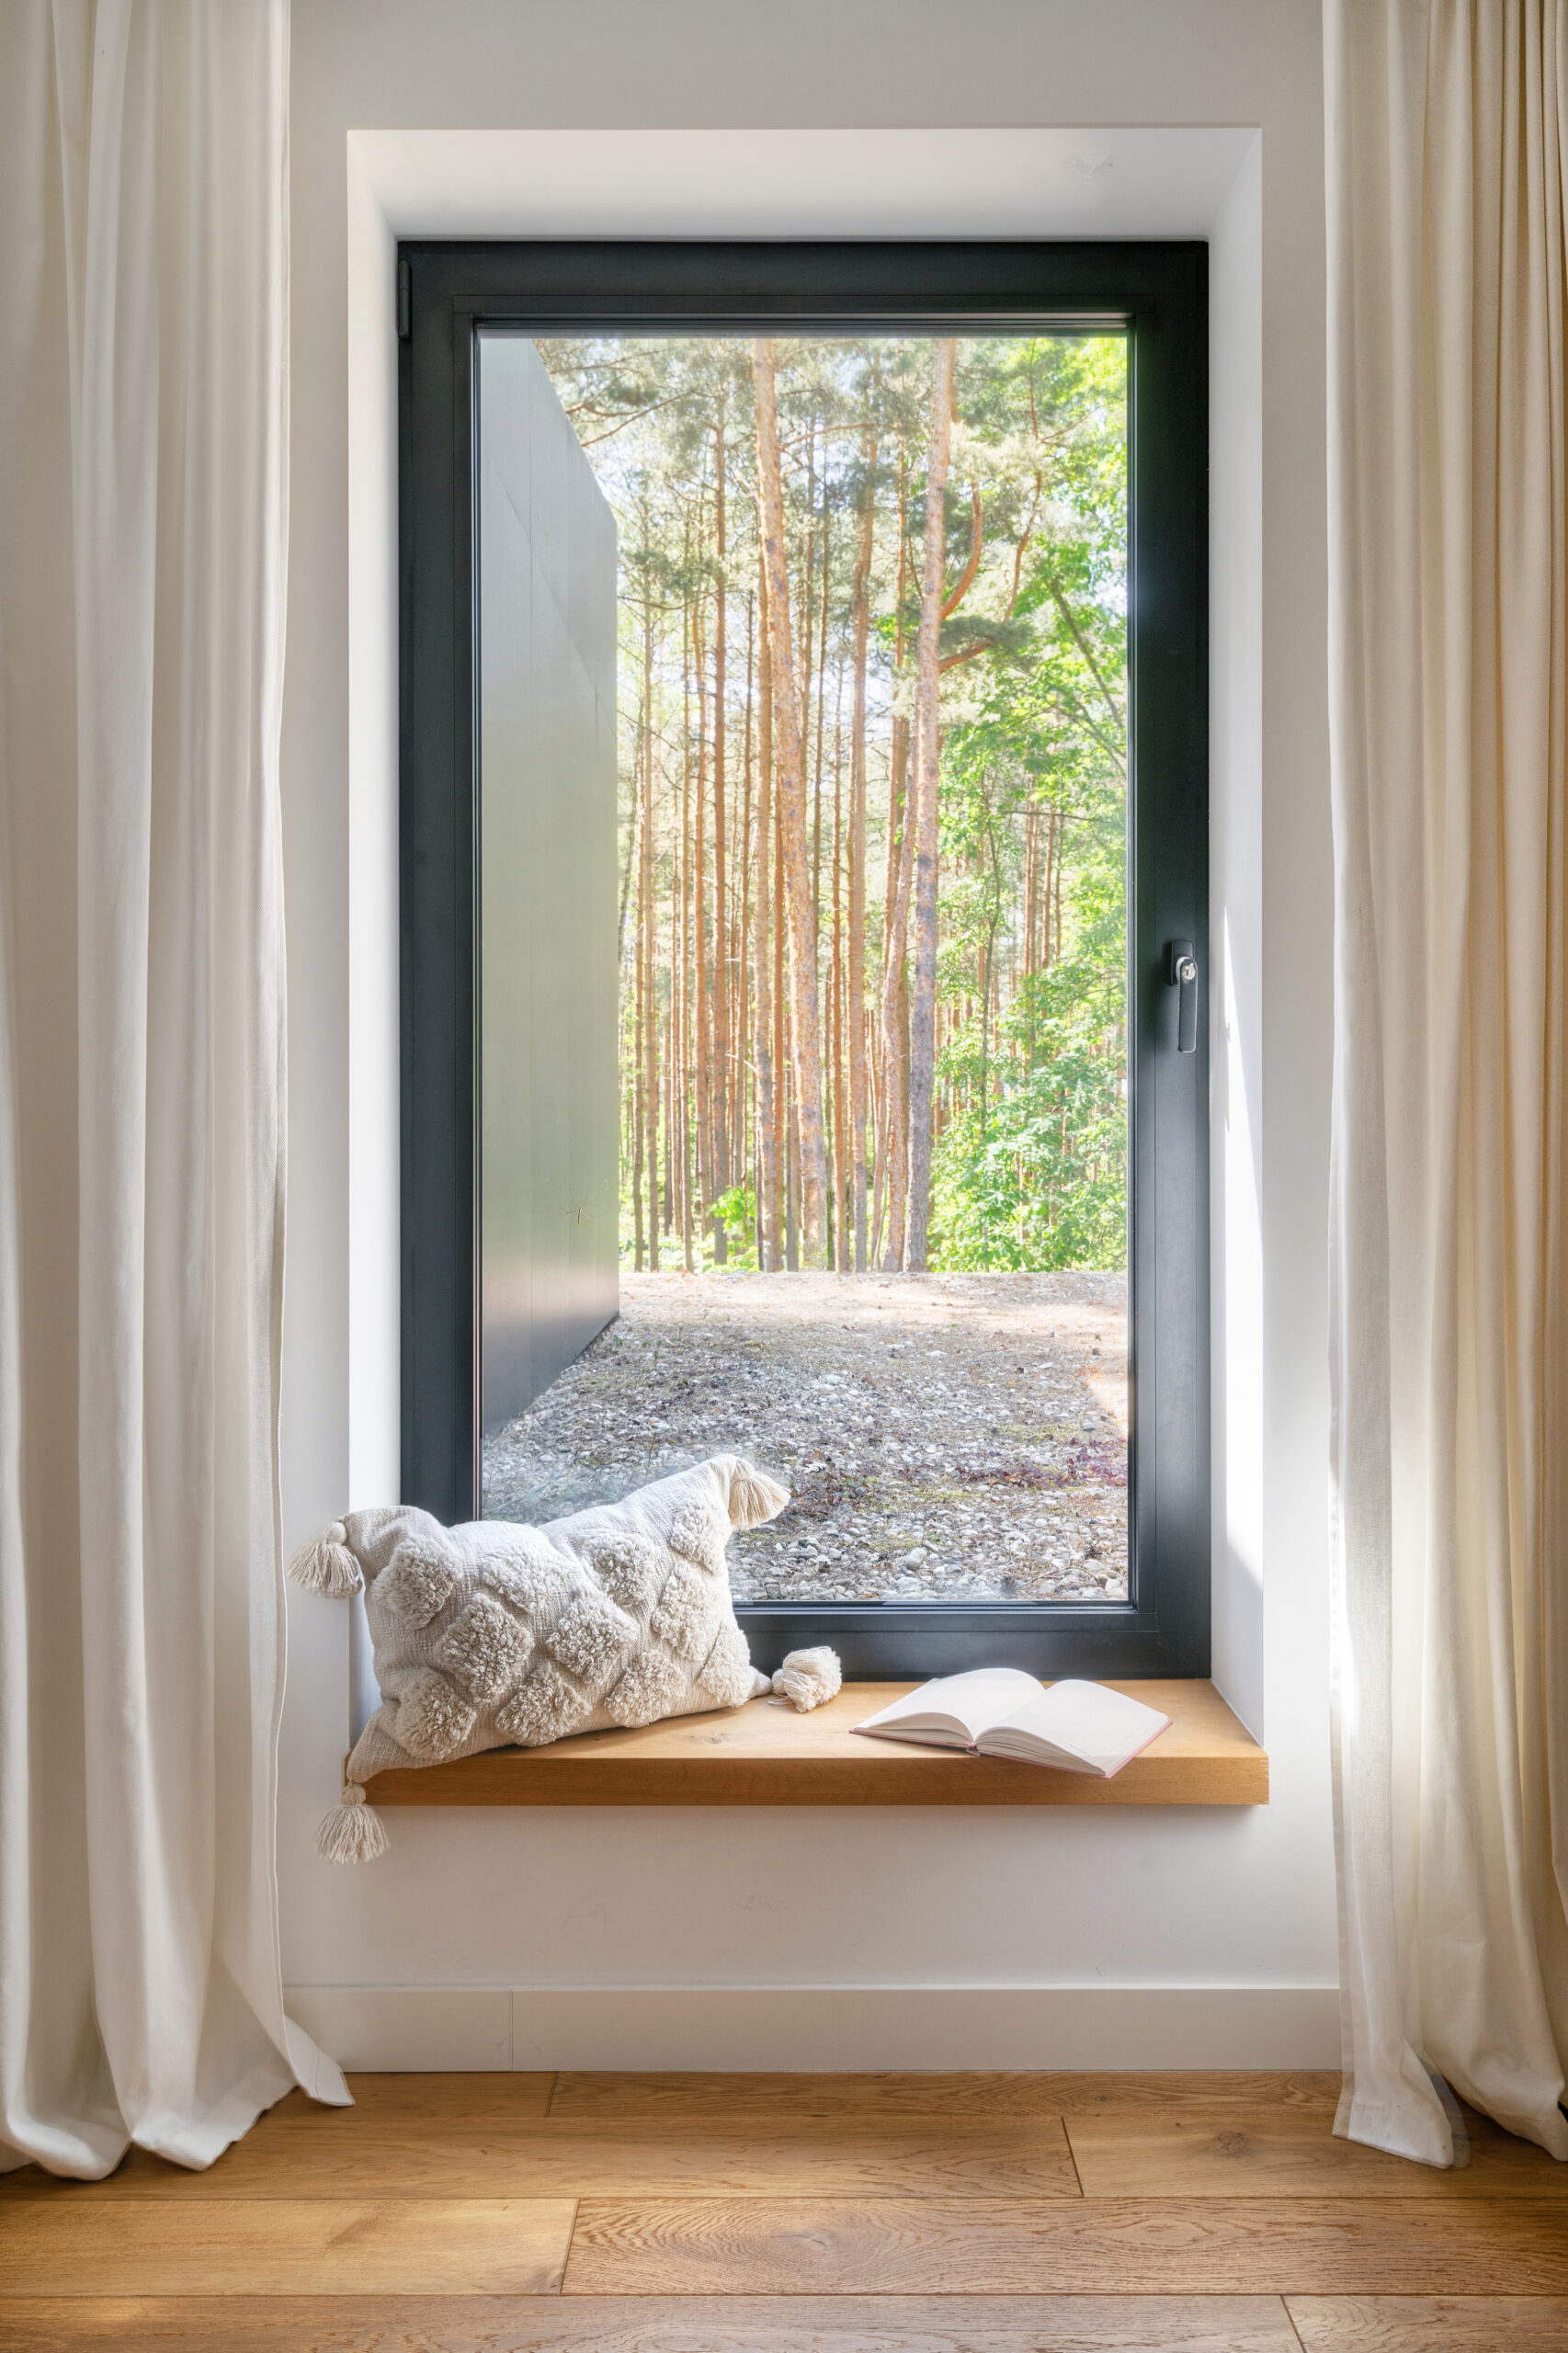
Pay attention to architectural features too. That awkward corner or structural column might seem like a challenge now, but it could become a design opportunity. Maybe it’s the perfect spot for a reading chair or a place to showcase tall plants. Understanding your room’s quirks helps you work with them rather than against them.
Understanding How You’ll Actually Use the Room
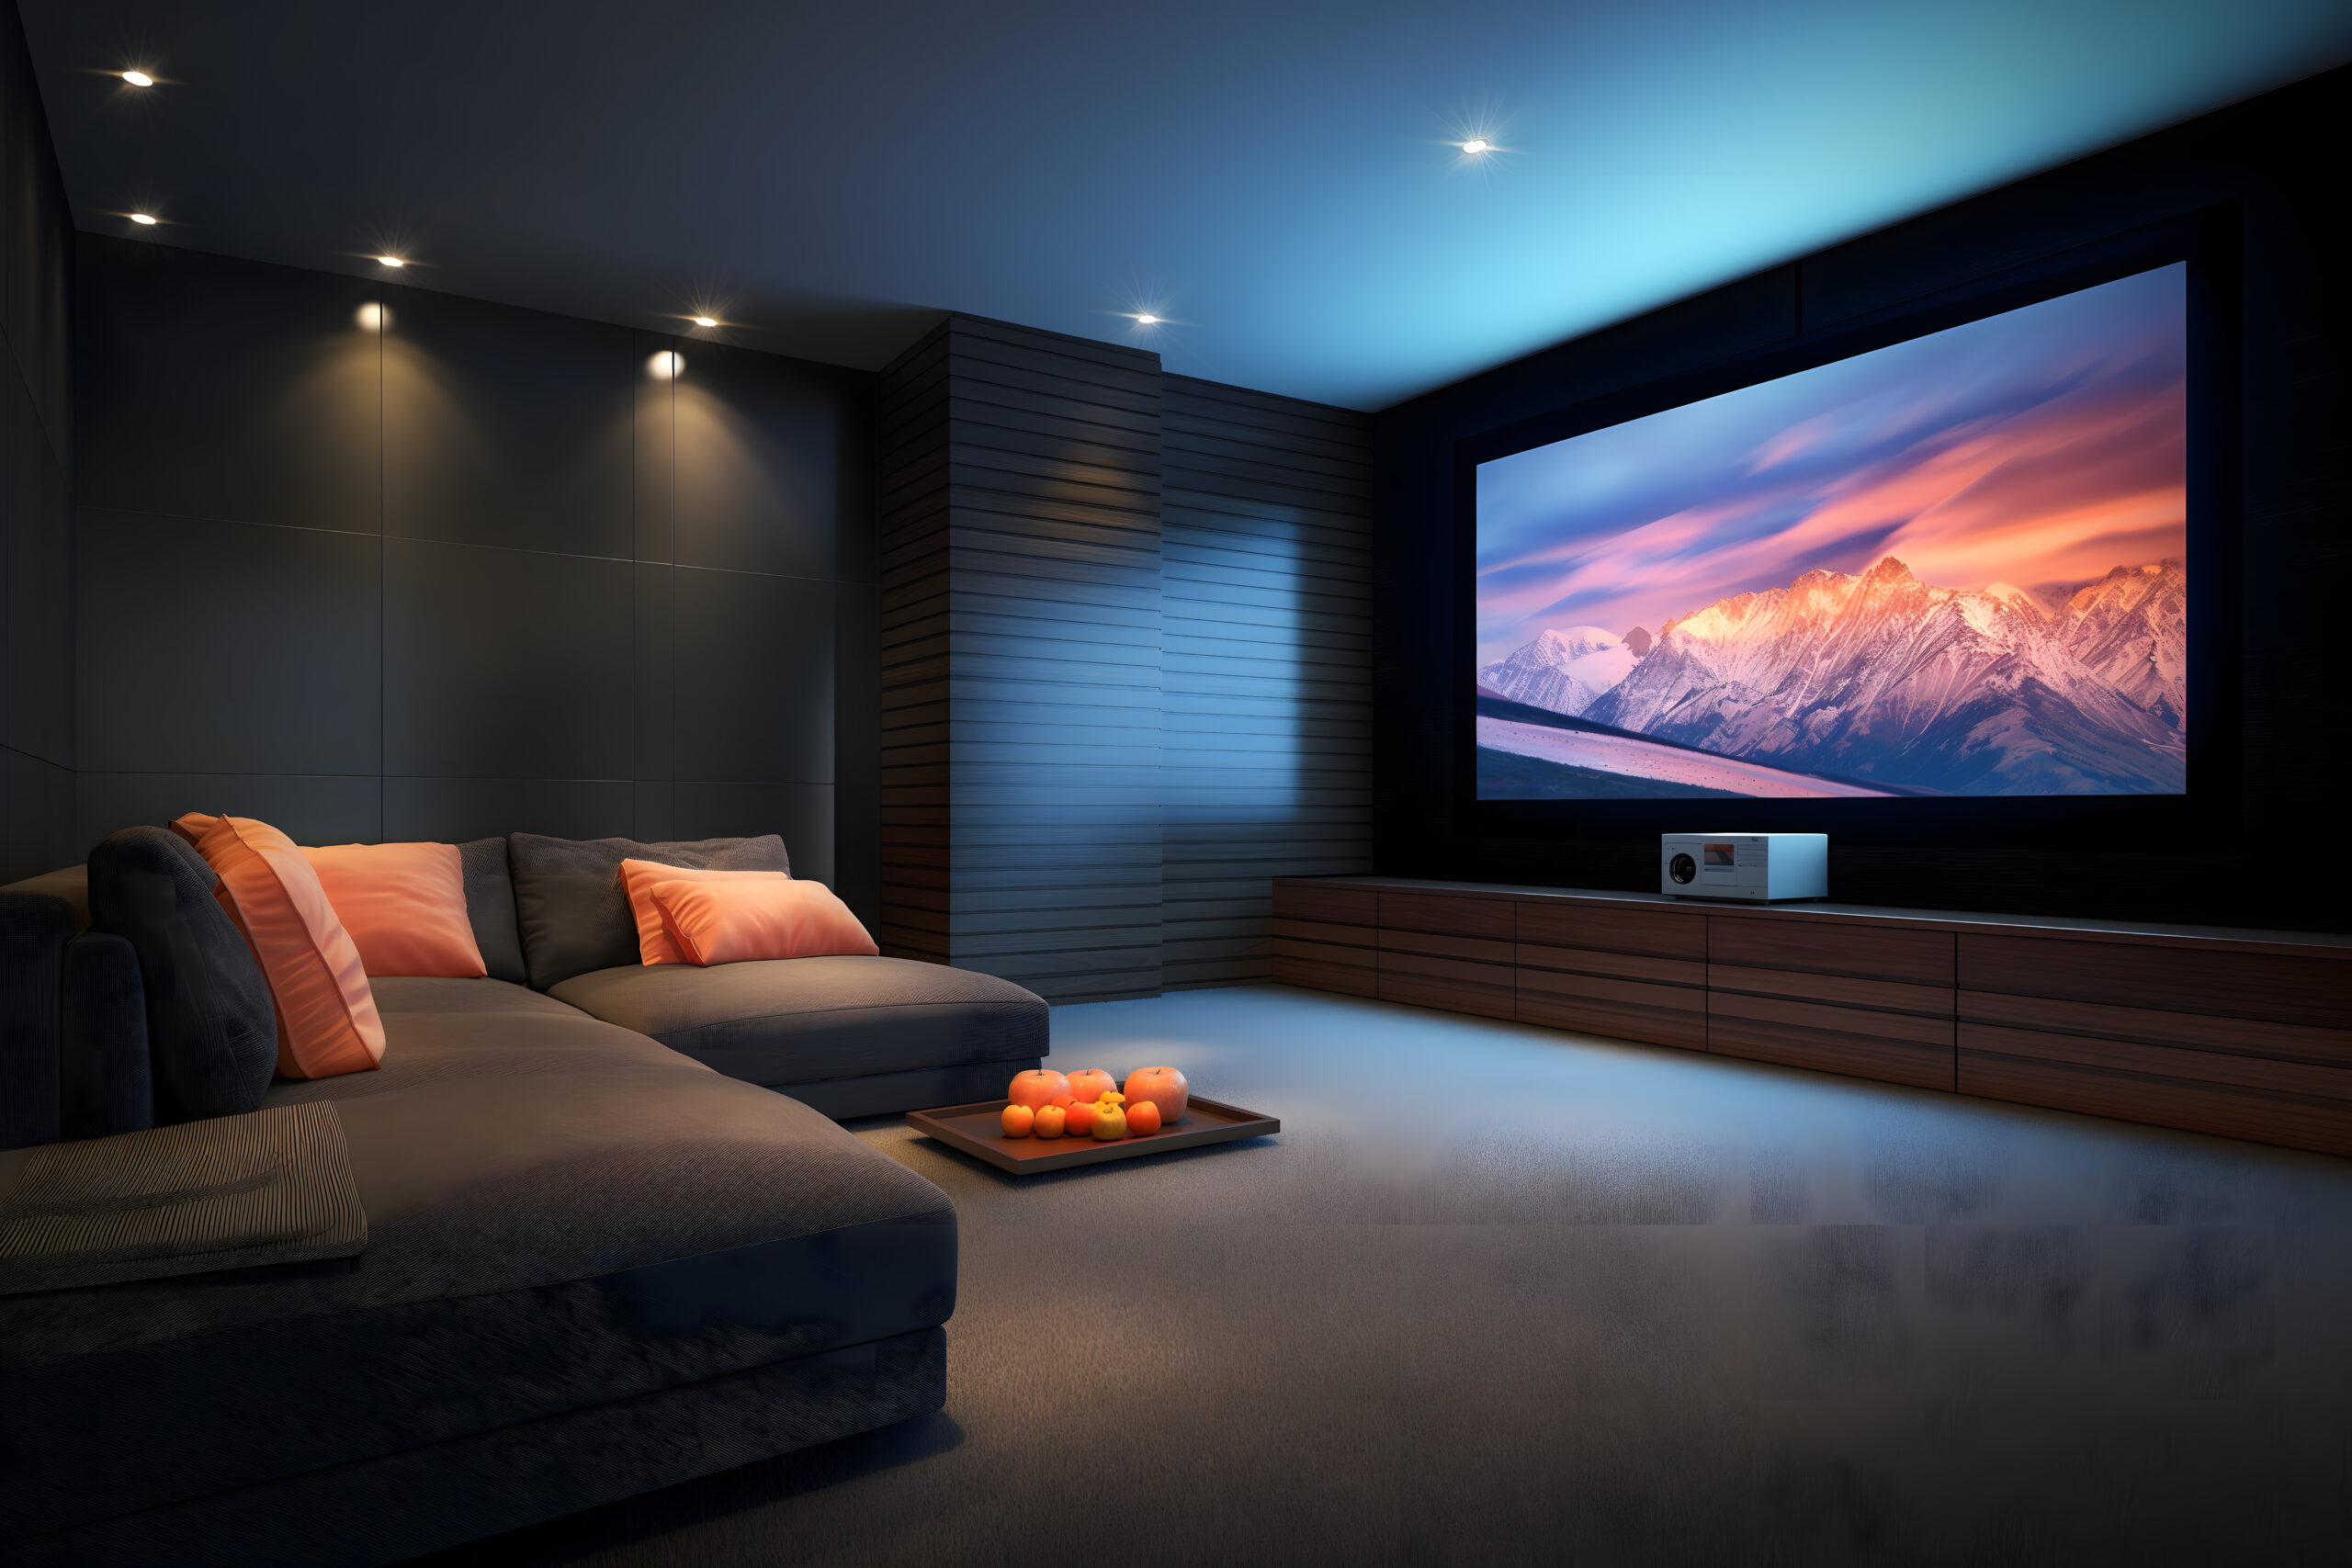
Here’s where many people get tripped up—they design for a fantasy lifestyle instead of their real one. If you have young kids, that pristine white sofa might not be your best choice. Love hosting game nights? You’ll need flexible seating arrangements and good lighting. Work from home occasionally? Consider incorporating a small desk area that doesn’t dominate the space.
Think about your daily routines. Do you watch TV every evening? The layout should support comfortable viewing angles. Prefer reading? Plan for task lighting and a cosy corner. When you understand how to decorate a living room step by step based on actual use, you create a space that enhances your life rather than complicating it.
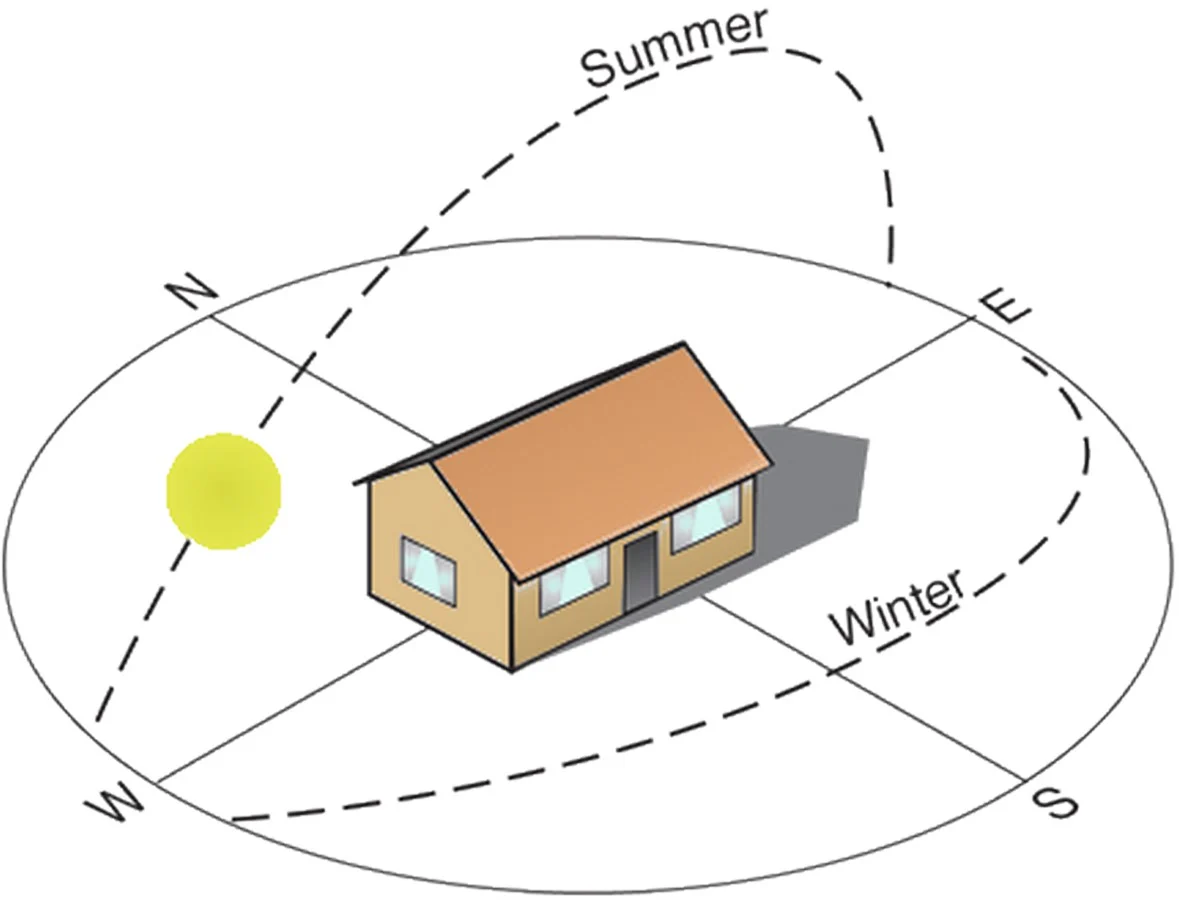
Analysing Natural Light Patterns
Spend a day observing how light moves through your room. Where does the morning sun hit? Which areas stay dim in the afternoon? This information shapes everything from paint colour choices to furniture placement. North-facing rooms need warmer colours to counteract cool light, while south-facing spaces can handle cooler tones.
Setting a Realistic Budget
Money talk isn’t glamorous, but it’s essential. Determine your total budget, then break it down: roughly 30% for major furniture, 20% for lighting, 15% for window treatments, 15% for accessories and art, and keep 20% as a buffer. This framework keeps you from blowing everything on a gorgeous sofa while forgetting you need lamps and curtains.
Remember, you don’t need to buy everything at once. Prioritise the essentials—seating, lighting, and window treatments—then layer in accessories over time. Quality basics with budget-friendly accents often look better than trying to furnish everything cheaply at once.
Creating Your Project Timeline
Decorating doesn’t happen overnight, especially if you’re doing it right. Map out a realistic timeline. Furniture delivery alone can take 8-12 weeks for custom pieces. Paint needs proper drying time between coats. If you’re planning any electrical work for new lighting, that needs to happen before painting.

By thoroughly assessing your space and setting clear goals, you’ve laid the groundwork for every decision ahead. This might feel like a lot of prep work, but trust me—spending time on this foundation saves countless headaches later. Now you’re ready to move into the fun part: defining your style and making design choices that bring your vision to life.
Step 2: Define Your Design Style and Create a Vision
Now that you understand your space and needs, it’s time to figure out what you actually want your living room to look and feel like. This step is where many people freeze up, worried about making the “wrong” choice. Here’s the thing—there’s no wrong choice if it reflects who you are and how you live.
Discovering Your Personal Style
Start by collecting images of living rooms that make you stop scrolling. Pinterest, design magazines, even screenshots from your favourite shows—gather them all. After collecting 20-30 images, patterns will emerge. Maybe you’re drawn to rooms with lots of natural wood and cosy textiles. Or perhaps sleek lines and minimal colour palettes keep catching your eye.
Don’t worry about naming your style yet. Focus on identifying what elements consistently appeal to you:
- Colour preferences (bright and bold vs. neutral and subtle)
- Material choices (warm woods vs. cool metals)
- Overall feeling (cosy and layered vs. clean and minimal)
- Pattern tolerance (mix of prints vs. solid colours)
Understanding Major Design Styles
While you don’t need to follow any style rigidly, knowing the basics helps you communicate what you want and shop more effectively. Here are the styles I see requested most often:
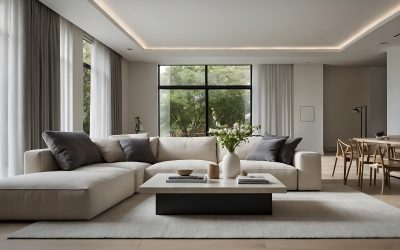
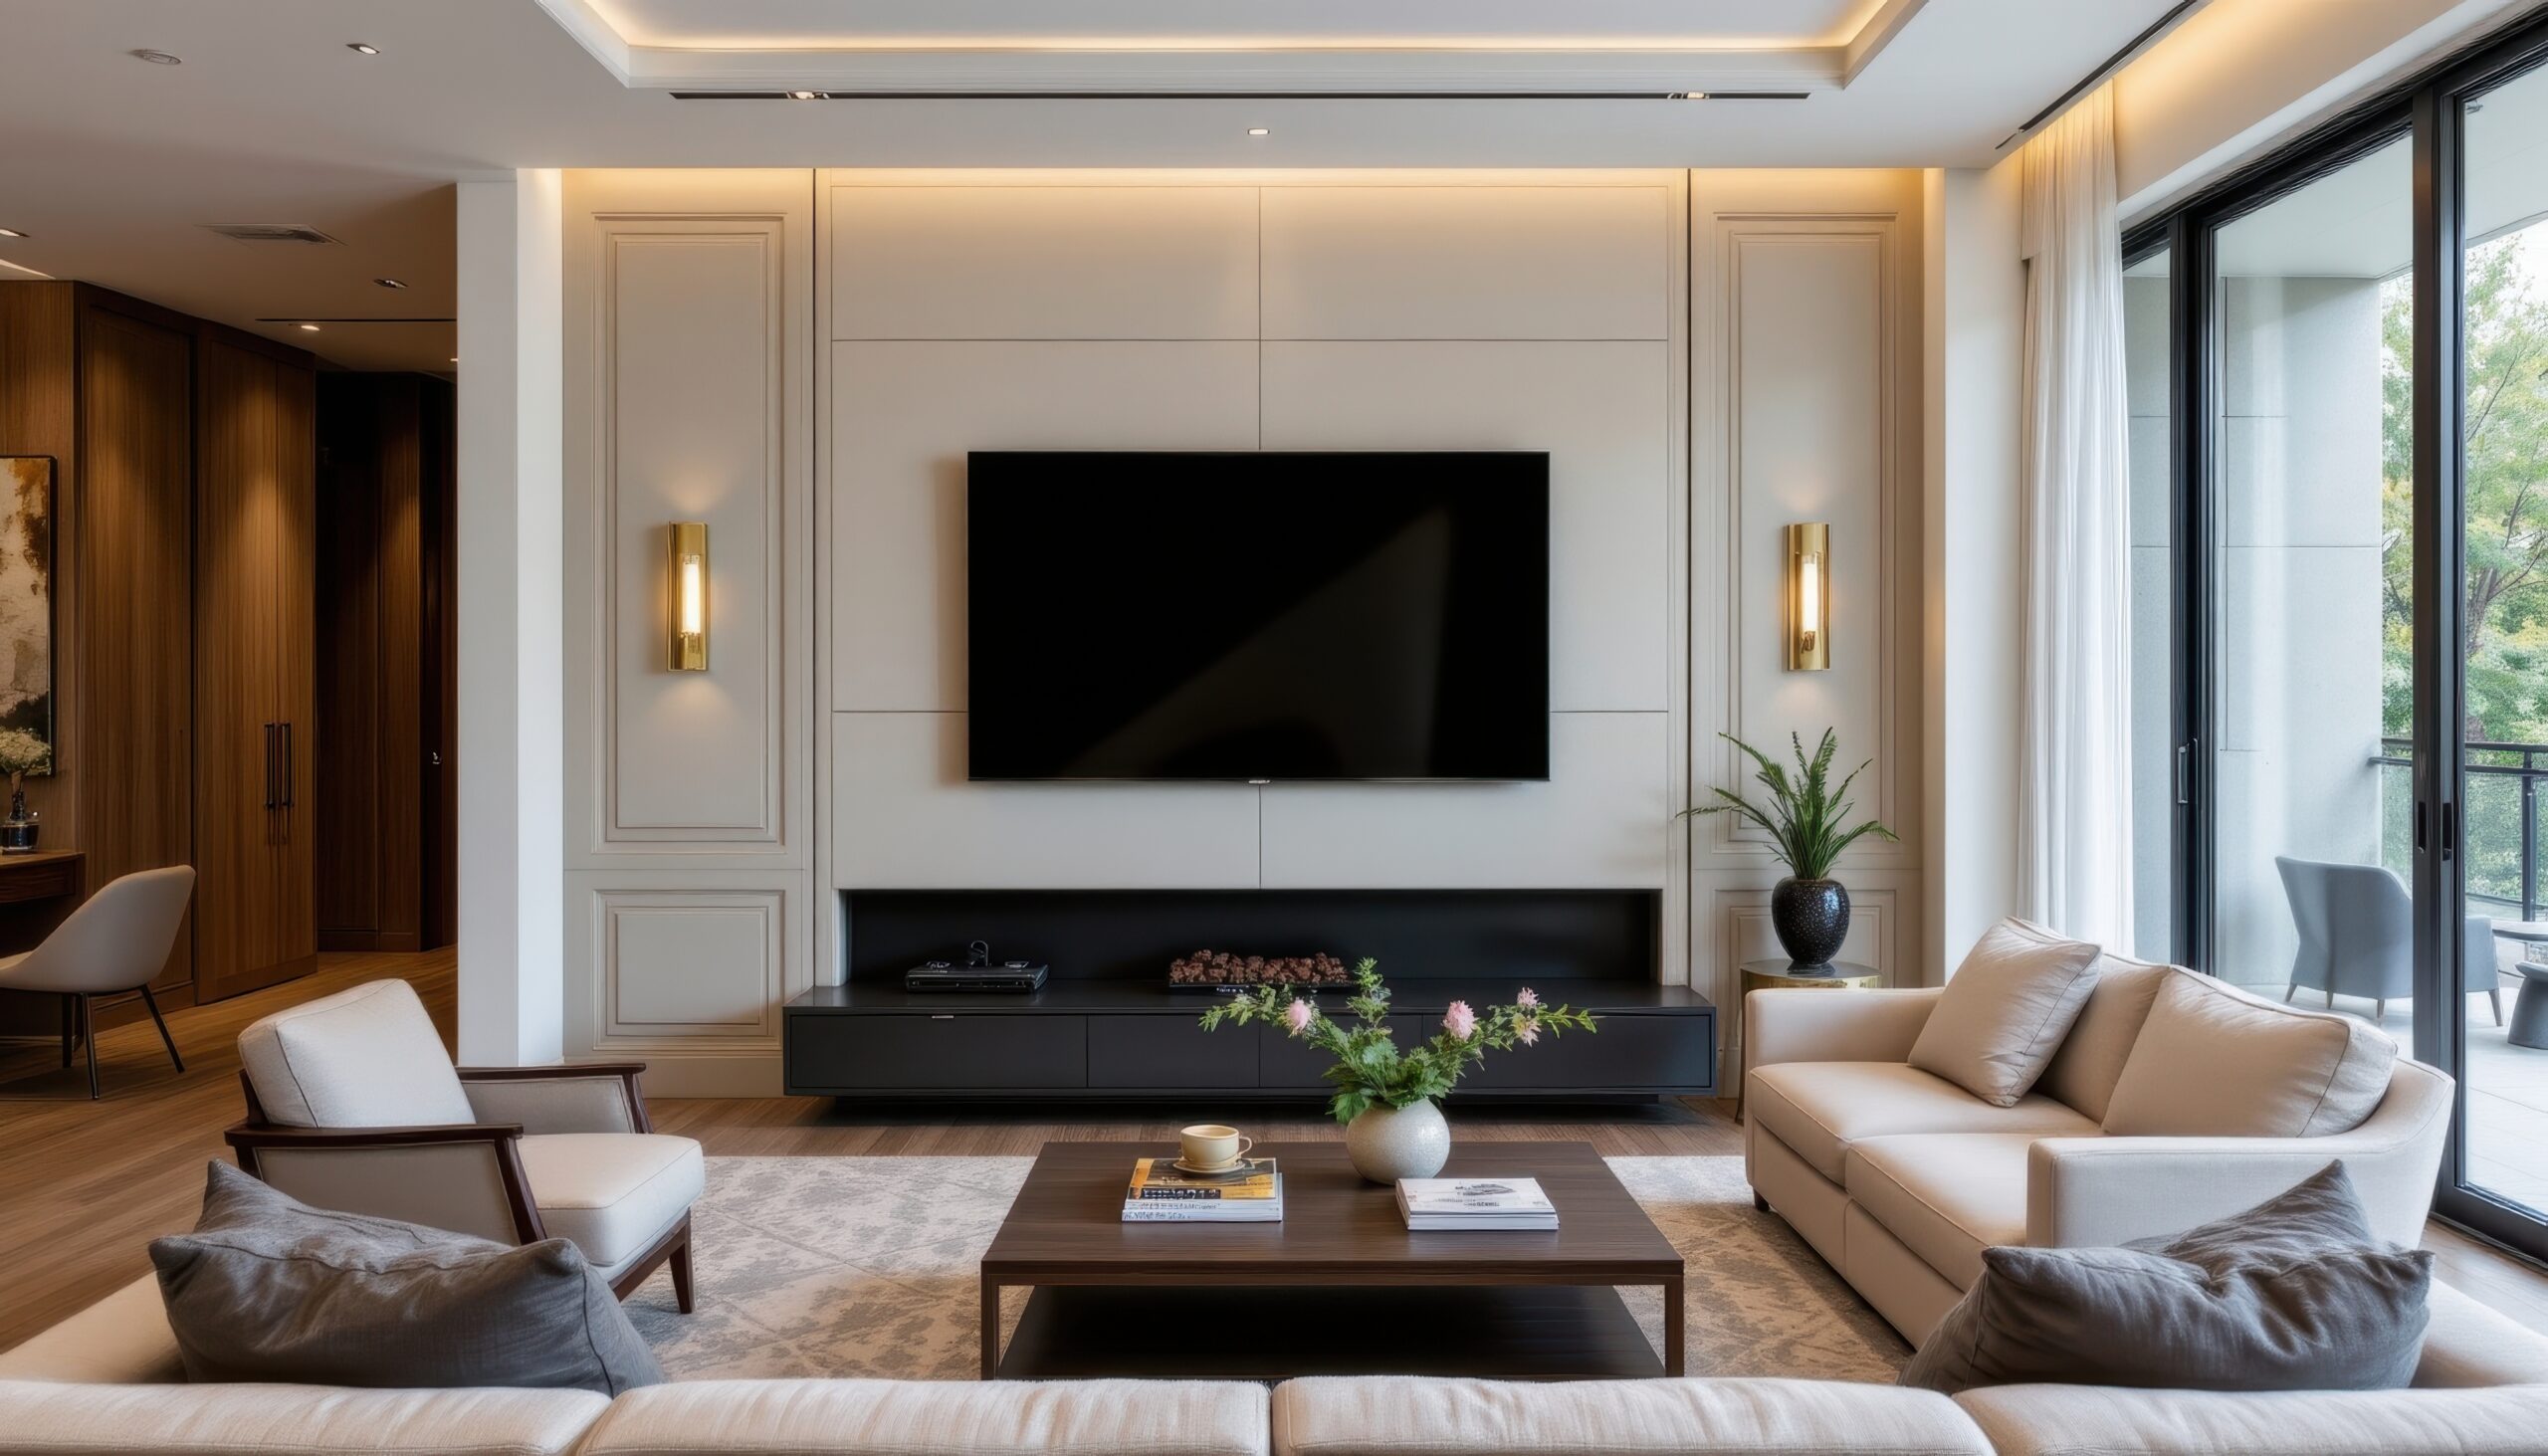
Modern/Contemporary: Clean lines, neutral colours, minimal accessories. The furniture has simple silhouettes, and the overall feel is uncluttered. Great for those who find peace in simplicity.
Traditional: Classic furniture shapes, rich colours, balanced symmetry. Think rolled-arm sofas, matching table lamps, and formal arrangements. Perfect if you love timeless elegance.
Transitional: The sweet spot between traditional and contemporary. You get the comfort of classic pieces with cleaner lines and updated colours. This style is incredibly livable and never looks dated.
Scandinavian: Light woods, white walls, cosy textures, and functional beauty. If you want a bright, airy space that still feels warm, this might be your direction.
Industrial: Raw materials, exposed elements, darker colours. Metal and wood combinations, vintage pieces, and an urban edge define this look.
Creating Your Vision Board
Once you’ve identified your preferences, create a focused vision board for your specific living room. This isn’t just pretty pictures—it’s your roadmap for how to decorate a living room step by step. Include:
- 3-5 full-room images that capture your desired vibe
- Close-ups of textures and materials you love
- Your colour palette (we’ll refine this in the next step)
- Furniture styles that appeal to you
- Lighting fixtures that fit your aesthetic
Digital tools like Canva or even a simple Pinterest board work great. The goal is to have a visual reference you can check when making decisions. That gorgeous velvet chair might be on sale, but does it fit your vision?
Avoiding Common Style Pitfalls
The biggest mistake I see? Trying to incorporate too many styles because you like elements of each. Your living room isn’t a design museum—it needs cohesion. Follow the 80/20 rule: 80% of your room should reflect your primary style, with 20% for accent pieces that add personality.
Another trap is choosing a style that doesn’t match your lifestyle. That all-white, minimalist living room looks stunning in photos, but if you have three dogs and love surrounding yourself with books and plants, you’re setting yourself up for frustration.
Considering Your Home’s Architecture
Your living room doesn’t exist in isolation. Consider your home’s architectural style and the flow from adjacent spaces. An ultra-modern living room might feel jarring in a 1920s bungalow with original mouldings. This doesn’t mean you can’t have contemporary furniture, but you’ll want to choose pieces that respect the home’s character.
Making It Personal
Whatever style direction you choose, remember that the best living rooms tell a story about the people who live there. Your style foundation should leave room for:
- Travel souvenirs and meaningful objects
- Family photos and personal artwork
- Collections and hobbies
- Books, plants, and things that bring you joy
These personal touches are what transform a styled space into a home. They’re not afterthoughts—plan for them from the beginning.
By the end of this step, you should have a clear vision of your living room’s style direction. This vision will guide every choice from here on, making the process of learning how to decorate a living room step by step much more straightforward. Next, we’ll translate this vision into a functional floor plan that brings your style to life.
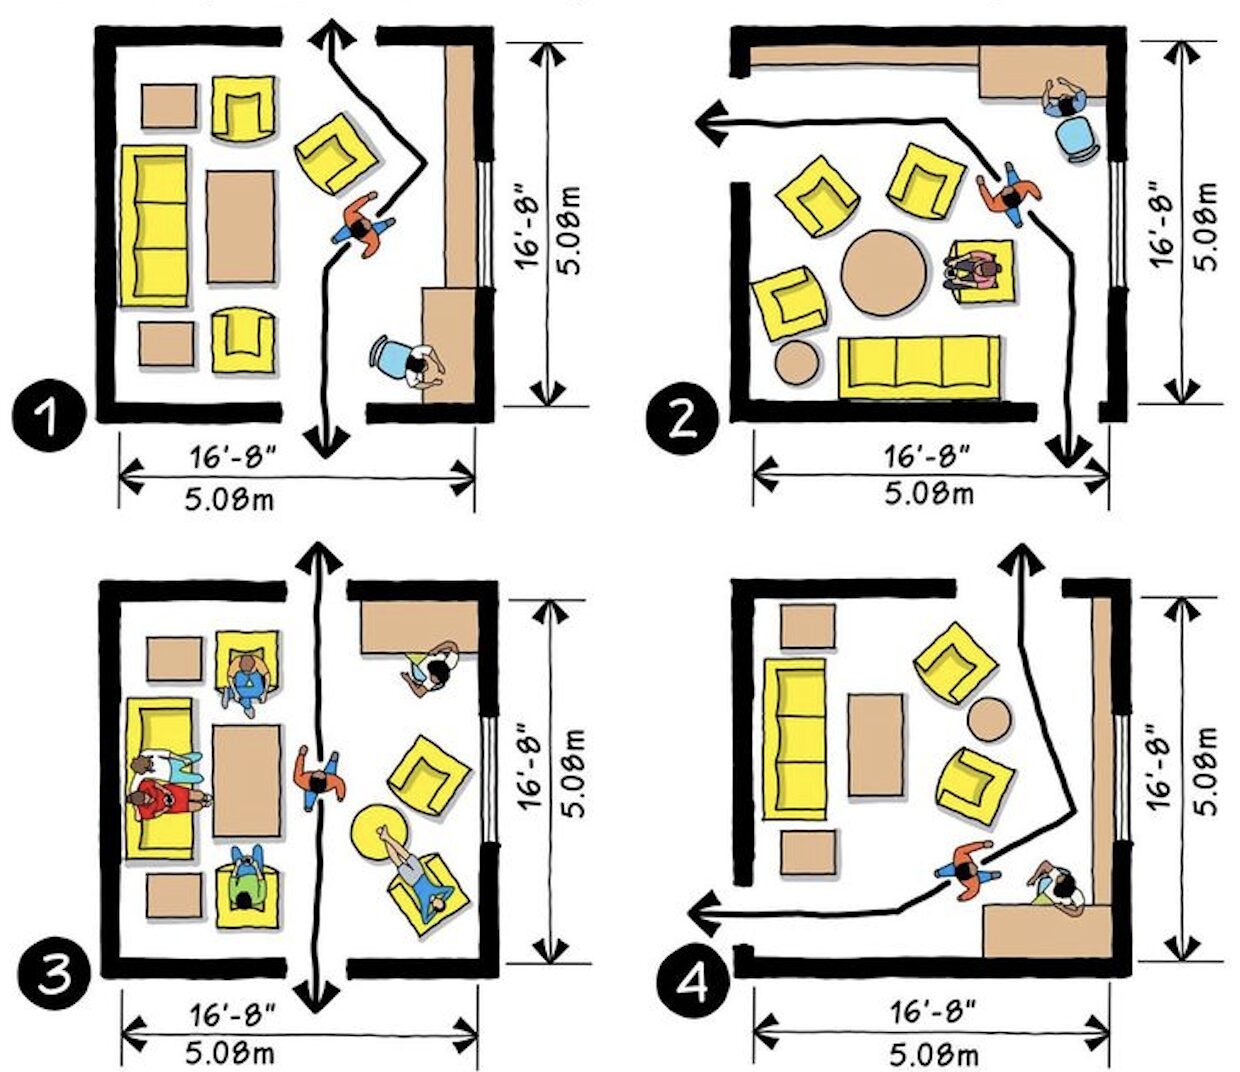
Step 3: Plan Your Layout and Traffic Flow
With your style vision clear, it’s time to tackle one of the most crucial aspects of living room design—the layout. Even the most beautiful furniture and decor won’t save a room with poor flow. Getting this right transforms how your space functions daily.
Finding Your Focal Point
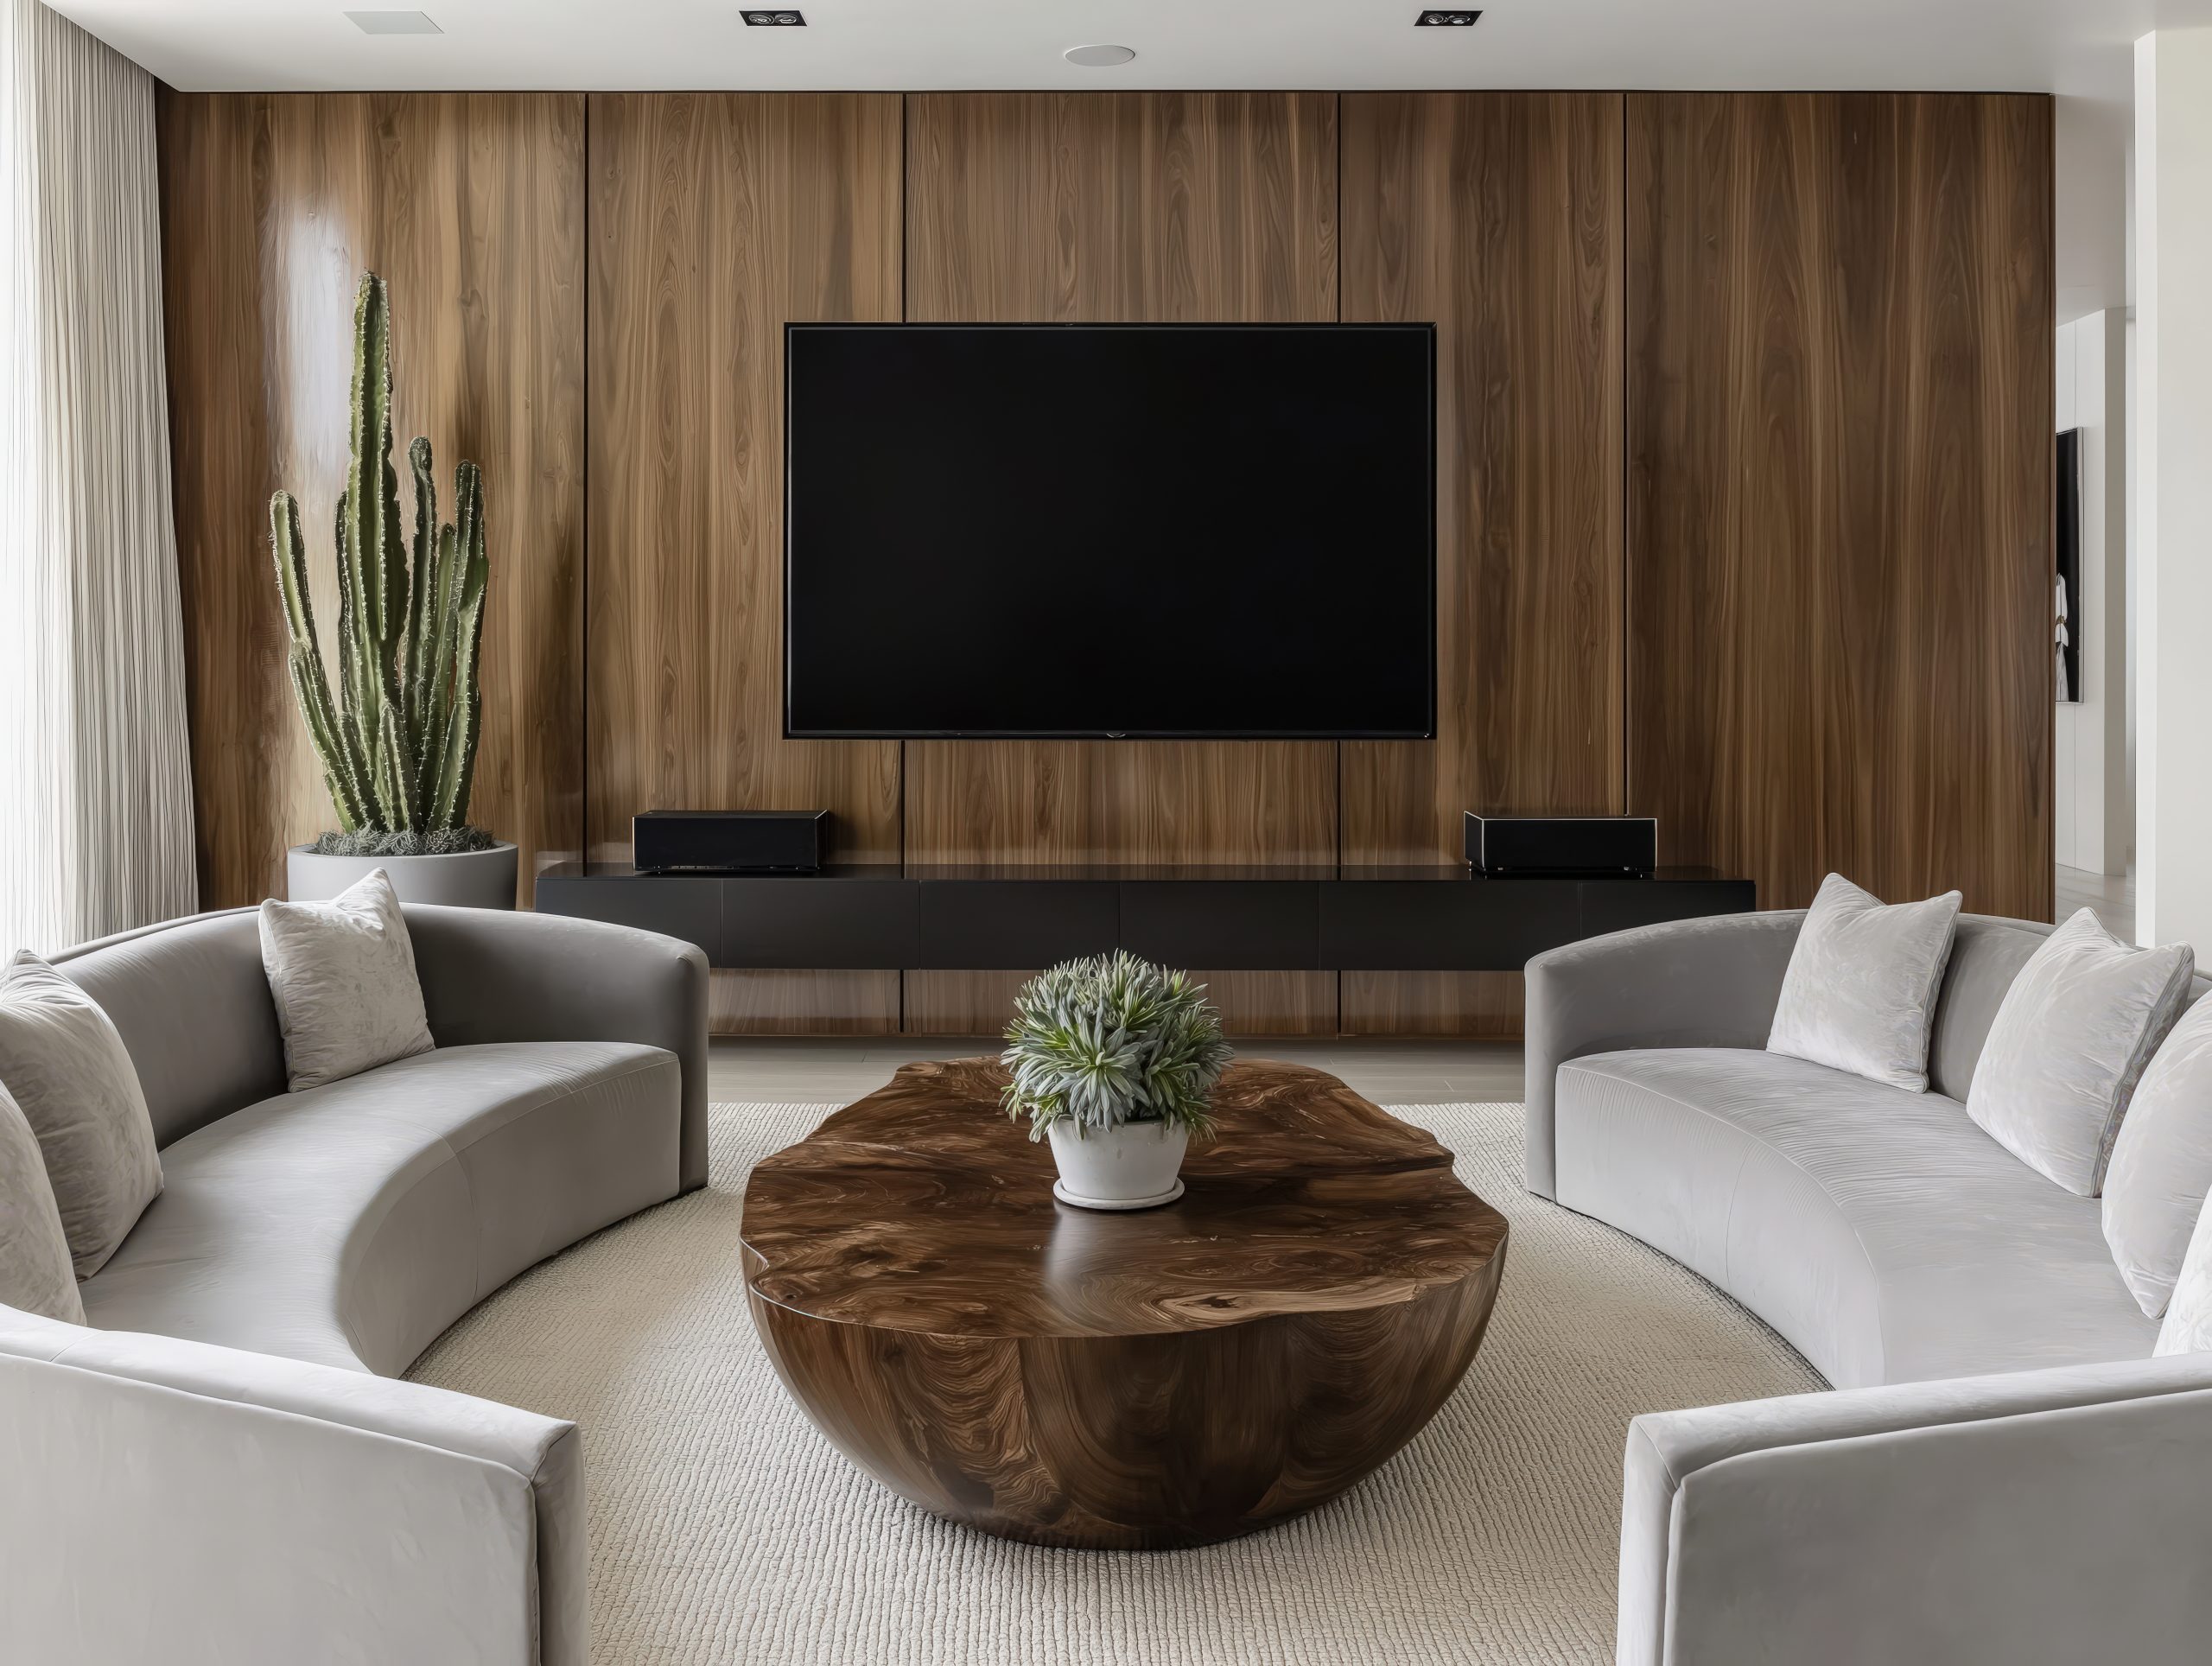
Every well-designed living room needs a focal point—that one element that naturally draws the eye and anchors the entire space. Sometimes it’s obvious: a fireplace, a wall of windows with a stunning view, or built-in shelving. Other times, you’ll need to create one.
If your room lacks a natural focal point, consider these options:
- A large piece of artwork or a gallery wall
- An entertainment centre or a mounted TV
- A statement furniture piece
- An accent wall with bold colours or wallpaper
Once identified, your furniture arrangement should acknowledge and enhance this focal point, not compete with it. That doesn’t mean everything faces one direction like a waiting room—it means creating a layout that feels balanced around this anchor.
Understanding Conversation Flow
The best living rooms encourage easy conversation. When figuring out how to decorate a living room step by step, remember that seating arrangements make or break the room’s social function. Keep these guidelines in mind:
- Place seating 8-10 feet apart for comfortable conversation
- Avoid forcing people to shout across the room or crane their necks
- Create multiple seating groups in larger rooms
- Ensure every seat has a surface nearby for drinks or books
Think about how conversations naturally happen. People need to see each other without straining, but also want the option to break eye contact naturally. Angled chairs, L-shaped sectionals, and mixed seating types all help create this dynamic.
Mapping Traffic Patterns
Before placing a single piece of furniture, trace the natural paths through your room. How do you enter? Where do you go from there? Are there doorways to other rooms? These invisible pathways need to stay clear, at least 3 feet wide for main routes, and 2 feet for secondary paths.
Common traffic flow mistakes include:
- Blocking the natural path from entry to seating
- Creating obstacle courses around coffee tables
- Forcing people to squeeze between furniture
- Ignoring the path to frequently used areas (like built-ins or windows)
The Power of Floating Furniture
Here’s where I see the biggest transformation in rooms—pulling furniture away from walls. Yes, even in small spaces. Floating your sofa even 12 inches from the wall creates depth and improves flow. It also gives you space for a console table, better lamp placement, or simply easier cleaning.
In larger rooms, floating furniture becomes essential. Create intimate zones rather than lining everything against the perimeter. A sofa floating in the centre with a console table behind it can define the living area while maintaining flow to other parts of the room.
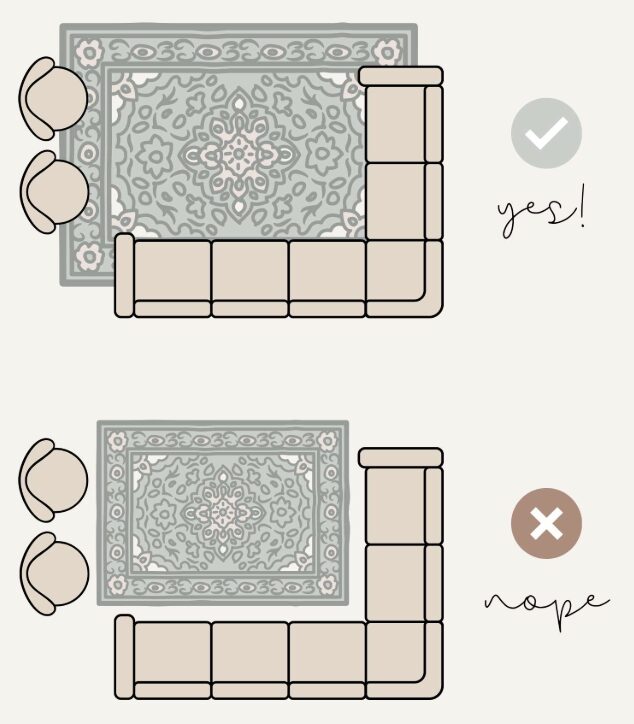
Using Rugs to Define Spaces
Area rugs are your secret weapon for layout success. They ground furniture groupings and define zones within larger spaces. The key is sizing—too small, and your room looks disjointed. Follow these rules:
- The front legs of all major seating should sit on the rug
- Leave 8-24 inches of bare floor around the rug’s perimeter
- In small rooms, a large rug can make the space feel bigger
- Multiple rugs can define different zones in open-plan spaces
Testing Your Layout
Before moving heavy furniture, test your layout plan. Use painter’s tape to mark furniture footprints on the floor. Live with it for a day. Walk through your normal routines. Sit in the taped “chairs” and check sightlines. This simple step saves backaches and prevents costly mistakes.
For tech-savvy planners, free apps like Floorplanner or even graph paper work well. Draw your room to scale (1/4 inch = 1 foot is standard), then cut out scaled furniture pieces to arrange and rearrange.
Accommodating Different Activities
Modern living rooms multitask. Your layout needs to support various activities without requiring furniture reshuffling. Consider:
For TV watching: Ensure comfortable viewing angles from the main seating. The TV centre should be at seated eye level, typically 42-48 inches from the floor.
For reading: Position a chair near natural light with a side table for books and drinks. Add a floor lamp for evening reading.
For games or homework: An ottoman with a tray or nesting tables provides surfaces that can disappear when not needed.
For entertaining: Create seating clusters that can merge for larger gatherings. Lightweight accent chairs or poufs offer flexible extra seating.
Small Room Strategies
Decorating a small living room step by step requires extra attention to the layout. Every inch counts, but that doesn’t mean cramming in undersized furniture. Instead:
- Choose one normal-sized sofa over multiple small chairs
- Use vertical space with tall bookcases or floating shelves
- Select furniture with exposed legs to maintain sight lines
- Consider dual-purpose pieces like storage ottomans
The goal is to make your small room feel as spacious as possible while meeting all your needs.
With your layout planned, you’ve created the bones of a functional living room. This foundation ensures that no matter how beautiful your colour choices or accessories, the room will work for daily life. Next, we’ll build on this practical layout with colour choices that bring your style vision to life.
Step 4: Choose Your Colour Palette
Colour sets the entire mood of your living room. It’s what people subconsciously react to first, even before they notice your furniture or layout. The right palette can make a small room feel spacious, a dark room feel bright, or a cold room feel cozy. Let’s break down how to decorate a living room step by step through strategic colour choices.
Understanding the 60-30-10 Rule
This classic design principle takes the guesswork out of colour distribution. Here’s how it works:
- 60% Dominant Colour: This is your room’s main colour, typically used on walls and large furniture pieces. Usually a neutral or muted tone that won’t overwhelm you.
- 30% Secondary Colour: Found in upholstery, curtains, and larger accessories. This colour supports and complements your dominant shade.
- 10% Accent Colour: Your pop of personality through pillows, artwork, and small accessories. This can be bold since it’s used sparingly.
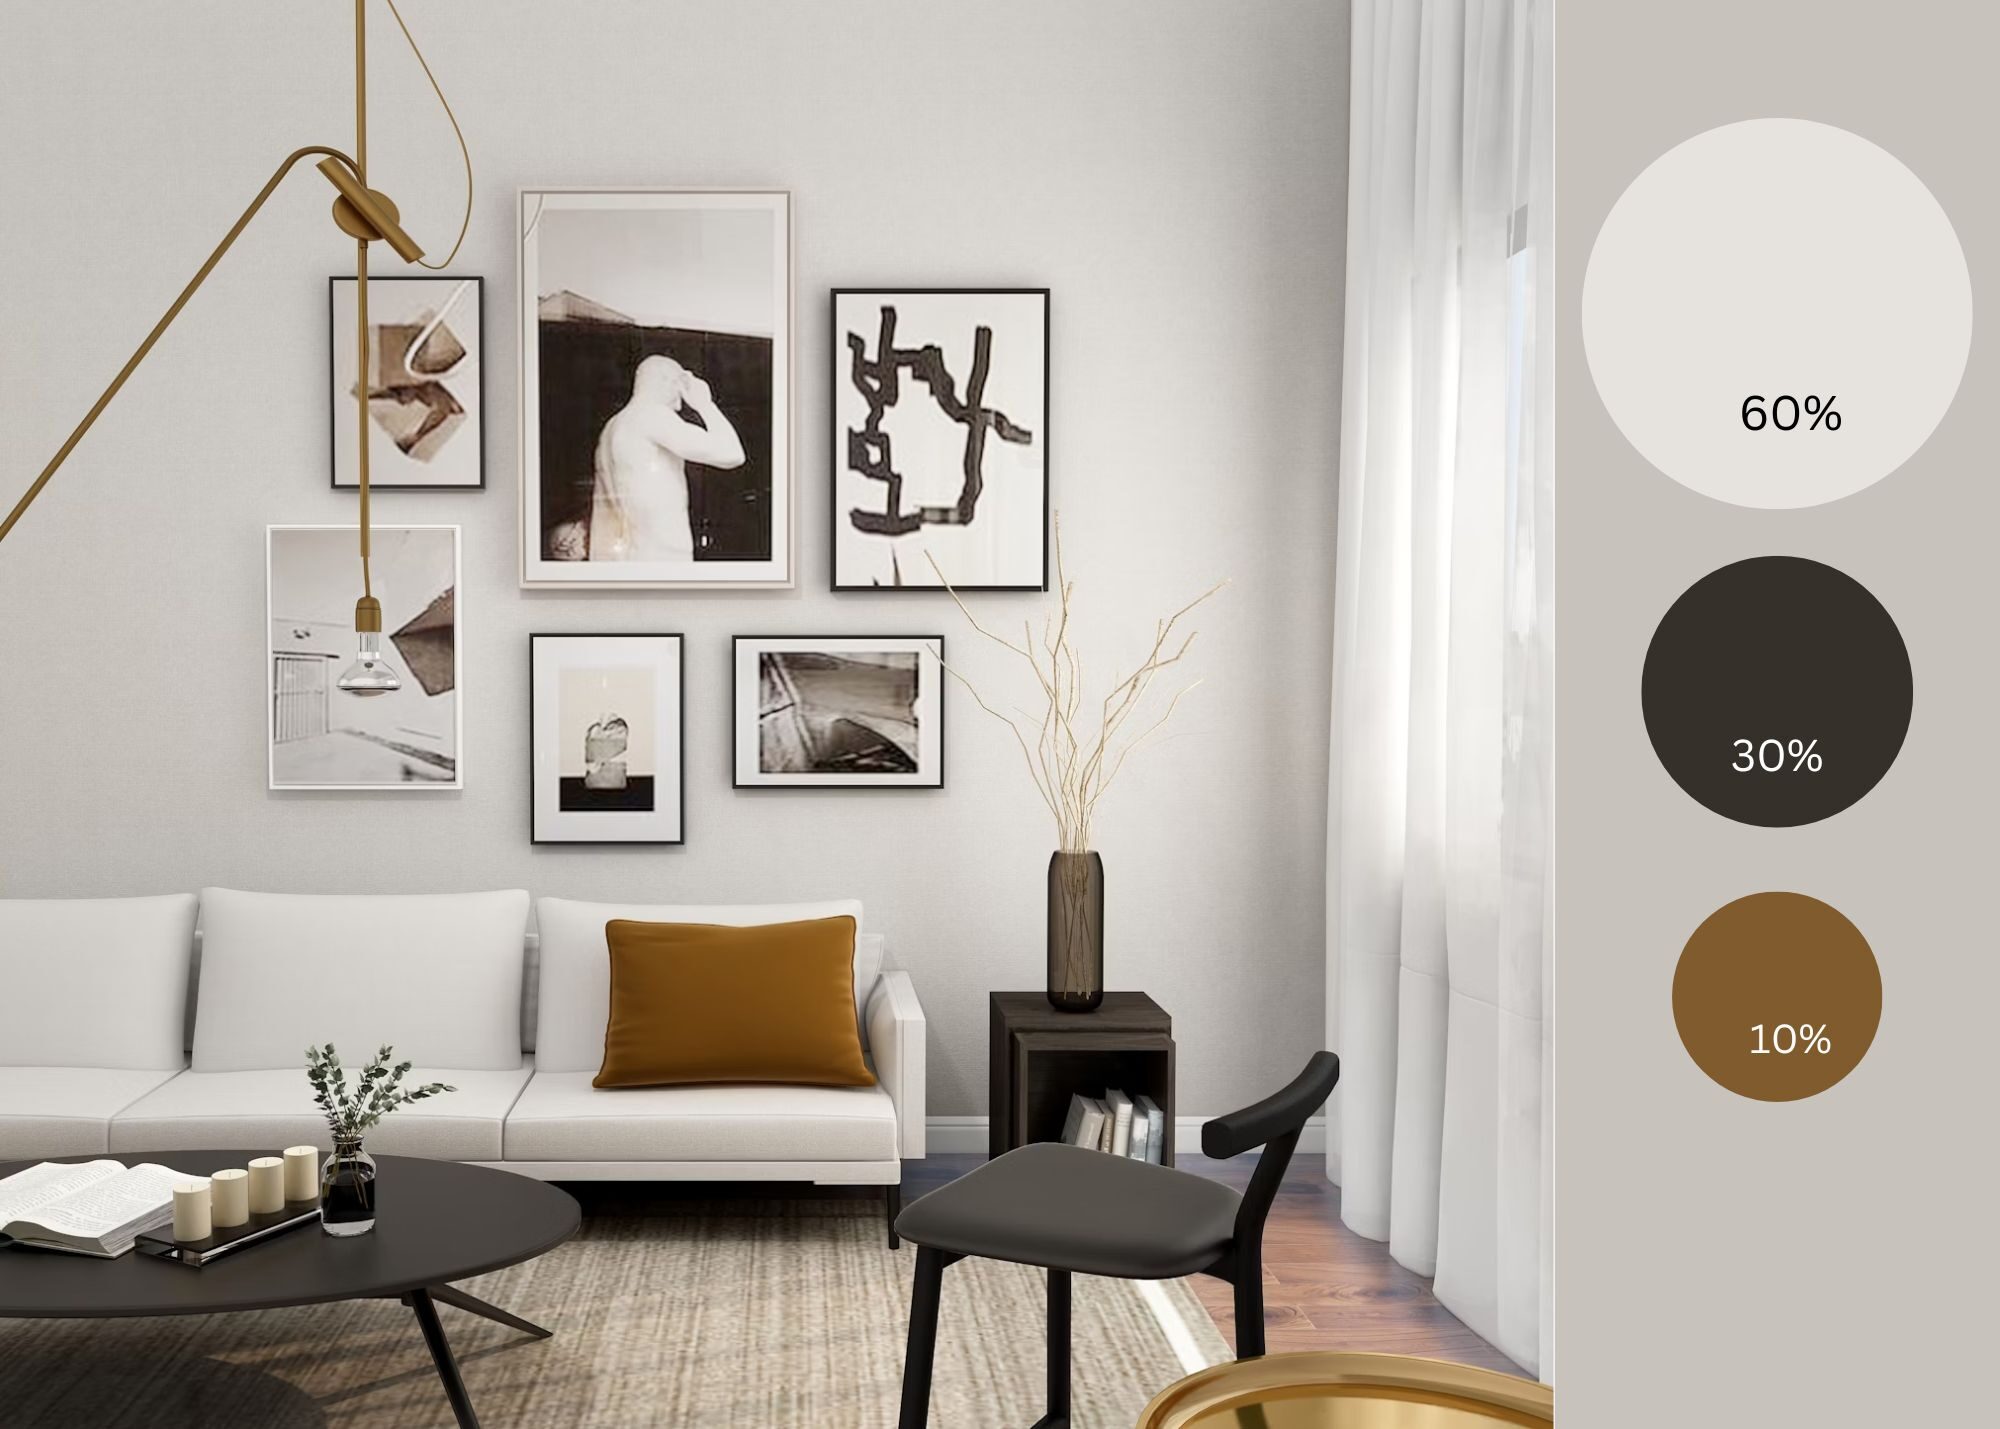
For example, you might have soft grey walls and a grey sofa (60%), navy curtains and a patterned rug incorporating navy (30%), and mustard yellow pillows with brass accents (10%). The proportions keep everything balanced while allowing personality to shine through.
Building Your Palette
Start with what you can’t change. Do you have wood floors? Their undertone (warm or cool) influences everything else. Keeping a favourite sofa? Its colour becomes part of your palette. Working around existing elements is part of learning how to decorate a living room step by step in real-world situations.
Consider these factors when selecting colours:
Natural Light: North-facing rooms get cool, indirect light that can make colours appear greyer. Warm these spaces with colours that have yellow or red undertones. South-facing rooms get warm, direct light and can handle cooler colours.
Room Size: Light colours reflect light and make spaces feel larger. Dark colours absorb light, creating intimacy but potentially making rooms feel smaller. That said, a small room painted in a rich, dark colour can feel incredibly sophisticated—it’s about intention.
Ceiling Height: Paint ceilings lighter than walls to add perceived height. In rooms with very high ceilings, a darker ceiling colour can make the space feel more intimate.
Testing Colours in Your Space
Never choose paint colours under store lighting. What looks perfect at the hardware store can be completely different in your living room. Here’s my tested process:
- Buy samples of your top 3-4 paint choices
- Paint large swatches (at least 2×2 feet) on different walls
- Observe them at different times of day
- Live with them for at least 48 hours
- Notice how they look with your lighting on
Pay attention to undertones—that “perfect grey” might look purple in your north-facing room or green next to your warm wood floors. This testing phase prevents expensive mistakes and disappointment.
Working with Neutrals
Neutrals get a bad reputation for being boring, but they’re actually complex and sophisticated. Today’s neutrals go far beyond beige:
- Warm Neutrals: Creams, taupes, warm greys, and greiges create cosy, inviting spaces
- Cool Neutrals: Pure whites, cool greys, and soft blacks offer a modern, crisp feel
- Natural Neutrals: Colours pulled from nature, like sage, clay, or sand, add subtle personality
The beauty of a neutral base? You can completely change your room’s personality by swapping accessories. That neutral sofa becomes bohemian with colourful pillows or sophisticated with monochromatic styling.
Adding Colour Strategically
If you love colour but feel nervous about commitment, start small. Ways to incorporate colour without it getting overwhelming:
- Accent Wall: One colourful wall creates impact without dominating
- Colourful Sofa: A statement piece that anchors the room
- Window Treatments: Curtains or Roman shades add softness and colour
- Area Rug: Brings multiple colours together at floor level
- Artwork: Large pieces or gallery walls introduce colour at eye level
Remember, colour doesn’t mean bright. Deep jewel tones, muted historical colours, or sophisticated earth tones all add richness without screaming for attention.
Creating Colour Flow
Your living room shouldn’t feel disconnected from the rest of your home. Create flow by:
- Repeating one colour from adjoining spaces
- Using varying intensities of the same colour family
- Carrying neutral base colours throughout
- Adding consistent accent colours in different rooms
This doesn’t mean every room matches—it means they have a conversation with each other.
The Psychology of Colour
Understanding how colours affect mood helps you create the right atmosphere:
Blues and Greens: Calming, peaceful, good for relaxation
Warm Neutrals: Comforting, versatile, broadly appealing
Rich Jewel Tones: Sophisticated, dramatic, creates intimacy
Bright Colours: Energising but potentially overwhelming in large doses
Monochromatic Schemes: Serene, sophisticated, easy to execute
Common Colour Mistakes to Avoid
- Matching everything too perfectly (it looks flat)
- Ignoring undertones when mixing colours
- Choosing colours in isolation without considering the whole room
- Following trends that don’t suit your space or style
- Being too safe and ending up with a bland, personality-free room
Your colour palette is the thread that ties your entire living room together. With these colours established, you’re ready to select furniture that brings your vision to life while working within your carefully planned layout. The next step transforms your colour palette and floor plan into a fully furnished, functional space.
Step 5: Select and Purchase Furniture
This is where your planning pays off. With your layout mapped and colours chosen, furniture selection becomes strategic rather than overwhelming. The key to learning how to decorate a living room step by step is making each furniture decision build upon the last, creating a cohesive whole.
Starting with the Sofa
Your sofa is the living room’s anchor piece—get this right, and everything else falls into place. Consider these factors:
Size: Measure your doorways, hallways, and stairs before falling in love with anything. That perfect sectional won’t matter if it can’t make it into your room. For the room itself, your sofa should be proportional—not so large it dominates, not so small it looks lost.
Style: Your sofa should align with your chosen design direction but remain somewhat timeless. Trendy shapes date quickly, and sofas are expensive to replace. Classic silhouettes with updated fabric choices give you flexibility.
Comfort: Sit on it. Really sit on it—the way you actually lounge at home. Deep seats work for tall people, but can be uncomfortable for shorter folks. Firm cushions maintain their shape but might feel stiff to some. There’s no universal “comfortable” sofa.
Fabric: Consider your real life. Performance fabrics have revolutionised upholstery—they look like linen or velvet but resist stains and wear. Leather develops character over time but requires specific care. Patterns hide wear but limit your accessory options.
Choosing Secondary Seating
Once your sofa is selected, add seating that complements without matching. Options include:
- Accent Chairs: Introduce pattern, colour, or texture. Swivel chairs add function.
- Ottoman: Provides extra seating, a footrest, or a coffee table alternative
- Bench: Great for narrow spaces or under windows
- Pouf: Lightweight, movable seating for flexible arrangements
Mix heights and shapes for visual interest. Two identical chairs flanking a fireplace create formal balance, while mismatched chairs feel more collected and casual.
Coffee Table Considerations
The coffee table often trips people up. Follow these guidelines:
Height: Should be within 2 inches of your sofa seat height (typically 16-18 inches)
Length: About 2/3 of your sofa’s length looks proportional
Distance: 14-18 inches from the sofa—close enough to reach, far enough to walk around
Shape: Round or oval tables improve flow in tight spaces. Rectangular works in most settings. Consider nesting tables for flexibility.
Material matters, too. Glass keeps sight lines open in small spaces. Wood adds warmth. Stone or metal brings sophisticated weight. Consider how the material relates to other elements in your room.
Storage Solutions
Living rooms need to be beautiful AND functional. Build in storage from the start:
Media Storage: Even in our streaming age, you need somewhere for remotes, game controllers, and that router you’re hiding. Media consoles with closed storage keep clutter invisible.
Display Storage: Open shelving, bookcases, or étagères showcase books and treasures while adding vertical interest. Mix displayed items with hidden storage boxes for practical balance.
Hidden Storage: Ottomans with lift tops, side tables with drawers, or console tables with baskets underneath. Every piece can work harder.
Quality Versus Budget
Here’s where I’ll be straight with you—furniture quality matters, but you need to be strategic about where to splurge. My priority list for how to decorate a living room step by step on any budget:
Splurge on:
- Sofa (you’ll use it daily for years)
- One quality accent chair (better than two cheap ones)
- Window treatments (custom often looks significantly better)
Save on:
- Accent tables (easily updated as styles change)
- Decorative accessories
- Throw pillows (buy covers, not whole pillows)
- Lamps (unless they’re statement pieces)
Consider vintage or secondhand for:
- Wood furniture (often better quality than new)
- Accent chairs (reupholstering costs less than buying quality new)
- Unique pieces that add character
Online Versus In-Store Shopping
Both have advantages. Online offers endless options and often better prices, but you can’t assess comfort or true colour. In-store lets you experience pieces but limits selection. My approach:
- Visit stores to understand what styles and scales work for you
- Sit on sofas and chairs to know what feels comfortable
- Order fabric samples online before purchasing
- Read reviews focusing on comfort and durability
- Check return policies carefully
- Measure everything twice
Timing Your Purchases
Furniture shopping requires patience. Custom pieces take 8-16 weeks. Even in-stock items might need 2-4 weeks for delivery. Plan accordingly:
- Order your sofa first (longest lead time)
- Purchase a rug and window treatments
- Add tables and secondary seating
- Layer in lighting and accessories
This staged approach also helps your budget and lets you live in the space before making final decisions.
Making It All Work Together
As you select each piece, reference your vision board and colour palette. Every furniture item should feel like part of the same story. That doesn’t mean matching sets—it means intentional coordination. Mix wood tones but keep them in the same warmth family. Vary shapes but maintain similar visual weight. Combine different metals, but limit yourself to two finishes.
With your major furniture pieces selected and ordered, your room is taking shape. The bones are in place. Next, we’ll add the lighting layers that will truly bring your space to life, making it functional for every activity and beautiful at every time of day.
Step 6: Layer Your Lighting
Good lighting transforms a living room from flat and one-dimensional to warm and inviting. Yet it’s often treated as an afterthought. When learning how to decorate a living room step by step, lighting deserves as much attention as your sofa selection. Done right, it makes every other design choice look better.
Understanding the Three Layers
Professional designers think about lighting in layers, each serving a different purpose:
Ambient Lighting: This is your general illumination—the replacement for natural light when the sun goes down. Usually comes from overhead fixtures, recessed lights, or torcheres that bounce light off the ceiling. Without good ambient light, rooms feel cave-like.
Task Lighting: Focused light for specific activities. Reading lamps beside chairs, picture lights above artwork, or pendant lights over a console. Task lighting prevents eye strain and makes your room functional.
Accent Lighting: The jewellery of lighting—purely decorative elements that add sparkle and highlight special features. Think uplights behind plants, LED strips under floating shelves, or decorative sconces flanking artwork.
Planning Your Lighting Layout
Start by mapping activities in your room. Where will people read? Where do you need light for games or puzzles? Which architectural features deserve highlighting? This functional approach ensures beautiful lighting that actually works for daily life.
For most living rooms, aim for 5-7 light sources. That might sound excessive, but remember—you won’t use them all at once. Multiple sources give you the flexibility to create different moods. A typical layout might include:
- Overhead fixture or recessed lights (4-6 in larger rooms)
- Table lamps flanking the sofa
- Floor lamp by the reading chair
- Accent light for artwork or plants
- Console or buffet lamp for an ambient glow
Choosing the Right Fixtures
Overhead Lighting: If you’re stuck with a builder-grade ceiling fan or dated fixture, replacing it makes an immediate impact. Choose a size that relates to your room—too small looks skimpy, too large overwhelms. For 12-foot ceilings or higher, consider a fixture with adjustable height.
Table Lamps: Height matters more than style. When seated, the bottom of the shade should be at eye level. This prevents glare while providing good reading light. For sofa end tables, 26-30 inches tall usually works. Matching pairs create formal symmetry while coordinating but different lamps feel more collected.
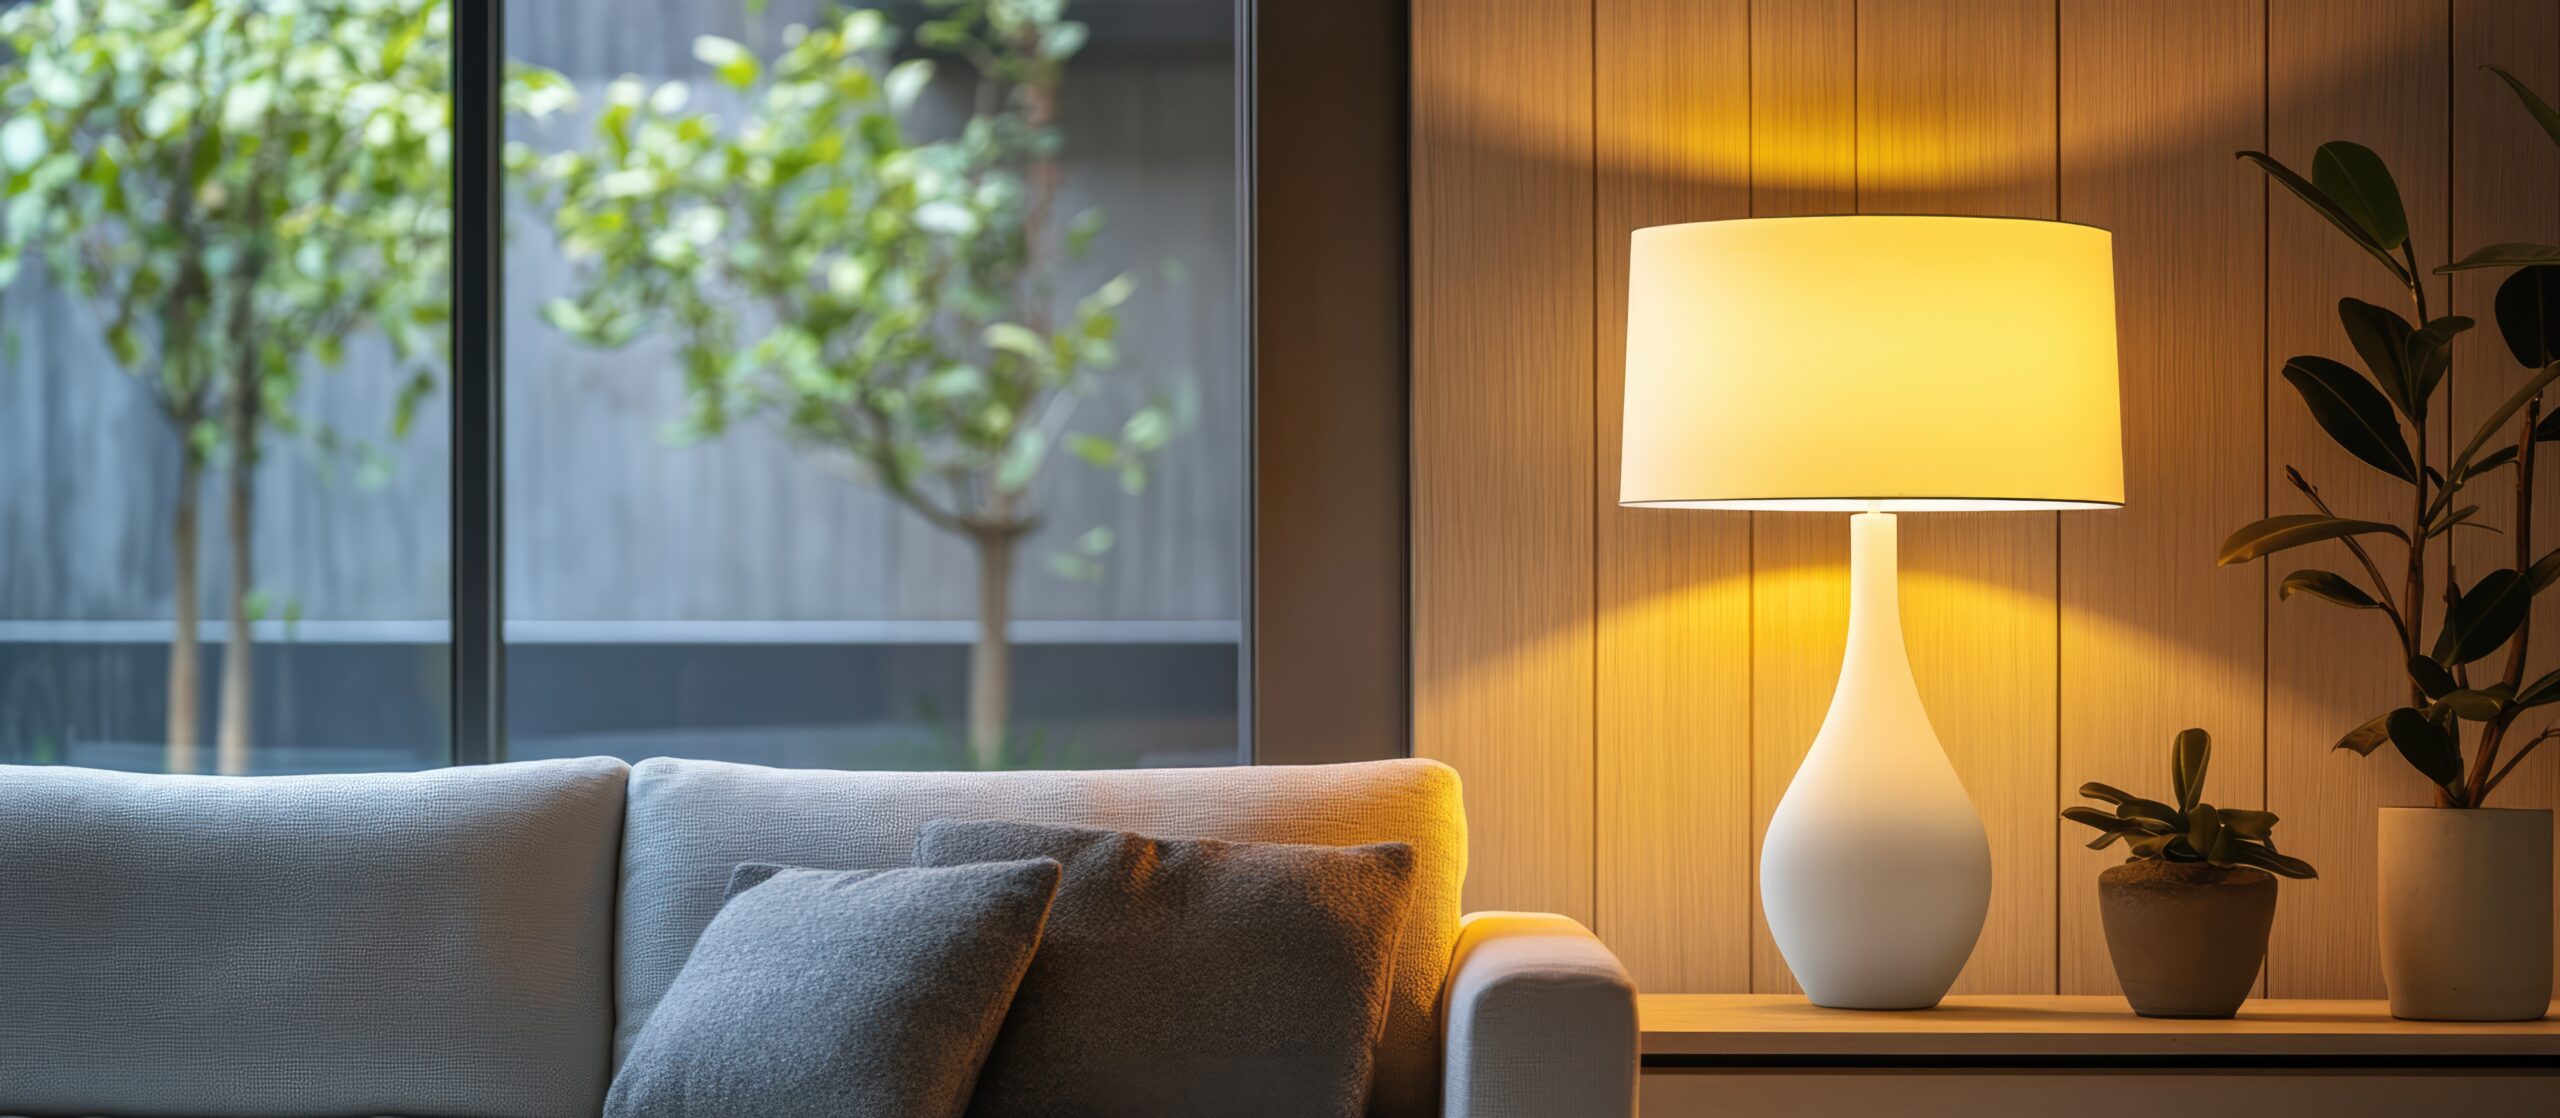
Floor Lamps: These add height and can illuminate dark corners. Arc floor lamps reach over seating without requiring a side table. Pharmacy-style lamps offer adjustable task lighting. Torcheres provide ambient light by washing walls and ceilings.
The Dimmer Difference
If you do one electrical upgrade, make it dimmers. They transform basic fixtures into mood lighting and extend bulb life. Every overhead light should be dimmable. For lamps, use three-way bulbs or smart bulbs you can control from your phone.
Speaking of smart bulbs—they’re game changers for renters or anyone who can’t rewire. Change the colour temperature from energizing daylight to cozy warm white. Set scenes for different activities. Some even sync with movies or music.
Getting Colour Temperature Right
Nothing ruins a carefully designed room faster than mismatched light colours. All bulbs in view together should be the same temperature:
- 2700 K- 3000 K (Warm White): Cozy, residential feel. Flatter’s warm colour palettes.
- 3500 K- 4000 K (Neutral White): Clean but not harsh. Works with any colour scheme.
- 5000K+ (Daylight): Energising but can feel commercial. Best for task lighting only.
Most living rooms look best in the 2700 K- 3000 K range, especially in the evening. If you need a brighter light for tasks, use adjustable fixtures rather than mixing temperatures.

Common Lighting Mistakes
Over-relying on overhead lights: One ceiling fixture creates harsh shadows and unflattering light. Layer multiple sources instead.
Ignoring scale: Tiny lamps on massive tables or huge fixtures in small rooms throw off proportions.
Placing lamps too low: Table lamps shorter than 24 inches rarely provide good light. Stack books underneath if needed.
Forgetting about outlets: Plan lamp placement around existing outlets or budget for adding more. Extension cords running everywhere ruin the look.
All matching fixtures: While coordinating finishes is good, identical fixtures everywhere feel like a hotel.
Natural Light Management
Don’t forget about controlling natural light. How to decorate a living room step by step includes managing daylight too:
- Sheer curtains filter harsh sun while maintaining brightness
- Blackout shades on windows that get direct sun to prevent glare and fading
- Mirrors positioned opposite windows amplify natural light
- Light-coloured walls and ceilings bounce daylight deeper into rooms
Creating Lighting Scenes
The magic happens when you combine different light sources for different moods:
Entertaining: All ambient lights at 75%, accent lights on, task lights off
Movie watching: All lights dimmed to 25% or off, bias lighting behind the TV
Reading: Task light on, ambient lights at 50%, others off
Everyday evening: Mix of ambient and task at comfortable levels
Budget-Friendly Lighting Updates
Great lighting doesn’t require rewiring or expensive fixtures:
- Replace lampshades for instant updates (white or cream lining reflects more light)
- Add battery-operated picture lights to highlight artwork
- Use plug-in pendant lights for rental-friendly ceiling fixtures
- Install dimmer switches (easier than you think)
- Add LED strips under shelves or behind furniture for an ambient glow
With your lighting plan in place, your room can transition from bright and energising during the day to warm and intimate at night. This flexibility is what makes a living room truly livable. Next, we’ll add the finishing touches that make your well-lit room feel complete and personally yours.
Step 7: Add Window Treatments
Window treatments do triple duty in your living room—they control light, provide privacy, and contribute significantly to your design aesthetic. Yet they’re often an afterthought, purchased in a rush when you realise neighbours can see straight in. When learning how to decorate a living room step by step, planning window treatments early ensures they enhance rather than detract from your overall design.
Function First
Before falling for beautiful fabrics, determine what you actually need from your window treatments:
Privacy Requirements: Street-level windows facing neighbours need different solutions than second-story windows overlooking trees. Consider when you need privacy—just at night, or during the day too?
Light Control: Do you get harsh afternoon sun that makes TV watching impossible? Morning light that wakes you too early if you’re near the living room? Or do you have precious little natural light you want to maximise?
Insulation: Windows are major sources of heat loss in winter and heat gain in summer. The right treatments can significantly impact your comfort and energy bills.
Sound Dampening: If you live on a busy street, heavy curtains can help muffle outside noise.
Choosing Your Style
Once you understand your functional needs, select treatments that align with your design aesthetic:
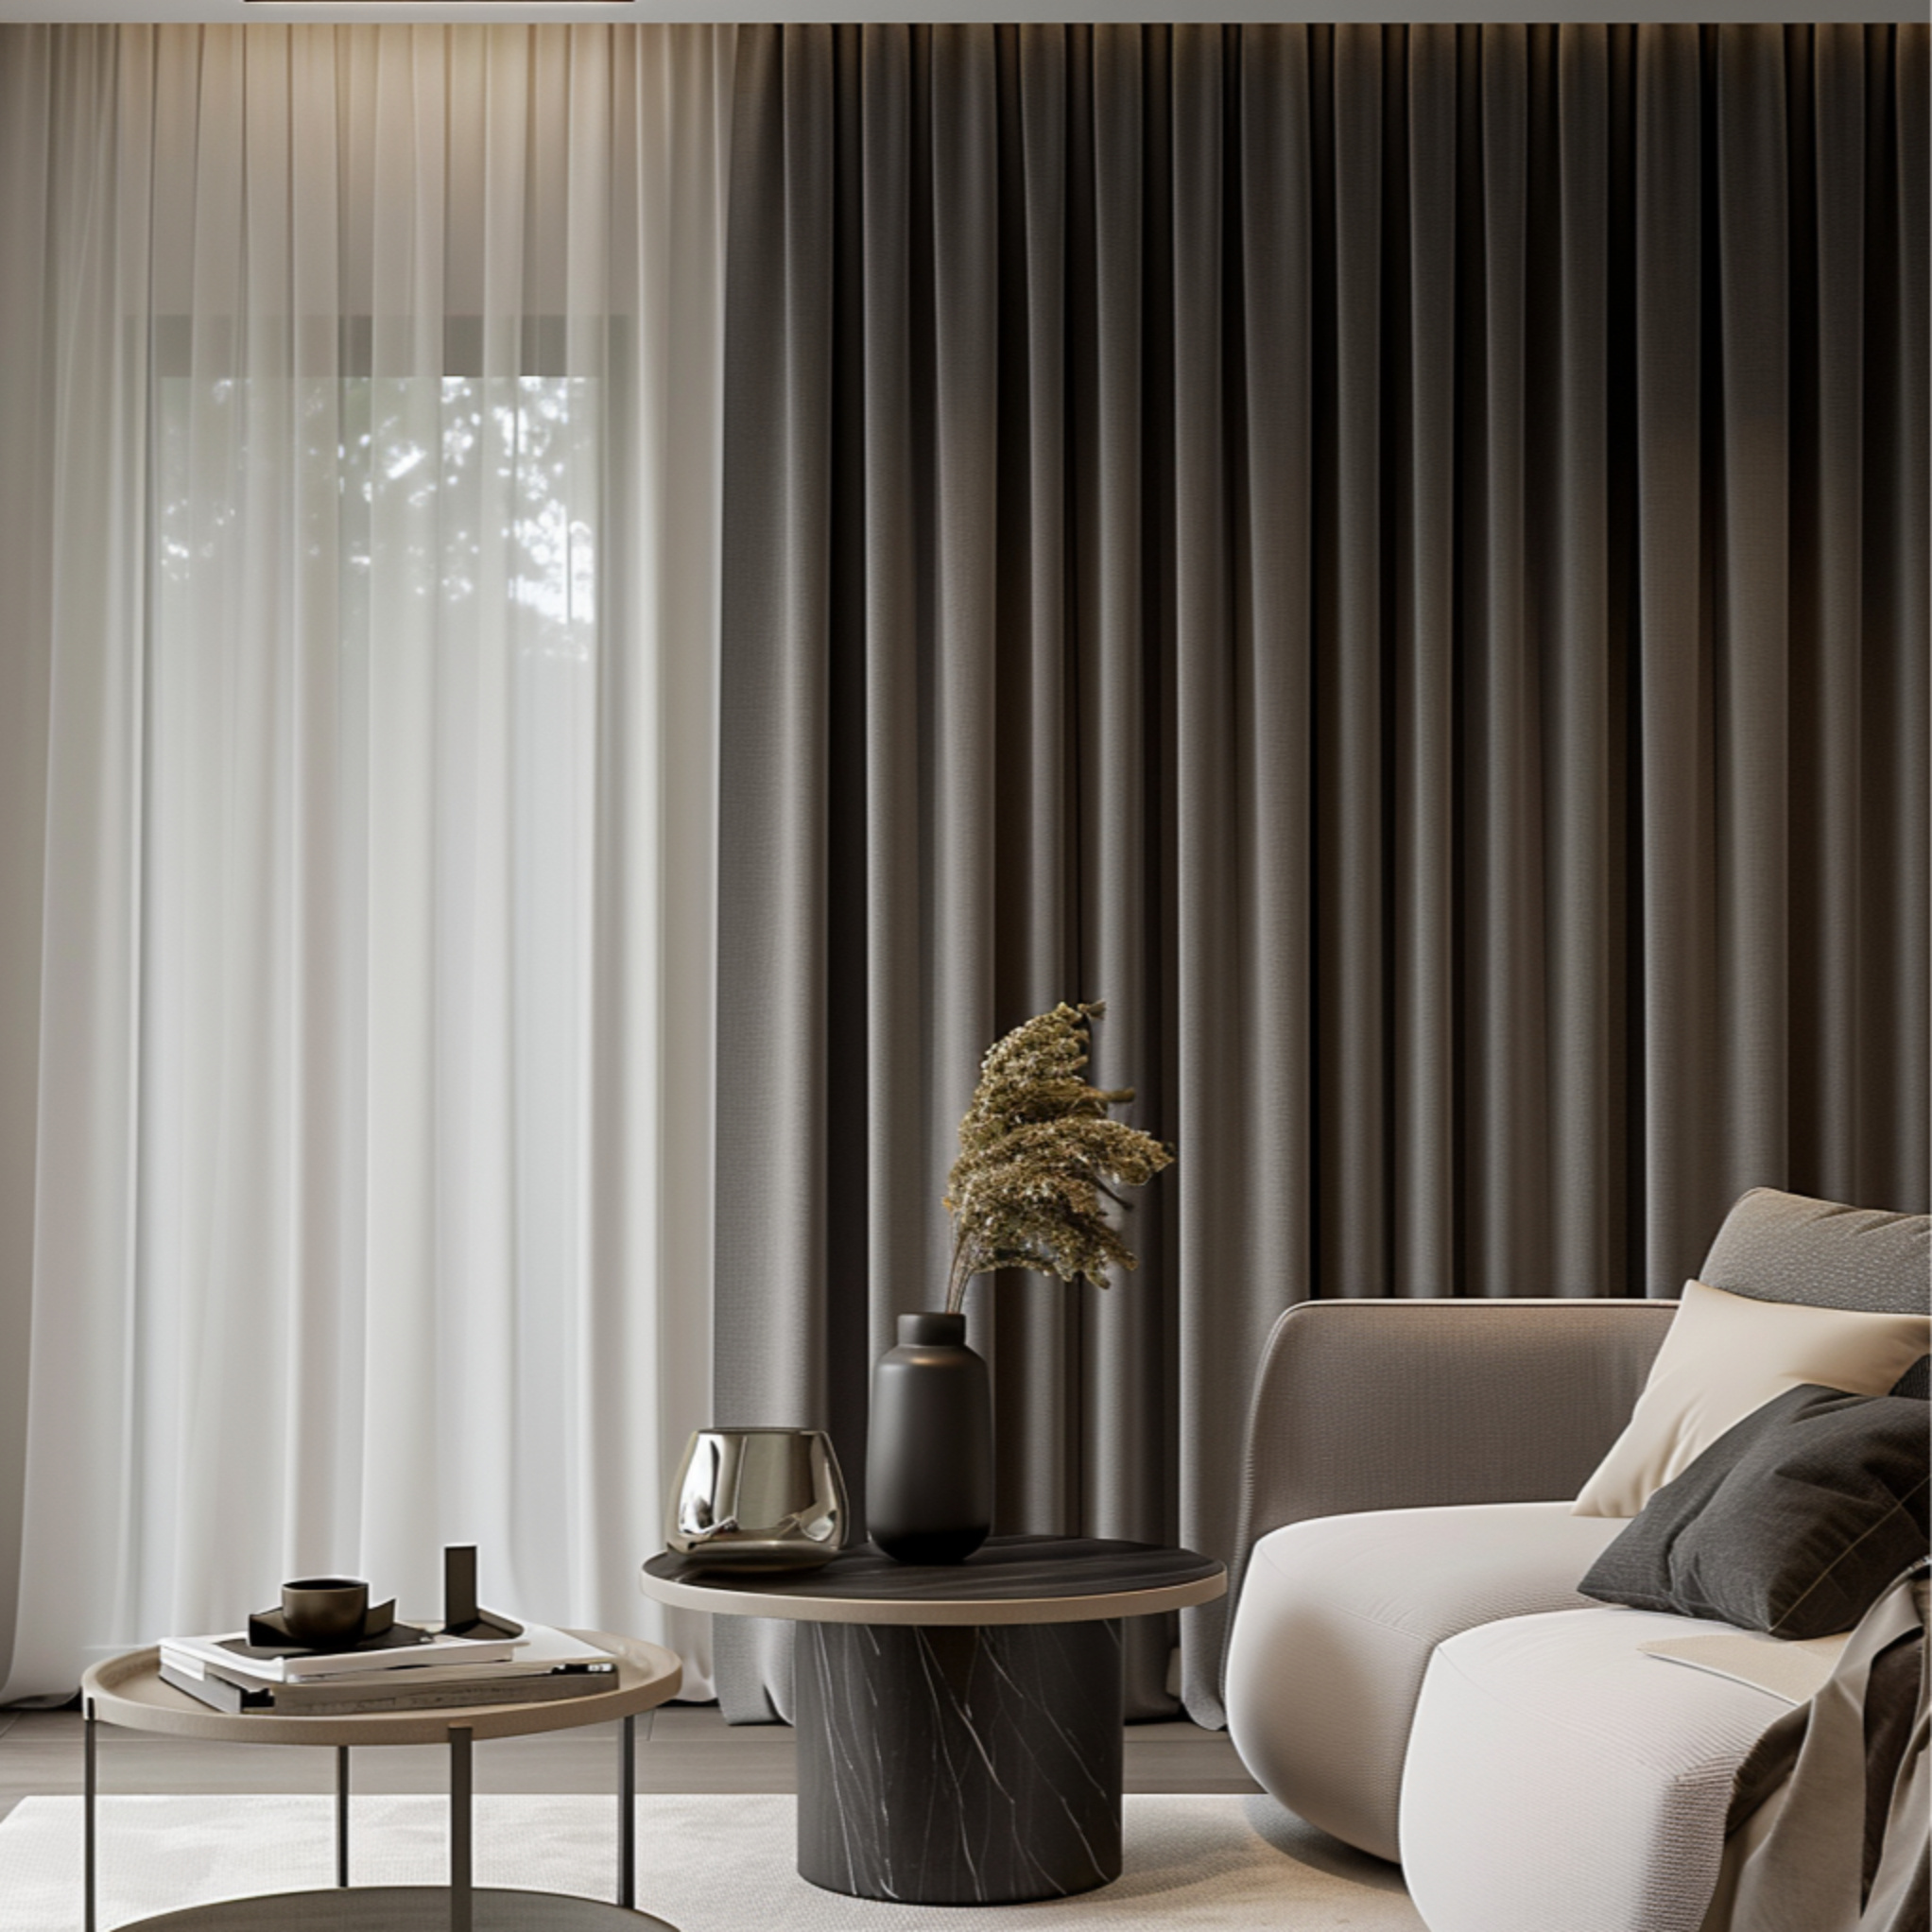
Curtains/Drapes: Soft and traditional, they add texture and can make windows appear larger when mounted high and wide. Full-length panels create elegance, while cafe curtains offer charm. Choose lined curtains for better light control and a more polished appearance from the outside.
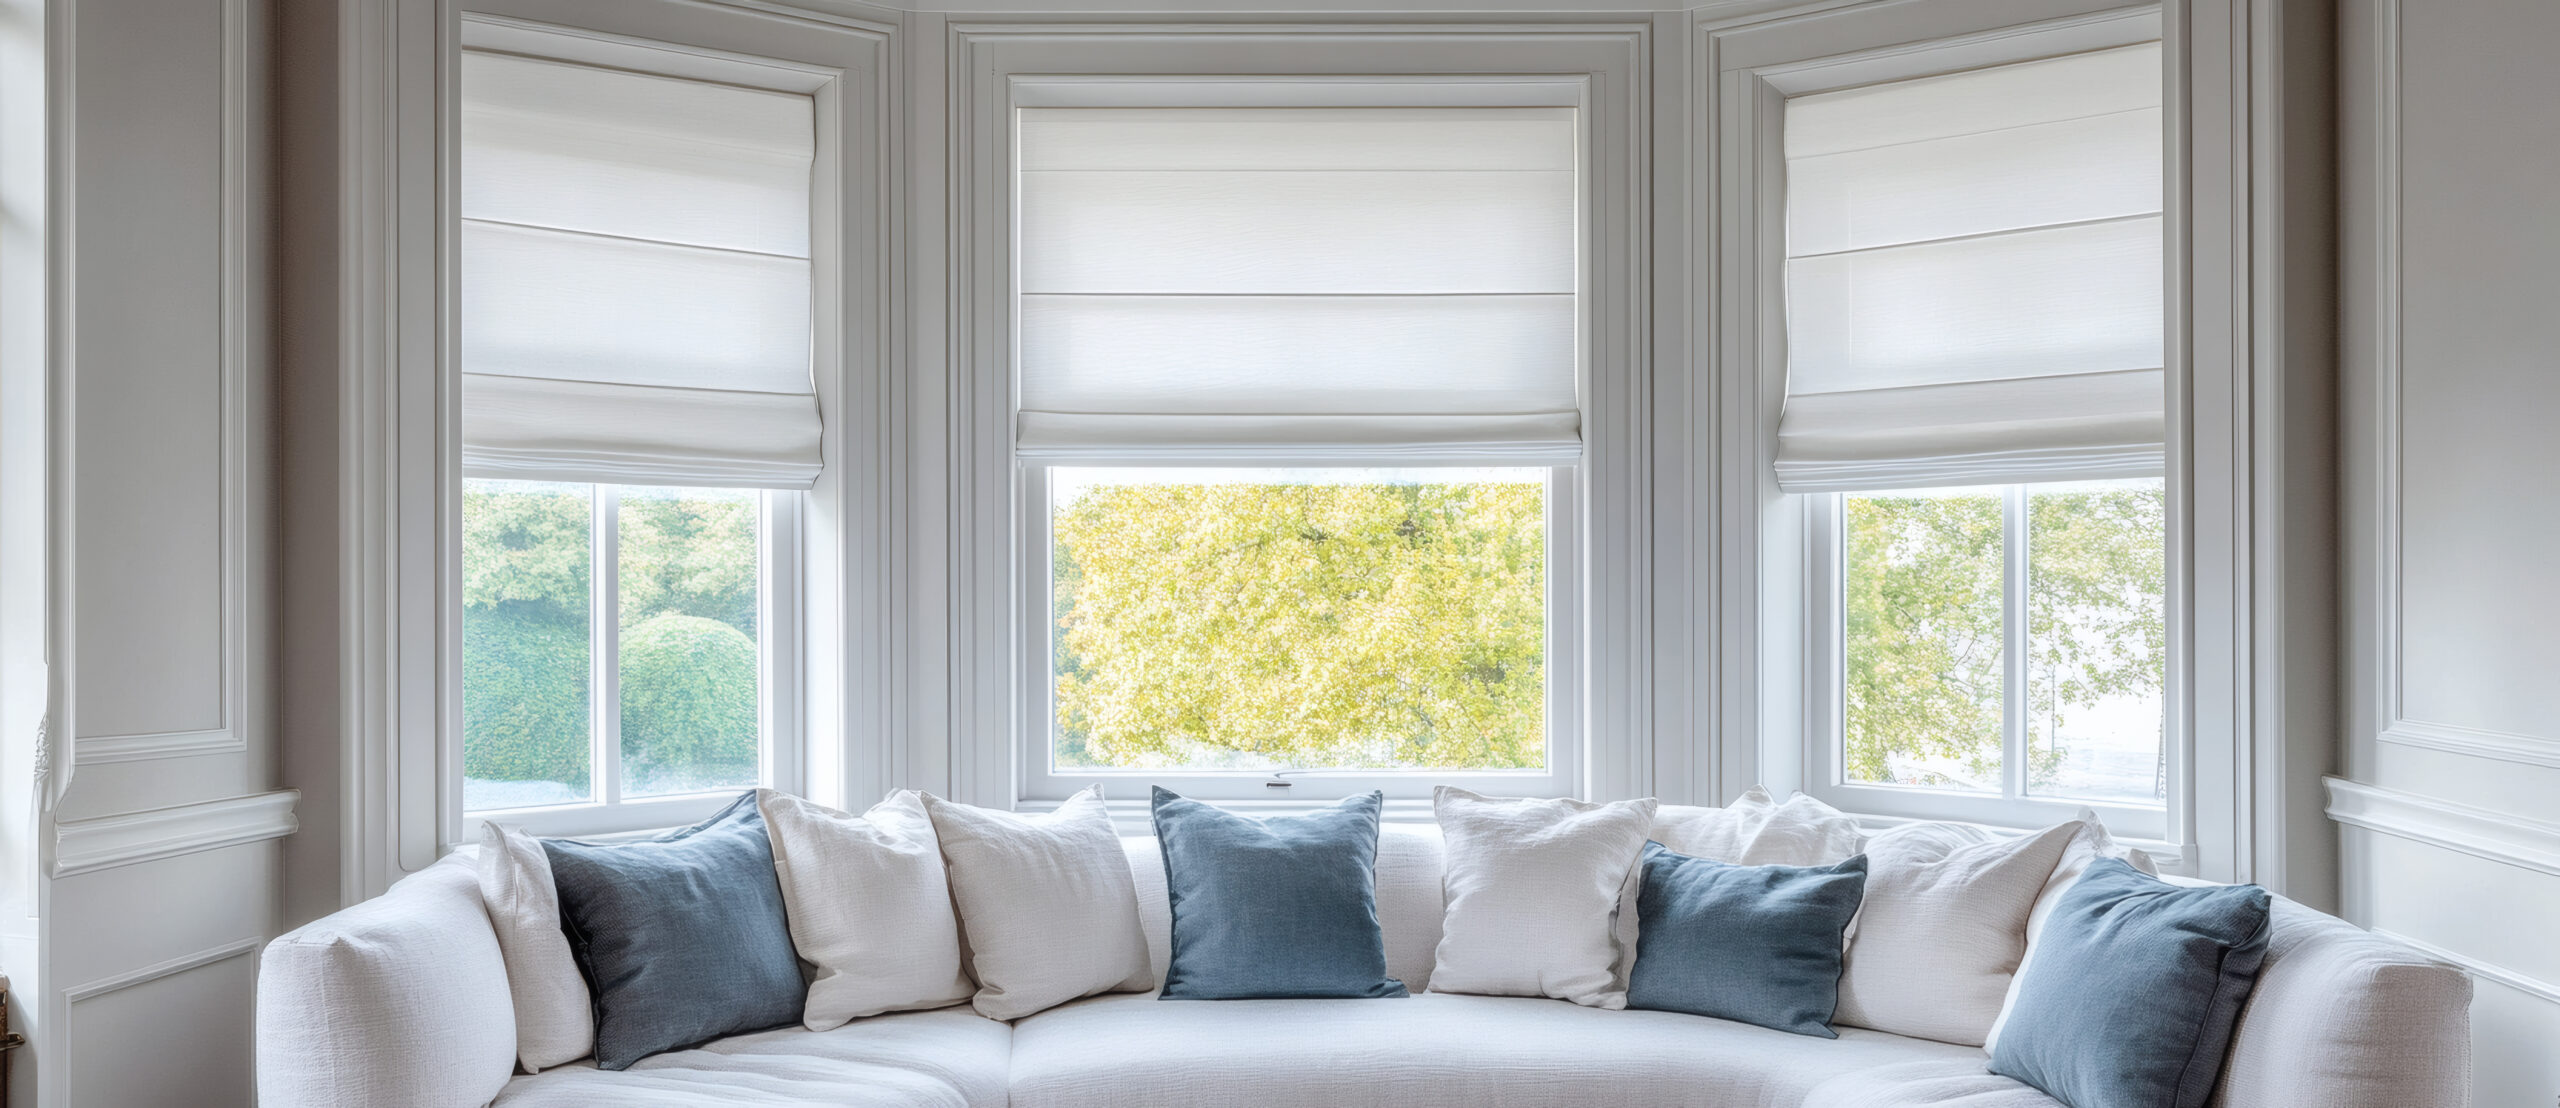
Roman Shades: Tailored and classic, they provide a clean look when raised and good coverage when lowered. Available in countless fabrics to coordinate with any design style. Inside mount for a built-in look, outside mount to make windows appear larger.
Roller/Solar Shades: Modern and minimal, perfect for contemporary spaces. Solar shades filter light while maintaining views. Blackout options are available for media rooms. Motorised versions offer ultimate convenience.
Blinds: Wood blinds add warmth and work with many design styles. Faux wood offers durability and moisture resistance. Avoid aluminium mini-blinds—they rarely look high-end.
Layering: Combine treatments for maximum flexibility. Sheers for daytime privacy with curtains for nighttime. Blinds for light control with decorative panels for softness.
Getting Measurements Right
Incorrect measurements are the fastest way to make expensive window treatments look cheap. Here’s how to measure for professional results:
For Curtains:
- Mount brackets 4-6 inches above the window frame (or halfway between the window and the ceiling for drama)
- Extend the rod 8-12 inches beyond the frame on each side
- For length, choose kissing the floor (1/2 inch above), breaking slightly (1-2 inch puddle), or floating (ending at the sill or apron)
- Order panels that are 2- 2.5x your window width for proper fullness
For Shades and Blinds:
- Inside mount: Measure width at the top, middle, and bottom—use the narrowest measurement
- Outside mount: Add 2-3 inches on each side for light blockage
- Consider obstacles like window cranks or locks
Never assume windows are the same size—measure each one individually.
Material Considerations
Fabric choice impacts both function and appearance:
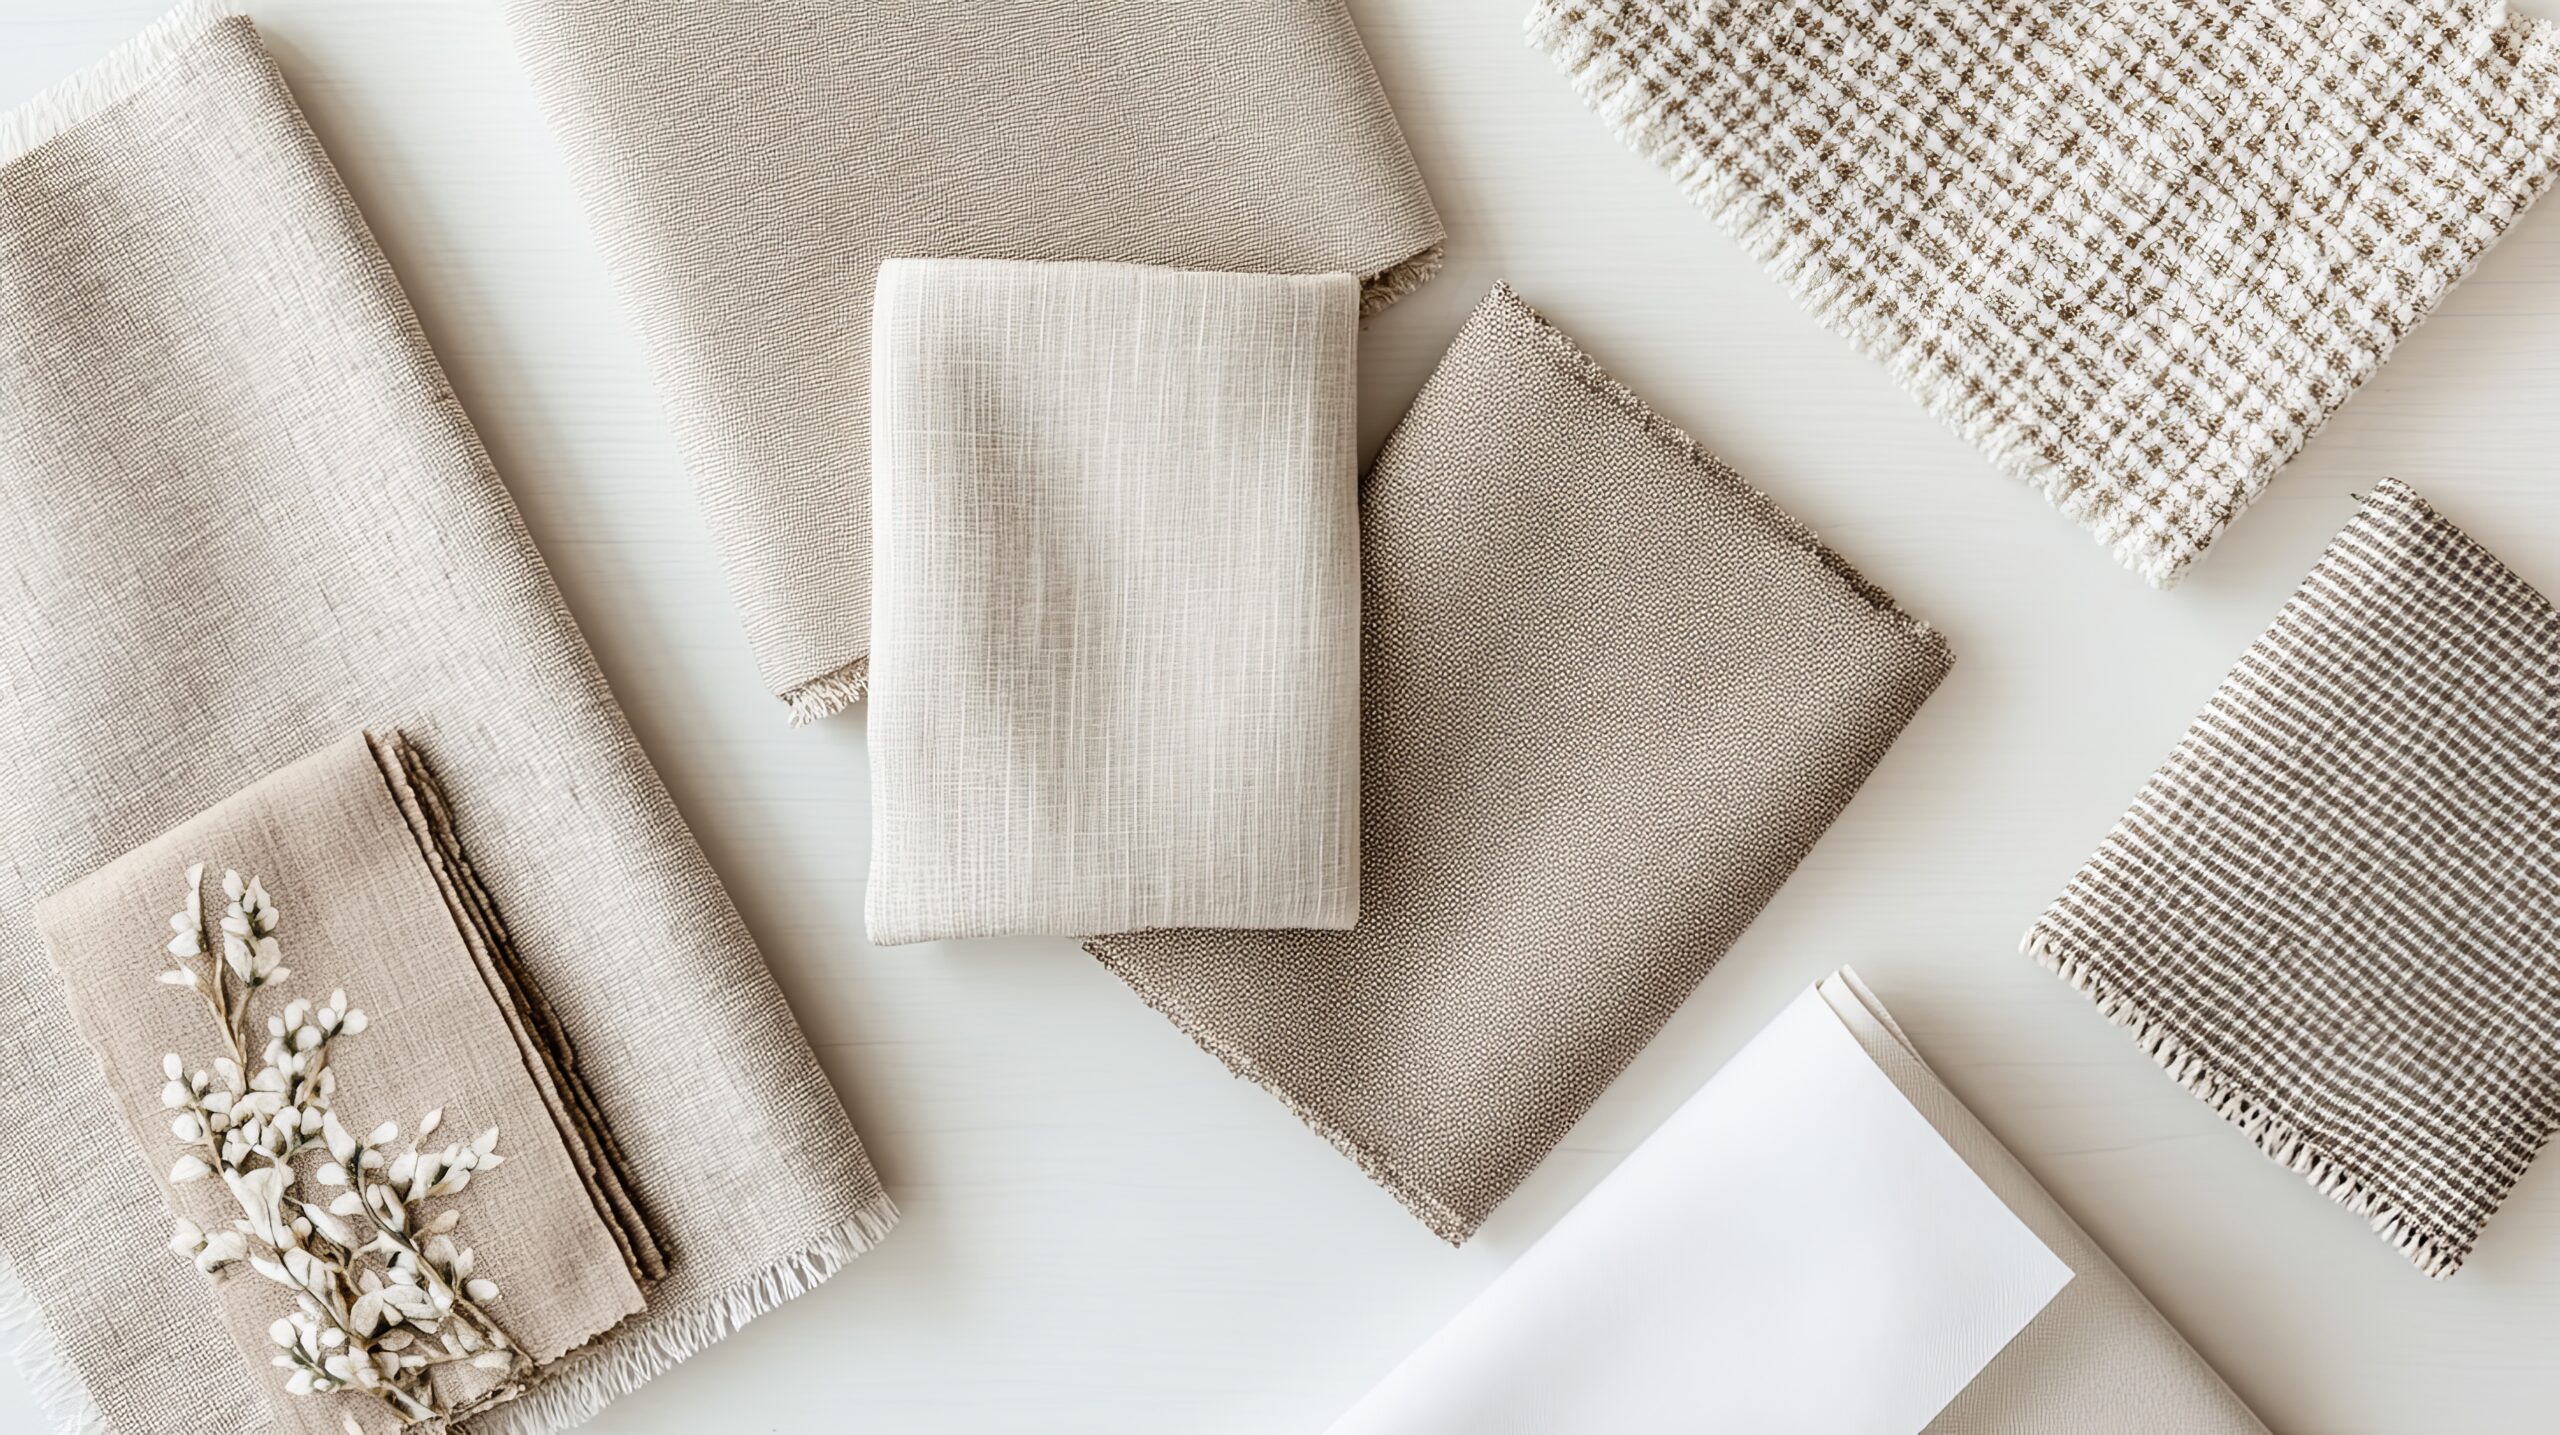
Linen: Casual elegance, filters light beautifully, wrinkles naturally
Cotton: Versatile, easy to clean, good for any style
Velvet: Luxurious, excellent insulation, blocks light well
Silk: Formal and elegant, but fades in direct sun (consider faux silk)
Polyester Blends: Durable, fade-resistant, often budget-friendly
Colour and Pattern Strategy
Your window treatments should enhance your colour scheme, not fight with it:
- Matching walls: Makes windows recede and rooms feel larger
- Contrasting colour: Creates focal points and adds drama
- Patterns: Use solid treatments if you have patterned furniture, or vice versa
- Texture: Even solid colours can add interest through texture
Remember to order fabric samples and view them in your actual room light before committing to expensive treatments.
Professional Touches
Details separate custom-looking treatments from obviously store-bought:
Proper Hanging: Iron or steam before hanging. Curtains should hang straight, not bunch at the bottom.
Quality Hardware: Rods and brackets should complement your room’s metal finishes. The diameter should relate to fabric weight—heavier fabrics need substantial rods.
Finishing Details: Curtain rings make panels easy to open and close. Tiebacks or holdbacks keep panels neat when open. Valances can hide mechanics but are used sparingly—they can date a room.
Common Window Treatment Mistakes
Hanging too low: Mounting right at the window frame makes the ceiling feel lower
Skimpy panels: Narrow curtains that barely cover windows when closed look cheap
Wrong length: Too-short curtains are the equivalent of flood pants
Ignoring the view from outside: Mismatched treatments look chaotic from the street
Over-accessorising: Skip the swags, jabots, and excessive layers
Budget-Friendly Options
Great window treatments don’t require custom pricing:
- Buy longer, inexpensive panels and hem them for the perfect length
- Use electrical conduit or plumbing pipes for industrial-style curtain rods
- Layer inexpensive sheers with ready-made panels for a custom look
- Paint or stain wooden blinds to coordinate with your colour scheme
- Buy basic roman shades and add trim for personality
Timing and Installation
Order window treatments early in your decorating process, custom options can take 6-8 weeks. Install them before arranging furniture to avoid disrupting your layout. If drilling into walls makes you nervous, many handypeople can install treatments quickly and ensure they’re level.
With window treatments in place, your room’s envelope is complete. Natural light is controlled, privacy is ensured, and your windows enhance rather than detract from your design. Now comes the fun part—adding the art, accessories, and personal touches that transform a well-designed room into your unique living space.
Step 8: Incorporate Art and Accessories
This is where your living room transforms from a furniture showroom into a home with personality. Accessories and art are what tell your story, but they’re also where many people freeze up or go overboard. The key to mastering how to decorate a living room step by step is approaching accessories with the same intentionality you brought to furniture selection.
Starting with Art
Art doesn’t have to mean expensive gallery pieces. What matters is choosing pieces that resonate with you and displaying them thoughtfully:
Scale Matters: The most common mistake is hanging art that’s too small. Above a sofa, artwork should be 2/3 to 3/4 of the sofa’s width. Over a console, leave 4-8 inches of space on each side. When in doubt, go larger or create a grouping.
Hanging Height: The centre of the artwork should hit at eye level—typically 57-60 inches from the floor. In living rooms where people are usually seated, you might hang slightly lower. Above furniture, leave 6-8 inches between the piece’s top and the art’s bottom.
Creating Gallery Walls: These add major personality but require planning:
- Cut paper templates of your frames and tape them to the wall first
- Keep 2-3 inches between pieces for breathing room
- Mix sizes but maintain visual balance
- Include non-art elements like mirrors or dimensional objects
- Stick to a consistent frame colour or style for cohesion
Beyond Framed Art: Think creatively:
- Textile art or vintage rugs as wall hangings
- Floating shelves with rotating displays
- Large-scale photography or maps
- Sculptural pieces on pedestals
- Oversized mirrors that act as art
Styling Surfaces
Every flat surface in your living room is a styling opportunity, but restraint prevents clutter:
Coffee Table Styling:
- Start with a tray to corral smaller items
- Layer heights: books stacked horizontally, a small object on top, something tall like flowers
- Include something living (a plant or flowers)
- Leave 2/3 of the surface clear for function
- Mix materials: wood, metal, glass, ceramic
Console and Side Tables:
- Create triangular compositions with varying heights
- Anchor with a lamp or a tall object
- Add medium-height items like picture frames or small plants
- Include low elements like decorative boxes or stacked books
- Keep the scale proportional to the furniture
Bookshelf Styling:
- Mix vertical and horizontal book placement
- Break up books with decorative objects
- Leave some breathing room—don’t pack every inch
- Group books by colour for impact or mix for a casual feel
- Hide clutter in attractive boxes or baskets
The Power of Plants
Nothing brings life to a room quite like actual living things. Plants add colour, texture, and improve air quality:
Choosing the Right Plants:
- Consider light levels: snake plants and pothos tolerate low light, while fiddle leaf figs need bright conditions
- Match plant size to space: a single large floor plant makes more impact than scattered small ones
- Mix heights and leaf shapes for interest
- Use consistent planters that coordinate with your colour scheme
Placement Strategy:
- Fill empty corners with tall floor plants
- Add height to console displays with medium plants
- Cluster small plants on shelves or window sills
- Hang plants in corners to draw the eye up
Incorporating Personal Items
The difference between a styled space and a home is personal meaning. Include items that tell your story:
Displaying Collections: Whether it’s pottery, vintage cameras, or seashells, group collections for impact rather than scattering them. Odd numbers feel more natural. Display on shelves, in shadow boxes, or on dedicated surfaces.
Family Photos: Mix frame styles within the same colour family. Create gallery walls mixing sizes, or display a collection on a console. Avoid cluttering every surface with photos—choose key locations for maximum impact.
Travel Souvenirs: Display thoughtfully rather than creating a cluttered “museum.” Group items by colour, material, or region. Rotate displays seasonally to enjoy everything without overwhelming the space.
Textile Layers
Soft accessories add comfort and tie colour schemes together:
Throw Pillows:
- Use odd numbers for casual appeal (3 or 5 per sofa)
- Mix patterns by varying scale: one large pattern, one medium, one small or solid
- Include different textures: smooth cotton, nubby linen, plush velvet
- Don’t match your sofa exactly—coordinate instead
- Invest in quality inserts, change covers seasonally
Throws:
- Drape casually over sofa backs or arms
- Fold neatly and place over the ottoman corners
- Choose materials that invite touching
- Keep one easily accessible for actual use
Editing and Restraint
The secret to professional-looking accessorising? Knowing when to stop:
The Rule of Three: Group accessories in odd numbers, typically three. Three different heights, three complementary colours, and three varying textures.
Negative Space: What you don’t fill is as important as what you do. Every surface doesn’t need styling. Not every wall doesn’t needs art. Let your room breathe.
Rotation Strategy: Own more accessories than you display. Rotate seasonally or when you need a refresh. This prevents accumulation and keeps your room feeling fresh.
Common Accessory Mistakes
- Pushing everything against the walls instead of layering depths
- Hanging art too high (remember, eye level!)
- Using accessories that are too small for the space
- Matching everything too perfectly (looks catalogue-stiff)
- Ignoring the view from your room’s entrance
Pulling It All Together
Step back and evaluate your accessorised room:
- Does it feel balanced from different viewpoints?
- Are your colours distributed throughout, not clustered in one area?
- Is there a mix of heights, textures, and materials?
- Can you still use the surfaces functionally?
- Does it feel like you, not a showroom?
With art and accessories in place, your living room should feel complete but not cluttered, styled but still functional. The final steps will ensure your beautifully designed room stays that way while serving your daily life.
Step 9: Final Styling and Bringing It All Together
You’ve selected furniture, layered lighting, hung window treatments, and added art. Now comes the crucial final phase—the styling details that elevate your living room from “nicely decorated” to magazine-worthy. This is where learning how to decorate a living room step by step really pays off, as you fine-tune each element to work in harmony.
The Final Layer: Sensory Details
Great rooms engage all the senses, not just sight. These finishing touches make spaces feel truly lived-in:
Scent: A subtle room fragrance creates an immediate impression. Skip overwhelming air fresheners for:
- Quality candles in complementary vessels
- Fresh flowers or eucalyptus stems
- Reed diffusers tucked discreetly on shelves
- Cedar blocks in baskets for natural freshness
Sound: Consider your room’s acoustics. Hard surfaces echo; soft furnishings absorb sound. If your room feels echo-y, add:
- Thick curtains
- Upholstered furniture
- Area rugs
- Wall tapestries or fabric art
Touch: Vary textures throughout the room to create interest and comfort:
- Smooth leather next to nubby linen
- Soft velvet against rough jute
- Cool metal with warm wood
- Plush areas balanced with sleek surfaces
Creating Cohesion
With all elements in place, ensure everything feels intentional and connected:
Colour Threading: Your accent colour should appear at least three times around the room at different heights. If you have navy pillows, perhaps add a navy lampshade and navy binding on your curtains. This creates visual flow.
Metal Consistency: Limit yourself to two metal finishes maximum. If your lighting is brass and chrome, ensure all visible metals fall into these categories. Mixed metals work when intentional, and look sloppy when random.
Style Consistency: Every piece doesn’t need to match your dominant style perfectly, but outliers should feel intentional. That antique chest works in your modern room if other elements bridge the gap, perhaps through colour or material.
Styling for Real Life
The best-designed living rooms work for everyday life, not just photo shoots:
Functional Beauty:
- Keep attractive baskets near seating for quick toy cleanup
- Use beautiful boxes on consoles to hide remotes
- Choose coffee table books you actually want to read
- Place coasters within reach of every seat
Easy Maintenance:
- Washable pillow covers for easy refreshing
- Scotch-guard treatment on susceptible fabrics
- Furniture pads under all legs to protect the floors
- Storage solutions that make tidying natural
The Photography Test
Step outside and re-enter your room with fresh eyes. Then take photos from multiple angles—cameras reveal what our eyes overlook:
- Is there visual balance from the entrance?
- Do sight lines feel clear or cluttered?
- Are there any “dead zones” that need attention?
- Does the lighting photograph well?
Photos also help you remember what works when you need to reassemble after cleaning or rearranging.
Seasonal Adjustments
A well-designed room can transition through seasons with minimal changes:
Summer: Lighten throw pillows, swap heavy throws for linen, add fresh flowers, maximise natural light
Fall: Introduce warmer textures, layer cosy throws, add amber lighting, and display seasonal branches
Winter: Maximum cosiness with faux fur, rich textures, candlelight, darker accent colours
Spring: Fresh colours in accessories, lighter curtains if layered, bright flowers, simplified surfaces
These changes keep your room feeling fresh without major overhauls or expenses.
Living In Your Design
The first few weeks in your newly decorated room are crucial. Pay attention to:
What’s Working:
- Which seats get used the most?
- Is task lighting adequate?
- Can you reach surfaces easily?
- Does traffic flow feel natural?
What Needs Adjusting:
- Lamps that need relocating for better function
- Art that needs raising or lowering
- Furniture that blocks pathways
- Accessories that create clutter
Don’t be afraid to make adjustments. How to decorate a living room step by step includes refining based on real use.
Maintaining Your Design
A beautiful room stays that way with simple routines:
Daily (5 minutes):
- Fluff and arrange pillows
- Fold and place the throws
- Clear surfaces of daily clutter
- Quick straightening of accessories
Weekly (20 minutes):
- Dust surfaces and vacuum
- Water plants
- Refresh flowers if needed
- Wipe down the coffee table and side tables
Monthly:
- Vacuum under furniture
- Clean lampshades
- Dust art and high shelves
- Rearrange accessories slightly for freshness
Seasonally:
- Deep clean upholstery
- Wash pillow covers and throws
- Edit accessories
- Update seasonal elements
When to Call in Help
Sometimes professional help makes sense:
- Mounting heavy art or mirrors safely
- Custom window treatment installation
- Electrical work for new outlets or fixtures
- Upholstery cleaning for investment pieces
The cost often prevents bigger mistakes or damage.
Embracing Evolution
Your living room should grow with you. The beauty of following a thoughtful process is that you can:
- Swap accessories as your taste evolves
- Update paint colours without starting over
- Change one major piece while maintaining cohesion
- Add new finds that complement your foundation
Your Living Room Transformation
Congratulations—you’ve learned how to decorate a living room step by step and created a space that’s both beautiful and functional. From that initial assessment through final styling, each phase is built upon the last to create a cohesive, personal space.
Remember:
- Good design takes time—don’t rush the process
- Function always trumps form—beauty that doesn’t work isn’t beautiful
- Your room should reflect your life, not magazine perfection
- Small adjustments can make big differences
- Living rooms are for living—enjoy yours!
The best part? You now have the knowledge and confidence to tackle any room in your home. The principles you’ve learned—assessing needs, defining style, planning layouts, layering elements, and styling with purpose—apply everywhere. Your living room was just the beginning.
by Kesaa Interiors | Beginner Design Guides, DESIGN GUIDES
Learn how to elevate your home by mastering these Key Interior Design Principles.
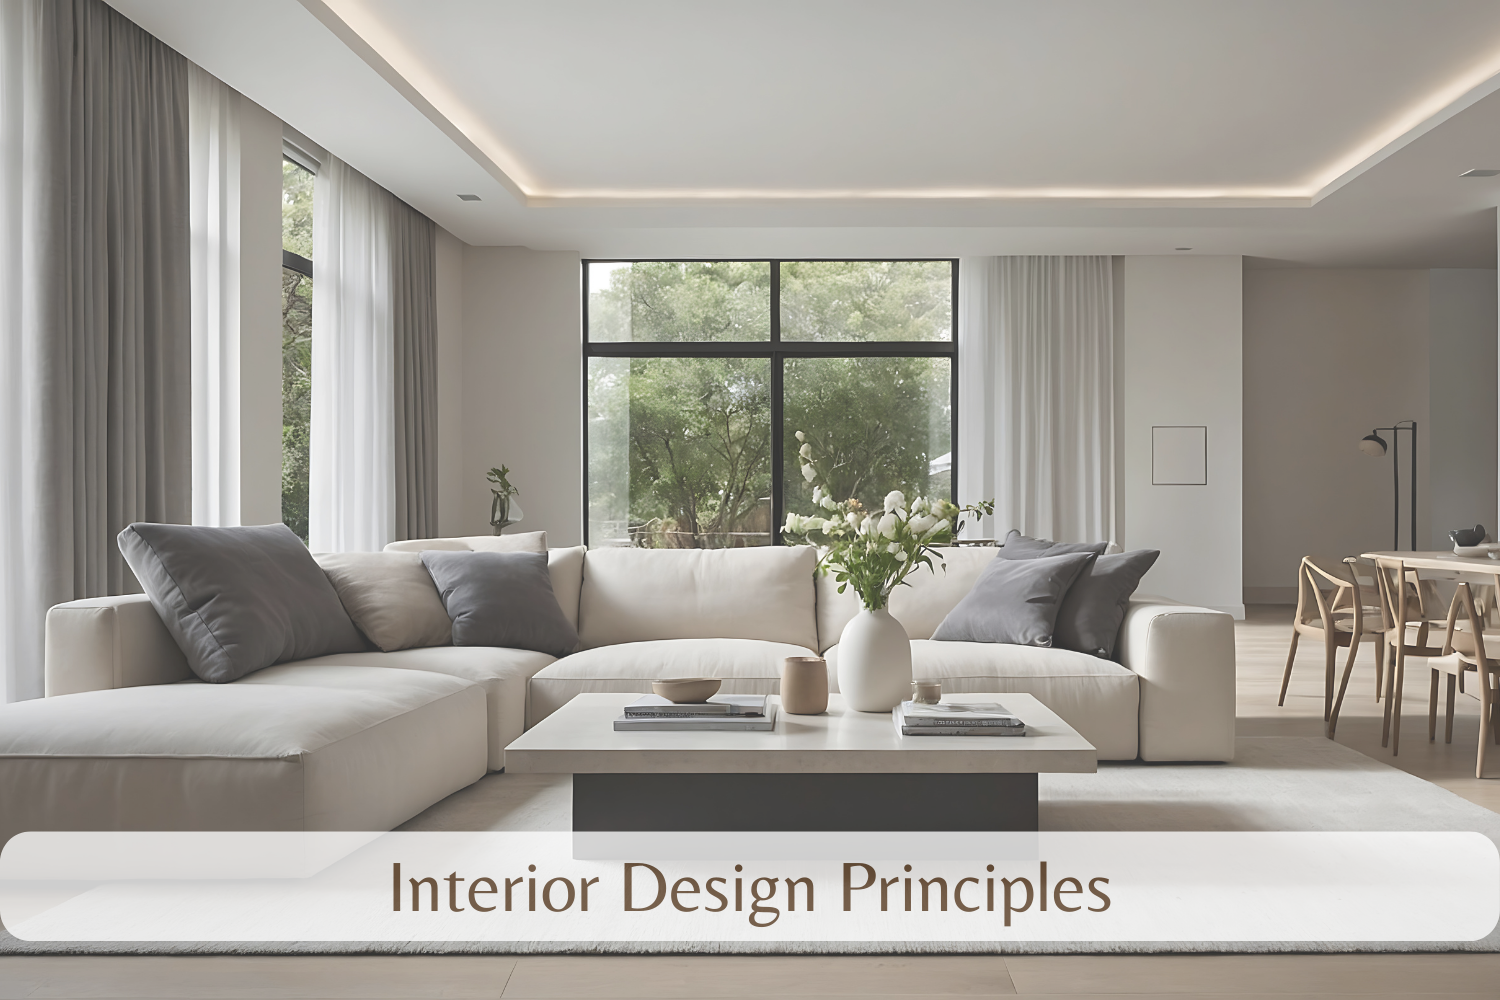
Tired of spaces that feel ‘almost there’? The secret to truly professional-looking interiors lies in understanding and applying fundamental interior design principles. Expert designers know how to build with these principles in mind to create spaces that look and feel curated.
This post breaks down those key principles—from balance to rhythm—and shows you how to use them to create stunning, harmonious spaces. You’ll gain practical insights into creating interiors that reflect your personality and stand the test of time. With core interior design principles, you can create your perfect space in no time.
By mastering these interior design principles, you’ll transform your house into a home that reflects your style and impresses everyone who walks through the door. Whether you’re a seasoned DIYer or just starting to explore the world of design, a strong base in interior design principles is just what you need to get started. Let’s dive in and explore the essential interior design principles that will elevate your design skills.
Important Interior Design Principles.
Balance in Interior Design: Achieving Visual Harmony
Balance, a fundamental design concept, is huge in achieving harmony within any living space. The principle of balance is about the equal distribution of visual weight within a space. In design terms, it’s all about visually giving your space a sense of rest. This means carefully arranging furnishings, decor, and colours to create an even distribution of visual impact. When it comes to crucial interior design principles, it’s all about visual appeal.
Why is balance so important in interior design principles? Because it creates a sense of stability, calmness, and visual appeal. Think of it like this: if you were designing a logo or painting, would you just put everything on one side? The balance you learn here isn’t just for furniture; it applies to colour palettes, texture choices, and how to create a satisfying look through this amazing design principle. An unbalanced room can feel unsettling, incomplete, or even jarring. It impacts the mood and comfort of your space more than you might realise. This is why keeping balance as part of your core plan for the design of your home makes all the difference.
There are three primary types of balance in interior design:
- Symmetrical Balance: (Mirror image; formal and traditional feel) This is the easiest type to identify and implement. In symmetrical balance, one side of the room mirrors the other.
- Examples: A living room with identical sofas flanking a fireplace; matching nightstands and lamps in a bedroom.
- When to use it: For a classic, formal, or peaceful ambience.
- Picture Suggestion: A well-executed example of symmetrical living room or dining room balance.
- Asymmetrical Balance: (Balance achieved through dissimilar objects of equal visual weight) Asymmetrical balance requires a little more finesse. It relies on placing different objects of varying sizes and shapes to create equilibrium.
- Examples: One large plant balanced by grouping smaller art pieces; A statement sofa with a unique armchair opposite.
- When to use it: For a more relaxed, modern, and dynamic feel. This is why interior design principles like asymmetrical balance are becoming more popular every year.
- Picture Suggestion: A modern living room illustrating asymmetrical balance, showing contrasting but visually weighted elements.
- Radial Balance: (Elements arranged around a central focal point) Think of radial balance as items all pointing to or placed around one point of emphasis in a room. The other type of design is much more natural.
- Examples: A round dining table with chairs surrounding it; a foyer with a circular rug and overhead light fixture.
- When to use it: For a dramatic, focused, and welcoming space. This design brings people together more than the others!
An Actionable Tip to check balance: imagine drawing a line down the centre of your space. Are the elements on either side visually equal in weight, even if they aren’t identical?
A strong understanding of interior design principles like balance can drastically improve your room’s overall feeling and show your home’s true potential! Balance might not be the most common design principle, but it’s one that will leave a lasting effect.
The Importance of Proportion and Scale in Interior Design
Following up on our conversation about balance as it relates to interior design principles, we arrive at proportion and scale, which determine the right size of furniture. Where balance sets the stage, proportion and scale define the players. Understanding how these elements interact is crucial for creating interiors that are not only visually pleasing but also feel comfortable and functional. They can take the visual and feeling of an average space and help make it your dream space.
- Proportion: This refers to the relationship between the sizes of different elements within a space. It’s about ensuring all the components work harmoniously, so it’s the most delicate interior design principle discussed thus far. Often, designers use the golden ratio (approximately 1:1.618) as a guide. This ratio is thought to be inherently pleasing to the eye. You see this design play out a lot in ancient cultures as it’s supposed to represent some level of perfection in what can be created by humans.
- Scale: Scale, on the other hand, considers the size of an object in relation to the human body or other objects in the space. It’s about ensuring that furniture and decor feel appropriately sized and contribute to a harmonious composition. To summarise, scale ensures that your armchair is at a proper height and weight compared to what is typically found. That can also allow for intentional variation if the designer desires it. If you’re not doing anything “wrong”, but it looks wrong? That means scale is an interior design principle you need to study.
Why are proportion and scale important? These interior design principles are vital for several reasons. Good proportion and scale create a sense of harmony and balance in a room. If furniture or decor is the wrong size, it can make the space feel cramped, awkward, or simply “off.” They enhance the overall comfort and functionality of a space. A sofa that’s too large for a room can impede traffic flow, while a rug that’s too small can make a living area feel disjointed. A good grasp of how to measure things in rooms can keep them cohesive in style or feelings, as it allows design for an overall theme in each room.
Let’s consider some examples of misapplication:
- Oversized furniture in a small room makes the room feel cramped and overwhelming. No one will like using your furniture, as the cramped state won’t create a mood or feel welcoming.
- A small rug in a large living room: Feels inadequate and visually disjointed, failing to anchor the space and leaving furniture “floating.” It almost makes things worse when a rug is, in fact, there.
- Tiny artwork above a large sofa: Lost and unbalanced, it fails to make a visual impact and can even look a bit silly.
Here are some tips for correctly applying proportion and scale within interior design principles:
- Measure your space carefully before buying furniture: Know the dimensions of your room to ensure that pieces will fit comfortably and according to their shape.
- Consider ceiling height when choosing furniture and decor: Taller ceilings can handle larger, more dramatic pieces, while lower ceilings may benefit from streamlined and lower-profile furnishings.
- Use painter’s tape to visualise the footprint of furniture on the floor: This simple trick can help you understand how much space furniture will take up before you commit to a purchase.
- The 60-30-10 rule for color palettes. Pick three colours for your colour palette: One primary (60%), one secondary (30%), and the other for accent. This simple guide for colour creates cohesion and balance throughout your room. This can further emphasise a level of professionalism for the designer who uses the golden ratio.
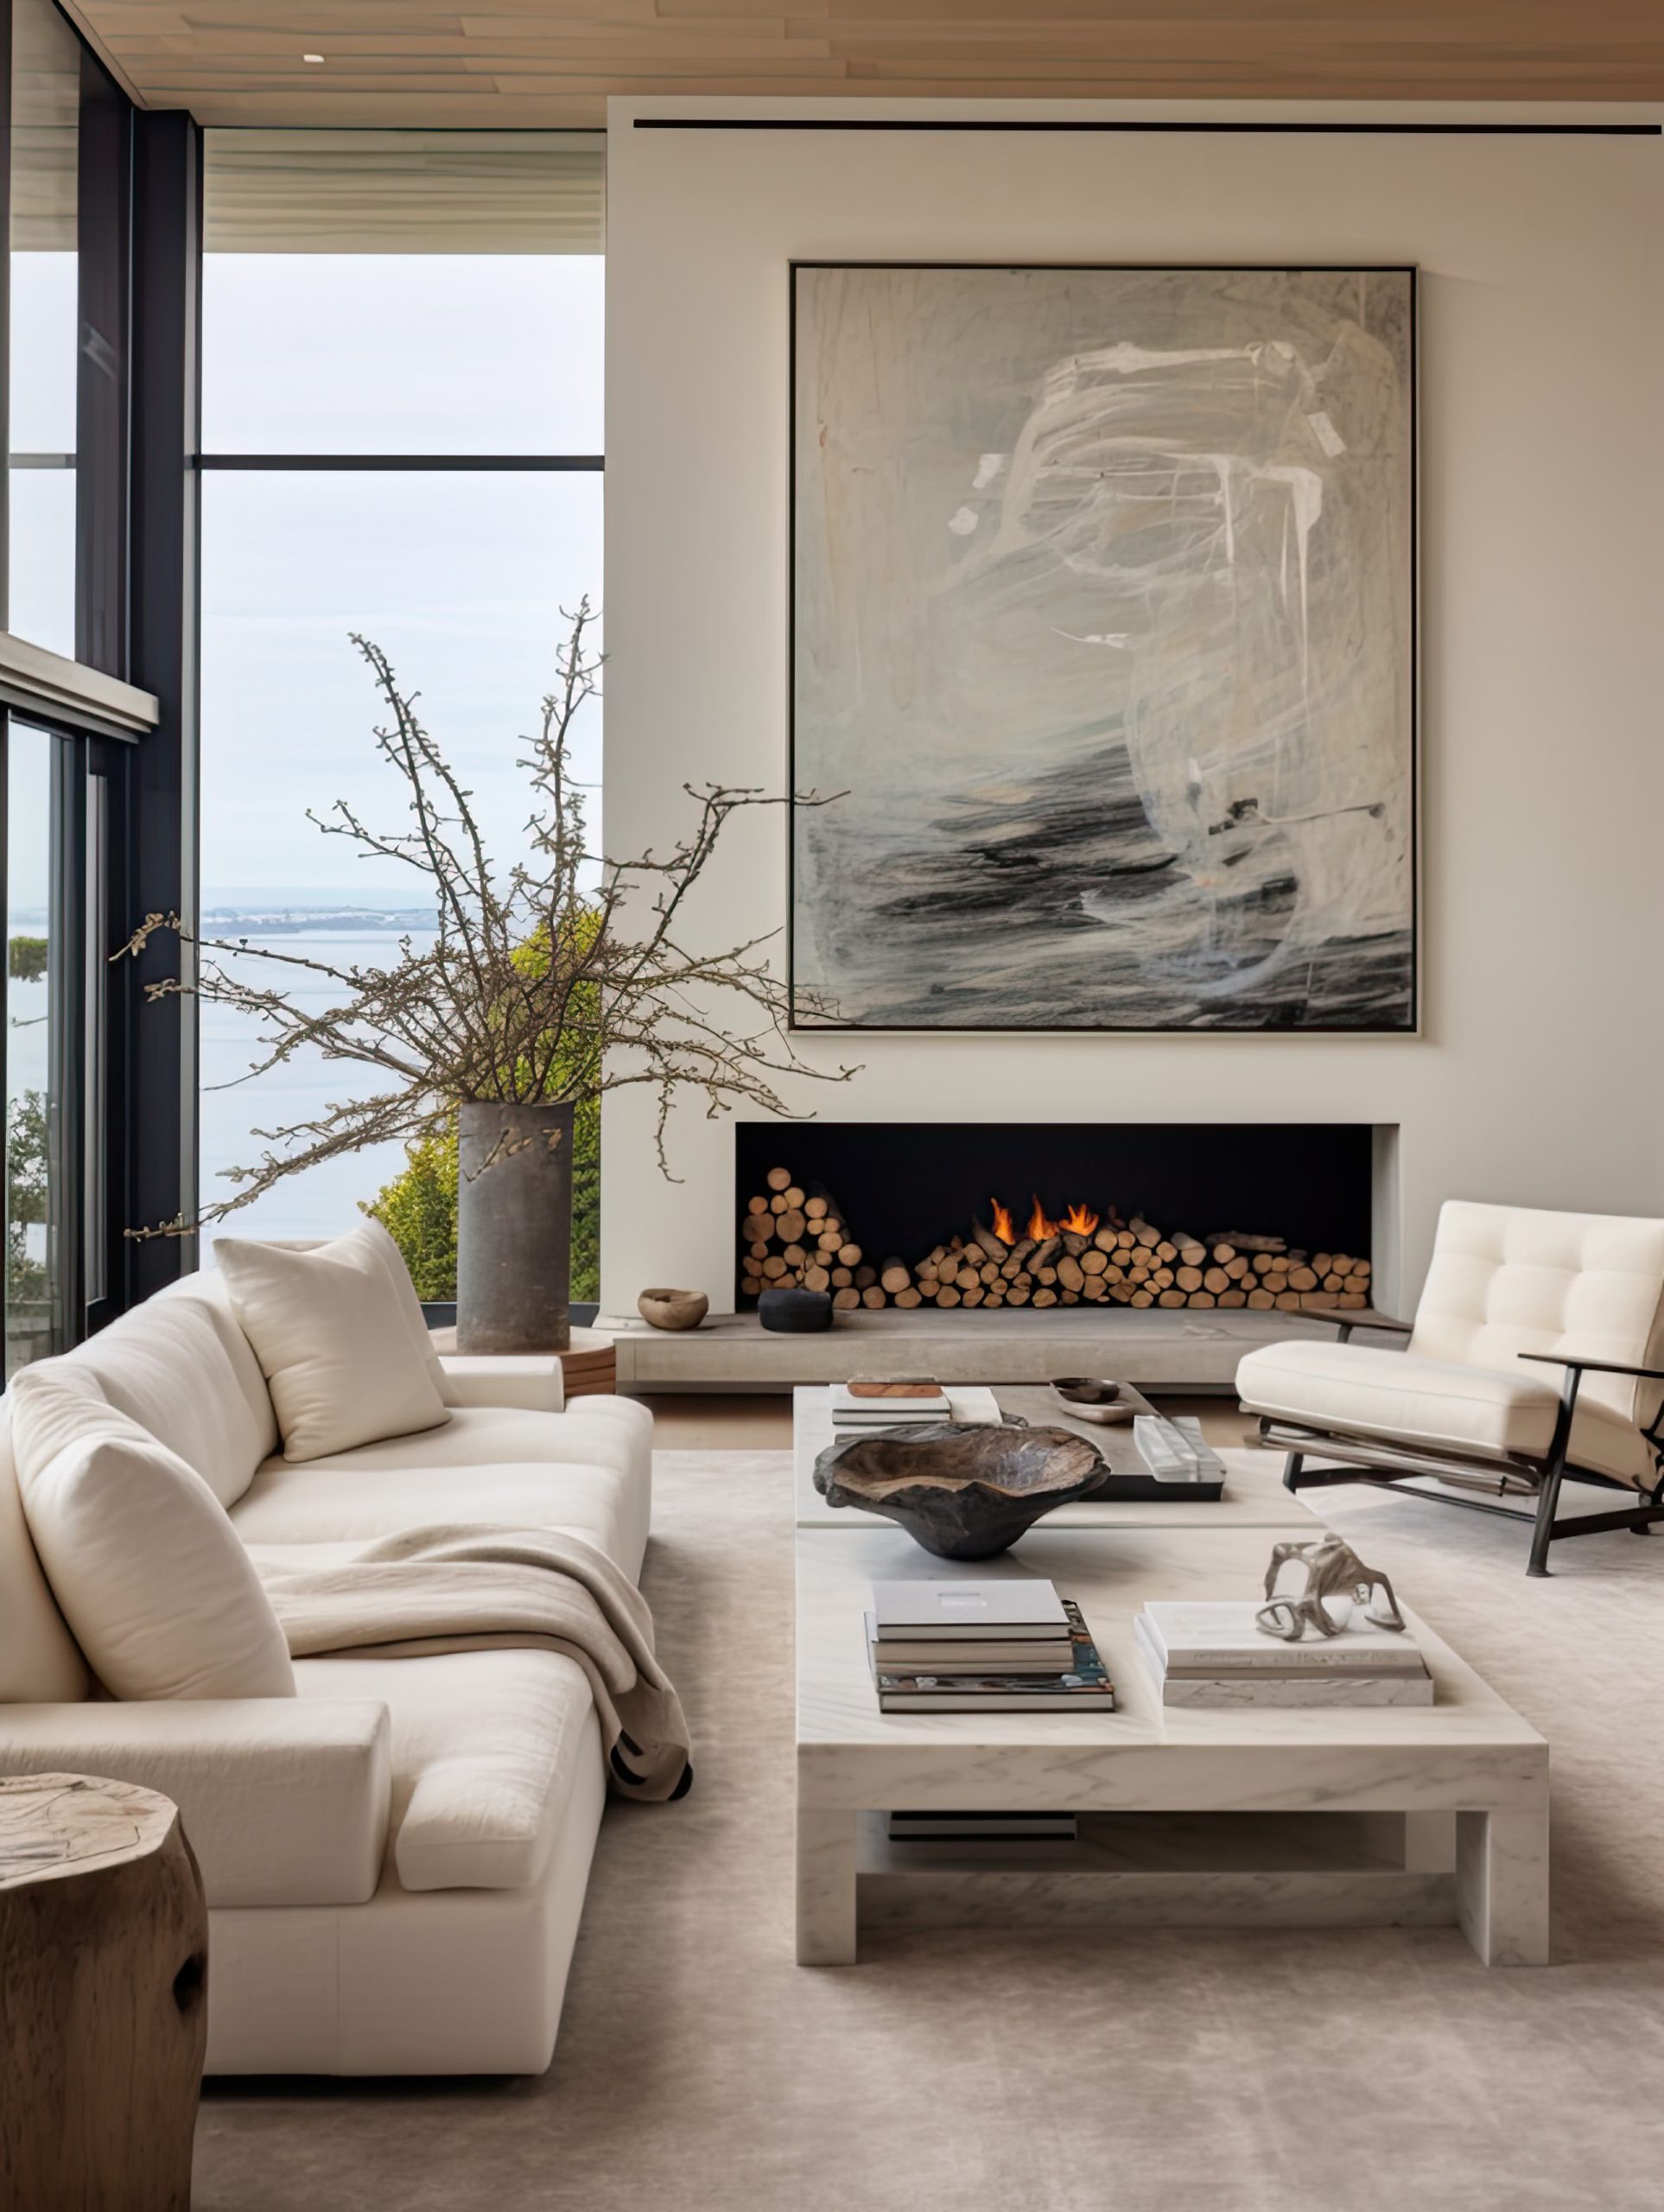
Ultimately, understanding and implementing proportion and scale is a vital element within interior design principles if you want to achieve that polished, professional aesthetic. Like balance, proportion and scale work in tandem to bring harmony and appeal to any living space. When considering where to emphasise that professional look in any room, consider utilising this scale principle to put it into practice.
Creating Harmony Through Rhythm in Your Interior Design
Building upon our discussions of scale and balance and how this creates essential design ideas to work with interior design principles, let’s now dive into rhythm and harmony. These principles guide your guest’s eyes in a design to the parts the designer wishes you to see. These essential ingredients for an even more eye-catching feel allow you to shape rooms like a master artist would use colours on their paint palette. You cannot have professional-level designs without knowing rhythm. The more your rhythms harmonise, the higher you will be perceived with talent as an interior designer.
- Rhythm: As part of the design, rhythm creates a sense of flow and movement, the kind you would get from dancing with someone you can trust. Rhythm is all about repeating aspects such as texture, shape and colour. The repeating makes one part more visible. In rhythm, our eyes can dance about what matters with ease.
- Harmony: This means your room should feel cohesive and well-thought-out. Each piece of furniture, art, or texture choice shouldn’t stand out negatively but should all “harmonise.” Without rhythm, there would be no harmony as one plays the stage for the other. A room should feel well-designed using both of these crucial interior design principles to look its very best.
Why are they essential together, harmony and rhythm in a room design? These interior design principles make all the difference in guiding a person’s sight, creating visual appeal, and making what matters more important more pronounced. These things make living spaces unique and personal, allowing owners to show their character as they design. The best designs not only look good, but they also reflect the identity of a family in ways that a store-purchased catalogue can never provide. How one space is designed as part of these two principles is very important.
Consider a few of the examples of using rhythm:
- Repetition: This means the designers should repeat patterns of similar designs with similar colours and shapes, drawing our eye across different spaces.
- Progression: Start with a focal point in your home, then branch it to the walls as each progresses with more detailed features, such as wallpaper design or shape.
- Contrast: Instead of cohesion with the same colour palettes or shapes, create more of a different approach by contrasting these details with an even sharper focal point.
- Transition: Using a more calm feel, take what is inside your living area and use transition and extend outwards, maybe creating an archway, to move our eyes as the design transitions smoothly to more areas around a room, allowing its cohesive rhythm to play a pivotal role here as part of all interior design principles.
How do you have harmony in your design by using rhythm principles? It can be easy as following the ways to achieve it:
- Sticking to colour themes
- Make your designs the same motifs from floor to ceiling, and don’t just emphasise colours for their focus
- With proper attention, your eyes will gravitate around areas with the best interior design principles you have followed.
Visual Examples can enhance these harmony skills more, showcasing a different effect and feel on different approaches. This will emphasise to your potential customers that if you are a designer yourself, there’s so much they can customise with your skill set. The visual examples below showcase them in an amazing way.
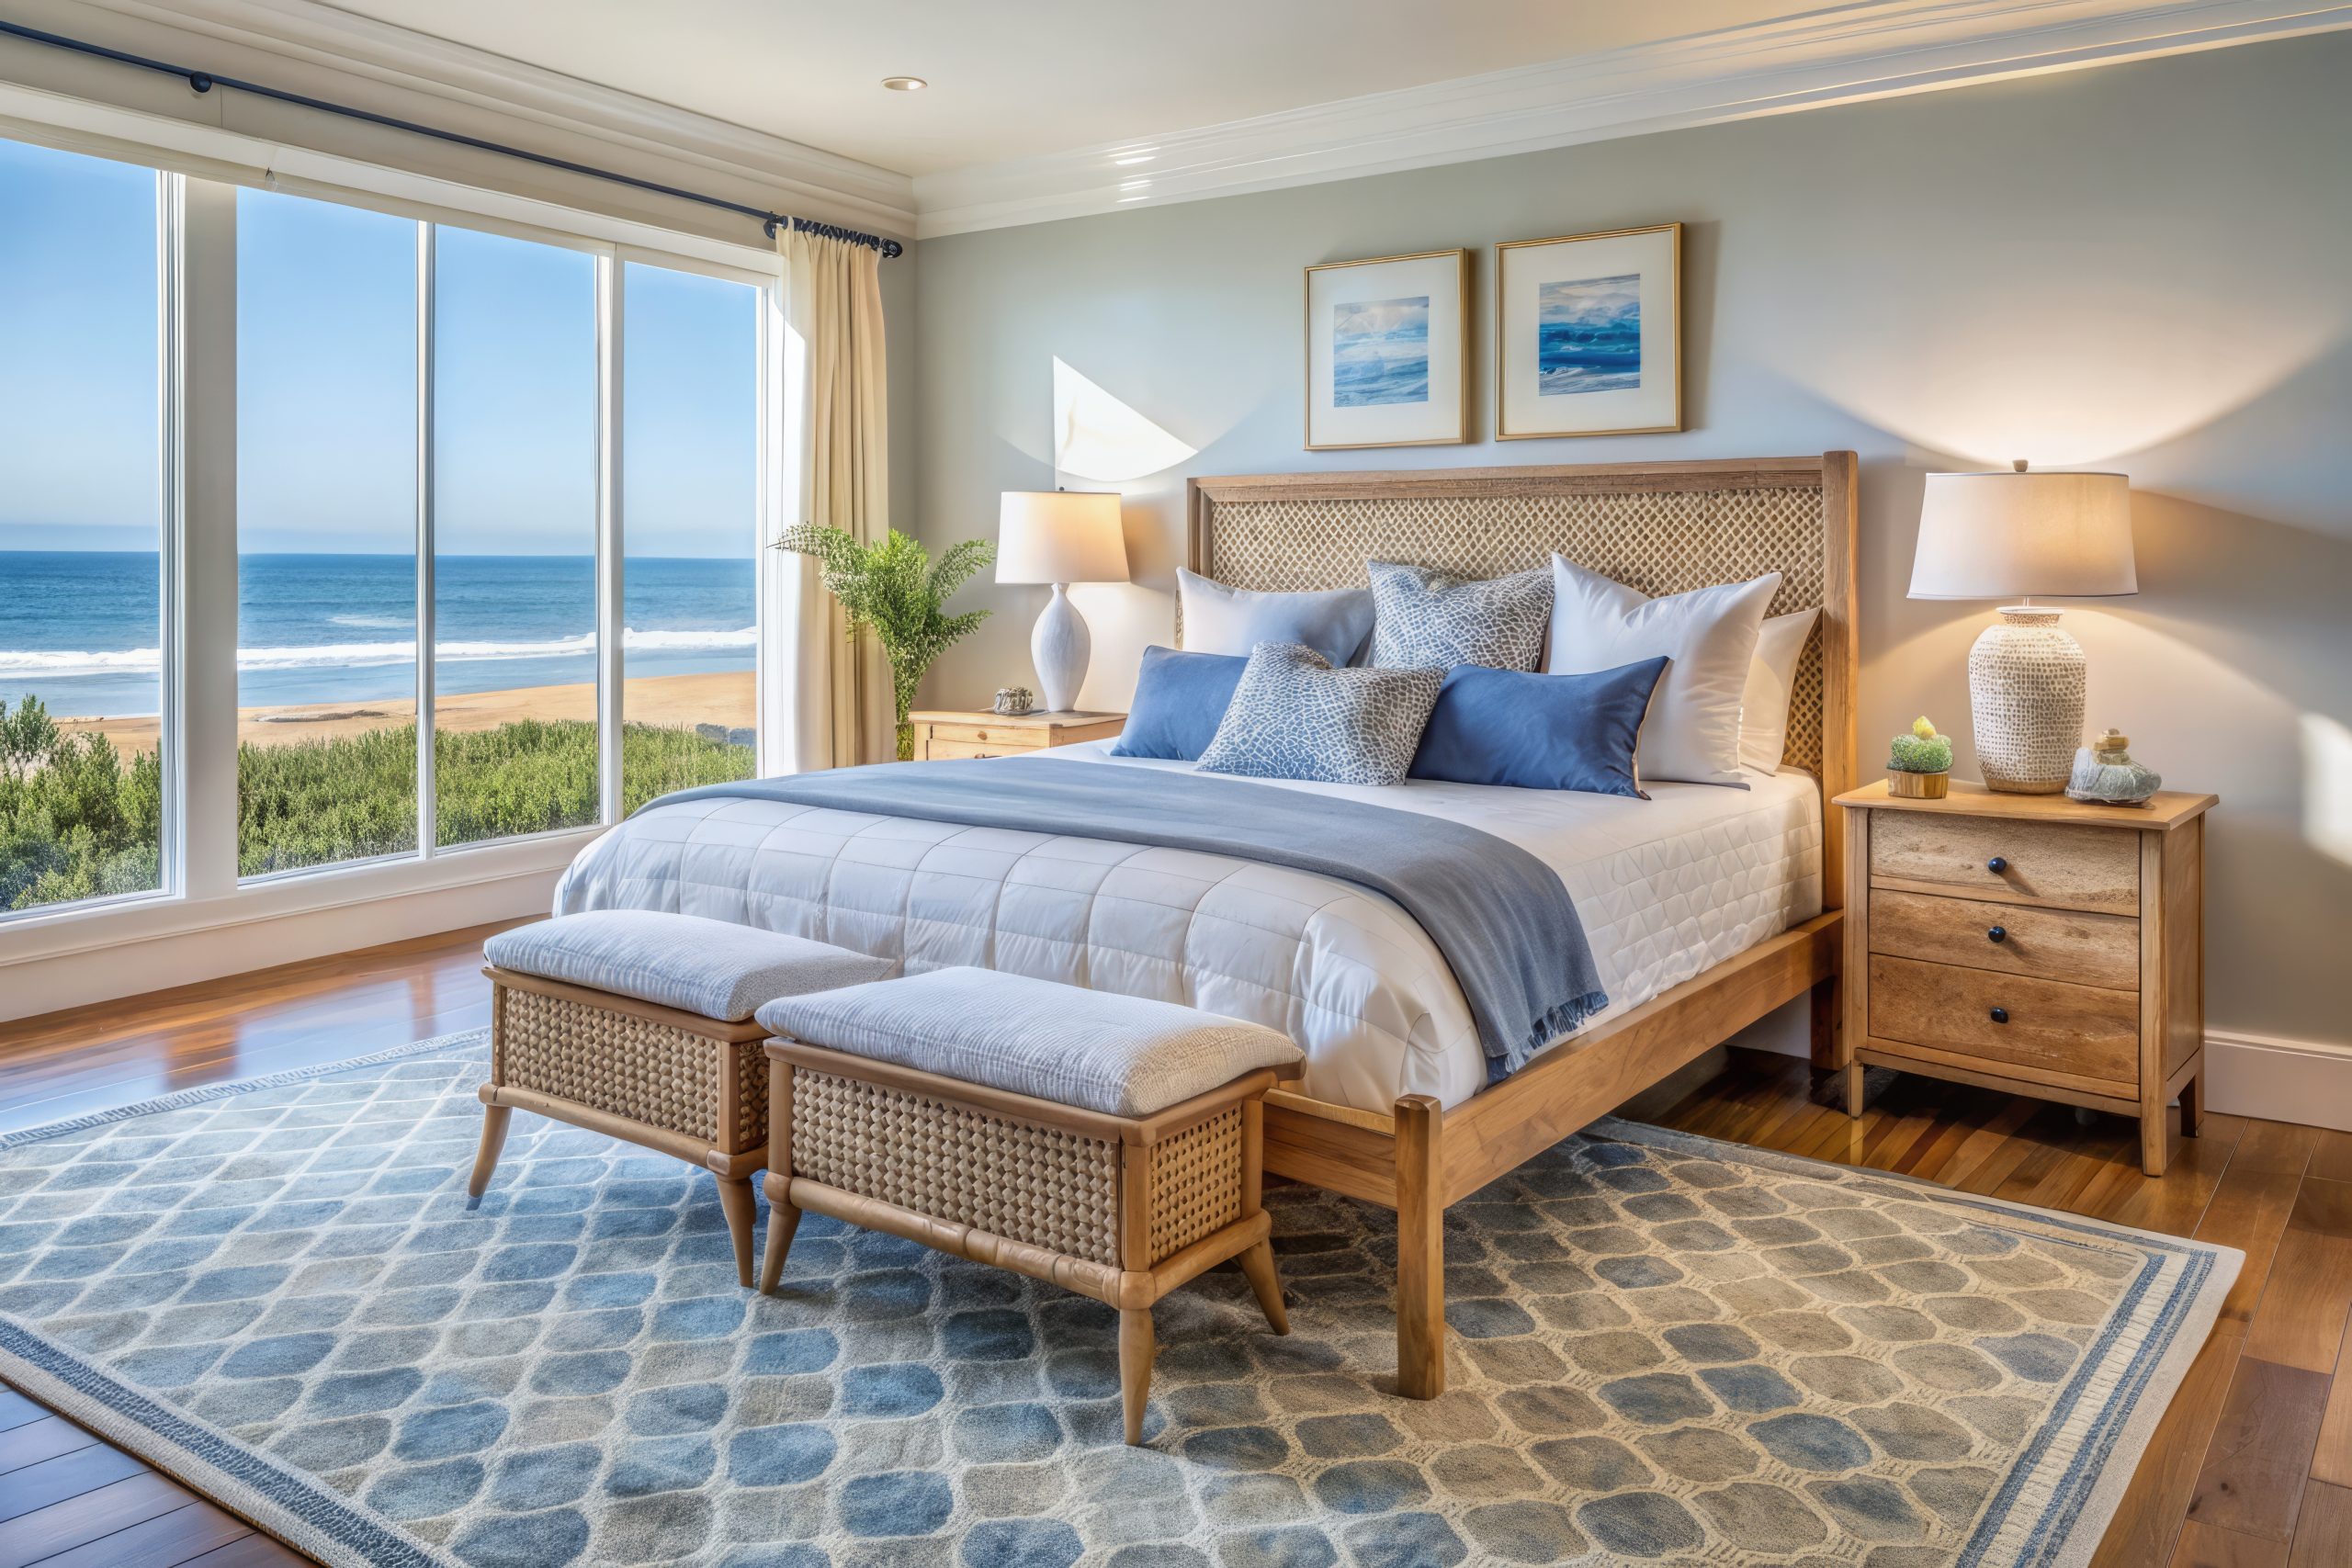
When you master rhythm and harmony together, you demonstrate a sophisticated understanding of the core interior design principles of professional quality. Through the understanding of the two skills discussed above in combination, a sense of style and cohesiveness plays out more effectively for the individual and their overall sense of character to be expressed. With each rhythmic move creating harmony, the final masterpiece speaks a story.
Creating a Captivating Focal Point in Your Interior Space
Following our previous understanding of Harmony and Rhythm with regard to our exploration of interior design principles, we can discuss how a professional-level designer uses their focus points. In a harmonious space, an area draws our eye there with detail that makes a home both more professional and stylish to admire. Combining many things together, such as contrast, proper placement, and light, will be what turns your house into a very personal home that gives your customers more meaning.
A focal point, as it’s called, will use everything inside one space, such as furnishings, to be that centrepiece area people are all going to emphasise around. It’s crucial to note that emphasis plays a part in an overall tone and can influence moods if that’s intended. By not giving things importance, they become, as it is called in photography, a bokeh – it creates areas that lack a bit more emphasis compared to the main points to notice.
There are many times you can see amazing focus, and these examples of focus inside rooms can be learned as part of making these designs yourself. Let us break that apart and explore why this is part of many interior design principles worth understanding.
- Having a fireplace creates an old touch with a modern look. It can be a point you draw the person in the very moment they pass through.
- Having a big window that catches the light. Lighting draws people, and the beautiful things they are drawn in make rooms have that attention more easily.
- Adding art pieces such as art to be eye-catching can show a lot about personality or emphasise what that part of character will give attention towards
- Adding lighting is an important trick many artists use as they draw focus towards the character with spotlights. Rooms can emulate this using lights!
By taking any focal area mentioned previously, adding techniques and details can all be learned through the following details:
- With proper planning, placement and position items where attraction would matter right. The point is drawing attention to that thing.
- The other part focuses on making things that give the feeling and vibe around one place that doesn’t quite reflect, such as lighting effects furniture or even shape to a background. Use it.
- Most lights can add a sharp line to draw people to look at what is on walls, such as artistic expression with abstract art or pictures that family would most relate to, such as pictures from around childhood. This detail adds a memory of home to your viewers as a person walks into the house!
Most can often just get tips and start drawing attention, but if they just have the basic grasp or ideas, they will often fall behind what other designers can offer. But we’ve touched on important principles about making the focus a key.
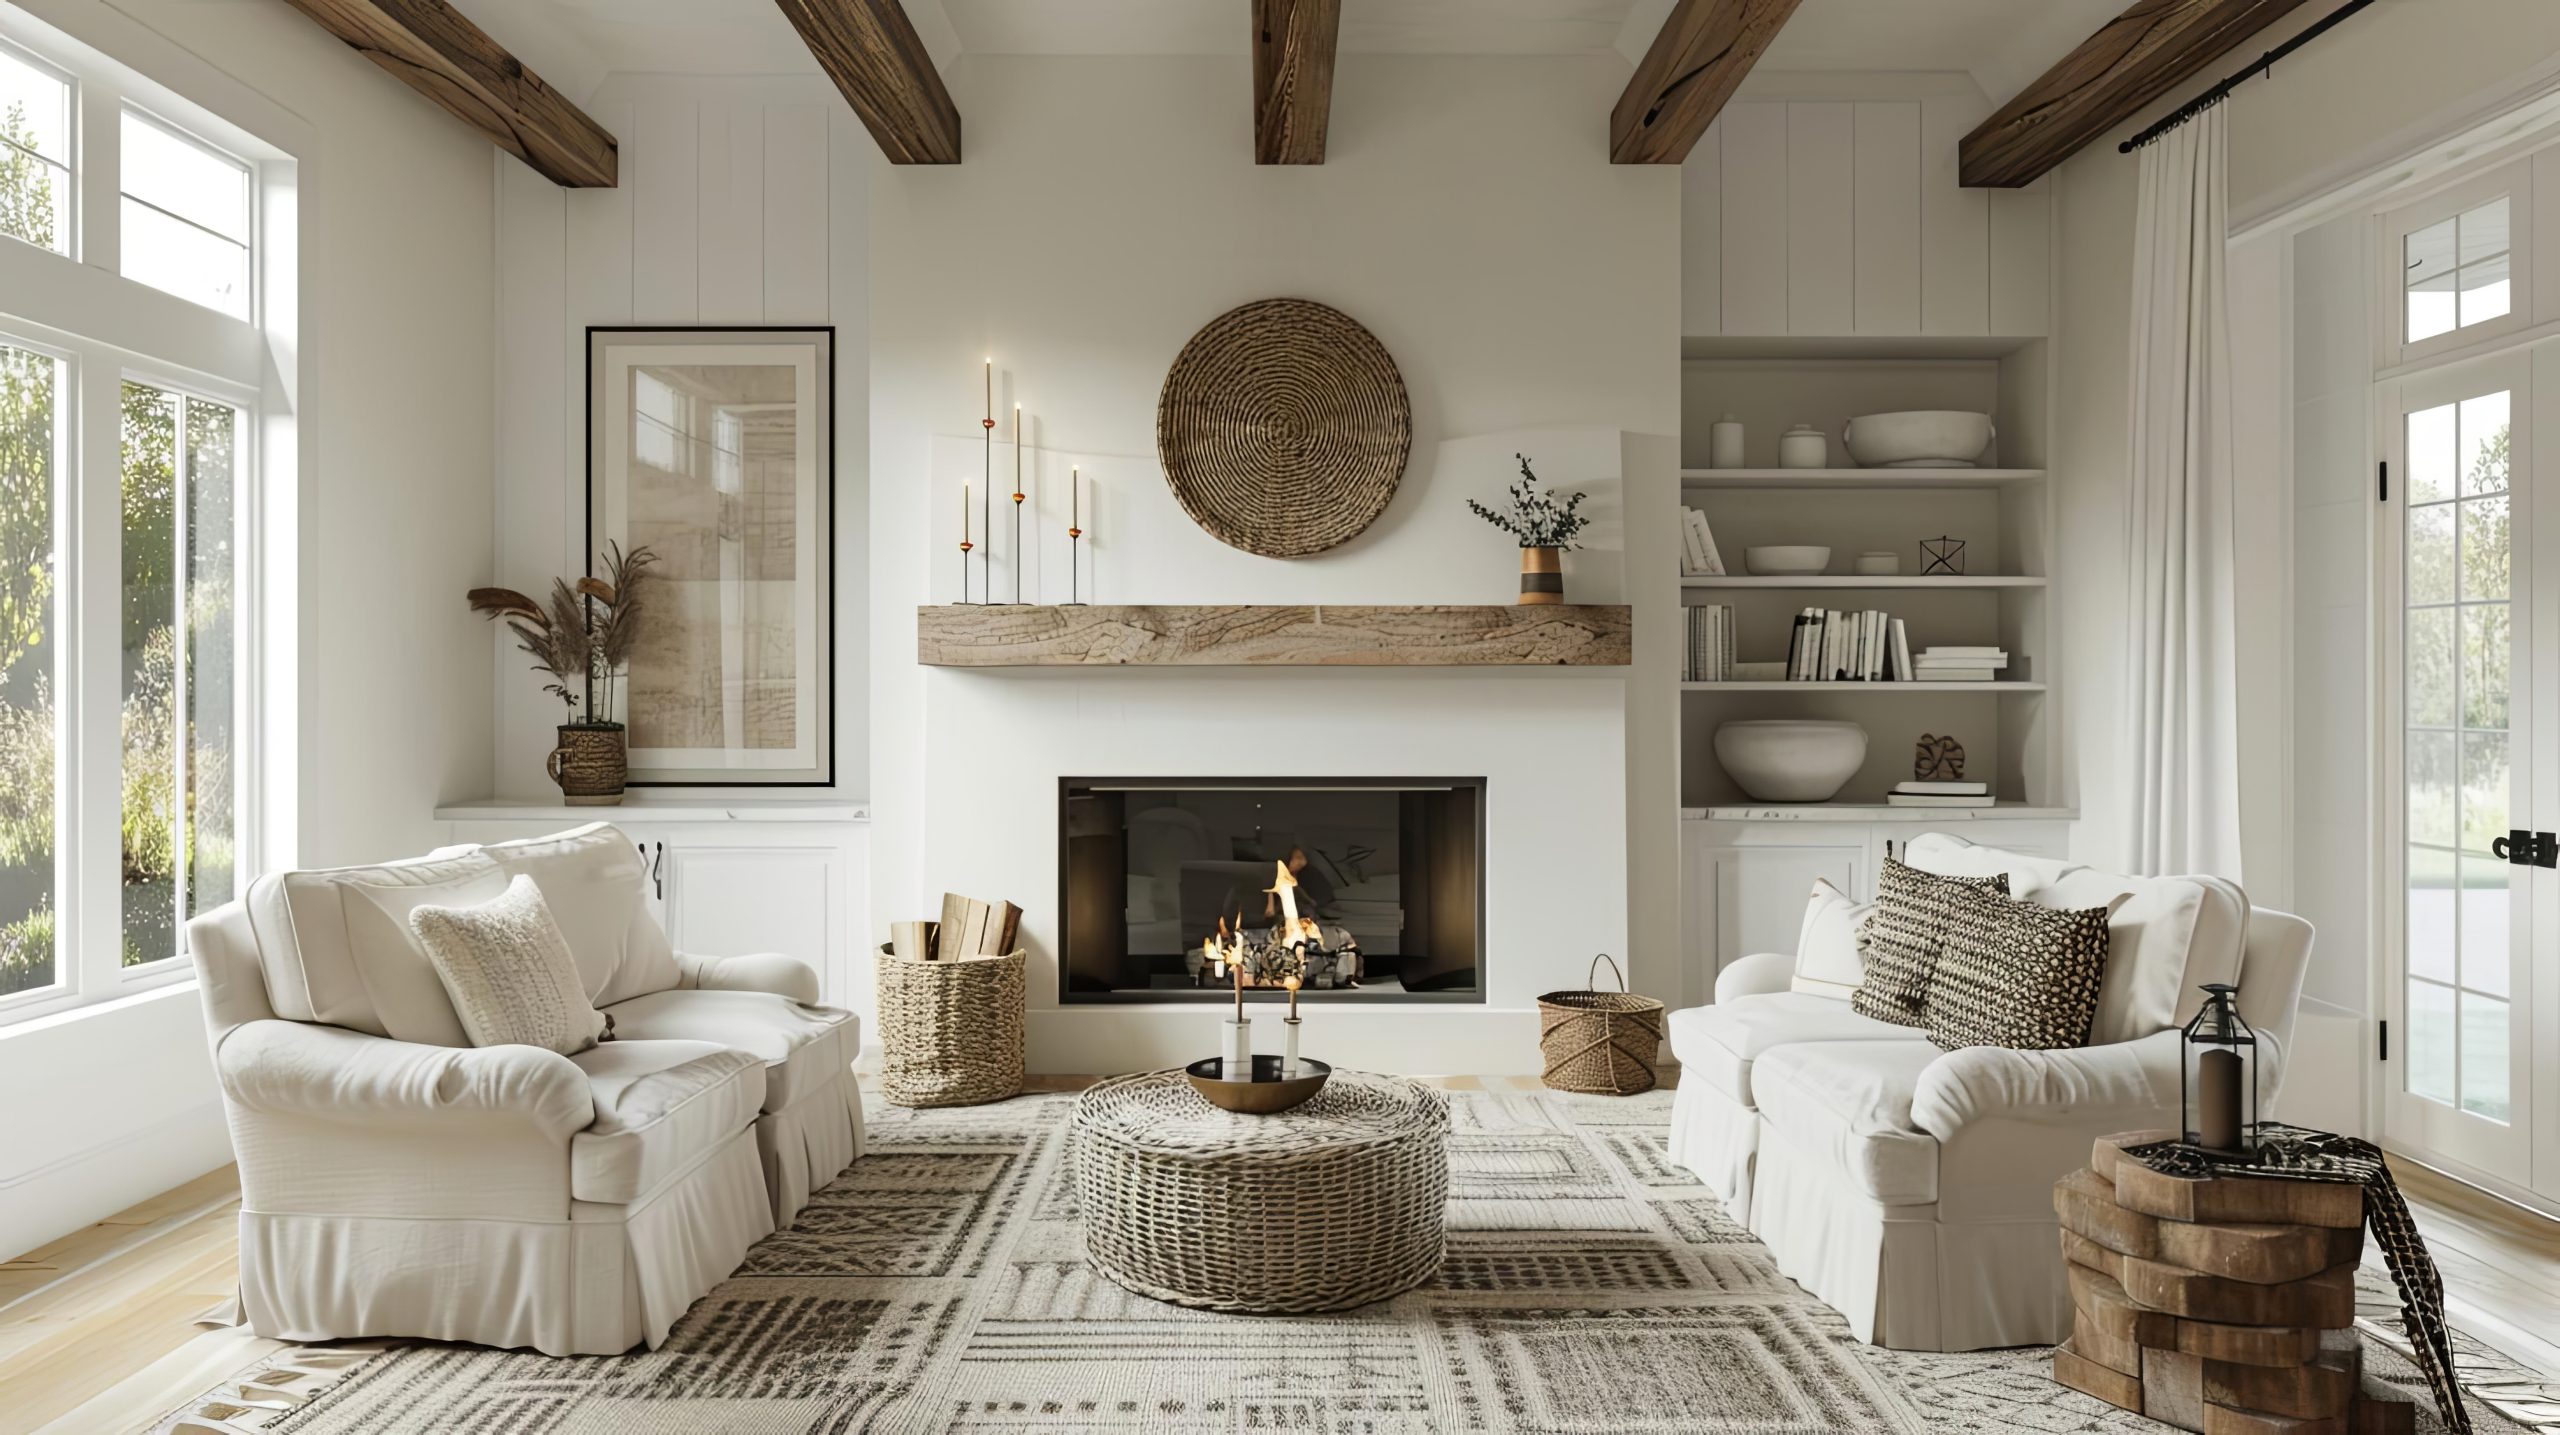
Adding emphasis creates attention with unique parts in homes for guests to look around. Not only do visitors remember those emphases, but these focal zones make it both an appealing look and create proper harmony by telling the story behind what the person represents and wishes to represent to others. The more often one is creative in these kinds of skills, the better designed it becomes.
This post was all about mastering Interior Design Principles.