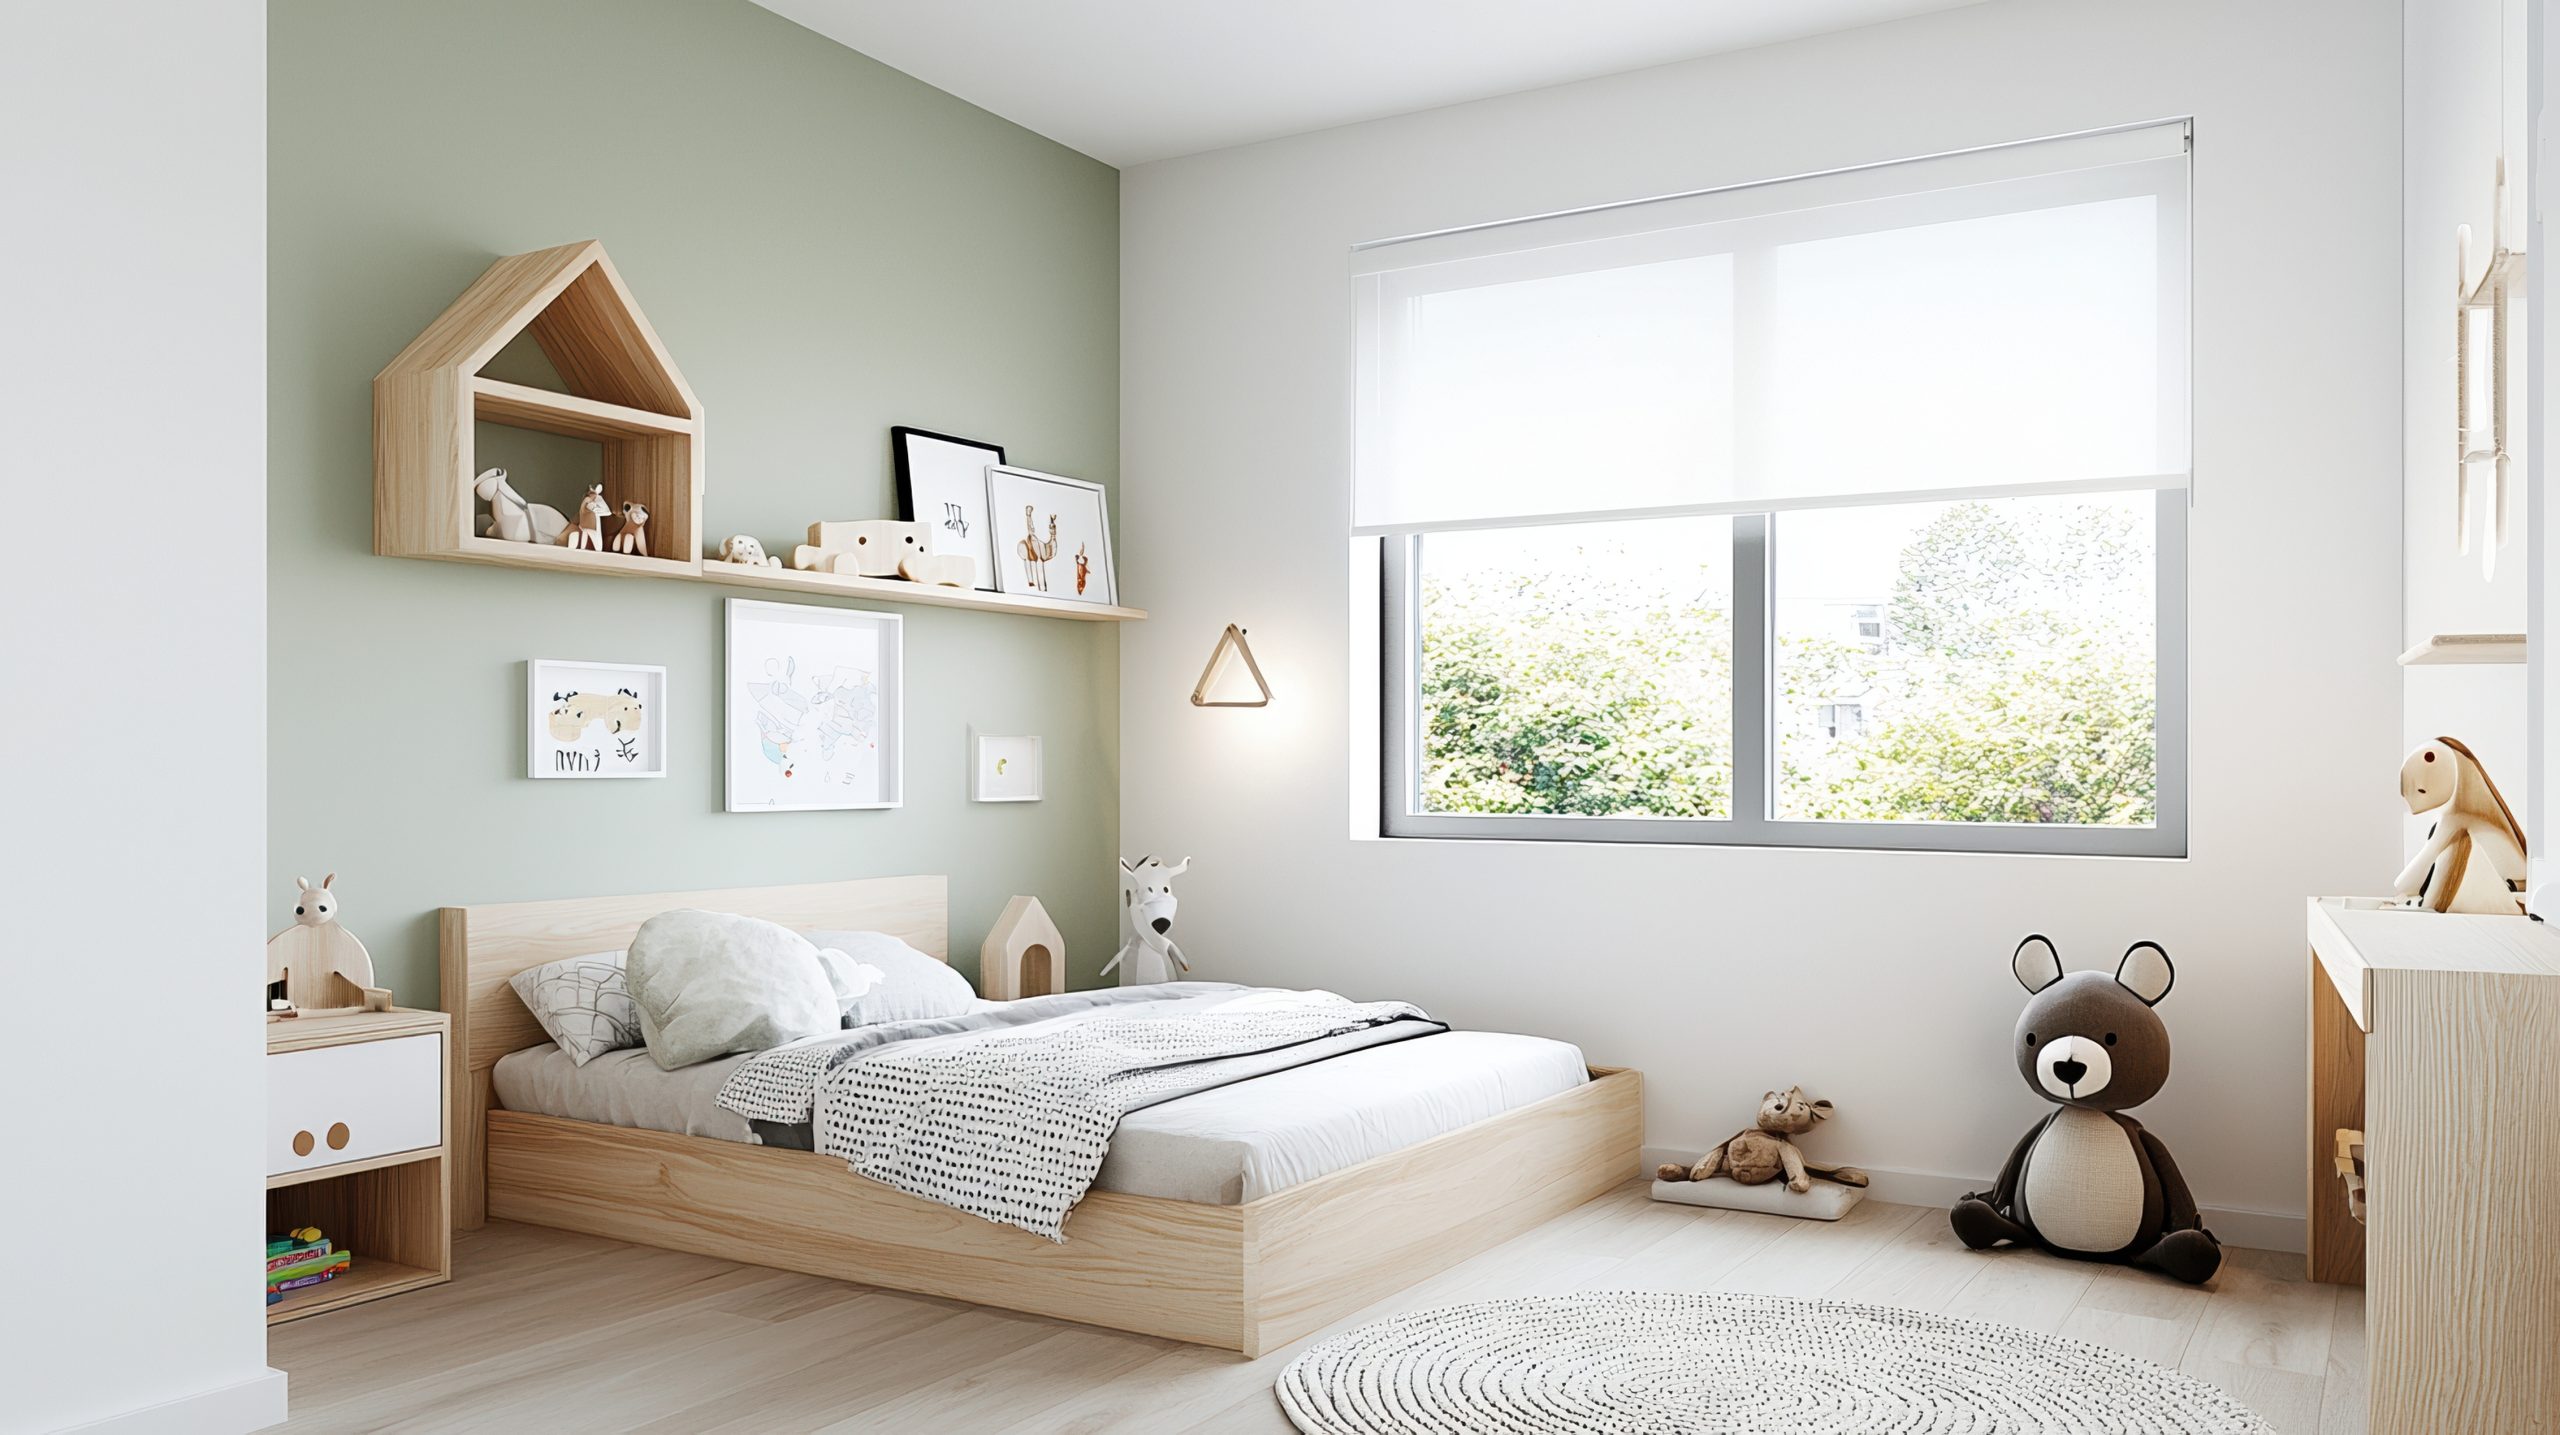
by Kesaa Interiors | Living Spaces, ROOMS, Storage & Organization
Creating a functional kids’ toy room requires thoughtful planning that balances organisation with imagination. A well-designed play space not only keeps toys contained but also fosters creativity, independence, and development.
Whether you’re working with a dedicated room or carving out a corner of your living space, the principles of effective toy room design remain consistent: accessible storage, defined activity areas, and systems that grow with your child.

1. Planning Your Kids Toy Room: The Essentials
Before purchasing storage containers or deciding on a colour scheme, take time to evaluate your specific needs. The most successful kids’ toy room designs begin with thoughtful planning.
- Assess your available space – Measure your area and note any architectural features that could impact your design
- Observe play patterns – Watch how your child interacts with their toys and what activities they gravitate toward
- Consider traffic flow – Allow adequate movement space between activity zones
- Plan for flexibility – Design a kids’ toy room that can evolve as interests change
- Establish a realistic budget – Prioritise essential organisational elements before decorative features
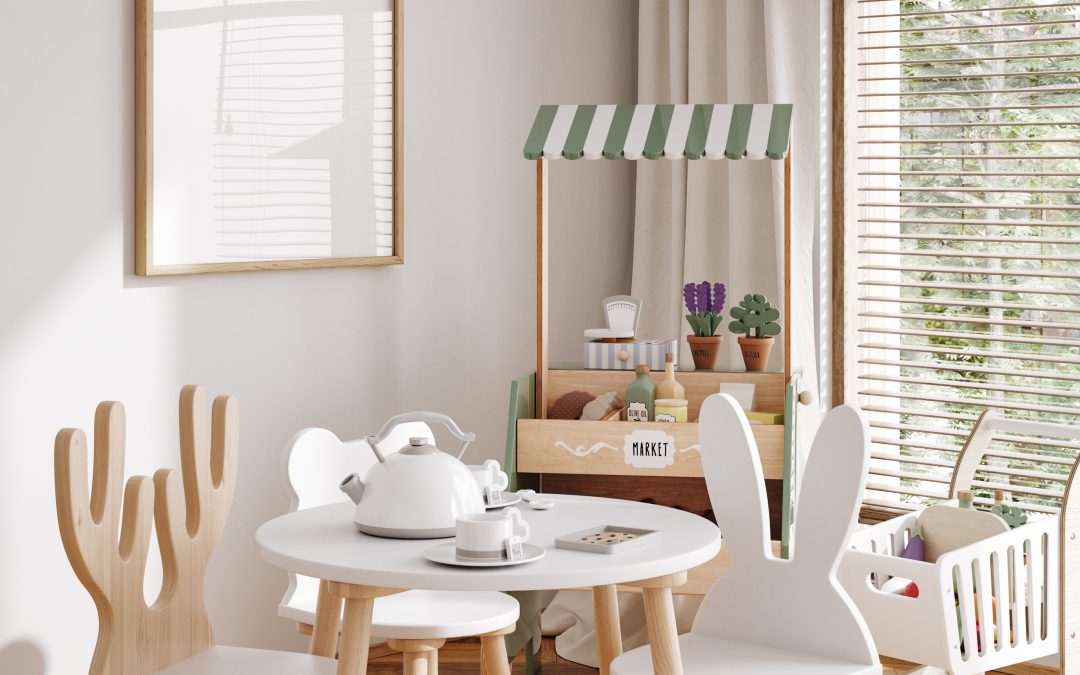
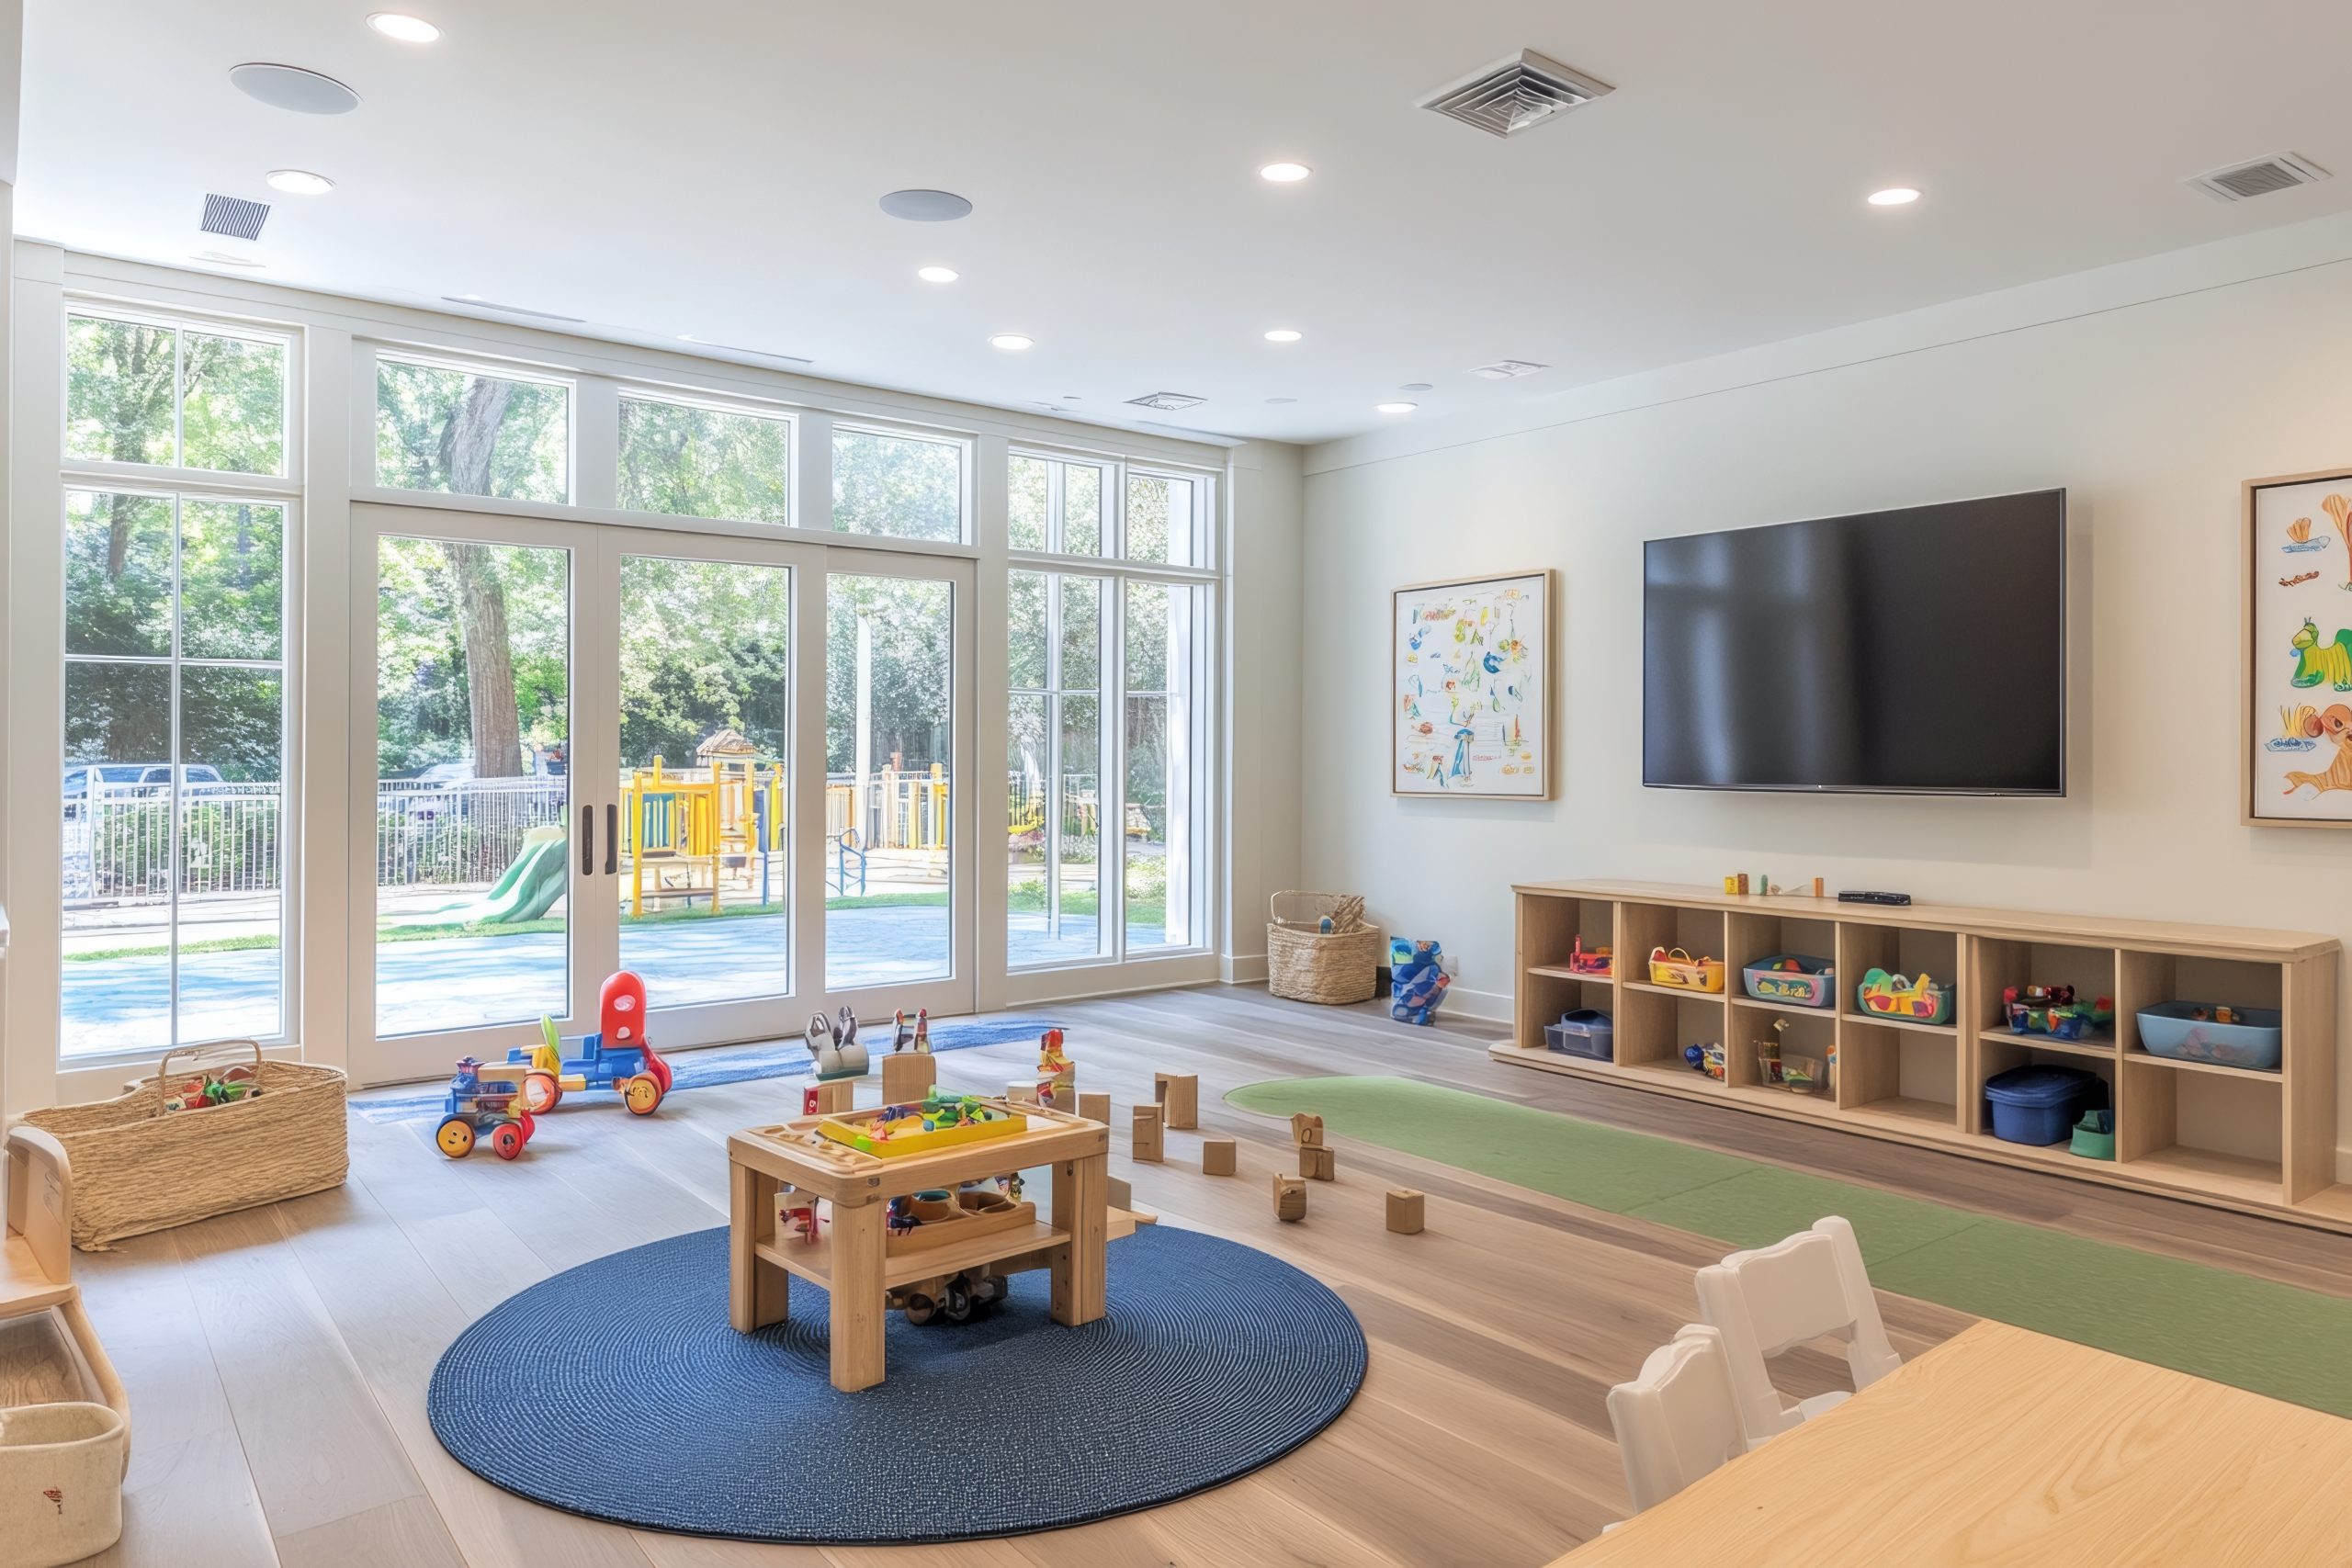
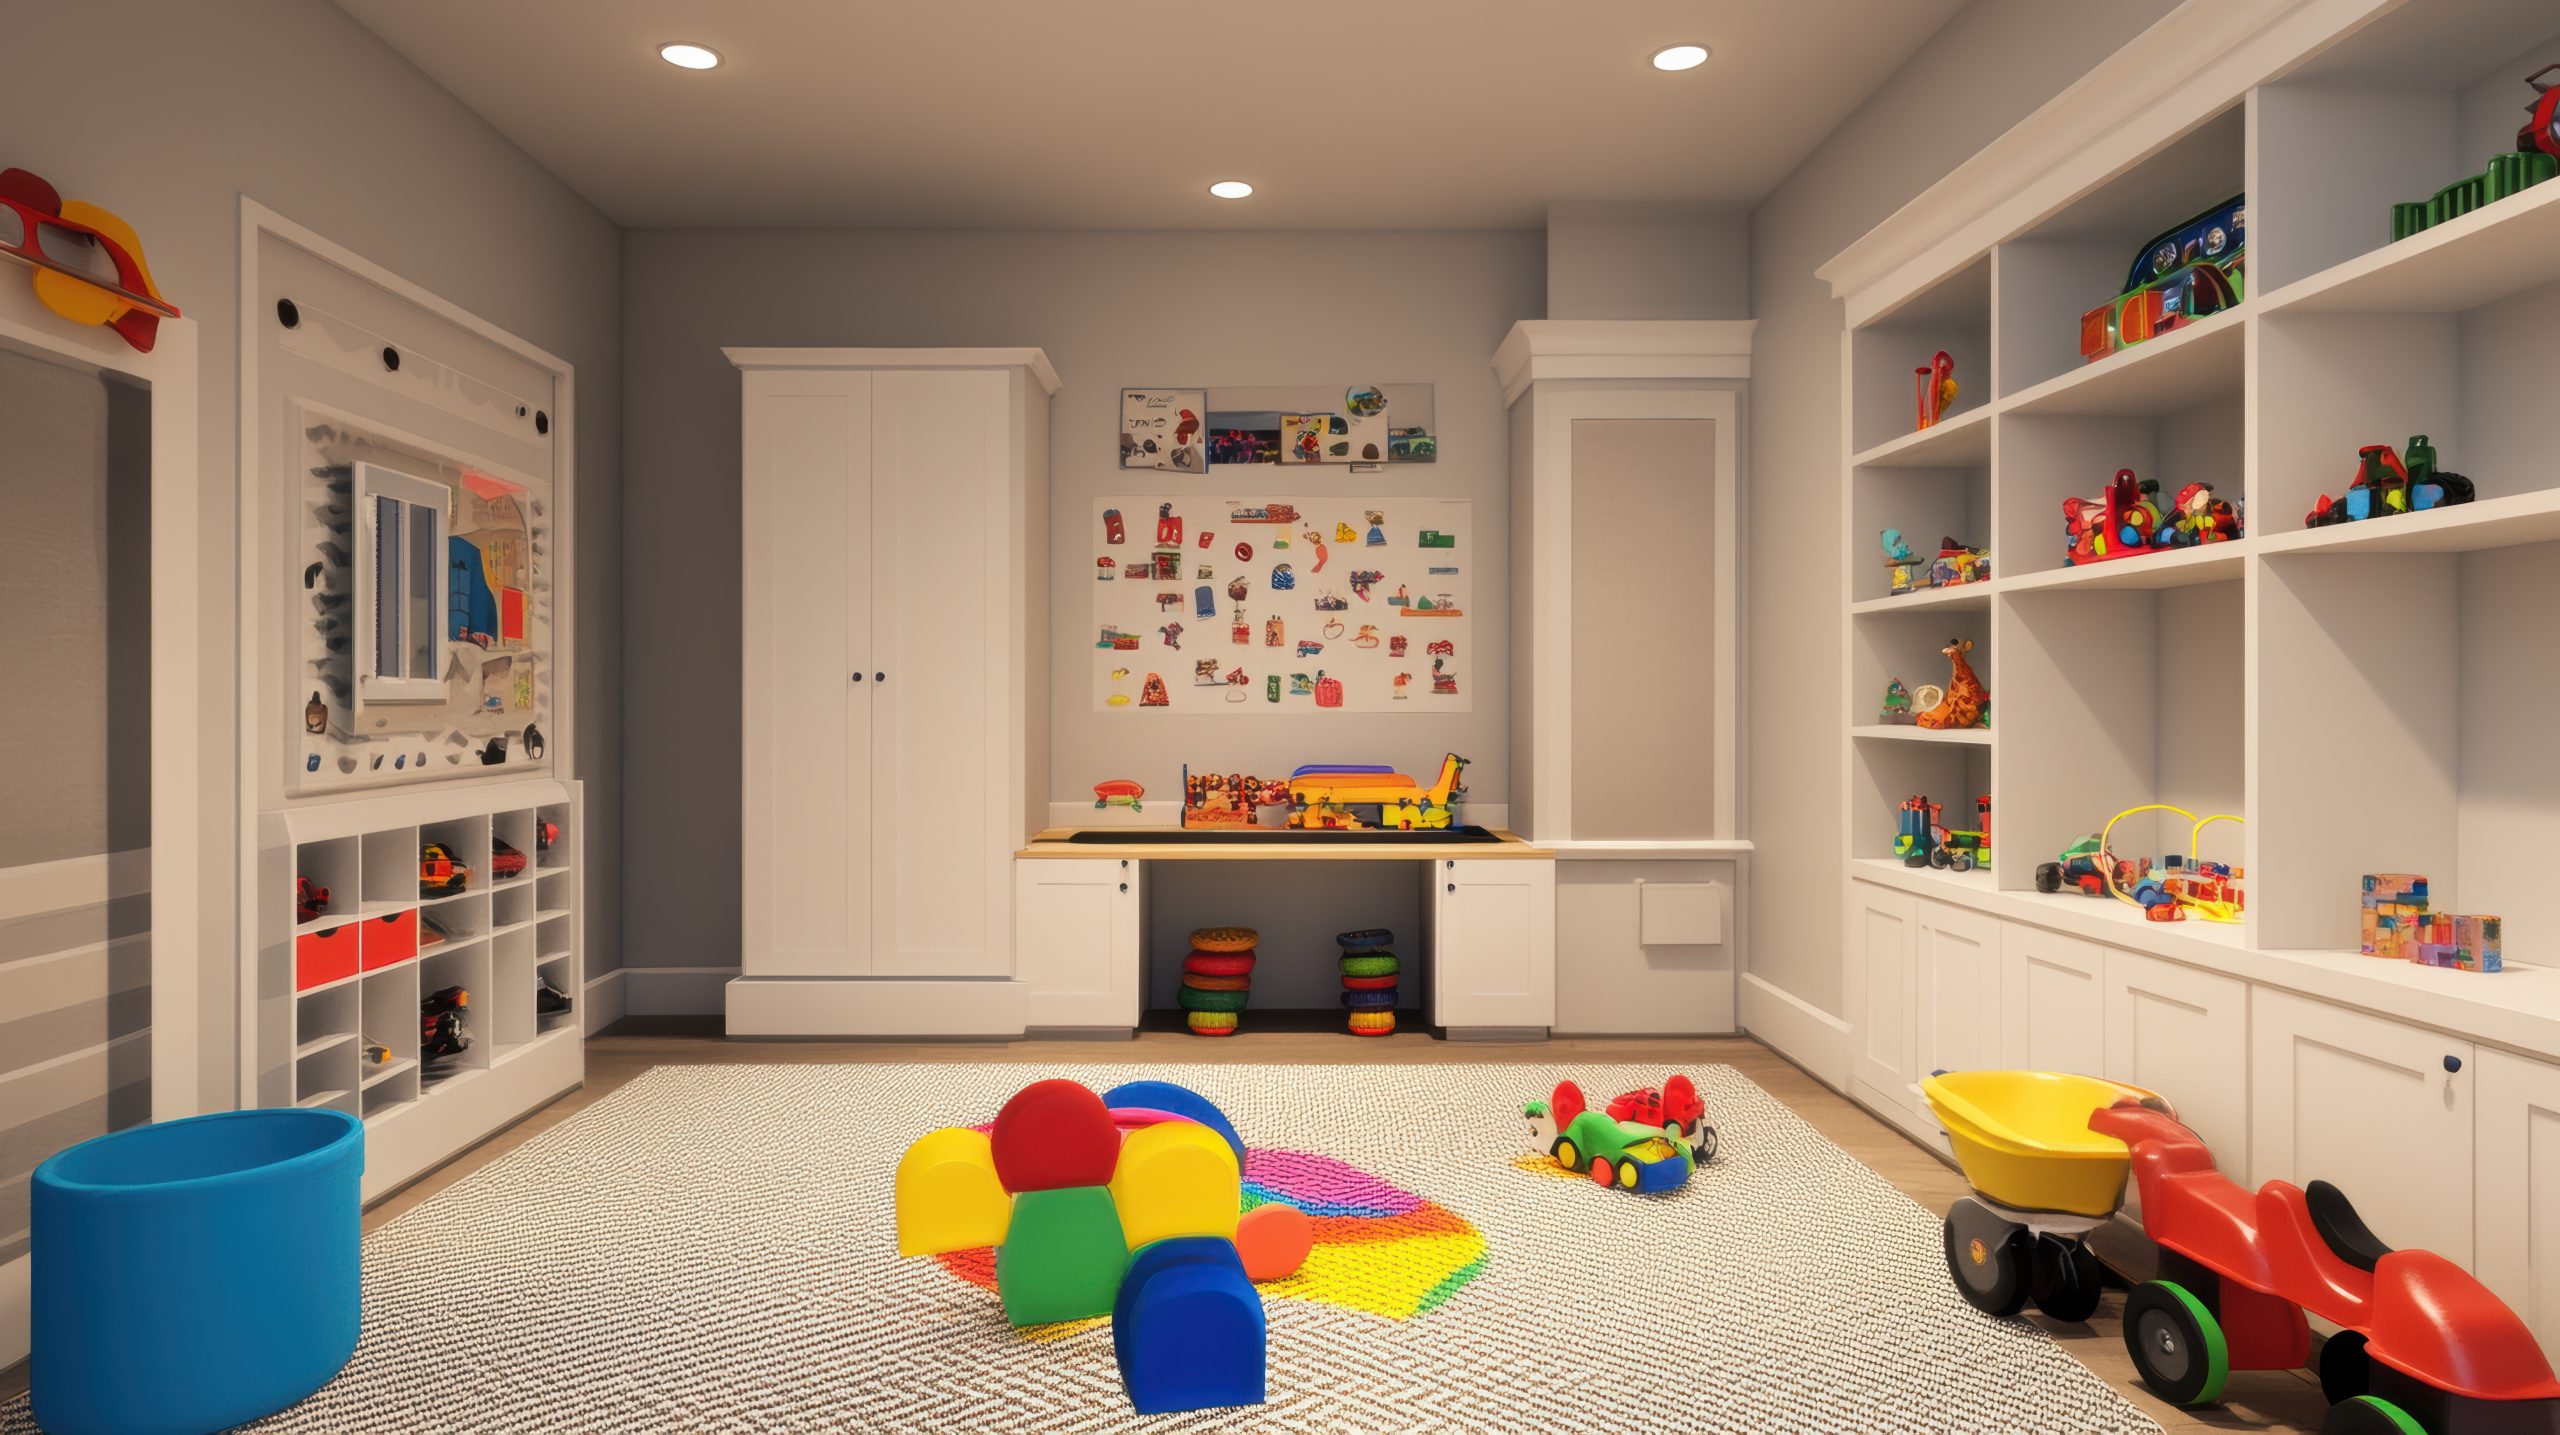
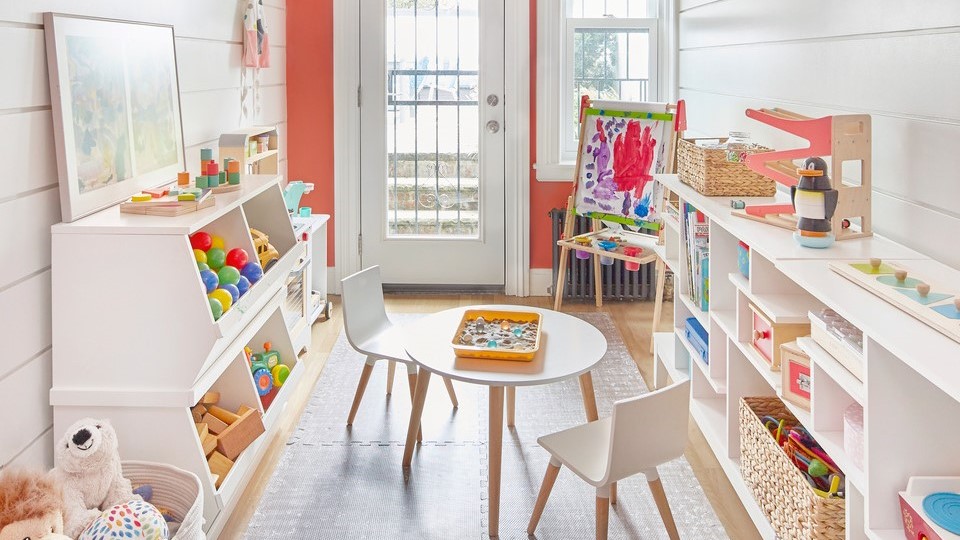
The most effective kids’ toy room designs balance visual appeal with practical functionality. Begin by dividing your space into activity zones based on how your child plays. A reading corner, building zone, creative area, and active play space create natural divisions that help children understand where different activities take place.
Pro tip: Before purchasing new storage solutions, take inventory of what toys need organising. Categories often include building blocks, creative supplies, books, pretend play items, and active toys.
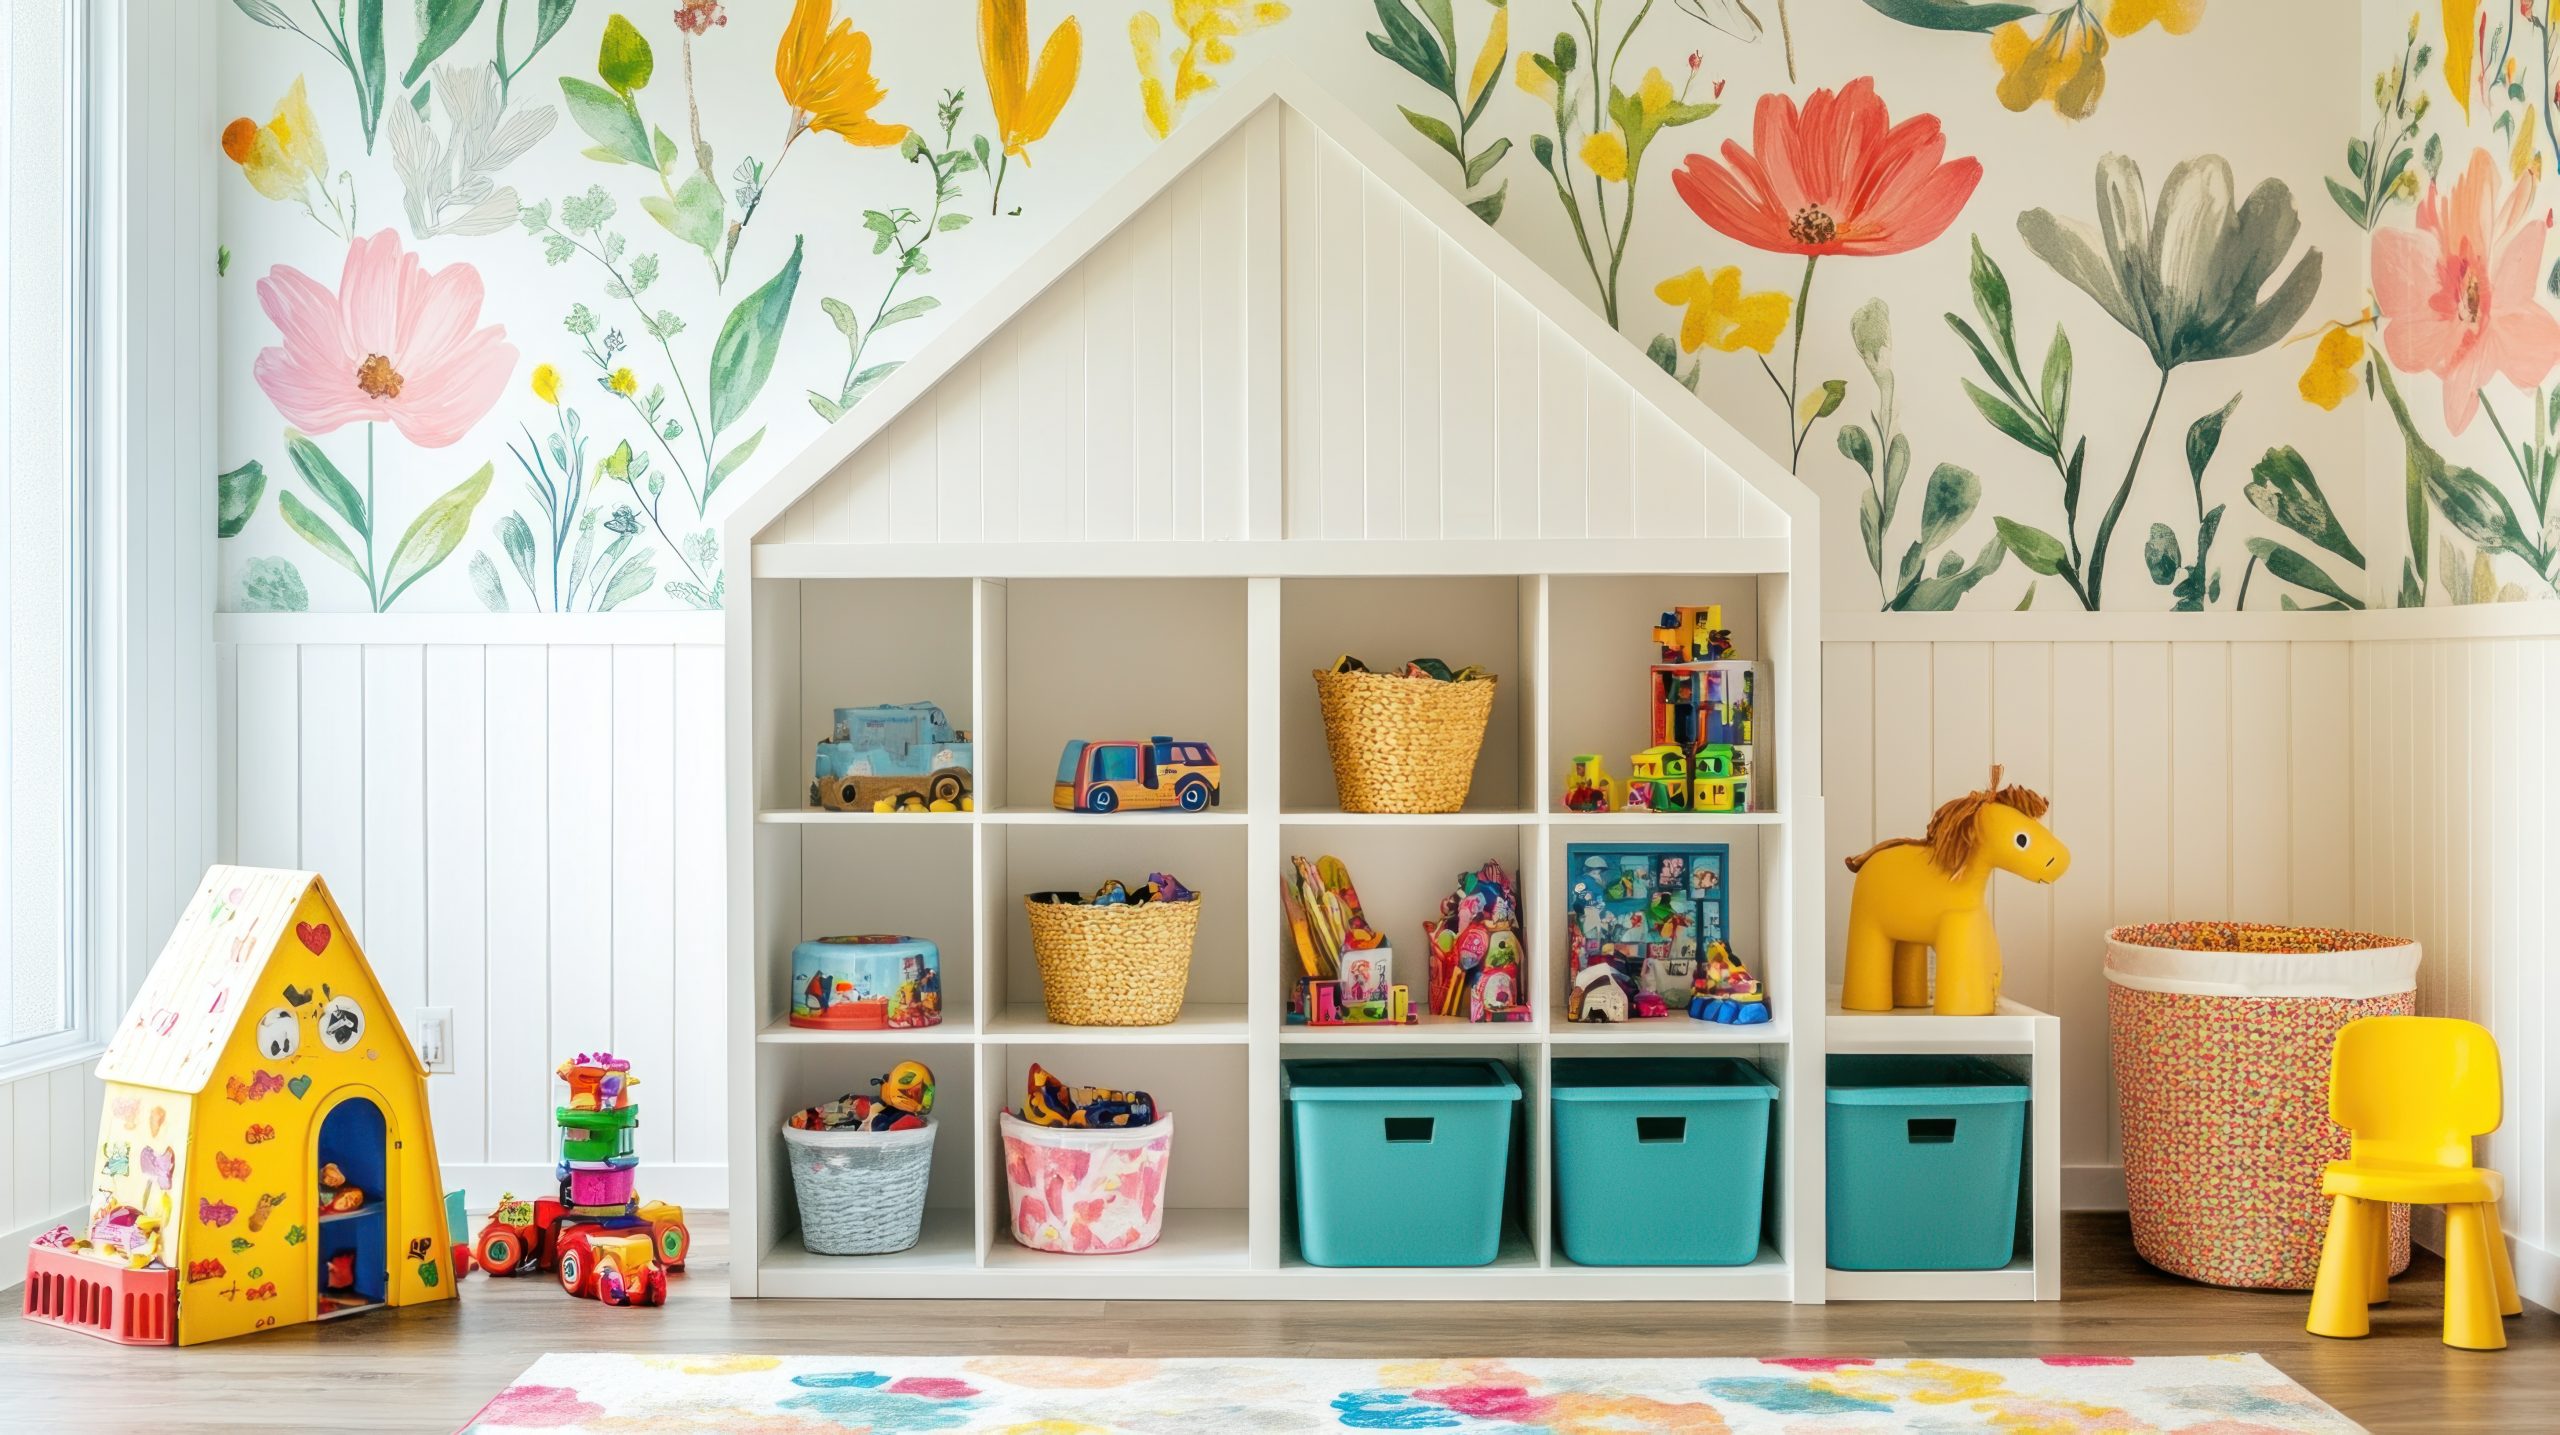
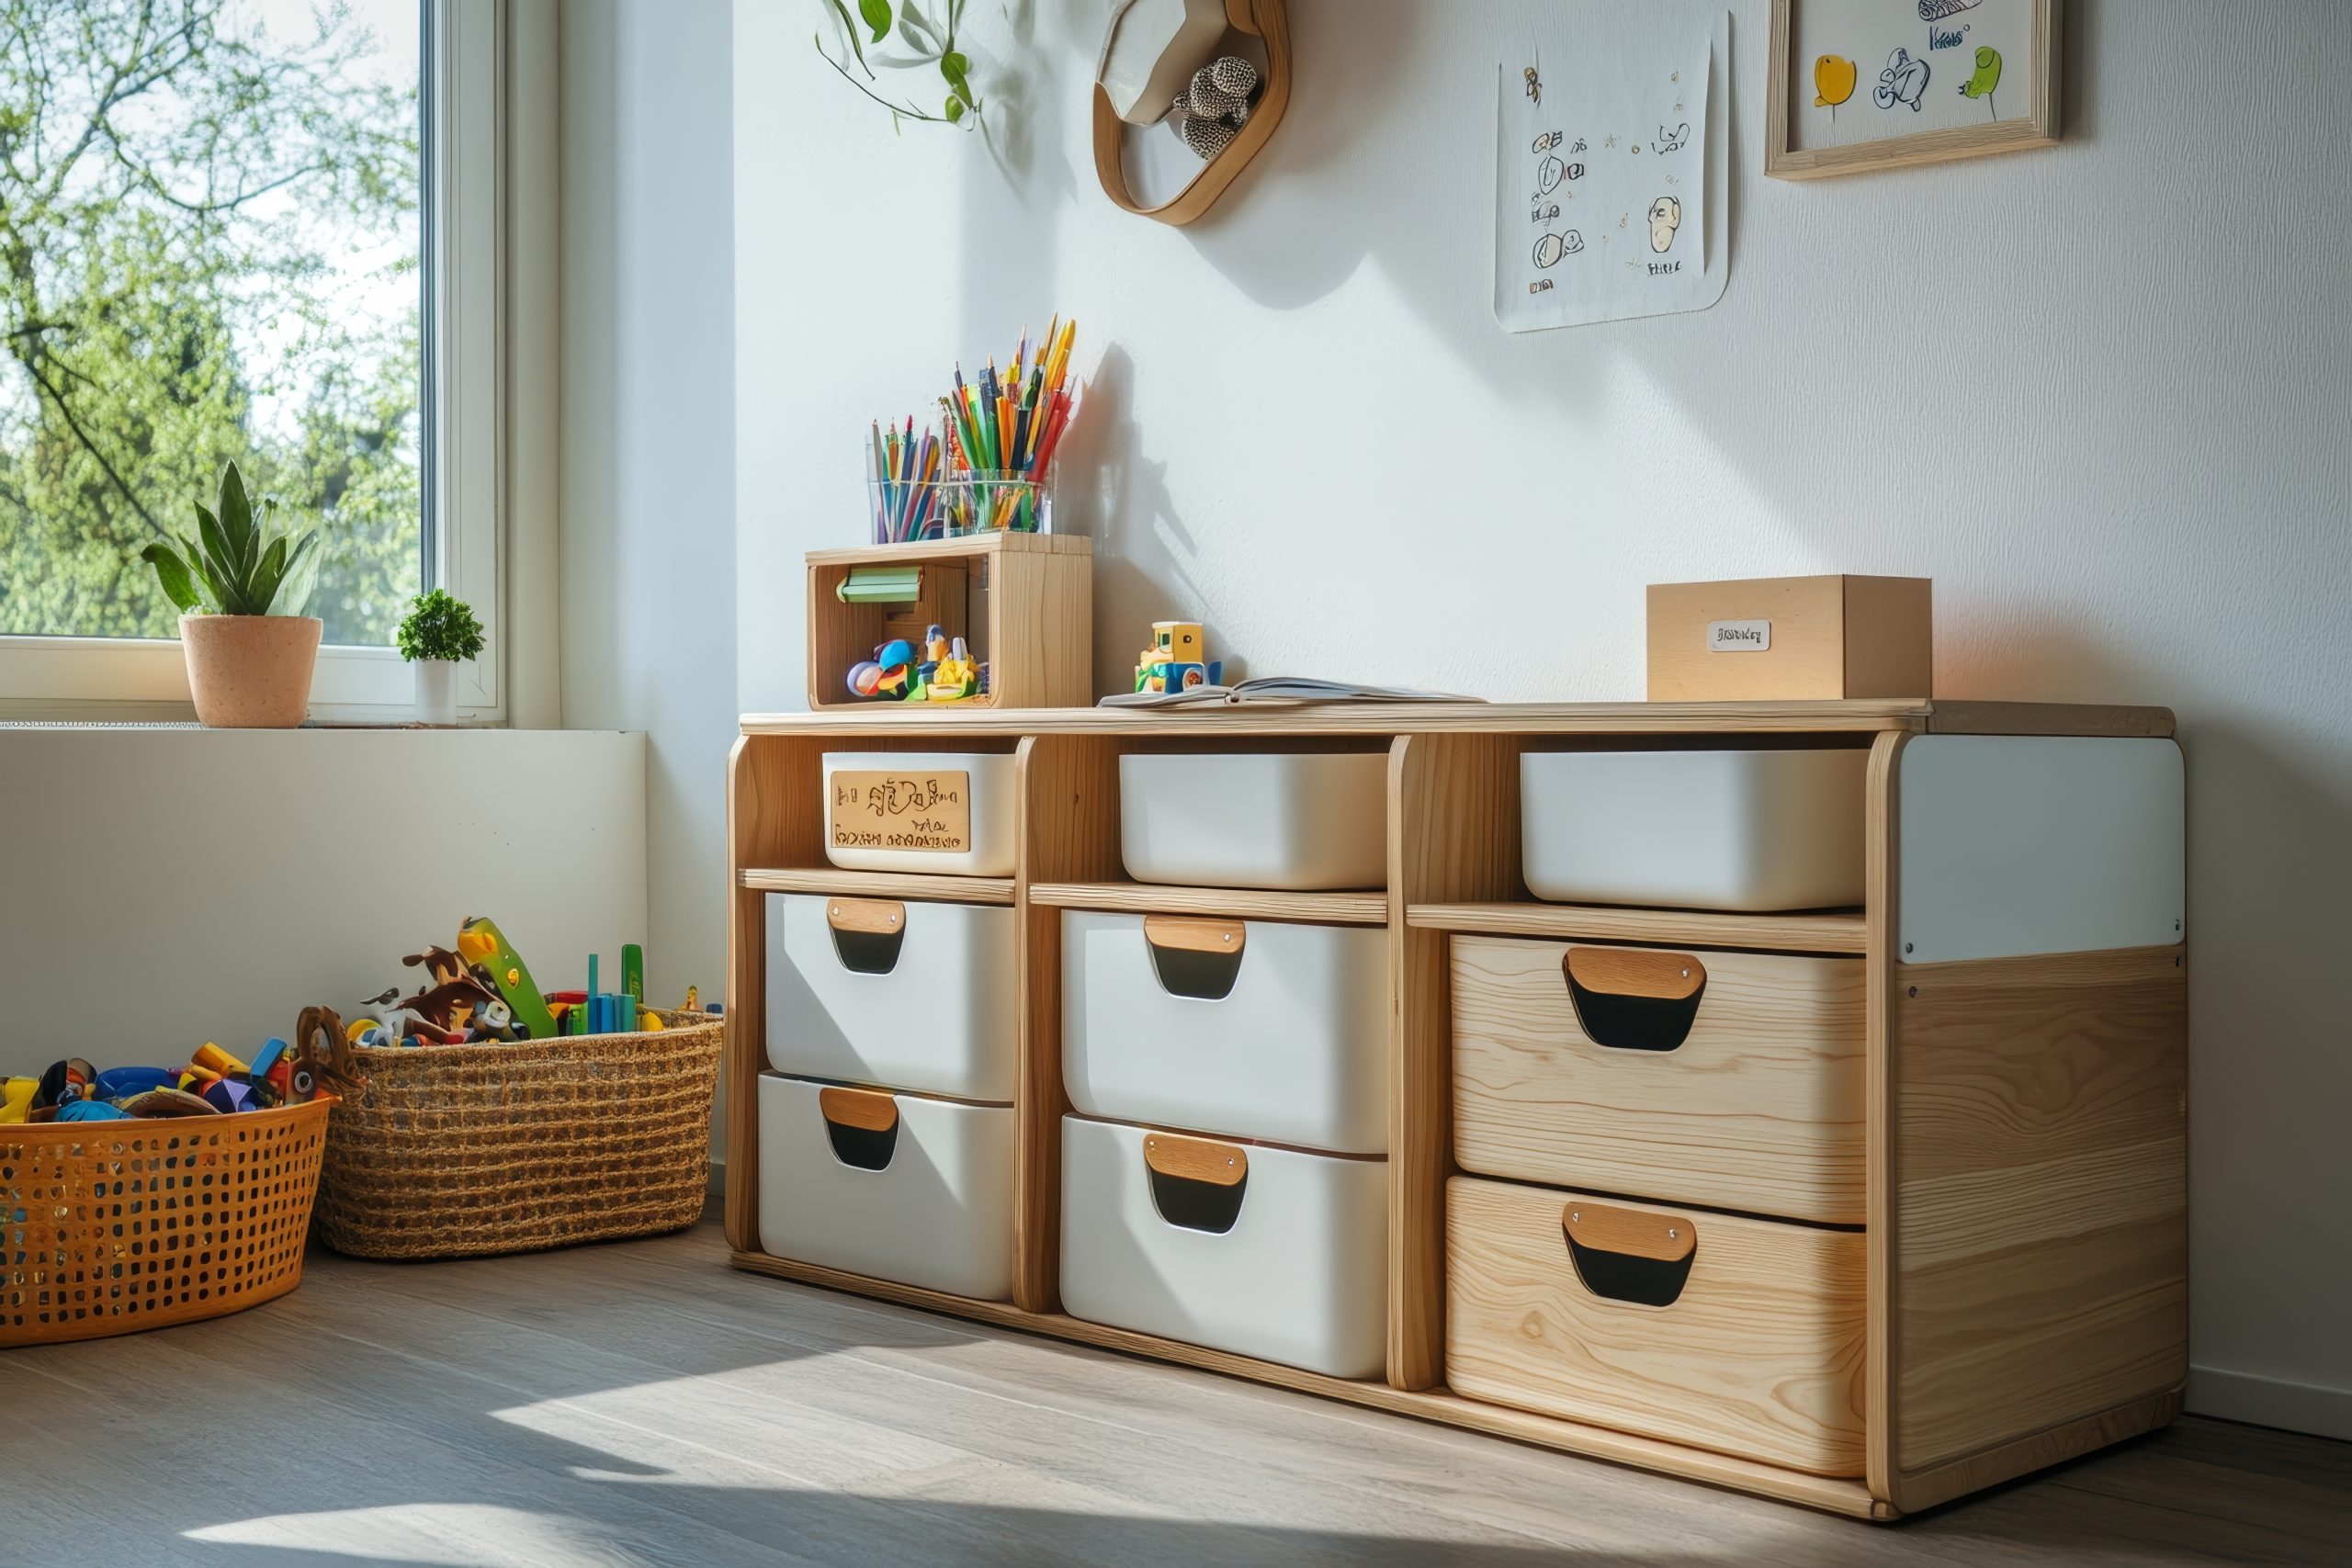
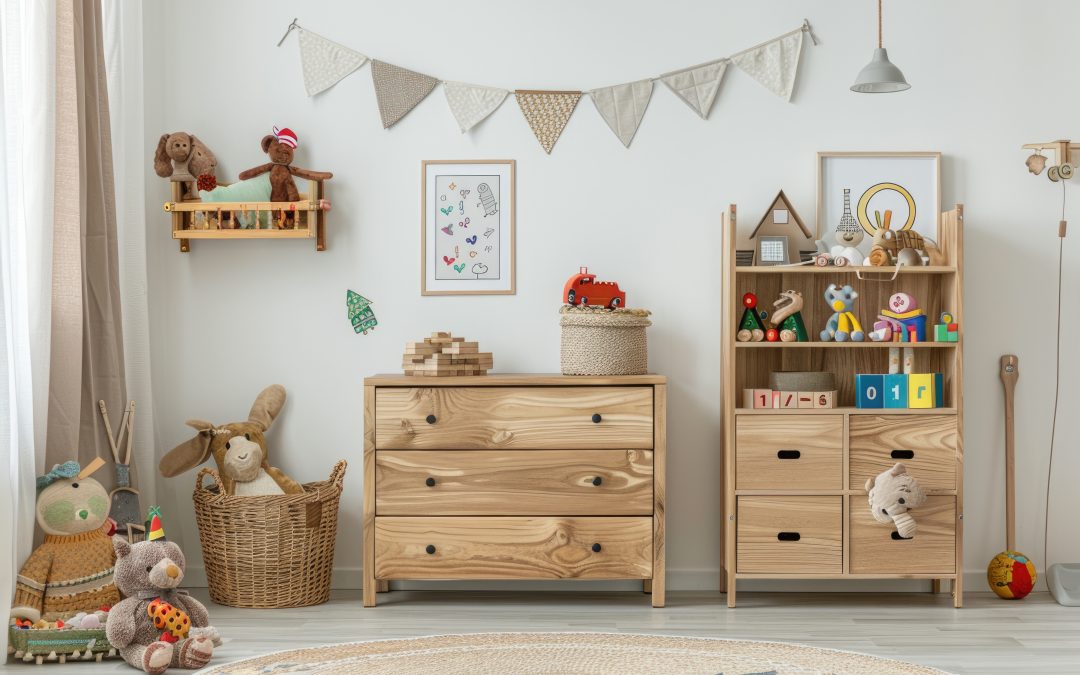
2. Storage Solutions That Grow With Your Child
The foundation of any successful kids’ toy room is appropriate storage. Effective toy organisation systems should be both accessible to children and visually appealing.
Open shelving works particularly well for frequently used items and can double as display space in your kids’ toy room. Consider these options for different toy categories:
- Low, open shelves for daily-use toys that encourage independent access
- Closed cabinets for items that require adult supervision or create visual clutter
- Clear bins for collections like building blocks or toy vehicles
- Soft baskets for stuffed animals and dress-up clothes
- Book displays that show covers rather than spines for young readers
What makes a kids’ toy room truly functional is a labelling system appropriate for your child’s age. For pre-readers, use picture labels with corresponding images on bins. As children grow, transition to written labels that they can read independently.
Pro tip: Modular storage systems allow your kids’ toy room to evolve as your child grows. Choose pieces that can be reconfigured or repurposed rather than age-specific furniture with limited longevity.
3. Flooring and Surface Considerations
The physical foundation of your kid’s toy room deserves careful consideration. Flooring needs to withstand creative messes, active play, and frequent cleaning.
Ideal flooring options for a kids’ toy room include:
- Luxury vinyl planks – Waterproof, durable, and available in attractive designs
- Low-pile carpeting – Offers comfort for floor play while being relatively easy to clean
- Large washable area rugs – Provide comfort over hardwood or tile
- Interlocking foam tiles – Create cushioned areas for active play
- Laminate flooring – Offers durability at a lower price point than hardwood
Wall surfaces in a kids’ toy room should balance aesthetics with practicality. Consider washable paint in a satin or semi-gloss finish that allows for wiping away inevitable marks. Magnetic paint or chalkboard sections create interactive areas that contain creative expression in designated spaces.
Pro tip: In multi-purpose spaces, use area rugs to define the kids’ toy room zone within a larger room. This creates a visual boundary that helps children understand where playthings belong.
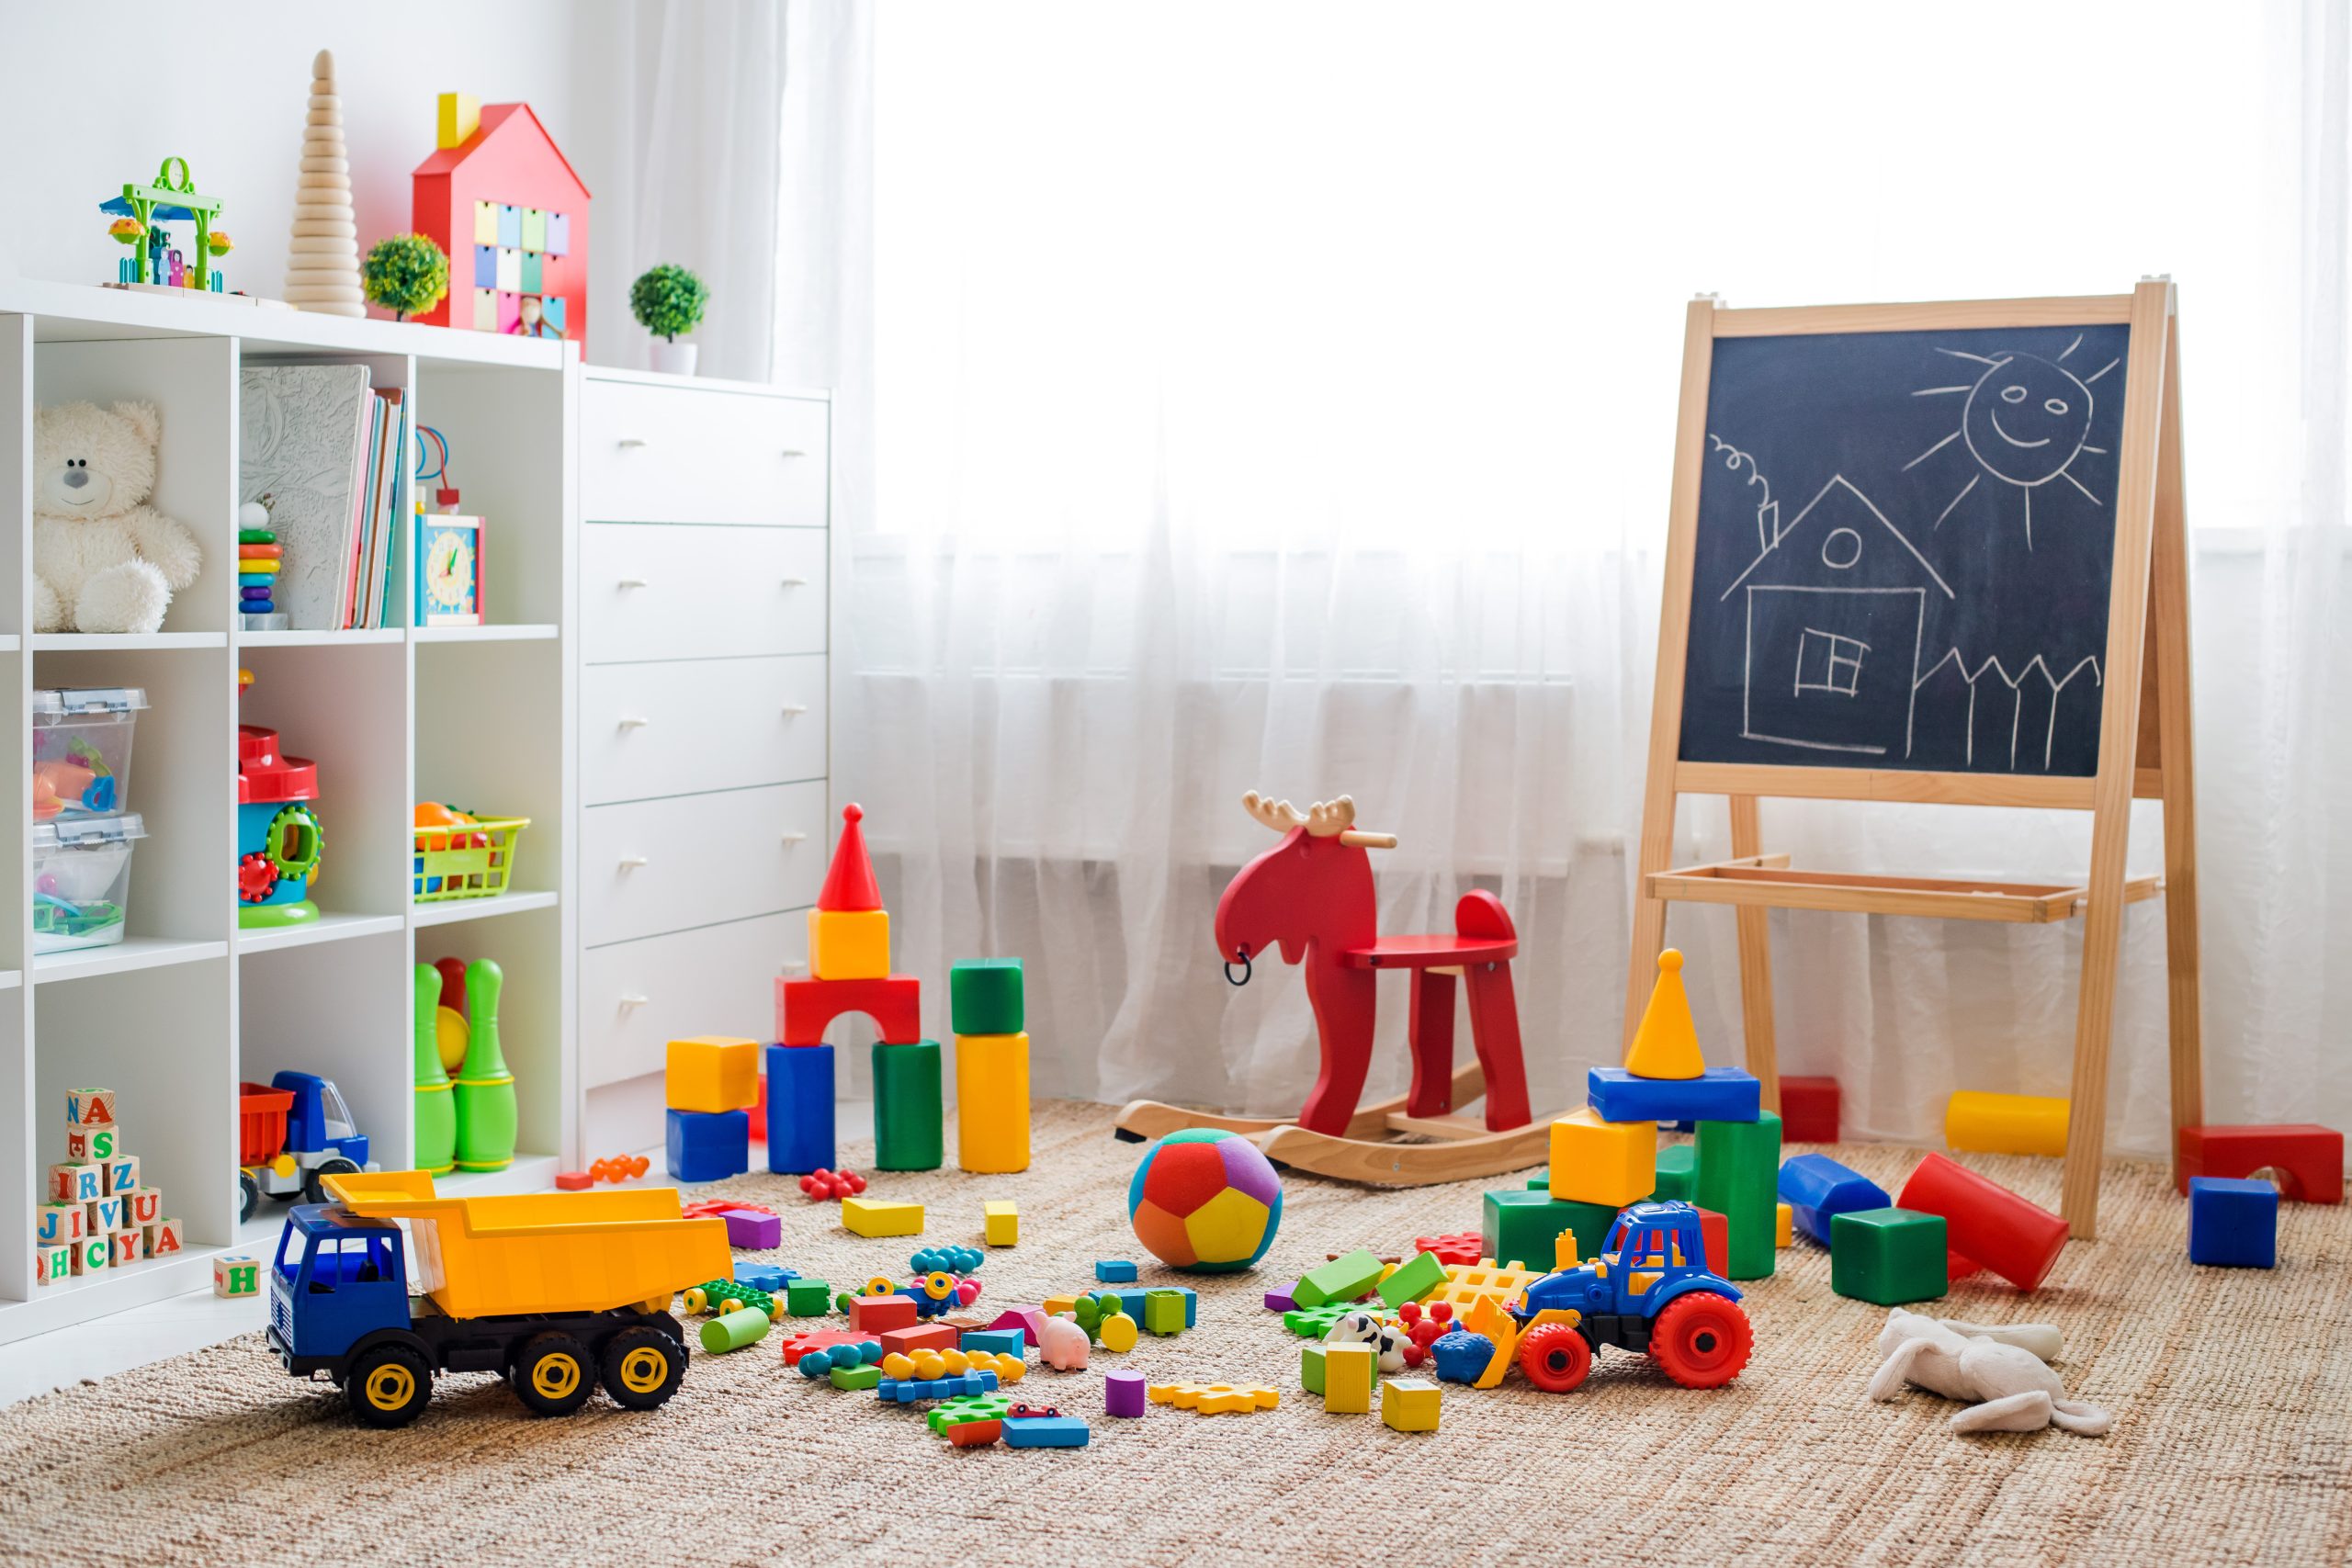
4. Creating Activity Zones in Your Kids’ Toy Room
A well-designed kids’ toy room incorporates distinct areas that support different types of play. Each zone should include appropriate storage, surfaces, and materials specific to the activity.
Reading Nook Essentials
Create a cosy reading corner in your kids’ toy room with:
- Comfortable seating (child-sized armchair, floor cushions, or bean bags)
- Good lighting (preferably natural light supplemented with task lighting)
- Forward-facing book displays that highlight covers
- Soft textiles that invite settling in with a book
Art and Craft Corner Setup
Dedicate a creative space in your kids’ toy room with:
- A washable work surface at an appropriate height
- Organised supplies in accessible containers
- Display space for completed artwork
- Adequate lighting for detail work
- Protective covering for surfaces if needed
Building and Construction Zone
Support constructive play in your kids’ toy room with:
- Clear containers organised by piece type or set
- Flat building surfaces (LEGO tables, play mats)
- Display shelves for completed constructions
- Comfortable floor space for larger structures
Pro tip: When designing zones in your kid’s toy room, consider acoustic properties. Place quieter activities like reading further from active play areas to allow simultaneous use by multiple children.
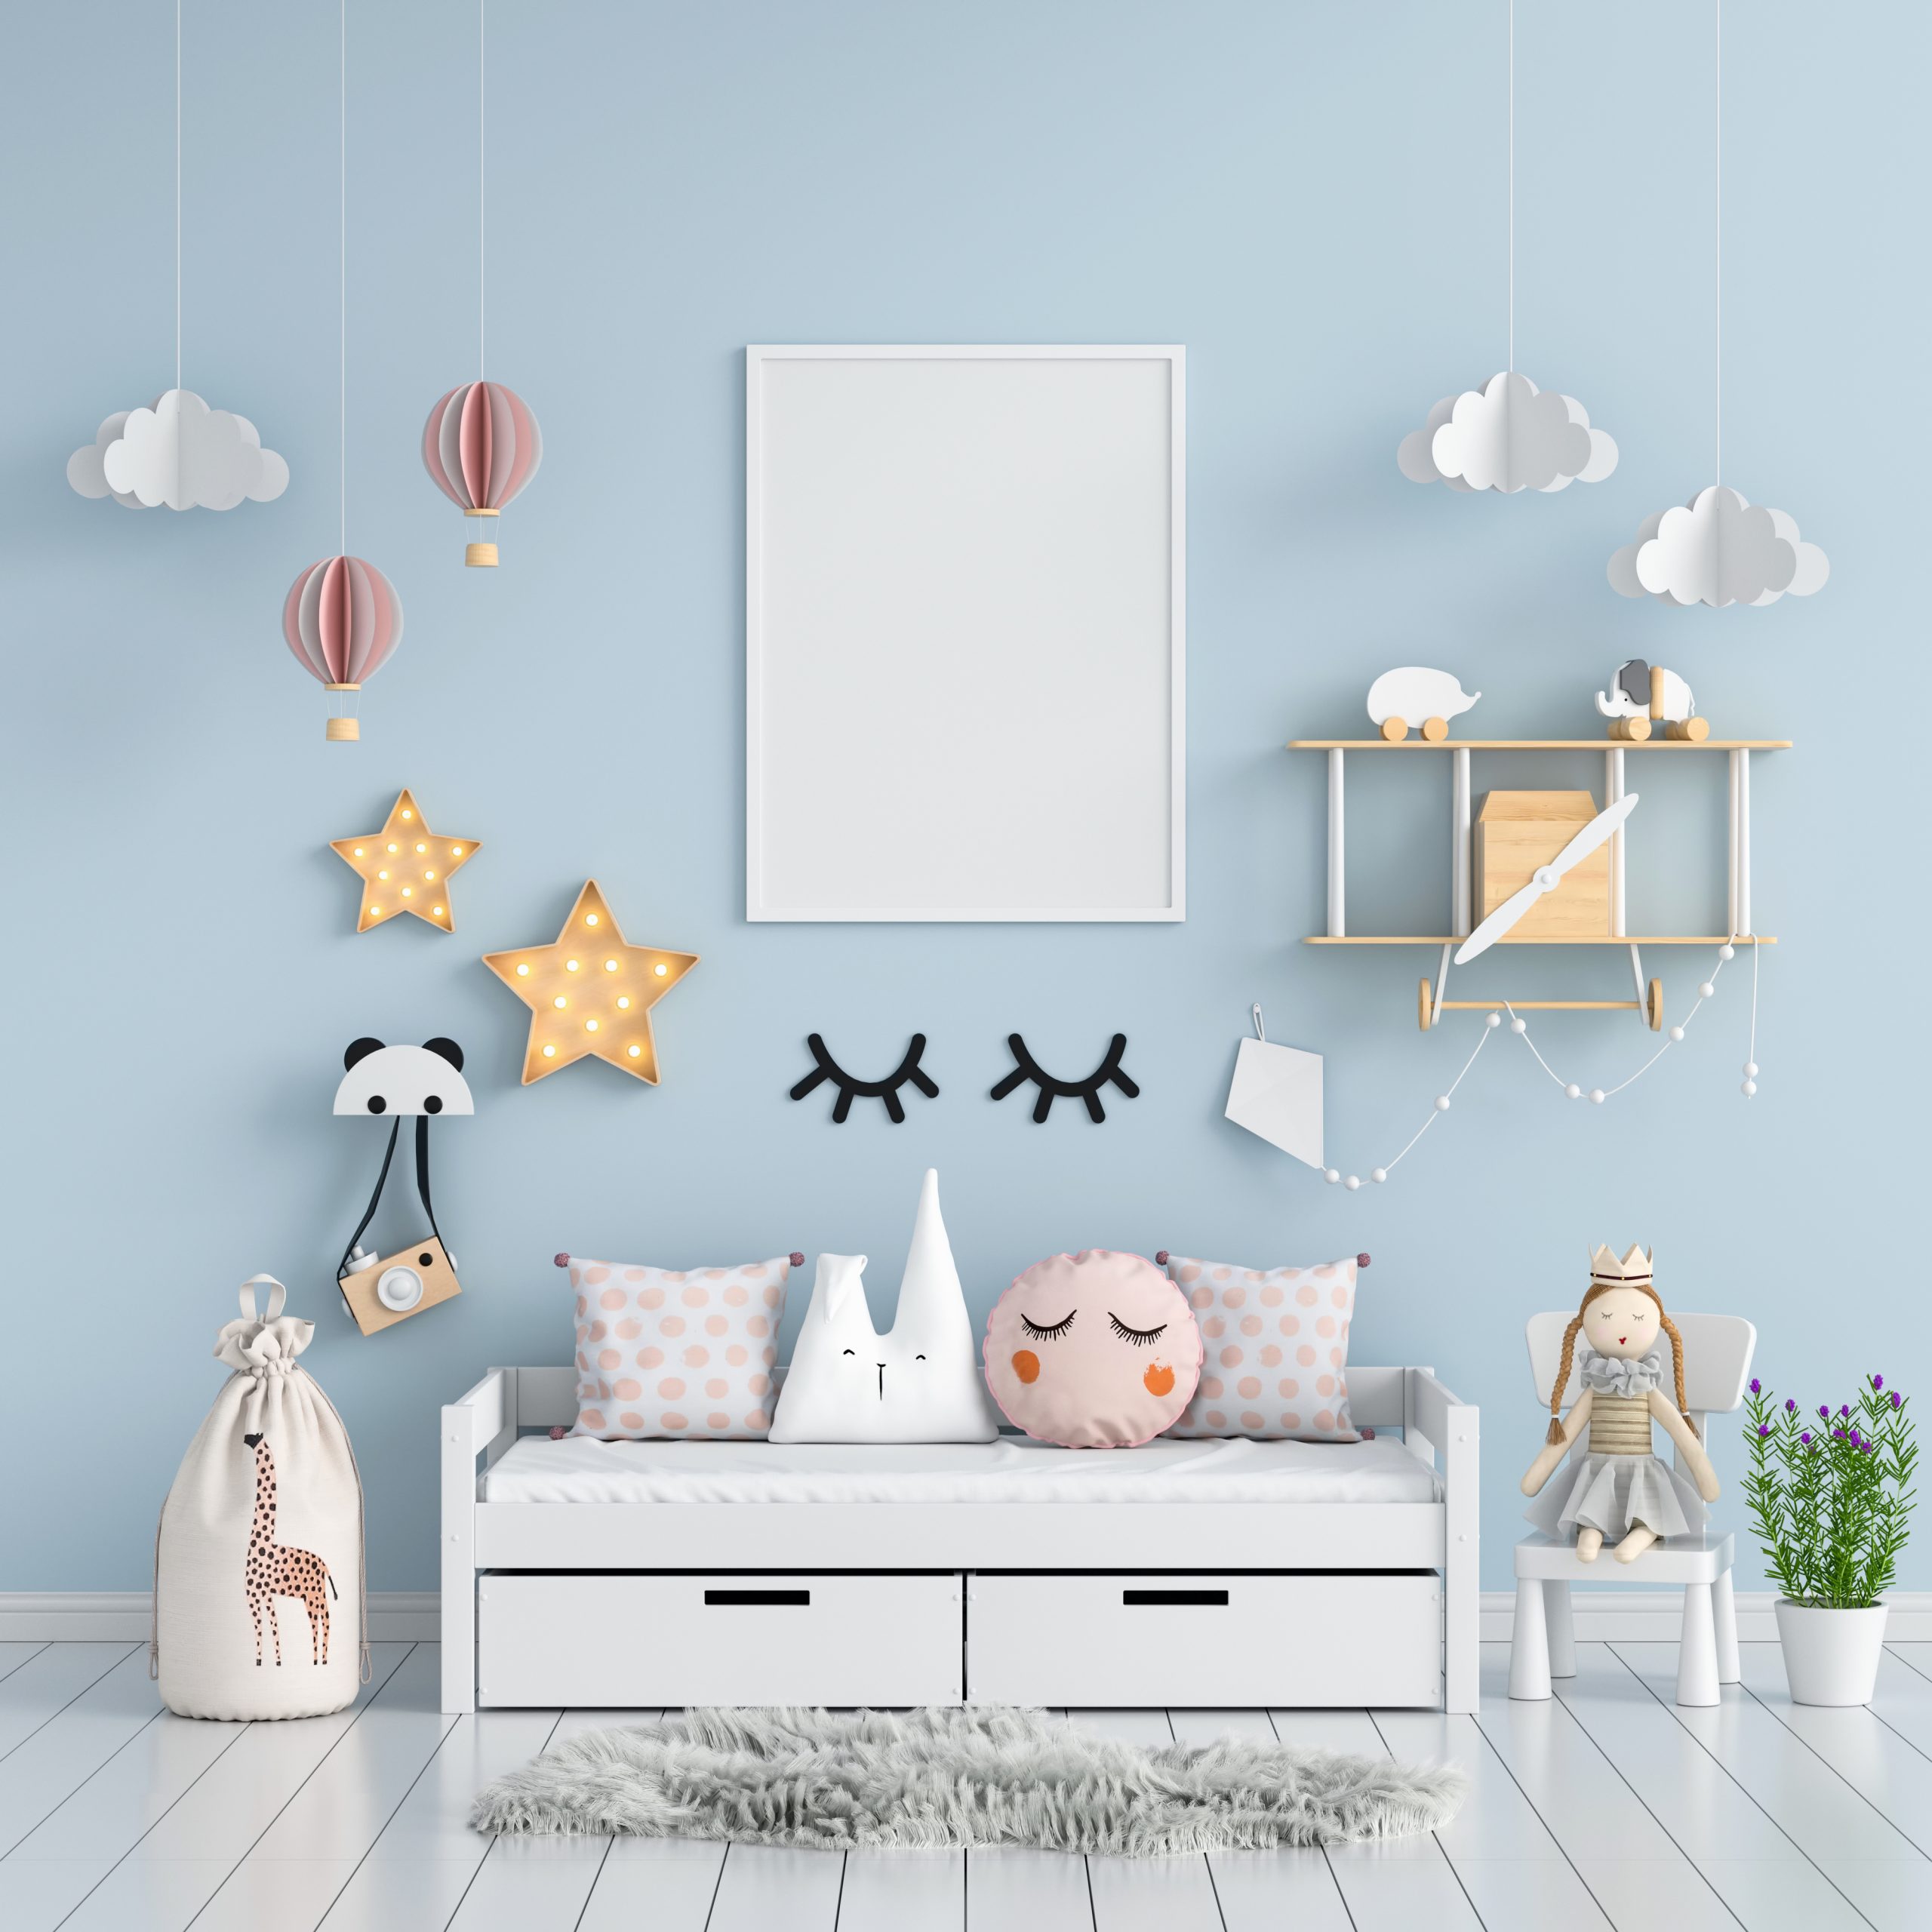
5. Display and Rotation Systems
A thoughtfully designed kids’ toy room includes intentional display areas that showcase special items and children’s creations. These displays serve multiple purposes: highlighting achievements, inspiring creativity, and creating visual interest in the space.
Effective display solutions for a kids’ toy room include:
- Gallery wall systems with easily changeable frames for rotating artwork
- Floating shelves at child height for displaying collections or creations
- Shadow boxes for three-dimensional items or special collections
- Wire systems with clips for frequently changing displays
- Museum-style display stands for showcasing current building projects
Implementing a toy rotation system keeps your kids’ toy room fresh and engaging while preventing overwhelm. Consider storing approximately one-third of toys out of sight, rotating them every few weeks to maintain interest while keeping the volume of visible toys manageable.
Pro tip: When designing your kids’ toy room, create a dedicated “display zone” where children can showcase their current projects without fear of them being dismantled or put away during cleanup time.
6. Lighting Your Kids’ Toy Room
Proper lighting transforms a kids’ toy room from functional to inspirational. A well-lit play space supports different activities while creating atmosphere and visual interest.
Consider these lighting elements for your kids’ toy room:
- Natural light – Position activity areas near windows when possible
- Overhead lighting – Provide even, ambient illumination throughout the space
- Task lighting – Add directed light for reading corners and craft areas
- Decorative lighting – Incorporate string lights or novelty fixtures that enhance the room’s theme
- Night lighting – Install dim options for evening transitions or nighttime comfort
The most effective kids’ toy room lighting plans include multiple sources at different heights. This layered approach creates a warm environment while ensuring adequate brightness for different activities.
Pro tip: In a kids’ toy room, consider cord management and safety features when selecting lighting. Wall-mounted options eliminate floor cords, while LED fixtures provide brightness without heat concerns.
7. Small Space Solutions
Not every home can accommodate a dedicated kids’ toy room, but even small spaces can incorporate organised play areas with strategic planning.
Maximise limited space with these kids’ toy room solutions:
- Vertical storage – Utilise wall space with tall bookcases and mounted organisers
- Under-bed storage – Choose beds with built-in drawers or use rolling containers underneath
- Door-hanging organisers – Use over-door systems for small toys or supplies
- Dual-purpose furniture – Select ottomans with storage, desks with shelving, or benches with bins
- Corner solutions – Maximise overlooked corner spaces with custom shelving or activity stations
When creating a kids’ toy room in a shared space, clearly define boundaries using area rugs, bookcases as room dividers, or designated cabinets that close when playtime ends.
Pro tip: In apartments or small homes, create a “portable kids toy room” concept using dedicated containers that can be moved between spaces as needed, maintaining organisation while adapting to space limitations.
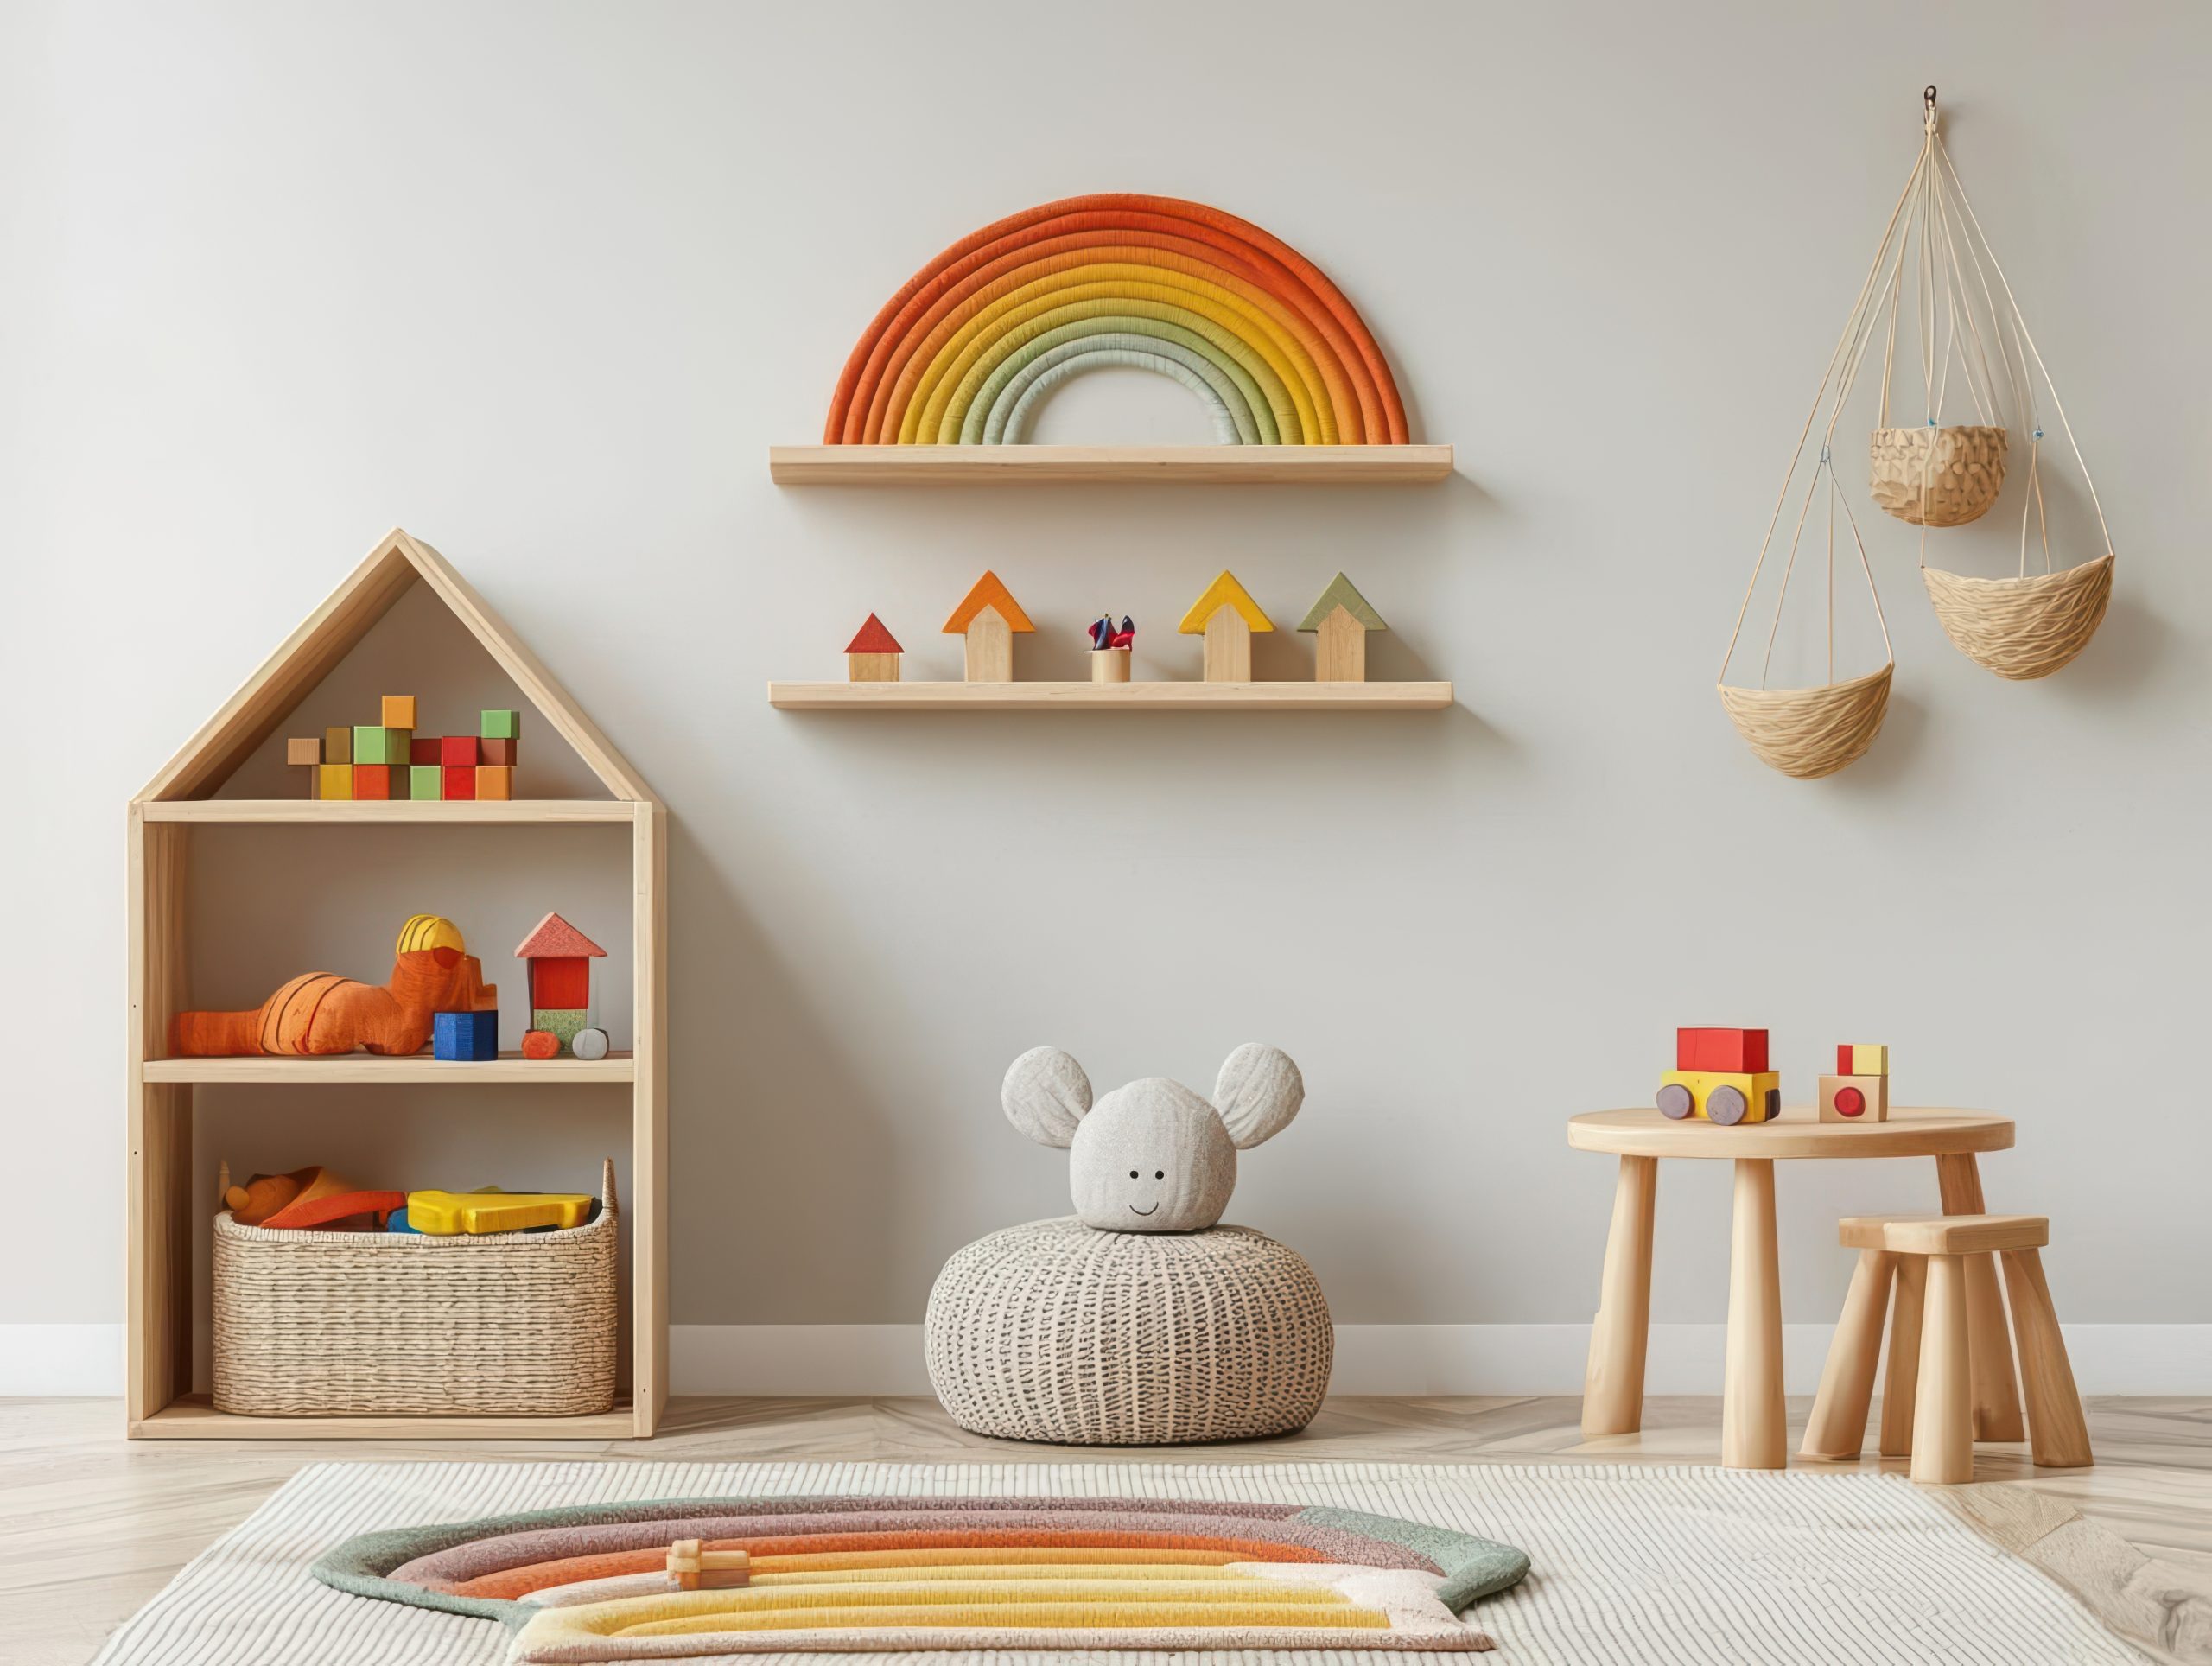
8. Theme and Décor Ideas That Inspire Play
Aesthetics matter in a kids’ toy room—not just for visual appeal, but because thoughtful design can stimulate imagination and engagement. The most successful play spaces balance personality with functionality.
When selecting a theme for your kids’ toy room, consider:
- Longevity – Choose concepts that can evolve as your child grows
- Neutrality – Select base elements that work with changing interests
- Flexibility – Incorporate themes through easily-changed accessories rather than permanent fixtures
- Child input – Involve children in age-appropriate decisions to increase their ownership of the space
- Colour psychology – Understand how different hues affect mood and behaviour
A well-designed kids’ toy room often uses colour strategically rather than overwhelmingly. Consider a neutral base palette with colourful accents that can be updated. This approach creates a visually calm environment while still offering personality and interest.
Pro tip: Rather than character-specific themes that may quickly fall out of favour, consider concept-based themes for your kids’ toy room, such as nature, adventure, or creativity, that can adapt as interests evolve.
9. Organisation Systems That Work
Creating a kids’ toy room is one achievement; maintaining it is another. Successful play spaces incorporate systems that make ongoing organisation manageable for both parents and children.
Effective kids’ toy room maintenance strategies include:
- Consistent categories – Group similar items together in logical categories
- Clear visual systems – Use consistent colours, labels, or symbols for different toy types
- Appropriate independence – Design storage that children can manage without assistance
- Regular reset times – Establish daily quick-cleanup and weekly deeper organisation routines
- One-in-one-out policy – Maintain toy volume by removing items when new ones enter the rotation
Labelling deserves special attention in any kids’ toy room organisation system. For younger children, use picture labels that clearly show what belongs where. As children develop reading skills, transition to word labels that support literacy development.
Pro tip: In a well-designed kids’ toy room, incorporate a “halfway house” basket for items that need parental help to put away. This teaches responsibility while acknowledging developmental capabilities.
10. Real Family Examples: Kids Toy Rooms That Work
While every family’s needs differ, examining successful kids’ toy room solutions provides valuable inspiration. The following examples demonstrate how core principles adapt to different situations.
Small Space Solution
A 6×8-foot dedicated area transformed into a complete kids’ toy room by:
- Using full-height wall storage
- Implementing a fold-down activity table
- Creating vertical display systems
- Utilising under-furniture storage
- Employing a strict rotation system to limit visible toys
Shared Sibling Space
A kids’ toy room designed for multiple ages incorporating:
- Colour-coded storage for each child
- Height-appropriate activity zones
- Lockable storage for materials needing supervision
- Flexible furniture arrangement for varying play styles
- Designated personal spaces within the shared room
Budget Transformation
An impressive kids’ toy room created with limited funds by:
- Repurposing existing furniture with paint
- Using inexpensive plastic bins with custom labels
- DIY wall organisation systems
- Strategic lighting upgrades
- Creative use of wall space for both storage and play
Pro tip: The most successful kids’ toy room designs prioritise organisational infrastructure first, with decorative elements added after the functional systems are established.
Conclusion
Creating an effective kids’ toy room involves balancing practical organisation with spaces that inspire creativity and independent play. The most successful designs consider not just current needs but how the space will evolve as children grow.
Key takeaways for designing your kids’ toy room include:
- Start with clear zones based on your child’s play patterns
- Prioritise accessible, intuitive storage systems
- Create visual calm through thoughtful design choices
- Implement maintenance routines that grow with your child
- Allow flexibility for changing interests and developmental needs
Remember that a well-designed kids’ toy room serves multiple purposes: containing toy clutter, supporting development through appropriate play opportunities, and creating an environment where children can exercise independence and creativity.
By applying these principles, you can create a kids’ toy room that works for your unique space, budget, and family needs, transforming toy chaos into an organised, inspiring environment that benefits both children and parents.
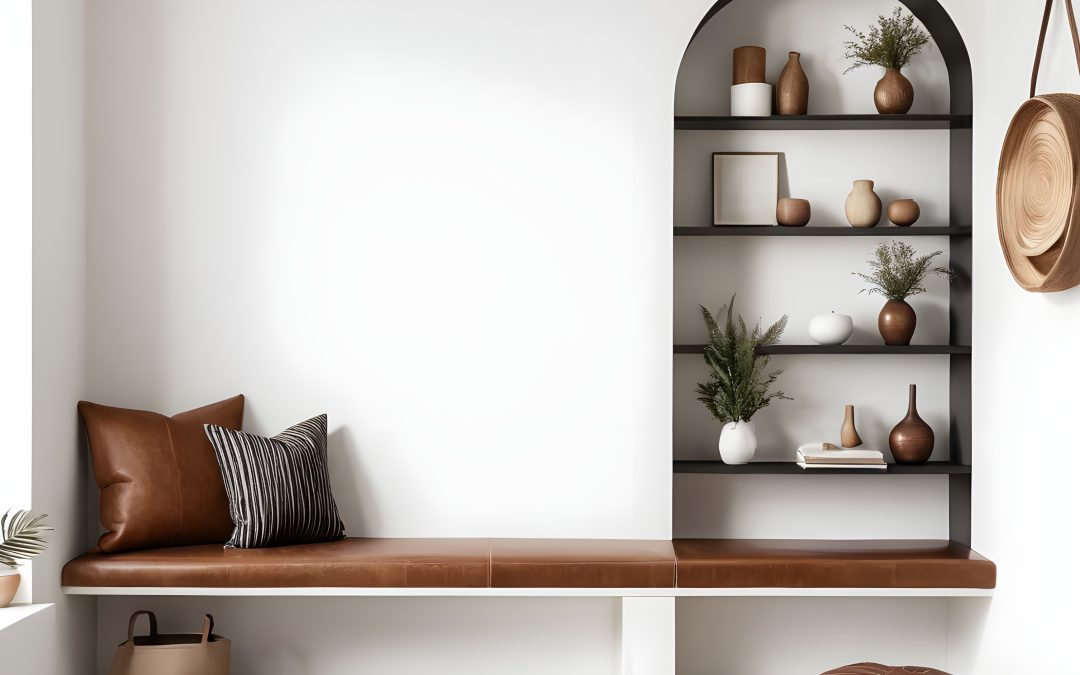
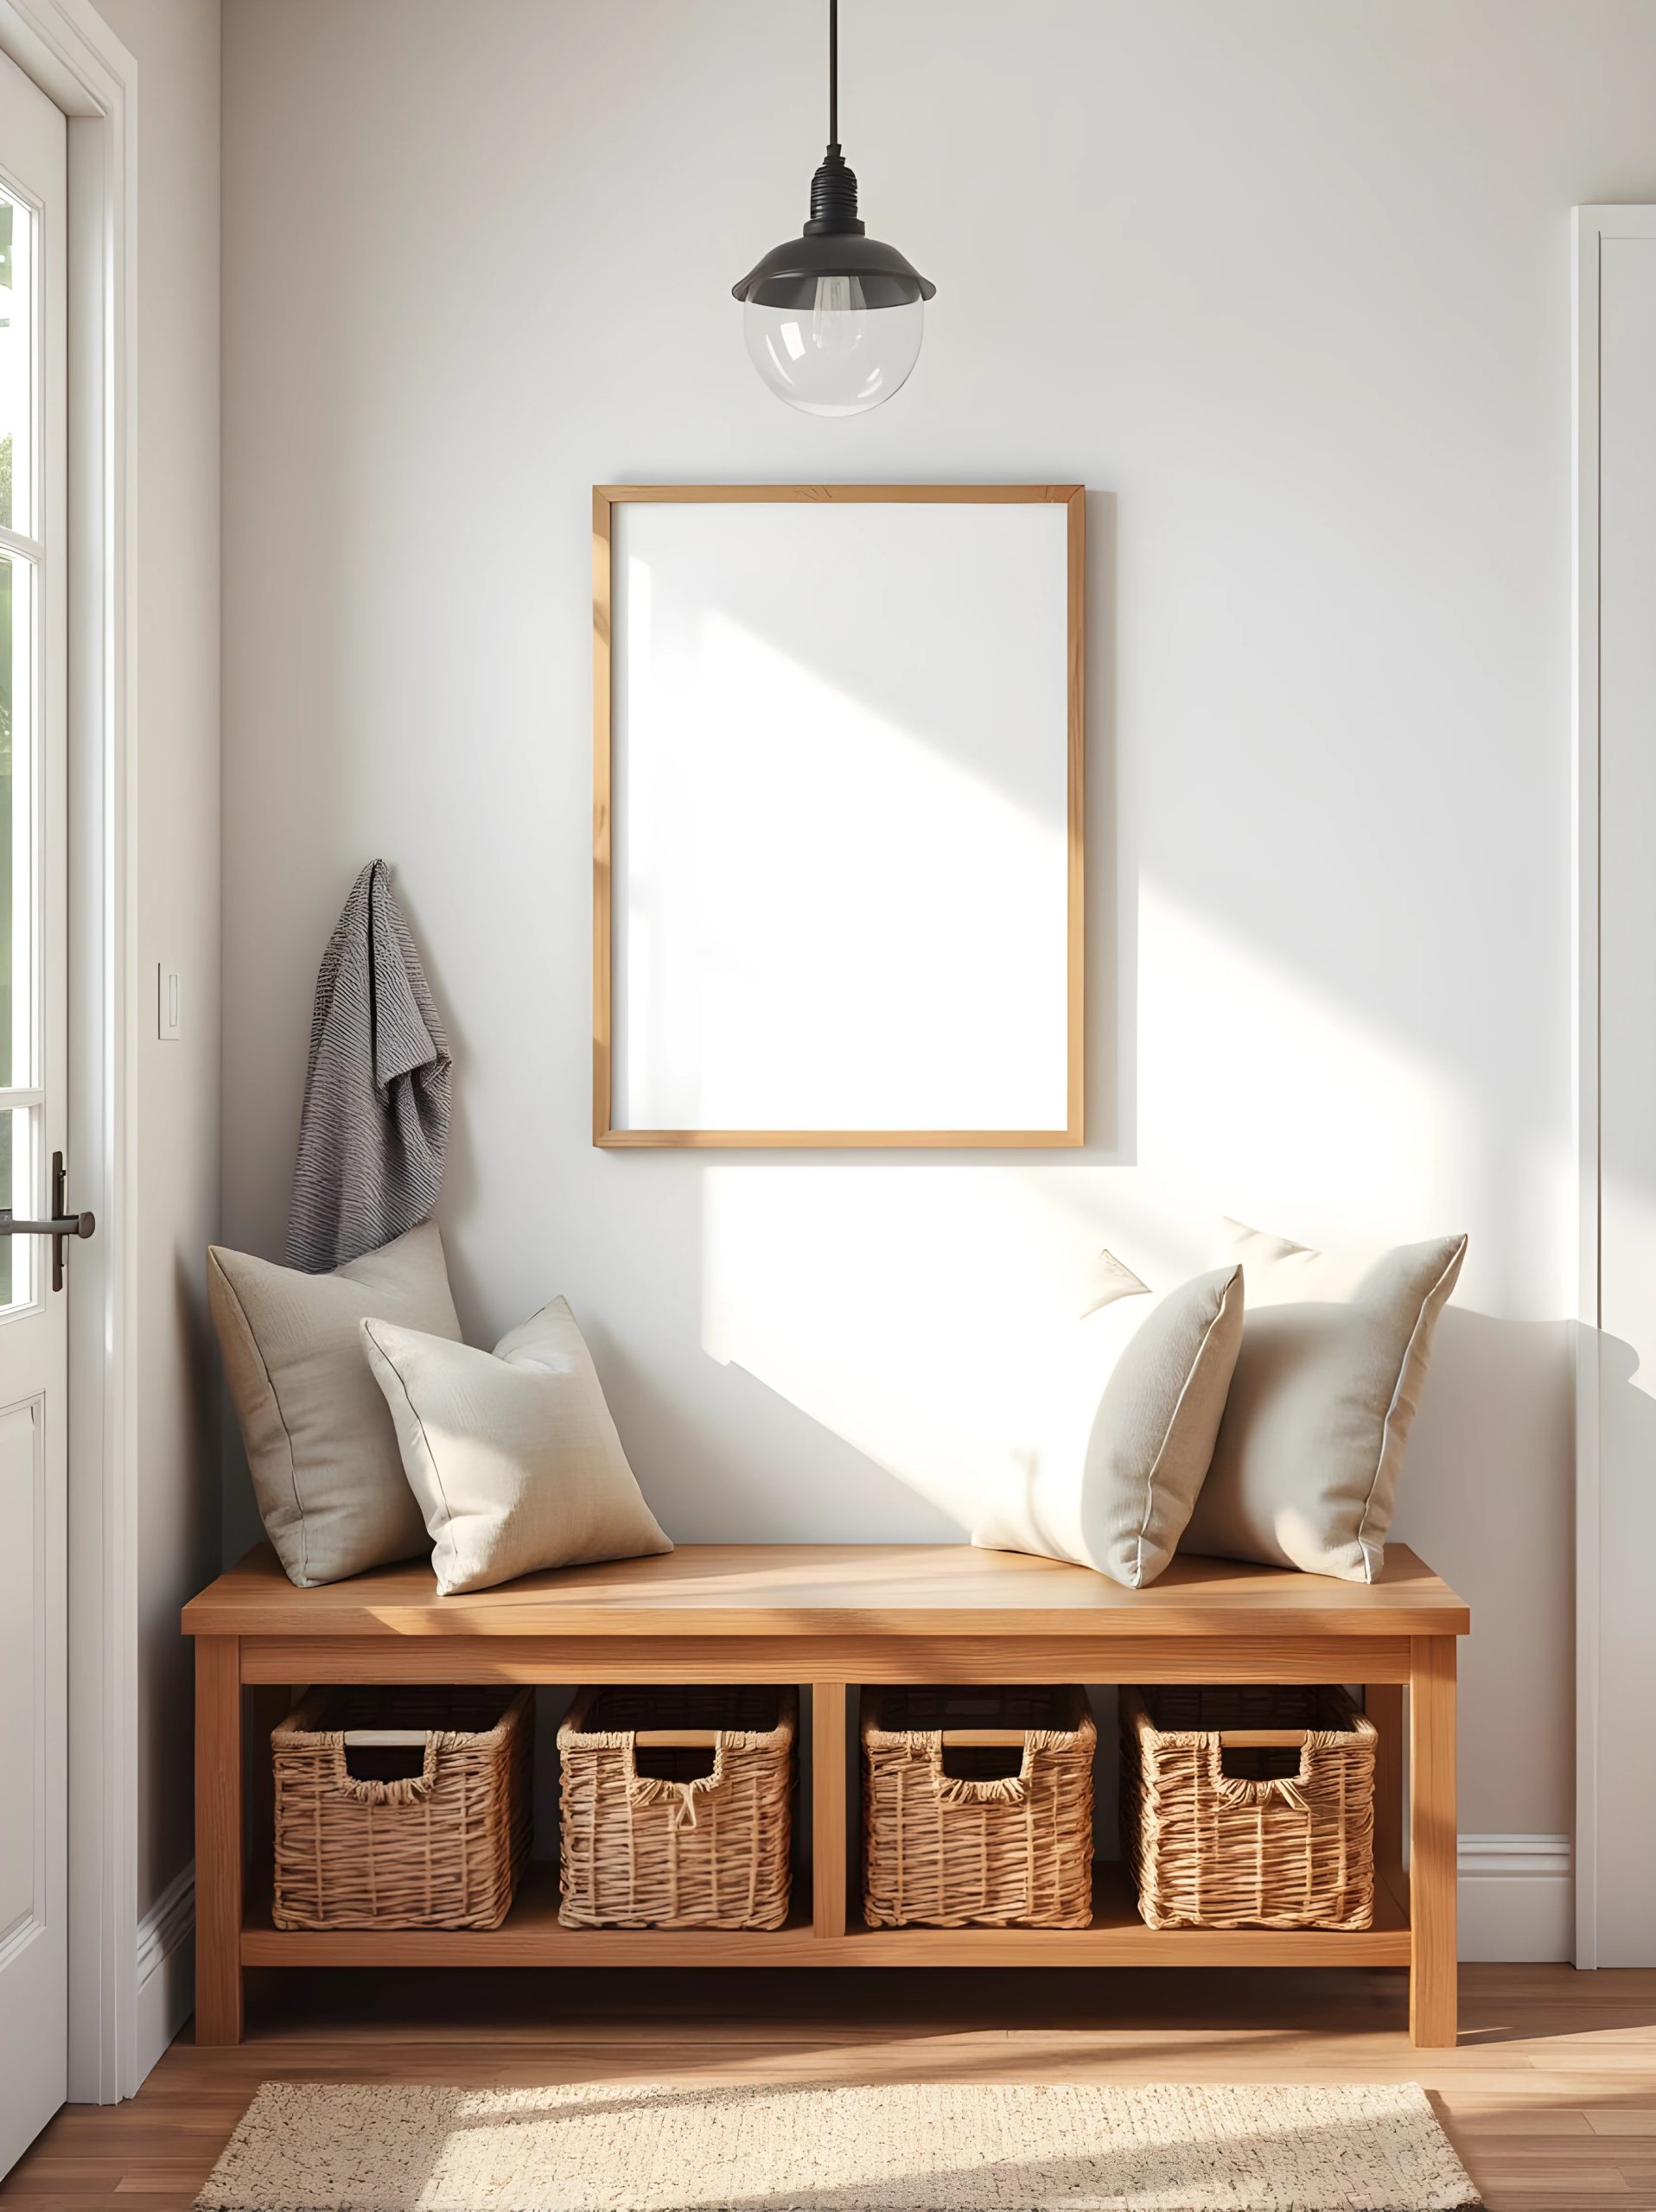
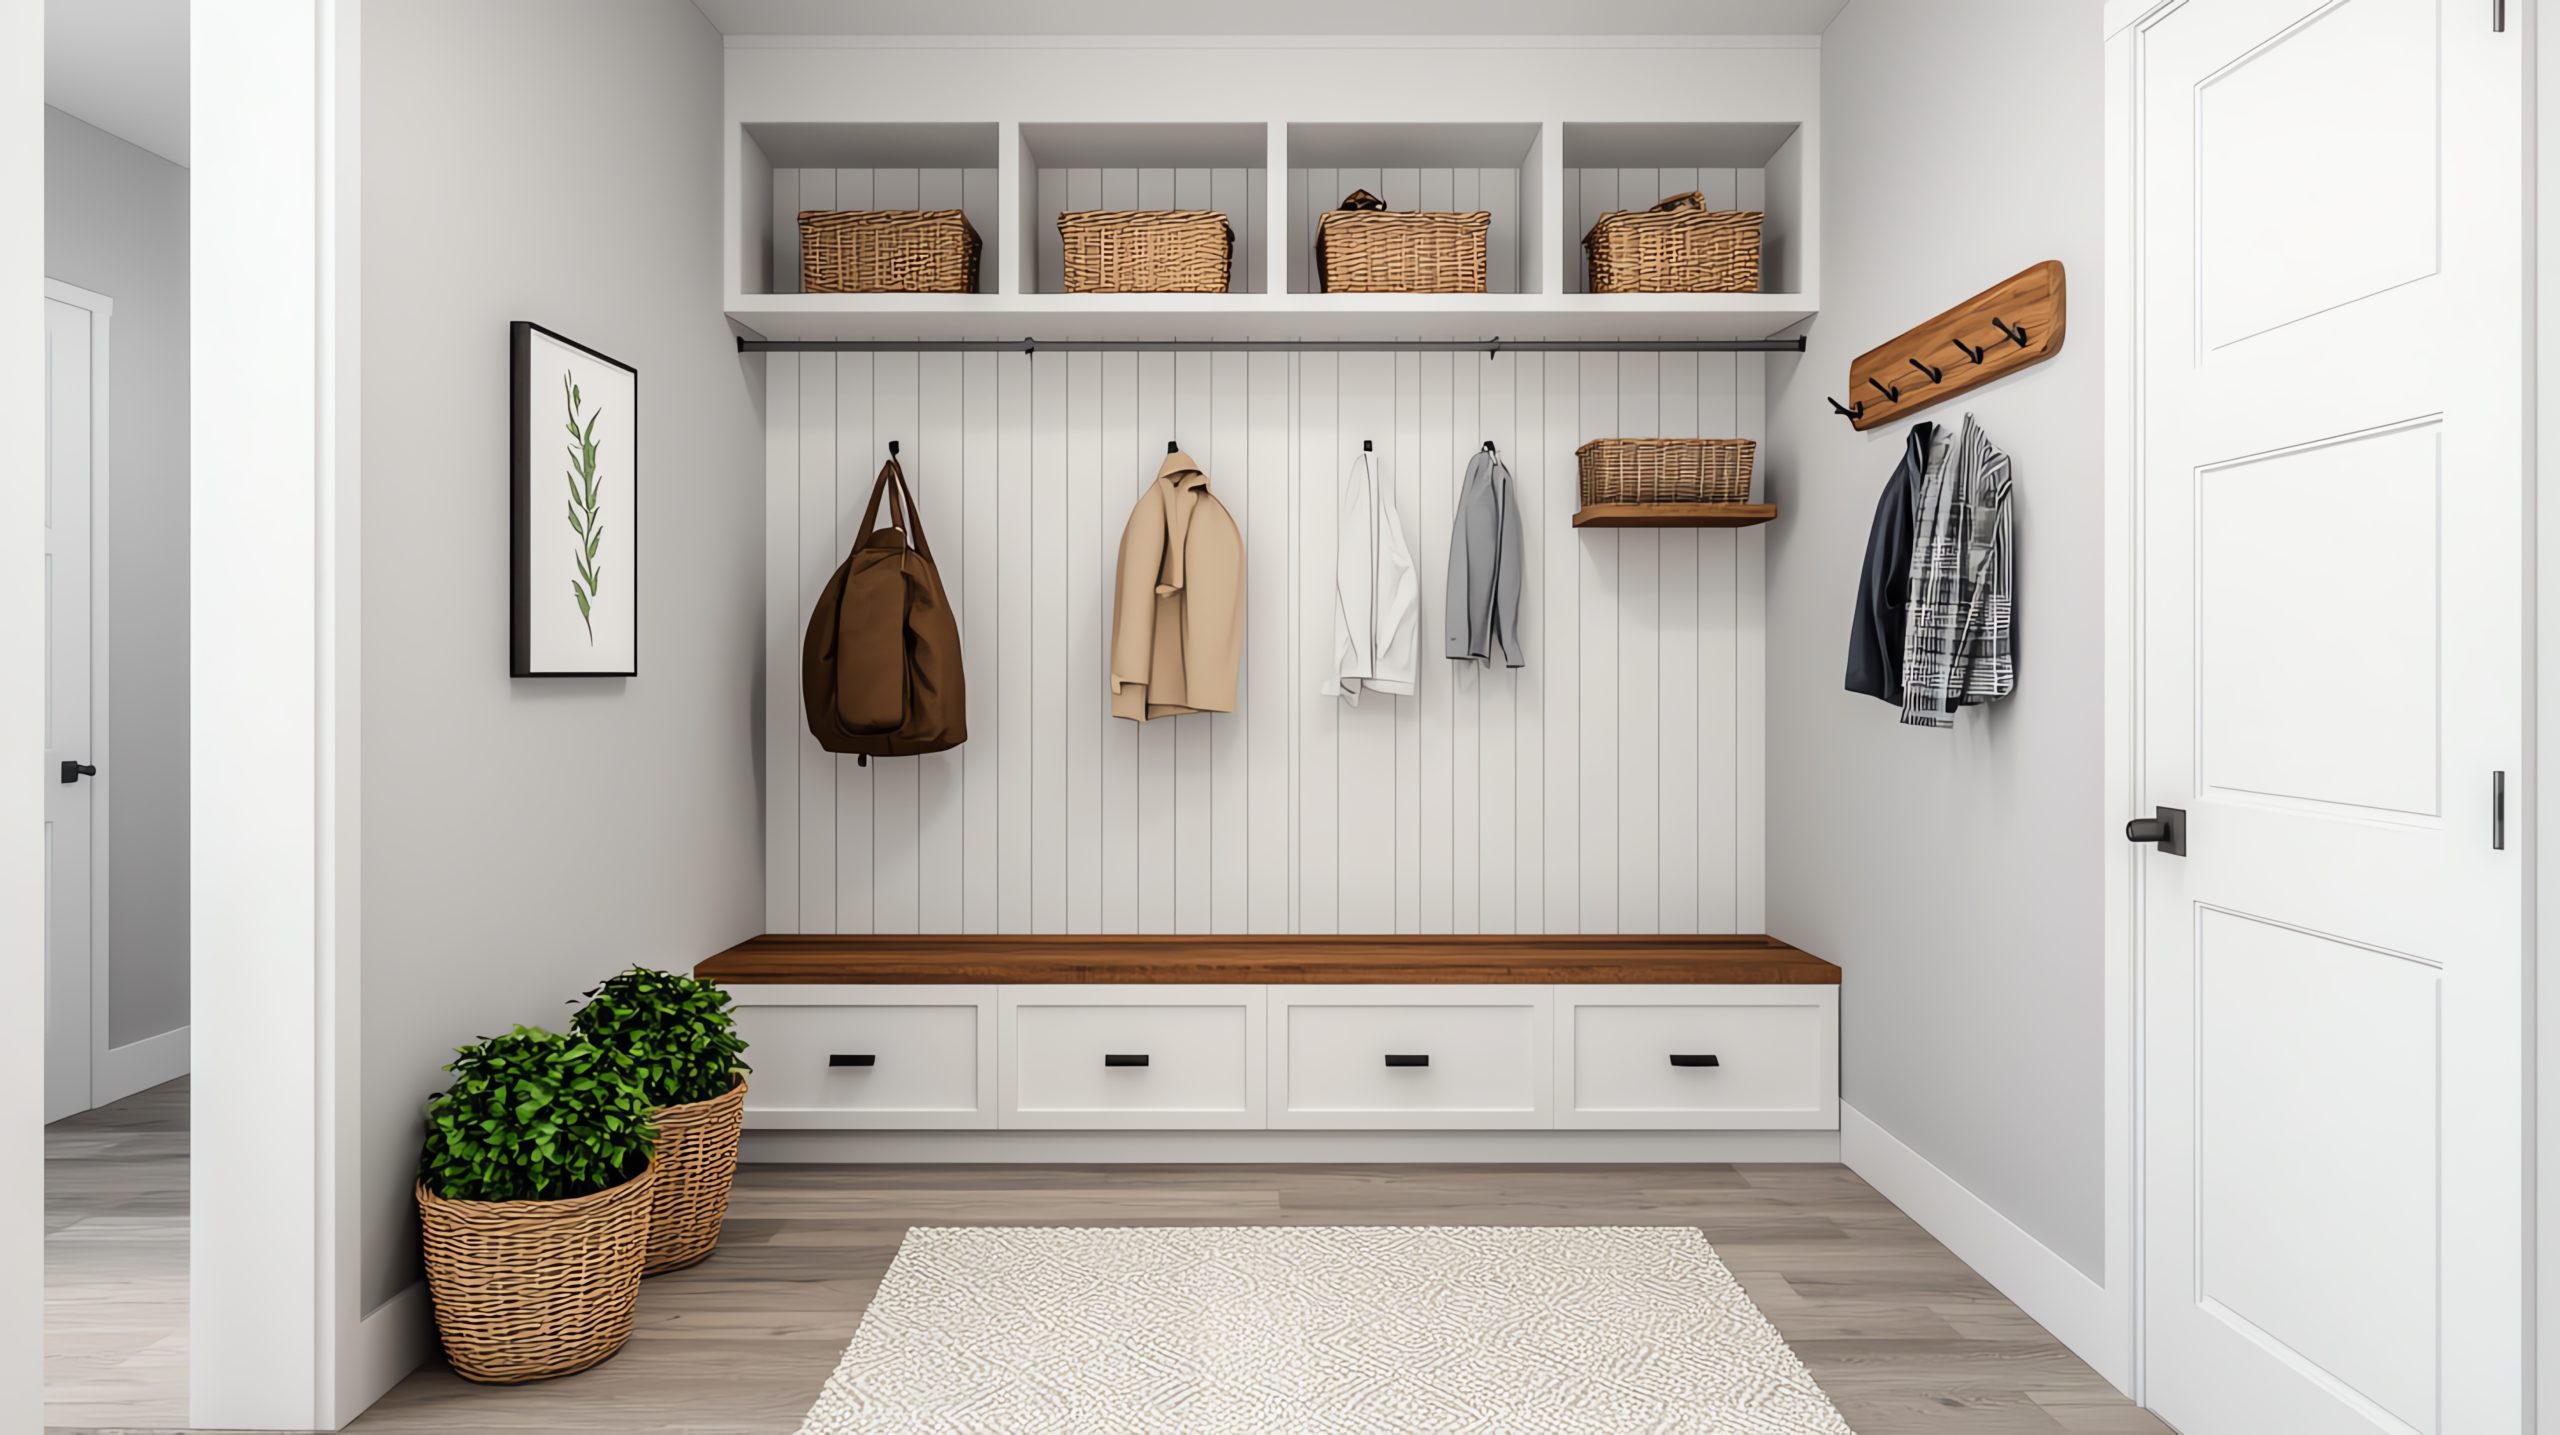
by Kesaa Interiors | ROOMS, Storage & Organization
Looking for the best mudroom storage ideas for the space you have? Read along for the best tips!
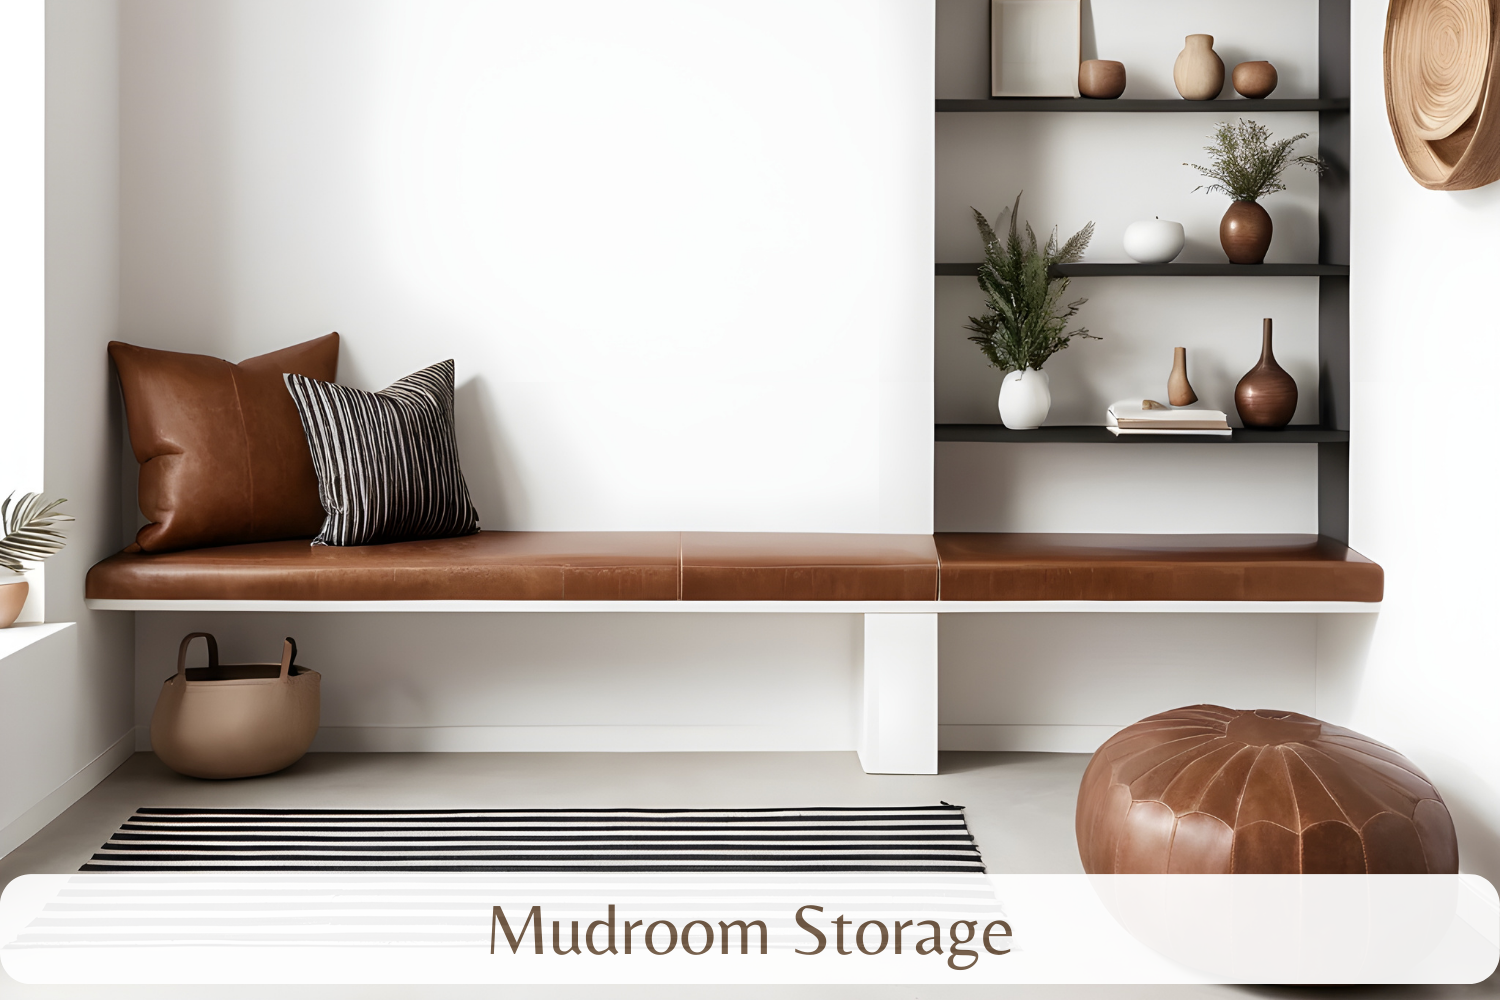
Let’s be honest, the mudroom is often the hardest-working space in the house. It’s the first line of defense against the chaos of the outside world, the drop zone for everything from backpacks and sports gear to muddy boots and wet umbrellas. But what happens when this crucial space becomes overwhelmed?
A cluttered mudroom can quickly turn into a source of stress, making it difficult to find what you need and keep things organised. That’s why effective mudroom storage is so essential, regardless of the size of your entryway.
This post will explore clever mudroom storage ideas for every space size, helping you transform your mudroom from a chaotic dumping ground into a functional and stylish hub.
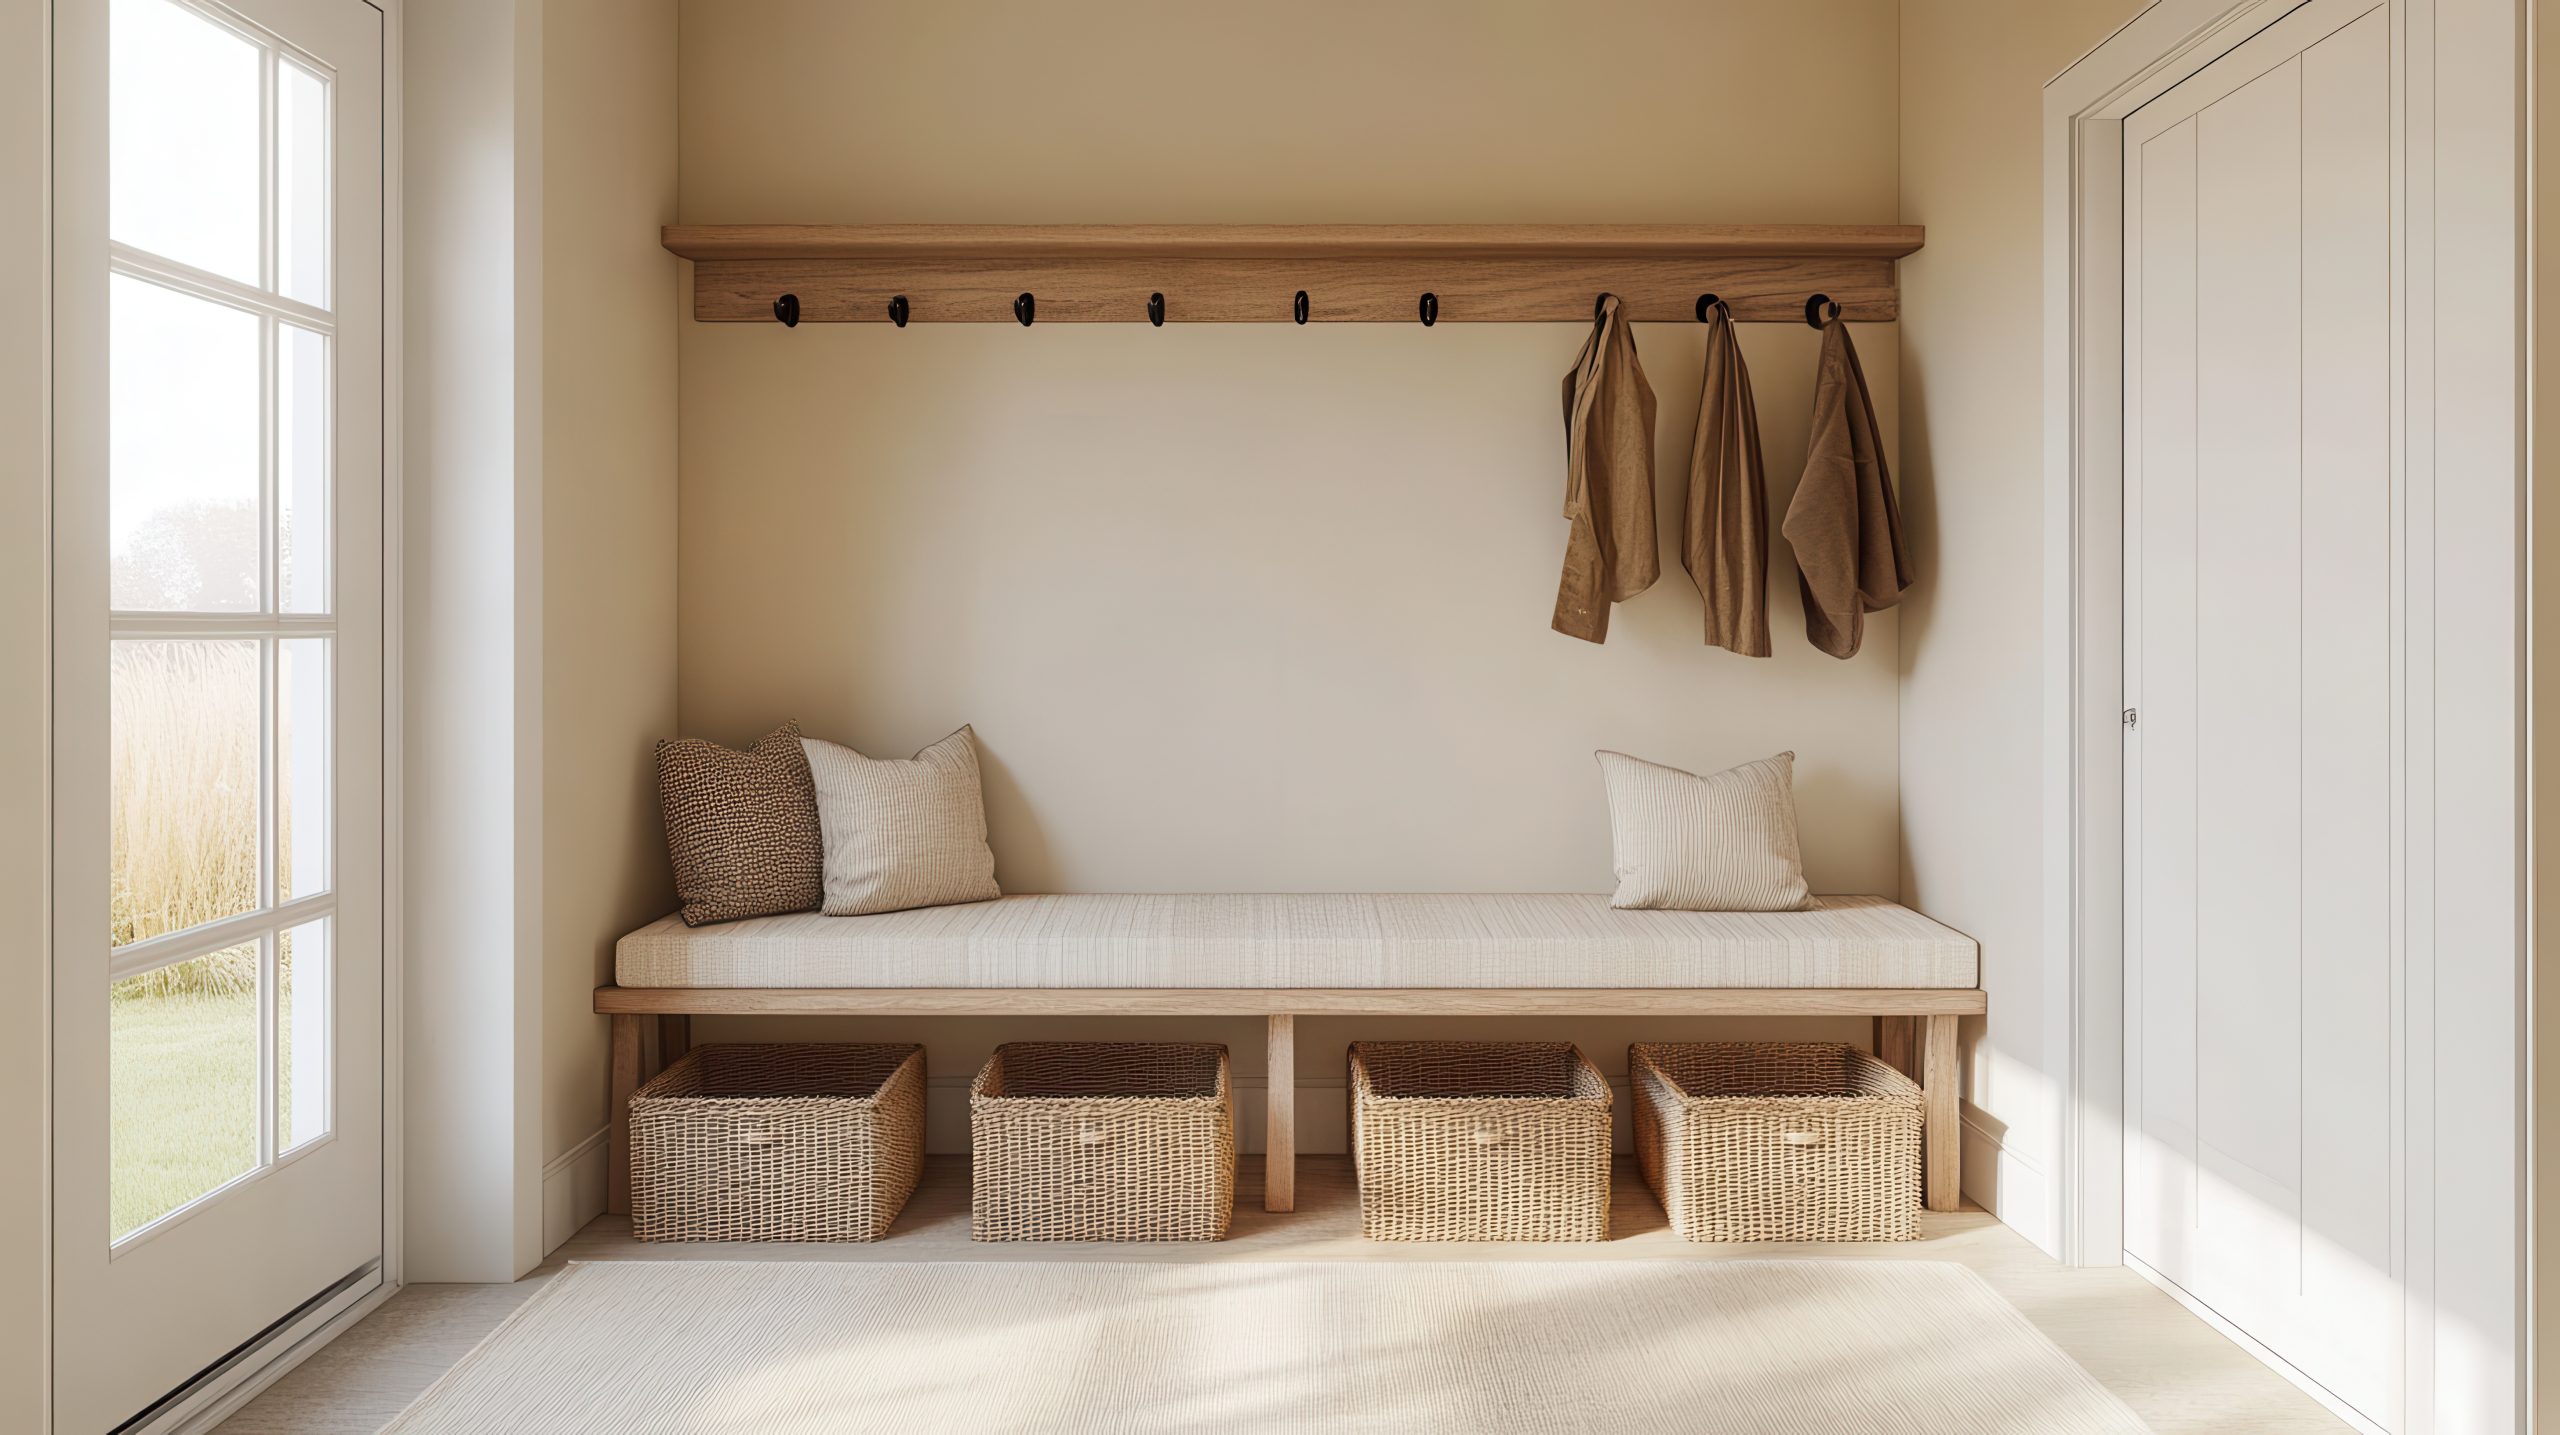
Best Mudroom Storage Hacks!
Tiny Mudrooms – Making the Most of Every Inch
Micro Mudroom Magic: Storage Solutions for the Smallest Entries
Dealing with a tiny entryway or a narrow hallway that has to function as your mudroom? Don’t despair! Even the smallest of spaces can be optimised with clever mudroom storage solutions. The key is to think vertically and utilize every available inch. Forget sprawling furniture; in these micro mudrooms, we’re focusing on compact and multi-functional pieces that maximise storage without sacrificing precious floor space. Effective mudroom storage in these tiny areas is less about having a designated “room” and more about creating a system that works within your limited square footage. Let’s explore some ingenious ideas to transform your miniature entryway into a storage powerhouse.
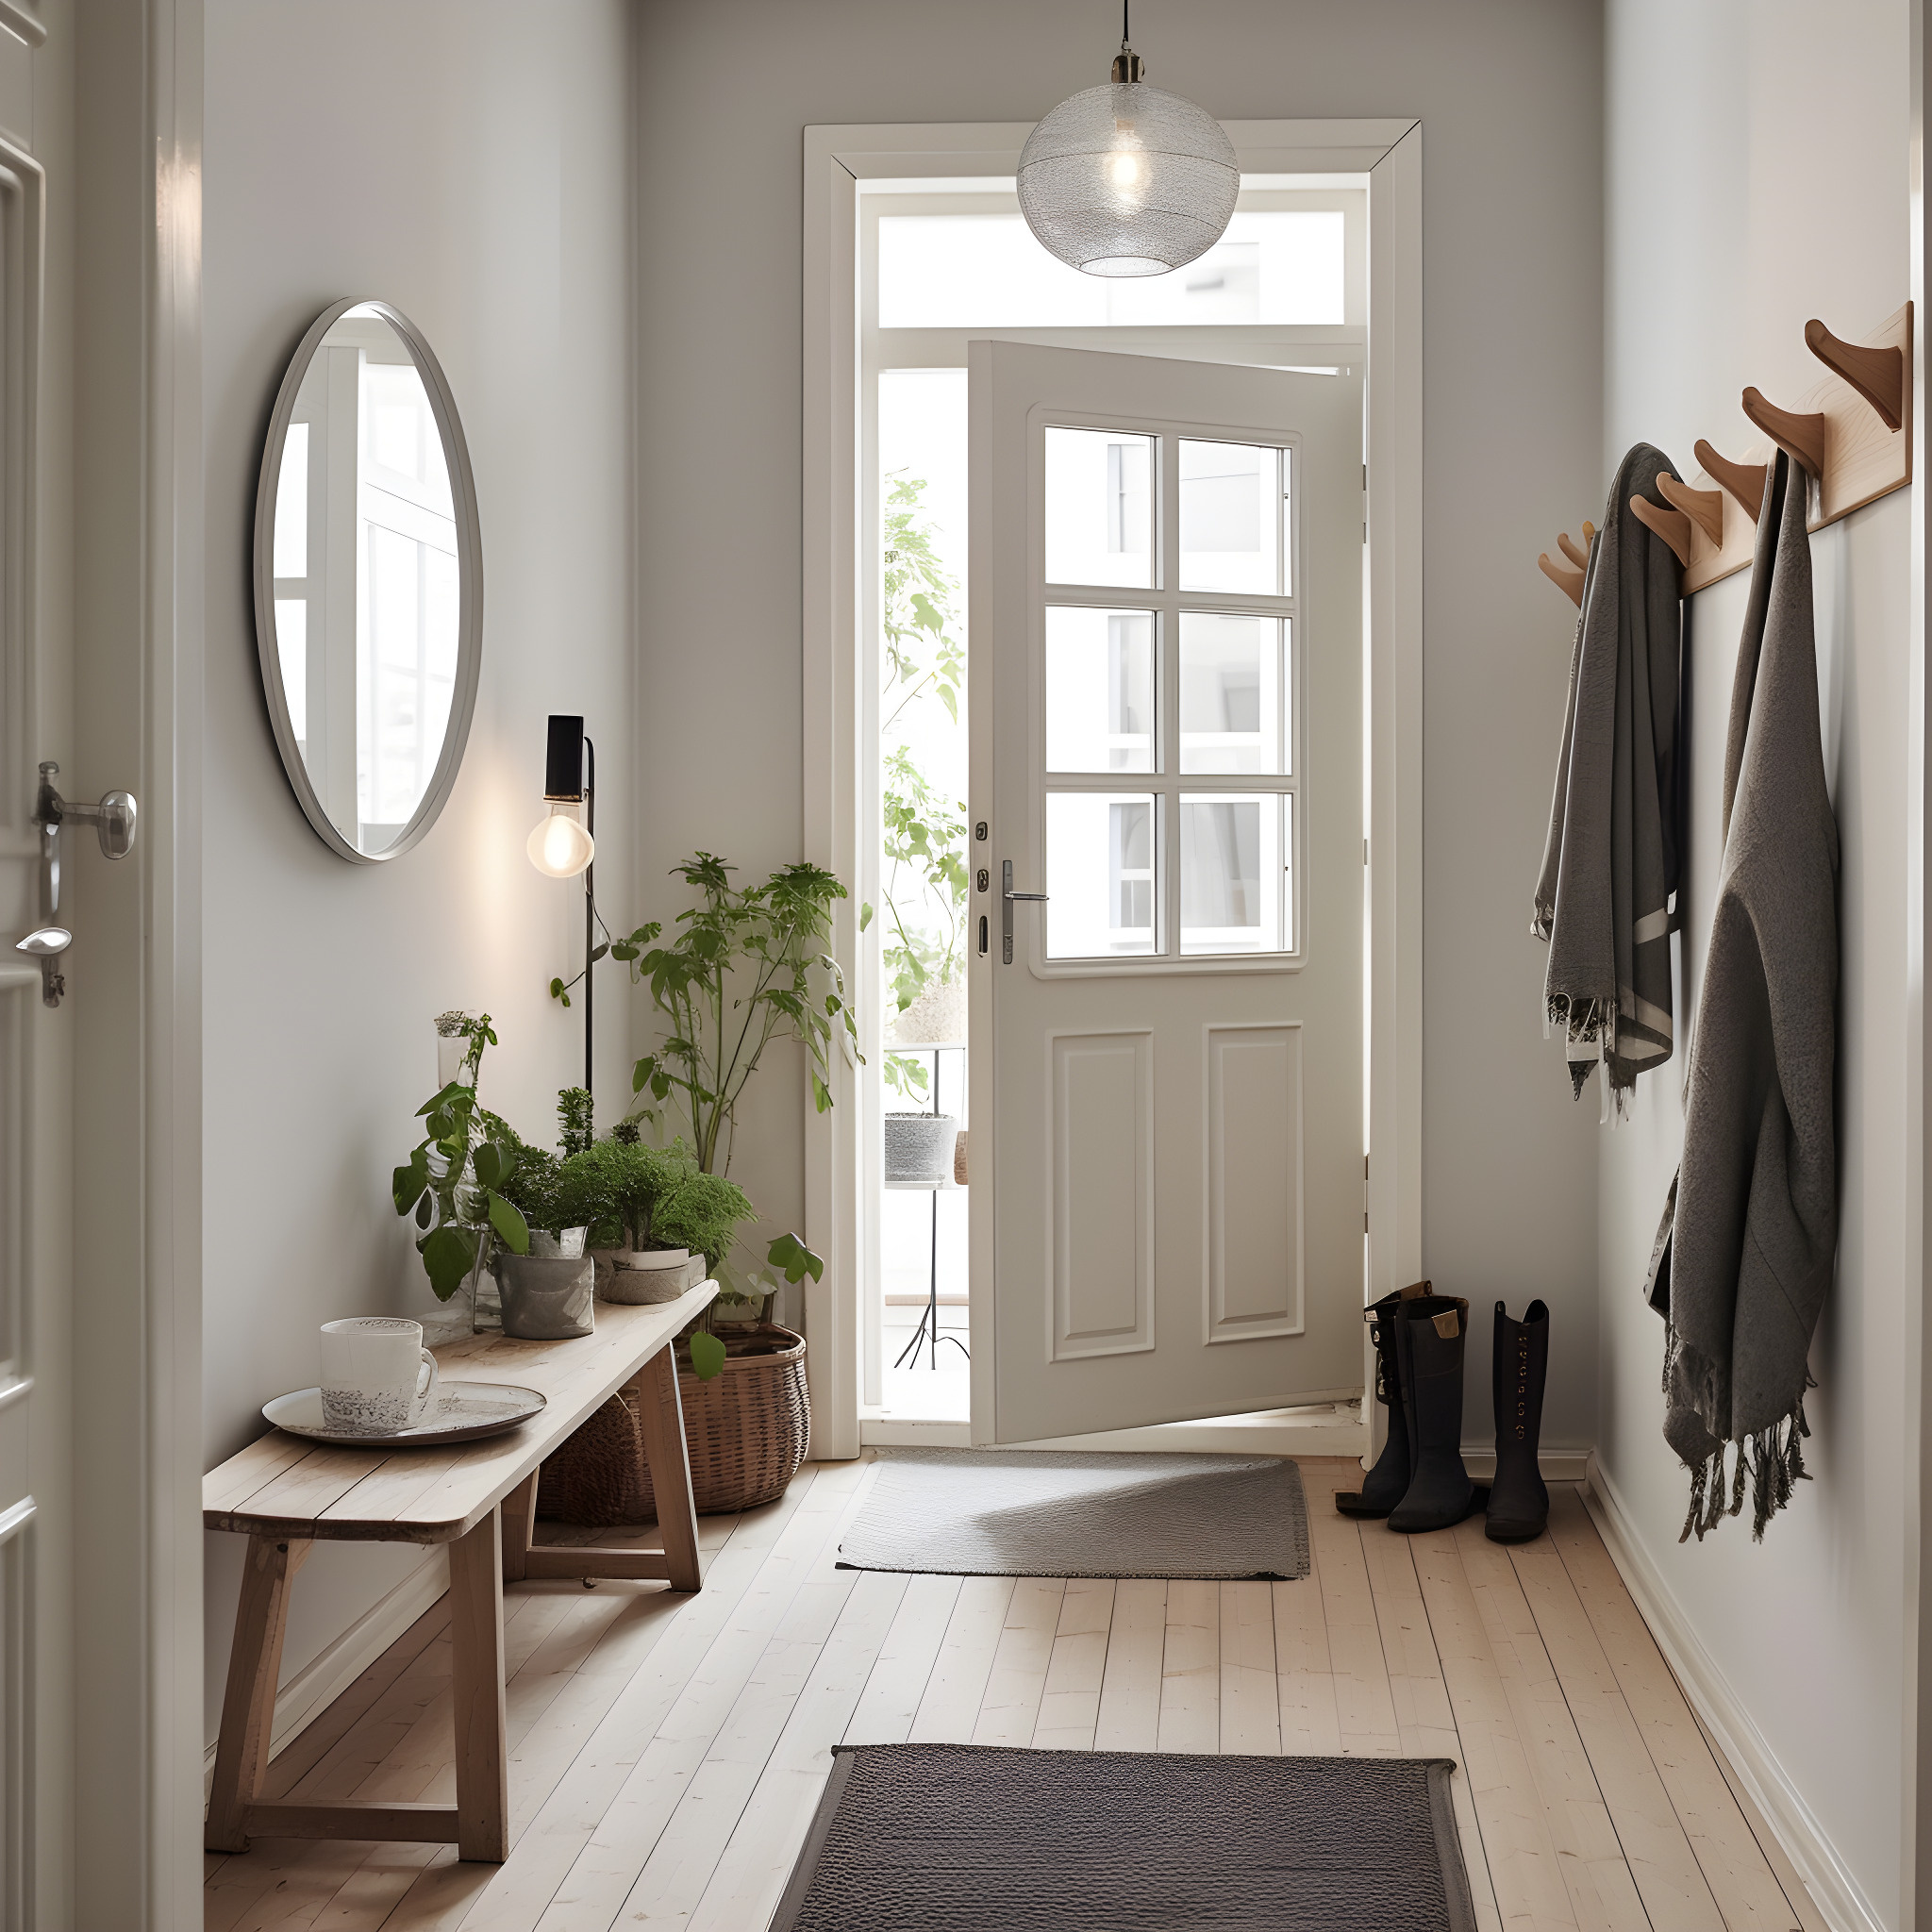
-
Wall-Mounted Coat Racks with Tiny Shelves: In a tiny mudroom, wall space is your best friend. Install a sturdy wall-mounted coat rack with a small shelf above. This provides a spot for coats, jackets, and bags, while the shelf can hold keys, mail, or small decorative items.
-
Over-the-Door Shoe Organisers: Maximise vertical space and keep shoes off the floor with an over-the-door shoe organiser. These are inexpensive, easy to install, and can hold a surprising number of pairs. They’re a game-changer for mudroom storage in tight spaces.
-
Vertical Shoe Racks: If you have a sliver of wall space, a slim, vertical shoe rack can be a lifesaver. These racks keep shoes organised and prevent them from cluttering the floor, which is crucial for maintaining a sense of order in a tiny mudroom.
-
Narrow Console Tables with Drawers: A narrow console table placed against the wall can serve as a landing strip for keys and mail, while drawers provide hidden storage for gloves, scarves, and other small essentials. This adds valuable mudroom storage without overwhelming the space.
Small Mudroom Storage – Verticality is Key
Small Space, Big Impact: Vertical Mudroom Storage Solutions
If you have a small, dedicated mudroom, you have a bit more room to work with than a tiny entryway, but maximising space is still crucial. Vertical mudroom storage solutions are your secret weapon in these areas. Think upwards and utilise the full height of your walls to create ample storage without making the space feel cramped. By incorporating tall shelving, wall-mounted organisers, and other clever vertical storage ideas, you can transform your small mudroom into an organised and functional zone. Let’s explore some effective strategies for maximising vertical space in your small mudroom.
-
Tall, Narrow Shelving Units: Opt for tall, narrow shelving units that reach the ceiling. These provide ample storage for everything from shoes and boots to baskets and bins filled with hats, gloves, and scarves. This type of mudroom storage keeps items organised and easily accessible while maximising vertical space.
-
Wall-Mounted Cubbies: Install wall-mounted cubbies to create designated spaces for each family member. These cubbies can hold backpacks, sports equipment, and other everyday essentials, keeping them off the floor and organised. This personalised mudroom storage solution is especially helpful for families with children.
-
Pegboards for Flexible Storage: Pegboards offer incredibly versatile mudroom storage. Use them to hang coats, bags, hats, and even small tools. The adjustable pegs allow you to customise the configuration to fit your specific needs, making it a highly adaptable storage solution.
Narrow Mudrooms – Long and Lean Storage Champions
Long and Lean: Storage Solutions for Narrow Mudrooms
Narrow mudrooms, often found in hallways or corridors, present a unique set of challenges. While they may lack width, their length offers an opportunity for clever mudroom storage solutions. The key is to embrace the long, lean layout and maximise storage along the wall without obstructing the flow of traffic. By incorporating long, narrow furniture pieces and utilising wall space strategically, you can create a highly functional and organised mudroom, even in a limited space. Let’s explore some effective storage ideas for narrow mudrooms.
-
Long Benches with Storage Underneath: A long bench placed along one wall provides a convenient place to sit and put on or take off shoes. Choose a bench with built-in storage underneath to maximise mudroom storage capacity. This can be in the form of drawers, cubbies, or a hinged lid for easy access to stored items.
-
Slim Console Tables with Drawers: Similar to the bench idea, a slim console table with drawers offers a surface for keys and mail while providing hidden storage for smaller items. Opt for a table with a shallow depth to avoid encroaching on the walkway. This adds valuable mudroom storage without making the space feel cramped.
-
Wall-Mounted Hooks and Shelves Running the Length of the Wall: Maximise wall space by installing hooks and shelves along the entire length of the wall. This provides ample hanging space for coats, bags, and hats, while shelves can hold baskets, bins, and other storage containers. This creates a continuous mudroom storage solution that utilises the narrow space effectively.
Medium Mudroom Storage – Balancing Form and Function
The Goldilocks Zone: Mudroom Storage for Medium Spaces
Medium-sized mudrooms offer a sweet spot for balancing both form and function. You have enough space to incorporate more substantial storage pieces without overwhelming the area. This allows for greater flexibility in design and the opportunity to create a truly personalised mudroom that caters to your family’s specific needs. The key is to choose mudroom storage solutions that are both practical and stylish, creating a space that is both organised and visually appealing. Let’s explore some inspiring ideas for medium-sized mudrooms.
-
Cubby Systems with Drawers and Baskets: Cubby systems are a fantastic way to provide designated storage for each family member. Combine open cubbies with drawers and baskets for concealed storage of smaller items. This creates a versatile mudroom storage solution that keeps belongings organised and easily accessible.
-
Coat Racks with Shoe Storage Benches: A dedicated coat rack combined with a shoe storage bench offers a classic and practical mudroom storage solution. The coat rack provides ample hanging space for coats and jackets, while the bench offers a place to sit and put on or take off shoes, with storage underneath for keeping footwear tidy.
-
Free-Standing Storage Units: Free-standing storage units, such as wardrobes or cabinets, offer versatile mudroom storage options. Choose units with a combination of shelves, drawers, and hanging rods to accommodate a variety of items. These units can be easily moved or reconfigured as needed, providing flexibility in your mudroom design.
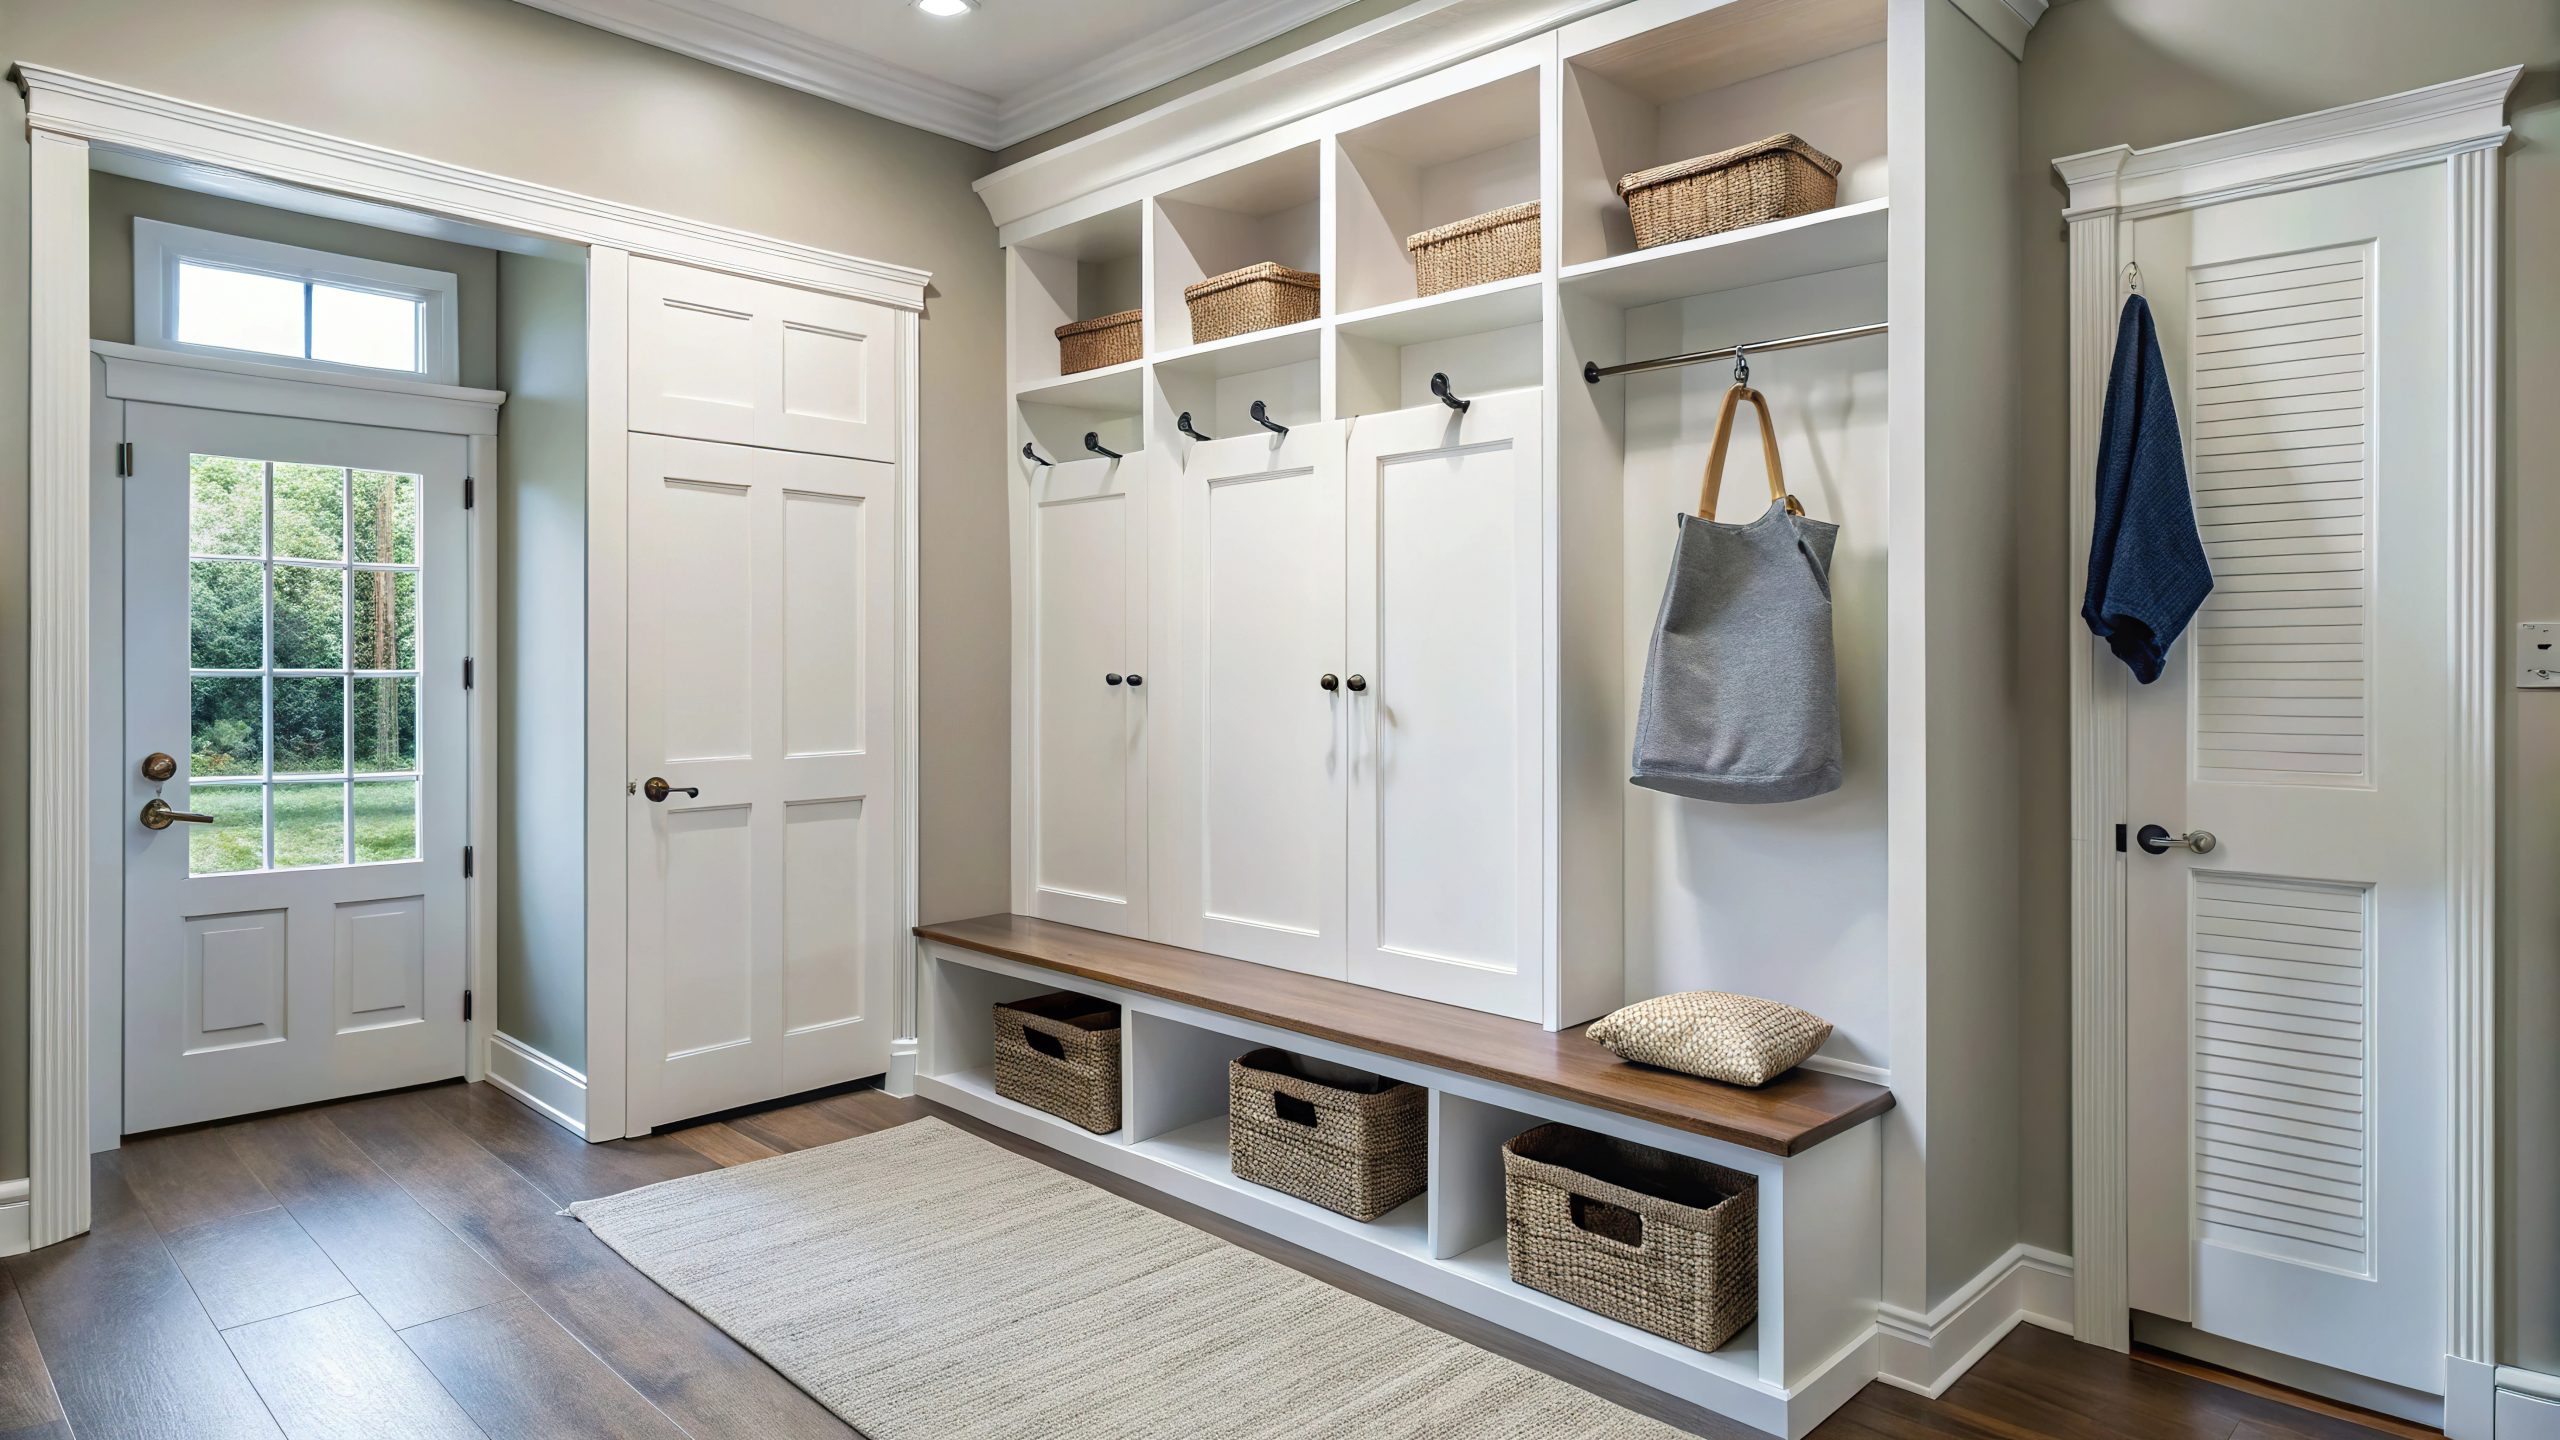
Large Mudrooms – Zoned for Organisation
Divide and Conquer: Zoned Storage for Large Mudrooms
Large mudrooms offer the luxury of space, allowing you to create distinct zones for different activities and storage needs. This is where you can truly optimise functionality and create a highly organised and efficient mudroom. Think about the various functions your mudroom serves – storing outerwear, organising sports equipment, managing pet supplies, etc. – and designate specific zones for each. This zoned approach to mudroom storage will transform your large mudroom into a well-oiled machine. Let’s explore some ideas for creating dedicated zones in your spacious mudroom.
-
Designated Areas for Coats, Shoes, Bags, Sports Equipment, etc.: Divide your large mudroom into specific areas for different categories of items. For example, create a coat closet or designated wall area for outerwear, a shoe storage zone with shelves or cubbies, a separate area for bags and backpacks, and a dedicated space for sports equipment. This zoned approach to mudroom storage makes it easy to find what you need and keeps everything organized.
-
Individual Lockers or Cubbies for Each Family Member: Consider installing individual lockers or cubbies for each family member. This provides personalised mudroom storage space and encourages responsibility for keeping belongings tidy. Each person can have their own designated area for coats, shoes, backpacks, and other personal items.
-
A Drop Zone for Mail and Keys: Create a designated drop zone near the entryway for mail, keys, and other small items. This could be a small table with a drawer, a wall-mounted organiser, or a designated basket or tray. This prevents these items from getting lost or cluttering other areas of the mudroom.
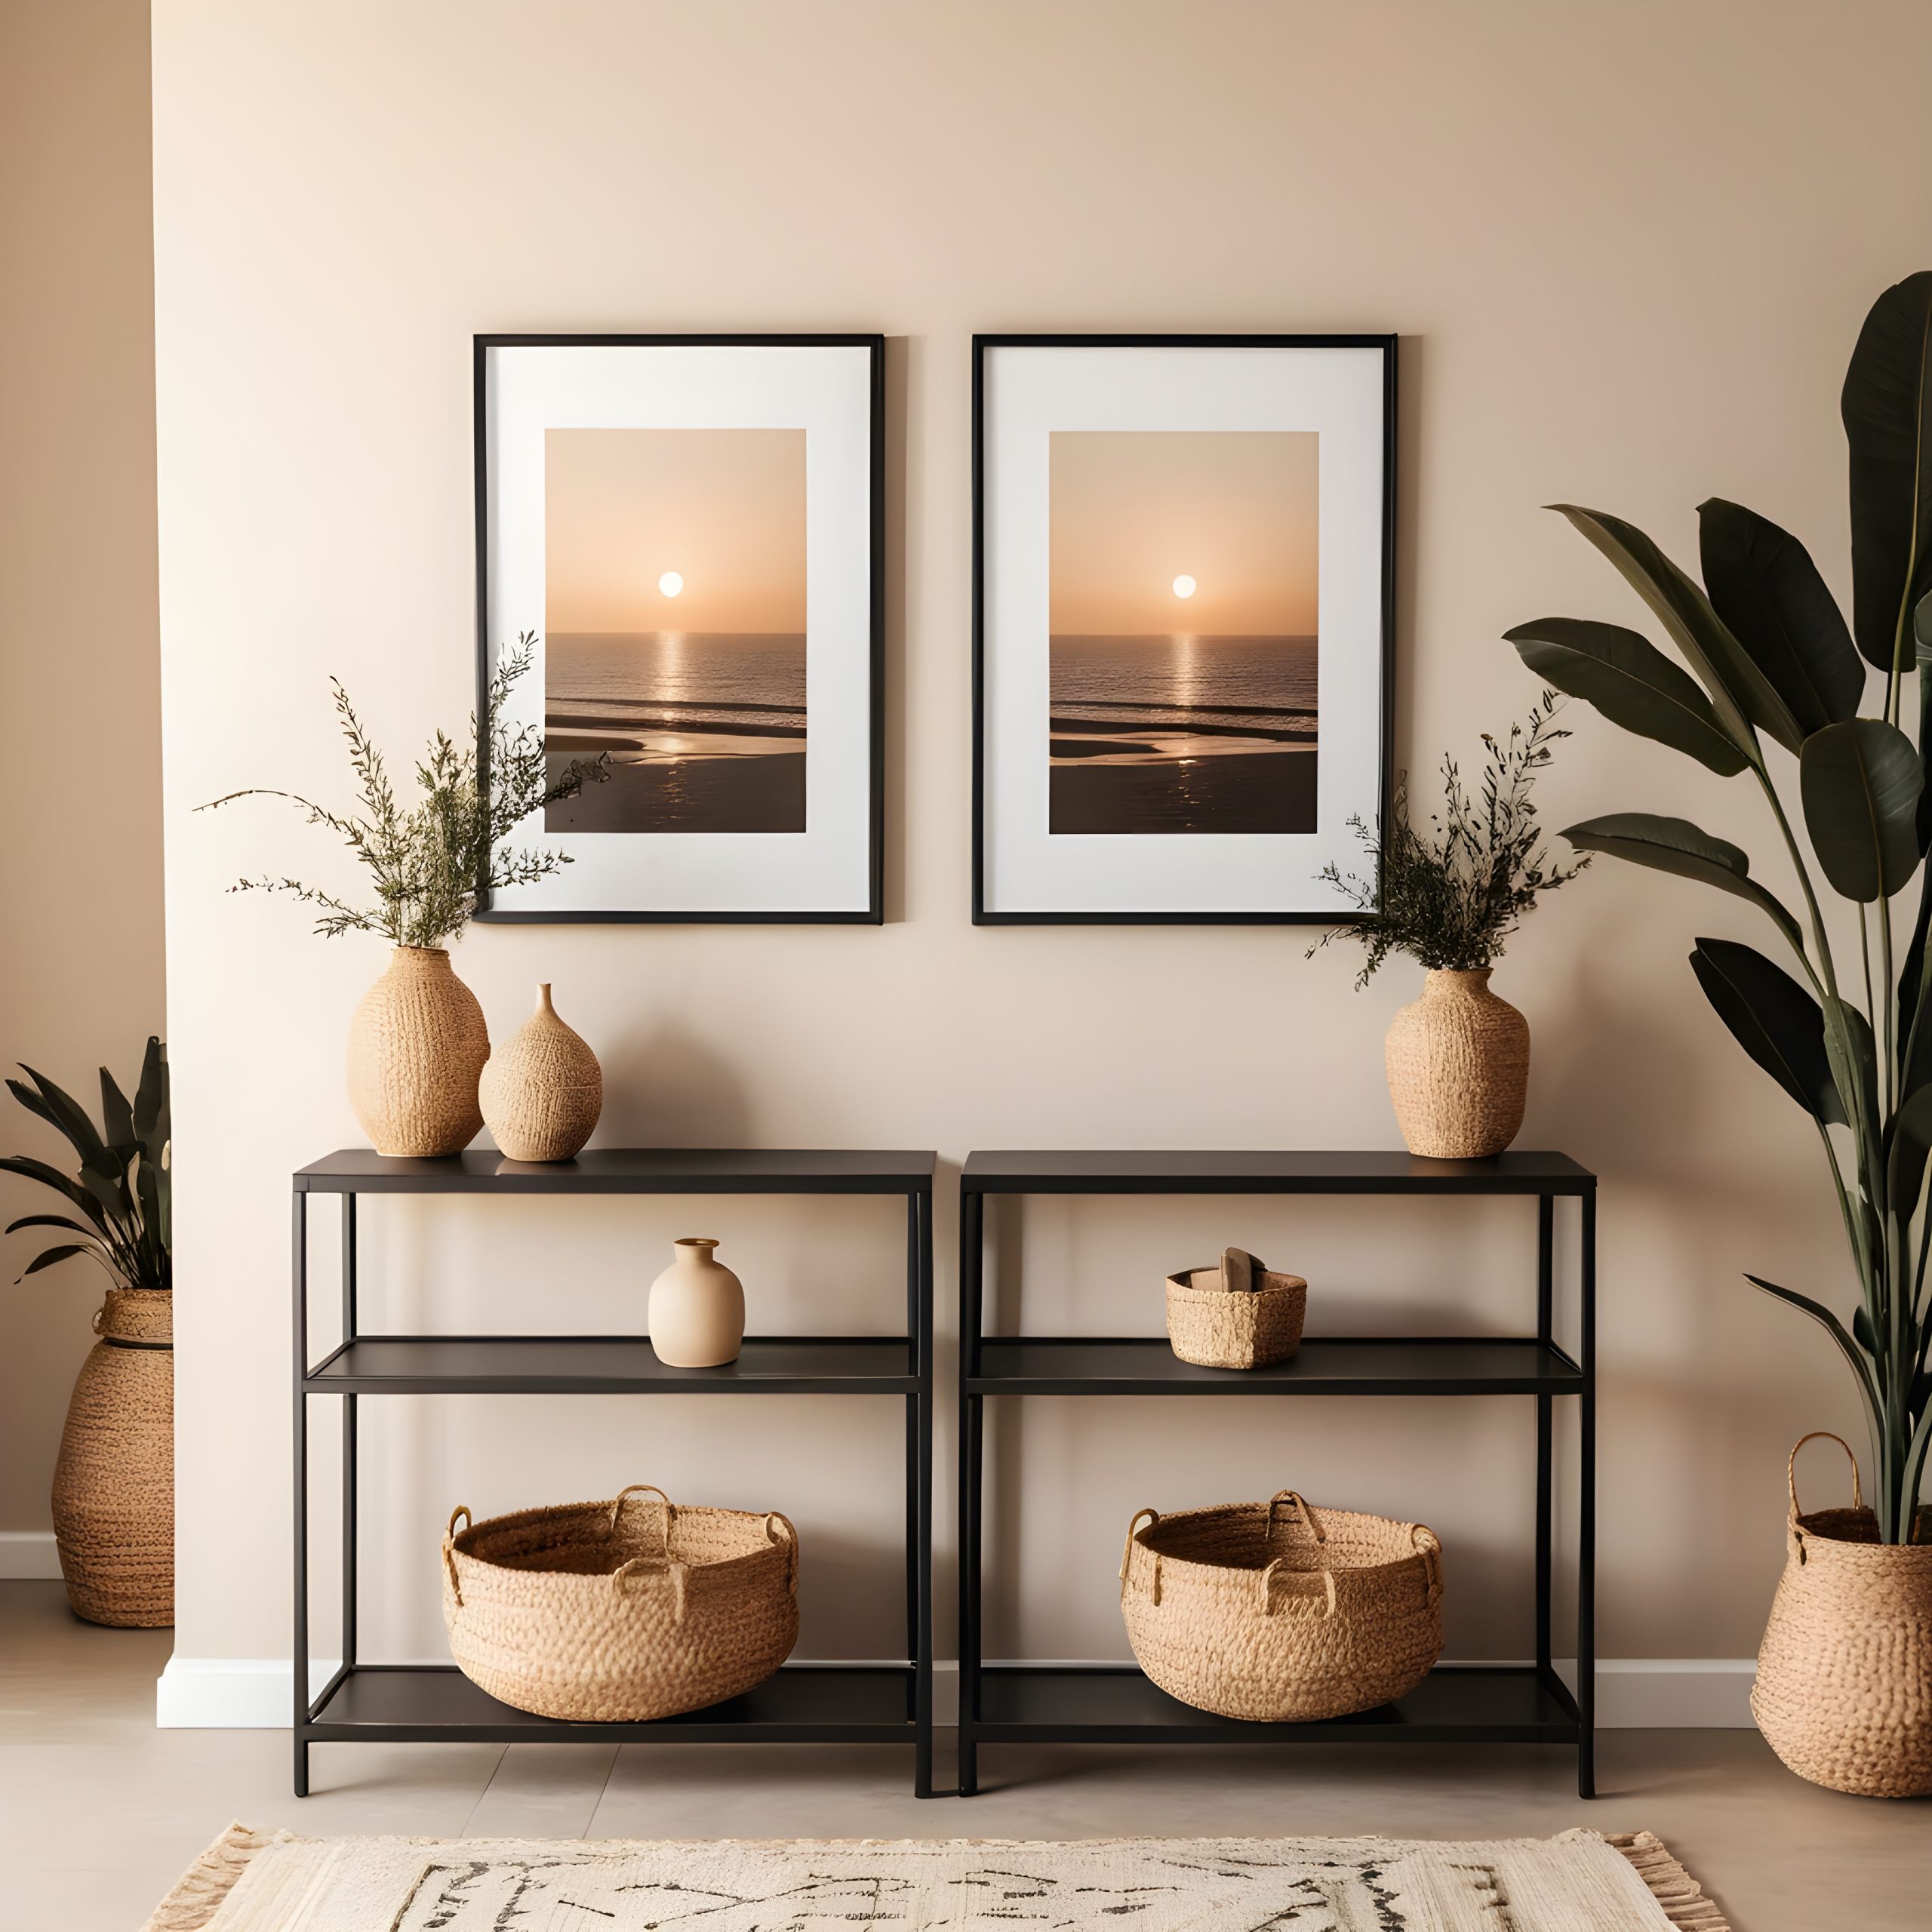
Extra-Large Mudrooms – The Ultimate Mudroom Dream
Mudroom Envy: Storage Solutions for Extra-Large Spaces
An extra-large mudroom is the ultimate dream for those who crave organisation and functionality. With ample space, you can incorporate luxurious features and create a truly customised mudroom that caters to every need. Think beyond basic storage and consider incorporating elements like seating areas, built-in organisers, and even dedicated pet washing stations. The possibilities are endless when it comes to mudroom storage in an extra-large space. Let’s explore some inspiring ideas for creating the mudroom of your dreams.
-
Mudroom Islands: A mudroom island provides additional storage, a countertop for folding laundry or organising items, and a central hub for managing household tasks. Include drawers, cabinets, and open shelving to maximise storage capacity.
-
Built-in Seating Areas: Incorporate a comfortable seating area with built-in benches and cushions. This provides a convenient place to put on and take off shoes, as well as a relaxing spot to read or chat. Include storage underneath the benches for shoes, boots, and other items.
-
Walk-in Closets: A walk-in closet within the mudroom provides ample storage for seasonal outerwear, sports equipment, and other bulky items. Include shelves, hanging rods, and drawers to organise everything efficiently.
-
Dedicated Laundry Areas: Integrate a laundry area within the mudroom for added convenience. This allows you to manage laundry tasks efficiently and keeps dirty clothes contained within a designated area.
-
Pet Washing Stations: For pet owners, a dedicated pet washing station within the mudroom is a luxurious and practical addition. This keeps muddy paws contained and makes it easy to clean up after your furry friends.
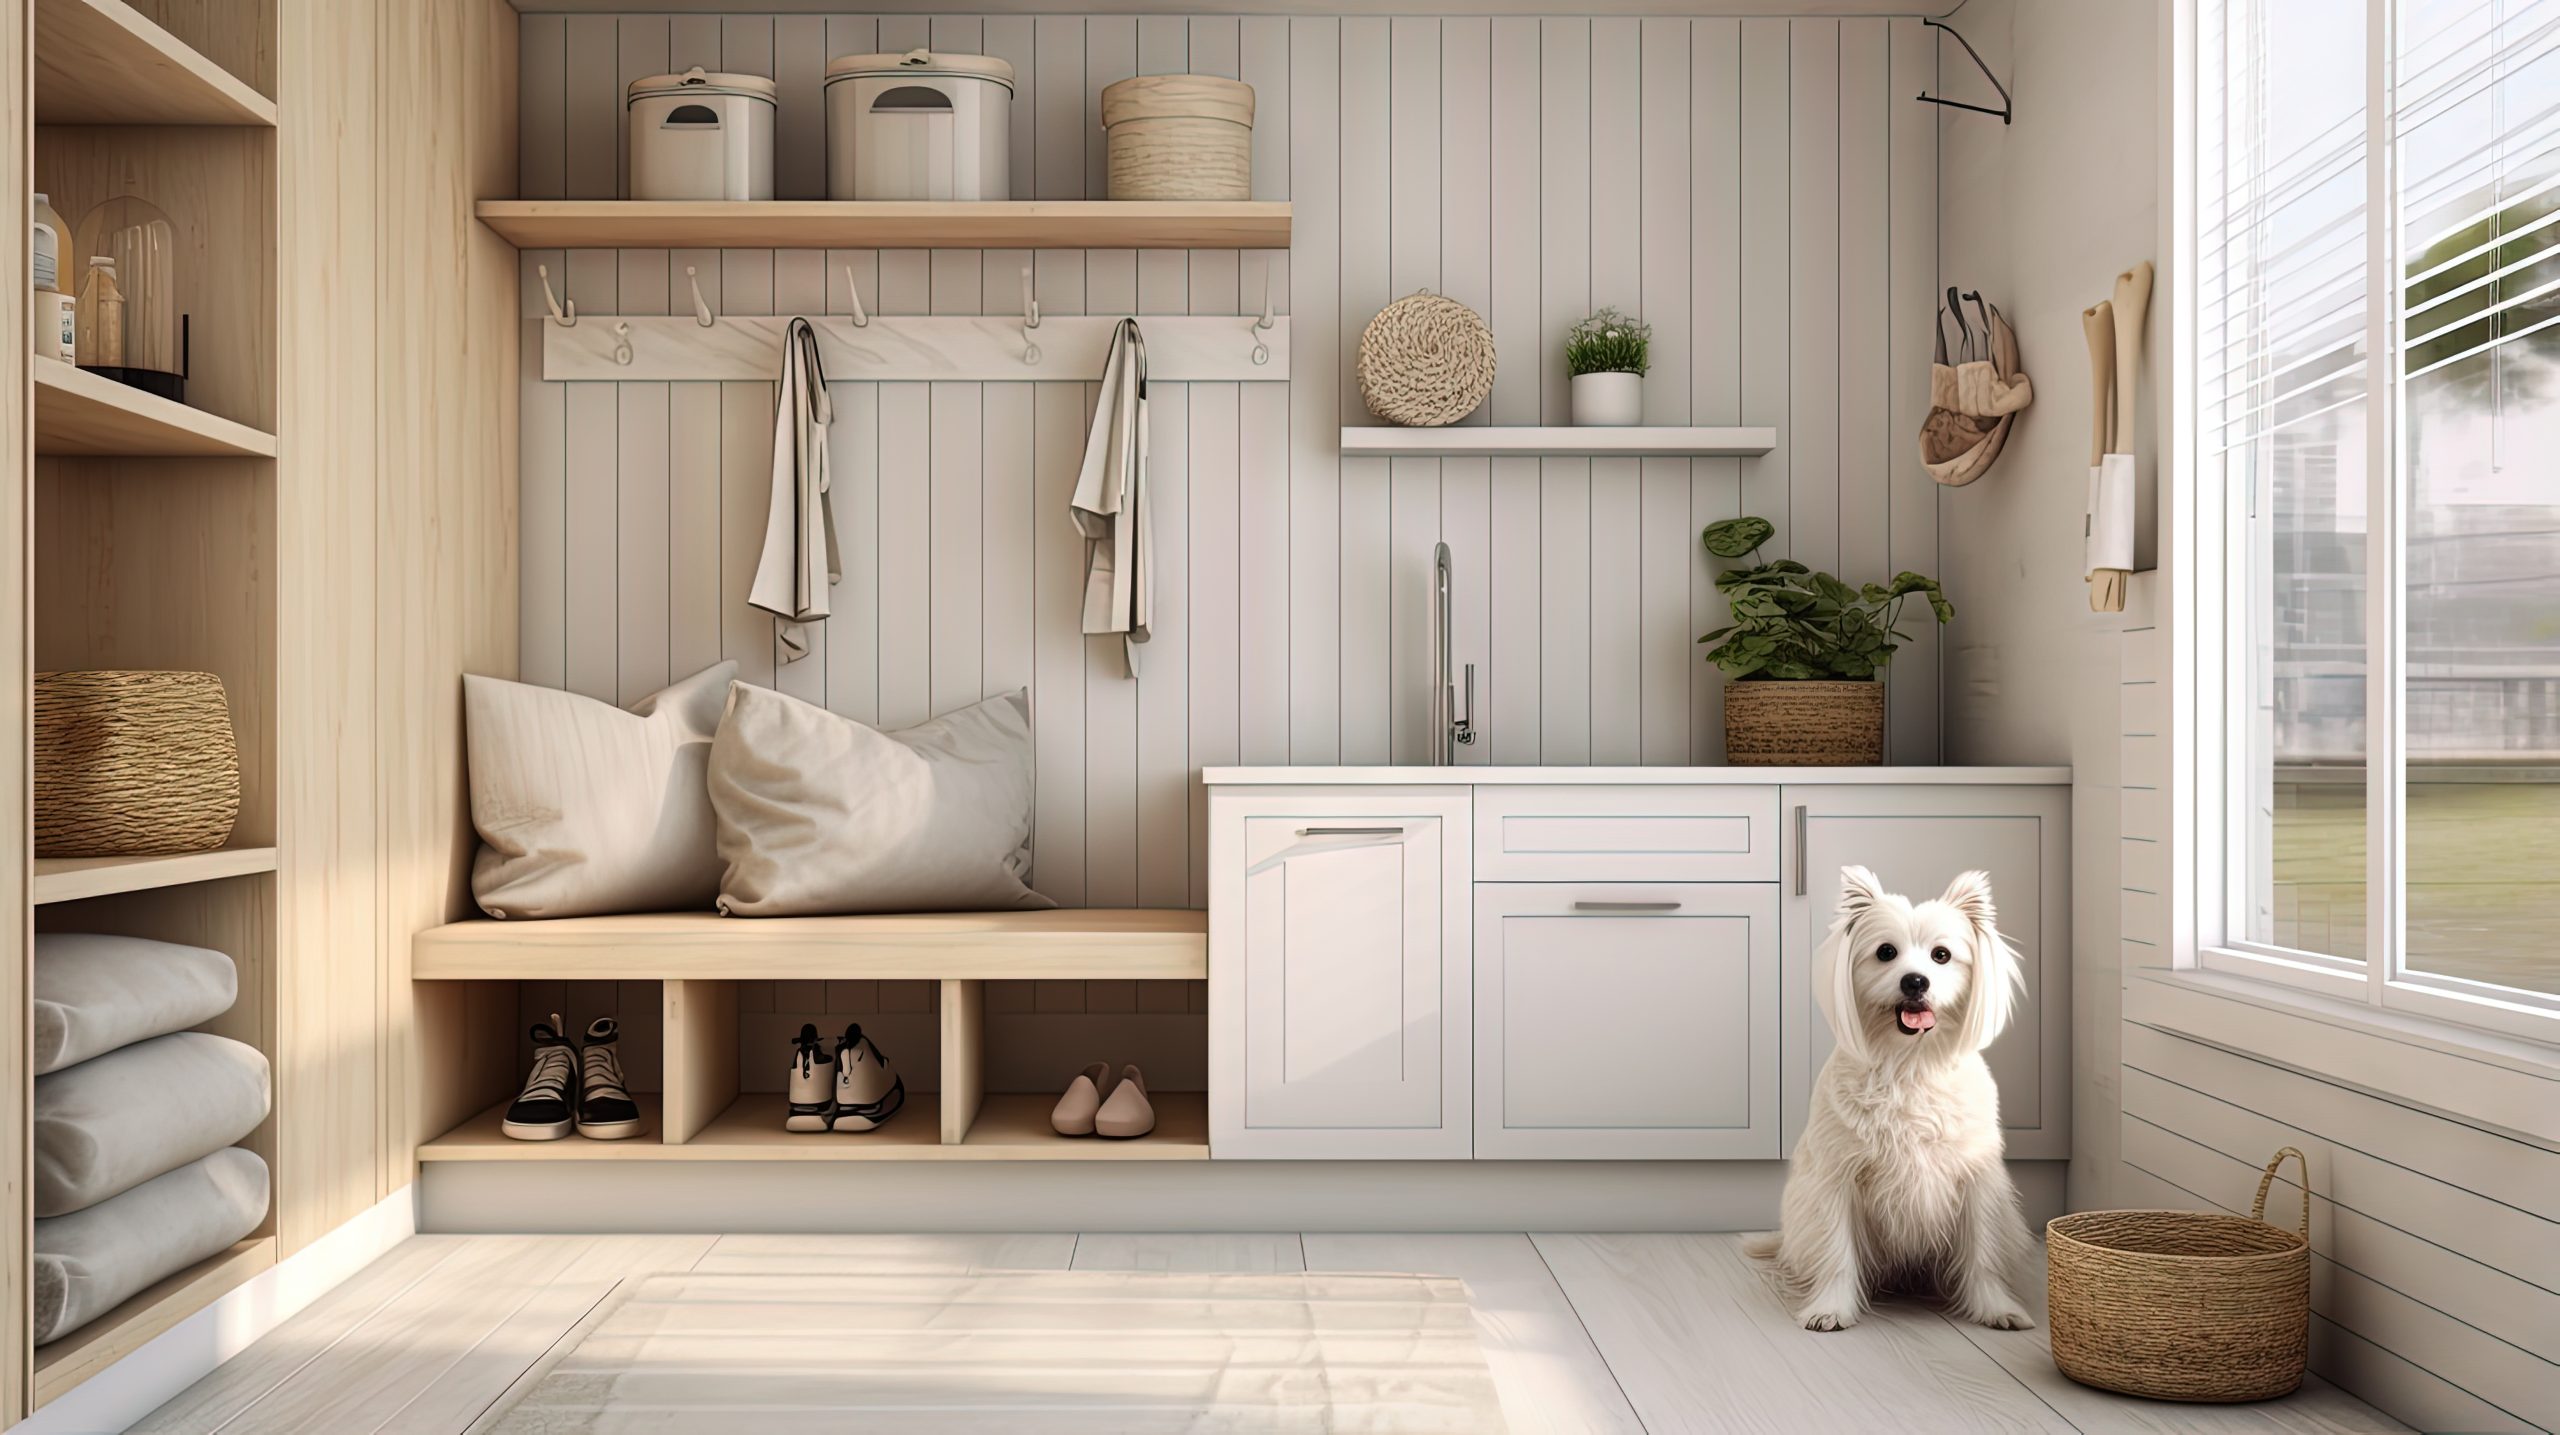
DIY Mudroom Storage Hacks – Budget-Friendly Brilliance
DIY Mudroom Magic: Budget-Friendly Storage Hacks
Creating a functional and stylish mudroom doesn’t have to break the bank. With a little creativity and some DIY ingenuity, you can implement effective mudroom storage solutions on a budget. Repurposing existing items, building simple organisers, and adding personalised touches can transform your mudroom without requiring a major investment. Let’s explore some budget-friendly DIY mudroom storage hacks.
-
Repurposed Crates and Pallets: Give old crates and pallets a new life by transforming them into rustic storage solutions. Sand them down, paint them, and stack them to create shelving units, shoe racks, or cubbies.
-
DIY Coat Racks: Create a unique and personalised coat rack using reclaimed wood, metal pipes, or even repurposed branches. This adds a touch of character to your mudroom while providing functional storage.
-
Customised Storage Bins: Decorate plain storage bins with fabric, paint, or stencils to add a pop of colour and personality to your mudroom. Label each bin clearly to keep items organised and easy to find.
-
Upcycled Jars and Containers: Use upcycled jars and containers to store small items like gloves, scarves, and dog leashes. Decorate them to match your mudroom’s décor and attach labels for easy identification.
-
DIY Shoe Storage Solutions: Create a simple shoe rack using PVC pipes, wooden planks, or even repurposed rain gutters. This keeps shoes off the floor and organised without requiring expensive shoe storage furniture.
A well-organised mudroom, regardless of its size, can significantly impact the overall functionality and flow of your home. By implementing these clever mudroom storage ideas, you can transform your entryway from a chaotic catch-all into a stylish and efficient space. Whether you’re working with a tiny entryway or a spacious mudroom, there are solutions to fit every need and budget.
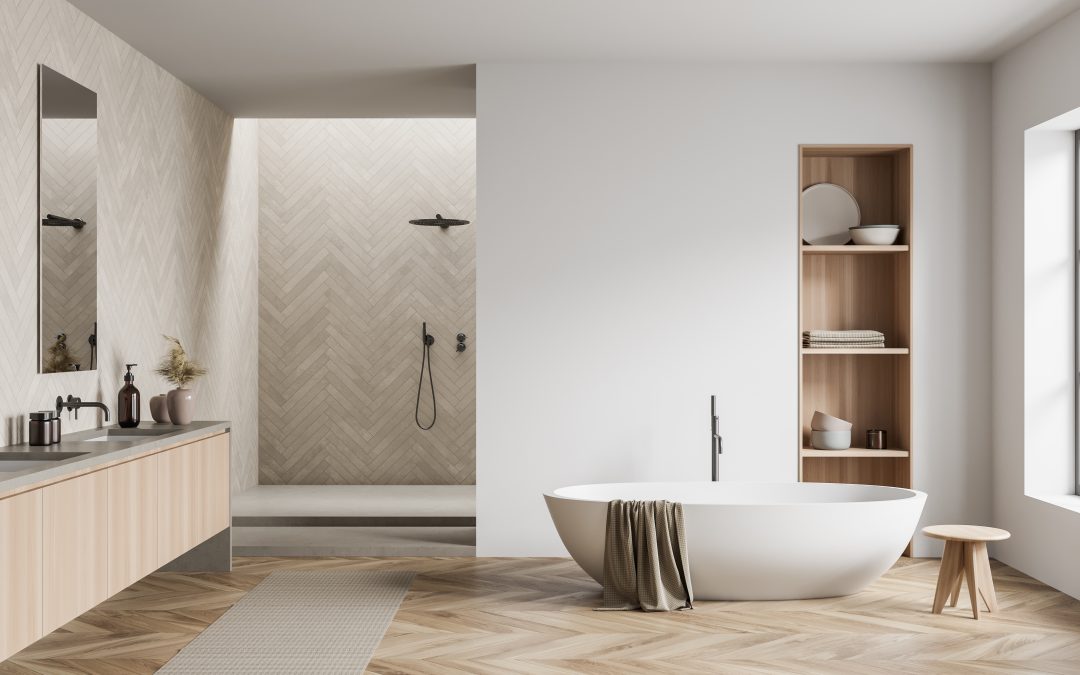
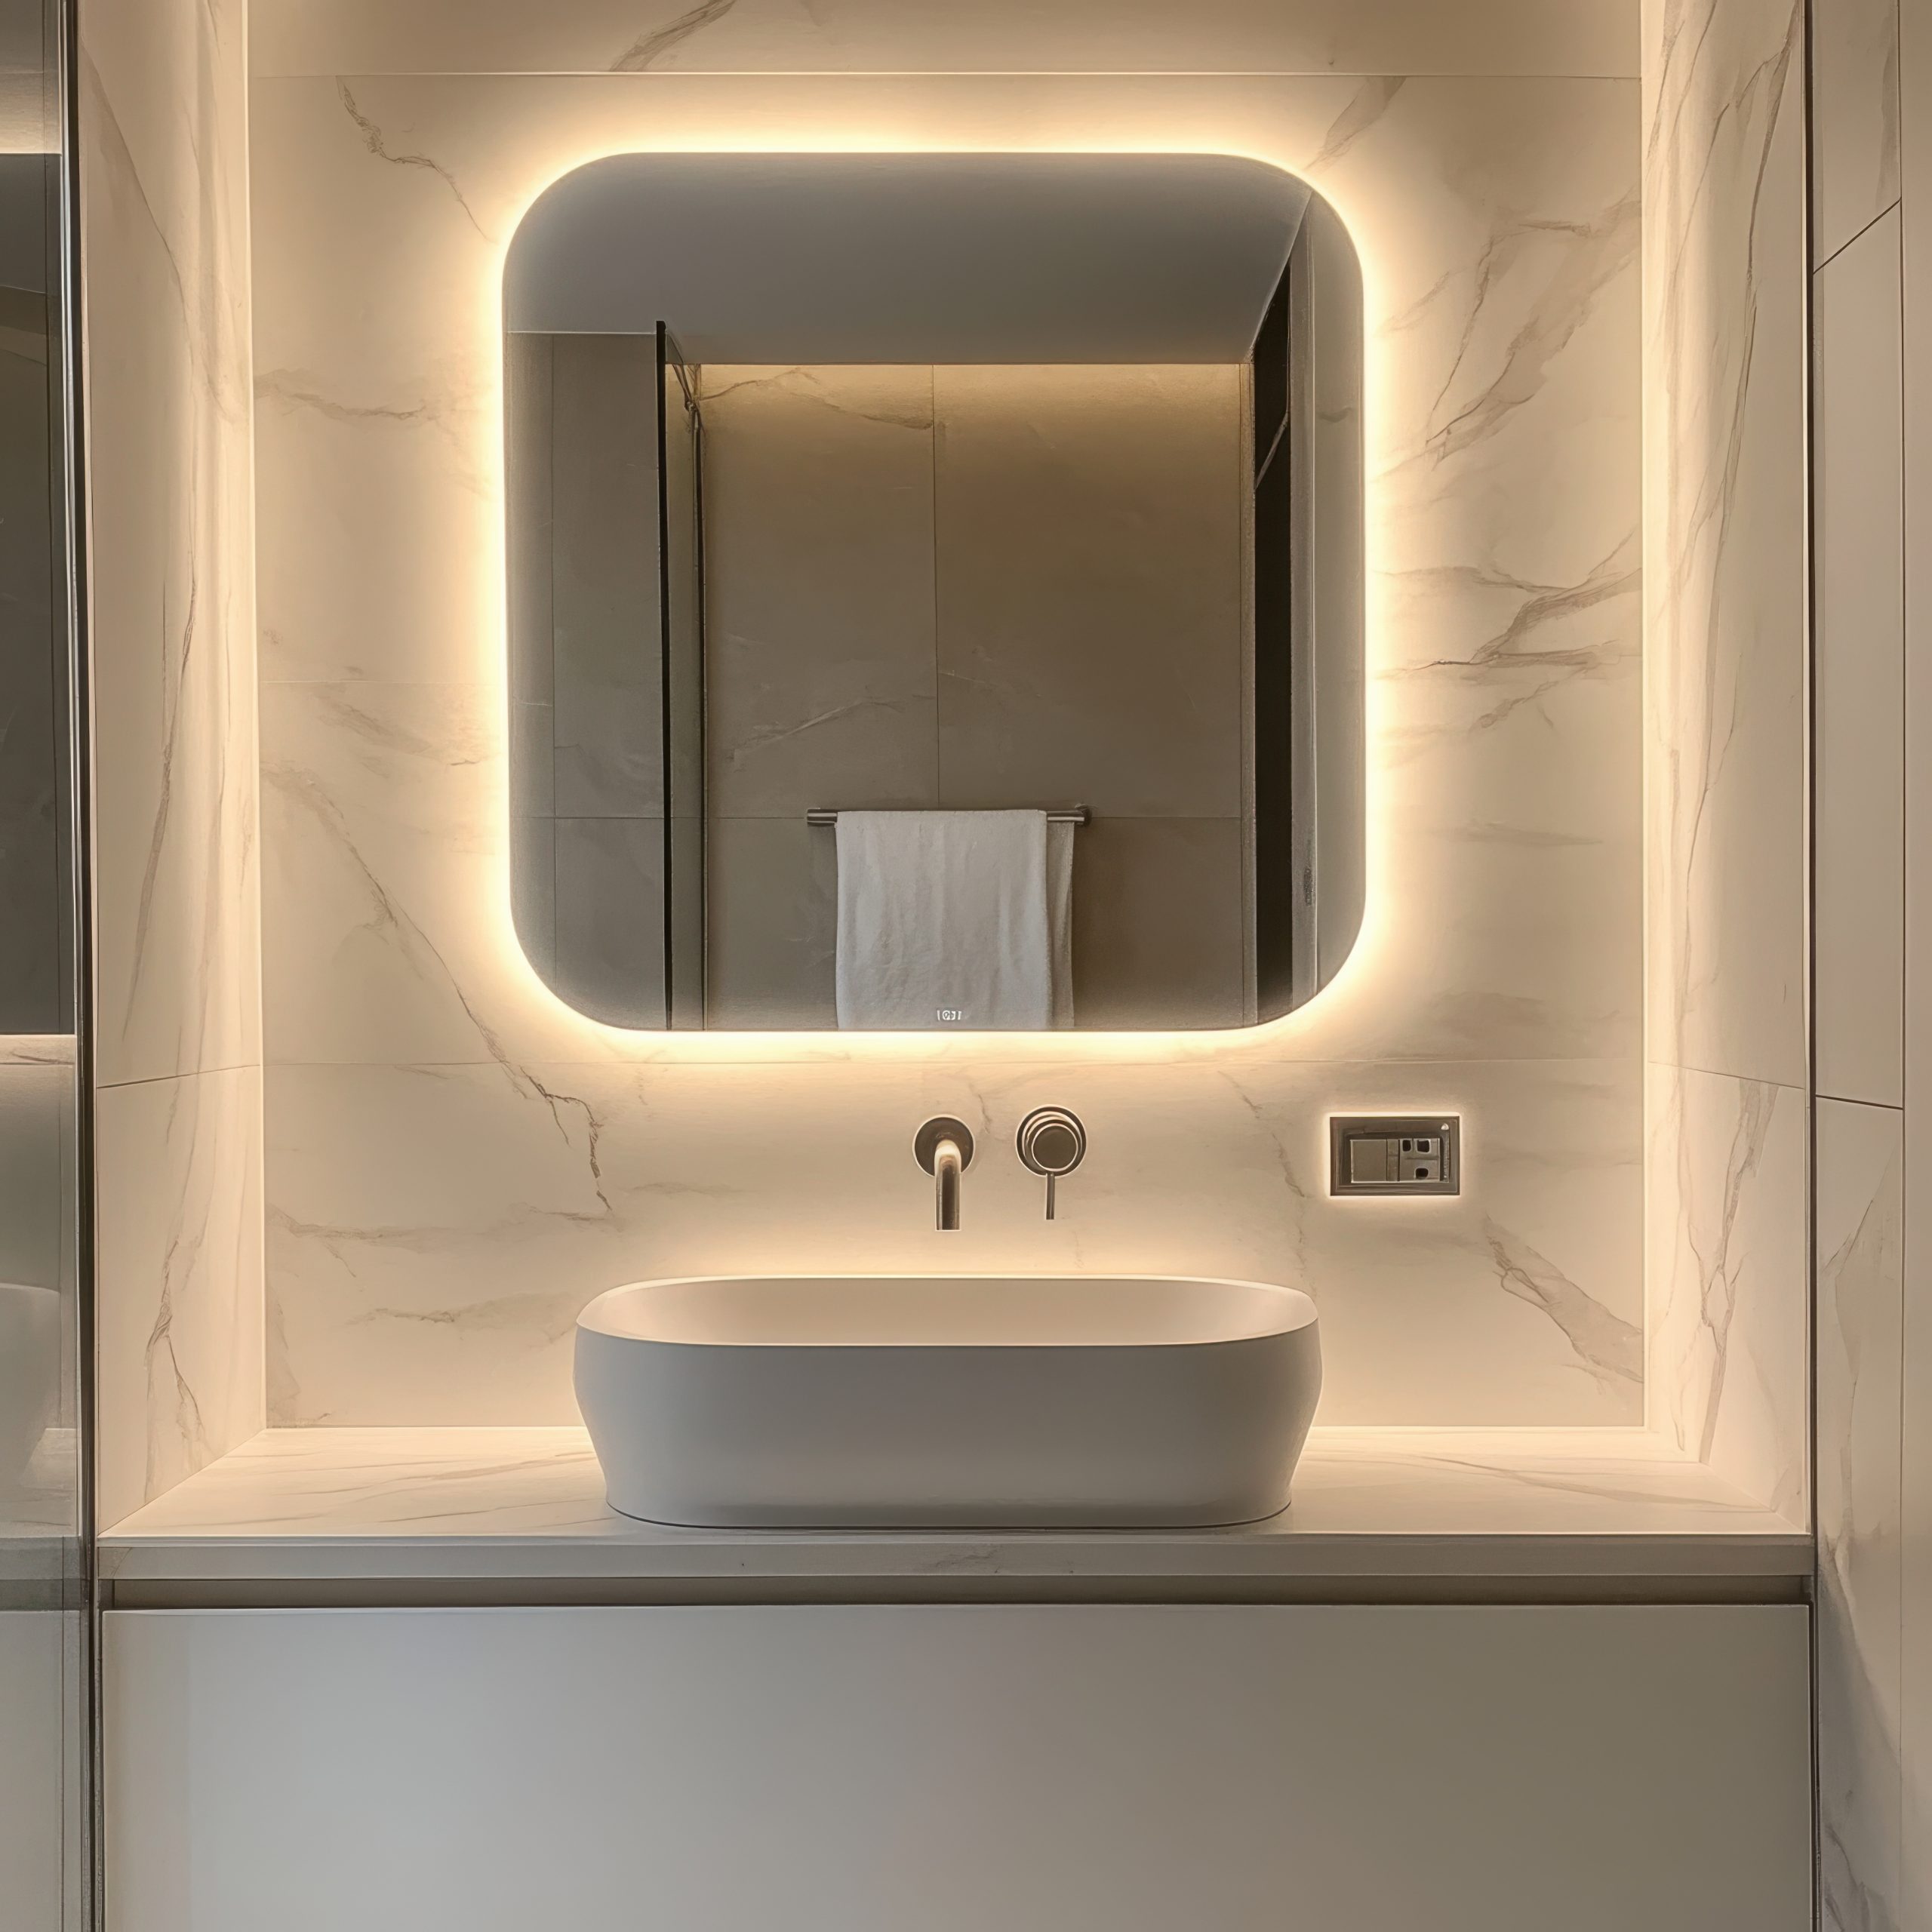
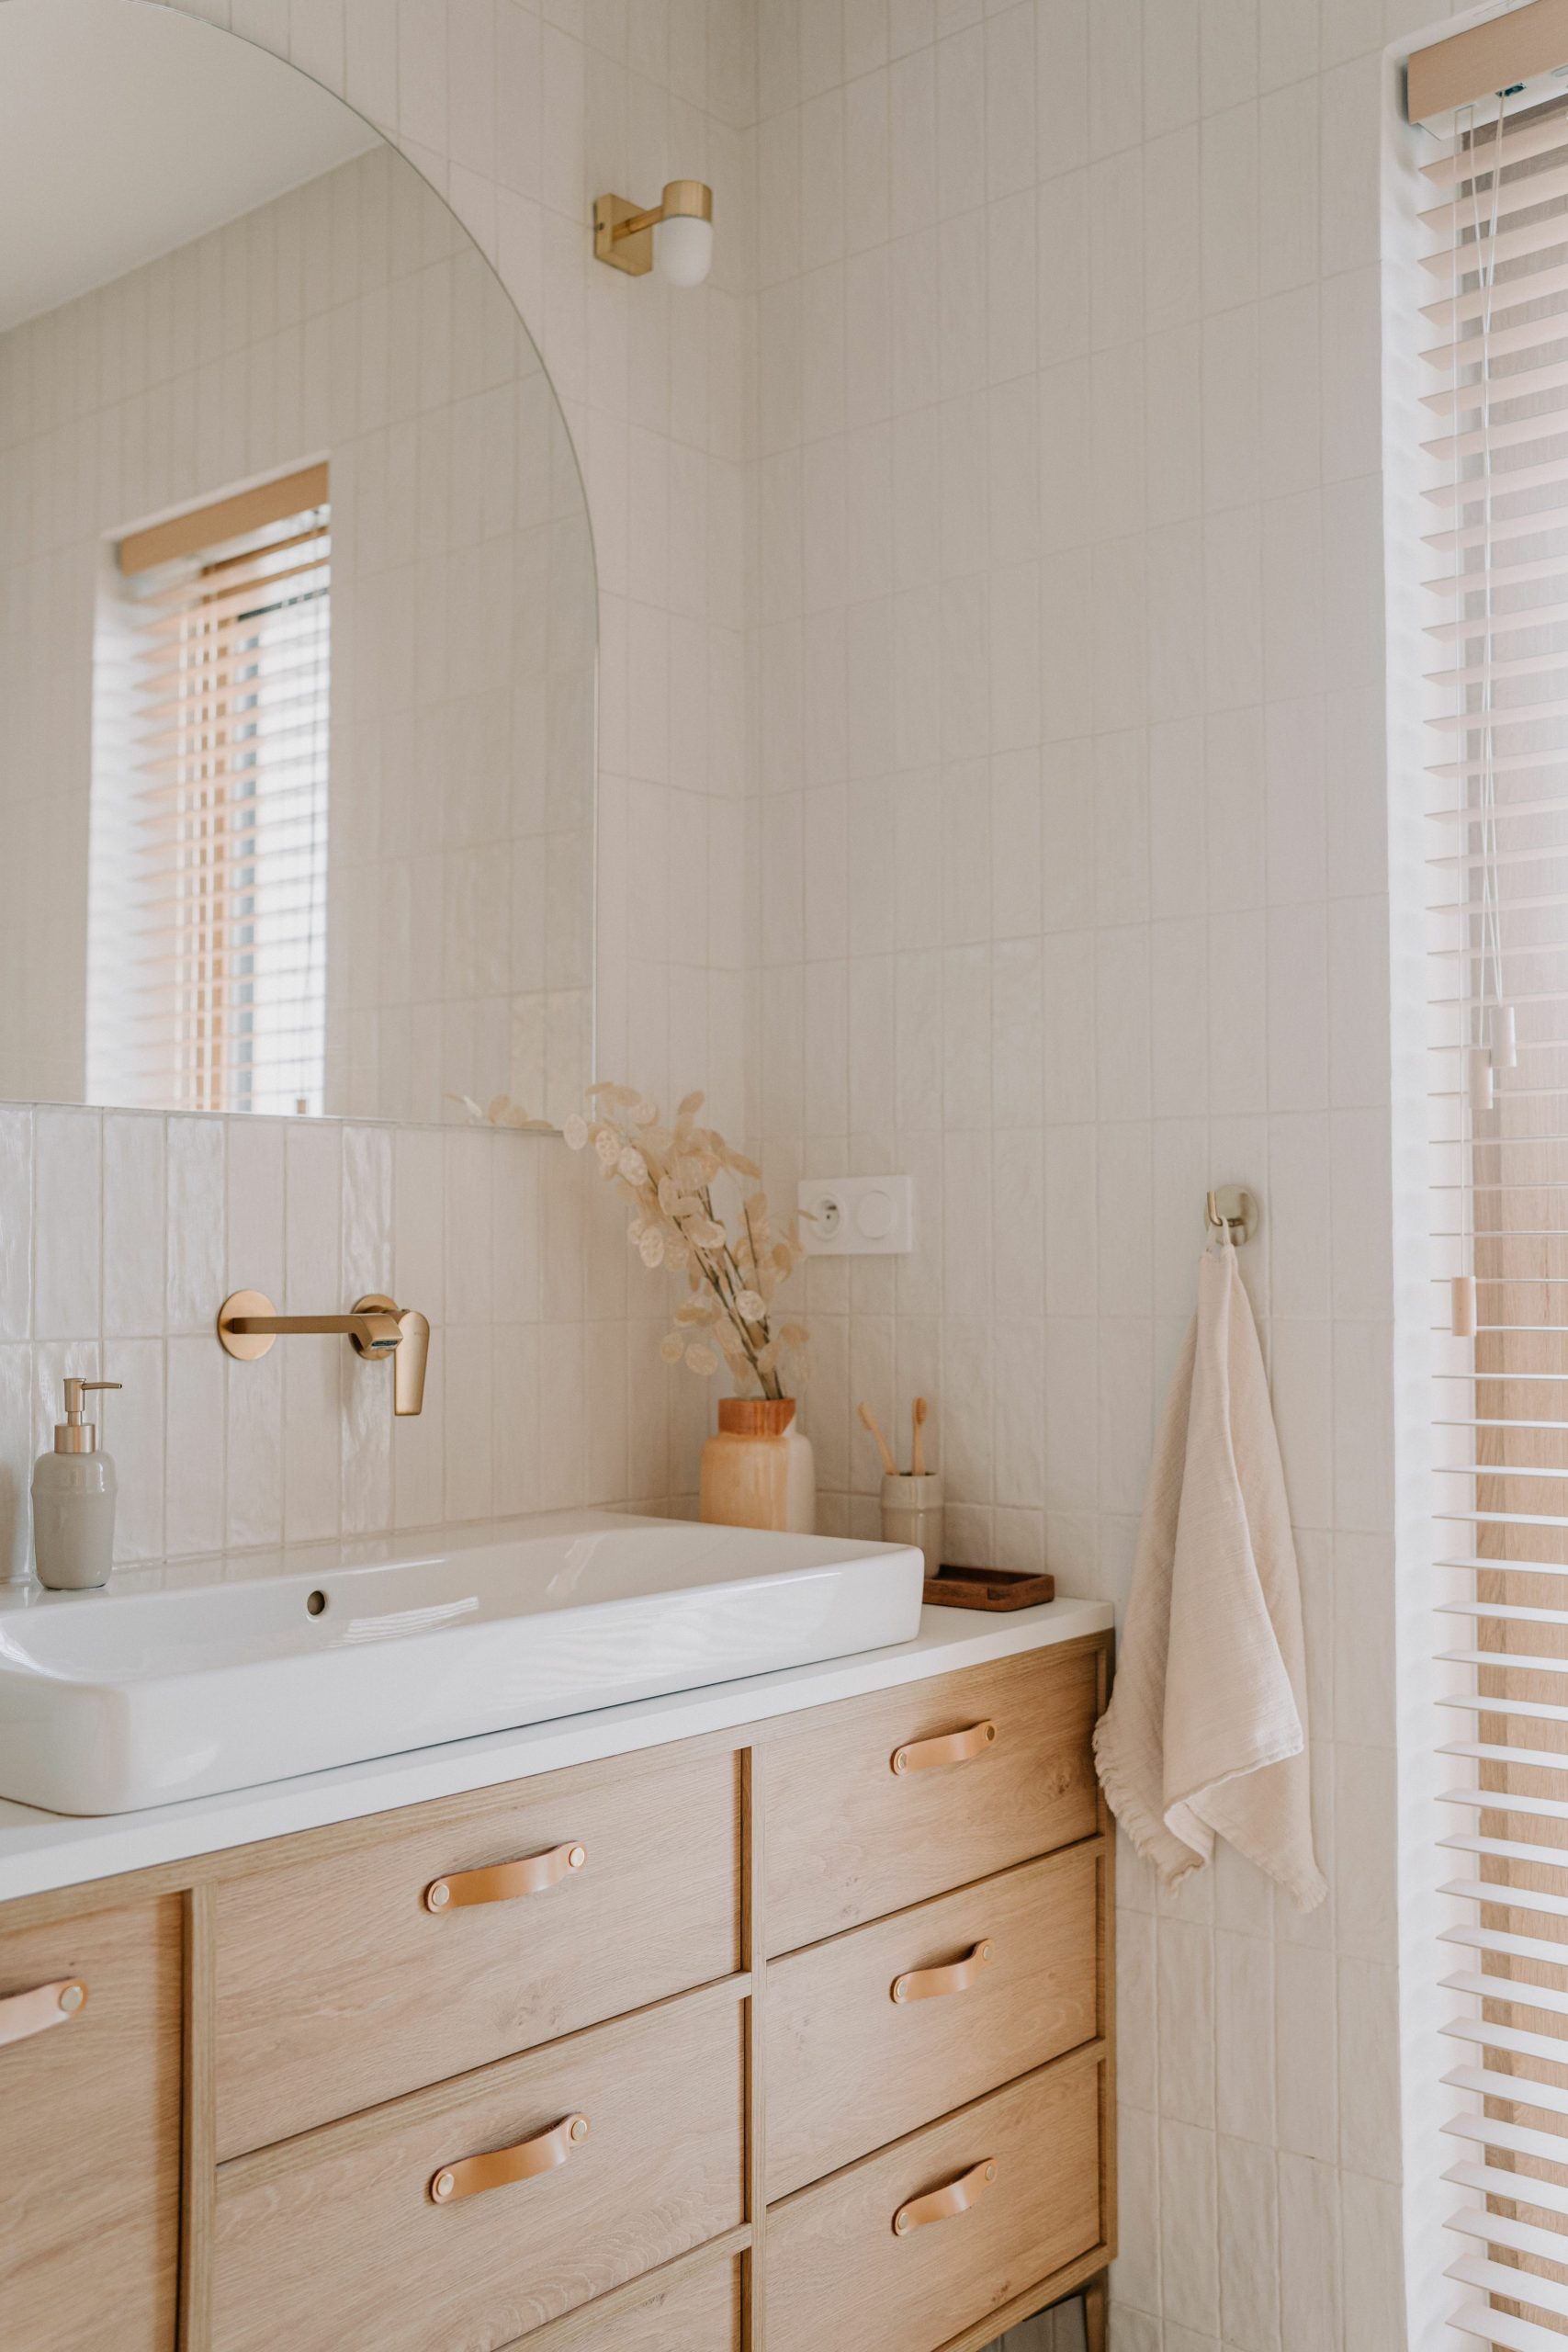
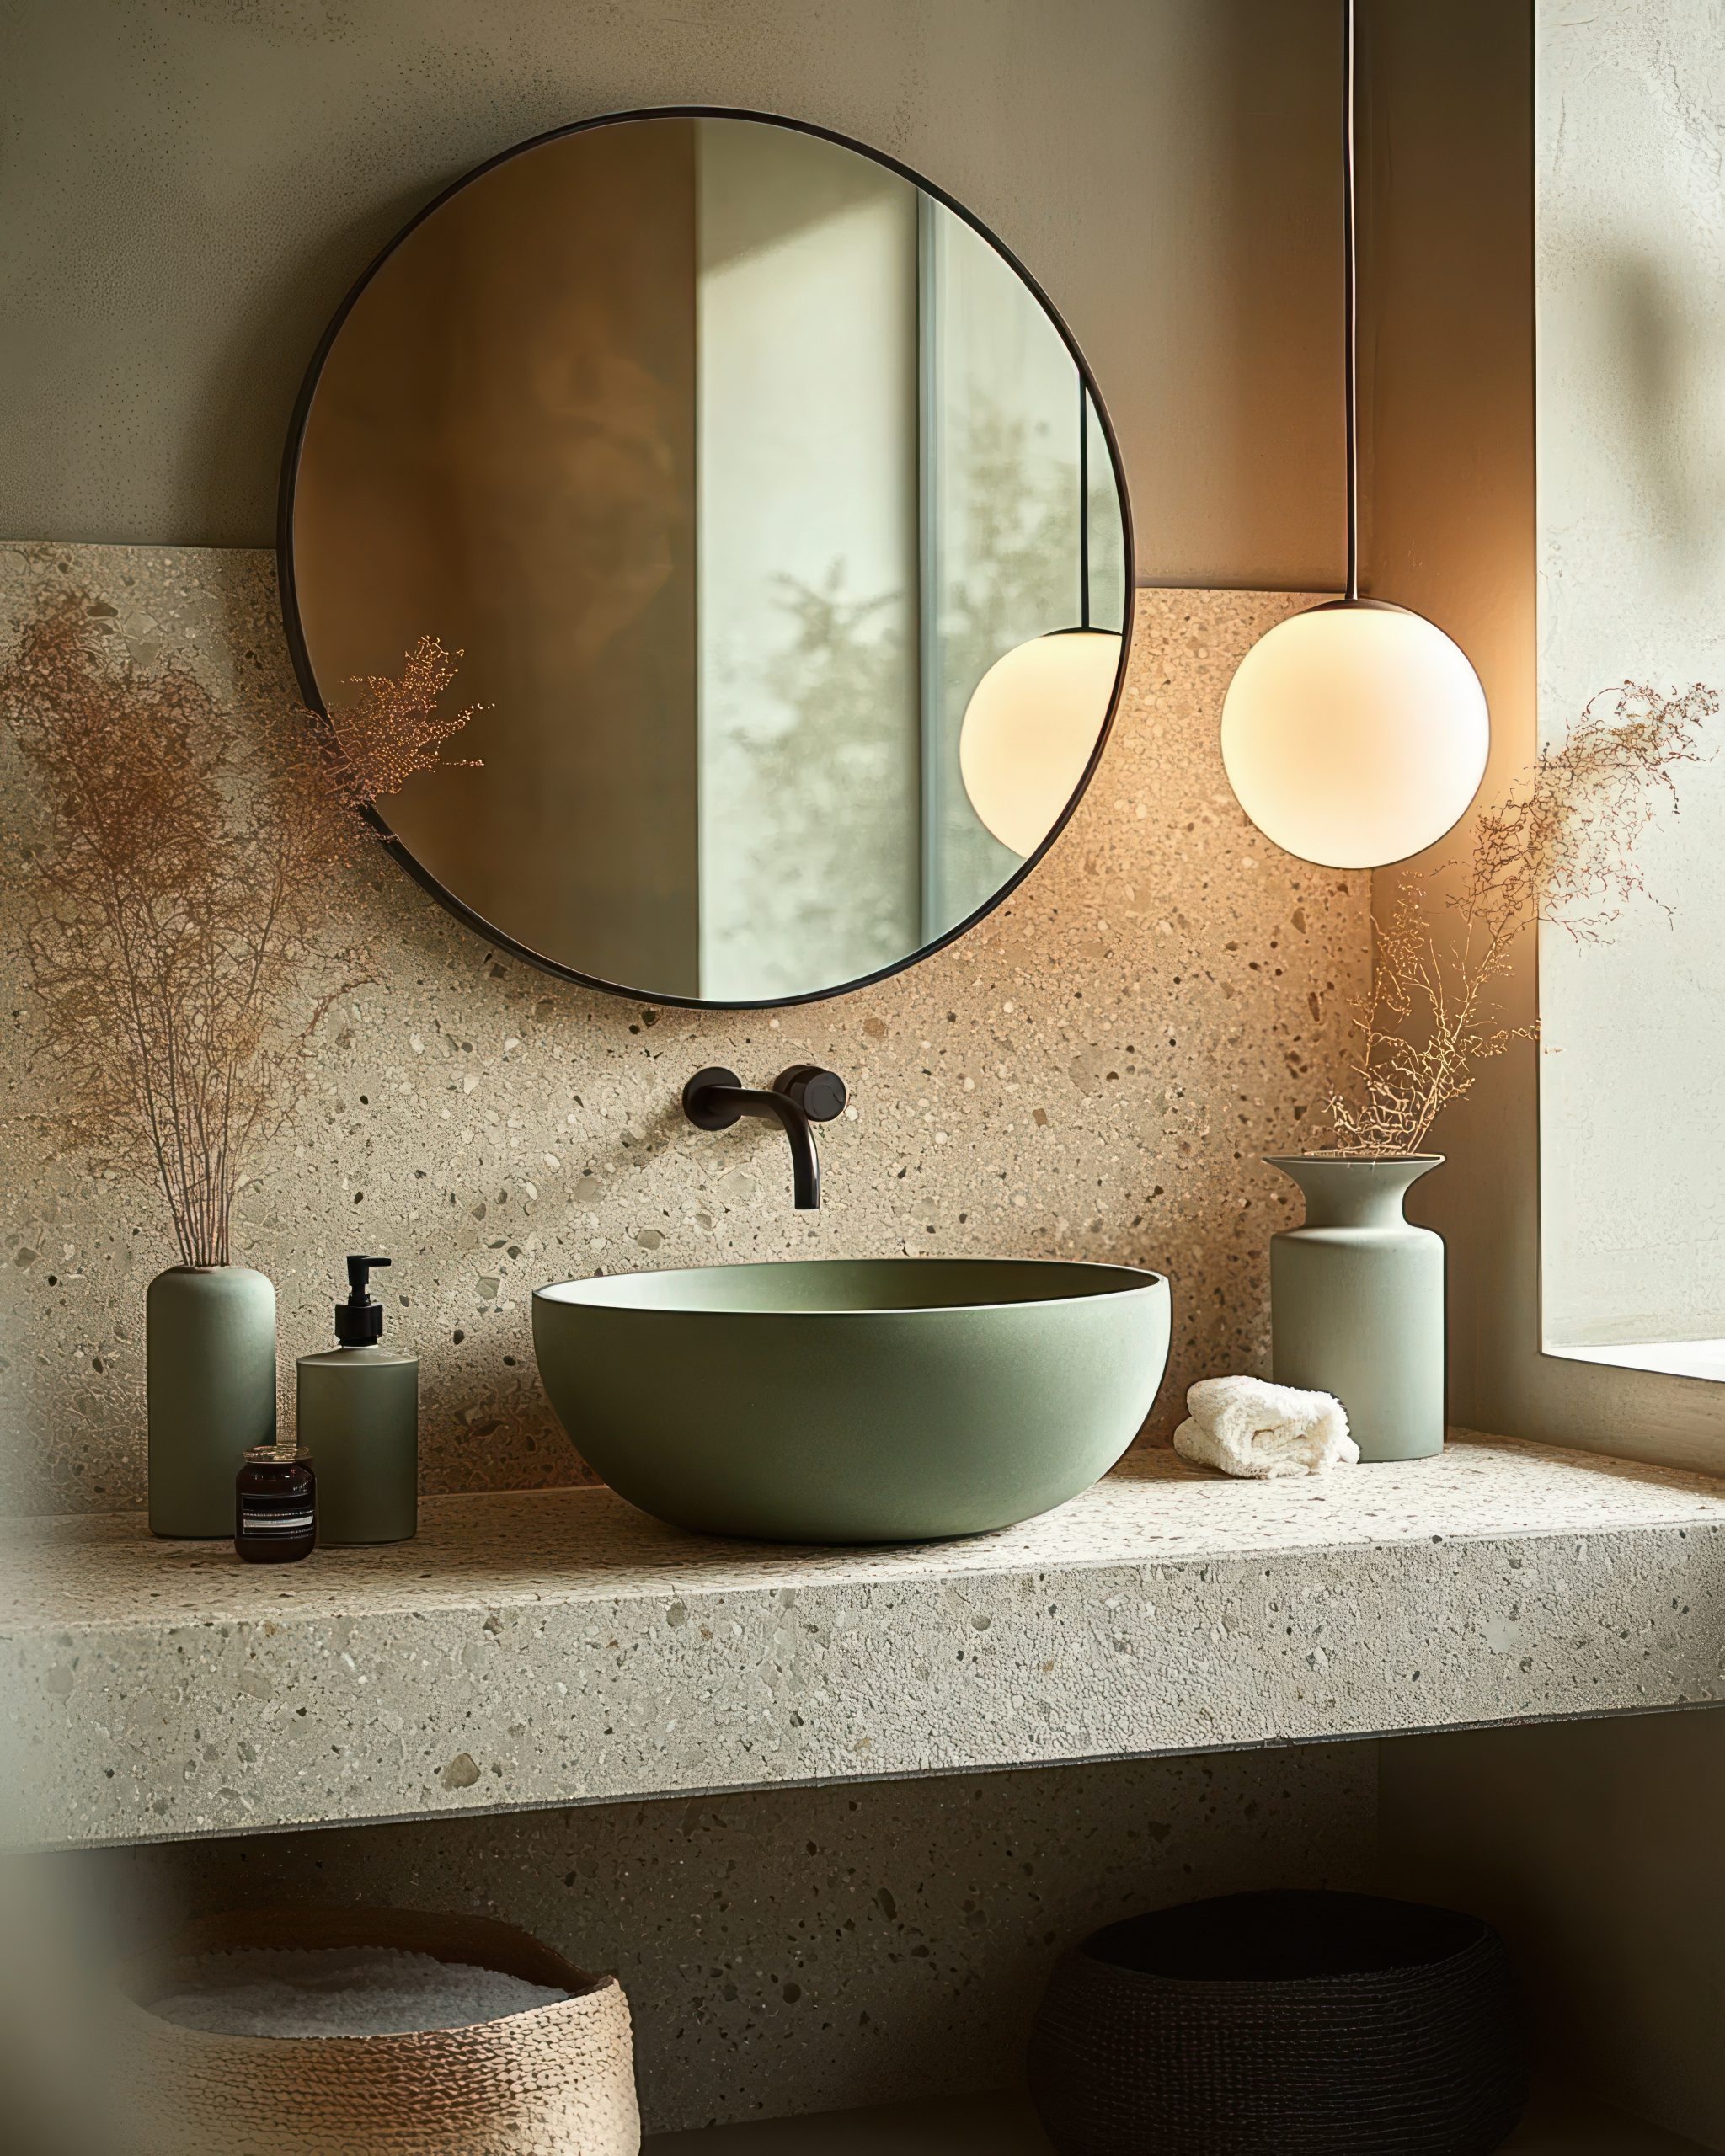
by Kesaa Interiors | Bathrooms, ROOMS, Storage & Organization
Looking For Bathroom Storage Solutions? You have come to the right place
Is your bathroom feeling more like a battlefield of bottles than a serene sanctuary? Squeezing into a cramped space filled with clutter is a daily struggle for many. Finding smart bathroom storage solutions can transform even the smallest spaces into organised havens.
From clever vertical storage ideas to innovative organisational hacks, we’ve compiled a list of genius bathroom storage solutions to help you maximise every inch and conquer bathroom chaos. This guide provides actionable ideas to implement fantastic bathroom storage solutions without breaking the bank.
Best Bathroom Storage Solutions!
Vertical Storage Solutions: Look Up!
When floor space is limited, looking up is key to discovering effective bathroom storage solutions. Vertical storage takes advantage of unused wall space, transforming it into a functional and visually appealing storage area. These innovative approaches can drastically declutter your bathroom and make it feel significantly larger.
-
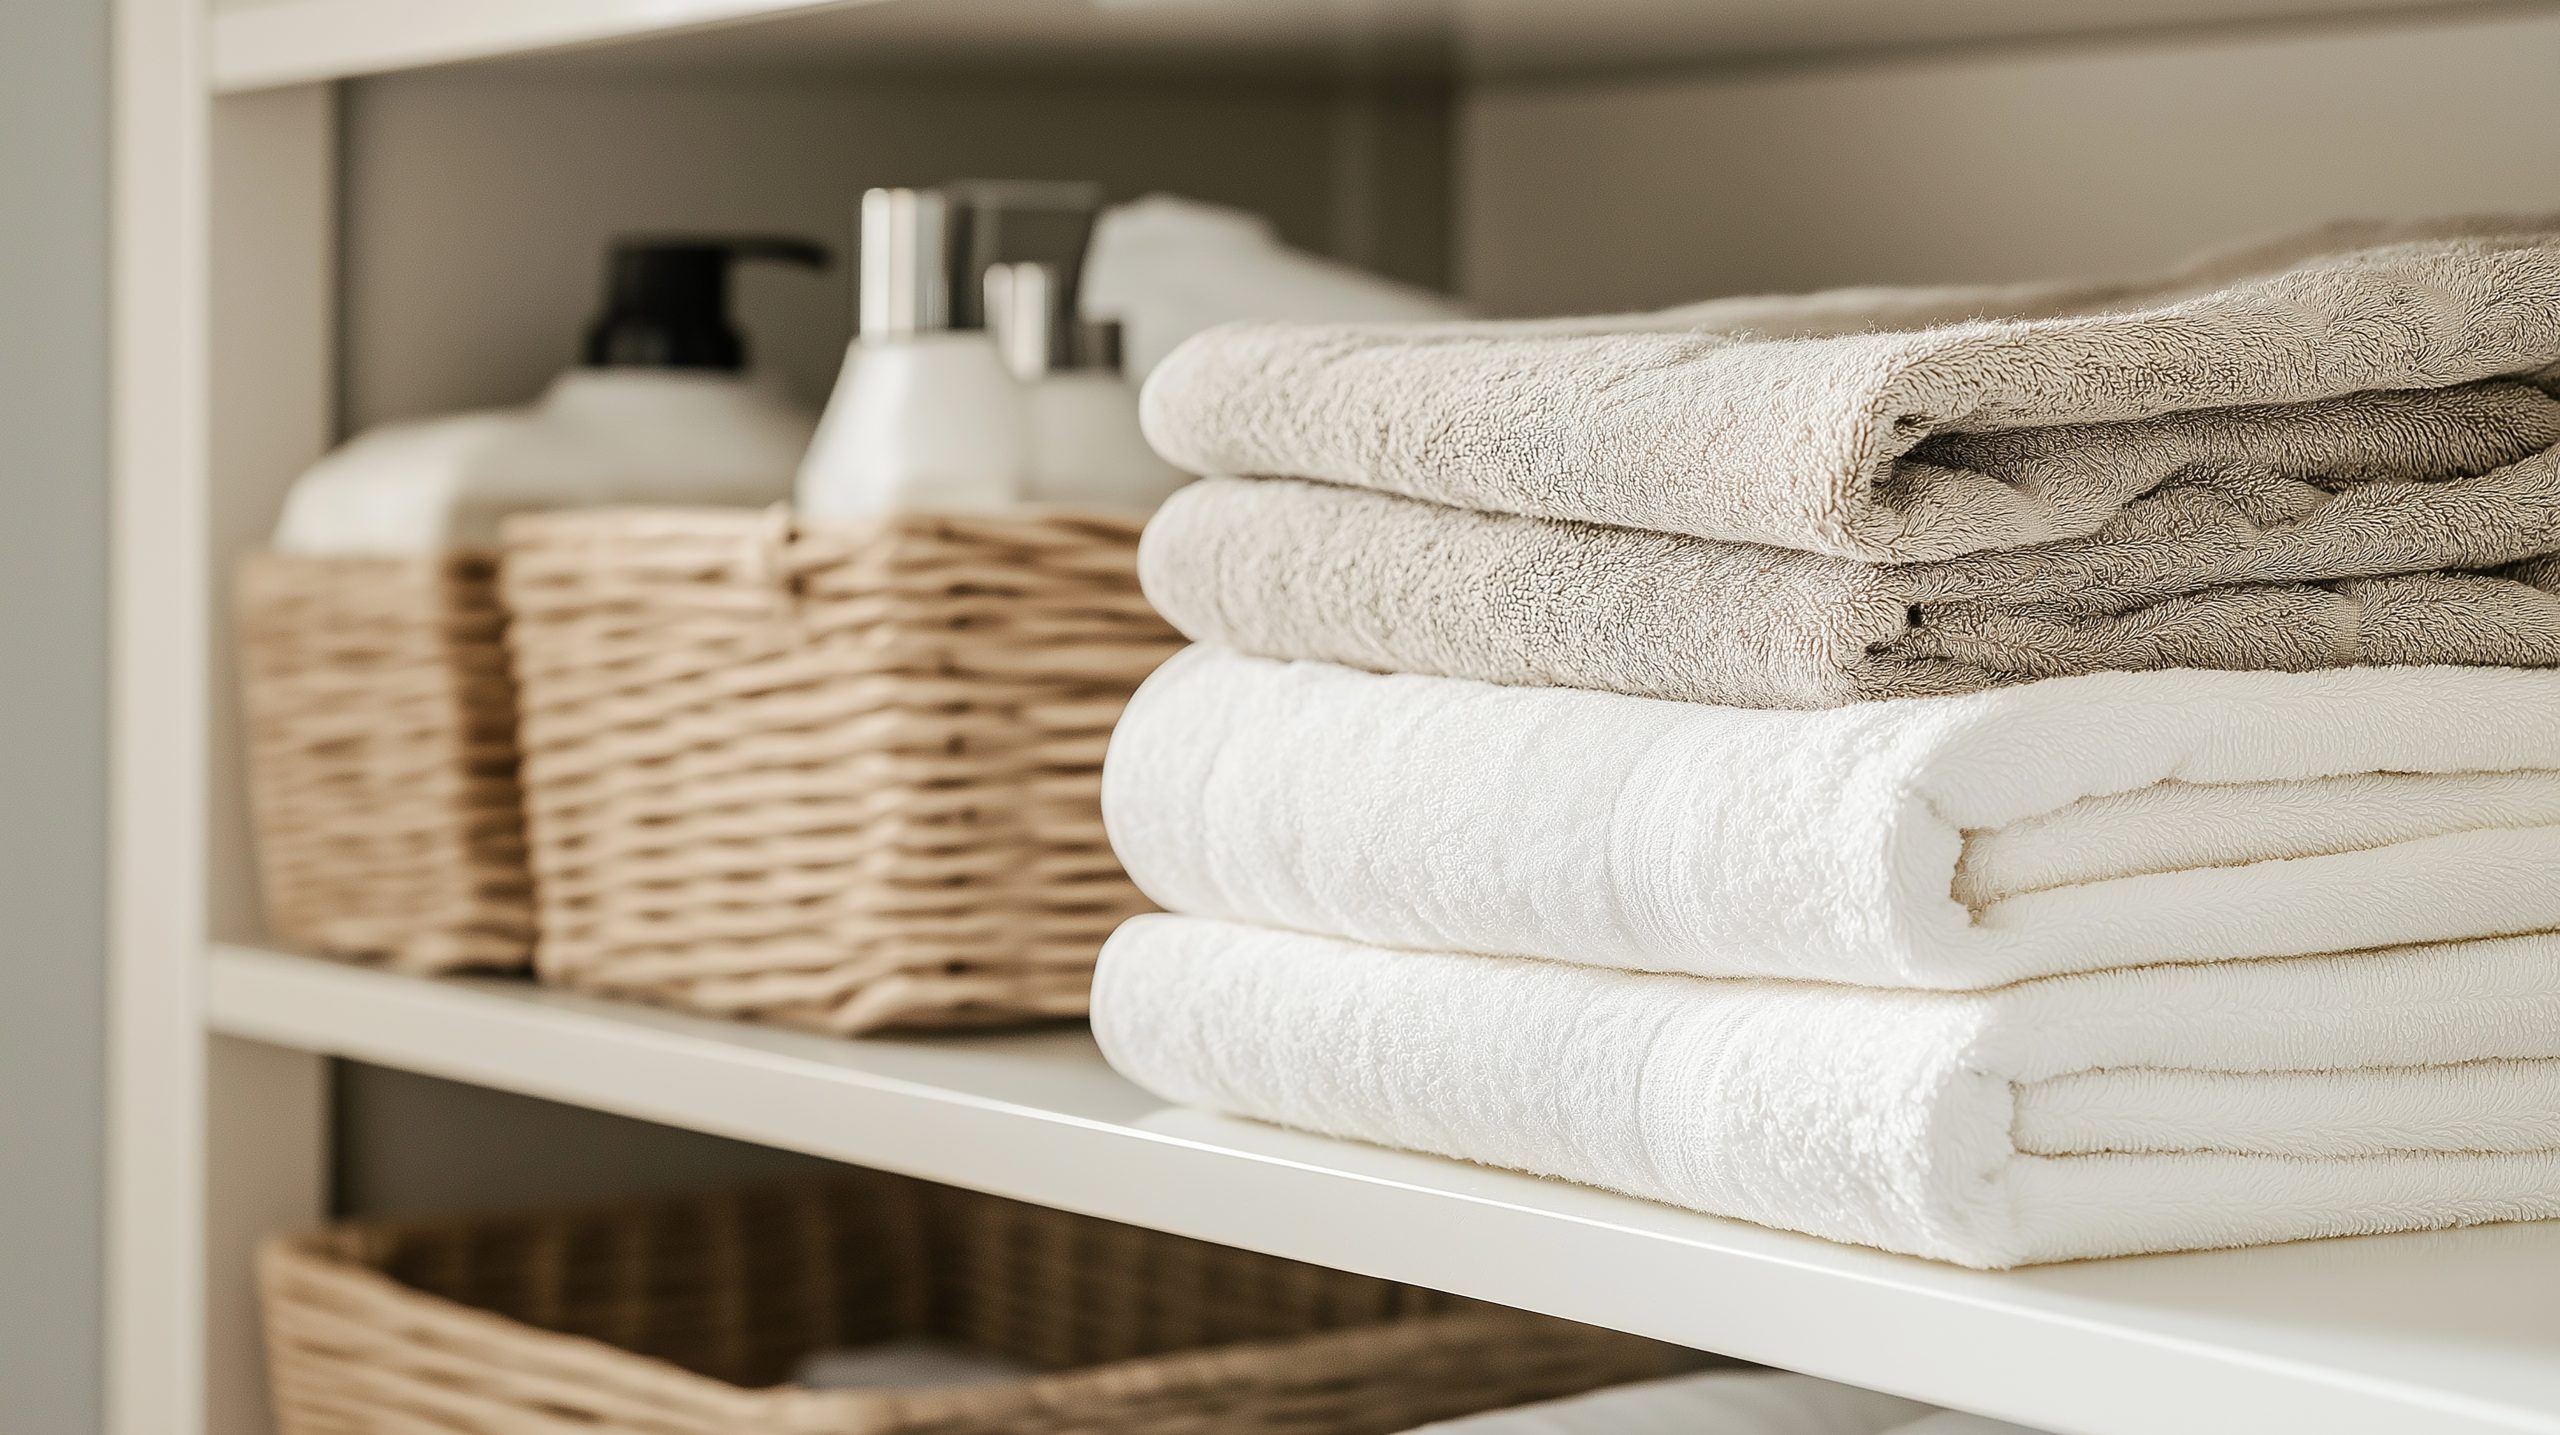
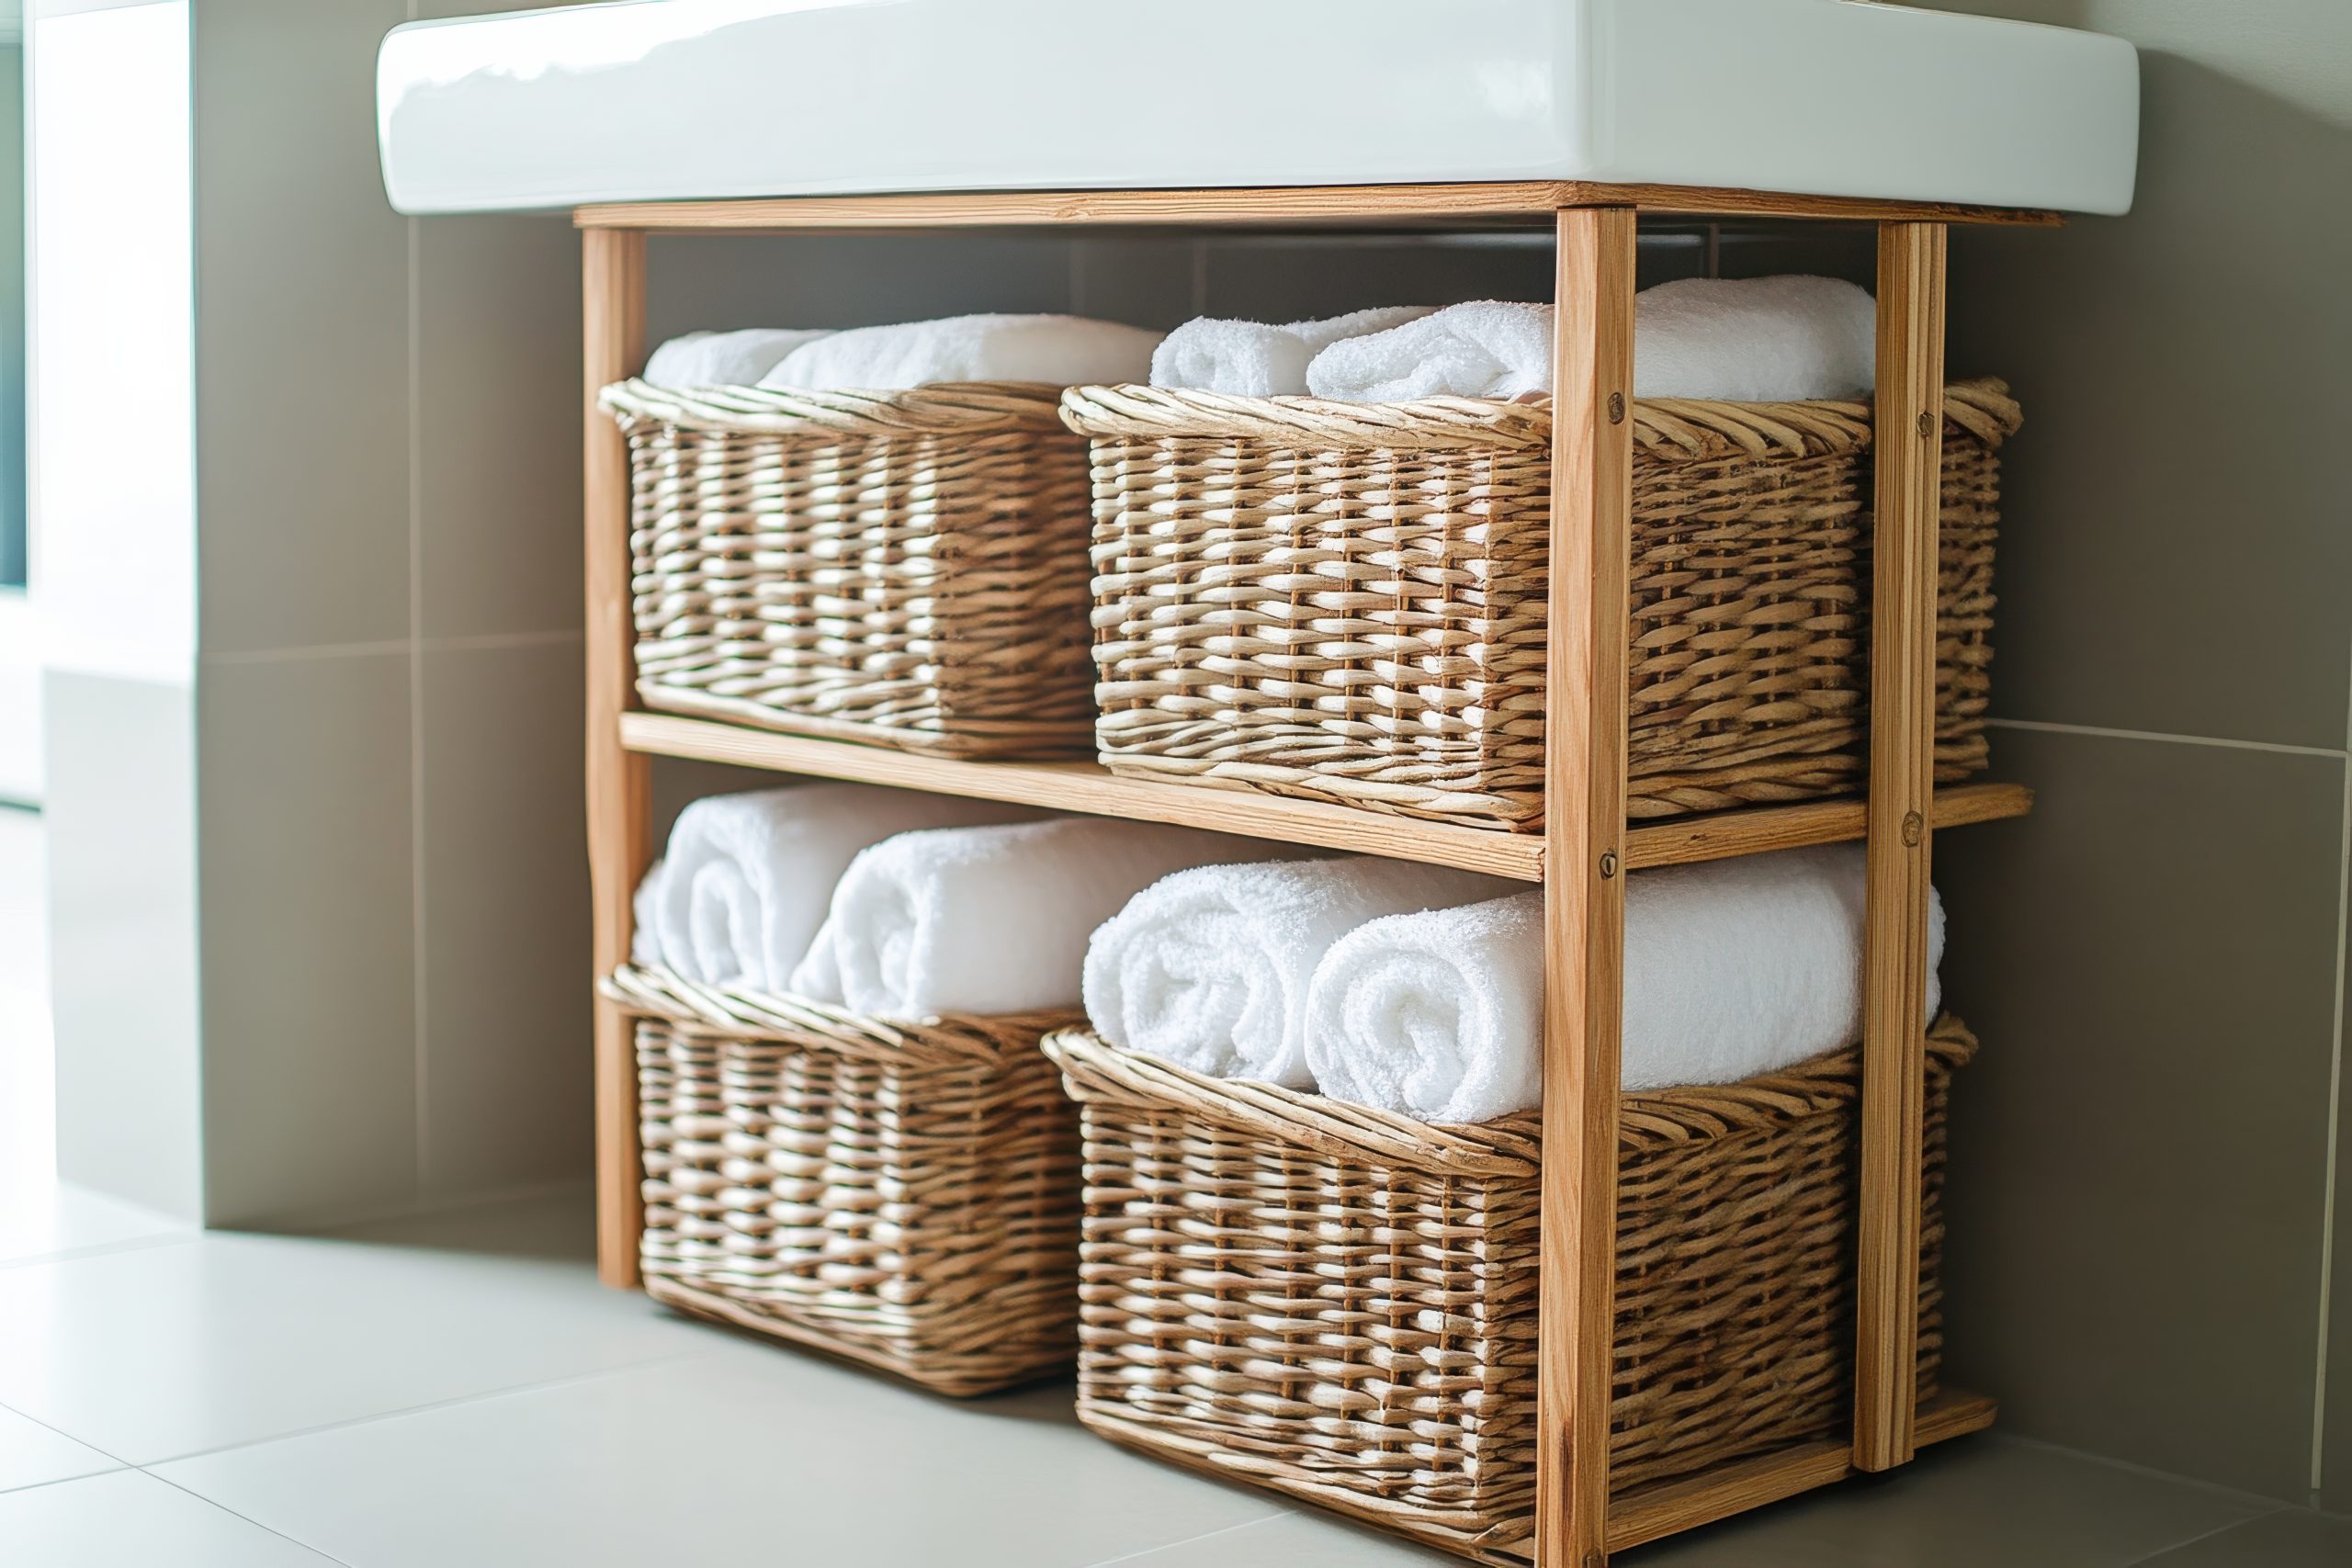
Open Shelving: Simple, affordable, and undeniably stylish, open shelving is a go-to for readily accessible items. Displaying beautifully organised baskets and neatly arranged toiletries transforms functional storage into an attractive decorative element. Keep the look consistent by using matching containers. Open shelving works best for items you use regularly, making it a fantastic element to add to your bathroom storage solutions.
-
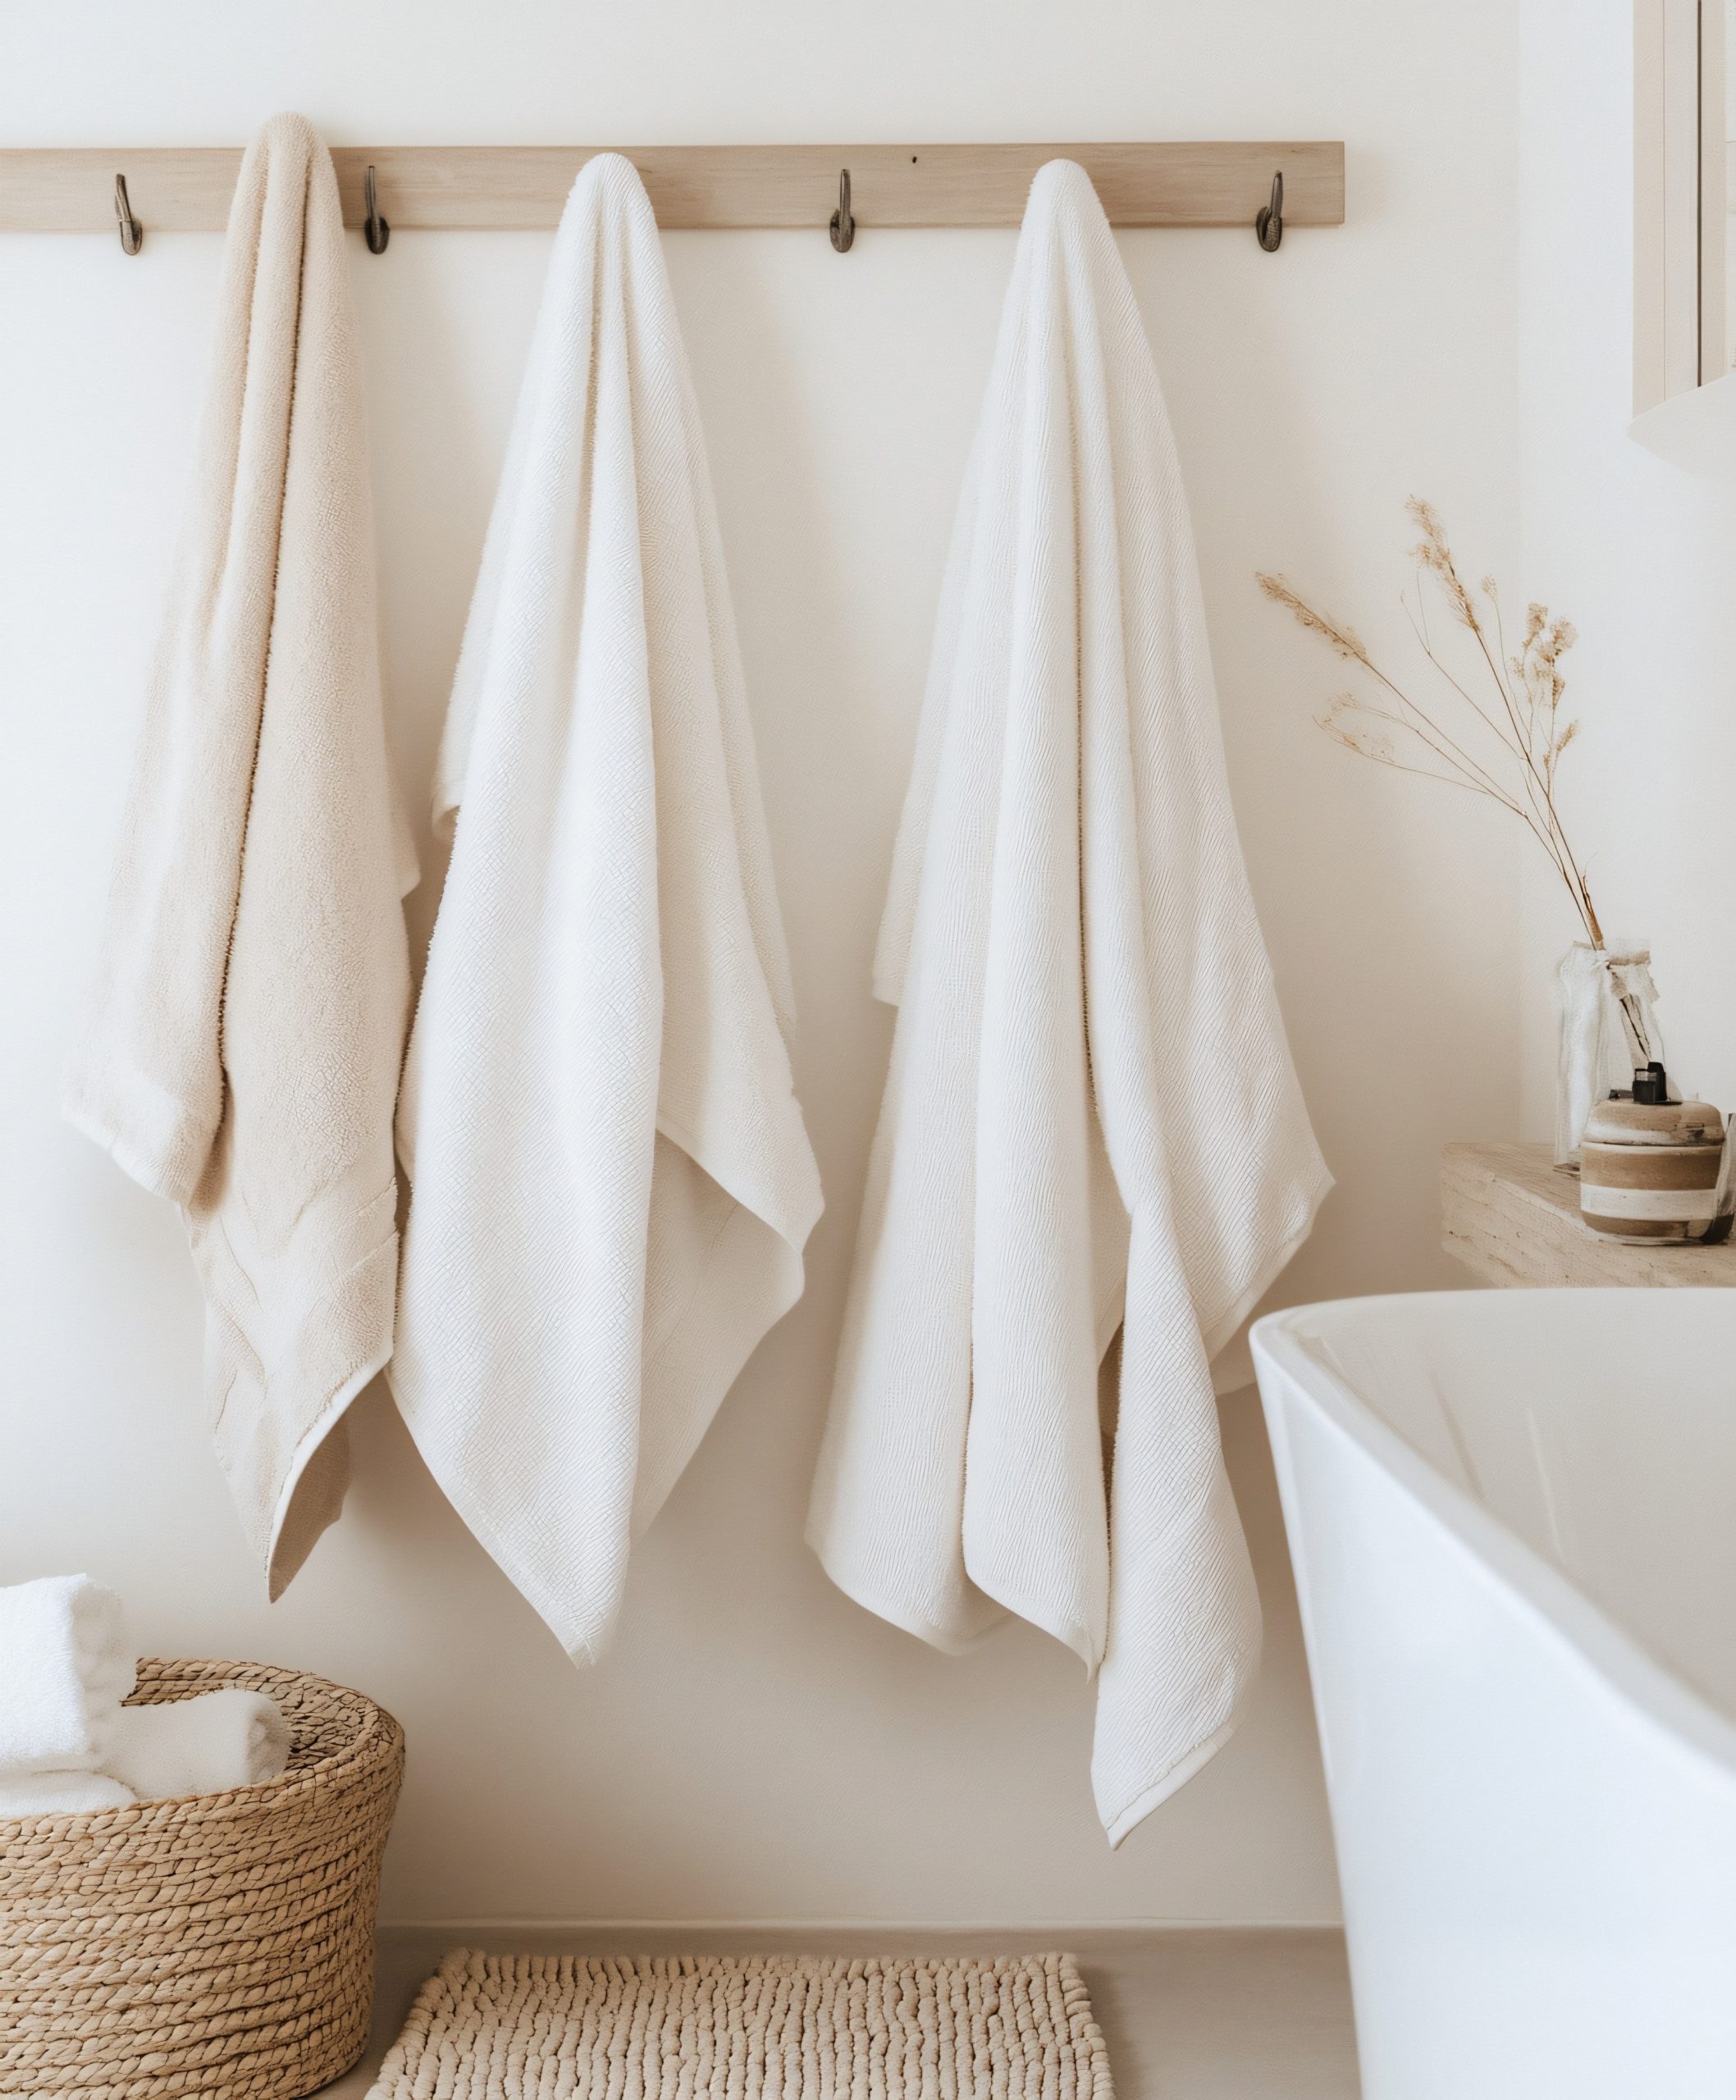
Towel Ladders: More than just a place to hang towels, towel ladders are a clever blend of functionality and décor. Available in various styles, from rustic wood to modern metal, a towel ladder can add a touch of personality while providing ample storage space. Use towel ladders as a part of your bathroom storage solutions.
-
Wall-Mounted Cabinets (above toilet, sink, or door): Often underutilised, the space above the toilet, sink, or even the door offers prime real estate for discreet bathroom storage solutions. Wall-mounted cabinets are excellent for storing medications, extra toiletries, or other items you prefer to keep out of sight. Consider opting for mirrored cabinets for added functionality, turning them into double duty pieces.
-
Tall, Narrow Storage Towers: Ideal for fitting into tight spaces, these towers are a smart addition to a small bathroom lacking sufficient storage. Opt for a unit with adjustable shelves to accommodate different-sized items, and choose between open shelving for frequently used products or closed cabinets for a more concealed look.
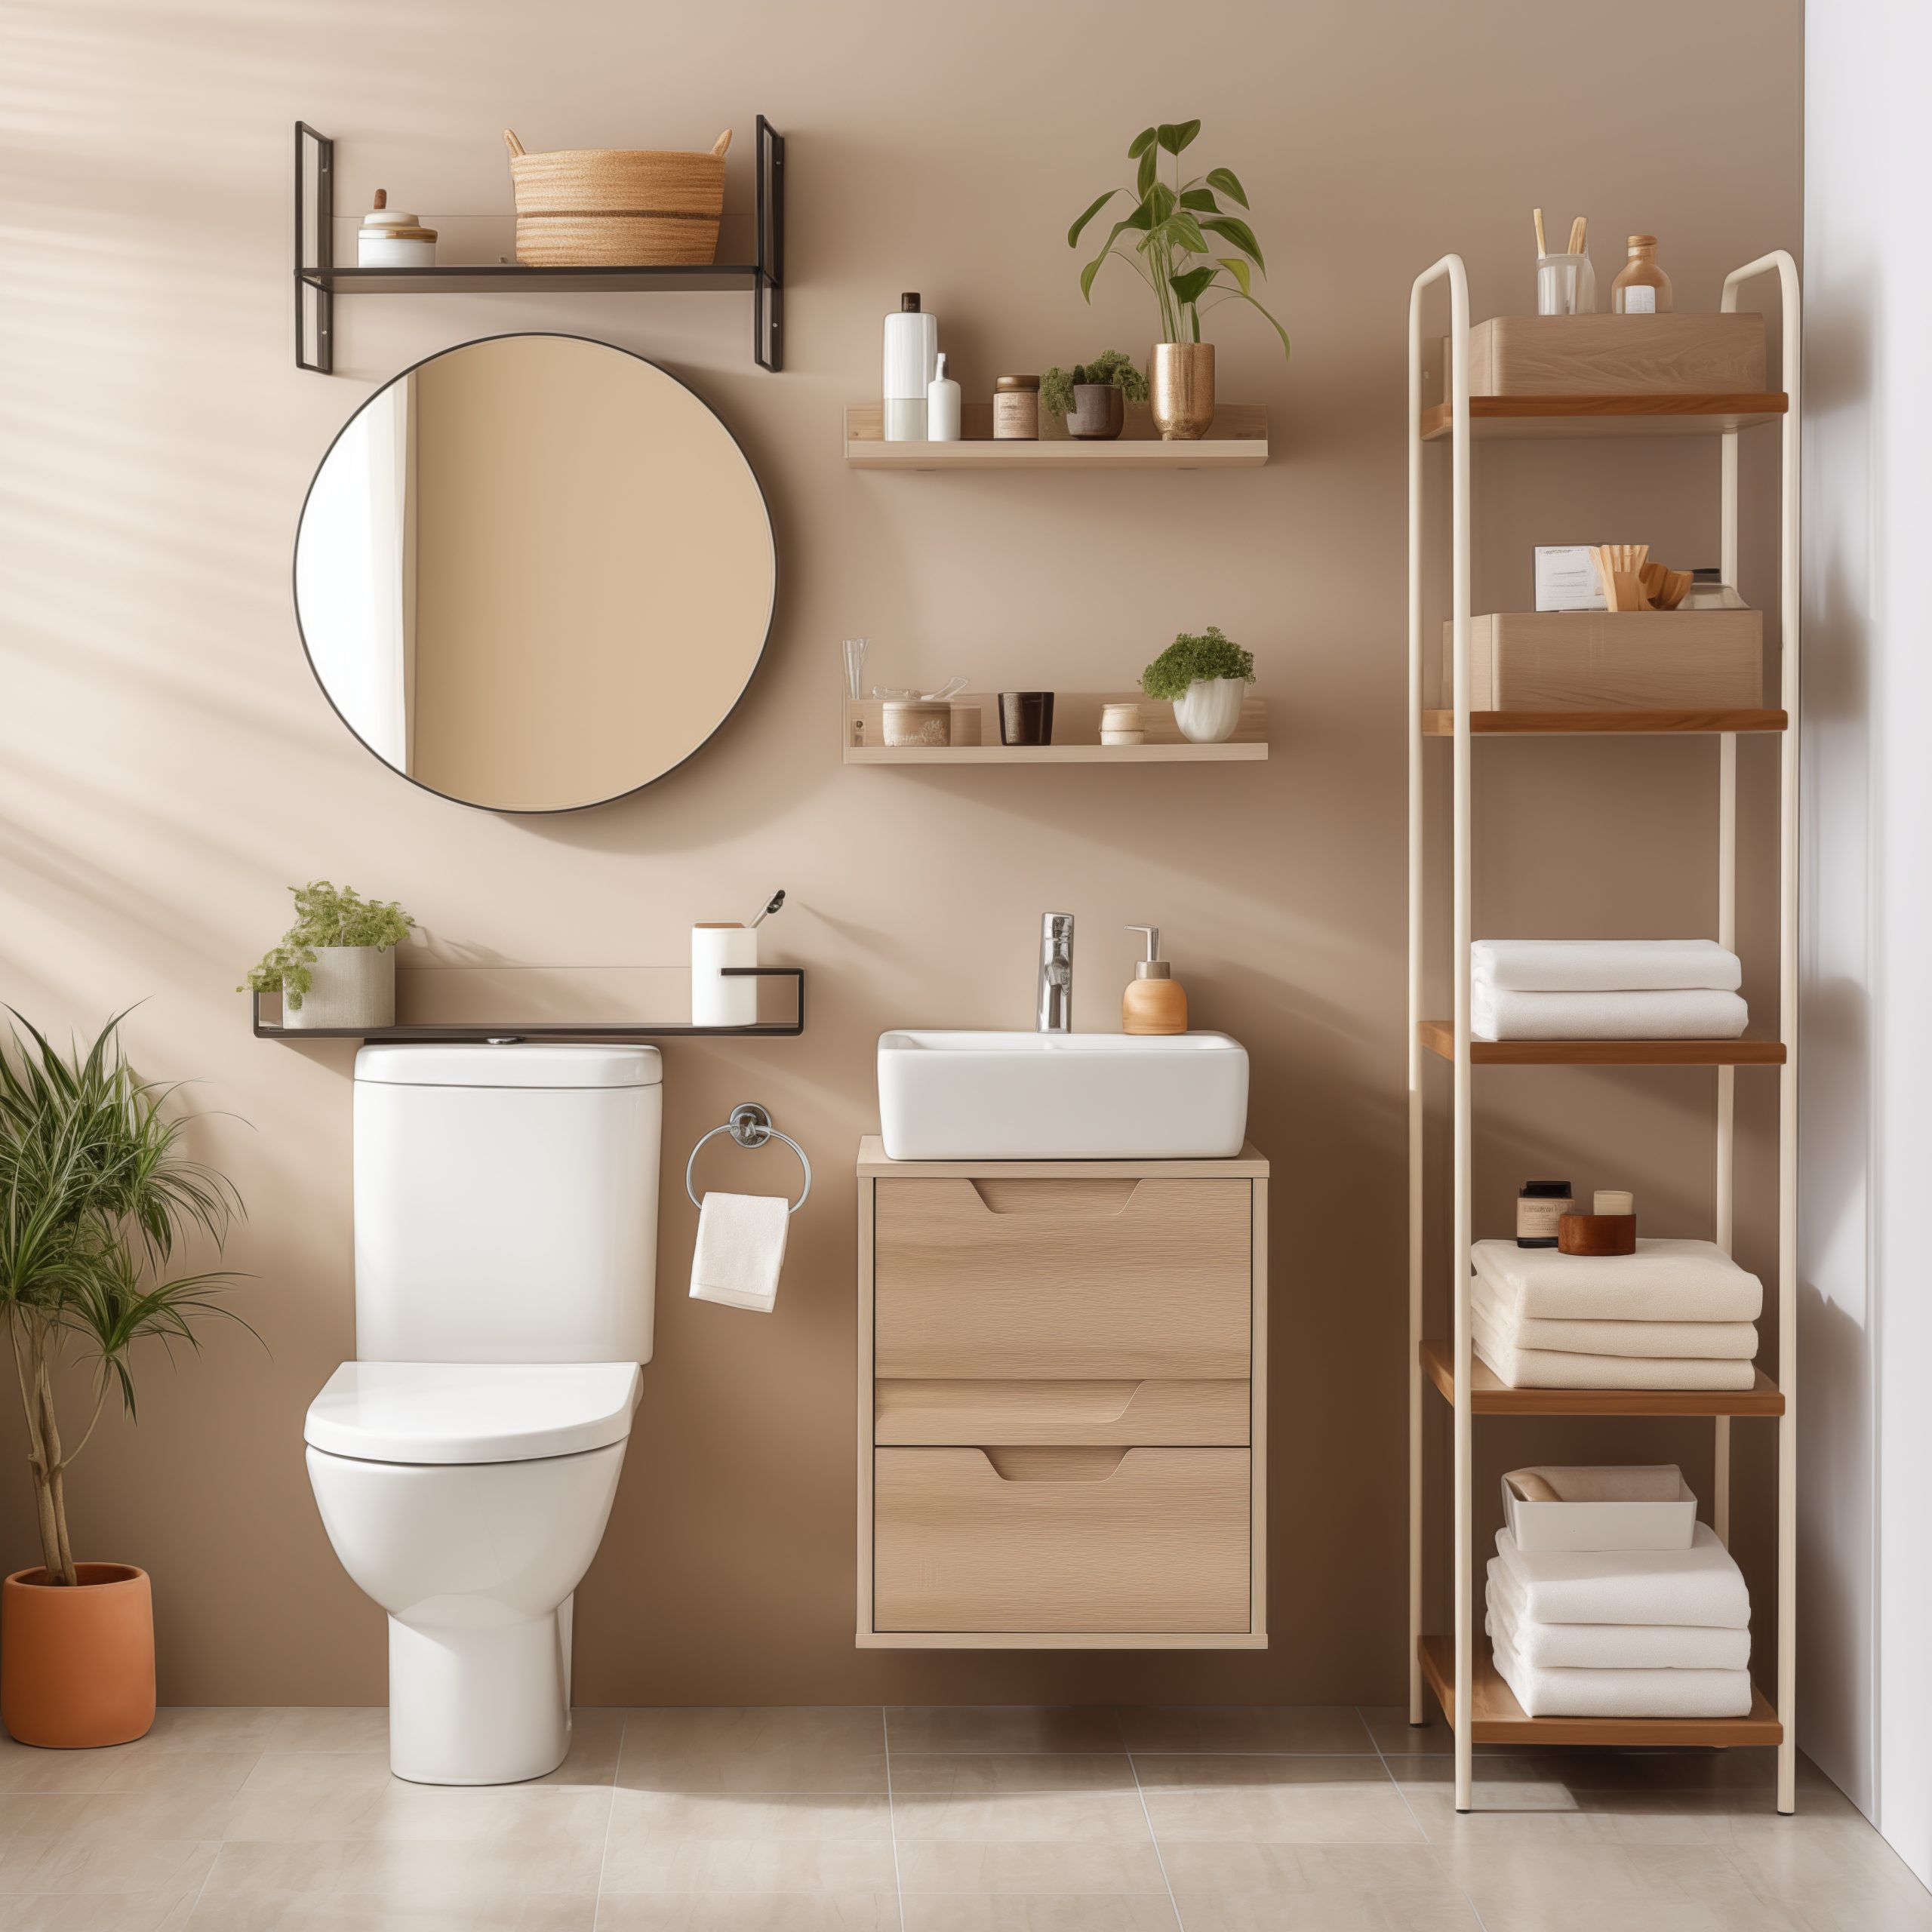
By embracing verticality, you can unlock hidden storage potential and significantly improve your bathroom’s overall organisation. Start maximising your bathroom space today with these vertical bathroom storage solutions.
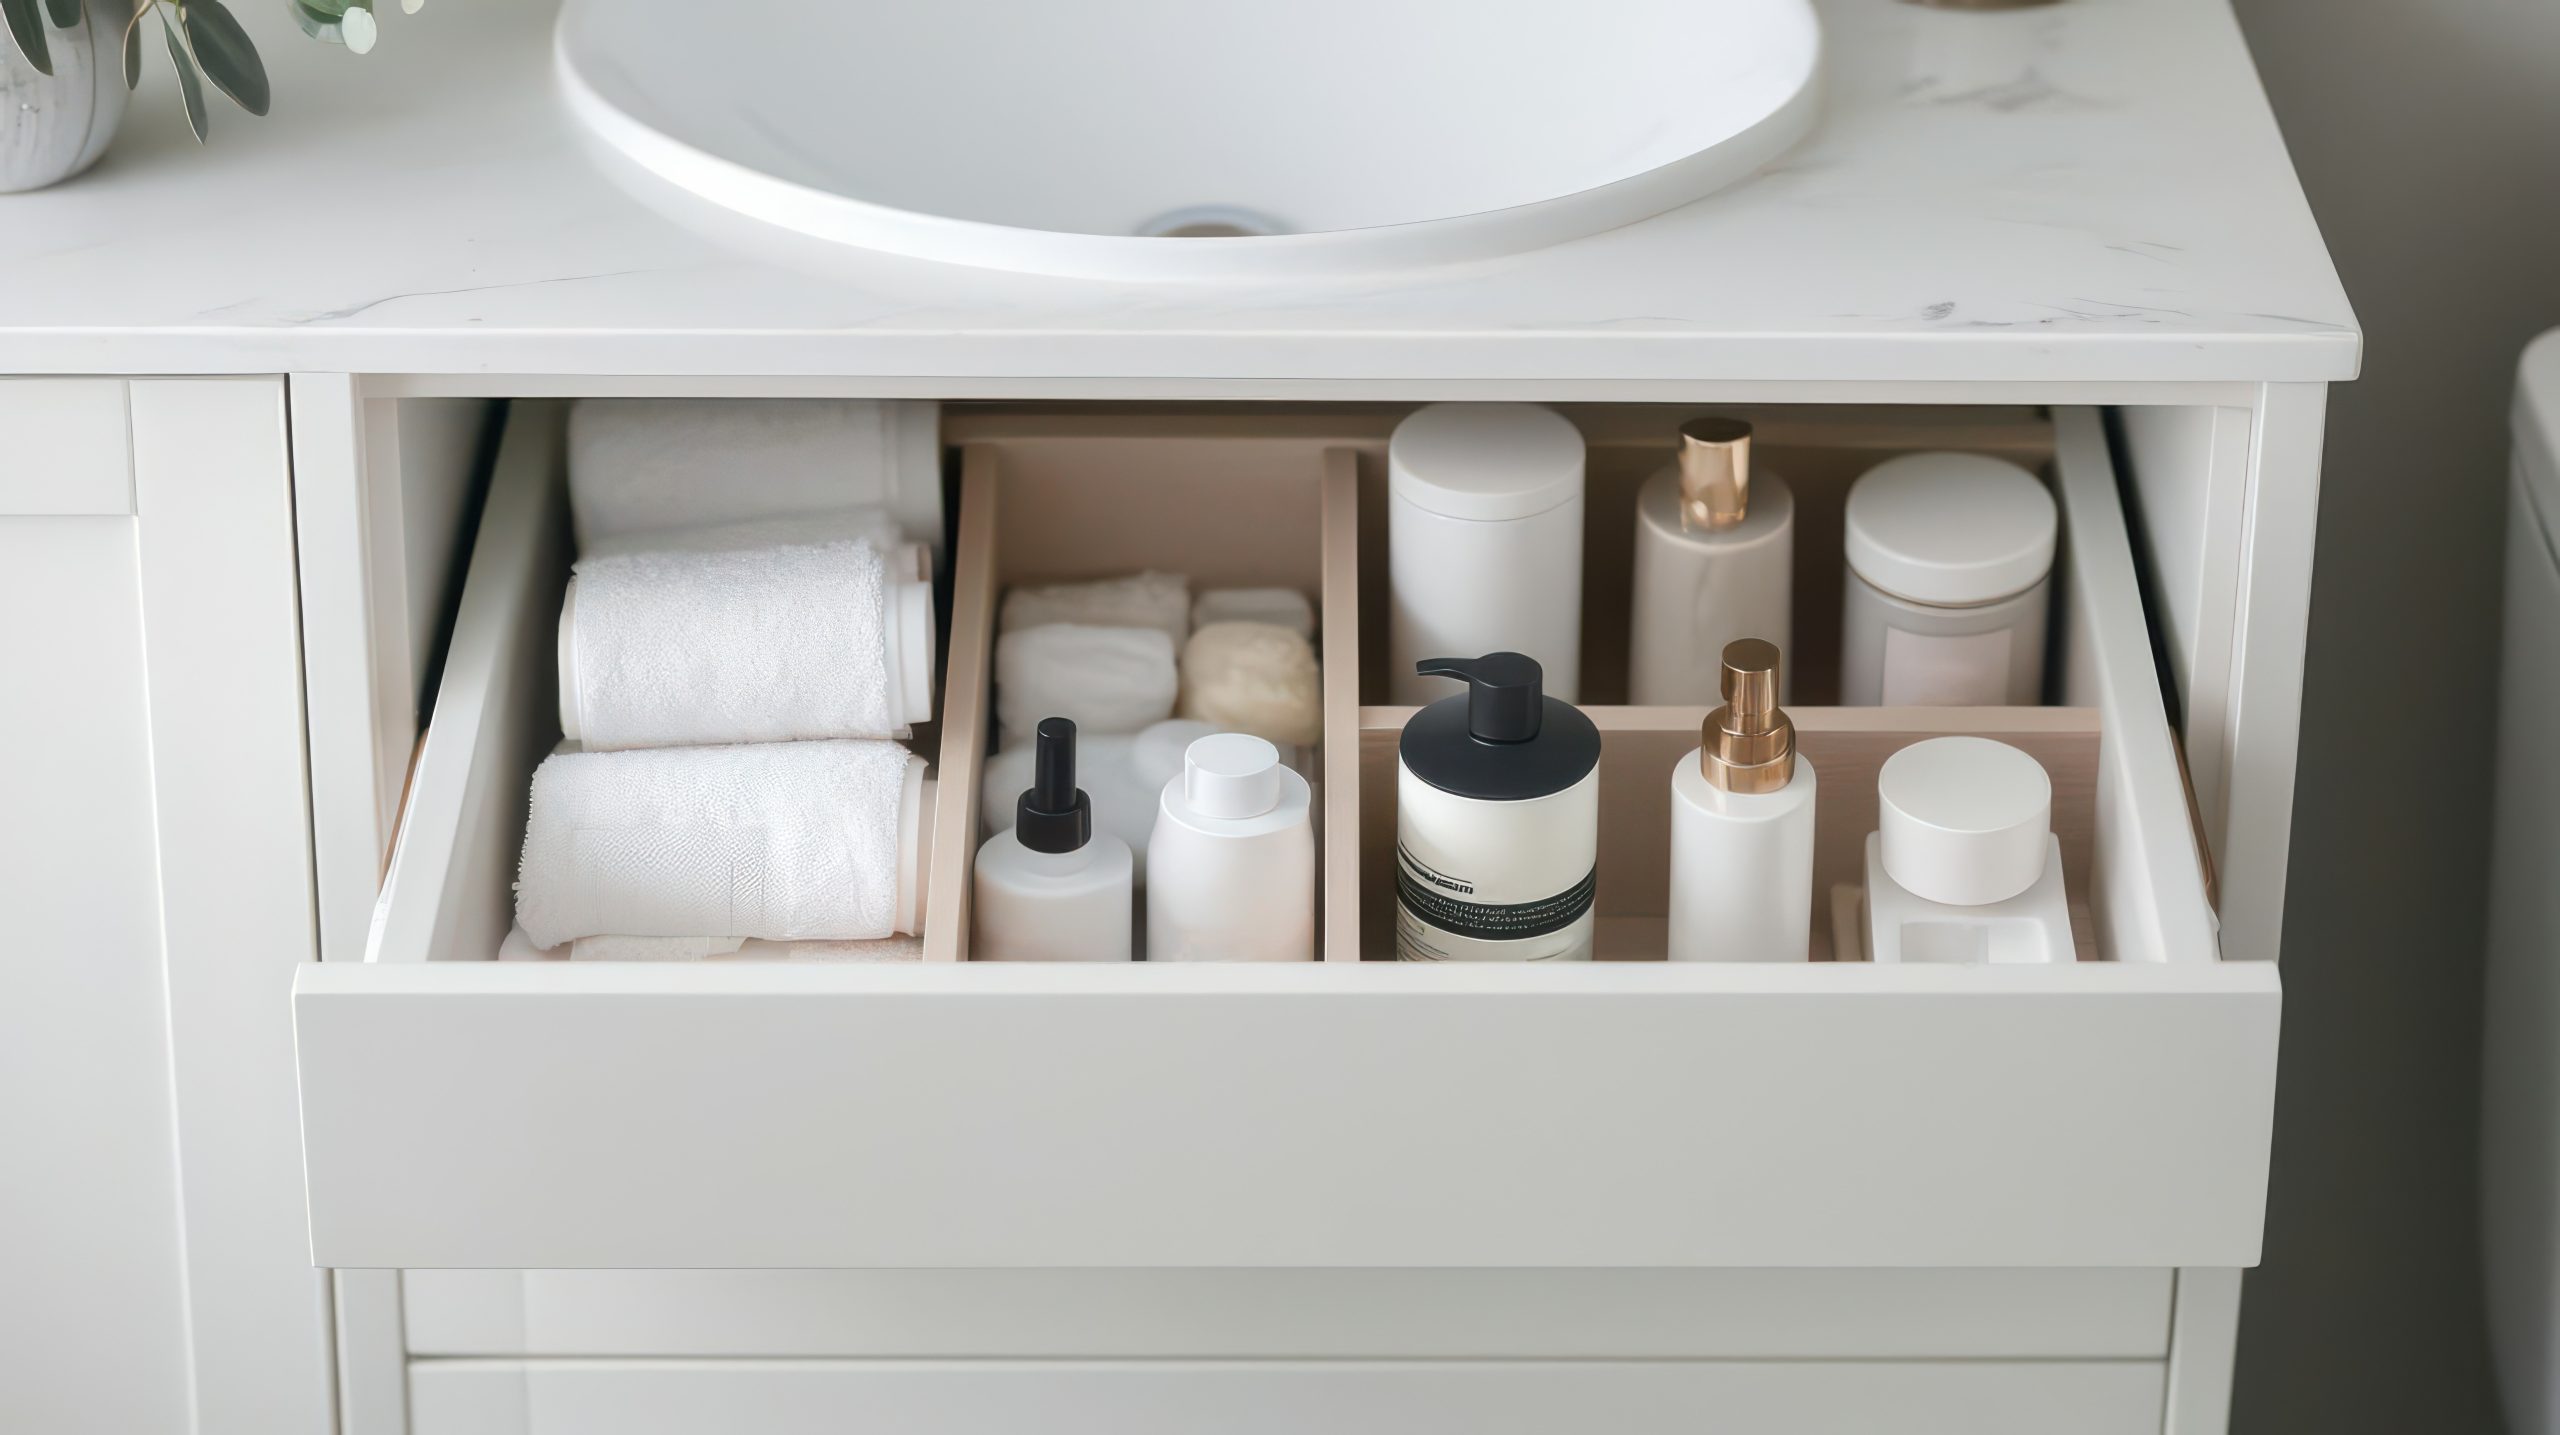
Under-Sink Solutions: Making the Most of Hidden Space
The area under the sink is often a forgotten zone, yet it presents a wealth of opportunity for clever bathroom storage solutions. Transforming this usually cluttered space into an organised haven will significantly reduce bathroom chaos. These under-sink strategies are key to unlocking the full potential of your bathroom’s storage capabilities.
-
Under-Sink Organisers with Sliding Drawers: Maximise access to even the deepest corners of your under-sink cabinet with pull-out drawers. These organisers ensure that you’re not fumbling around in the dark for what you need, and they keep items neatly contained, making them fantastic bathroom storage solutions. Look for adjustable models to fit around plumbing fixtures.
-
Shelf Risers: If you’re not ready for a full organiser system, simple shelf risers can instantly double the vertical space within your under-sink cabinet. Use them to stack cleaning supplies, create separate zones for different product categories, or elevate smaller items for easier access. It’s a simple yet effective element of your bathroom storage solutions.
-
Door-Mounted Baskets or Hooks: Take advantage of the often-unused space on the inside of your under-sink cabinet doors. Mount baskets to hold hair dryers, styling tools, or cleaning supplies. Hooks are perfect for hanging small towels or sponges. It is a unique twist to bathroom storage solutions.
-
Customised Shelving: For the seriously DIY-inclined, building custom shelving specifically tailored to your plumbing configuration allows you to create the most efficient and personalised bathroom storage solutions. Measure carefully and design shelving that maximises every inch of available space while accommodating pipes and drains.
Countertop Strategies: Combating Clutter
A cluttered countertop can instantly make a bathroom feel smaller and more chaotic. Implementing smart countertop strategies is essential for achieving a clean and organised space. These bathroom storage solutions focus on minimising visual clutter while keeping essential items within easy reach.
-
Tiered Trays: These multi-level wonders not only keep frequently used items accessible but also add a touch of elegance to your countertop. Organise makeup brushes, skincare products, perfumes, and other daily essentials in a stylish and easily accessible way. It’s also a stylish addition to bathroom storage solutions.
-
Matching Containers: Organise cotton swabs, cotton balls, and other small items into aesthetically pleasing jars or containers. Not only does this streamline the look of your countertop, but it also makes it easier to see what you have on hand. This easy change could provide a boost to your bathroom storage solutions.
-
Toothbrush Holders and Soap Dispensers: Elevate these everyday essentials by opting for coordinated or stylish versions. Having designated spots for your toothbrush and soap instantly creates a sense of order. This is a fantastic twist in bathroom storage solutions to try.
-
Makeup Organisers: Keep your makeup collection neatly arranged and easily accessible with a clear or compartmentalised makeup organiser. Opt for acrylic organisers that allow you to see everything at a glance, or choose a tiered organiser to maximise vertical space.
-
Small Storage Cabinets: Even a small cabinet is a convenient storage spot, but they offer more hidden storage, such as makeup or brushes. If you’re a minimalist who values functionality, a cabinet may be right up your alley for creating bathroom storage solutions.
Behind-the-Door Magic: Maximise Unused Surfaces
Don’t overlook the often-forgotten potential of the back of your bathroom door! This simple surface provides a surprisingly versatile opportunity to implement clever bathroom storage solutions, helping you squeeze extra storage out of your existing space without taking up precious square footage. This space is a particularly valuable asset in smaller bathrooms where every inch counts.
-
Over-the-Door Organisers: Available in a variety of styles—clear plastic pockets, fabric organizers, or metal racks—over-the-door organisers are ideal for stashing toiletries, cleaning supplies, or small accessories. They’re perfect for shared bathrooms or families with a lot of product clutter.
Tips & Considerations: When choosing an over-the-door organiser, pay attention to the material and weight capacity. A sturdy organiser with deep pockets will be more effective for heavier items. Clear pockets allow you to quickly see what’s inside, while fabric organisers offer a more discreet look. Make sure the hooks are properly padded to avoid scratching the door. Some also have adjustable height settings for a truly customised approach.
-
Towel Hooks: A simple but powerful solution. Install multiple hooks to maximise hanging space for towels, robes, or even loofahs. Choose hooks that complement your bathroom décor for a cohesive look.
Tips & Considerations: Opt for hooks that are sturdy and well-suited for the weight of the items you intend to hang. Consider different styles like single hooks, double hooks, or even decorative wall-mounted towel racks that offer multiple hanging points. Position hooks at various heights to accommodate different items and users, this also optimises bathroom storage solutions.
By tapping into this often-ignored space, you’ll uncover practical and affordable bathroom storage solutions, bringing a sense of calm and order to your bathroom!
DIY Bathroom Storage Solutions on a Budget
Effective bathroom storage solutions don’t have to break the bank! With a little creativity, resourcefulness, and maybe a touch of elbow grease, you can create stylish and functional storage using repurposed materials and budget-friendly supplies. These DIY options allow you to customise your storage to fit your specific needs and aesthetic, all while keeping costs down.
-
Repurpose Jars and Containers: Turn old candle jars, food containers (think mason jars, glass pasta sauce jars), or glass bottles into stylish storage containers for cotton swabs, cotton balls, makeup brushes, or small toiletries.
Tips & Considerations: Clean them thoroughly and remove any labels. For a cohesive look, paint the lids or rims with matching colors. Add labels to each jar to identify its contents. Decorate the jars with twine, ribbon, lace, or paint for a personalised touch. These creative jars create fantastic bathroom storage solutions.
-
Floating Shelves from Salvaged Wood: Add a touch of rustic charm and unique character to your bathroom by creating floating shelves from reclaimed or salvaged wood. This is a great way to reuse materials and create a unique piece of storage that matches your personal style.
Tips & Considerations: Sand and seal the wood thoroughly to protect it from moisture. Choose sturdy brackets that can support the weight of the shelves and the items you intend to store. Measure carefully and use a level to ensure the shelves are mounted evenly. You’ll want sturdy walls for mounting.
-
Upcycled Crates or Baskets: Give old wooden crates or woven baskets a new lease on life by using them as decorative and functional storage containers. They can hold towels, rolled-up washcloths, extra toilet paper, or even potted plants.
Tips & Considerations: Paint them to match your bathroom décor or leave them with their natural finish for a rustic look. Stack crates on the floor to create open shelving or mount baskets on the wall for extra storage. Line the baskets with fabric to protect delicate items from snagging. They’re flexible when it comes to your design plan, and they also provide bathroom storage solutions.
Bathroom Storage Furniture: Additional Space and Decor
When built-in storage falls short, strategically placed furniture can make all the difference. These pieces not only provide extra space for your essentials but can also elevate the overall aesthetic of your bathroom, turning it from purely functional to stylishly organised. Careful selection will add to your bathroom storage solutions.
-
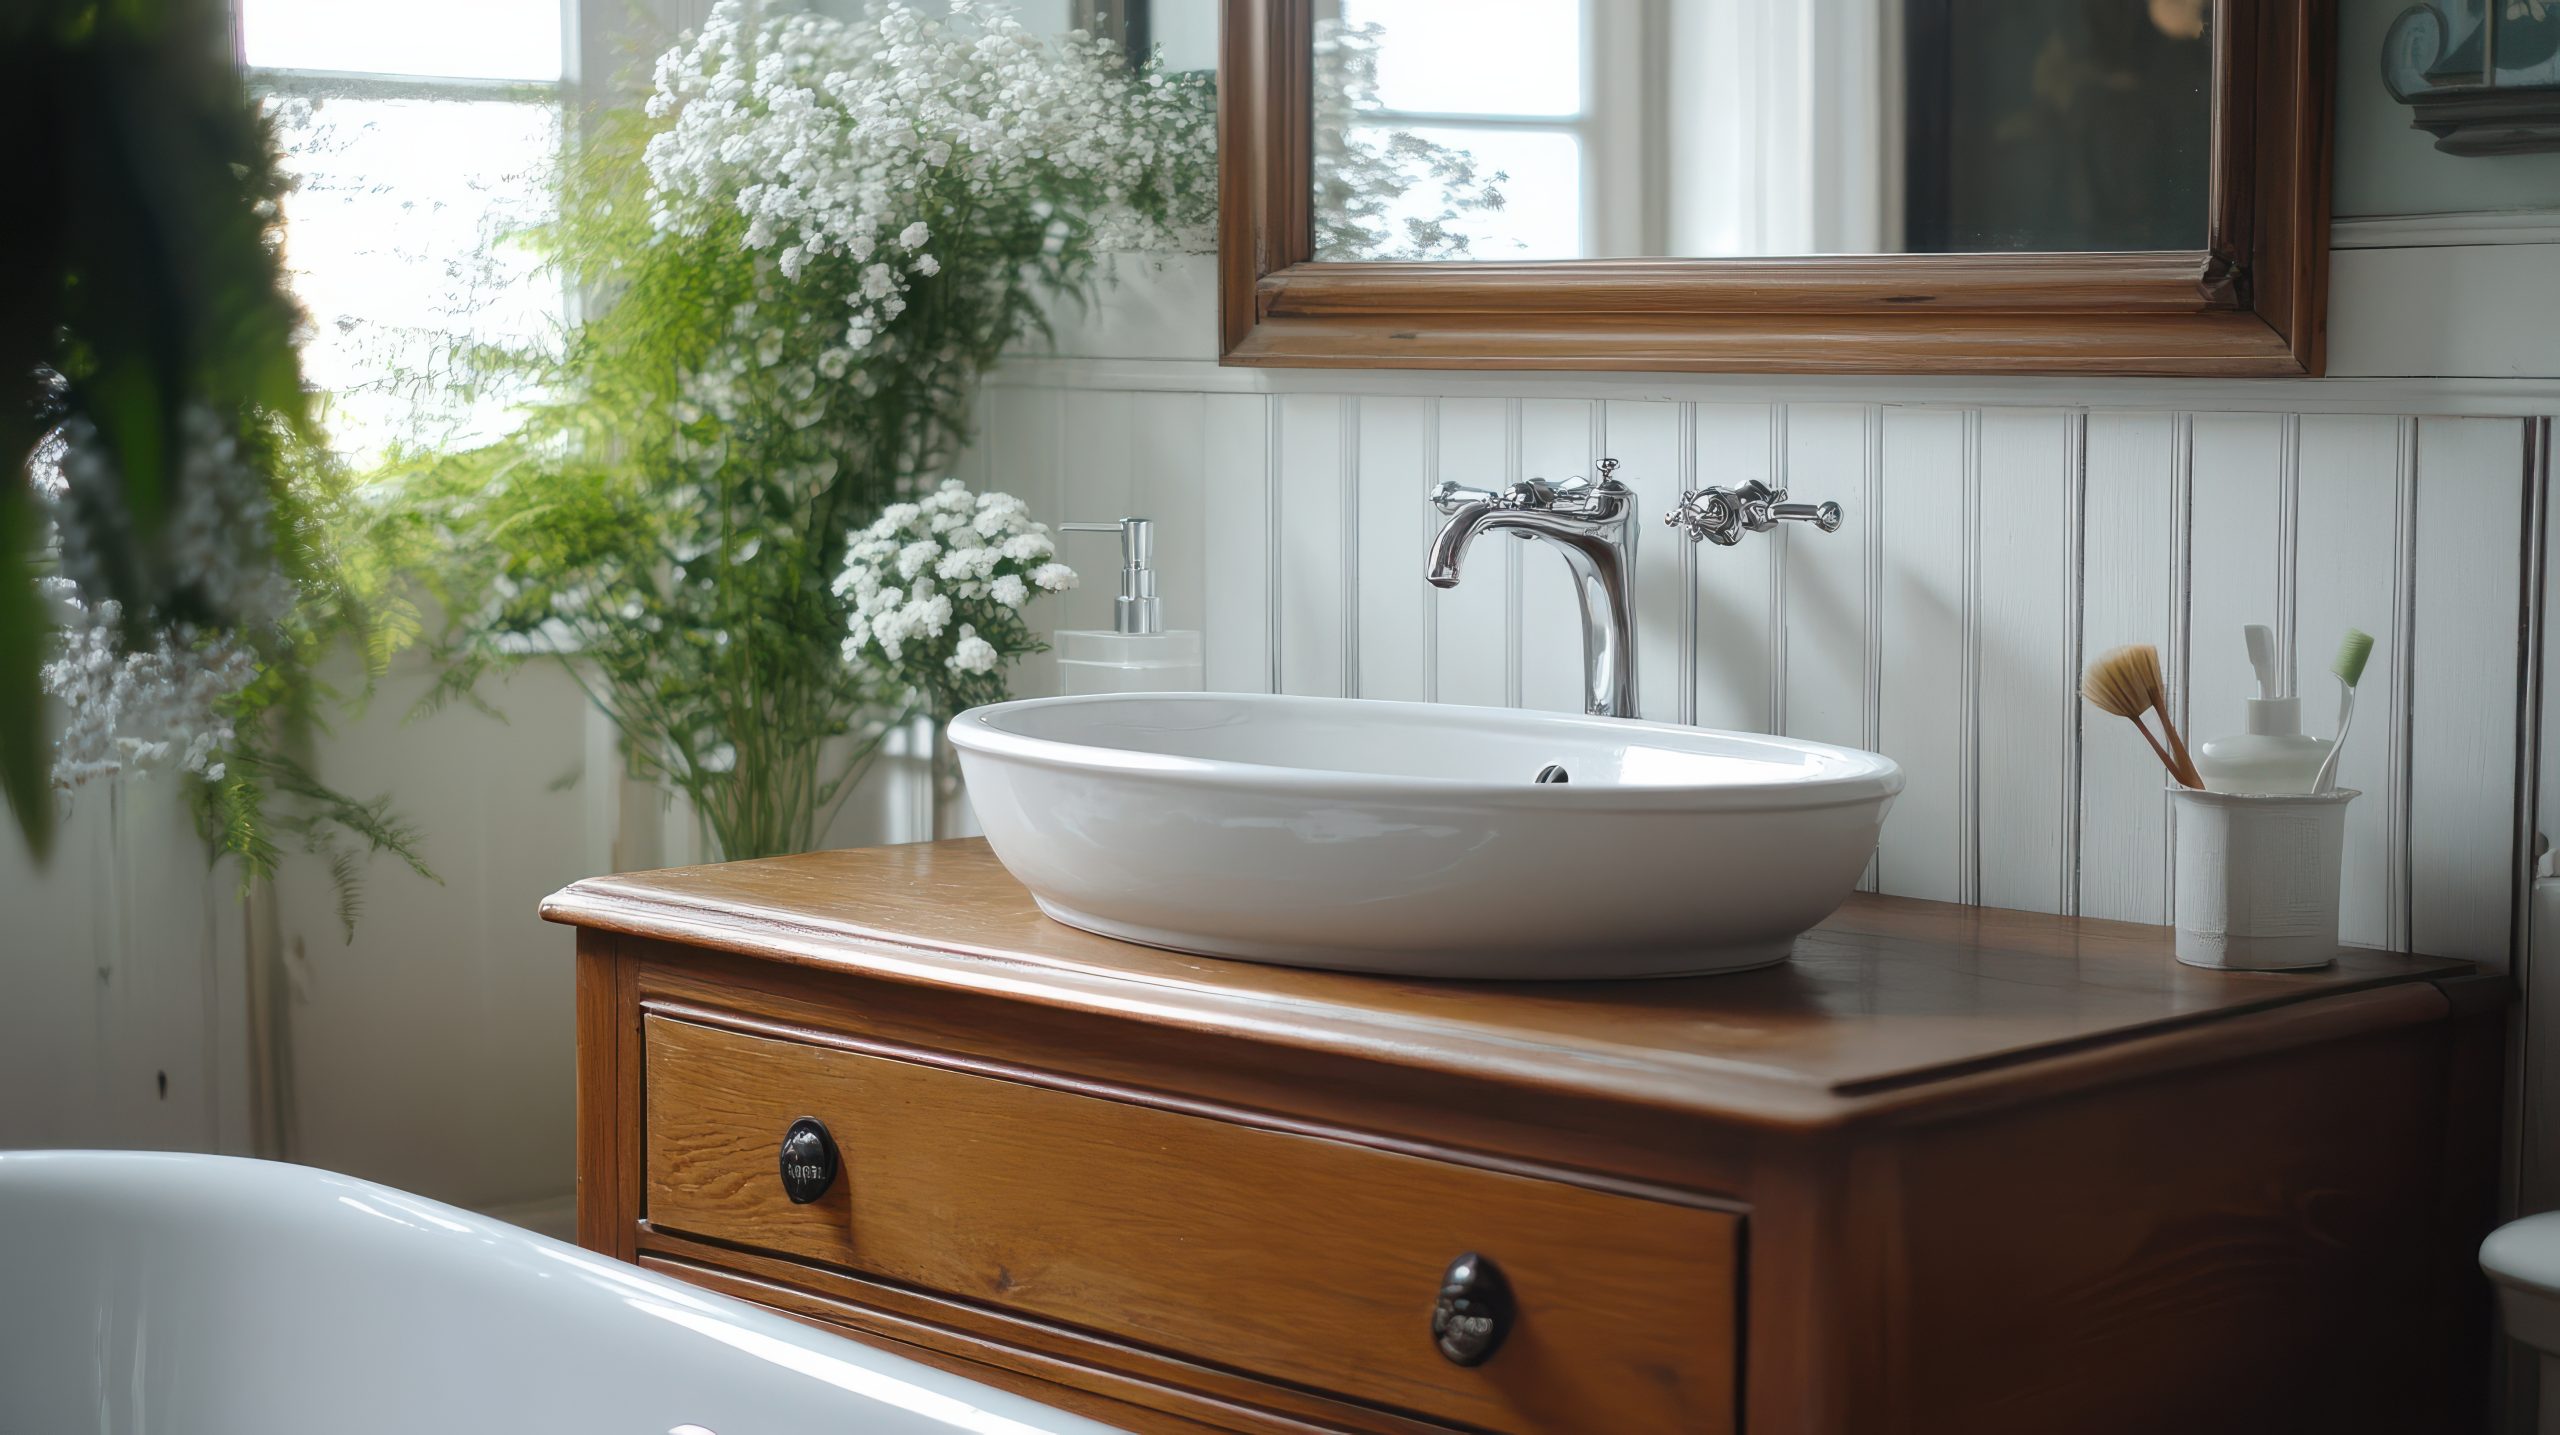
Bathroom Vanities: A stylish and functional bathroom vanity not only provides a surface for your sink but also offers a wealth of storage space beneath. It’s a central piece that combines utility with visual appeal.
Tips & Considerations: Look for vanities with drawers, cabinets, or a combination of both to accommodate all your toiletries and essentials. Consider the style and finish to ensure it complements the rest of your bathroom décor. Measure the space carefully to ensure the vanity fits comfortably and allows for adequate clearance around it.
-
Shower Caddies: Transform a stall in your bathroom for soaps and body wash in all sizes and styles. With a caddie, this provides easier access while having all the items that are a necessity.
-
Rolling Cart/Trolley: Offering portability and flexibility, a rolling cart or trolley is a versatile addition to any bathroom. It can be used to store towels, washcloths, toiletries, or even styling tools.
Tips & Considerations: Choose a cart with multiple shelves or compartments for maximum organisation. Opt for a model with wheels that lock for stability. Use the cart to create a mini spa station, complete with essential oils, lotions, and a cosy robe.
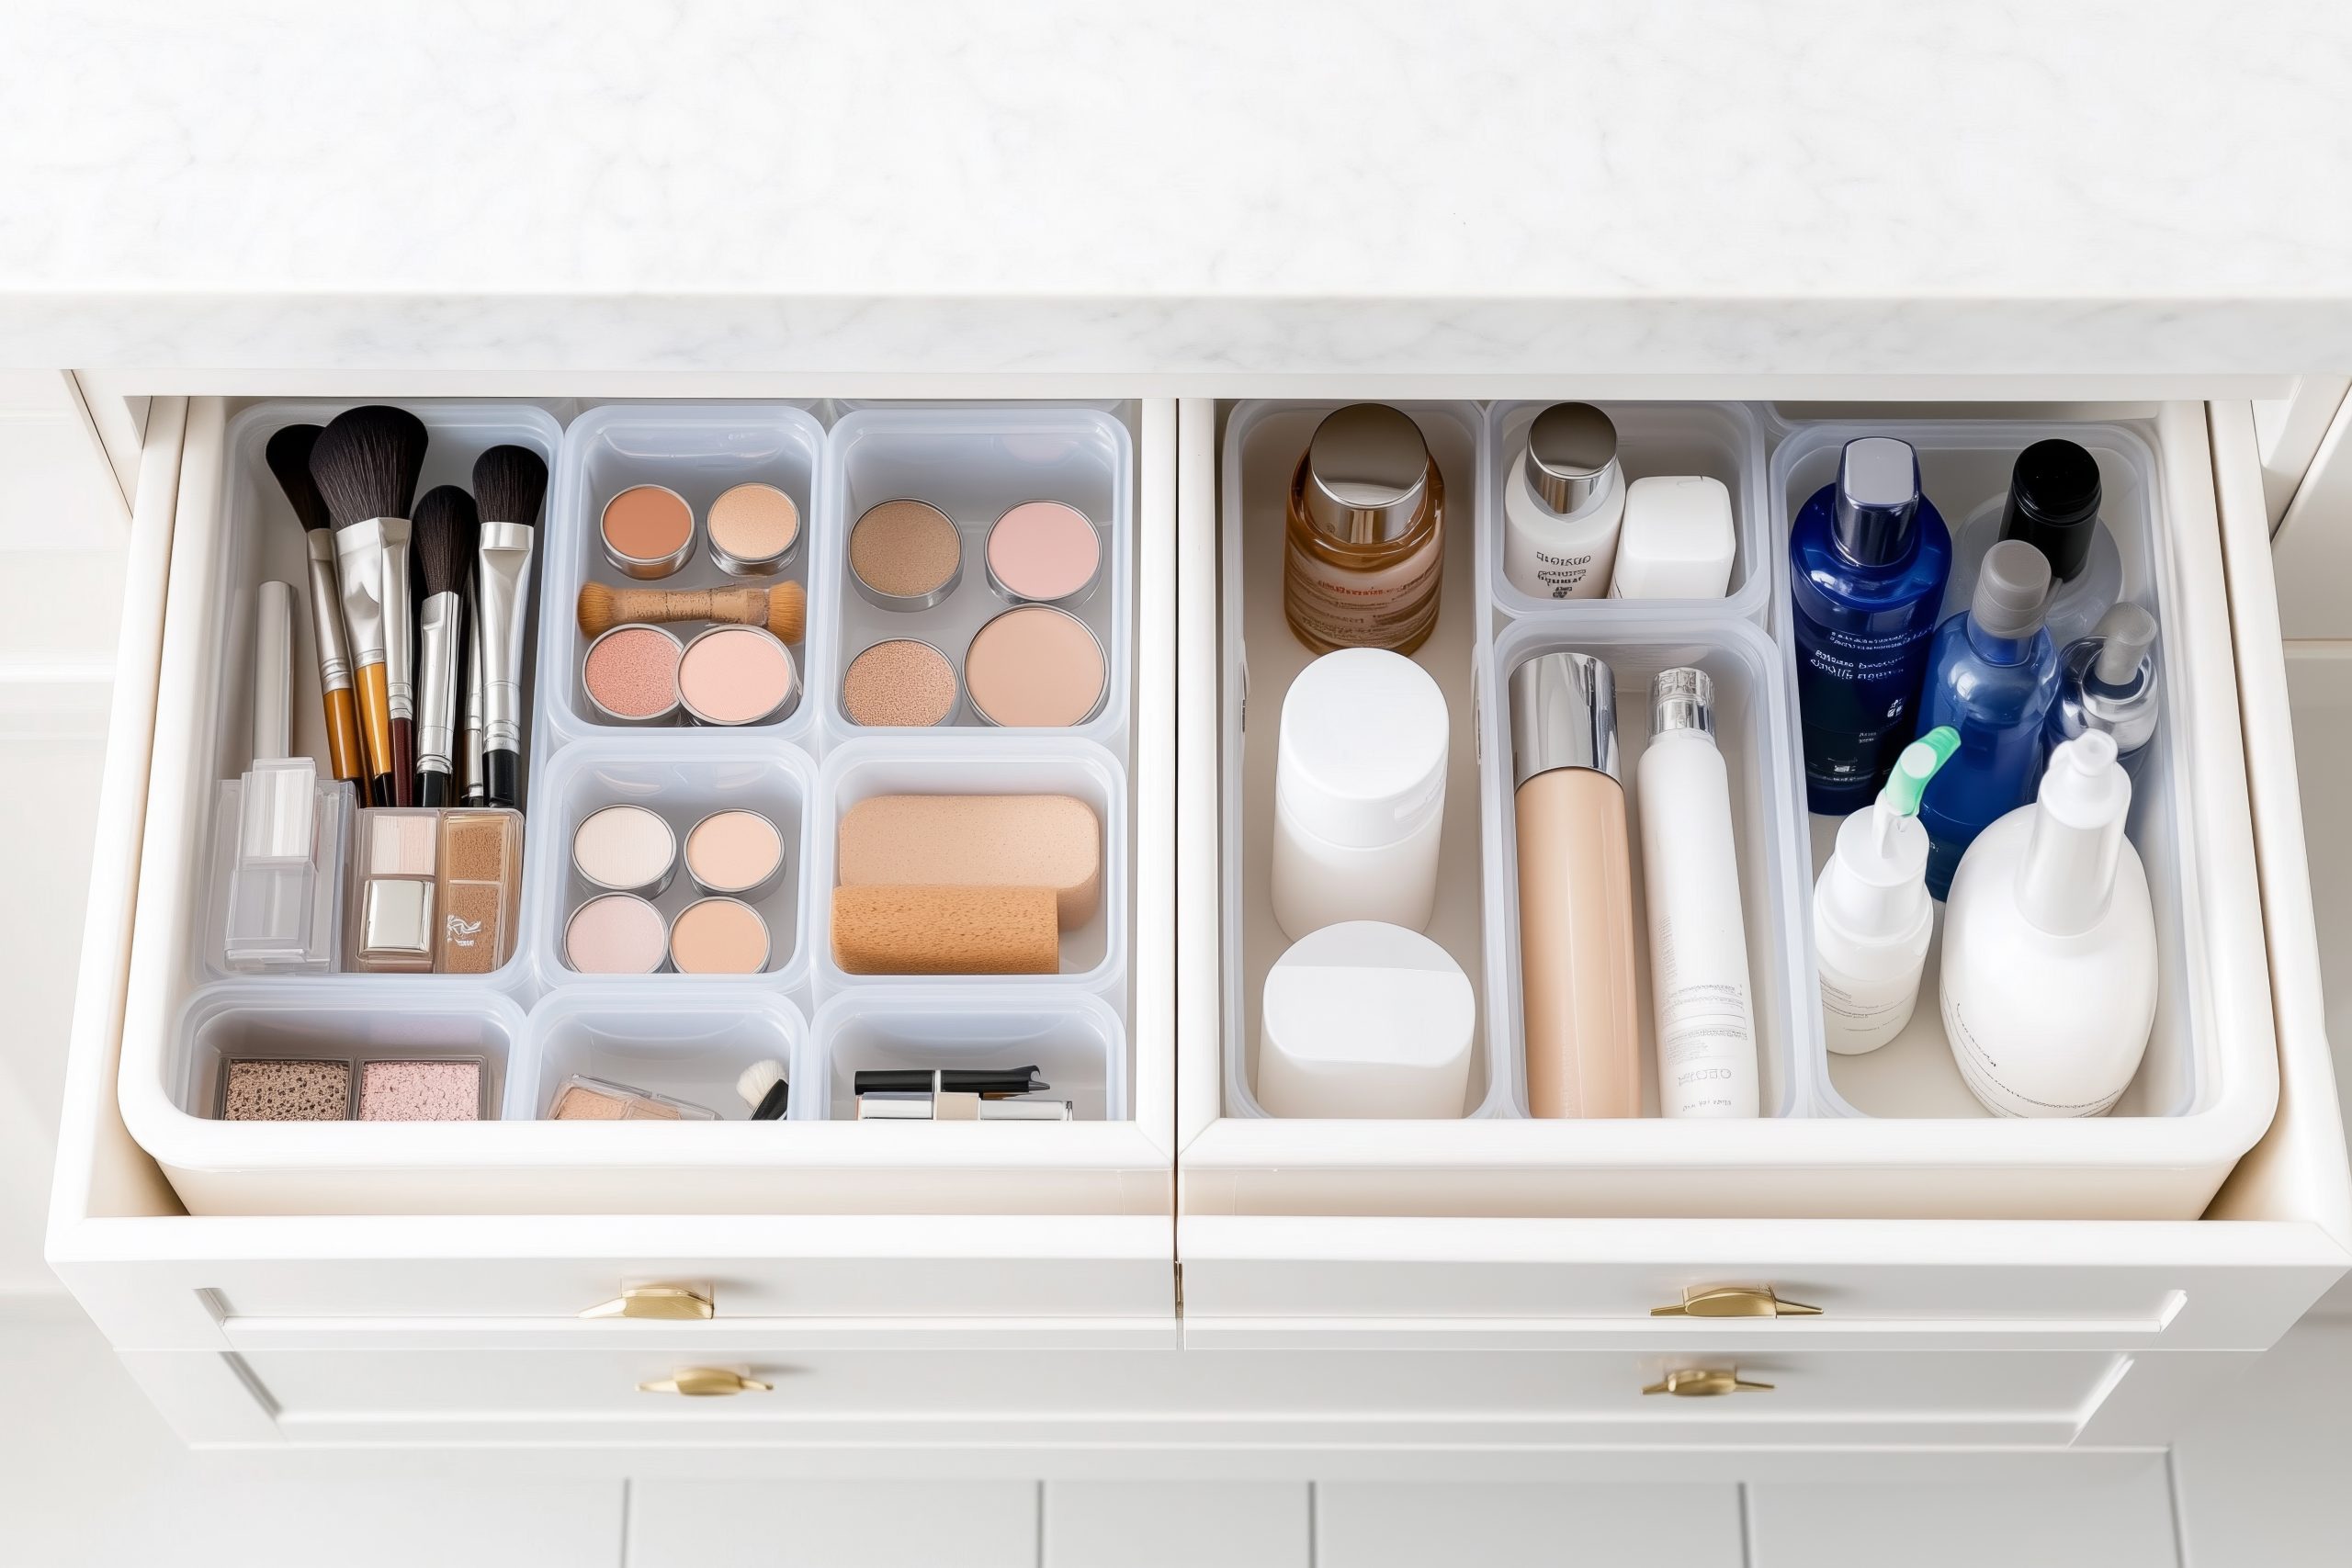
Utilising Drawer Dividers: Organise Inside, Optimise Outside
While having enough drawers is a good start, the real organisational magic happens on the inside! Drawer dividers are game-changing bathroom storage solutions that transform chaotic piles into neatly arranged compartments. They help maximise every square inch of drawer space and ensure that everything has its designated place, creating a sense of calm and order whenever you open a drawer.
-
Adjustable Drawer Dividers: The beauty of adjustable dividers lies in their flexibility. These dividers often feature spring-loaded tension or interlocking designs, allowing you to customise the size and configuration of each compartment to perfectly fit your items.
Tips & Considerations: Look for dividers with padded ends to protect the drawer walls and prevent slipping. Measure the height of your drawers to ensure the dividers fit properly. Use them to create zones for different categories of items, such as makeup, skincare, or hair accessories. This also creates fantastic bathroom storage solutions.
-
Fixed Compartment Dividers: Offering a more permanent organisation solution, these drawer inserts feature fixed compartments tailored to specific items. You might find inserts designed specifically for makeup brushes, lipstick, jewelry, or even neatly folded washcloths and cotton swabs.
Tips & Considerations: Before purchasing a fixed compartment divider, carefully assess the items you want to store and choose a divider with appropriately sized compartments. Consider using different dividers for different types of items to create a truly customised organisational system. Use velvet-lined dividers for delicate jewelry to prevent scratching.
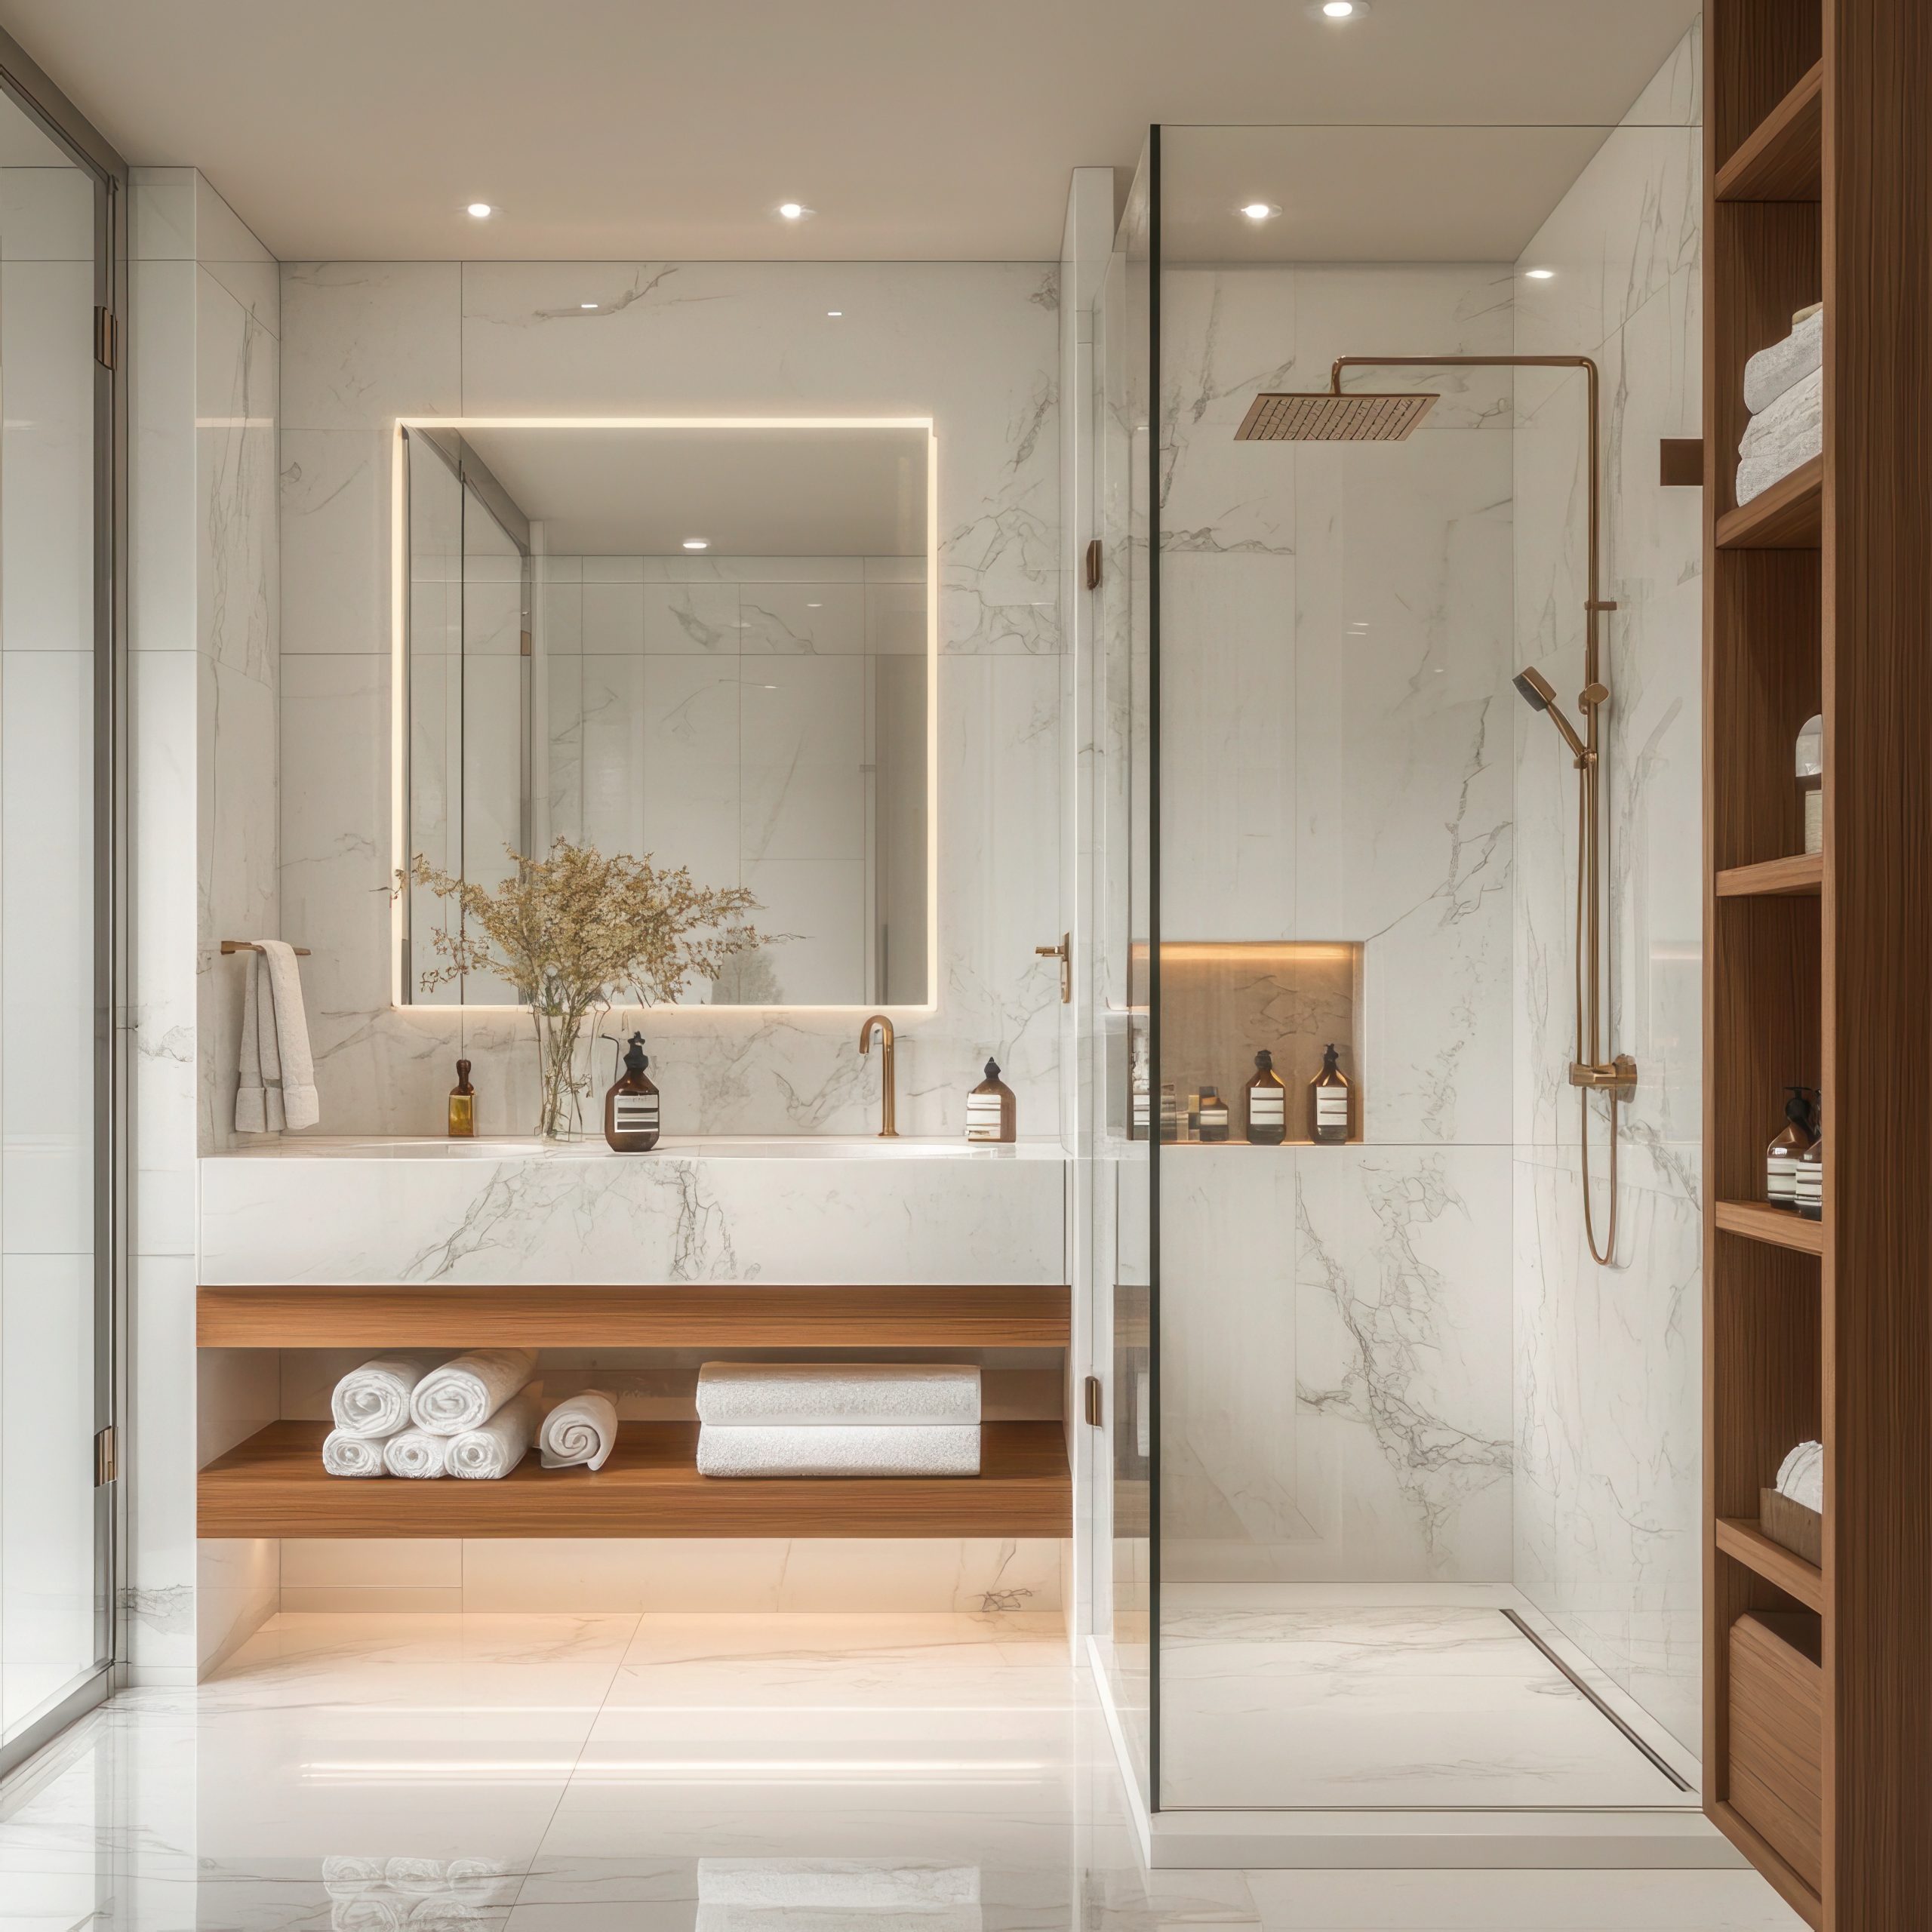
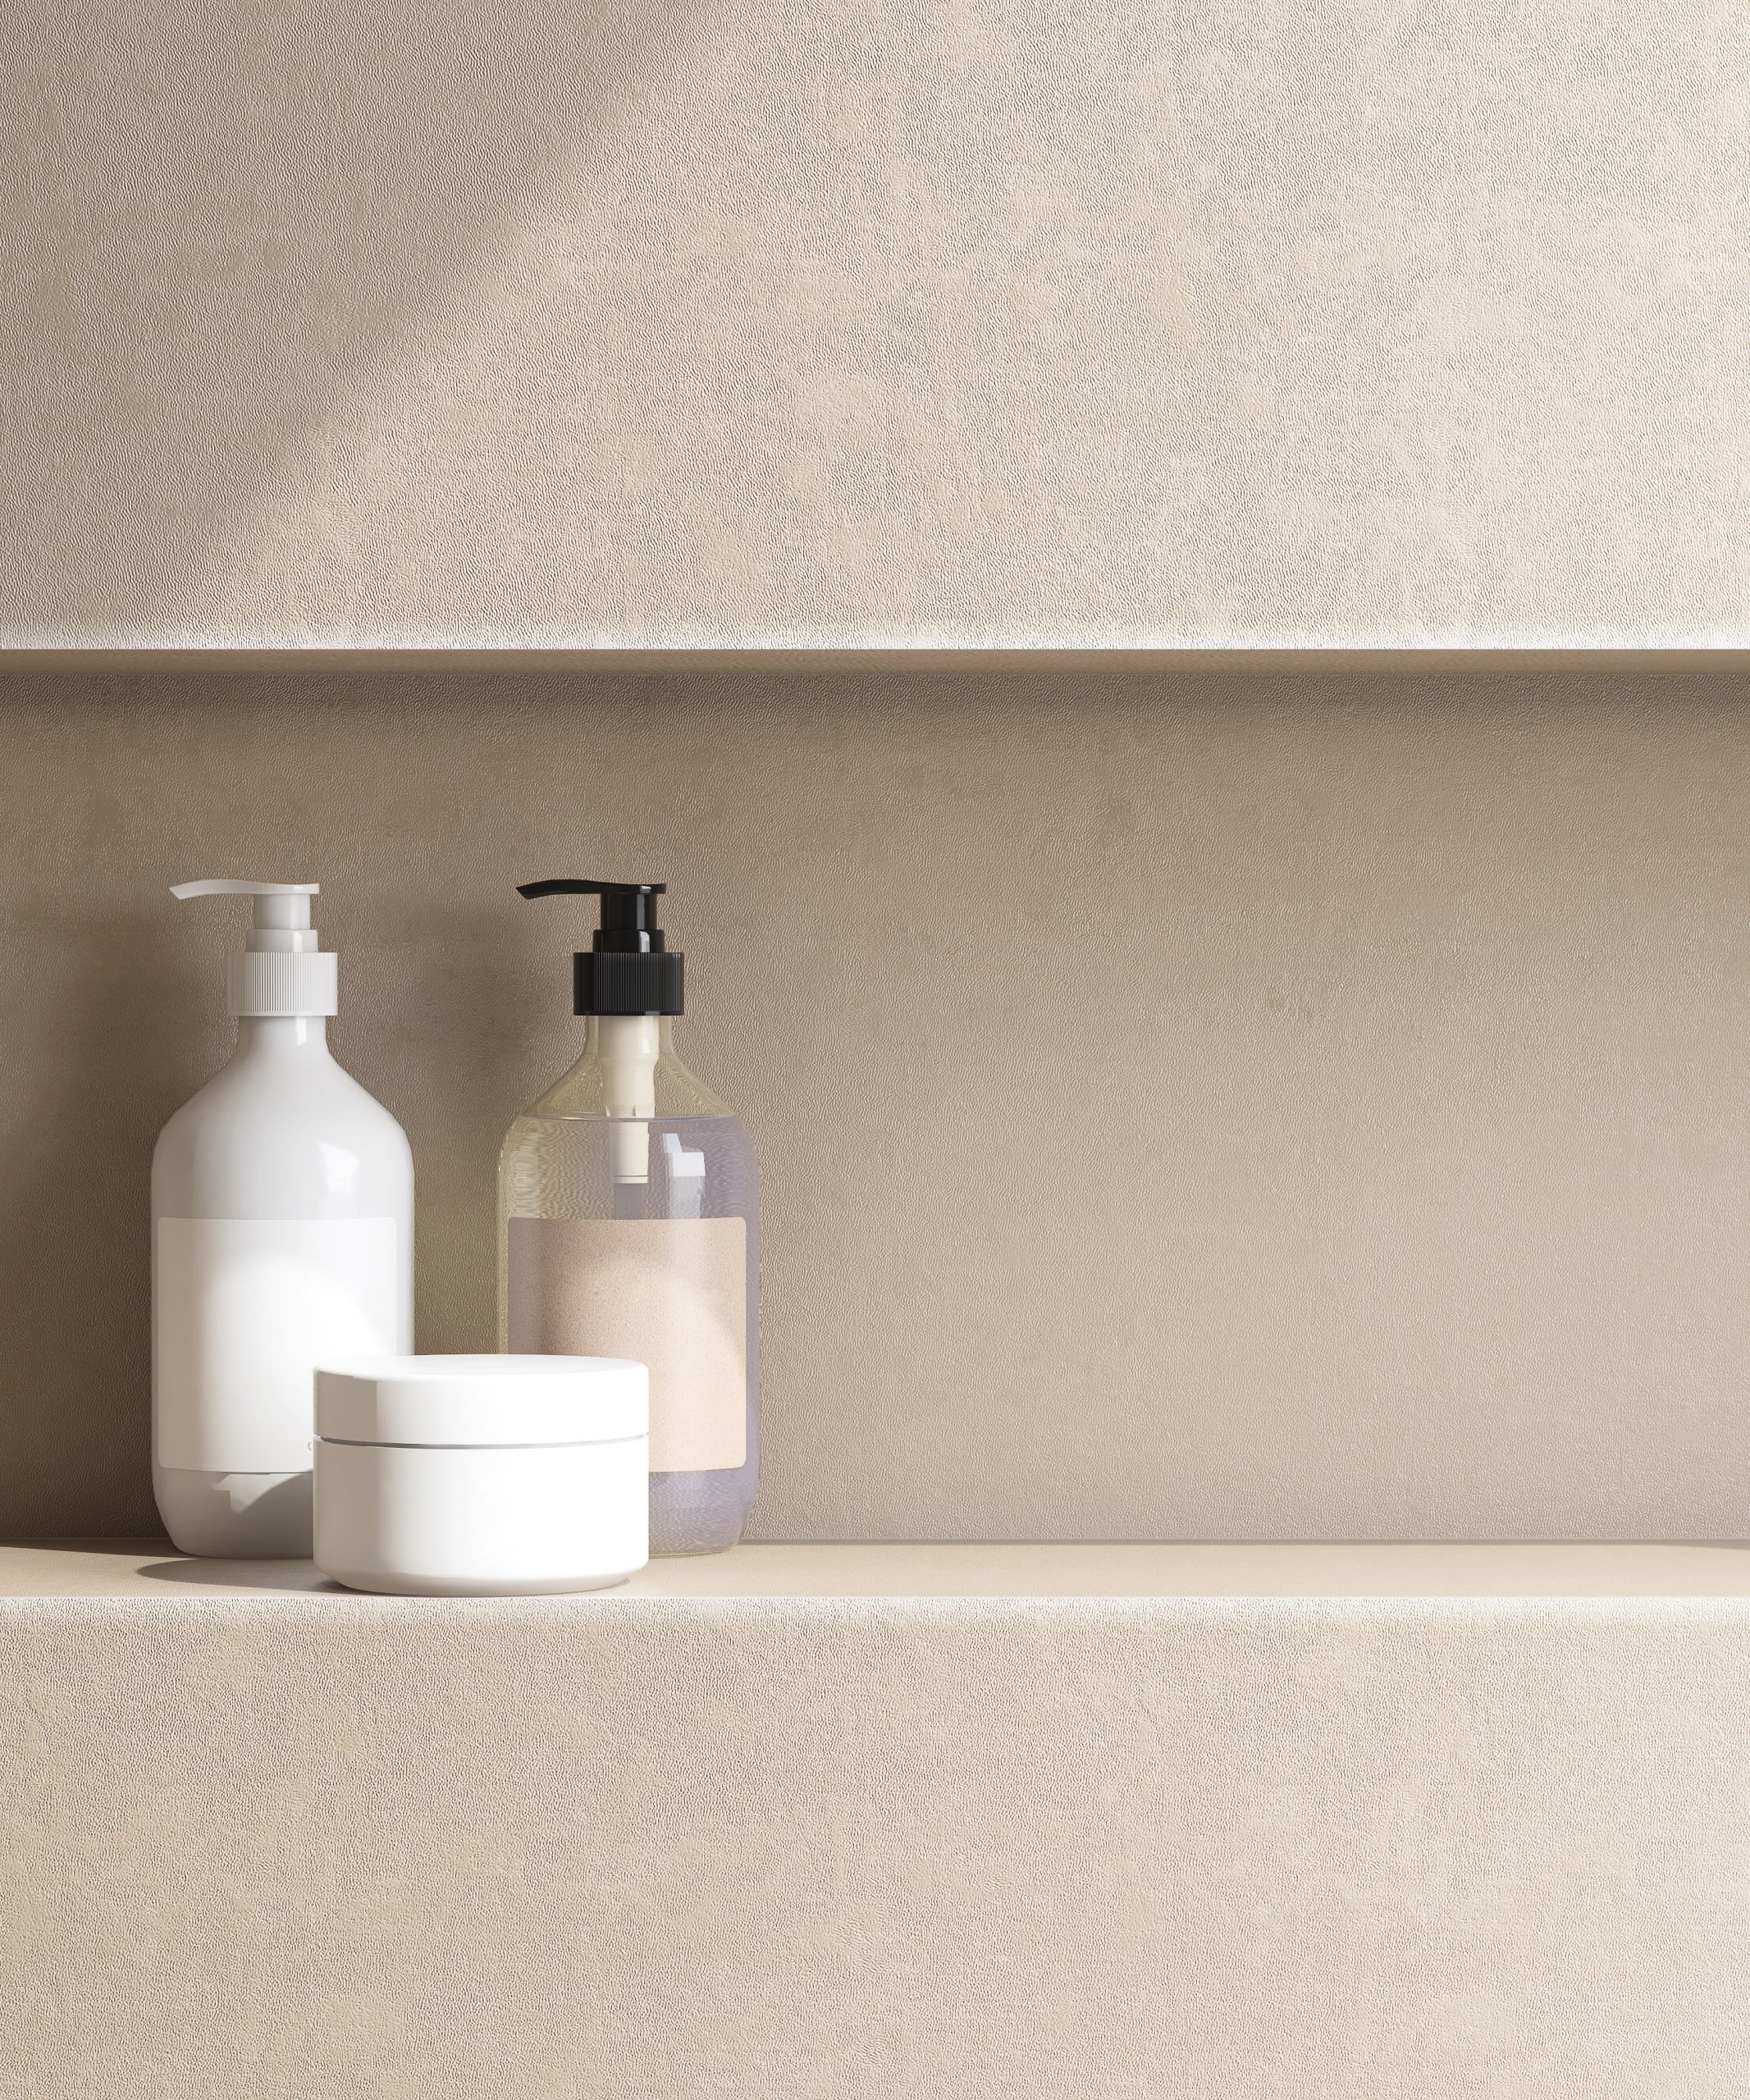
Shower Niches: Seamless, Built-in Storage for Your Shower Essentials
Say goodbye to precarious shampoo bottles teetering on the edge of your bathtub! Shower niches offer sleek and seamless built-in bathroom storage solutions directly within your shower enclosure. These recessed shelves provide a dedicated and easily accessible spot for your soaps, shampoos, conditioners, shaving cream, and other shower essentials, creating a clutter-free and spa-like showering experience.
-
Built-in Shower Niches: During a bathroom remodel, incorporating a built-in niche is the ultimate way to maximise space, eliminate clutter, and create a streamlined, modern look. Niches can be designed in a variety of sizes and shapes to accommodate your specific needs and preferences. From a single, large niche to multiple smaller ones, the possibilities are endless.
Planning and Considerations:
-
Placement: Carefully consider the placement of your niche. Ideally, it should be located at a comfortable height and in a spot that’s easily accessible while showering. Avoid placing it directly in the path of the showerhead spray to prevent water from splashing out.
-
Waterproofing: Proper waterproofing is essential to prevent water damage behind the niche. Ensure the contractor uses high-quality waterproofing membranes and seals to protect the surrounding walls.
-
Tiling: Tiling the niche with the same tile as the shower walls creates a cohesive and elegant aesthetic. You can also use a contrasting tile or mosaic to create a focal point. Consider adding a decorative accent, like a border or small shelf. The perfect spot and tiling for bathroom storage solutions.
-
Lighting: Adding a small LED light within the niche can enhance the ambiance and make it easier to see your shower products.
-
Slope: Design the shelves within the niche with a slight downward slope to allow water to drain effectively and prevent buildup. That brings a plus into designing a space that provides bathroom storage solutions.
Transforming your bathroom from chaotic to calm is achievable with the right bathroom storage solutions. From clever vertical strategies and under-sink organizers to DIY projects and stylish furniture, there’s a solution for every space and every budget. The key is to assess your needs, analyze your space, and implement the strategies that best suit your lifestyle.
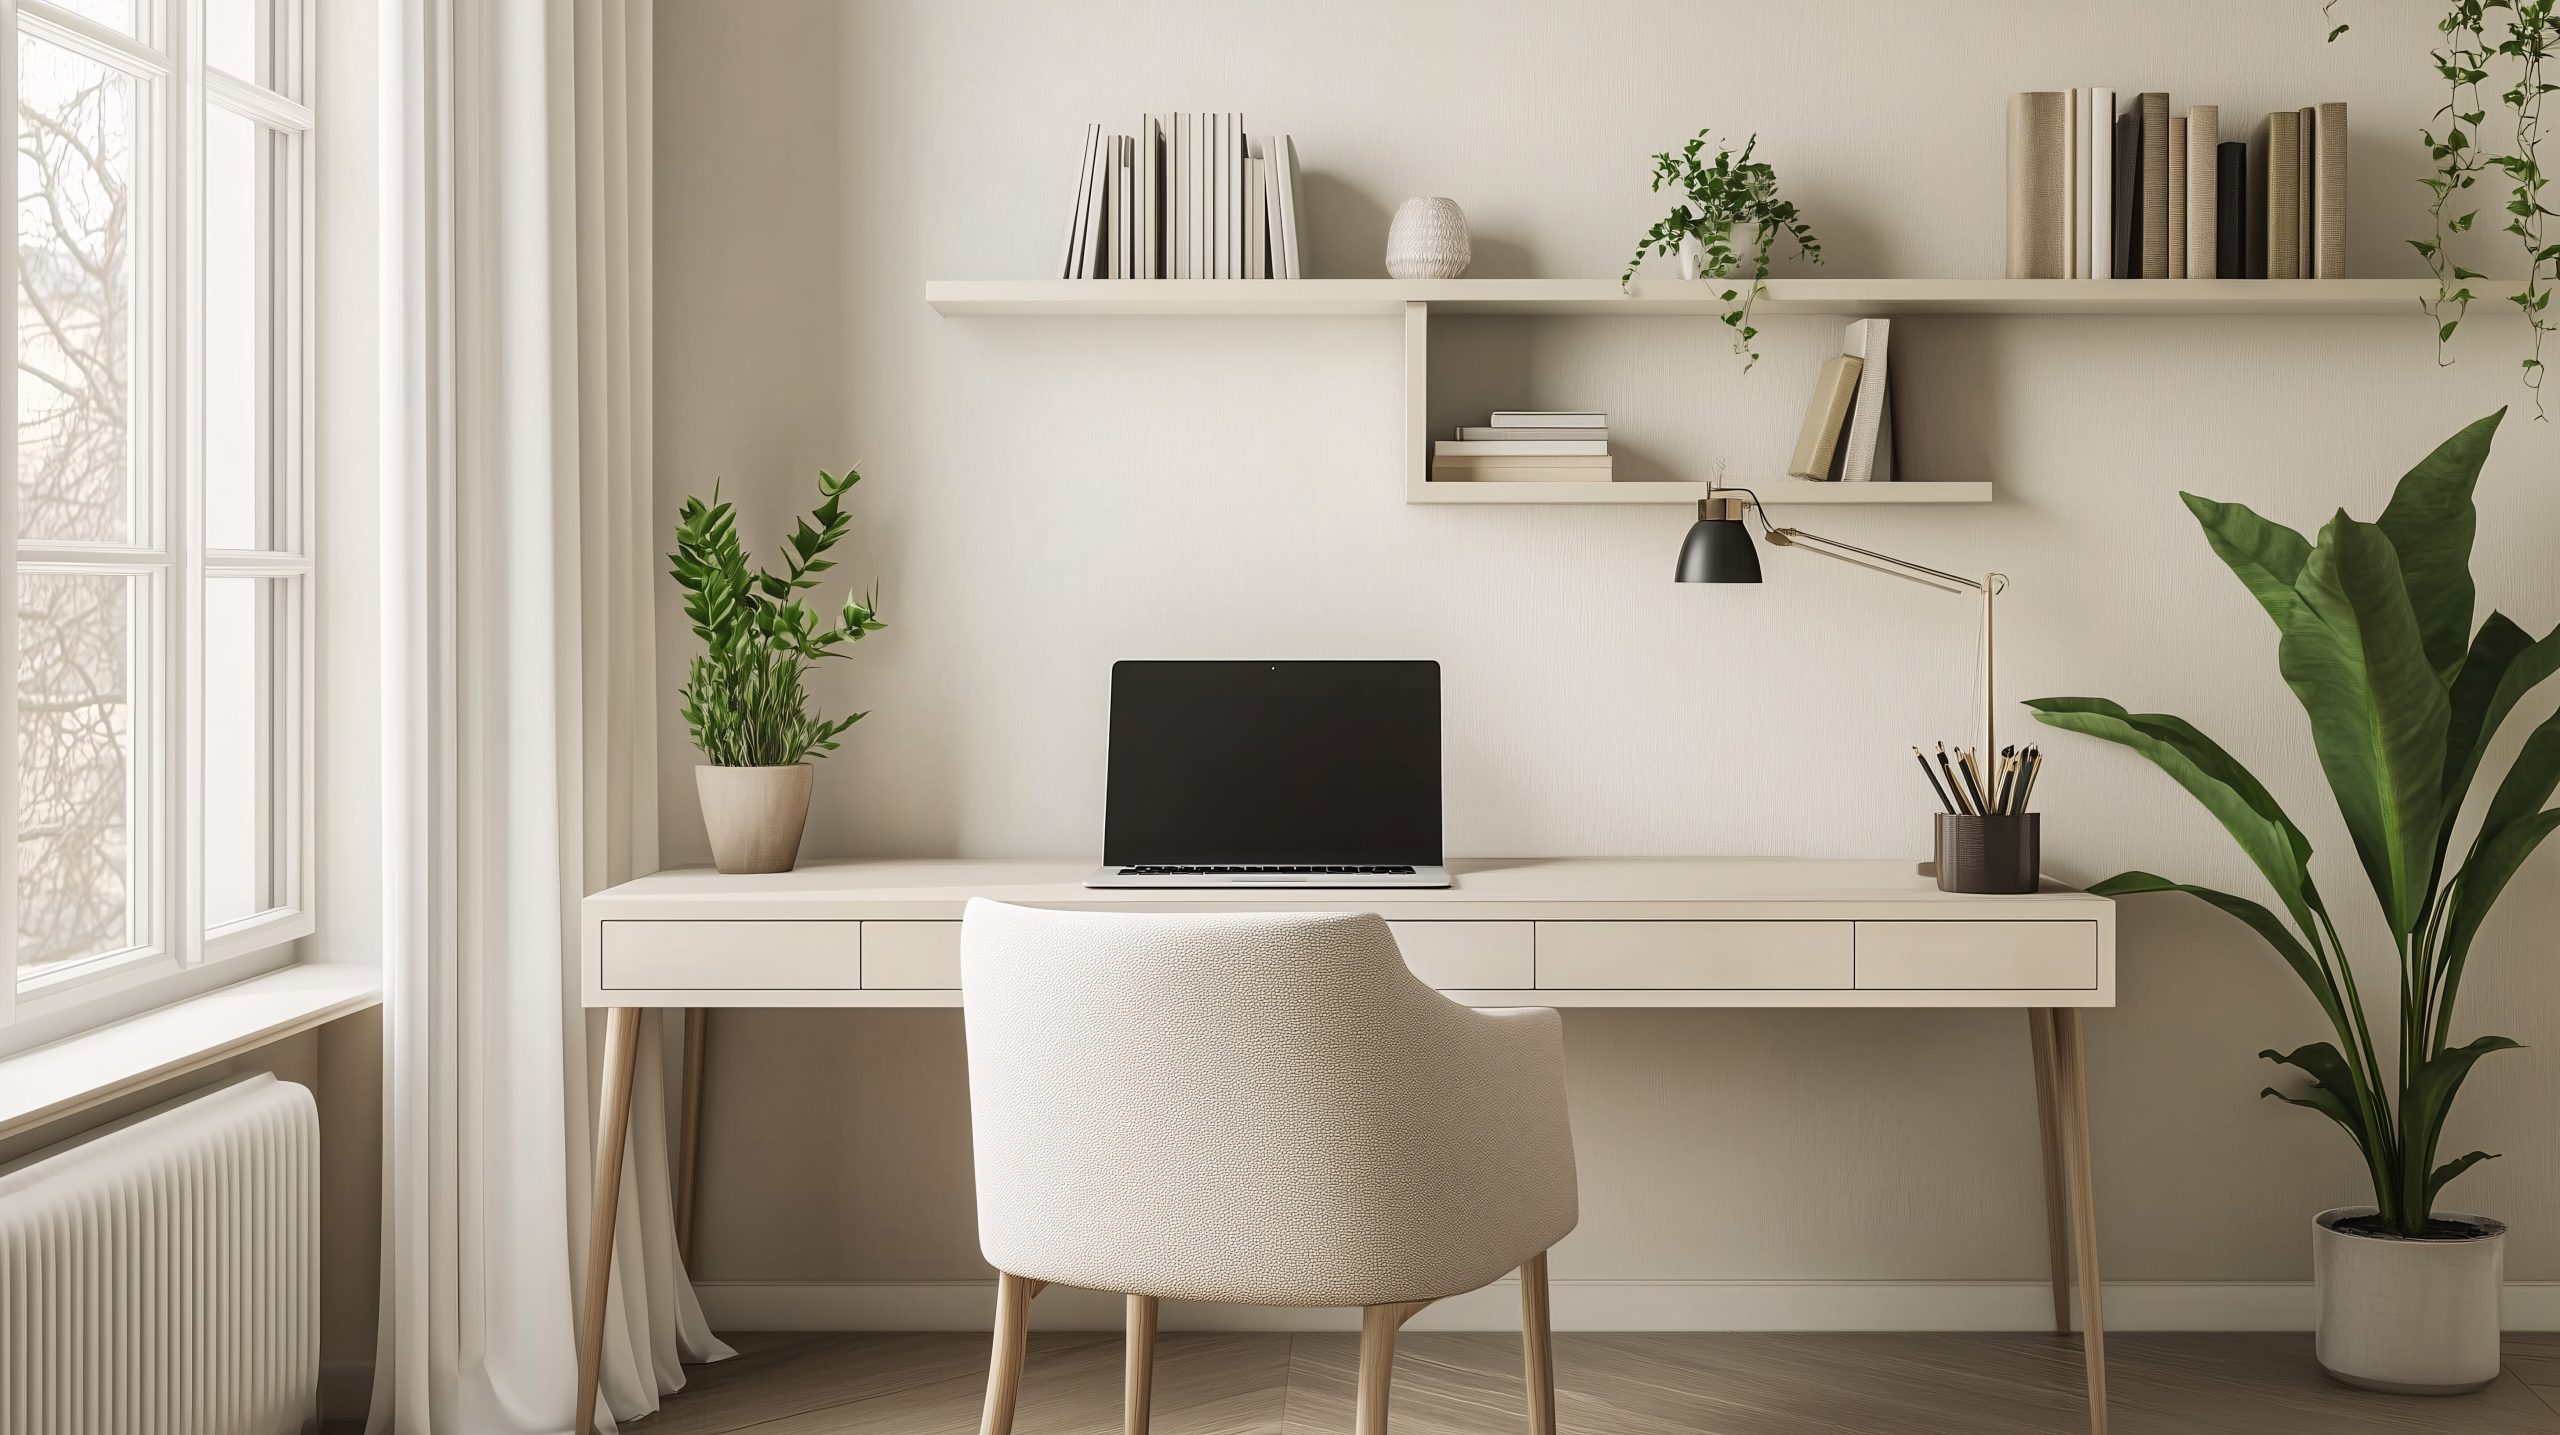
by Kesaa Interiors | DESIGN GUIDES, ROOMS, Storage & Organization
Want to know how the create the perfect productive home office? Read along for the best tips and tricks!
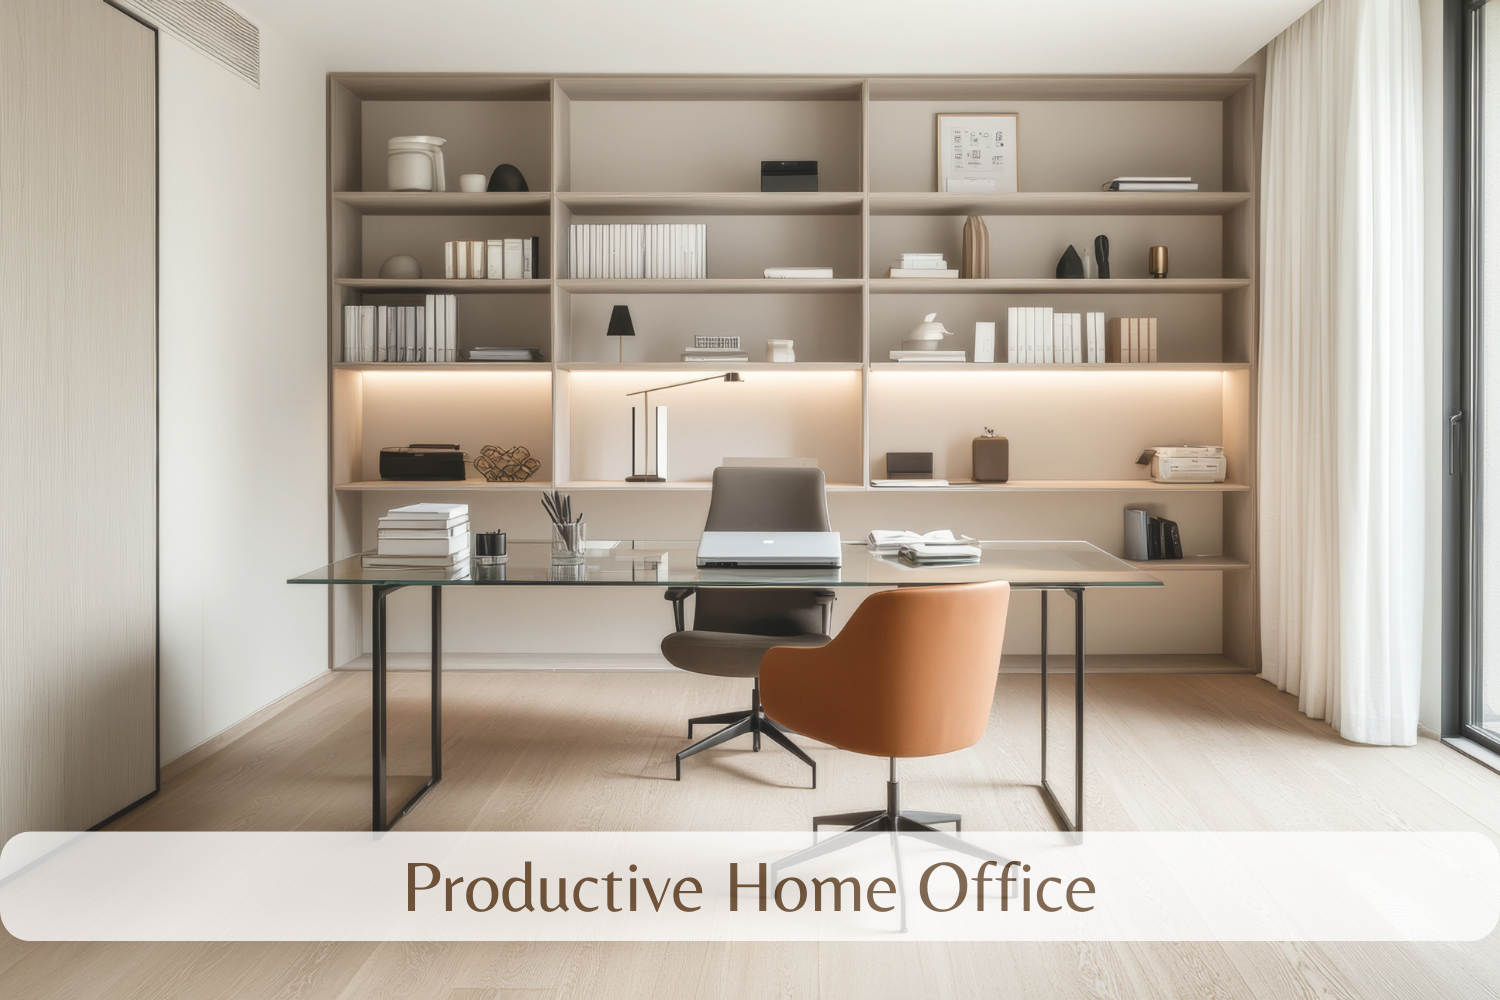
Working from home offers flexibility, but a poorly designed workspace can quickly kill productivity. Creating a productive home office requires more than just slapping a desk in a spare room.
This post delves into proven expert strategies to optimise your home office for focus, efficiency, and overall well-being. Whether you’re a seasoned remote worker or new to the home office scene, these insights will help you transform your space into a hub of productivity and comfort.
Best Productive Home Office Tips.
Assessing Your Needs for a Productive Home Office
Before diving into the world of office furniture and gadgets, it’s crucial to start by realistically assessing the available space in your home. A lack of spatial awareness can significantly hinder the development of your potential in a productive home office. Understanding the dimensions and limitations of your space will guide you in making informed decisions that enhance productivity rather than detract from it.
Begin by asking yourself some essential questions: How much space do you realistically need? Can you dedicate an entire room, or will you need to carve out a section of a shared space? Assessing the room’s shape and identifying any limitations will help you navigate challenges and create a more productive home office. For instance, if your space is narrow, consider vertical storage solutions to maximise efficiency. By thoughtfully evaluating your space, you can lay the foundation for a home office that supports your work habits and boosts your productivity.
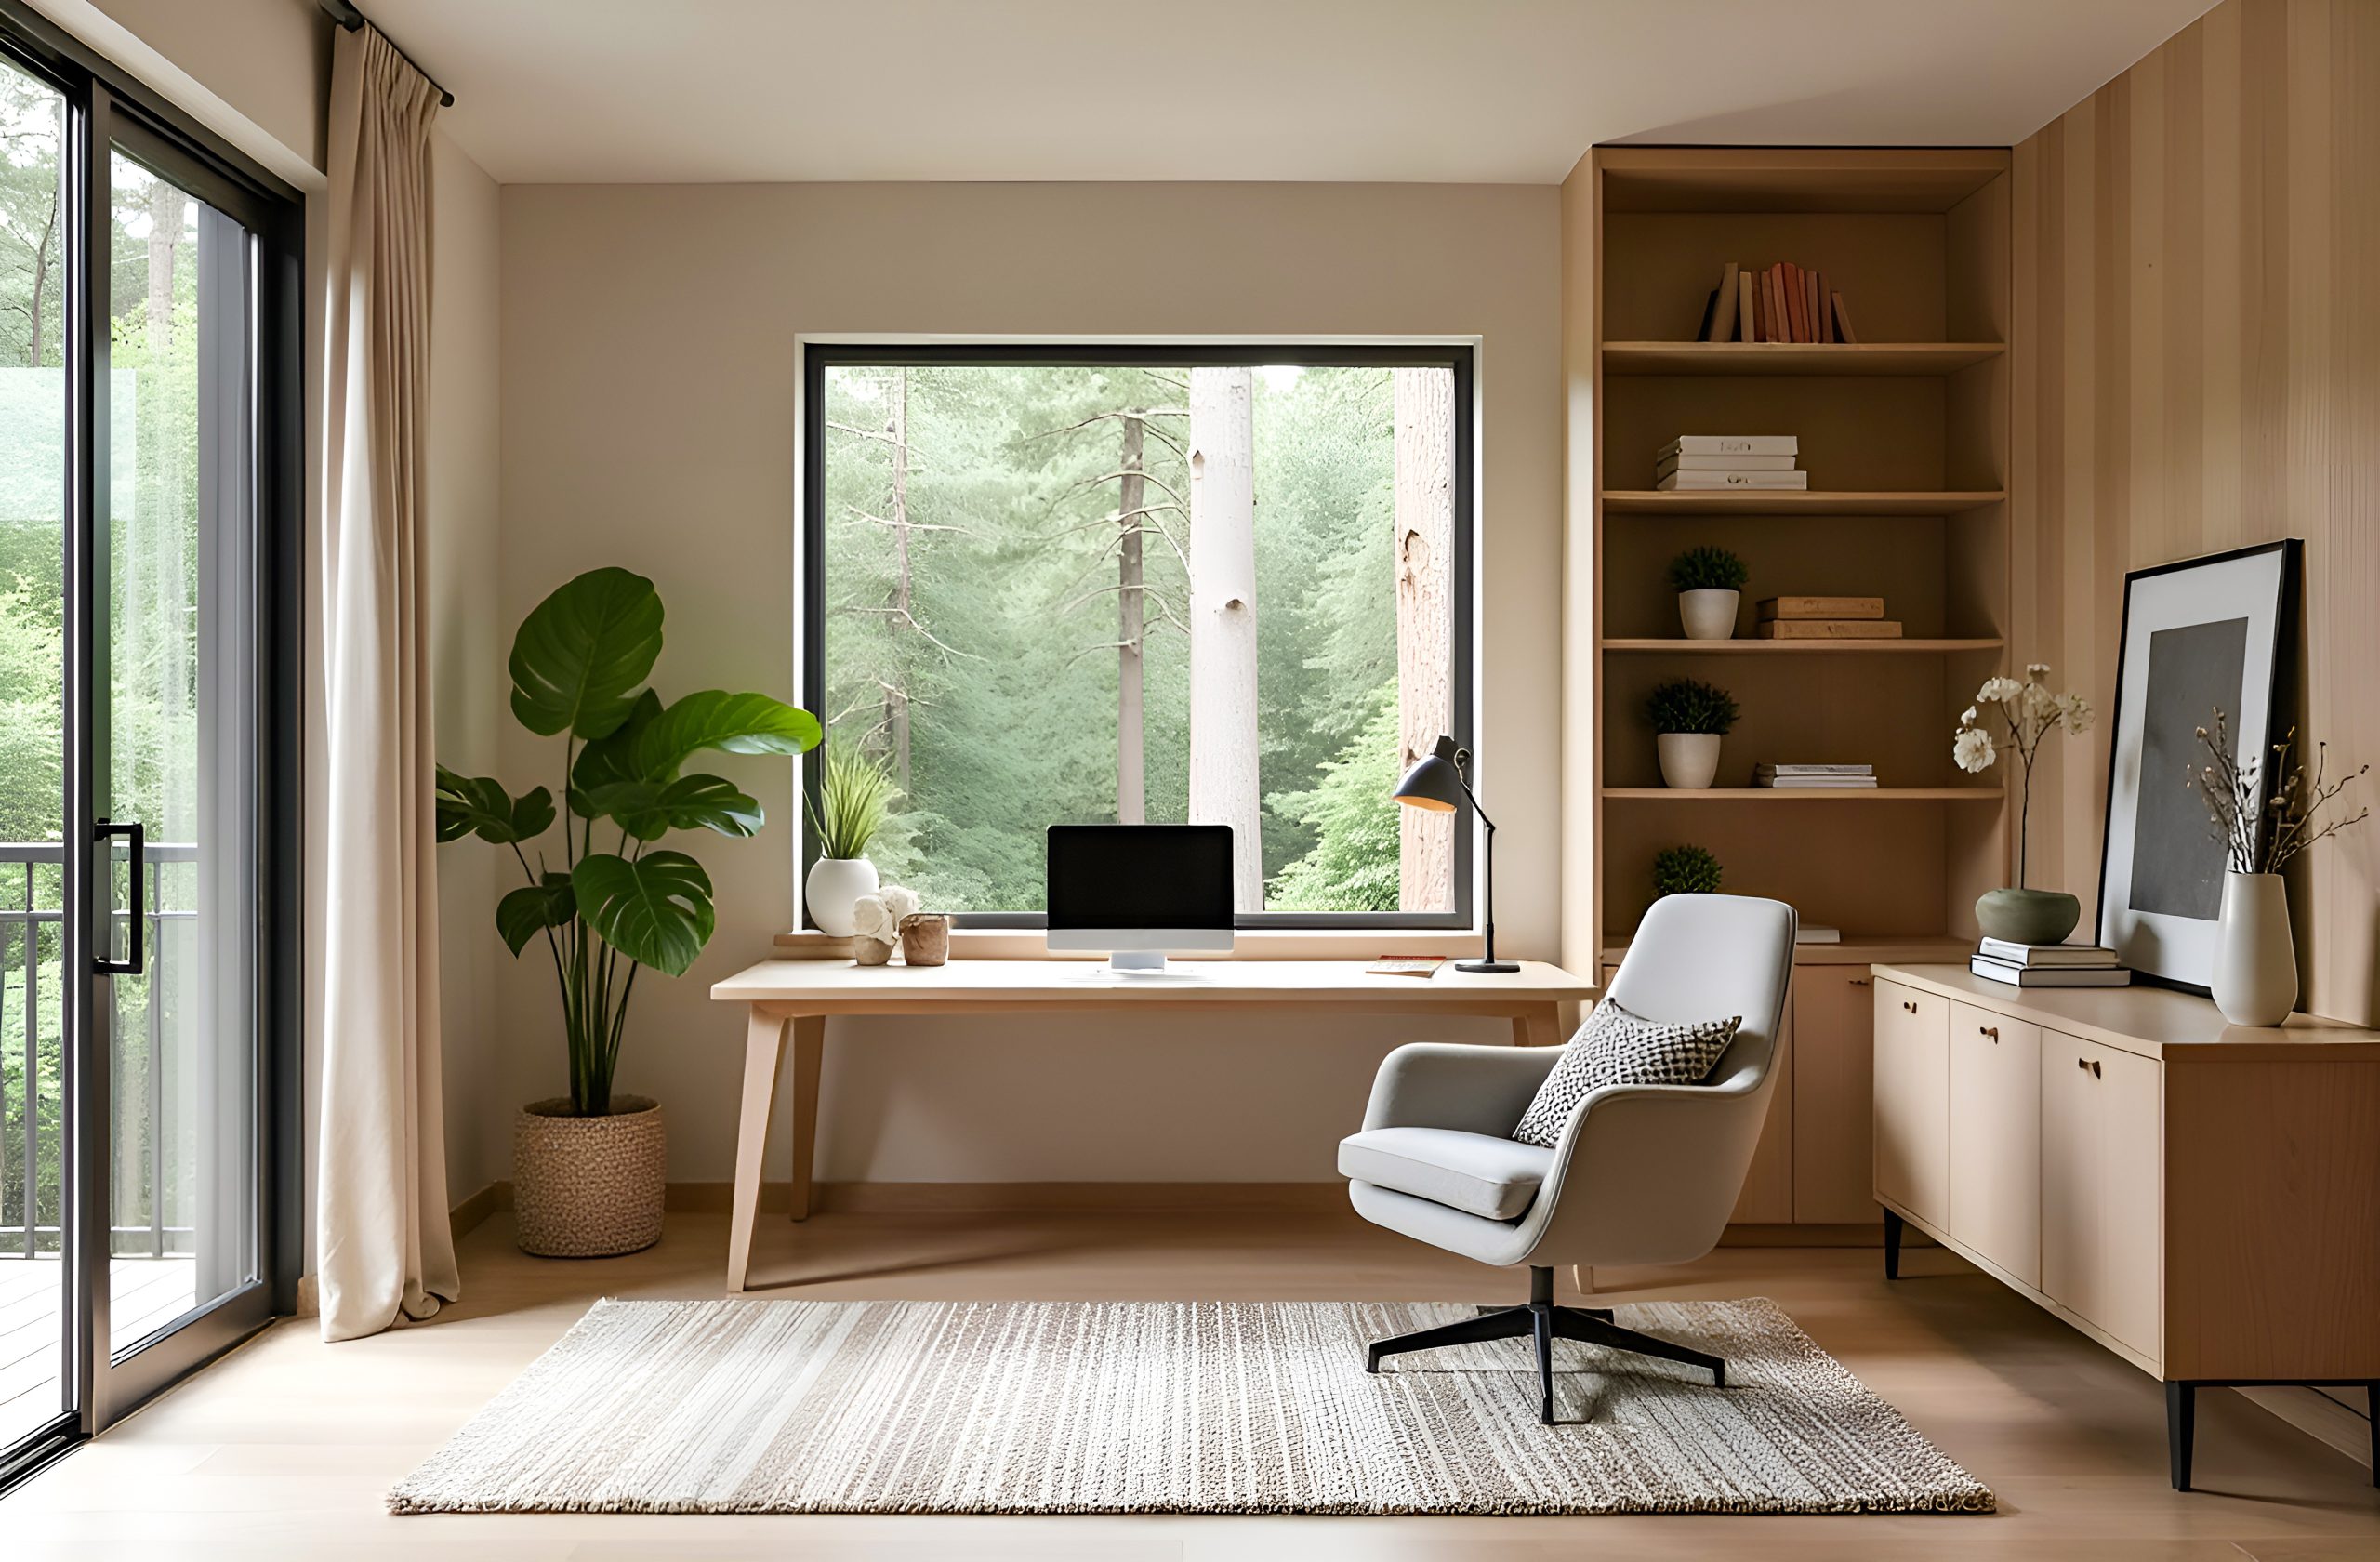
Harnessing Natural Light
Natural light is a powerful ally in creating a productive home office. Research has shown that exposure to natural light can significantly enhance mood, focus, and overall well-being. A workspace bathed in natural light not only feels more inviting but also helps reduce eye strain and fatigue, making it easier to maintain concentration throughout the day. Conversely, a lack of natural light can diminish the potential of your productive home office, leading to a less energised and more lethargic work environment.
To maximise natural light access, consider the placement of your desk and other key elements in your office. Position your workspace near windows to take full advantage of daylight. Use light, airy window treatments that allow sunlight to filter through while minimising glare. Additionally, choose paint colours and furnishings that reflect light, such as whites and light pastels, to brighten the space. If natural light is limited, consider incorporating smart additions like mirrors to reflect light or using full-spectrum white lights to mimic daylight. These strategies can help you achieve optimal lighting conditions, enhancing the productivity and ambience of your home office.
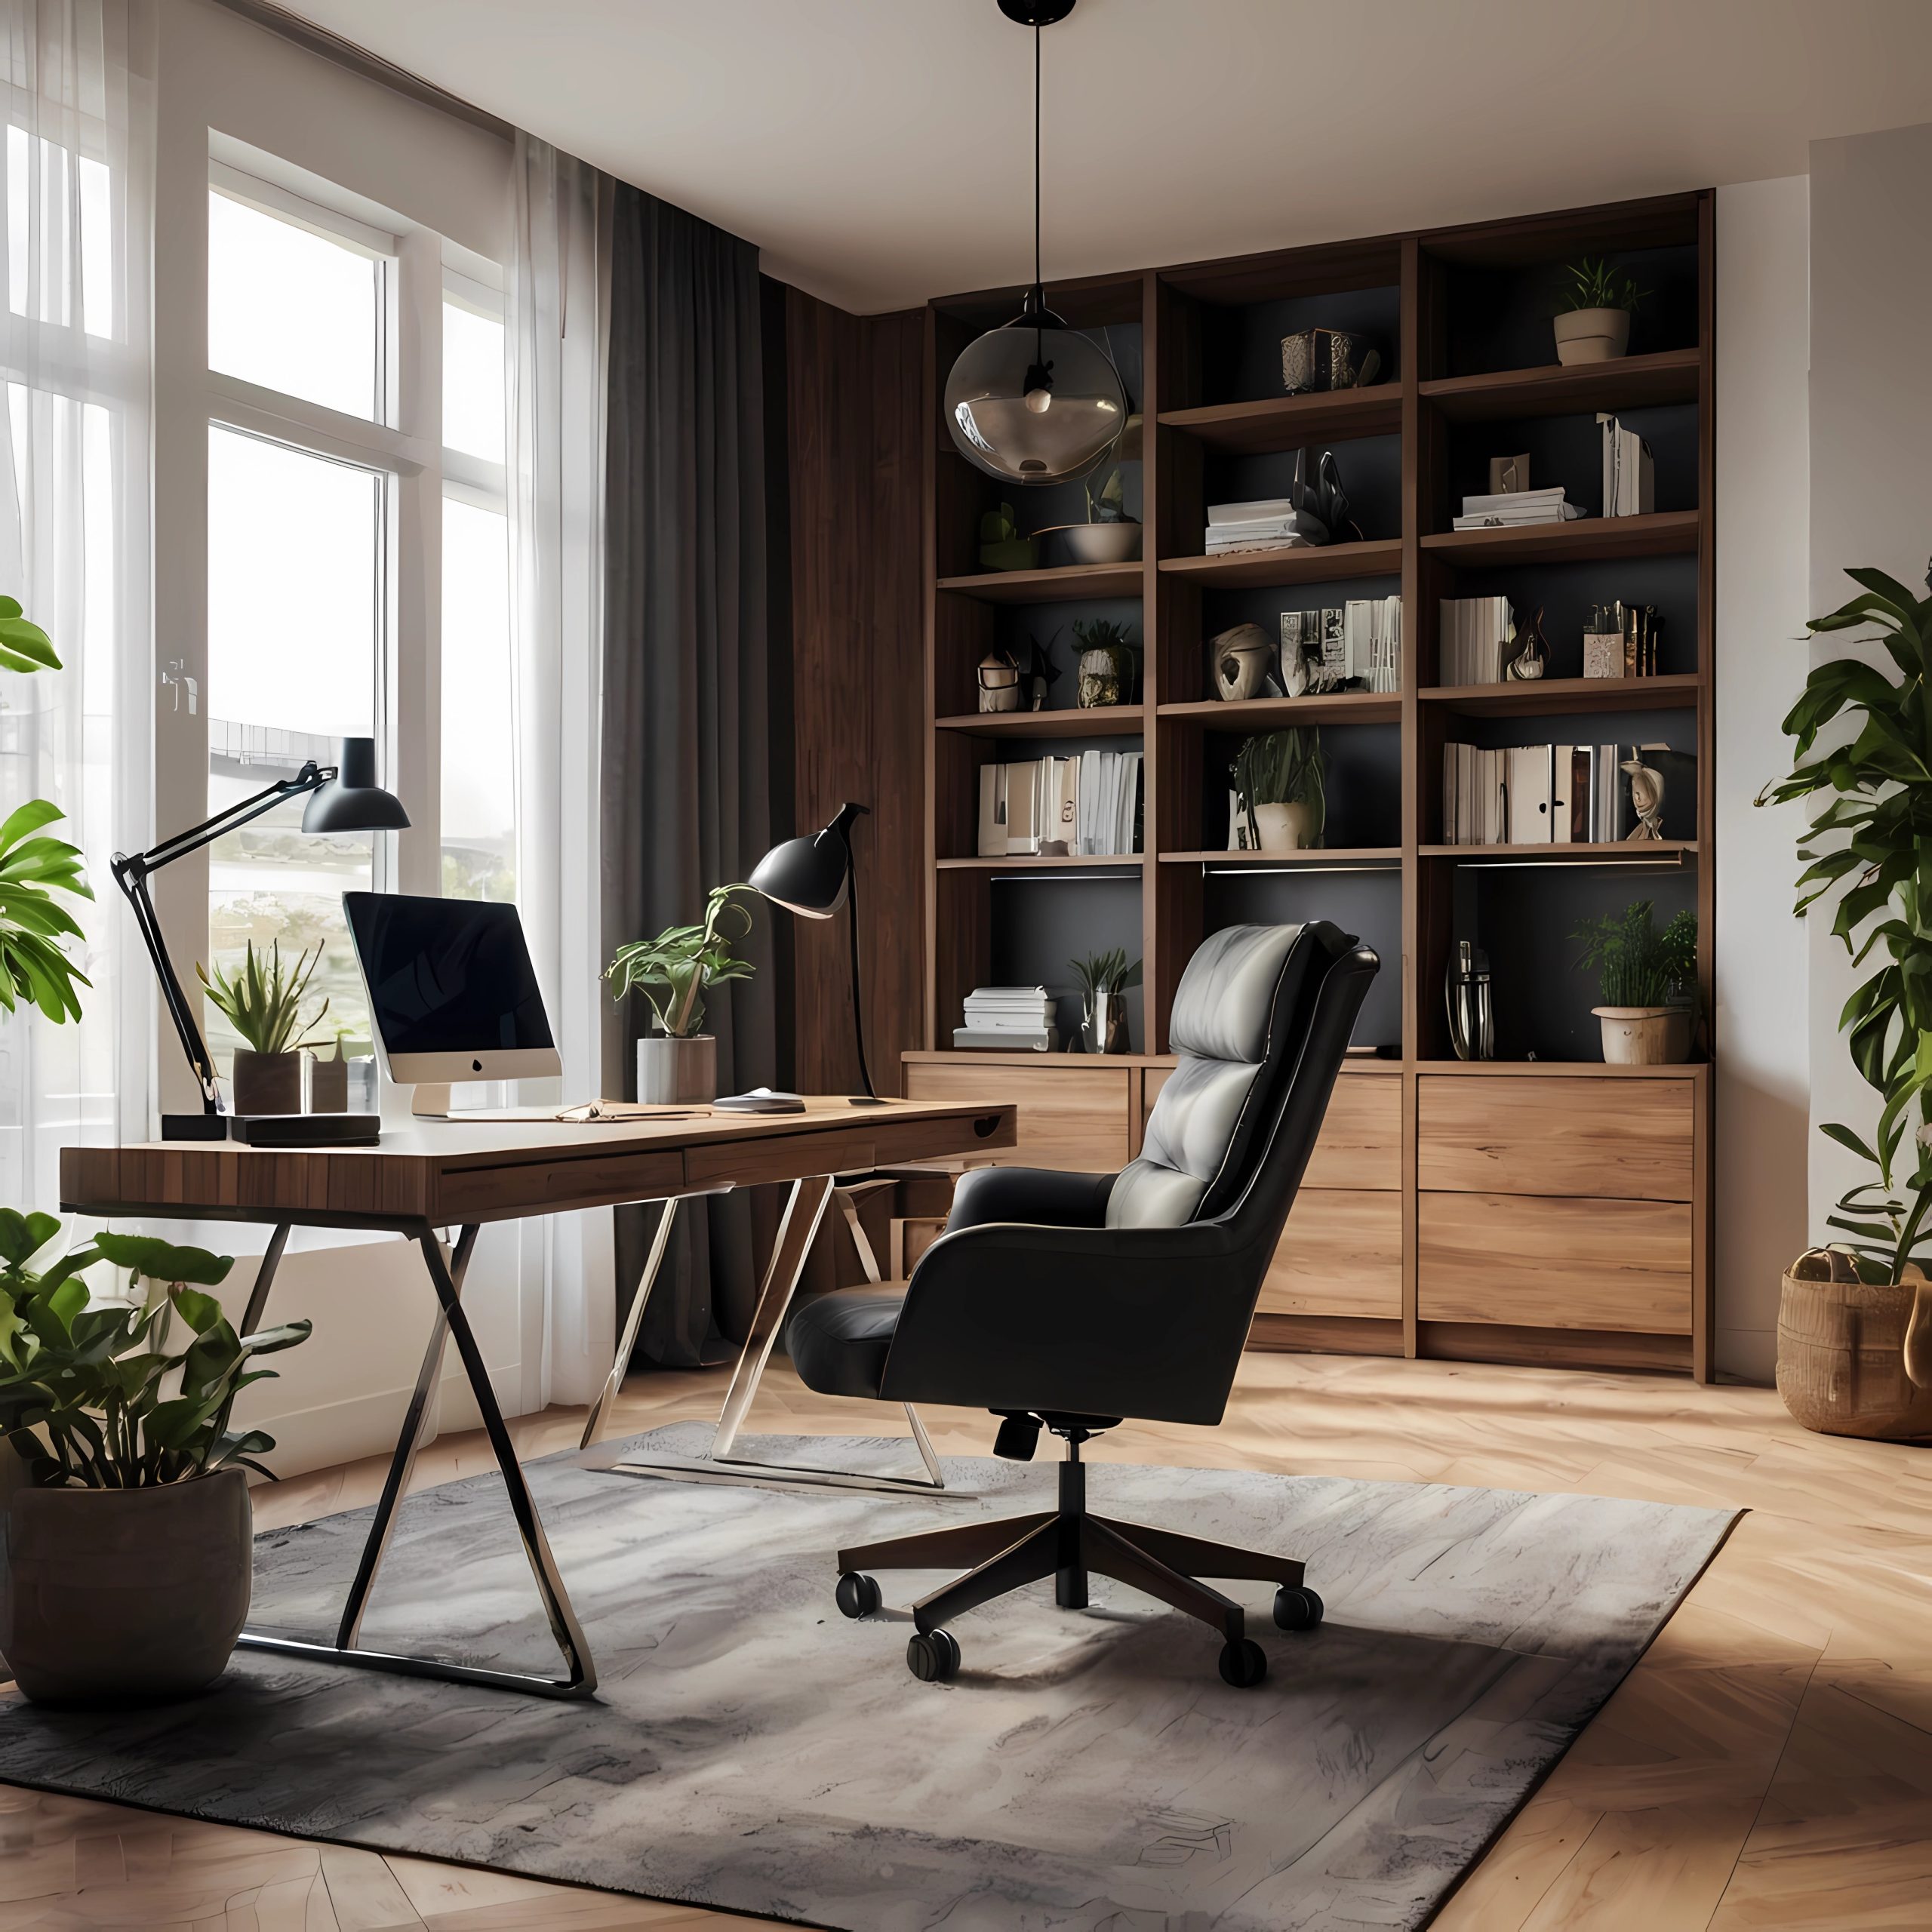
Choosing the Right Chair
A good chair is more than just a piece of furniture; it’s a critical component of a productive home office. The right chair supports your body, enhances comfort, and helps prevent long-term health problems such as back pain and poor posture. Ergonomic issues can significantly hinder the development of a positive and efficient workspace, making it essential to invest in a chair that meets your needs.
When selecting an ergonomic chair, look for key features that promote comfort and support. Adjustable lumbar support is crucial for maintaining the natural curve of your spine, while armrests can help reduce strain on your shoulders and neck. The ability to adjust seat height ensures that your feet rest flat on the floor, promoting better circulation and posture. Consider reputable brands known for their ergonomic designs, as these often offer high-quality options that can optimise your productive home office. By prioritising ergonomics, you create a workspace that not only supports your physical health but also enhances your ability to focus and perform at your best.
Proper Monitor Placement
Proper monitor placement is essential for preventing eye strain, neck pain, and poor posture, all of which can detract from the productivity of your home office. When your monitor is positioned correctly, it helps maintain a comfortable and healthy posture, allowing you to work more efficiently and with less discomfort. Poor posture and improper monitor placement can create a negative atmosphere in your workspace, undermining the potential of your productive home office.
To ensure optimal monitor placement, follow these recommendations: Position the top of your monitor at or slightly below eye level, so you can view the screen without tilting your head. The monitor should be about arm’s length away from your eyes, reducing the need to squint or lean forward. Additionally, angle the monitor to minimise glare from windows or overhead lighting. Consider using monitor stands or adjustable arms to achieve the ideal height and angle. By taking these steps, you create an environment that supports your vision and comfort, enhancing your productivity and focus.

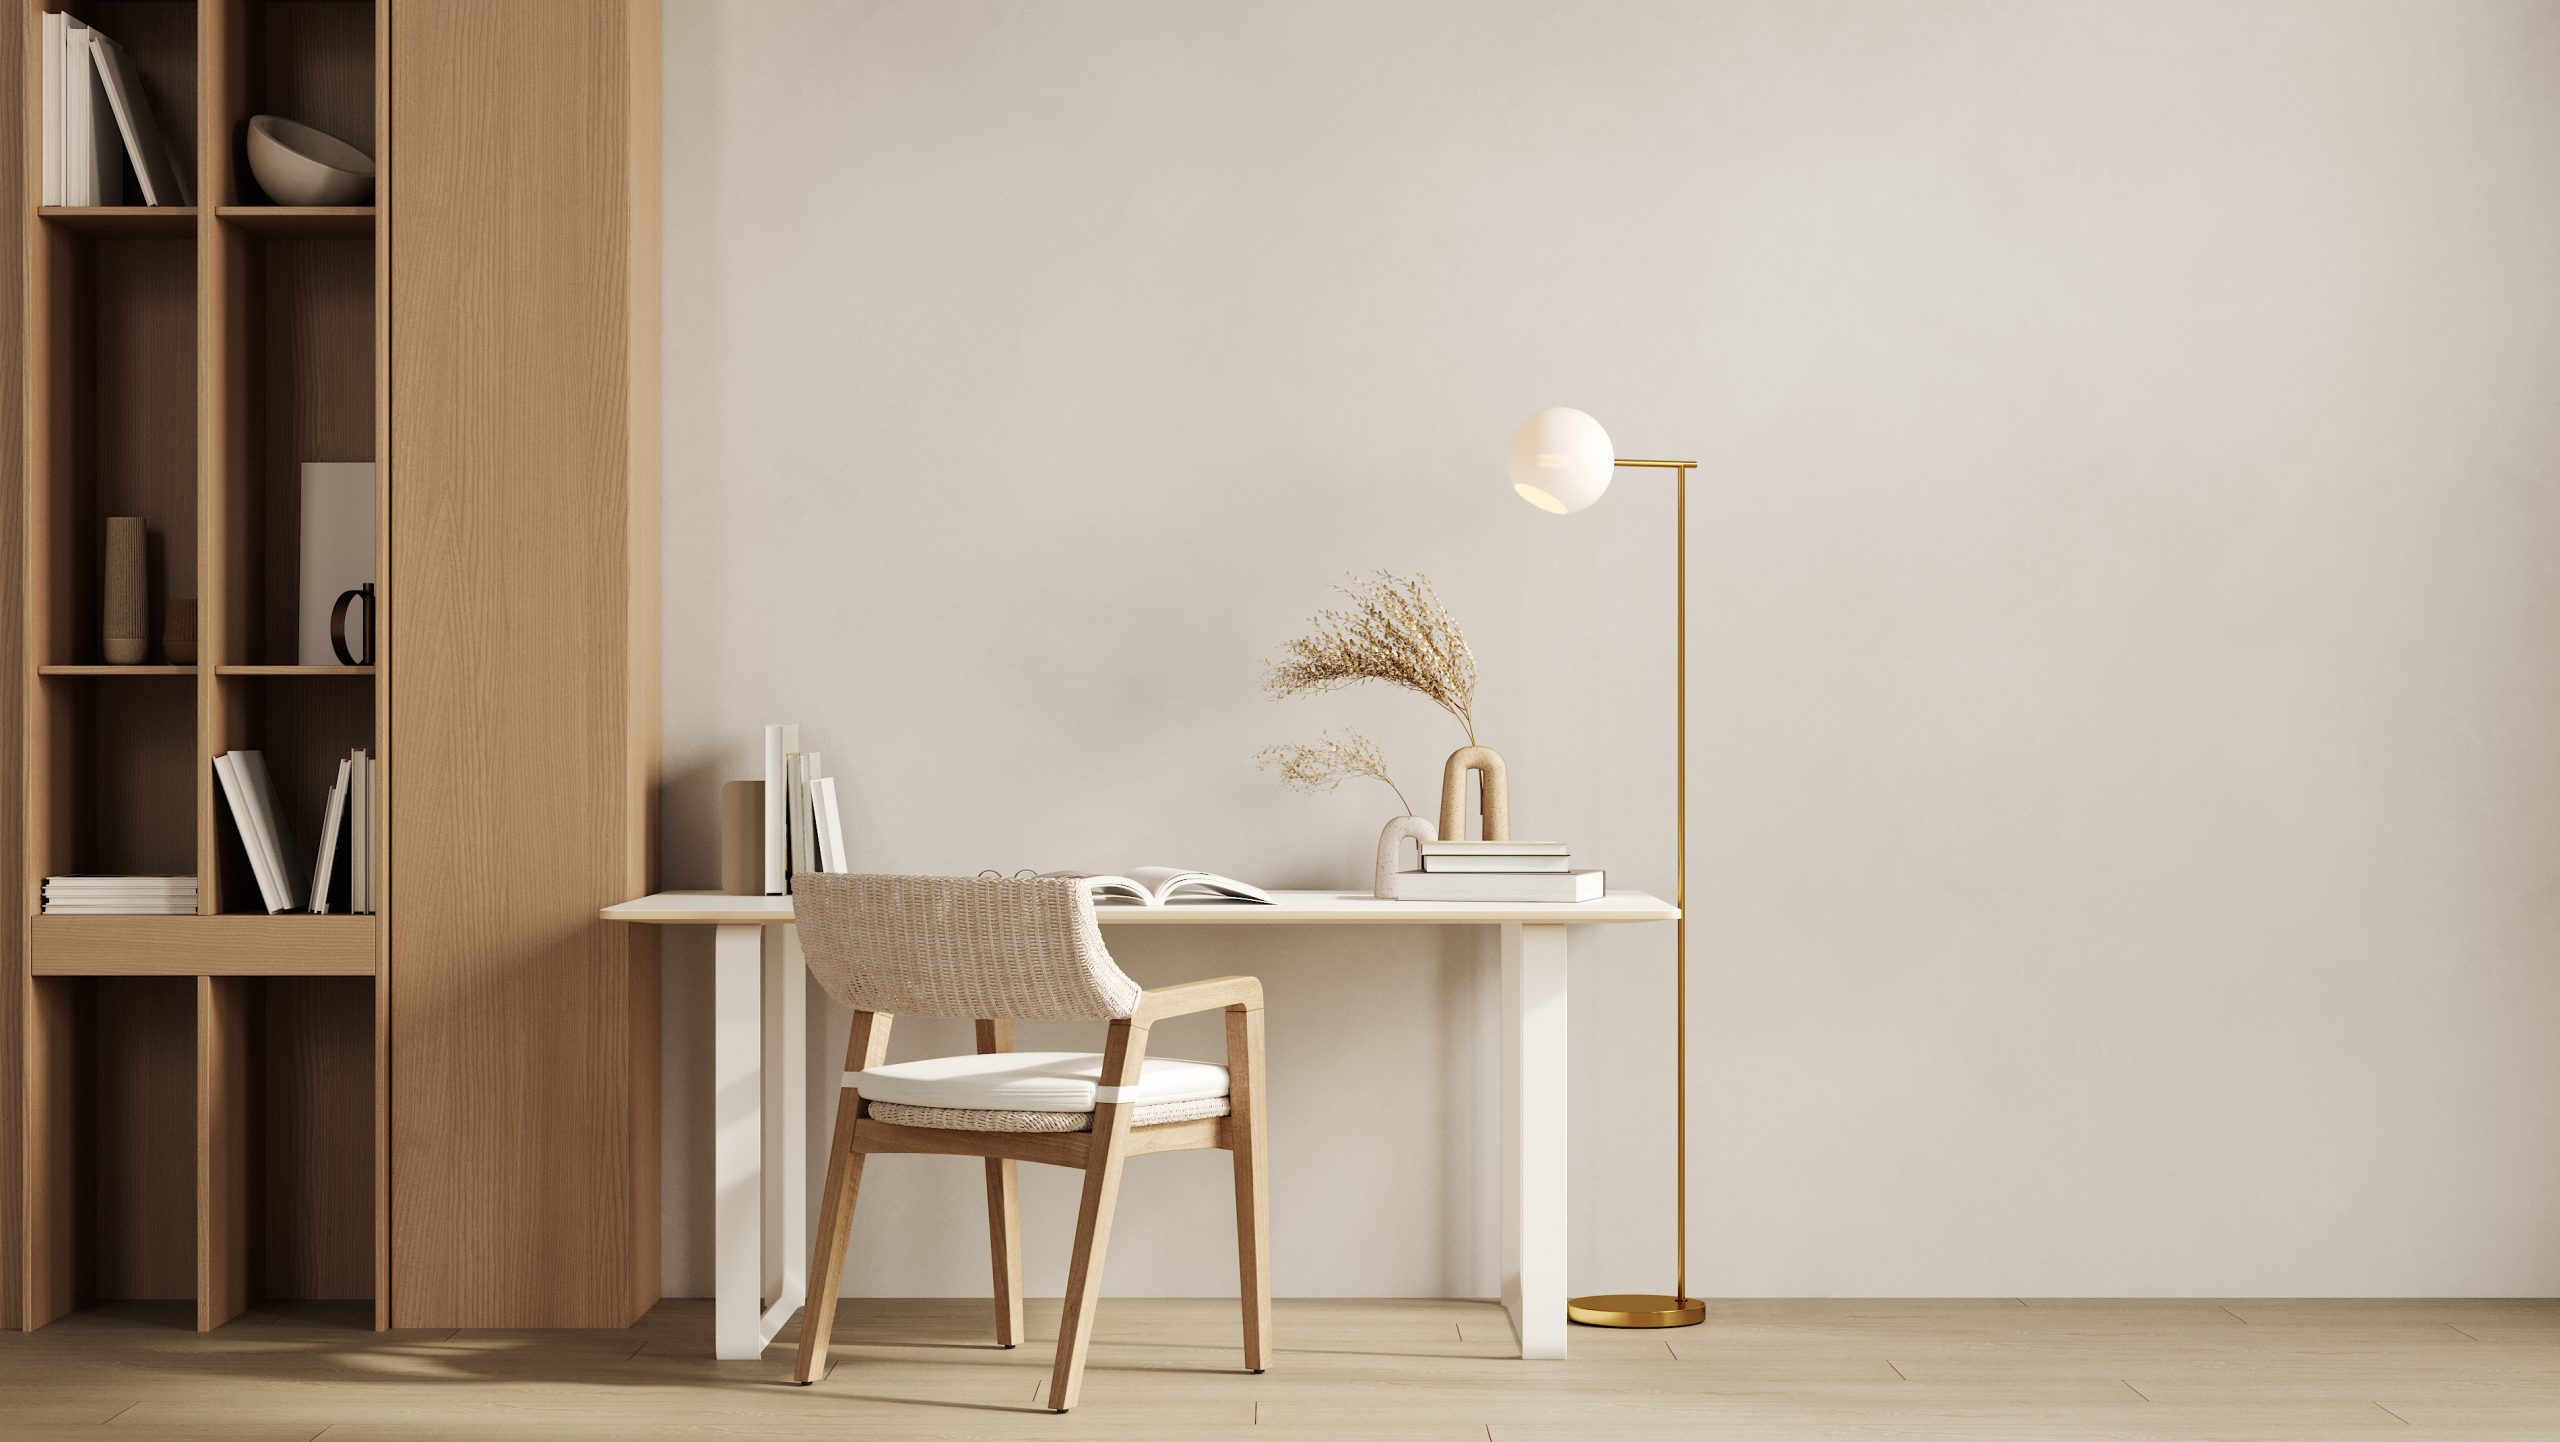
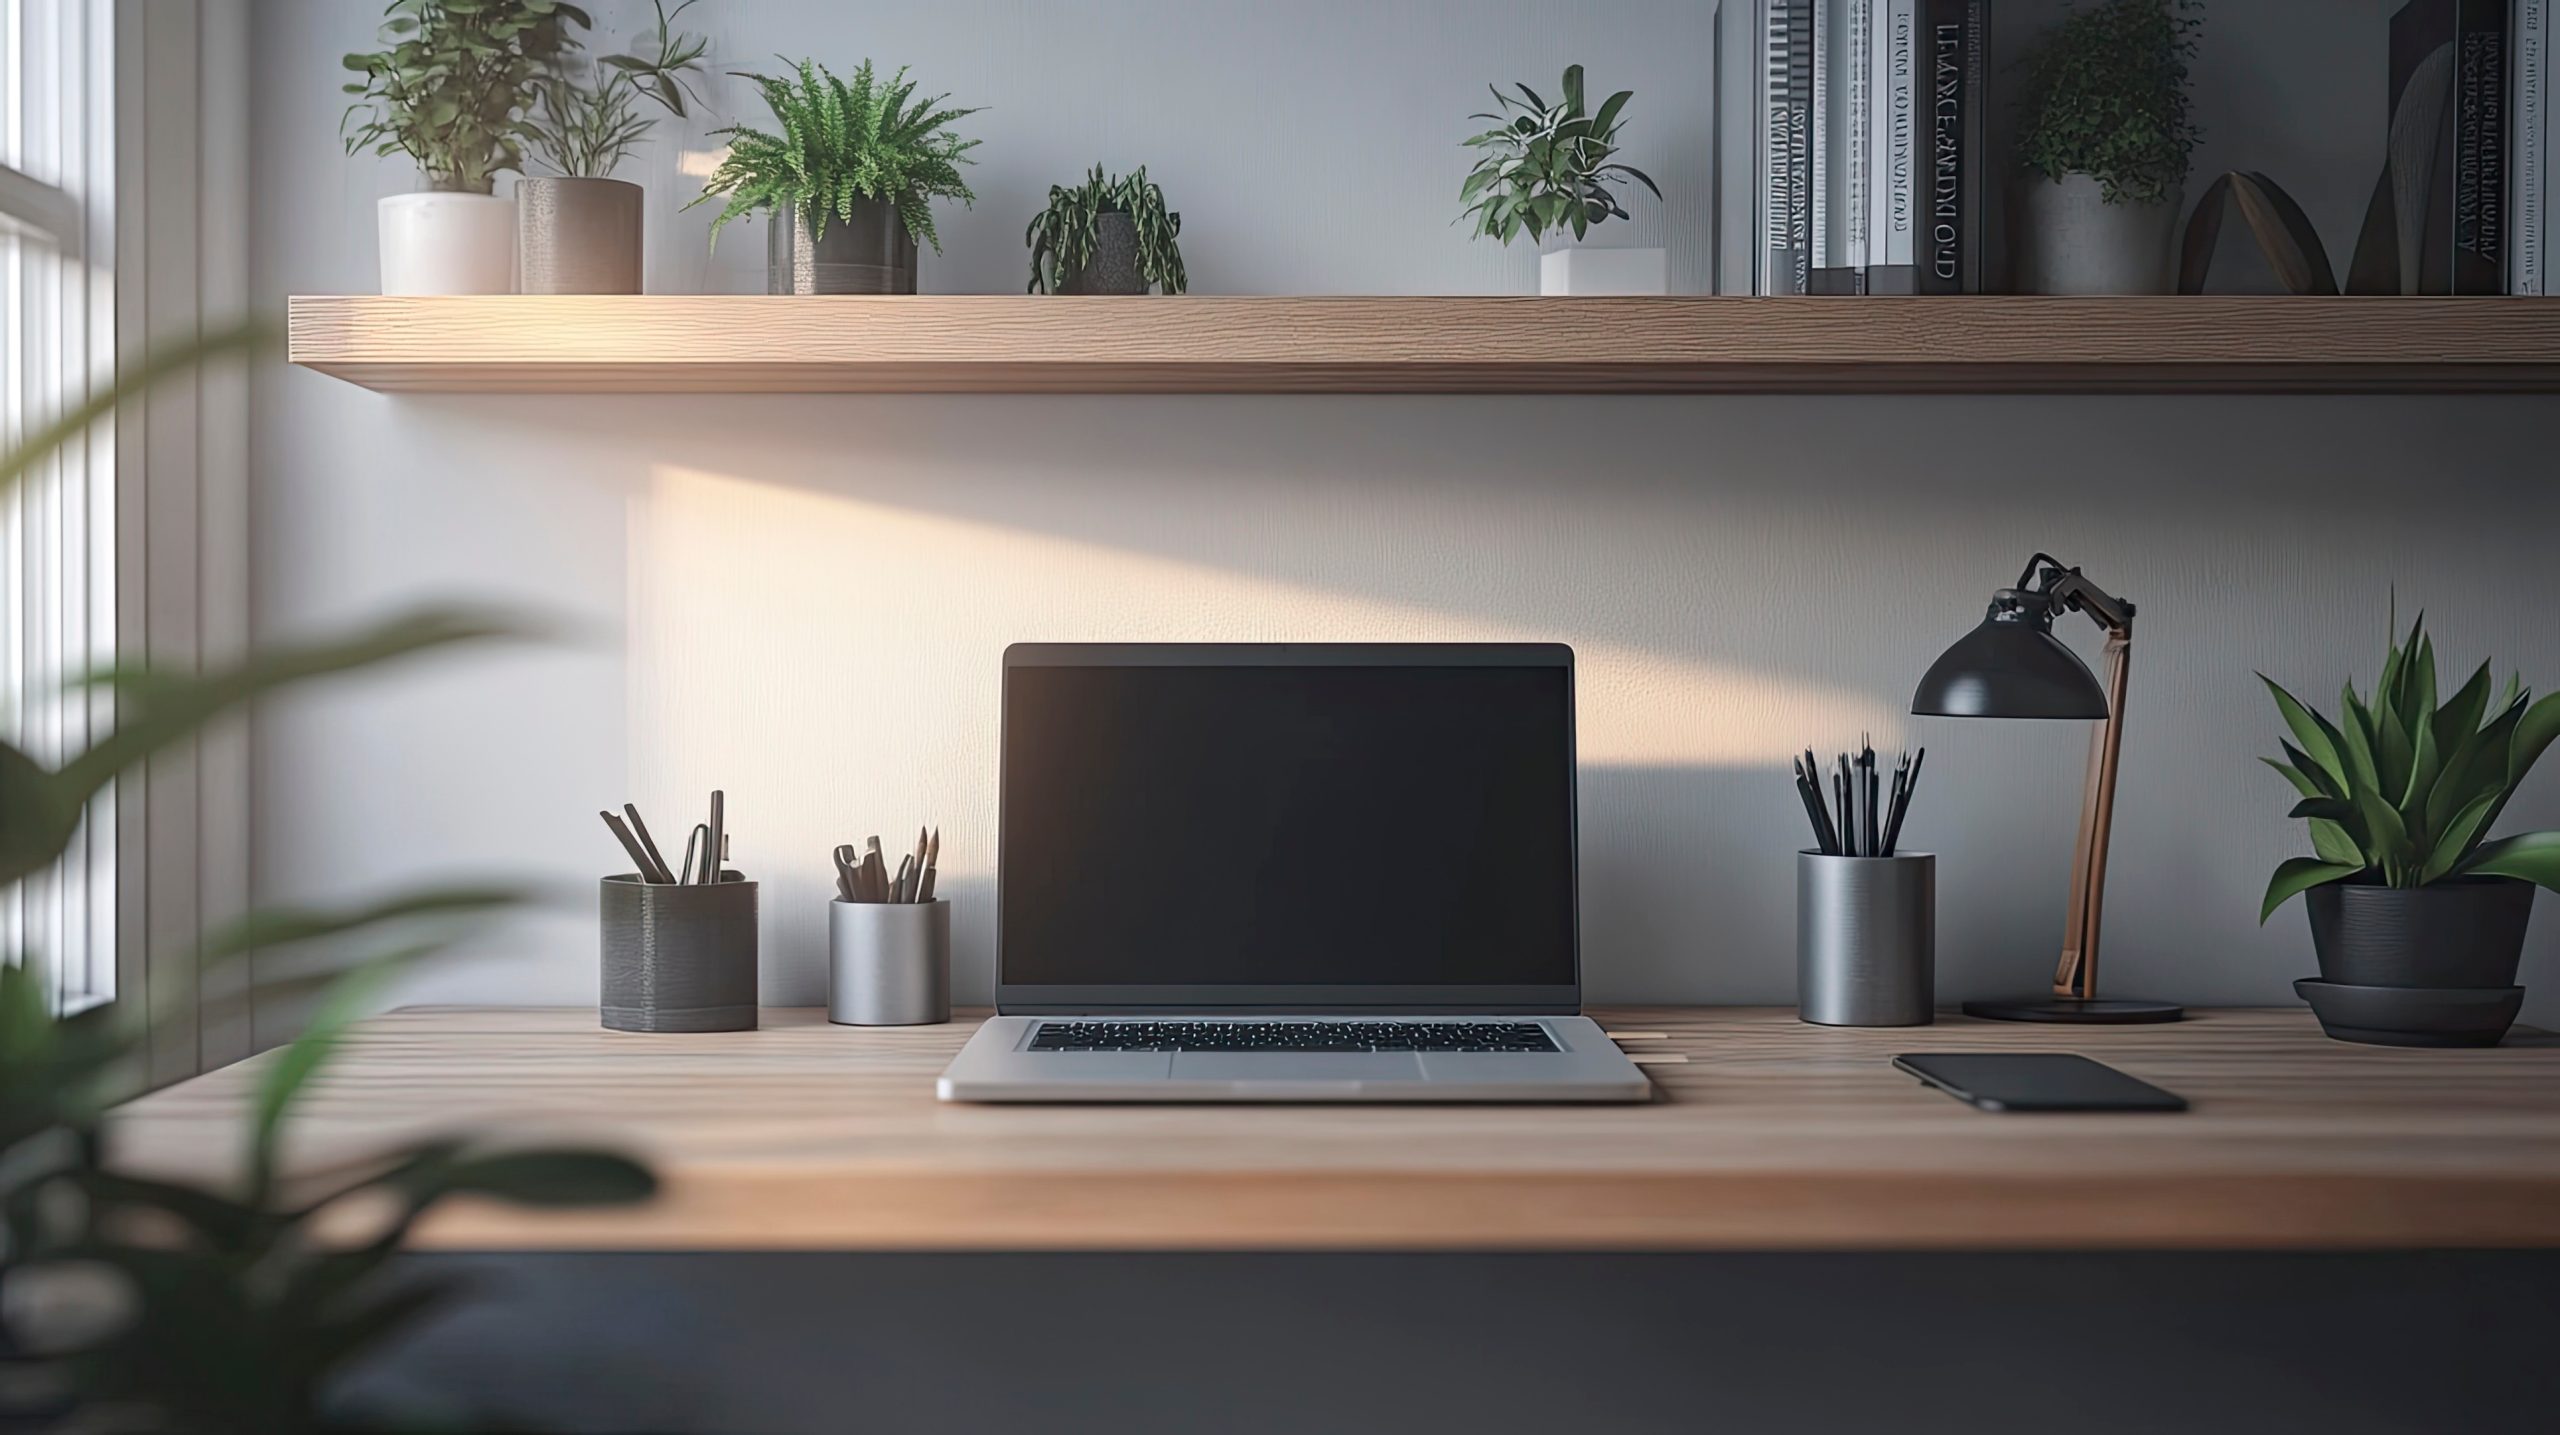
Reducing Visual Clutter
Visual clutter can have a profound impact on your ability to focus and maintain mental clarity. The adage “a cluttered desk equals a cluttered mind” holds true, as a disorganised workspace can lead to increased stress and decreased productivity. In a productive home office, it’s essential to keep your environment tidy and organised to foster a sense of calm and concentration.
To eliminate visual clutter, start by decluttering your workspace. Remove unnecessary items and keep only the essentials within reach. Implement effective file management systems to organise documents and reduce paper piles. Cable organisation is also crucial; use cable ties or sleeves to keep cords neatly arranged and out of sight. Additionally, consider digital file management to keep your computer desktop as organised as your physical one. By maintaining a clean and orderly workspace, you create a positive functional, productive home office that supports your mental well-being and work efficiency.
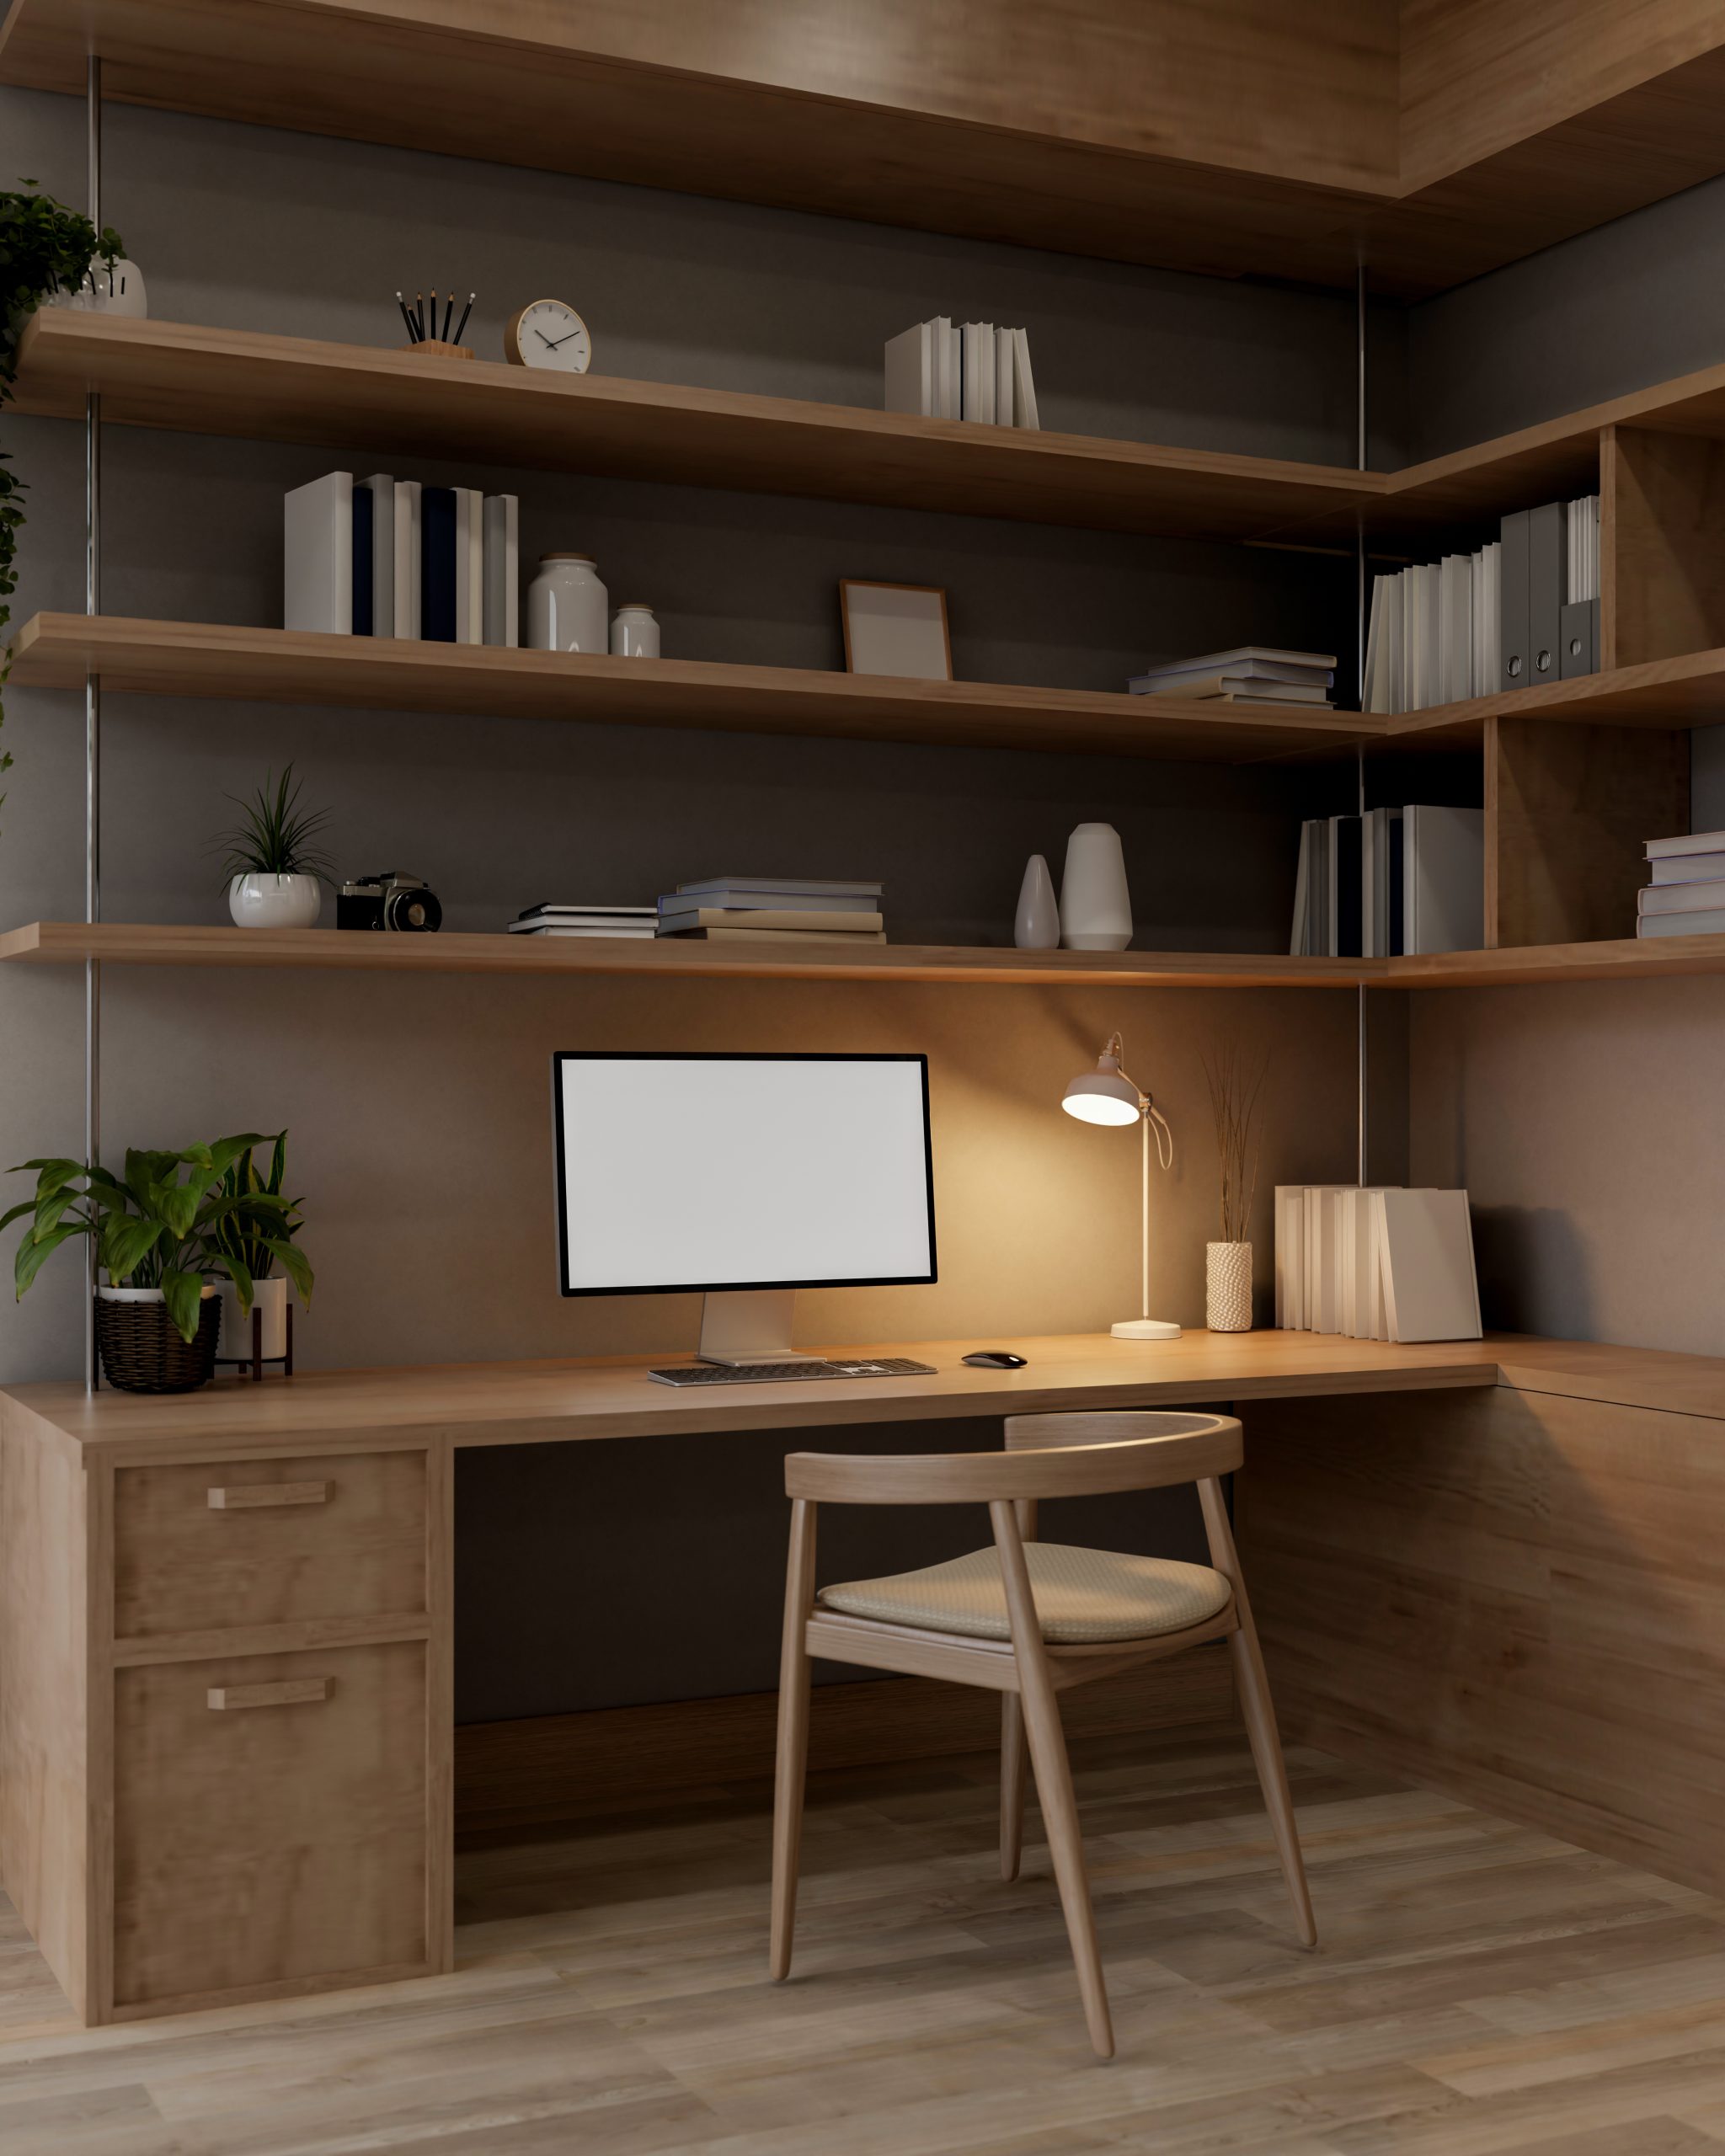
Maximising Vertical Storage
In a small office space, utilising vertical storage can be a game-changer, allowing you to make the most of your available area while maintaining a productive home office. By thinking vertically, you can free up valuable floor space and keep your workspace organised and efficient.
Consider installing wall shelves to store books, supplies, and decorative items without encroaching on your desk area. Hanging organisers can be used for smaller items like stationery, keeping them within easy reach but off your work surface. Tall storage cabinets are another excellent option, providing ample storage without taking up much floor space. By creatively using vertical storage solutions, you not only enhance the functionality of your office but also open up opportunities for innovative design. This approach not only boosts your productivity but also inspires creativity, making your home office a place where you can thrive.
Plant Life
Incorporating plants into your home office can significantly enhance your work environment, contributing to both aesthetic appeal and improved mental well-being. Studies have shown that having plants in your workspace can reduce stress, increase productivity, and improve air quality, making them a valuable addition to any productive home office.
Plants bring a touch of nature indoors, creating a calming atmosphere that can boost your mood and focus. For those new to plant care, start with low-maintenance options like succulents or snake plants, which require minimal attention but still offer the benefits of greenery. For more experienced green thumbs, consider adding a variety of plants to create a lush, vibrant space. The presence of plants not only adds life to your office but also encourages a sense of growth and renewal, aligning with the goals of a productive home office. By integrating plant life into your workspace, you cultivate an environment that supports both your personal and professional development.
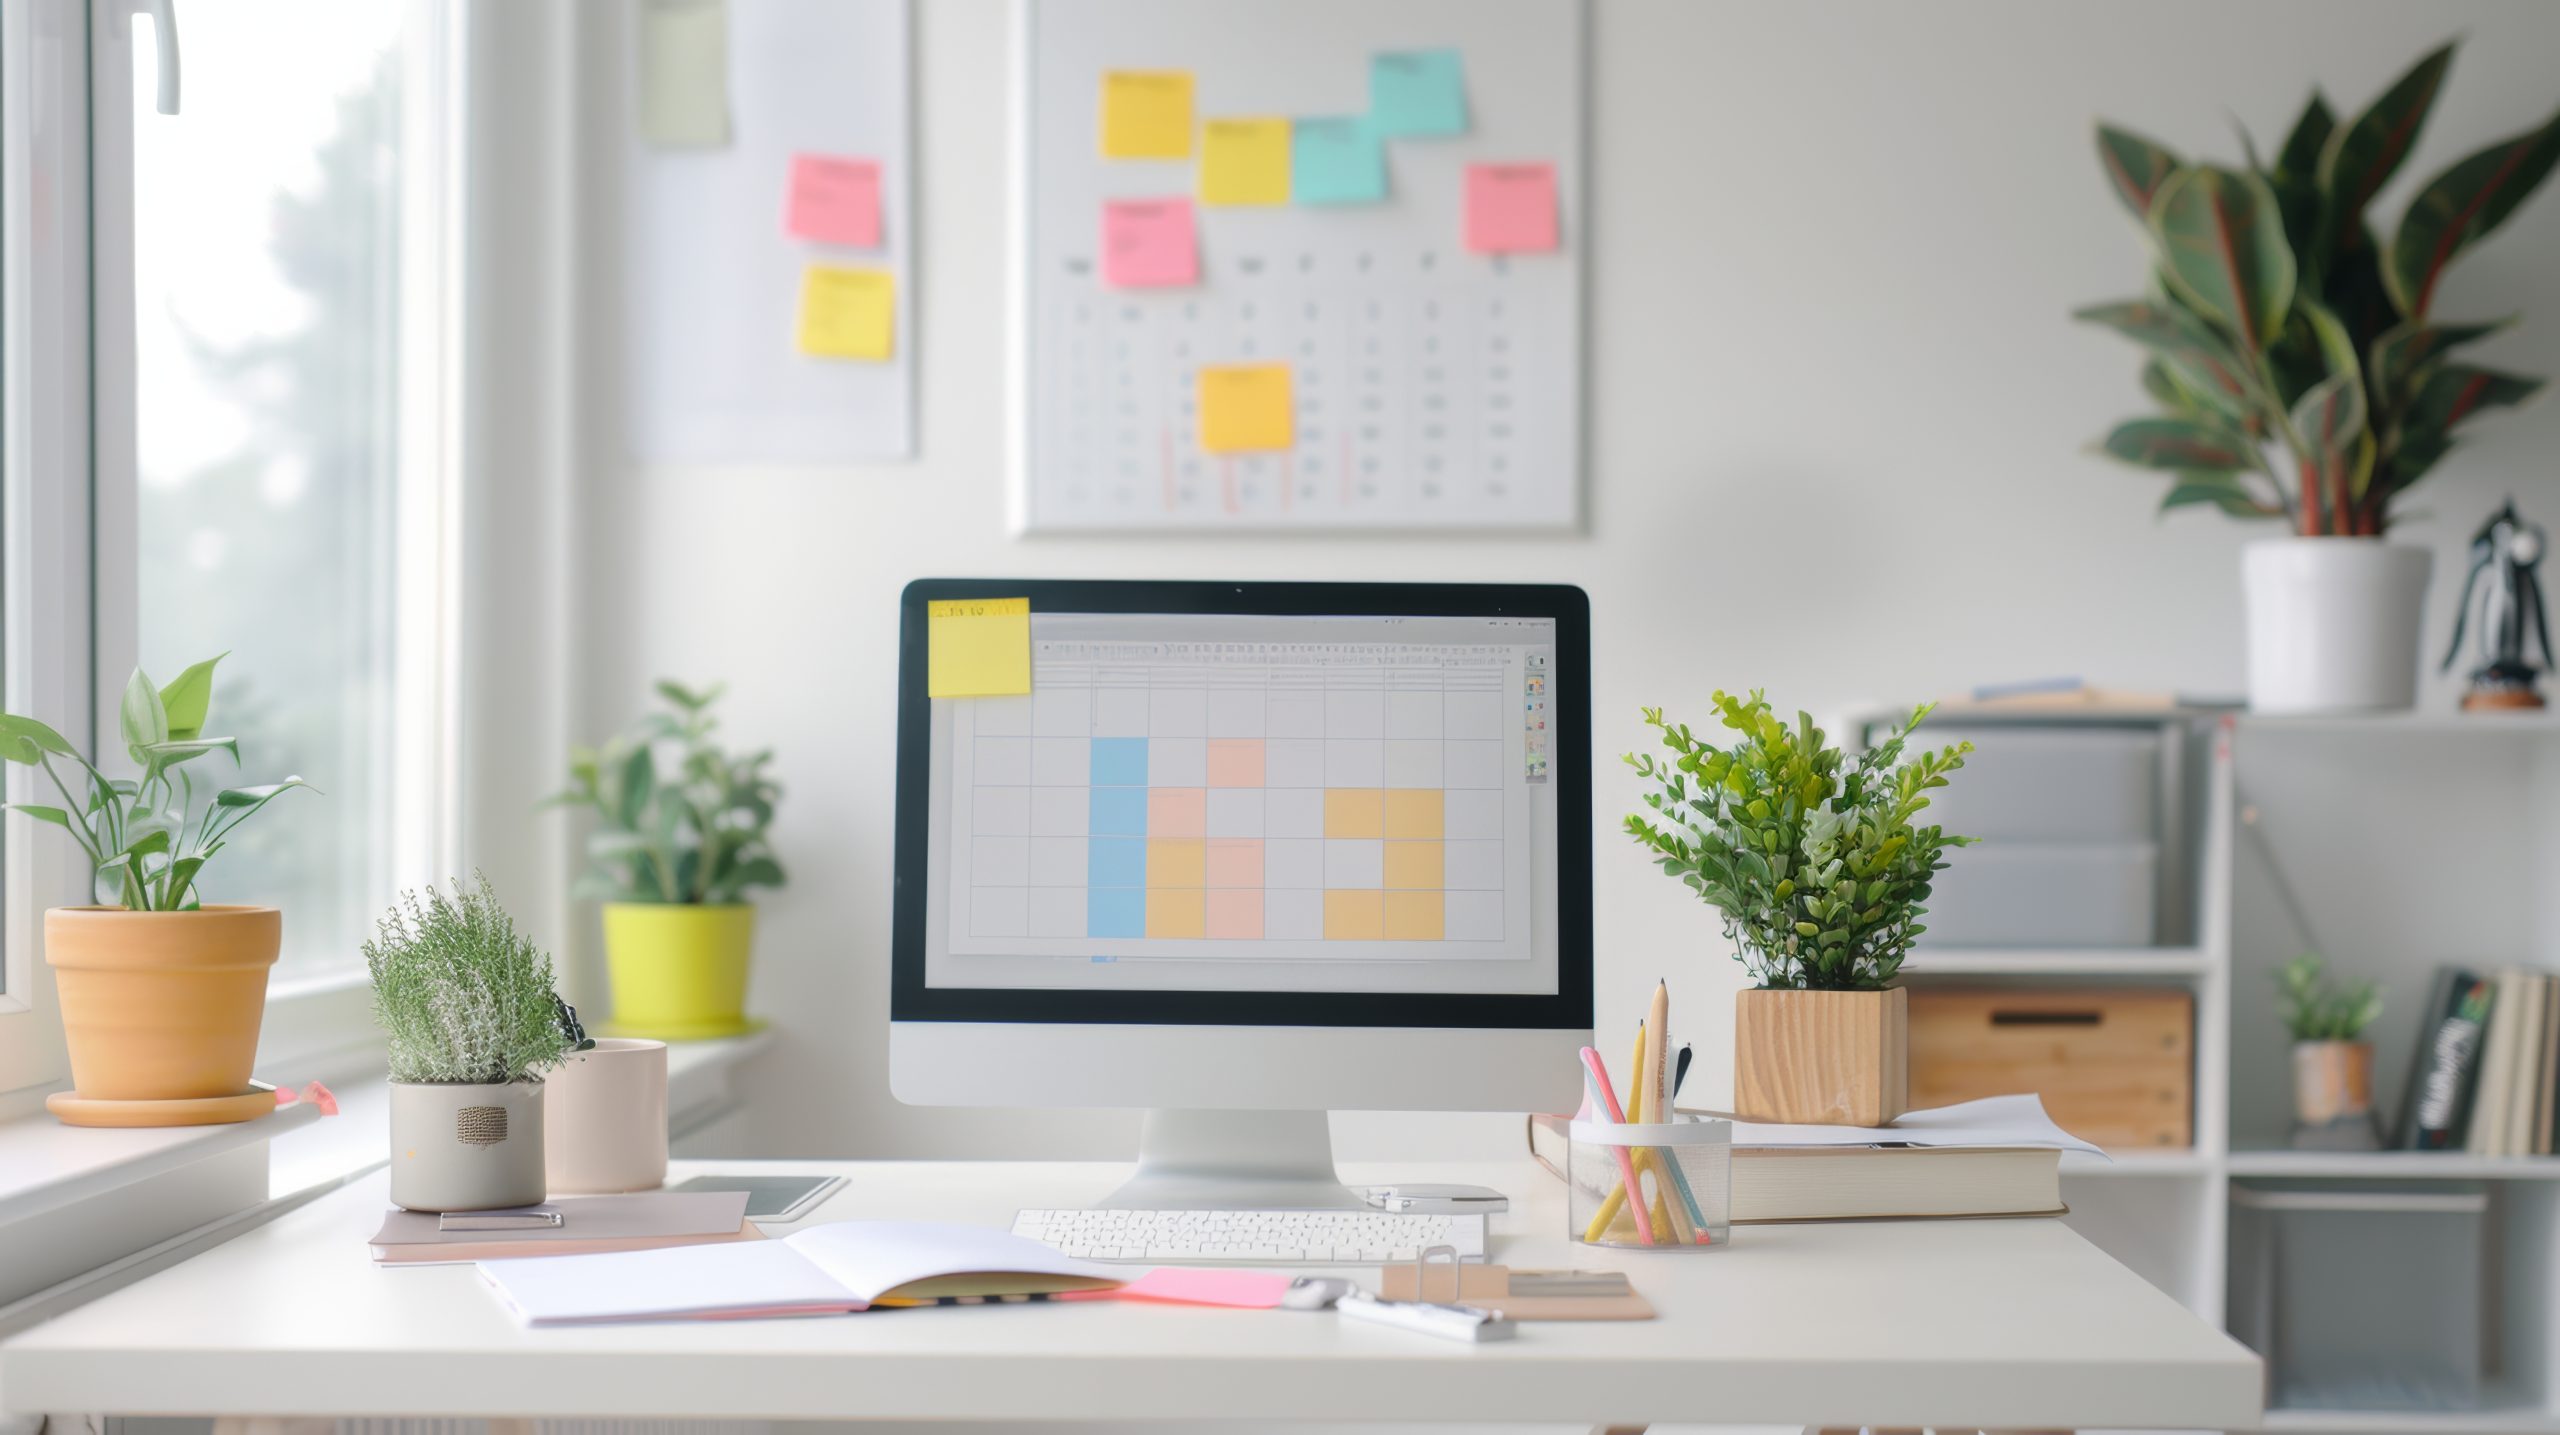
Develop Time Management Plans
Effective time management is a cornerstone of a productive home office. While a to-do list is a great starting point, developing a comprehensive schedule that includes both daily tasks and long-term goals can transform your work habits and boost productivity. By planning your time wisely, you can create a structured environment that fosters creativity and efficiency.
Consider implementing strategies like bullet journaling, which allows you to track tasks, goals, and progress in a visually appealing and organised manner. Time blocking is another effective technique, where you allocate specific time slots for different activities, ensuring that you focus on one task at a time. Additionally, adopting the “one task rule” can help you prioritise and complete tasks more effectively, reducing the overwhelm of multitasking. By developing these time management skills, you not only enhance your productivity but also create a more balanced and fulfilling work-life dynamic in your productive home office.
Barriers Between Chaos and Focus
Noise can be a significant distraction in a home office, disrupting your focus and reducing productivity. To create a truly productive home office, it’s essential to address both external and internal noise, ensuring a peaceful and conducive work environment.
Start by considering noise-cancelling headphones, which can help you maintain concentration by blocking out background sounds. For those who prefer a quieter space without wearing headphones, sound-absorbing panels can be installed on walls to dampen noise. Additionally, soft furnishings like rugs and curtains can help absorb sound and reduce echo, creating a more serene atmosphere. If your workspace is near a busy street or noisy area, consider using heavy drapes to block out both sound and harsh sunlight. By implementing these noise-reducing solutions, you create a sanctuary of focus and calm, allowing you to perform at your best in your productive home office.

Creating a productive home office involves more than just setting up a desk and chair; it requires thoughtful planning and attention to detail. By carefully considering the layout of your space, optimising lighting, prioritising ergonomics, and maintaining organisation, you can transform your home office into a hub of productivity and well-being. Mindful decoration, such as incorporating plants and managing noise levels, further enhances the environment, while effective time management strategies ensure you make the most of your work hours.

by Kesaa Interiors | Storage & Organization
This post is all about Fall Decor Inspiration.Every year, when September rolls around, I find myself drawn to richer textures and warmer tones in my design work. It's that distinct shift in natural light—softer, more golden—that signals it's time to help homes...
This post is all about Boys' Bedroom Decorating Ideas. Creating a bedroom that truly works for boys at different stages of their lives has become one of my favourite design challenges. After years of working with families, I've learned that boys' bedroom decorating...
This post is all about How to decorate a living room step by step. The living room is where life happens. It's where we unwind after long days, gather with friends, and create countless memories. Yet for many homeowners, decorating this central space feels...
This post is all about How to Mix Patterns in a Room! Pattern mixing is one of those design skills that separates rooms with real personalities from spaces that feel like they're playing it safe. After years of working with patterns in every imaginable combination,...
This post is all about Halloween Indoor Decorations. As an interior designer, I genuinely look forward to October every year. It's the one time when dramatic transformations aren't just welcomed—they're expected. Halloween indoor decorations offer this unique...
Looking for the best tips and tricks to decorate a small bedroom for a girl? You are in the right place! There's something uniquely satisfying about transforming a small bedroom into a space that feels both functional and magical. When figuring out how to decorate a...
The kitchen island has evolved into something truly spectacular in today's homes. Modern kitchen island bench designs now deliver the perfect combination of style and practicality that transforms how we use our kitchens. As open-concept living continues to dominate...
Put in your email and sign up for weekly emails updating you on everything happening in the design world
by Kesaa Interiors | Bedrooms, ROOMS, Storage & Organization
This post is all about Kids Room Storage.

Is your child’s room more of a toy explosion than a peaceful space? You’re not alone! The never-ending cycle of toy piles, scattered clothes, and misplaced art supplies can turn any parent into a decluttering machine. This constant chaos isn’t just stressful; it can also create safety hazards and make it nearly impossible to find that one specific Lego piece when you need it most! But there’s hope.
This post is your guide to unlocking the secrets of organized kids room storage, making your life easier and your child’s space more enjoyable. Finding the right kids room storage solutions can be a game-changer, transforming a chaotic space into a functional and inviting environment where your child can play, learn, and thrive. Let’s ditch the overwhelm and dive into some practical and creative strategies!
Best Kids Room Storage Solutions.
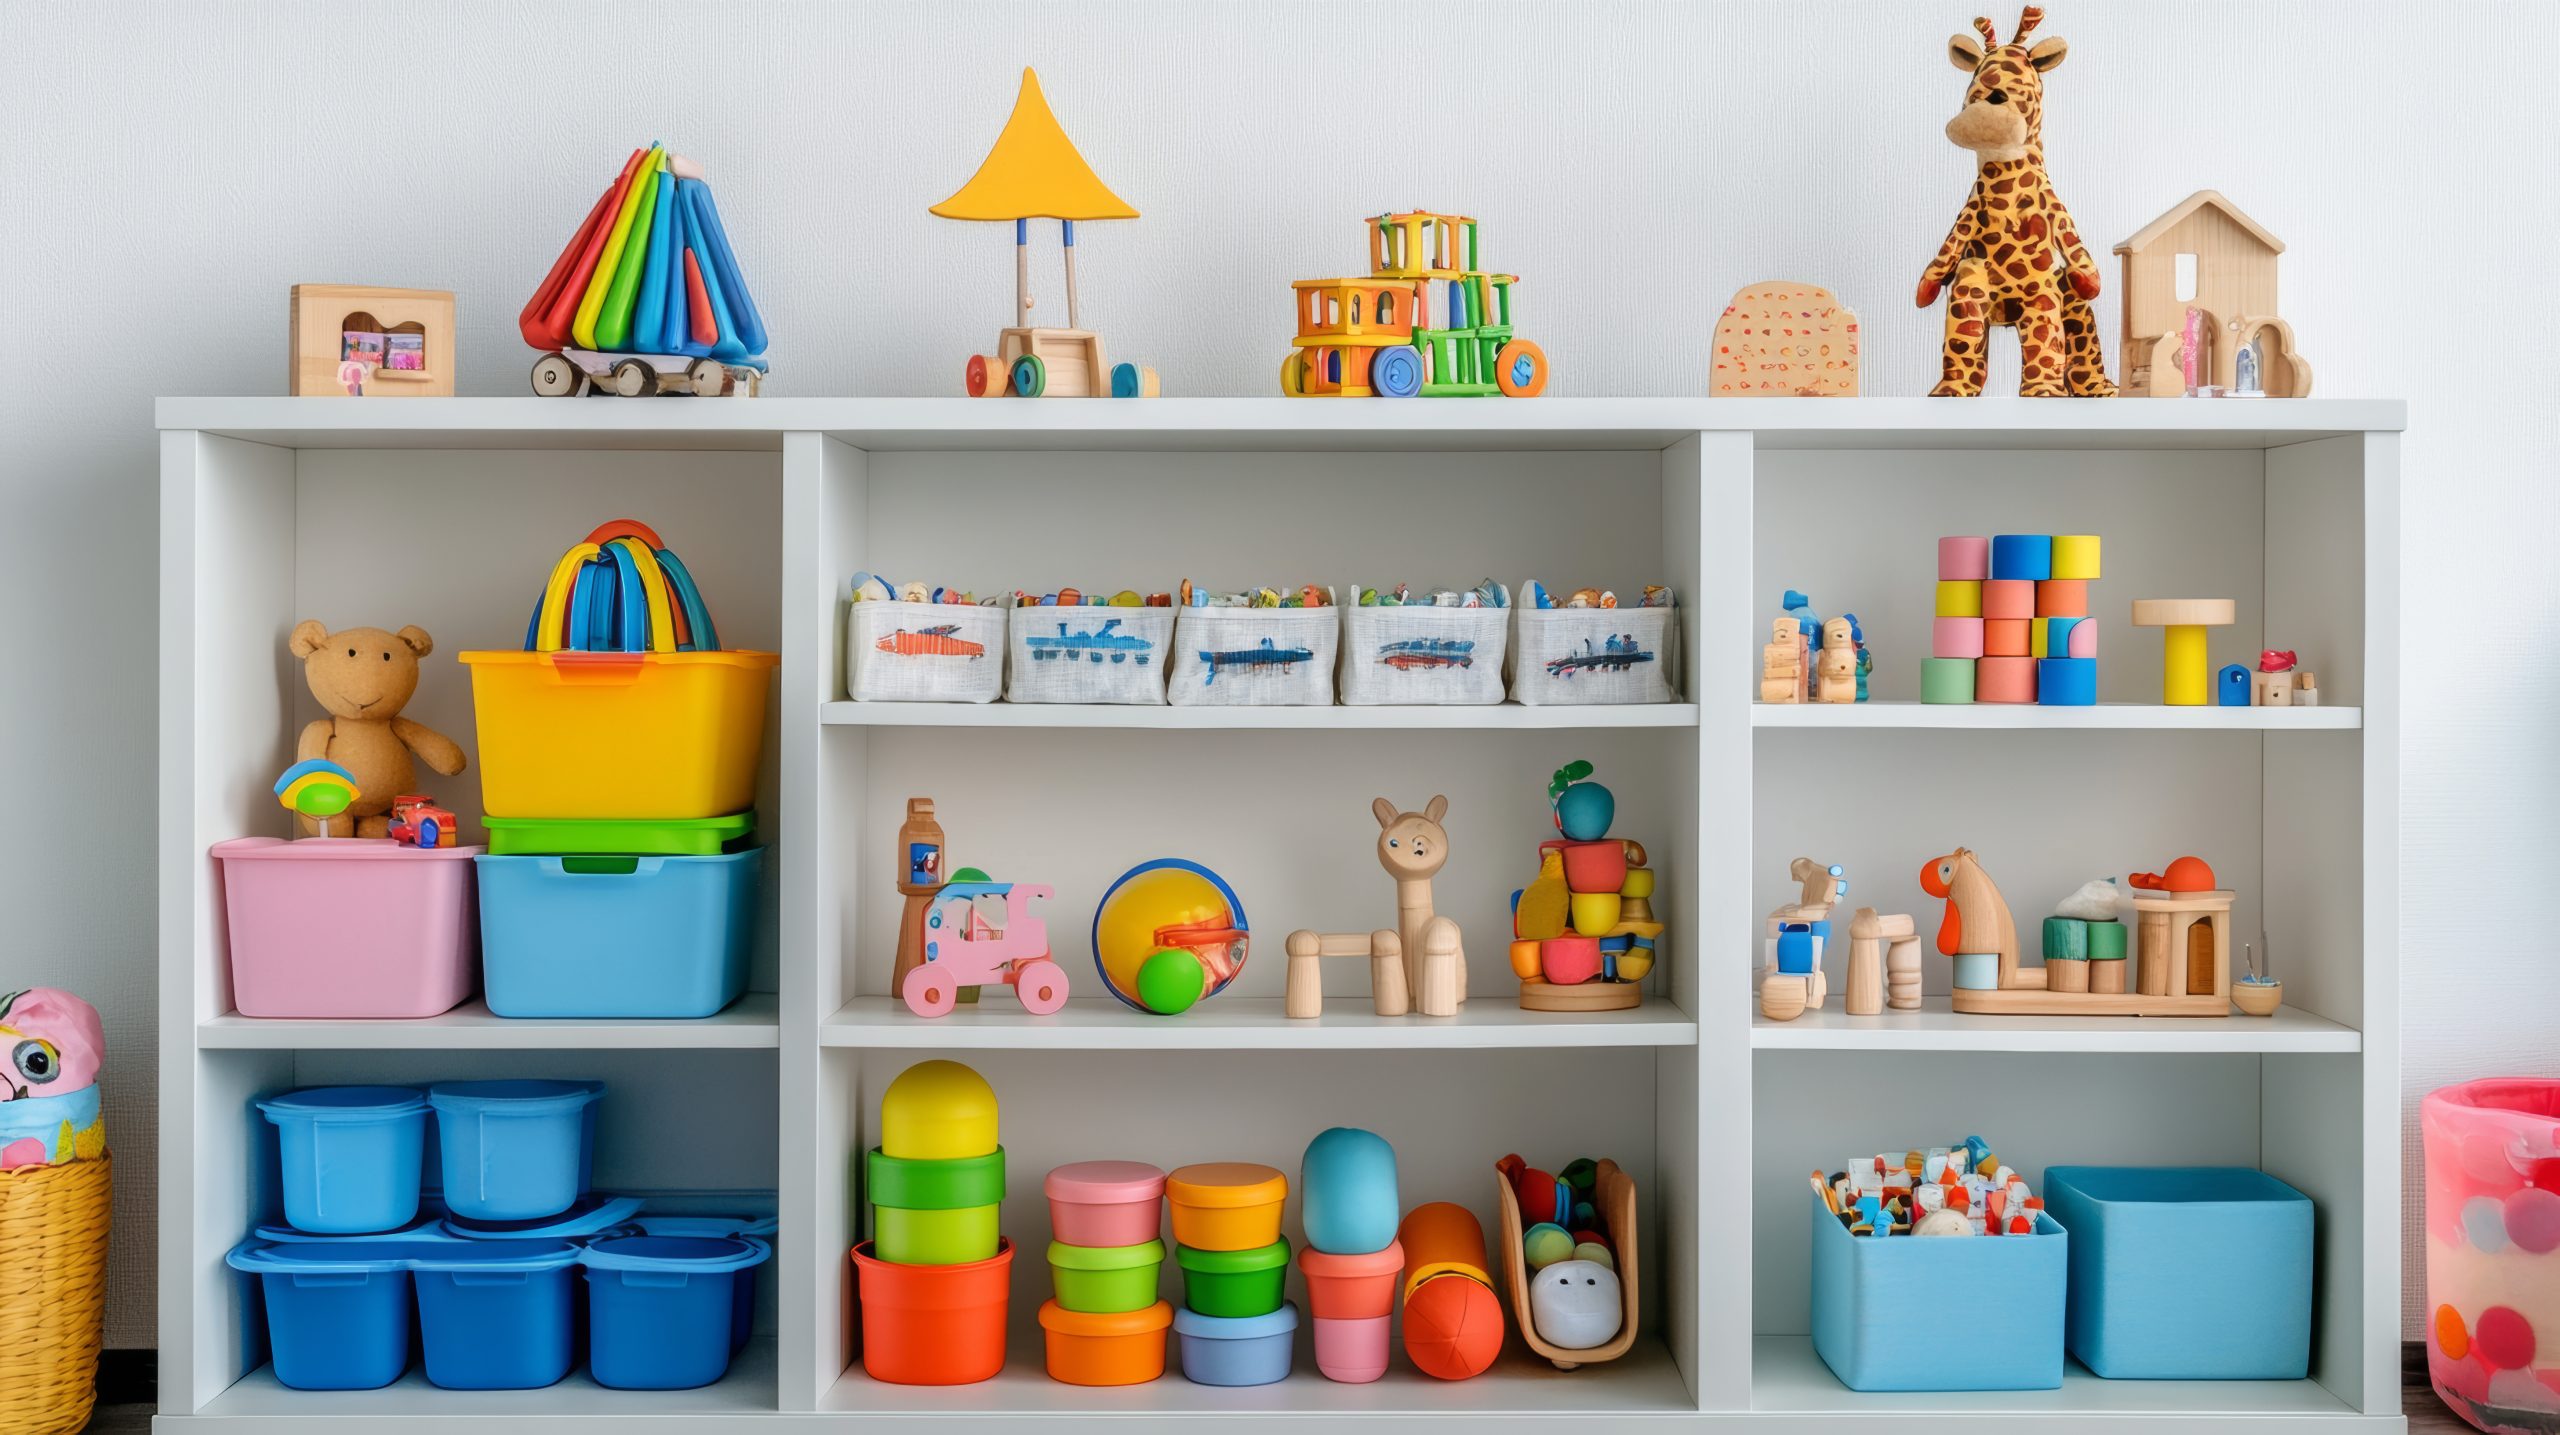
1. Before You Buy: Assessing Your Kids Room Storage Needs & Decluttering Like a Pro
Before you even think about browsing the Container Store, the key to truly effective kids room storage lies in understanding what needs to be stored and, most importantly, getting rid of the excess! Skipping this crucial step is like trying to fit an elephant into a shoebox – it just won’t work.
Inventory is Key: The first step is to take a thorough inventory of everything that currently resides in your child’s room. Consider breaking down your search by these common room occupant items;
-
Toys: Sort toys by category – large (ride-ons, playhouses), small (action figures, miniature cars), plush toys, building blocks (Legos, Duplo), puzzles, and games.
-
Books: Picture books, chapter books, board books, workbooks.
-
Clothing: Current season, outgrown items, dress-up clothes, shoes.
-
Art Supplies: Crayons, markers, paint, paper, construction paper, modeling clay.
-
Bedding: Sheets, blankets, comforters, pillows.
-
Other: Unique to your child’s interests (e.g., musical instruments, sports equipment, collections).
Decluttering is Key: The beauty of less is truly displayed when you think about the organization of your kids room storage situation. Fewer items to store = a significant boost to any existing setup.
-
Less Stuff, Less Stress: The more you purge, the less you need to organize, making the entire process less overwhelming. It’s like clearing a path to easier mornings and calmer bedtimes.
-
Finding Items with Ease: Less clutter means items are more readily and easily accessible. You can encourage your child’s independence by allowing them to easily find items from the start.
-
Make It A Game (Age Appropriate): Try to involve your child with age-appropriate instructions in your decluttering process. Donate old stuffed toys and find new homes, your child will feel like a giving person from the get go!
Categorize & Prioritize: Next, organize those items into easily labeled categories! Group similar items together. Toys will be grouped with each other, art supplies too! Determine what your child uses the most, keep these easily accessible and at an arms reach. This can keep play time quick and cleanup easy too!
Measure & Map: Grab your measuring tape! Don’t even think about ordering storage bins without knowing the dimensions of your closet, the space under the bed, or that awkward corner in the room. Before investing in any new kids room storage, make a simple floor plan of the room. Note the dimensions of key storage areas and existing furniture. This helps visualize what will fit and avoid costly mistakes.
2. Conquer Clutter Zone by Zone: Kids Room Storage Ideas for Every Space
Now that you’ve decluttered and assessed your needs, it’s time to get strategic! Different areas of a kids room storage benefit from different storage solutions. Let’s break down some ideas zone by zone:
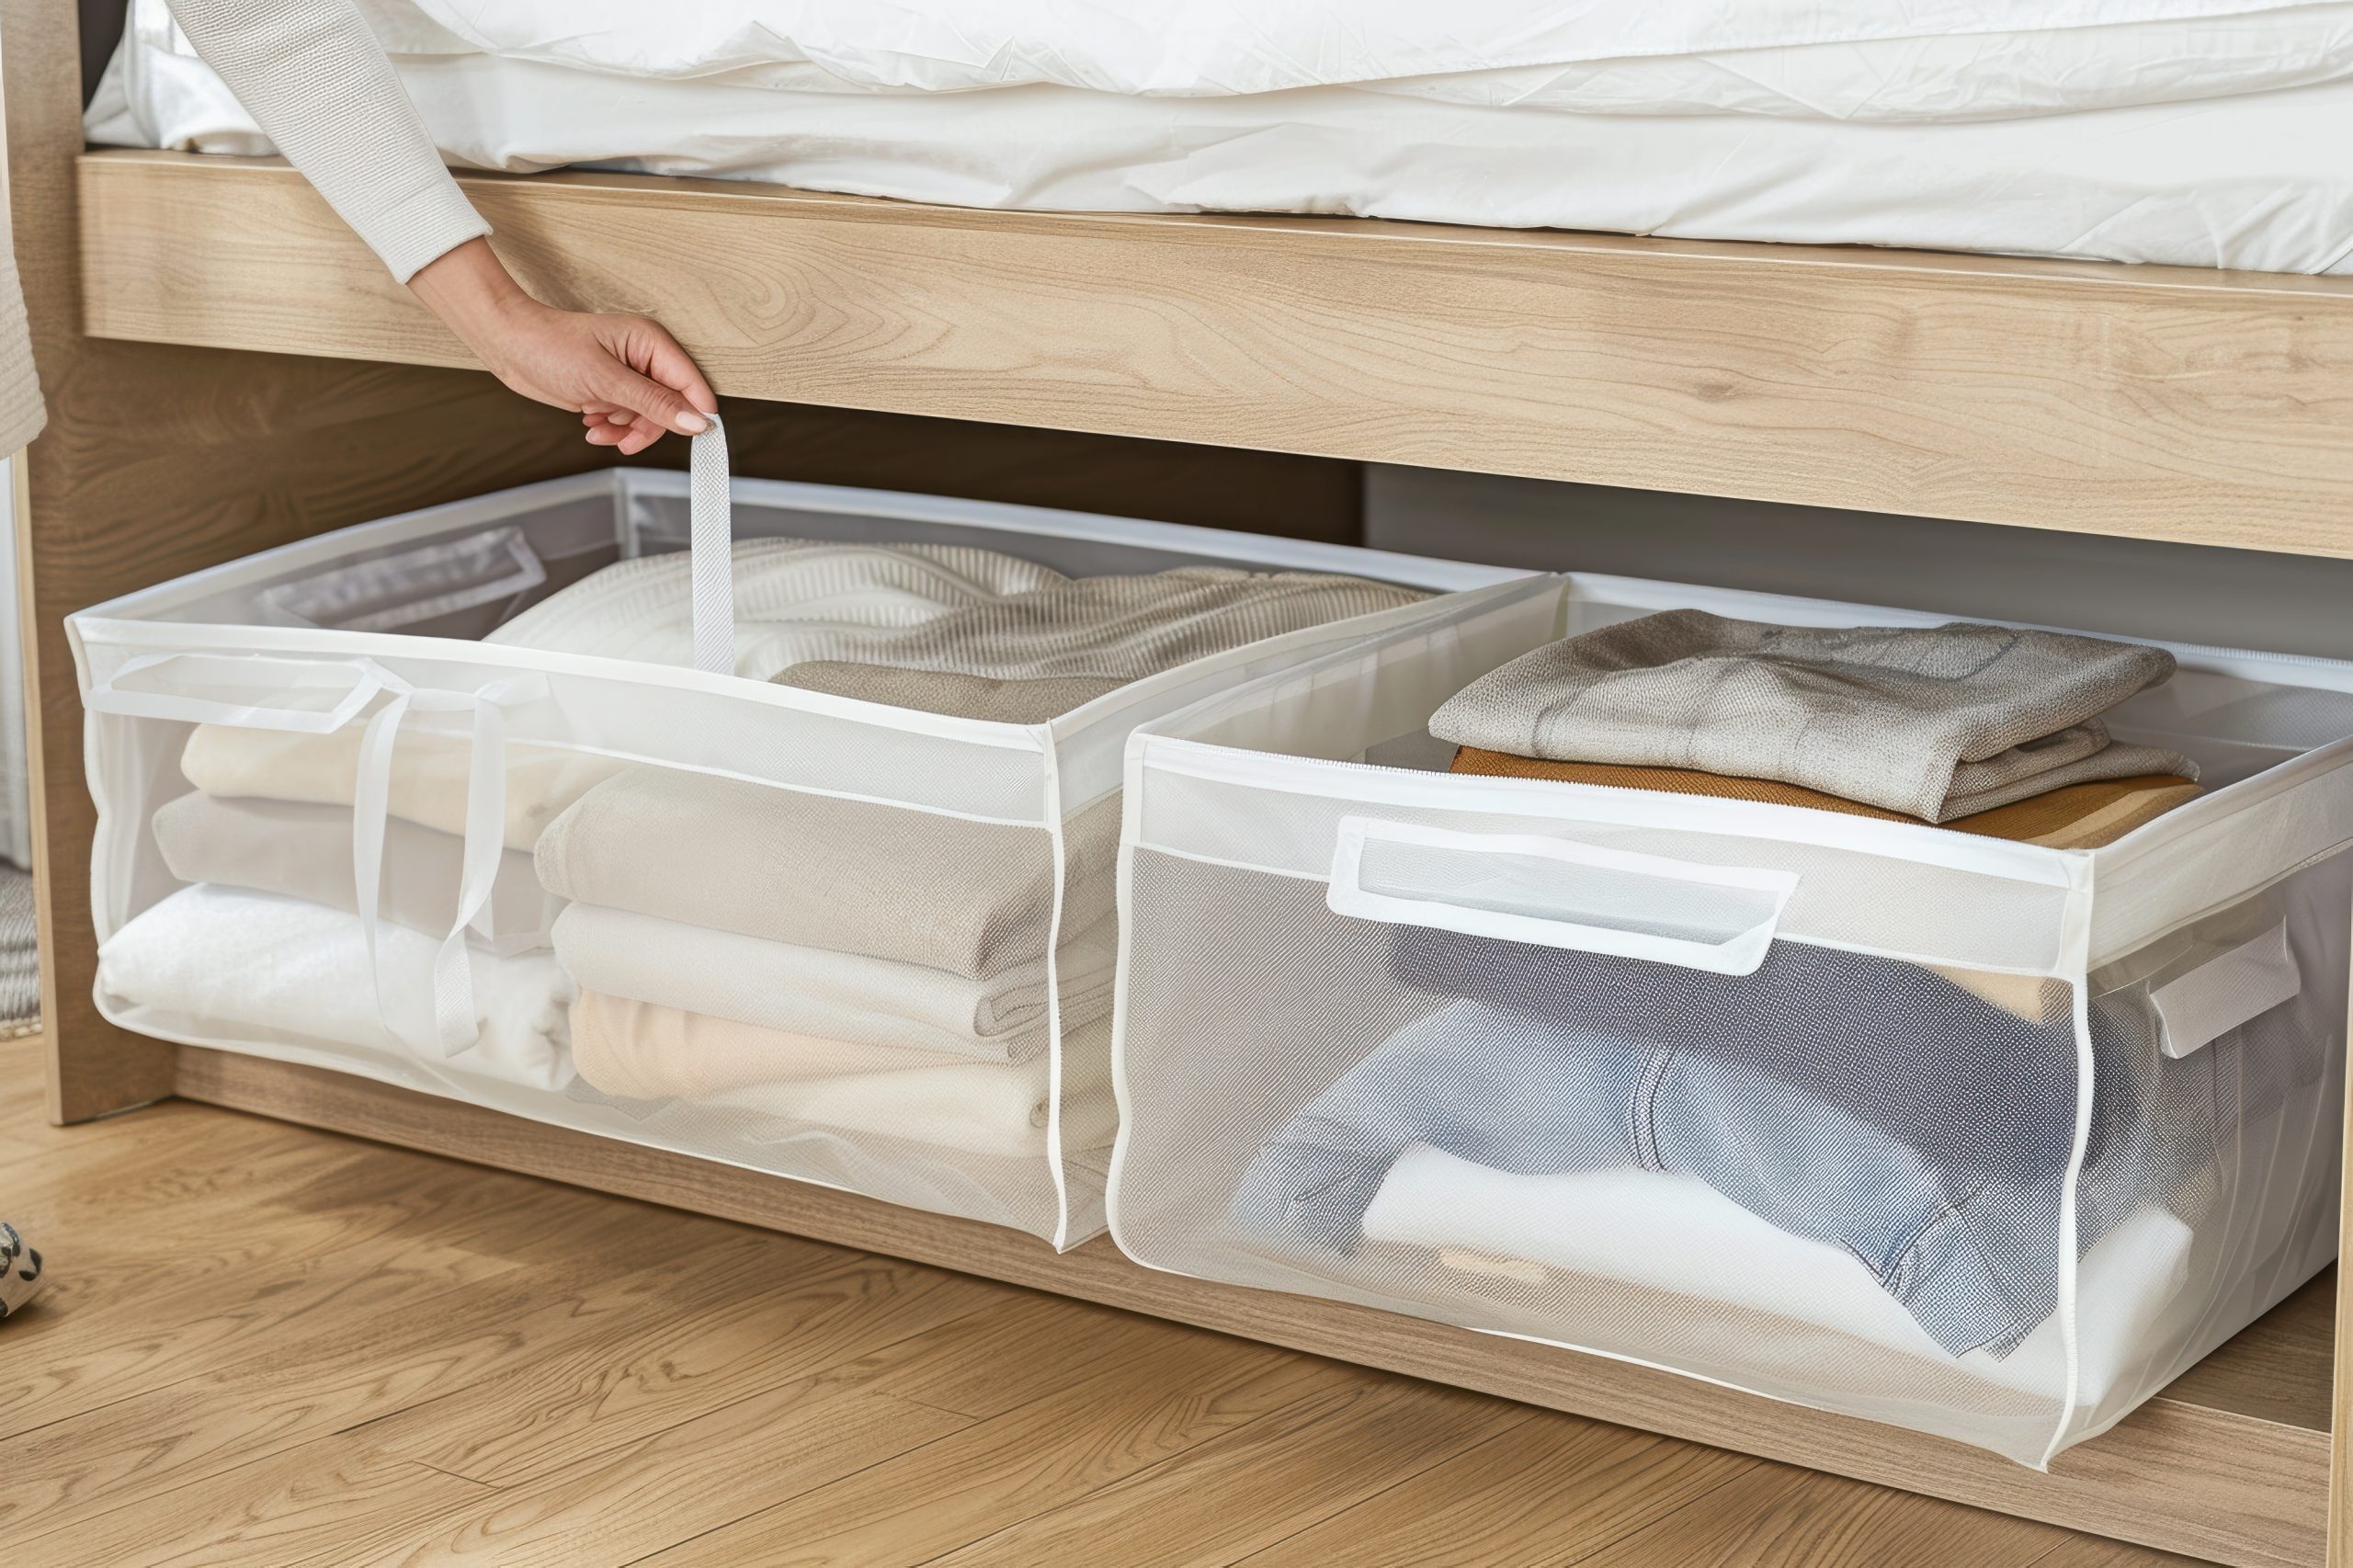
A. Under-Bed Storage:
Taming the vast expanse beneath the bed is a classic strategy for discreet kids room storage. It’s especially helpful for items that aren’t used every day, like seasonal clothing, extra bedding, or larger toys.
-
Types of Under-Bed Storage:
-
Rolling Drawers: Pre-made drawers on wheels slide easily in and out, perfect for frequently accessed items like toys or blankets.
-
Shallow Bins with Lids: Ideal for storing folded clothes, shoes, or smaller toys. Look for clear bins for easy visibility.
-
Vacuum-Sealed Bags: Best for storing off-season clothing or bulky bedding to maximize space and protect against dust and pests.
-
DIY Options: Repurpose sturdy cardboard boxes, adding wheels and a decorative cover for a budget-friendly solution.
-
Considerations: Pay attention to the height of your bed and the clearance underneath. Measure carefully before purchasing any under-bed storage. Also, consider the floor type (carpet vs. hardwood) as it may affect the ease of sliding the storage containers. Regularly check under-bed storage for dust.
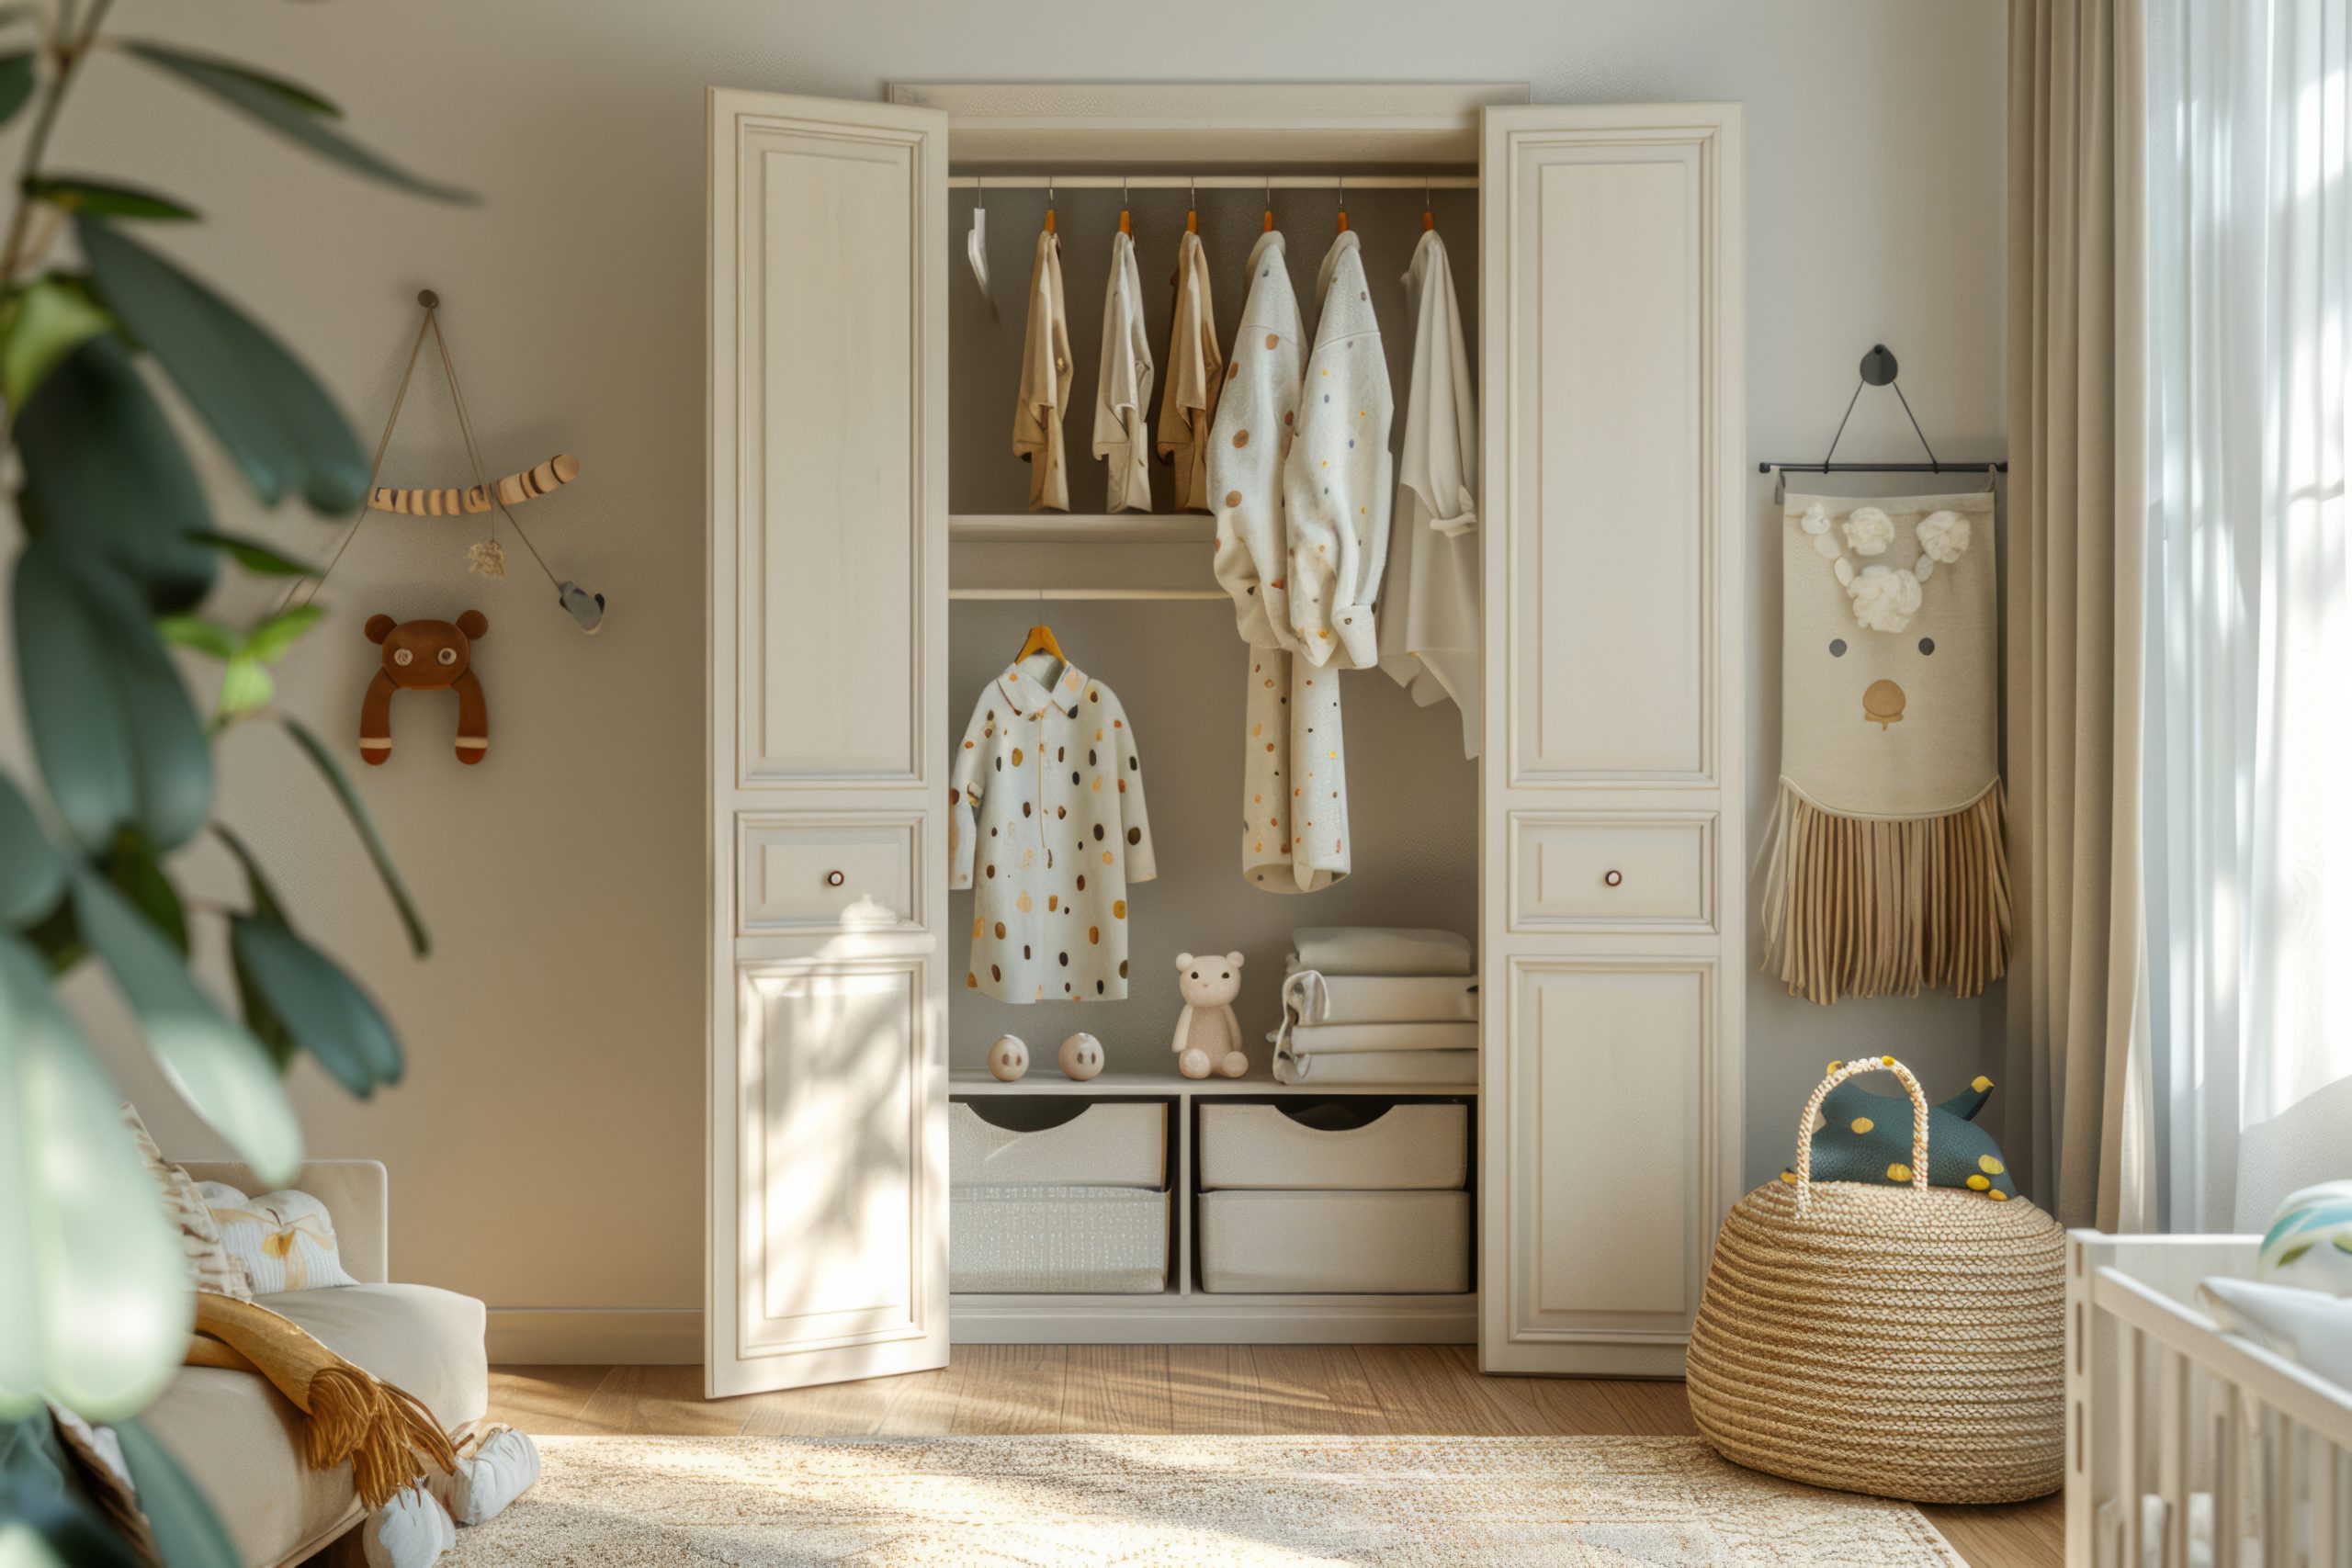
B. Closet Organization:
The closet can quickly become a black hole if left unorganized. Effective kids room storage in the closet is key to managing clothing, shoes, and other essentials.
-
Maximize Vertical Space:
-
Adjustable Shelving and Rods: Invest in a closet system with adjustable shelves and rods to accommodate clothing of different lengths and sizes. As your child grows, you can adjust the shelves accordingly.
-
Hanging Organizers: Utilize hanging shoe organizers for storing small toys, craft supplies, or accessories. Sweater organizers can hold folded clothes or out-of-season items.
-
Baskets and Bins: Use baskets and bins on shelves to keep smaller items contained and organized. Label the bins clearly for easy identification.
-
Make it Kid-Friendly:
-
Lower Rods & Shelves: Lower the hanging rod (if possible) or add a second rod at a lower height so your child can reach their own clothes.
-
Small Step Stool: Keep a small, sturdy step stool nearby to help your child reach upper shelves or hanging items safely.
C. Wall Storage:
Don’t underestimate the power of vertical space! Utilizing walls for kids room storage can free up valuable floor space and keep items off the ground, reducing clutter and creating a more visually appealing room.
-
Shelf Strategies:
-
Floating Shelves: Provide a clean, modern look and are perfect for displaying books, toys, or decorative items. Be sure to mount them securely, especially if storing heavier items.
-
Bookshelves: Choose a bookshelf that is the appropriate size for your child’s room. Consider one with adjustable shelves for maximum flexibility.
-
Baskets and Hooks:
-
Wall-Mounted Baskets: Great for storing art supplies, small toys, or even stuffed animals.
-
Pegboards with Hooks: Highly customizable and versatile, pegboards allow you to create a storage system tailored to your specific needs. Use hooks to hang everything from art supplies to backpacks.
- Keep things accessible:
º Mount storage shelves within reach, and keep items your child may need within immediate access while setting anything else out of reach to encourage self-dependency.
3. Thinking Outside the Box: Unique and Multifunctional Kids Room Storage
Sometimes the most effective kids room storage solutions are the ones that are a bit unexpected! Embracing multifunctionality and thinking creatively can unlock hidden potential and make your space work even harder.
-
Furniture with Built-in Storage: Investing in furniture pieces that double as storage is a game-changer, particularly in smaller spaces.
-
Beds with Drawers Underneath: A practical solution for storing clothing, toys, or extra bedding. Beds with built-in drawers often come in platform and Captains’ designs, maximizing every inch of space beneath the mattress.
-
Ottomans with Storage Inside: Stylish and functional, storage ottomans provide a hidden space for toys, blankets, or board games while adding seating to the room.
-
Benches with Storage: Ideal for entryways or playrooms, storage benches provide a comfortable place to sit while concealing toys, shoes, or other items. A storage bench can also act as a window seat adding comfort while decluttering.
-
Desks with Storage: Desks with drawers, shelves, or built-in cubbies help keep school supplies and art materials organized and within easy reach.
-
Repurposed Items: Get creative by transforming ordinary items into unique and charming storage solutions!
-
Old Suitcases as Toy Storage: Vintage suitcases stacked on a shelf or the floor add a whimsical touch while providing storage for dolls, action figures, or other small toys.
-
Ladder as a Blanket Rack: Lean an old wooden ladder against the wall to create a rustic and decorative blanket rack.
-
Dressers as Toy Stations: An old dresser can be repurposed as a toy station. Give the dresser a fresh coat of paint or keep the original to display items and keep your child’s items away to declutter more.
-
DIY Storage Solutions: Don’t be afraid to roll up your sleeves and tackle some DIY storage projects!
-
Easy-to-Build Shelves: Simple wooden shelves can be easily constructed using basic materials and tools. Customize the shelves to fit your specific needs and decorate them with paint, wallpaper, or stencils.
-
Decorating Plain Bins: Add personality to plain plastic bins with paint, fabric scraps, or stickers. Label each bin clearly to ensure everyone knows what goes where.
-
Storage That Doubles as Décor: Functional storage doesn’t have to be boring! Choose storage solutions that are also visually appealing and contribute to the overall aesthetic of the room.
-
Baskets as Decorative Elements: Woven baskets in various shapes, sizes, and textures can add warmth and character to a room while providing stylish storage.
-
Color-Coded Storage: Use color-coded bins, baskets, or shelves to create a visually appealing and easy-to-understand storage system. Assign a specific color to each type of item (e.g., blue for toys, green for books, red for art supplies).
4. Keeping it Clean: Tips for Maintaining Your Organized Kids Room Storage System
Creating an organized kids room storage setup is just the first step! The real challenge is maintaining that organization over time. Without consistent effort, the clutter monster will inevitably creep back in.
-
Establish a Routine: Making clean-up a regular habit is crucial for long-term success. Designate a specific time each day (e.g., before dinner or bedtime) for tidying up the room. Involve your child in the routine, making it a shared responsibility. This also teaches the benefits of organization while becoming routine with time.
-
Label Everything: Clear and consistent labels on bins, baskets, shelves, and drawers are essential. Labels help everyone (including kids!) know where things belong and encourage them to put items back in their designated spots.
-
Use Pictures for Younger Children: For children who cannot yet read, use picture labels alongside words to help them identify the contents of each storage container. Print or draw pictures of toys, clothes, or other items and attach them to the bins.
-
Teach Your Child to Sort and Put Away: Age-appropriate tasks that children can help with include toys or clothes! Encourage them to get involved to make cleaning a more routine process for themselves.
º Teach children what to put away in different areas to ensure children’s comprehension with cleanup
-
Regular Decluttering: Schedule regular decluttering sessions to purge unwanted or unused items. Set aside time every few months to go through the room and get rid of anything that is no longer needed or used. Involve your child in the decluttering process to teach them about giving back to the community.
-
Designate a “Home” for Everything: Ensure that every item in the room has a designated “home” – a specific spot where it belongs. This prevents items from ending up in random piles and makes it easier to find them when needed. Explain that every item goes back to its designated area, once that is understood by your child, everything goes smoothly after the fact.
Transforming a chaotic kids’ room into an organized and functional space may seem daunting, but by embracing a strategic approach and implementing clever kids room storage solutions, you can create a room that both you and your child will love. Remember the key principles: declutter first, understand your specific storage needs, choose solutions that maximize every area of the room, get creative with repurposed items, and establish consistent habits to maintain order.
By tackling this step-by-step, you’ll significantly reduce your stress, make finding items far easier, and even foster greater independence in your child.