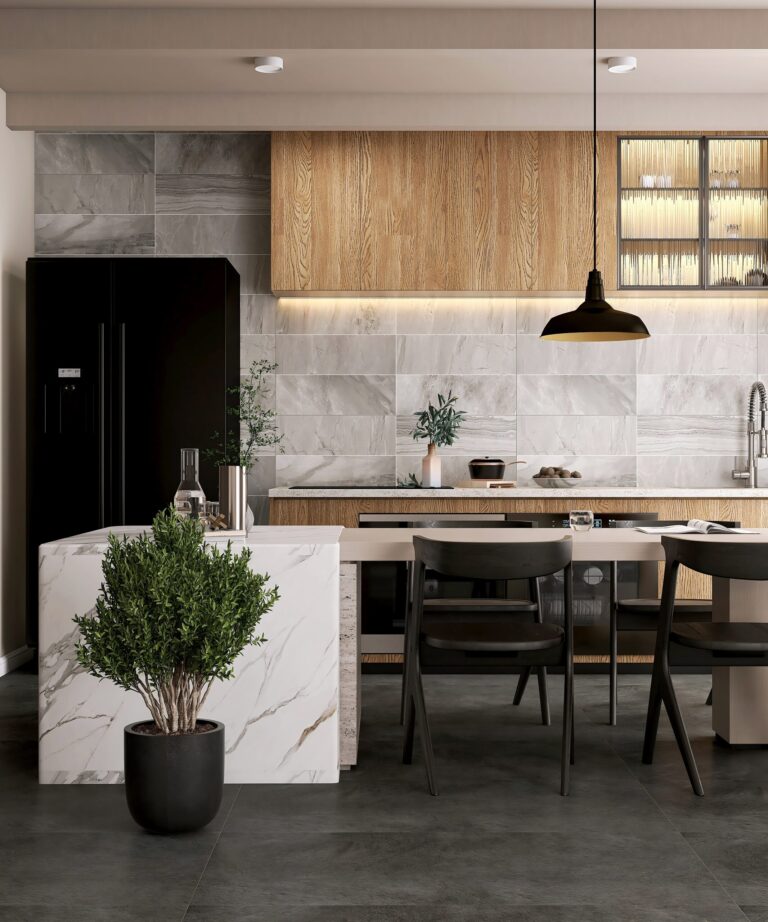
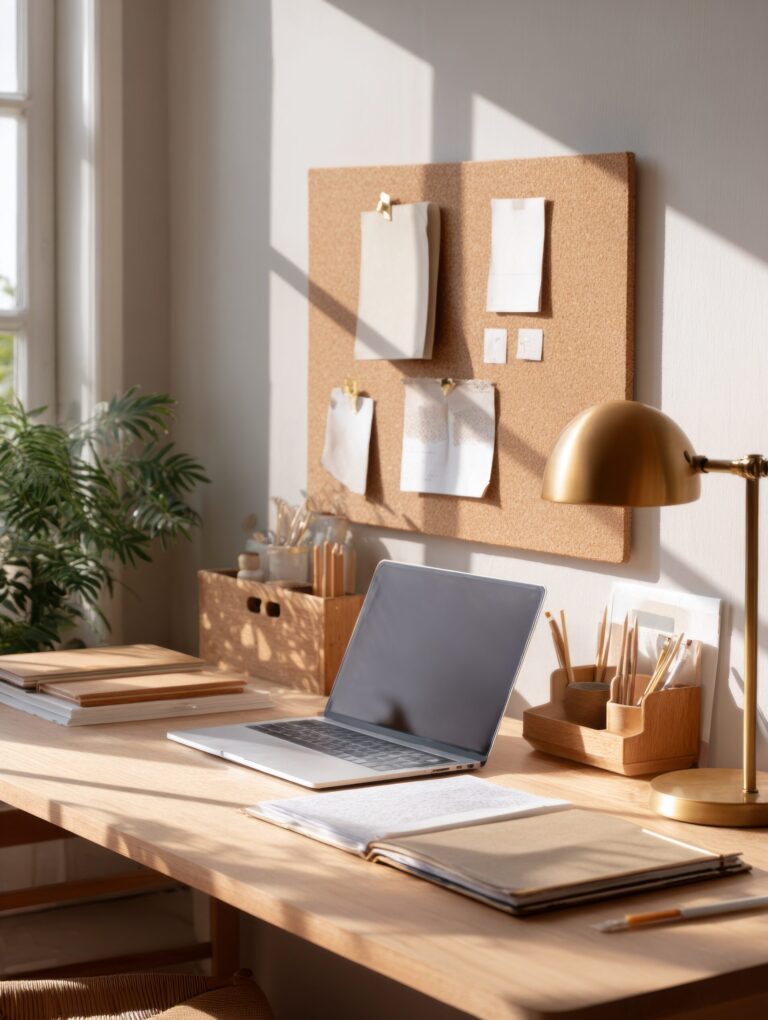
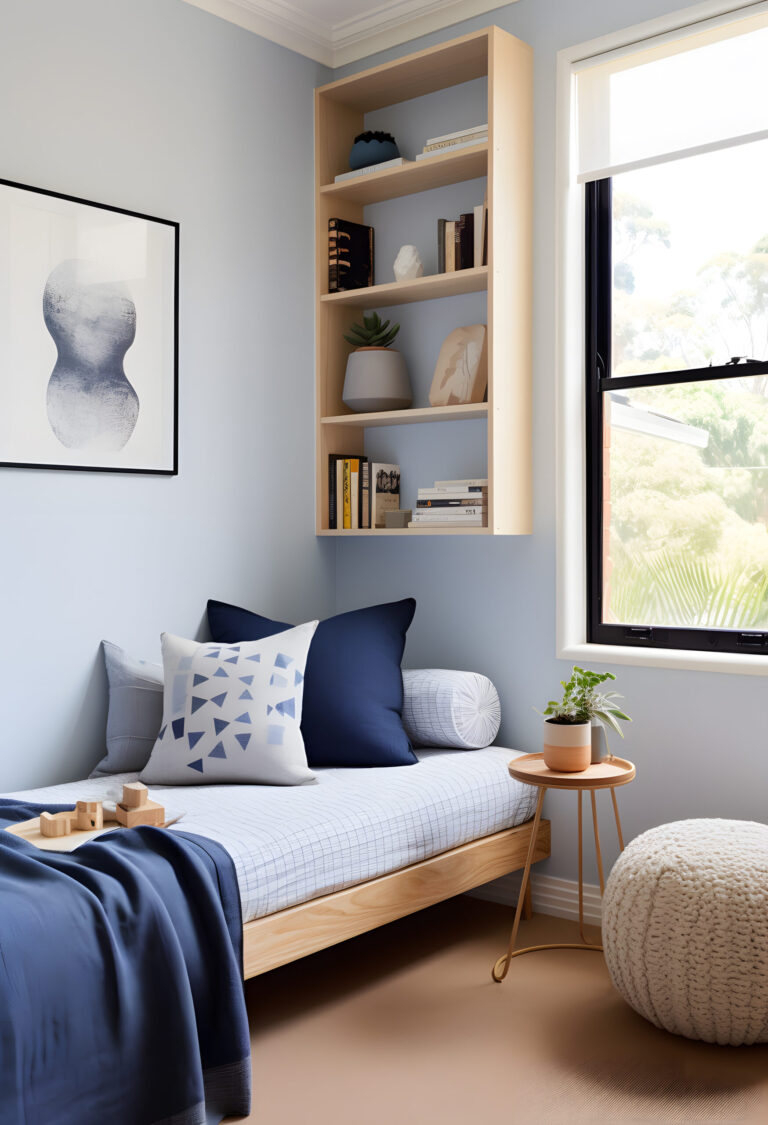
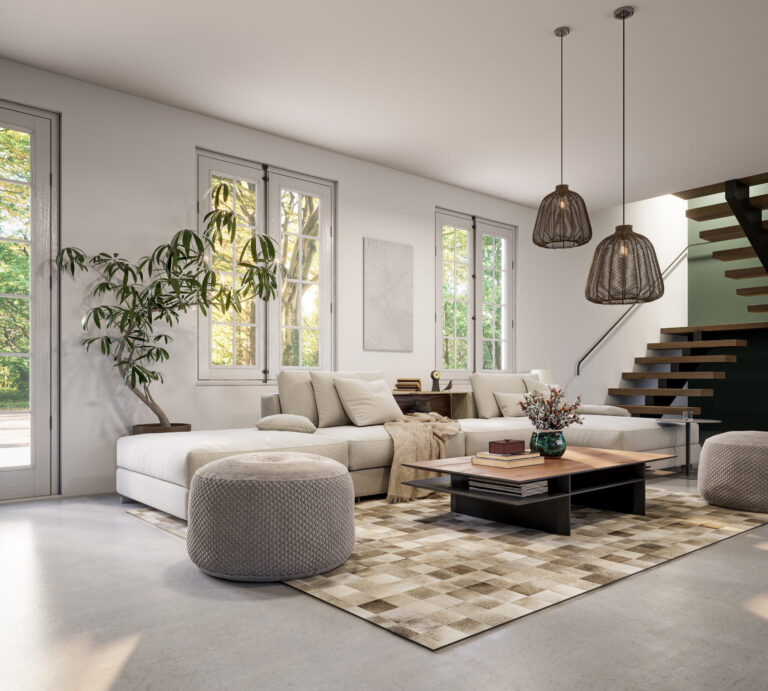
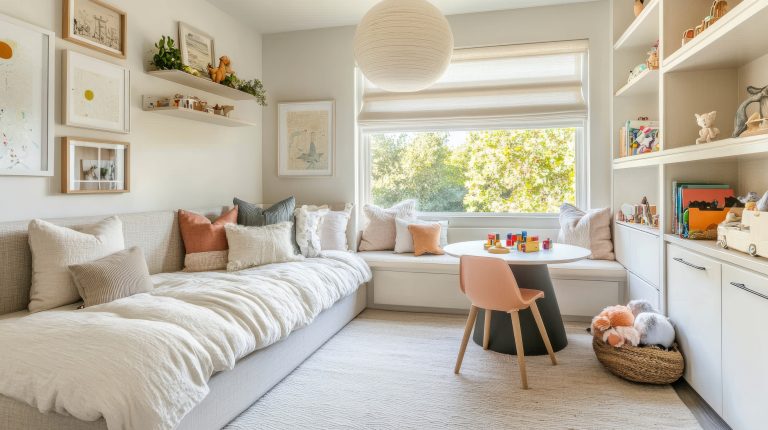
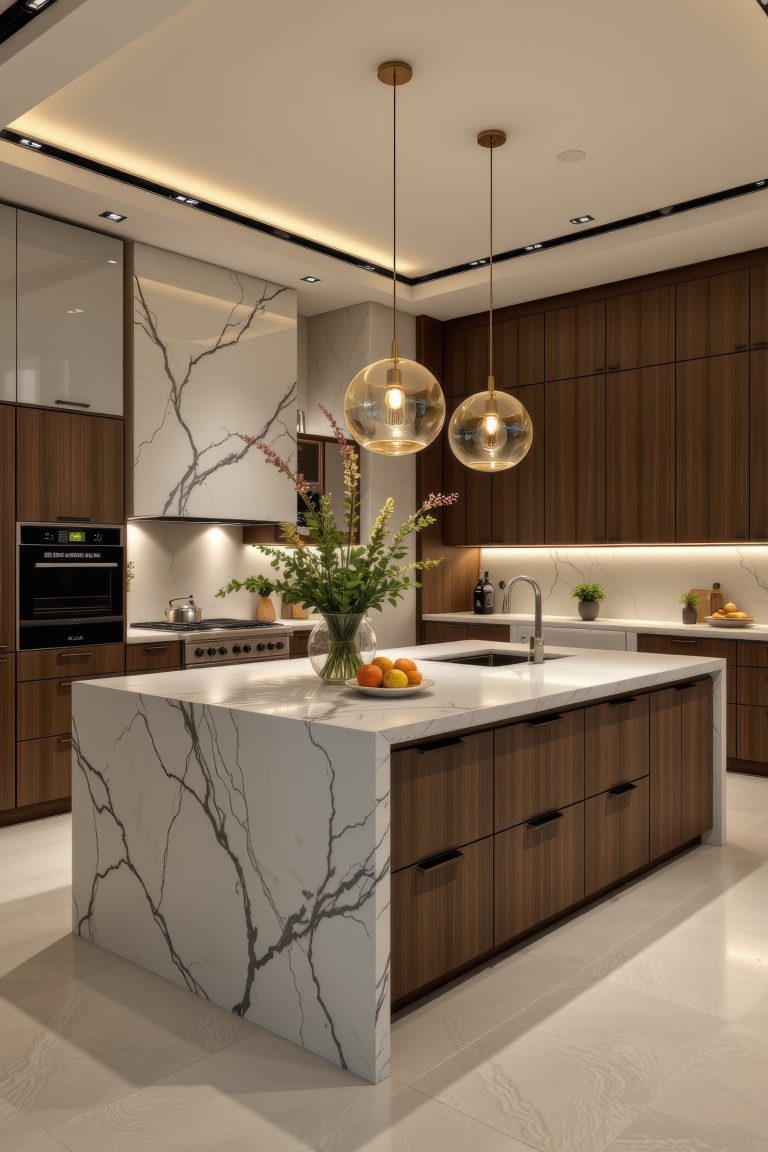
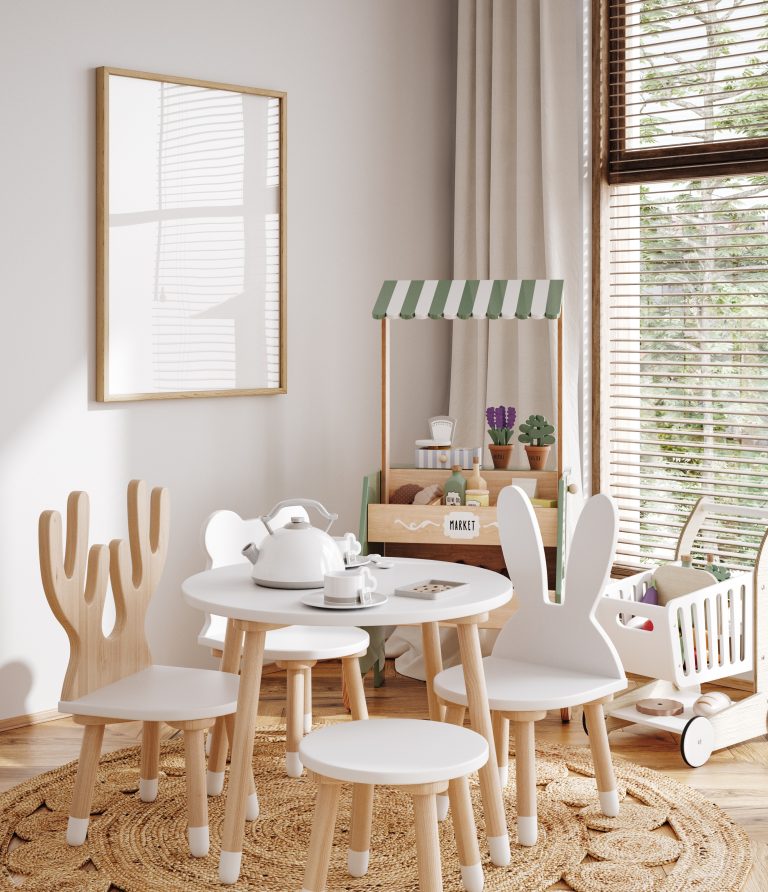
Design Your Dream Patio: Small Patio Ideas on a Budget

Design Your Dream Patio: Small Patio Ideas on a Budget

This blog post is all about the best small patio ideas on a budget.

small patio ideas on a budget

Dreaming of lazy afternoons lounging on your patio, surrounded by greenery and the gentle hum of summer? You don’t need a sprawling backyard or a bottomless bank account to create the perfect outdoor oasis.

Even the smallest patio can become a haven with a little creativity and some savvy small patio ideas on a budget. This post is packed with inspiration and practical tips to help you transform your tiny outdoor space into the patio of your dreams without emptying your wallet.

Best Small Patio Ideas on a Budget!

1: Maximizing Space: Clever Layout & Furniture Choices

affordable patio design

Smart Strategies for a Spacious Small Patio

Let’s be honest, when you’re working with a small patio, every square inch counts. But limited space doesn’t have to mean limited style or functionality. With a few clever layout choices and the right furniture, you can make your small patio feel surprisingly spacious.

Vertical Gardening: Greenery that Grows Up, Not Out

One of the best small patio ideas on a budget is to embrace vertical gardening. Think up, not out! Wall-mounted planters, hanging baskets, and trellises are your best friends when space is at a premium. They add a lush, vibrant feel without taking up valuable floor space. Imagine a wall bursting with colorful flowers or a cascade of fragrant herbs – instant ambiance and a touch of garden magic, all while maximizing your square footage.

Double-Duty Furniture: Storage Solutions that Seat

When it comes to small patio ideas on a budget, furniture that pulls double duty is a game-changer. Look for pieces with built-in storage, like benches with compartments underneath or ottomans that open up to reveal hidden storage space. These clever solutions provide a place to stash cushions, gardening tools, or other outdoor essentials, keeping your patio clutter-free and maximizing usable space.

Folding & Stackable Wonders: Flexibility for Your Small Space

Folding chairs and stacking tables are the unsung heroes of small patio design. They offer incredible flexibility, allowing you to easily adapt your space to different needs. Need extra seating for a gathering? Unfold those chairs! Want more room to move around? Simply fold them up and tuck them away. This is a key element of styling small patio ideas on a budget, as it allows you to avoid investing in bulky furniture that might overwhelm the space.

2: Budget-Friendly Flooring: Grounding Your Space Without Breaking the Bank

budget friendly outdoor decor

Affordable Flooring Options for Your Patio

The right flooring can completely transform the look and feel of your patio. But patio flooring can be expensive, right? Wrong! There are plenty of budget-friendly options that don’t compromise on style or durability. Let’s explore some fantastic small patio ideas on a budget for underfoot elegance.

Paving Stones: Classic Charm on a Budget

Paving stones offer a timeless and versatile look that can complement any patio style. They’re relatively inexpensive, especially if you opt for concrete pavers, and they’re easy to install yourself, saving you even more money. Plus, they come in a variety of shapes, sizes, and colors, allowing you to create a custom look that reflects your personal taste.

Gravel Pathways: Easy Installation and Versatility

Gravel is another excellent budget-friendly flooring option for small patios. It’s incredibly easy to install – simply lay down a weed barrier and spread the gravel evenly. Gravel also offers excellent drainage, making it a practical choice for areas prone to rain. And with a wide range of colors and textures available, from smooth pea gravel to crushed granite, you can easily find a gravel that complements your patio design.

Decking Tiles: Instant Style Upgrade

If you’re looking for a quick and easy way to upgrade your patio flooring, decking tiles are a fantastic option. These interlocking tiles are typically made of wood, composite materials, or even recycled plastic, and they can be installed directly over existing concrete or other surfaces. They provide a warm and inviting feel underfoot and can instantly elevate the look of your patio. Plus, they’re surprisingly affordable, making them a great choice for small patio ideas on a budget.

3: DIY Decor: Adding Personality with a Personal Touch

space saving patio solutions

Creative & Affordable DIY Patio Decor Ideas

Injecting your personality into your patio decor doesn’t have to mean maxing out your credit card. Some of the most charming and unique decor pieces are often the ones you create yourself. These small patio ideas on a budget will unleash your inner artist and save you money in the process.

Upcycled Planters: Giving New Life to Old Containers

Before you toss out those old tin cans, chipped teacups, or worn-out watering cans, consider their potential as unique planters. A little paint, some decoupage, or even just a simple cleaning can transform these discarded items into charming homes for your favorite plants. This is a fantastic way to add a touch of whimsy and personality to your patio while embracing sustainable small patio ideas on a budget.

Painted Furniture: A Fresh Coat for a Fresh Look

Don’t underestimate the transformative power of a fresh coat of paint. That old metal bistro set or wooden bench can be given a new lease on life with a vibrant color or a chic, distressed finish. This is one of the easiest and most affordable small patio ideas on a budget, and it can completely change the look and feel of your outdoor space.

String Art & Wall Hangings: Adding Artistic Flair

Bring a touch of handmade charm to your patio with DIY string art or wall hangings. These projects are surprisingly easy to create, even for beginners, and they offer endless possibilities for customization. Use colorful string to create geometric patterns, inspirational quotes, or even simple silhouettes. These personalized touches will add character and warmth to your patio without breaking the bank.

4: Lighting Magic: Creating Ambiance on a Dime

cost effective patio lighting

Budget-Friendly Lighting Ideas for Your Patio

Lighting plays a crucial role in setting the mood and ambiance of your patio. It can transform your outdoor space from a simple seating area into a magical evening retreat. And the best part? Creating a captivating atmosphere doesn’t require expensive fixtures. These small patio ideas on a budget will illuminate your space beautifully.

String Lights: Festive and Functional

String lights are a classic choice for patio lighting, and for good reason. They’re affordable, easy to install, and instantly add a touch of whimsy and charm. Drape them across your patio, wrap them around trees or railings, or hang them from a pergola for a magical, twinkling effect. Whether you choose classic Edison bulbs, colorful globe lights, or twinkling fairy lights, string lights are a surefire way to create a warm and inviting atmosphere.

Solar Lanterns: Harnessing the Power of the Sun

Solar lanterns are a practical and eco-friendly way to light up your patio. They come in a variety of styles, from rustic metal lanterns to colorful glass globes, and they require no wiring or electricity. Simply place them in a sunny spot during the day, and they’ll automatically illuminate your patio at night. This is a fantastic option for small patio ideas on a budget, as it saves you money on electricity bills while adding a touch of sustainable style.

Candlelight and Citronella: Setting the Mood

For a truly magical ambiance, nothing beats the warm glow of candlelight. Place candles in hurricane lanterns or decorative holders for a touch of romance and elegance. For a practical twist, opt for citronella candles, which not only provide beautiful light but also help keep pesky mosquitoes at bay. This simple addition can create a cozy and inviting atmosphere for those relaxing evenings outdoors.

5: Textiles & Soft Furnishings: Adding Comfort and Style

inexpensive patio makeover

Cozying Up Your Patio on a Budget

Textiles and soft furnishings are the key to creating a comfortable and inviting patio. They add warmth, texture, and personality to your outdoor space, making it feel like an extension of your home. And you don’t have to spend a fortune to achieve this cozy, welcoming vibe. These small patio ideas on a budget will help you create a stylish and comfortable outdoor retreat.

Outdoor Rugs: Defining Spaces and Adding Warmth

An outdoor rug can instantly transform your patio, defining different areas and adding a touch of warmth and comfort underfoot. Choose a rug that’s specifically designed for outdoor use, as these are typically made from durable, weather-resistant materials. From vibrant patterns to neutral tones, there’s an outdoor rug to suit every style and budget. This is a simple yet effective way to enhance the look and feel of your small patio while staying within budget.

Throw Pillows & Cushions: Comfort and Color

Adding throw pillows and cushions to your patio furniture is an easy and affordable way to boost comfort and add a pop of color. Choose weather-resistant fabrics that can withstand the elements, and don’t be afraid to mix and match patterns and textures for a playful and eclectic look. These small additions can make a big difference in the overall comfort and style of your patio.

Curtains & Drapes: Privacy and Shade

If you’re looking for a way to add privacy and shade to your small patio, consider hanging outdoor curtains or drapes. These can be hung from a pergola, awning, or even a simple curtain rod attached to your house. Choose lightweight, weather-resistant fabrics that allow for airflow while providing some protection from the sun and prying eyes. This is a stylish and functional way to enhance your patio and create a more intimate and secluded space.

6: The Thrill of the Hunt: Secondhand Finds & Upcycling

diy patio projects

Unearthing Treasures for Your Patio

Creating a stylish patio doesn’t require buying everything brand new. In fact, some of the most unique and charming pieces can be found secondhand. Embracing the thrill of the hunt for pre-loved treasures is not only eco-friendly but also one of the smartest small patio ideas on a budget.

Thrift Store Gems: Finding Hidden Patio Treasures

Local thrift stores, flea markets, and online marketplaces are treasure troves of potential patio furniture and decor. You can often find hidden gems, like vintage planters, quirky garden statues, or even a charming bistro set, all at a fraction of the cost of new items. With a little patience and a keen eye, you can score some amazing deals and give these pre-loved pieces a new life on your patio.

Upcycling Furniture: Giving Old Pieces New Purpose

That old wooden chair or metal side table might look destined for the landfill, but with a little creativity and some DIY magic, it can be transformed into a stylish addition to your patio. A fresh coat of paint, some new hardware, or even a simple sanding and staining can work wonders. Upcycling furniture is a sustainable and budget-friendly way to add character and personality to your outdoor space.

Repurposing Materials: Creative Uses for Everyday Items

Think outside the box and look for creative ways to repurpose everyday items into patio decor. Old pallets can be transformed into vertical gardens or quirky wall art. Mason jars can become charming candle holders or hanging planters. Even old tires can be repurposed into colorful planters or whimsical seating. The possibilities are endless, and this is a fantastic way to add unique and personal touches to your patio while embracing small patio ideas on a budget.

7: Small Patio Style Guide: Three Budget-Friendly Looks

cheap patio furniture

Curating Your Dream Patio Aesthetic

Now that we’ve covered the practical aspects of creating a budget-friendly patio, let’s talk style! Whether you prefer a bohemian oasis, a modern minimalist retreat, or a cozy rustic escape, you can achieve your dream patio aesthetic without breaking the bank. These small patio ideas on a budget will inspire you to create a space that reflects your personal style.

Bohemian Oasis: Relaxed Vibes and Global Inspiration

Create a relaxed and eclectic bohemian vibe with colorful textiles, vibrant patterns, and an abundance of plants. Think globally inspired accents, like Moroccan lanterns, woven tapestries, and patterned throw pillows. Layer textures and colors for a rich and inviting atmosphere. Upcycled furniture and thrifted finds fit perfectly into this eclectic style, adding to the bohemian charm without straining your budget.

Modern Minimalist: Clean Lines and Simple Elegance

For a sleek and sophisticated look, embrace modern minimalism. Choose furniture with clean lines and a neutral color palette. Focus on functionality and simplicity, avoiding clutter and unnecessary embellishments. A few carefully chosen plants and minimalist decor pieces can add a touch of personality without overwhelming the space. This style is perfect for small patios, as it creates a sense of spaciousness and tranquility.

Cozy Rustic: Natural Charm and Warmth

Embrace the warmth and charm of rustic style with natural materials, warm colors, and vintage accents. Think weathered wood, wrought iron, and cozy textiles. Incorporate elements like reclaimed wood furniture, vintage planters, and string lights for a touch of rustic charm. This style creates a welcoming and inviting atmosphere, perfect for relaxing evenings outdoors.

8: Plants & Greenery: Bringing Life to Your Patio

low cost patio plants

Budget-Friendly Ways to Add Greenery

Plants are essential for creating a vibrant and inviting patio. They add life, color, and texture to your outdoor space, transforming it into a relaxing oasis. And you don’t need to spend a fortune on expensive landscaping to achieve a lush and verdant patio. These small patio ideas on a budget will help you bring the beauty of nature to your doorstep.

Potted Plants: Versatile and Affordable

Potted plants are a versatile and affordable way to add greenery to your patio. Choose a variety of sizes and shapes to create visual interest, and don’t be afraid to mix and match different types of plants. From flowering annuals to lush tropical foliage, there’s a potted plant to suit every style and budget. Plus, potted plants are easy to move around, allowing you to change up the look of your patio whenever you like.

Herbs & Vegetables: Edible Landscaping

Why not combine beauty and practicality by growing herbs and vegetables on your patio? A small herb garden or a few tomato plants in pots can add a touch of freshness and flavor to your outdoor space. Plus, you’ll have the added bonus of fresh herbs and vegetables right at your fingertips. This is a fantastic way to maximize space and create a functional and beautiful patio on a budget.

Propagating Plants: Multiplying Your Greenery for Free

One of the smartest small patio ideas on a budget is to propagate your existing plants. Taking cuttings from your favorite plants and rooting them in water or soil is a simple and free way to expand your plant collection. This is a sustainable and budget-friendly way to add more greenery to your patio without spending a dime.

9: Maintaining Your Budget-Friendly Patio: Tips & Tricks

thrifty patio decor

Keeping Your Patio Looking Great on a Budget

Creating a beautiful patio is just the first step. Maintaining it and keeping it looking its best is equally important. And just like creating your patio, maintaining it doesn’t have to be expensive. These small patio ideas on a budget will help you protect your investment and keep your outdoor space looking great for years to come.

Cleaning & Care: Protecting Your Investment

Regular cleaning and care are essential for prolonging the life of your patio furniture and decor. Wipe down furniture regularly to remove dirt and grime, and sweep or hose down your patio flooring to keep it clean. For wooden furniture, apply a sealant or stain every year or two to protect it from the elements. These simple maintenance tasks can prevent costly repairs and replacements down the road.

Seasonal Updates: Refreshing Your Patio Throughout the Year

Keep your patio looking fresh and inviting by making seasonal updates. Swap out cushions and throws for different colors and patterns to reflect the changing seasons. Add festive decorations for holidays and special occasions. These small updates can make a big difference in the overall look and feel of your patio without requiring a major investment.

Long-Term Savings: Investing Wisely for the Future

While it’s tempting to opt for the cheapest options upfront, sometimes investing a little more in higher-quality materials can save you money in the long run. Durable, weather-resistant furniture and flooring may cost more initially, but they’ll last longer and require less maintenance, ultimately saving you money on replacements and repairs. Consider this when planning your small patio ideas on a budget for long-term value.

Creating your dream patio doesn’t require a massive budget or a sprawling backyard. As we’ve explored throughout this post, even the smallest of patios can be transformed into a stylish and functional outdoor oasis with a little creativity and some savvy small patio ideas on a budget. From upcycled planters and thrifted furniture to DIY lighting solutions and clever space-saving strategies, there are countless ways to personalize your patio and make it your own without emptying your wallet.

Create an Ergonomic Home Office That Looks as Good as It Feels

Create an Ergonomic Home Office That Looks as Good as It Feels

Want to know how to create the perfect ergonomic home office? You have come to the right place!

With more and more of us embracing the work-from-home lifestyle, the need for a dedicated and productive workspace has never been greater. But simply having a desk and chair isn’t enough. To truly thrive while working remotely, you need an ergonomic home office – a space designed to support your physical well-being and boost your productivity.

This post will guide you through creating an ergonomic home office that not only feels fantastic but looks stunning too. We’ll cover everything from choosing the right furniture to incorporating stylish décor, ensuring your workspace is a haven of both comfort and inspiration.

ergonomic home office

Best Ergonomic Home Office Tips!

Location, Location, Location: Choosing the Right Spot for Your Ergonomic Home Office

Creating the perfect ergonomic home office starts with selecting the right location. Where you choose to set up shop can significantly impact your focus, comfort, and overall productivity. Consider these key factors when deciding on the optimal spot for your ergonomic home office:

  • Natural Light: Positioning your ergonomic home office near a window allows you to harness the power of natural light. Natural light not only reduces eye strain but also boosts mood and energy levels, contributing to a more positive and productive work experience.
  • Noise Levels: Minimize distractions by choosing a location that’s relatively quiet. If your home is bustling with activity, consider a room away from high-traffic areas or invest in noise-cancelling headphones to maintain focus in your ergonomic home office.
  • Privacy: A dedicated workspace free from interruptions is crucial for concentration. If possible, select a room with a door that can be closed to create a private and productive ergonomic home office environment. Even a strategically placed room divider can help establish a sense of separation and minimize distractions.

home office ergonomics

Space Planning: Maximizing Your Home Office Footprint for an Ergonomic Setup

Once you’ve chosen the perfect location for your ergonomic home office, it’s time to optimize the space itself. Careful planning is essential for creating a functional and comfortable work environment. Here’s how to maximize your home office footprint:

  • Measure and Map: Before purchasing any furniture, meticulously measure your available space. This will help you determine the appropriate size and scale of furniture pieces, ensuring a comfortable fit and avoiding a cramped or cluttered ergonomic home office. Sketching a floor plan can be invaluable in visualizing the layout and optimizing traffic flow.
  • Designated Zones: Consider dividing your ergonomic home office into distinct zones for different activities. For example, you might have a primary work zone centered around your desk, a secondary zone for reading or brainstorming, and a storage zone for files and supplies. This helps maintain organization and promotes efficient workflow.
  • Traffic Flow: Ensure there’s ample space to move around comfortably within your ergonomic home office. Avoid placing furniture in a way that obstructs pathways or creates tight squeezes. Easy movement contributes to a more comfortable and less stressful work environment.
  • Future Growth: While planning your ergonomic home office layout, anticipate future needs. Consider whether you might need to accommodate additional equipment, storage, or even another workspace down the line. Planning for potential expansion can save you headaches and remodeling efforts in the future.

setting up an ergonomic home office

The Ergonomic Chair: Your Throne of Productivity in Your Ergonomic Home Office

Investing in a high-quality ergonomic chair is arguably the most crucial step in creating a truly ergonomic home office. You’ll be spending a significant amount of time seated, so a chair that supports your body and promotes good posture is essential for your long-term health and well-being. Look for these key features when choosing your new chair:

  • Adjustable Height: The ability to adjust the seat height is paramount. Your feet should rest flat on the floor with your knees bent at a 90-degree angle. An adjustable height ensures proper posture and reduces strain on your legs and back.
  • Lumbar Support: Adequate lumbar support is crucial for maintaining the natural curve of your spine. Look for a chair with adjustable lumbar support that can be customized to fit your individual needs. This helps prevent back pain and promotes a healthy posture while working in your home office.
  • Armrests: Adjustable armrests are another important feature. They should allow your arms to rest comfortably at your sides with your elbows bent at a 90-degree angle. This reduces strain on your shoulders and neck.
  • Seat Depth and Width: The seat should be deep enough to support most of your thighs while leaving a small gap behind your knees. The width should allow you to sit comfortably without feeling restricted.
  • Material and Breathability: Choose a chair with breathable fabric to prevent overheating and discomfort during long work sessions. Consider materials like mesh or high-quality fabric upholstery.

best ergonomic home office chair

Desk Duty: Selecting the Perfect Desk for Your Ergonomic Home Office

The right desk is just as important as the right chair in your ergonomic home office setup. It provides the foundation for your workspace and significantly impacts your comfort and productivity. Here’s a breakdown of different desk types and how to choose the perfect one for your needs:

  • Standing Desks: Standing desks have gained immense popularity for their health benefits. They allow you to alternate between sitting and standing, promoting better circulation, reducing back pain, and boosting energy levels. If you opt for a standing desk, ensure it’s height-adjustable to accommodate both sitting and standing positions within your home office.
  • Adjustable Height Desks (Sit-Stand Desks): These desks offer the best of both worlds, allowing you to seamlessly transition between sitting and standing throughout the day. They are a great investment for creating a truly flexible and ergonomic home office.
  • Traditional Desks: If you prefer a traditional desk, ensure it’s the correct height for your stature. Your elbows should be at a 90-degree angle when typing, and your wrists should be straight. Consider using a keyboard tray to achieve the optimal ergonomic position in your ergonomic home office.
  • Desk Size and Shape: Choose a desk size and shape that accommodates all your essential equipment and provides ample workspace. Consider an L-shaped desk for maximizing corner space or a U-shaped desk for a more expansive work area within your home office.
  • Material and Style: Select a desk material and style that complements your overall home office décor. Options range from classic wood to modern glass and metal.

ergonomic home office desk

Storage Solutions: Taming the Clutter Monster in Your Ergonomic Home Office

A clutter-free workspace is essential for a productive and ergonomic home office. Disorganization can lead to distractions, stress, and wasted time. Implement these storage solutions to keep your home office tidy and efficient:

  • Vertical Storage: Maximize vertical space with shelves, drawers, and filing cabinets. This keeps items off your desk surface, freeing up valuable workspace and contributing to a cleaner, more home office environment.
  • Desk Organizers: Utilize desk organizers for pens, pencils, paperclips, and other small items. This keeps your desktop tidy and prevents clutter from accumulating.
  • Cable Management System: Implement a cable management system to keep cords and wires organized and out of sight. This not only improves the aesthetics of your home office but also prevents tripping hazards.
  • Hidden Storage: Utilize hidden storage solutions, such as ottomans with storage compartments or drawers under your desk, to maximize space and maintain a clean, minimalist look in your home office.
  • Labeling: Labeling drawers, shelves, and boxes makes it easy to find what you need quickly, saving you time and reducing frustration in your home office.
  • Regular Decluttering: Schedule regular decluttering sessions to purge unnecessary items and maintain an organized and efficient home office.

ergonomic home office accessories

Monitor Placement: Protecting Your Precious Eyesight in Your Ergonomic Home Office

Correct monitor placement is crucial for preventing eye strain, neck pain, and headaches, all of which can significantly impact your productivity and well-being in your ergonomic home office. Follow these guidelines for optimal monitor placement:

  • Arm’s Length Distance: Position your monitor an arm’s length away from your eyes. This reduces eye strain and allows for a comfortable viewing distance.
  • Eye Level or Slightly Below: The top of your monitor should be at or slightly below eye level. This prevents you from craning your neck upwards, which can lead to discomfort and pain. Proper monitor placement is a cornerstone of a truly ergonomic home office.
  • Center Your Monitor: Center your monitor directly in front of you to avoid twisting your neck or body. This promotes a neutral posture and reduces strain.
  • Angle for Glare Reduction: Angle your monitor slightly upwards to minimize glare from overhead lights or windows. Glare can cause eye strain and make it difficult to focus, hindering your productivity.
  • Multiple Monitors: If you use multiple monitors, arrange them in a slight curve around you to maintain a comfortable viewing angle for each screen in your setup.

improve home office ergonomics

Keyboard and Mouse: Small Adjustments, Big Impact on Your Ergonomic Home Office

While seemingly minor, the positioning of your keyboard and mouse plays a significant role in your overall comfort and the ergonomics of your home office. Incorrect placement can lead to wrist pain, carpal tunnel syndrome, and other repetitive strain injuries. Follow these tips for optimal keyboard and mouse positioning:

  • Keyboard Placement: Position your keyboard directly in front of you, ensuring your elbows are bent at a 90-degree angle and your wrists are straight. Avoid reaching or twisting to access your keyboard. This central placement is key for working efficiently. 
  • Mouse Placement: Place your mouse next to your keyboard, close enough to avoid reaching. Keep your wrist straight and avoid resting your wrist on hard surfaces.
  • Ergonomic Keyboard and Mouse: Consider investing in an ergonomic keyboard and mouse. Ergonomic keyboards are designed to promote a more natural wrist position, while ergonomic mice reduce strain on your hand and wrist. These are valuable additions to any ergonomic home office.
  • Mouse Pad with Wrist Support: A mouse pad with wrist support can provide additional cushioning and help maintain a neutral wrist position.
  • Micro-breaks: Take frequent micro-breaks to stretch your hands and wrists. Even short breaks can help prevent stiffness and discomfort.

ergonomic home office design ideas

Lighting: Illuminating Your Workspace for Productivity in Your Ergonomic Home Office

Proper lighting is essential for a productive and comfortable home office. Poor lighting can lead to eye strain, headaches, and fatigue, hindering your ability to focus and work effectively. Follow these tips to optimize your home office lighting:

  • Natural Light is King: Maximize the use of natural light by positioning your desk near a window. Natural light is not only beneficial for your eyesight but also boosts mood and productivity. It’s a key element of a truly ergonomic home office.
  • Layer Your Lighting: Combine natural light with artificial light sources for optimal illumination. Use a combination of ambient lighting (general lighting for the room), task lighting (focused light for specific tasks), and accent lighting (decorative lighting to enhance the ambiance) to create a balanced and comfortable lighting scheme in your home office.
  • Task Lighting: A desk lamp with an adjustable arm is ideal for task lighting. Position the lamp so it illuminates your work surface without creating glare on your monitor.
  • Avoid Harsh Overhead Lighting: Harsh overhead lighting can cause glare and shadows, leading to eye strain. Opt for softer, diffused lighting or use a dimmer switch to control the intensity.
  • Color Temperature: Choose light bulbs with a color temperature that promotes focus and productivity. Cool white or blue light is generally recommended for workspaces, while warm white light is better suited for relaxation areas. Consider the impact of color temperature when designing your ergonomic home office.

small ergonomic home office ideas

Styling Your Space: Infusing Personality into Your Ergonomic Home Office

Creating an ergonomic home office doesn’t mean sacrificing style. In fact, a visually appealing and inspiring workspace can boost your mood, creativity, and productivity. Here’s how to infuse personality into your home office while maintaining functionality:

  • Color Psychology: Consider the impact of color on mood and productivity. Blues and greens are known for their calming and focusing effects, while yellows and oranges can spark creativity. Incorporate these colors strategically into your ergonomic home office design.
  • Plants: Introduce plants into your workspace to bring life and vibrancy to your home office. Plants not only purify the air but also create a more calming and inviting atmosphere.
  • Artwork and Accessories: Personalize your space with artwork, photographs, and decorative accessories that reflect your interests and style. These personal touches can make your home office feel more inviting and inspiring.
  • Textiles: Add warmth and texture with rugs, curtains, and cushions. Choose fabrics and patterns that complement your overall design scheme.
  • Wall Decor: Utilize wall space to display artwork, inspirational quotes, or even a vision board. This can add personality and motivation to your home office.
  • Balance: Strive for a balance between functionality and aesthetics. While incorporating decorative elements, ensure they don’t clutter your workspace or interfere with your workflow.

benefits of an ergonomic home office

Cable Management: Hiding the Digital Jungle in Your Ergonomic Home Office

Tangled cables and wires can quickly turn a tidy home office into a chaotic mess. Effective cable management not only improves the aesthetics of your workspace but also prevents tripping hazards and makes it easier to clean. Implement these strategies to tame the digital jungle:

  • Cable Ties and Clips: Use cable ties or clips to bundle cords together and keep them organized. This prevents them from tangling and creates a cleaner look.
  • Cable Trays and Sleeves: Conceal cables under your desk or along walls using cable trays or sleeves. This keeps them out of sight and creates a more streamlined appearance.
  • Wireless Devices: Whenever possible, opt for wireless devices such as keyboards, mice, and printers. This minimizes the number of cables cluttering your home office.
  • Designated Power Strip: Use a designated power strip to plug in all your electronic devices. This keeps cords organized and makes it easier to manage power consumption.
  • Labeling: Label your cables to identify which device they belong to easily. This is especially helpful if you need to troubleshoot or disconnect a specific device.
  • Regular Maintenance: Regularly check your cable management system and make adjustments as needed. This prevents cables from becoming tangled and maintains a tidy home office space.

diy ergonomic home office

Maintenance: Keeping Your Ergonomic Haven in Tip-Top Shape

Creating an ergonomic home office is an ongoing process, not a one-time event. Regular maintenance is essential for ensuring your workspace remains comfortable, functional, and conducive to productivity. Here are some key maintenance tips:

  • Regular Breaks: Take frequent breaks throughout the day to stretch, move around, and rest your eyes. This helps prevent stiffness, fatigue, and eye strain, all crucial for maintaining a truly ergonomic home office. Set reminders to ensure you take breaks regularly.
  • Cleaning and Dusting: Regularly clean and dust your workspace to maintain a healthy and hygienic environment. Dust can accumulate on keyboards, monitors, and other surfaces, impacting both the aesthetics and functionality of your home office.
  • Equipment Check-ups: Periodically check your equipment for wear and tear. Ensure your chair, desk, keyboard, and mouse are functioning properly and providing adequate support. Addressing issues promptly helps maintain the ergonomics of your home office.
  • Re-evaluate Your Setup: As your needs and work habits evolve, re-evaluate your ergonomic home office setup. Make adjustments to your chair, desk, monitor placement, and other elements to ensure they continue to support your comfort and productivity.
  • Organization: Regularly declutter and organize your workspace to prevent clutter from accumulating. A tidy and organized ergonomic home office promotes focus and efficiency.

ergonomic home office checklist


Creating an ergonomic home office that is both functional and aesthetically pleasing is an investment in your well-being and productivity. By implementing the tips outlined in this post, you can transform your workspace into a haven of comfort and inspiration.

Clever Mudroom Storage Ideas for Every Space Size

Clever Mudroom Storage Ideas for Every Space Size

Looking for the best mudroom storage ideas for the space you have? Read along for the best tips!

mudroom storage

Let’s be honest, the mudroom is often the hardest-working space in the house. It’s the first line of defense against the chaos of the outside world, the drop zone for everything from backpacks and sports gear to muddy boots and wet umbrellas. But what happens when this crucial space becomes overwhelmed?

A cluttered mudroom can quickly turn into a source of stress, making it difficult to find what you need and keep things organised. That’s why effective mudroom storage is so essential, regardless of the size of your entryway.

This post will explore clever mudroom storage ideas for every space size, helping you transform your mudroom from a chaotic dumping ground into a functional and stylish hub.

Best Mudroom Storage Hacks!

Tiny Mudrooms – Making the Most of Every Inch

Micro Mudroom Magic: Storage Solutions for the Smallest Entries

Dealing with a tiny entryway or a narrow hallway that has to function as your mudroom? Don’t despair! Even the smallest of spaces can be optimised with clever mudroom storage solutions. The key is to think vertically and utilize every available inch. Forget sprawling furniture; in these micro mudrooms, we’re focusing on compact and multi-functional pieces that maximise storage without sacrificing precious floor space. Effective mudroom storage in these tiny areas is less about having a designated “room” and more about creating a system that works within your limited square footage. Let’s explore some ingenious ideas to transform your miniature entryway into a storage powerhouse.

entryway storage ideas

  • Wall-Mounted Coat Racks with Tiny Shelves: In a tiny mudroom, wall space is your best friend. Install a sturdy wall-mounted coat rack with a small shelf above. This provides a spot for coats, jackets, and bags, while the shelf can hold keys, mail, or small decorative items.

  • Over-the-Door Shoe Organisers: Maximise vertical space and keep shoes off the floor with an over-the-door shoe organiser. These are inexpensive, easy to install, and can hold a surprising number of pairs. They’re a game-changer for mudroom storage in tight spaces.

  • Vertical Shoe Racks: If you have a sliver of wall space, a slim, vertical shoe rack can be a lifesaver. These racks keep shoes organised and prevent them from cluttering the floor, which is crucial for maintaining a sense of order in a tiny mudroom.

  • Narrow Console Tables with Drawers: A narrow console table placed against the wall can serve as a landing strip for keys and mail, while drawers provide hidden storage for gloves, scarves, and other small essentials. This adds valuable mudroom storage without overwhelming the space.

Small Mudroom Storage – Verticality is Key

Small Space, Big Impact: Vertical Mudroom Storage Solutions

If you have a small, dedicated mudroom, you have a bit more room to work with than a tiny entryway, but maximising space is still crucial. Vertical mudroom storage solutions are your secret weapon in these areas. Think upwards and utilise the full height of your walls to create ample storage without making the space feel cramped. By incorporating tall shelving, wall-mounted organisers, and other clever vertical storage ideas, you can transform your small mudroom into an organised and functional zone. Let’s explore some effective strategies for maximising vertical space in your small mudroom.

small mudroom organization

  • Tall, Narrow Shelving Units: Opt for tall, narrow shelving units that reach the ceiling. These provide ample storage for everything from shoes and boots to baskets and bins filled with hats, gloves, and scarves. This type of mudroom storage keeps items organised and easily accessible while maximising vertical space.

  • Wall-Mounted Cubbies: Install wall-mounted cubbies to create designated spaces for each family member. These cubbies can hold backpacks, sports equipment, and other everyday essentials, keeping them off the floor and organised. This personalised mudroom storage solution is especially helpful for families with children.

  • Pegboards for Flexible Storage: Pegboards offer incredibly versatile mudroom storage. Use them to hang coats, bags, hats, and even small tools. The adjustable pegs allow you to customise the configuration to fit your specific needs, making it a highly adaptable storage solution.

Narrow Mudrooms – Long and Lean Storage Champions

Long and Lean: Storage Solutions for Narrow Mudrooms

Narrow mudrooms, often found in hallways or corridors, present a unique set of challenges. While they may lack width, their length offers an opportunity for clever mudroom storage solutions. The key is to embrace the long, lean layout and maximise storage along the wall without obstructing the flow of traffic. By incorporating long, narrow furniture pieces and utilising wall space strategically, you can create a highly functional and organised mudroom, even in a limited space. Let’s explore some effective storage ideas for narrow mudrooms.

mudroom storage solutions

  • Long Benches with Storage Underneath: A long bench placed along one wall provides a convenient place to sit and put on or take off shoes. Choose a bench with built-in storage underneath to maximise mudroom storage capacity. This can be in the form of drawers, cubbies, or a hinged lid for easy access to stored items.

  • Slim Console Tables with Drawers: Similar to the bench idea, a slim console table with drawers offers a surface for keys and mail while providing hidden storage for smaller items. Opt for a table with a shallow depth to avoid encroaching on the walkway. This adds valuable mudroom storage without making the space feel cramped.

  • Wall-Mounted Hooks and Shelves Running the Length of the Wall: Maximise wall space by installing hooks and shelves along the entire length of the wall. This provides ample hanging space for coats, bags, and hats, while shelves can hold baskets, bins, and other storage containers. This creates a continuous mudroom storage solution that utilises the narrow space effectively.

Medium Mudroom Storage – Balancing Form and Function

The Goldilocks Zone: Mudroom Storage for Medium Spaces

Medium-sized mudrooms offer a sweet spot for balancing both form and function. You have enough space to incorporate more substantial storage pieces without overwhelming the area. This allows for greater flexibility in design and the opportunity to create a truly personalised mudroom that caters to your family’s specific needs. The key is to choose mudroom storage solutions that are both practical and stylish, creating a space that is both organised and visually appealing. Let’s explore some inspiring ideas for medium-sized mudrooms.

best mudroom storage systems

  • Cubby Systems with Drawers and Baskets: Cubby systems are a fantastic way to provide designated storage for each family member. Combine open cubbies with drawers and baskets for concealed storage of smaller items. This creates a versatile mudroom storage solution that keeps belongings organised and easily accessible.

  • Coat Racks with Shoe Storage Benches: A dedicated coat rack combined with a shoe storage bench offers a classic and practical mudroom storage solution. The coat rack provides ample hanging space for coats and jackets, while the bench offers a place to sit and put on or take off shoes, with storage underneath for keeping footwear tidy.

  • Free-Standing Storage Units: Free-standing storage units, such as wardrobes or cabinets, offer versatile mudroom storage options. Choose units with a combination of shelves, drawers, and hanging rods to accommodate a variety of items. These units can be easily moved or reconfigured as needed, providing flexibility in your mudroom design.

Large Mudrooms – Zoned for Organisation

Divide and Conquer: Zoned Storage for Large Mudrooms

Large mudrooms offer the luxury of space, allowing you to create distinct zones for different activities and storage needs. This is where you can truly optimise functionality and create a highly organised and efficient mudroom. Think about the various functions your mudroom serves – storing outerwear, organising sports equipment, managing pet supplies, etc. – and designate specific zones for each. This zoned approach to mudroom storage will transform your large mudroom into a well-oiled machine. Let’s explore some ideas for creating dedicated zones in your spacious mudroom.

mudroom locker storage

  • Designated Areas for Coats, Shoes, Bags, Sports Equipment, etc.: Divide your large mudroom into specific areas for different categories of items. For example, create a coat closet or designated wall area for outerwear, a shoe storage zone with shelves or cubbies, a separate area for bags and backpacks, and a dedicated space for sports equipment. This zoned approach to mudroom storage makes it easy to find what you need and keeps everything organized.

  • Individual Lockers or Cubbies for Each Family Member: Consider installing individual lockers or cubbies for each family member. This provides personalised mudroom storage space and encourages responsibility for keeping belongings tidy. Each person can have their own designated area for coats, shoes, backpacks, and other personal items.

  • A Drop Zone for Mail and Keys: Create a designated drop zone near the entryway for mail, keys, and other small items. This could be a small table with a drawer, a wall-mounted organiser, or a designated basket or tray. This prevents these items from getting lost or cluttering other areas of the mudroom.

Extra-Large Mudrooms – The Ultimate Mudroom Dream

Mudroom Envy: Storage Solutions for Extra-Large Spaces

An extra-large mudroom is the ultimate dream for those who crave organisation and functionality. With ample space, you can incorporate luxurious features and create a truly customised mudroom that caters to every need. Think beyond basic storage and consider incorporating elements like seating areas, built-in organisers, and even dedicated pet washing stations. The possibilities are endless when it comes to mudroom storage in an extra-large space. Let’s explore some inspiring ideas for creating the mudroom of your dreams.

garage entryway storage

  • Mudroom Islands: A mudroom island provides additional storage, a countertop for folding laundry or organising items, and a central hub for managing household tasks. Include drawers, cabinets, and open shelving to maximise storage capacity.

  • Built-in Seating Areas: Incorporate a comfortable seating area with built-in benches and cushions. This provides a convenient place to put on and take off shoes, as well as a relaxing spot to read or chat. Include storage underneath the benches for shoes, boots, and other items.

  • Walk-in Closets: A walk-in closet within the mudroom provides ample storage for seasonal outerwear, sports equipment, and other bulky items. Include shelves, hanging rods, and drawers to organise everything efficiently.

  • Dedicated Laundry Areas: Integrate a laundry area within the mudroom for added convenience. This allows you to manage laundry tasks efficiently and keeps dirty clothes contained within a designated area.

  • Pet Washing Stations: For pet owners, a dedicated pet washing station within the mudroom is a luxurious and practical addition. This keeps muddy paws contained and makes it easy to clean up after your furry friends.

DIY Mudroom Storage Hacks – Budget-Friendly Brilliance

DIY Mudroom Magic: Budget-Friendly Storage Hacks

Creating a functional and stylish mudroom doesn’t have to break the bank. With a little creativity and some DIY ingenuity, you can implement effective mudroom storage solutions on a budget. Repurposing existing items, building simple organisers, and adding personalised touches can transform your mudroom without requiring a major investment. Let’s explore some budget-friendly DIY mudroom storage hacks.

DIY mudroom storage with bench

  • Repurposed Crates and Pallets: Give old crates and pallets a new life by transforming them into rustic storage solutions. Sand them down, paint them, and stack them to create shelving units, shoe racks, or cubbies.

  • DIY Coat Racks: Create a unique and personalised coat rack using reclaimed wood, metal pipes, or even repurposed branches. This adds a touch of character to your mudroom while providing functional storage.

  • Customised Storage Bins: Decorate plain storage bins with fabric, paint, or stencils to add a pop of colour and personality to your mudroom. Label each bin clearly to keep items organised and easy to find.

  • Upcycled Jars and Containers: Use upcycled jars and containers to store small items like gloves, scarves, and dog leashes. Decorate them to match your mudroom’s décor and attach labels for easy identification.

  • DIY Shoe Storage Solutions: Create a simple shoe rack using PVC pipes, wooden planks, or even repurposed rain gutters. This keeps shoes off the floor and organised without requiring expensive shoe storage furniture.

A well-organised mudroom, regardless of its size, can significantly impact the overall functionality and flow of your home. By implementing these clever mudroom storage ideas, you can transform your entryway from a chaotic catch-all into a stylish and efficient space. Whether you’re working with a tiny entryway or a spacious mudroom, there are solutions to fit every need and budget.

Fresh Living Room Color Schemes That Never Fail

Fresh Living Room Color Schemes That Never Fail

Looking for the best living room color schemes? You are at the right place for the best inspiration!

Living room color schemes

Choosing the right living room color scheme can dramatically transform the heart of your home. Color has a powerful impact on mood and atmosphere, influencing how you and your guests feel in the space.

This post will explore fresh and timeless living room color schemes that never fail, offering inspiration for creating a living room you’ll love.

Best Living Room Color Schemes!

I. Monochromatic Magic: Shades of Serenity

Monochromatic living room color schemes revolve around a single color, utilising various shades and tints to create depth and visual interest. This approach offers a calming and sophisticated atmosphere, fostering a sense of tranquillity and unity. From the deepest navy to the palest sky blue, a monochromatic blue living room color scheme, for example, can evoke a sense of peace and serenity. Similarly, exploring various shades of green can create a connection to nature, while a grayscale palette offers a sleek and modern feel. By playing with textures and patterns within your chosen color family, you can prevent a monochromatic scheme from feeling flat or one-dimensional.

living room paint colors

II. Earthy Neutrals: Embrace the Warmth

Earthy neutral living room color schemes offer a timeless appeal, creating a comforting and inviting atmosphere. Their versatility allows for easy integration with various decor styles, from modern farmhouse to contemporary chic. Think warm beiges, creamy whites, rich browns, and subtle hints of green or terracotta. These hues create a sense of grounding and stability, making the living room a perfect relaxing sanctuary. Layering textures, such as a chunky knit throw or a woven rug, adds depth and visual interest to an earthy neutral palette. Consider incorporating natural materials like wood and stone to further enhance the organic feel.

Living room color schemes

III. Coastal Calm: Breezy Blues and Whites

Transport yourself to a seaside retreat with a coastal-inspired living room color scheme. These palettes evoke a sense of tranquillity and freshness, utilizing light blues, crisp whites, and natural textures. Imagine pairing navy blue accents, like striped throw pillows or a patterned rug, with white walls and light wood furniture. Touches of beige and sandy hues can further enhance the beachy vibe. Natural light is key to achieving the airy and bright feel of a coastal space, so consider sheer curtains or blinds to maximise sunlight.

living room color ideas

IV. Bold & Dramatic: Jewel Tones for Opulence

For a touch of luxury and drama, embrace the richness of jewel-toned living room color schemes. Emerald green, sapphire blue, ruby red, and amethyst purple can create a truly opulent atmosphere. Balance these bold colors with neutral elements, such as a light-colored sofa or white walls, to prevent the space from feeling overwhelming. Consider pairing emerald green with sapphire blue accents, or ruby red with gold accents for a touch of glamour. Luxurious fabrics like velvet and silk can further enhance the richness of the jewel tones.

best living room colors

V. Modern Minimalist: Grayscale Sophistication

Grayscale living room color schemes exude elegance and sophistication. Varying shades of grey and white create depth and visual interest while maintaining a clean and uncluttered aesthetic. Incorporate metallic accents, such as silver or gold, to add a touch of glamour. Alternatively, introduce a pop of color with a vibrant piece of artwork or a brightly colored throw pillow to create a focal point. The key to a successful grayscale scheme is to play with textures and patterns to prevent the space from feeling sterile.

living room wall colors

VI. Rustic Charm: Warm Woods and Earthy Tones

Create a cosy and inviting atmosphere with a rustic living room color scheme. Warm wood tones, earthy colors, and natural materials are key to achieving this style. Think browns, greens, oranges, with hints of deep red or blue. Exposed beams, stone fireplaces, and leather furniture can further enhance the rustic charm. Incorporate textured fabrics like wool and linen to add warmth and comfort.

small living room color schemes

VII. Scandinavian Simplicity: Light and Airy Spaces

Embrace the minimalist aesthetic of Scandinavian design with a light and airy living room color scheme. White walls, light grey furniture, and pastel accents create a sense of calm and serenity. Natural light is essential in Scandinavian design, so maximise sunlight with sheer curtains or blinds. Incorporate natural materials like wood and wool to add warmth and texture.

modern living room color schemes

From monochromatic serenity to bold jewel tones, the possibilities for living room color schemes are endless. The key is to choose a palette that reflects your personal style and complements the size and natural light of your space. Consider the mood you want to create and the overall aesthetic you’re aiming for. Don’t be afraid to experiment and find what works best for you.

Your Complete Garden Planning Guide for a Beautiful Yard

Your Complete Garden Planning Guide for a Beautiful Yard

Read along for the ultimate garden planning guide.

garden planning


Imagine stepping into your backyard and being greeted by a vibrant oasis of colour and fragrance. A well-designed garden can be a source of immense joy, providing a peaceful retreat and a connection to nature. But achieving this idyllic scene doesn’t happen by chance. Effective garden planning is the key to transforming your outdoor space into the beautiful yard you’ve always dreamed of.

This comprehensive guide will equip you with the knowledge and tools you need to embark on your garden planning journey, covering everything from assessing your space to choosing the right plants and maintaining your garden’s beauty for years to come.

The Best Garden Planning Tips!

1: Assessing Your Space and Resources for Effective Garden Planning

Understanding Your Canvas

Before you even consider picking up a trowel, the first step in garden planning is to thoroughly assess your existing space and resources. Understanding your yard’s unique characteristics will lay the foundation for a successful and thriving garden. This initial phase of garden planning might seem tedious, but it’s crucial for making informed decisions down the line.

Begin by analysing the sunlight exposure in different areas of your yard. Some plants thrive in full sun, while others prefer shade. Observe how the sunlight moves across your yard throughout the day. A simple sun map can be incredibly helpful during the garden planning process.

backyard landscaping plans

Next, evaluate your soil type and drainage. Different plants have different soil preferences. Is your soil sandy, clay-like, or loamy? Does the water pool after rain, or does it drain quickly? Knowing the answers to these questions will guide your plant selection and garden planning decisions.

Accurate measurements are essential for effective garden planning. Measure the available space for planting, taking into account existing features like trees, fences, and structures. This will help you determine how many plants you can accommodate and how to arrange them effectively.

Finally, consider your budget and available time for garden maintenance. Garden planning should be realistic. Choose plants that fit your lifestyle and resources. A low-maintenance garden might be ideal if you have limited time. Careful garden planning from the outset will prevent frustration and ensure a garden you can enjoy for years to come.

2: Defining Your Garden Style and Purpose

Visualising Your Dream Garden

With a clear understanding of your yard’s characteristics, the next stage of garden planning involves defining your garden’s style and purpose. This is where you let your creativity bloom and envision the garden of your dreams. What kind of atmosphere do you want to create? What do you hope to achieve with your garden?

Explore different garden styles to find one that resonates with you. Do you prefer the structured elegance of a formal garden, the charming informality of a cottage garden, or the clean lines of a contemporary garden? Researching various styles will provide inspiration and help you narrow down your preferences.

garden layout ideas

Consider the primary purpose of your garden. Are you primarily interested in growing colorful flowers for visual appeal? Do you envision a bountiful vegetable garden to provide fresh produce for your table? Or perhaps you seek a tranquil retreat for relaxation and contemplation? Defining your garden’s purpose is a crucial element of garden planning.

Your personal preferences and lifestyle should also play a significant role in your garden planning process. Do you enjoy spending time outdoors tending to your plants, or do you prefer a low-maintenance garden? Think about how you plan to use your garden space. Will it be a place for entertaining guests, or a private sanctuary for quiet enjoyment? Effective garden planning aligns your garden with your individual needs and desires.

3: Choosing the Right Plants for Your Garden Plan

Selecting Your Green Companions

Now comes the exciting part of garden planning: choosing the plants that will bring your vision to life! With countless plant varieties available, it’s essential to select plants that are well-suited to your specific climate, soil conditions, and garden style.

Thorough research is key to successful garden planning. Consult local gardening resources, nurseries, or online databases to identify plants that thrive in your region. Consider factors such as average temperatures, rainfall, and frost dates. Choosing plants adapted to your local climate will significantly increase their chances of survival and minimise the need for extensive care.

When selecting plants, pay attention to their size, growth habit, and flowering season. Do you want tall, stately plants or low-growing groundcovers? Do you prefer plants with vibrant blooms or interesting foliage? Consider the timing of their flowering periods to ensure a continuous display of colour throughout the growing season.

small garden design ideas

A diverse selection of plants is essential for a healthy and visually appealing garden. Incorporating a variety of species not only adds interest but also promotes biodiversity and resilience. Think about companion planting, a technique where certain plants are grown together to benefit each other. Some combinations can deter pests, improve soil health, or even enhance the flavor of vegetables. Successful garden planning involves considering these ecological interactions.

4: Creating a Functional and Aesthetic Garden Layout

Designing Your Garden’s Blueprint

With your plant selection finalised, the next phase of garden planning involves creating a functional and aesthetically pleasing layout. This is where you’ll determine the precise placement of each plant and other elements within your garden space.

Start by sketching a garden plan on paper or using online garden planning tools. This visual representation will help you organise your thoughts and ensure that all the elements work together harmoniously. Indicate the location of existing features like trees, fences, and structures, and then begin placing your chosen plants within the available space.

garden design plans

Consider the flow and accessibility of different areas within your garden. Create pathways that allow you to easily navigate through the space and access different sections for maintenance. Think about how you want to move through the garden and where you might want to pause and enjoy the scenery.

Focal points and visual pathways are essential elements of effective garden planning. A focal point can be a striking plant, a sculpture, or a water feature that draws the eye and creates a sense of visual interest. Visual pathways, created through the arrangement of plants and hardscaping elements, guide the eye through the garden and create a sense of depth and perspective.

Hardscaping elements such as paths, patios, and retaining walls play a crucial role in defining the structure and functionality of your garden. These features not only enhance the aesthetic appeal but also provide practical benefits like improved drainage and erosion control. Incorporate hardscaping elements strategically into your garden plan to create distinct areas and enhance the overall design.

5: Preparing the Soil and Planting Your Garden

Bringing Your Garden to Life

With your garden plan in place, it’s time to get your hands dirty and start preparing the soil for planting. This crucial step in garden planning ensures that your plants have the best possible start and sets the stage for healthy growth.

Amend the soil with compost or other organic matter to improve its structure, fertility, and drainage. This is a fundamental aspect of garden planning, as healthy soil is the foundation of a thriving garden. Spread a layer of compost over the planting area and work it into the existing soil using a garden fork or tiller.

flower garden plan

Follow proper planting techniques for different plant types. Some plants prefer to be planted in shallow holes, while others require deeper planting. Pay attention to the spacing recommendations for each plant to avoid overcrowding and ensure adequate air circulation.

Water thoroughly after planting to help the roots establish themselves in the new soil. Consistent watering is especially important during the first few weeks after planting. Mulch around plants to retain moisture, suppress weeds, and regulate soil temperature. Mulching is a valuable garden planning technique that reduces maintenance and promotes healthy plant growth.

6: Maintaining Your Garden’s Beauty

Nurturing Your Garden’s Growth

Once your garden is planted, ongoing maintenance is essential for preserving its beauty and ensuring its long-term health. This final stage of garden planning involves developing a regular routine to provide your plants with the care they need to thrive.

Develop a watering schedule based on plant needs and weather conditions. Some plants require frequent watering, while others are more drought-tolerant. Monitor the soil moisture regularly and adjust your watering schedule accordingly.

Fertilise plants regularly to provide them with the nutrients they need for optimal growth. Choose a fertiliser that is appropriate for the types of plants in your garden. Follow the instructions on the fertiliser packaging carefully to avoid over-fertilising, which can harm your plants.

diy garden design

Prune plants to maintain their shape, encourage flowering, and remove dead or diseased branches. Pruning is an important aspect of garden planning, as it helps to keep your plants healthy and looking their best.

Regularly monitor your garden for pests and diseases. Early detection is key to preventing widespread infestations or infections. Take appropriate action if you notice any signs of pests or diseases, such as using organic pest control methods or removing affected plant parts. Ongoing garden planning is essential for long-term success.

7: Adapting Your Garden Plan Over Time

Embracing the Evolution of Your Garden

One of the most important things to remember about garden planning is that gardens are dynamic and ever-changing. As your plants grow and mature, your garden will evolve, and your garden planning should evolve along with it. Embrace this process of change and be prepared to adapt your garden plan over time.

Acknowledge that some plants may grow larger than anticipated, while others may not perform as well as expected. Be prepared to relocate plants, divide overgrown perennials, or even remove plants that are not thriving. Flexibility is key to successful long-term garden planning.

Consider the seasonal changes and adapt your maintenance accordingly. Different seasons require different approaches to watering, fertilising, and pest control. Incorporate seasonal tasks into your garden planning, such as preparing your garden for winter or planting spring bulbs.

landscape design for begginers

Don’t be afraid to experiment with new plants and design ideas. As you gain experience with garden planning, you may discover new plants that you love or develop new design preferences. Be open to trying new things and incorporating them into your garden plan. A garden is a living canvas, and garden planning is an ongoing process of learning and experimentation.


Creating a beautiful and thriving garden is a rewarding journey that begins with careful garden planning. By following the steps outlined in this guide, you can transform your outdoor space into a haven of beauty and tranquility. Remember that successful garden planning involves understanding your space, choosing the right plants, creating a functional layout, and providing ongoing maintenance.

Brilliant Playroom Organization Ideas for Busy Families

Brilliant Playroom Organization Ideas for Busy Families

Best playroom organization ideas to keep your house organized.

playroom organization

Let’s be honest, keeping a playroom organized can feel like a never-ending battle, especially for busy families. Toys seem to multiply overnight, and what starts as a tidy space quickly transforms into a chaotic landscape of building blocks, dolls, and art supplies.

But don’t worry, achieving and maintaining playroom organization isn’t an impossible dream. This post is packed with practical playroom organization ideas designed to make cleanup quick, easy, and even fun for both kids and parents. Get ready to transform your playroom from a source of stress into a haven of fun and creativity!

Best Playroom Organization Tips!

Declutter Before You Organize

The First Step: Decluttering Your Playroom

Before diving into bins, baskets, and labels, there’s one crucial step that will make all your playroom organization efforts significantly more effective: decluttering. It might seem counterintuitive to add another task to your to-do list but trust us, this is the foundation of successful playroom organization. A clutter-free space is much easier to organize and maintain in the long run. So, how do you tackle the mountain of toys?

Start by sorting through everything. Be honest with yourself – are there toys your children have outgrown? Are there broken toys that can’t be repaired? Are there duplicates or toys that rarely get played with? Create three piles: one for donating, one for selling (if you’re feeling ambitious), and one for discarding. This process not only improves playroom organization but also teaches children valuable lessons about letting go and appreciating what they have. Once you’ve decluttered, you’ll have a much clearer picture of what needs to be organized and what storage solutions will work best for your family.

decluttering playroom

Zoning for Defined Play Areas

Create Zones for Different Activities

Now that you’ve decluttered and have a clearer view of your play space, it’s time to implement one of the most effective playroom organization ideas: zoning. Zoning involves dividing your playroom into designated areas for different types of play. This not only helps with playroom organization by containing specific toys in their designated areas, but it also encourages more focused and imaginative play.

Think about the types of activities your children enjoy. Do they love building elaborate structures with blocks? Do they have a passion for arts and crafts? Is there a budding bookworm in the family? Based on their interests, you can create zones such as a building block area, an arts & crafts station, a reading nook, a dress-up corner, or a board game area.

kids playroom ideas

Clearly defining these zones makes it easier for children to find what they’re looking for and, more importantly, makes cleanup a breeze. When it’s time to tidy up, they know exactly where each toy belongs, reducing the overwhelming feeling and making playroom organization a much less daunting task. For example, all the building blocks go back to the block area, art supplies return to the art station, and books go back to the reading nook. This simple strategy can dramatically improve the overall playroom organization and create a more harmonious and functional play space.

Storage Solutions: Bins, Baskets, and Beyond

Clever Storage Solutions for Maximum Playroom Organization

With your playroom zoned and ready for action, it’s time to tackle the next essential element of playroom organization: storage. Choosing the right storage solutions can make or break your efforts to maintain a tidy and functional play space. The key is to select options that are both practical and accessible for little hands.

toy storage solutions

Bins, baskets, and containers are your best friends when it comes to playroom organization. Clear bins are particularly helpful as they allow children to easily see what’s inside, eliminating the need to rummage and create a mess. For younger children, labelling bins with both pictures and words can further enhance playroom organization and encourage them to put things away independently. Categorise toys by type – building blocks, dolls, cars, art supplies – and assign a designated bin or basket for each category. This makes it simple for children to find what they’re looking for and just as easy to put away when they’re finished. Consider using different coloured bins for different zones to add an extra layer of visual organization to your playroom. Beyond bins and baskets, explore other storage options like drawers, cubbies, and hanging organizers to maximize space and keep everything neatly tucked away. Remember, effective storage is the backbone of a successful playroom organization.

Vertical Space: Reaching New Heights of Organization

Utilizing Vertical Space for Efficient Playroom Organization

When it comes to playroom organization, don’t forget to look up! Utilizing vertical space is a game-changer, especially in smaller playrooms. Walls offer valuable real estate for storage and can significantly enhance your playroom organization efforts.

playroom storage ideas

Install wall shelves to display books, showcase favourite toys, and store smaller items in attractive baskets or containers. Choose shelves that are sturdy and appropriately sized for the items you plan to store. Floating shelves are a great option for a modern look, while traditional bookcases offer ample storage space. For younger children, ensure that lower shelves are within easy reach so they can access their toys independently. Consider using wall-mounted organizers for art supplies, dress-up clothes, or even sports equipment. These organizers not only maximize vertical space but also keep items neatly contained and off the floor, contributing to a more organized and functional playroom. By thinking vertically, you can free up valuable floor space for play and create a more visually appealing and efficiently organized playroom.

Furniture that Works as Hard as You Do

Choosing the Right Furniture for Playroom Organization and Functionality

The furniture you select for your playroom can play a significant role in its overall organization. Opt for pieces that not only look good but also work hard to maximize storage and functionality. This is a key element of effective playroom organization.

Multi-purpose furniture is a must-have for any well-organized playroom. Look for ottomans with hidden storage compartments, benches with built-in drawers, or play tables with storage underneath. These clever pieces provide valuable storage space while also serving their primary function. A storage bench, for example, can provide seating while also concealing toys, blankets, or games. A play table with drawers can store art supplies, building blocks, or other small toys, keeping them within easy reach during playtime. When selecting furniture, consider the size and layout of your playroom. Choose pieces that are appropriately scaled and don’t overwhelm the space. Child-sized furniture is also a great option, as it allows children to access their toys and belongings independently, fostering a sense of ownership and responsibility in maintaining playroom organization.

Toy Rotation: Keeping it Fresh and Engaging

Toy Rotation: A Secret Weapon for Playroom Organization and Engagement

Even the most organized playroom can start to feel stale if children are constantly surrounded by the same toys. This is where toy rotation comes in – a brilliant strategy for both playroom organization and keeping kids engaged and excited about their toys.

small playroom organizaton

The concept is simple: instead of having all toys available at all times, store a portion of them away in labelled bins or boxes. Every few weeks or months, swap out the toys, bring out the stored toys and put away the ones that have been in regular rotation. This not only reduces the visual clutter in the playroom, contributing to a more organized and less overwhelming environment, but it also reintroduces toys that may have been forgotten, sparking renewed interest and extending their lifespan. Toy rotation is a fantastic way to manage the sheer volume of toys many children accumulate, making playroom organization more manageable and playtime more exciting. It also encourages more focused play, as children are presented with a smaller, more curated selection of toys at any given time. This simple strategy can be a game-changer for maintaining a tidy and engaging playroom.

Cleanup Strategies: Making it Easy and Fun

Easy Cleanup Strategies for a Stress-Free Playroom

Maintaining playroom organization isn’t just about having the right storage solutions; it’s also about establishing routines and strategies that make cleanup a manageable and even enjoyable part of the day. After all, even the most organized playroom will eventually succumb to the inevitable tide of toys if cleanup isn’t a regular practice.

playroom organization hacks

One of the most effective playroom organization strategies is to establish designated cleanup times. This could be before dinner, before bedtime, or any other time that works well for your family’s schedule. Making cleanup a regular part of the routine helps children understand that it’s an expected part of playtime. But cleanup doesn’t have to be a chore. In fact, it can be an opportunity for fun and learning! Try turning cleanup into a game. Set a timer and see how quickly everyone can put their toys away. Play some upbeat music to make it more energetic. Or create a reward system for a consistently tidy playroom. Visual cues can also be incredibly helpful for playroom organization, especially for younger children. Label bins and shelves with pictures and words so children know exactly where each toy belongs. Colour coding can also be a fun and effective way to help children identify where things go. By making cleanup a regular, engaging activity, you can maintain playroom organization and teach children valuable life skills at the same time.

Creating and maintaining a well-organized playroom is a worthwhile investment for any busy family. Effective playroom organization not only reduces stress and clutter but also fosters a more positive and productive play environment for children.

By implementing these playroom organization ideas – from decluttering and zoning to utilizing clever storage solutions and establishing consistent cleanup routines – you can transform your playroom from a chaotic mess into a haven of fun and creativity. Remember, a well-organized playroom benefits the entire family, creating a more harmonious and enjoyable home environment.