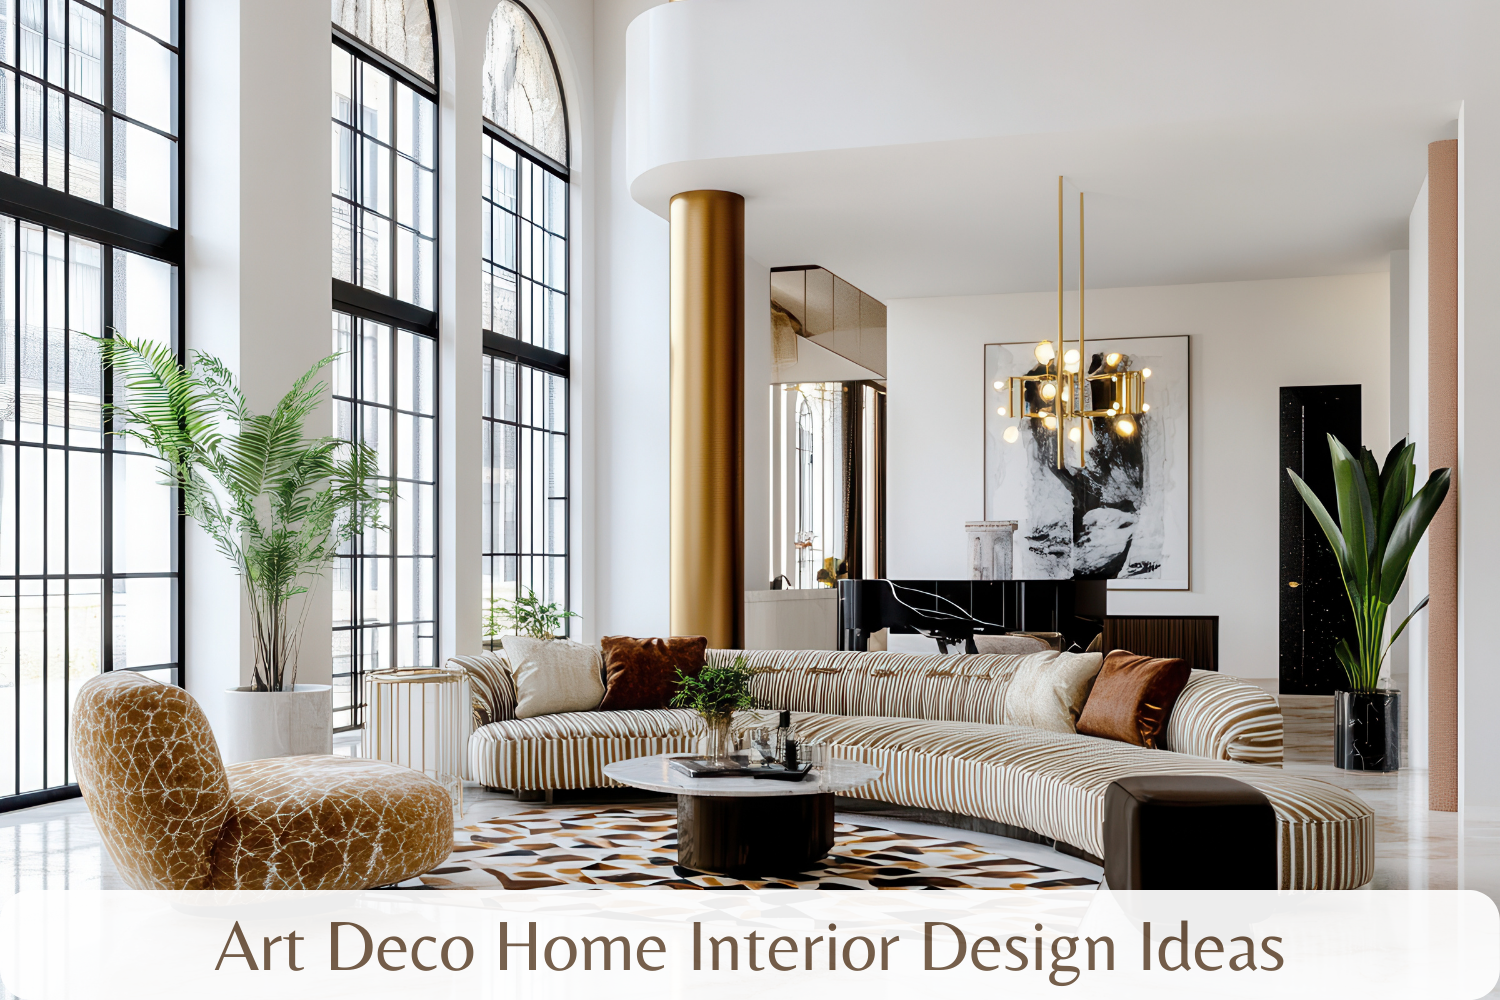
by Kesaa Interiors | DESIGN GUIDES, Interior Design Styles, Style Guides, STYLES & TRENDS
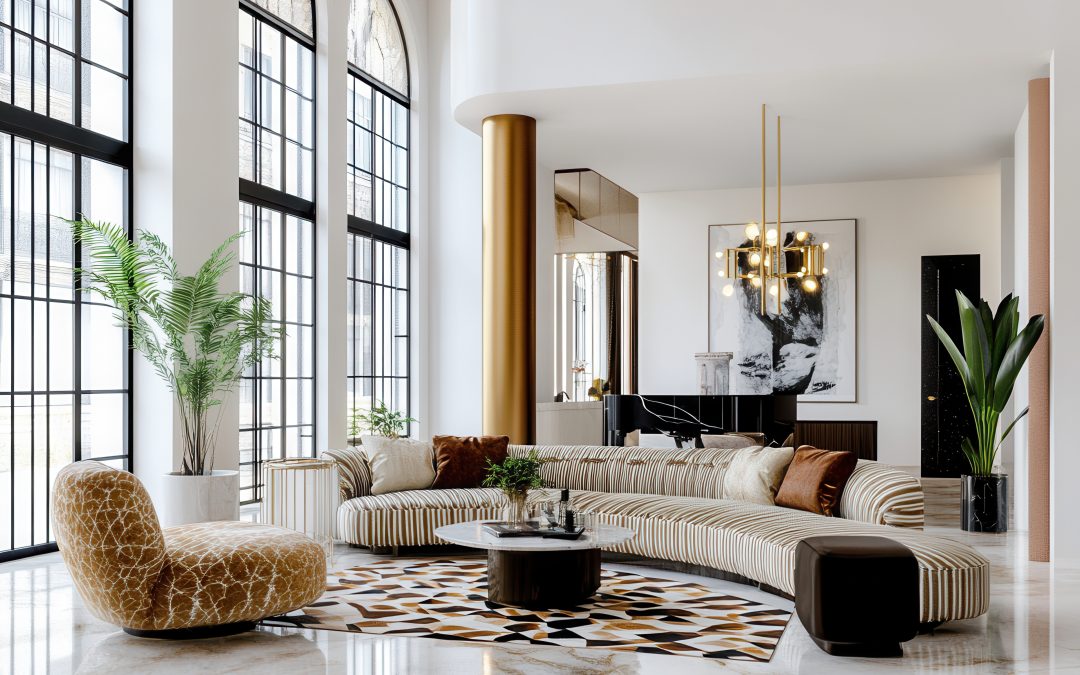
There’s something undeniably magical about Art Deco interior design that keeps drawing me back to this style. I’ve seen how incorporating Art Deco home interior design ideas can transform an ordinary space into something extraordinary. The style’s perfect blend of glamour and sophistication has captivated homeowners and designers alike for decades. I’m thrilled to share my favourite ways to bring this timeless aesthetic into your home.
I’ll walk you through 15 stunning Art Deco home interior design ideas that can help you achieve that perfect luxe look. Whether you’re planning a complete renovation or looking to add just a touch of that signature Art Deco glamour, these tips will help you create the space you’ve been dreaming of.
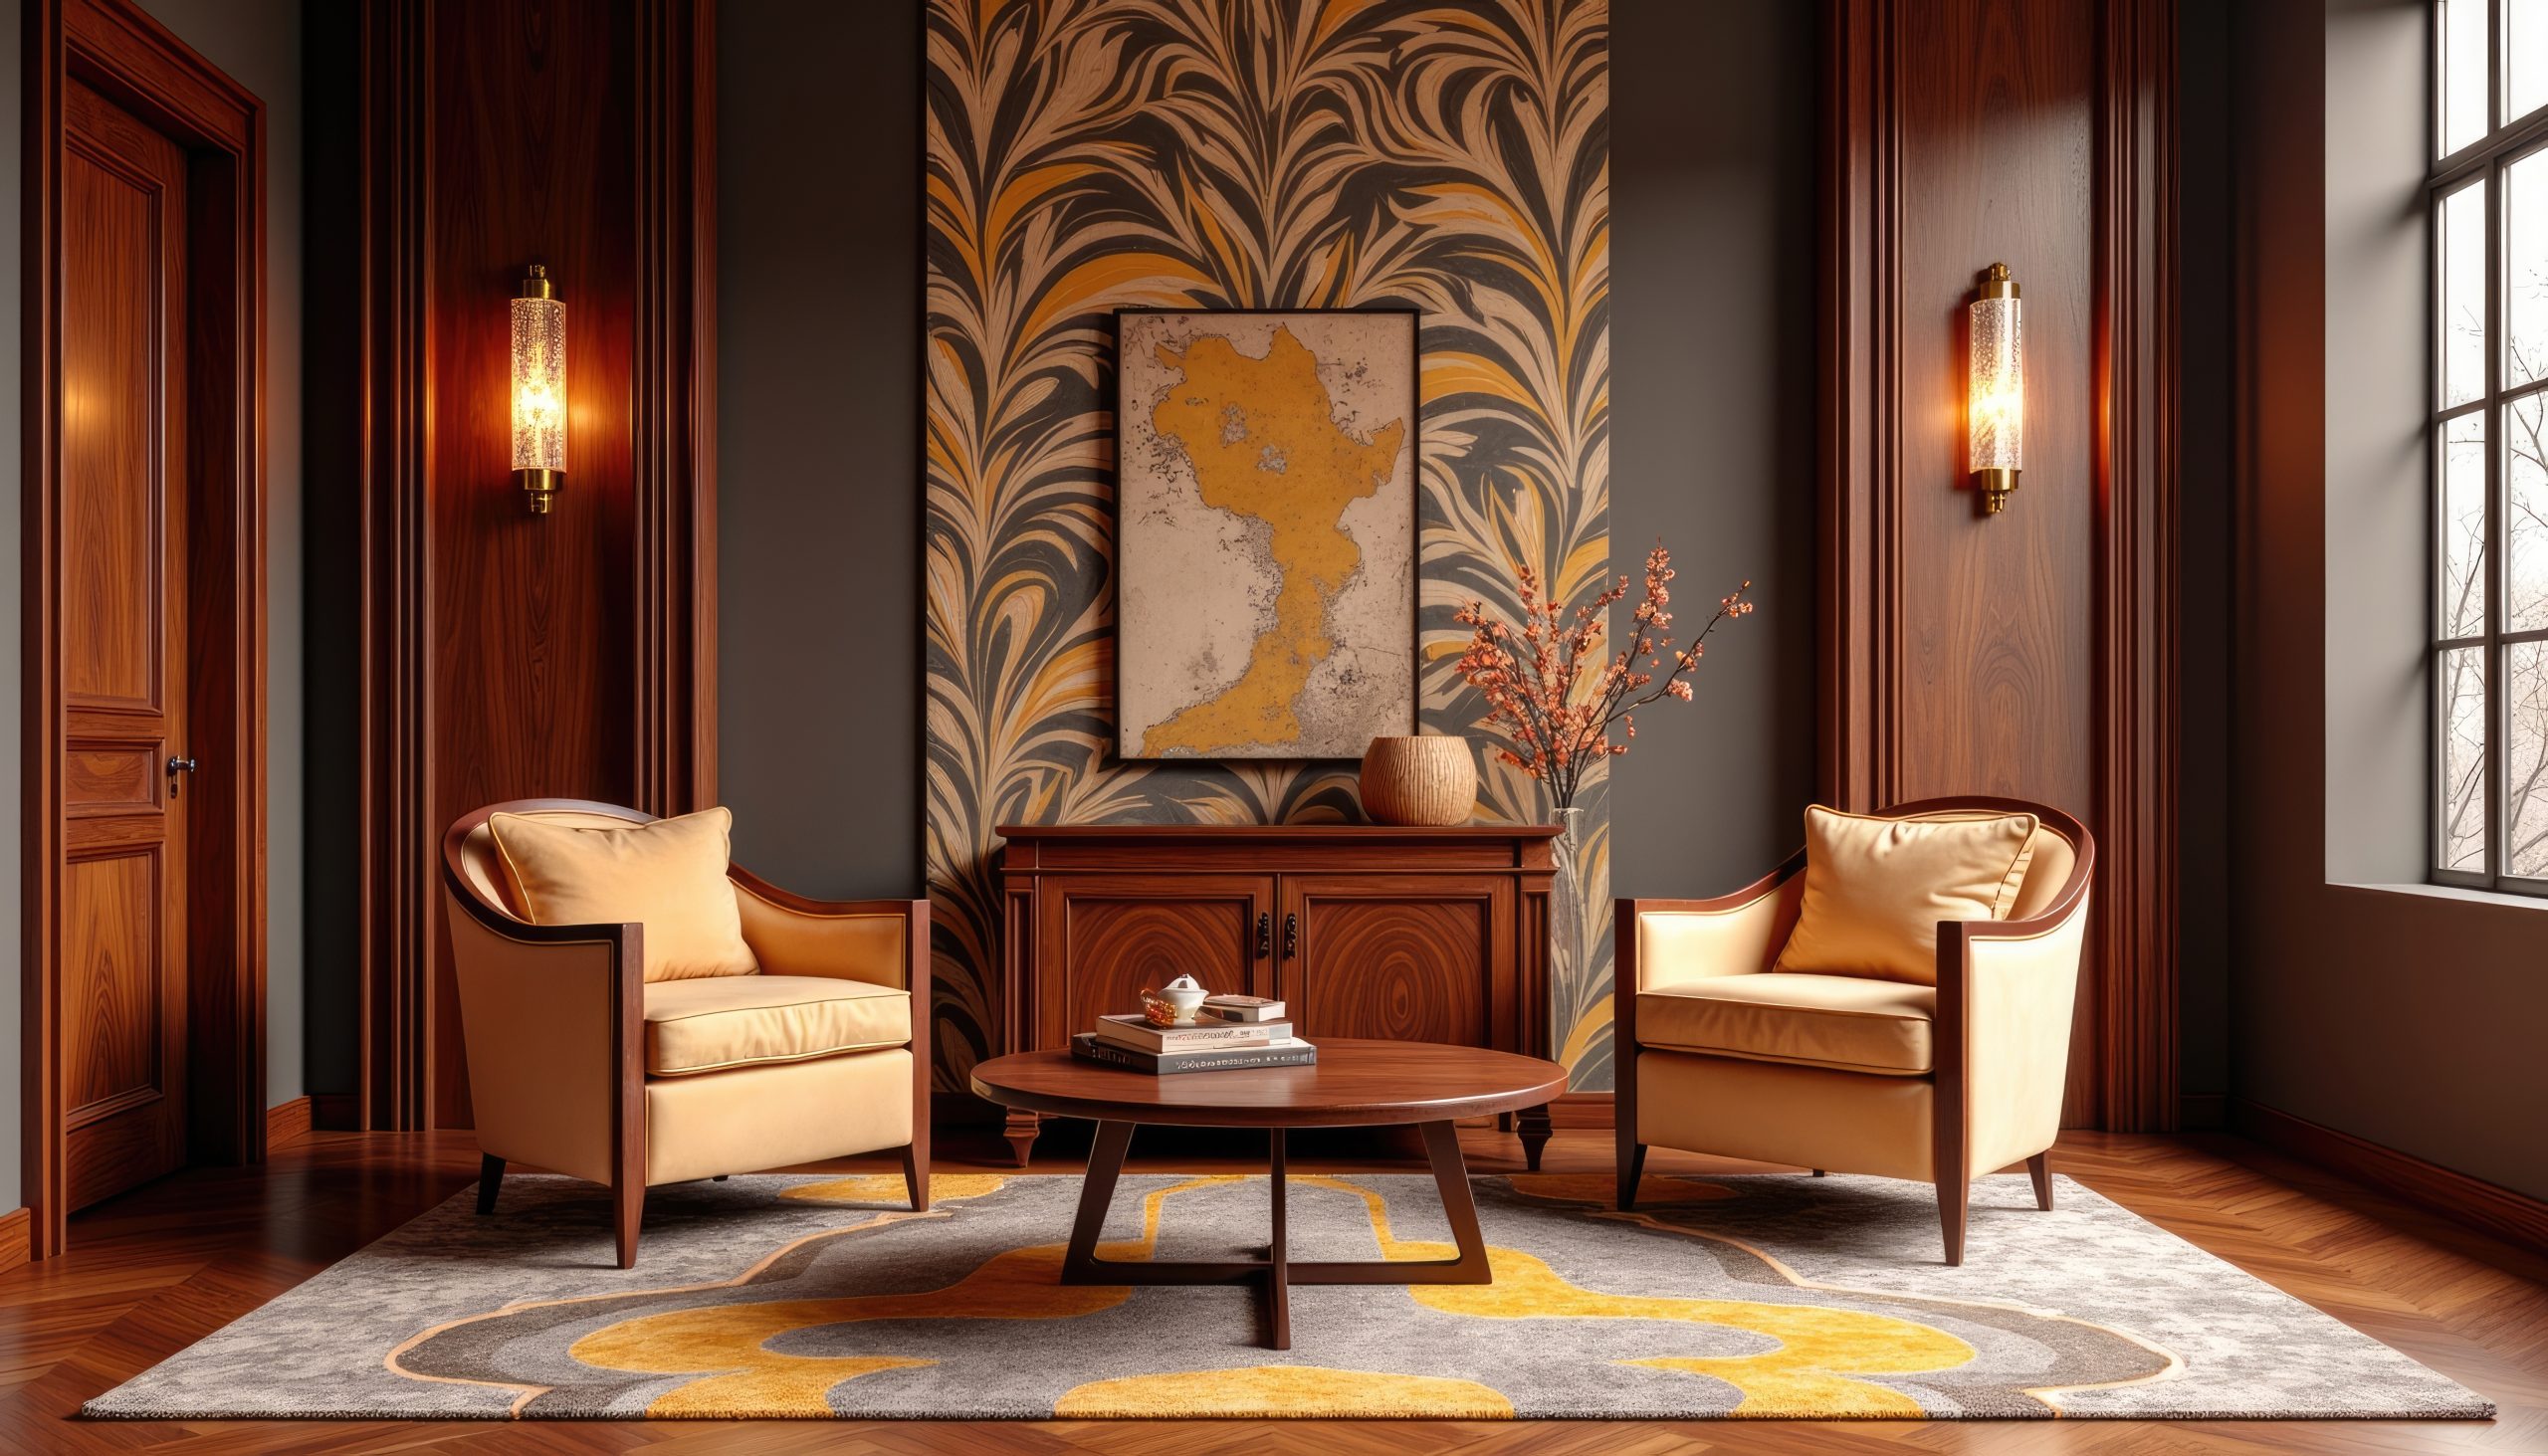
Geometric Patterns and Bold Lines
If there’s one element that truly defines Art Deco home interior design, it’s the bold use of geometric patterns. These dramatic designs are the heart and soul of the style, and they have an incredible way of transforming even the most basic room into something spectacular.
Here’s my approach to incorporating these patterns:
- Start with one bold geometric element as your focal point. I always suggest beginning with either wallpaper or a large area rug – these anchor pieces set the tone for the entire space.
- Layer in angular furniture pieces that echo your main pattern. Think zigzag-patterned throw pillows or a stunning cabinet with geometric overlay.
- Mix different scales of patterns, but keep them in the same colour family. One of my favourite combinations is pairing a large-scale geometric wallpaper with smaller-patterned cushions or curtains.

Pro tip: If you’re nervous about committing to bold geometric wallpaper, try starting with removable wallpaper panels or focus on incorporating geometric patterns through art pieces and textiles. This is a fantastic way to experiment with Art Deco home interior design ideas without making permanent changes.
Remember, the key to successful Art Deco pattern play is confidence – this isn’t a style for the timid! I always tell my clients that if they’re going to embrace Art Deco, they should embrace it. The beauty of these geometric patterns is that they create an instant focal point and set the stage for all your other Art Deco elements to shine.
These striking patterns aren’t just decorative; they’re conversation starters. The impact of a bold geometric design element is undeniable – it’s exactly the kind of statement we’re looking for with Art Deco home interior design. These patterns command attention and exude confidence, creating spaces that feel both sophisticated and dramatic.
Luxurious Metallics
Nothing says Art Deco home interior design quite like the gleam of metallic finishes. The way metals catch and reflect light adds that essential layer of glamour that’s so characteristic of this style. Gold, brass, and chrome are the holy trinity of Art Deco metallics, and I never tire of seeing how they can elevate a space.
Here’s how I love to incorporate these luxurious elements:
- Start with your hardware: Door handles, cabinet pulls, and light switches in polished brass or chrome make for an immediate Art Deco upgrade.
- Layer in larger metallic pieces: Think mirrors with metal frames, side tables with brass legs, or chrome-finished bar carts.
- Mix your metals thoughtfully: While traditional Art Deco favoured single metal tones, modern interpretations can beautifully blend different metallics – just keep them in the same temperature family.
The key is to distribute these metallic elements evenly throughout your space. I find that treating metals like jewellery for your room works perfectly – they should enhance rather than overwhelm. A metallic ceiling medallion paired with matching wall sconces, for instance, creates a cohesive look that draws the eye around the room.
Pro tip: When incorporating metallics into your Art Deco home interior design ideas, remember that a little shine goes a long way. Balance these gleaming surfaces with rich, matte textures like velvet or wool to create depth and visual interest.
One of my favourite ways to make a statement is with a large metallic piece – perhaps an oversized sunburst mirror or a striking gold-leafed cabinet. These signature pieces become natural focal points while embodying the luxury and drama that make Art Deco so appealing.
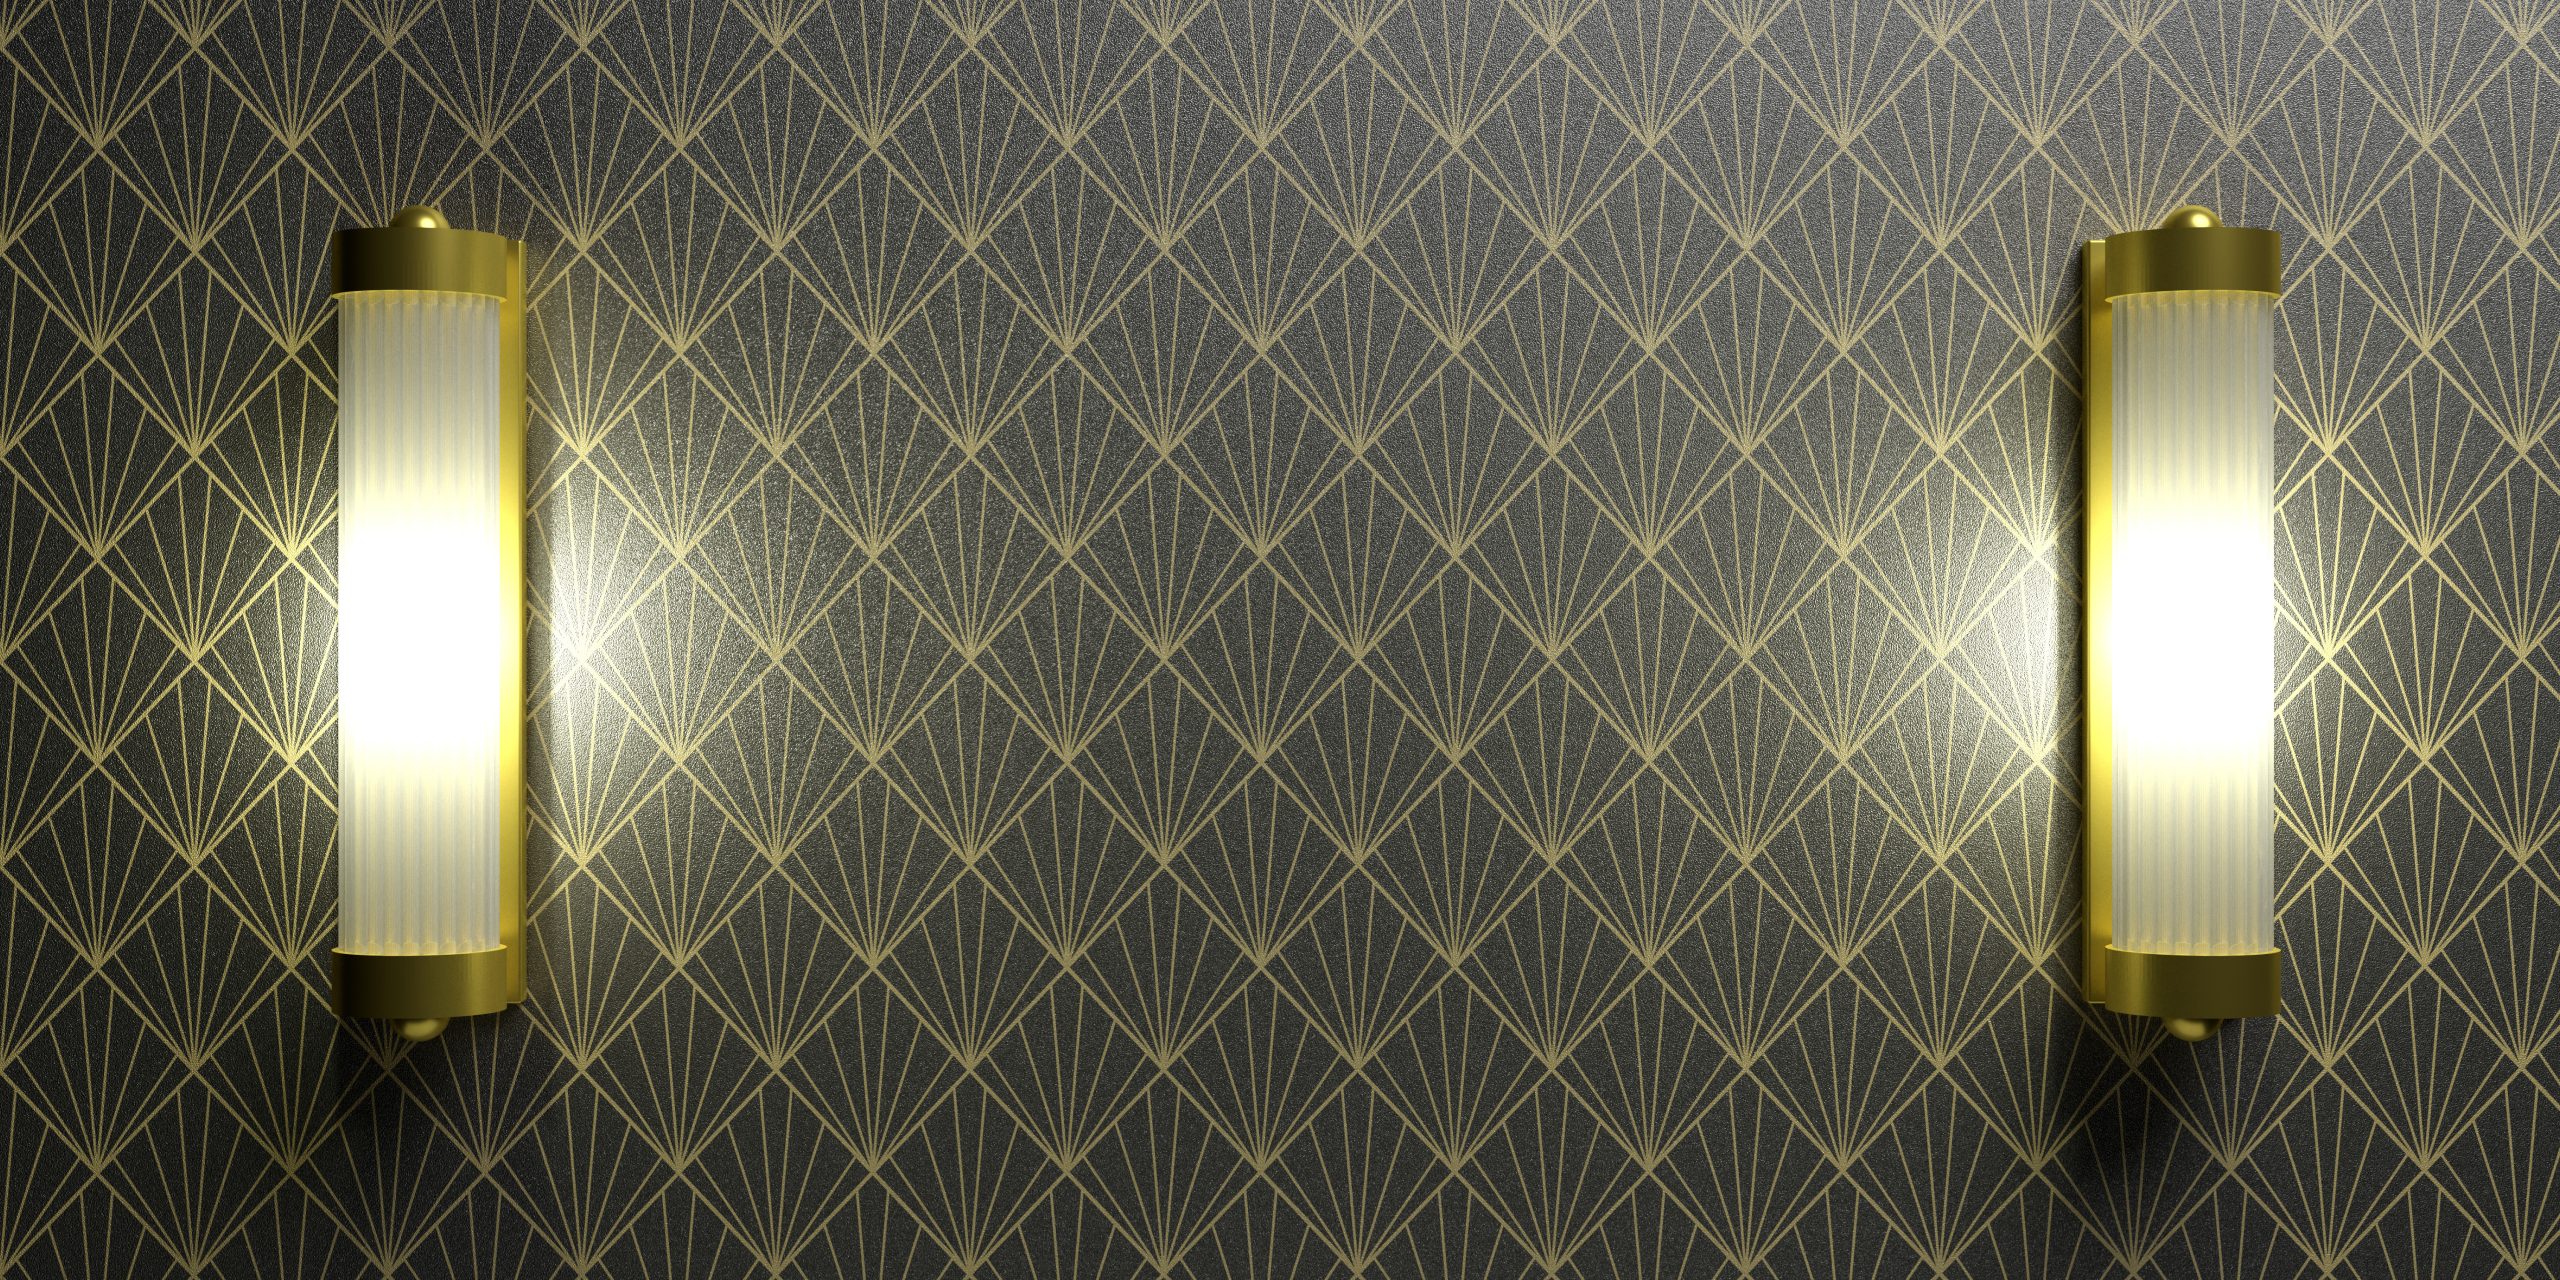
Statement Lighting
If there’s one element that can make or break your Art Deco home interior design, it’s lighting. Art Deco lighting fixtures are like functional sculptures, commanding attention whether they’re switched on or off.
The most impactful Art Deco lighting features include:
- Tiered chandeliers with geometric glass panels
- Sconces with stepped designs and metallic finishes
- Pendant lights featuring clean lines and frosted glass
When selecting lighting, look for pieces that incorporate typical Art Deco motifs – sunbursts, fan shapes, and geometric patterns. The right fixture can become the cornerstone of your entire design scheme, informing the rest of your decor choices.
What makes Art Deco lighting so special is its ability to serve as both illumination and art. During the day, these fixtures act as sculptural elements, while at night, they create dramatic shadow plays and lighting effects that transform your space.
Remember, the placement of your lighting is just as important as the fixtures themselves. Consider creating layers of light with a mix of ceiling fixtures, wall sconces, and table lamps. This layered approach not only provides practical illumination but also adds depth and drama, which are essential elements in Art Deco home interior design.
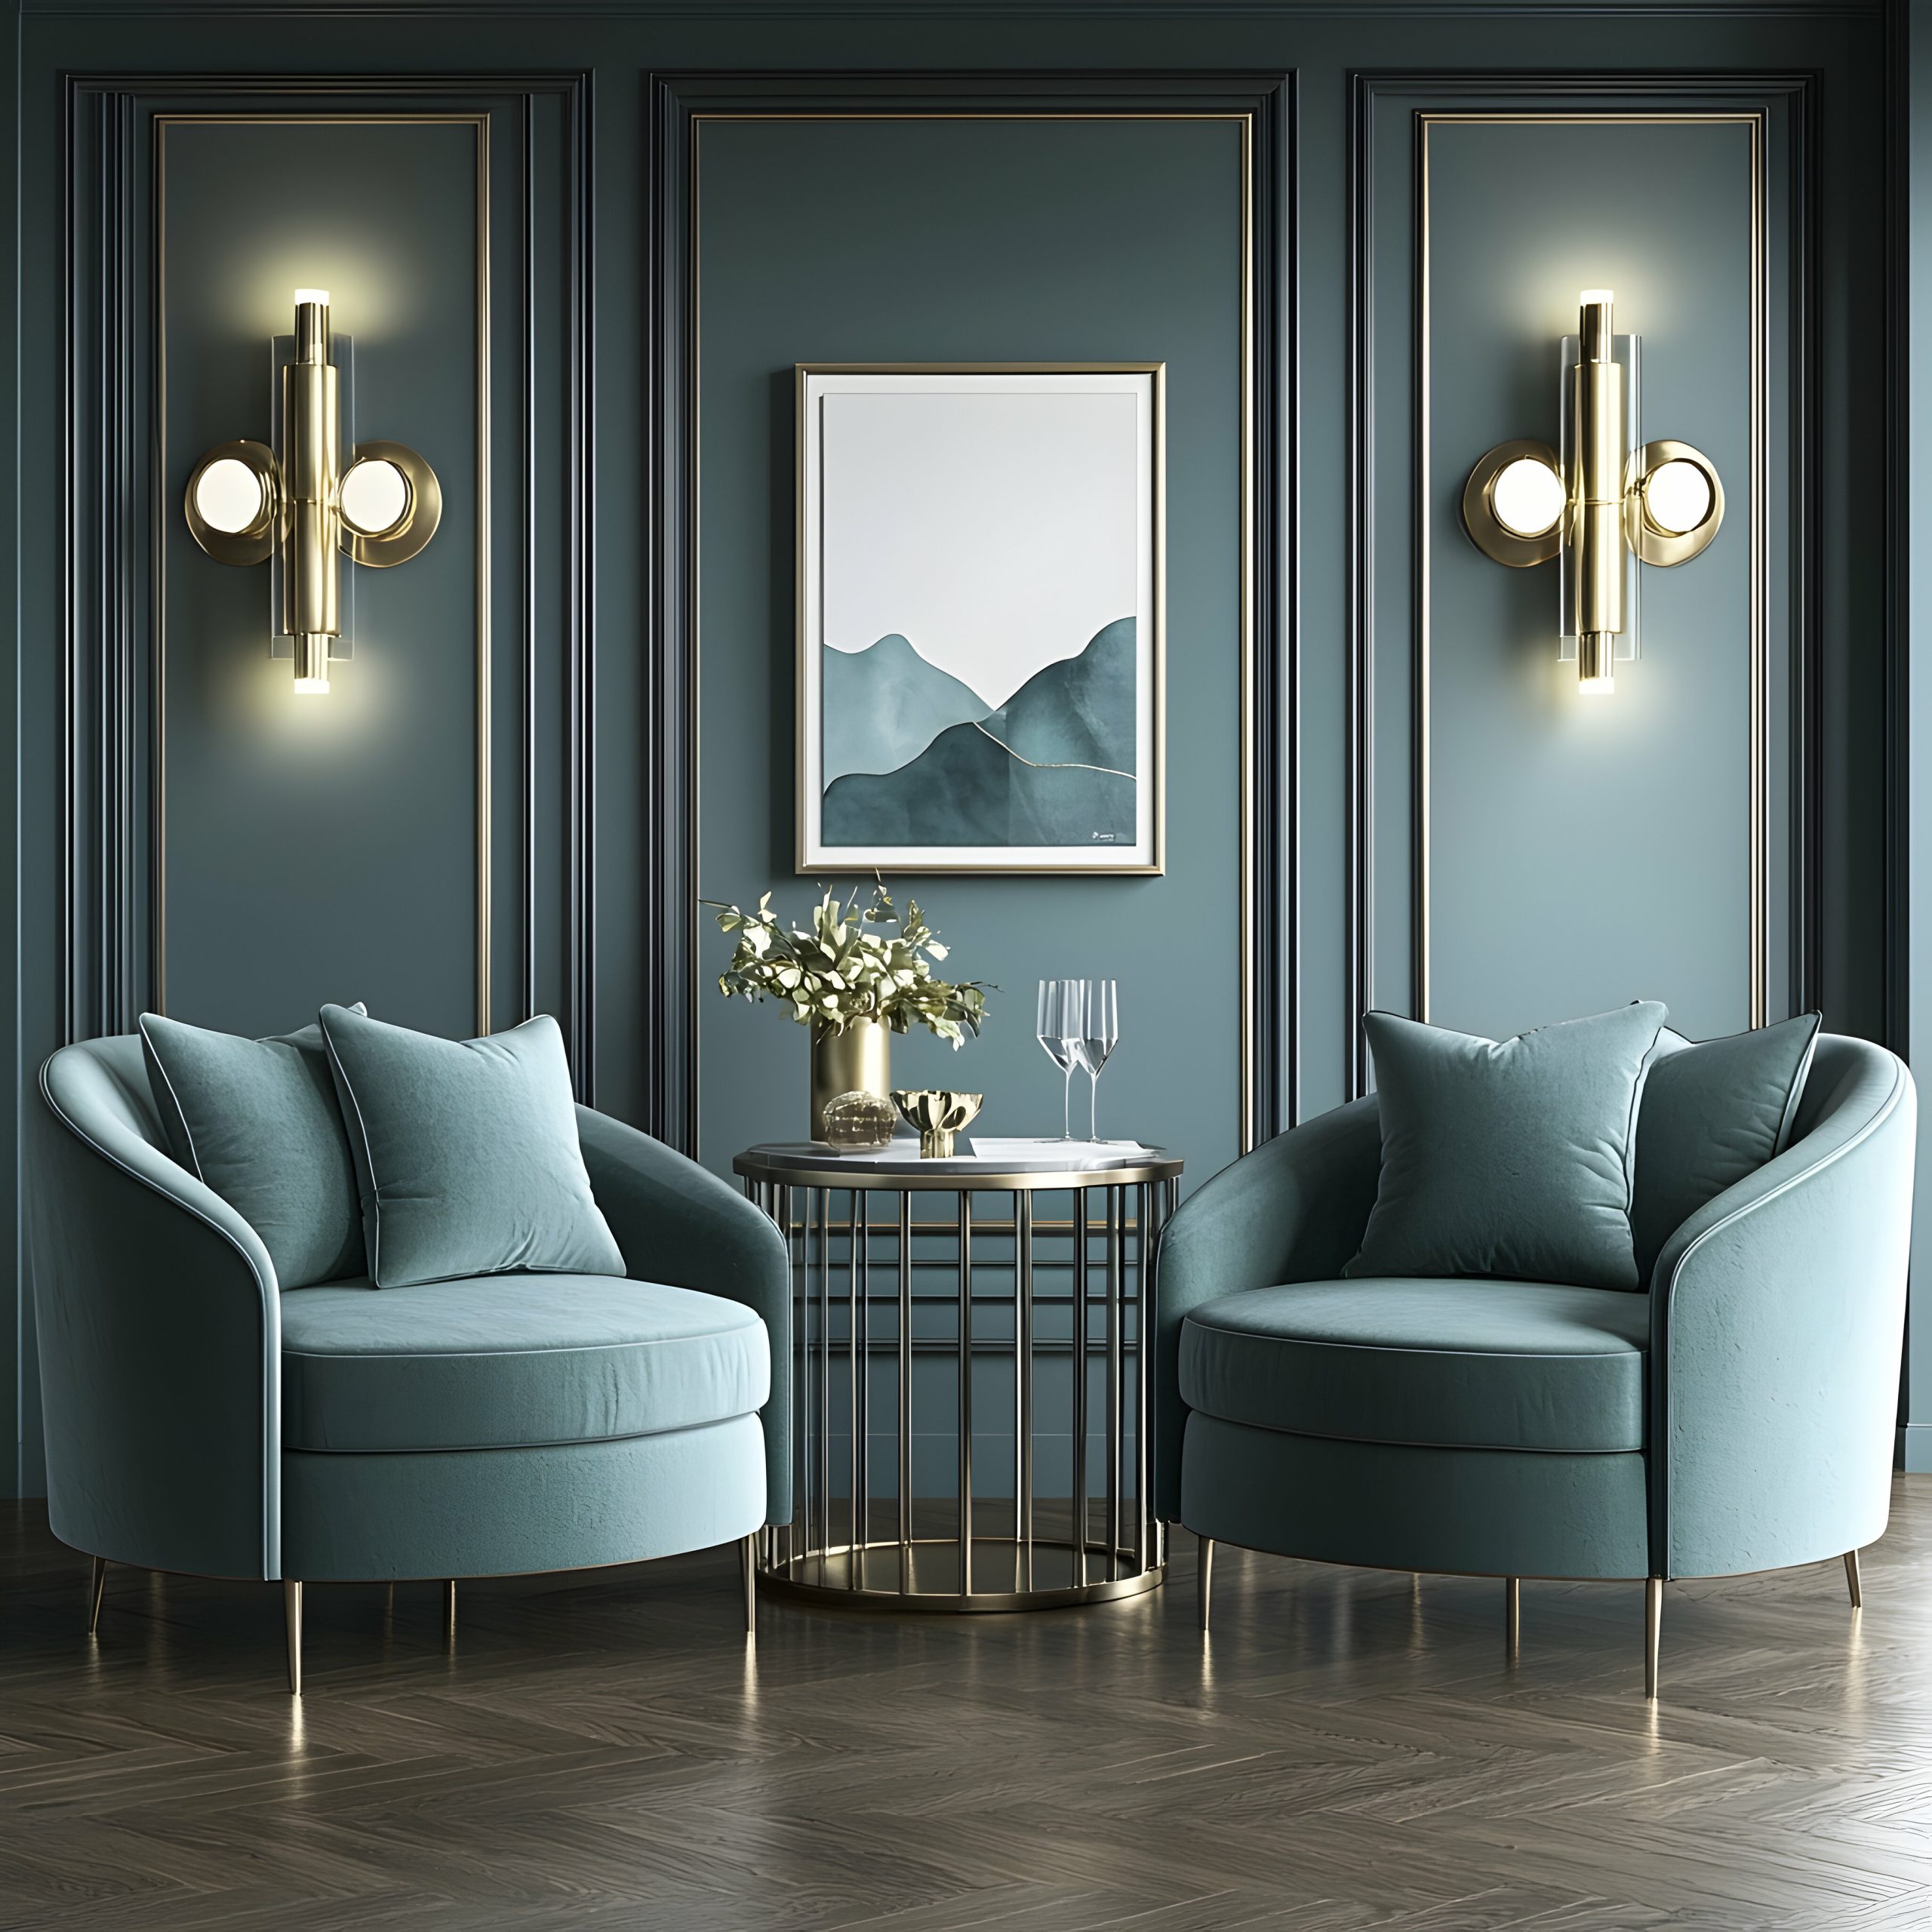
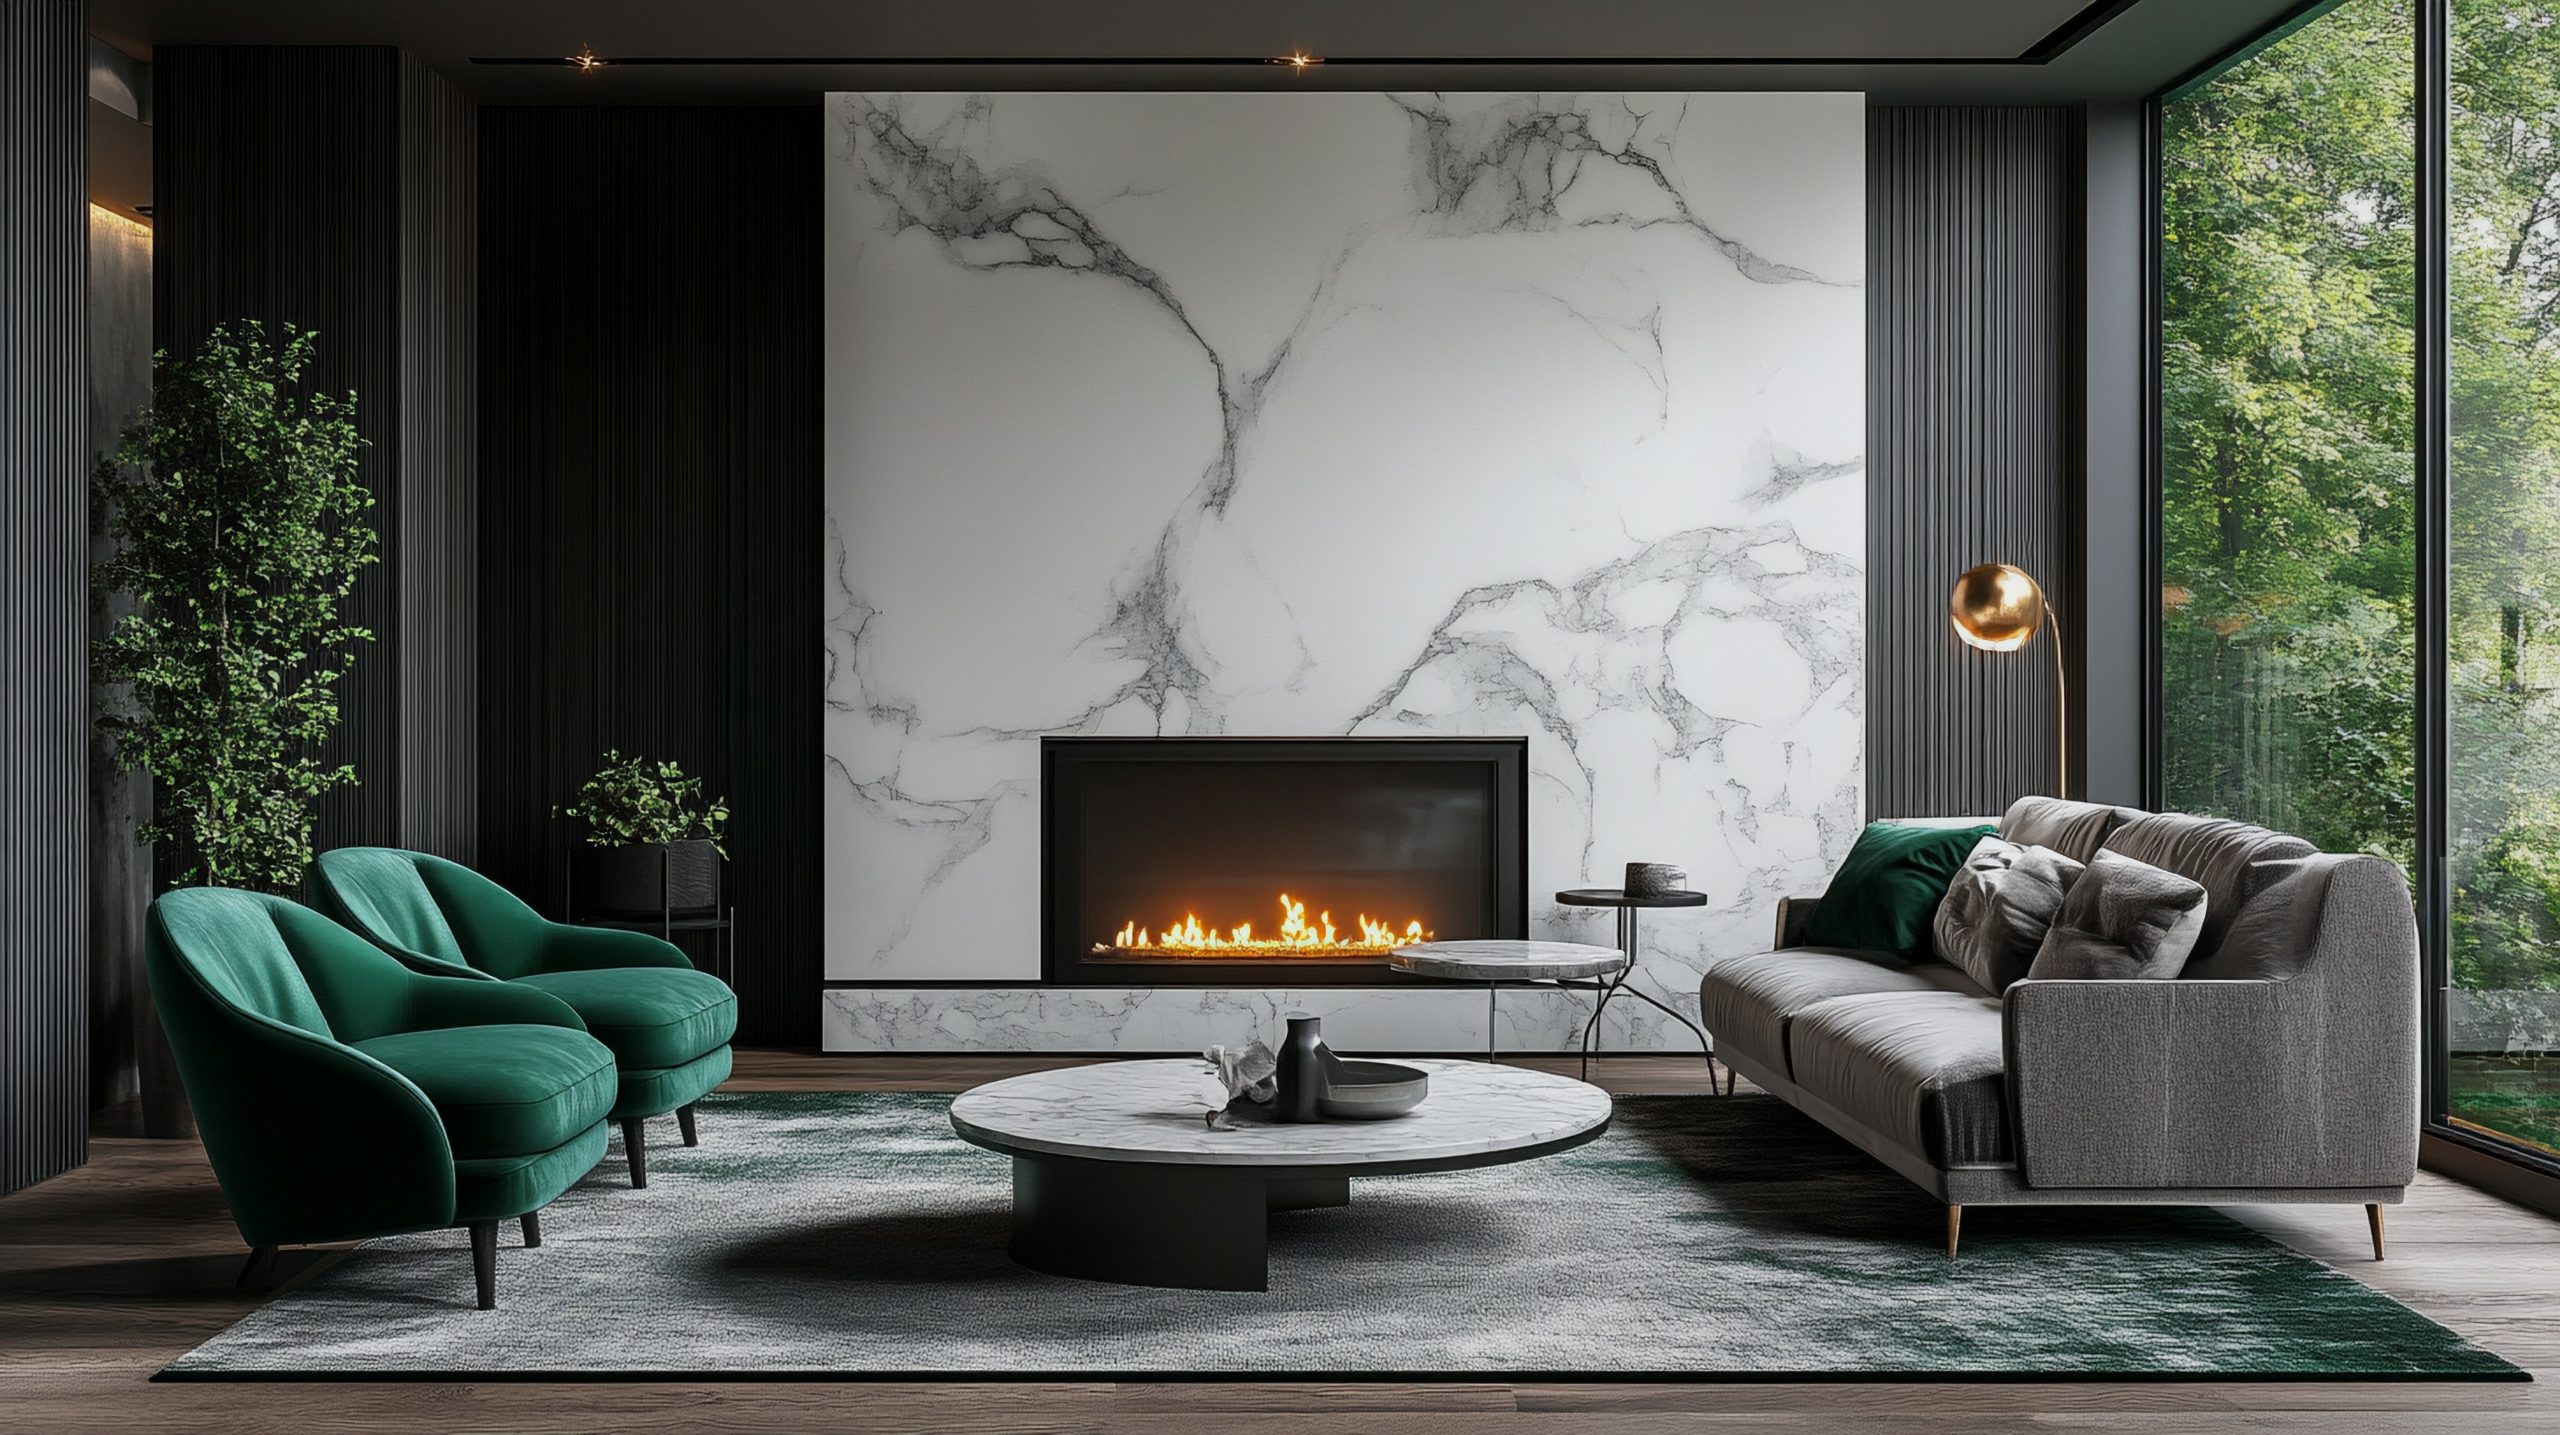
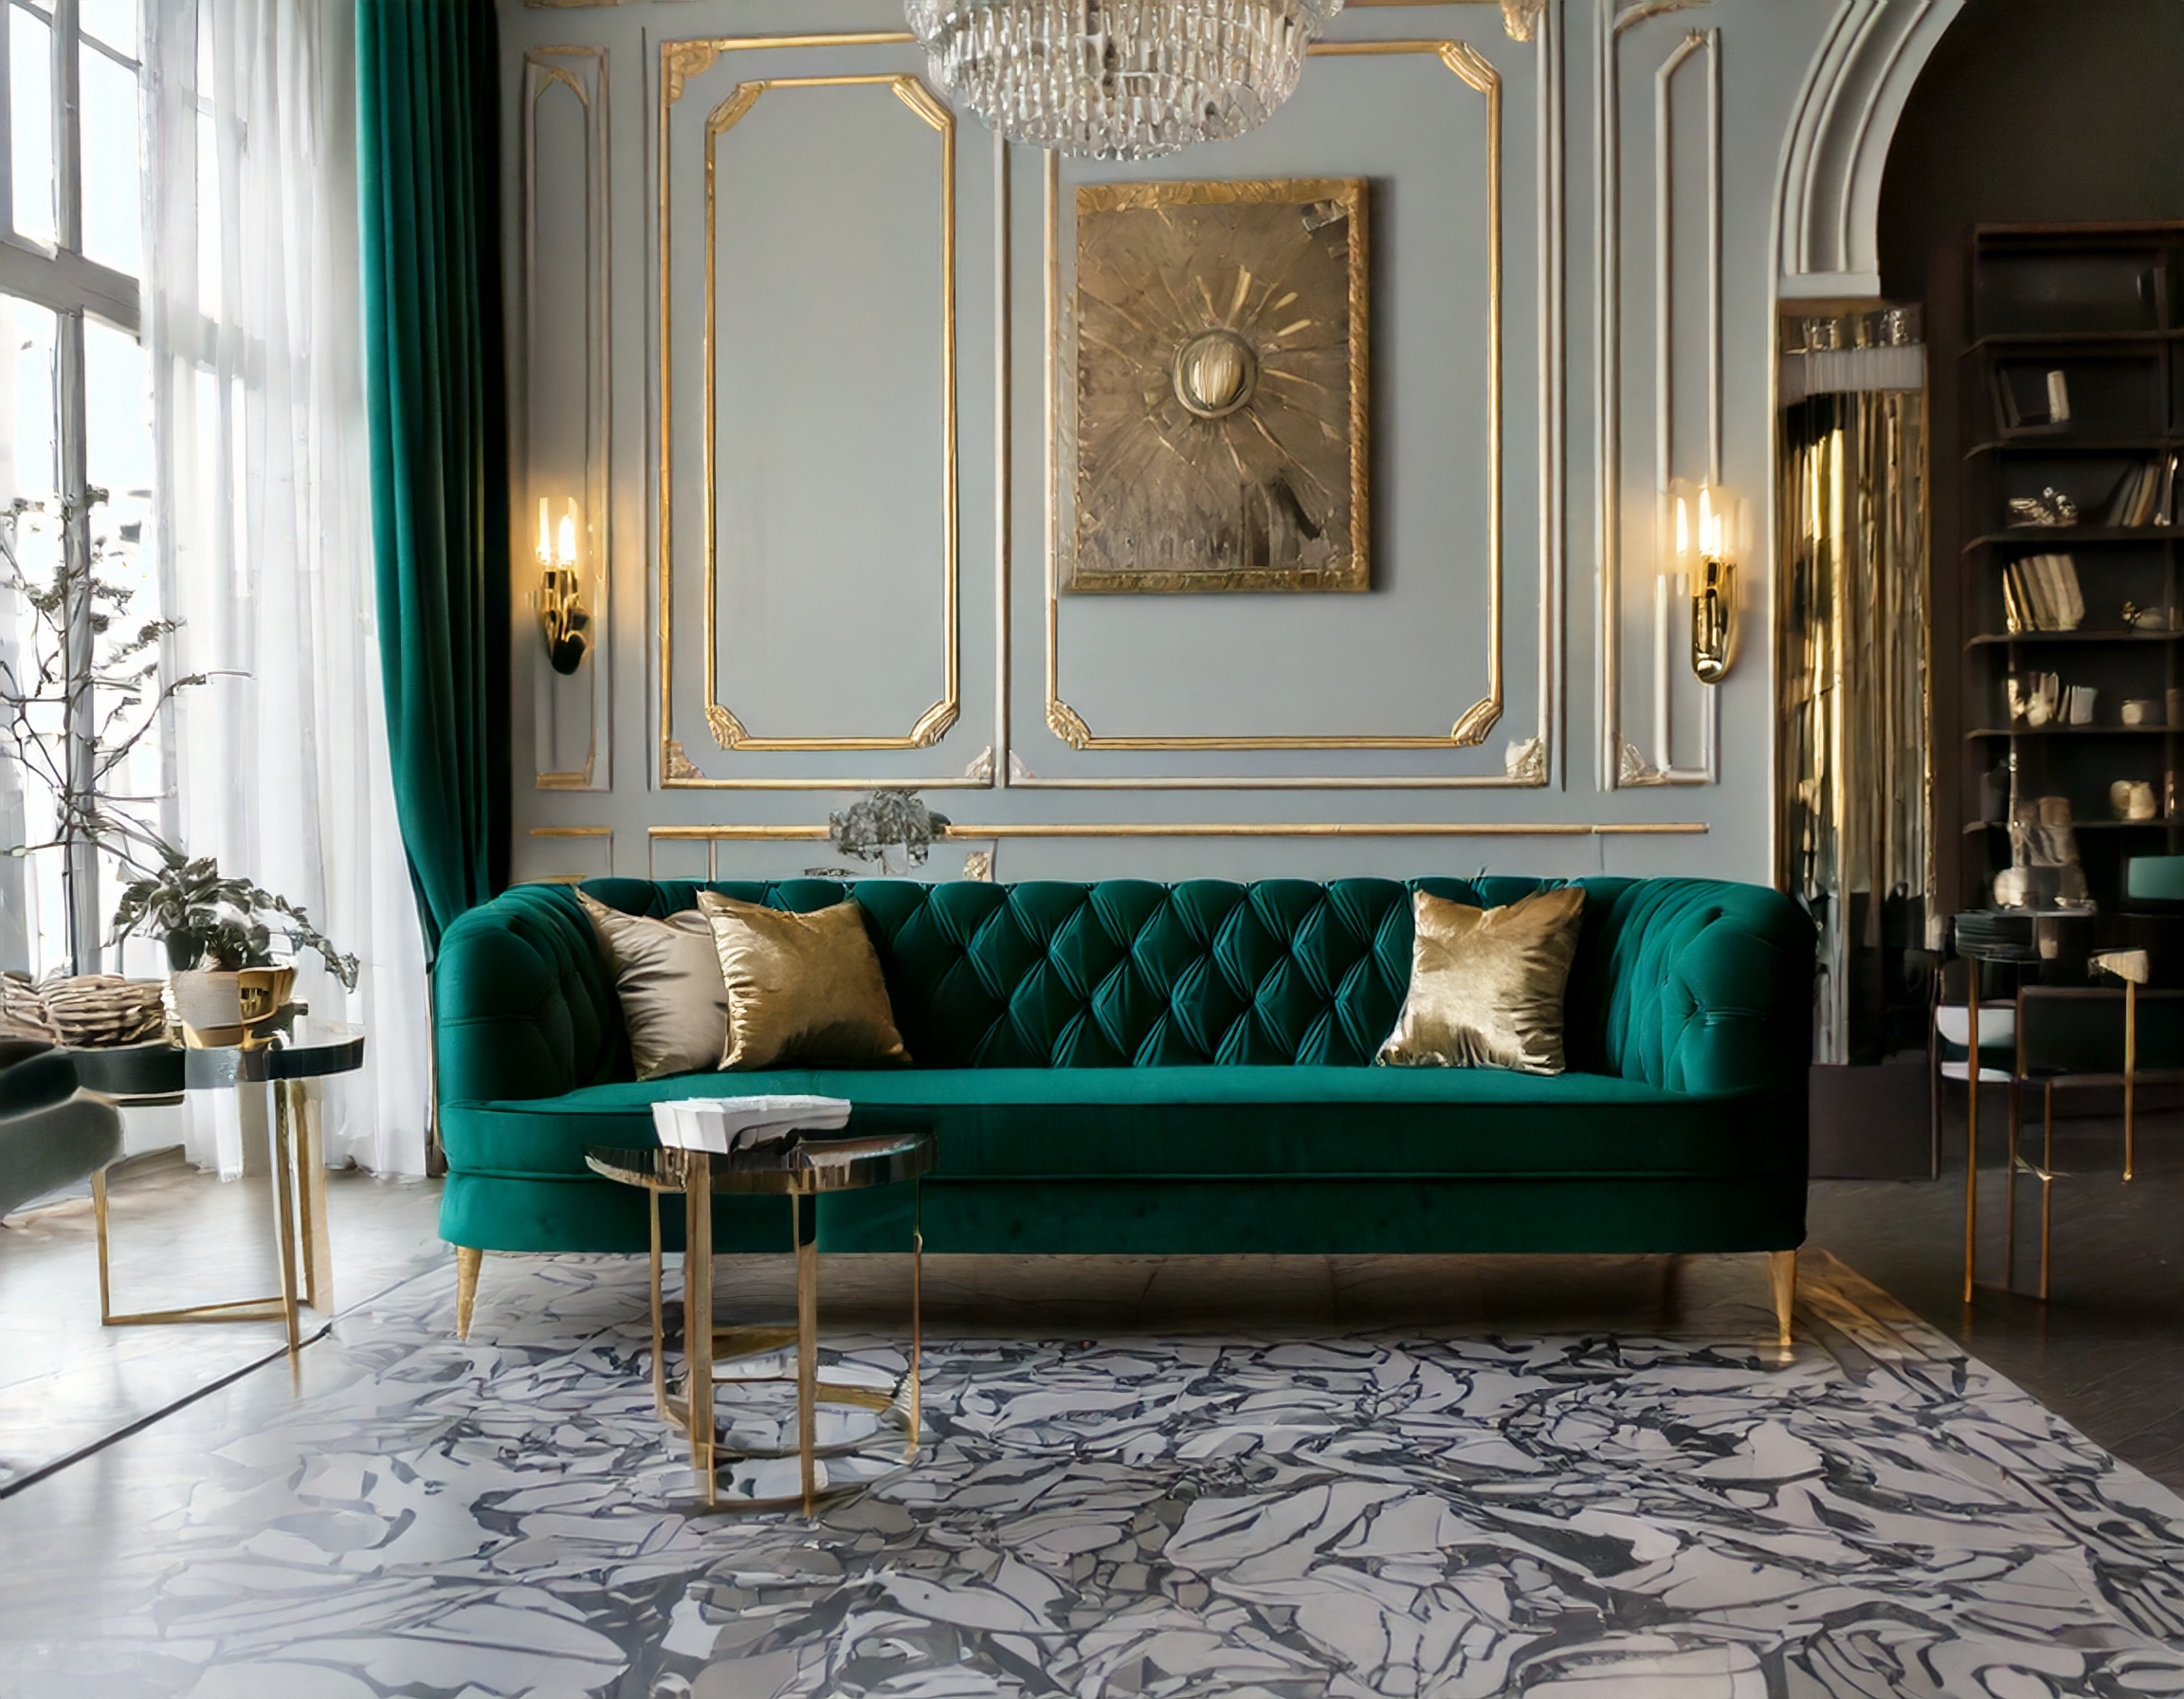
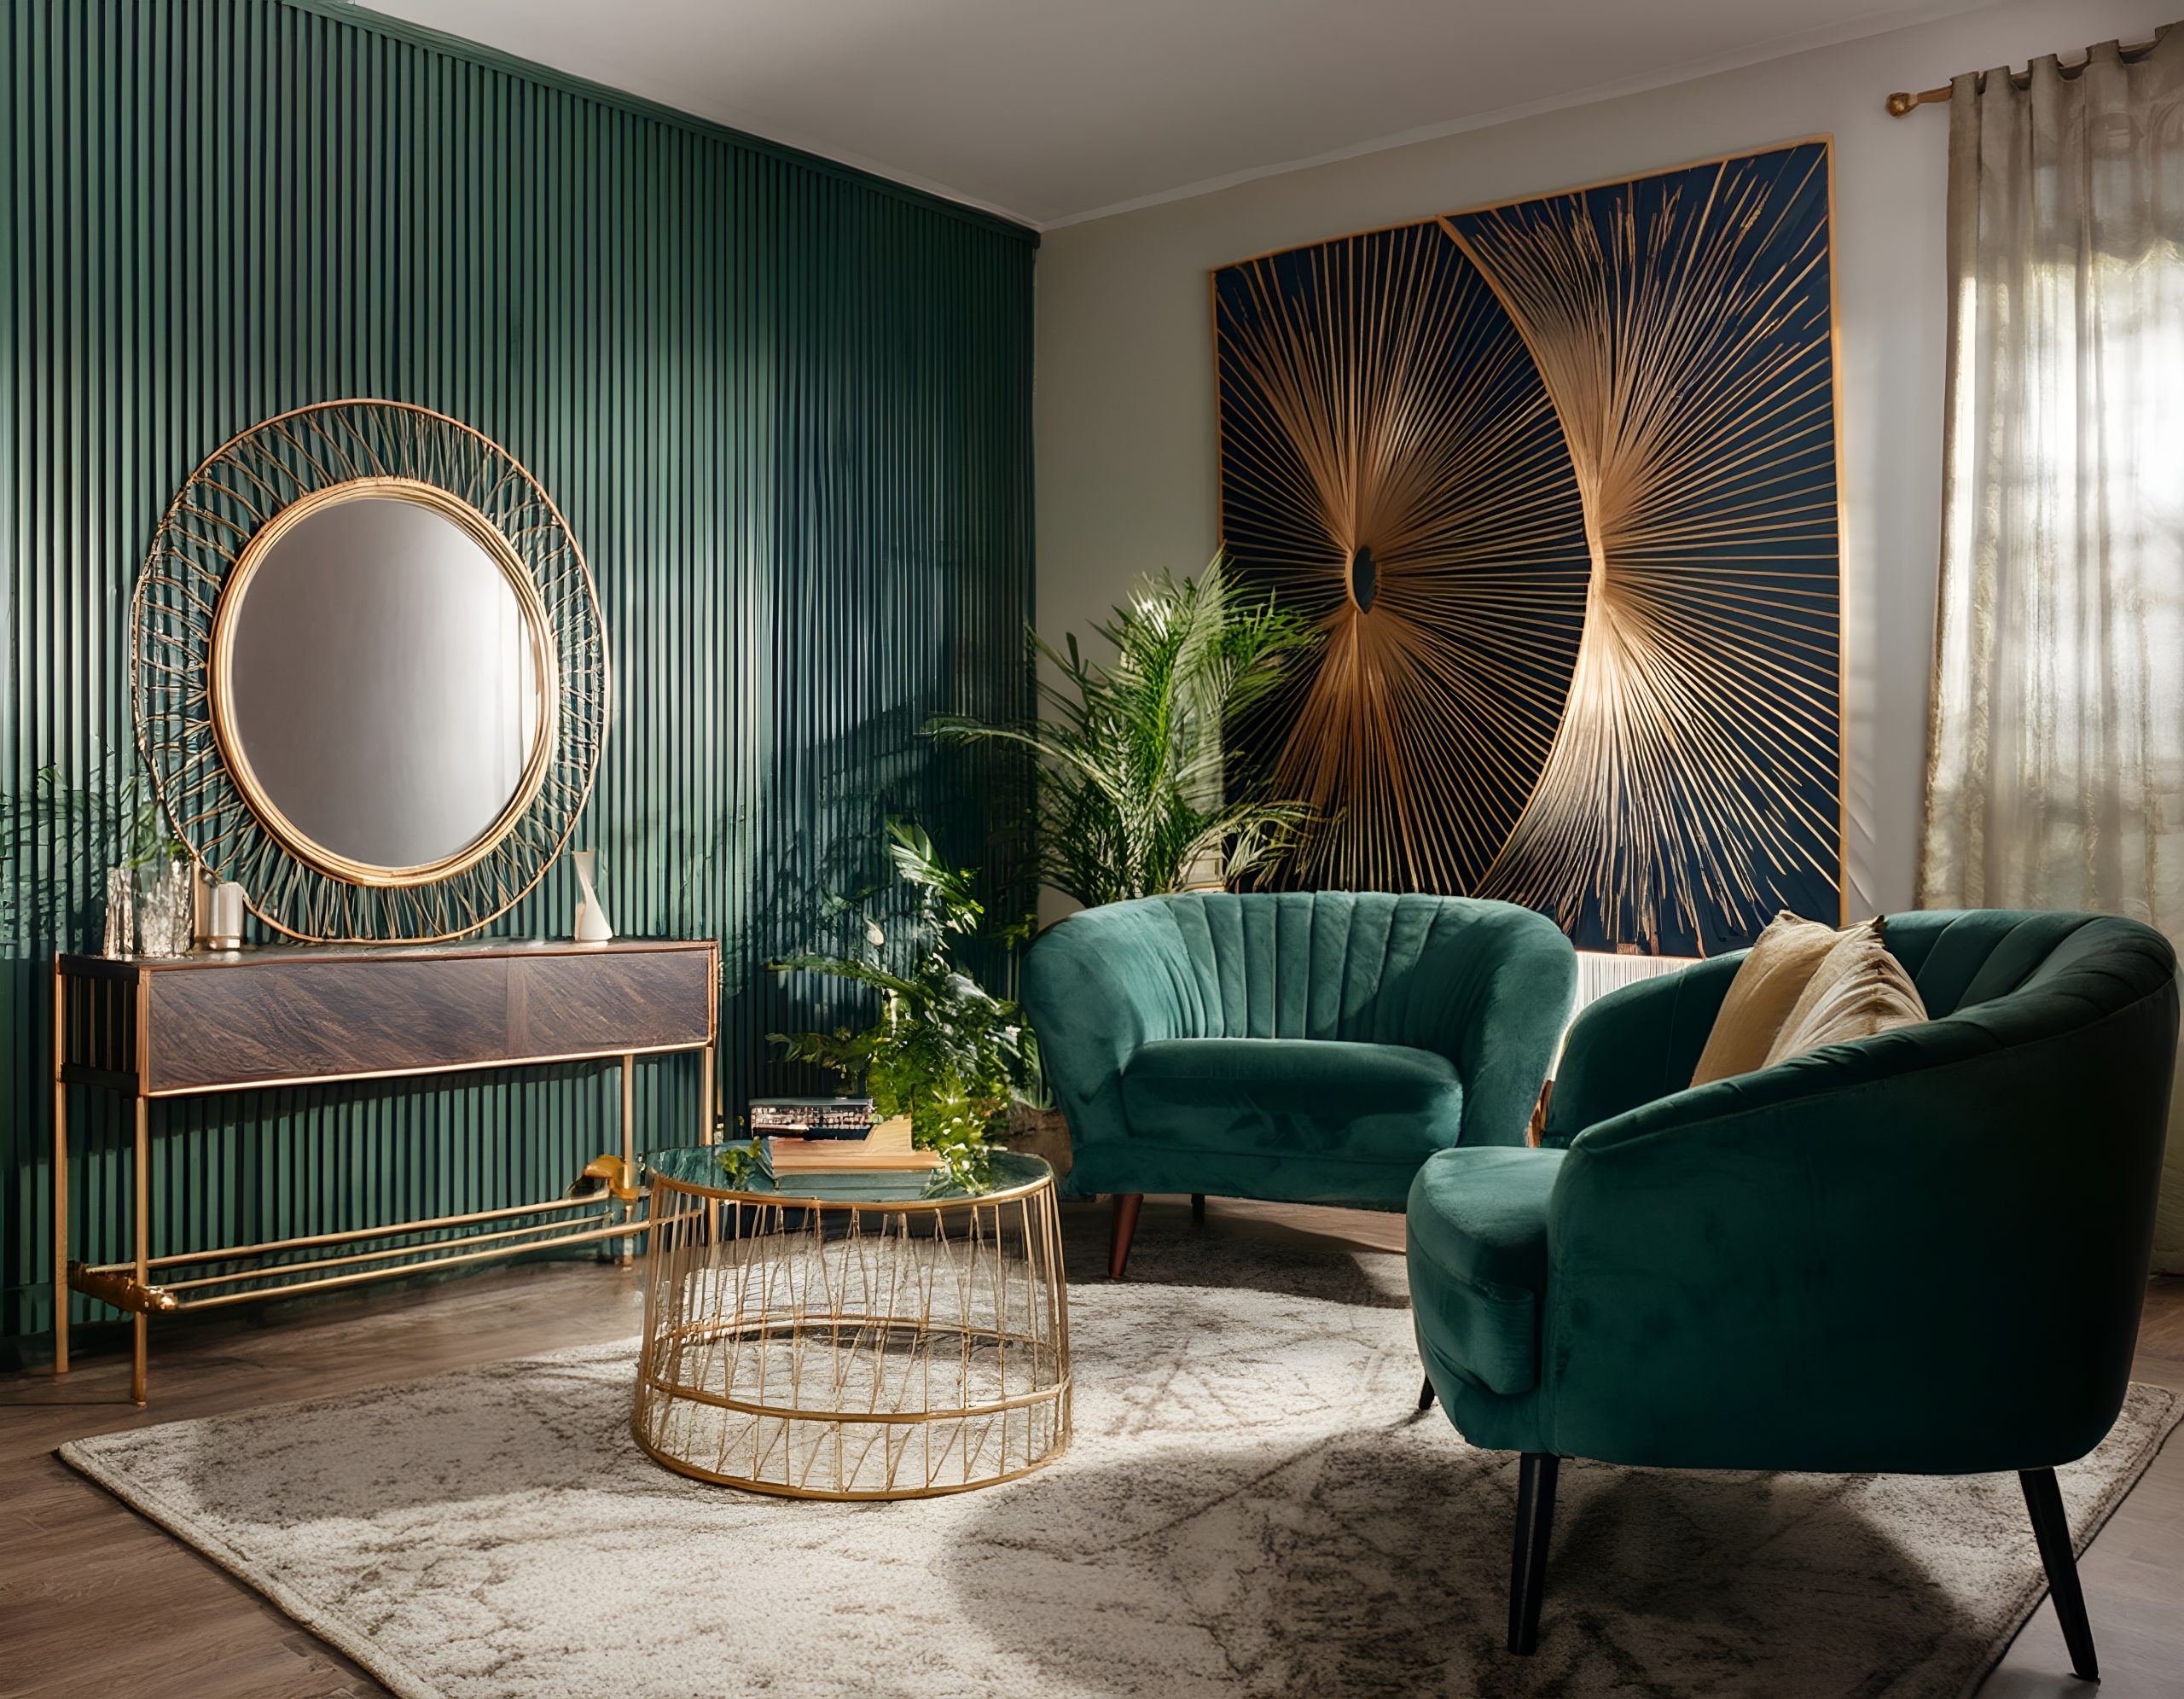
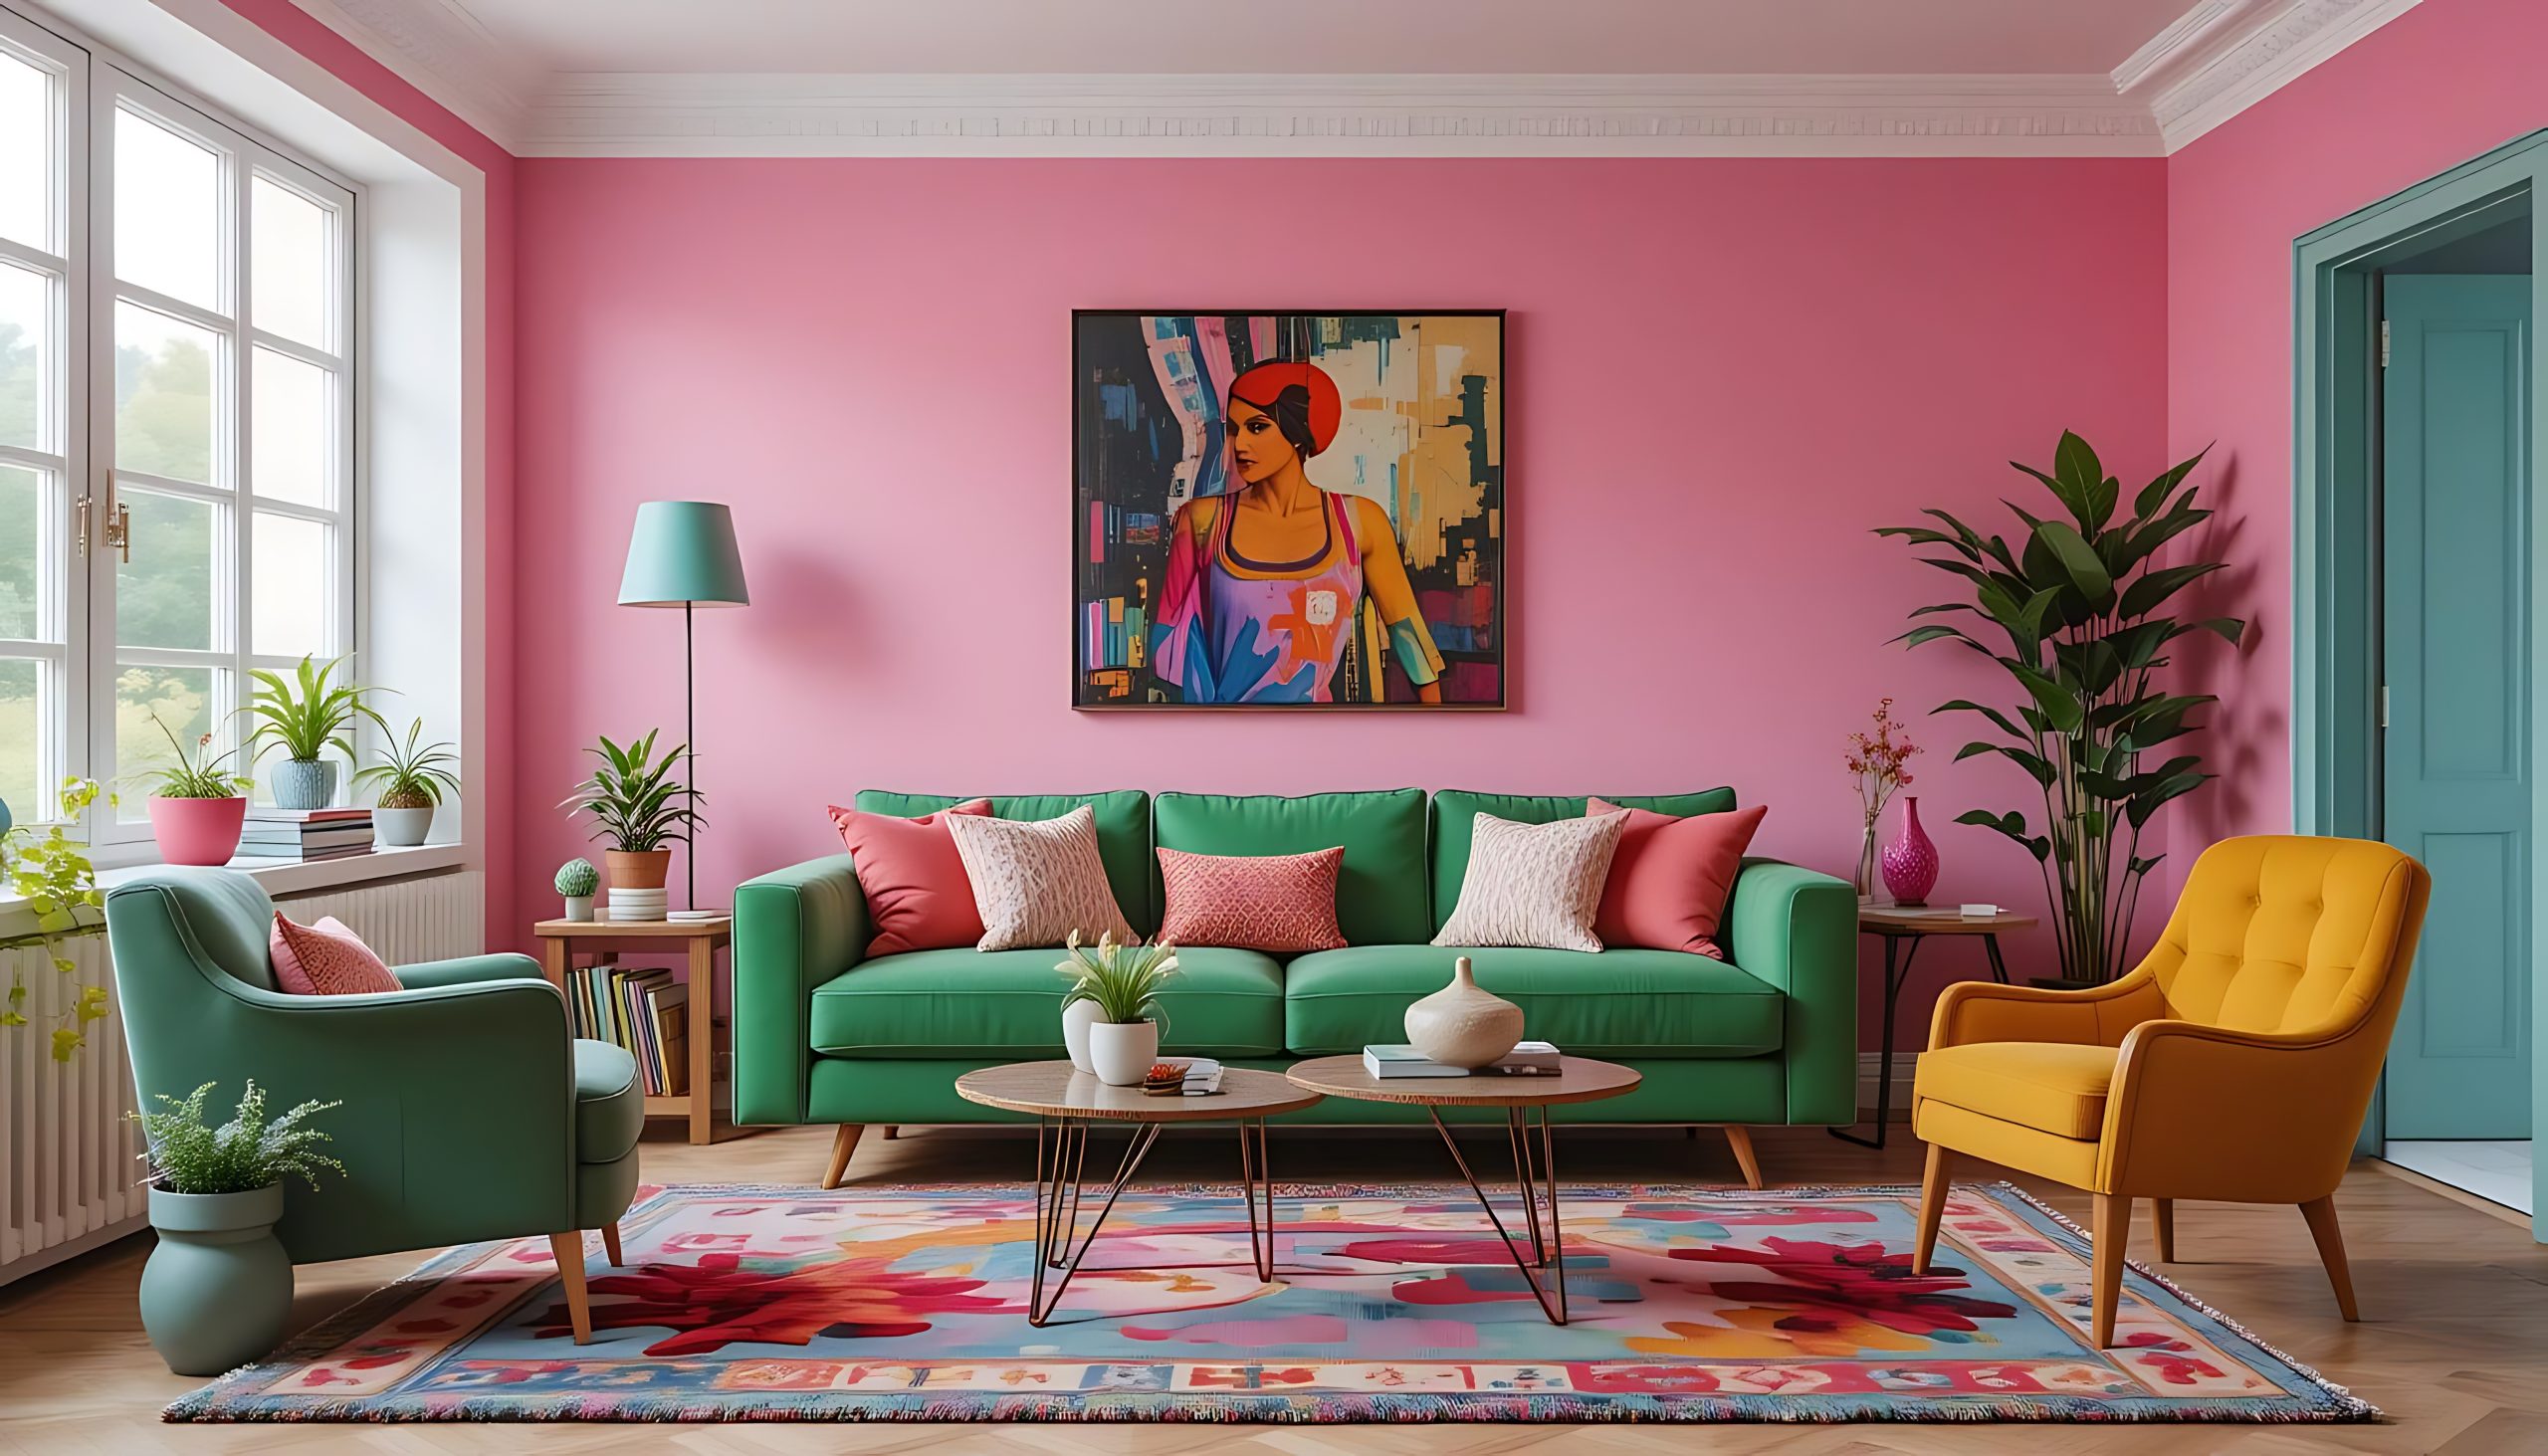
Rich Colour Palettes
The colours you choose for your Art Deco home interior design set the stage for drama and sophistication. What I love most about Art Deco colour schemes is their boldness – these aren’t your typical safe, neutral palettes. Instead, we’re talking about colours that make a statement and leave an impression.
The most striking Art Deco colour combinations include:
- Deep emerald green paired with gold and black
- Sapphire blue with silver and cream
- Ruby red combined with chrome and white
- Rich tobacco brown with bronze and ivory
When working with these bold colours, I find it’s best to follow the 60-30-10 rule: 60% of your space in a dominant colour, 30% in a secondary colour, and 10% in an accent colour. This creates balance while maintaining that signature Art Deco drama.
Pro tip: Start with one bold colour you absolutely love and build your palette around it. The walls don’t always need to be the boldest element – a deep-coloured velvet sofa can be just as impactful against neutral walls.
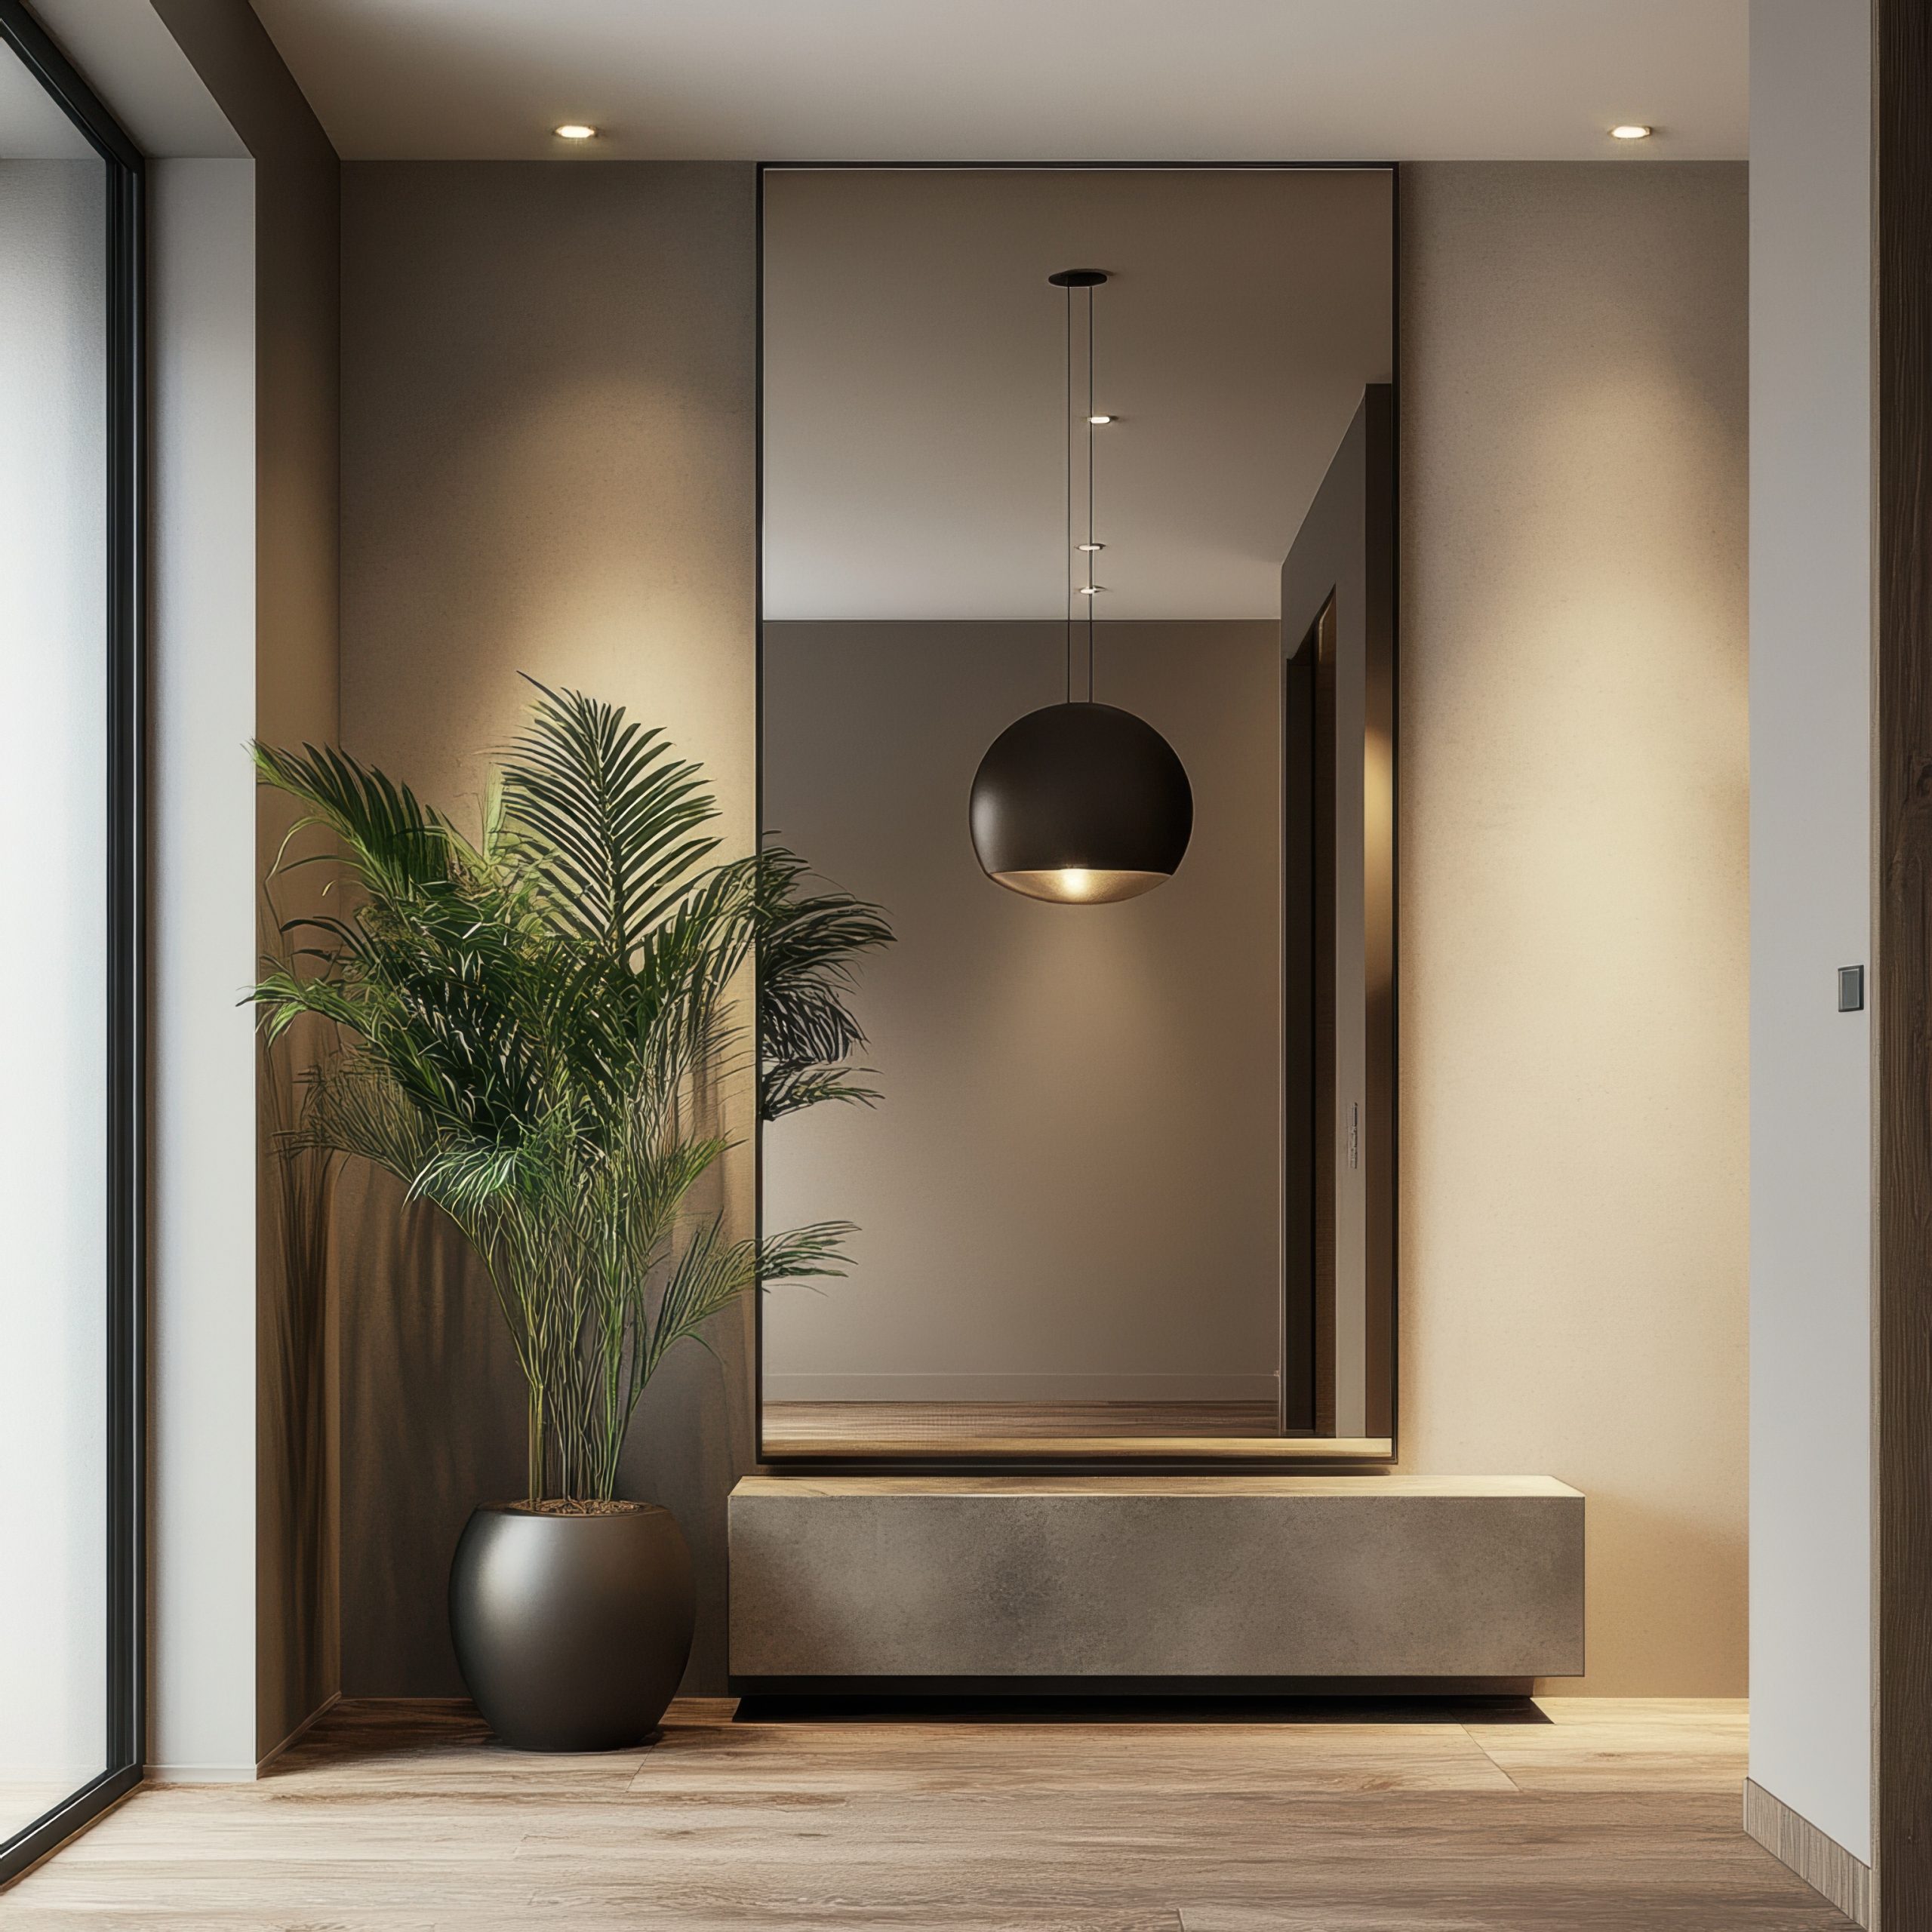
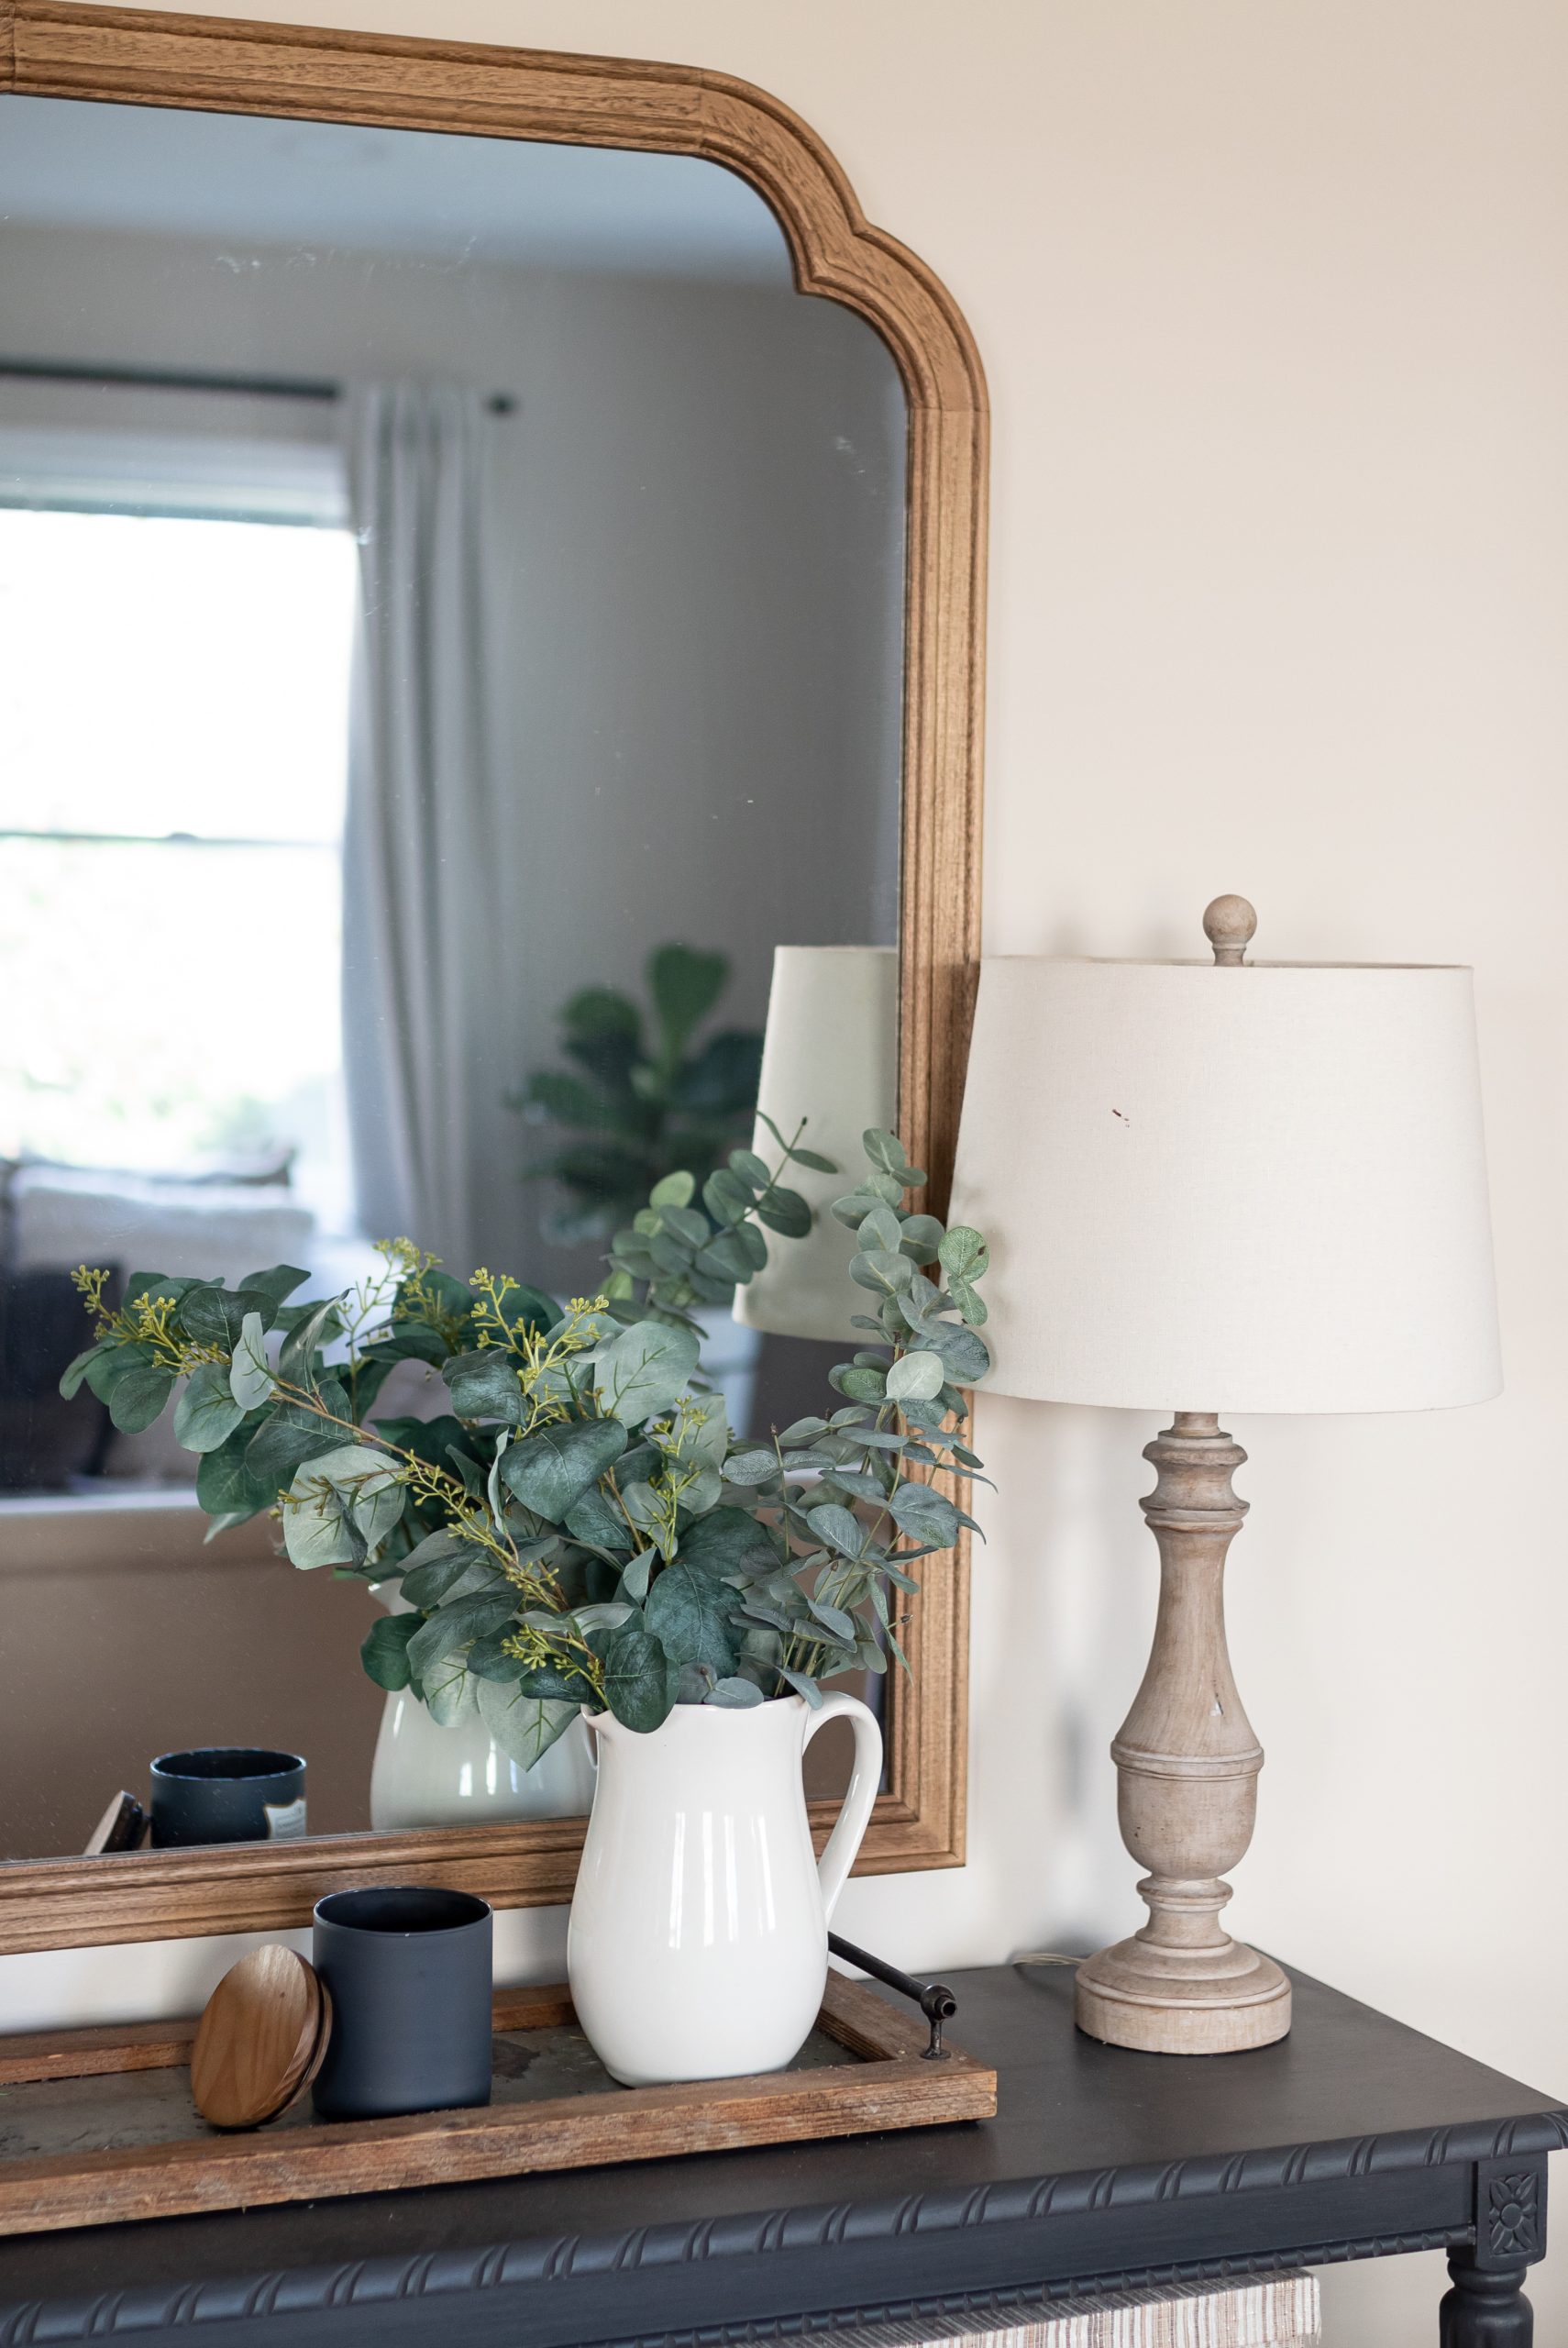
Mirrored Surfaces
Nothing captures the glamour of Art Deco home interior design quite like the strategic use of mirrors and mirrored surfaces. These reflective elements add depth, light, and a touch of Hollywood golden age glamour to any space.
Key ways to incorporate mirrored elements:
- Install mirror panels with geometric divisions
- Choose furniture pieces with mirrored accents
- Add mirrored trays and decorative objects
- Consider an Art Deco-style mirror as wall art
The trick with mirrors is to place them thoughtfully. Position them to reflect something interesting – perhaps your statement lighting or a beautiful piece of art. This doubles the impact of your best decorative elements while creating that sought-after Art Deco sparkle.
One word of caution: while mirrors are fantastic, too many can feel overwhelming. I always suggest choosing one or two significant mirrored pieces rather than filling every surface with reflection.
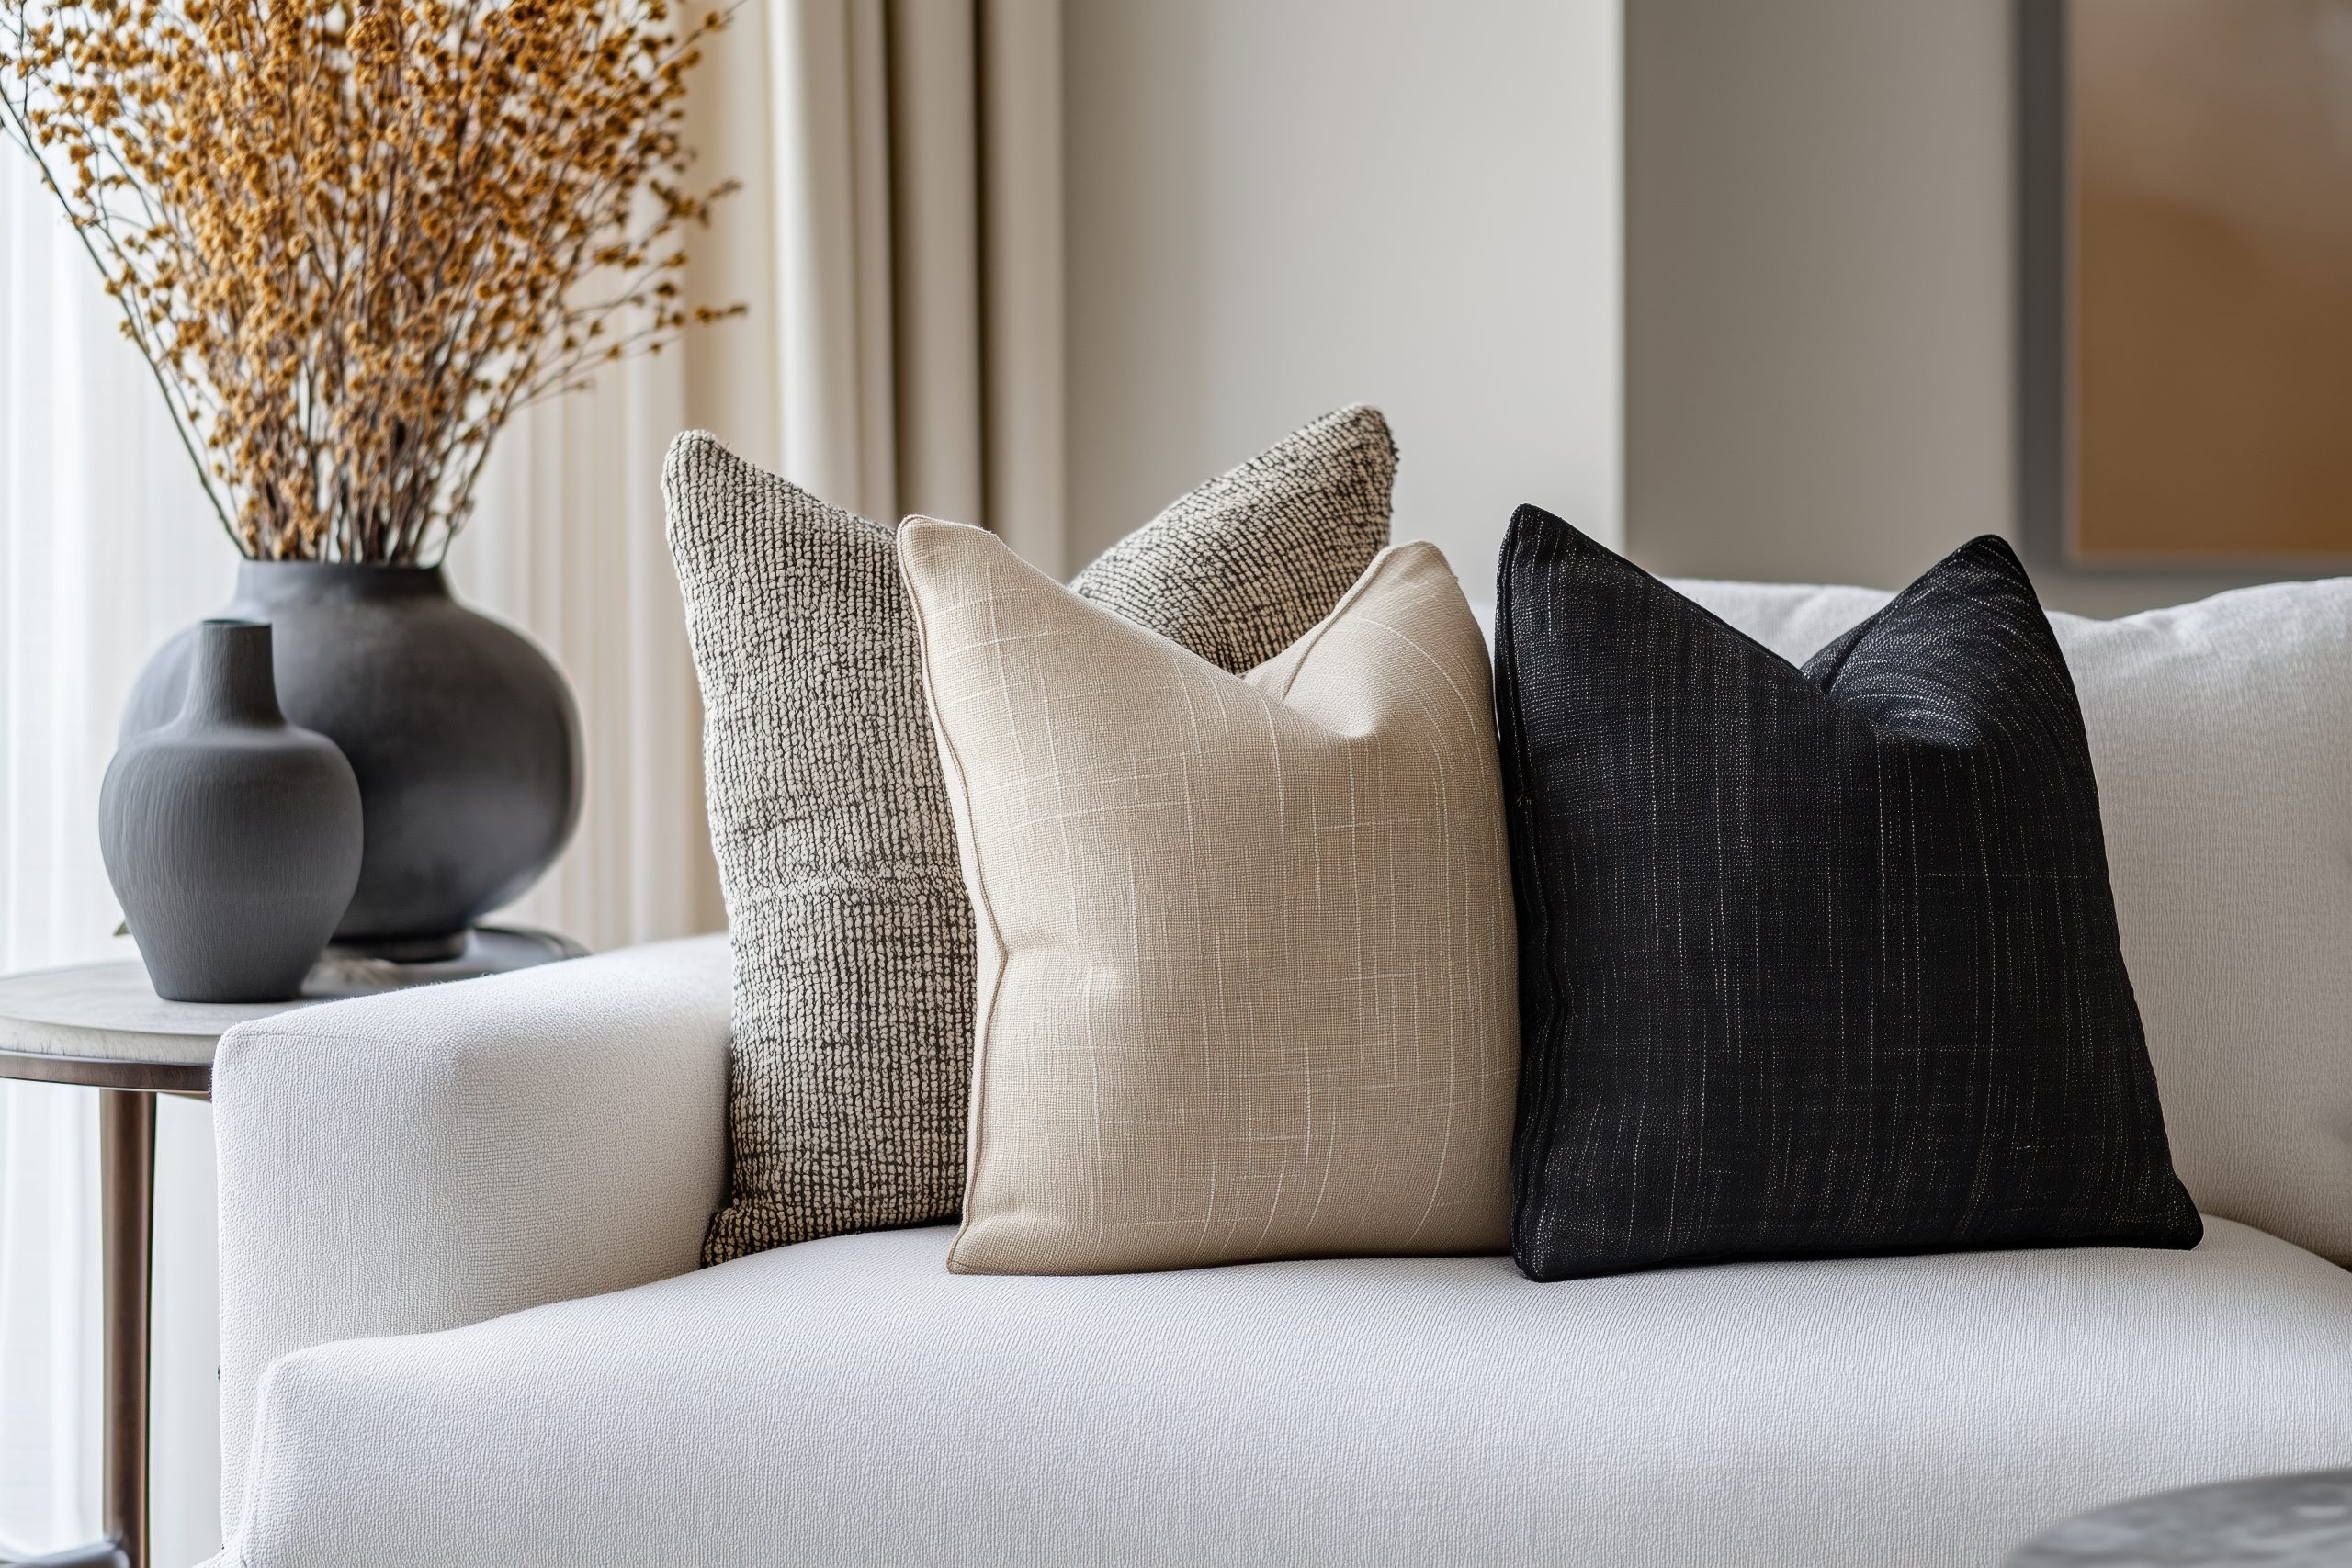
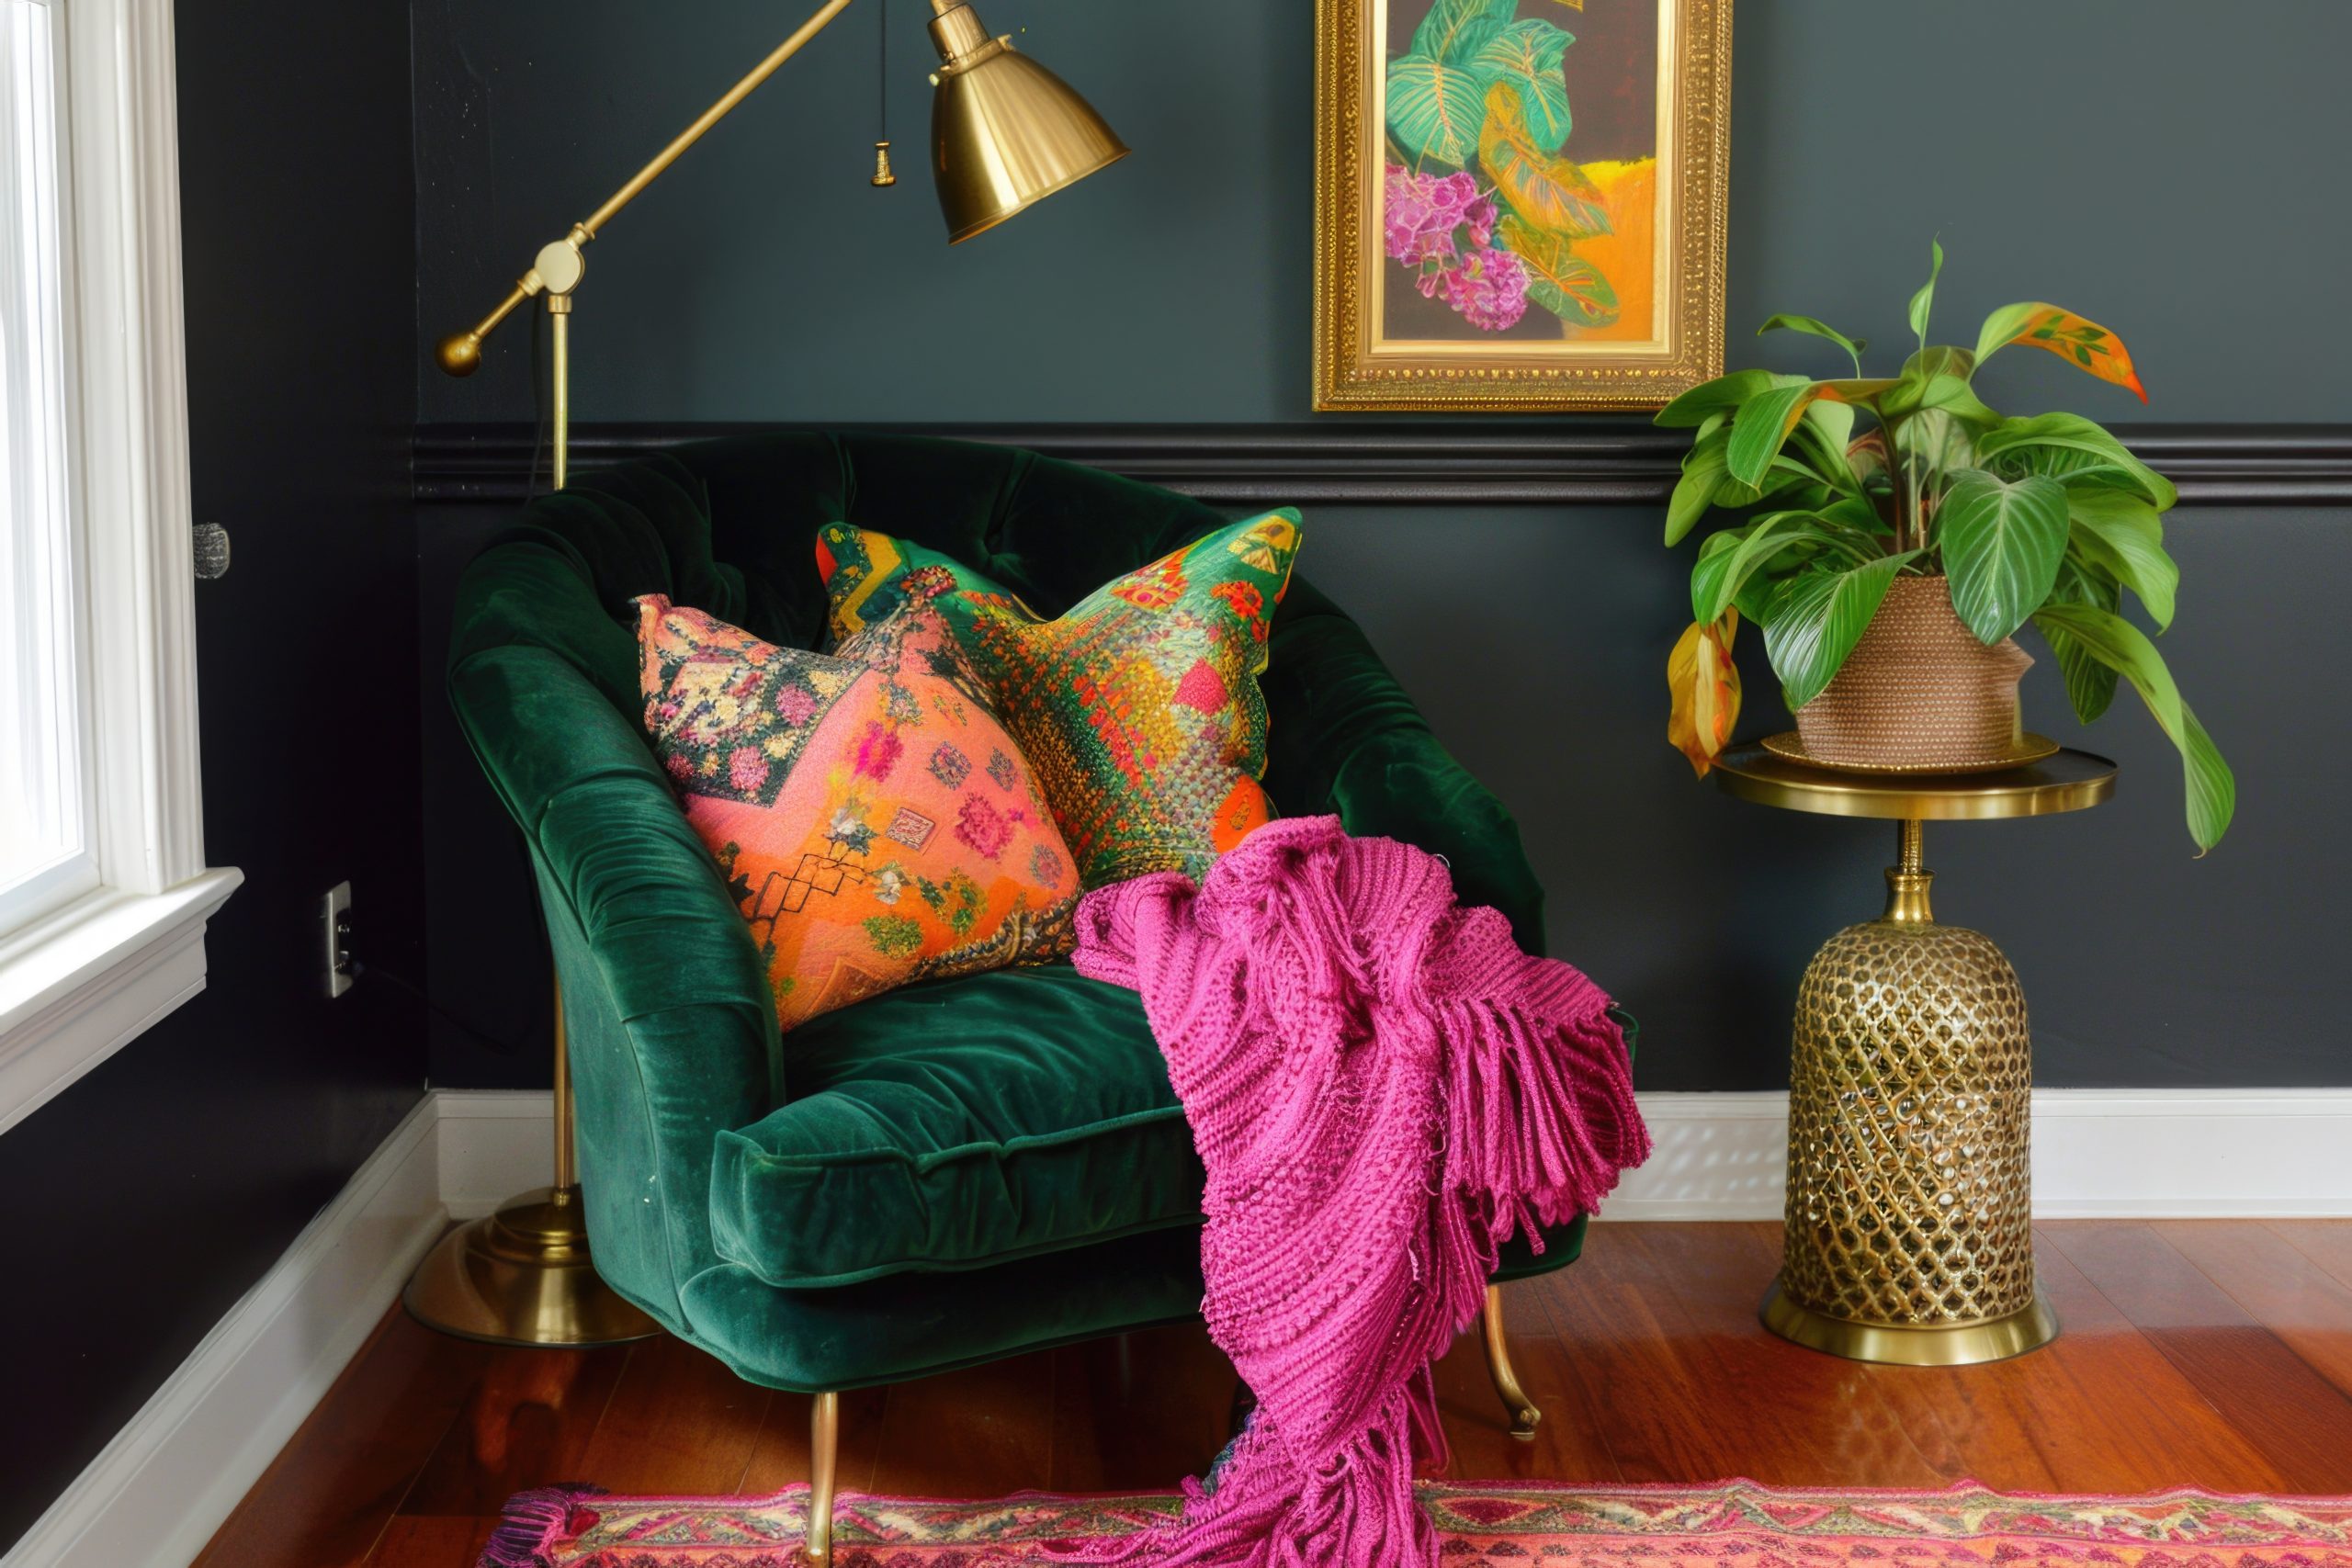
Sophisticated Materials
The materials you choose for your Art Deco home interior design are crucial for creating that luxurious feel. This style is all about combining different textures and surfaces to create a rich, layered effect.
Essential Art Deco materials include:
- Polished woods (especially exotic varieties)
- Plush velvets
- Smooth lacquer finishes
- High-gloss marble
- Sleek glass
The key to working with these materials is contrast. Pair smooth, glossy surfaces with soft, tactile fabrics. Consider a lacquered sideboard topped with velvet-covered boxes, or marble floors softened by a plush geometric rug.
When selecting furniture pieces, look for:
- High-sheen wood finishes
- Upholstery in luxurious fabrics
- Pieces combining different materials
- Clean lines with sophisticated details
Remember, quality matters in Art Deco design. While there are always ways to achieve the look on a budget, investing in a few key pieces made from authentic materials will elevate your entire space.
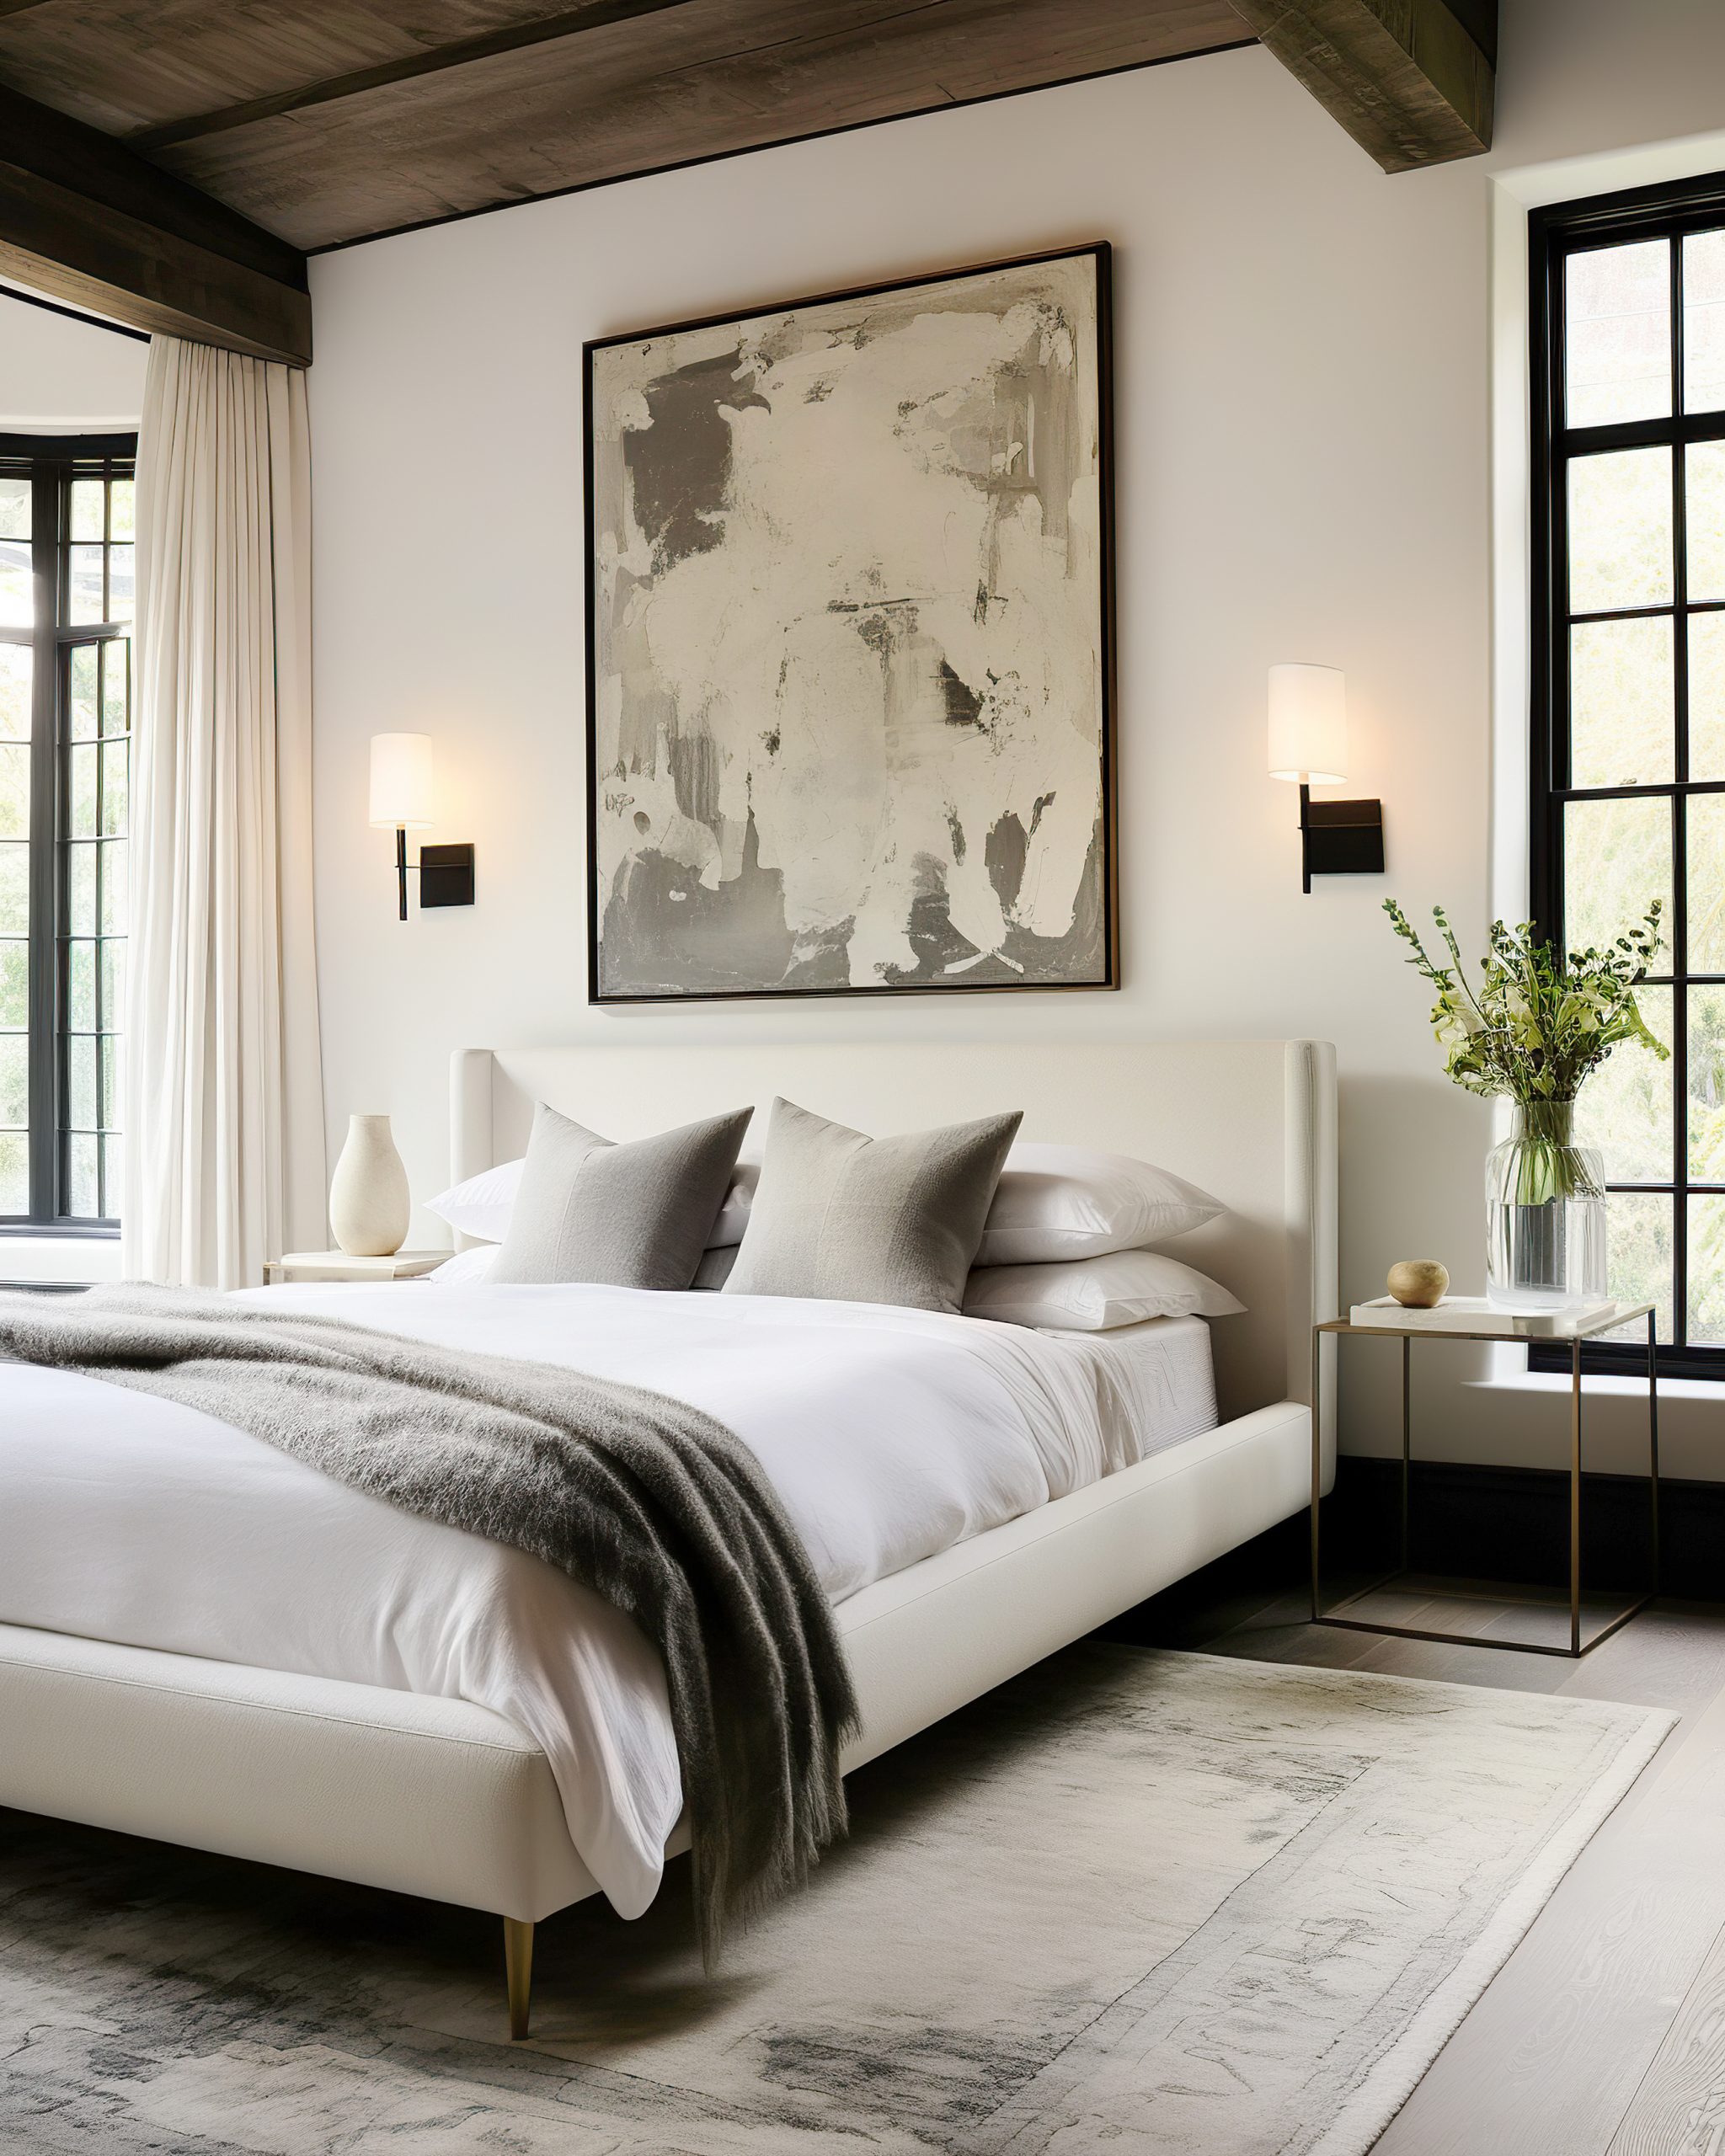
Bold Artwork and Wall Panels
Art Deco home interior design isn’t complete without making a statement through your wall treatments. The artwork and wall details of this era were never meant to fade into the background – they’re intended to be bold, dramatic, and impossible to ignore.
Key elements to consider:
- Large-scale artwork featuring geometric patterns
- Stylised figures and motifs
- Decorative wall panels with stepped designs
- Bold murals with metallic accents
- Sculptural wall installations
When selecting artwork, look for pieces that embrace typical Art Deco themes: sunbursts, chevrons, stylised animals, and figurative works with elongated forms. I particularly love how oversized pieces can transform an entire wall into a focal point.
For wall panels, consider:
- Wood panels with geometric inlays
- Upholstered panels in luxe fabrics
- Metal or mirror panels with decorative overlays
- Painted panels with metallic details
The beauty of Art Deco wall treatments is their versatility. You might opt for a single dramatic mural behind your sofa, or create an entire wall of geometric panels. Whatever you choose, make sure it complements rather than competes with your other Art Deco elements.
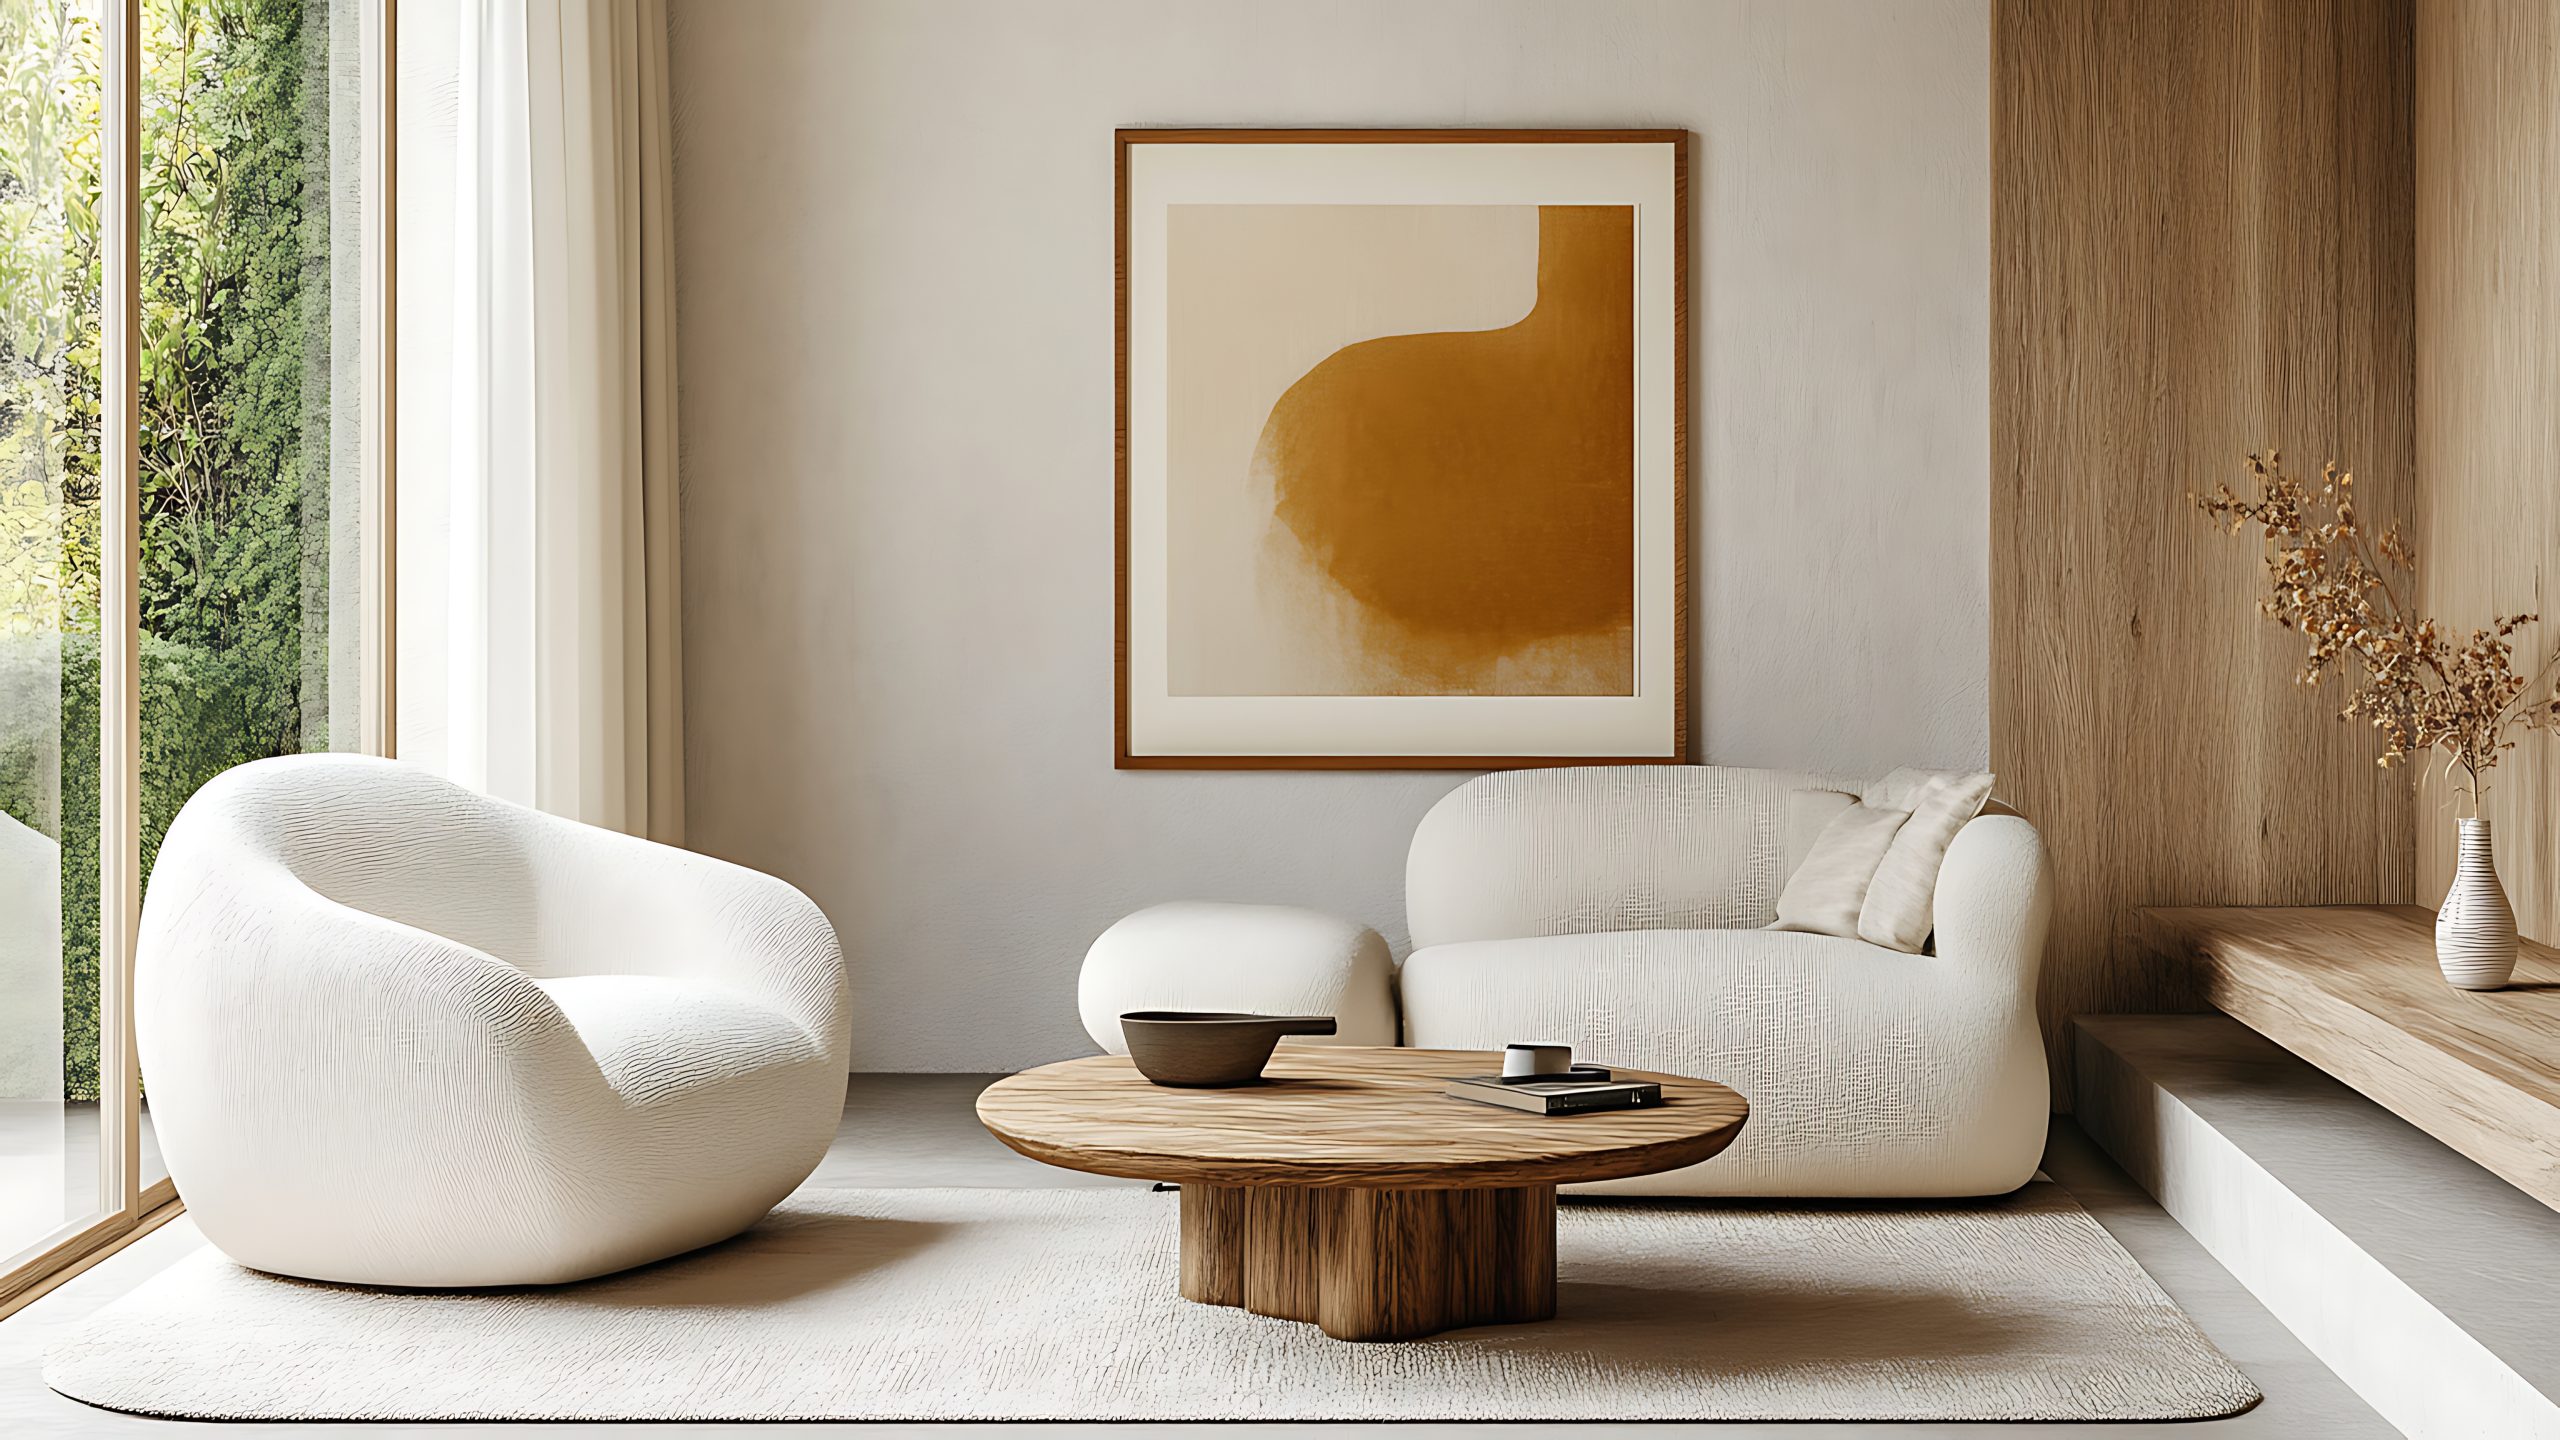
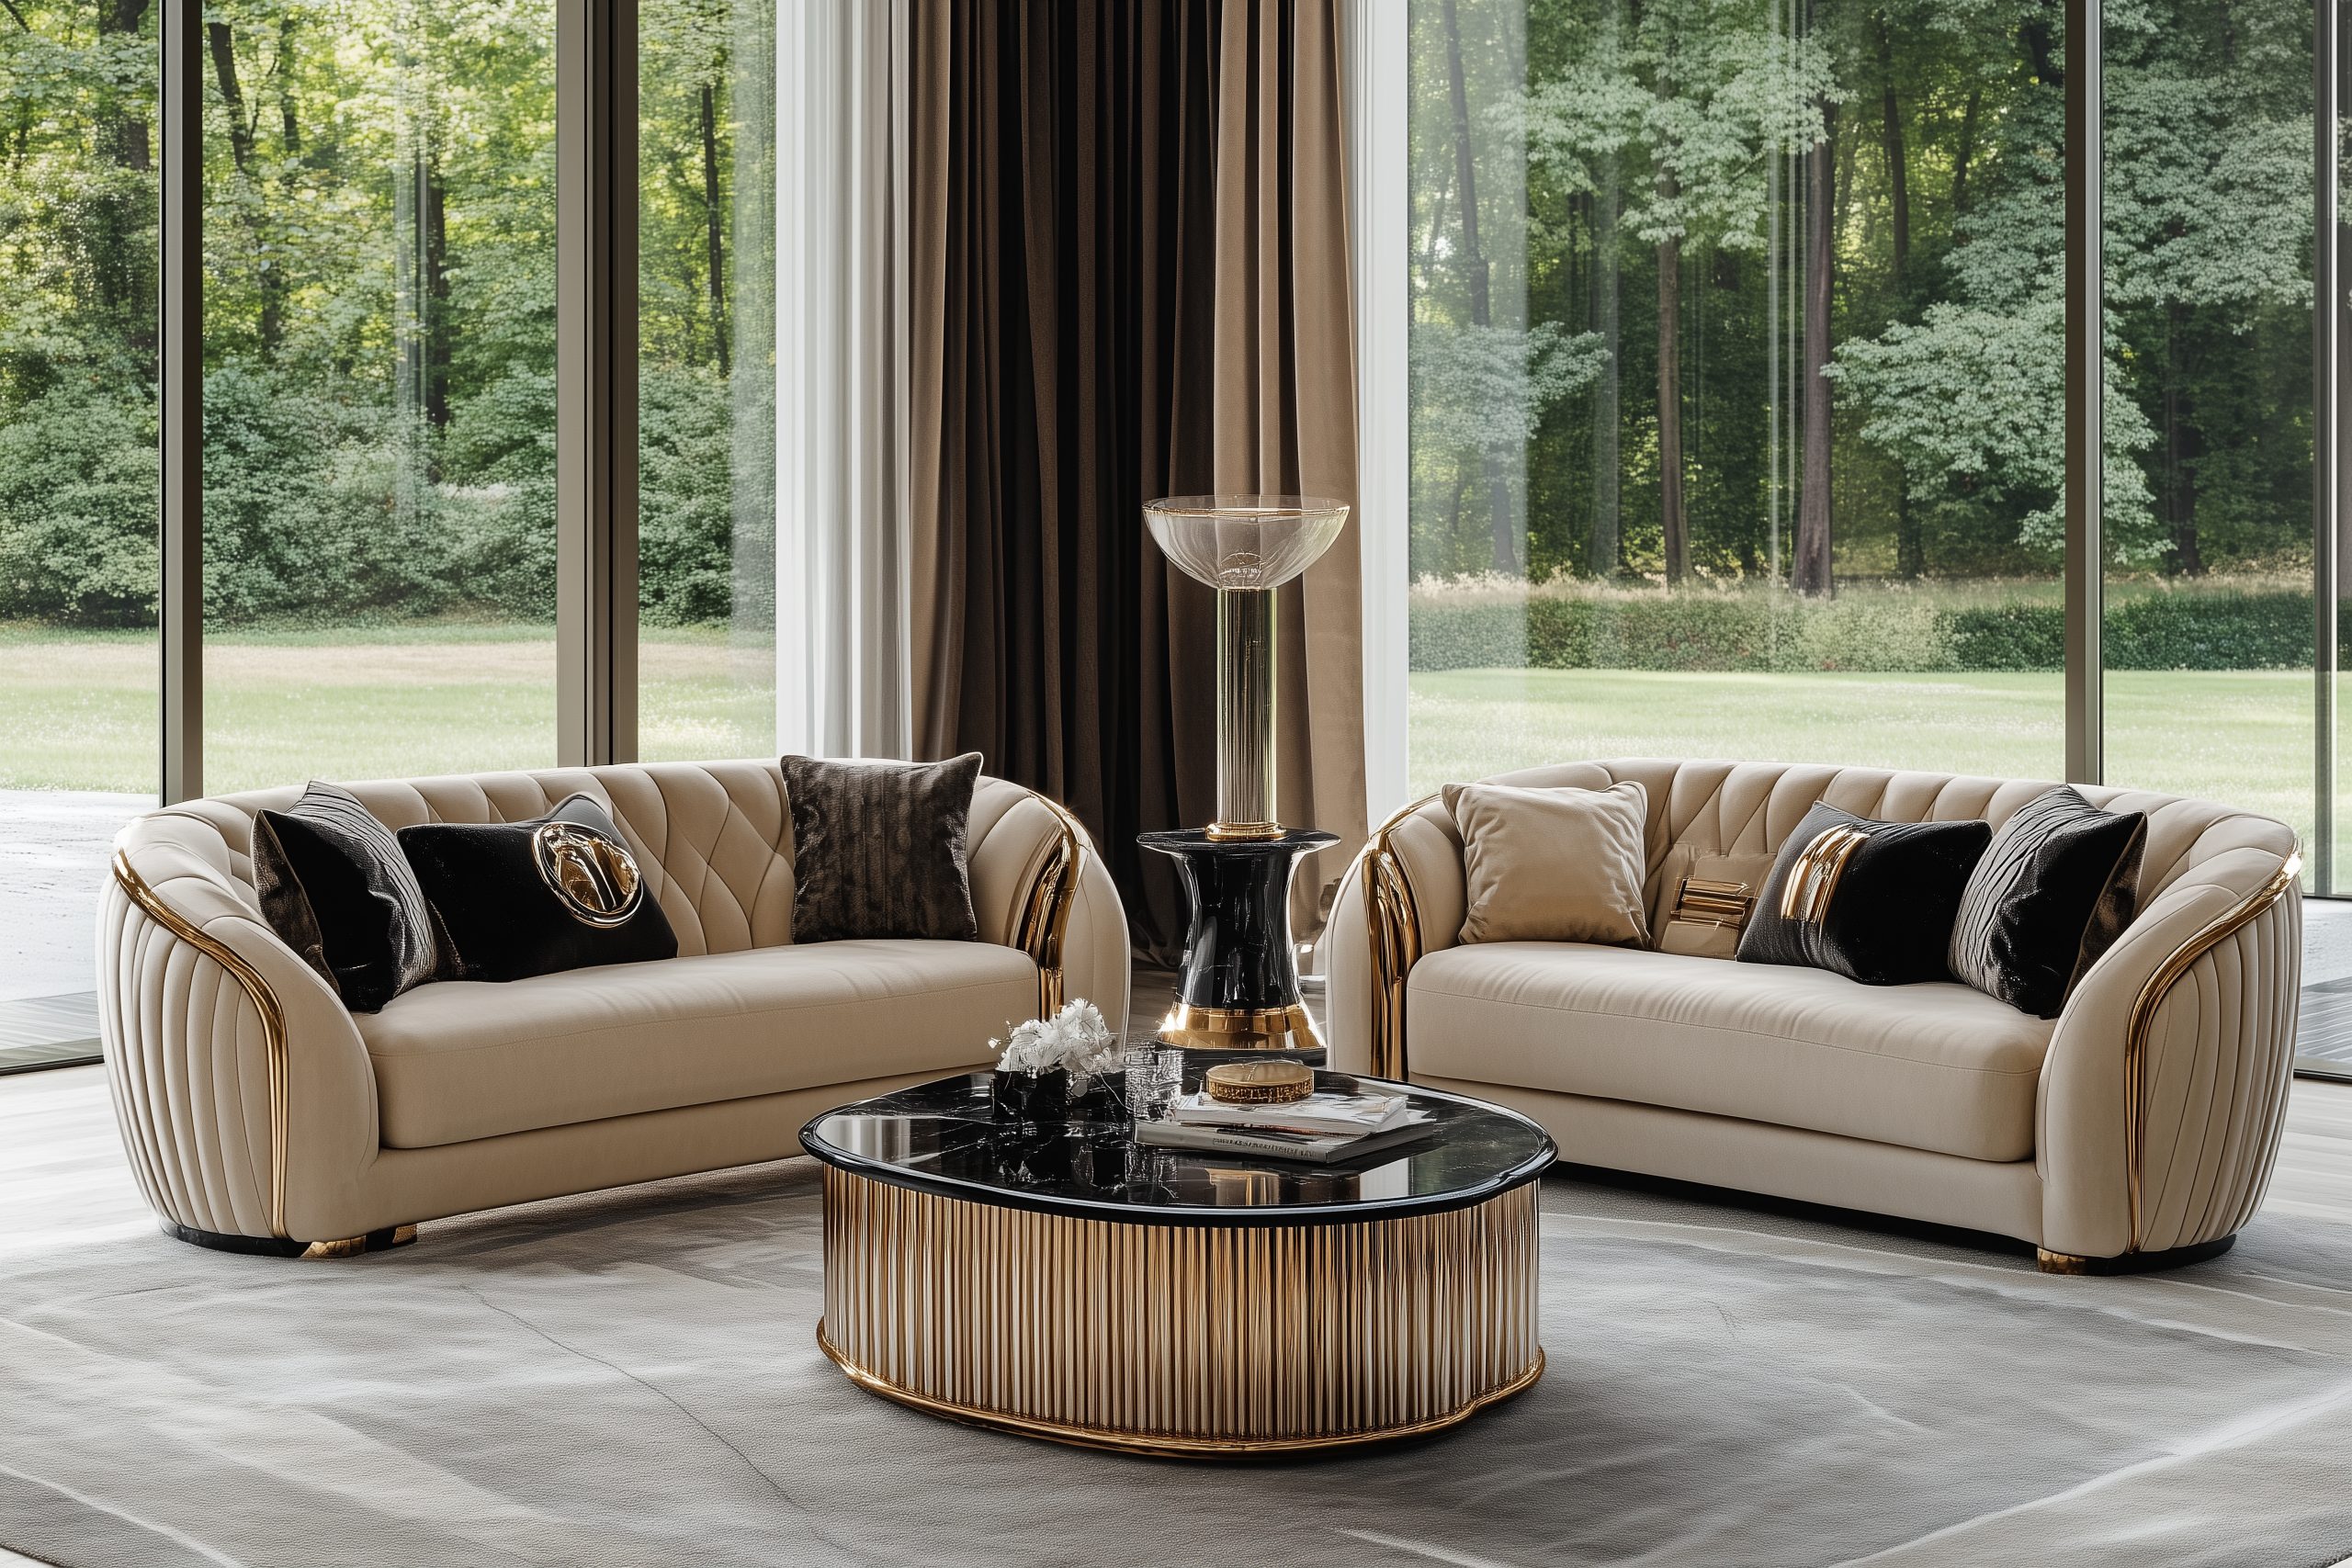
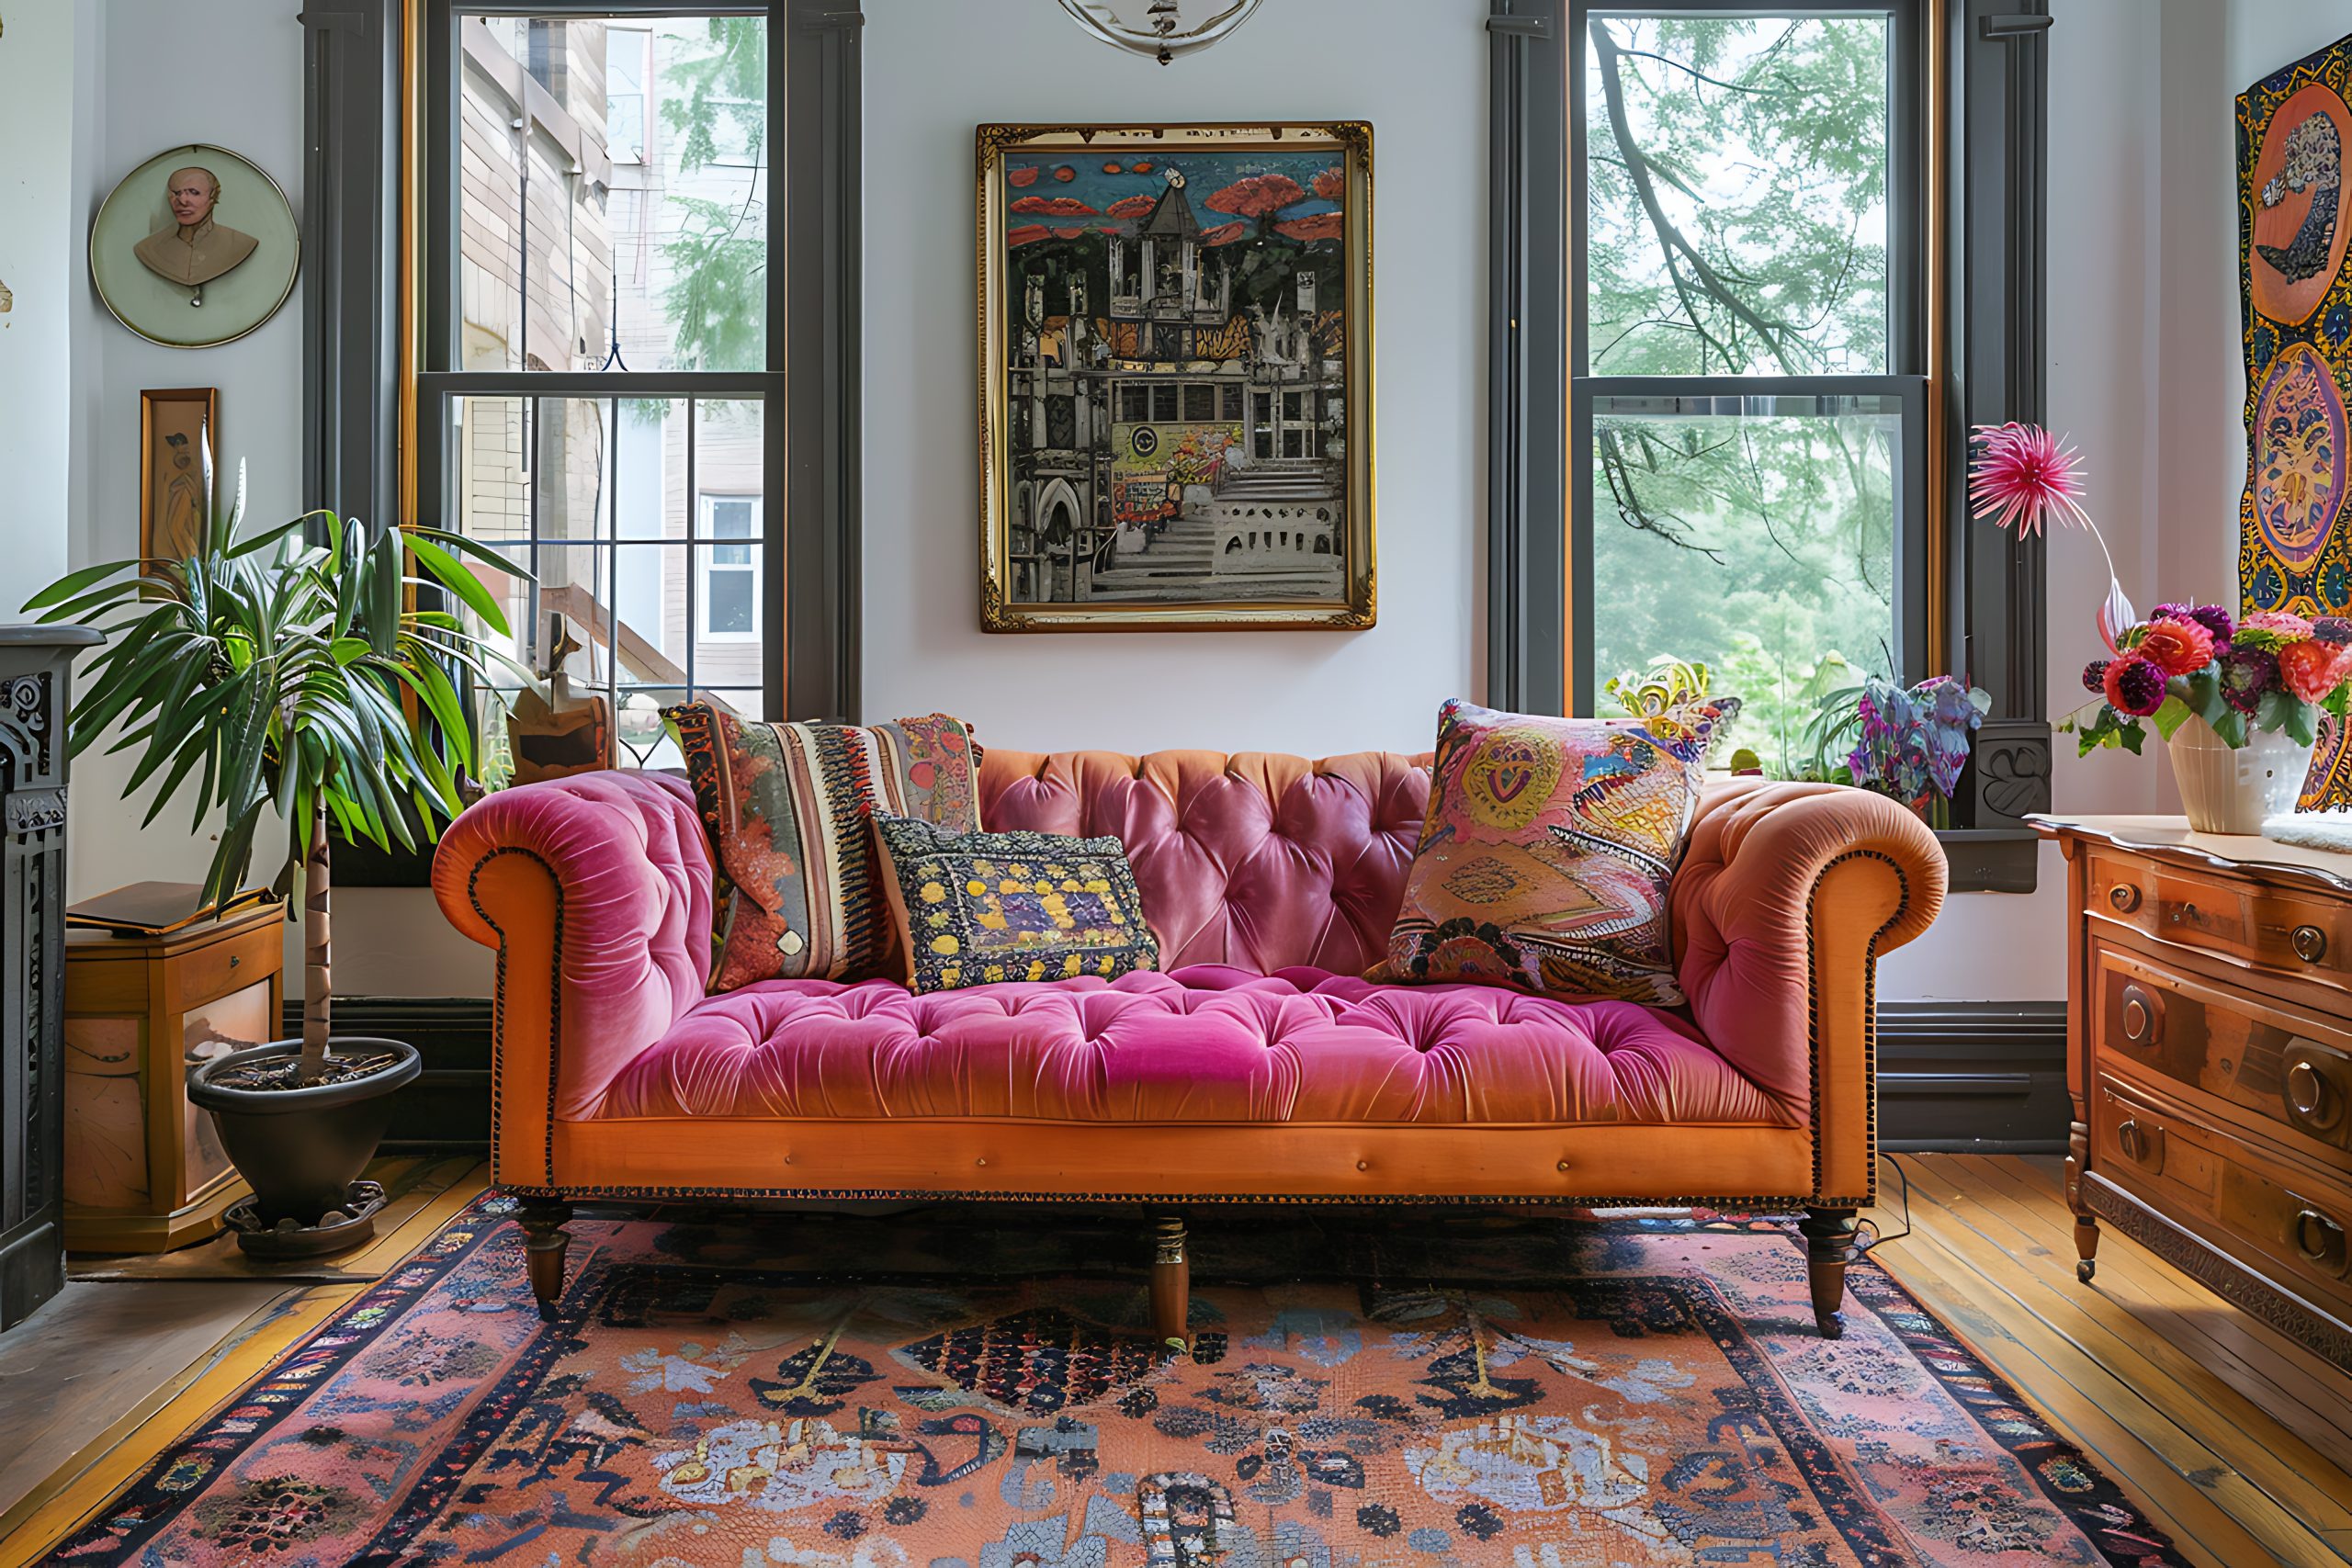
Streamlined Furniture
The furniture in Art Deco home interior design tells a story of elegance through form. These pieces are all about clean lines and curved edges, creating a sense of movement while maintaining sophistication.
Essential furniture characteristics include:
- Curved sofas and club chairs
- Streamlined silhouettes
- Built-in seating nooks
- Furniture with stepped or waterfall edges
- Pieces that combine different materials
When selecting furniture, I always recommend focusing on:
- Low-profile pieces with strong horizontal lines
- Rounded corners and smooth curves
- Symmetrical arrangements
- Pieces that make a statement without being bulky
The key to successful Art Deco furniture placement is balance. Create conversation areas that feel intimate yet sophisticated, and don’t be afraid to mix curved pieces with angular ones – this contrast is what makes Art Deco so dynamic.
Pro tip: If you’re working with a smaller space, choose fewer, more impactful pieces rather than trying to squeeze in too many elements. A single spectacular curved sofa can have more impact than multiple smaller pieces.
Remember, comfort shouldn’t be sacrificed for style. The best Art Deco rooms combine visual drama with practical livability. Look for pieces that invite you to sit and stay while maintaining those classic Art Deco lines.
When it comes to upholstery, opt for:
- Rich, solid colours
- Geometric patterns
- Luxurious textures
- High-quality fabrics that will stand the test of time
The beauty of Art Deco furniture lies in its ability to be both functional and sculptural. Each piece should work as part of your overall design while being striking enough to stand on its own.
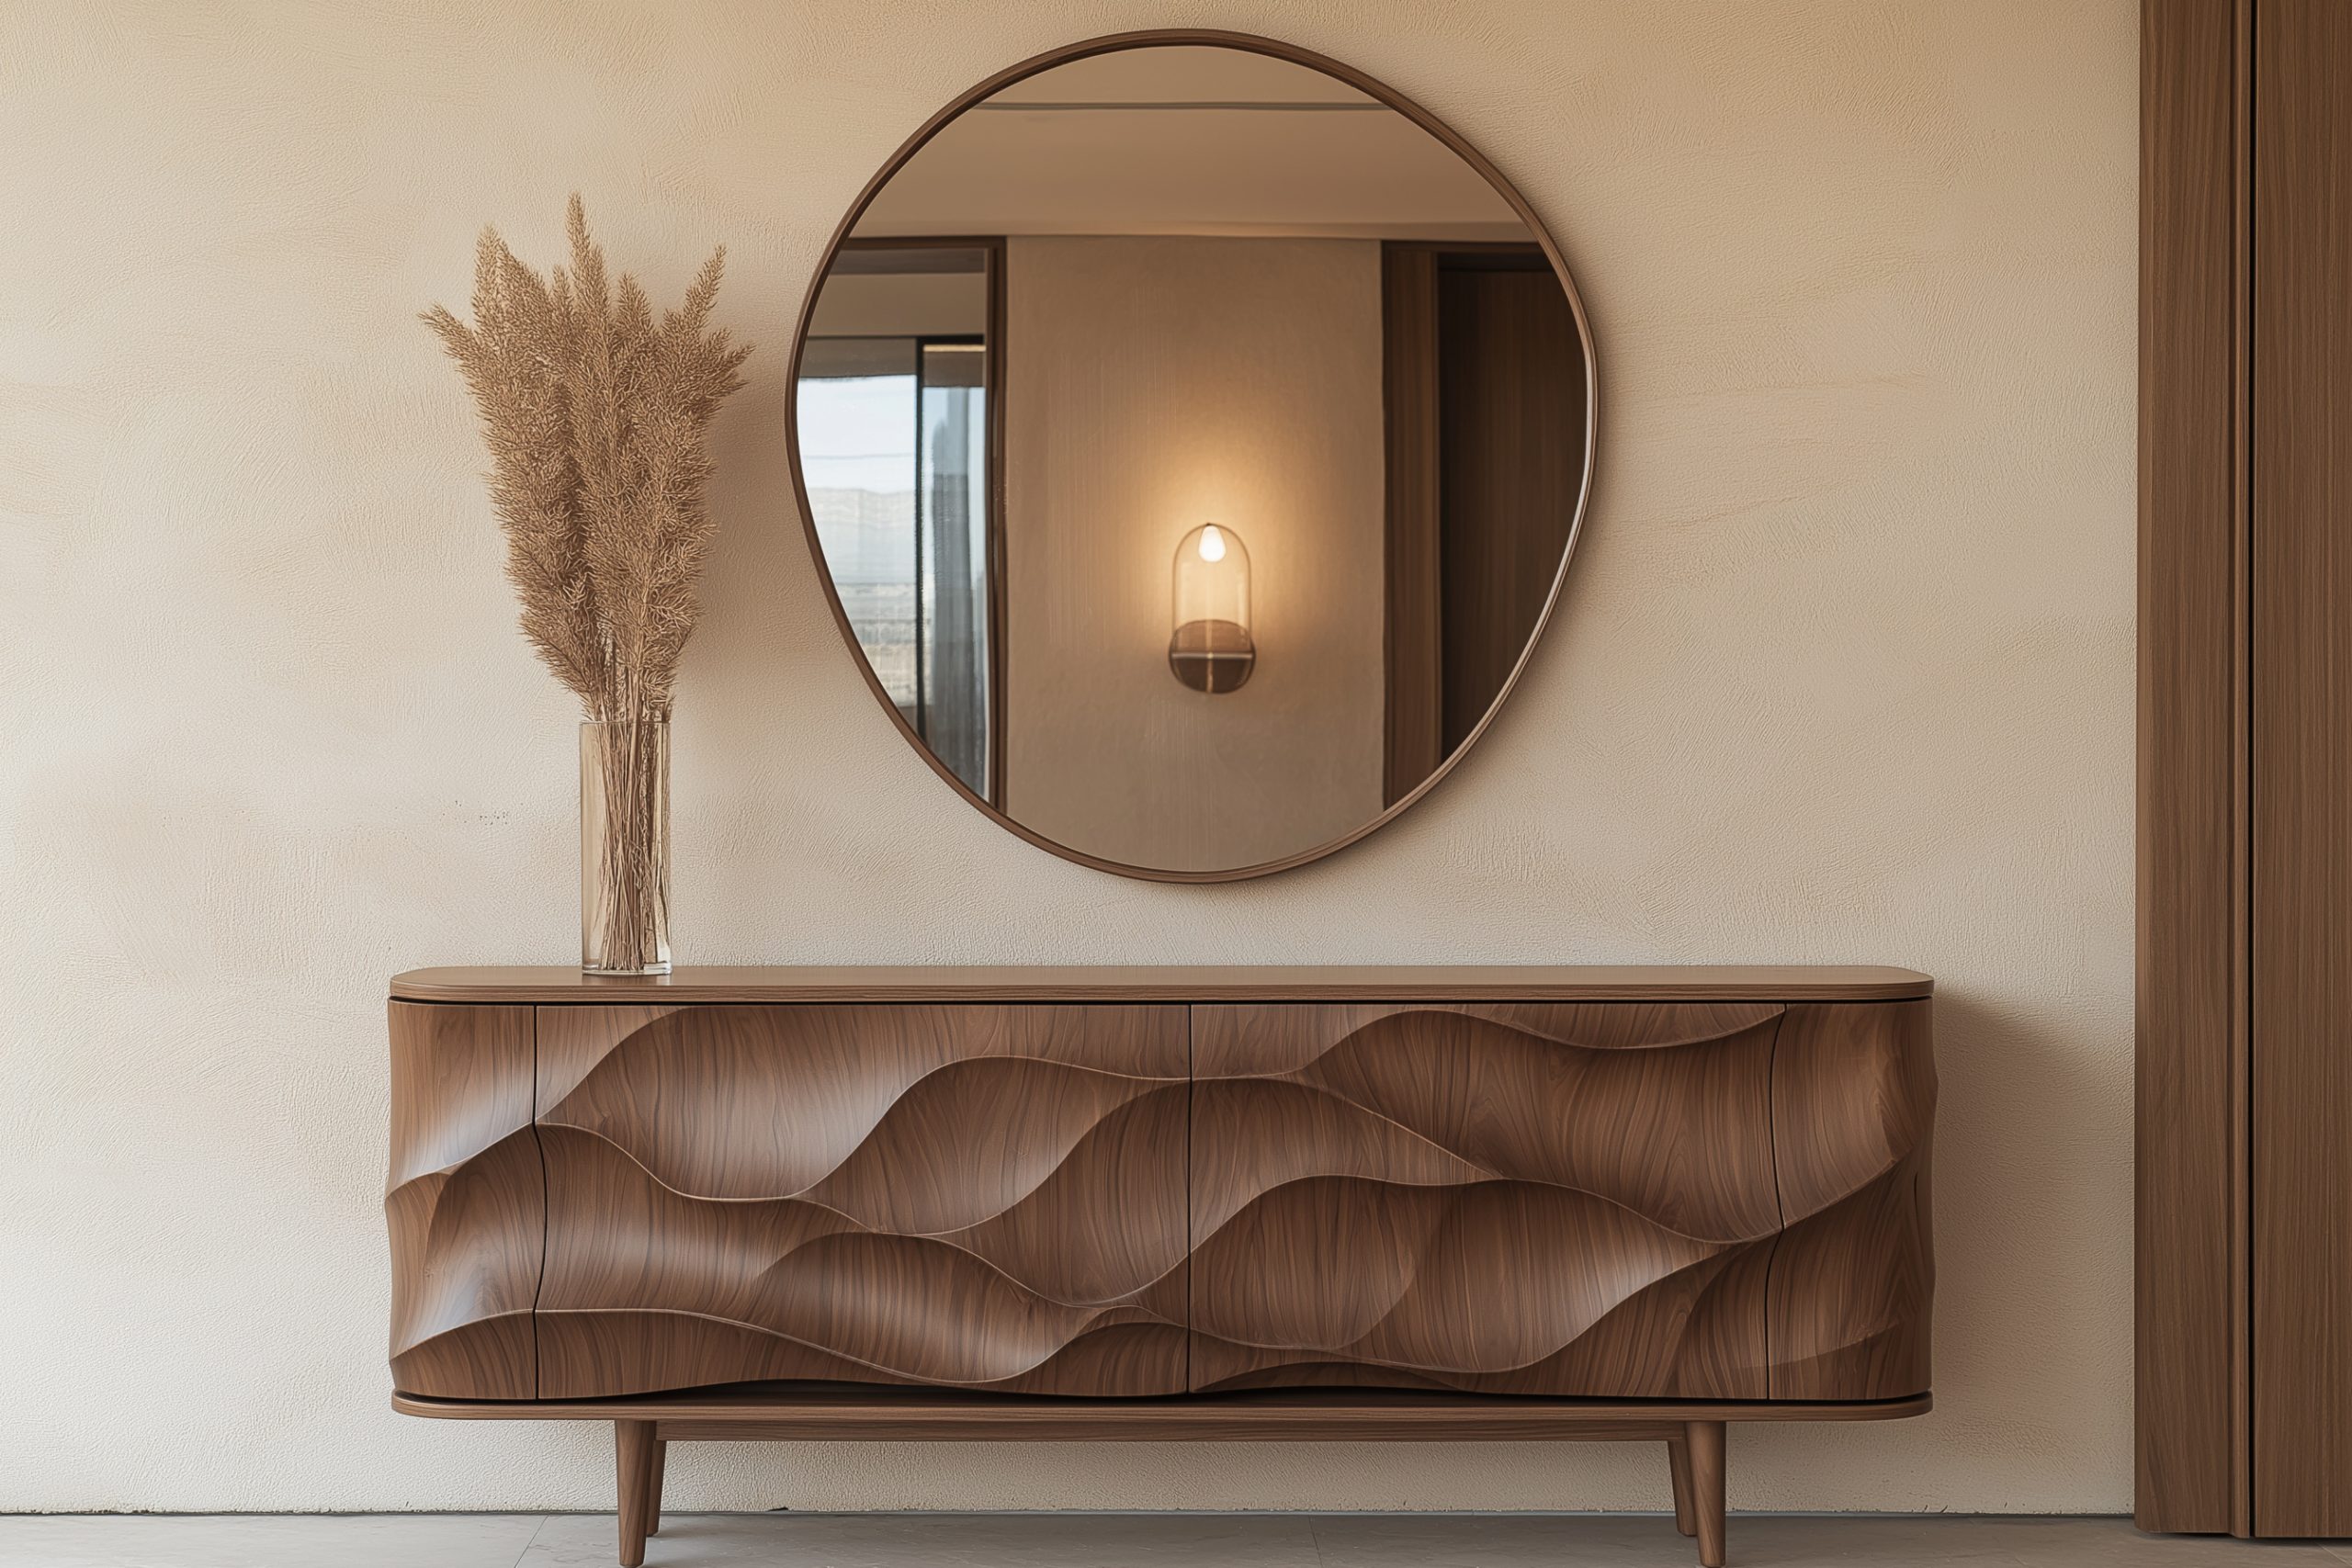
Exotic Wood Finishes
The use of luxurious woods is one of the most distinctive features of Art Deco home interior design. These aren’t your everyday wood finishes – we’re talking about spectacular grains and rich colours that immediately elevate a space’s sophistication level.
Key wood varieties to consider:
- Macassar ebony with its dramatic striped grain
- Bird’s eye maple for its unique spotted pattern
- Zebra wood offers bold, natural stripes
- Burled walnut with its swirling patterns
- Rosewood for its deep, rich tones
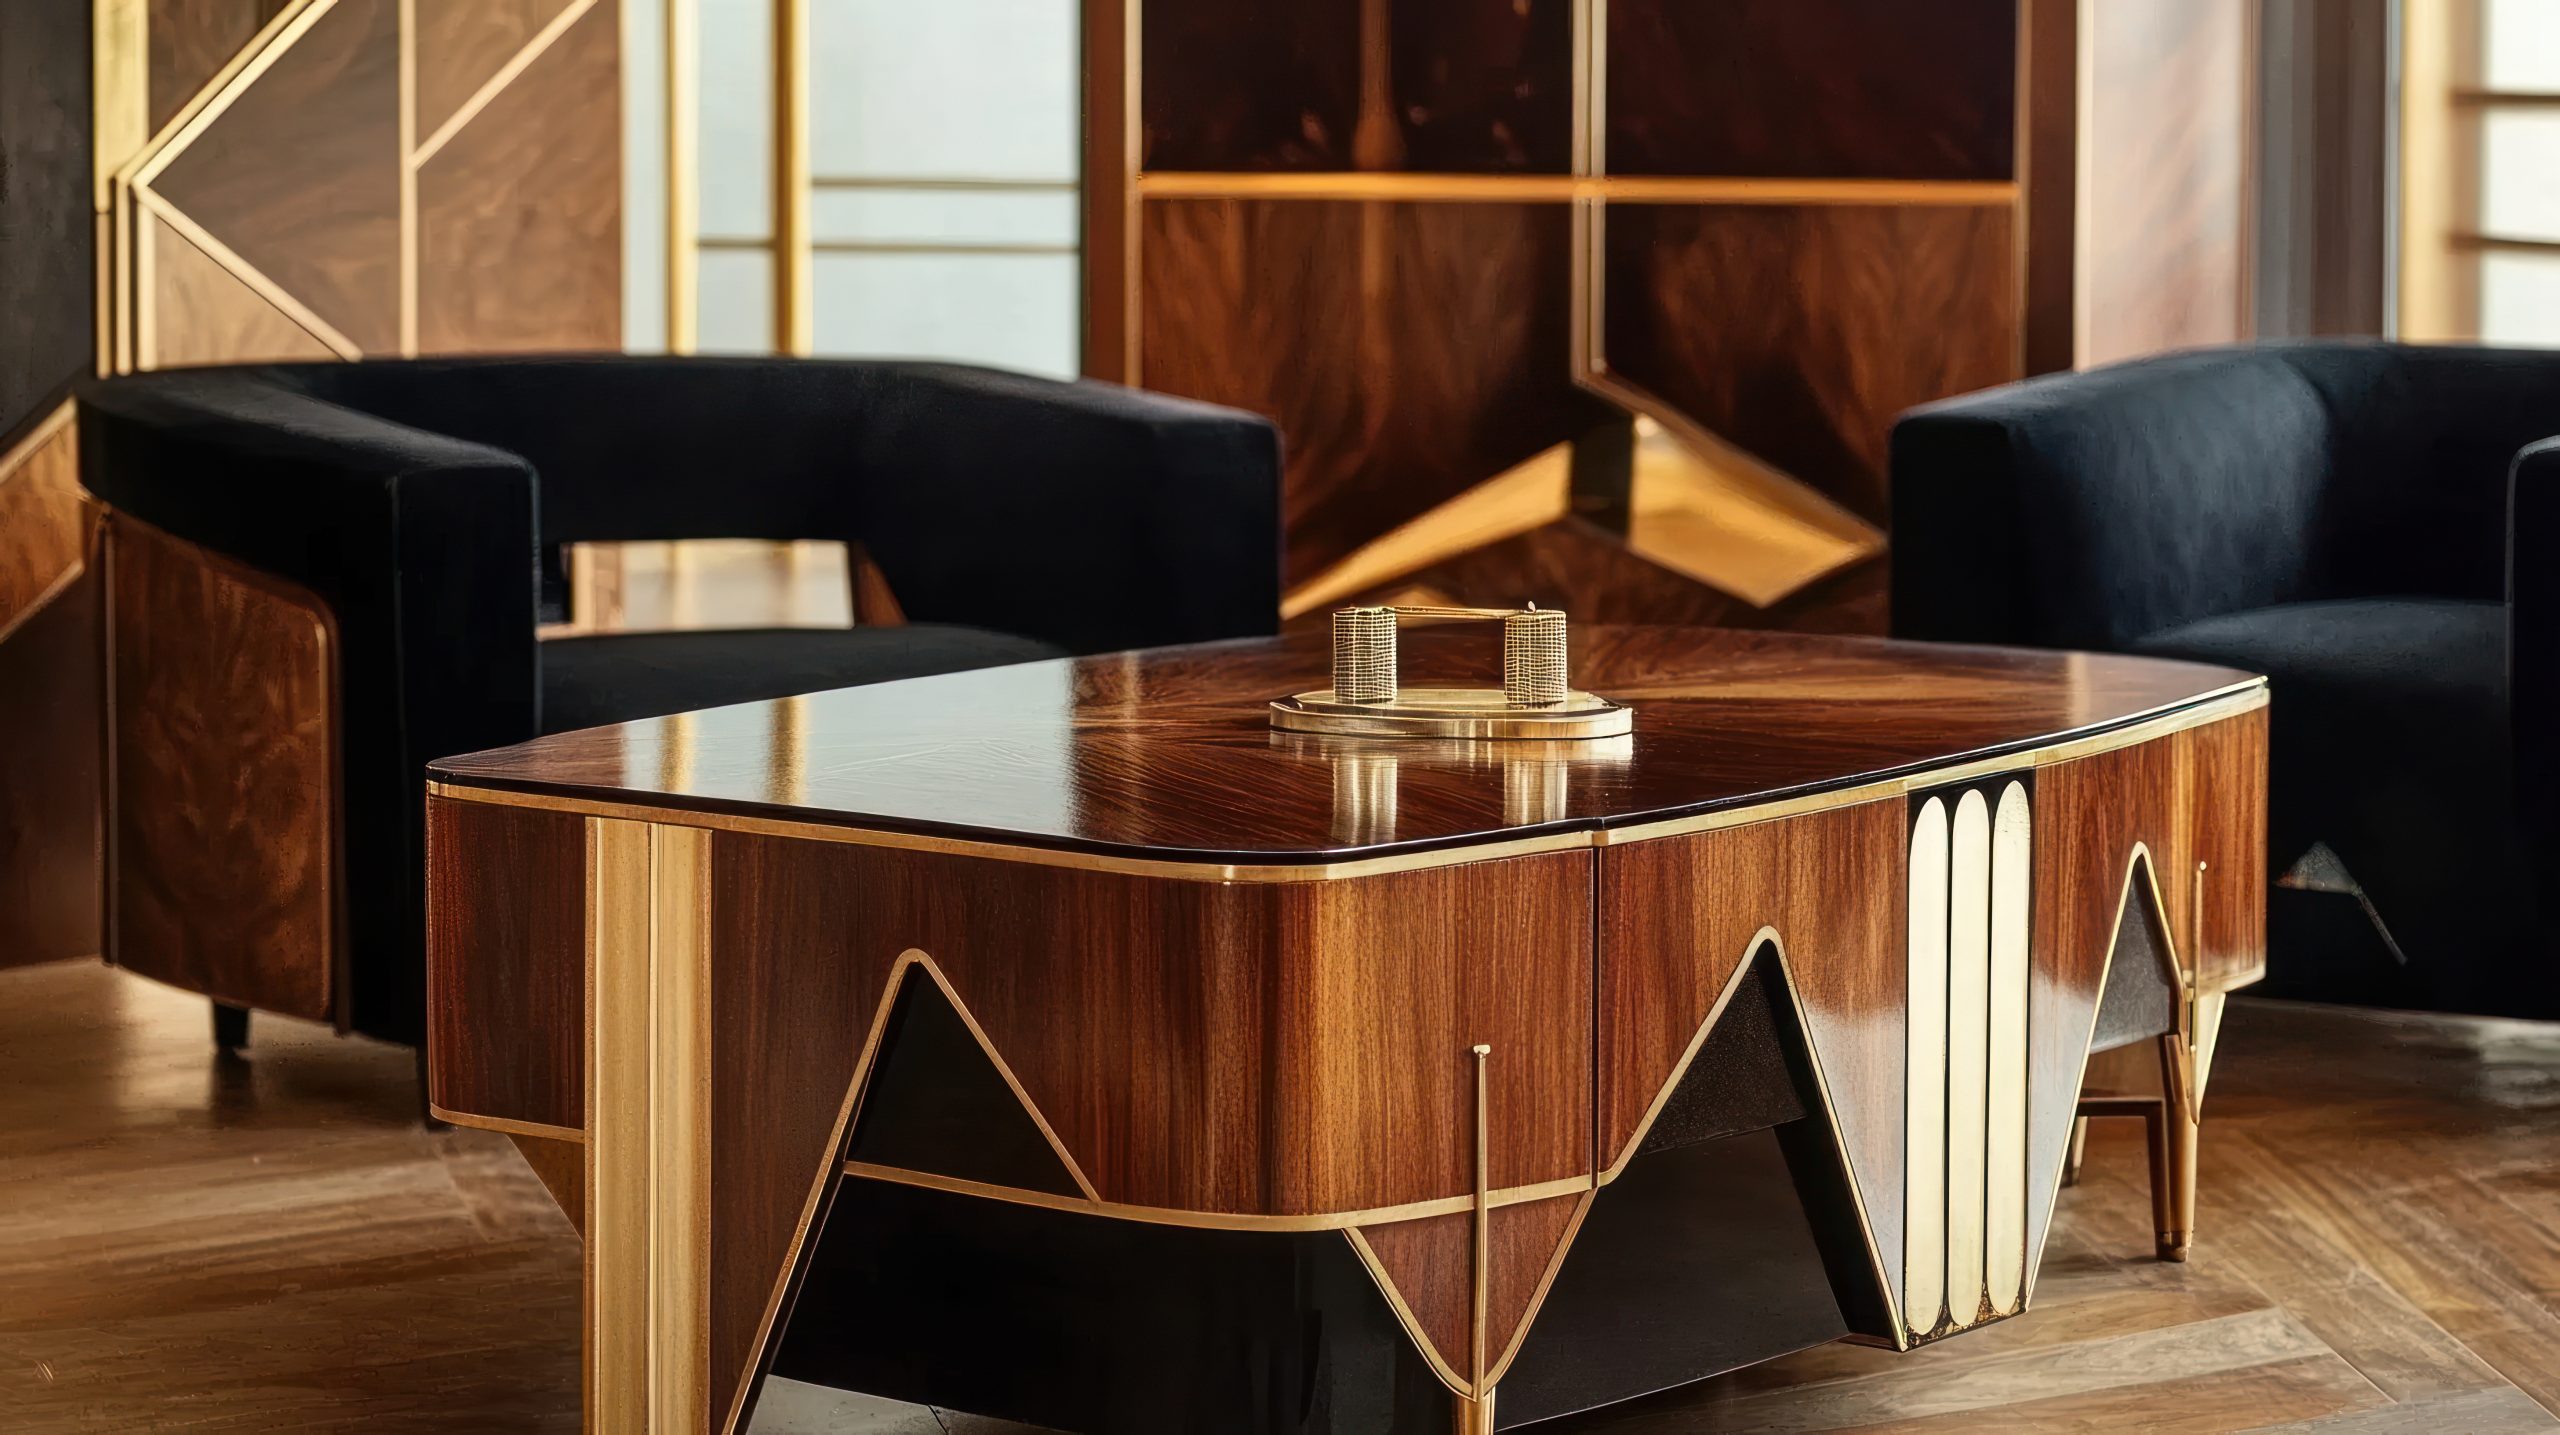
The beauty of these woods lies in their natural patterns. Whether it’s through furniture pieces, wall panels, or built-ins, these materials add organic geometry to your Art Deco scheme. I particularly love how they catch the light and create depth in a space.
Using exotic woods effectively:
- Choose one statement piece as your anchor
- Mix different woods while keeping finishes consistent
- Balance dark and light wood tones
- Consider wood inlays for added detail
Pro tip: If authentic exotic woods are beyond your budget, there are excellent veneers and alternatives available that can create a similar effect. The key is choosing options with strong, distinctive grain patterns.
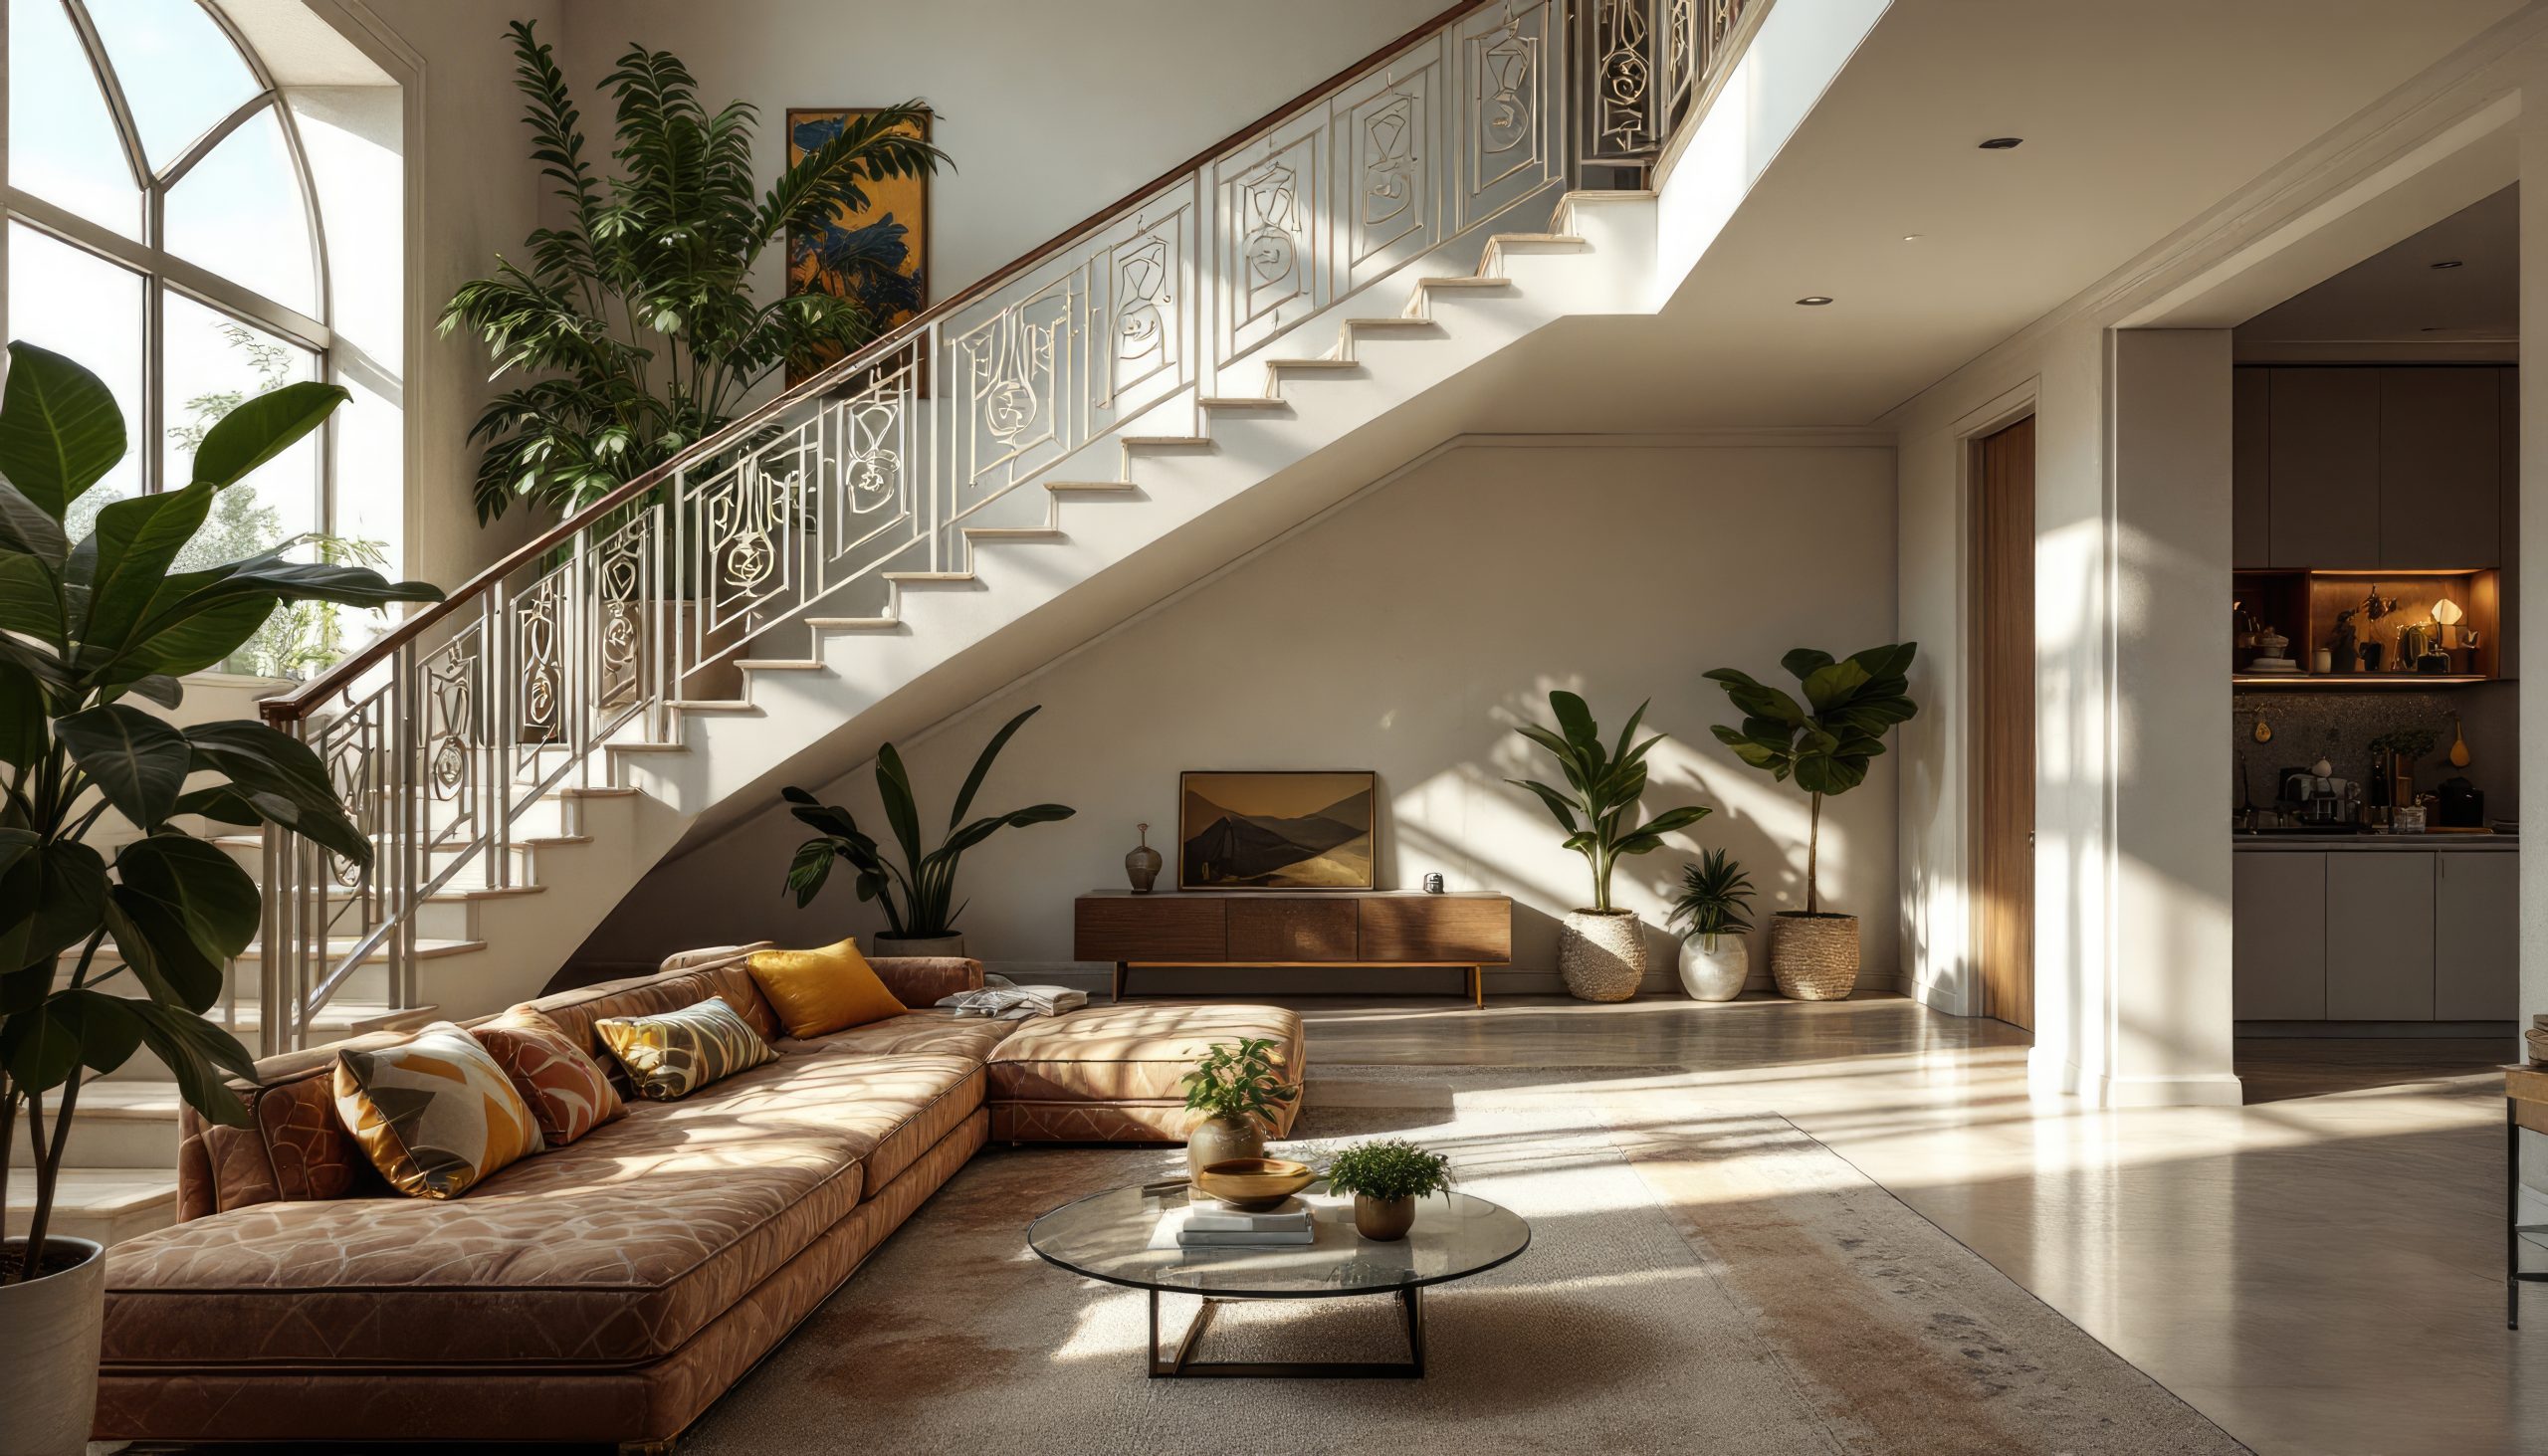
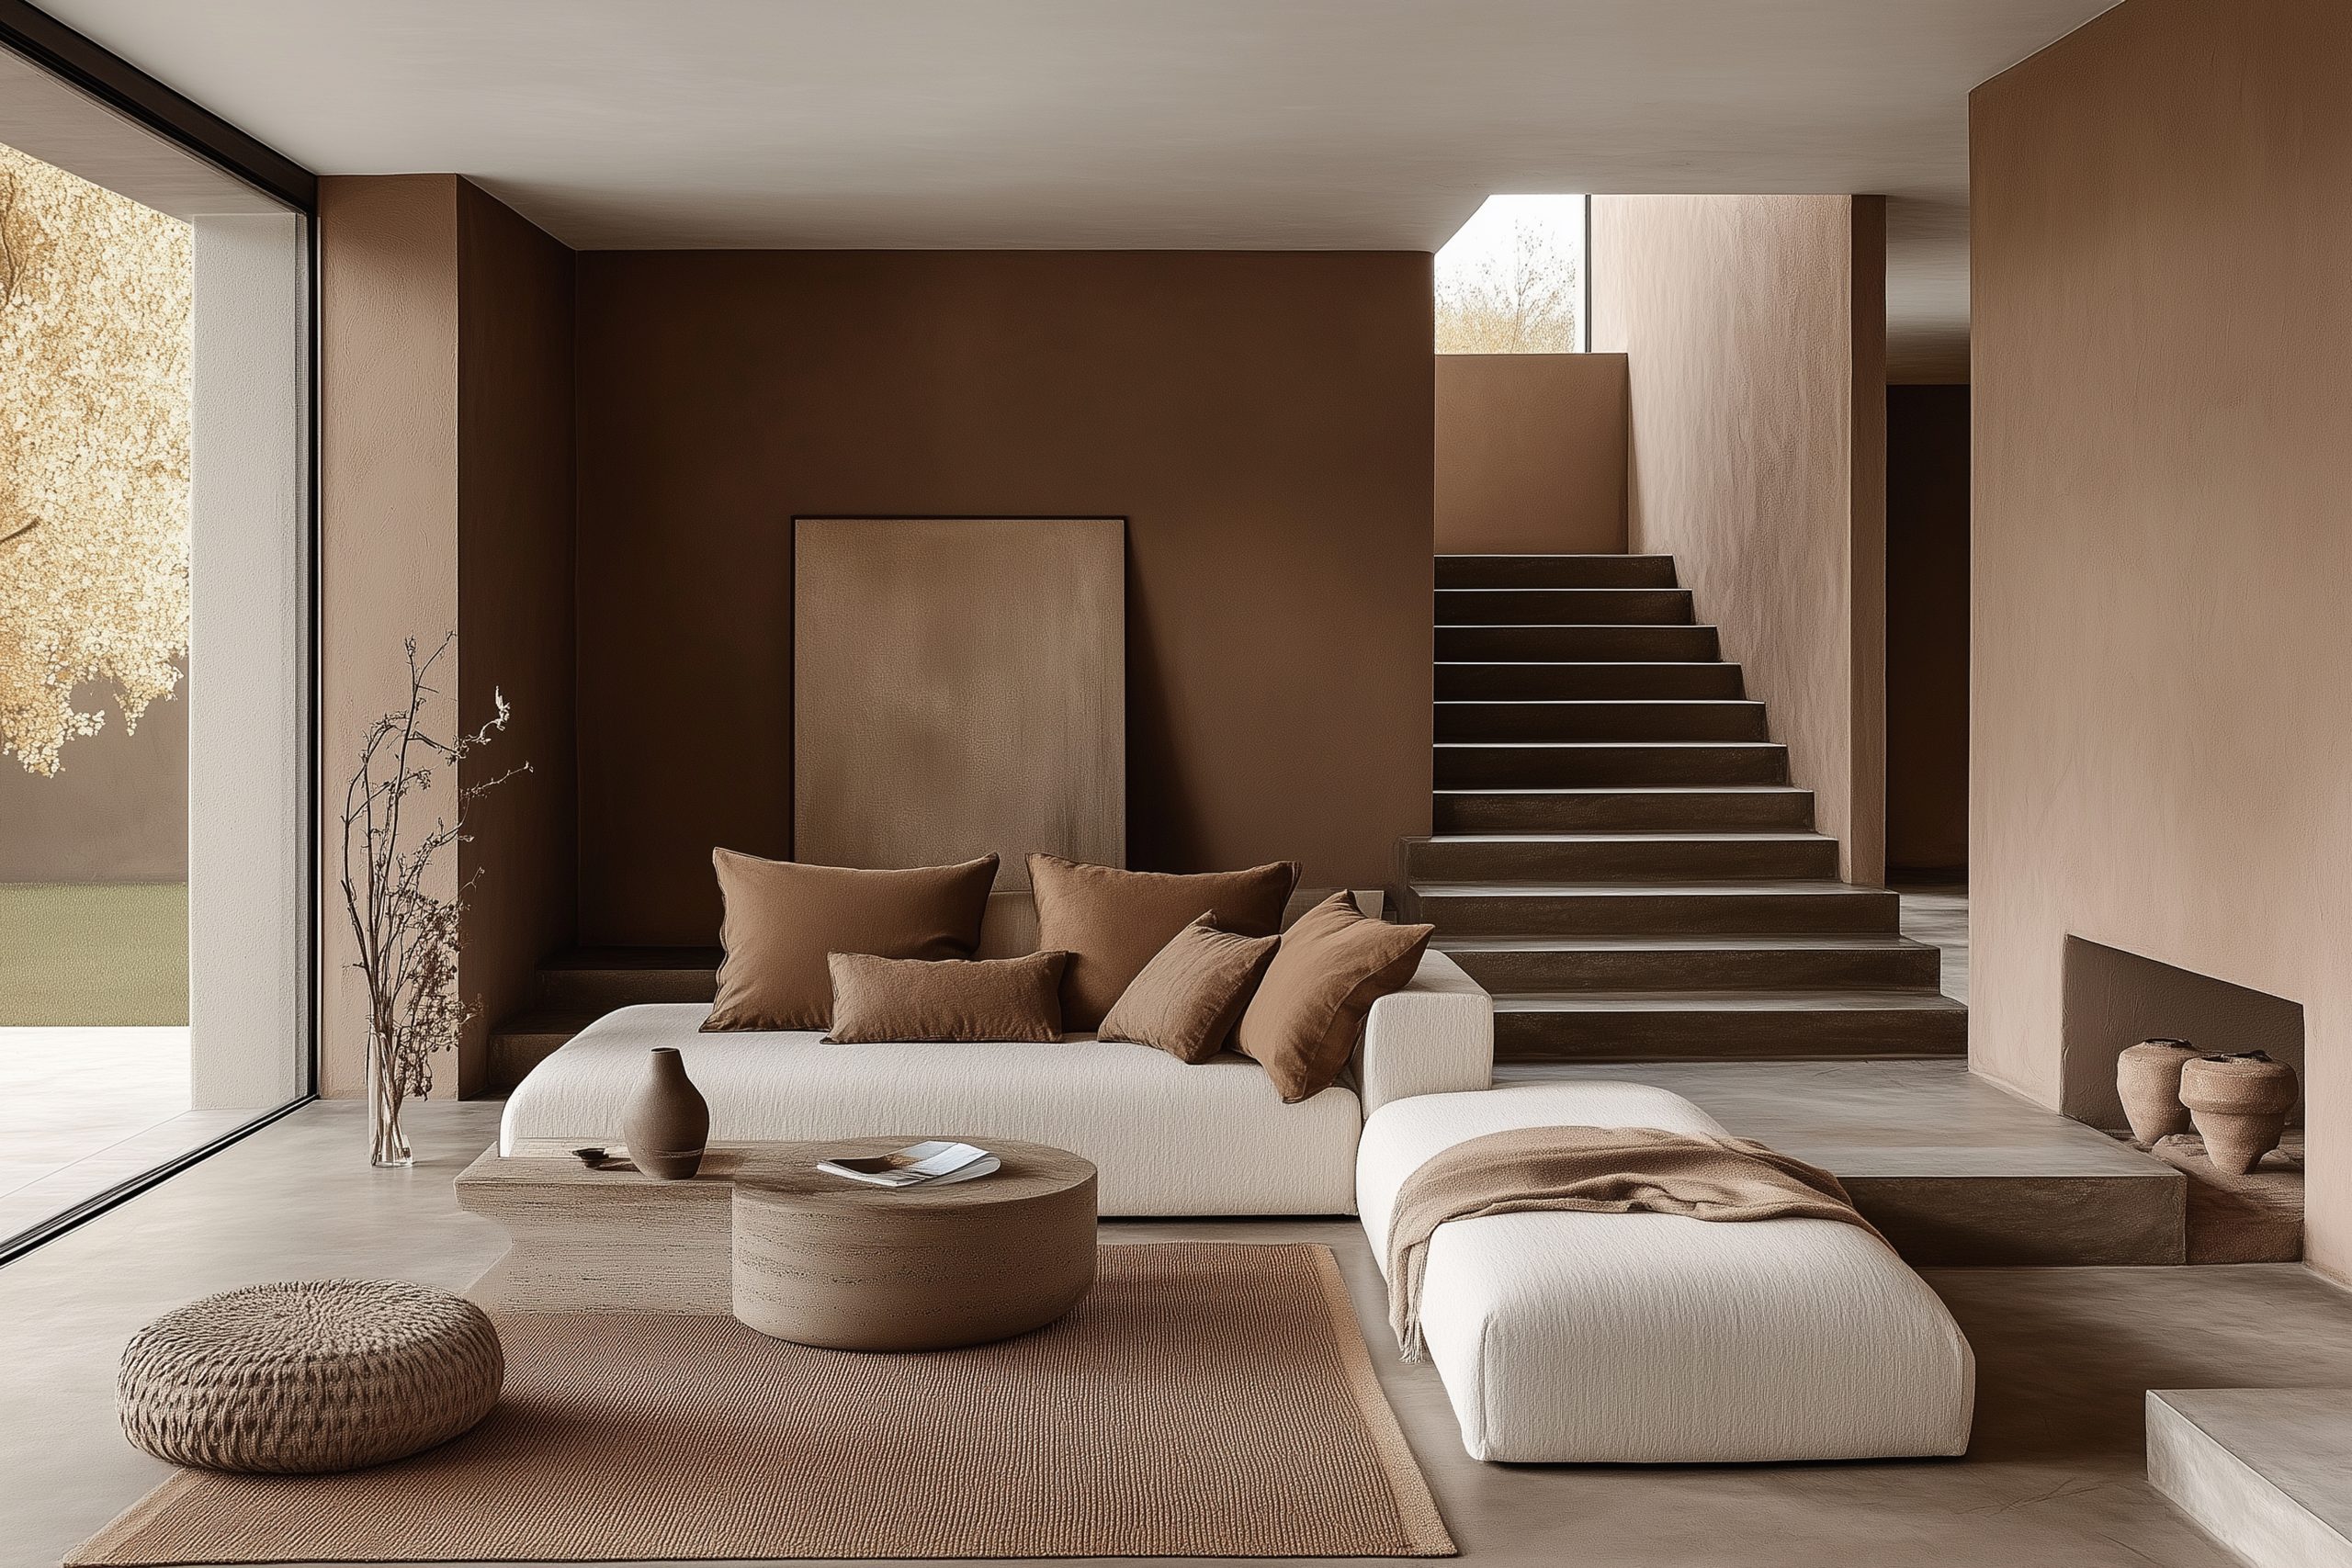
Statement Staircases
In Art Deco home interior design, staircases aren’t just functional elements – they’re architectural showpieces that can define an entire space. Whether you’re working with a grand curved staircase or a more modest design, there are plenty of ways to incorporate Art Deco elements.
Essential staircase features include:
- Geometric railings with repeated patterns
- Chrome or brass handrails
- Stepped details in the balustrades
- Dramatic runner patterns
- Contrasting materials
The most impactful staircase elements combine:
- Clean lines with decorative details
- Mixed materials like wood and metal
- Strategic lighting to highlight design features
- Pattern play through flooring or runners
When designing or updating a staircase, consider:
- The visual weight of different elements
- How light plays off metallic surfaces
- The balance between plain and decorative components
- The transition between different levels of your home
Even if you’re working with an existing staircase, there are ways to add Art Deco flair:
- Update balusters with geometric designs
- Add metallic accents to handrails
- Install a bold geometric runner
- Create drama with wall treatments alongside the stairs
Remember, your staircase should work in harmony with your other Art Deco elements while still making its own statement. Think of it as a piece of functional sculpture that helps tell your home’s design story.
The real magic happens when you combine these architectural elements with thoughtful lighting and decorative details. A well-designed Art Deco staircase catches the eye while guiding it upward, creating a sense of anticipation for what’s to come.
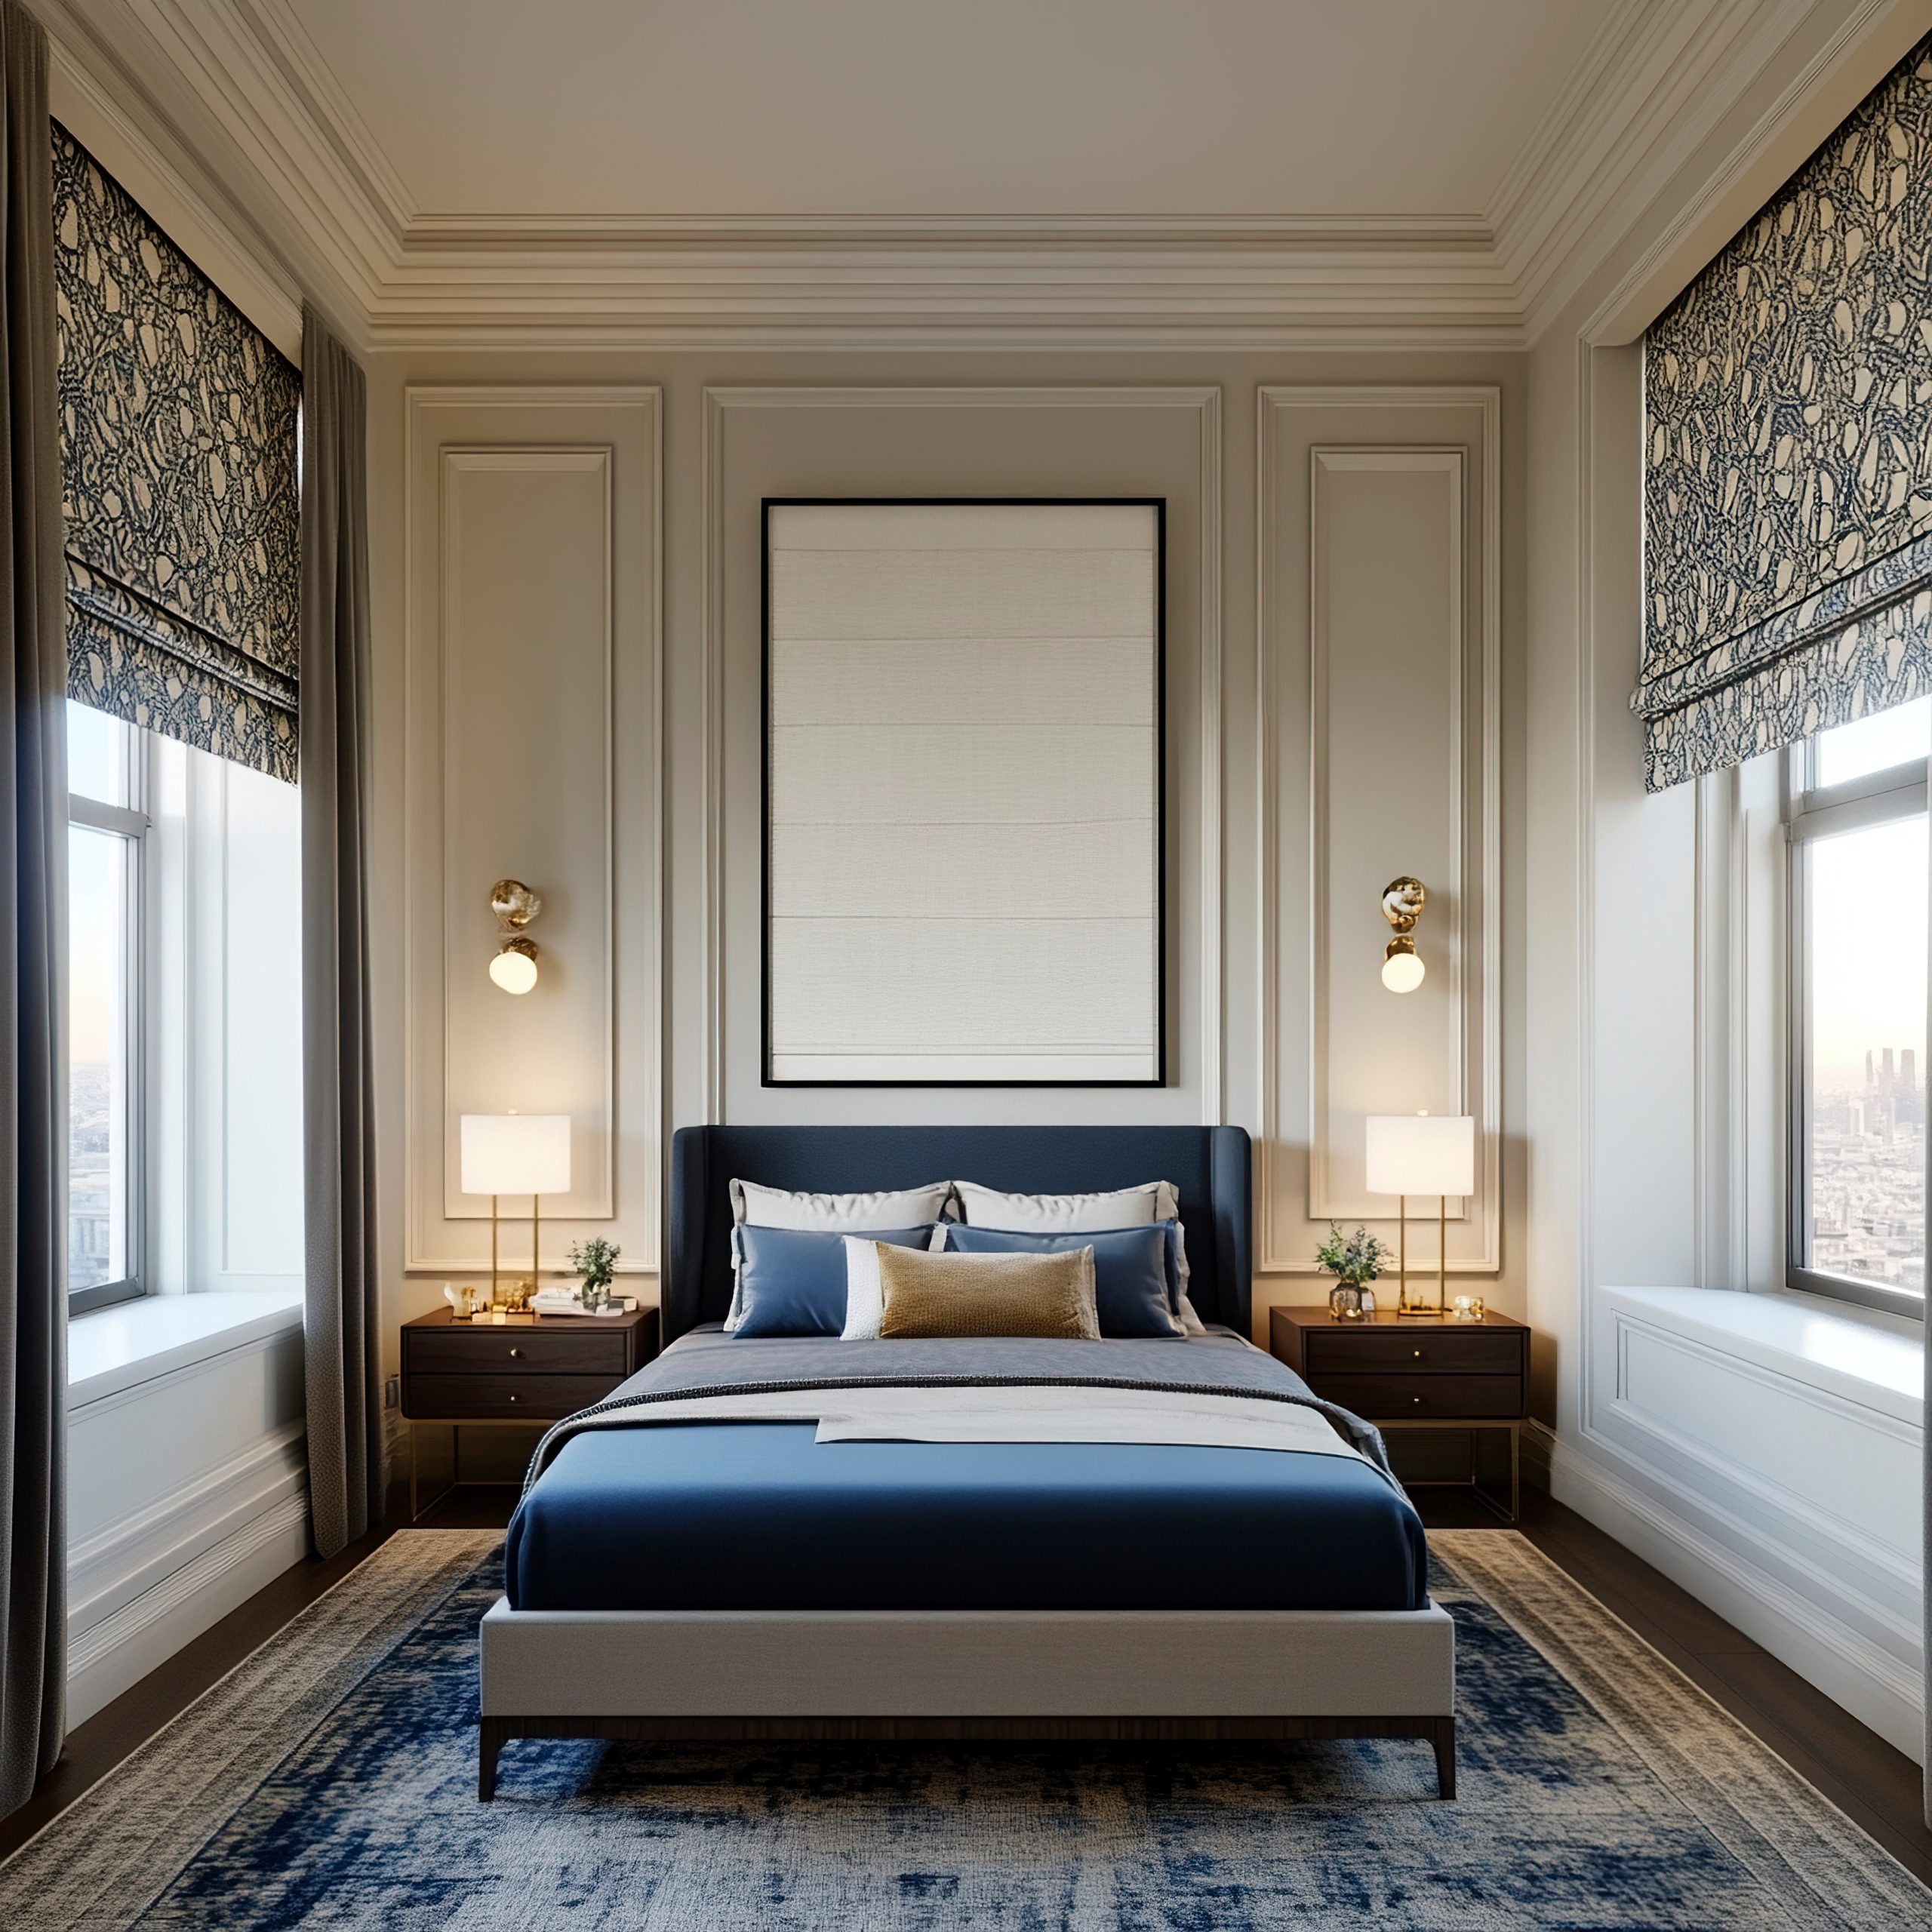
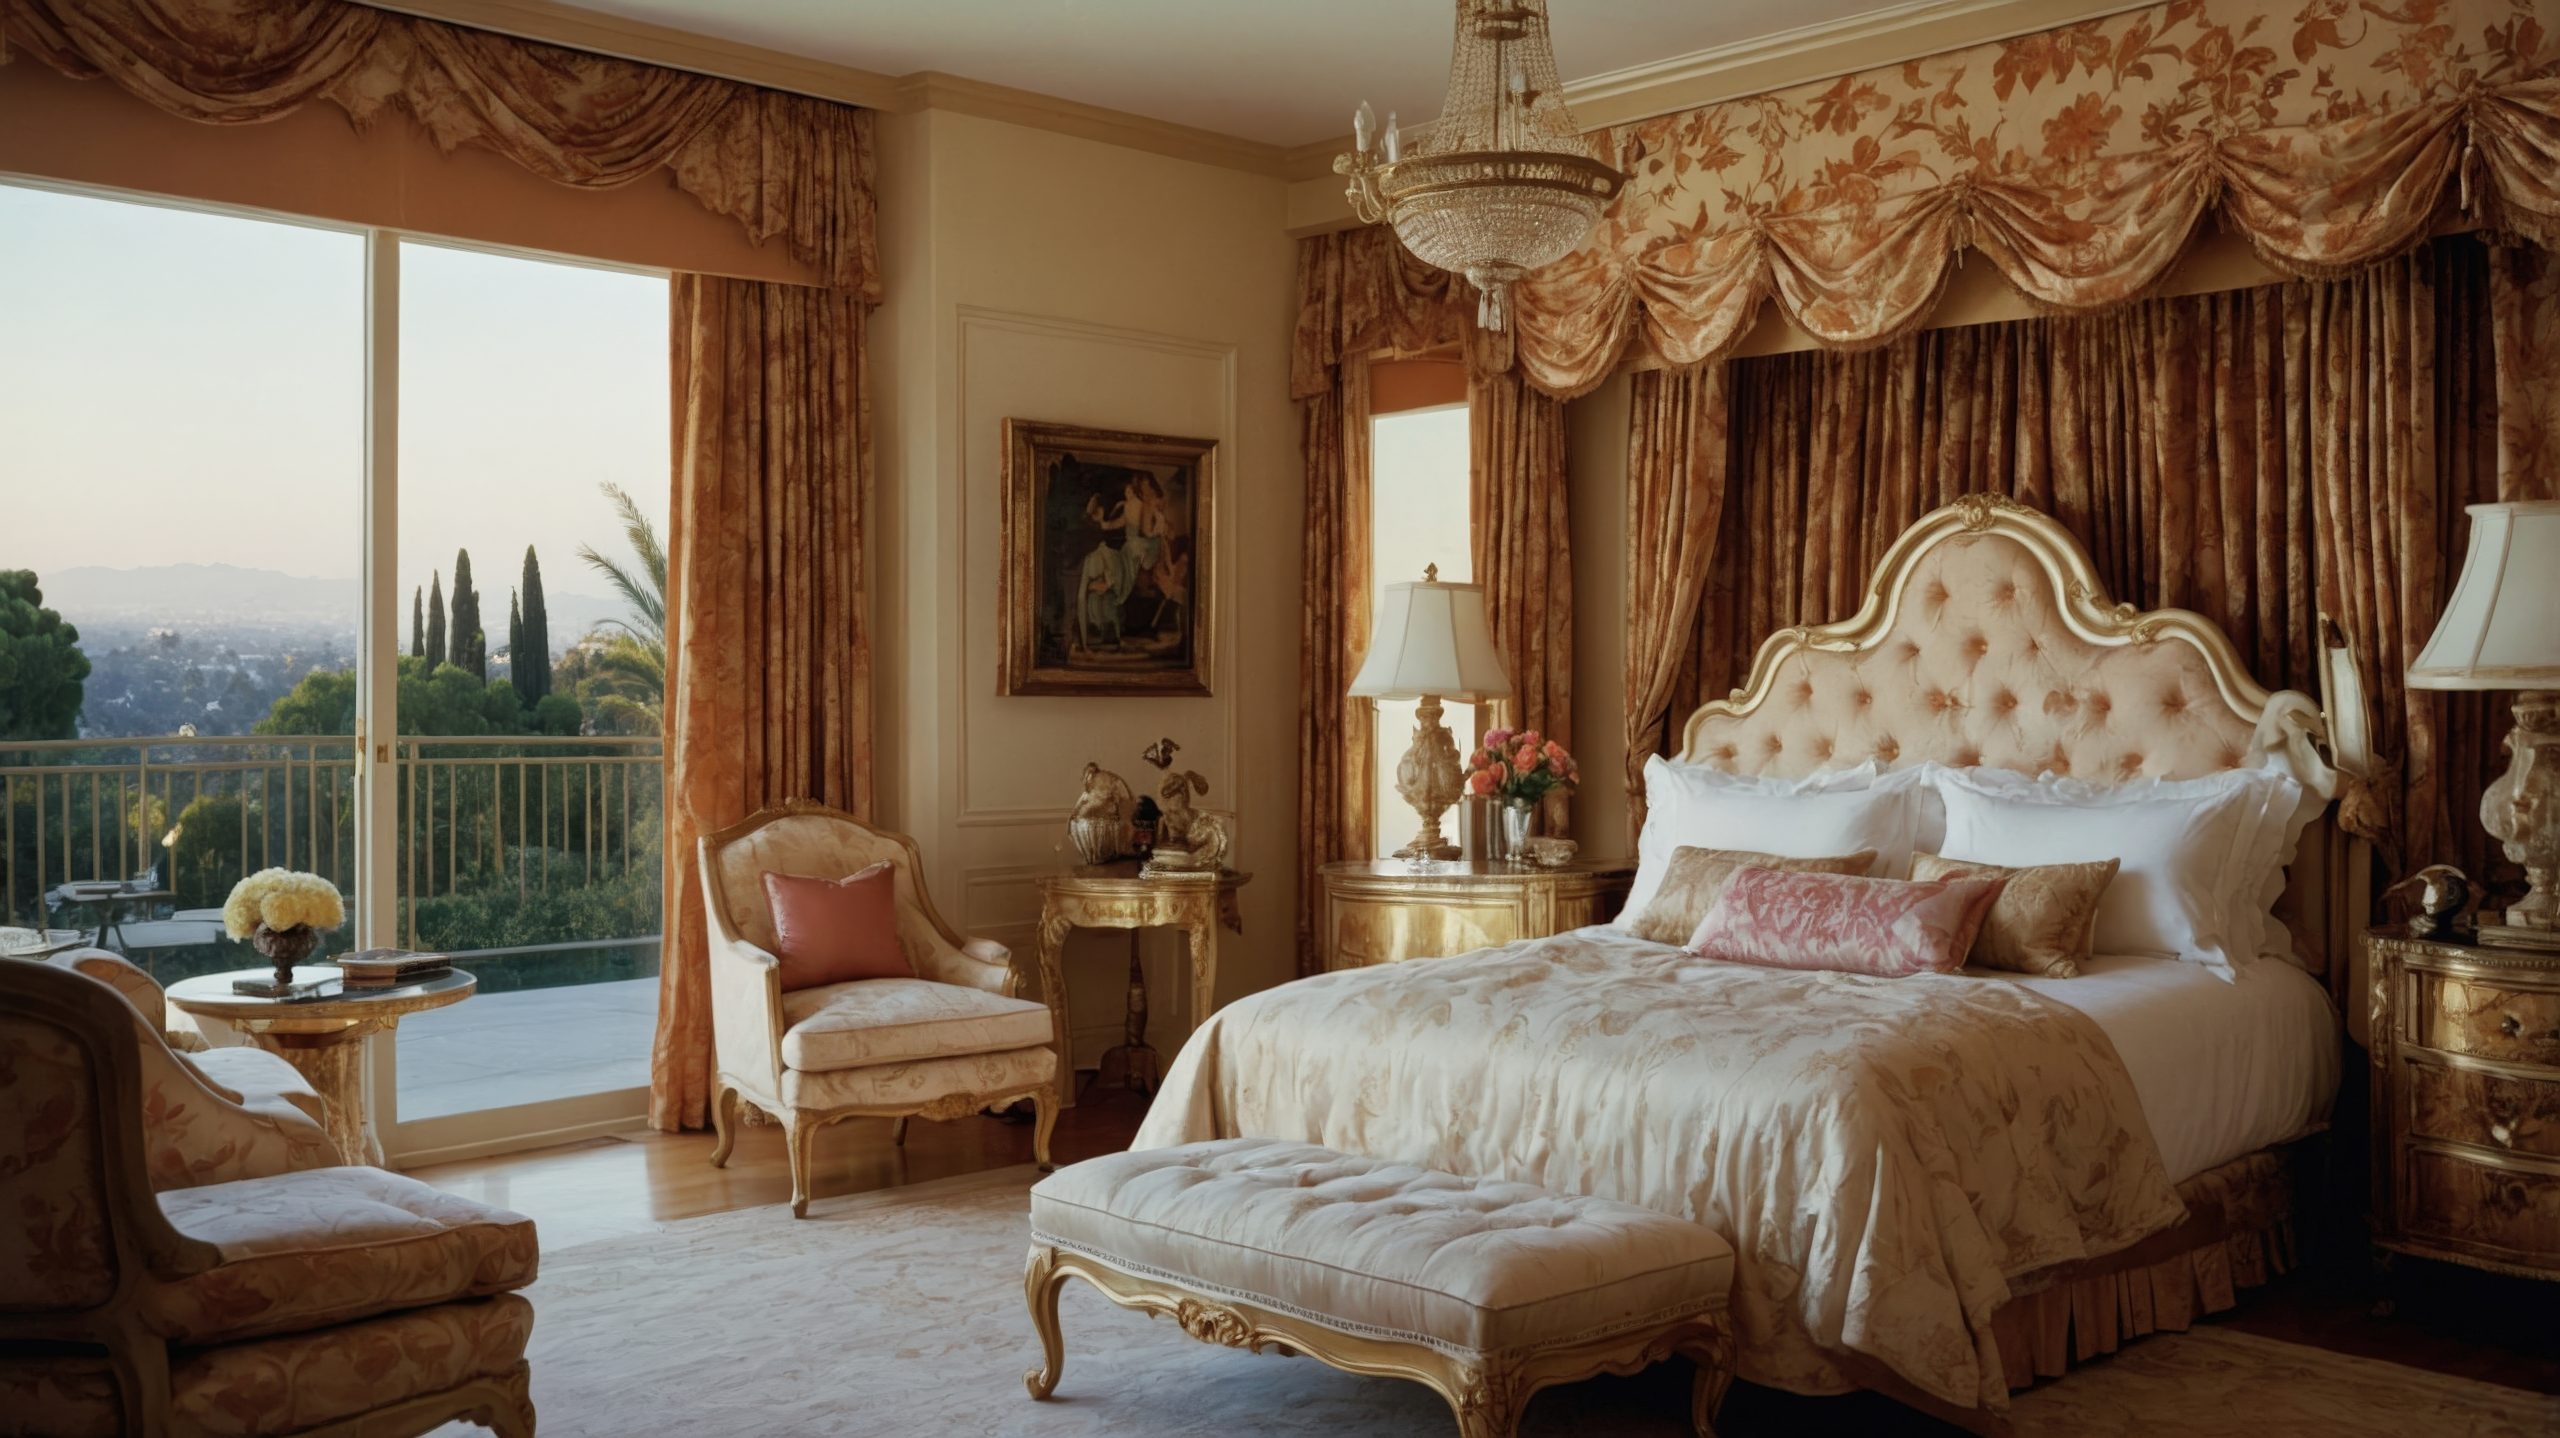
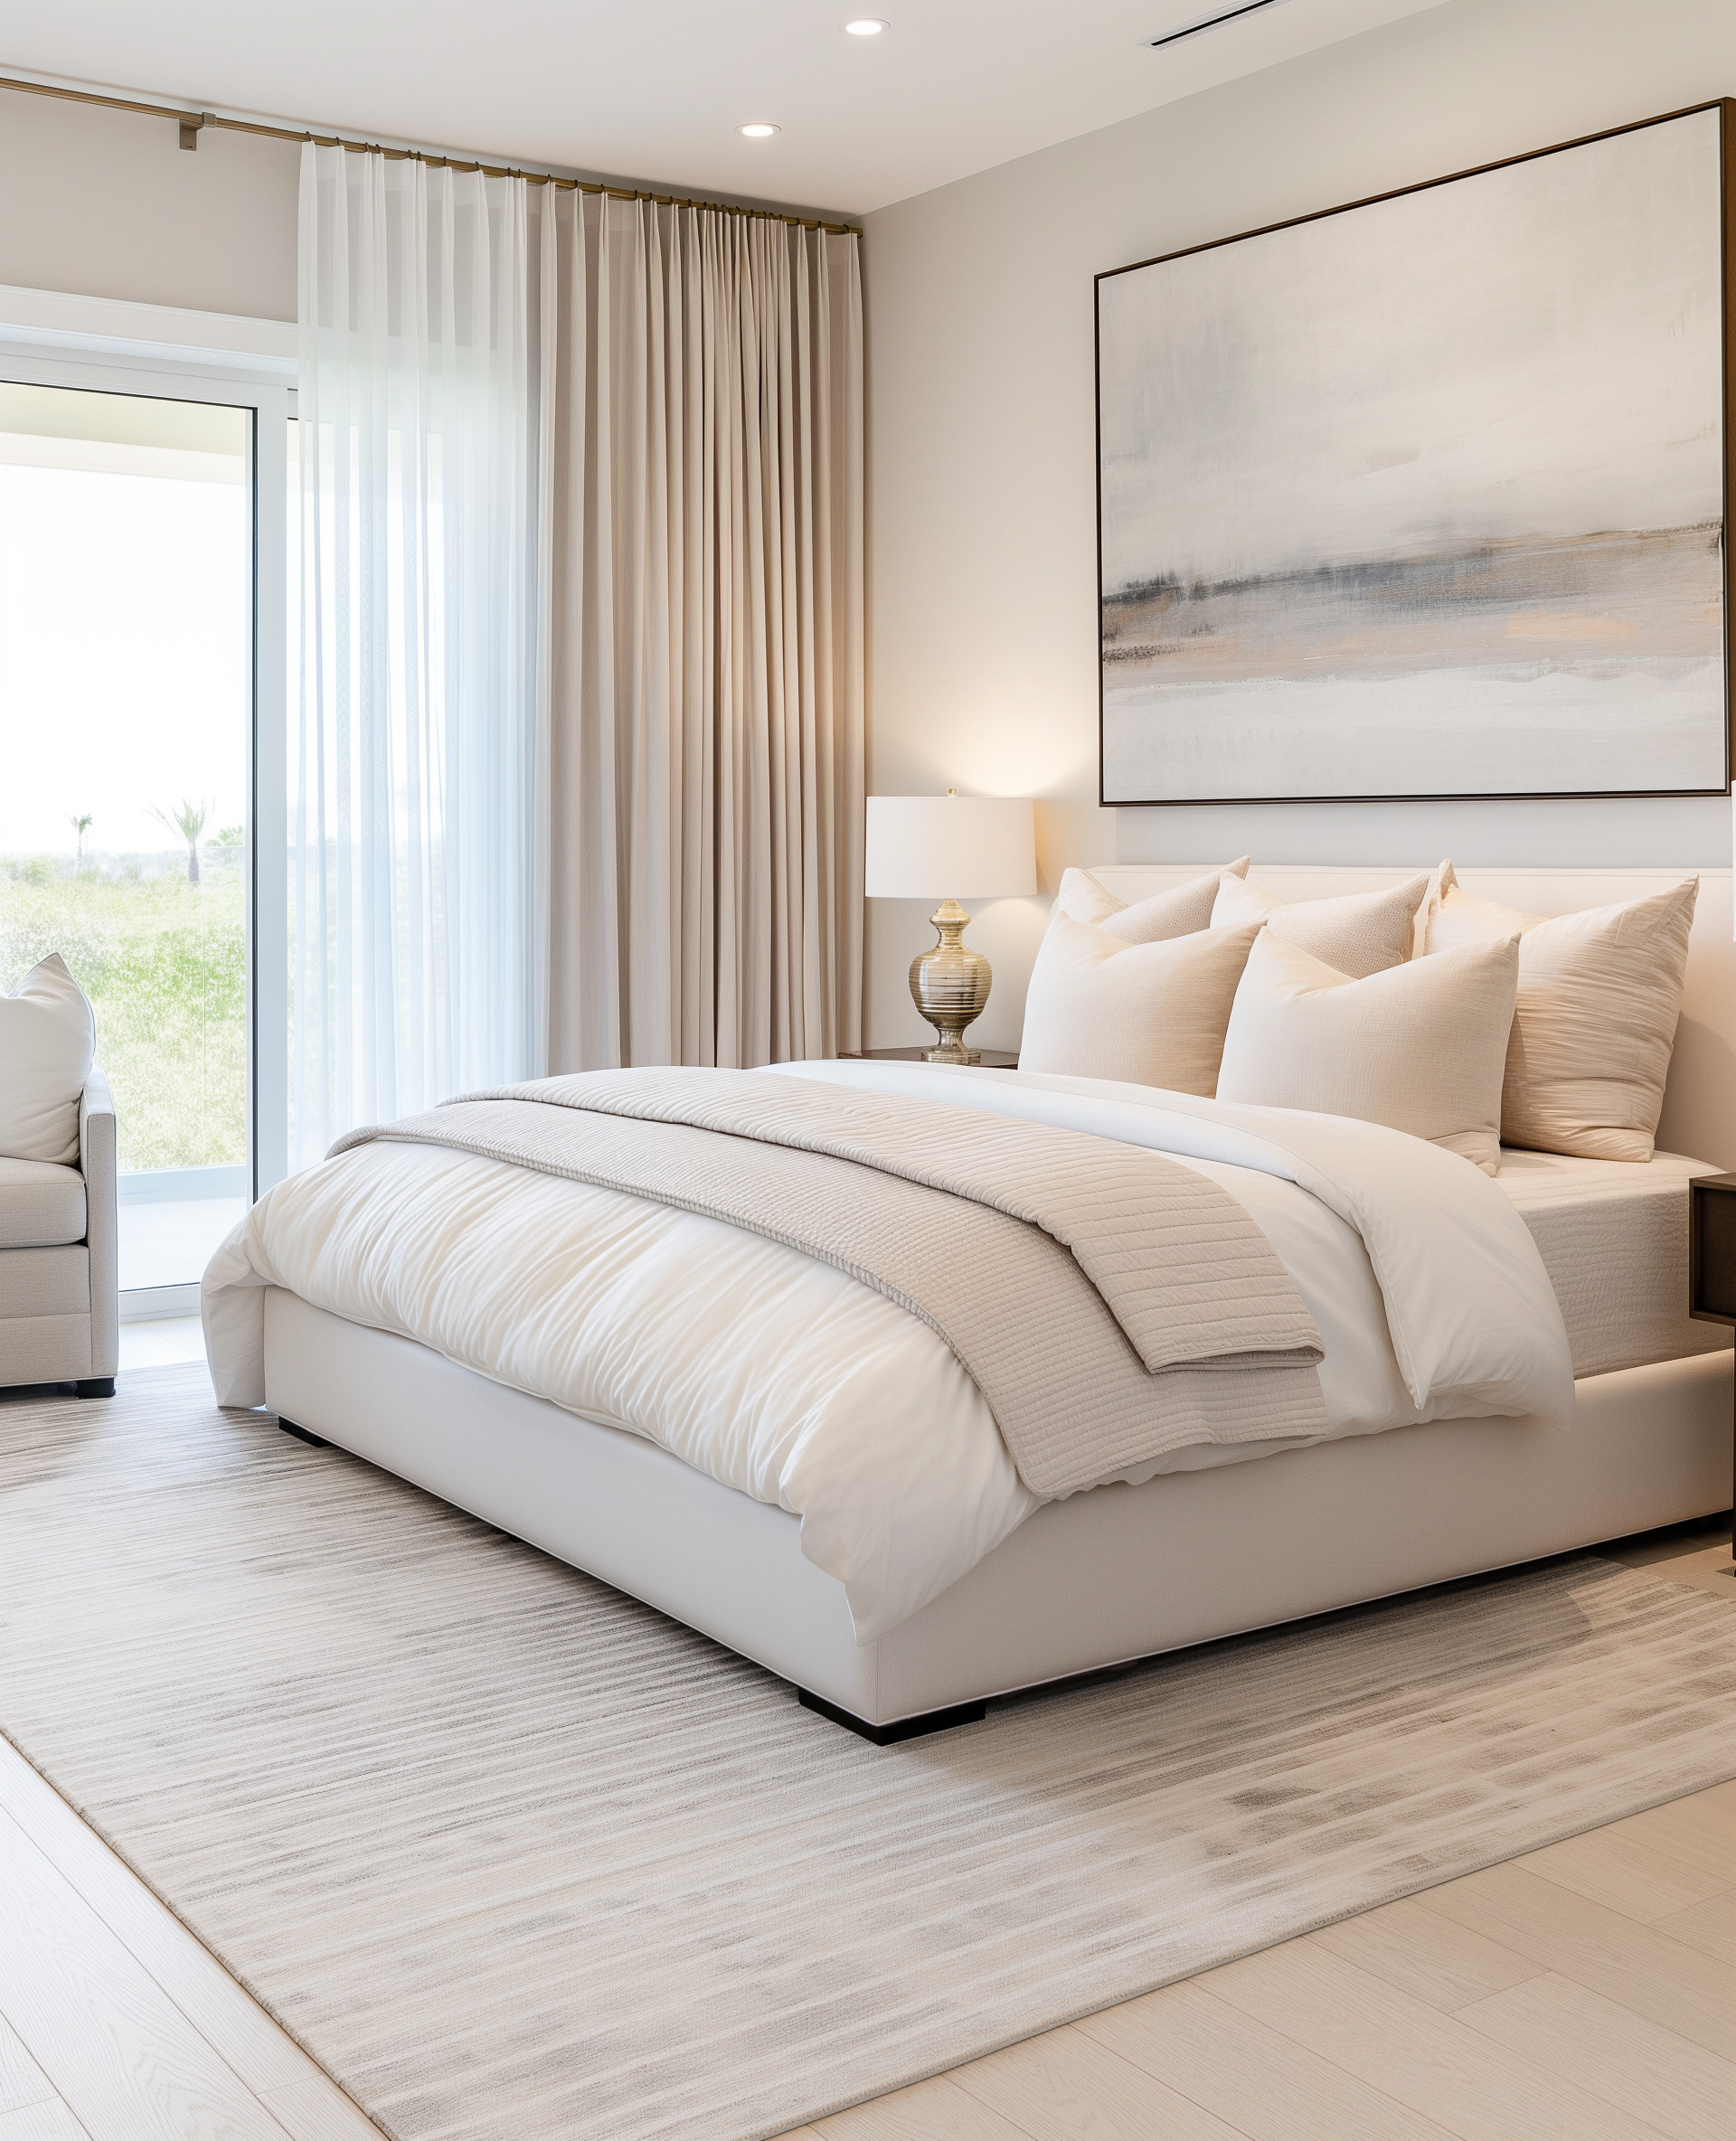
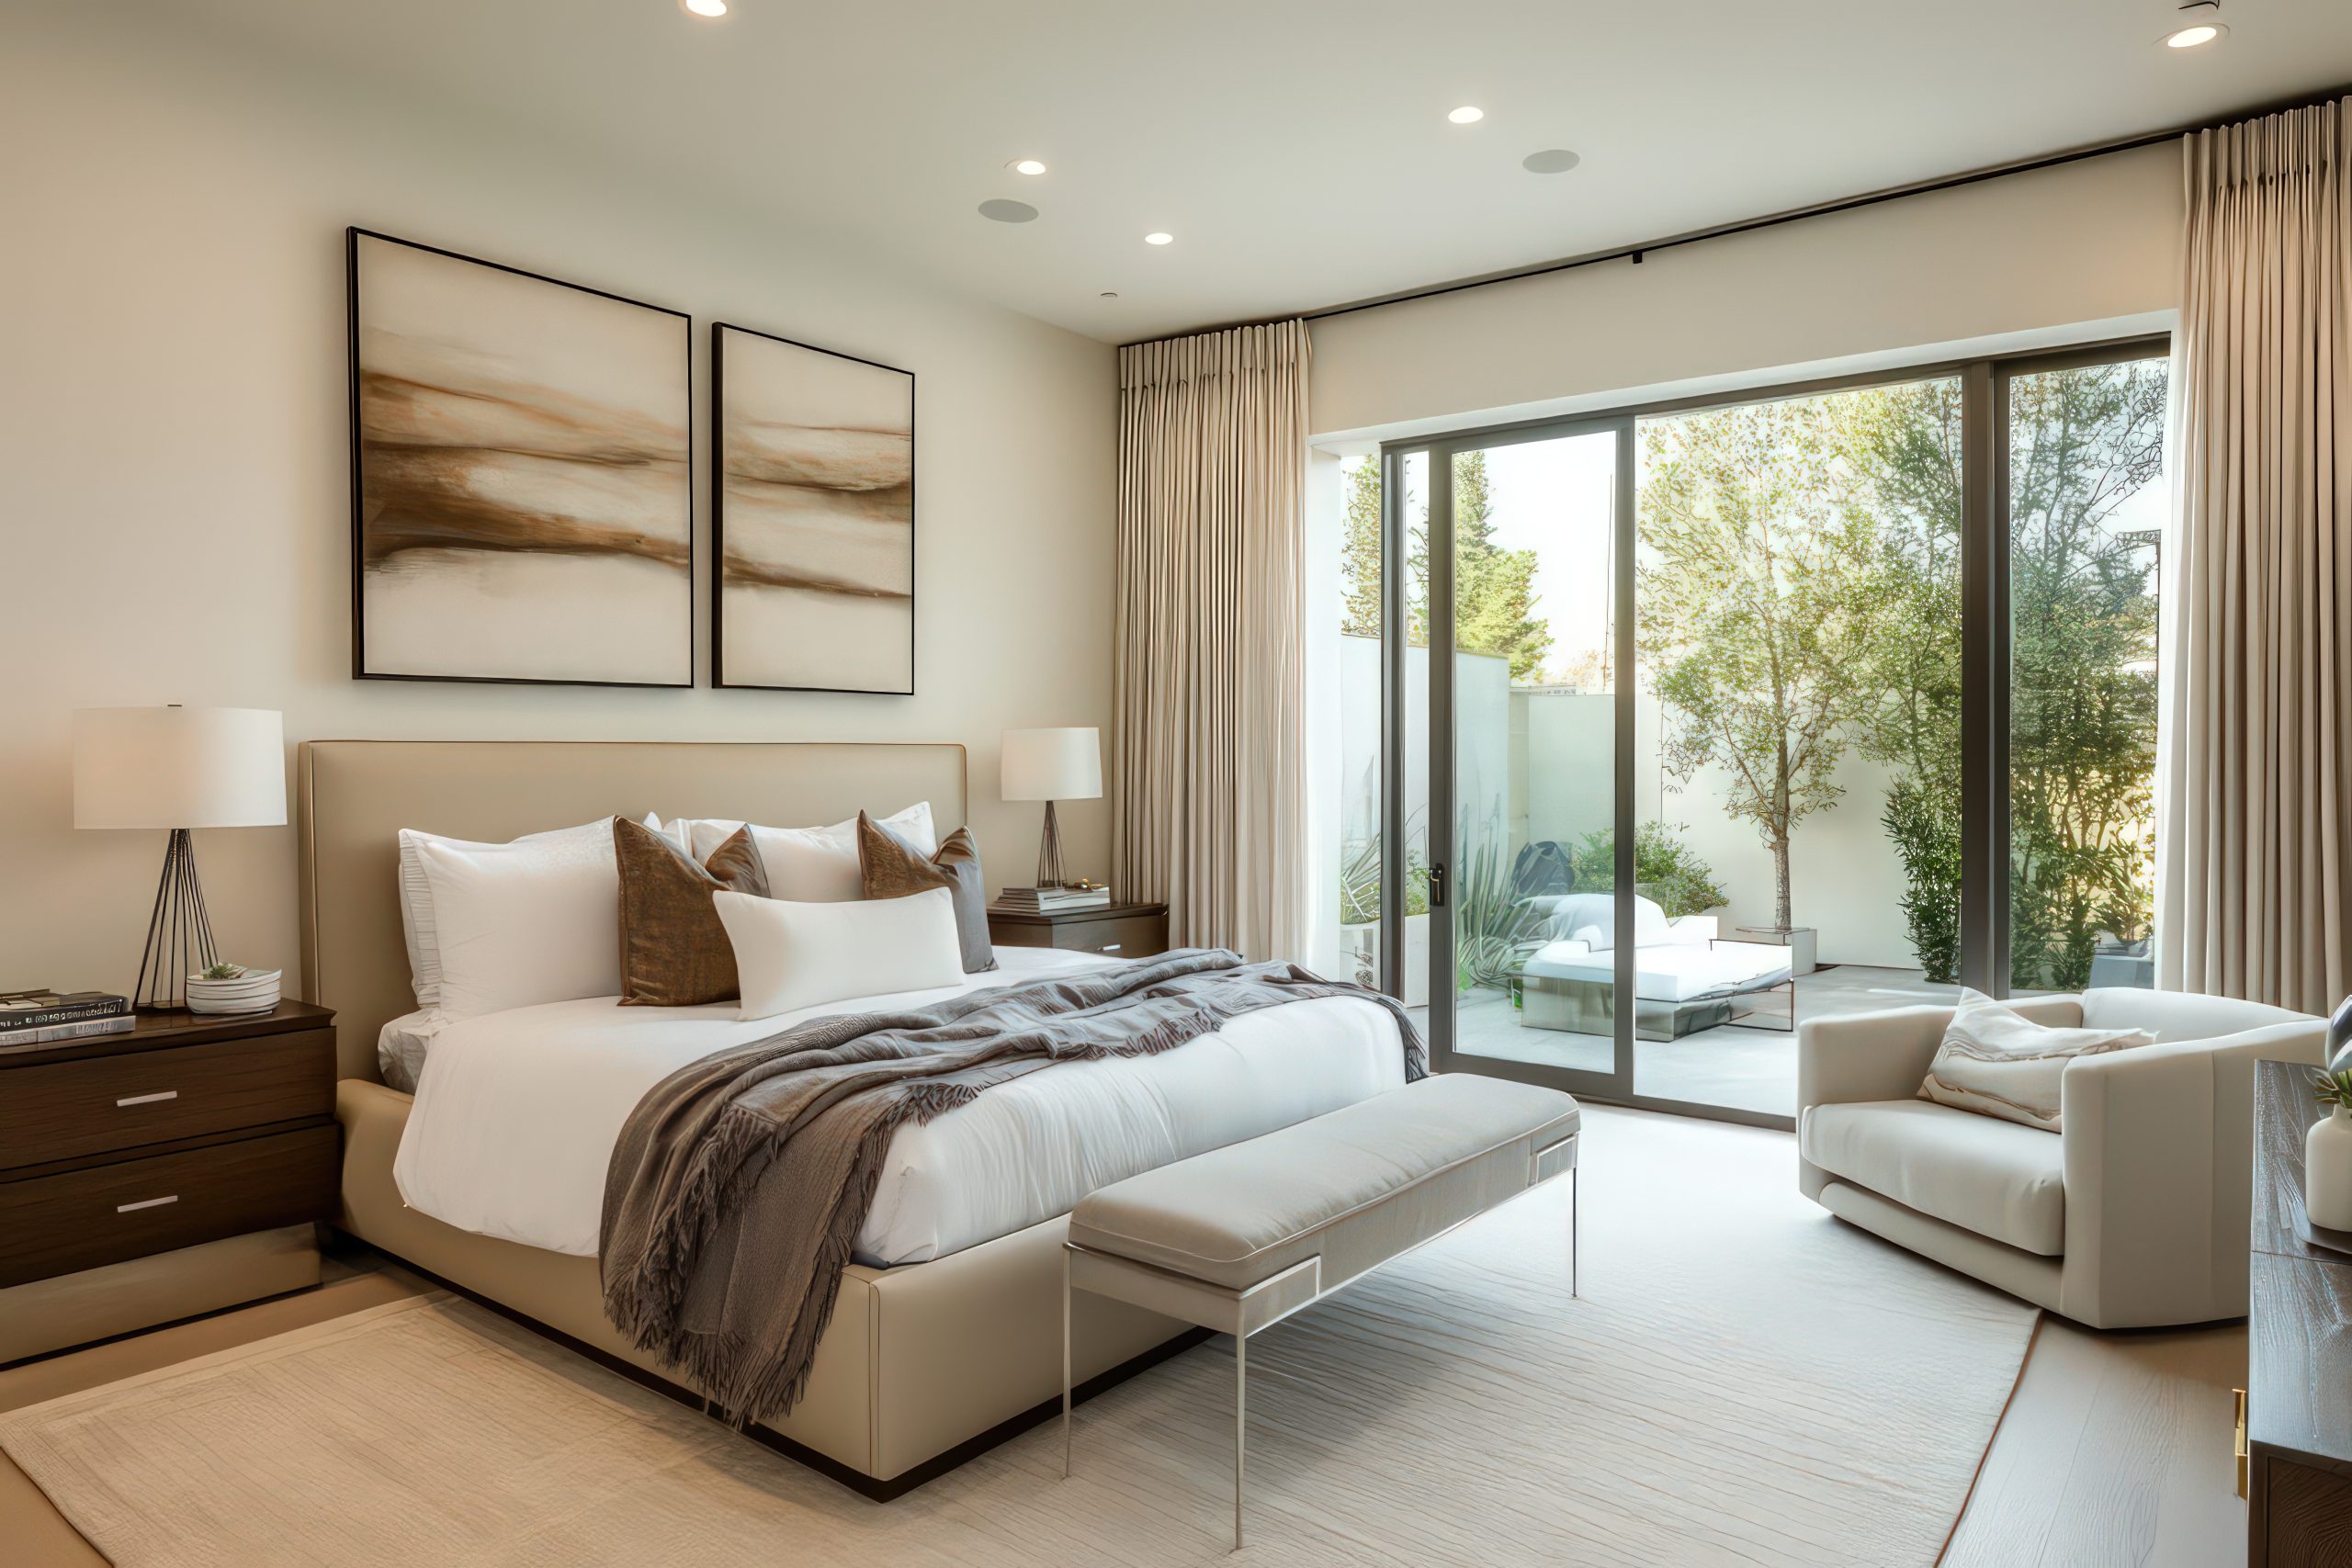
Luxe Window Treatments
Window treatments in Art Deco home interior design are never an afterthought – they’re an integral part of the room’s architecture and overall drama. The right window treatments can frame your views while adding that essential layer of Art Deco sophistication.
Key elements to consider:
- Layered treatments with sheer and heavy fabrics
- Strong horizontal banding
- Metallic hardware and finials
- Geometric patterns in fabric choices
- Dramatic height with floor-to-ceiling designs
When selecting window treatments, think about:
- Heavy silk or velvet for the main curtains
- Sheer panels with subtle geometric patterns
- Metal rods with decorative ends
- Valances with stepped or angular designs
- Automated systems hidden behind pelmets
Pro tip: Height is crucial in Art Deco design. Mounting curtains close to the ceiling and letting them fall to the floor creates that sought-after sense of drama and luxury.
The hardware you choose is just as important as the fabric:
- Choose bold finials that echo other room elements
- Consider chrome, brass, or black metal finishes
- Look for geometric shapes in curtain rings and holdbacks
- Don’t shy away from substantial curtain rods
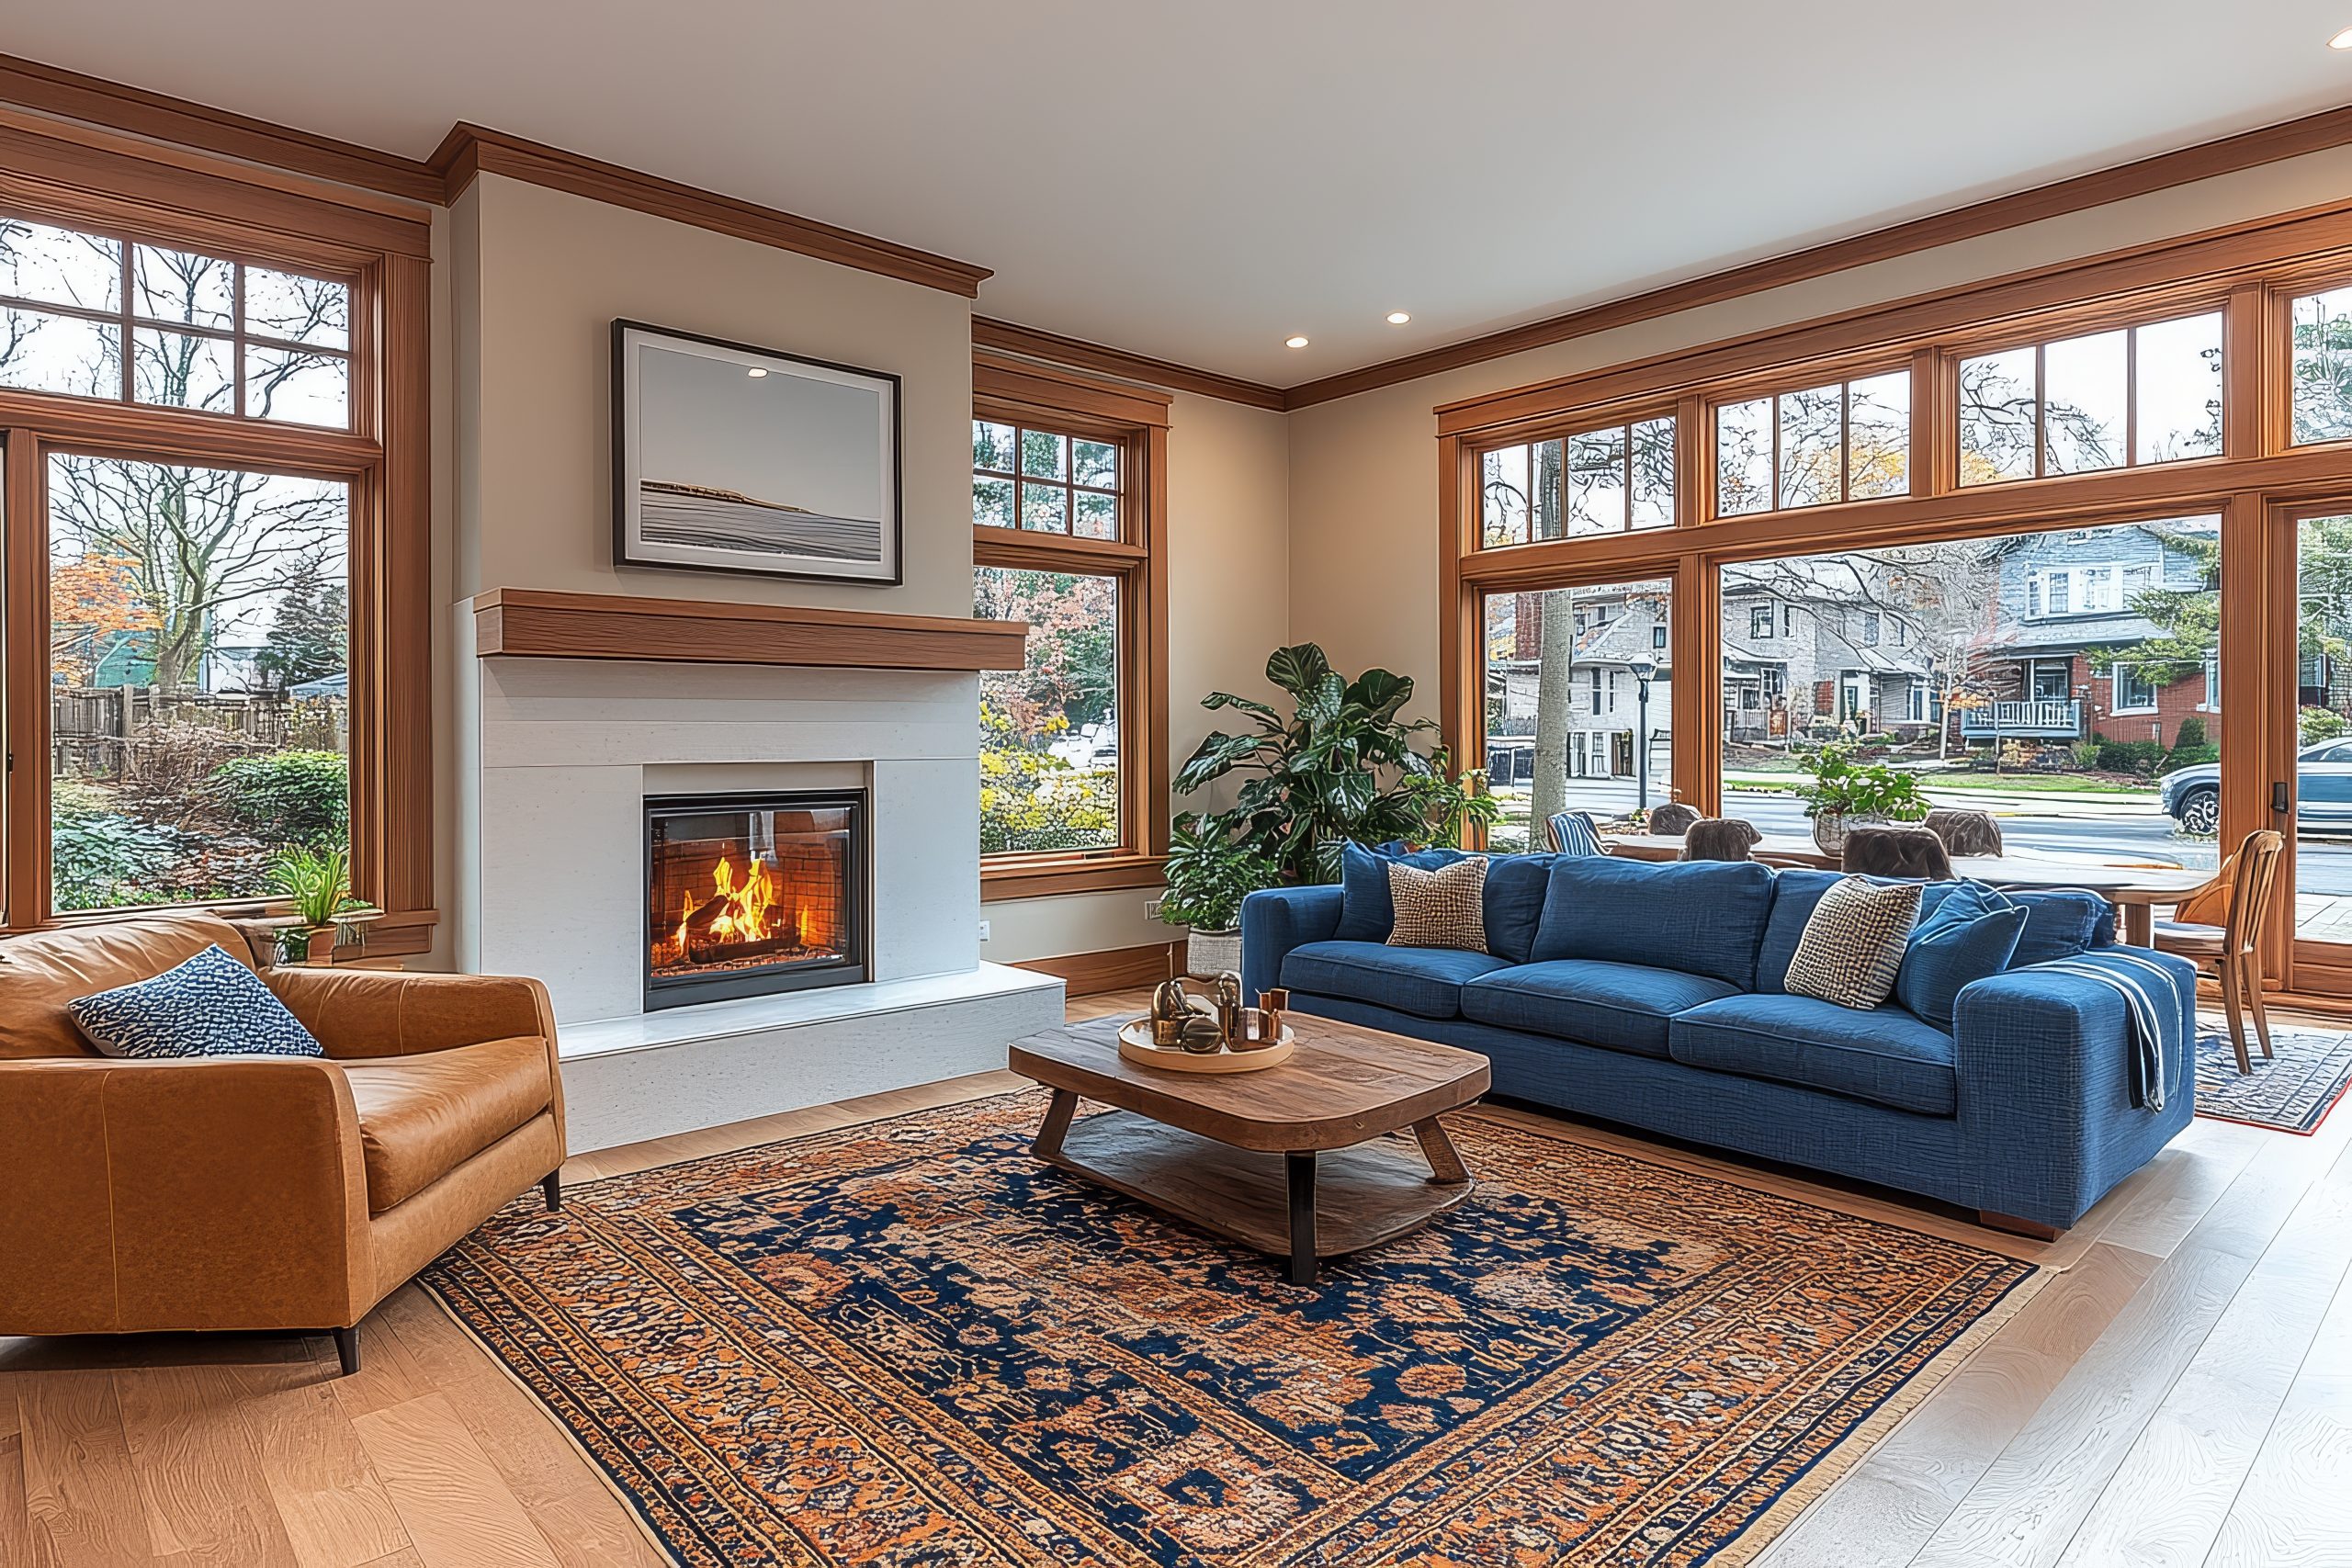
Floor Design
The floor is your room’s largest surface area, and in Art Deco home interior design, it deserves special attention. A well-designed floor creates a foundation that supports and enhances all your other decorative elements.
Signature flooring options include:
- Geometric pattern tiles
- Inlaid wood designs
- Bold marble patterns
- High-contrast combinations
- Luxurious carpets with Art Deco motifs
The key to successful Art Deco flooring lies in:
- Strong pattern definition
- Careful material selection
- Thoughtful layout planning
- Balance with other room elements
When working with hard surfaces, consider:
- Contrasting materials like wood and marble
- Geometric inlays that define spaces
- Borders that frame room areas
- Patterns that direct traffic flow
For those working with carpets and rugs:
- Choose bold geometric patterns
- Look for high-quality materials
- Consider custom designs for the perfect scale
- Use rugs to define separate areas within a space
Remember, your flooring should work in harmony with your wall treatments and furniture. While it can be bold, it shouldn’t compete with other key elements in your space. Think of it as the sophisticated canvas upon which your Art Deco story unfolds.
Pro tip: If you’re hesitant about committing to permanent patterned flooring, start with a dramatic Art Deco rug. It can provide the same impact while offering flexibility for future changes.
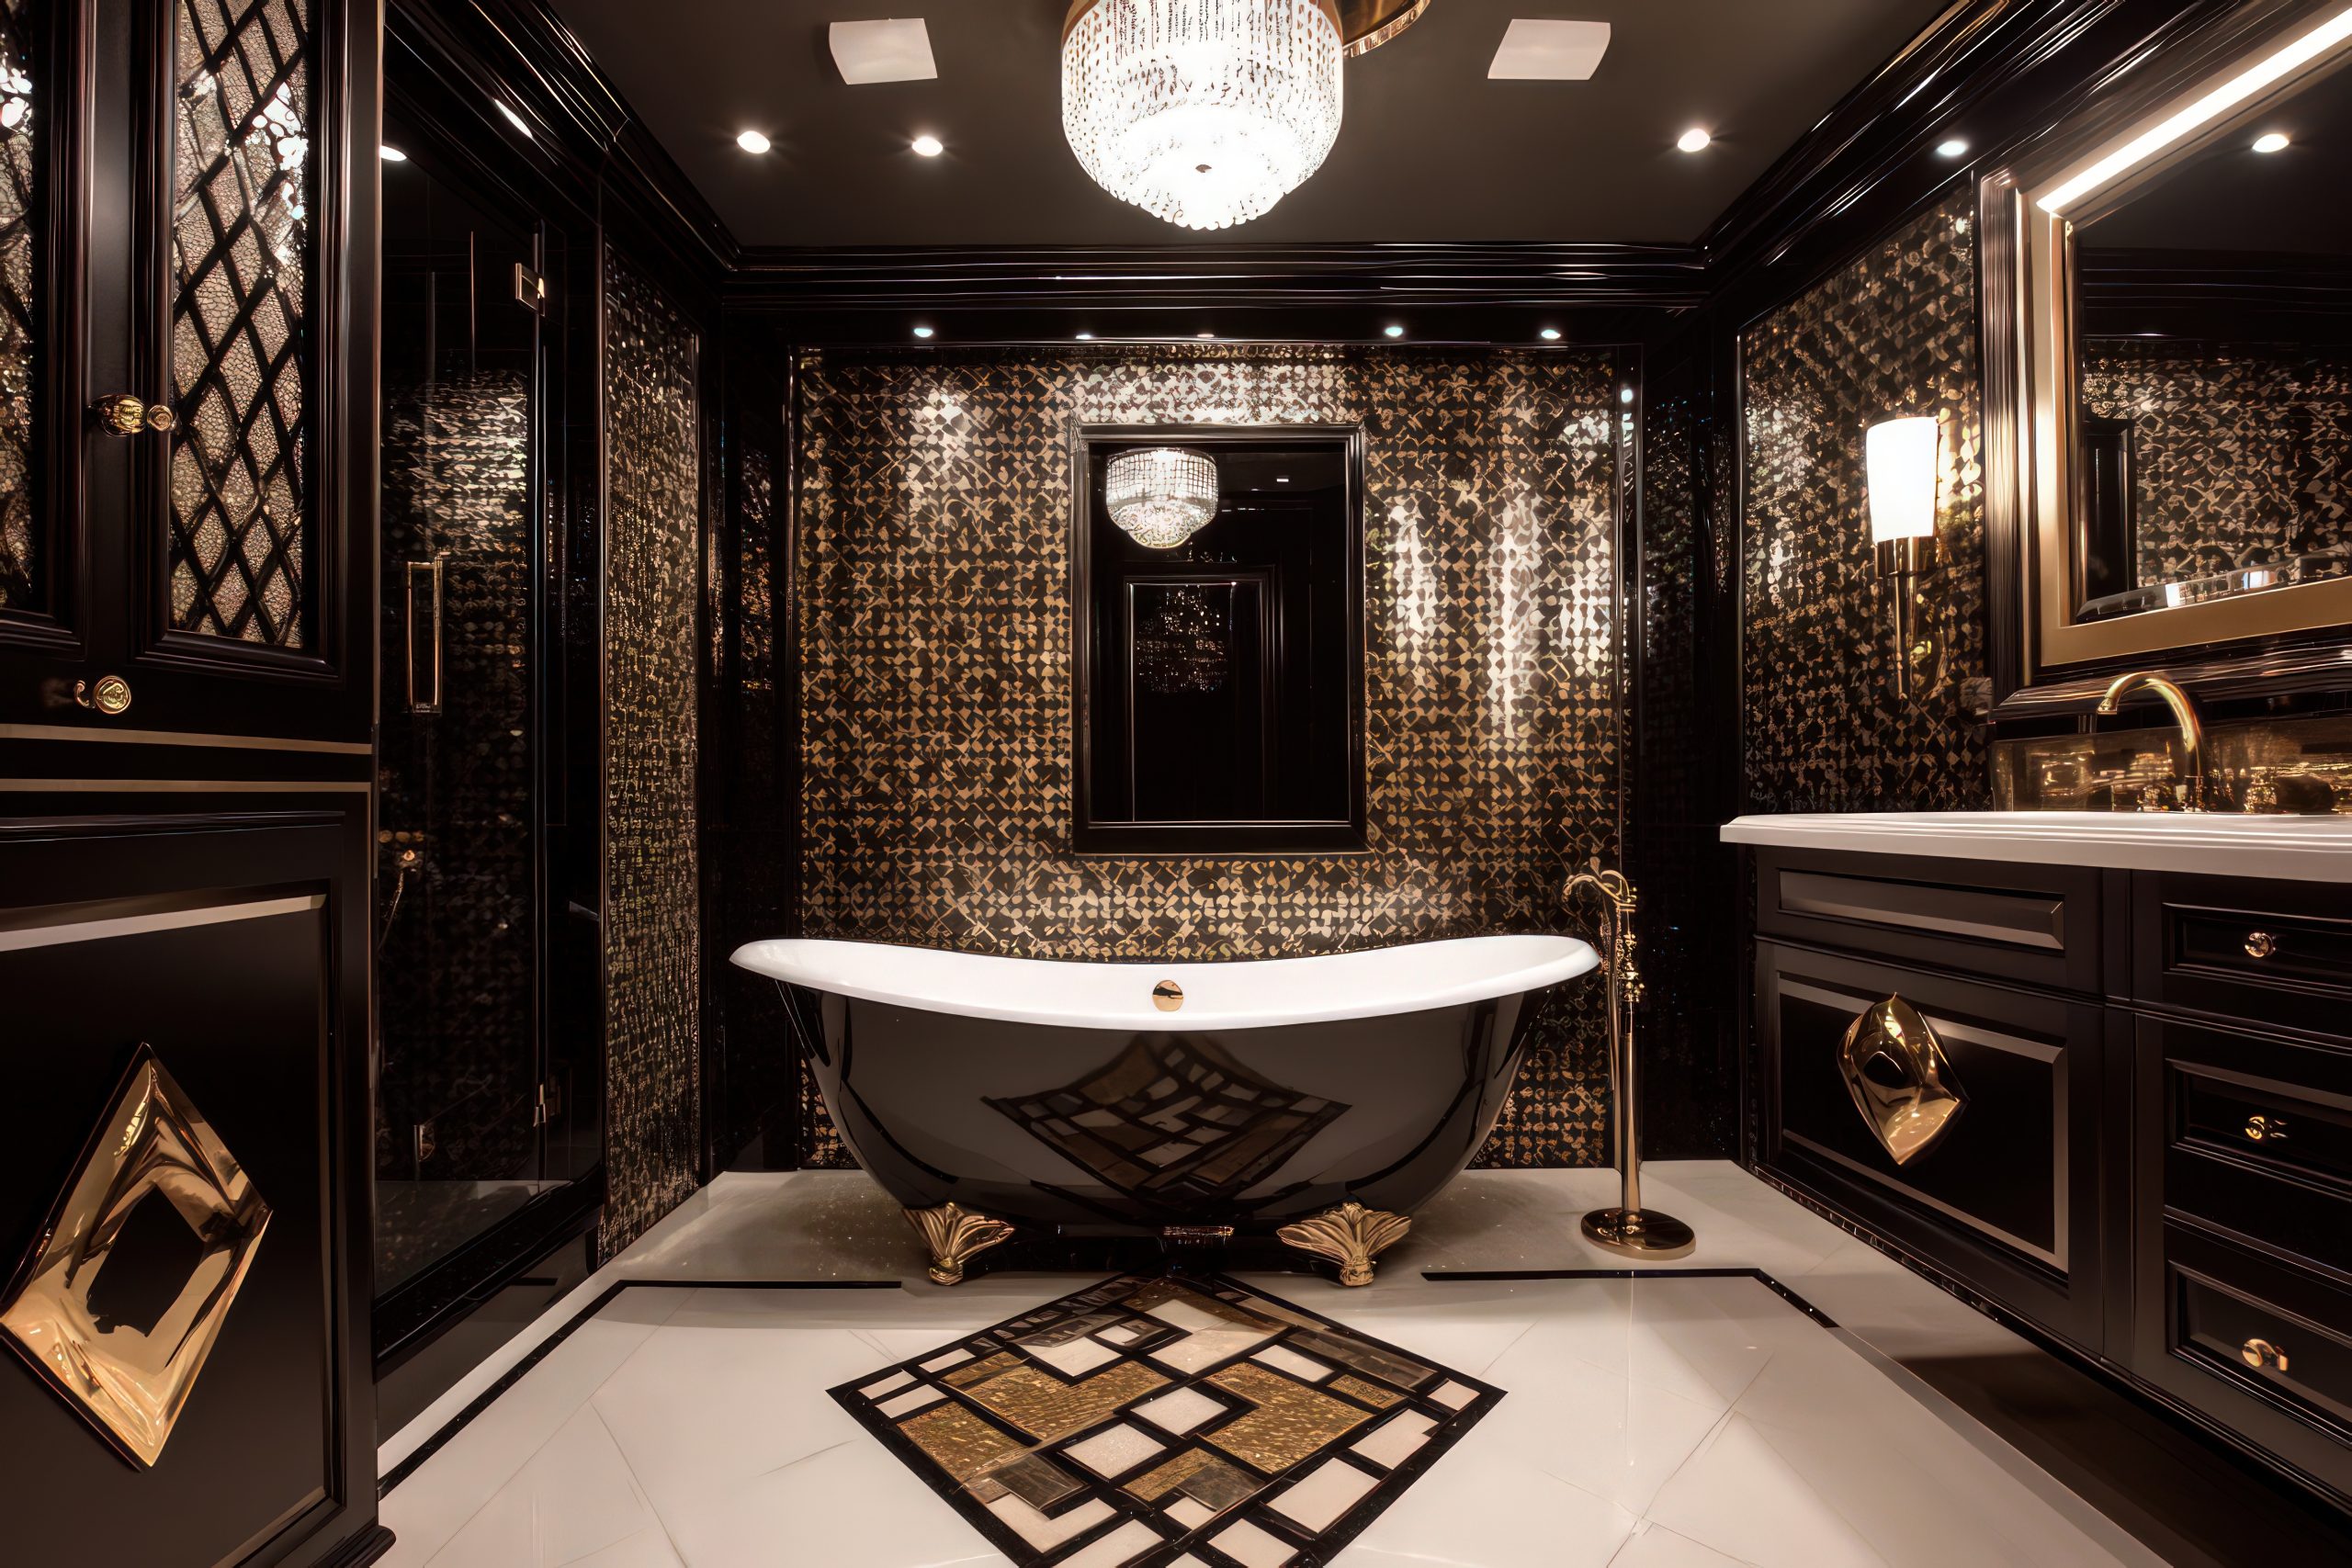
Bathroom Glamour
The bathroom presents a perfect opportunity to fully embrace Art Deco home interior design in all its glamorous glory. This is one space where you can really indulge in luxury and create a stunning private retreat.
Essential Art Deco bathroom elements:
- Black and white tile combinations
- Geometric tile patterns
- Beveled mirrors
- Chrome or gold fixtures
- Marble vanity tops
- Stepped architectural details
What makes an Art Deco bathroom special is attention to detail:
- Consider a statement vanity mirror with a geometric design
- Install wall sconces with frosted glass shades
- Choose fixtures with clean, angular lines
- Add metallic accents through hardware and accessories
When selecting tiles, think about:
- Classic black and white combinations
- Geometric patterns for feature walls
- Marble with strong veining
- Contrasting border details
- Small hexagonal tiles for an authentic period feel
Pro tip: Even in smaller bathrooms, you can create impact through thoughtful material choices and strategic placement of mirrors. The key is to maintain balance while incorporating those signature Art Deco elements.
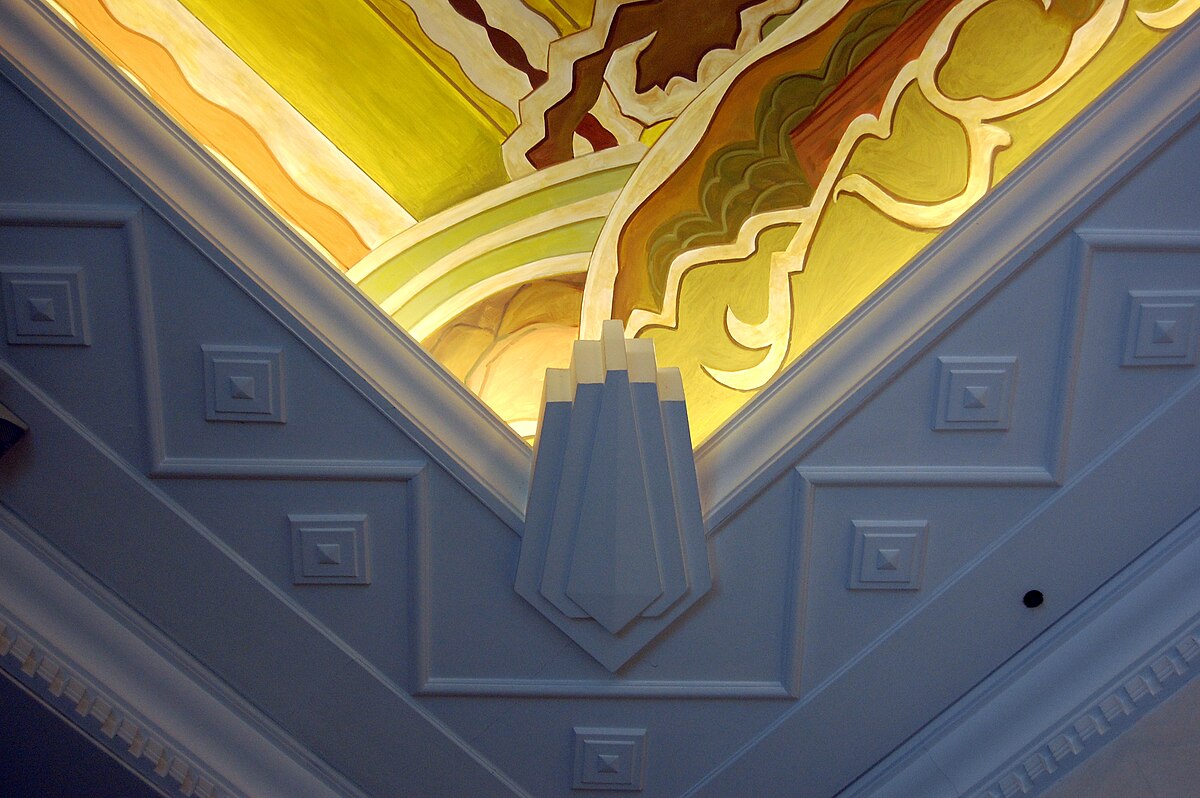
Ceiling Details
In Art Deco home interior design, the ceiling is often referred to as the fifth wall, and it deserves just as much attention as any other surface. A well-designed ceiling can completely transform the feel of a room.
Key ceiling elements include:
- Stepped crown moulding
- Geometric ceiling medallions
- Painted or applied patterns
- Coffered details
- Integrated lighting designs
When planning your ceiling design, consider:
- The room’s height and proportions
- How light fixtures will integrate
- The balance with wall treatments
- The overall scale of patterns
Lighting plays a crucial role in ceiling design:
- Centre medallions that complement chandeliers
- Cove lighting to highlight architectural details
- Recessed lighting positioned to enhance patterns
- Wall sconces that create interesting shadows
Remember that ceiling treatments should enhance rather than overwhelm your space. The goal is to draw the eye upward naturally, creating a sense of height and grandeur while maintaining harmony with the rest of your design elements.
For rooms with lower ceilings:
- Use lighter colours to create height
- Keep patterns scaled appropriately
- Consider subtle metallic details
- Focus on lighting to create depth
Pro tip: If architectural ceiling details aren’t possible in your space, consider using paint or wallpaper to create pattern and interest. Even simple geometric designs can make a significant impact when executed well.
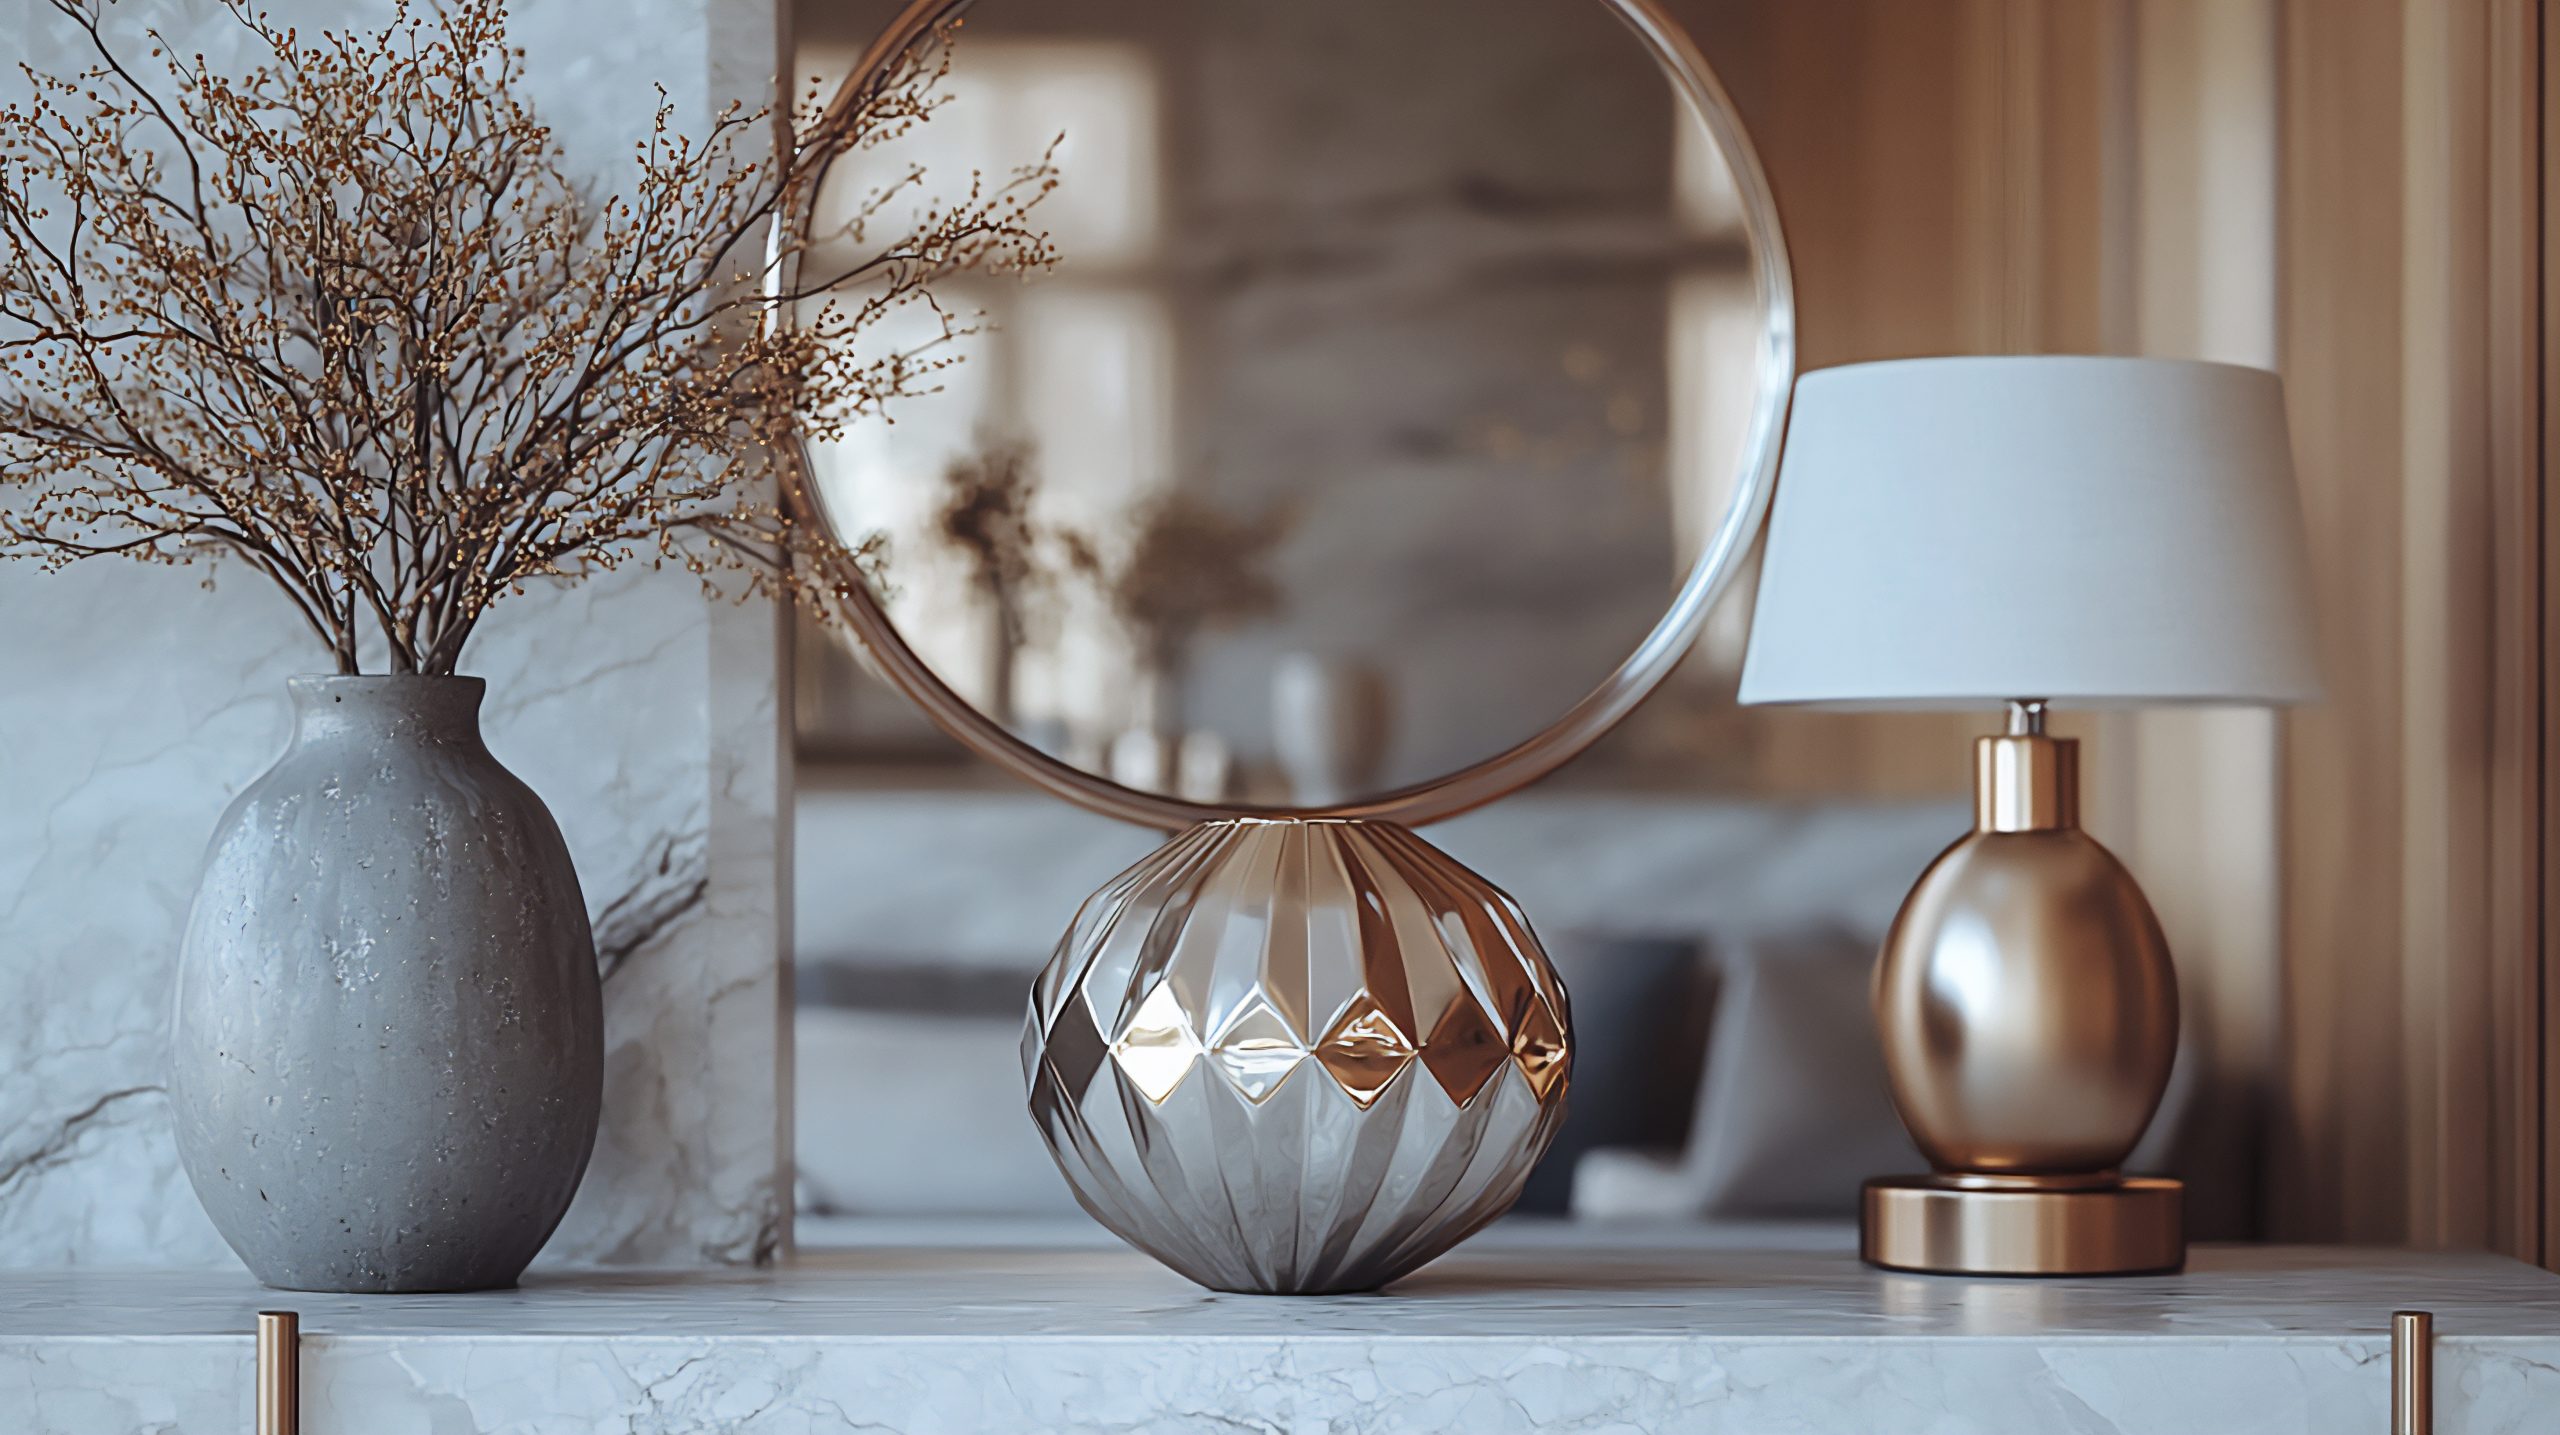
Accessorising
The art of accessorising in Art Deco home interior design is about selecting pieces that both complement and elevate your space. These finishing touches are what bring personality and completeness to your Art Deco vision.
Key decorative elements to consider:
- Sculptural table objects in metal or glass
- Geometric bookends and vases
- Sunburst or fan-shaped wall decorations
- Period-inspired clocks
- Crystal or cut glass decanters
- Abstract figurines
When selecting accessories, focus on:
- Quality over quantity
- Strong shapes and clean lines
- Materials that reflect light
- Pieces that tell a story together
- Scale and proportion
Pro tip: Group accessories in odd numbers and vary their heights. This creates more interesting compositions while maintaining that essential Art Deco balance between order and drama.

Remember, every piece should serve a purpose:
- Choose items that reflect light and add sparkle
- Include both decorative and functional pieces
- Mix materials for visual interest
- Create small vignettes throughout your space
Practical Tips Section
Now that we’ve covered the essential elements, let’s talk about how to bring it all together successfully in your Art Deco home interior design.
Key considerations for implementation:
Budget-Friendly Approaches:
- Start with one statement piece and build around it
- Use paint to create geometric patterns
- Incorporate metallic finishes through accessories
- Choose quality reproductions for larger pieces
- Focus on lighting as a transformative element
Mixing Modern and Art Deco:
- Keep the colour palette consistent
- Choose modern pieces with Art Deco-inspired lines
- Use contemporary artwork that echoes Art Deco patterns
- Balance old and new elements carefully
- Maintain clean lines throughout
Common mistakes to avoid:
- Overcrowding spaces with too many patterns
- Mixing too many different metals
- Choosing undersized lighting fixtures
- Forgetting about negative space
- Overlooking the importance of quality materials
Pro tip: When in doubt, edit. Art Deco style is about making bold statements, but each element needs room to breathe and be appreciated.
Creating a successful Art Deco home interior design isn’t just about following a checklist – it’s about understanding how all these elements work together to create something truly spectacular. Whether you’re incorporating just a few Art Deco touches or going all-in with a complete transformation, the key is to maintain balance while embracing the style’s inherent drama.
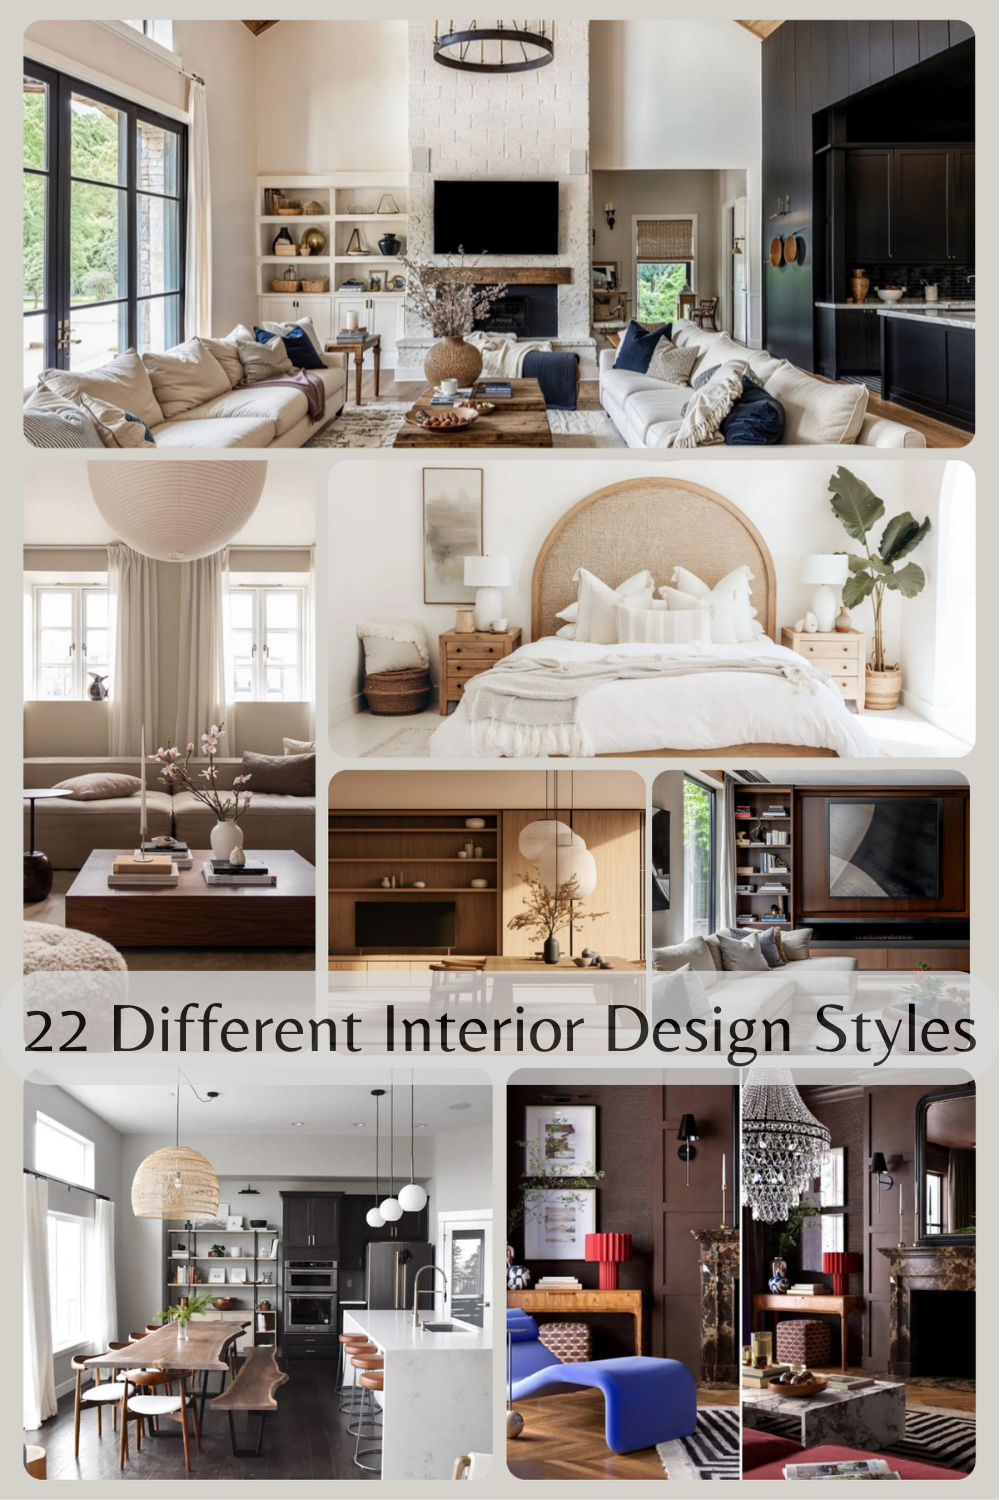
by Kesaa Interiors | DESIGN GUIDES, STYLES & TRENDS
When it comes to decorating your home, understanding different interior design styles is crucial. As an interior designer with over a decade of experience, I’ve seen countless clients feel overwhelmed when trying to define their style preferences. With 22 different interior design styles to explore, it’s no wonder many feel stuck! But don’t worry – I’m here to break down each style in a way that actually makes sense, helping you identify what truly speaks to you.
How to Use This Guide
Before we dive into exploring all 22 different interior design styles, let me share how to make the most of this guide. Think of it as your design roadmap. I’ve organised these styles into broader categories to make them easier to digest. While reading through each style, pay attention to your initial reactions. Which spaces make you think, “I could live there”? Which ones make you want to scroll past quickly? These gut reactions are incredibly valuable in determining your personal style.
Traditional Design Styles
Let’s start our journey through interior design styles with the classics. Traditional design styles have stood the test of time for good reason – they bring a sense of history, elegance, and proven livability to our homes.
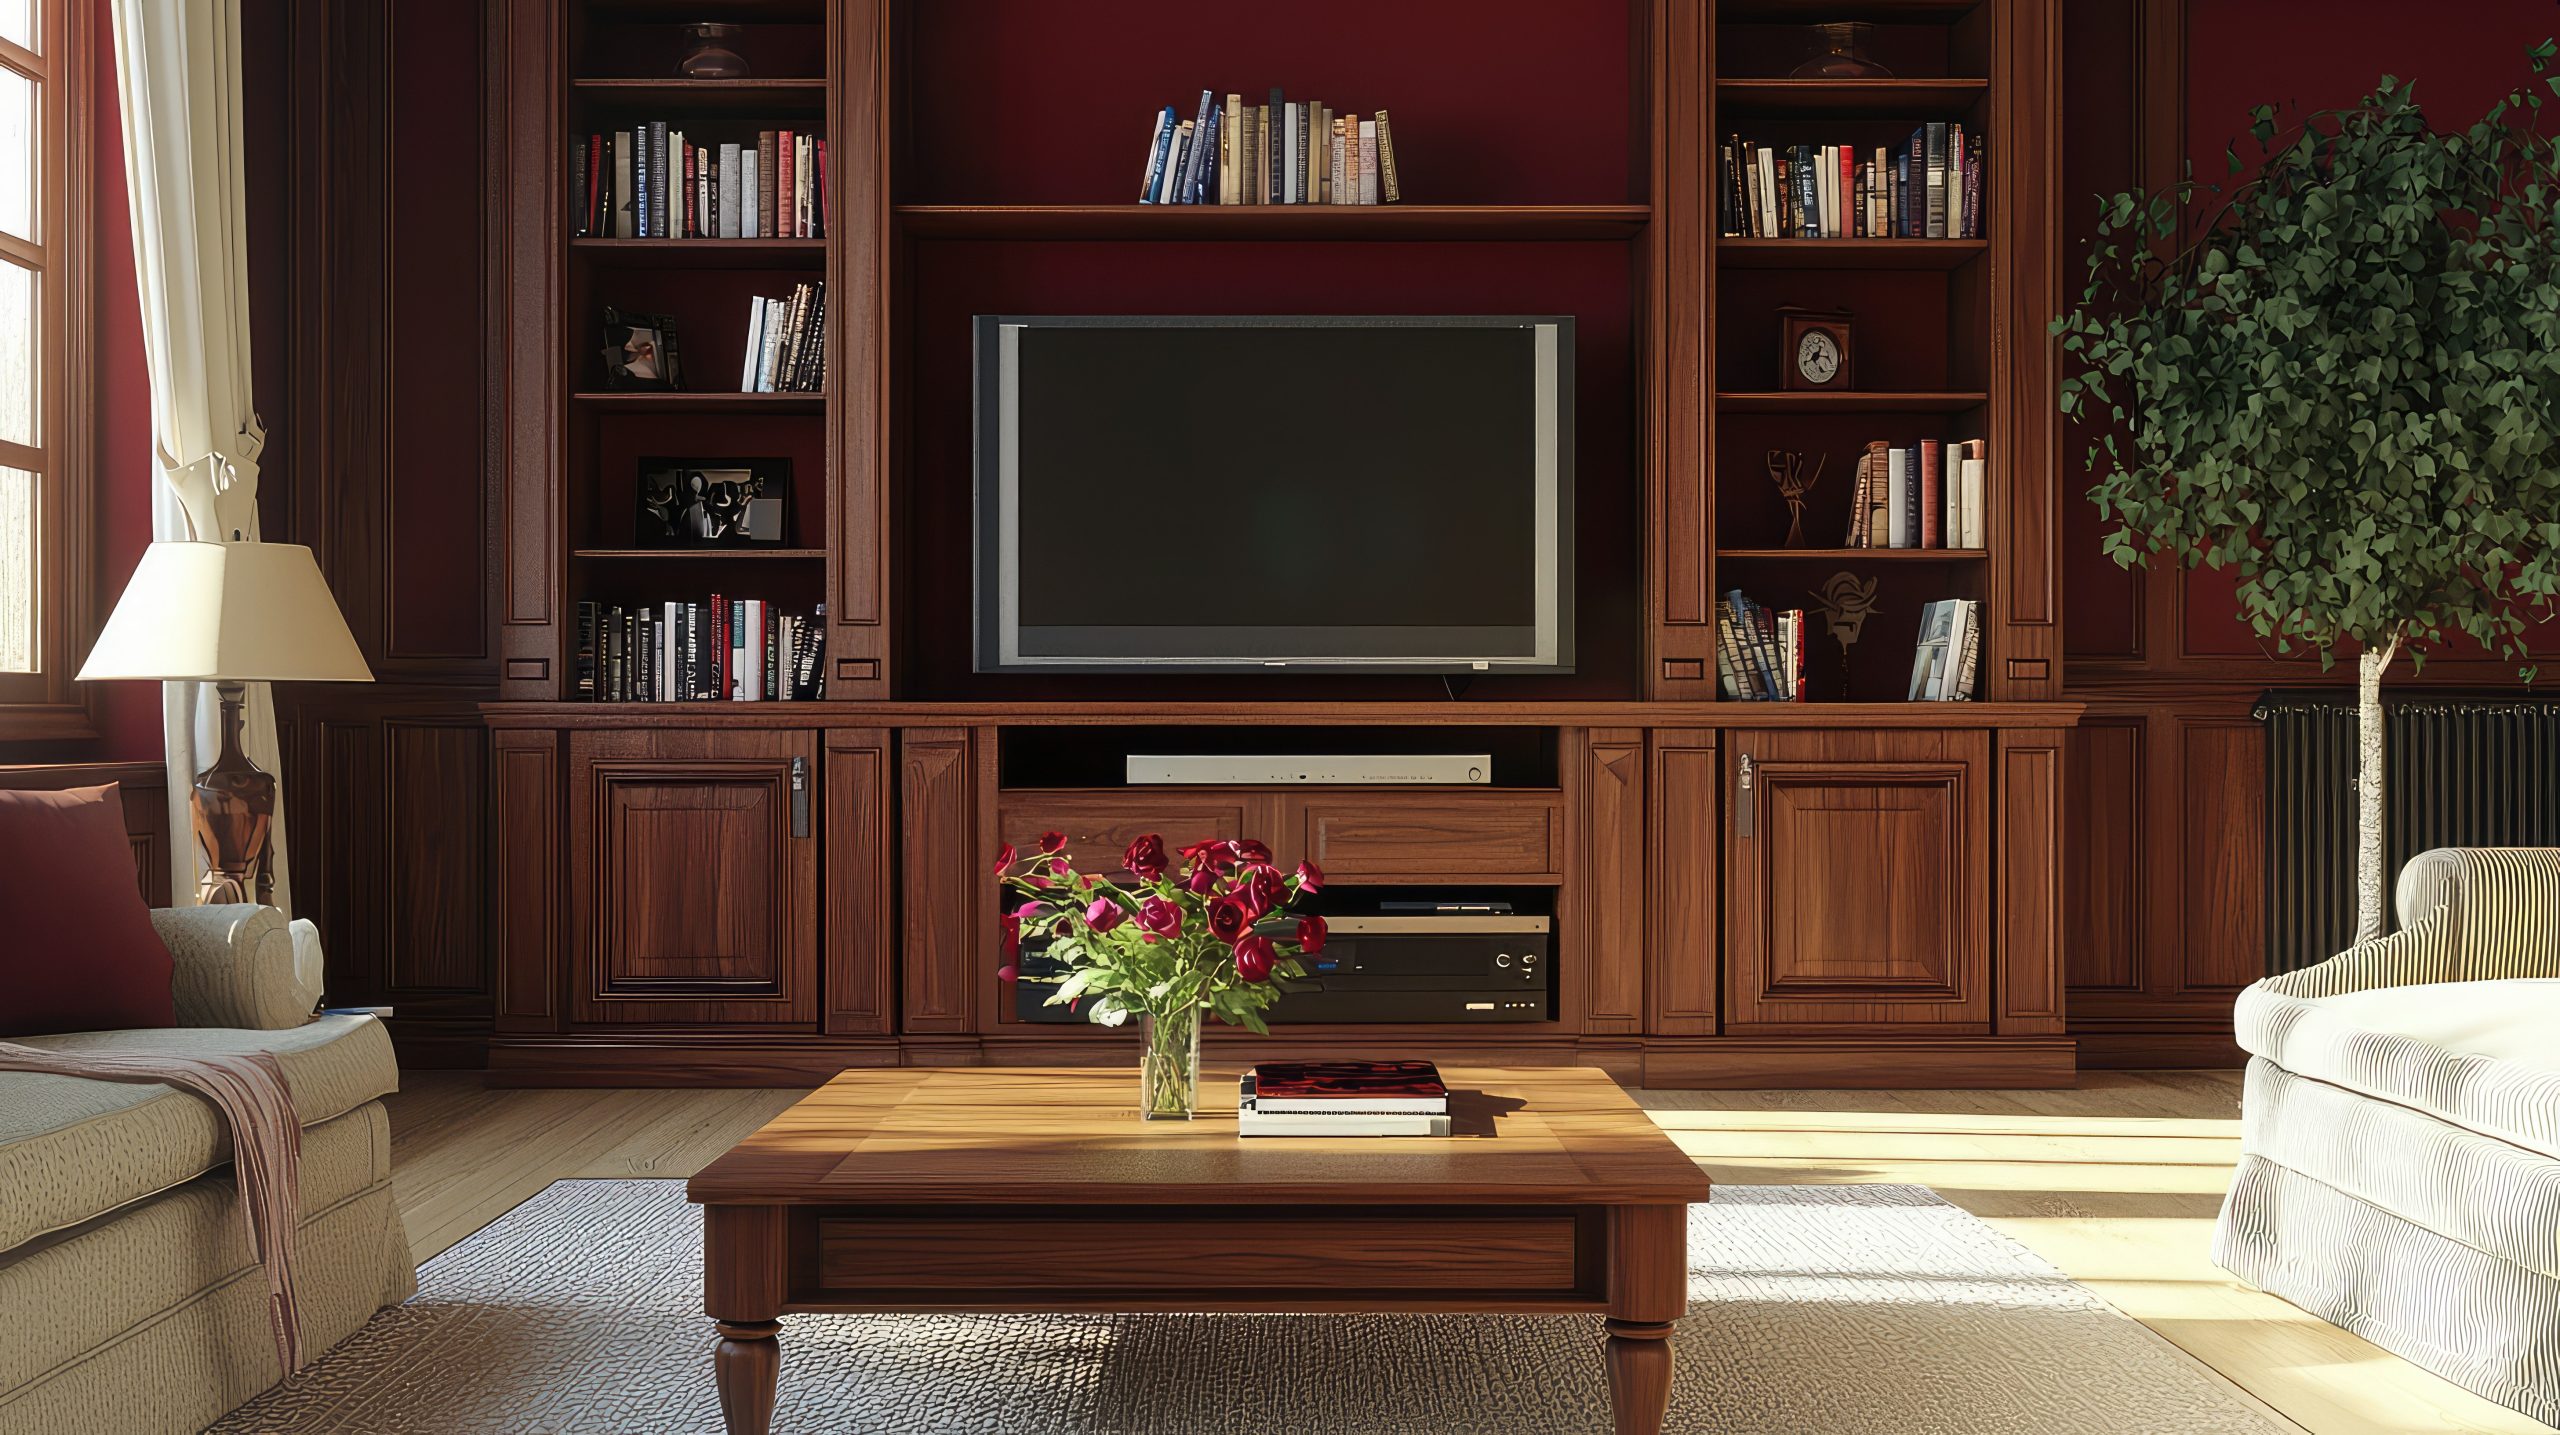
1. Classic Traditional
When clients ask me about Traditional style, I often describe it as the equivalent of a perfectly tailored suit in the fashion world – timeless, sophisticated, and always appropriate. This style carries the wisdom of generations of design, refined over centuries to create spaces that feel both elegant and wonderfully livable.
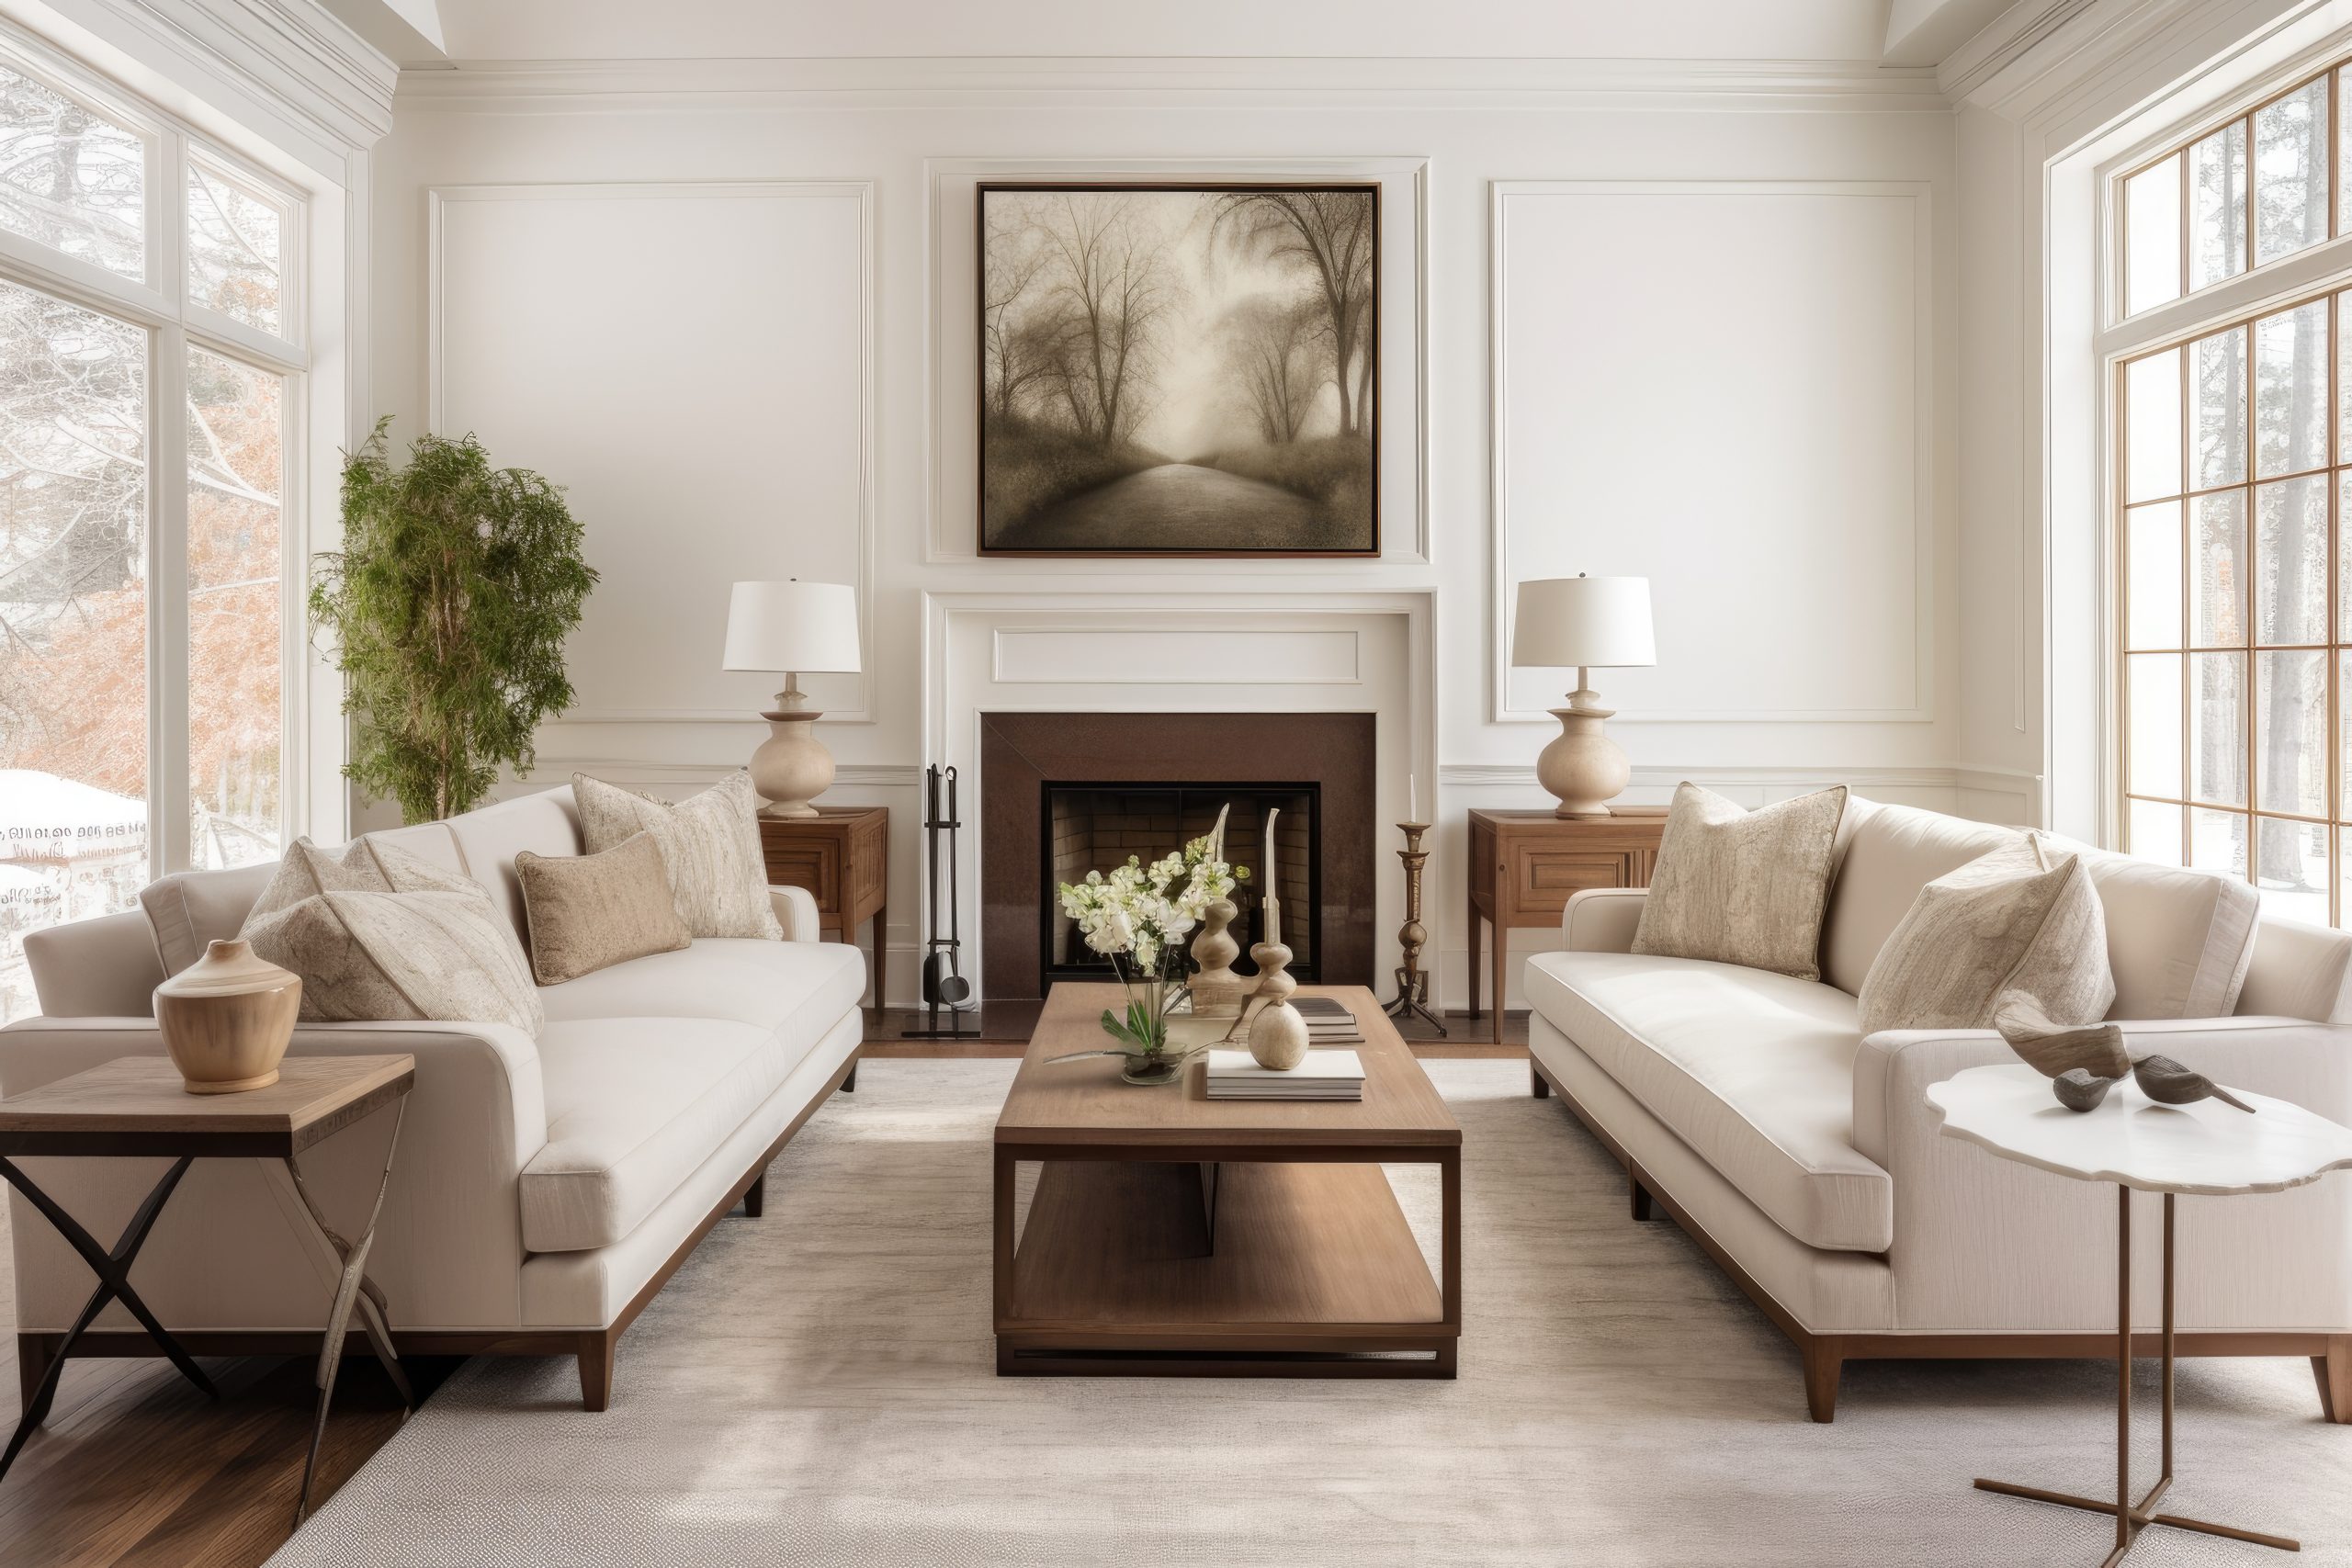
What makes Traditional style special is its attention to detail and commitment to creating balanced, harmonious spaces. It’s the perfect choice for those who appreciate classic literature, fine wine, and things that get better with age.
Key Characteristics:
- Symmetrical arrangements
- Rich wood tones in furniture pieces
- Elegant curves and detailed woodwork
- Refined textiles like silk, velvet, and leather
- Architectural details
- Classic artwork and accessories
Colour Palettes: Traditional design embraces rich, time-tested colours
Primary Colours:
- Warm neutrals
- Deep reds
- Navy blues
- Forest greens
- Rich browns
Accent Colours:
- Burgundy
- Gold
- Deep purple
- Hunter green
- Warm cream
Materials That Define the Style:
- Mahogany and cherry woods
- Crystal and glass
- Polished brass
- Fine silk and velvet
- Oriental rugs
- Damask fabrics
- Carved wood
Pro Tip: Don’t feel like every piece needs to be an antique. I always tell clients that traditional style works beautifully with reproductions, as long as they’re high quality and stay true to classic proportions.
Furniture Elements:
- Wing-back chairs
- Claw-foot tables
- Tufted upholstery
- Queen Anne legs
- Roll-arm sofas
- China cabinets
- Writing desks
- Carved bed frames
Space Planning:
Traditional rooms require thoughtful arrangement:
- Symmetrical furniture placement
- Formal conversation areas
- Clear traffic patterns
- Balanced room layouts
- Designated seating groups
- Formal dining arrangements
- Reading nooks
- Display areas for collections
Styling Guidelines:
- Use pairs to create symmetry
- Layer window treatments
- Include classic artwork
- Display family heirlooms
- Add fresh flowers
- Incorporate table lamps
- Use rich throw pillows
- Feature oriental rugs
Common Mistakes to Avoid:
- Overcrowding rooms
- Using matched sets exclusively
- Forgetting about comfort
- Making it feel too formal
- Overlooking lighting layers
- Using poor quality reproductions
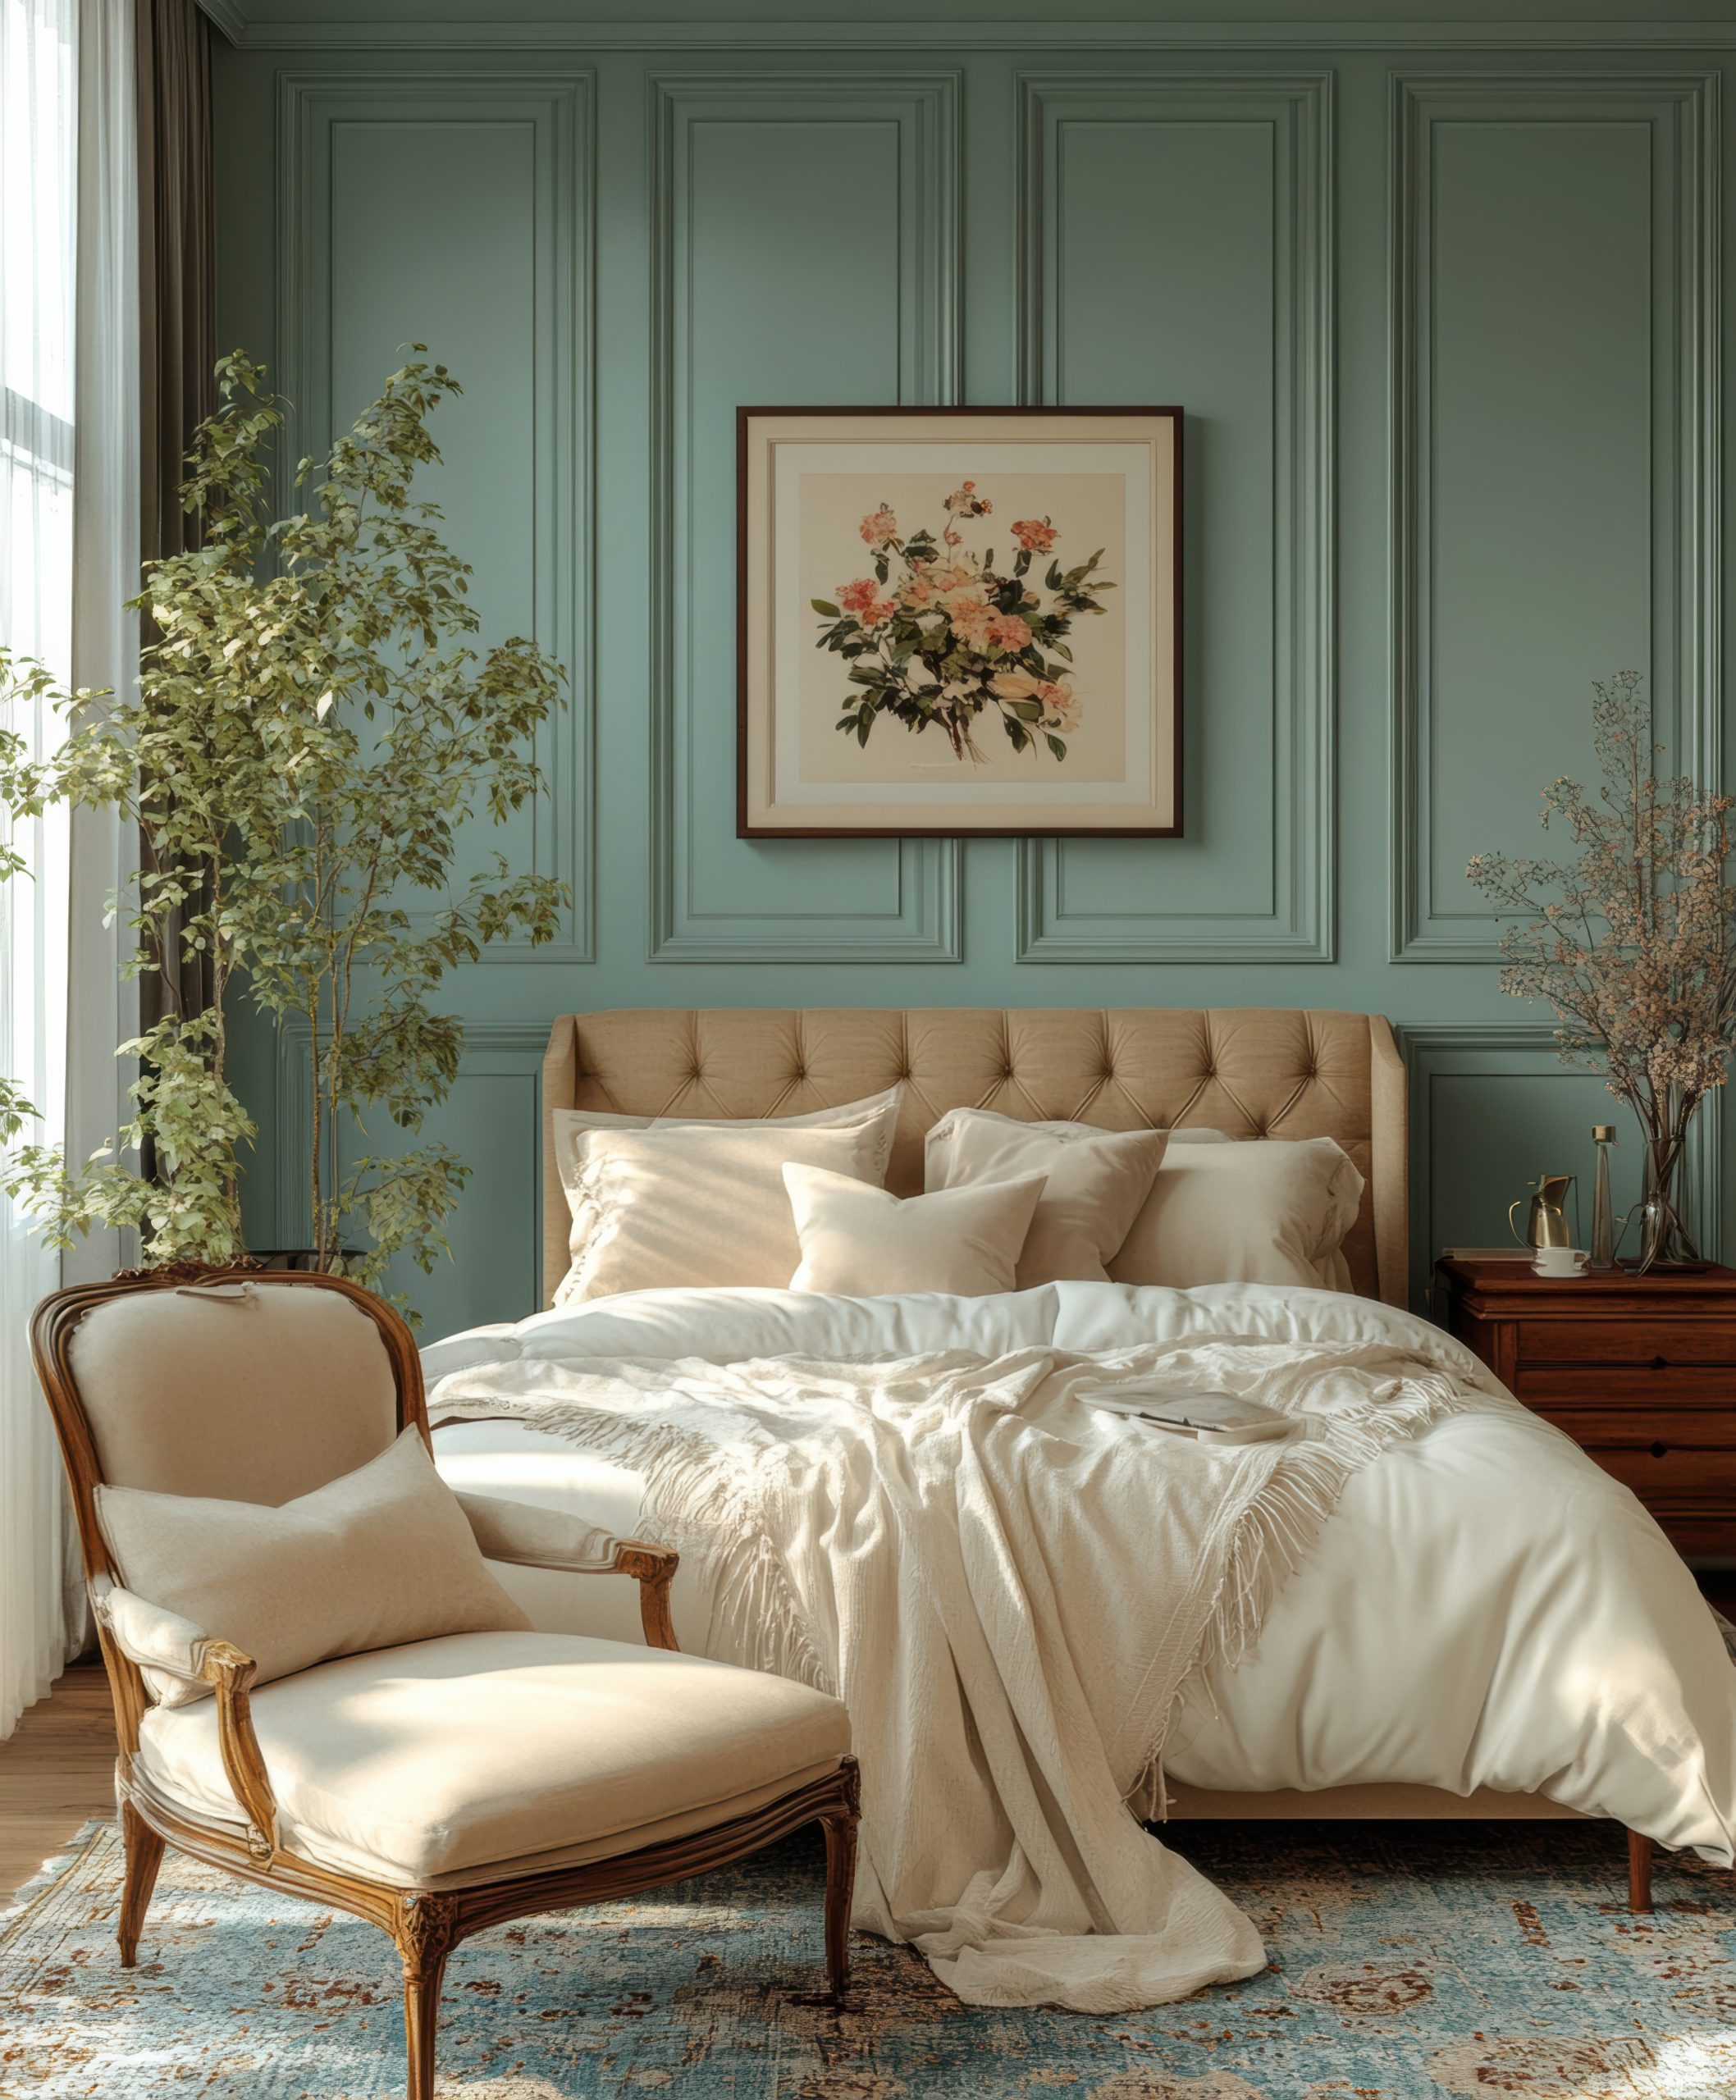
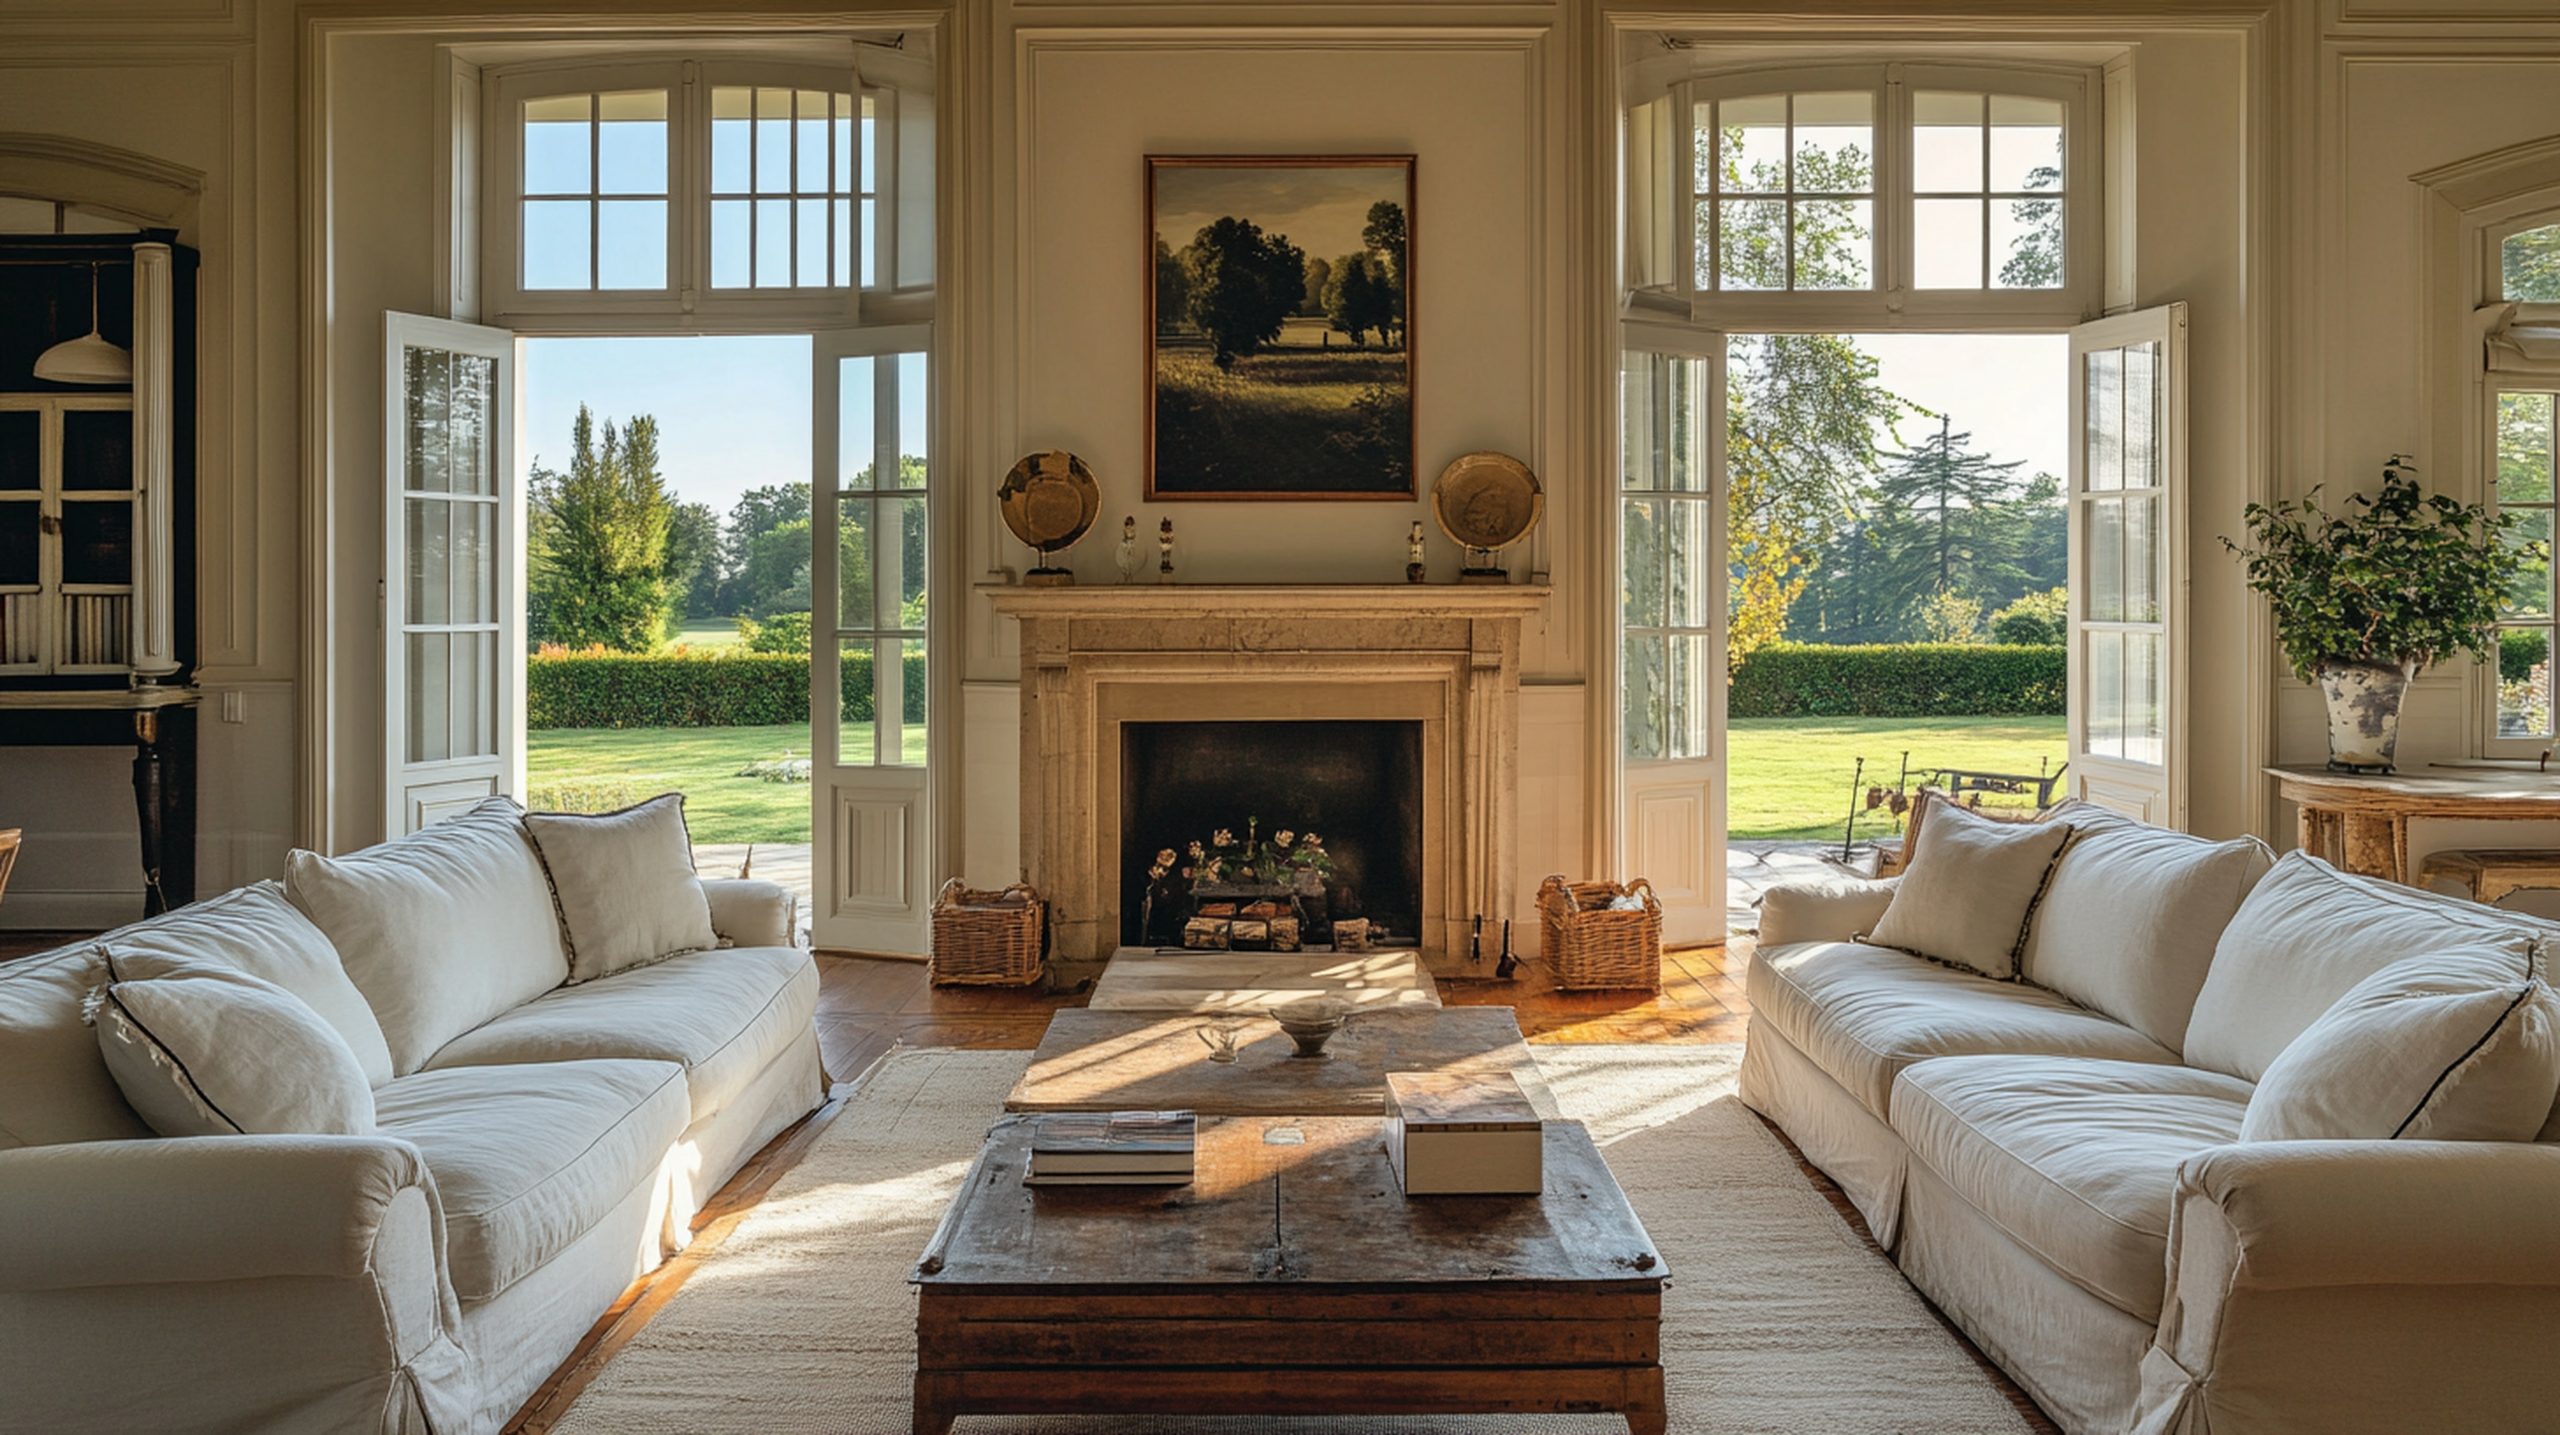
2. French Country
Let’s explore one of my favourite traditional styles – French Country. This style has a magical way of making any space feel like a charming cottage in Provence, no matter where you actually live.
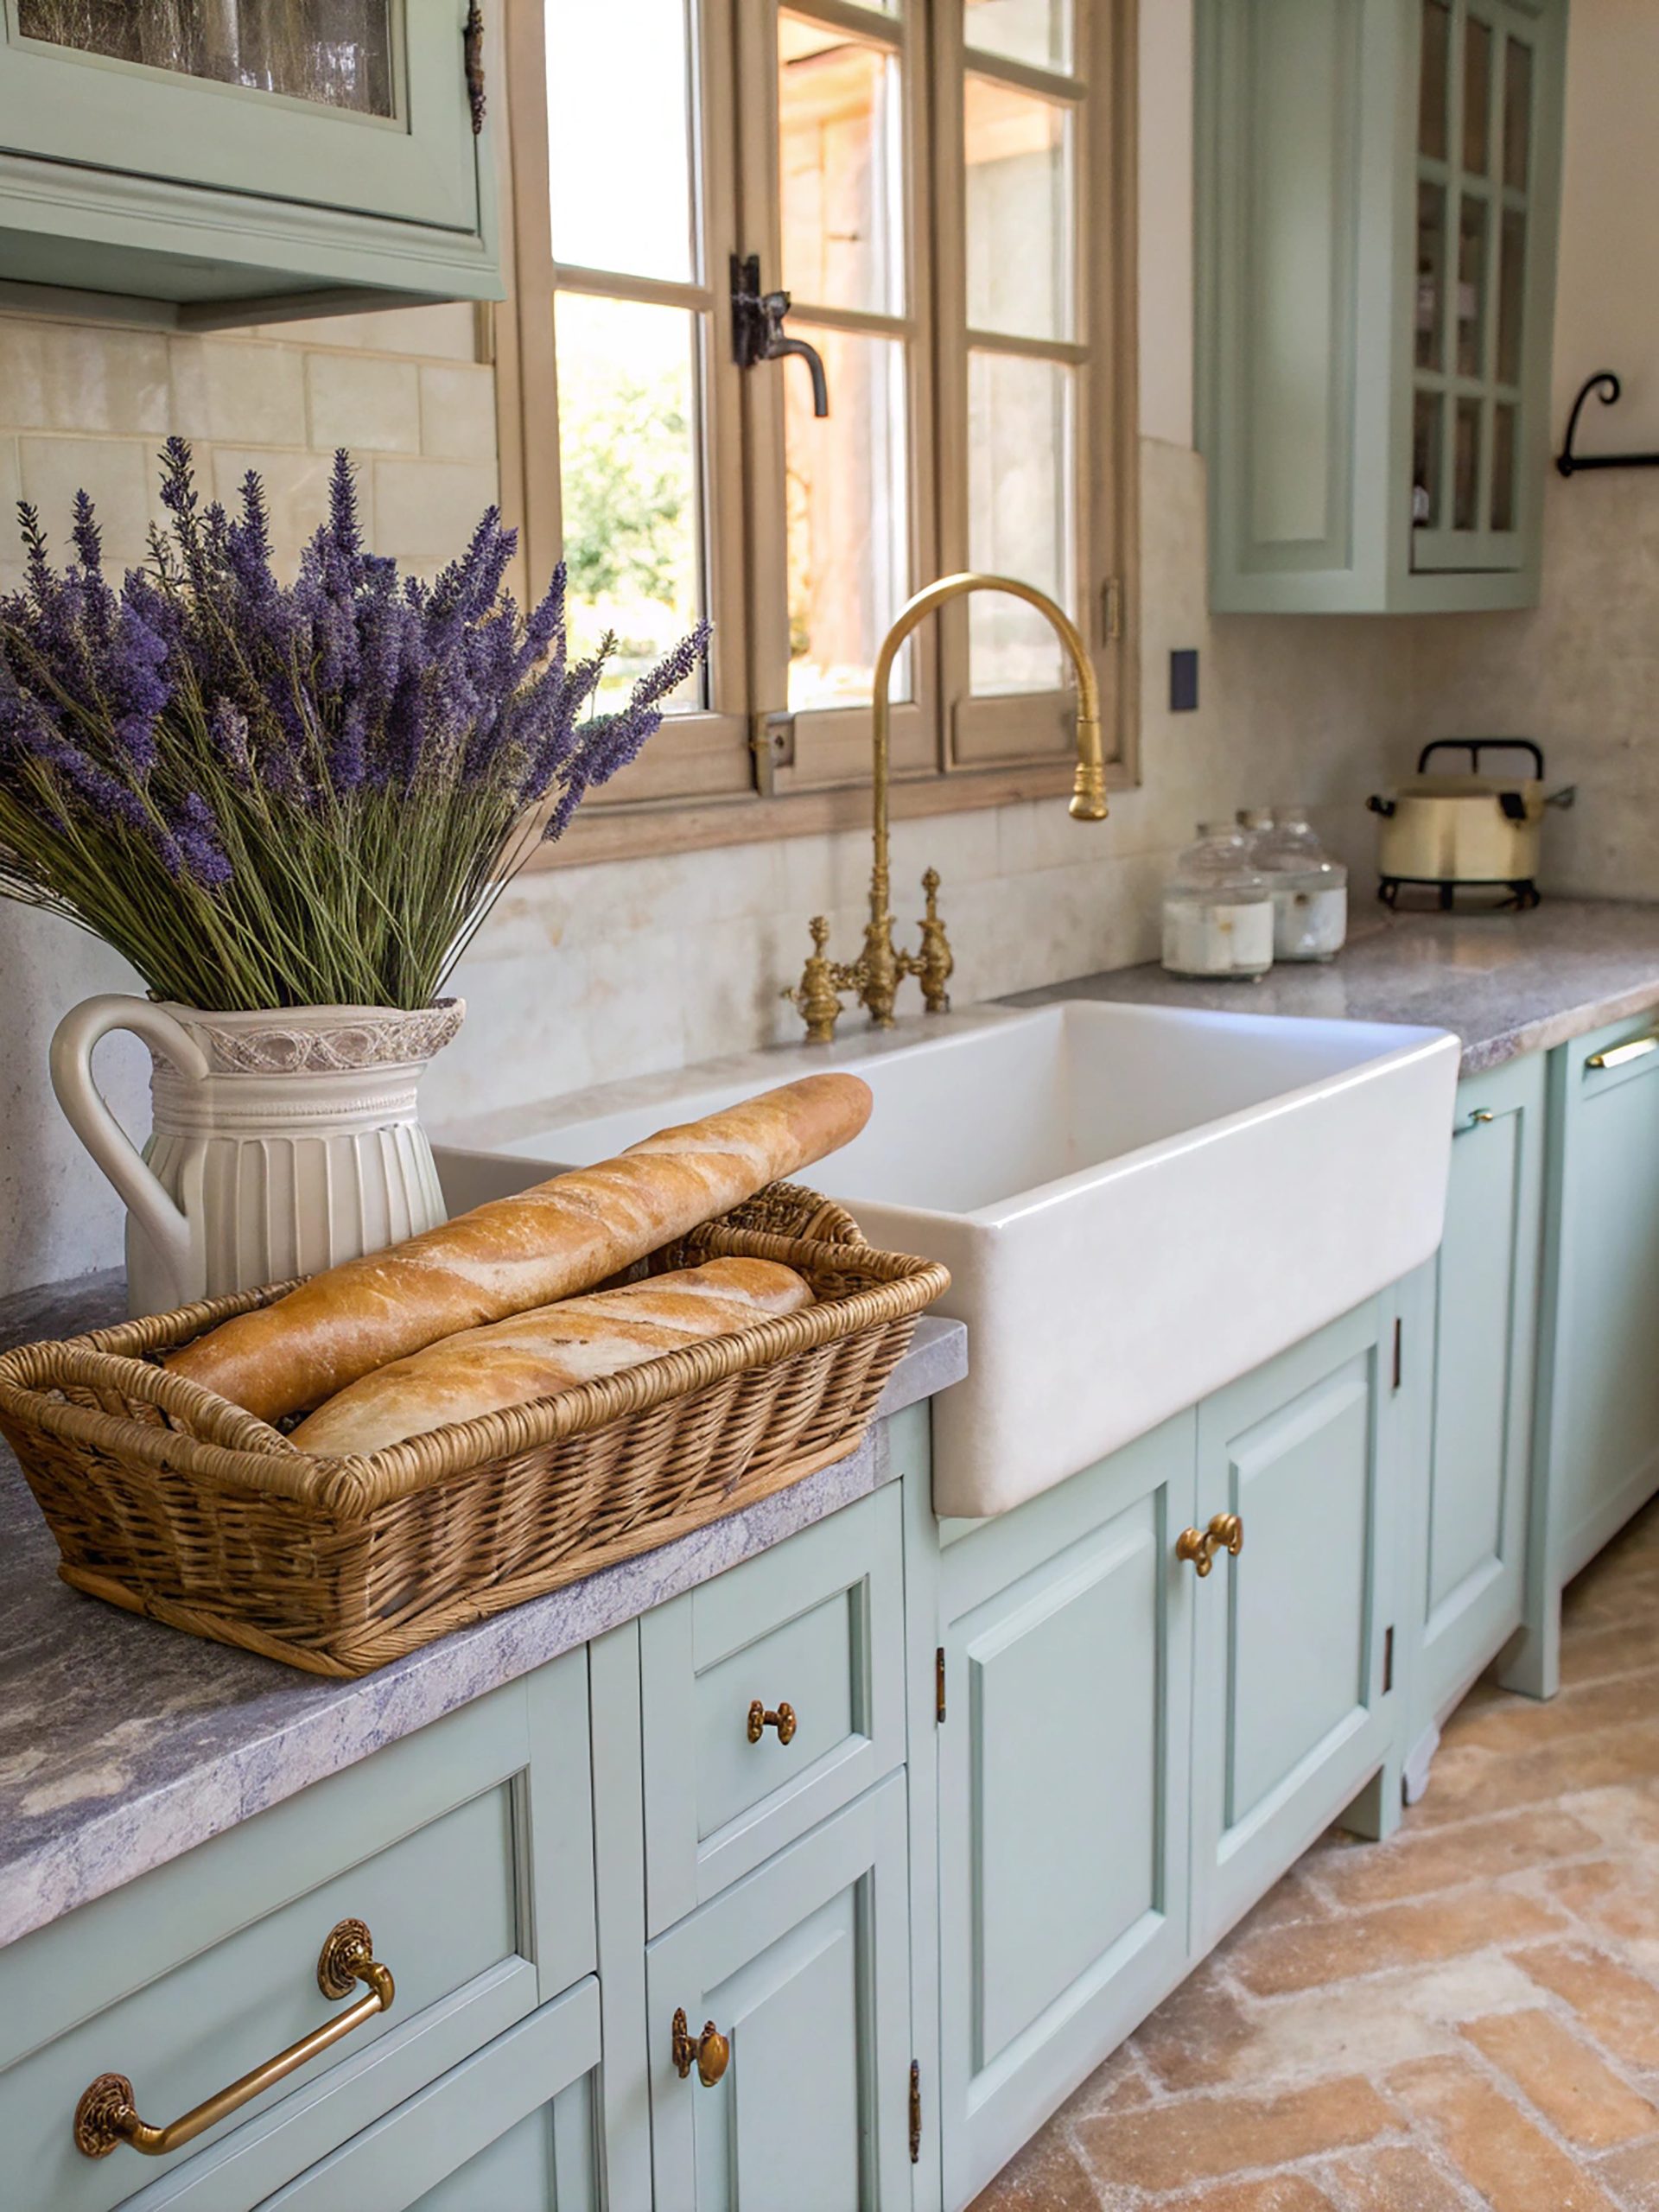
What makes French Country special is its ability to blend elegance with rustic charm. Unlike formal French design, this style embraces imperfection and celebrates the beauty of everyday life. It’s where sophistication meets comfort, and believe me, it’s a beautiful marriage.
Key Characteristics:
- Soft, curved lines
- Distressed finishes
- Mix of formal and rustic elements
- Warm wood tones
- Natural stone
- Hand-painted details
- Wrought iron accents
Colour Palettes: French Country colours are inspired by the French countryside
Primary Colours:
- Warm whites
- Creamy neutrals
- Soft golds
- Terra cotta
- Gentle blues
Accent Colours:
- Lavender
- Sunny yellow
- Sage green
- Rustic red
- Soft black
Materials That Define the Style:
- Natural stone flooring
- Exposed wooden beams
- Wrought iron
- Natural linens
- Cotton toile
- Ceramic tiles
- Copper and brass
Pro Tip: When designing French Country spaces, always remember authenticity is key. Don’t be afraid of a few chips in your painted furniture or wear marks on your wooden table – these “imperfections” add character and charm.
Furniture Elements:
- Carved wooden armoires
- Upholstered dining chairs
- Painted dressers
- Farmhouse tables
- Bergère chairs
- Curved sofas
- Woven chairs
Pattern Play:
French Country embraces specific patterns:
- Toile de Jouy
- Florals
- Stripes
- Checks
- Provincial prints
- Damask
- Plaids
Essential Decor Elements:
- Ceramic pitchers
- Woven baskets
- Fresh and dried herbs
- Copper cookware
- Vintage signs
- Provincial artwork
- Fresh flowers
Space Planning:
French Country design emphasises:
- Comfortable gathering spaces
- Kitchen as the heart of home
- Indoor-outdoor flow
- Intimate seating areas
- Natural light
- Practical workspace
- Cosy corners
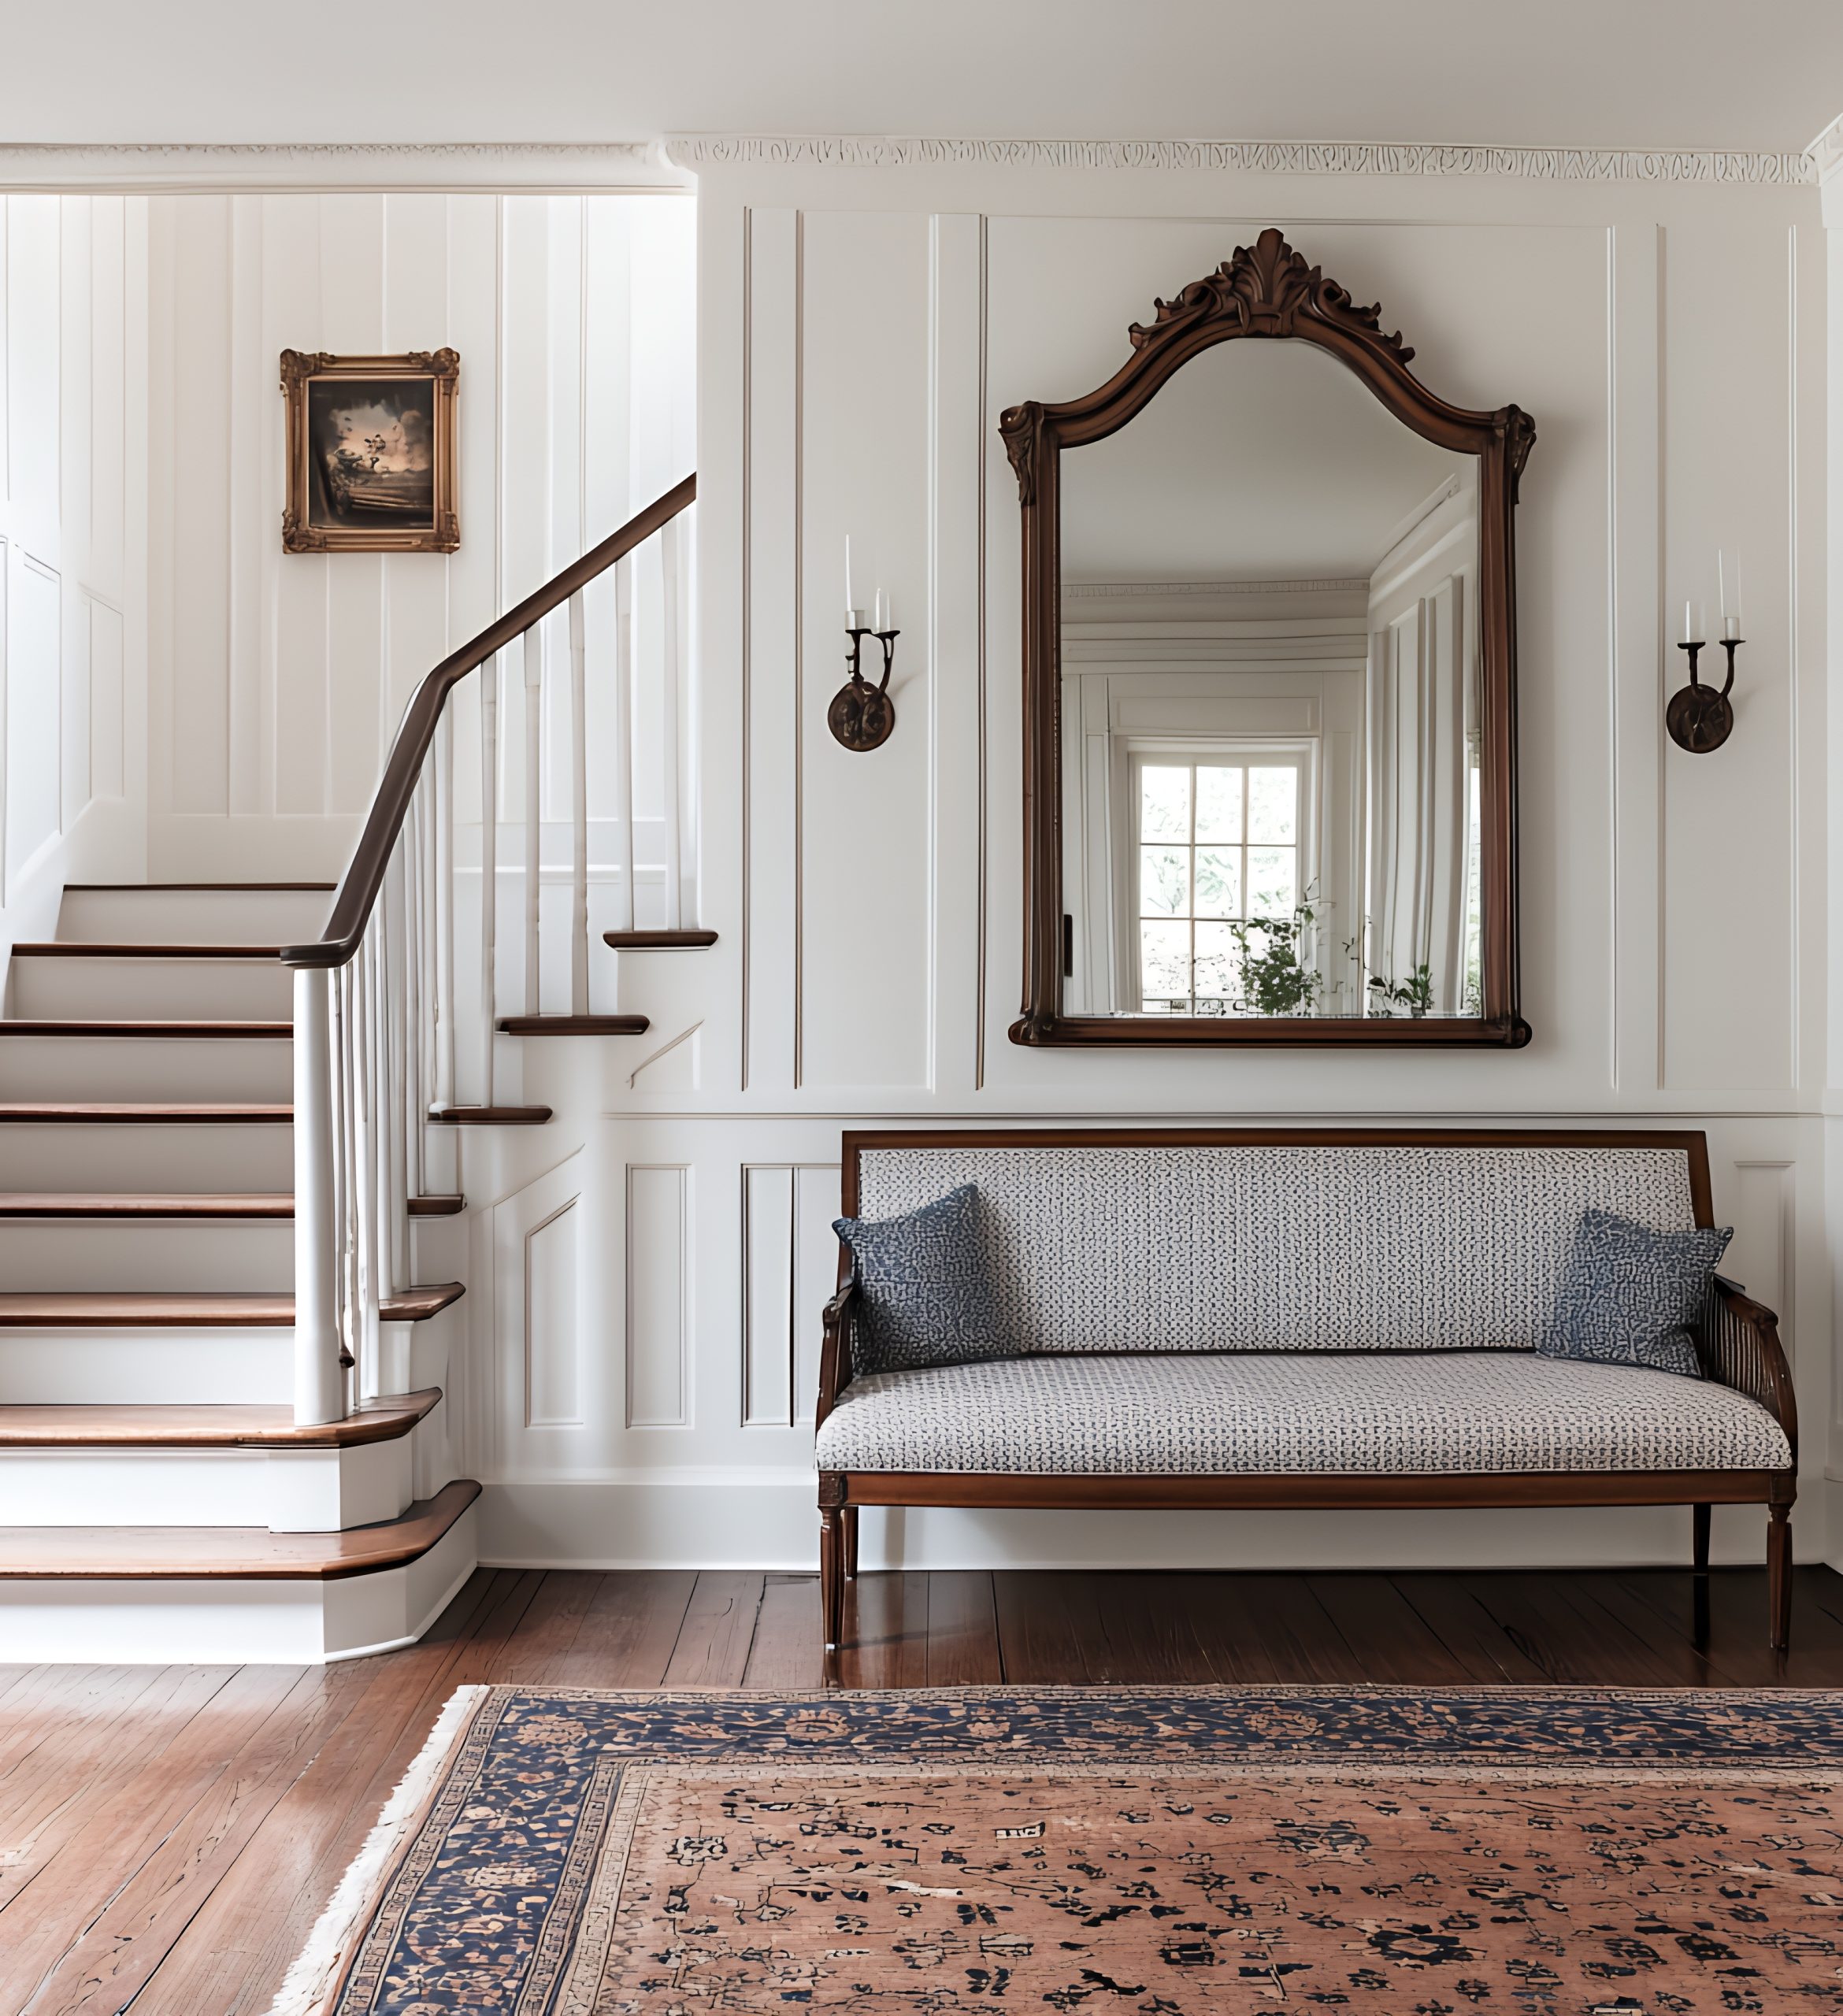
3. Victorian
Let’s step back in time to one of the most opulent of our traditional styles – Victorian design. This style is all about embracing decoration, detail, and drama in the most sophisticated way possible.
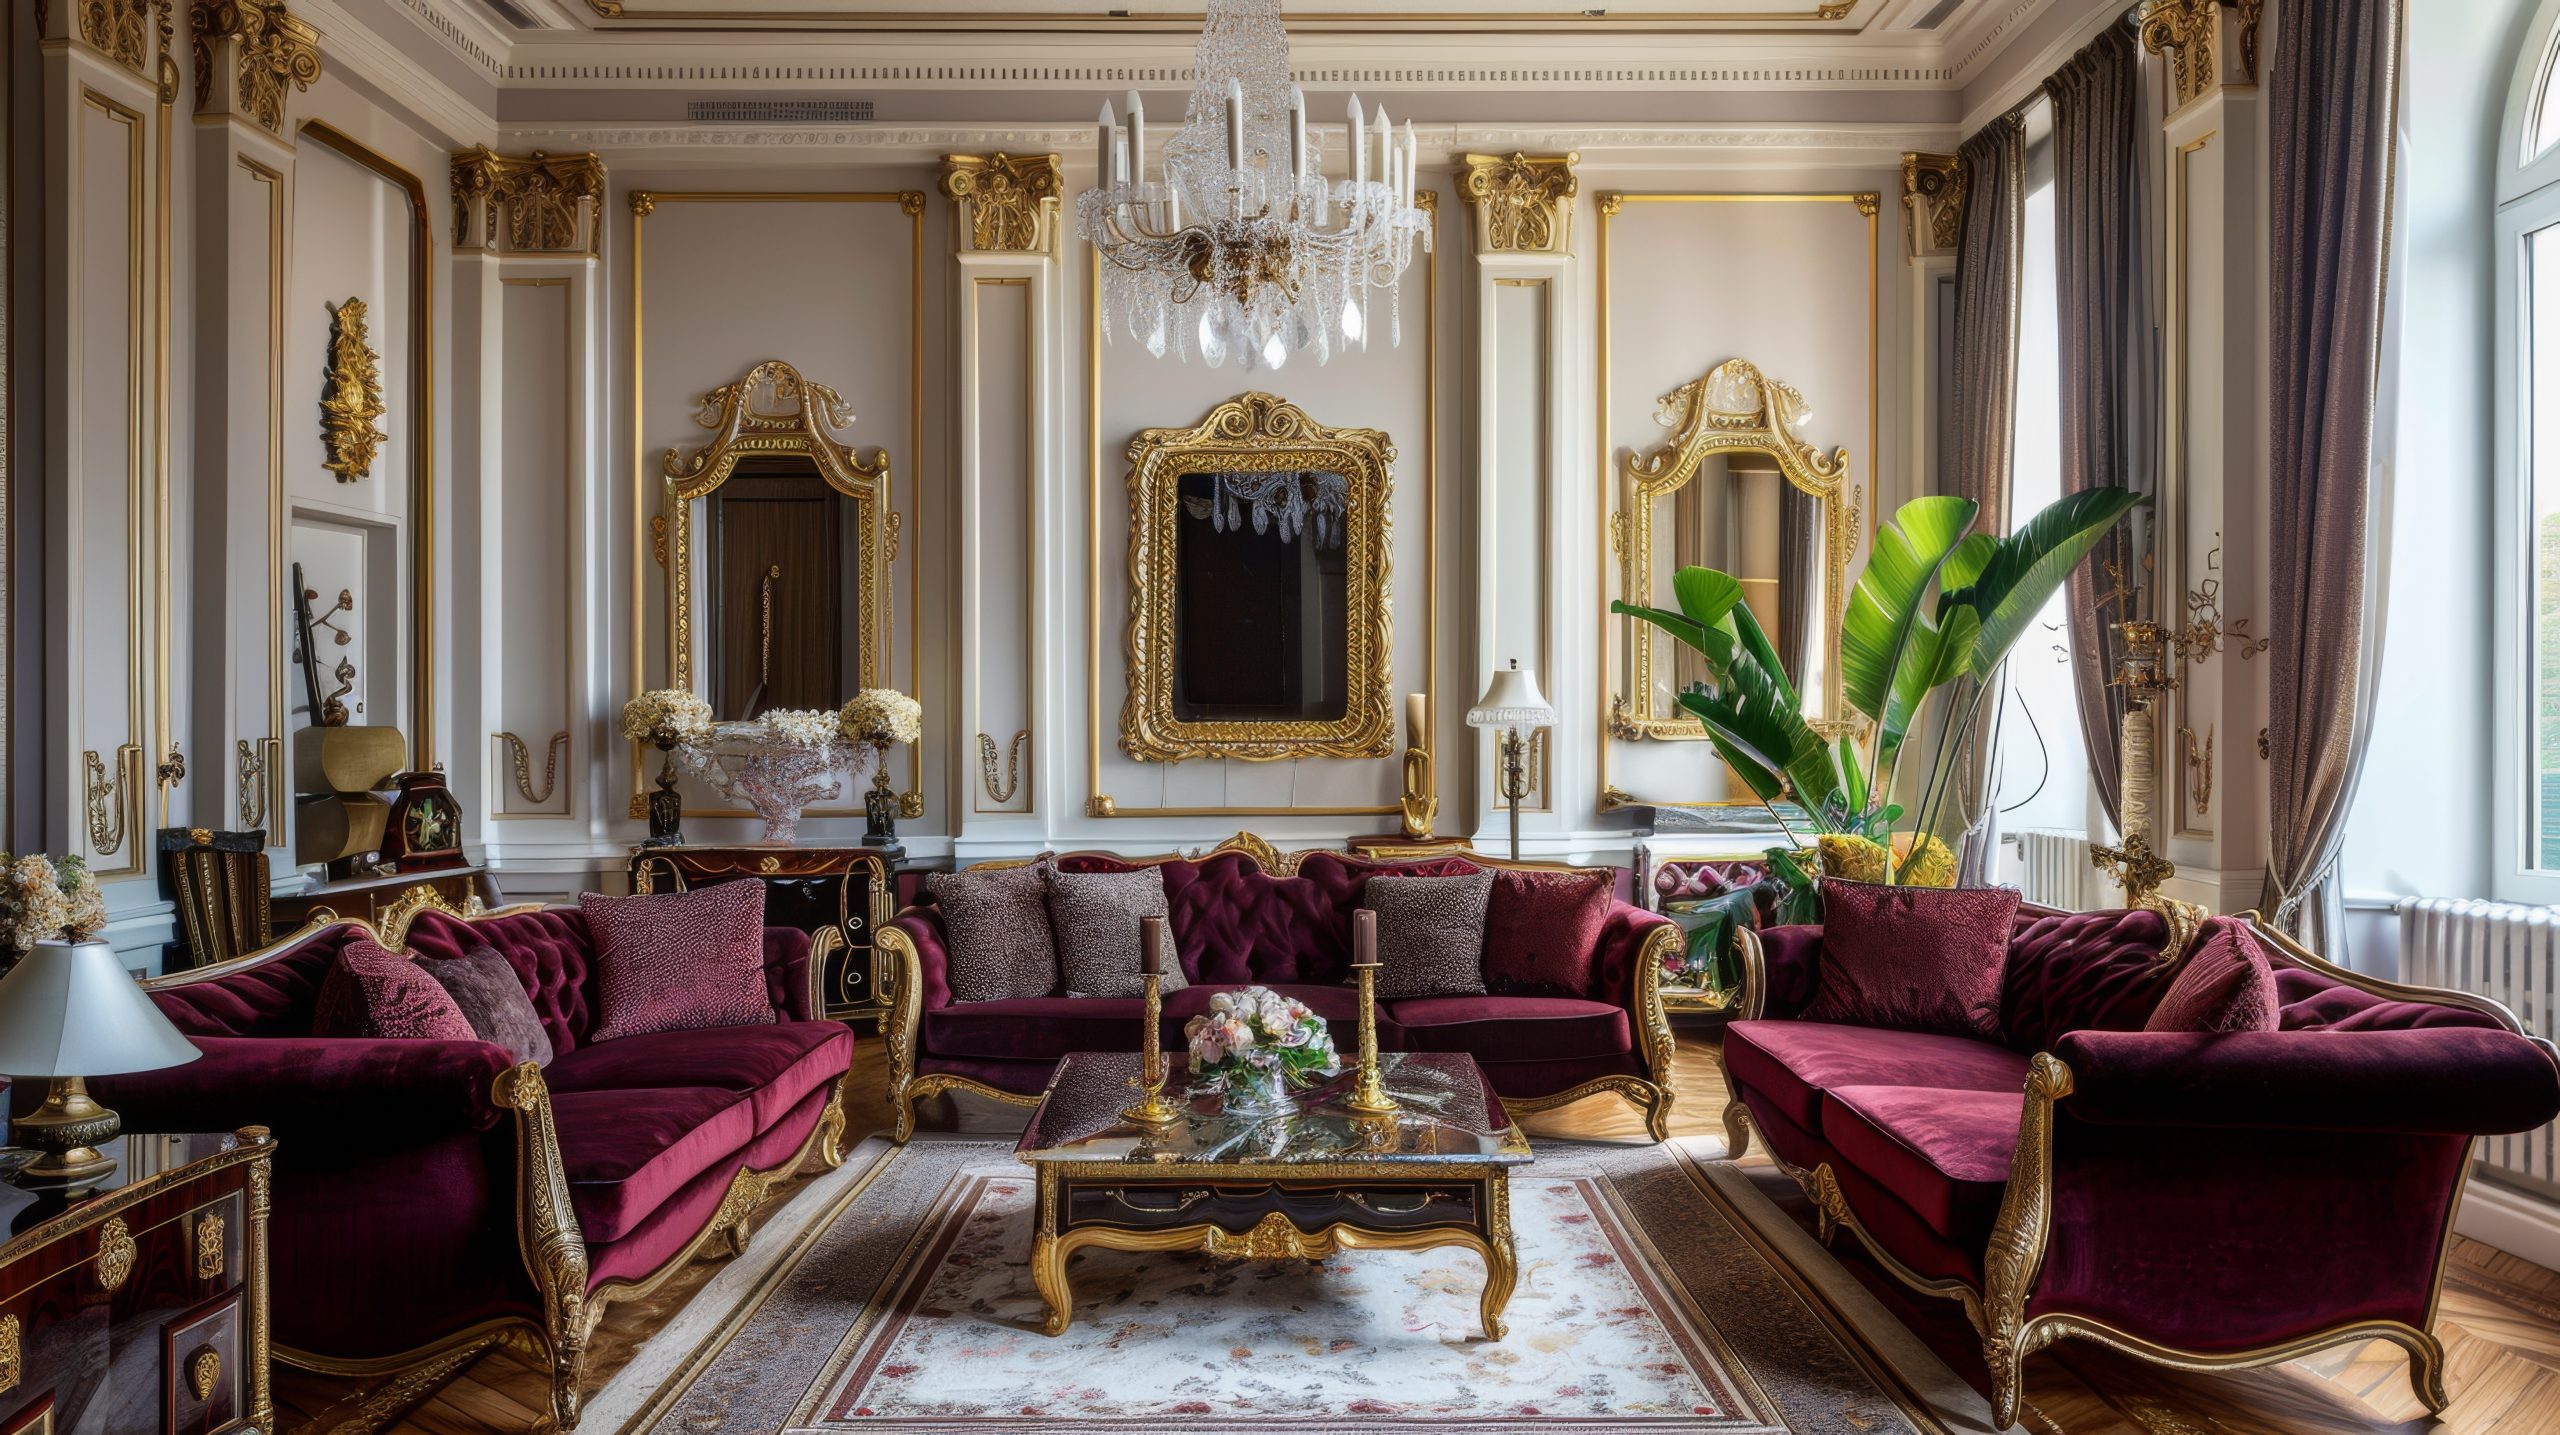
What makes Victorian style unique is its celebration of abundance and ornamentation. This style emerged during Queen Victoria’s reign (1837-1901), when showing off one’s wealth and taste through interior design was not just acceptable – it was expected. Think of it as the maximalist’s dream come true.
Key Characteristics:
- Ornate decorative elements
- Multiple patterns and textures
- Rich, dark colour palettes
- Layered window treatments
- Abundant accessories
- High ceilings
- Intricate millwork
- Heavy furniture pieces
Colour Palettes: Victorian design embraces rich, dramatic colours
Primary Colours:
- Deep jewel tones
- Burgundy
- Forest green
- Royal purple
- Rich brown
Accent Colours:
- Gold
- Deep red
- Sapphire blue
- Bronze
- Black
Materials That Define the Style:
- Dark, polished woods
- Velvet and silk
- Crystal
- Marble
- Brass and bronze
- Detailed wallpapers
- Oriental rugs
- Lace
Pro Tip: When designing Victorian spaces for modern living, always remember that you can honour the style’s ornate nature while still editing for today’s lifestyle. Not every surface needs to be covered!
Furniture Elements:
- Button-tufted sofas
- Carved wooden pieces
- Fainting couches
- Wingback chairs
- Ottoman footstools
- Heavy draperies
- Ornate beds
- China cabinets
Architectural Details:
- Crown molding
- Ceiling medallions
- Carved doorways
- Bay windows
- Decorative fireplace mantels
- Wainscoting
- Detailed trim work
- Stained glass
Pattern Play:
Victorian style loves layering patterns:
- Damask
- Florals
- Stripes
- Plaids
- Oriental designs
- Gothic motifs
- Nature-inspired patterns
Essential Decor Elements:
- Crystal chandeliers
- Heavy curtains with tassels
- Oil paintings in gilded frames
- Decorative mirrors
- Plants in ornate stands
- China collections
- Family portraits
- Books and globes

Space Planning:
Victorian rooms require thoughtful arrangement:
- Formal furniture groupings
- Conversation areas
- Display spaces for collections
- Reading nooks
- Music corners
- Clear pathways
- Symmetrical layouts
Modern Interpretation:
Here’s how I help clients adapt Victorian style for contemporary living:
- Lighter colour palettes
- Selected ornate pieces
- Updated textiles
- Modern lighting options
- Simplified window treatments
- Edited accessories
- Functional spaces
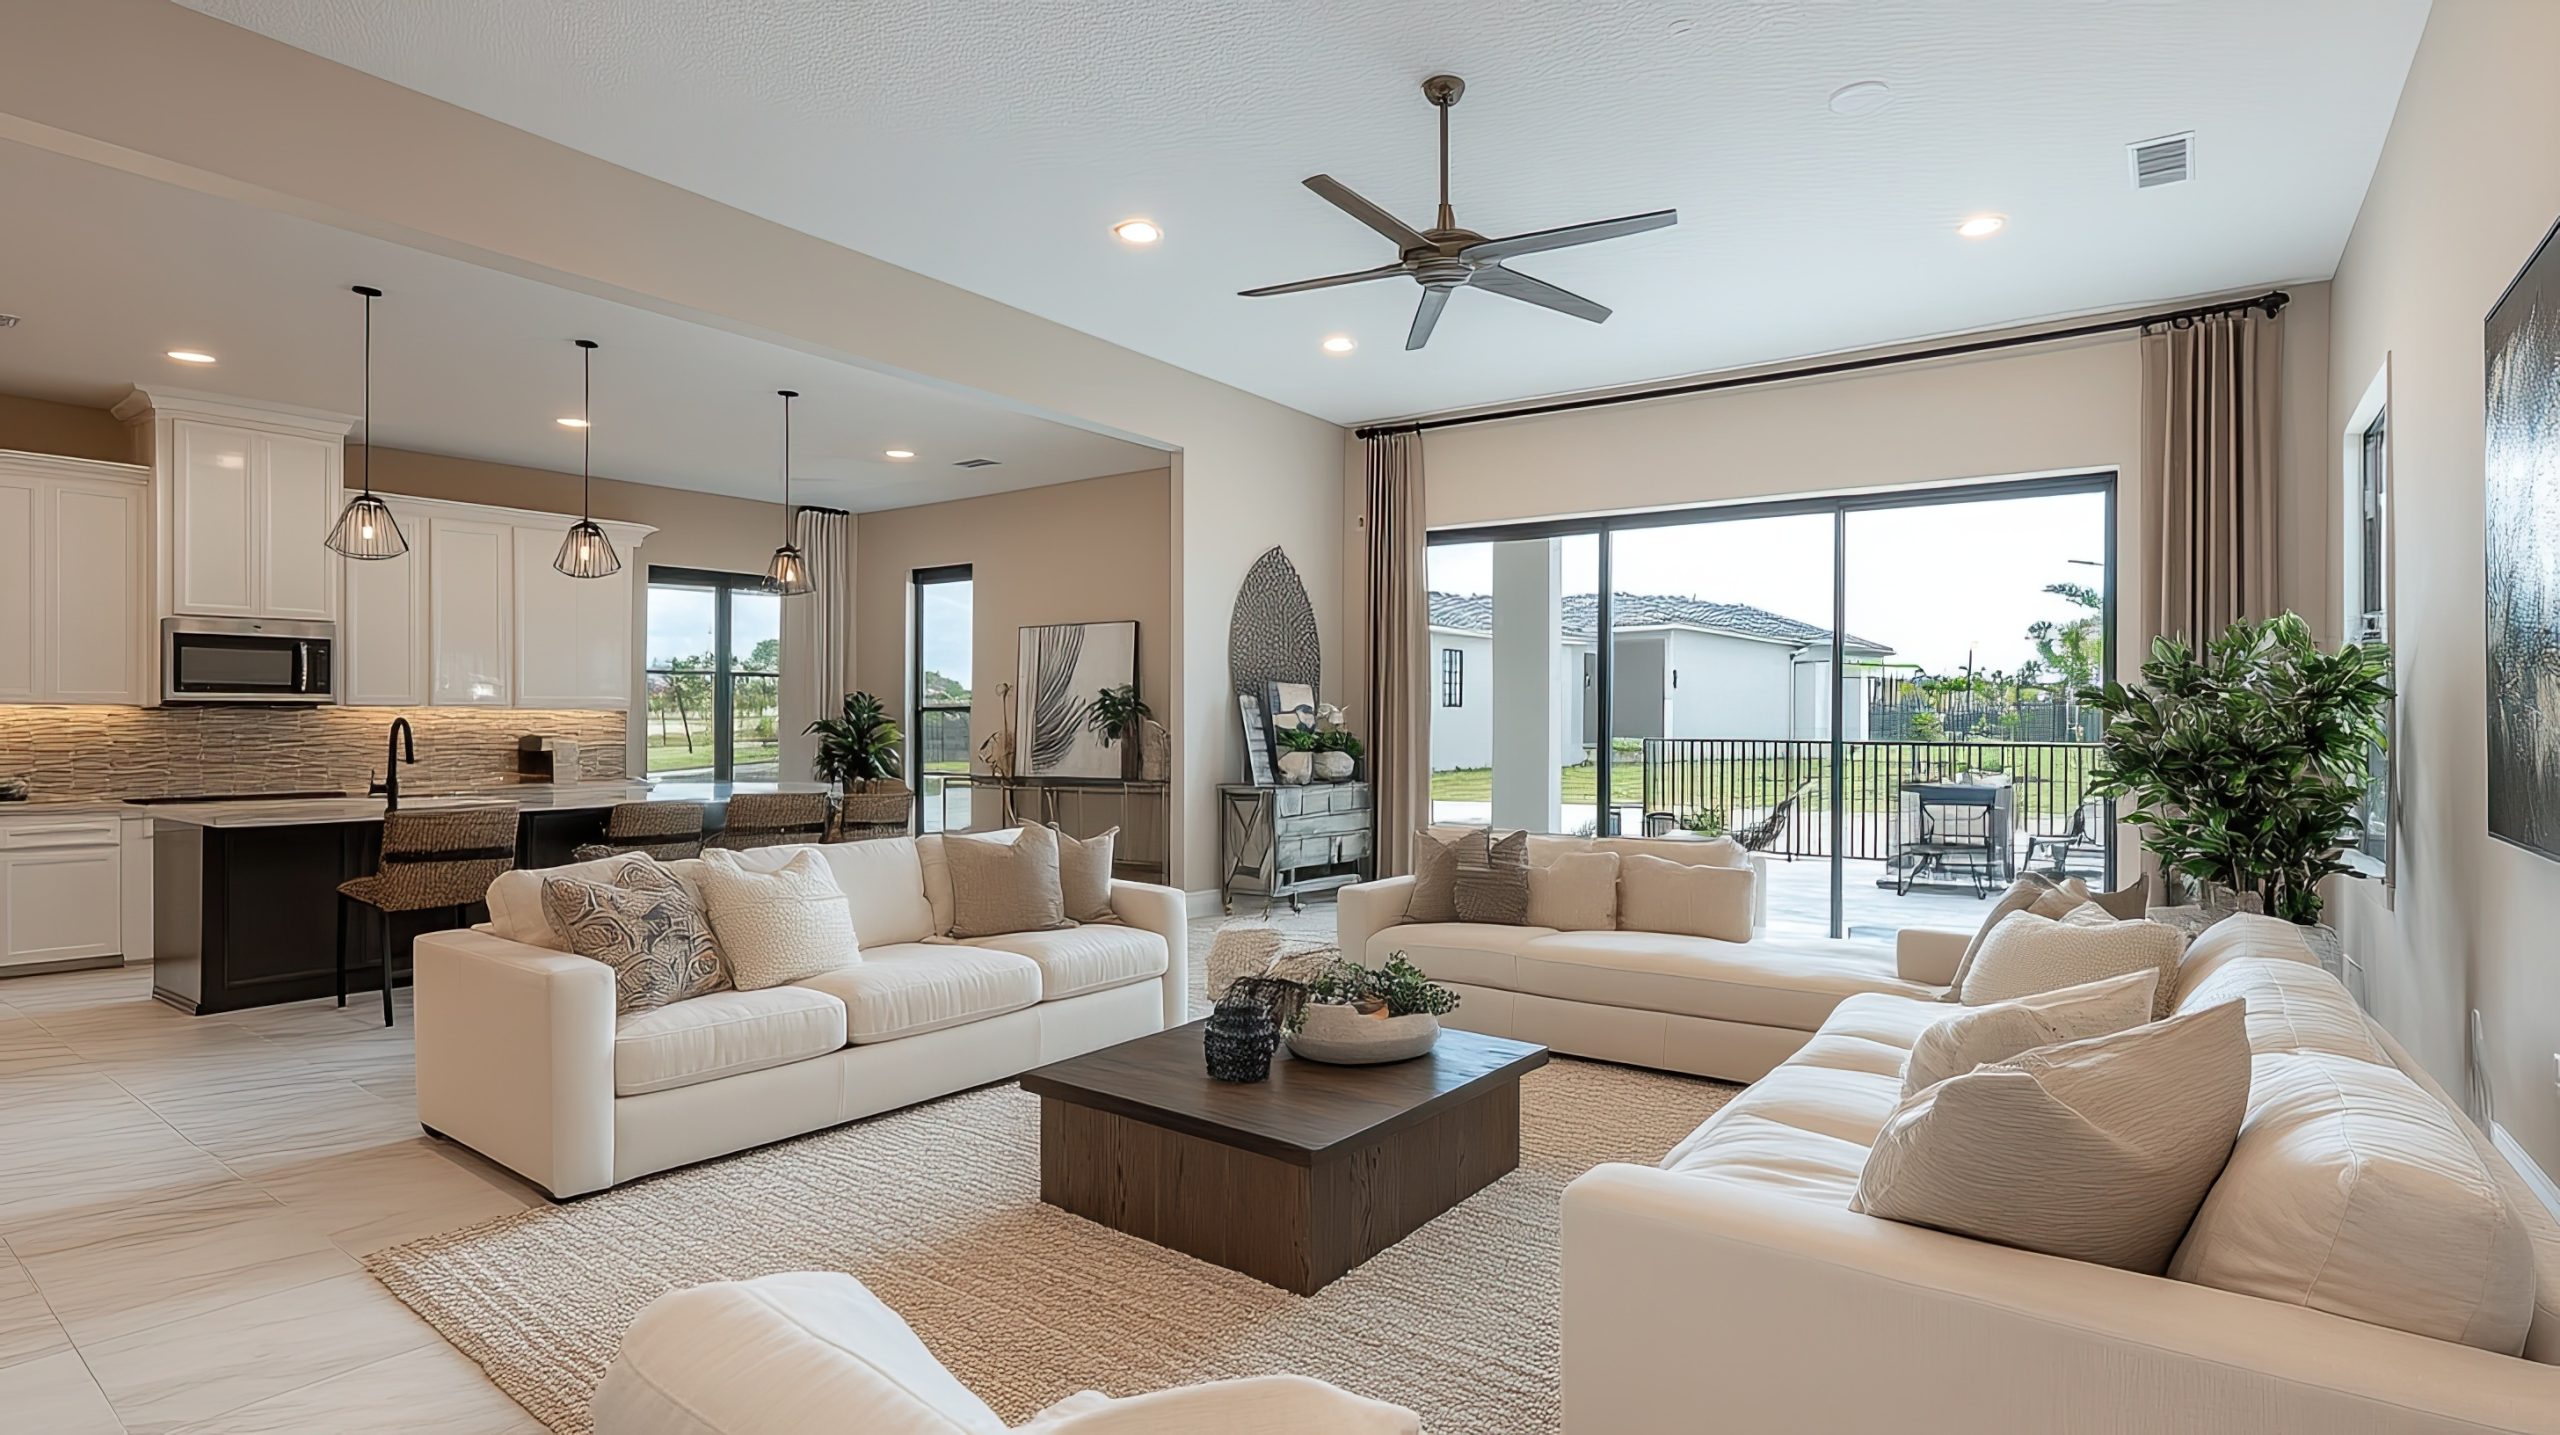
Modern & Contemporary Styles
Now let’s shift gears completely as we explore designs that embrace clean lines, minimalism, and contemporary living. These styles represent a dramatic departure from traditional ornamentation, focusing instead on the principle that form follows function.
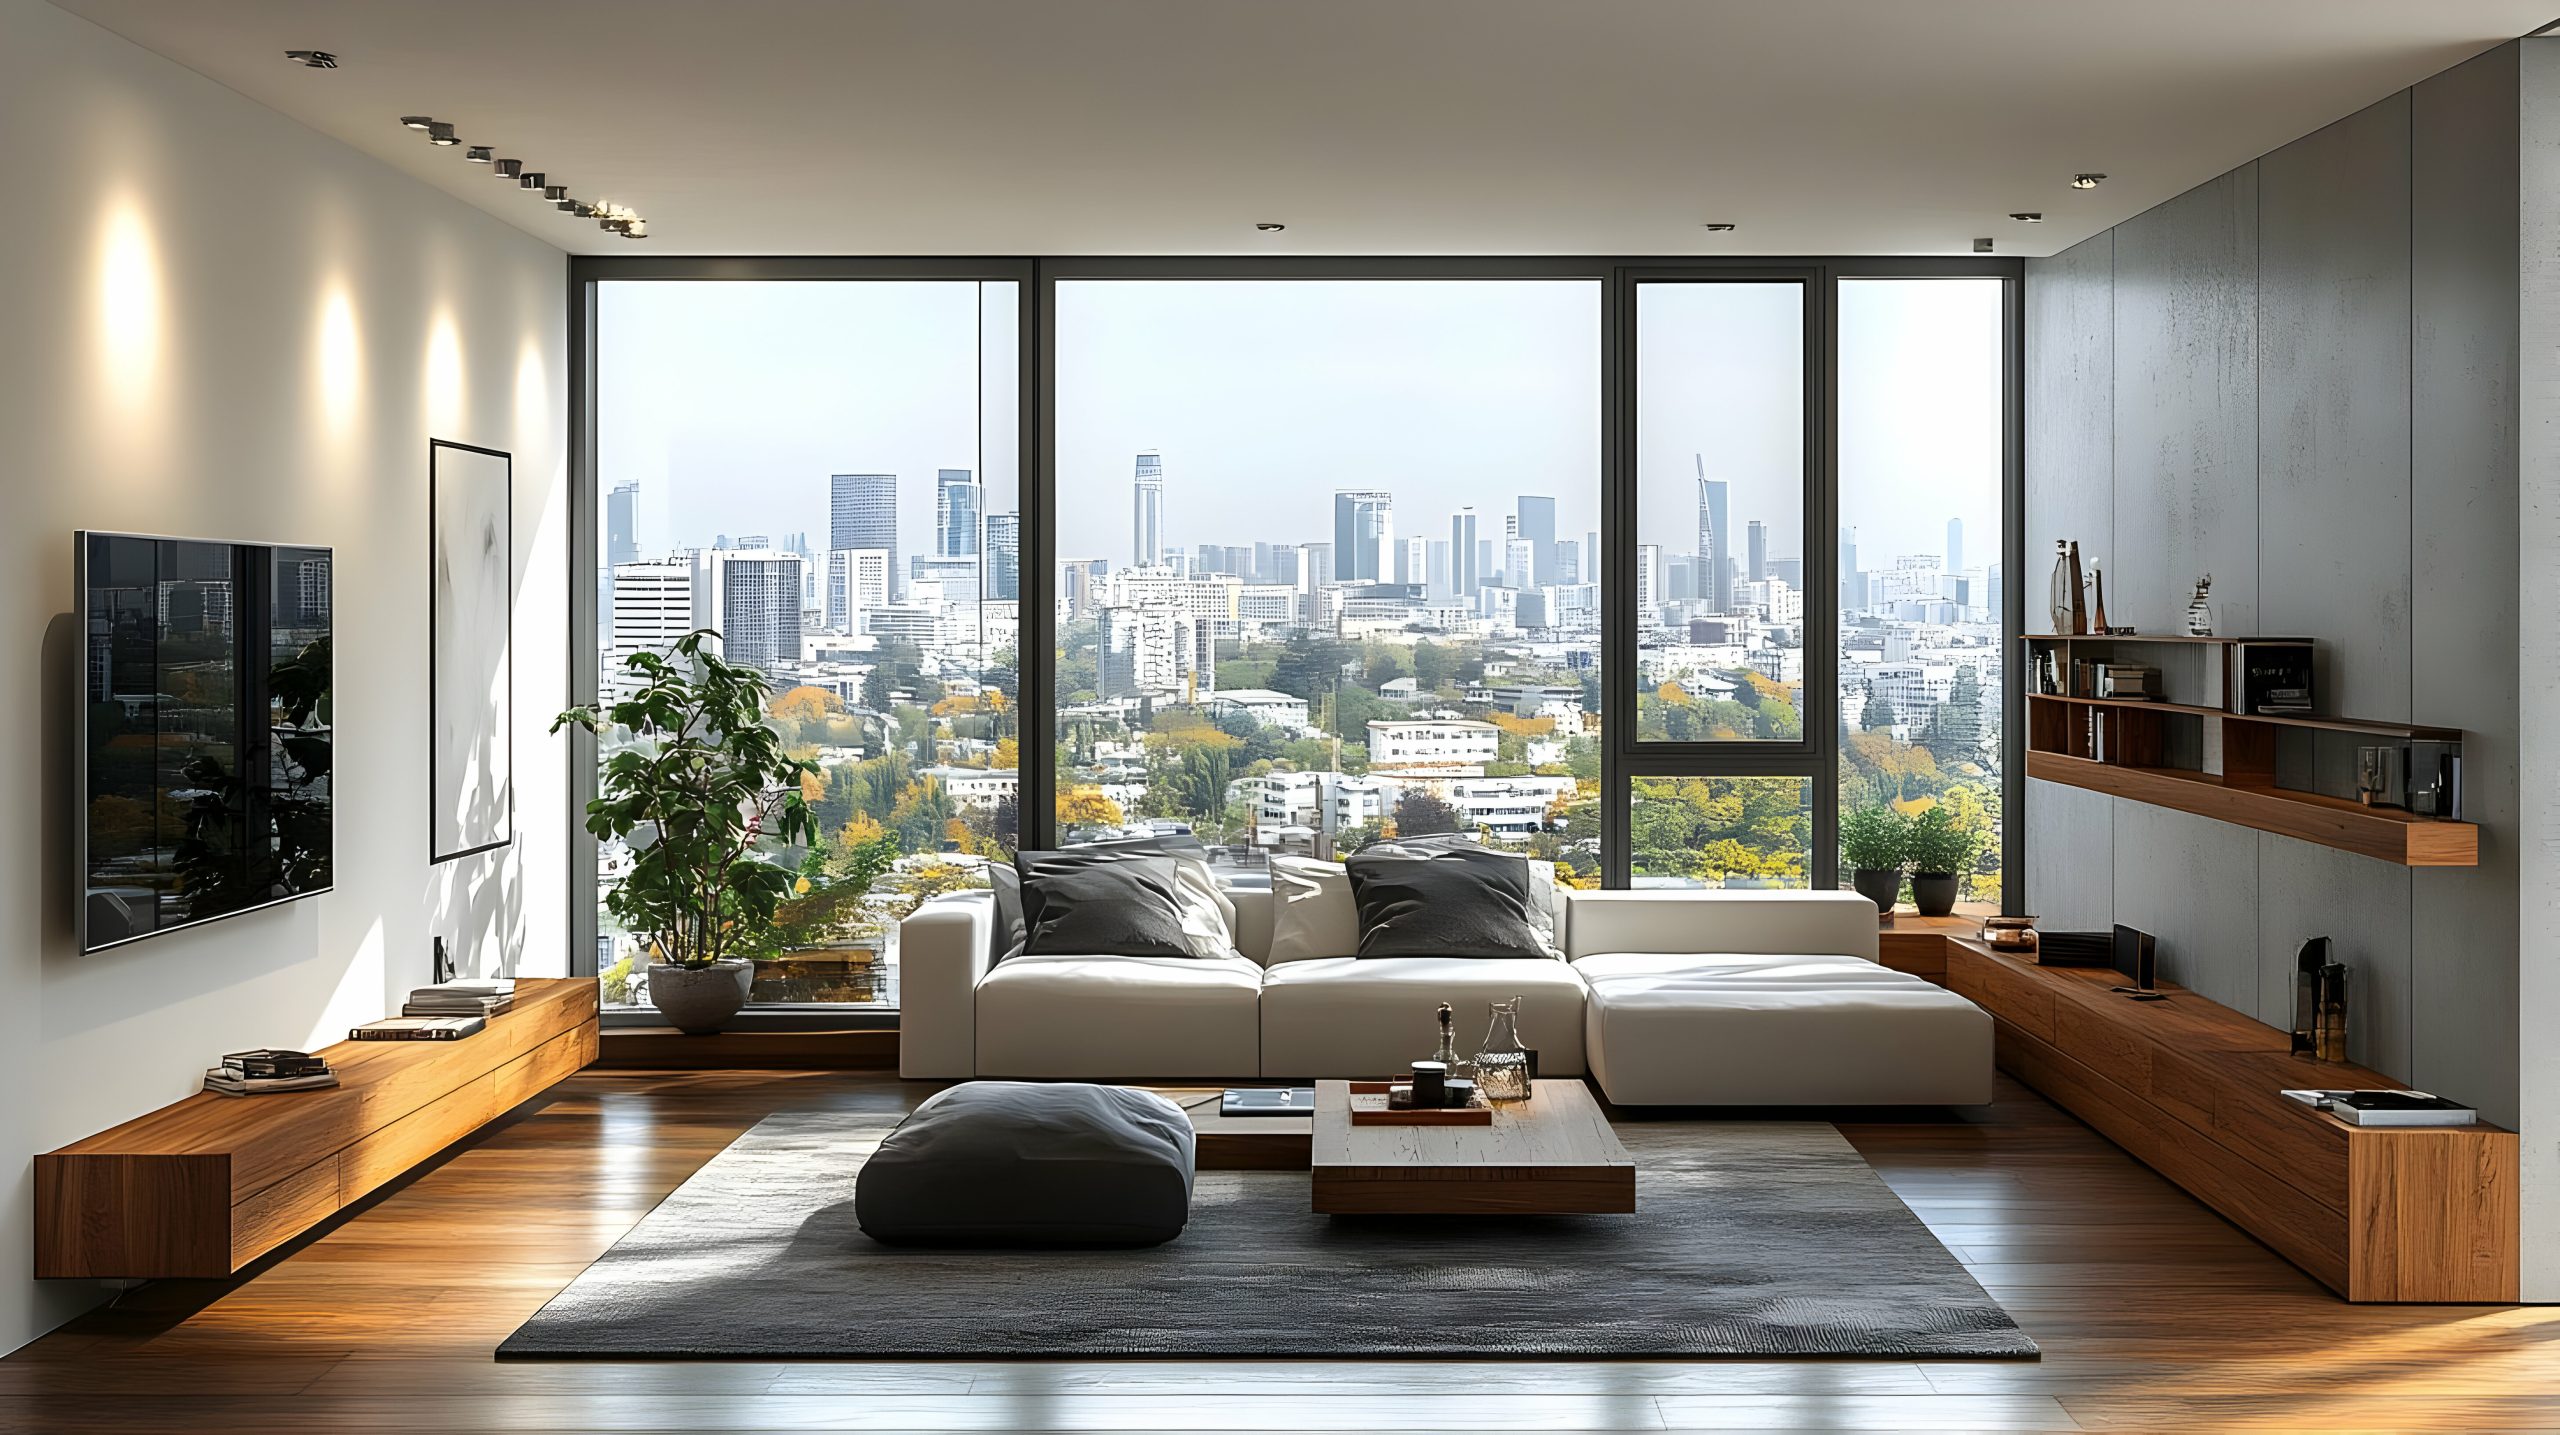
4. Modern
Let me clear up something I discuss with clients almost daily – Modern design isn’t just about being current or trendy. It’s actually a distinct style that emerged in the early to mid-20th century, revolutionising how we think about interior design.
What makes Modern style special is its groundbreaking approach to design. Think of it as the moment when interior design broke free from the past and embraced new materials, technologies, and ways of living. It’s like the difference between classical and jazz music – both beautiful, but with completely different rules and expressions.
Key Characteristics:
- Clean, straight lines
- Minimal ornamentation
- Open floor plans
- Form follows function
- Industrial materials
- Absence of clutter
- Integration with nature
- Emphasis on horizontal and vertical lines
Colour Palettes: Modern design takes a deliberate approach to colour
Primary Colours:
- White
- Black
- Grey
- Earth tones
- Natural wood tones
Accent Colours:
- Primary colours (red, blue, yellow)
- Rust orange
- Forest green
- Deep brown
- Muted metallics
Materials That Define the Style:
- Steel
- Glass
- Concrete
- Natural wood
- Leather
- Molded plywood
- Chrome
- Plastic
Pro Tip: When designing modern spaces, every piece should earn its place through both function and form. If it doesn’t serve a purpose or contribute to the overall aesthetic, it doesn’t belong.
Furniture Elements:
- Low-profile seating
- Platform beds
- Moulded plastic chairs
- Chrome-framed furniture
- Built-in storage
- Floating cabinets
- Glass tables
- Leather loungers
Architectural Elements:
- Floor-to-ceiling windows
- Exposed structural elements
- Flat roofs
- Open floor plans
- Built-in furniture
- Minimal trim work
- Clean-lined fireplaces
- Indoor-outdoor connection
Lighting:
Modern lighting is crucial to the style:
- Architectural fixtures
- Track lighting
- Simple pendant lights
- Floor lamps with clean lines
- Task lighting
- Hidden indirect lighting
- Statement chandeliers
Space Planning:
Modern design emphasises:
- Open concept living
- Uncluttered spaces
- Clear sight lines
- Functional zones
- Connection to the outdoors
- Minimal barriers
- Thoughtful negative space
- Strategic furniture placement
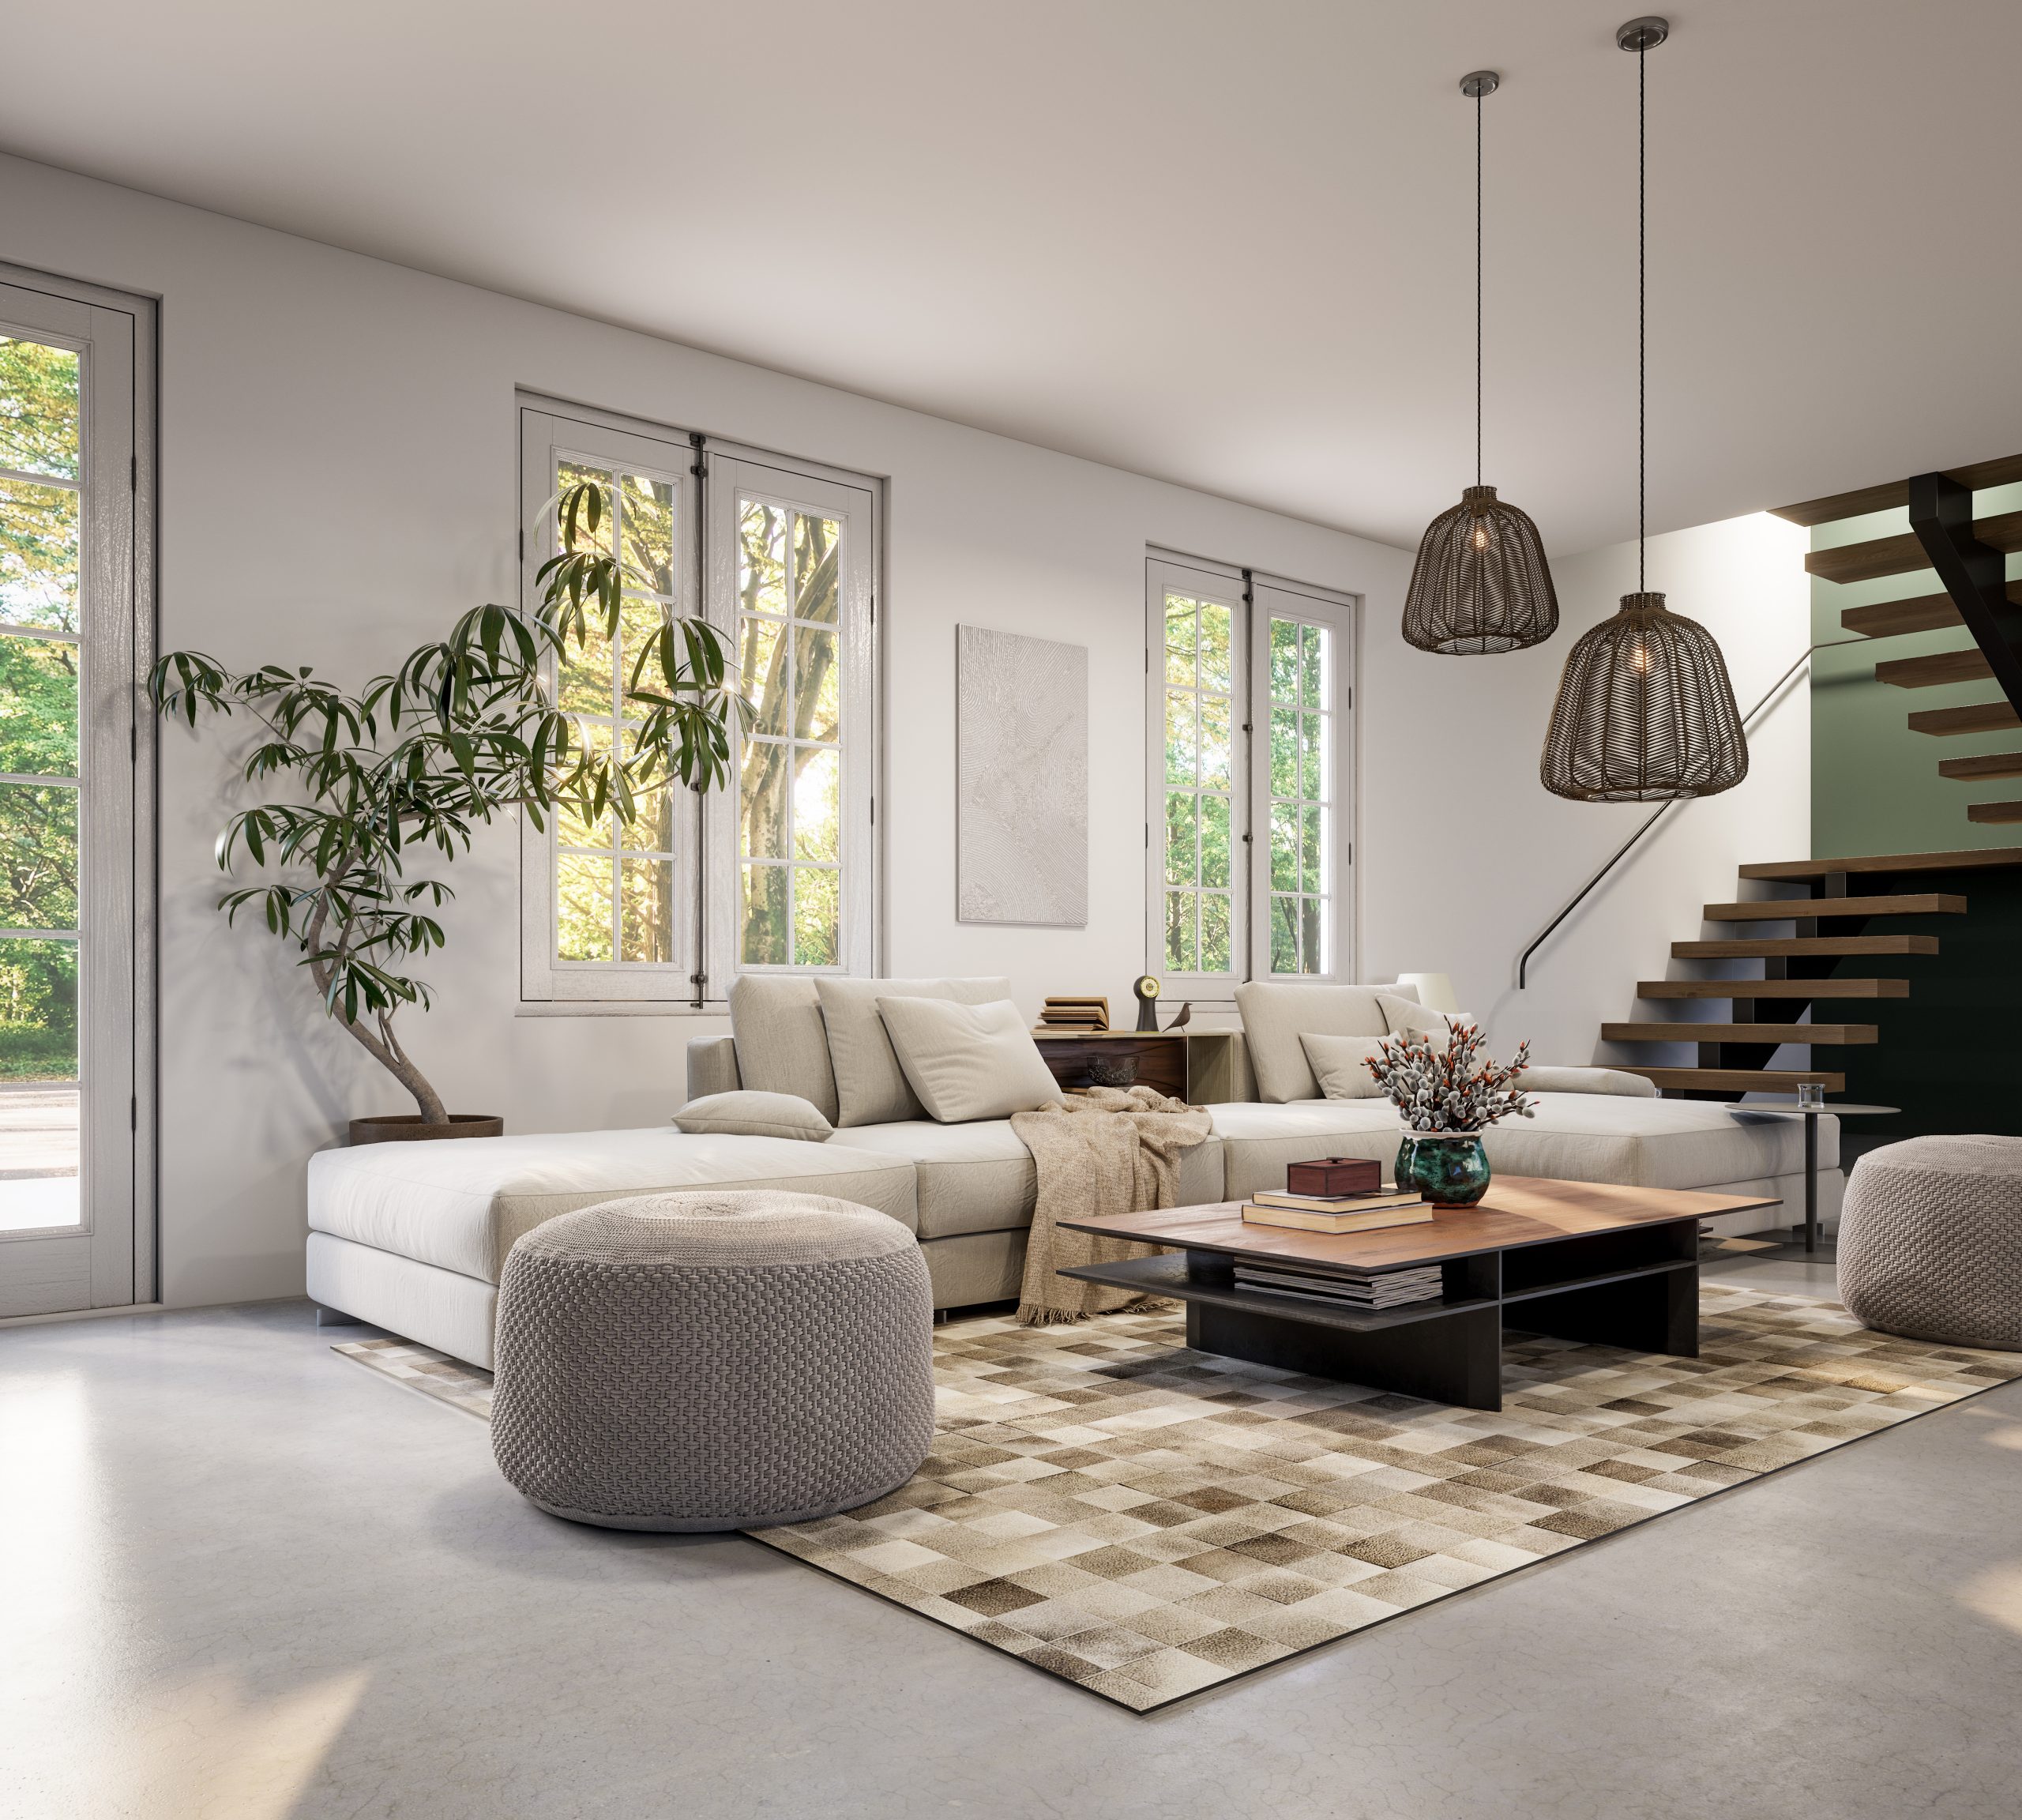
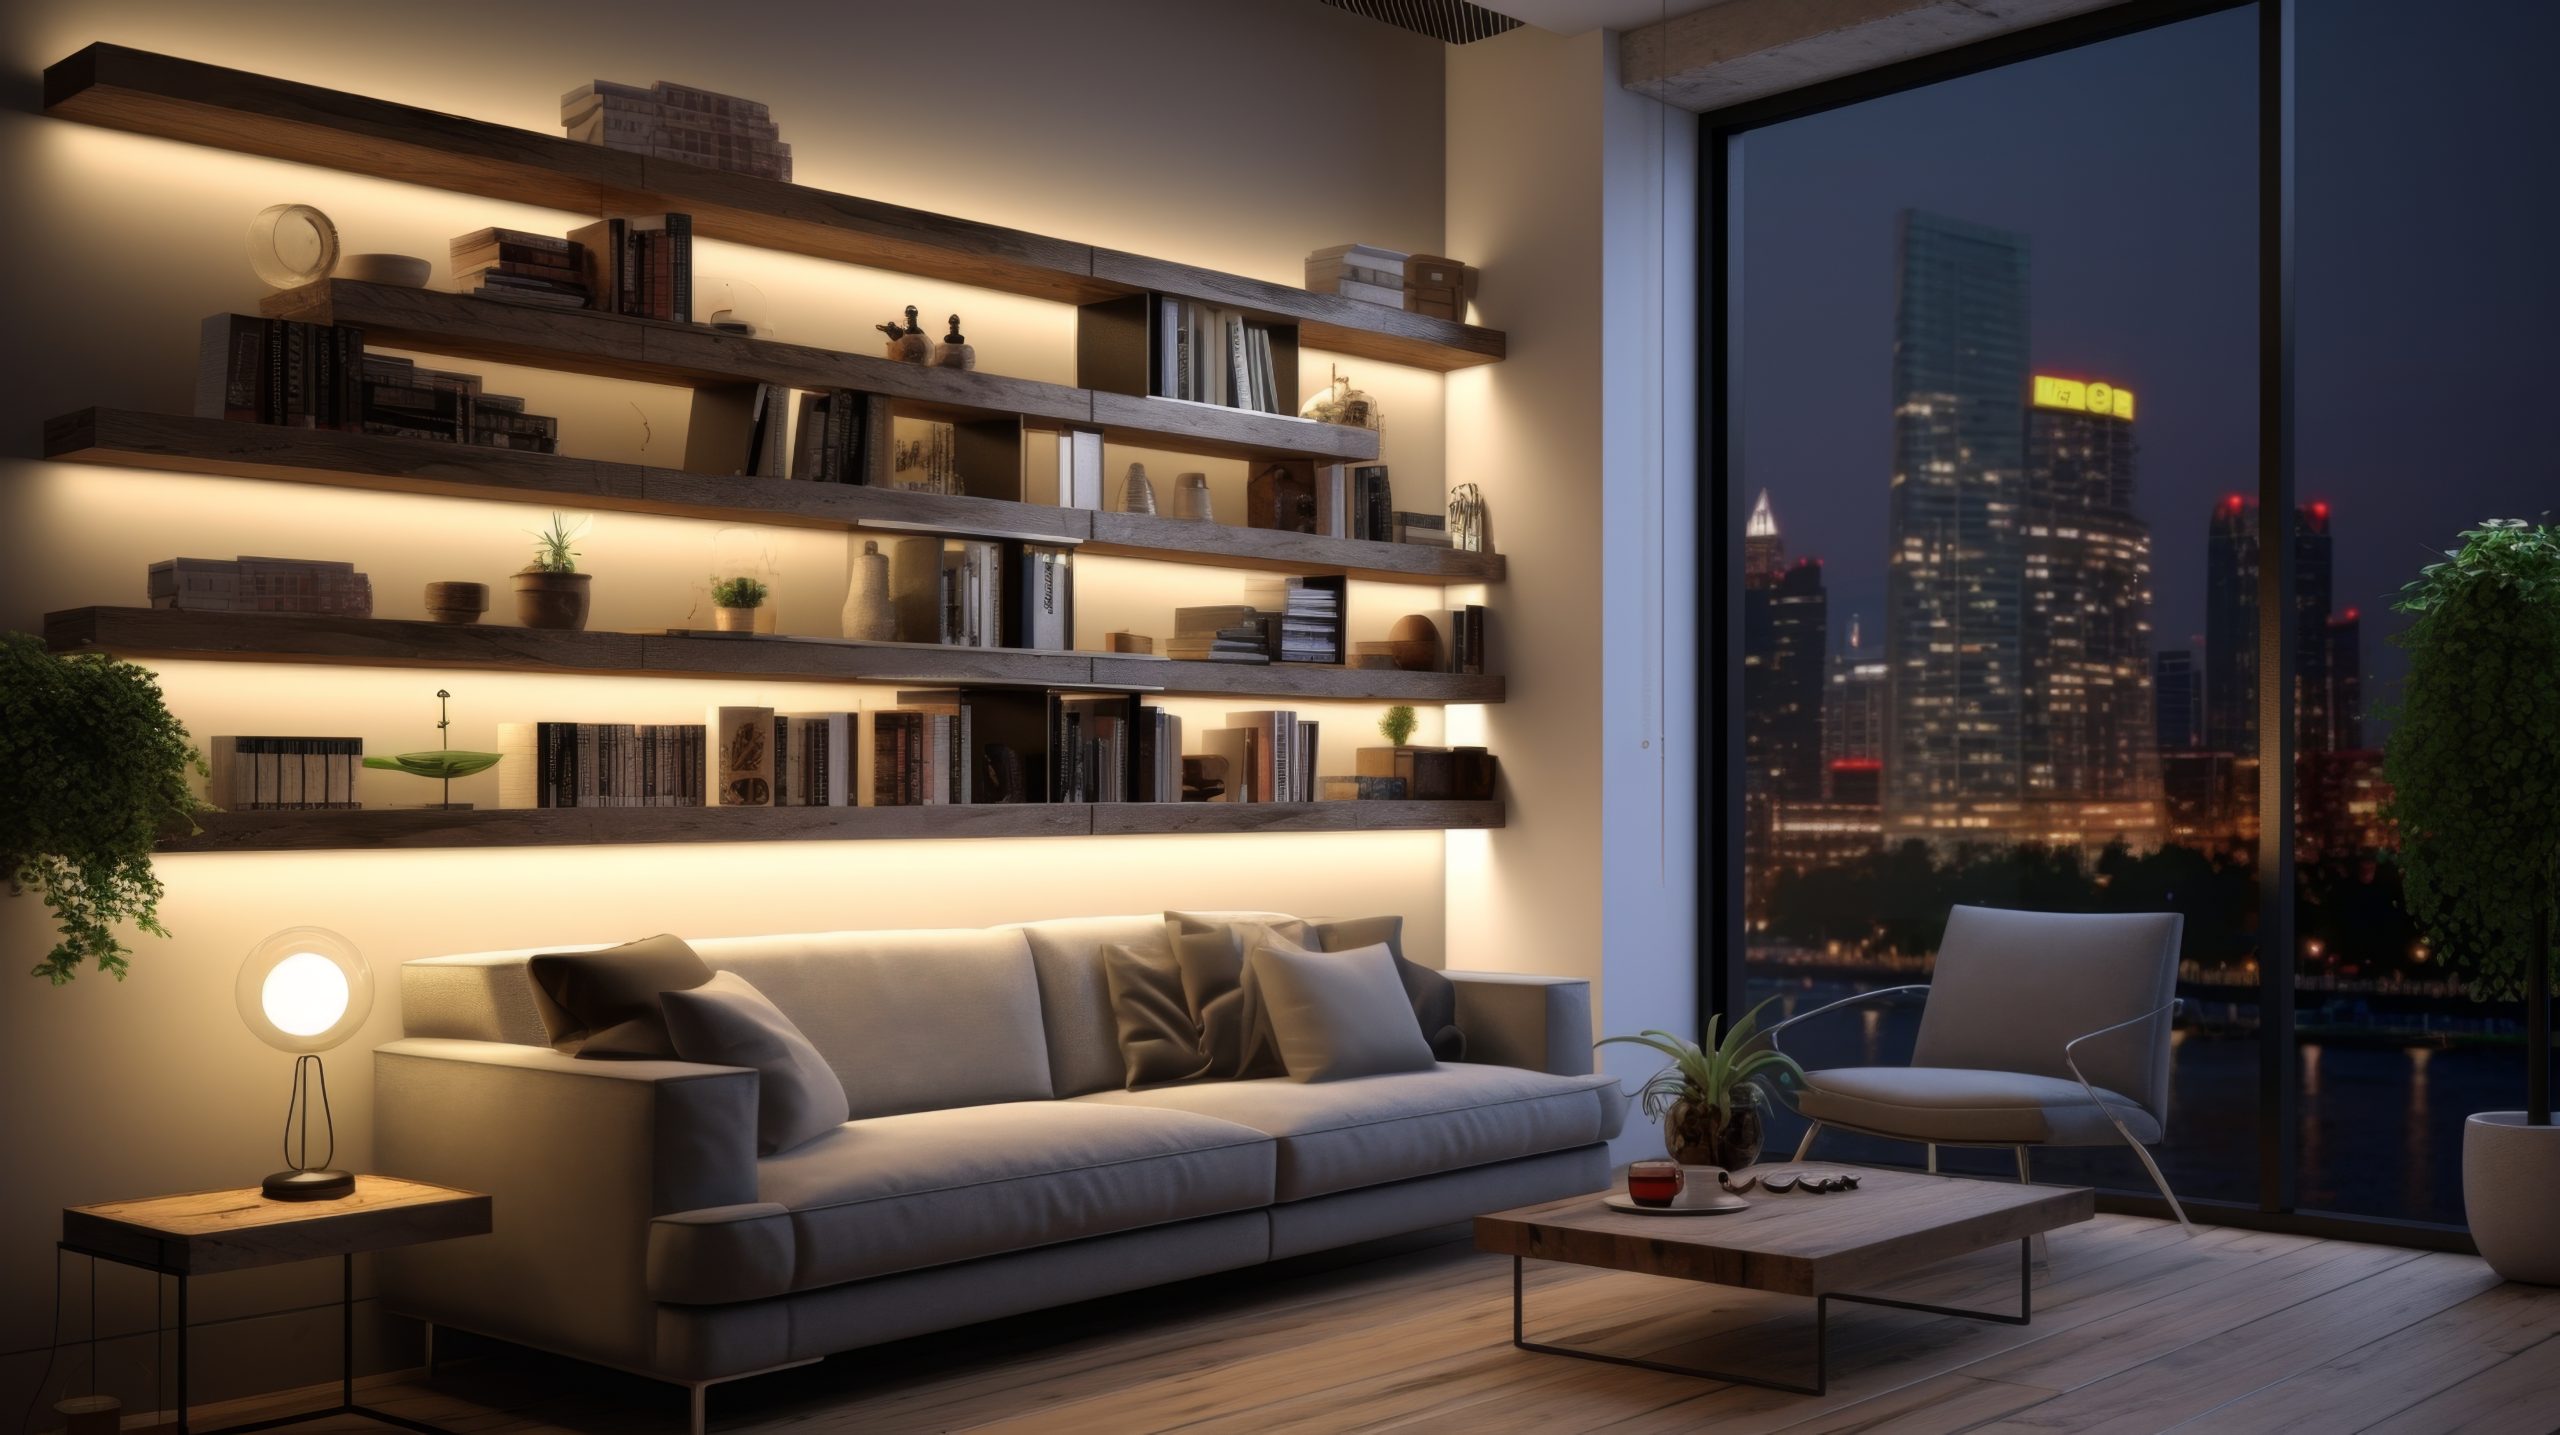
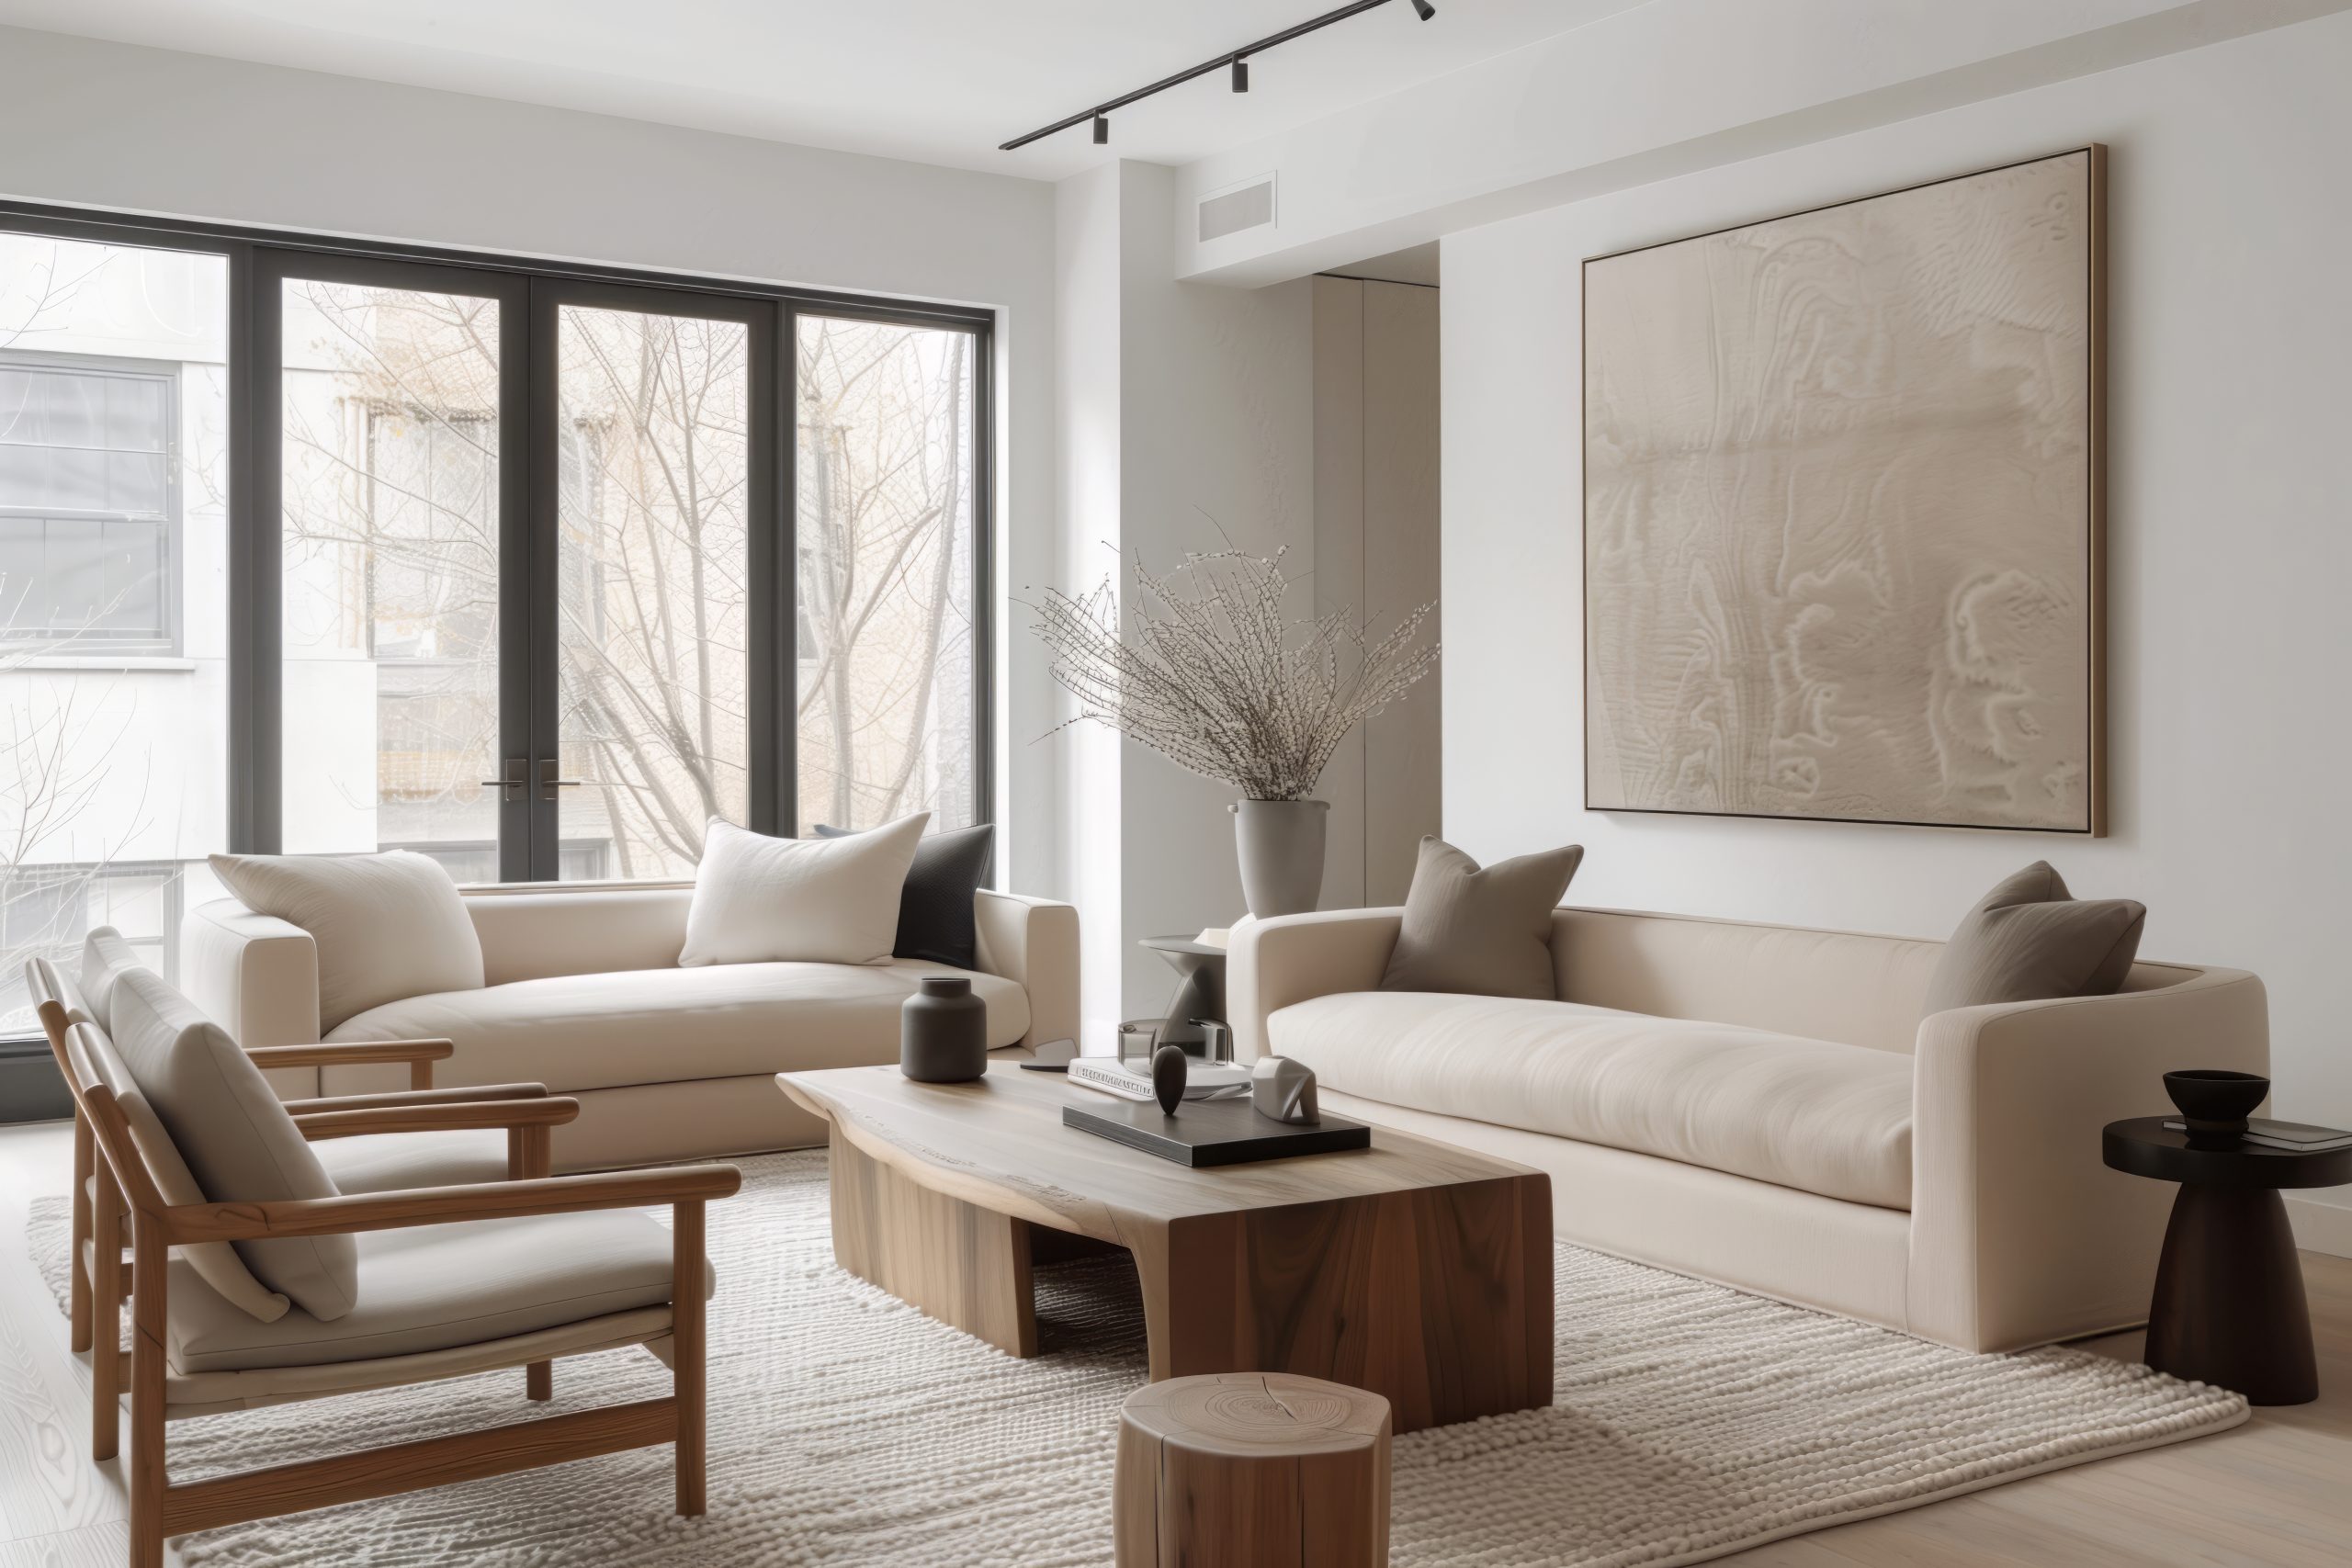
5. Contemporary
Moving through our exploration of modern design styles, let’s talk about Contemporary – and here’s something I’m always explaining to clients: while Modern is a specific style, Contemporary is ever-evolving, reflecting what’s current right now.
What makes Contemporary style unique is its ability to adapt and change. Think of it as design’s equivalent to current fashion – it borrows from various styles and trends while maintaining a fresh, of-the-moment feel. As someone who’s designed countless contemporary spaces, I can tell you it’s one of the most flexible and exciting styles to work with.
Key Characteristics:
- Clean, sophisticated lines
- Mix of textures and materials
- State-of-the-art features
- Emphasis on negative space
- Subtle sophistication
- Technology integration
- Artistic elements
- Sustainability focus
Colour Palettes:
Contemporary design typically features:
Primary Colours:
- Whites
- Grays
- Blacks
- Taupes
- Neutral metallics
Accent Colours:
- Bold jewel tones
- Unexpected colour pops
- Trending colours
- Nature-inspired hues
- Sophisticated pastels
Materials That Define the Style:
- Mixed metals
- Textured fabrics
- Sustainable materials
- Glass
- Composite materials
- Natural stone
- Engineered wood
- Smart materials
Pro Tip: In contemporary spaces, invest in quality staple pieces with clean lines, then add personality through easily changeable accessories and art. This allows the space to evolve with trends.
Furniture Elements:
- Streamlined upholstery
- Mixed material pieces
- Multi-functional furniture
- Statement lighting
- Geometric shapes
- Innovative storage
- Tech-integrated pieces
- Comfort-focused designs
Signature Features:
- Smart home integration
- Sustainable elements
- Abstract art
- Statement lighting
- Mixed metal finishes
- Textural contrasts
- Indoor plants
- Architectural details
Space Planning:
Contemporary spaces prioritise:
- Flexible layouts
- Multi-functional areas
- Technology zones
- Entertainment spaces
- Work-from-home solutions
- Indoor-outdoor flow
- Social gathering areas
- Private retreats
Styling Elements:
- Large-scale art
- Minimal accessories
- Natural elements
- Geometric patterns
- Textural layers
- Strategic colour pops
- Innovative lighting
- Tech-savvy solutions
Modern Interpretation:
What makes Contemporary design special today:
- Integration of smart home features
- Sustainable materials and practices
- Flexible spaces for modern living
- Balance of comfort and style
- Mix of old and new elements
- Focus on wellness
- Outdoor living integration
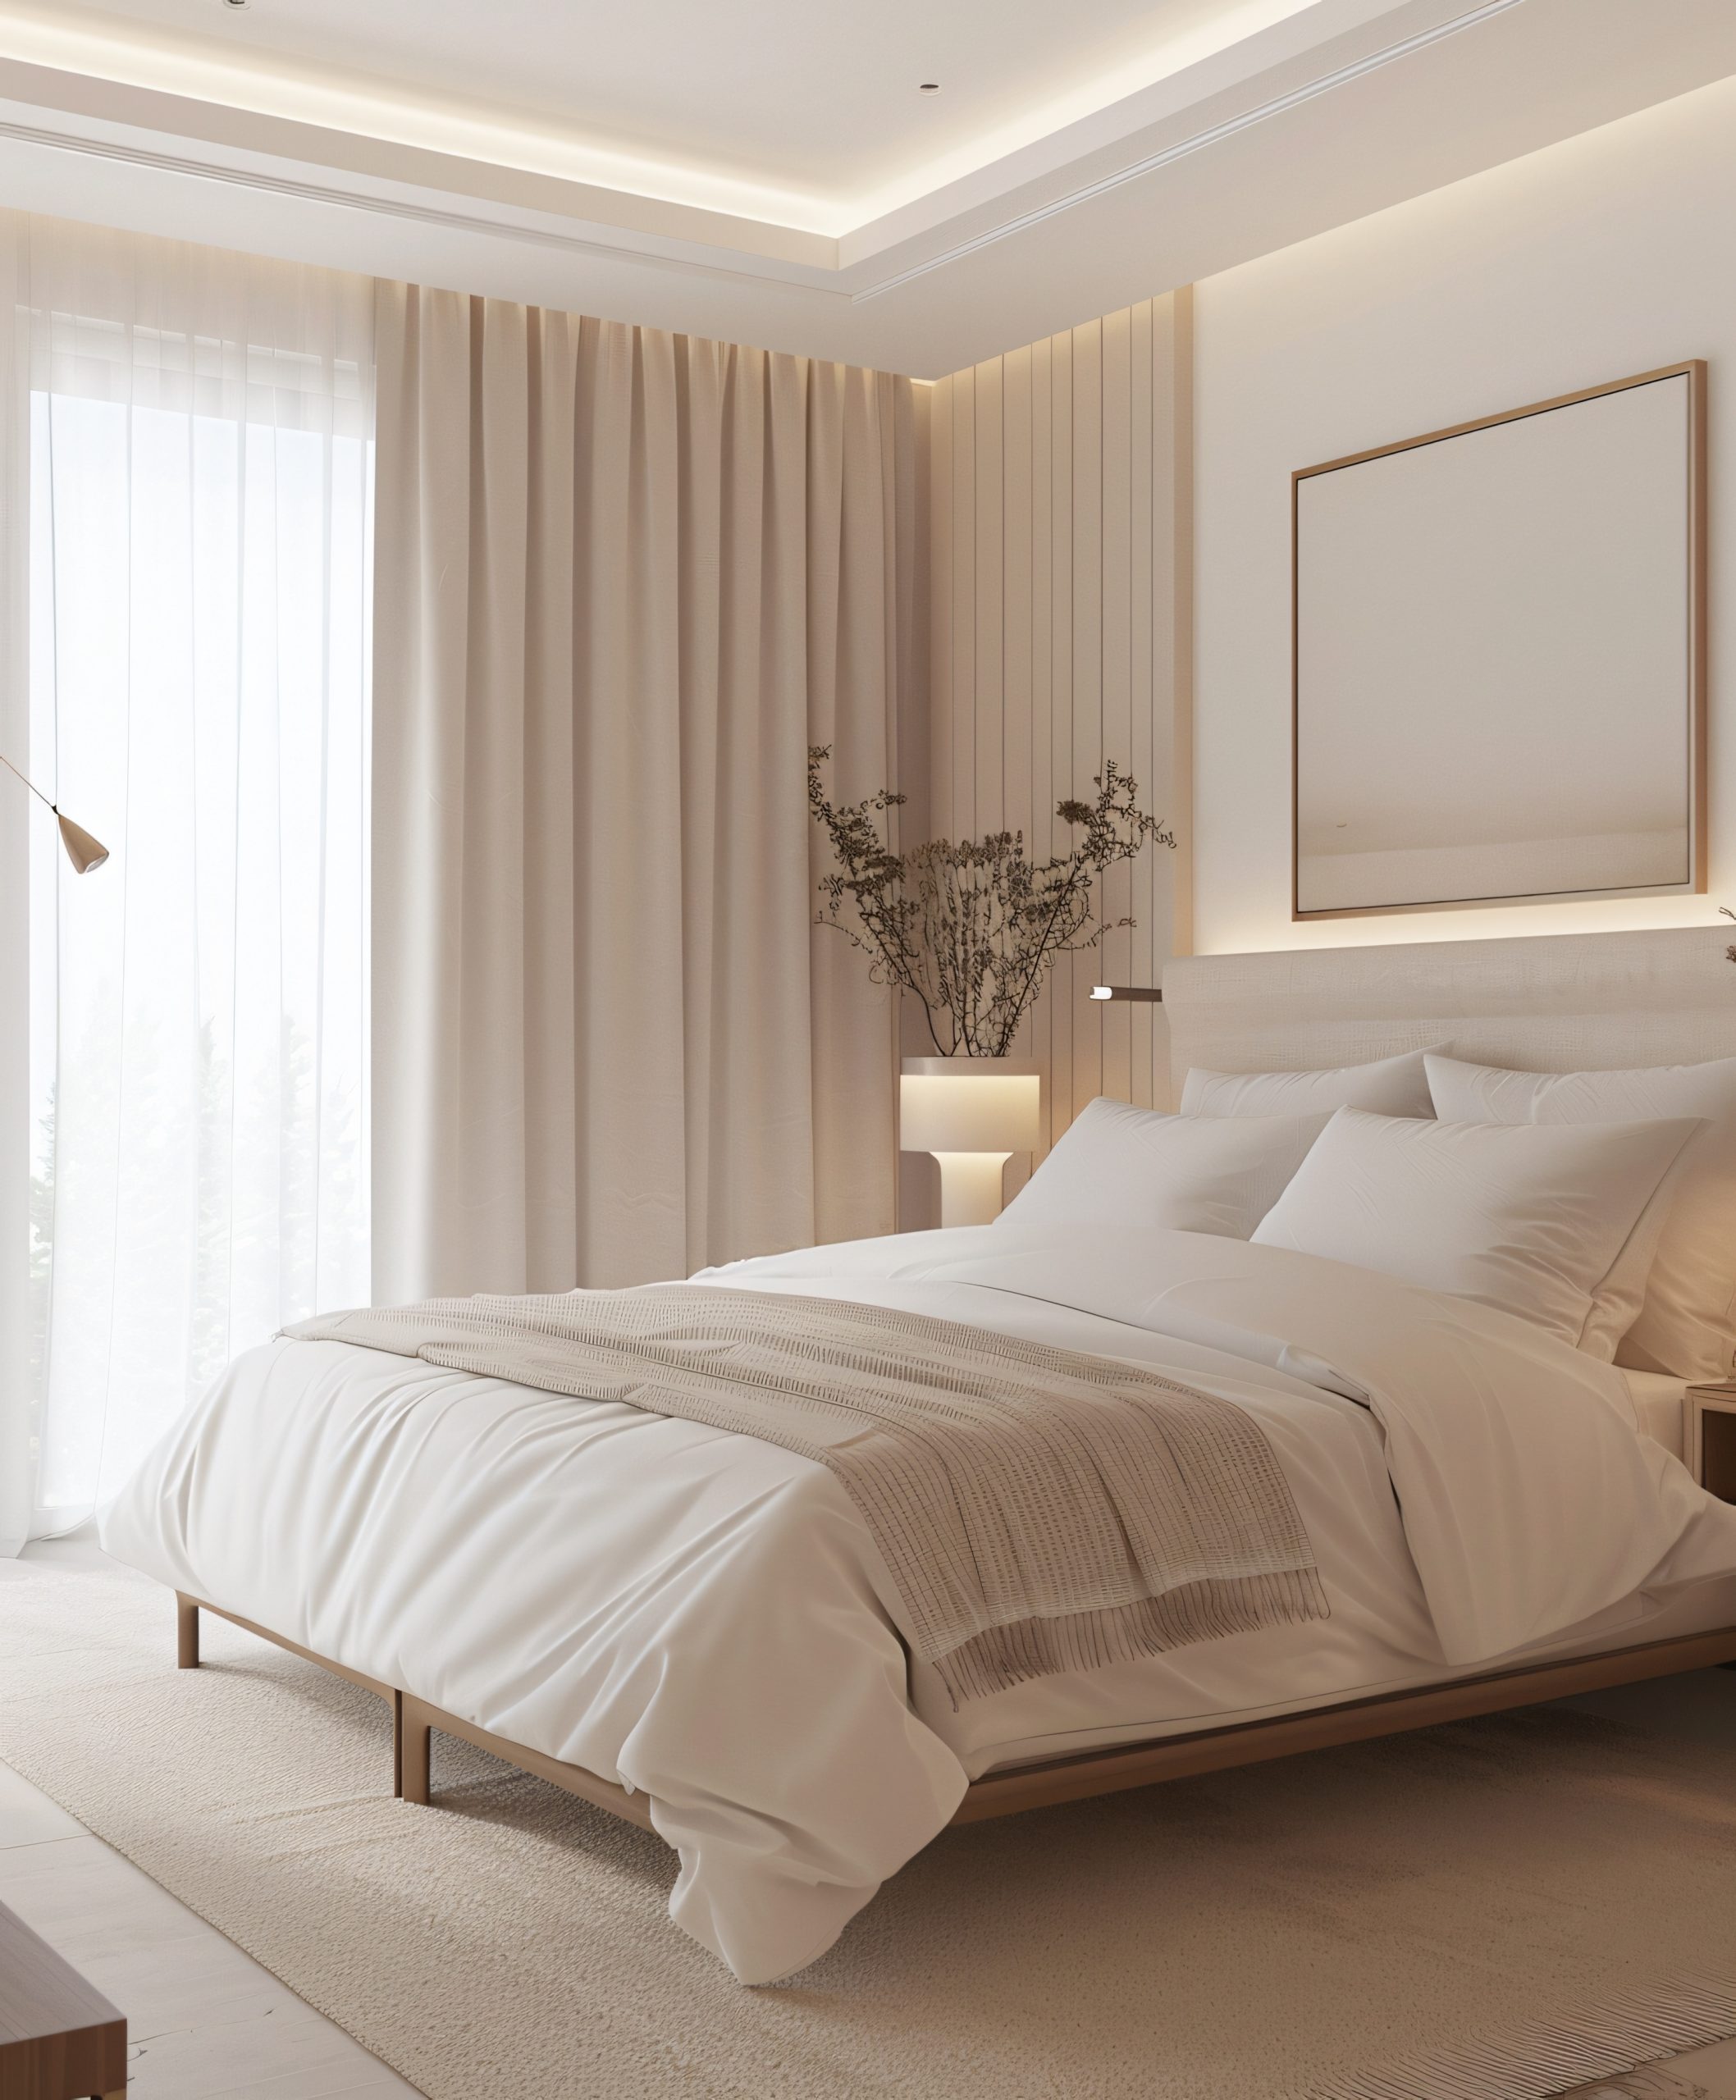
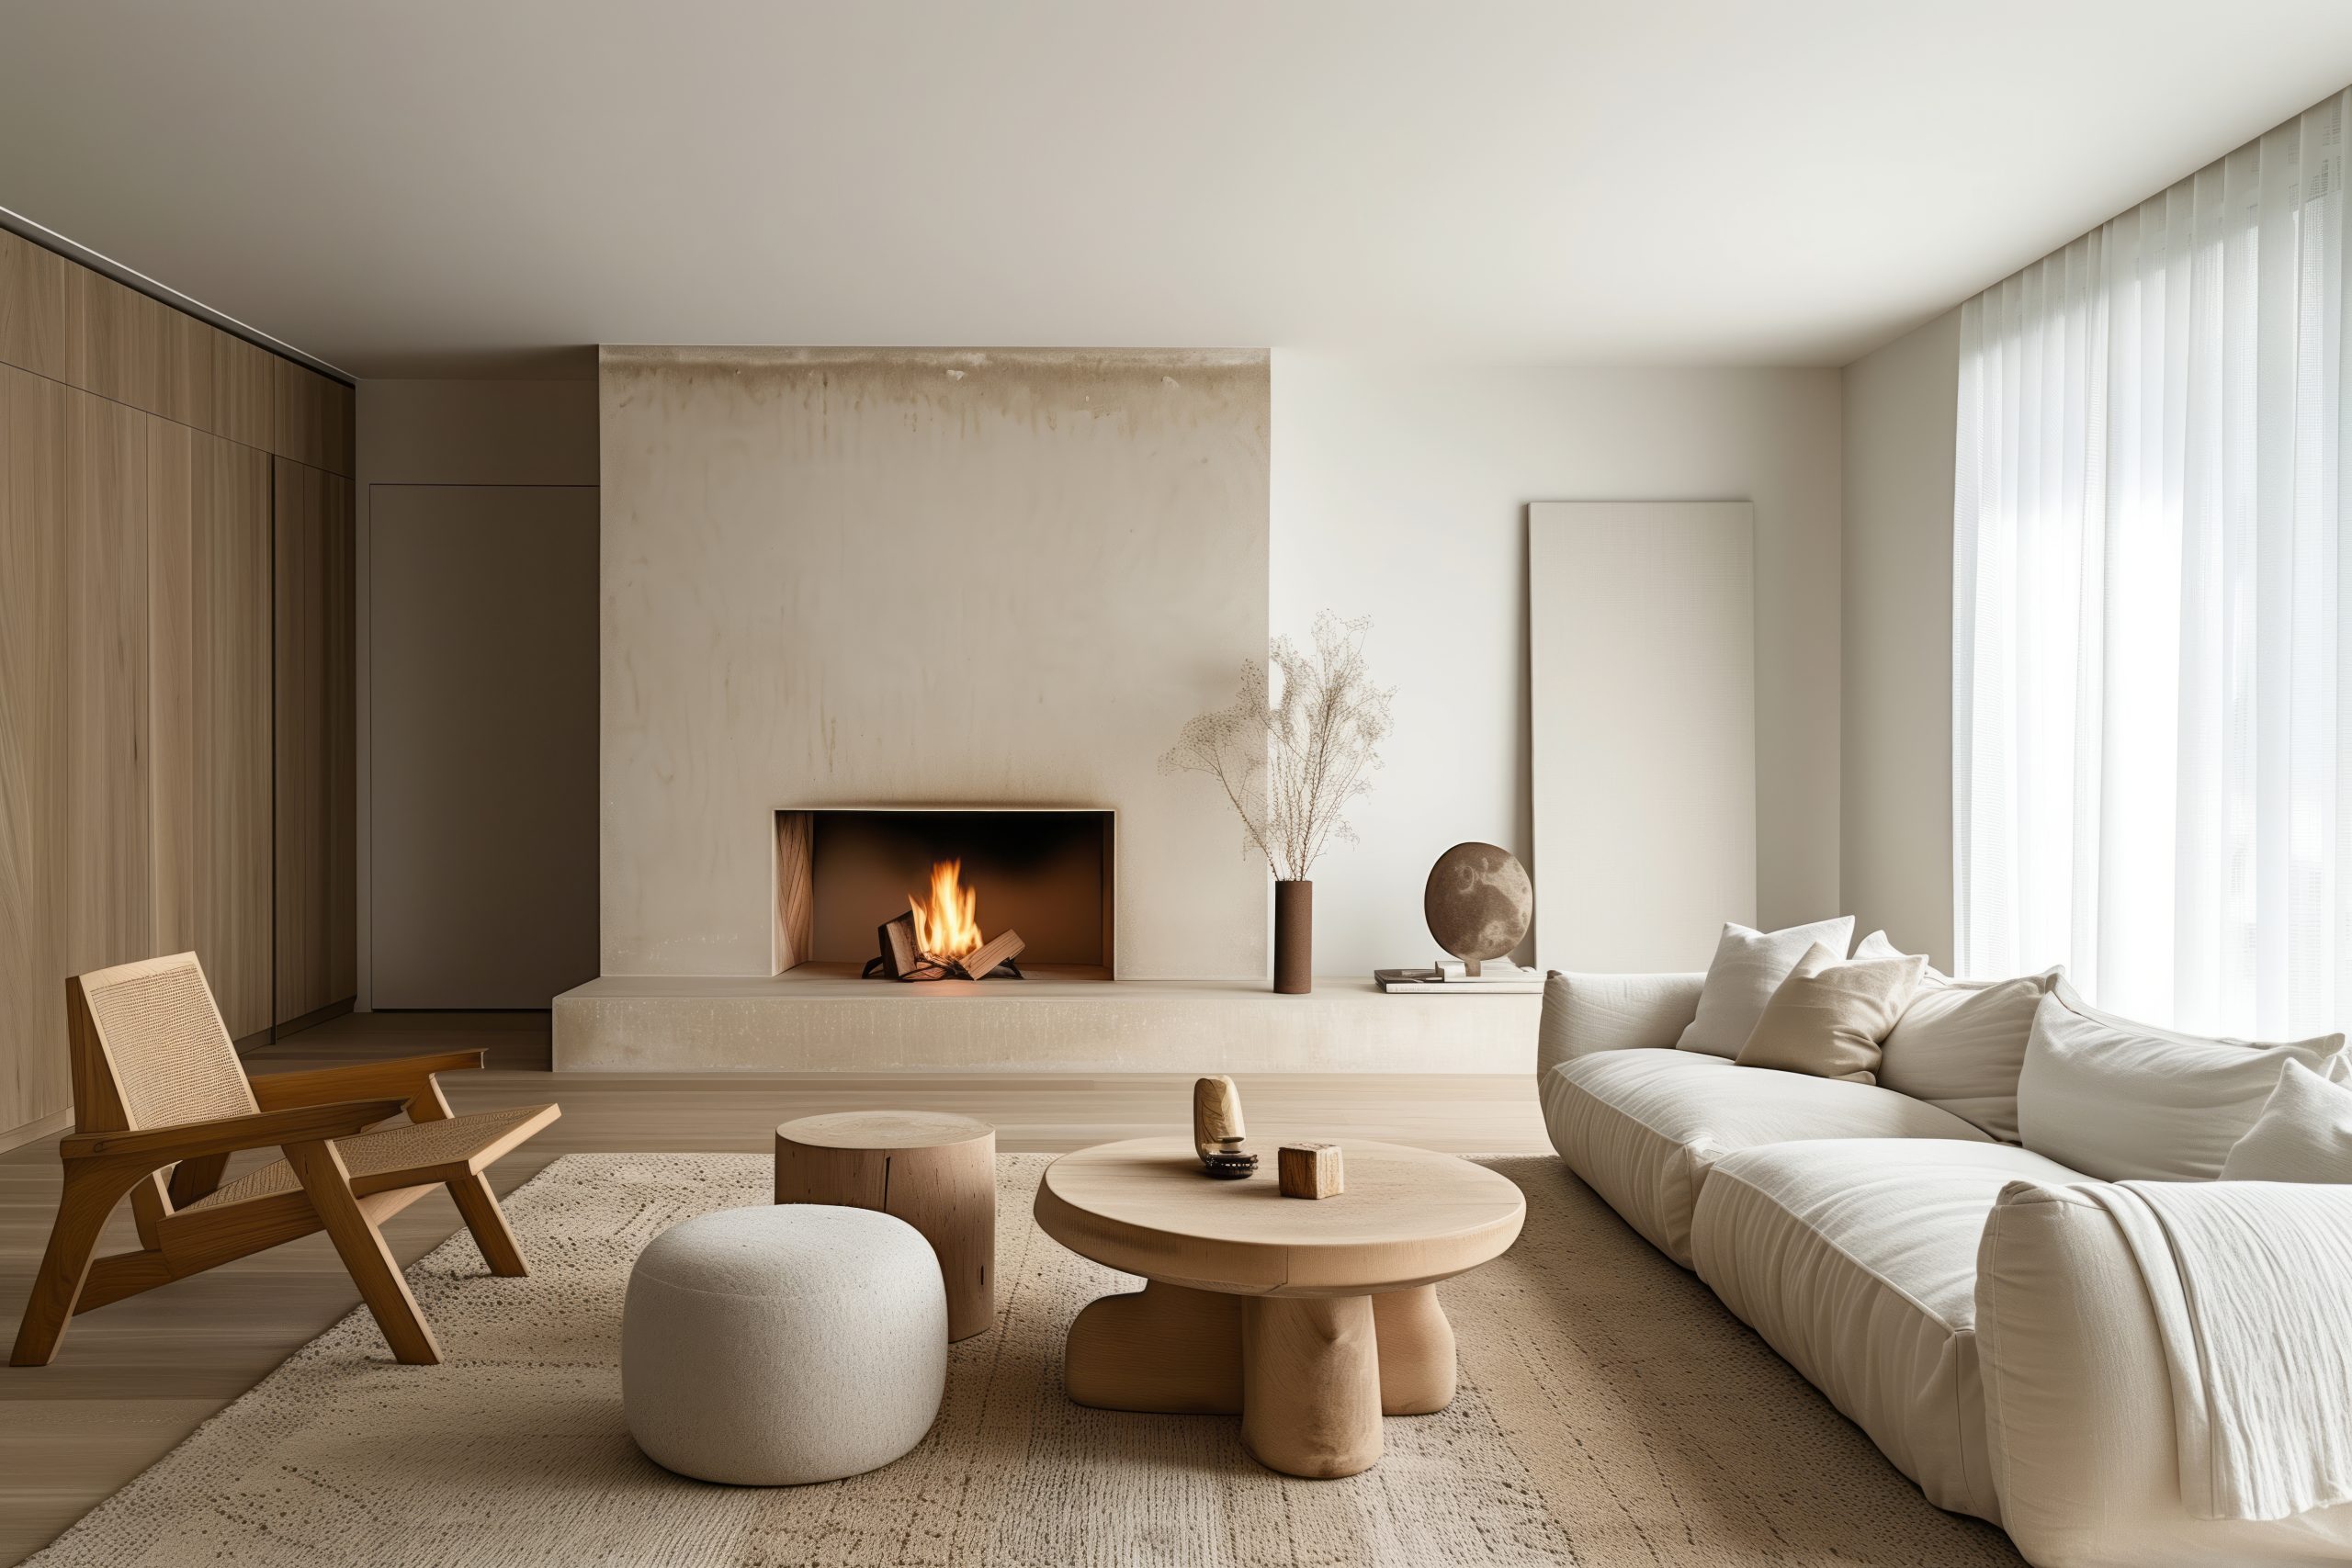
6. Minimalist
Let’s explore one of the most misunderstood of our 22 different interior design styles – Minimalist design. It’s not just about having less stuff; it’s about being intentional with every single element you include.
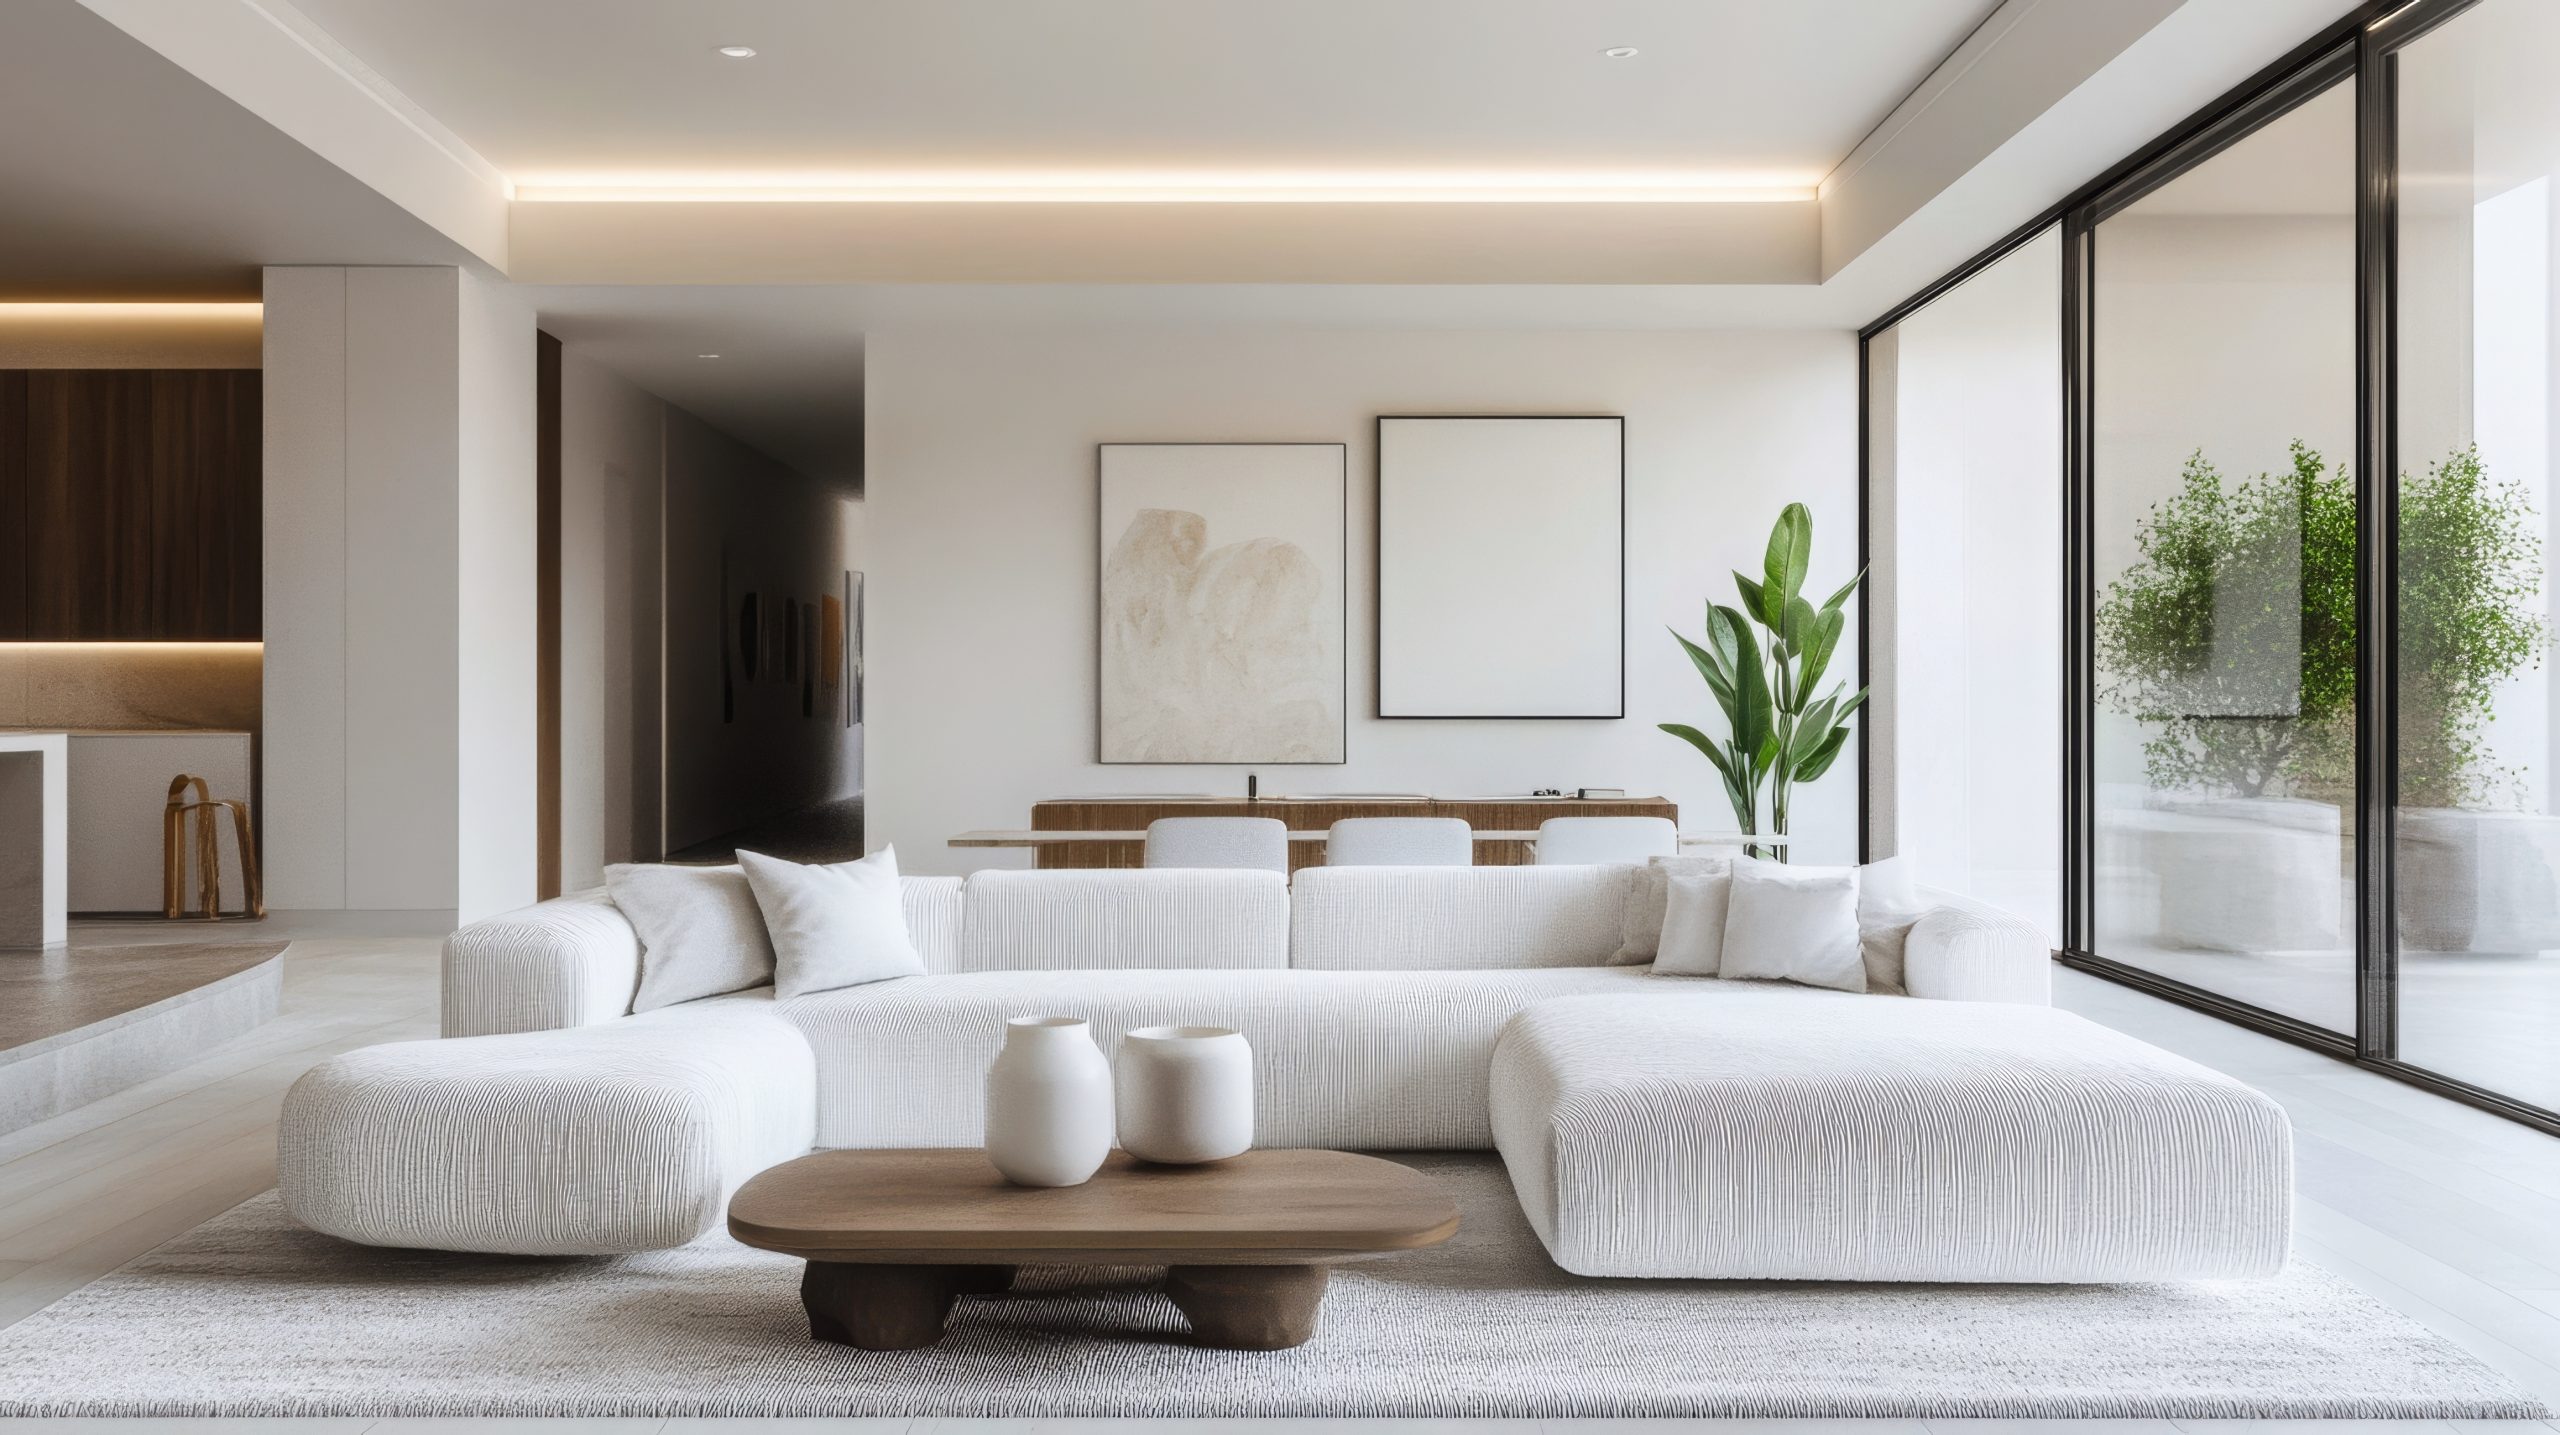
What makes the Minimalist style special is its focus on the essential. Think of it as the design equivalent of a perfectly edited novel – every element must serve a purpose, and anything that doesn’t enhance the space is removed. It’s about creating calm through clarity.
Key Characteristics:
- “Less is more” philosophy
- Clean, purposeful lines
- Monochromatic colour schemes
- Intentional negative space
- Quality over quantity
- Functional design
- Clutter-free surfaces
- Hidden storage solutions
Colour Palettes: Minimalist design embraces a restricted palette
Primary Colours:
- Pure whites
- Soft whites
- Light grays
- Charcoal
- Black
Accent Colours:
- Single bold accents
- Natural wood tones
- Concrete grays
- Earth tones
- Muted metallics
Materials That Define the Style:
- Smooth woods
- Polished concrete
- Glass
- Steel
- Natural stone
- High-quality textiles
- Matte finishes
- Simple textures
Pro Tip: When designing minimalist spaces, I always remind clients that every item should earn its place. Ask yourself, “Does this piece serve a purpose, either functional or aesthetic?”
Furniture Elements:
- Simple, clean-lined pieces
- Built-in storage
- Platform beds
- Hidden hardware
- Multi-functional furniture
- Low-profile seating
- Floating shelves
- Streamlined tables
Storage Solutions:
This is crucial in minimalist design:
- Hidden closets
- Built-in cabinets
- Drawer organisers
- Wall-mounted solutions
- Under-bed storage
- Seamless closet doors
- Organised pantries
- Multi-functional pieces
Space Planning:
Minimalist spaces require:
- Clear traffic patterns
- Breathing room between pieces
- Strategic furniture placement
- Uncluttered surfaces
- Defined zones
- Natural light maximisation
- Simple window treatments
- Thoughtful negative space
Styling Guidelines:
- Keep surfaces 90% clear
- Choose artwork carefully
- Limit decorative objects
- Focus on form and function
- Embrace empty space
- Use texture for interest
- Maintain clean lines
Common Mistakes to Avoid:
- Creating cold, uninviting spaces
- Forgetting about texture
- Overlooking storage needs
- Making spaces feel sterile
- Sacrificing comfort for style
- Ignoring personality completely
Industrial & Urban Styles
Now let’s explore styles that celebrate city living and architectural elements. These styles embrace raw materials and urban aesthetics while creating wonderfully livable spaces.
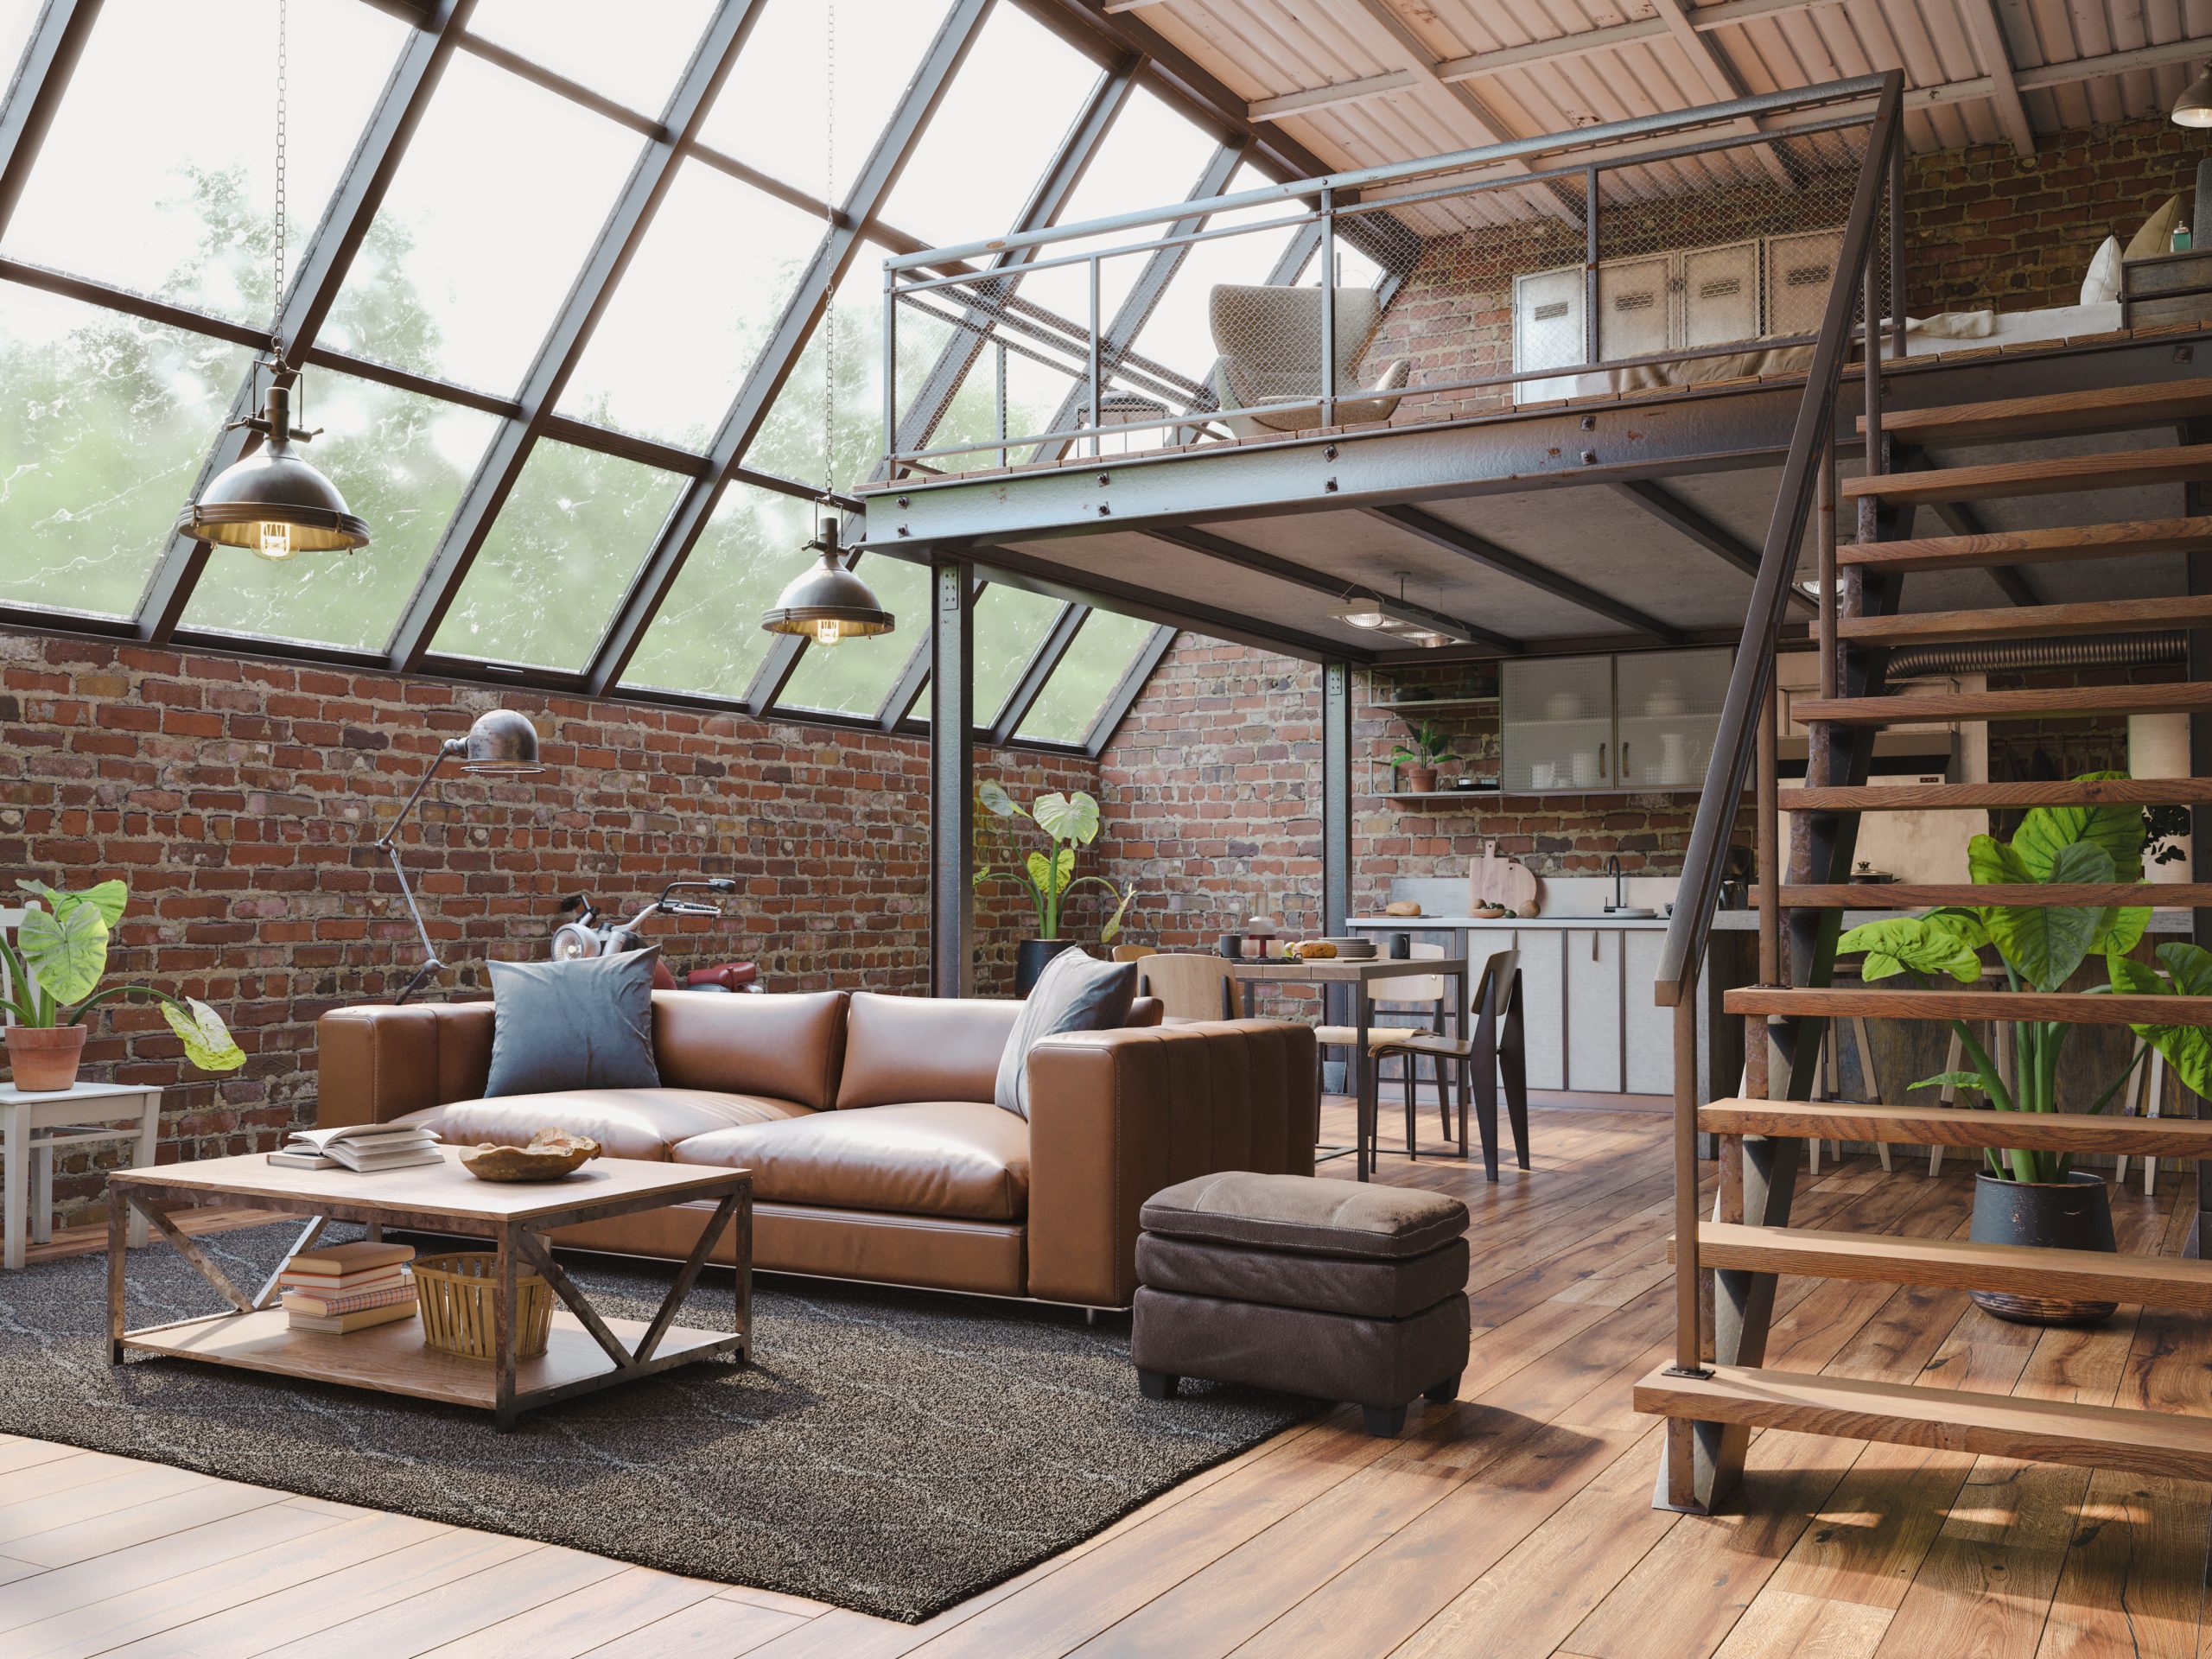
7. Industrial
One of the most exciting transformations I’ve witnessed in my design career is how industrial spaces have evolved from actual factories to some of the most sought-after residential designs. This style tells a story of urban renewal and architectural appreciation.
What makes Industrial style unique is its honest approach to materials and architecture. Think of it as the design equivalent of a documentary film – it reveals and celebrates the true nature of a space rather than trying to hide it.
Key Characteristics:
- Exposed structural elements
- Raw materials
- Open floor plans
- High ceilings
- Large windows
- Visible systems (pipes, ducts, etc.)
- Metal fixtures
- Weathered finishes
Colour Palettes: Industrial design embraces natural material colours
Primary Colours:
- Concrete greys
- Rust browns
- Metal silvers
- Brick reds
- Deep blacks
Accent Colours:
- Navy blue
- Forest green
- Burnt orange
- Weathered brass
- Copper tones
Materials That Define the Style:
- Exposed brick
- Concrete
- Steel beams
- Cast iron
- Reclaimed wood
- Metal pipe
- Wire mesh
- Aged leather
Pro Tip: When designing industrial spaces, don’t fight the building’s bones. If you have exposed pipes or ductwork, celebrate them rather than trying to hide them.
Furniture Elements:
- Metal-framed furniture
- Leather seating
- Reclaimed wood tables
- Rolling carts
- Factory-style lighting
- Workshop stools
- Steel shelving
- Vintage industrial pieces
Architectural Features:
- Exposed brick walls
- Concrete floors
- Visible support beams
- Industrial windows
- Open ductwork
- Metal staircases
- Warehouse doors
- High ceilings
Space Planning:
Industrial spaces need:
- Flexible layouts
- Defined zones in open plans
- Multiple seating areas
- Work spaces
- Entertainment zones
- Clear traffic patterns
- Conversation areas
- Multi-functional spaces
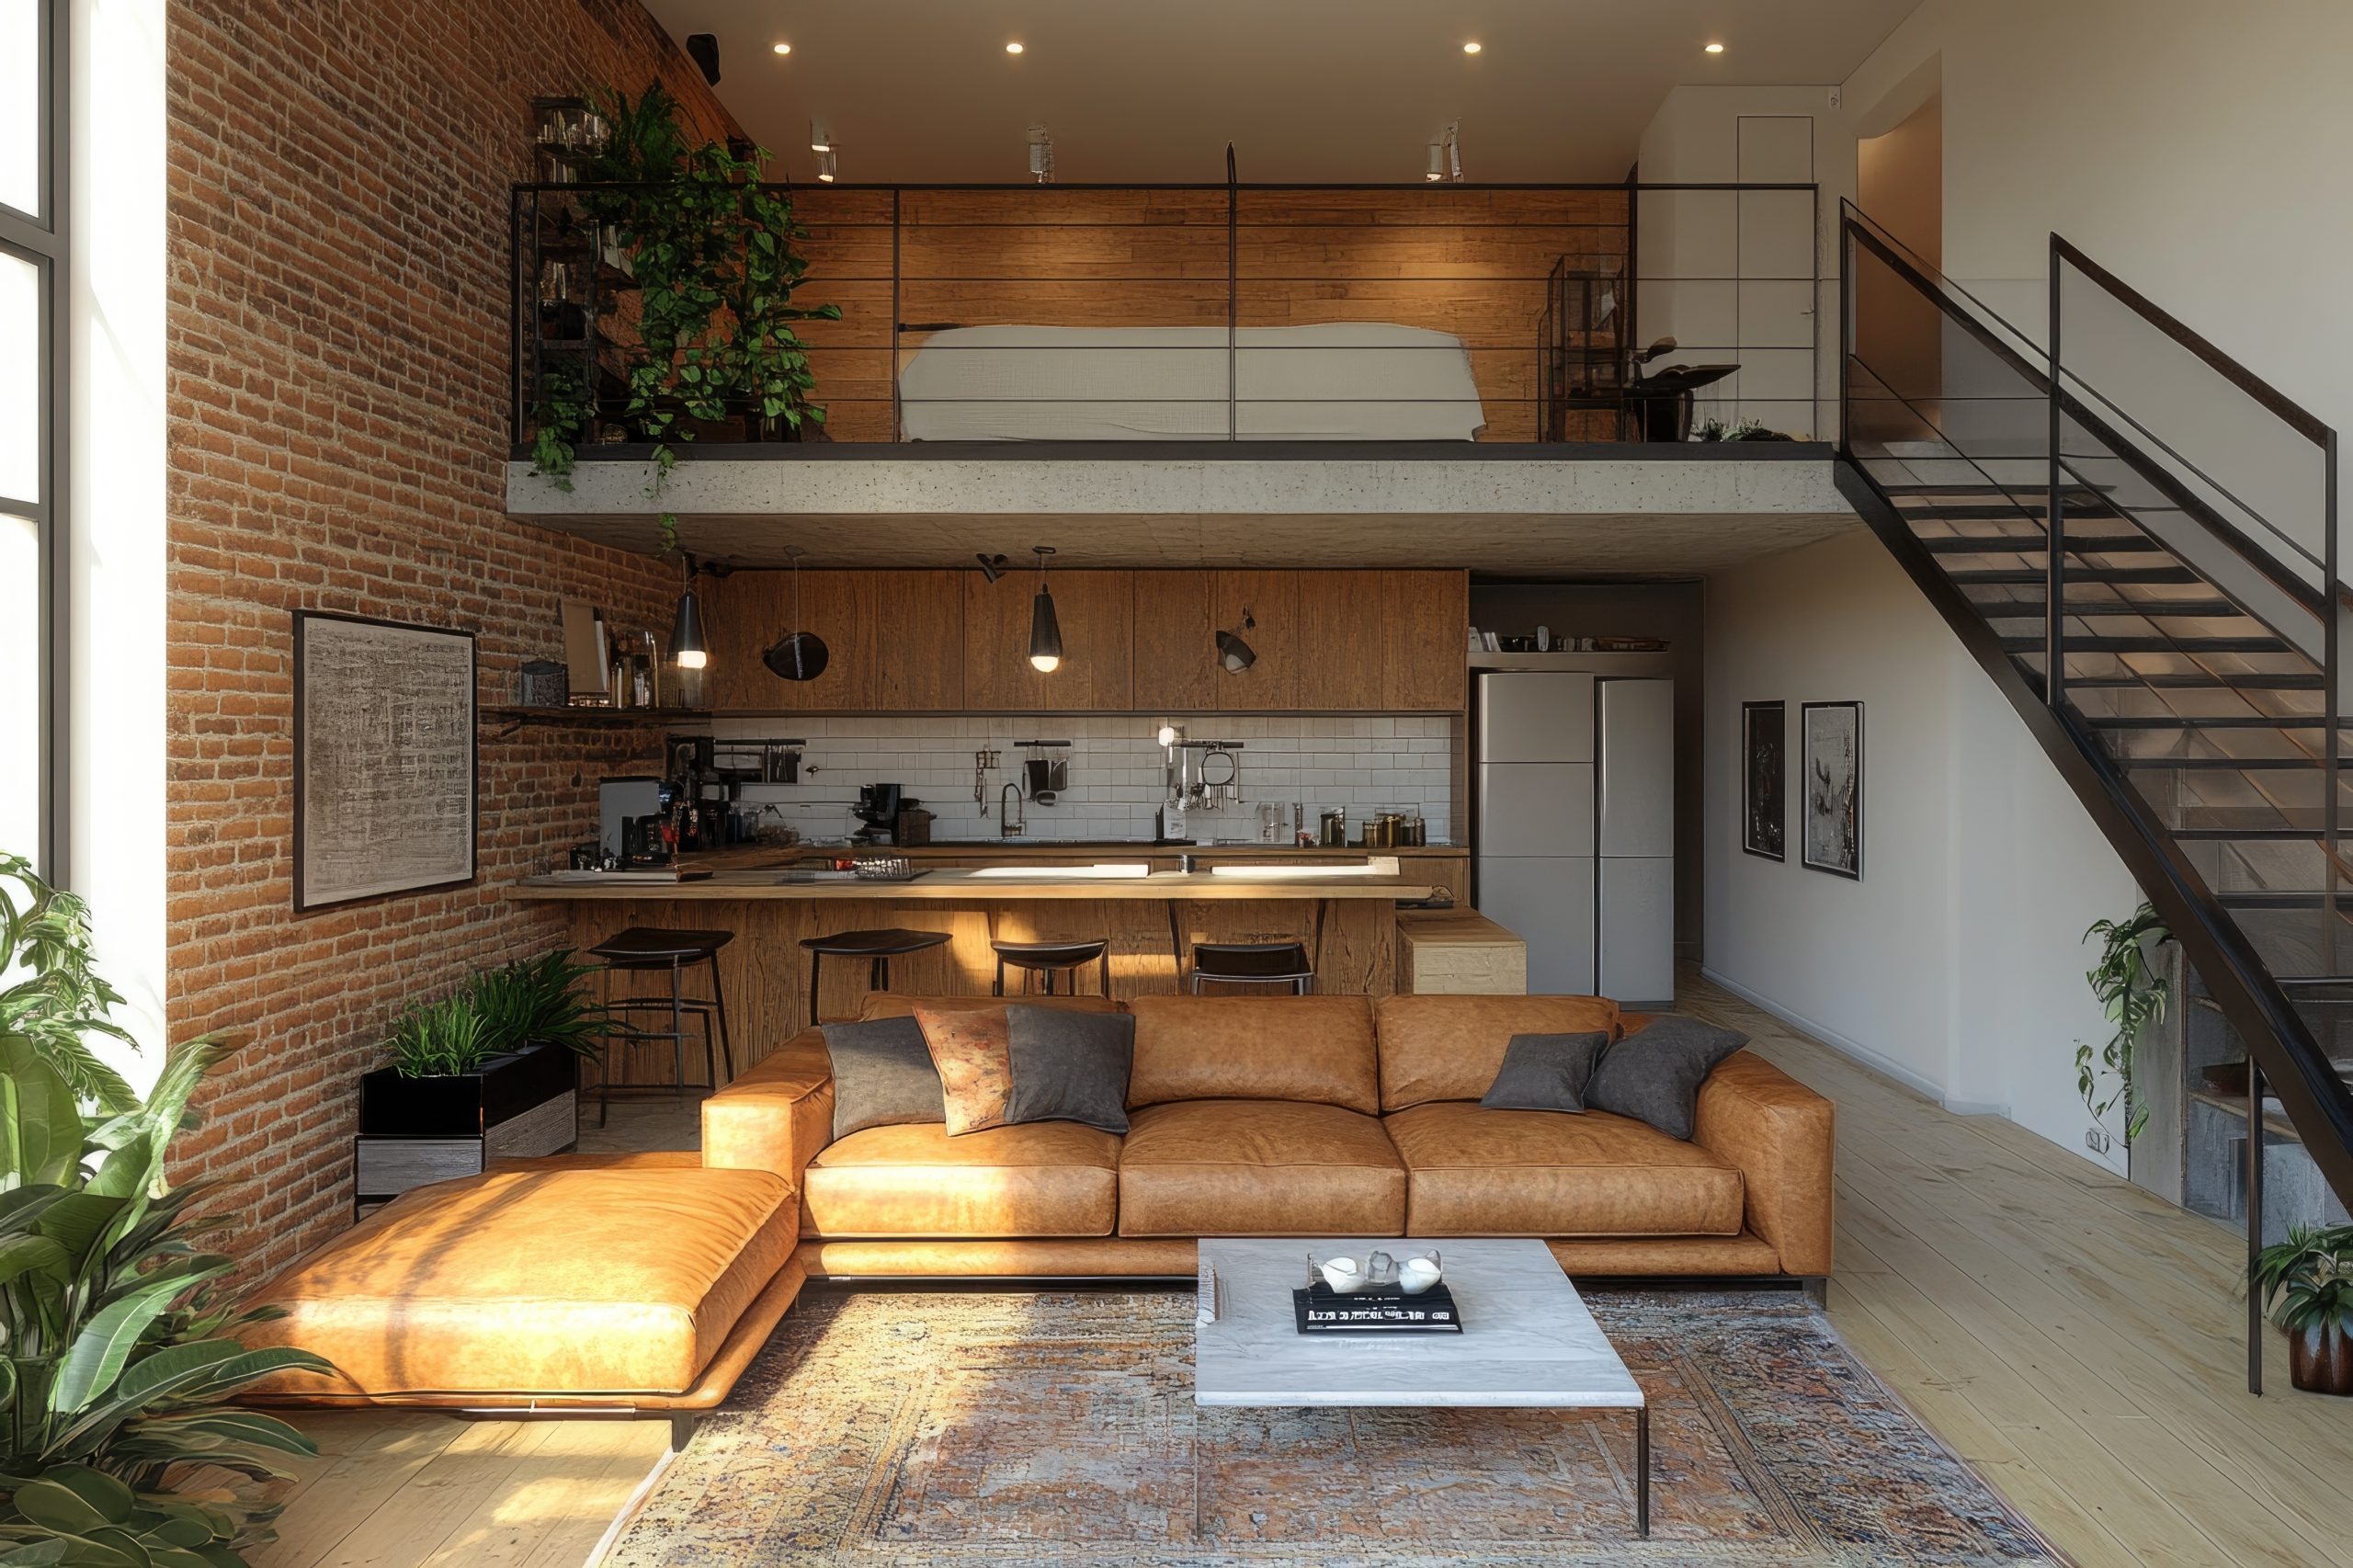
8. Urban Modern
Let’s explore Urban Modern style – a sophisticated evolution of industrial design that perfectly captures contemporary city living. This style masterfully balances metropolitan edge with comfortable living.
What makes Urban Modern special is how it takes the energy of city life and transforms it into livable, sophisticated spaces. Think of it as the perfect blend of industrial edge, modern sophistication, and contemporary comfort – ideal for those who love city living but want their home to feel like a refined sanctuary.
Key Characteristics:
- Clean architectural lines
- Mixed materials
- City influences
- Smart storage solutions
- Sophisticated colour schemes
- Contemporary artwork
- Strategic lighting
- Functional luxury
Colour Palettes: Urban Modern embraces city-inspired colours
Primary Colours:
- Concrete gray
- Charcoal
- Pure white
- Soft black
- Warm neutrals
Accent Colours:
- Deep blues
- Urban green
- Manhattan brown
- Steel blue
- Bronze metallics
Materials That Define the Style:
- Polished concrete
- Sleek metals
- Engineered wood
- Glass
- Leather
- Microfiber
- High-gloss finishes
- Textured wallcoverings
Pro Tip: In Urban Modern spaces, invest in multi-functional pieces. When you’re dealing with city-sized spaces, every piece needs to work twice as hard.
Furniture Elements:
- Low-profile sofas
- Modular seating
- Built-in storage
- Statement lighting
- Multi-functional pieces
- Floating shelves
- Glass dining tables
- Contemporary beds
Technology Integration:
Urban Modern embraces smart living:
- Hidden TV solutions
- Integrated sound systems
- Smart home features
- Automated window treatments
- Modern climate control
- Tech charging stations
- Smart lighting
- Security features
Space Planning:
Urban spaces require:
- Maximised floor plans
- Flexible layouts
- Work-from-home zones
- Entertainment areas
- Dining solutions
- Storage optimisation
- City view enhancement
- Traffic flow consideration
Styling Elements:
- Contemporary art
- City photography
- Geometric patterns
- Metal accents
- Textural contrasts
- Statement pieces
- Urban-inspired decor
- Strategic mirrors
Design Solutions:
Common urban challenges and solutions:
- Small space maximisation
- Storage integration
- Privacy solutions
- Noise reduction
- Light optimisation
- Multi-functional areas
- Entertainment spaces
- Work-life balance
Mid-Century & Scandinavian Styles
Let’s explore styles that revolutionised design through simplicity, functionality, and connection to nature.
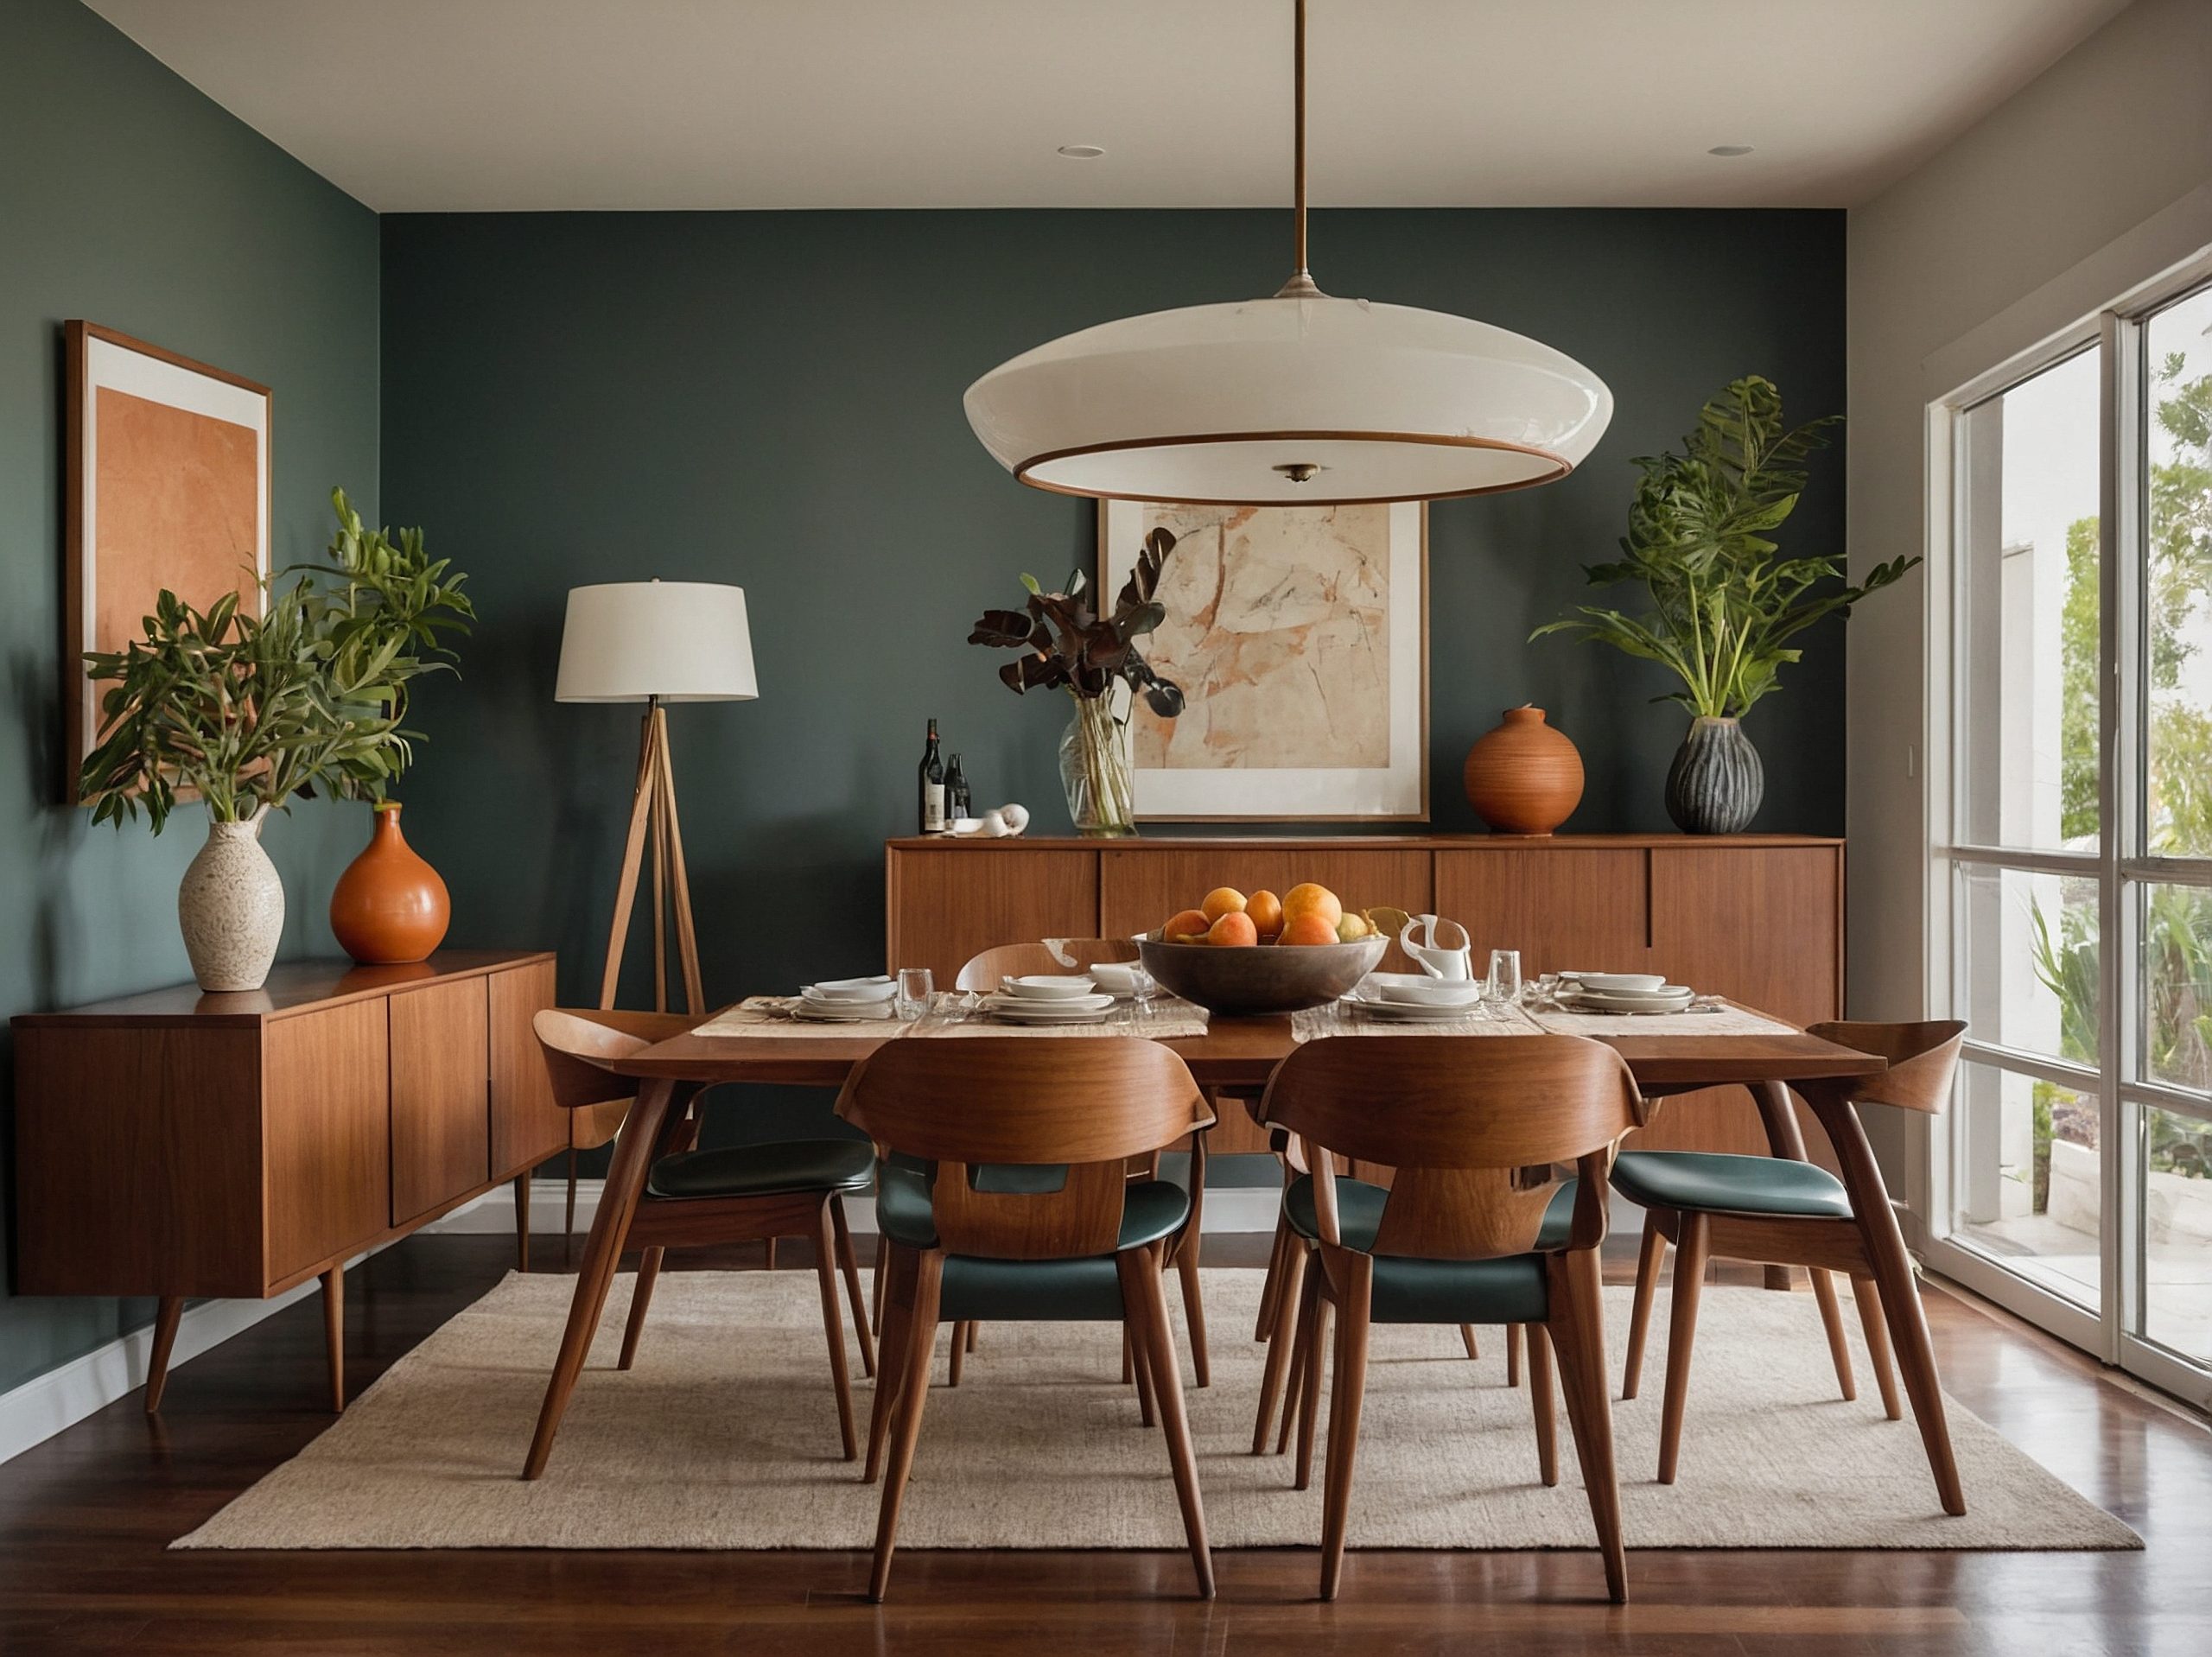
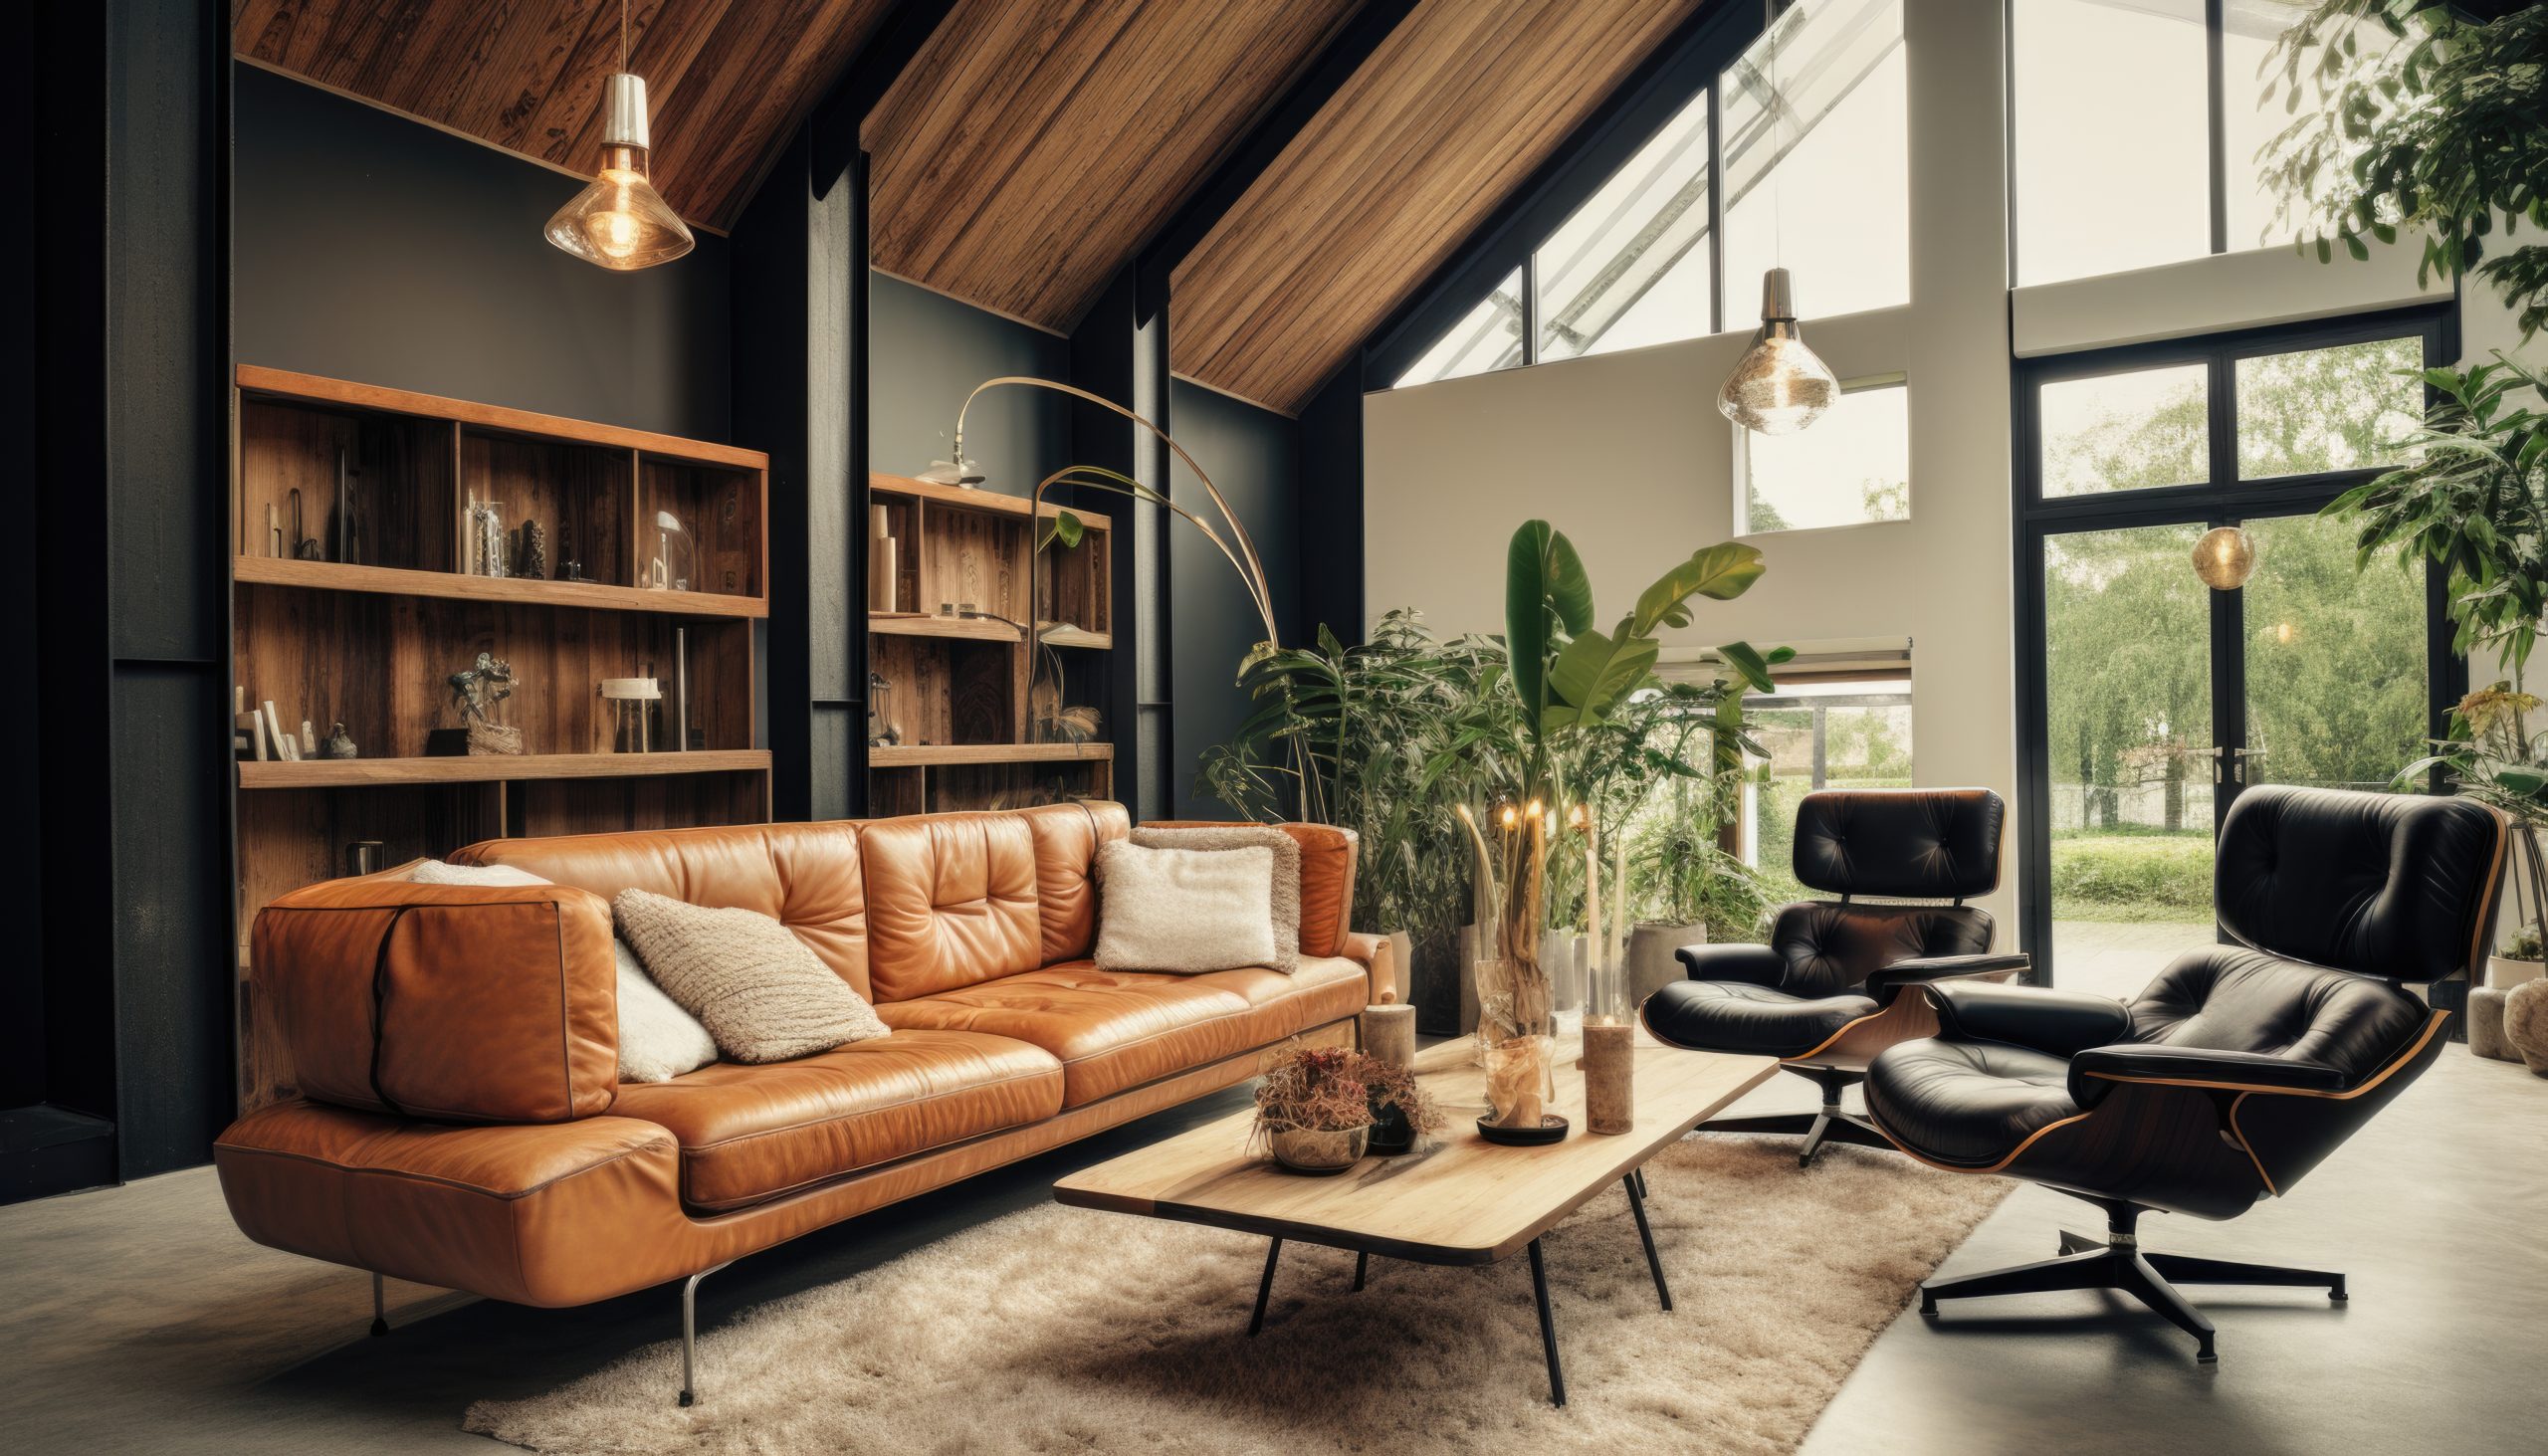
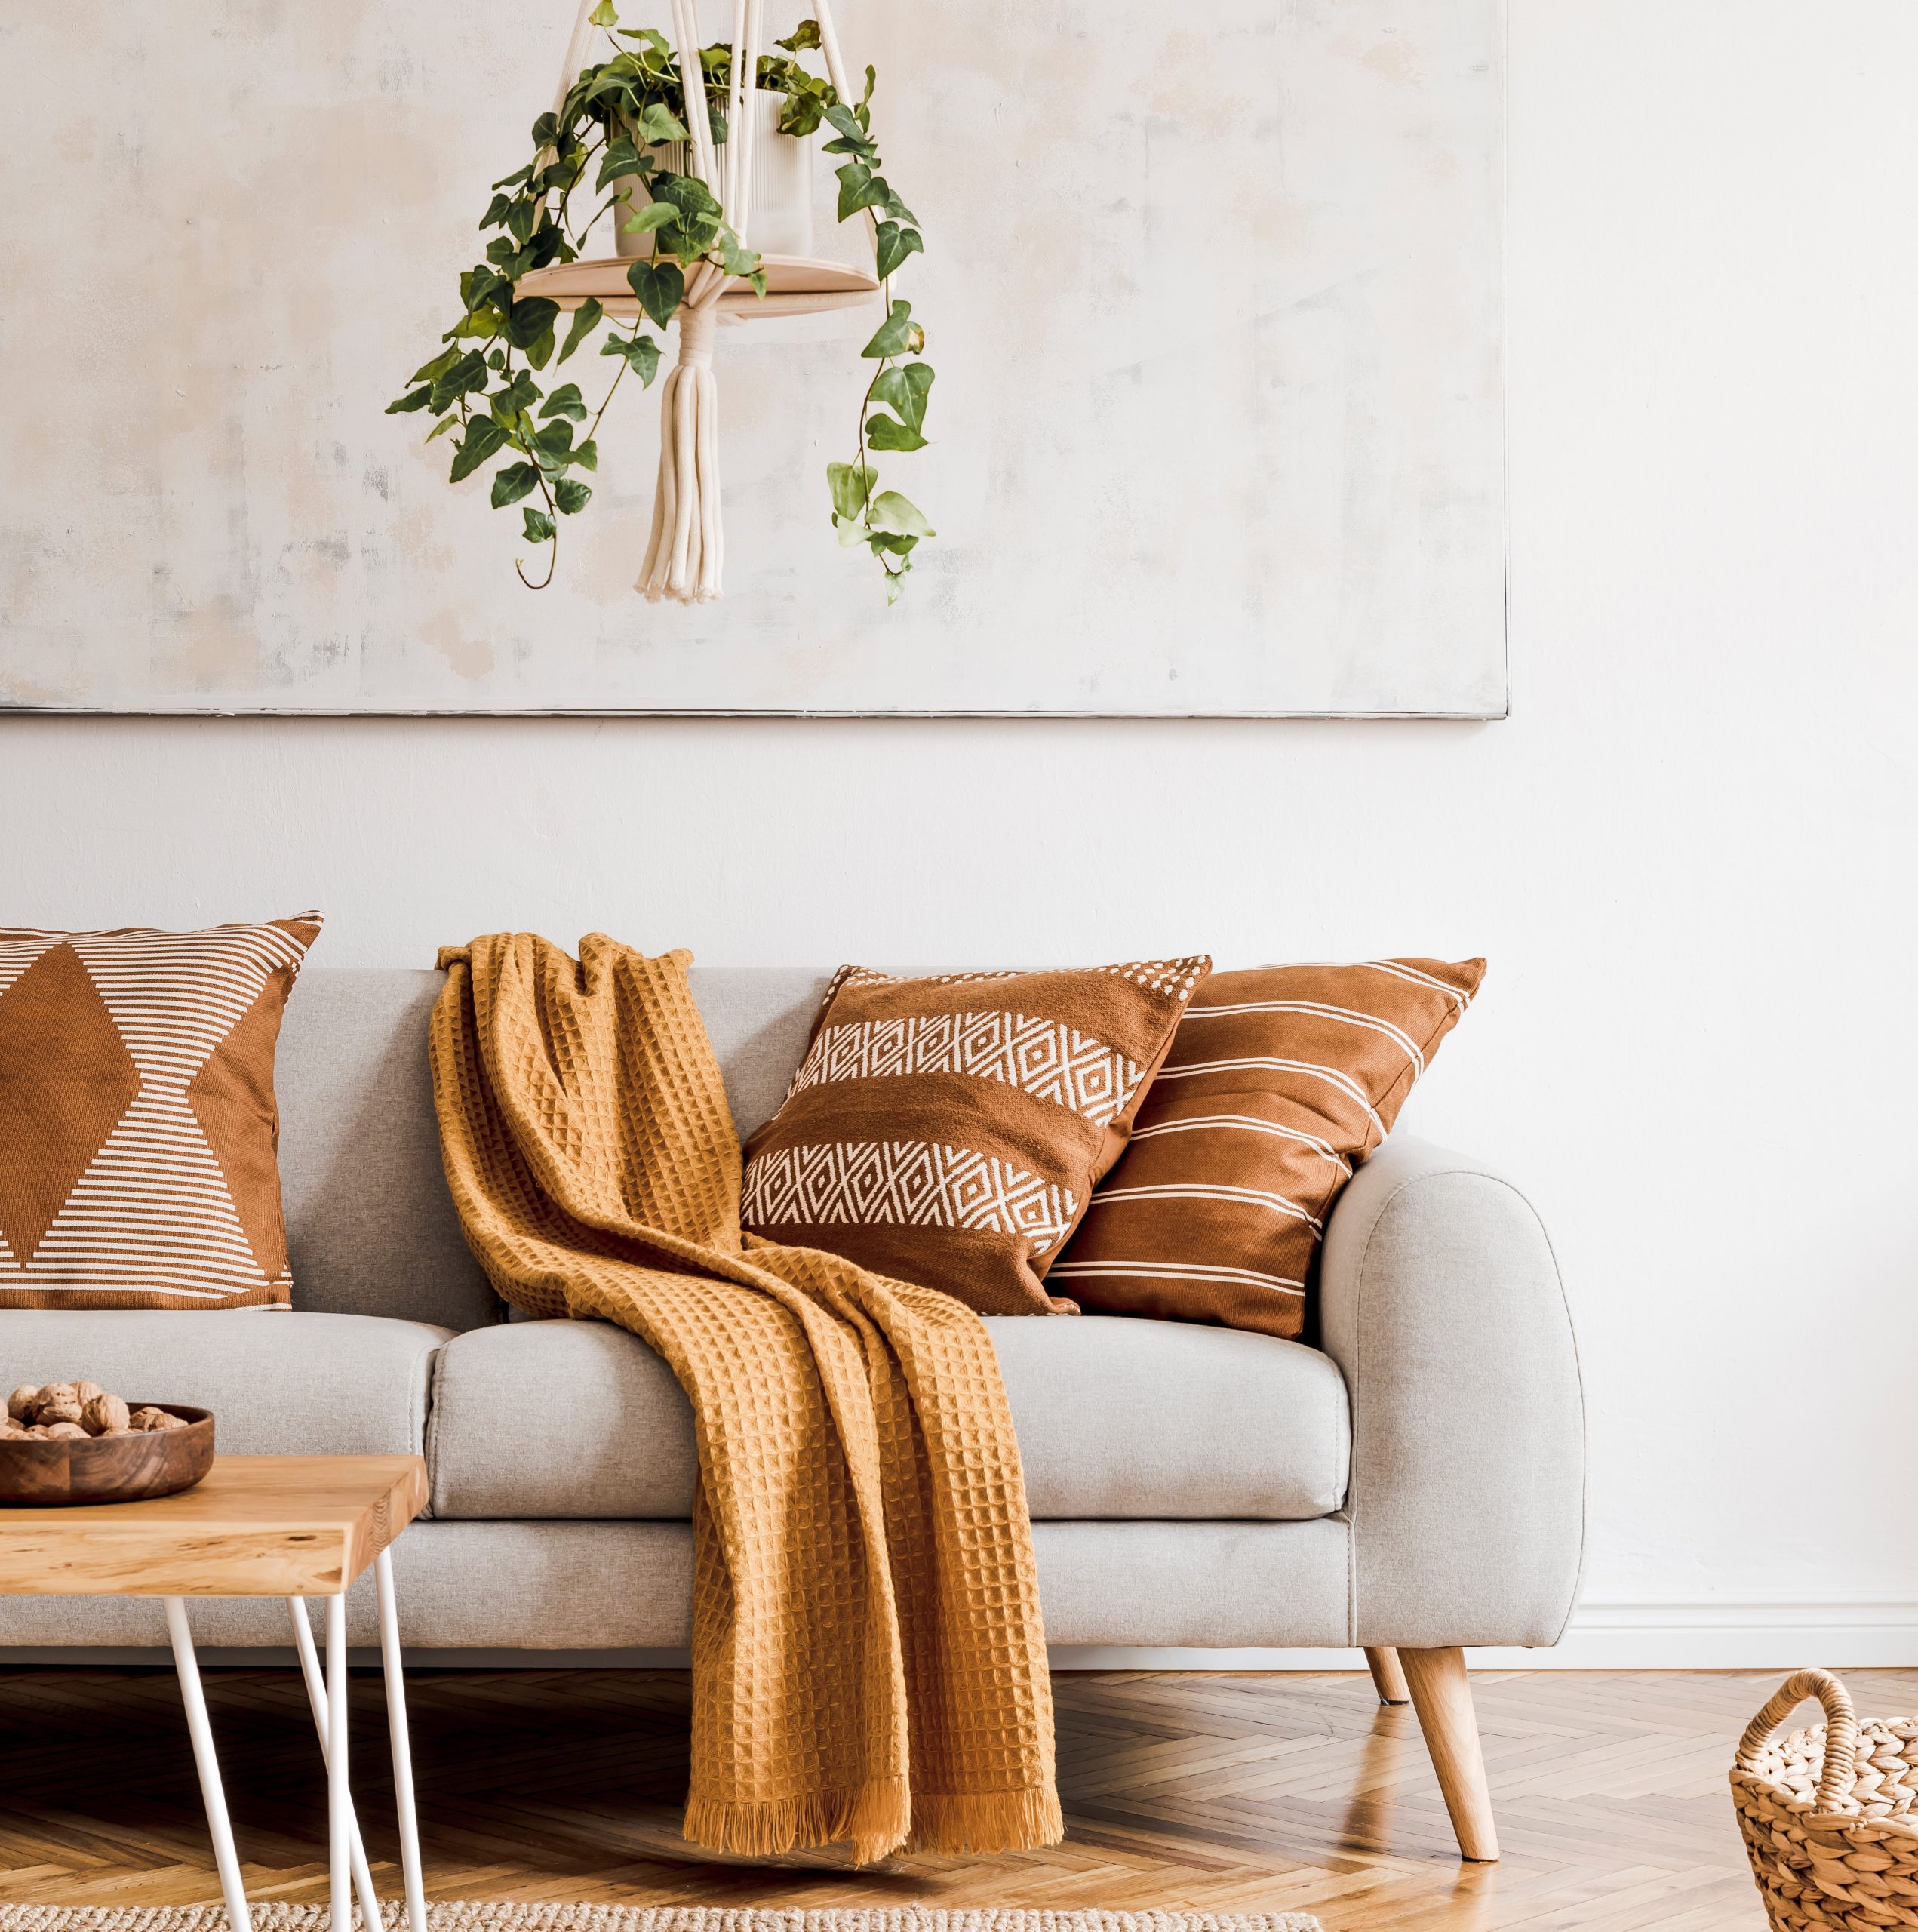
9. Mid-Century Modern
Of all 22 different interior design styles we’re exploring, Mid-Century Modern holds a special place in design history. This style’s enduring popularity isn’t just about nostalgia – it’s about timeless, functional beauty.
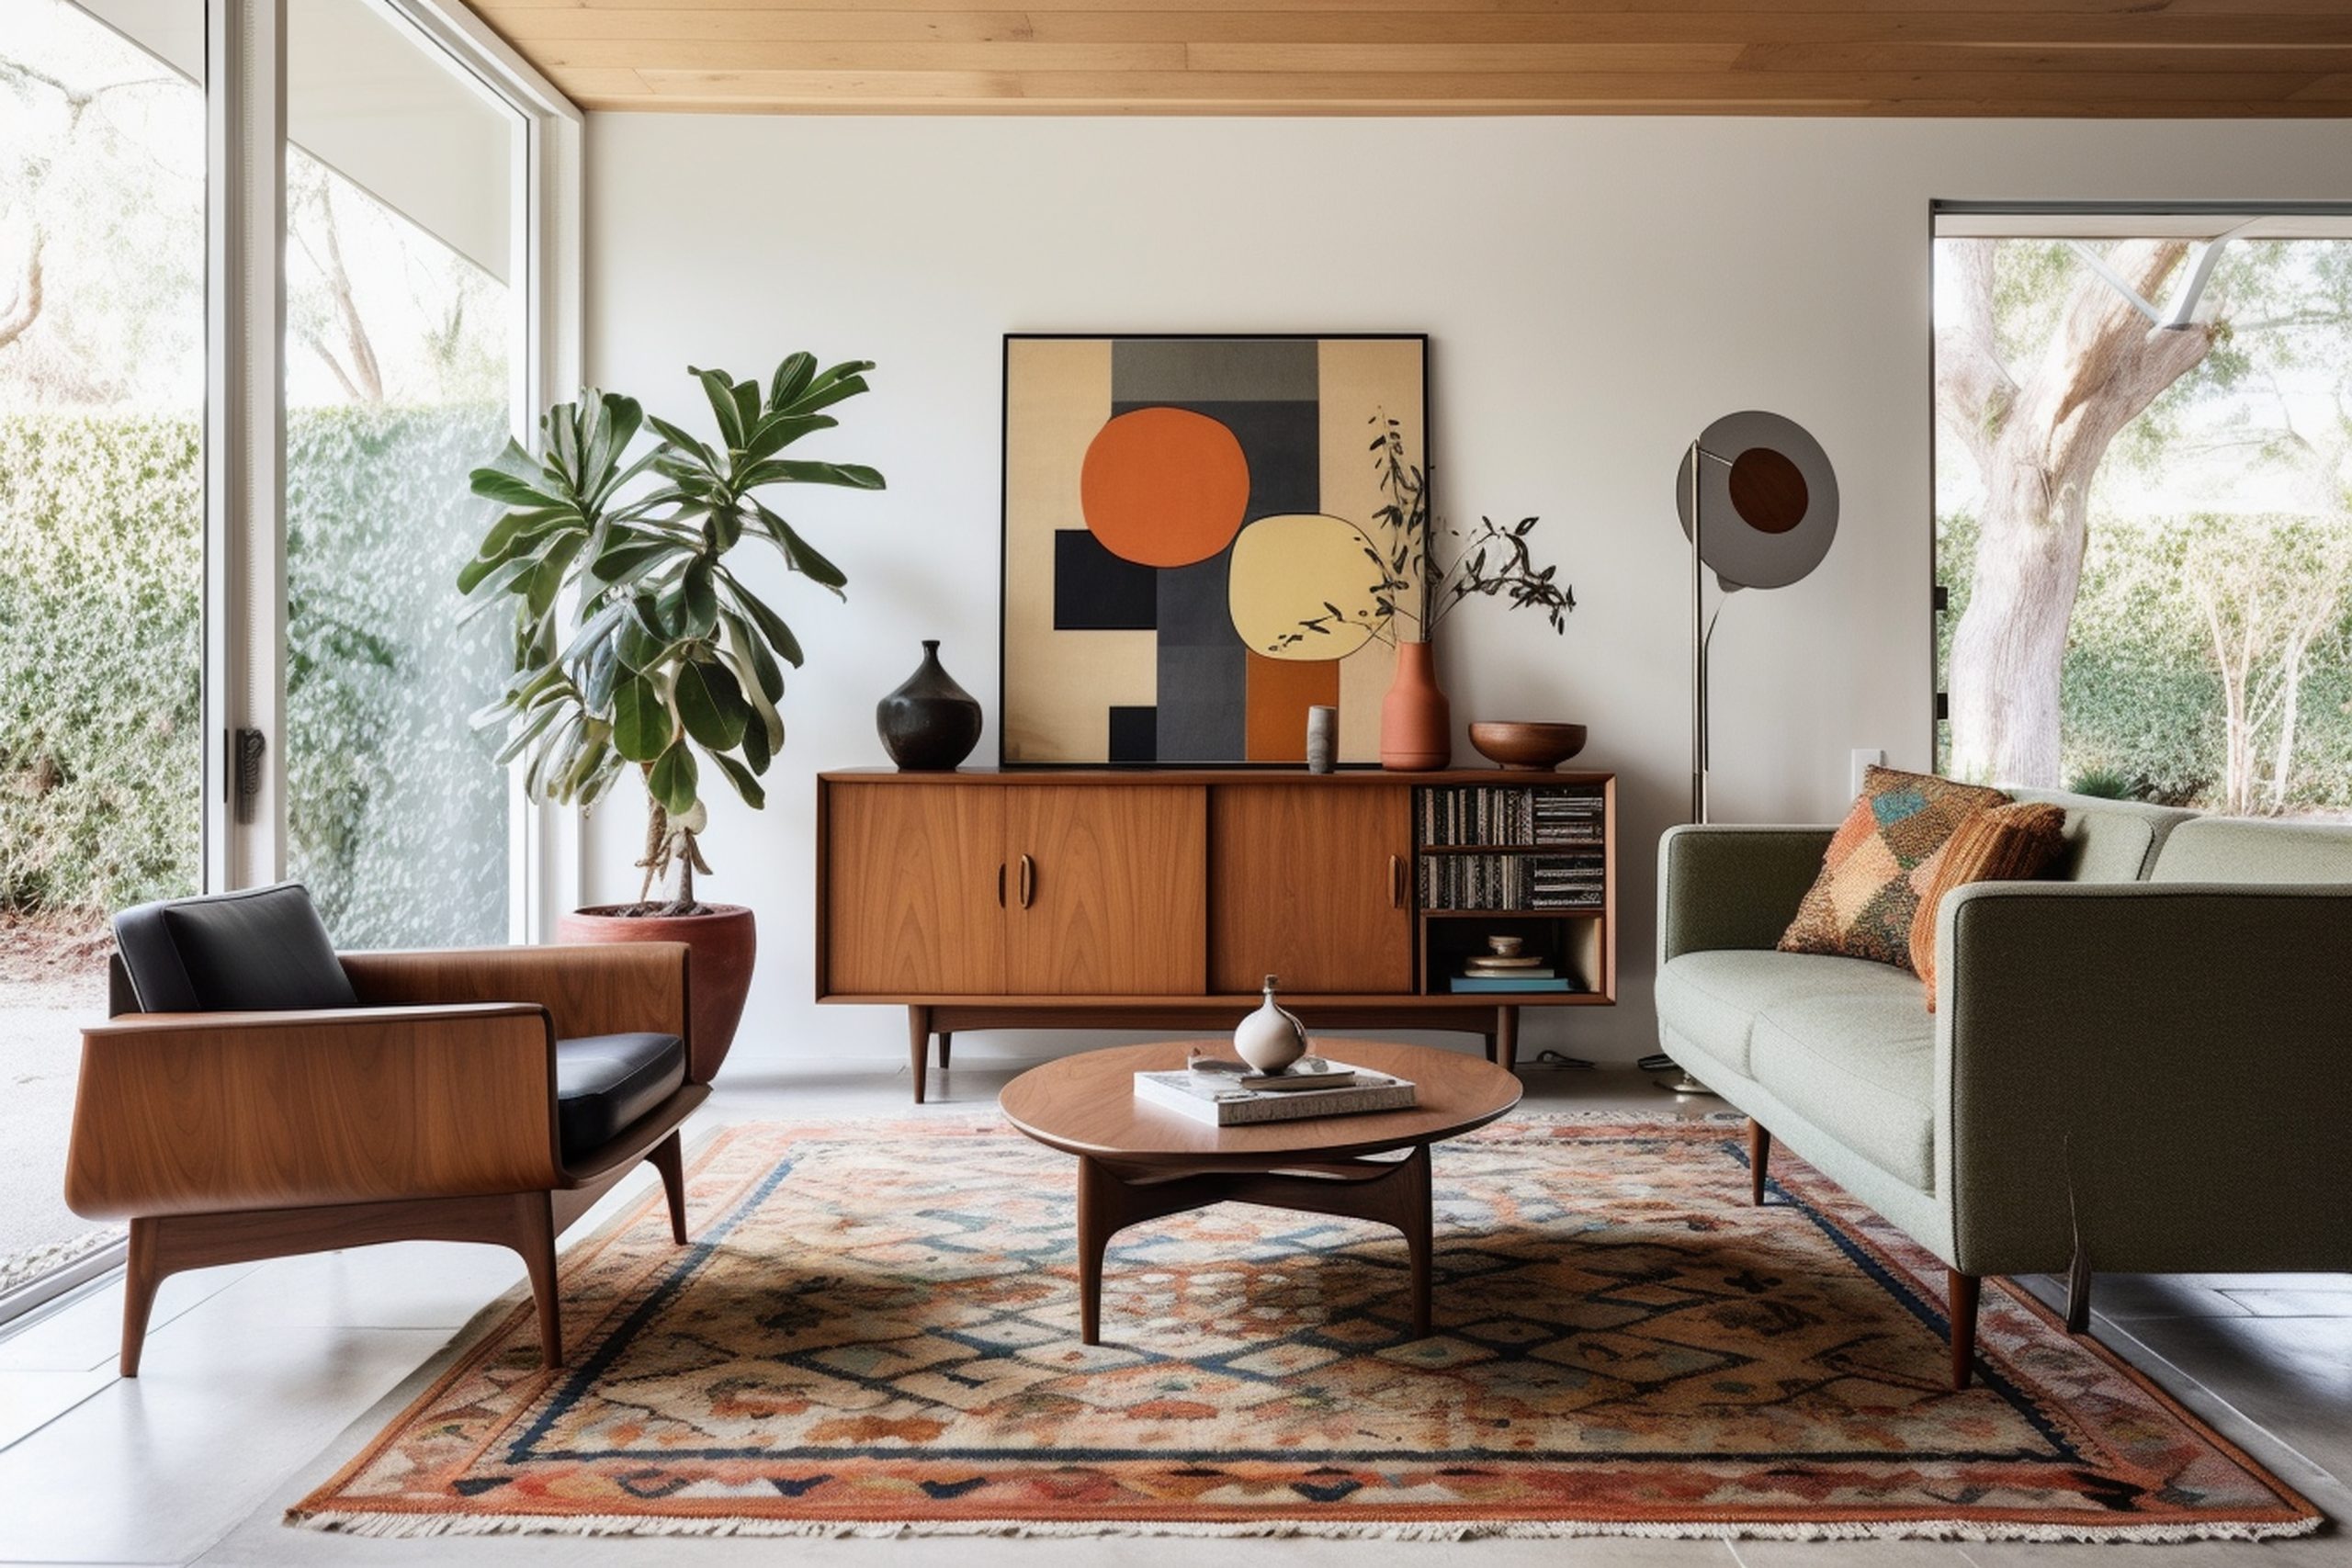
What makes Mid-Century Modern special is its perfect balance of form and function. Born roughly between the 1940s and 1970s, this style revolutionised how we think about home design. Think of it as the moment when interior design became democratic – beautiful, functional design for everyone.
Key Characteristics:
- Clean, organic lines
- Minimal ornamentation
- Mixed materials
- Indoor-outdoor connection
- Geometric patterns
- Contrasting textures
- Functionality focus
- Statement lighting
Colour Palettes: Mid-Century Modern embraces both neutral and bold colours
Primary Colours:
- Warm whites
- Natural woods
- Earthy browns
- Charcoal gray
- Black accents
Accent Colours:
- Mustard yellow
- Burnt orange
- Olive green
- Teal blue
- Brick red
Materials That Define the Style:
- Walnut and teak woods
- Molded plastic
- Glass
- Steel
- Brass
- Leather
- Vinyl
- Textured fabrics
Pro Tip: When designing Mid-Century spaces, you don’t need to fill your home with vintage pieces. Quality modern reproductions can work beautifully alongside authentic pieces.
Furniture Elements:
- Eames-style chairs
- Platform sofas
- Tulip tables
- Floating credenzas
- Tapered legs
- Egg chairs
- Organic shapes
- Built-in cabinetry
Signature Elements:
- Sunburst clocks
- Sputnik chandeliers
- Abstract art
- Geometric patterns
- Bar carts
- Plant stands
- Room dividers
- Statement lighting
Space Planning:
Mid-Century spaces emphasise:
- Open floor plans
- Conversation areas
- Indoor-outdoor flow
- Multiple seating zones
- Clear sight lines
- Natural light
- Functional zones
- Social spaces
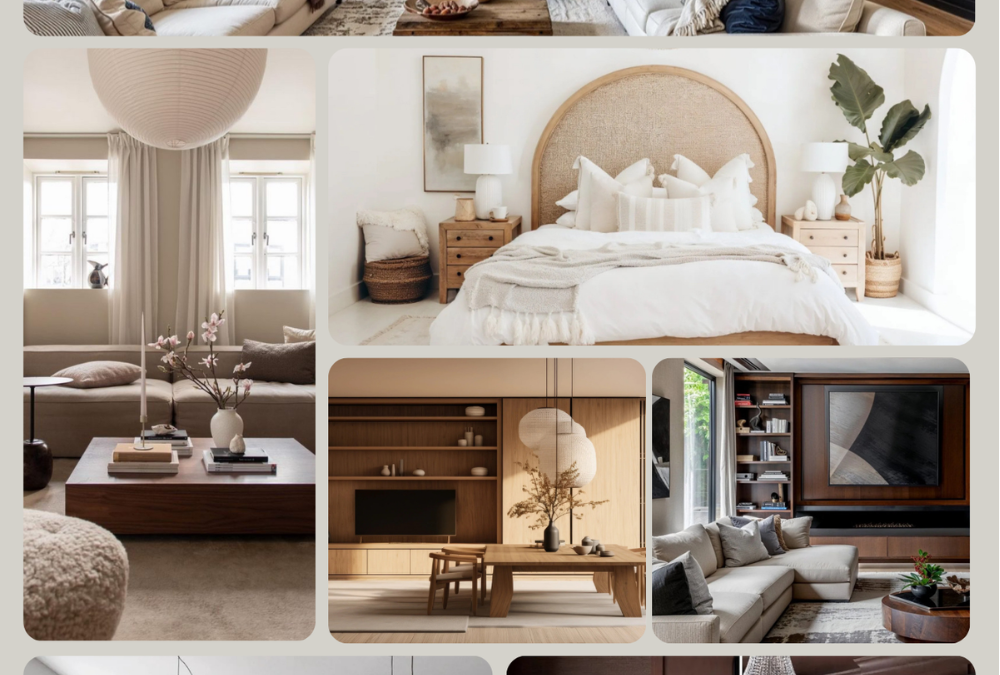
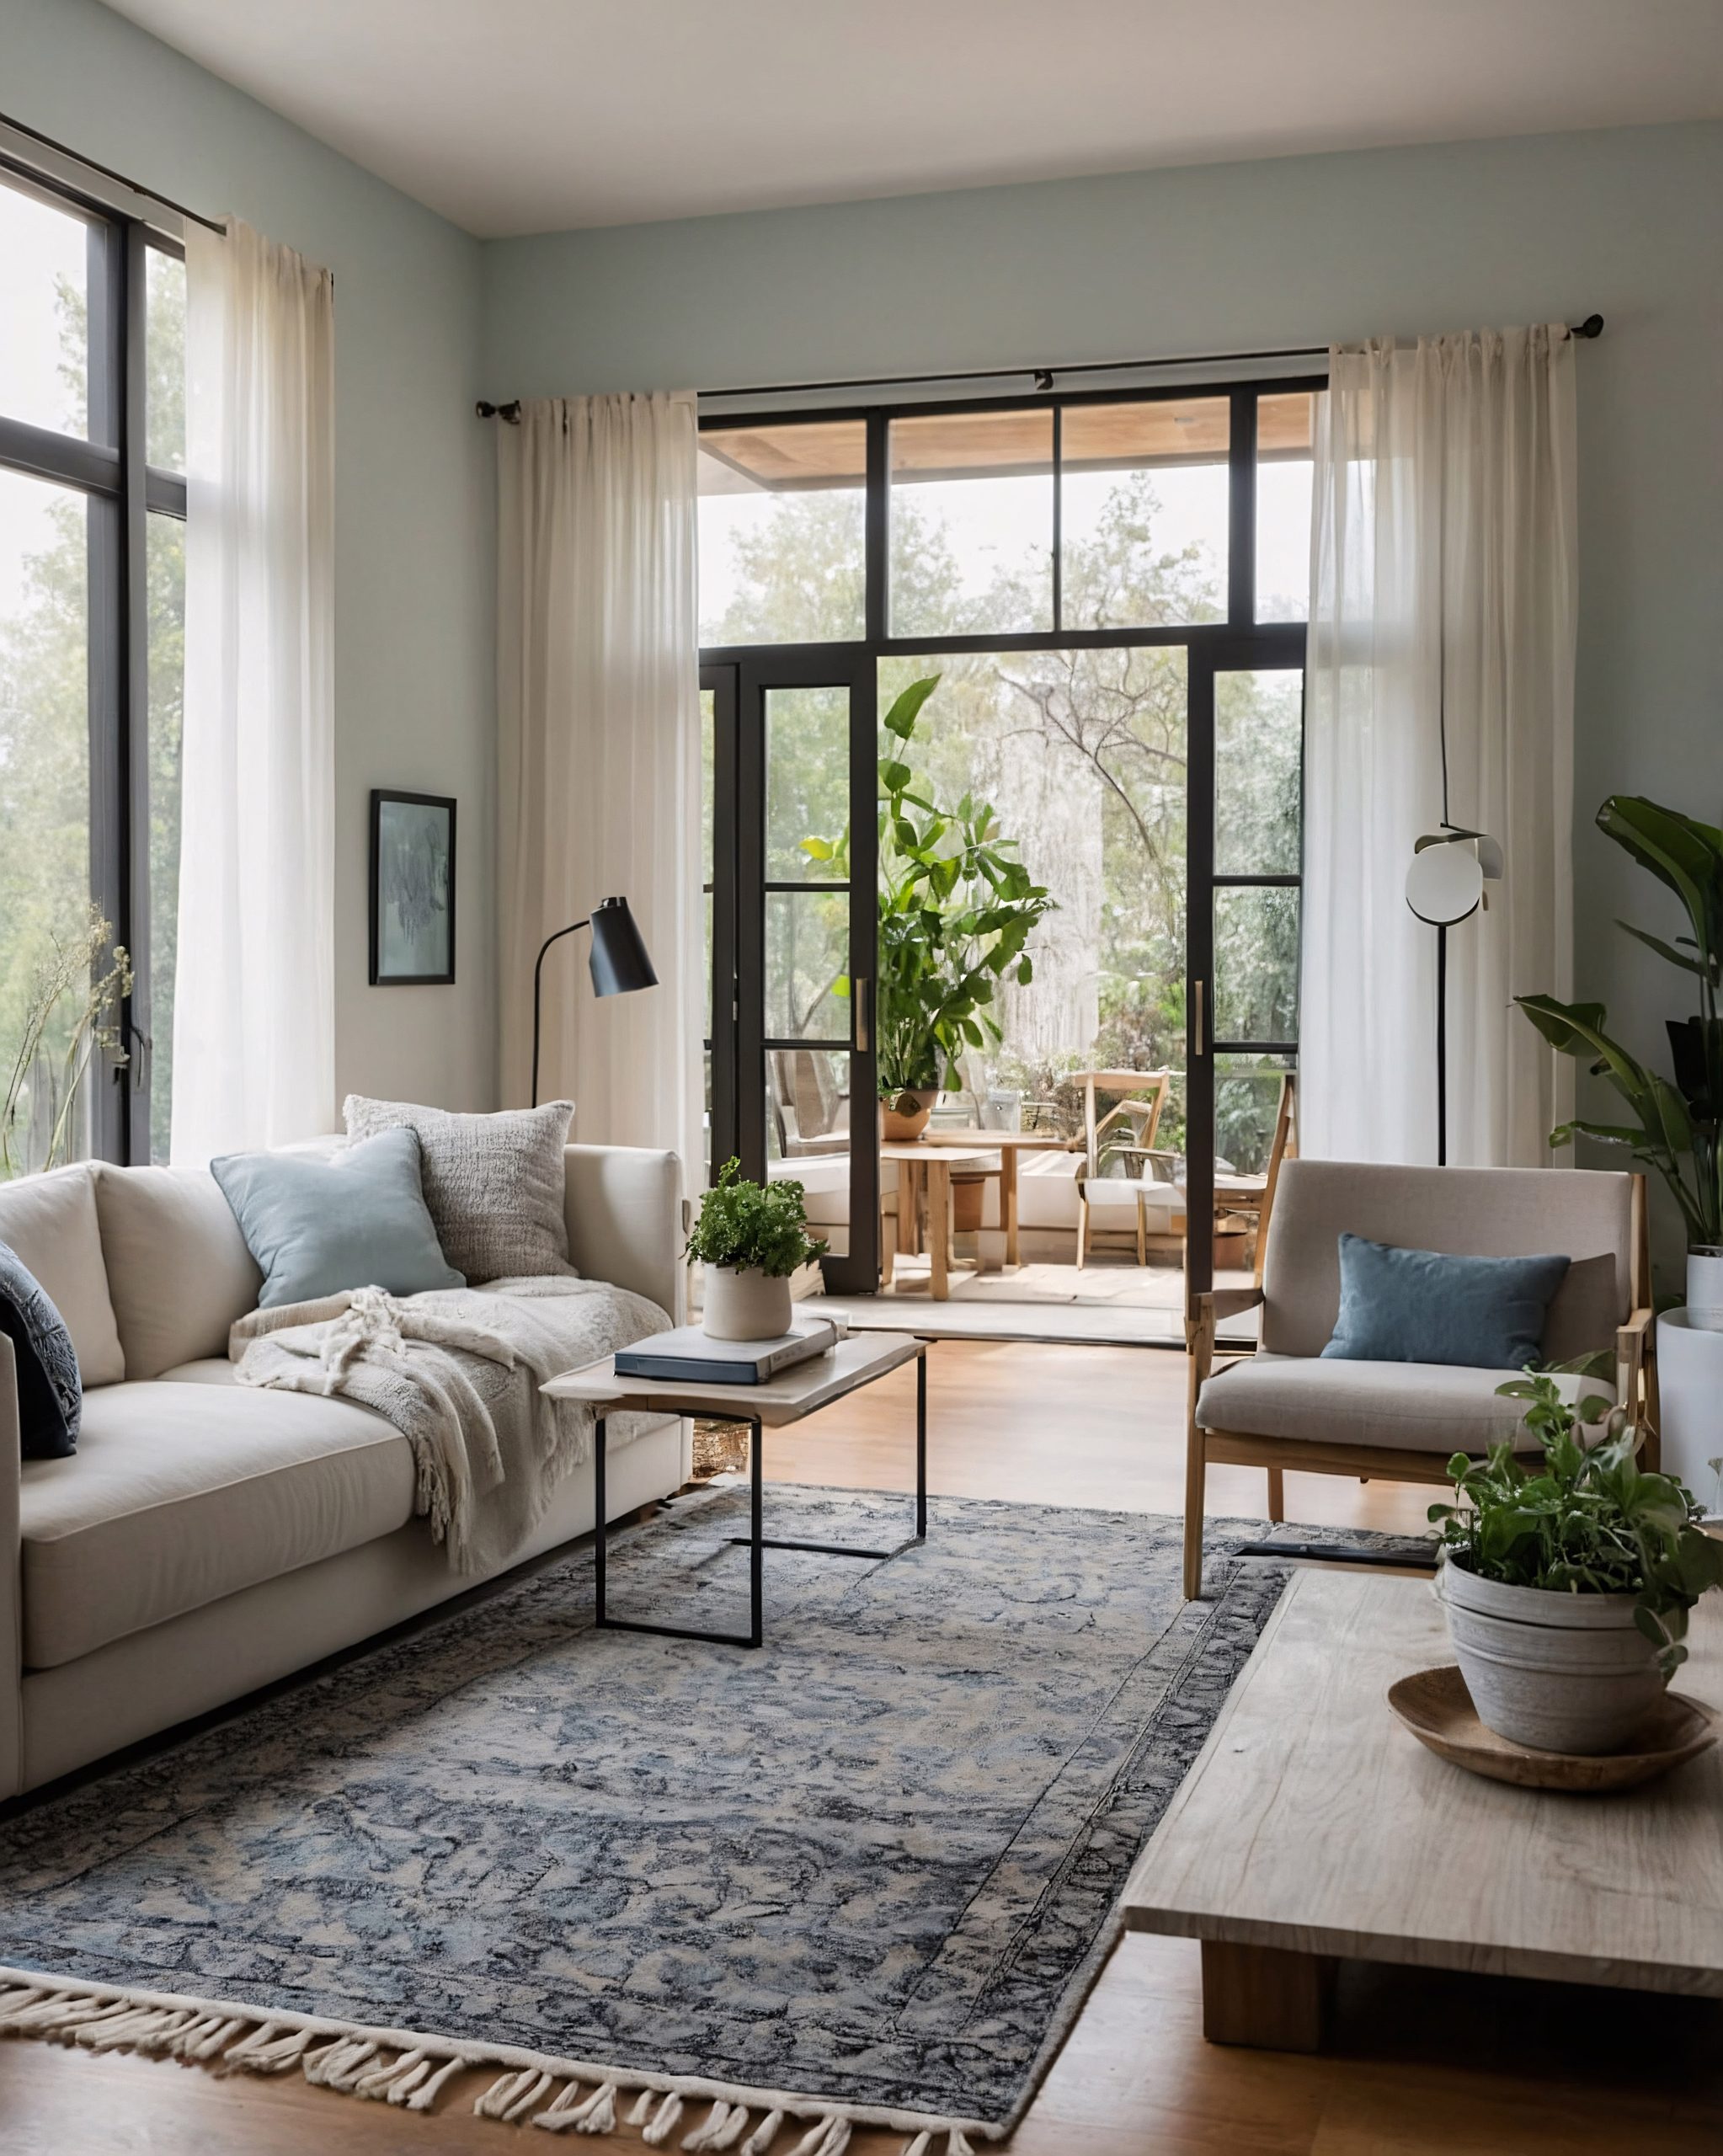
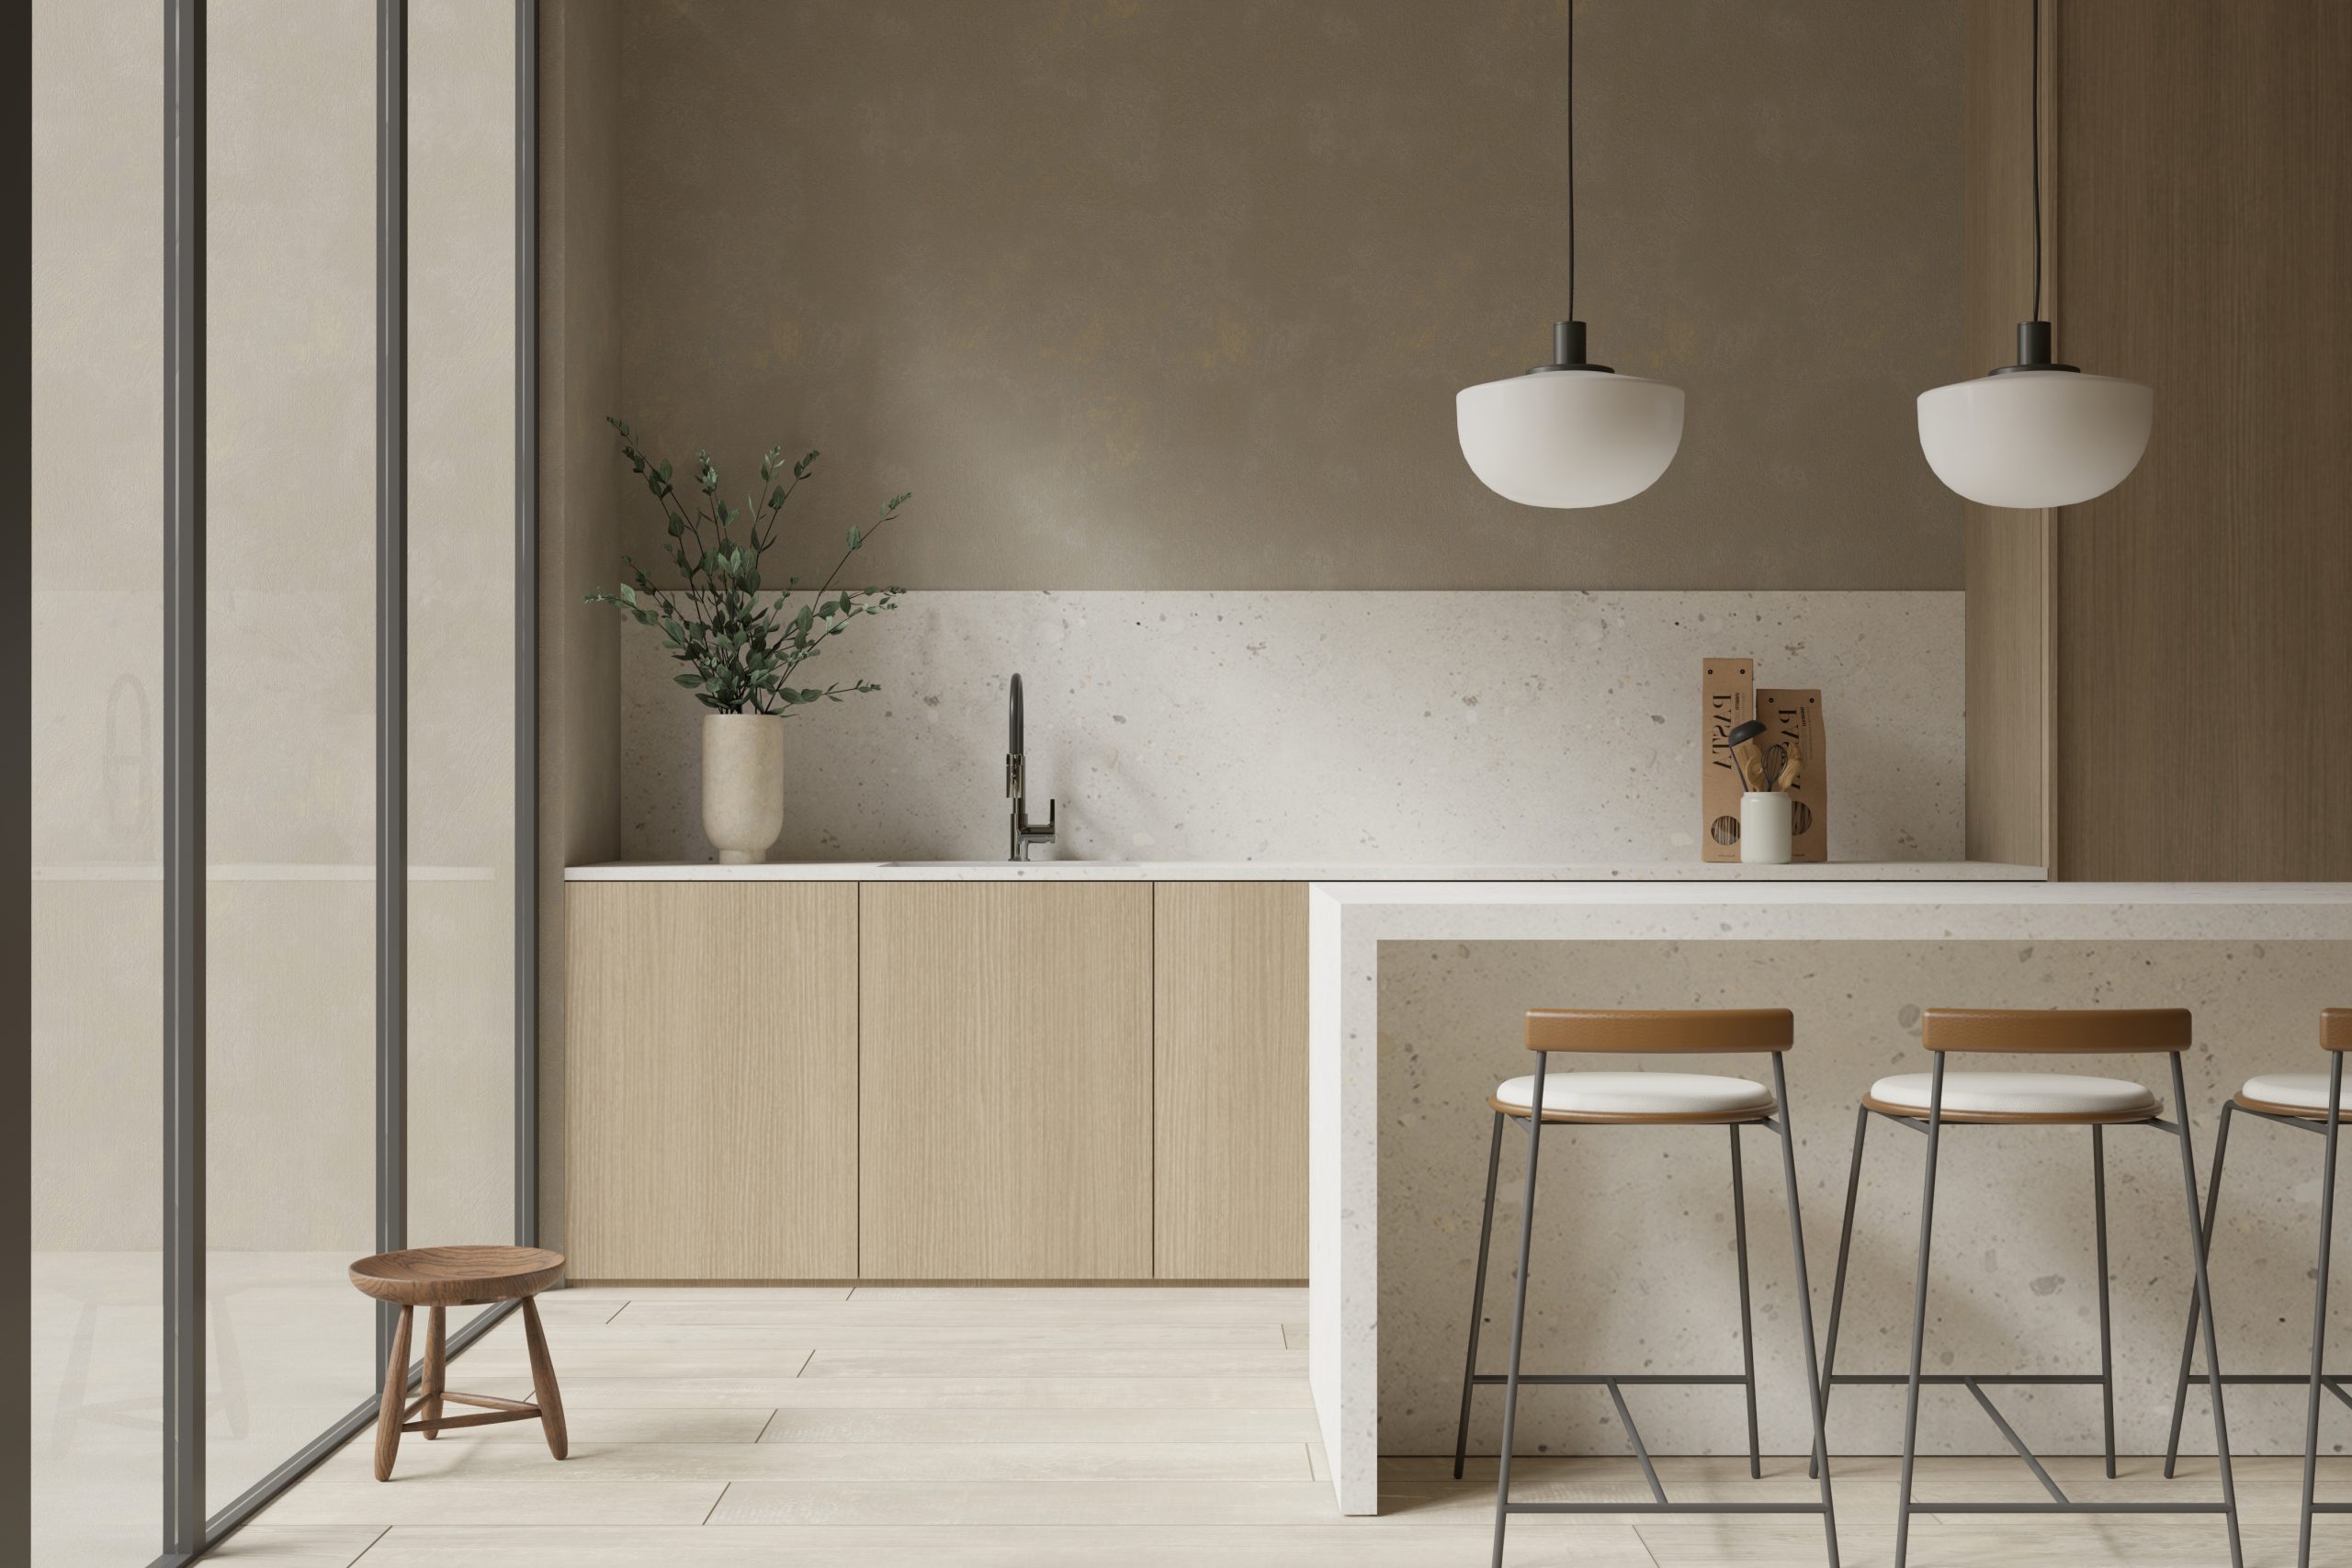
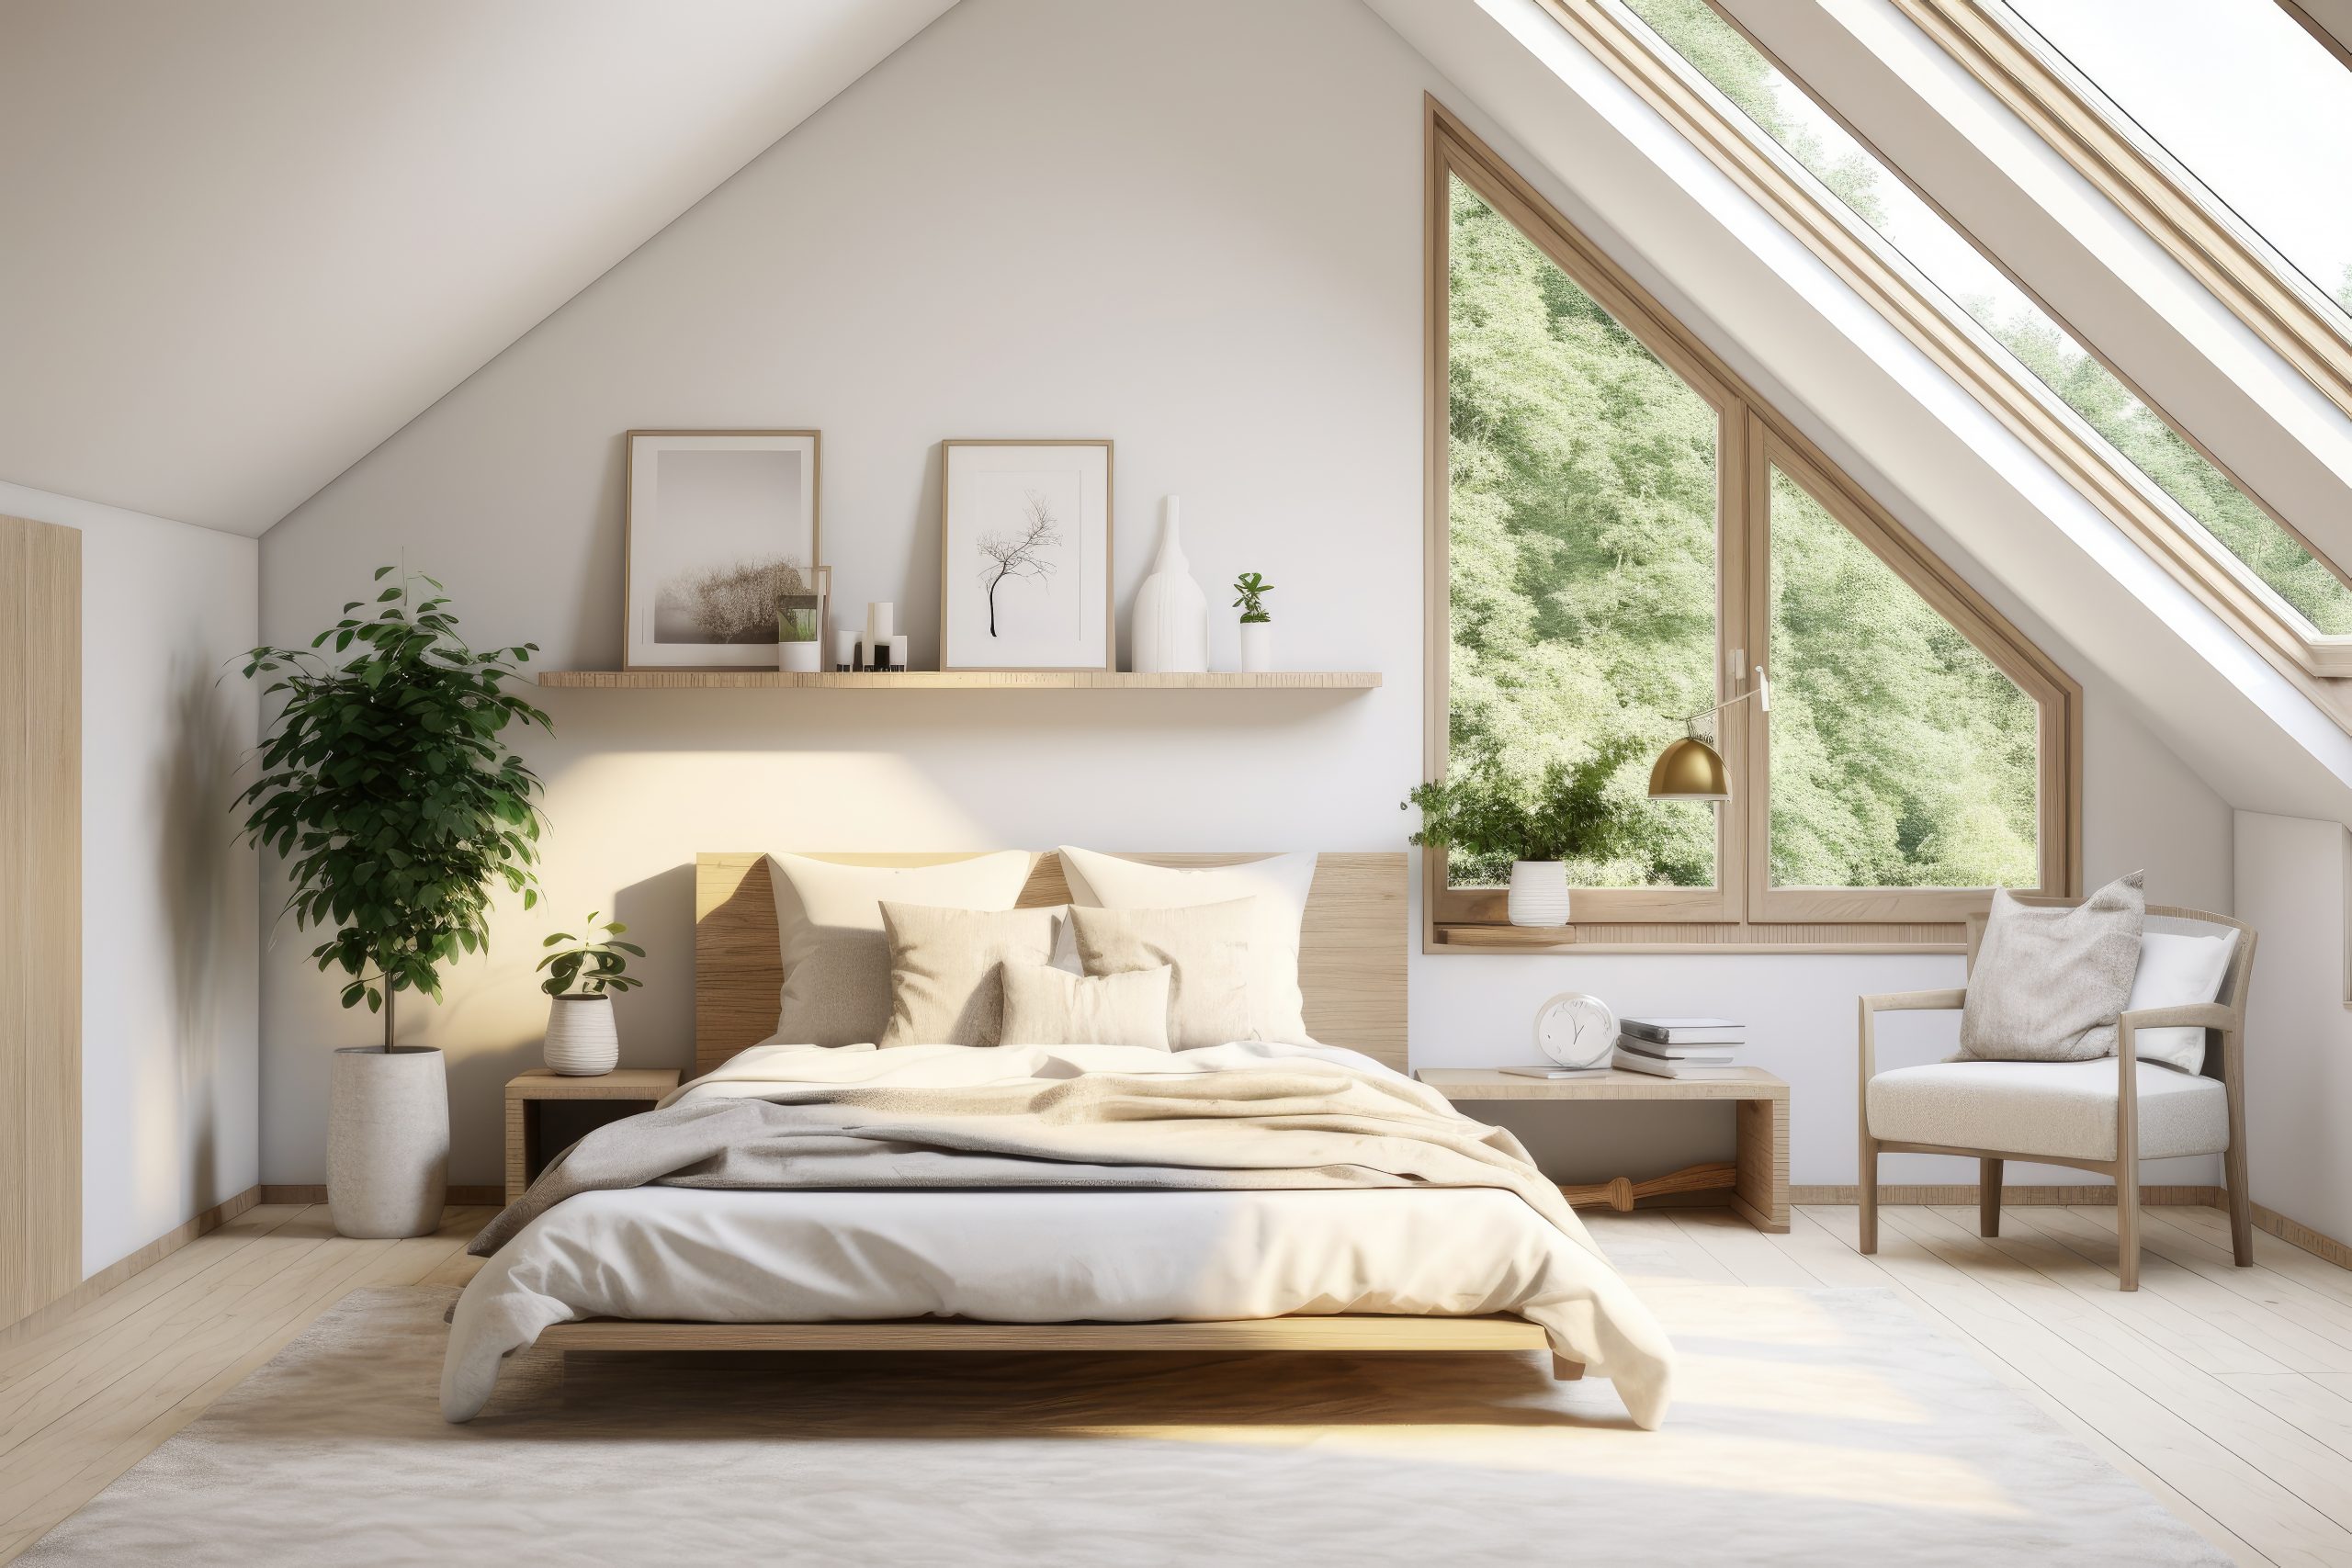
10. Scandinavian
Let’s explore one of the most popular and enduring of our 22 different interior design styles – Scandinavian design. This style is about much more than just white walls and IKEA furniture.
What makes Scandinavian design special is its focus on creating bright, functional spaces that promote well-being. Born in Nordic countries where winter daylight is precious, this style masterfully combines beauty with practicality while emphasising connection to nature.
Key Characteristics:
- Light and airy spaces
- Minimal decor
- Natural materials
- Functional design
- Clean lines
- Cosy elements (hygge)
- Abundant light
- Clutter-free surfaces
Colour Palettes: Scandinavian design embraces light, natural colours
Primary Colours:
- Crisp whites
- Soft greys
- Pale woods
- Light beiges
- Gentle blacks
Accent Colours:
- Sage green
- Dusty blue
- Pale pink
- Soft yellow
- Muted terracotta
Materials That Define the Style:
- Light woods (especially pine and birch)
- Natural textiles
- Wool
- Leather
- Sheepskin
- Linen
- Stone
- Glass
Pro Tip: When designing Scandinavian spaces, always remember that creating hygge (cosy comfort) is just as important as maintaining minimalism. It’s about finding that perfect balance.
Furniture Elements:
- Clean-lined sofas
- Wooden dining sets
- Platform beds
- Built-in storage
- Reading nooks
- Window seats
- Functional workspaces
- Simple chairs
Textile Elements:
Creating warmth through:
- Chunky knit throws
- Natural fibre rugs
- Simple curtains
- Sheepskin throws
- Linen upholstery
- Cotton pillows
- Woven textiles
- Natural fibre carpets
Creating Hygge:
Essential elements for cosiness:
- Candles
- Soft lighting
- Reading corners
- Natural elements
- Comfortable seating
- Warm textures
- Personal touches
- Indoor plants
Space Planning:
Scandinavian spaces require:
- Maximised natural light
- Clear pathways
- Functional zones
- Storage solutions
- Social areas
- Quiet corners
- Work spaces
- Family areas
Modern Interpretation:
How to make Scandinavian style work today:
- Smart storage solutions
- Technology integration
- Multi-functional furniture
- Sustainable materials
- Modern conveniences
- Family-friendly solutions
- Work-from-home spaces
- Entertainment areas
Bohemian & Global Styles
Let’s explore styles that celebrate cultural diversity, personal expression, and artistic freedom.
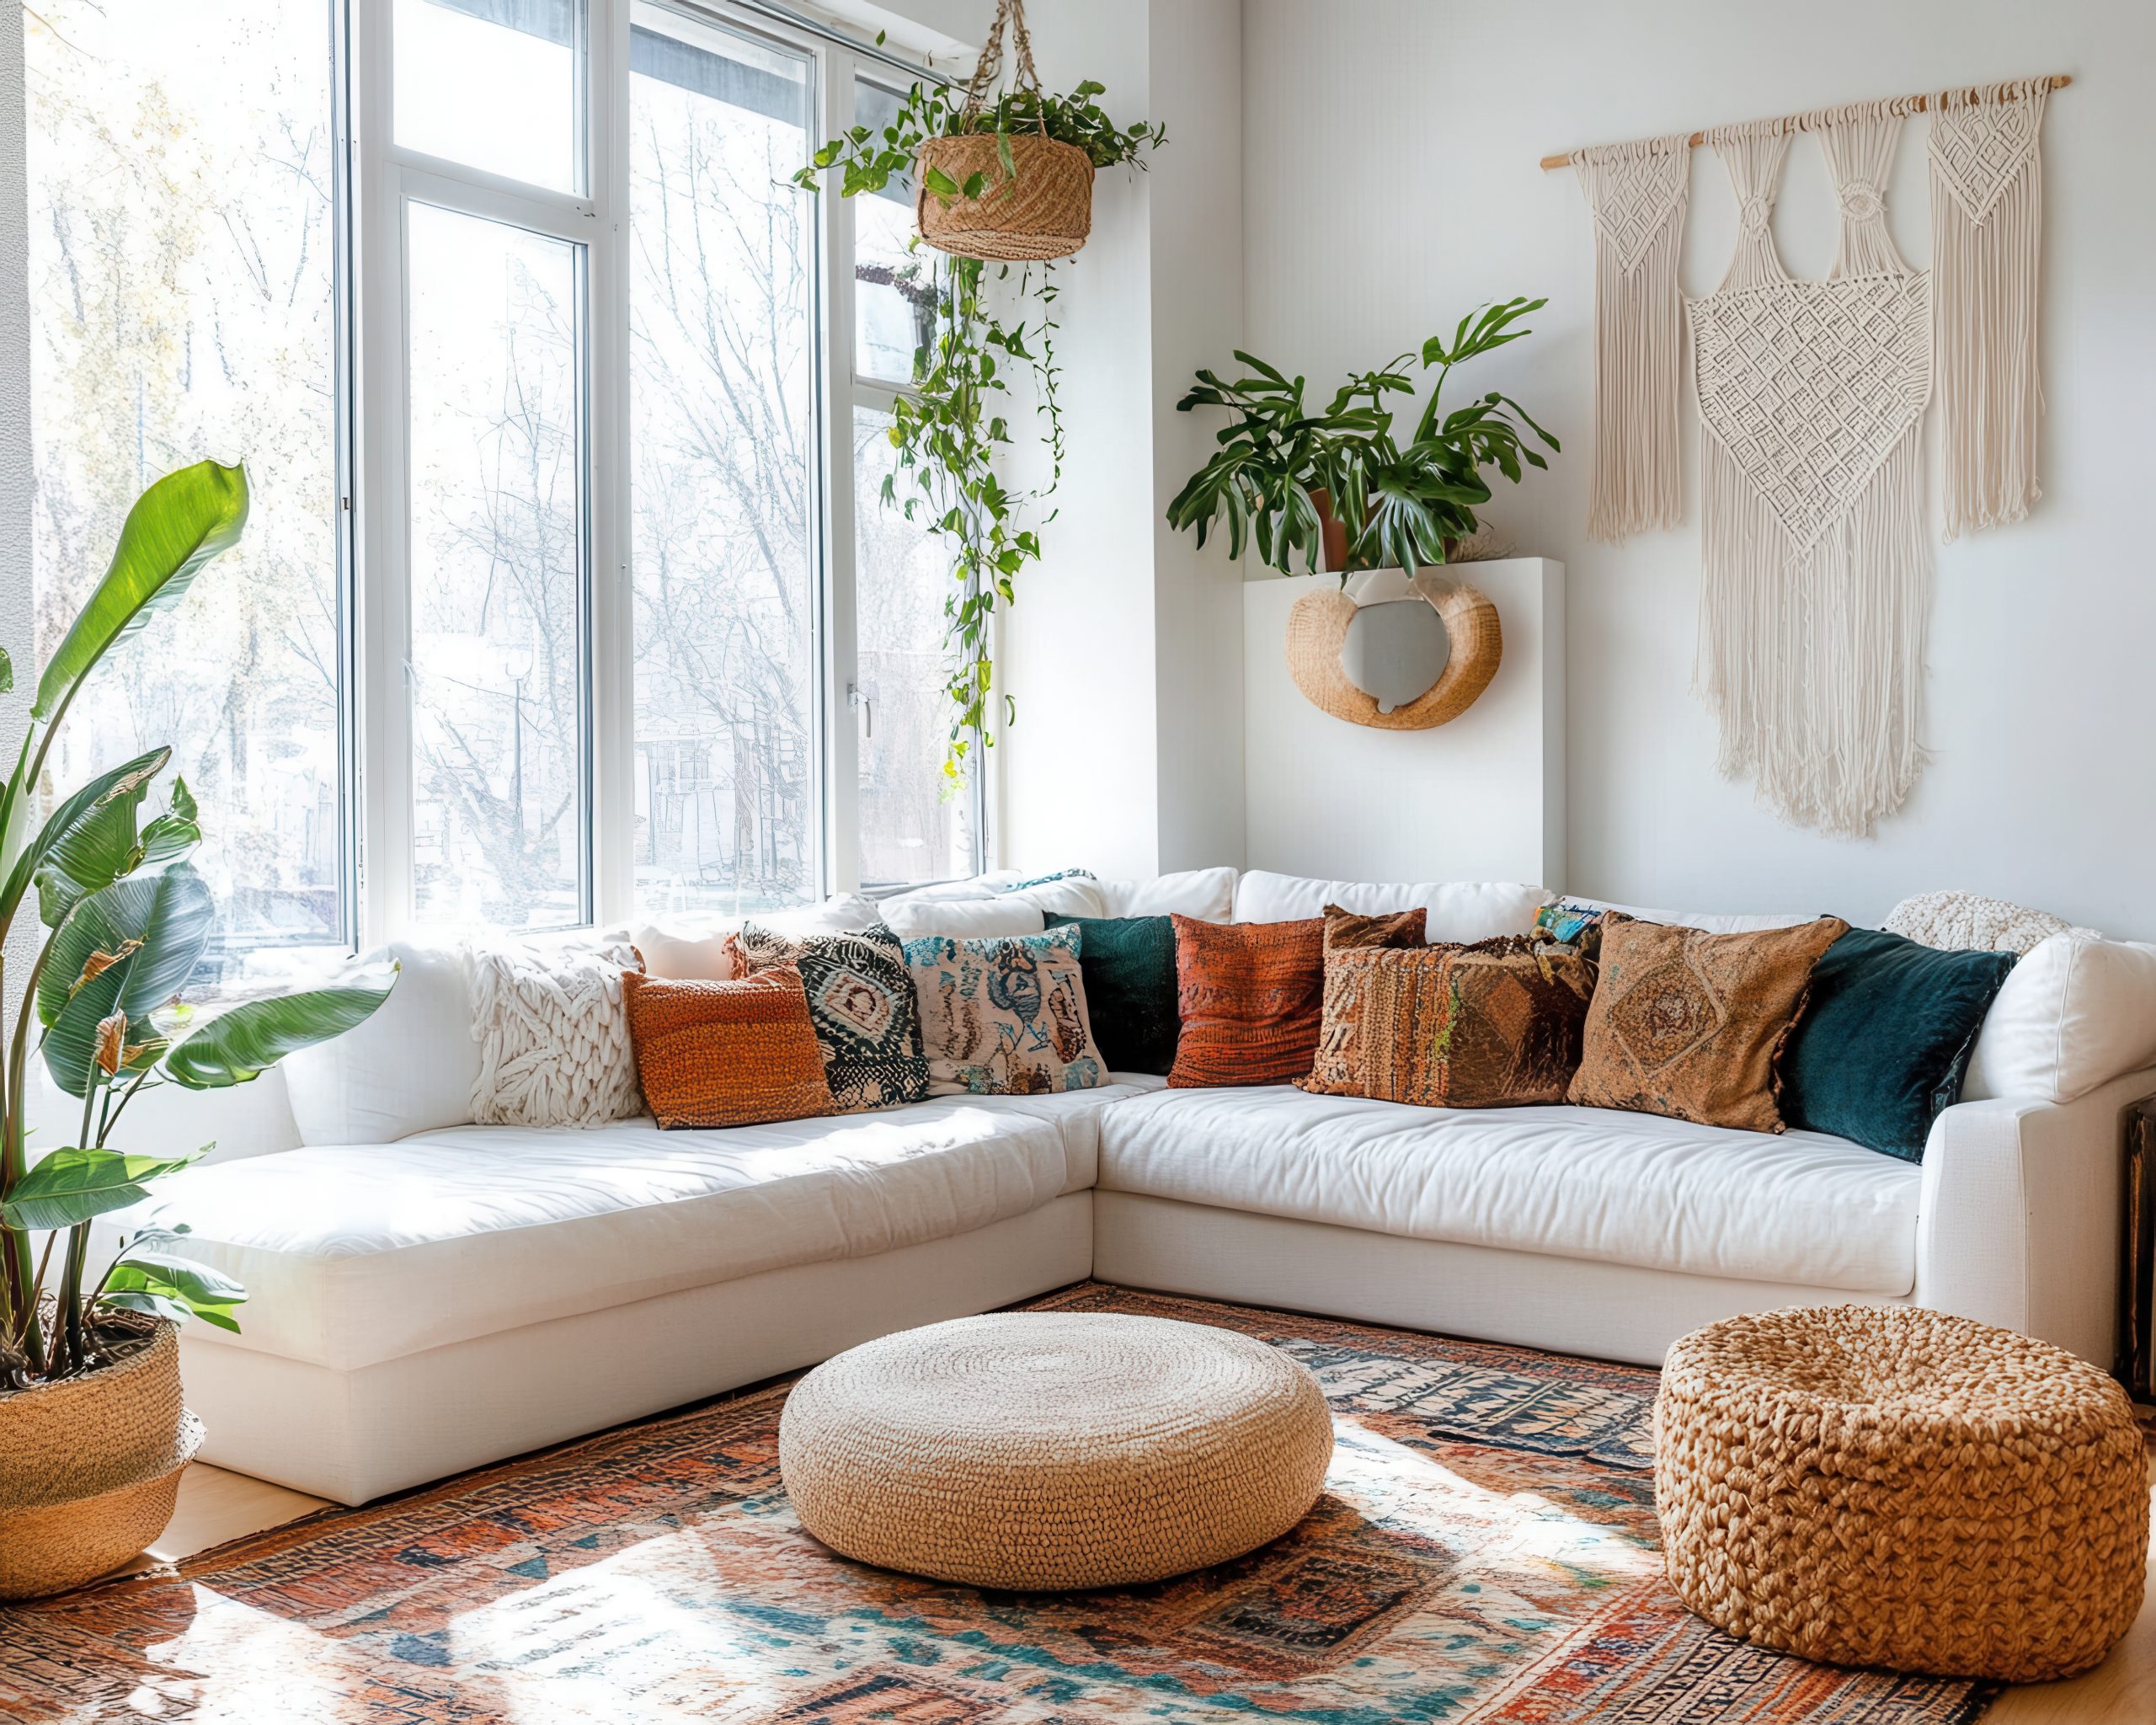
11. Bohemian
Of all the styles we’re exploring, Bohemian (or ‘Boho’) is perhaps the most free-spirited and personal. This style is less about following rules and more about breaking them creatively.
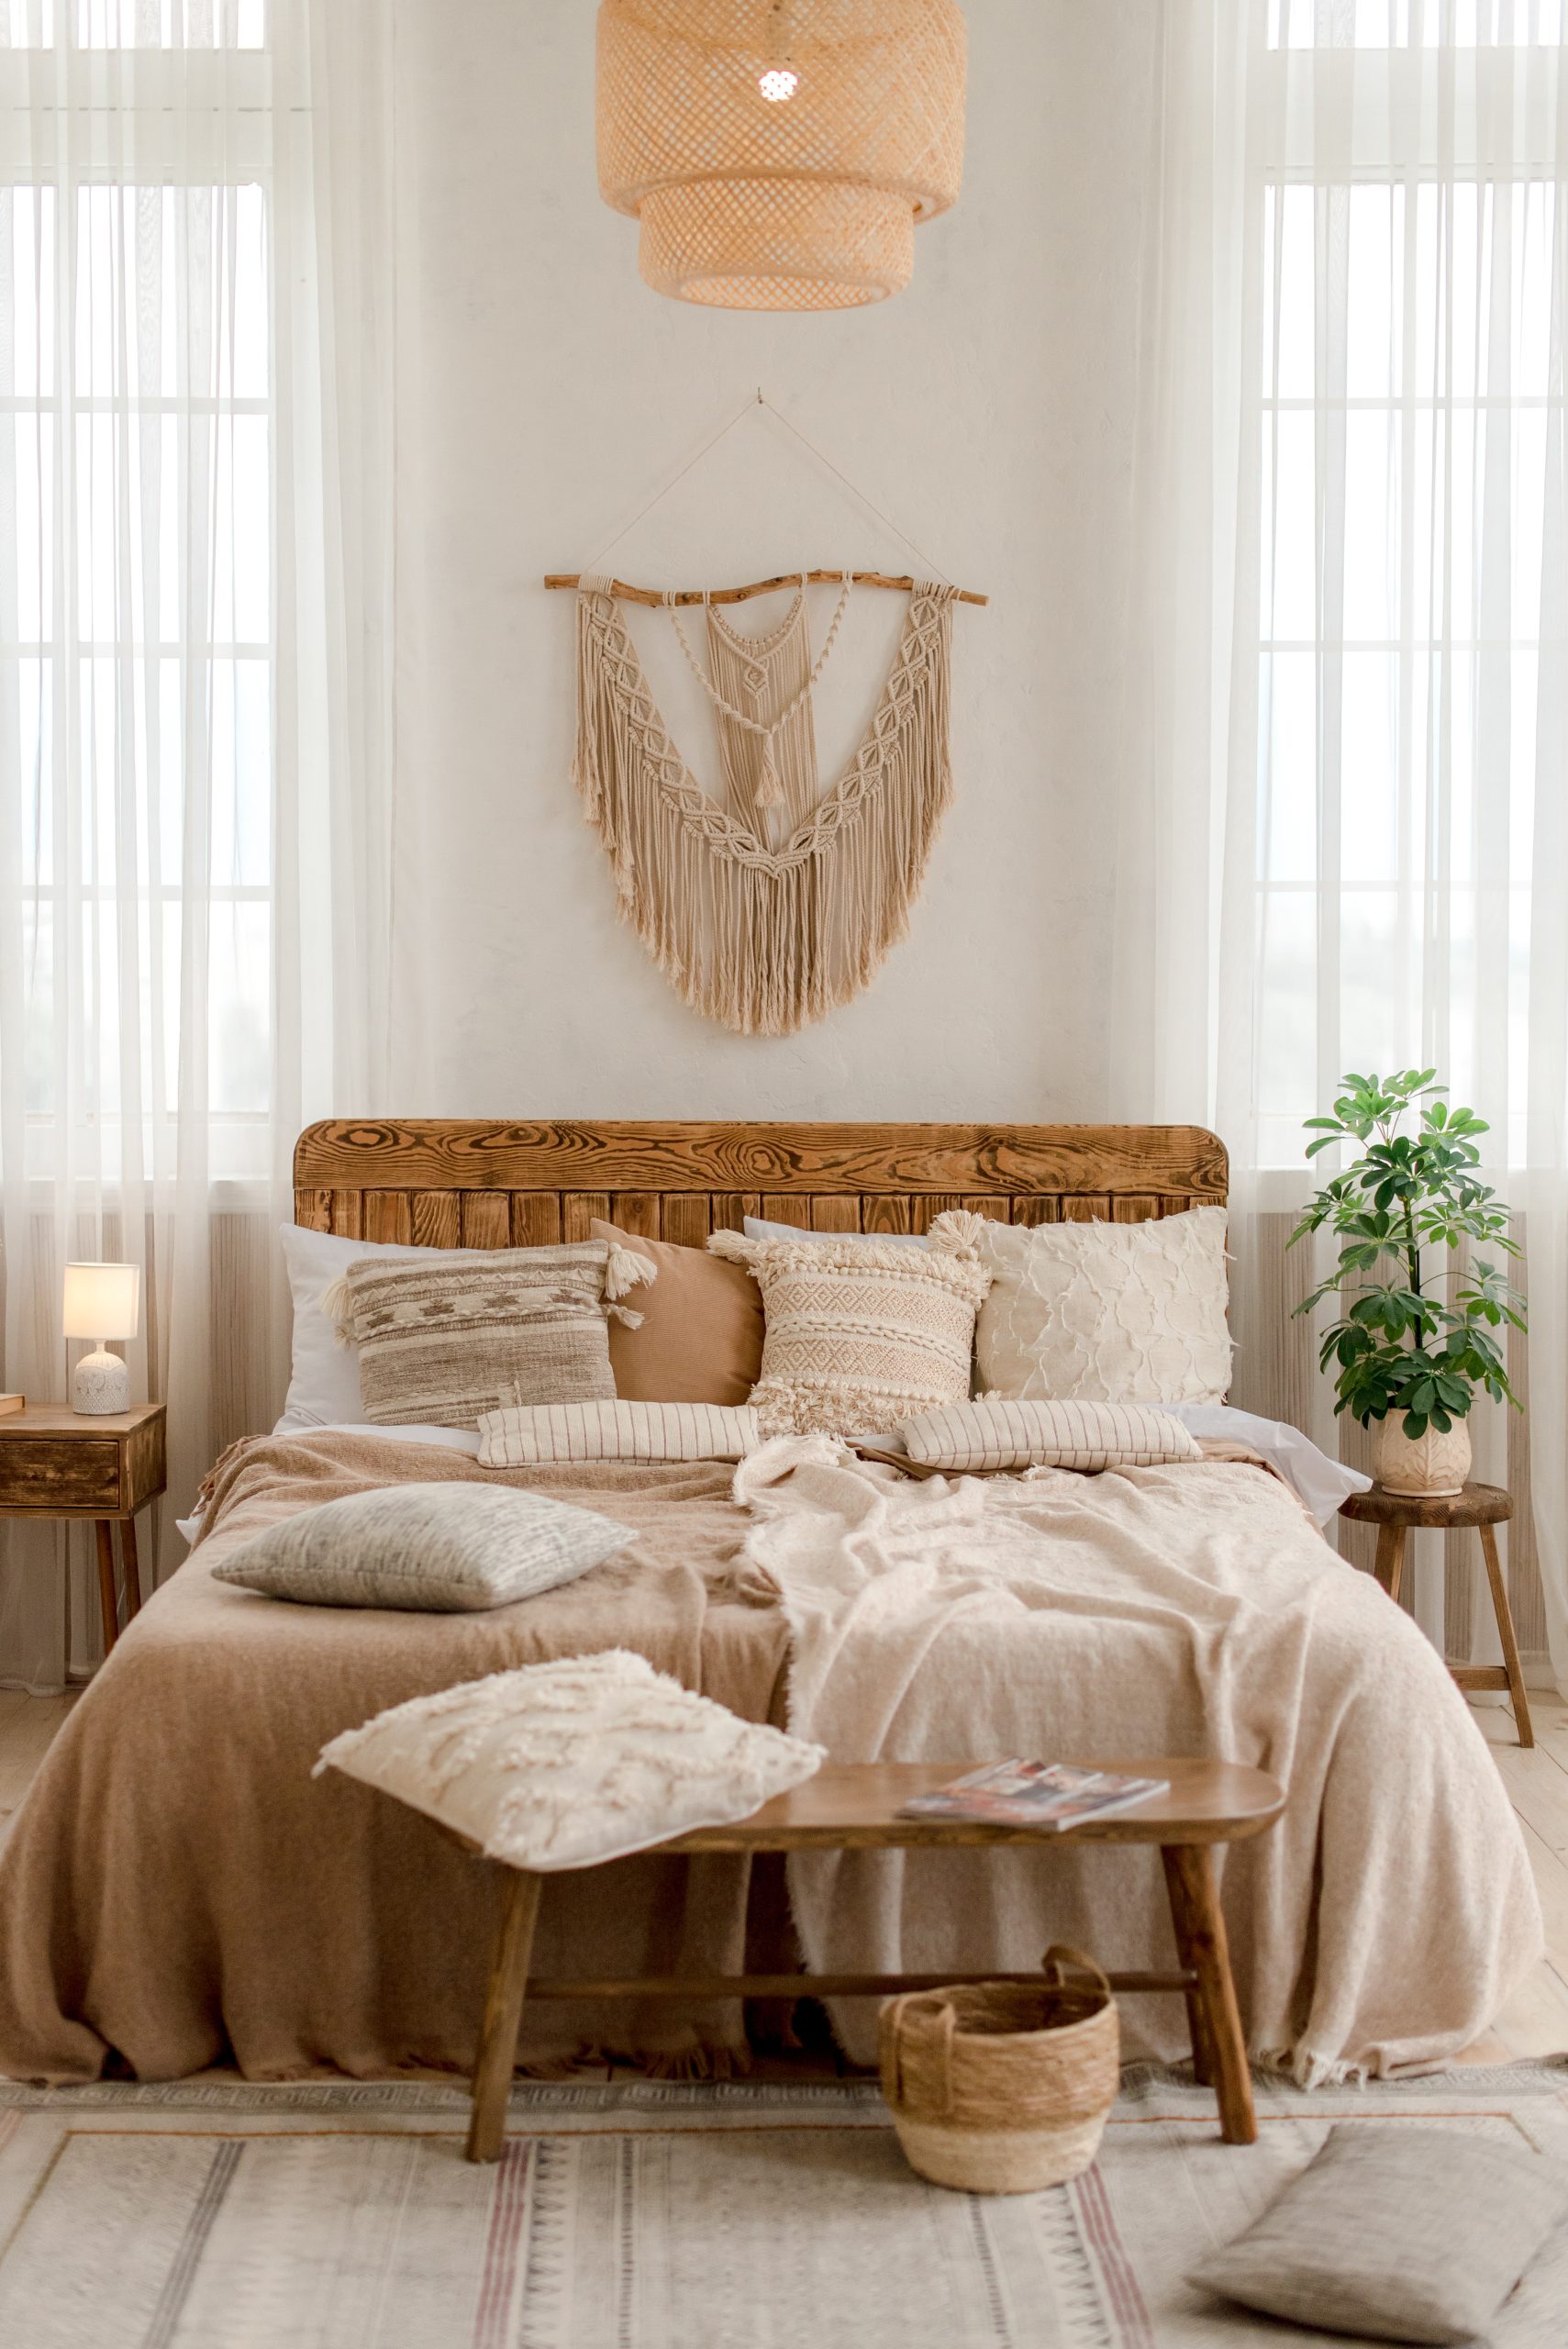
What makes Bohemian style special is its celebration of individuality and artistic expression. Think of it as the design equivalent of jazz improvisation – there’s an underlying structure, but the beauty comes from personal interpretation and unexpected combinations.
Key Characteristics:
- Layer upon layer of textures
- Mixed patterns
- Global influences
- Collected items
- Plants and natural elements
- Rich colours
- Personal mementos
- Artistic expression
Colour Palettes: Bohemian style embraces bold, varied colours
Primary Colours:
- Jewel tones
- Earth tones
- Deep browns
- Rich reds
- Warm oranges
Accent Colours:
- Emerald green
- Peacock blue
- Purple
- Gold
- Turquoise
Materials That Define the Style:
- Natural fibers
- Woven textiles
- Rattan and bamboo
- Vintage fabrics
- Mixed woods
- Metallic accents
- Crystal
- Glass
Pro Tip: When creating Bohemian spaces, start with a neutral base, then layer in colours, patterns, and meaningful pieces over time. It should look collected, not decorated.
Furniture Elements:
- Low-slung seating
- Floor cushions
- Vintage pieces
- Hanging chairs
- Mixed dining chairs
- Carved wooden pieces
- Layered rugs
- Statement headboards
Textiles and Patterns:
Essential to Boho style:
- Persian rugs
- Suzani fabrics
- Ikat prints
- Macramé
- Tapestries
- Kilim pillows
- Moroccan textiles
- Indian block prints
Decorative Elements:
- Plants (lots of them!)
- Global artifacts
- Crystals and geodes
- Vintage maps
- Musical instruments
- Art books
- Handmade pieces
- Gallery walls
12. Global
As we continue exploring our 22 different interior design styles, let’s dive into Global style – a sophisticated approach to incorporating worldwide design influences. This style is about creating thoughtful, culturally-rich interiors that tell stories of places and traditions.
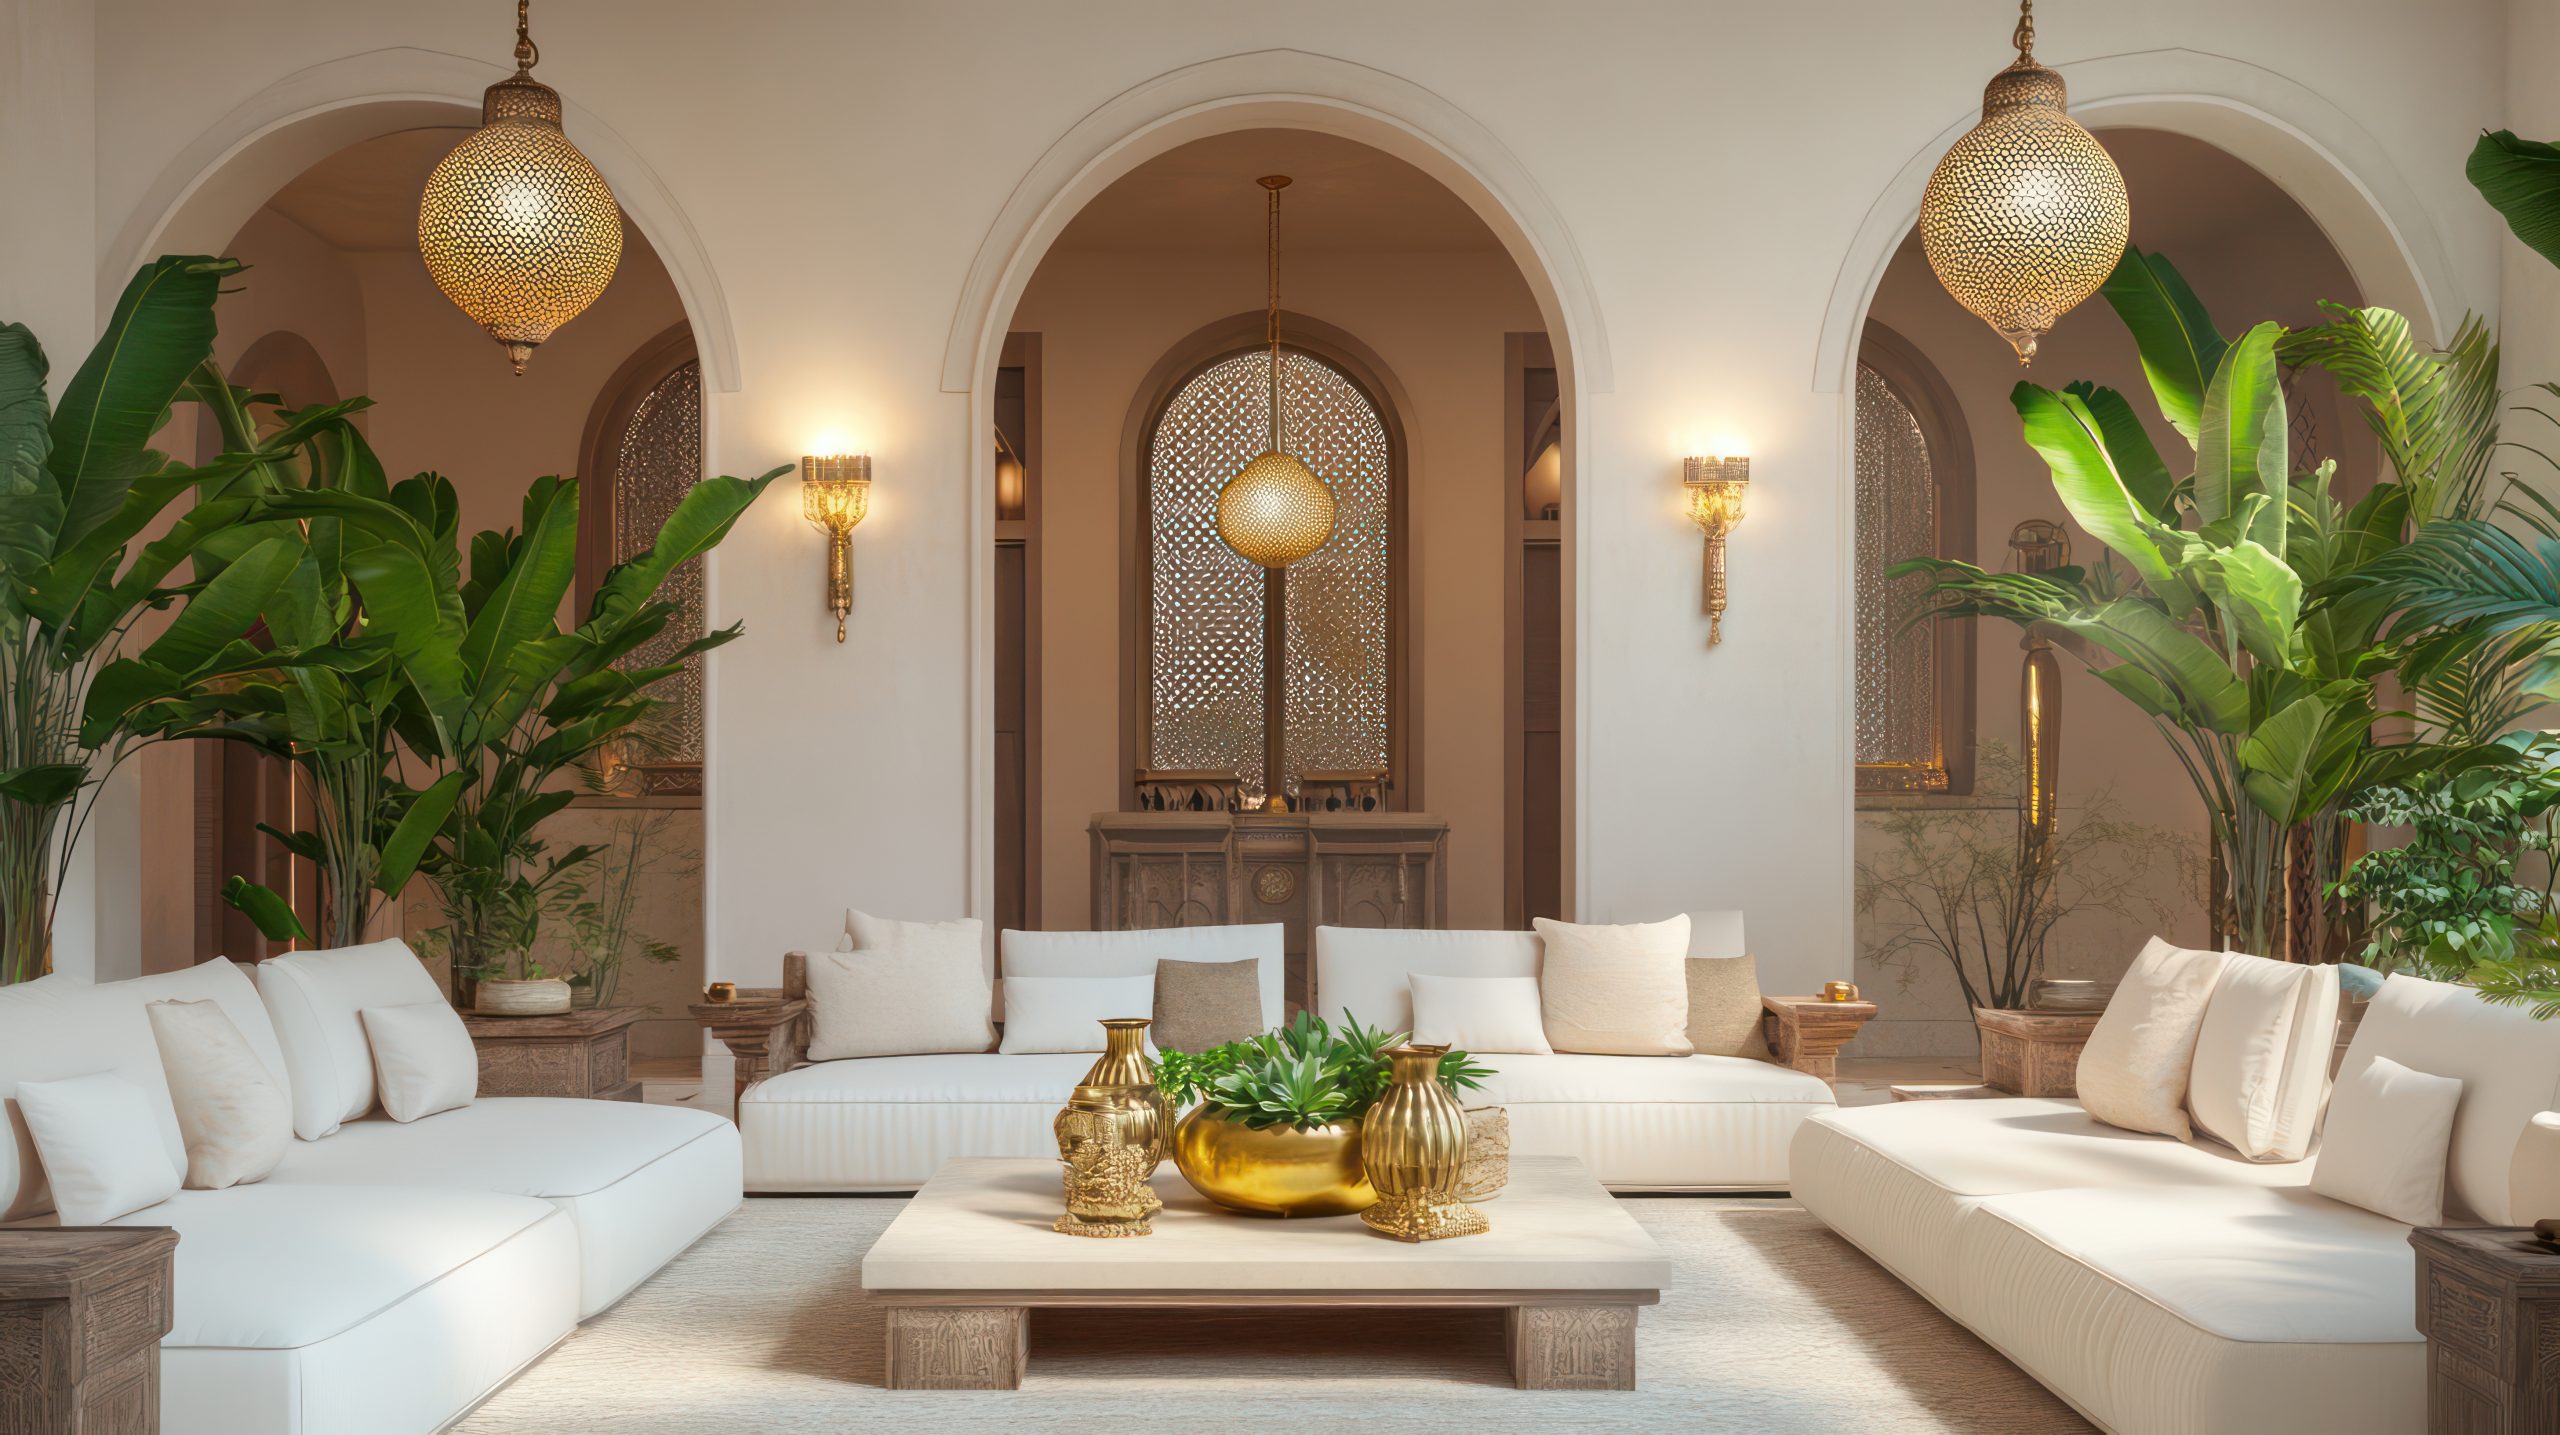
What makes Global style special is its ability to weave together influences from different cultures while maintaining respect for their origins. Think of it as creating a well-curated museum of your world travels, but in a way that’s completely livable and personal.
Key Characteristics:
- Cultural artwork
- Handcrafted elements
- Rich textures
- Traditional patterns
- Natural materials
- Meaningful accessories
- Mixed metals
- Authentic pieces
Colour Palettes: Global style embraces rich, earth-inspired colours
Primary Colours:
- Spice market reds
- Terra cotta
- Deep browns
- Rich golds
- Warm neutrals
Accent Colours:
- Indigo blue
- Saffron yellow
- Mediterranean blue
- Desert rose
- Forest green
Materials That Define the Style:
- Hand-carved woods
- Hammered metals
- Natural fibers
- Handwoven textiles
- Ceramic tiles
- Stone
- Leather
- Silk
Pro Tip: When designing Global spaces, remember that authenticity is key. One genuine piece tells a better story than multiple mass-produced “global-inspired” items.
Furniture Elements:
- Hand-carved chairs
- Low seating options
- Wooden chests
- Metal-worked tables
- Floor cushions
- Painted cabinets
- Prayer benches
- Intricate screens
Cultural Elements:
Thoughtful incorporation of:
- African masks
- Moroccan lanterns
- Indian textiles
- Chinese ceramics
- Turkish rugs
- Japanese screens
- Mexican pottery
- Persian carpets
Space Planning:
Global spaces require:
- Conversation areas
- Display spaces
- Meditation corners
- Social gathering spots
- Cultural zones
- Reading nooks
- Collection displays
- Flexible seating
Styling Guidelines:
- Mix textures thoughtfully
- Layer patterns carefully
- Create visual stories
- Group similar items
- Balance colours
- Include natural elements
- Add meaningful lighting
- Create focal points
Common Mistakes to Avoid:
- Over-mixing cultures
- Using inauthentic pieces
- Creating a bazaar look
- Forgetting about comfort
- Overlooking quality
- Missing personal connection
Coastal & Mediterranean Styles
Let’s explore styles that bring the essence of waterfront living and sun-drenched shores into our homes.
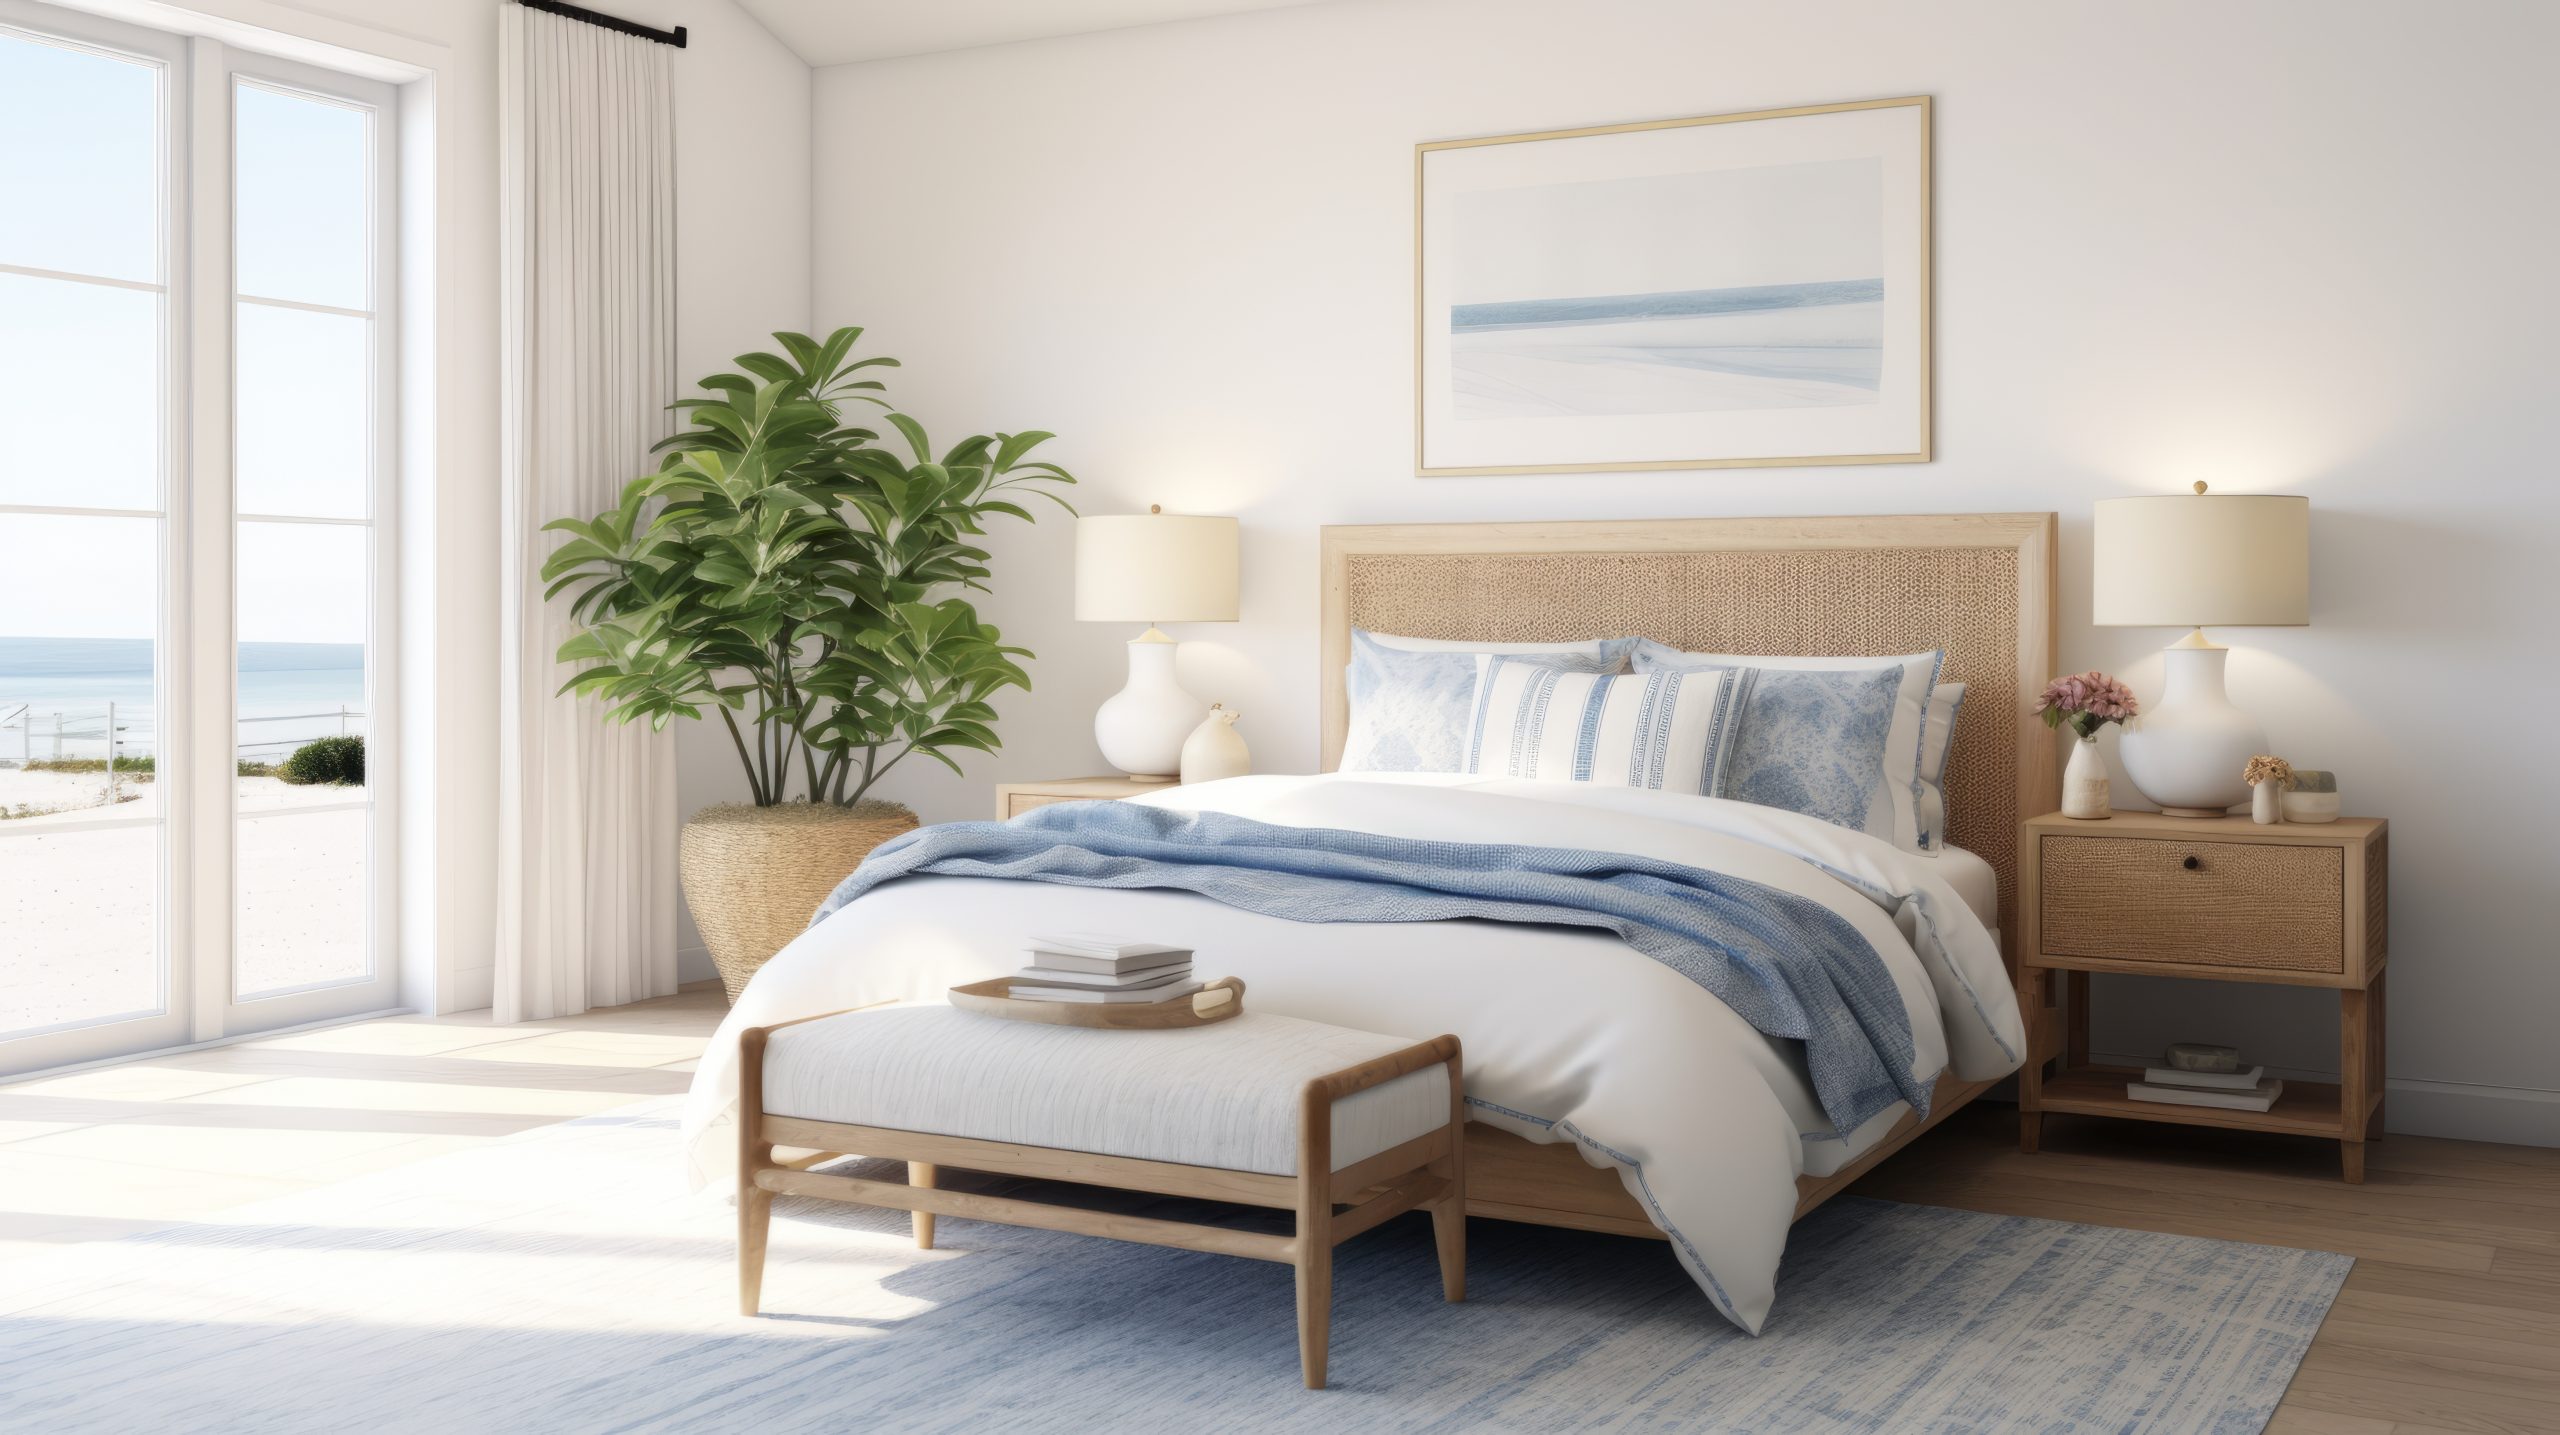
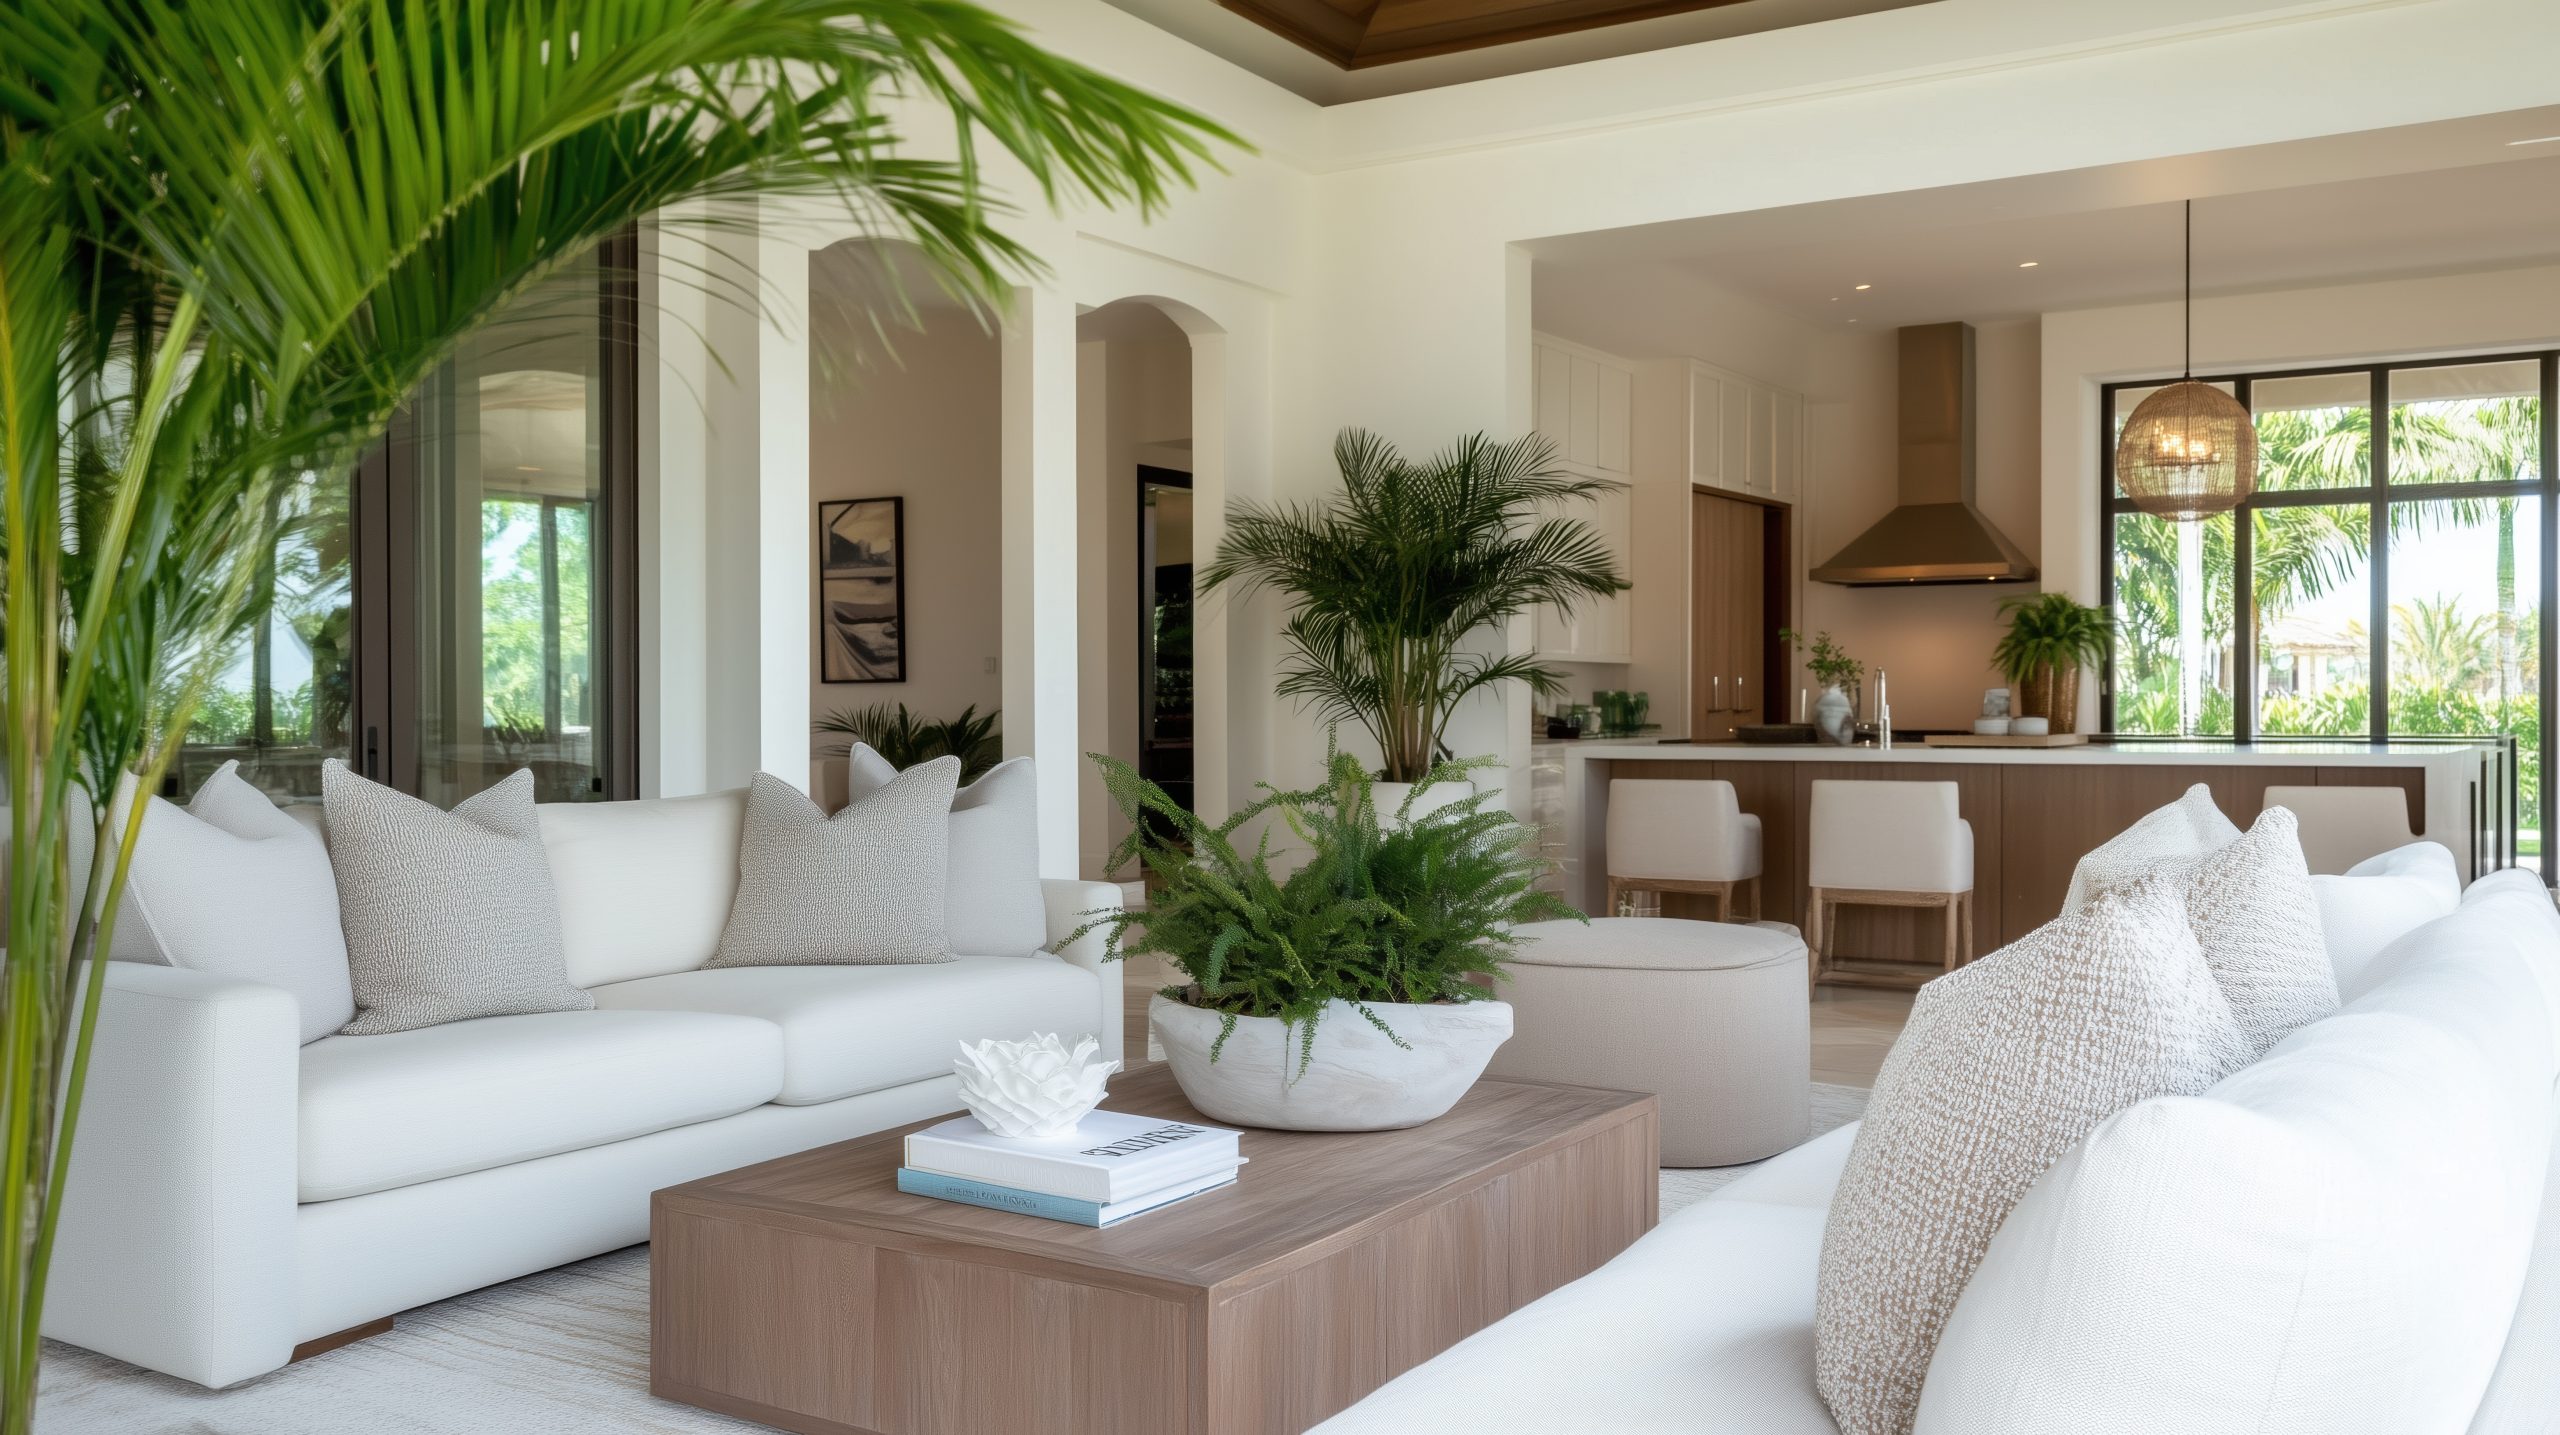
13. Coastal
Of all the styles we’re discussing, coastal design instantly transports you to a more relaxed state of mind. This style is about much more than seashells and anchors.
What makes Coastal style special is its ability to create a vacation-like atmosphere while maintaining sophistication and livability. Think of it as bottling the feeling of a perfect beach day and infusing it into your daily living space.
Key Characteristics:
- Light and airy spaces
- Natural light abundance
- Ocean-inspired colours
- Relaxed furnishings
- Natural textures
- Clean lines
- Beachy elements
- Uncluttered spaces
Colour Palettes: Coastal design draws from nature’s seaside palette
Primary Colours:
- Crisp whites
- Sandy beiges
- Ocean blues
- Soft greys
- Driftwood taupes
Accent Colours:
- Sea glass green
- Coral pink
- Navy blue
- Shell pink
- Seafoam
Materials That Define the Style:
- Weathered wood
- Natural fibers
- Linen
- Cotton
- Rope
- Seagrass
- Jute
- Glass
Pro Tip: When designing coastal spaces, suggest the beach rather than recreate it literally. One beautiful piece of coral on a coffee table speaks volumes more than a room full of seashells.
Furniture Elements:
- Slipcovered sofas
- Woven chairs
- Painted wood pieces
- Glass-top tables
- Upholstered headboards
- Window seats
- Rattan accents
- Built-in storage
Textile Choices:
- Cotton duck
- Linen
- Performance fabrics
- Natural fibre rugs
- Textured throws
- Striped pillows
- Woven blinds
- Light curtains
Essential Elements:
- Natural fibre rugs
- Woven baskets
- Glass vessels
- Driftwood pieces
- Abstract seascapes
- White ceramics
- Beach grass
- Mirror accents
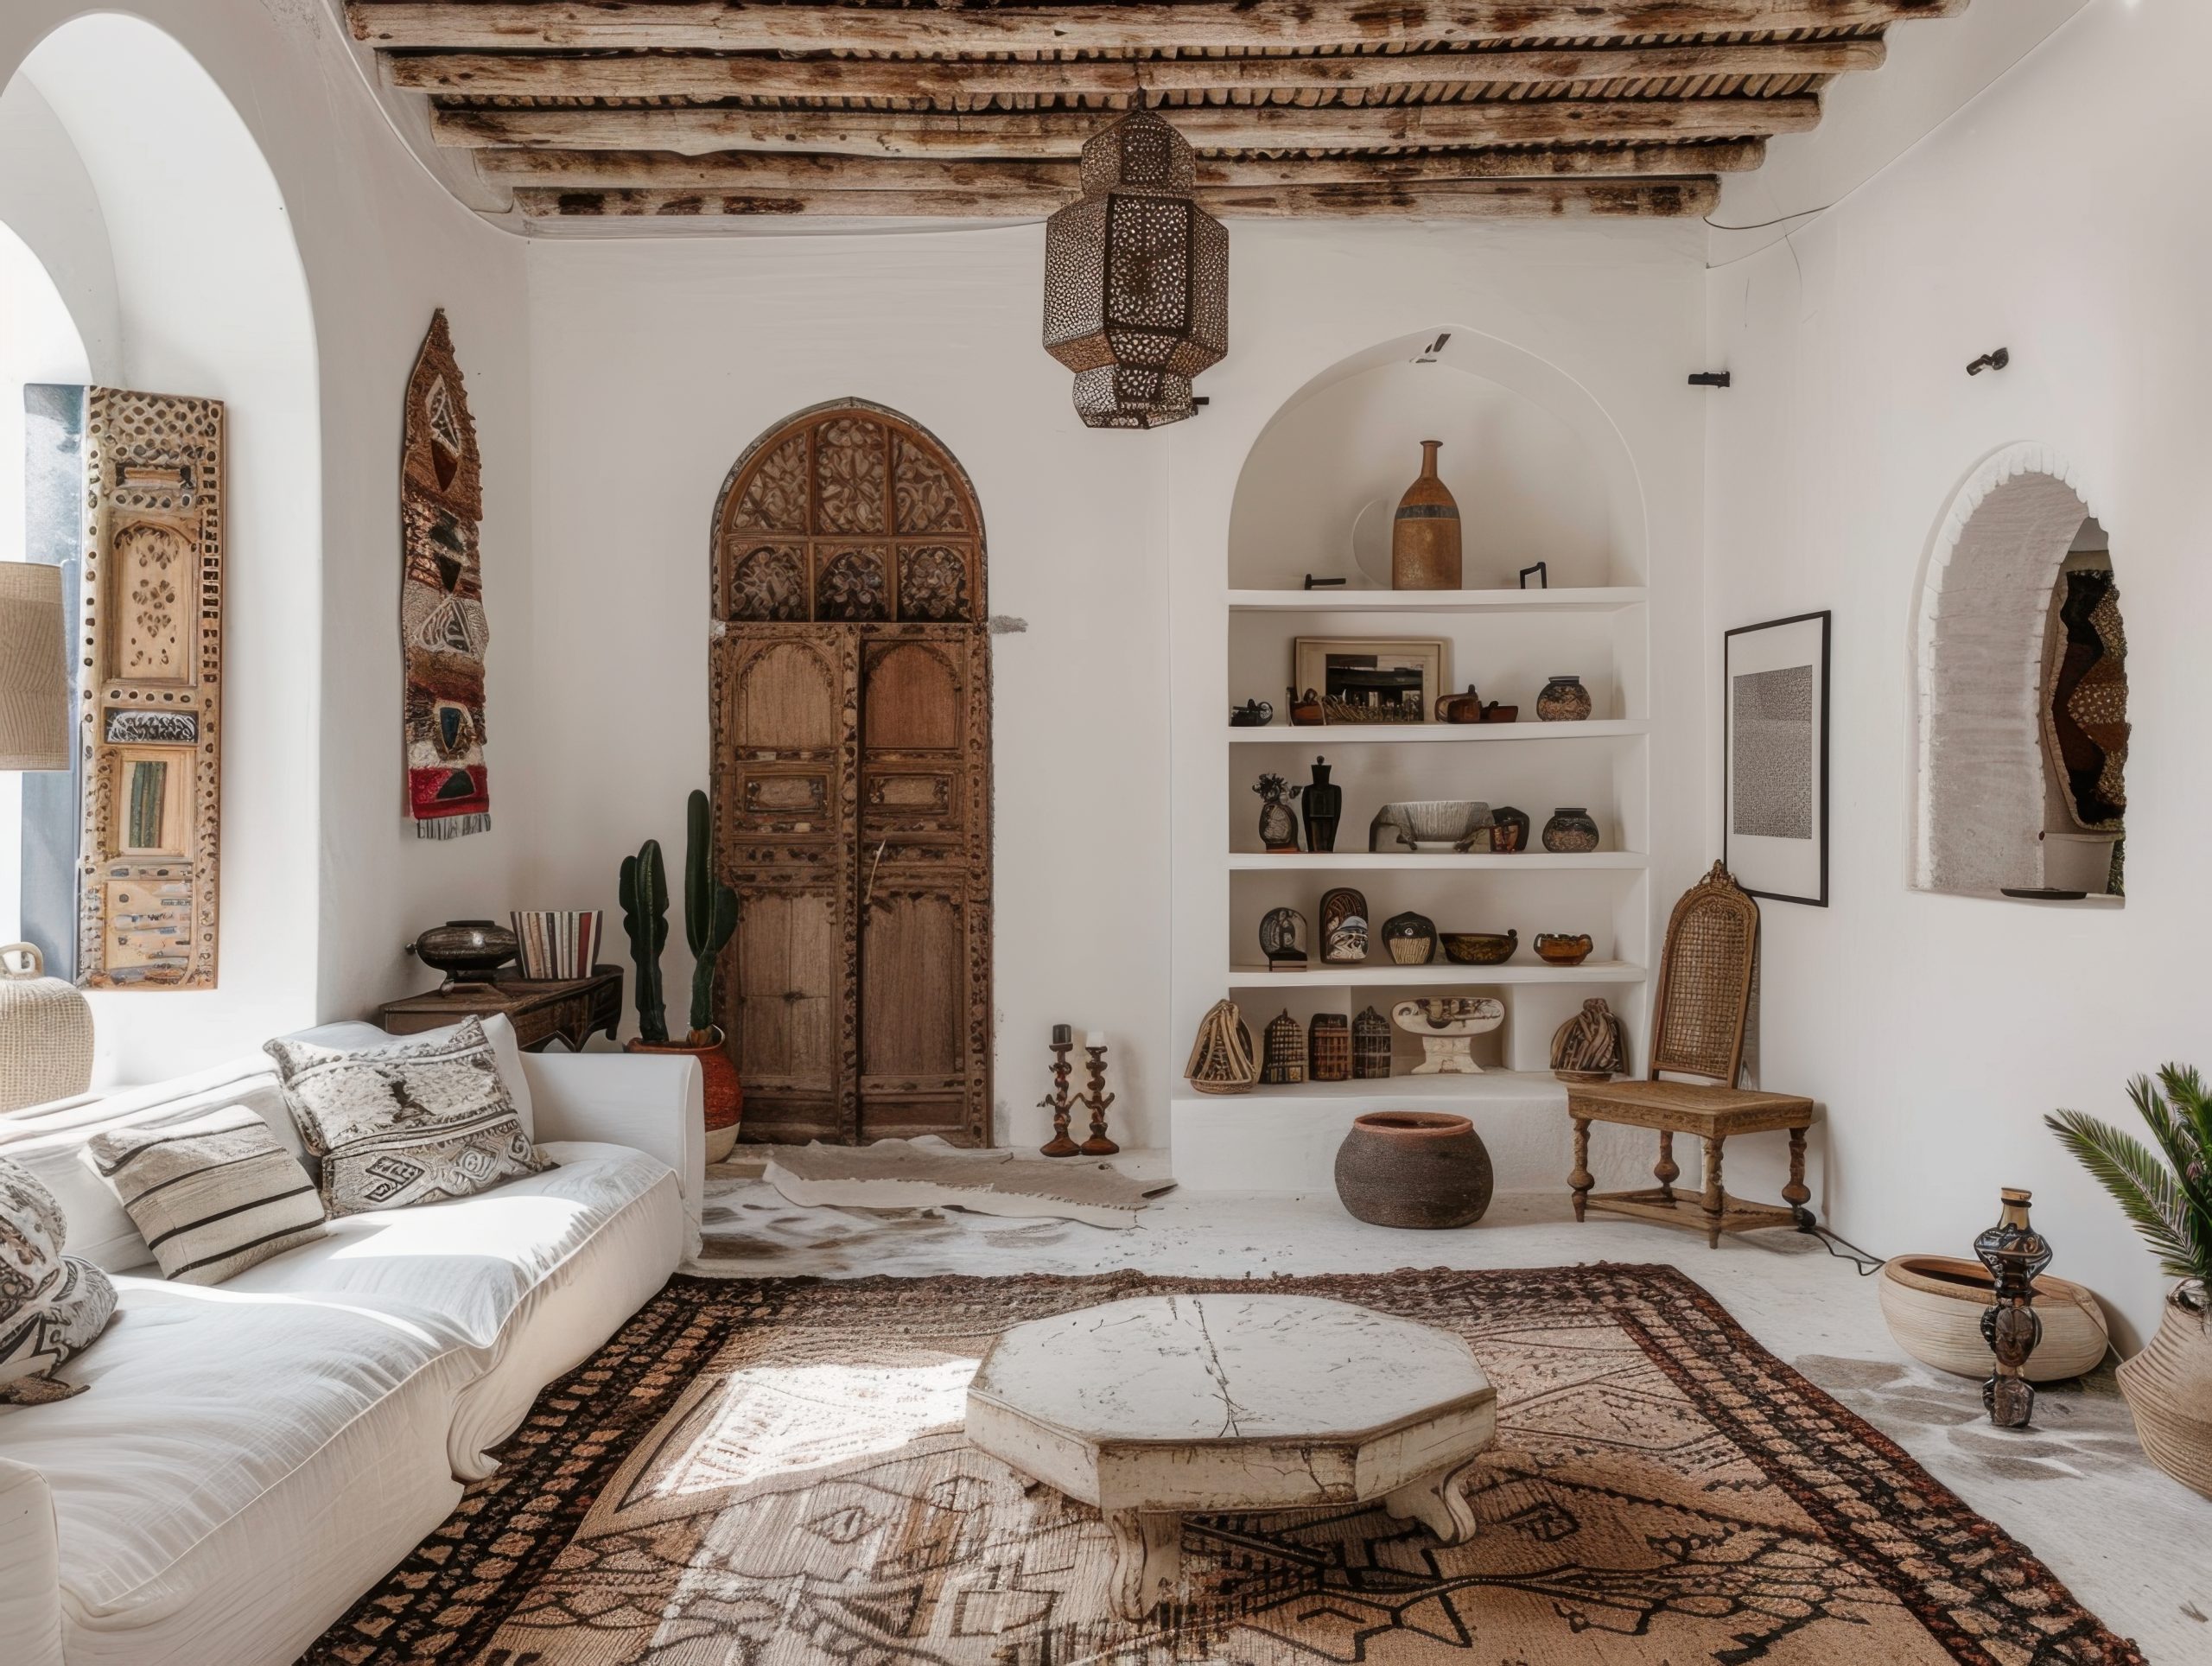
14. Mediterranean
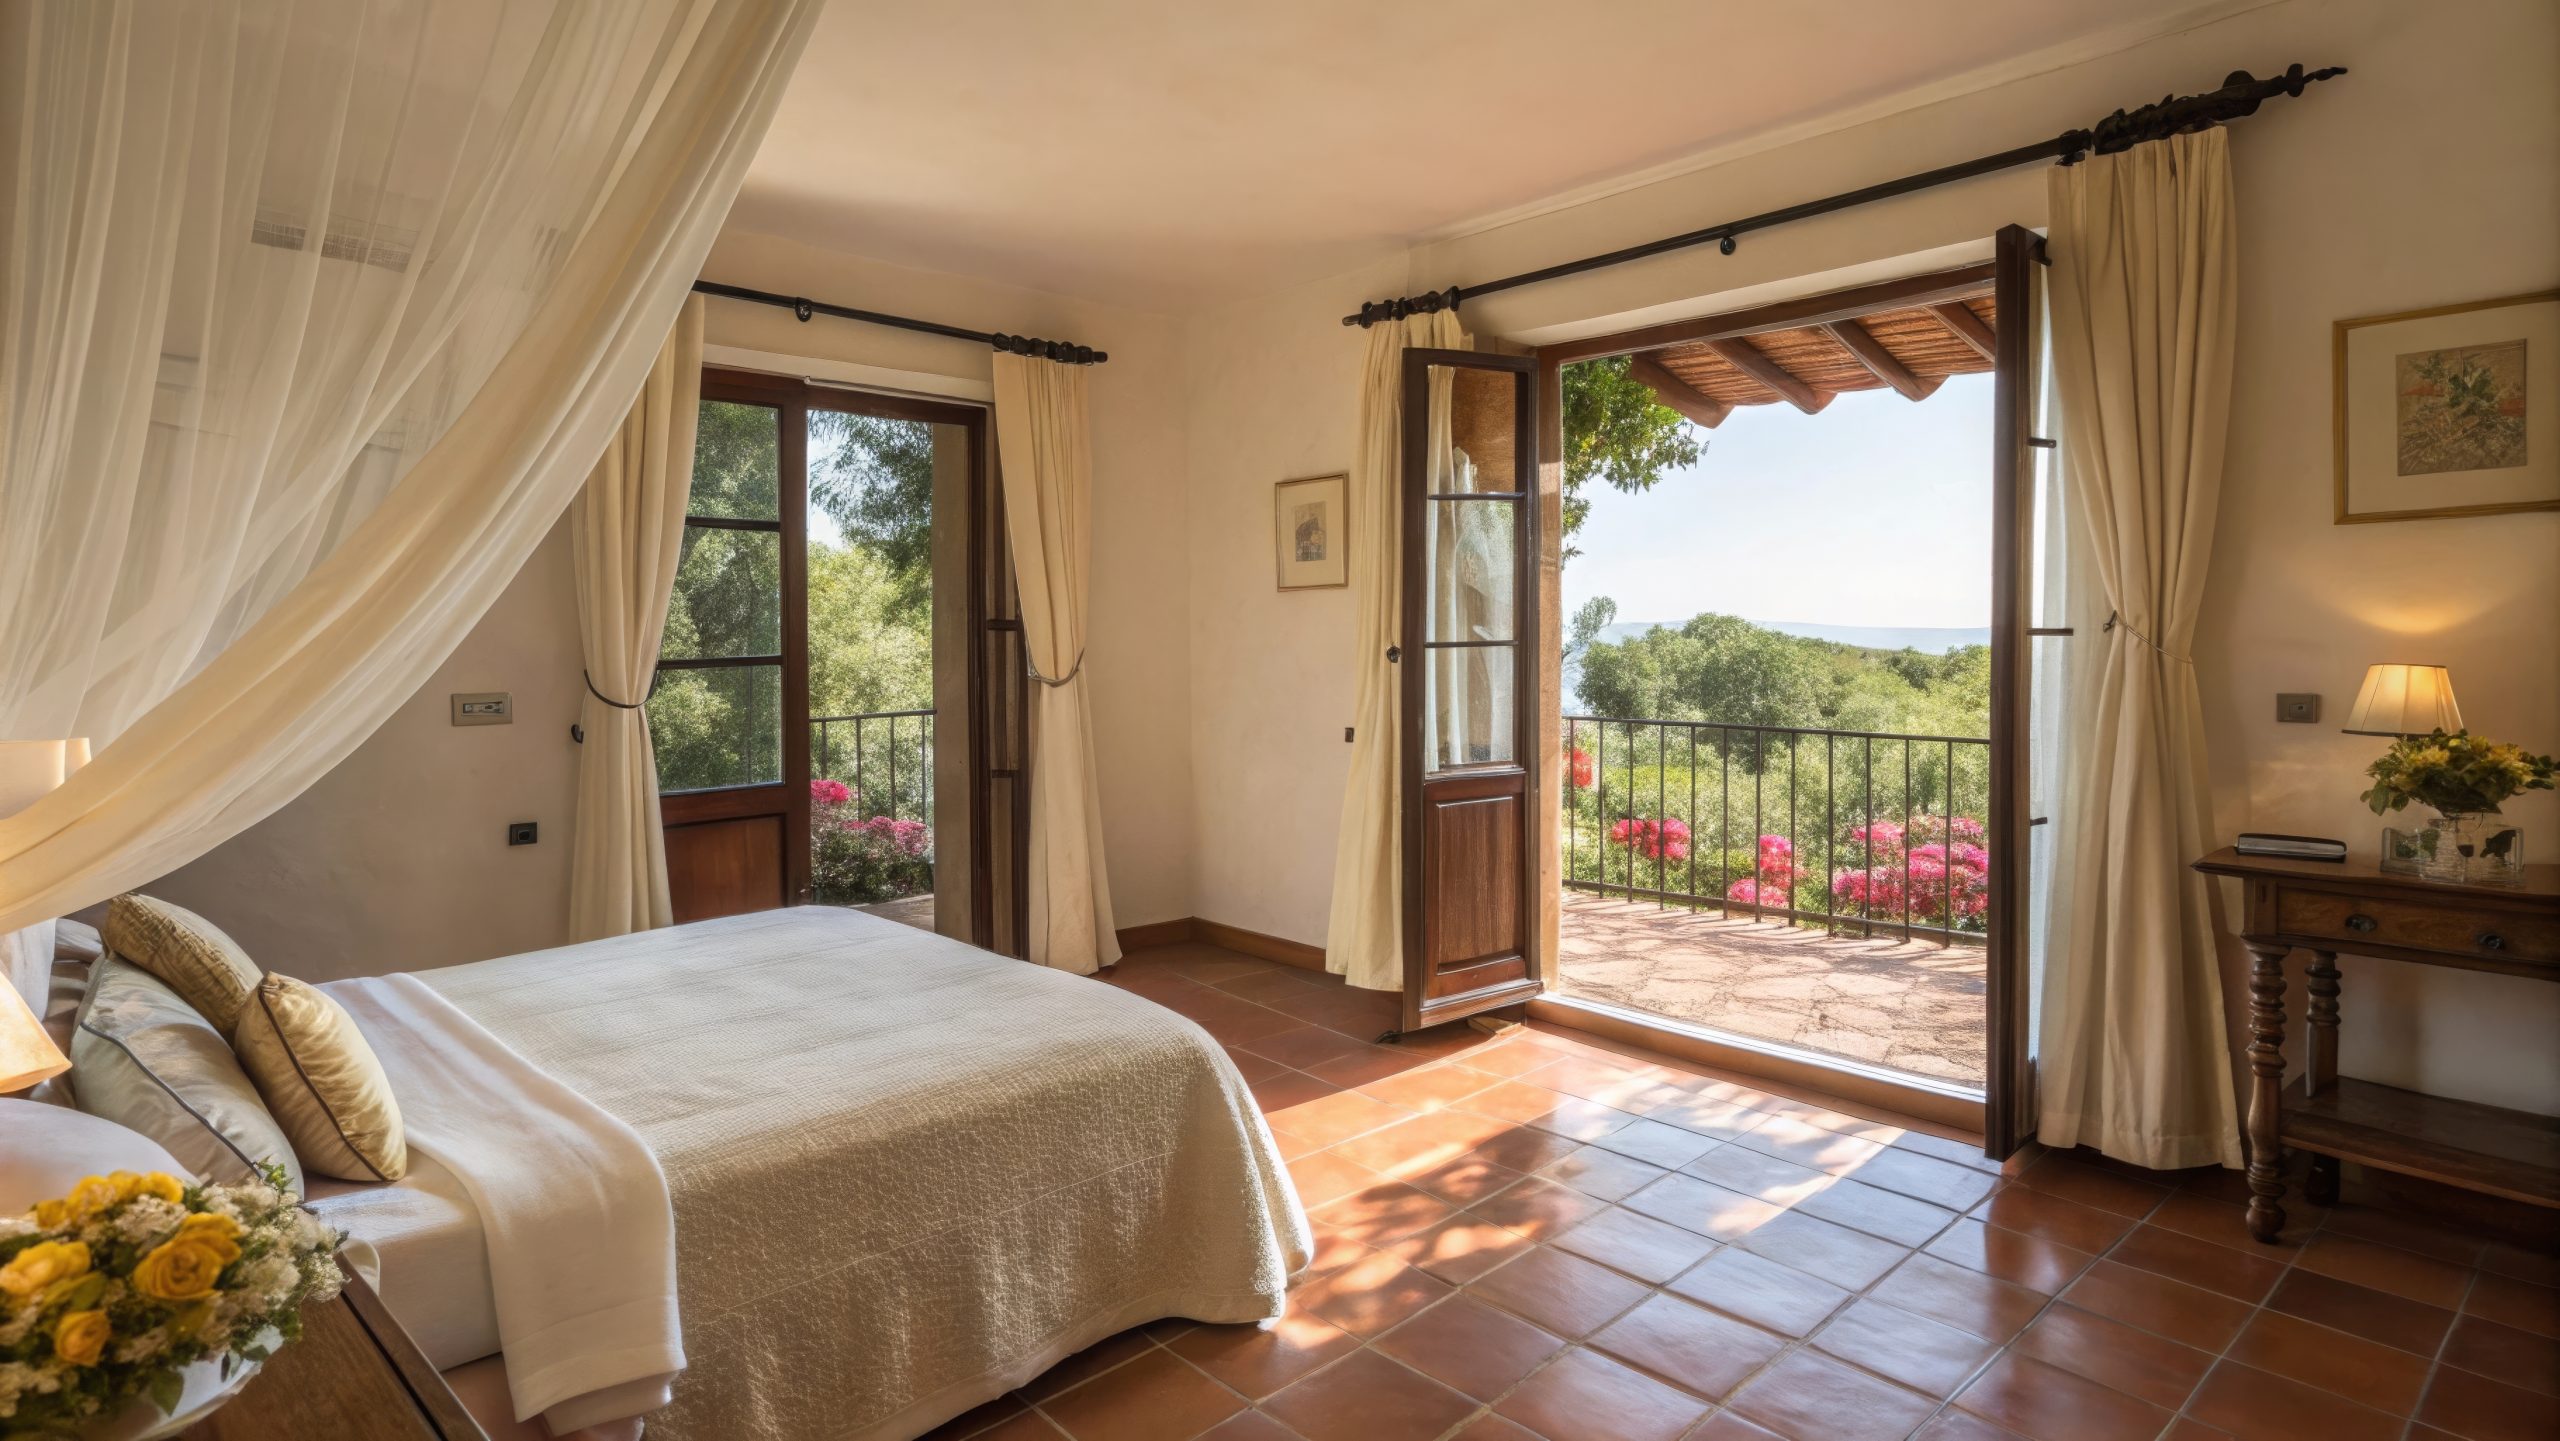
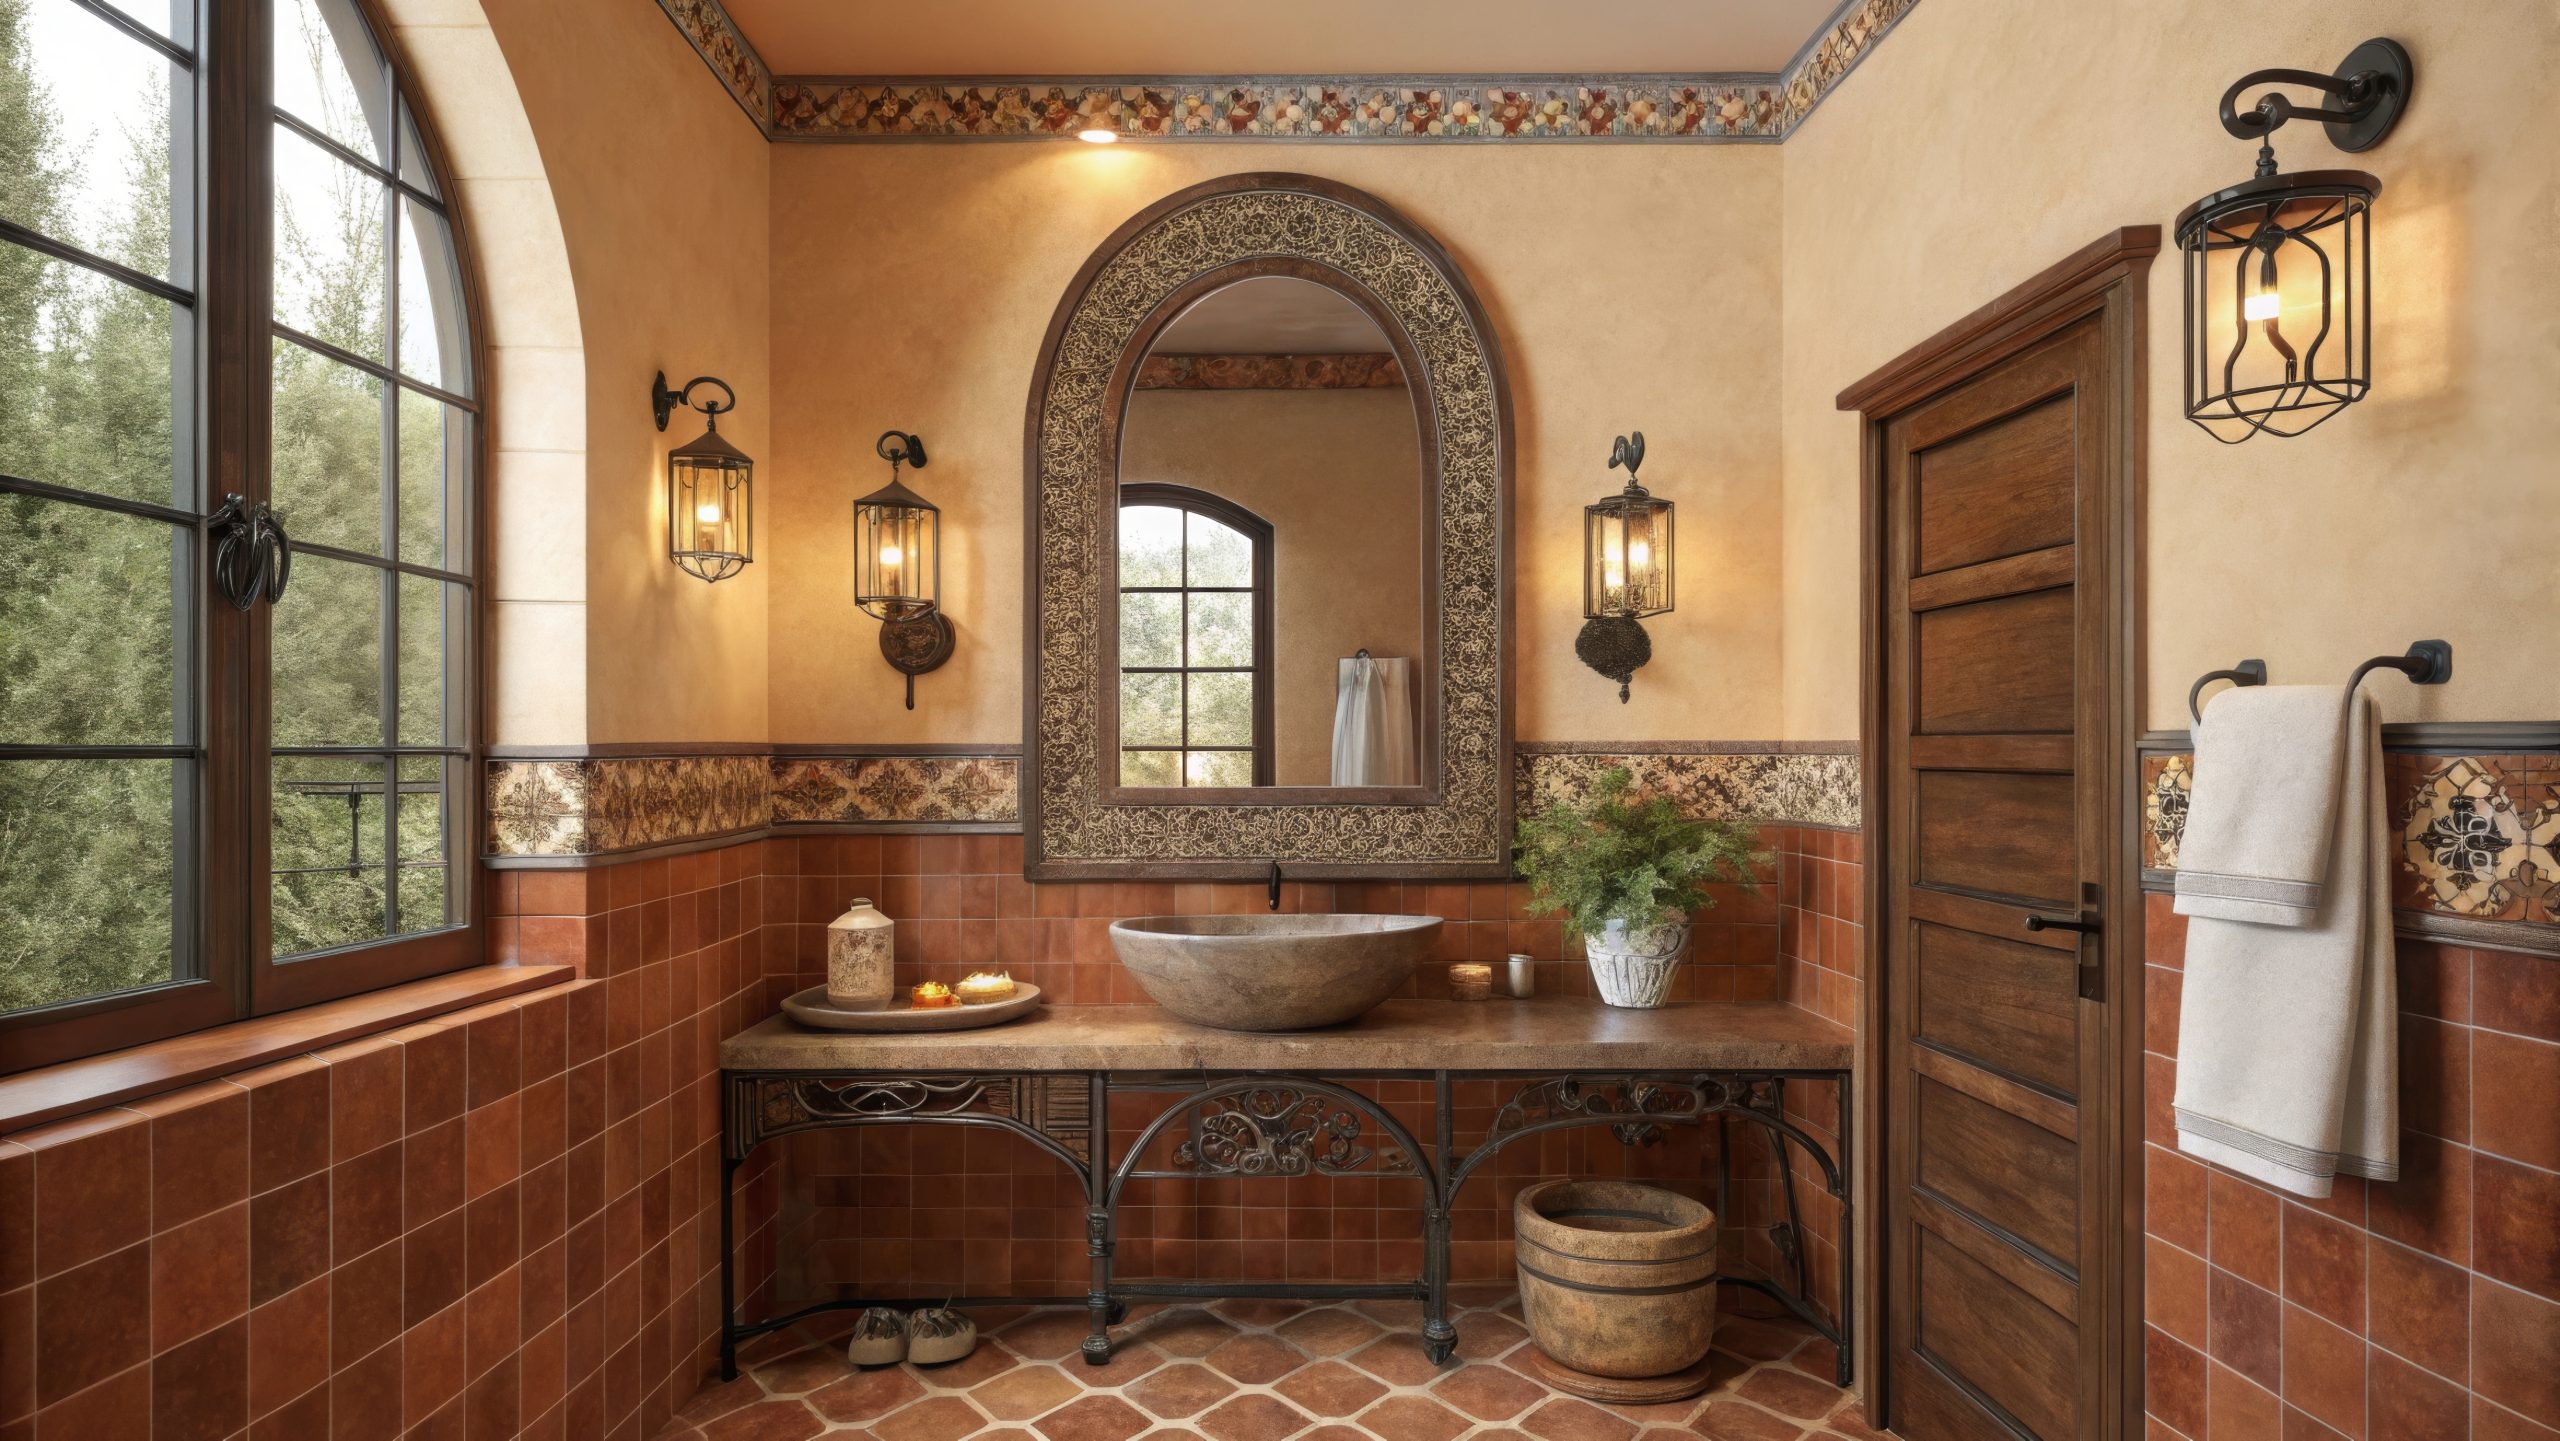
Let’s explore Mediterranean style – a design approach that captures the warmth and romance of seaside villas in Italy, Spain, and Greece. This style is about creating spaces that feel both luxurious and incredibly livable.
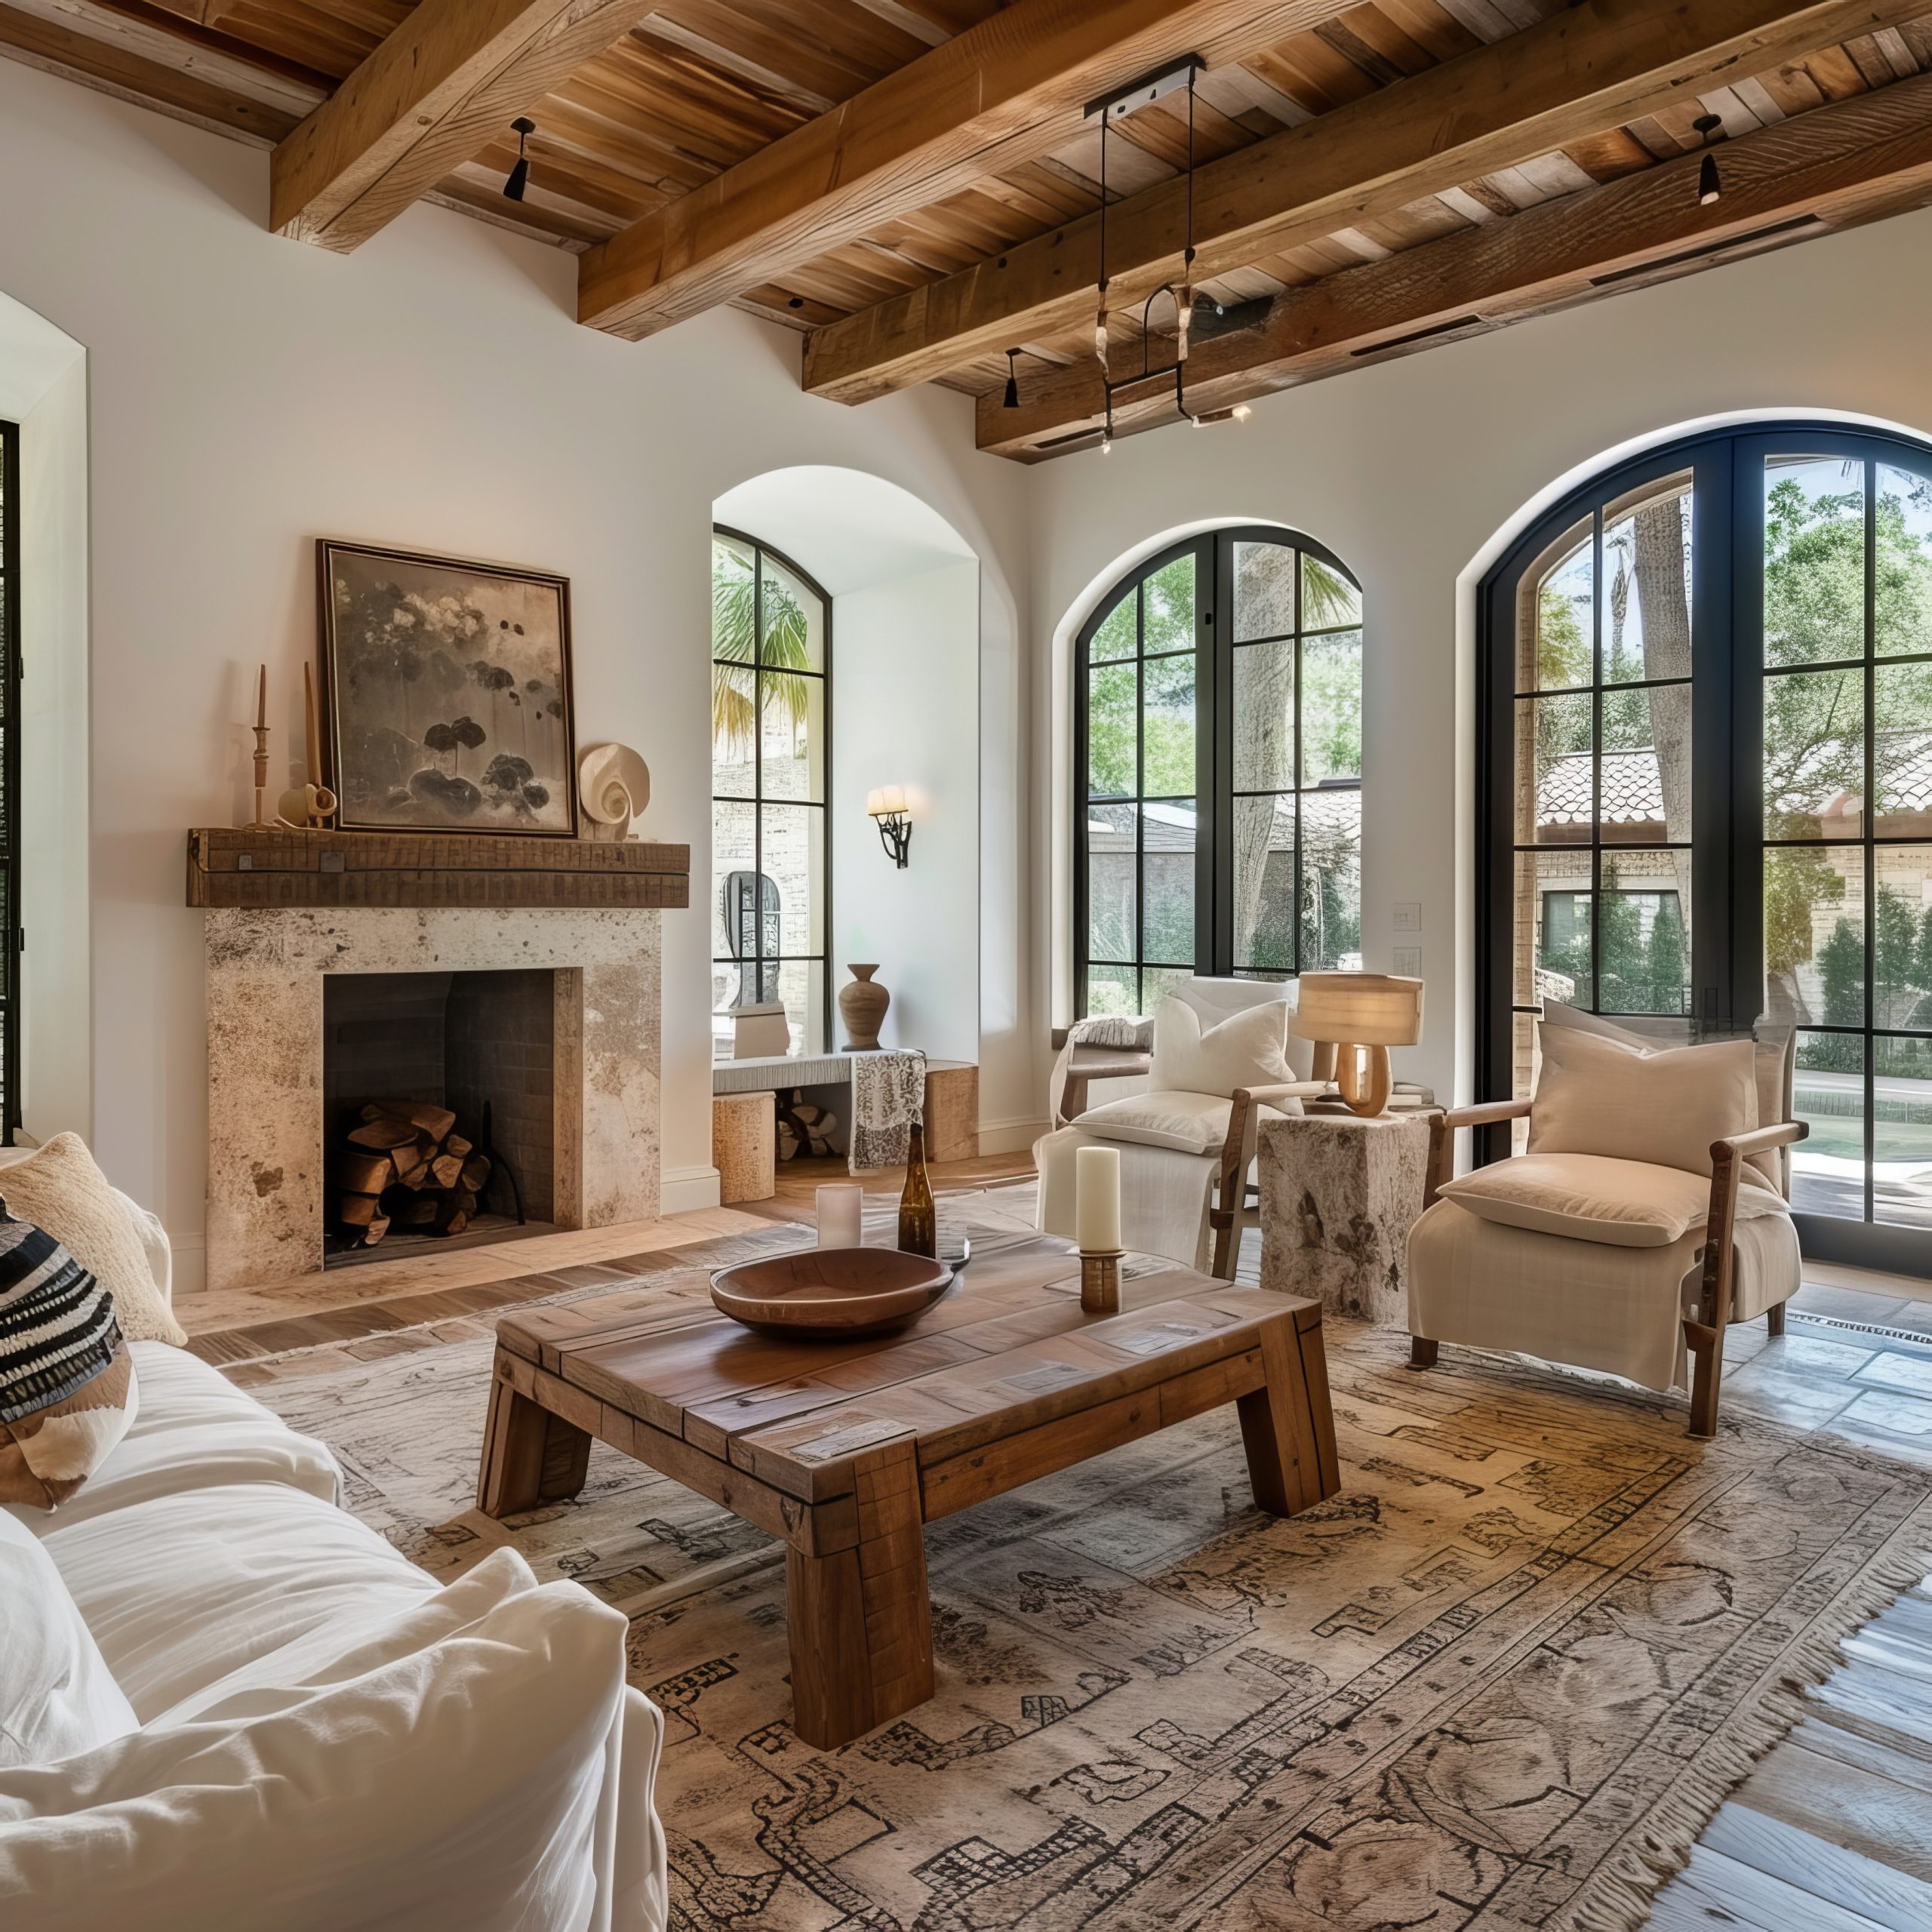
What makes Mediterranean style special is its ability to blend indoor and outdoor living while celebrating craftsmanship and natural materials. Think of it as bringing the sun-drenched charm of the Mediterranean coast into your daily life, complete with all the texture and warmth that implies.
Key Characteristics:
- Textured walls
- Arched doorways
- Terra cotta tiles
- Wrought iron details
- Indoor-outdoor flow
- Warm colours
- Hand-crafted elements
- Natural materials
Colour Palettes: Mediterranean design embraces sun-warmed colours
Primary Colours:
- Terra cotta
- Warm whites
- Sandy beiges
- Ocean blues
- Olive greens
Accent Colours:
- Burnt orange
- Deep reds
- Sea blue
- Cypress green
- Golden yellow
Materials That Define the Style:
- Terra cotta
- Natural stone
- Wrought iron
- Ceramic tiles
- Carved wood
- Marble
- Copper
- Mosaic tiles
Pro Tip: When designing Mediterranean spaces, always remember that authenticity in materials is key. One real terra cotta floor will add more character than any amount of faux finishing.
Furniture Elements:
- Heavy wooden pieces
- Wrought iron beds
- Carved details
- Upholstered dining chairs
- Built-in seating
- Wooden benches
- Ornate occasional tables
- Outdoor furniture
Architectural Elements:
- Stucco walls
- Arched windows
- Carved doors
- Exposed beams
- Tiled roofs
- Stone floors
- Column details
- Courtyard connections
Decorative Features:
- Colourful tiles
- Pottery and urns
- Iron light fixtures
- Fountain features
- Mediterranean art
- Ceramic plates
- Fresh herbs
- Olive trees
Space Planning:
Mediterranean homes emphasise:
- Flow between spaces
- Outdoor living areas
- Formal dining spaces
- Gathering spots
- Kitchen as a focal point
- Courtyard access
- Natural light
- View maximisation
Creating Authenticity:
Essential elements for true Mediterranean style:
- Use genuine materials
- Include water features
- Embrace outdoor living
- Add handcrafted touches
- Include local materials
- Create gathering spaces
- Incorporate plants
- Focus on natural light
Rustic & Farmhouse Styles
Let’s explore styles that celebrate natural materials, simplicity, and a connection to rural living.
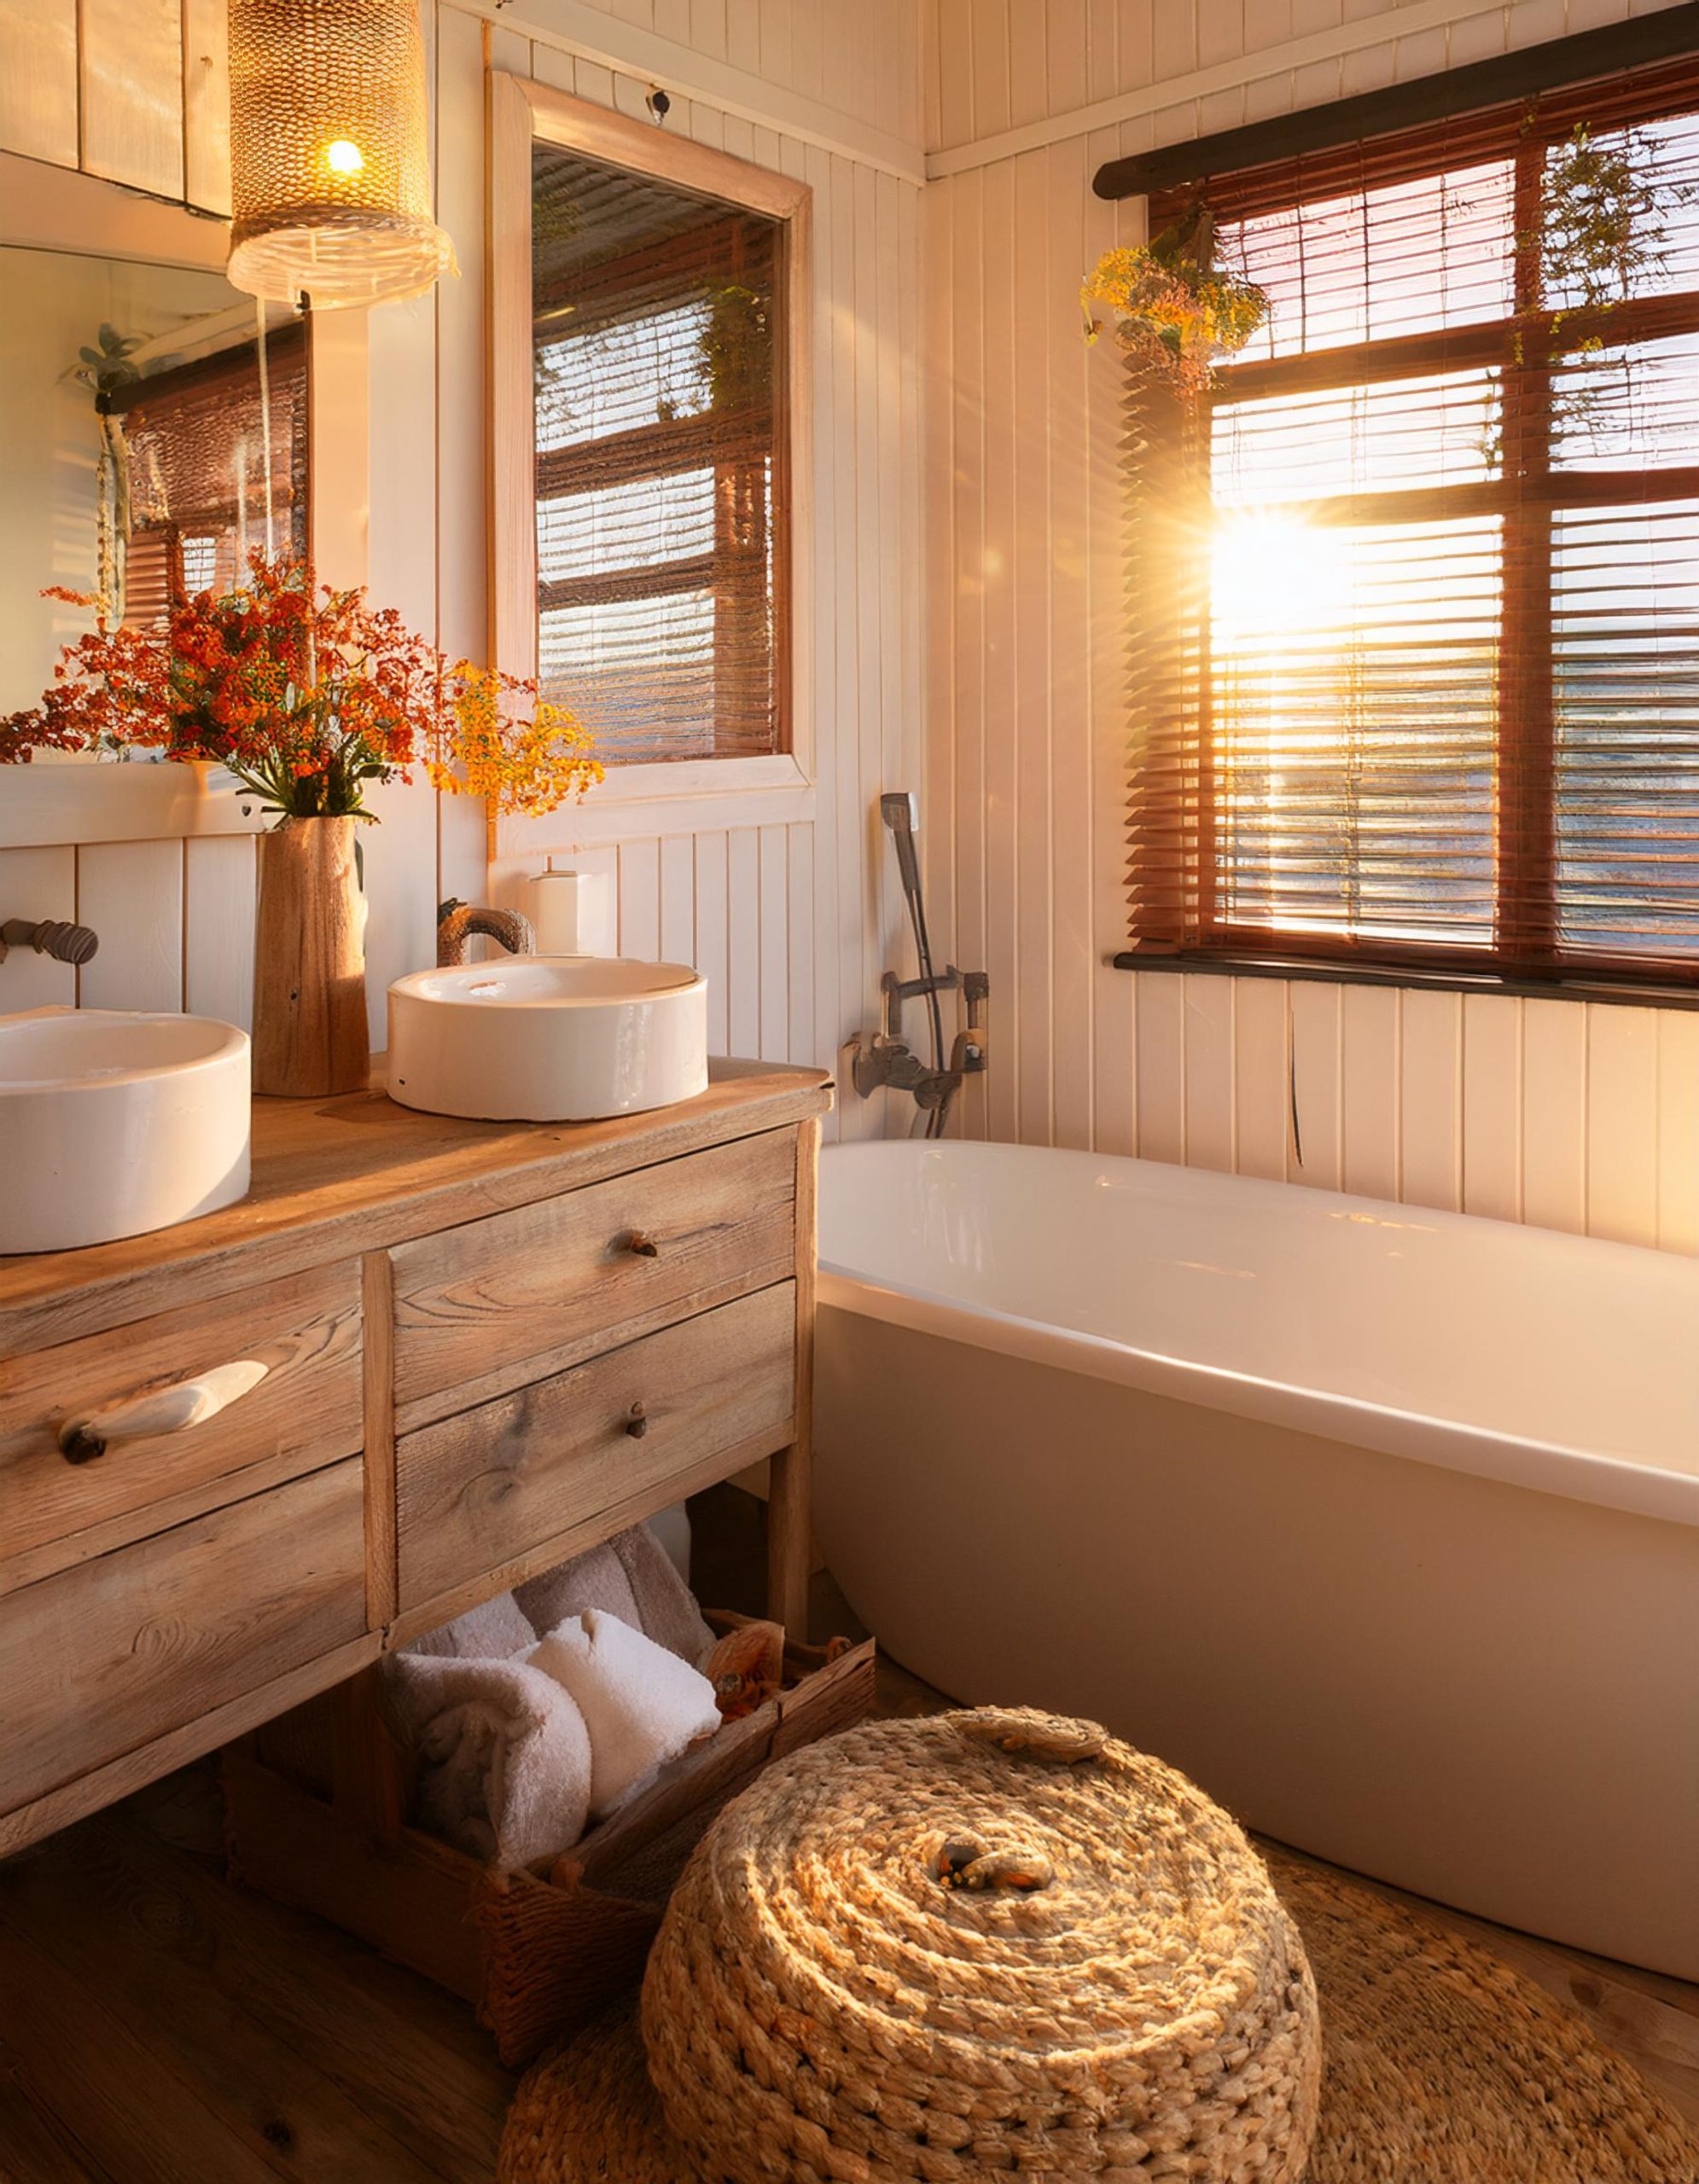
15. Rustic
Among our 22 different interior design styles, Rustic design stands out for its raw authenticity. This style is about celebrating nature in its most honest form.

What makes Rustic style special is its ability to bring the outdoors in while creating spaces that feel both grounding and cosy. Think of it as living in harmony with nature, where every material tells a story and imperfections are celebrated rather than hidden.
Key Characteristics:
- Natural materials
- Rough textures
- Exposed beams
- Stone elements
- Weathered wood
- Organic shapes
- Hand-crafted items
- Natural colour schemes
Colour Palettes: Rustic design draws from nature’s own palette
Primary Colours:
- Wood browns
- Stone grays
- Forest greens
- Earth tones
- Warm whites
Accent Colours:
- Deep reds
- Hunter green
- Charcoal
- Leather brown
- Copper tones
Materials That Define the Style:
- Reclaimed wood
- Natural stone
- Rough-hewn beams
- Raw metals
- Leather
- Burlap
- Wool
- Branch elements
Pro Tip: When designing rustic spaces, remember that authenticity is everything. One genuine piece of weathered wood furniture will add more character than an entire room of faux-distressed items.
Furniture Elements:
- Log furniture
- Live-edge tables
- Leather seating
- Wooden benches
- Iron bed frames
- Stone-based tables
- Handcrafted pieces
- Timber storage

Architectural Features:
- Exposed ceiling beams
- Stone fireplaces
- Wood-planked walls
- Rough-hewn columns
- Natural floors
- Timber framing
- Wide plank flooring
- Stone accents
Styling Elements:
- Antlers
- Woven baskets
- Iron hardware
- Vintage tools
- Natural textiles
- Handwoven rugs
- Ceramic pottery
- Native plants
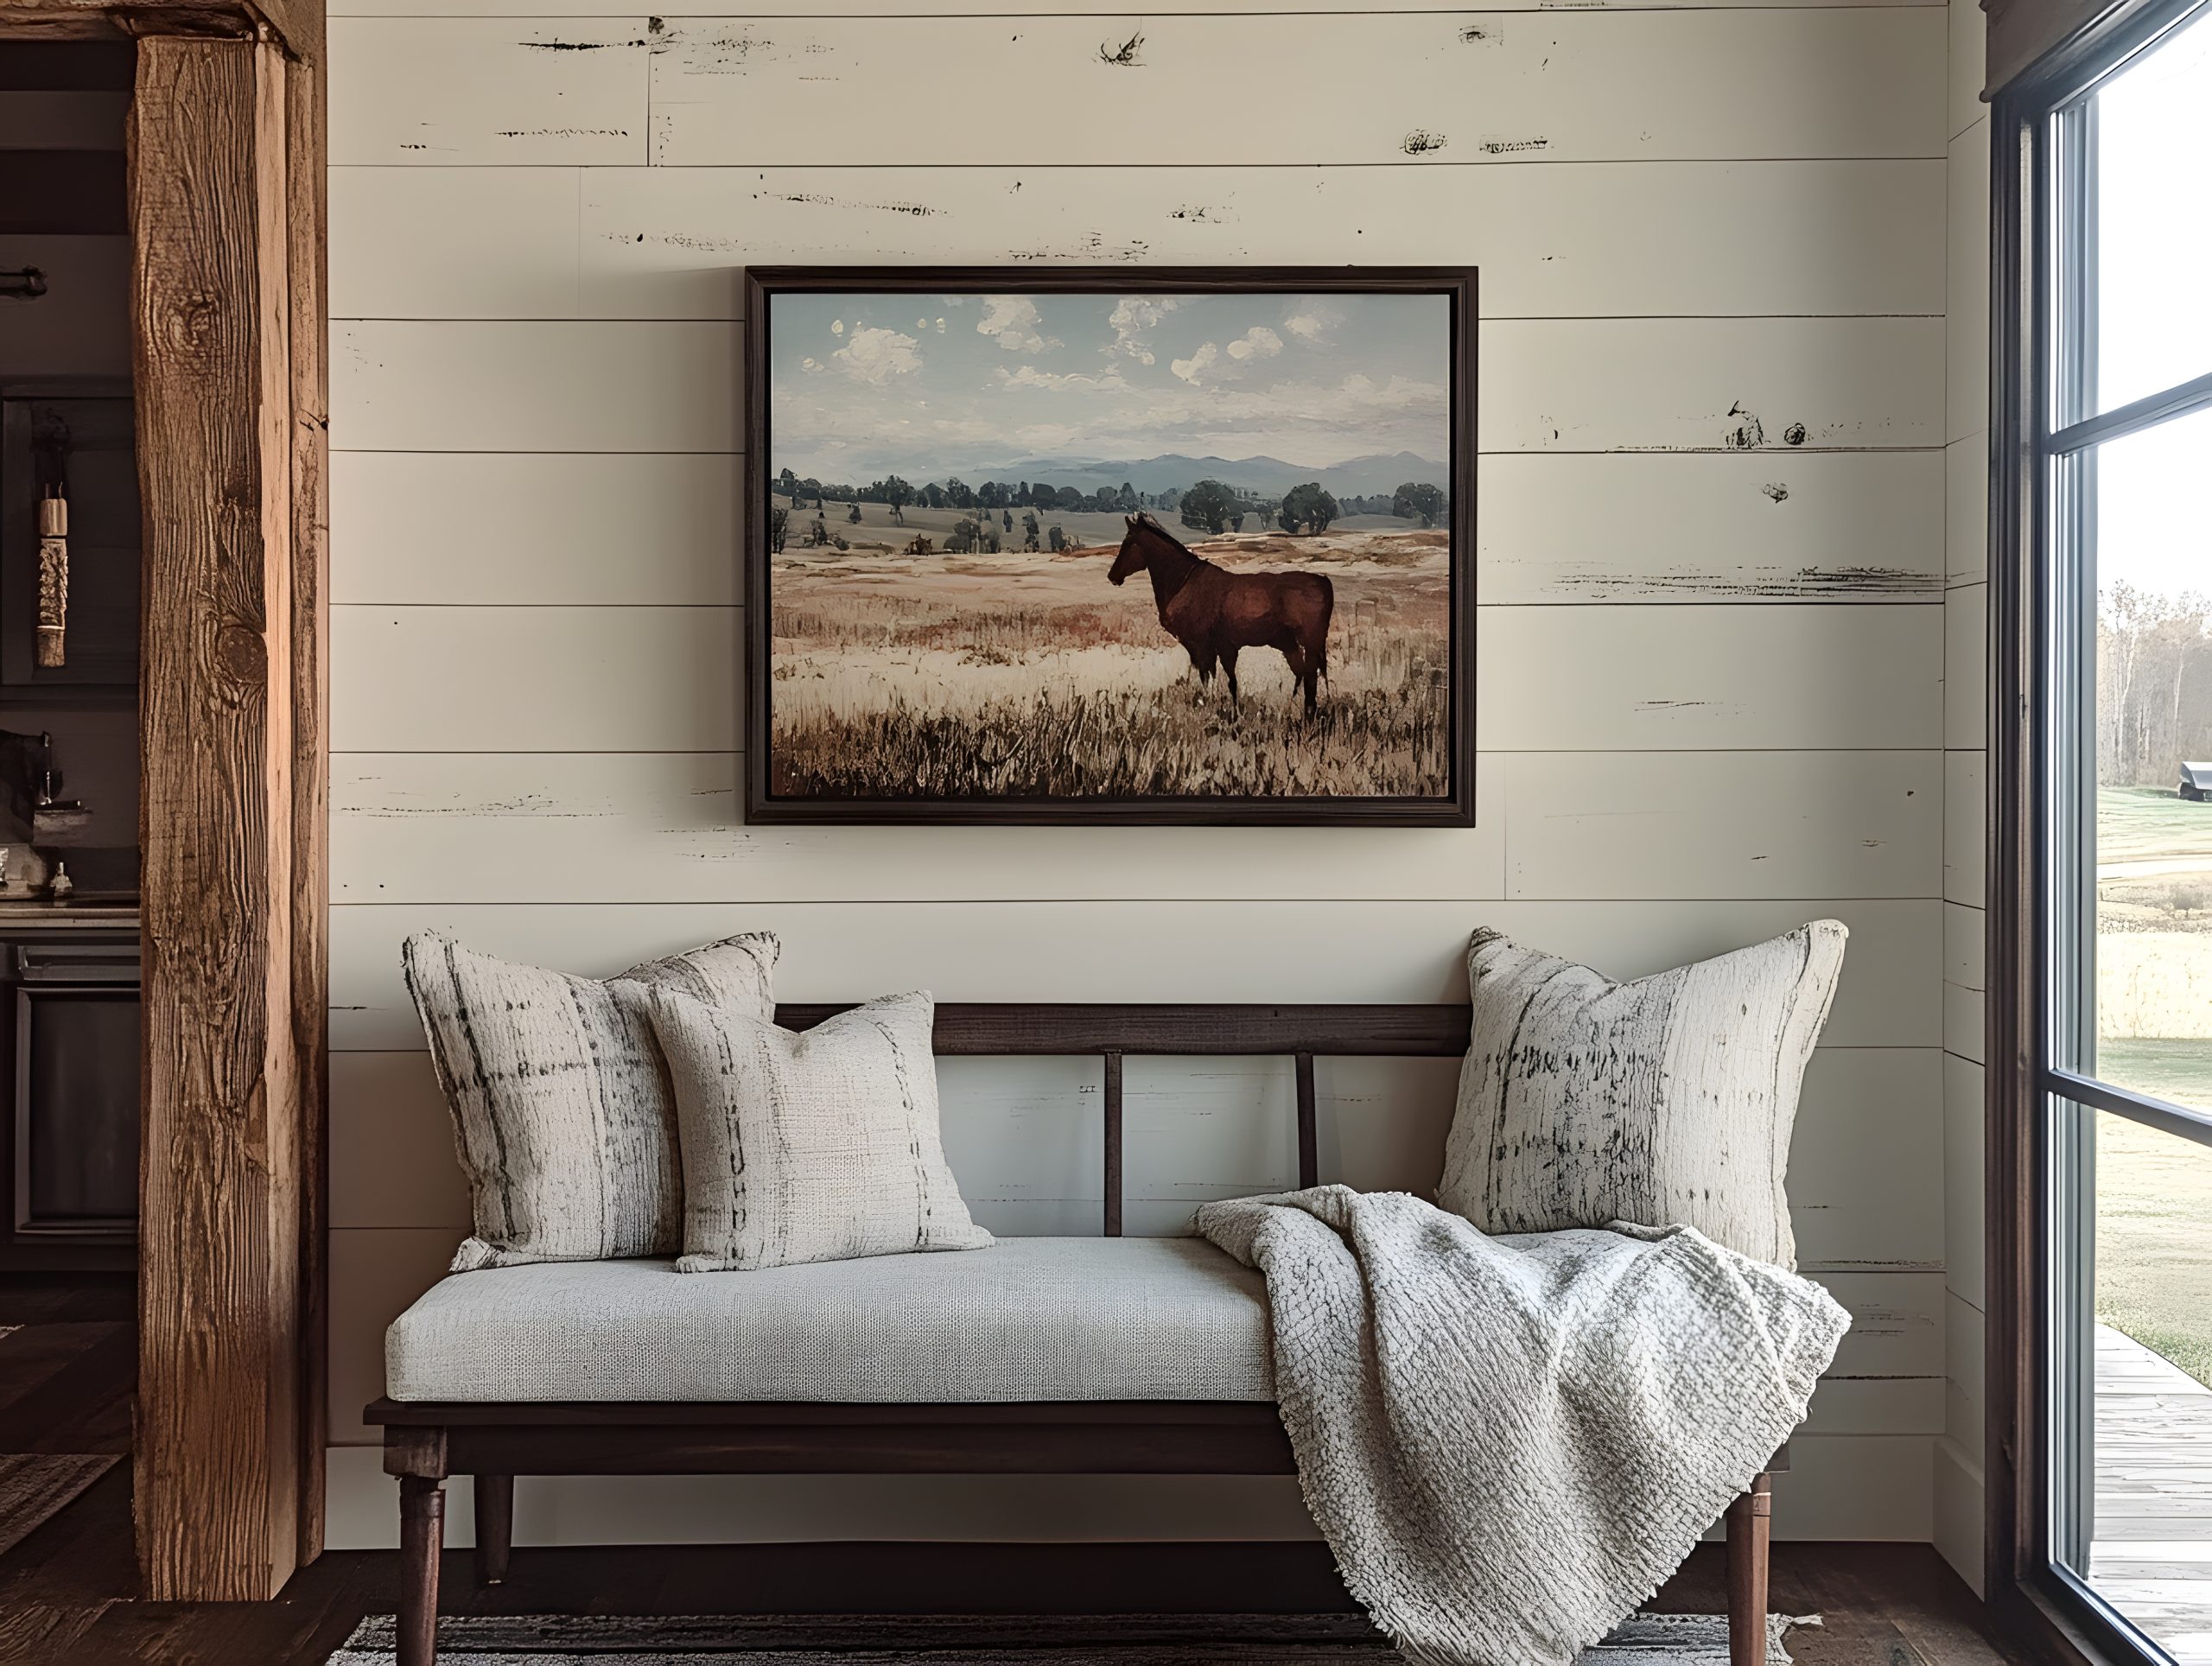
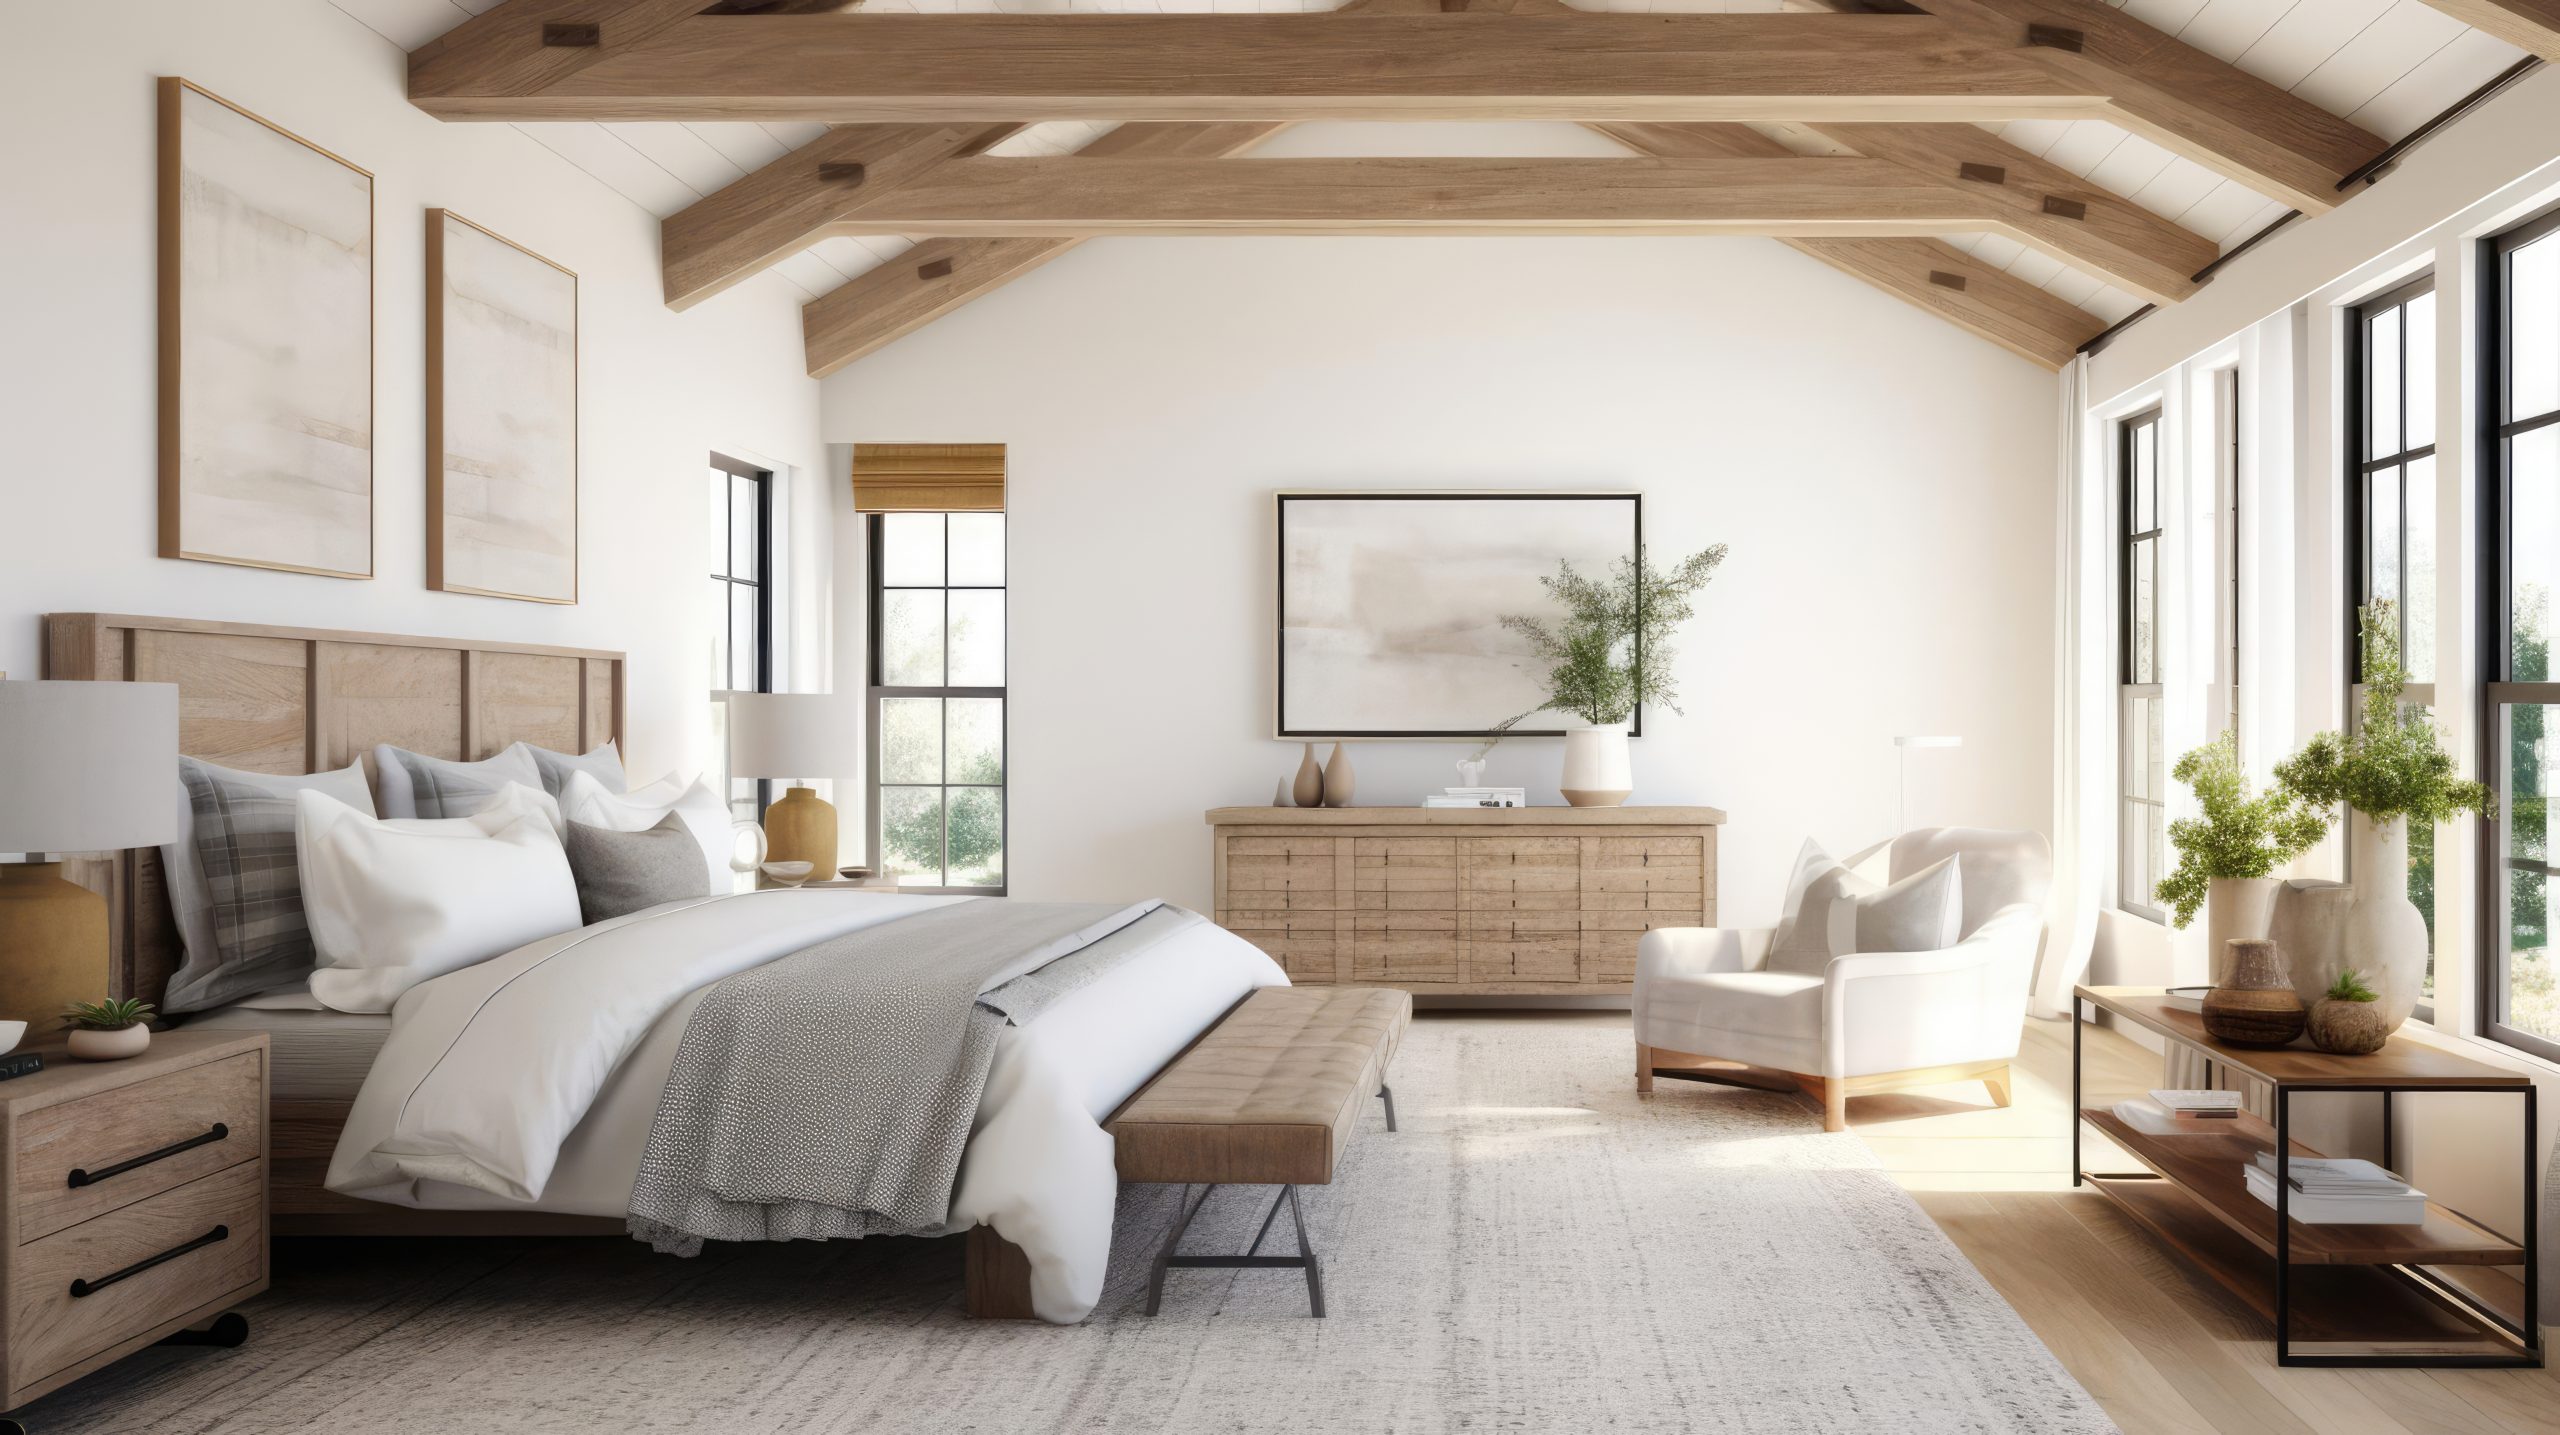
16. Modern Farmhouse
One of the most popular of our 22 different interior design styles today is Modern Farmhouse. This style perfectly balances rustic charm with contemporary convenience, and that’s exactly why people love it.
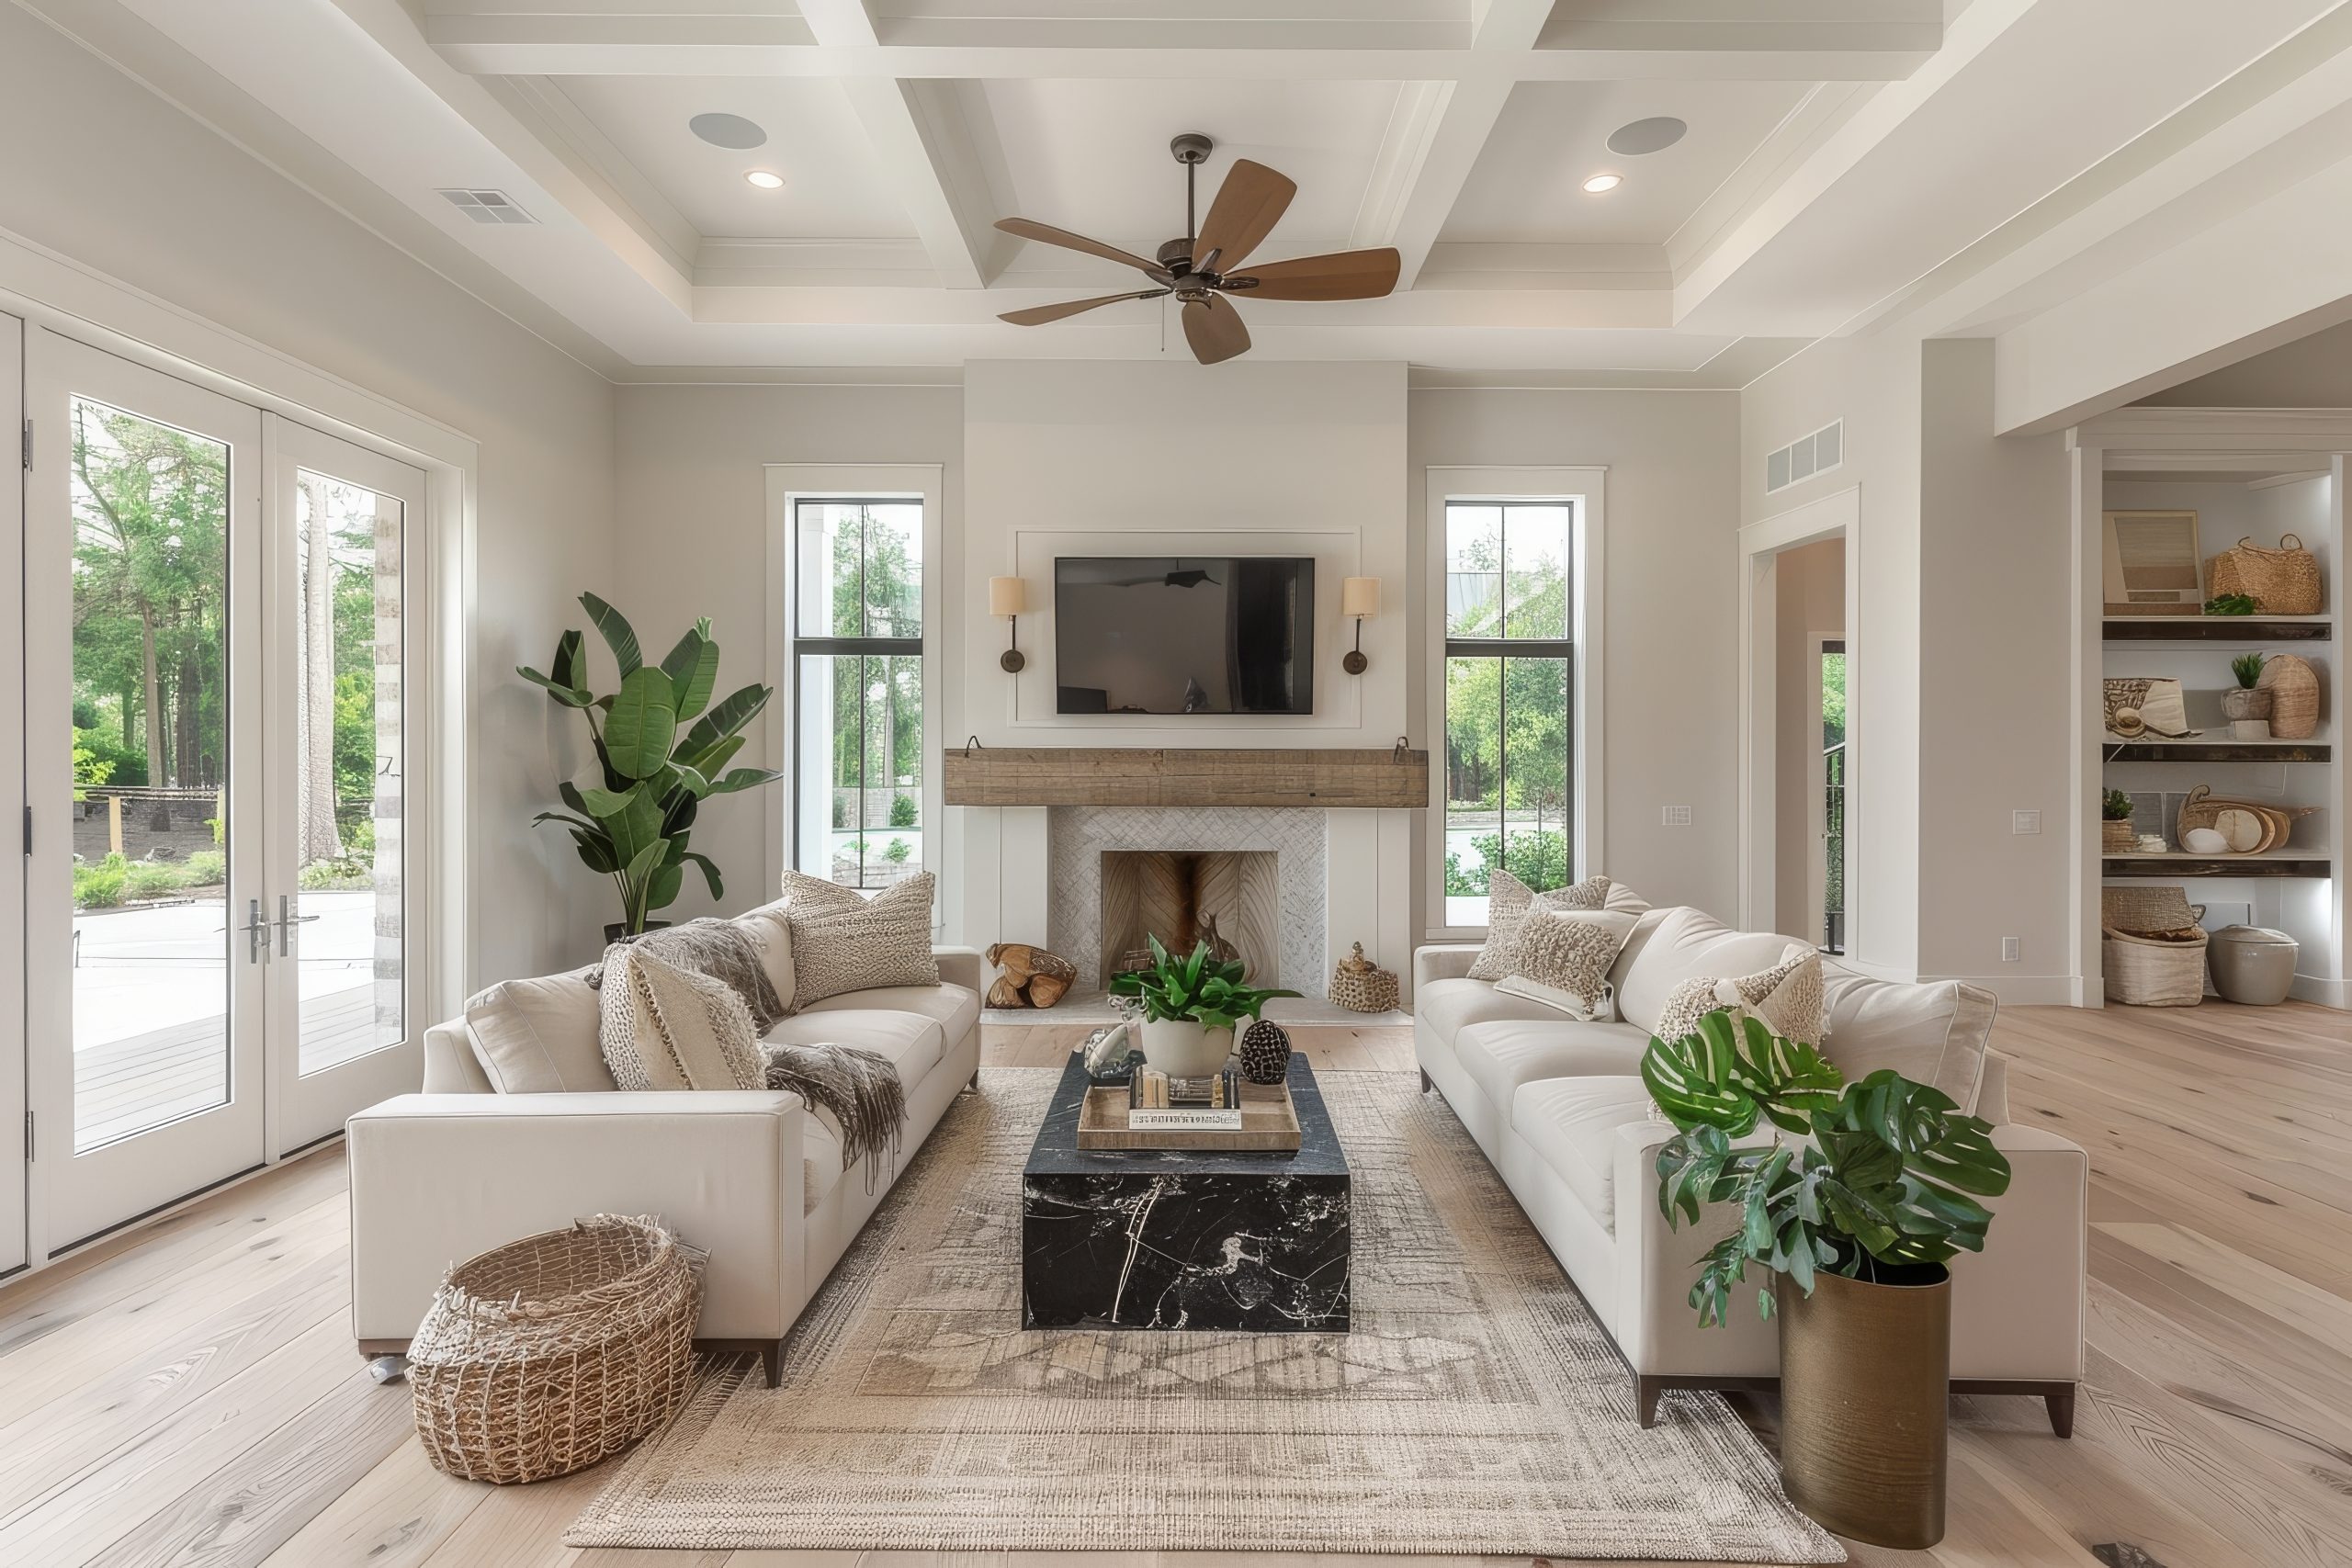
What makes Modern Farmhouse special is its ability to combine the comfort and warmth of traditional farmhouse style with clean, modern elements. Think of it as taking the best of country living and updating it for today’s lifestyle – comfortable but never cluttered, rustic but never rough.
Key Characteristics:
- Clean lines with rustic touches
- Shiplap walls
- Mixed metals
- Industrial accents
- Natural textures
- Neutral colour palette
- Vintage elements
- Modern conveniences
Colour Palettes: Modern Farmhouse embraces a refined neutral palette
Primary Colours:
- Crisp whites
- Warm greys
- Soft blacks
- Creamy neutrals
- Natural wood tones
Accent Colours:
- Navy blue
- Sage green
- Iron black
- Aged brass
- Weathered bronze
Materials That Define the Style:
- Painted wood
- Wrought iron
- Galvanized metal
- Natural fibers
- Cotton
- Linen
- Stone
- Aged brass
Pro Tip: When designing Modern Farmhouse spaces, remember that restraint is key. You want to suggest farmhouse living without creating a country theme park.
Furniture Elements:
- Slipcovered sofas
- Windsor chairs
- Industrial lighting
- Farmhouse tables
- Metal bed frames
- Open shelving
- Storage ottomans
- X-back chairs
Signature Elements:
- Apron sinks
- Barn doors
- Industrial lighting
- Open shelving
- Vintage signs
- Woven baskets
- Metal hardware
- Natural textiles
Space Planning:
Modern Farmhouse spaces emphasise:
- Open concept living
- Gathering spaces
- Functional kitchens
- Mudroom areas
- Indoor-outdoor flow
- Family-friendly layouts
- Entertainment zones
- Practical storage
Design Details:
Essential elements include:
- Board and batten
- Shiplap walls
- Exposed beams
- Industrial hardware
- Mixed metals
- Natural wood accents
- Vintage touches
- Modern appliances
Styling Guidelines:
- Mix old and new pieces
- Layer textures thoughtfully
- Keep accessories minimal
- Include natural elements
- Add industrial touches
- Maintain clean lines
- Incorporate vintage finds
- Focus on functionality
Art Deco & Transitional Styles
Let’s explore styles that either celebrate glamorous sophistication or masterfully blend different design elements.
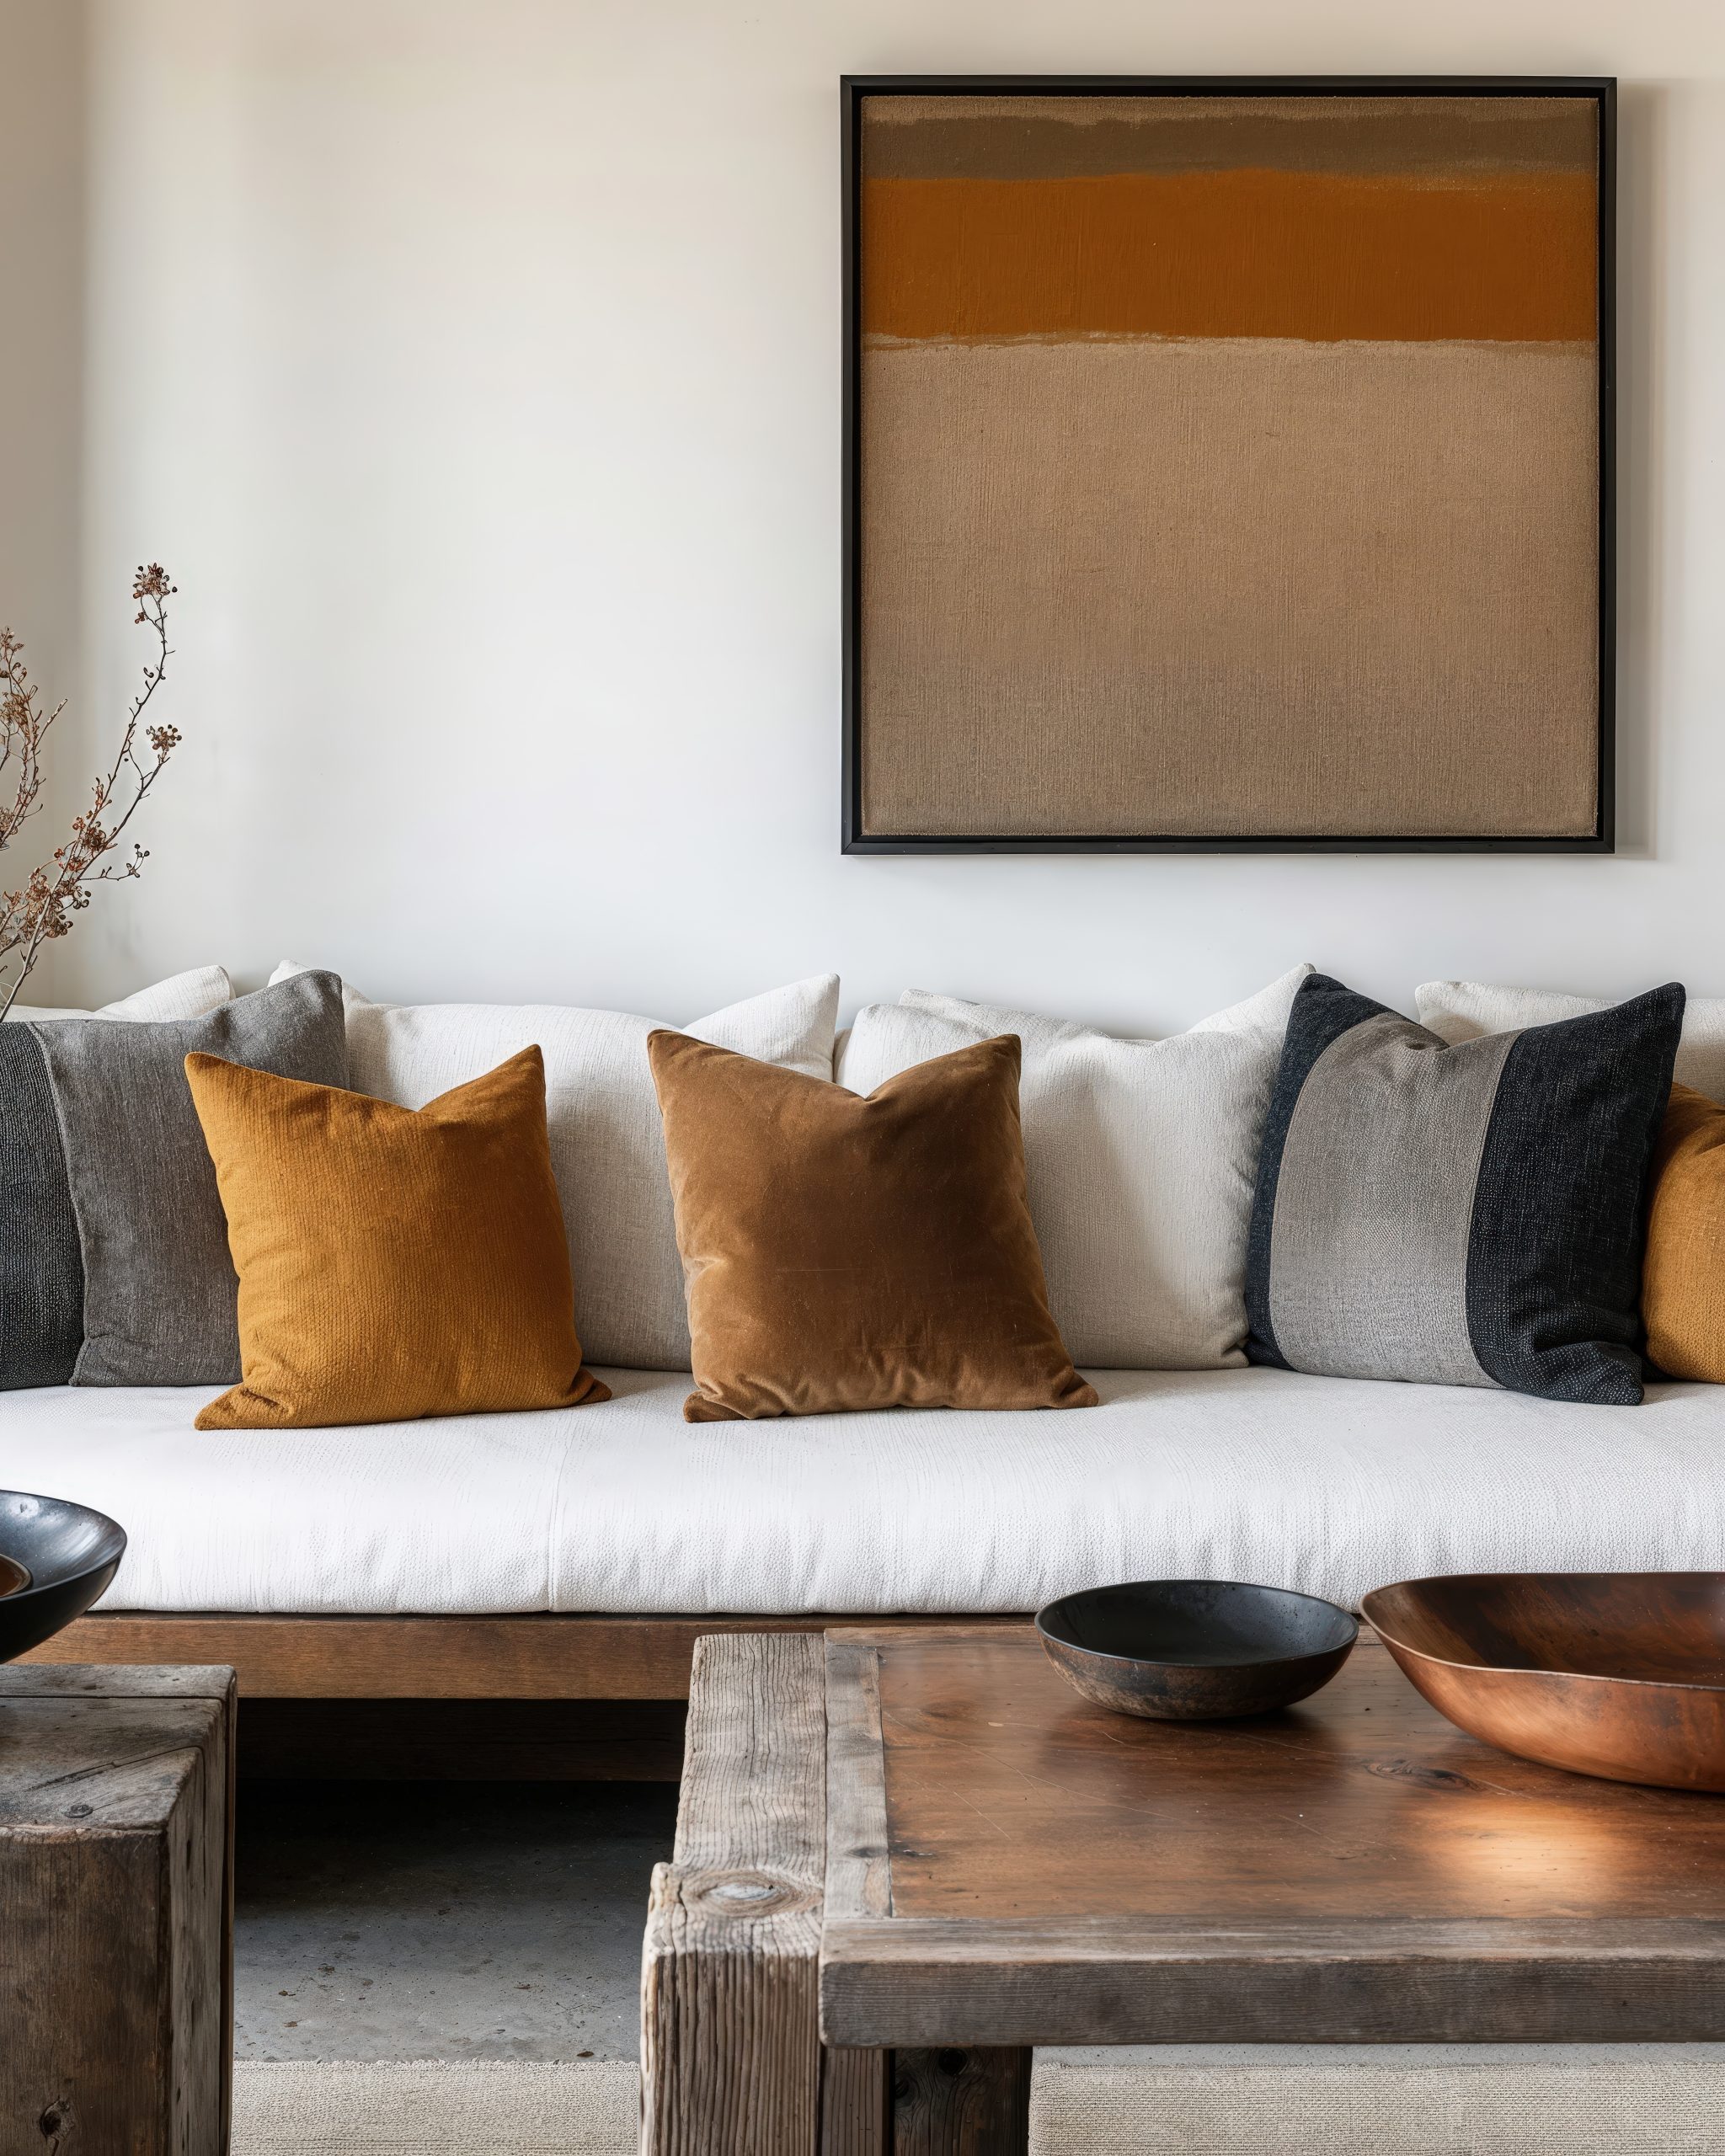
17. Art Deco
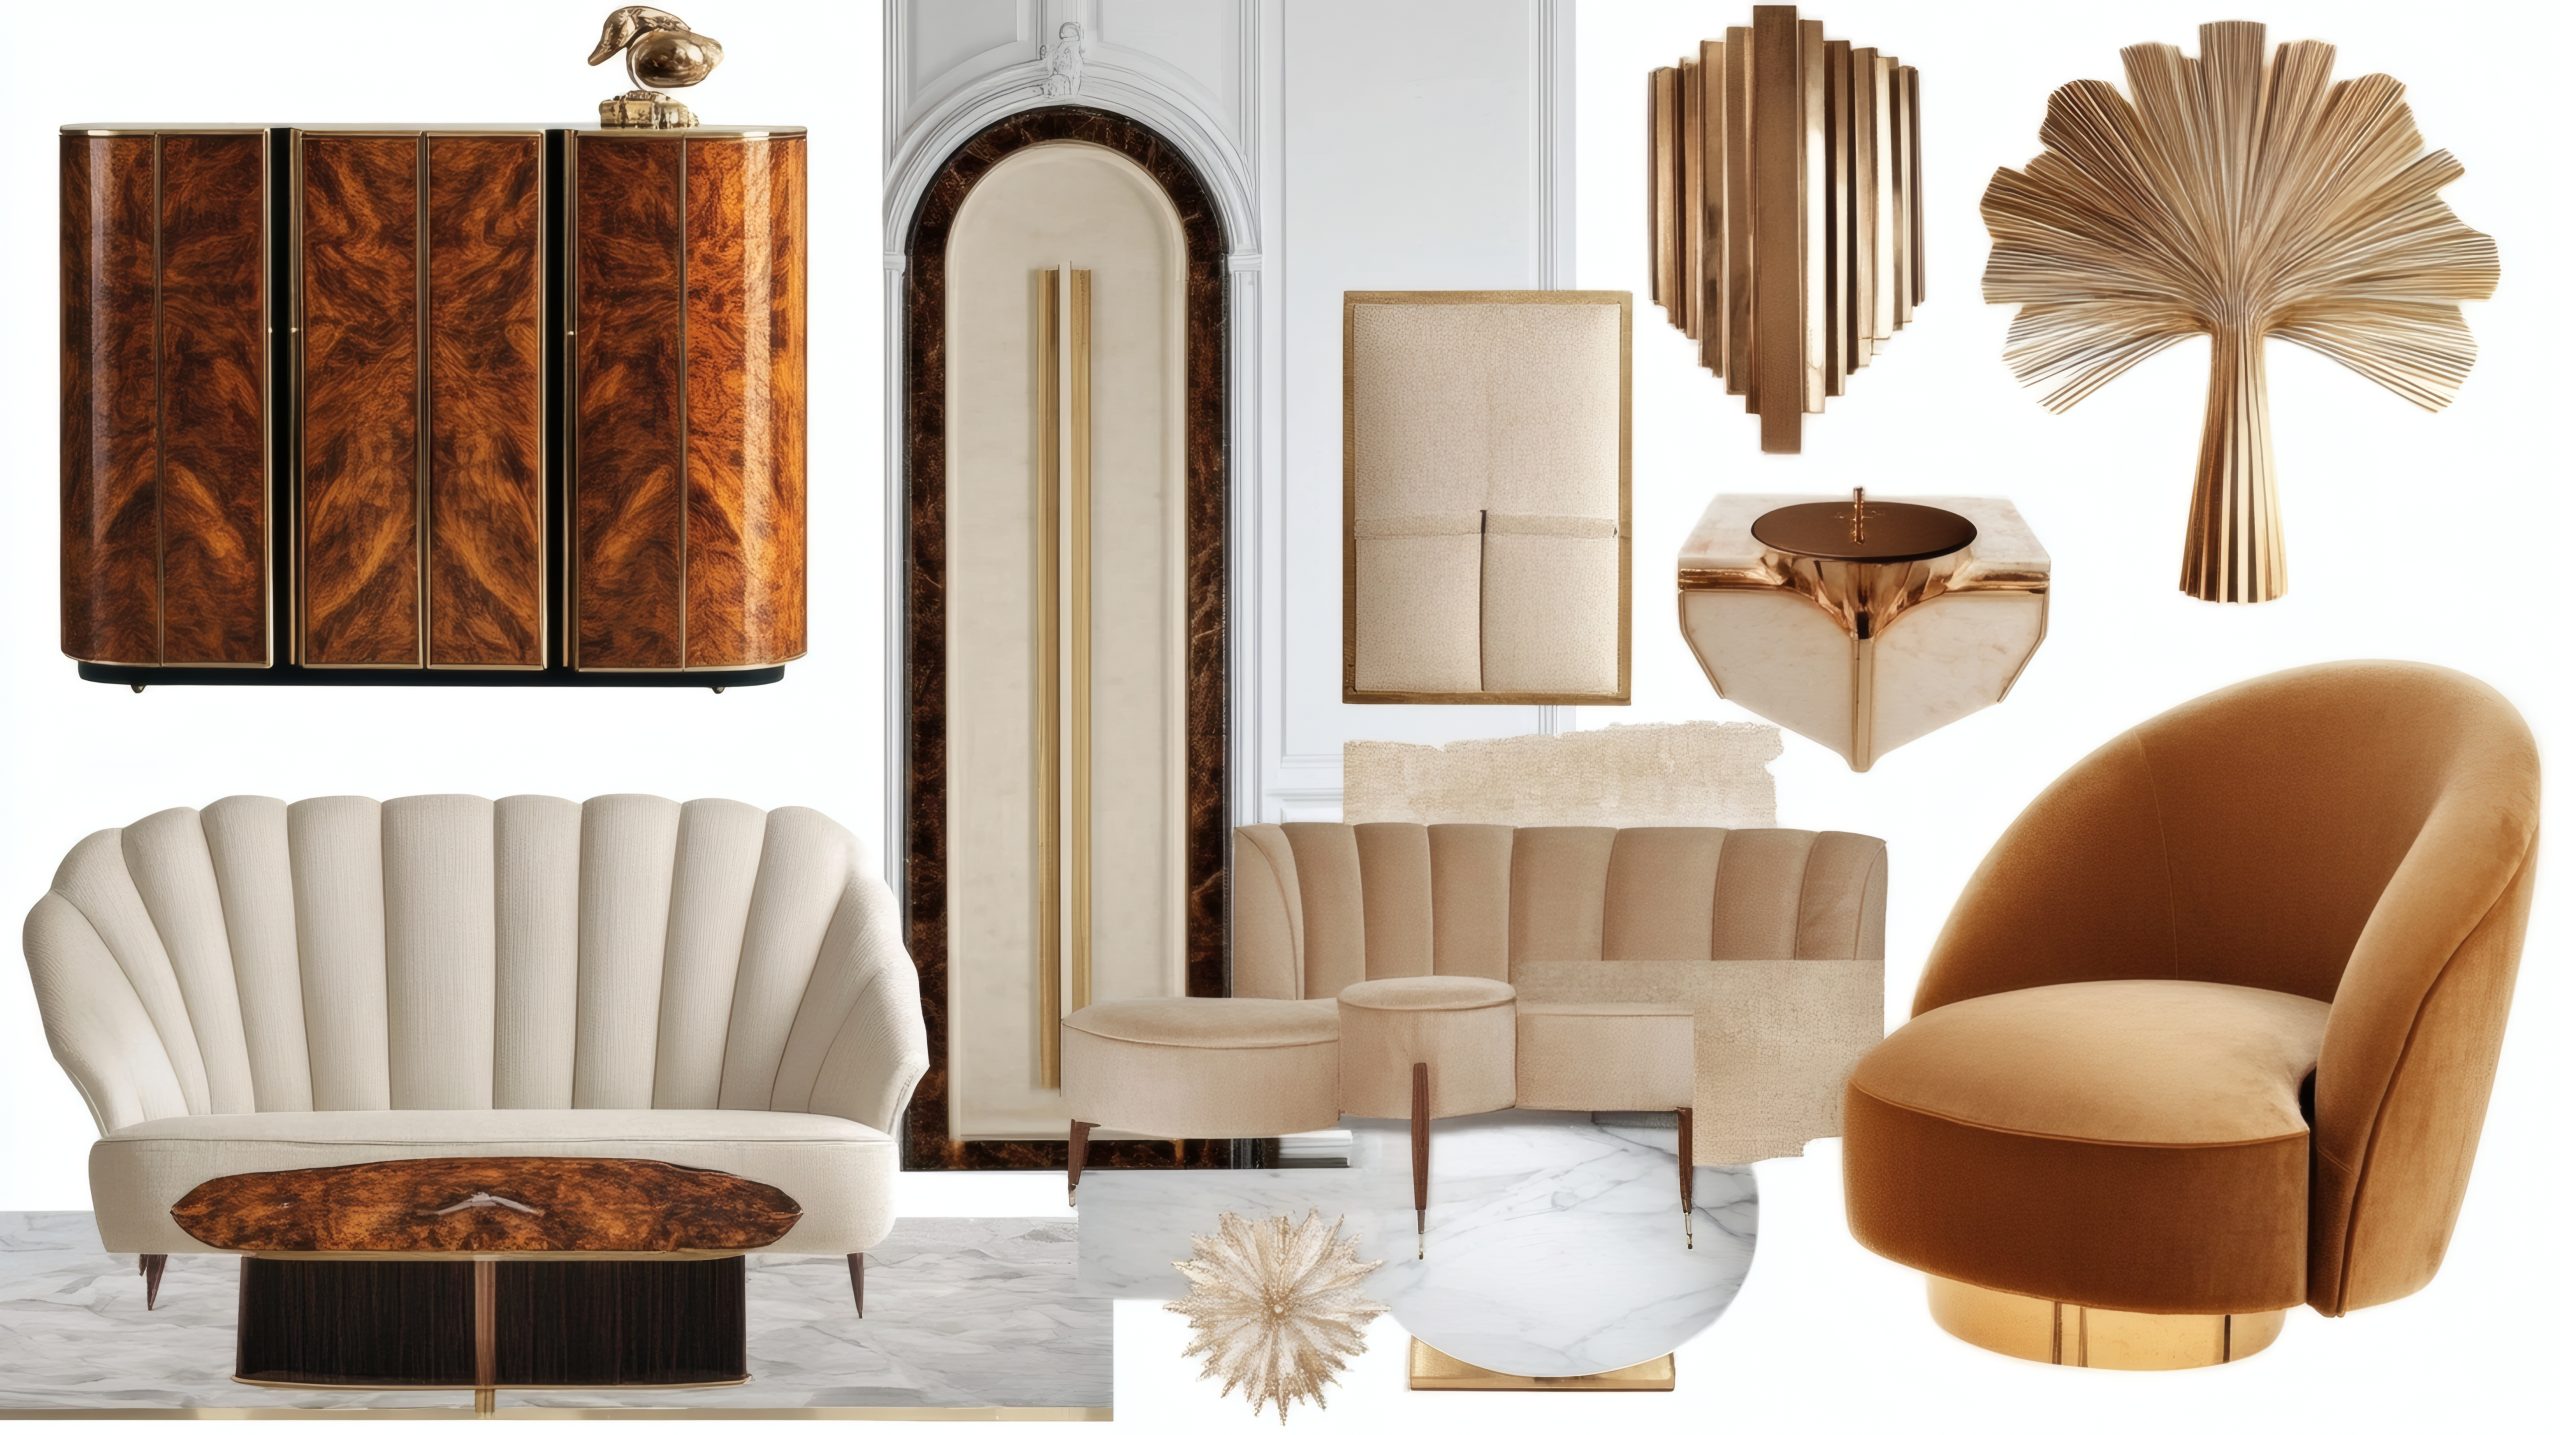
Among our 22 different interior design styles, Art Deco stands out for its unabashed glamour and geometric precision. This style is about celebrating luxury, modernity, and artistic expression in its boldest form.
What makes Art Deco special is its perfect balance of sophistication and drama. Born in the 1920s and 1930s, this style represents the height of pre-war elegance. Think of it as the Great Gatsby of interior design – bold, confident, and unapologetically luxurious.
Key Characteristics:
- Bold geometric patterns
- Symmetrical designs
- Stepped forms
- Sunburst motifs
- High-gloss finishes
- Luxurious materials
- Strong vertical lines
- Dramatic lighting
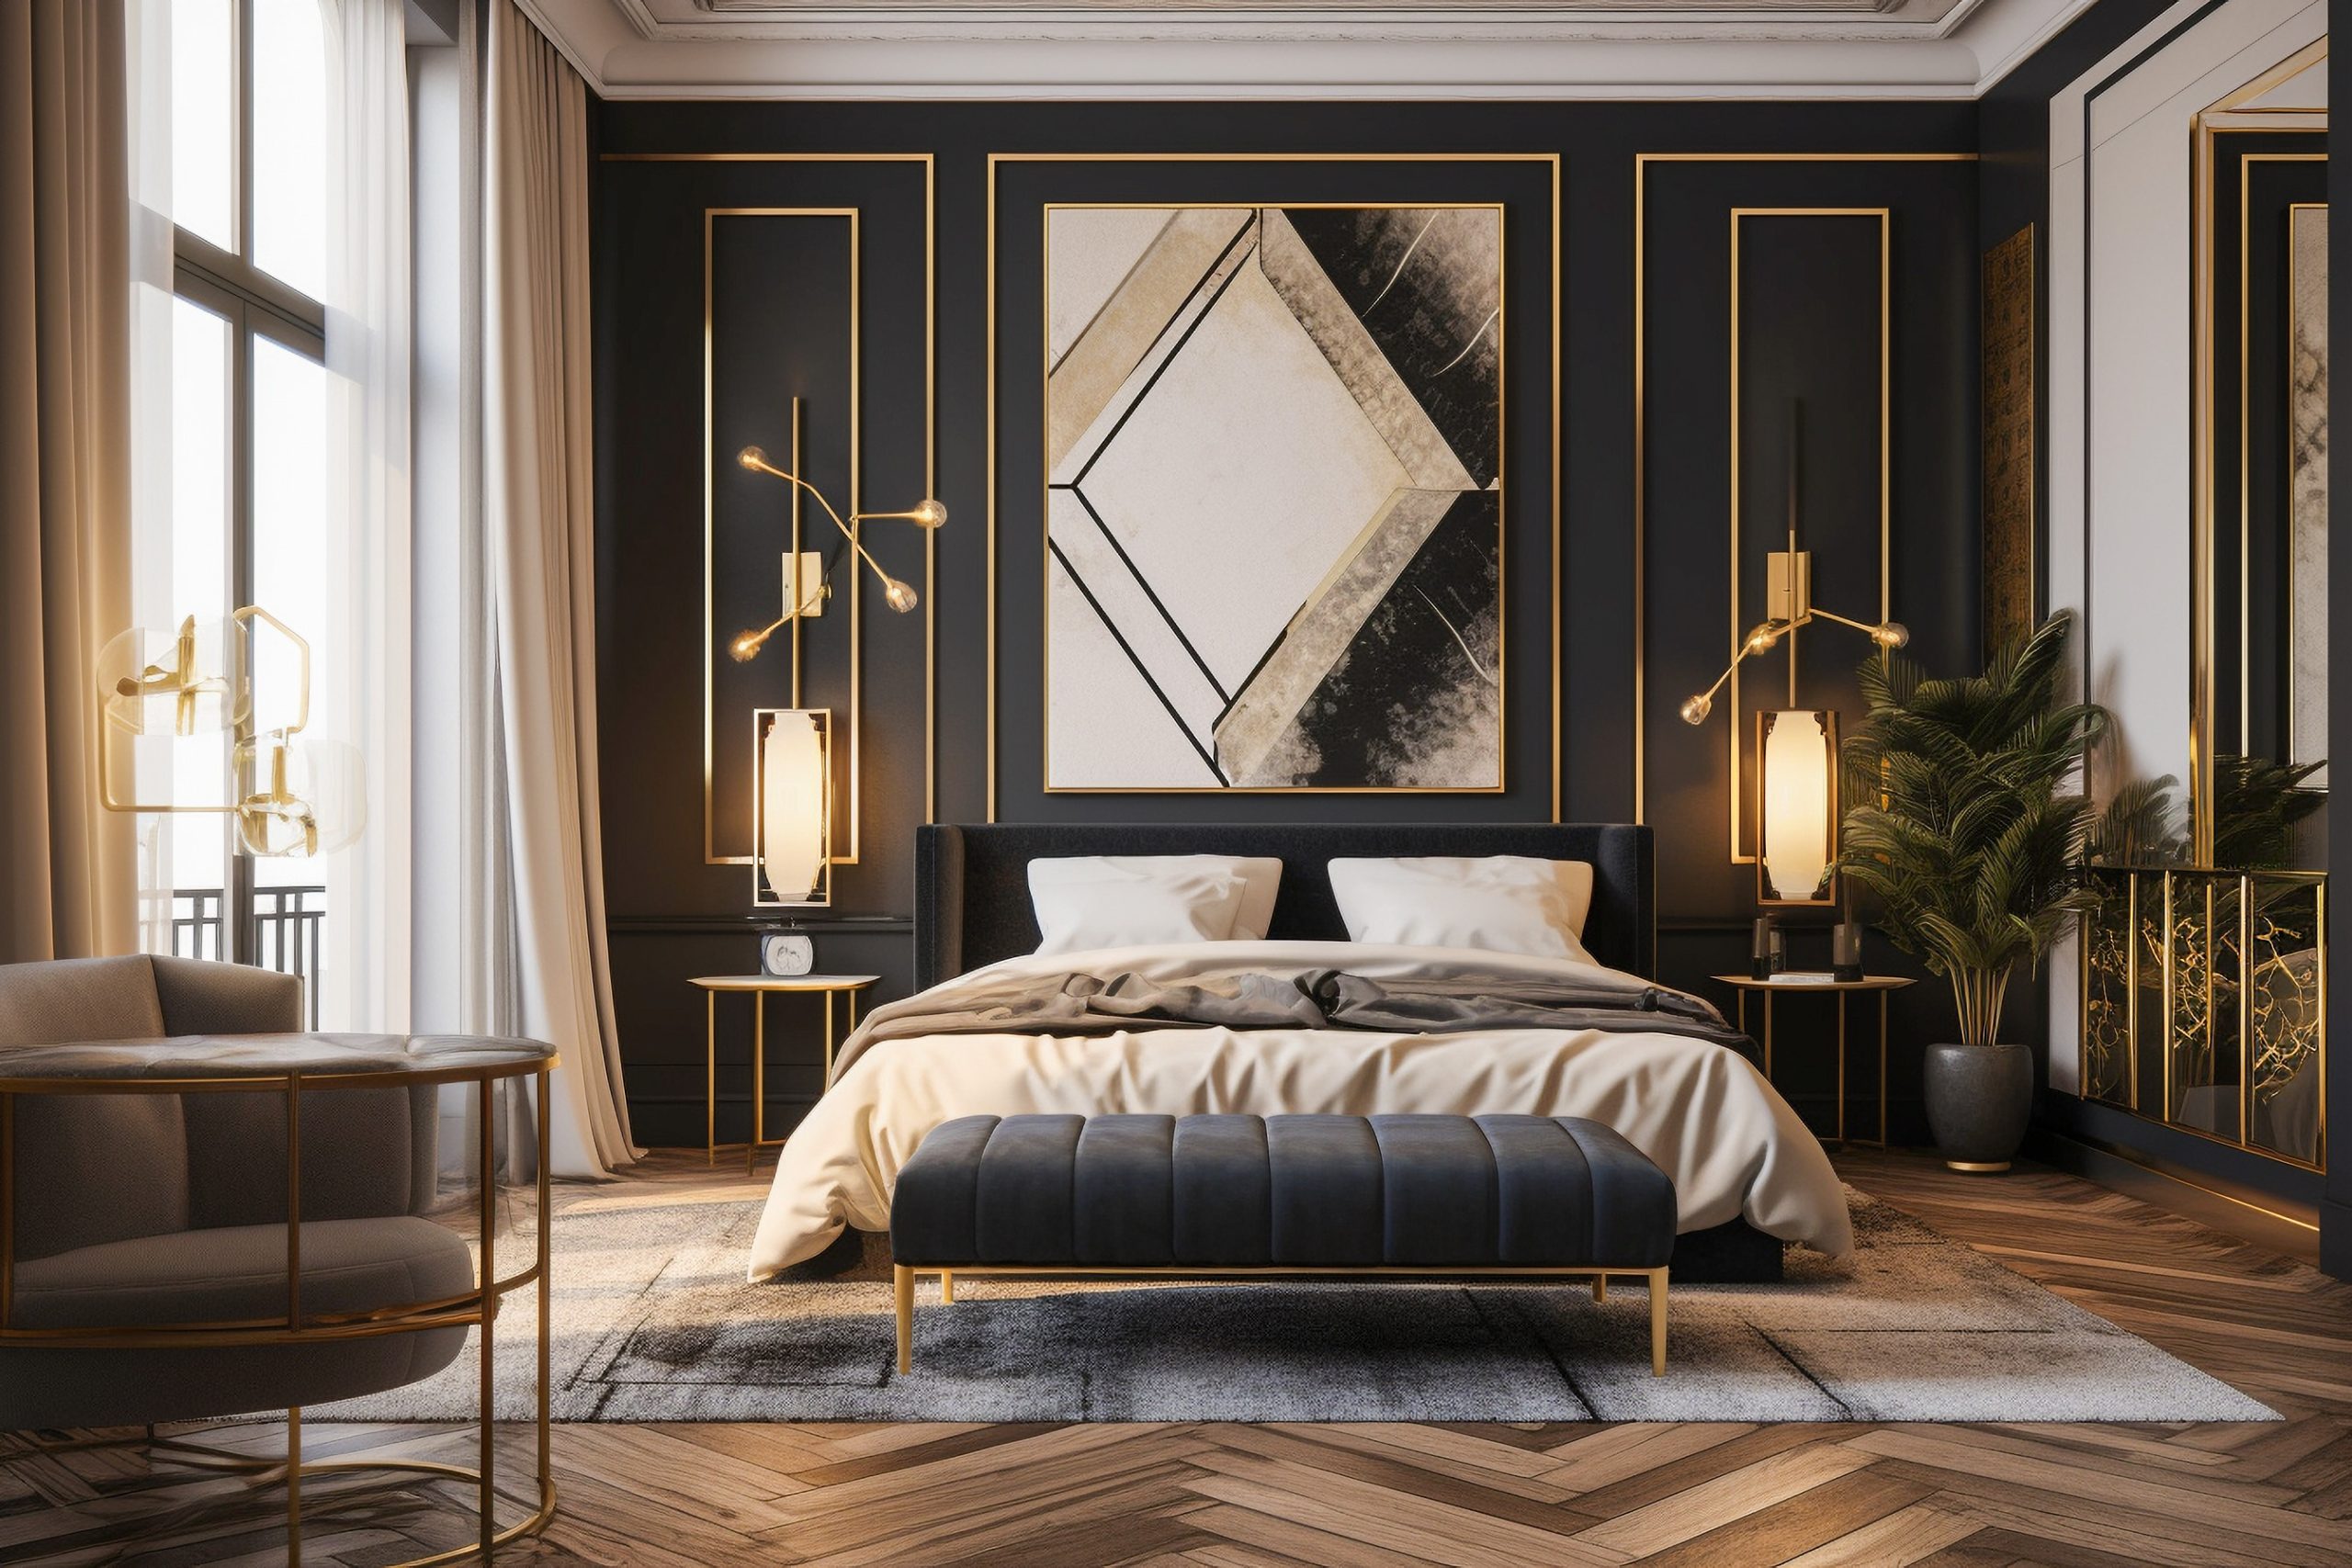
Colour Palettes: Art Deco embraces bold, dramatic colours
Primary Colours:
- Black and white
- Gold
- Silver
- Deep greens
- Rich blues
Accent Colours:
- Ruby red
- Emerald green
- Sapphire blue
- Bronze
- Pearl white
Materials That Define the Style:
- Polished stone
- Chrome
- Brass
- Mirror
- Glass
- Exotic woods
- Lacquer
- Velvet
Pro Tip: When designing Art Deco spaces, remember that each piece should feel like a work of art. This style is about making statements, not playing it safe.
Furniture Elements:
- Curved club chairs
- Streamlined sofas
- Mirrored furniture
- Chrome-based tables
- Geometric cabinets
- High-gloss sideboards
- Built-in shelving
- Statement seating
Decorative Features:
- Tiered chandeliers
- Wall sconces
- Geometric mirrors
- Abstract statuary
- Zigzag patterns
- Fan motifs
- Exotic animal prints
- Metallic sculptures
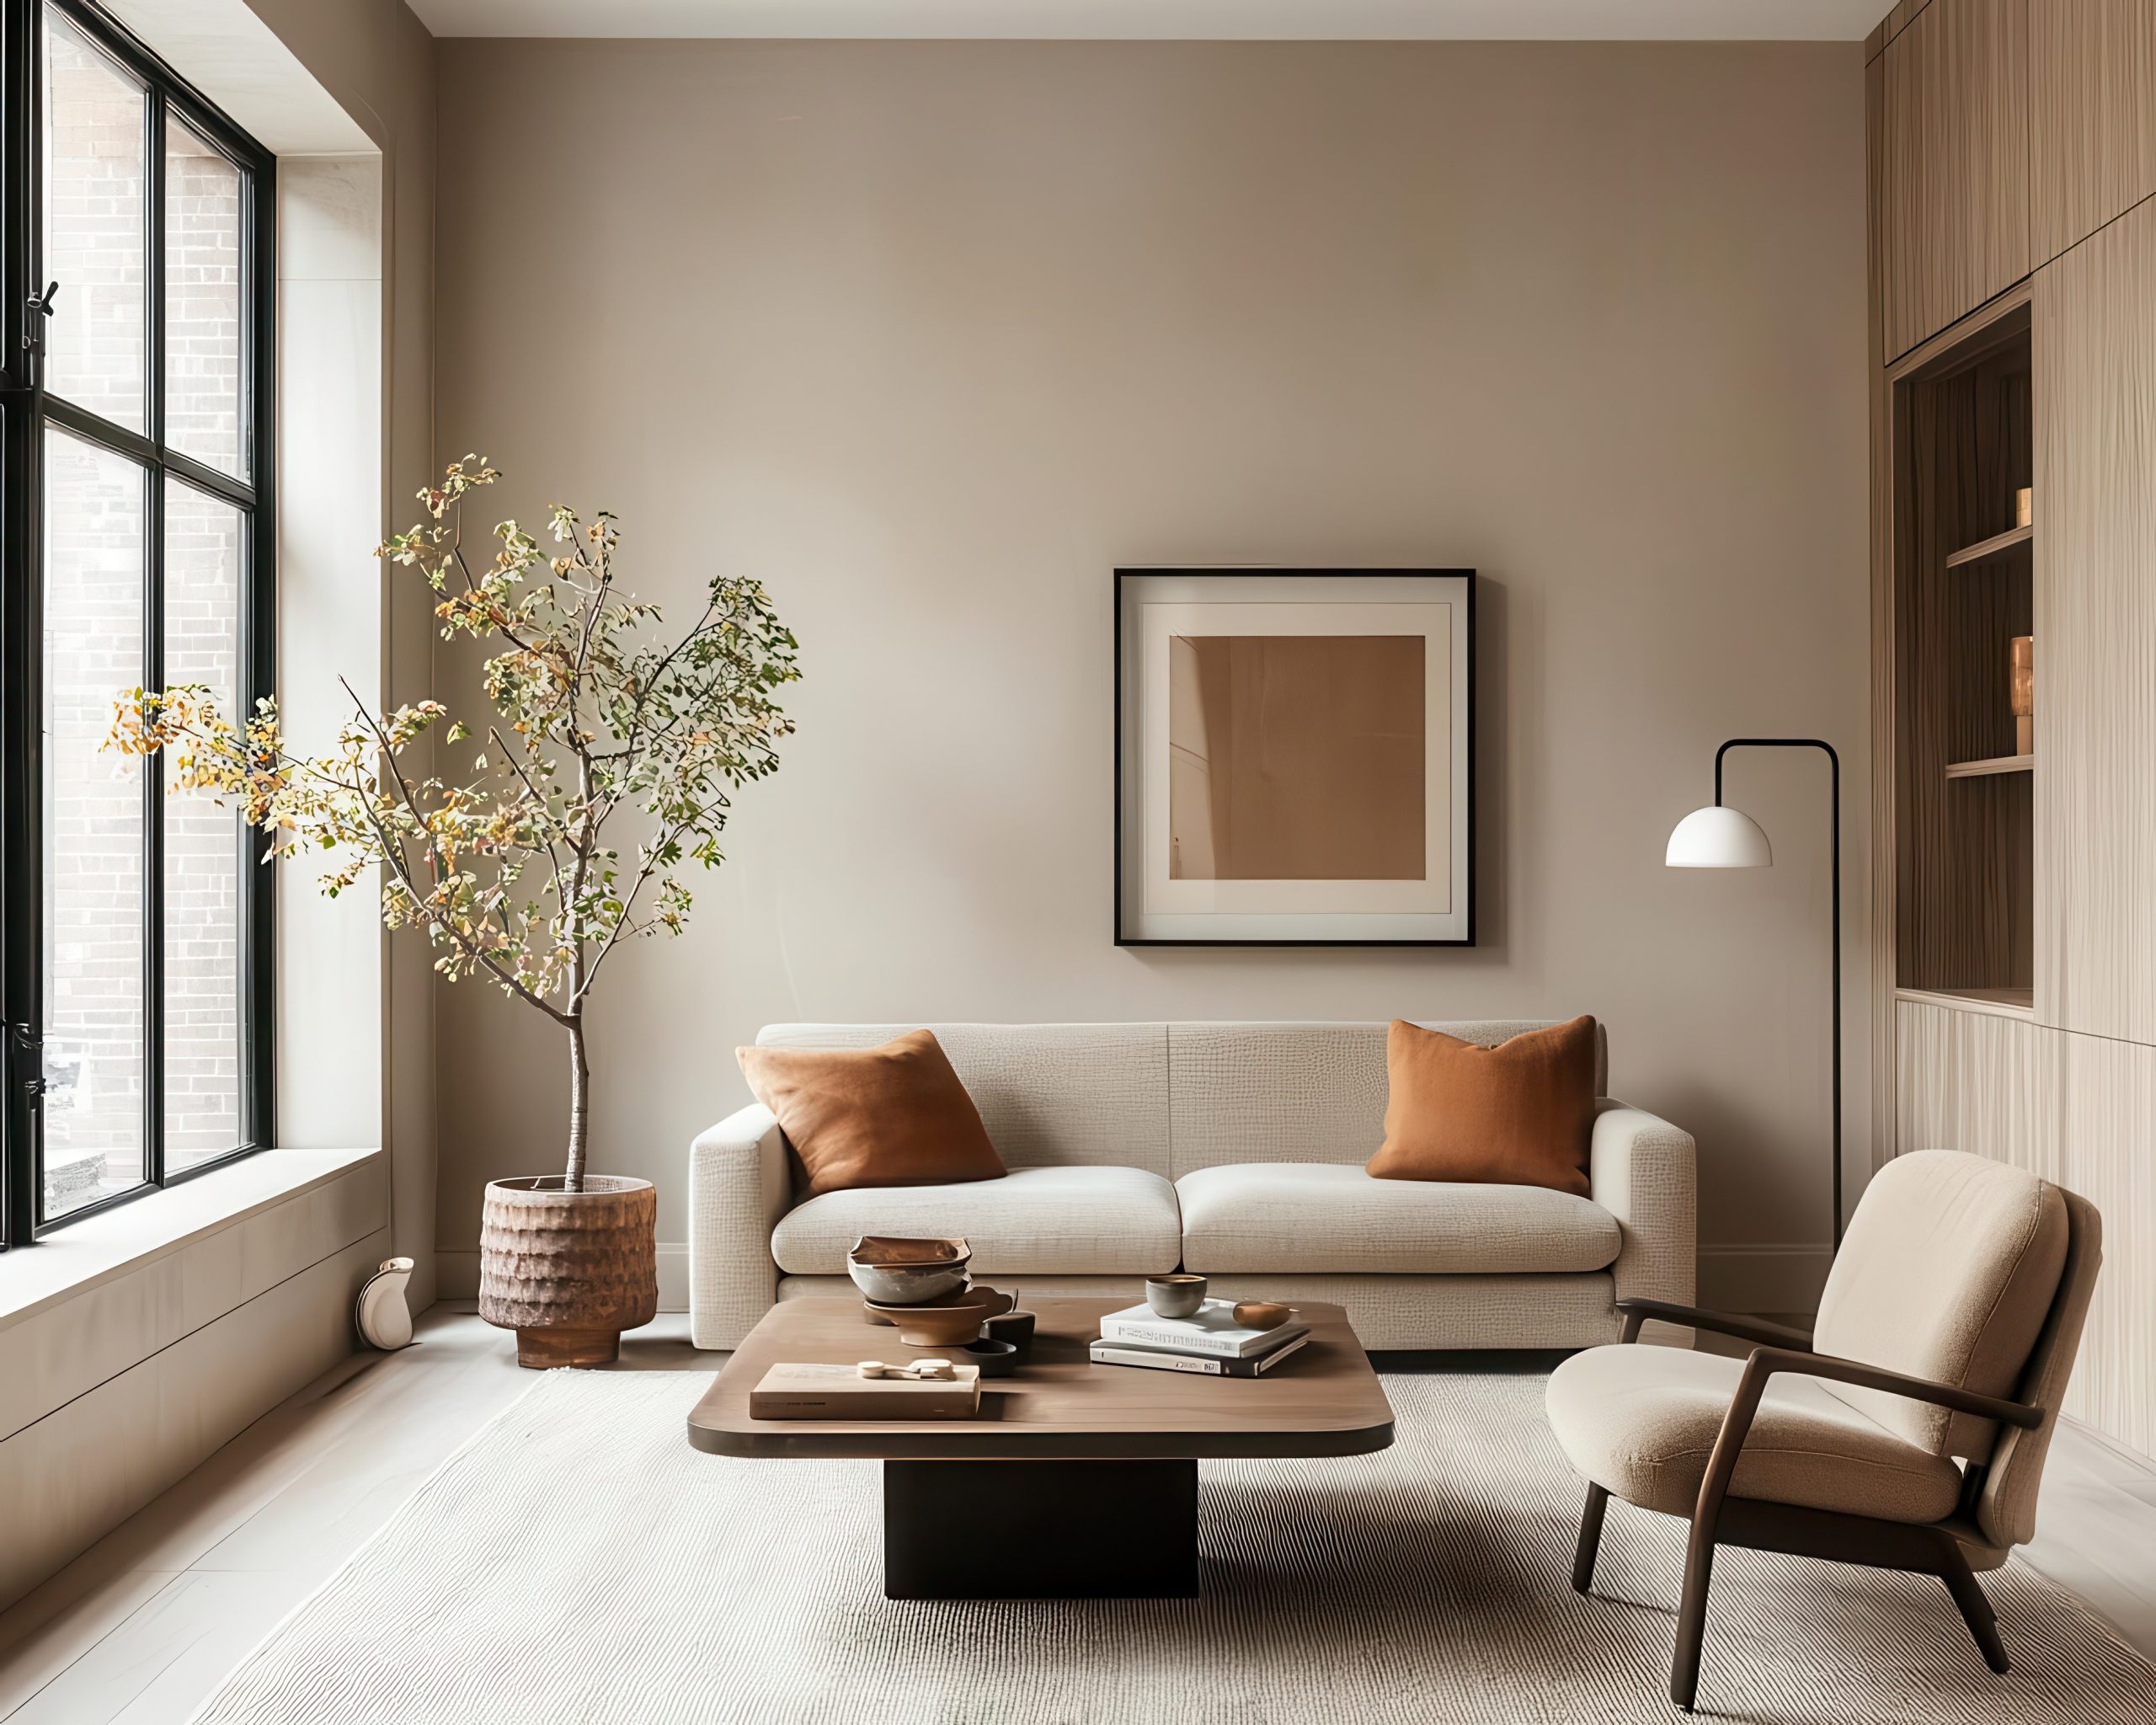
18. Transitional
Let’s explore Transitional style – one of the most versatile of our 22 different interior design styles. This style is perfect for those who appreciate both traditional and contemporary design but don’t want to commit fully to either.
What makes Transitional style special is its ability to bridge different design eras and aesthetics. Think of it as the diplomatic mediator of interior design – it brings peace between traditional and contemporary elements, creating spaces that feel both timeless and current.
Key Characteristics:
- Balance of traditional and modern
- Clean lines with classic details
- Neutral colour palette
- Sophisticated textures
- Updated classics
- Comfortable elegance
- Refined scale
- Minimal accessories
Colour Palettes: Transitional design favours refined neutrals
Primary Colours:
- Warm greys
- Soft whites
- Rich creams
- Gentle taupes
- Subtle beiges
Accent Colours:
- Navy blue
- Chocolate brown
- Slate grey
- Muted gold
- Soft black
Materials That Define the Style:
- Polished woods
- Textured fabrics
- Leather
- Glass
- Nickel
- Bronze
- Marble
- Linen
Pro Tip: When designing transitional spaces, focus on texture rather than pattern. This style is about creating interest through layered materials rather than bold prints.
Furniture Elements:
- Clean-lined sofas
- Updated wing chairs
- Glass-top tables
- Tailored upholstery
- Modern case goods
- Traditional silhouettes
- Neutral ottomans
- Refined storage pieces
Balance Points:
Key areas where traditional meets modern:
- Curved furniture with straight lines
- Classic shapes in current fabrics
- Updated traditional lighting
- Modern art in traditional frames
- Clean-lined millwork
- Simplified traditional patterns
- Contemporary mirrors
- Mixed metal finishes
Space Planning:
Transitional spaces require:
- Balanced furniture groupings
- Conversation areas
- Clear traffic patterns
- Formal and casual zones
- Negative space
- Symmetrical layouts
- Functional flow
- Comfortable seating
Styling Guidelines:
- Keep accessories minimal
- Focus on quality over quantity
- Mix furniture styles thoughtfully
- Layer textures carefully
- Maintain clean lines
- Include traditional touches
- Add modern elements
- Create visual balance
Common Mistakes to Avoid:
- Over-accessorising
- Using too many patterns
- Mixing too many styles
- Forgetting about comfort
- Losing balance
- Including trendy pieces
Eclectic & Contemporary Craftsman Styles
Let’s explore styles that either celebrate creative mixing or honour traditional craftsmanship with a modern twist.
19. Eclectic
Among our 22 different interior design styles, Eclectic design offers the most creative freedom. This style is like being a DJ of interior design – it’s all about mixing different elements to create something uniquely harmonious.
What makes Eclectic style special is its ability to combine different periods, styles, and textures while maintaining a cohesive look. Think of it as creating a beautiful symphony using instruments from different orchestras – it’s about finding harmony in diversity.
Key Characteristics:
- Mixed design elements
- Unexpected combinations
- Personal collections
- Varied textures
- Curated displays
- Multiple periods
- Artistic expression
- Thoughtful disorder
Colour Palettes: Eclectic style can embrace any colours, but typically includes
Primary Colours:
- Unifying base colour
- Rich neutrals
- Bold statement hues
- Earthy tones
- Dramatic darks
Accent Colours:
- Jewel tones
- Bright pops
- Metallic accents
- Unexpected combinations
- Personal favorites
Materials That Define the Style:
- Mixed woods
- Various metals
- Different textiles
- Glass
- Stone
- Ceramic
- Leather
- Unique finds
Pro Tip: When designing eclectic spaces, follow the 80/20 rule – 80% cohesion through colour or style, 20% surprise elements that make the space unique.
Furniture Elements:
- Different period pieces
- Statement seating
- Mixed dining chairs
- Diverse tables
- Unique storage
- Collected items
- Family heirlooms
- Modern classics
Pattern Play:
Guidelines for mixing patterns:
- Vary the scale
- Connect through colour
- Mix geometrics with organics
- Balance busy with simple
- Include texture patterns
- Combine old and new
- Layer thoughtfully
- Create rhythm
Space Planning:
Eclectic spaces need:
- Clear traffic patterns
- Defined zones
- Conversation areas
- Display spaces
- Focal points
- Balance points
- Visual breaks
- Personal corners
20. Contemporary Craftsman
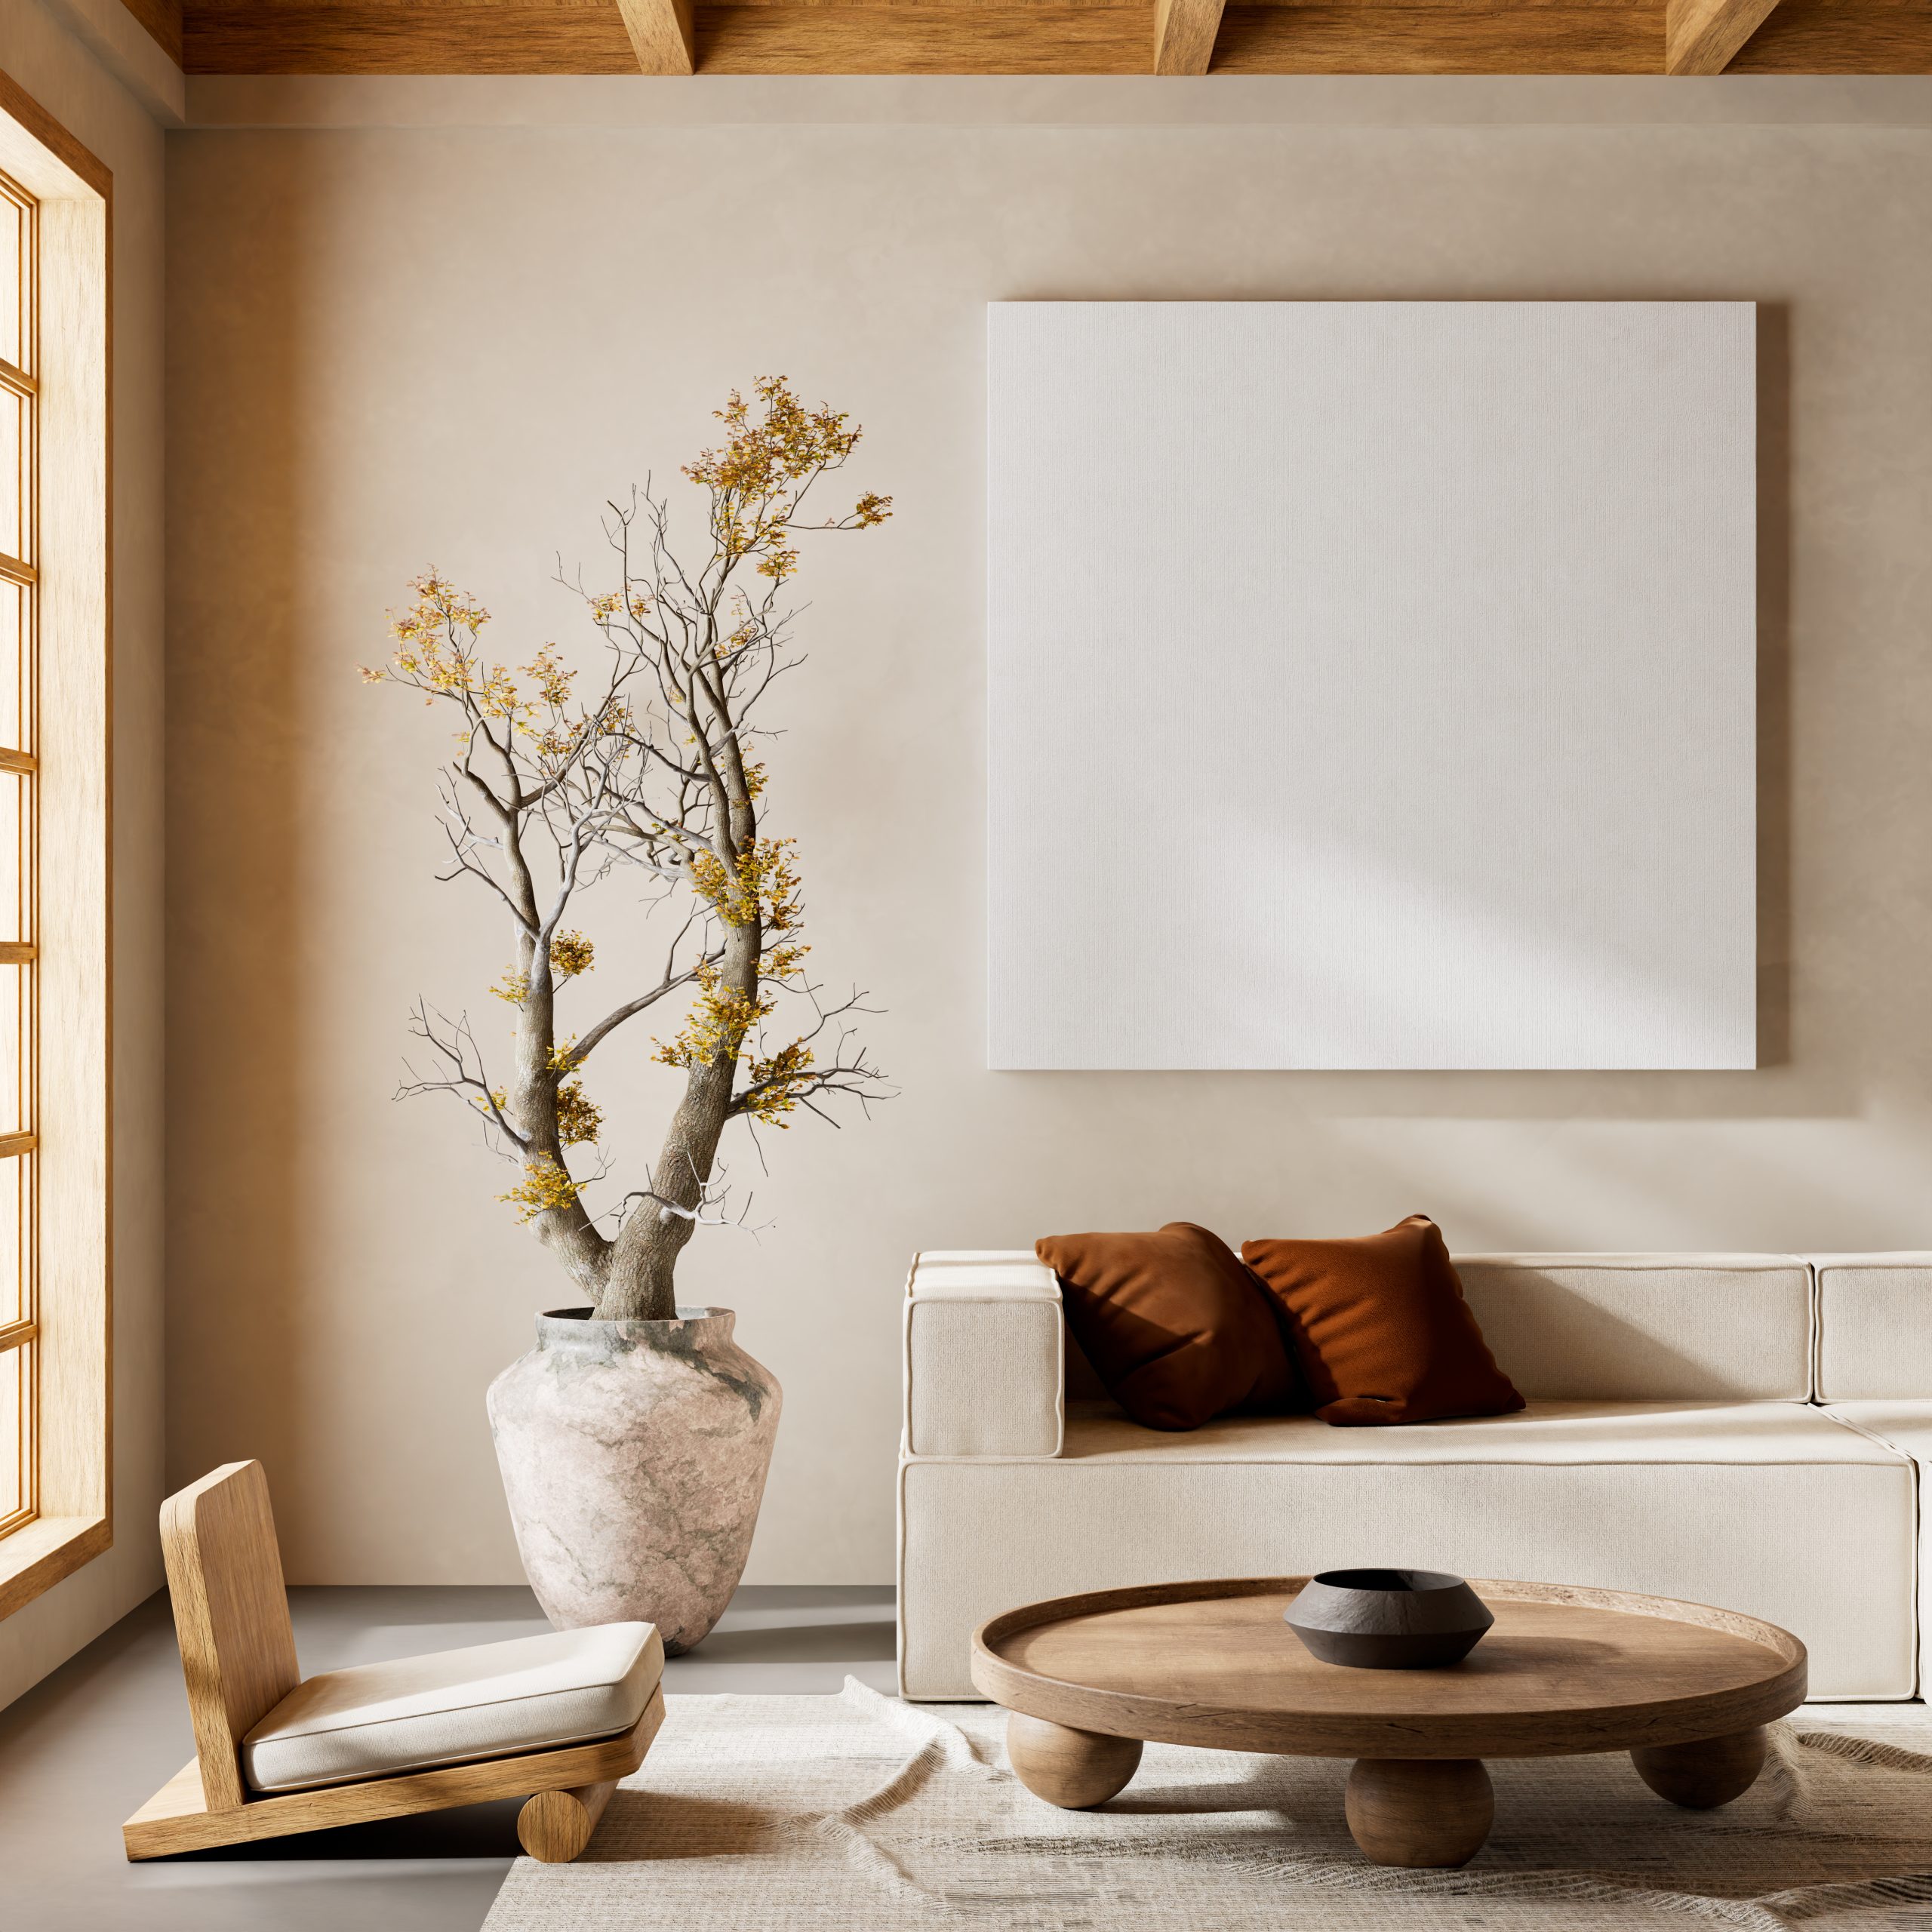
As we continue exploring our 22 different interior design styles, let’s look at Contemporary Craftsman – a style that beautifully updates the traditional Arts and Crafts movement for modern living. This style perfectly balances historical charm with current functionality.
What makes Contemporary Craftsman special is its respect for handcrafted details while embracing modern conveniences. Think of it as taking the soul of the Arts and Crafts movement – quality craftsmanship and natural materials – and adapting it for 21st-century living.
Key Characteristics:
- Clean architectural lines
- Natural materials
- Handcrafted details
- Built-in features
- Wood accents
- Modern amenities
- Organic elements
- Quality craftsmanship
Colour Palettes: Contemporary Craftsman embraces nature-inspired colours
Primary Colours:
- Warm woods
- Earth tones
- Sage greens
- Deep browns
- Warm greys
Accent Colours:
- Copper red
- Forest green
- Navy blue
- Bronze
- Amber
Materials That Define the Style:
- Quarter-sawn oak
- Natural stone
- Hand-forged metal
- Ceramic tile
- Stained glass
- Copper
- Leather
- Linen
Pro Tip: When designing Contemporary Craftsman spaces, quality is everything. One well-crafted piece will add more character than multiple mass-produced items.
Furniture Elements:
- Clean-lined sofas
- Mission-style chairs
- Built-in cabinets
- Window seats
- Solid wood tables
- Storage benches
- Leather upholstery
- Modern interpretations
Architectural Details:
- Exposed beams
- Built-in bookcases
- Window trim
- Wainscoting
- Column details
- Modern light fixtures
- Updated hardware
- Glass accents
Design Elements:
Essential features include:
- Natural wood trim
- Geometric patterns
- Stained glass accents
- Metal hardware
- Updated lighting
- Modern technology
- Practical storage
- Indoor-outdoor connection
Space Planning:
Contemporary Craftsman spaces need:
- Open floor plans
- Defined rooms
- Built-in features
- Reading nooks
- Work spaces
- Gathering areas
- Connection to nature
- Modern functionality
Modern Interpretation:
How to update Craftsman style:
- Lighter wood tones
- Modern lighting
- Updated hardware
- Smart home features
- Contemporary fabrics
- Simplified details
- Open concept adaptation
- Modern amenities
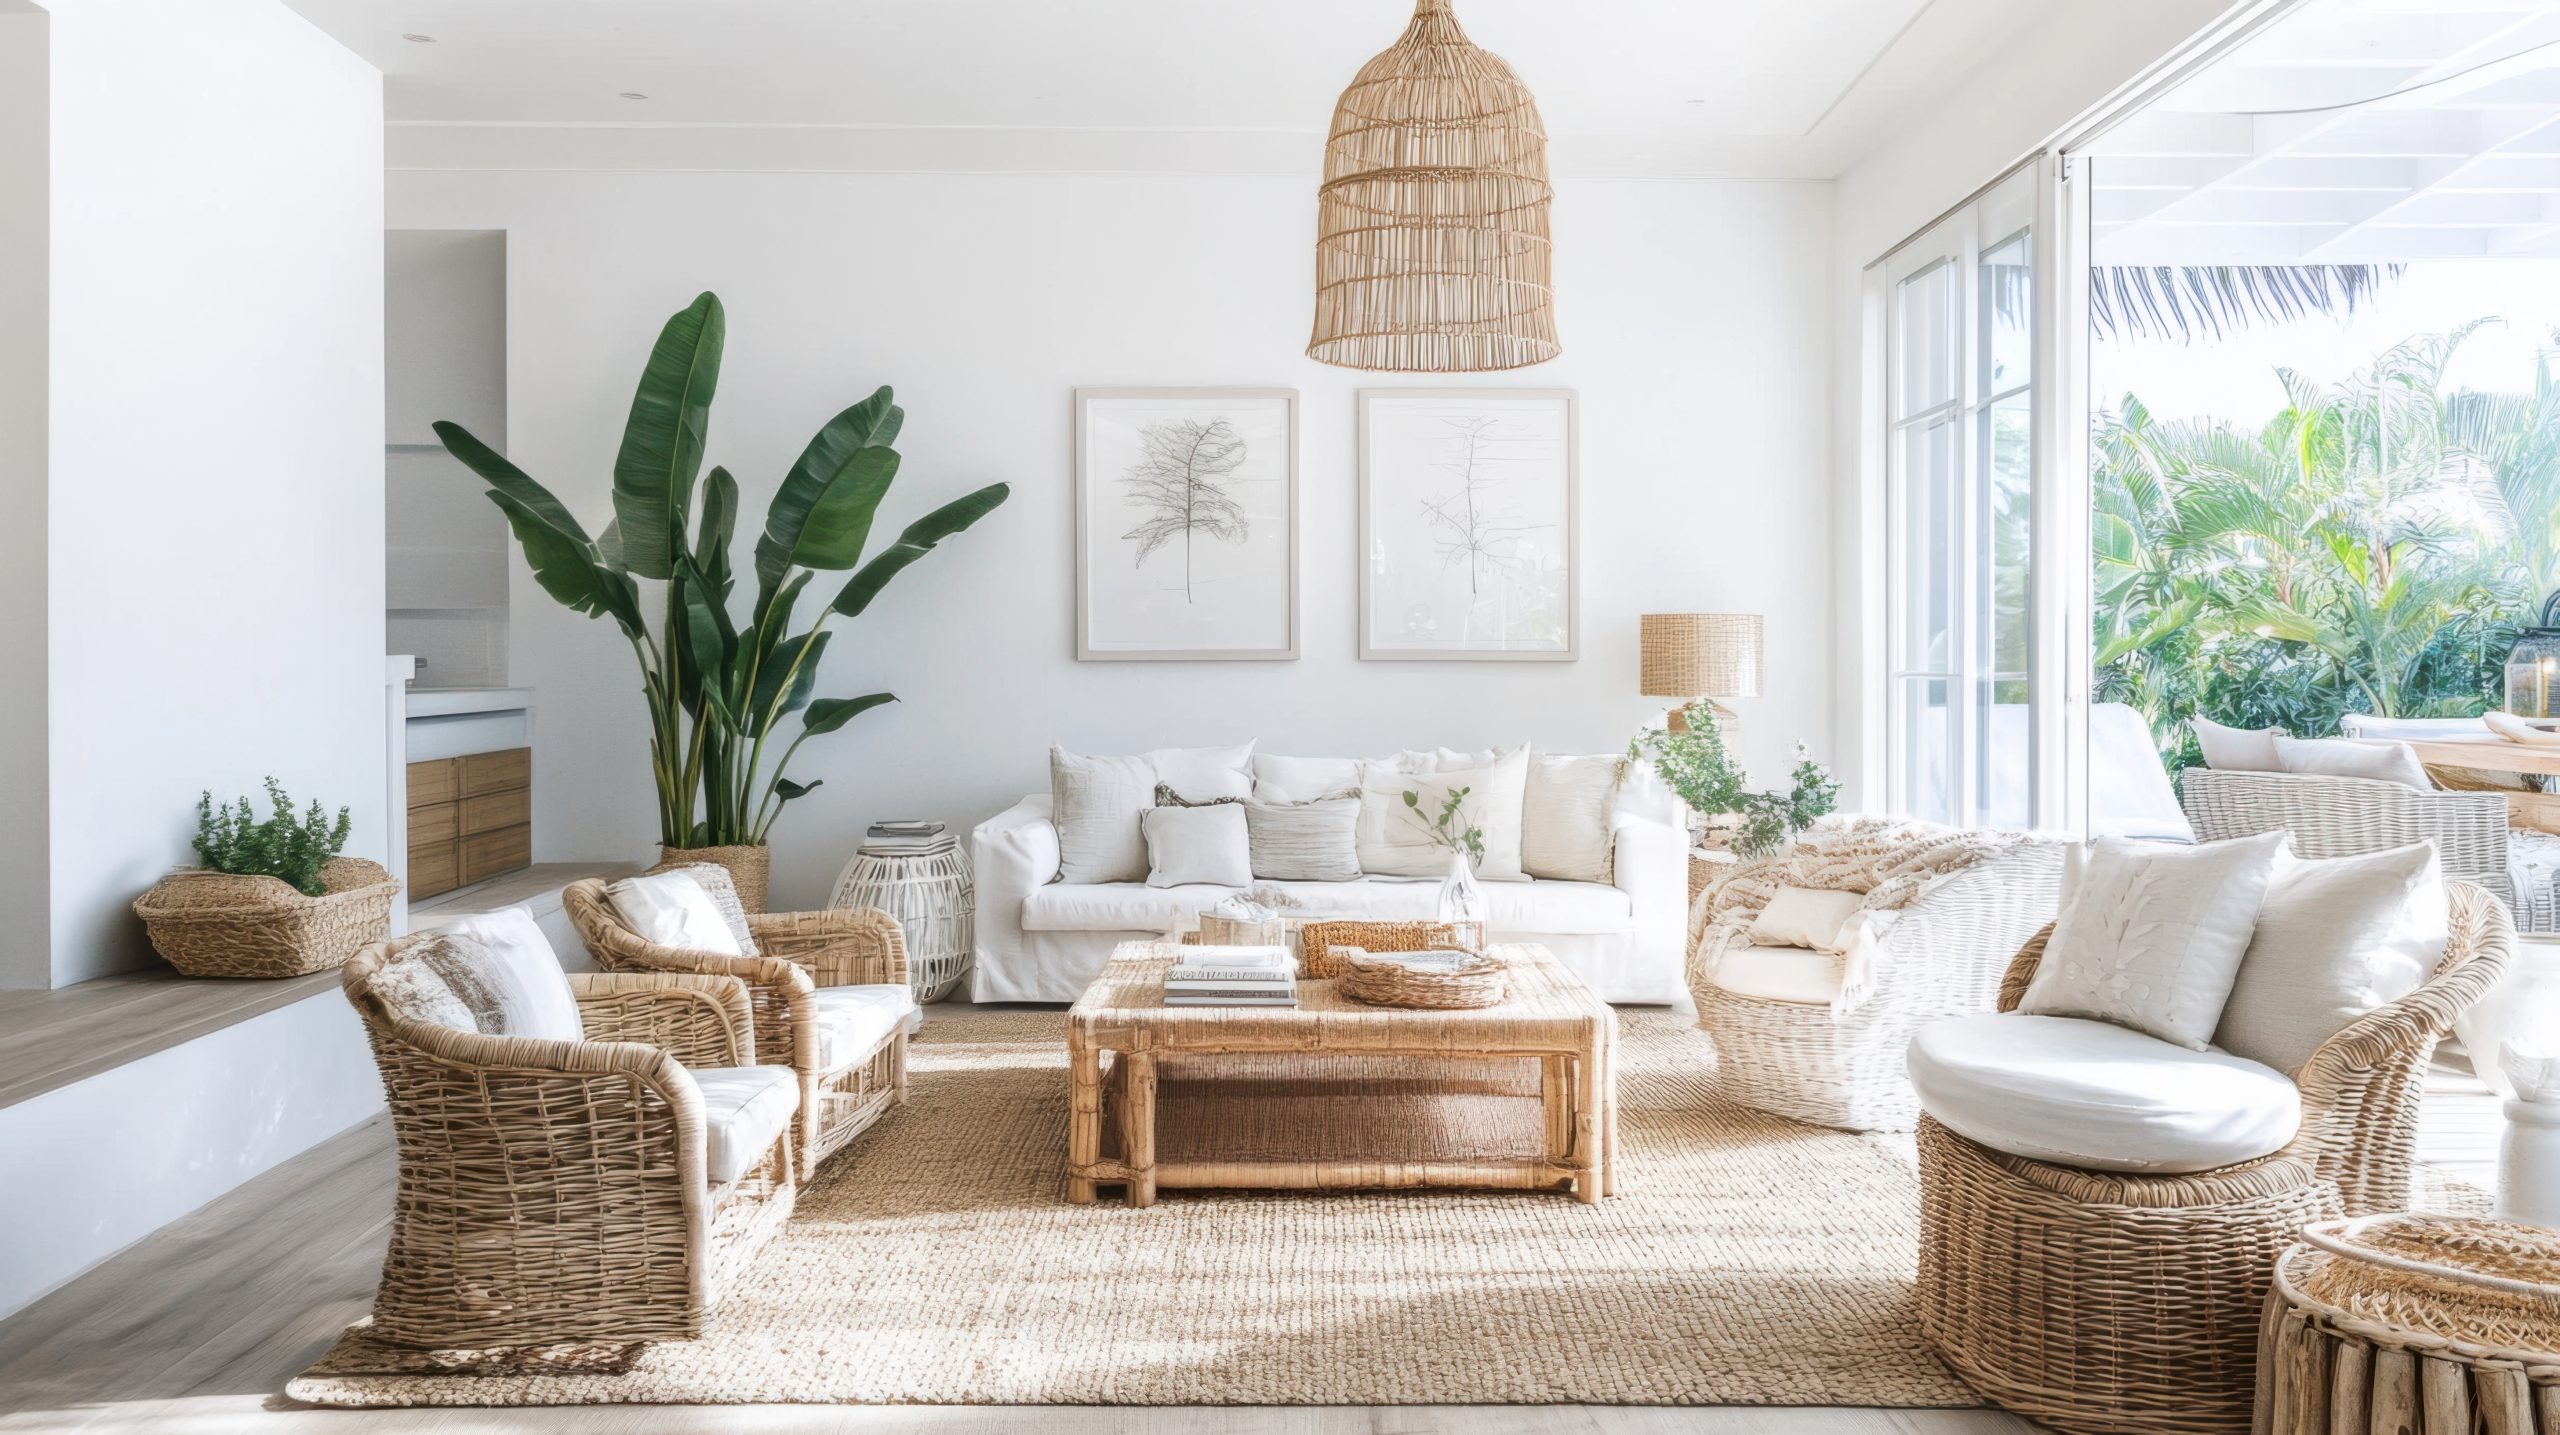
21. Tropical
Moving through our 22 different interior design styles, let’s explore Tropical design – a style that brings the essence of paradise into everyday living. This style is about much more than just palm prints and bright colours.
What makes Tropical style special is its ability to create a permanent vacation feeling while maintaining sophistication. Think of it as capturing the essence of a luxury island resort but making it completely livable for daily life.
Key Characteristics:
- Indoor-outdoor flow
- Natural materials
- Lush greenery
- Bright, natural light
- Bold patterns
- Relaxed atmosphere
- Resort-inspired elements
- Organic textures
Colour Palettes: Tropical design embraces nature’s vibrant colours
Primary Colours:
- Warm whites
- Ocean blues
- Leafy greens
- Sandy beiges
- Natural browns
Accent Colours:
- Coral pink
- Sunny yellow
- Bright orange
- Orchid purple
- Turquoise
Materials That Define the Style:
- Rattan
- Bamboo
- Wicker
- Natural fibers
- Teak wood
- Linen
- Cotton
- Jute
Pro Tip: When designing tropical spaces, I always tell clients that balance is key – you want that paradise feeling without turning your home into a theme park resort.
Furniture Elements:
- Rattan chairs
- Bamboo tables
- Upholstered pieces
- Wooden ceiling fans
- Outdoor-inspired seating
- Plantation chairs
- Woven furniture
- Natural wood pieces
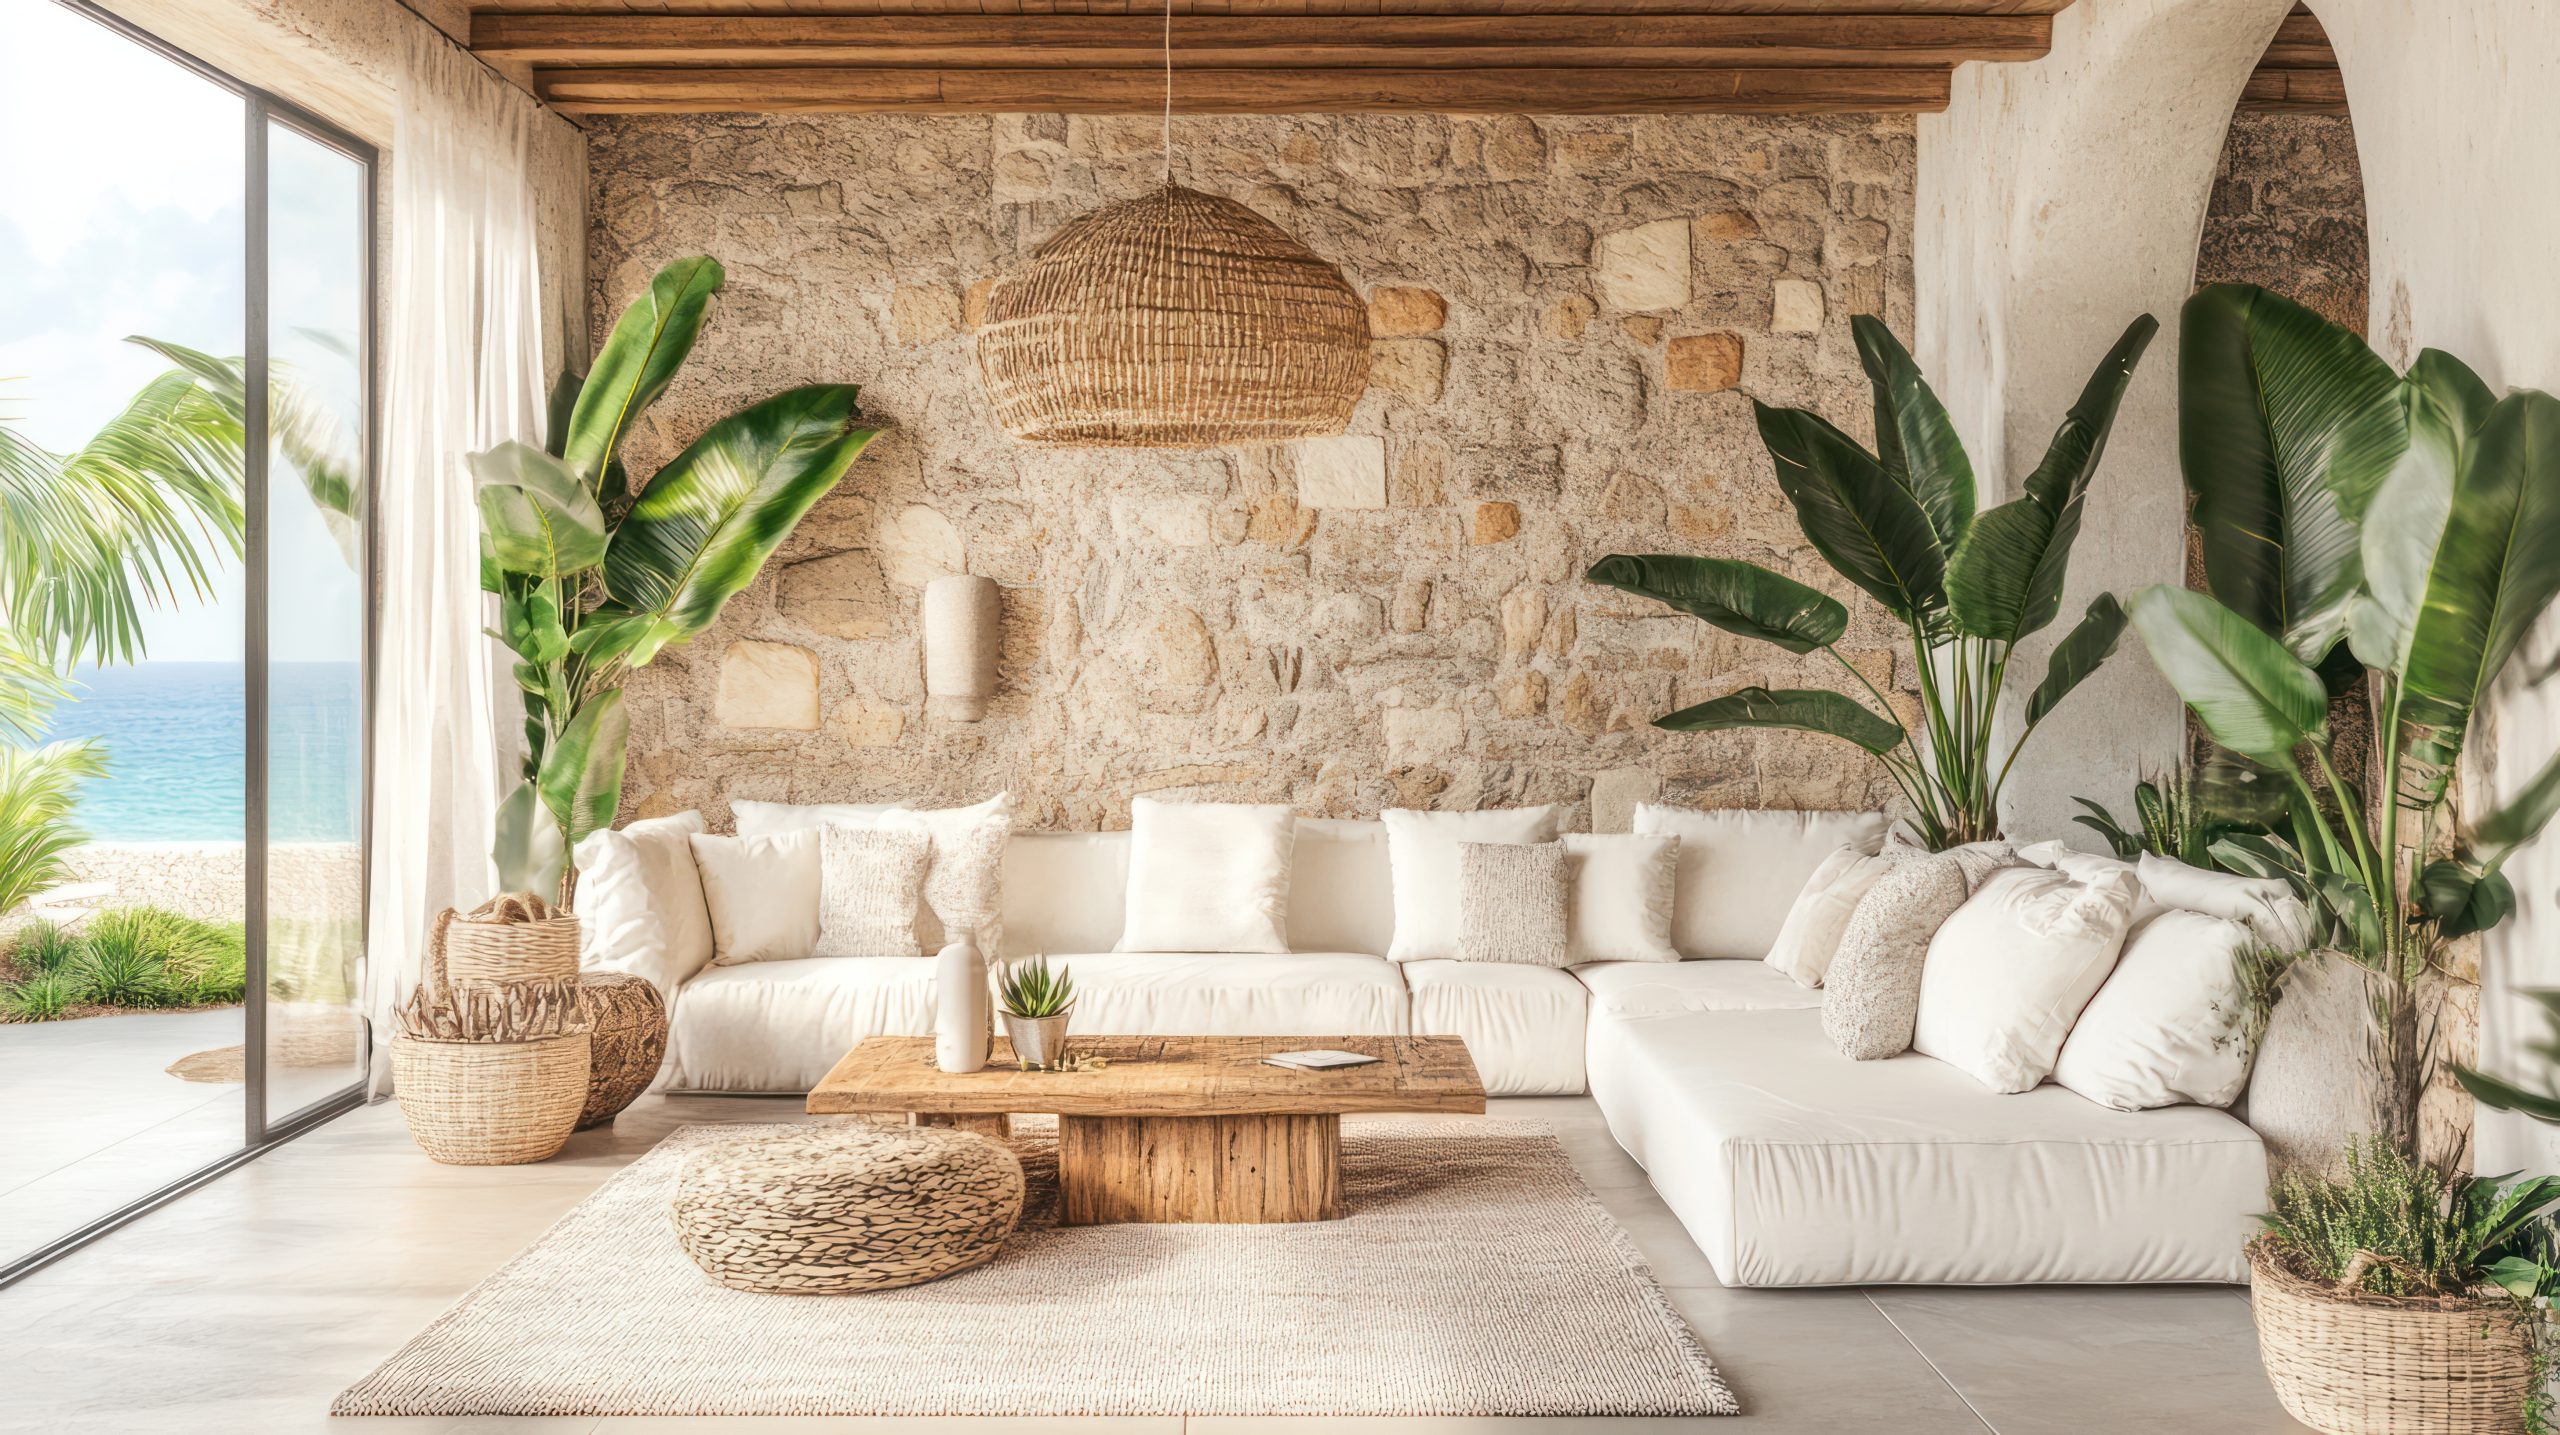
Pattern Play:
Signature tropical patterns:
- Palm leaves
- Botanical prints
- Animal prints
- Tribal motifs
- Geometric patterns
- Natural textures
- Floral designs
- Island-inspired motifs
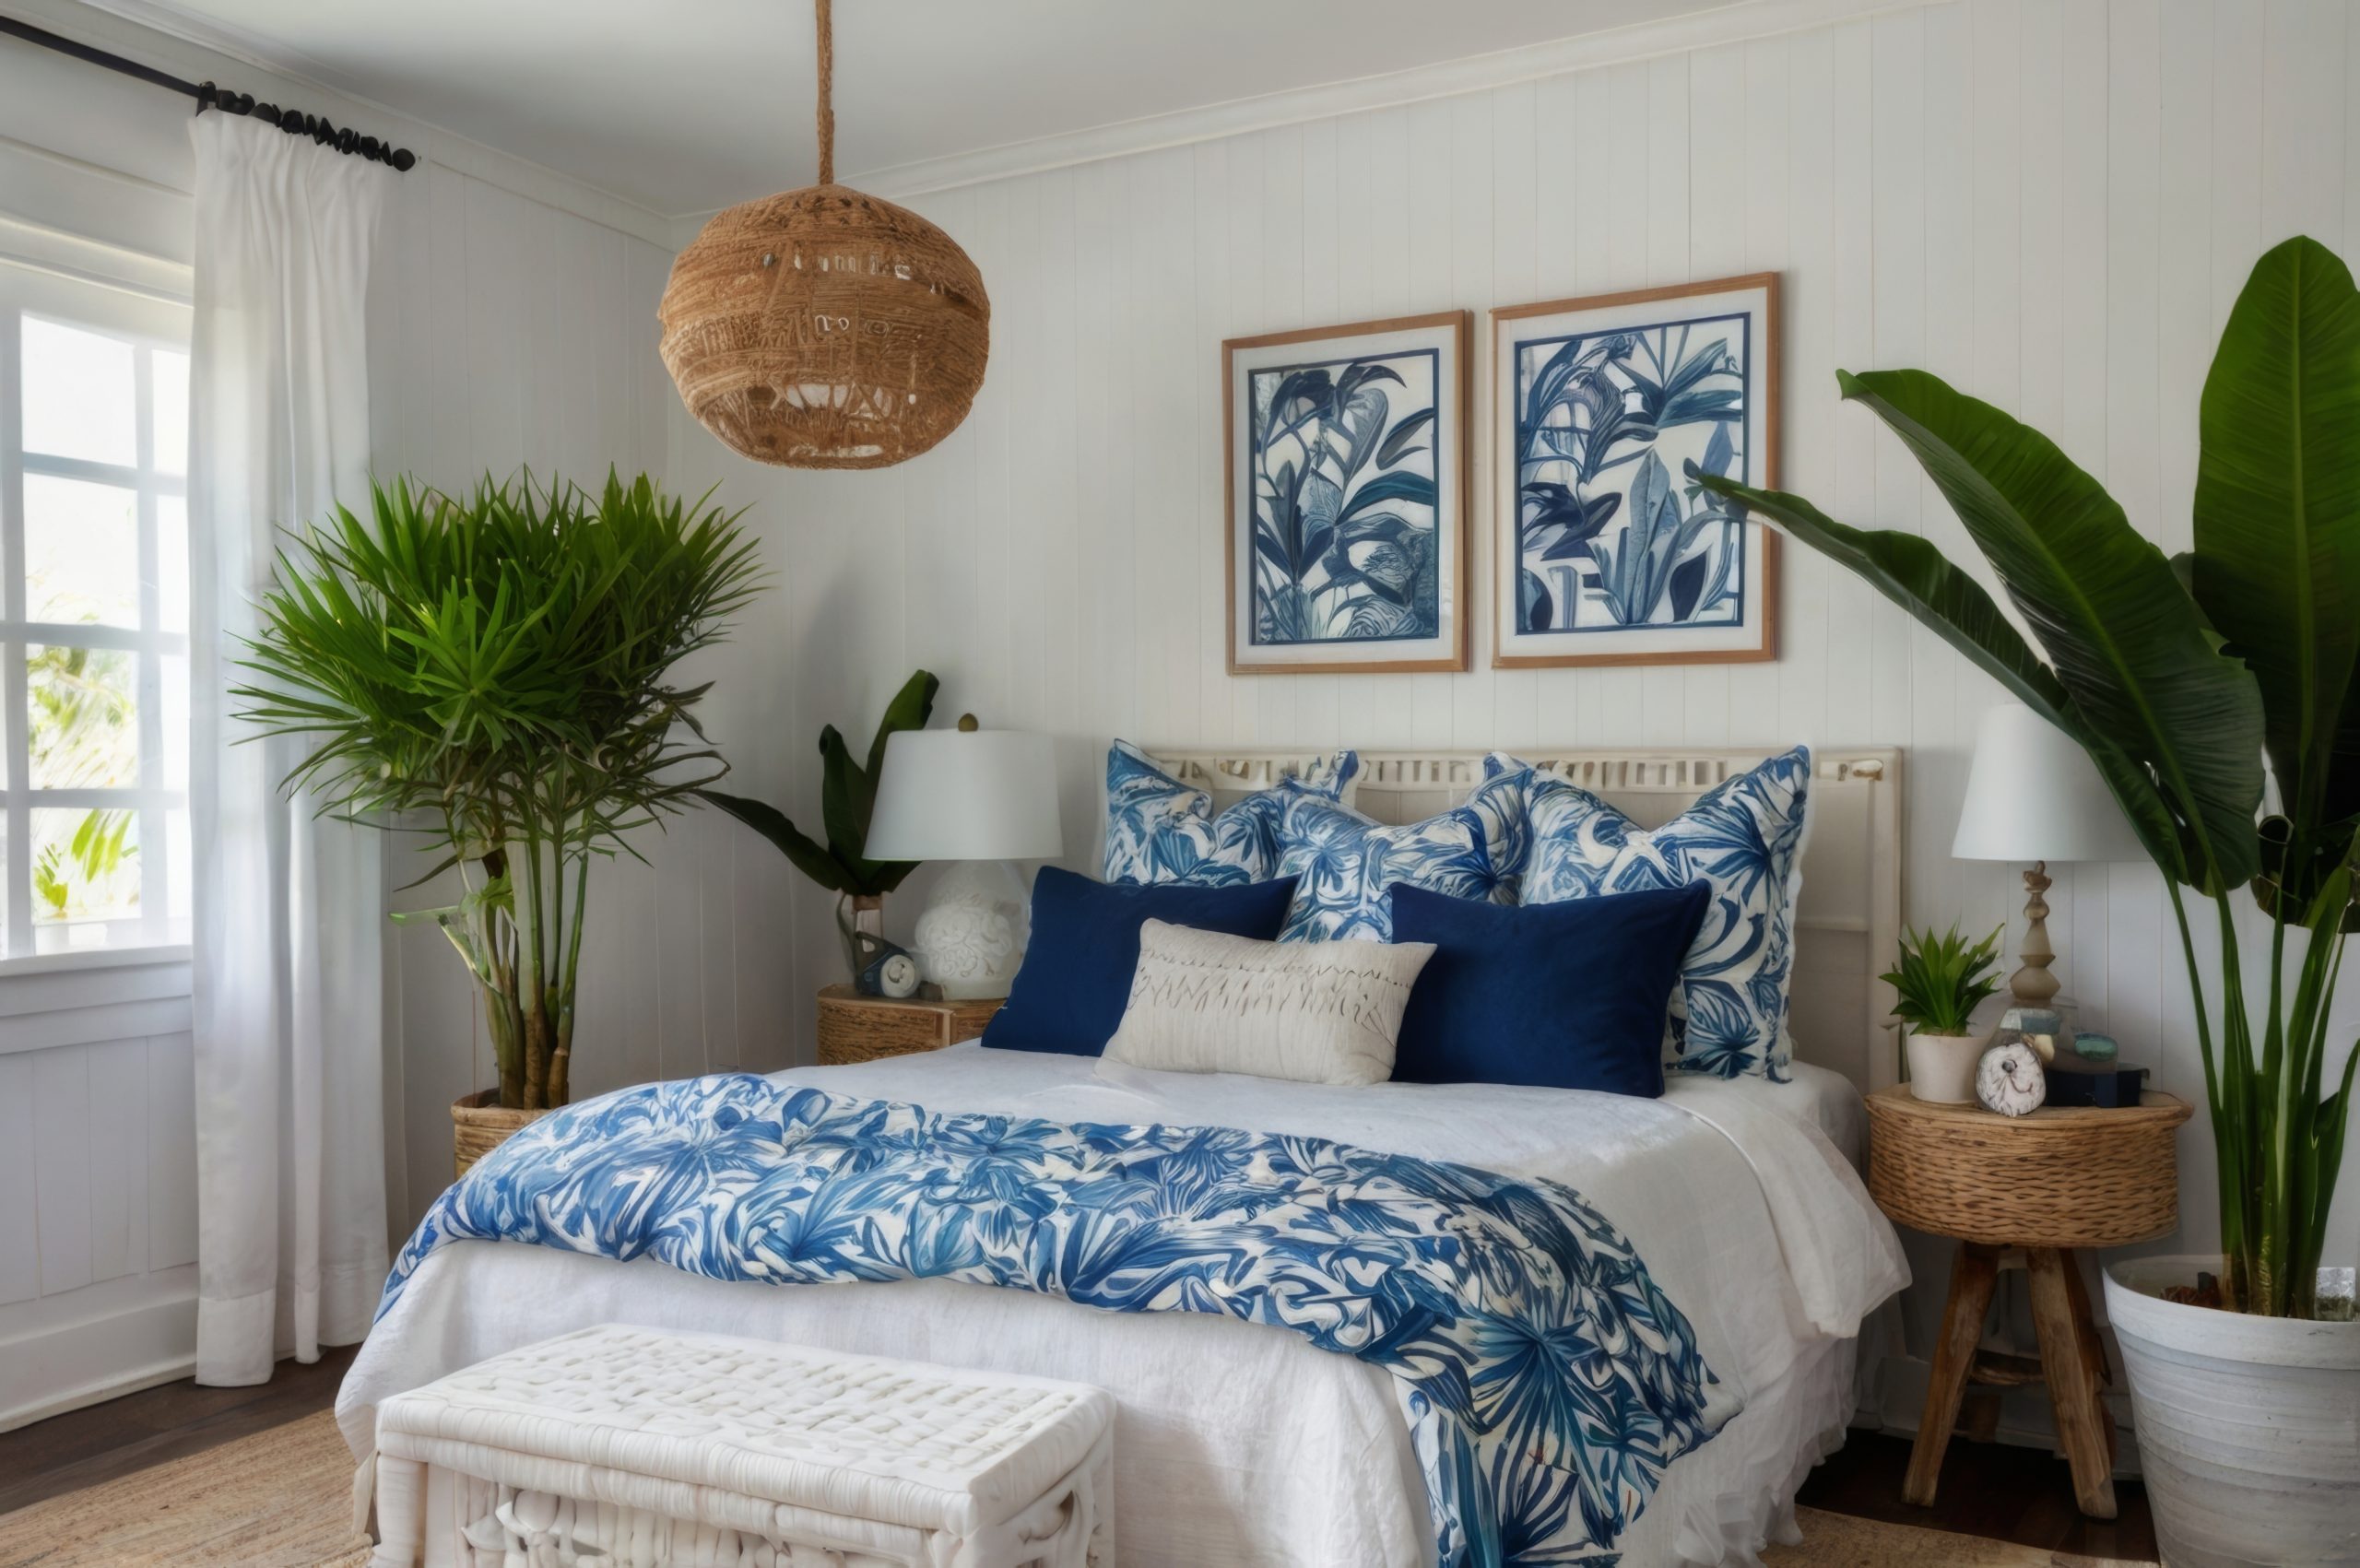
Essential Decor Elements:
- Live plants
- Natural fibre rugs
- Woven baskets
- Carved wood accents
- Shell collections
- Local artwork
- Ceiling fans
- Water features
22. Japandi
For our final style in our exploration of 22 different interior design styles, let’s discuss Japandi – a beautiful fusion of Japanese and Scandinavian design principles. This hybrid style perfectly combines minimalist aesthetics with cosy functionality.
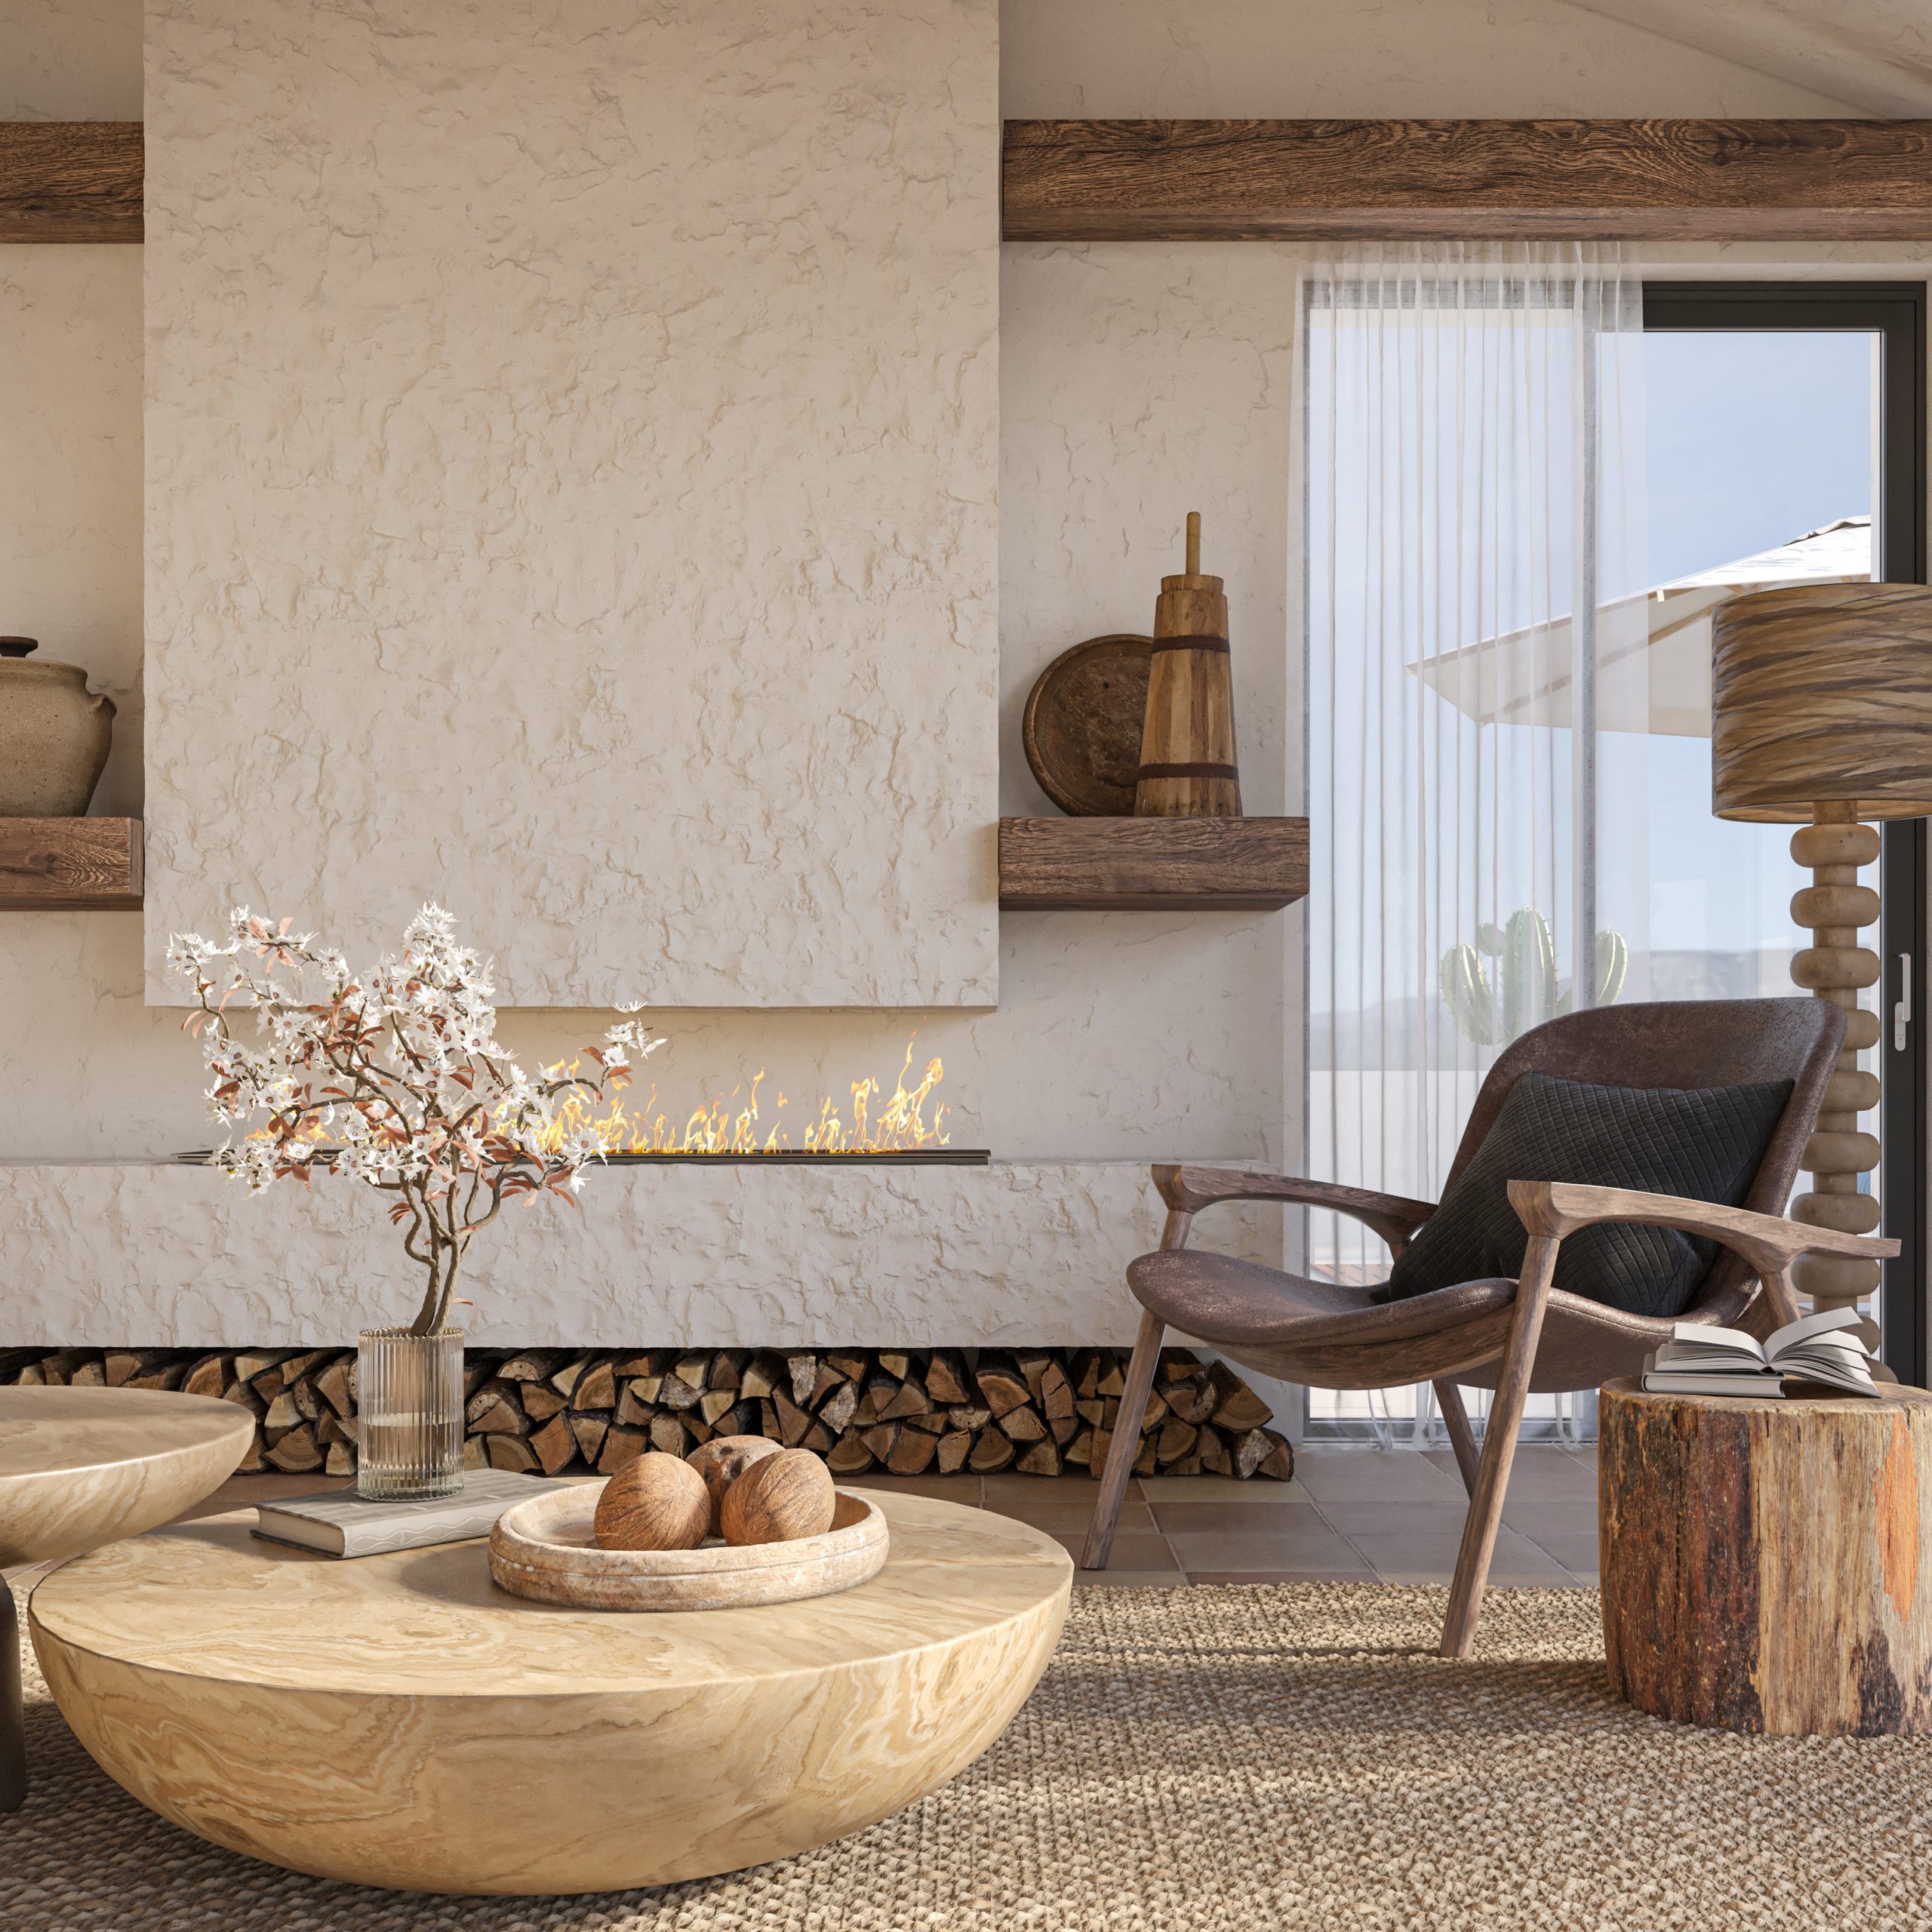
What makes Japandi special is how it marries the warmth of Scandinavian hygge with the minimalist serenity of Japanese design. Think of it as creating the perfect balance between cosy and calm, where every element serves both an aesthetic and functional purpose while maintaining a sense of tranquillity.
Key Characteristics:
- Minimalist design
- Natural materials
- Clean lines
- Neutral colours
- Thoughtful empty space
- Functional beauty
- Handcrafted elements
- Sustainable focus
Colour Palettes: Japandi embraces a refined neutral palette
Primary Colours:
- Warm whites
- Soft greys
- Natural wood tones
- Charcoal
- Earth tones
Accent Colours:
- Sage green
- Pale blush
- Deep ocean blue
- Warm rust
- Muted clay
Materials That Define the Style:
- Light and dark woods
- Natural fibers
- Paper
- Stone
- Linen
- Cotton
- Ceramic
- Bamboo
Pro Tip: When designing Japandi spaces, contrast is key – the style works best when you balance light Scandinavian elements with darker Japanese influences.
Furniture Elements:
- Low-profile sofas
- Platform beds
- Clean-lined chairs
- Minimal coffee tables
- Built-in storage
- Natural wood pieces
- Handcrafted items
- Multi-functional furniture
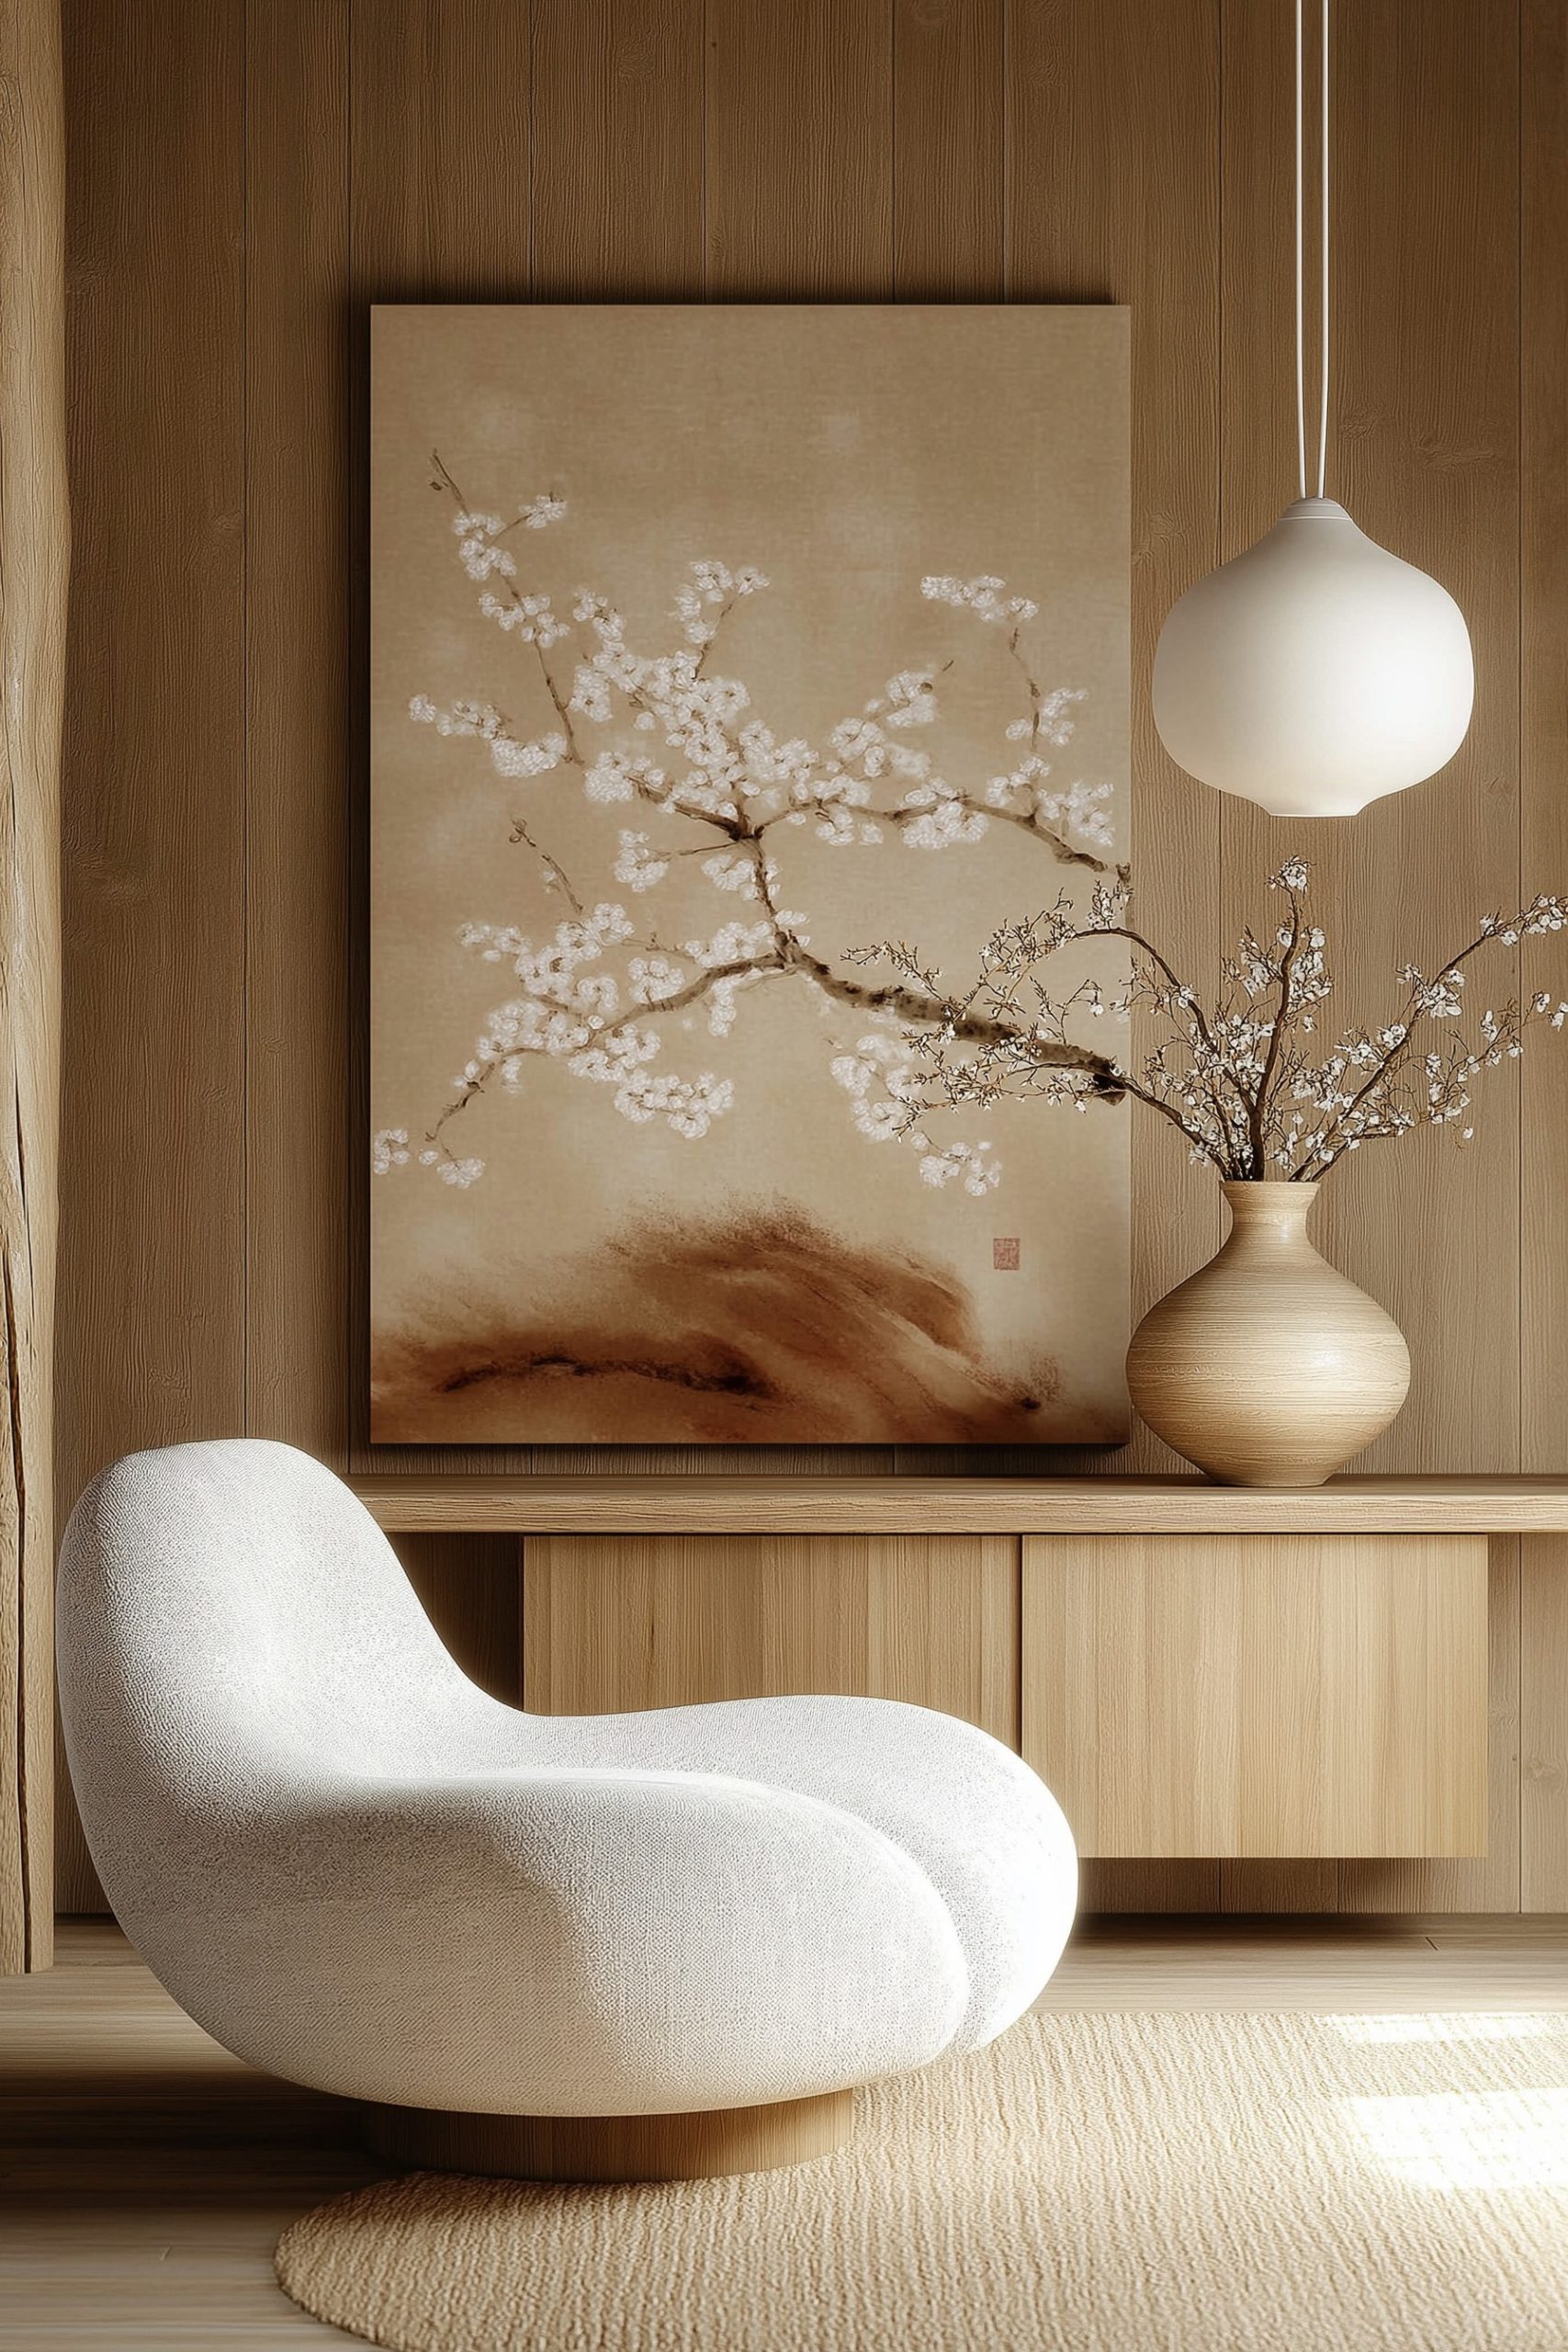
Essential Elements:
- Simple artwork
- Ceramic vessels
- Natural textiles
- Indoor plants
- Paper lanterns
- Woven baskets
- Minimal decor
- Textural elements
Space Planning:
Japandi spaces require:
- Uncluttered layouts
- Functional zones
- Clear pathways
- Purposeful furniture
- Natural light emphasis
- Cosy corners
- Storage solutions
- Peaceful flow
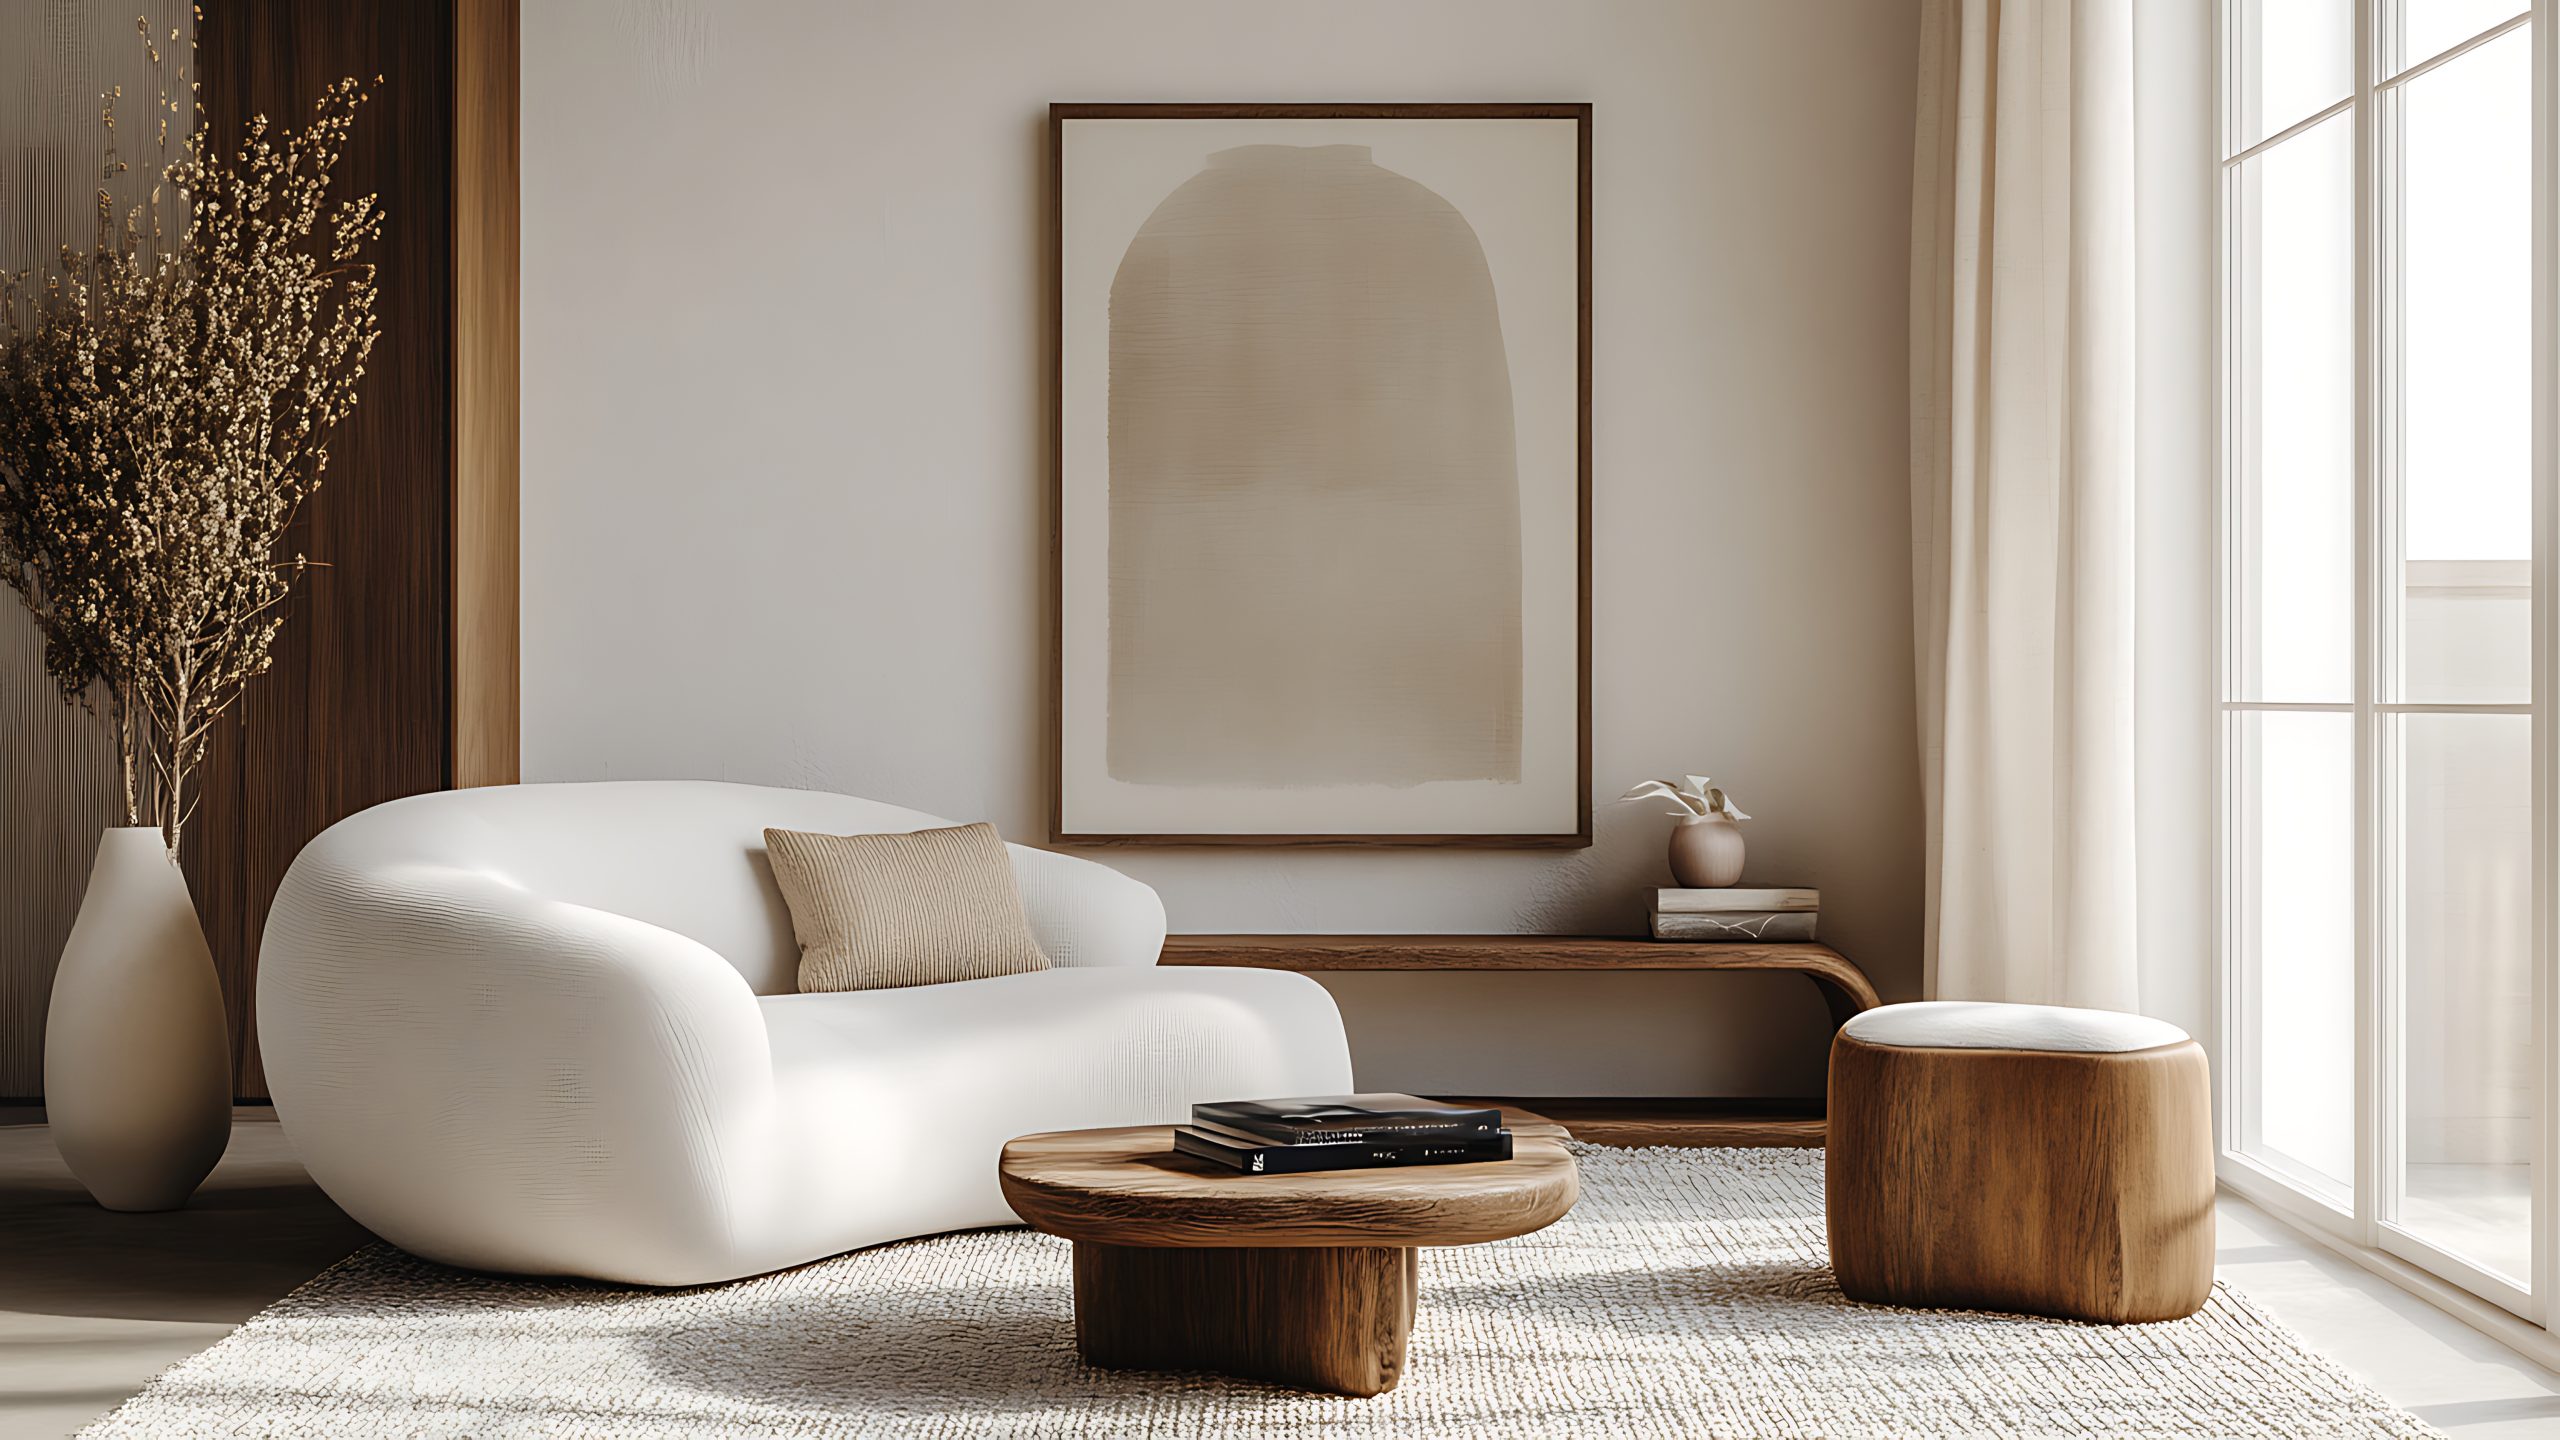
Styling Guidelines:
- Focus on quality over quantity
- Mix light and dark elements
- Layer natural textures
- Keep accessories minimal
- Include handcrafted pieces
- Add warmth through textiles
- Incorporate plants thoughtfully
- Create peaceful vignettes
Common Mistakes to Avoid:
- Over-accessorising
- Using artificial materials
- Forgetting about comfort
- Making spaces too stark
- Missing storage solutions
- Losing cultural balance
The beauty of Japandi lies in its ability to create spaces that are both practical and peaceful, minimal yet warm. It’s perfect for those who appreciate clean lines but don’t want their home to feel cold or uninviting
After exploring these 22 different interior design styles, remember that the perfect style for you might be one of these or a thoughtful combination of several. The key is to choose elements that resonate with your lifestyle and personal taste while creating a space that functions well for your needs.
How to Choose Your Style
Consider these factors when selecting your ideal design style:
- Your lifestyle needs
- The architecture of your home
- Your colour preferences
- Maintenance requirements
- Budget considerations
- Long-term livability
- Personal comfort level
- Family needs
Mixing Different Interior Design Styles
Understanding these 22 different interior design styles gives you the freedom to mix and match elements that speak to you. Here’s how to successfully blend styles:
Basic Principles for Mixing Styles:
- Choose a dominant style (about 70%)
- Add a secondary style (about 20%)
- Include accent elements (about 10%)
- Maintain a consistent colour palette
- Keep proportions in mind
- Consider the flow between rooms
- Focus on quality over quantity
- Trust your instincts
Common Successful Combinations:
- Modern + Mid-century
- Traditional + Contemporary
- Industrial + Rustic
- Scandinavian + Japandi
- Coastal + Modern Farmhouse
- Bohemian + Global
Things to Avoid When Mixing Styles:
- Too many competing elements
- Clashing colour schemes
- Inconsistent quality levels
- Forced combinations
- Overwhelming spaces
- Losing functionality
As we’ve explored these 22 different interior design styles, remember that creating your perfect space is a journey, not a destination. Whether you’re drawn to the elegance of Traditional, the clean lines of Modern, or a unique combination of several styles, the most important thing is that your home reflects who you are and how you live.
Don’t feel pressured to strictly adhere to any single style. The best spaces are often those that evolve naturally over time, incorporating elements that speak to you while maintaining functionality for your lifestyle.
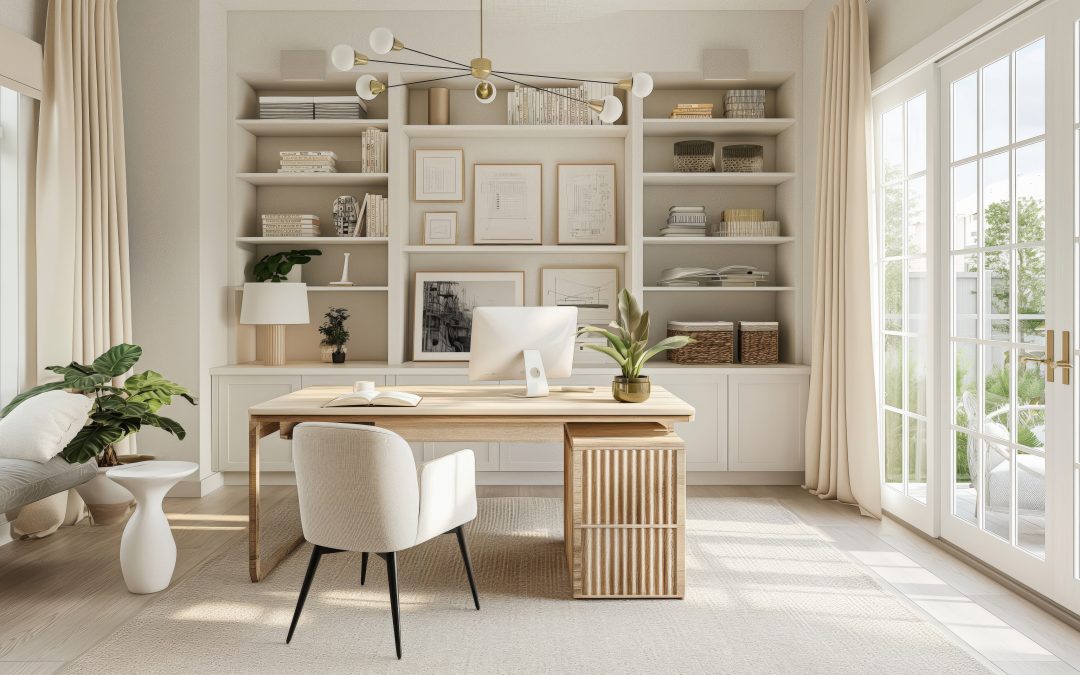
by Kesaa Interiors | DESIGN GUIDES, Home Office, Room-by-Room Guides, ROOMS
Want to know what the essentials are for a productive home office design? You have come to the right place to find out!
As an interior designer, I’ve seen firsthand how the right environment can make all the difference, especially when it comes to working from home. With more of us setting up shop in our living spaces, having a productive home office design is crucial.
It’s not just about having a desk and chair; it’s about creating a space that inspires and helps you stay focused. Today, I want to share some tips on how you can transform your home office into a functional and motivating place. Let’s dive in!
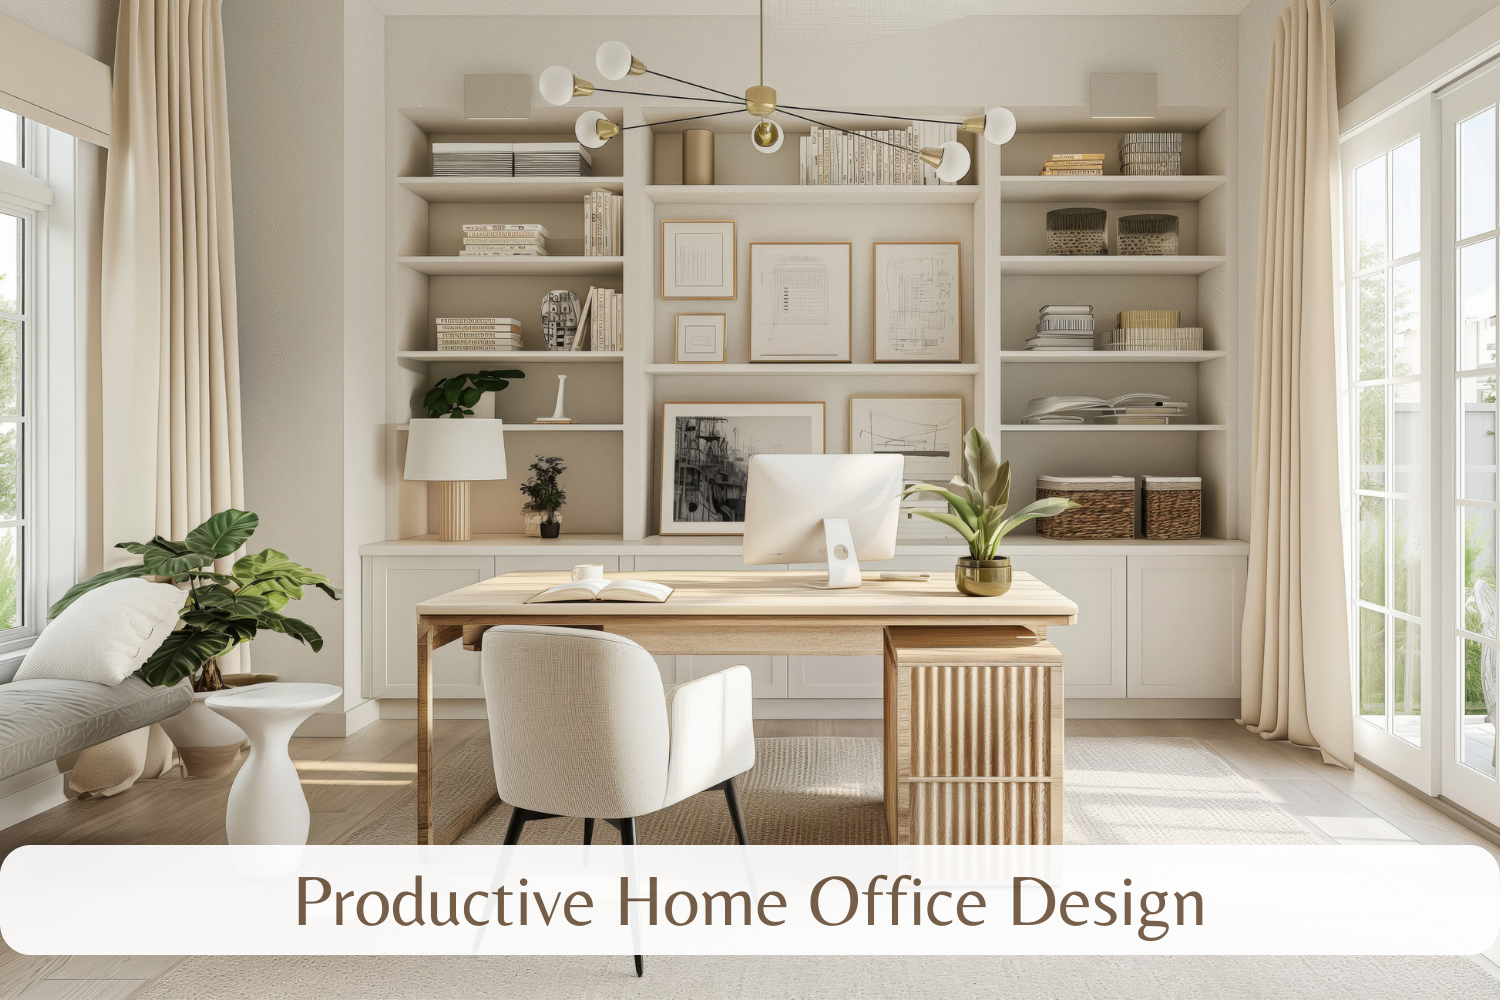
Best Productive Home Office Design Essentials!
1. Understanding the Basics of Productive Home Office Design
Creating a productive home office design starts with understanding what you need from your workspace. It’s about more than just aesthetics; it’s about functionality and personal comfort. Here’s how you can start:
- Identify Your Work Style: Are you someone who thrives in a minimalist setting, or do you need a bit of creative chaos around you? Understanding your work style is key to designing a space that works for you. A productive home office design should cater to your specific needs, whether that means having plenty of storage for your files or a big whiteboard for brainstorming sessions.
- Balance Aesthetics and Functionality: You want a space that feels inviting and reflects your personal style, but it also needs to support your work habits. Think of it as creating a little haven where you can be your most productive self. Consider the following:
- Colour Schemes: Choose colours that boost your mood and concentration. Blues and greens are known for their calming effects, while yellows can stimulate creativity.
- Textures and Materials: Incorporate materials that are both pleasing to the eye and functional. A wooden desk can add warmth, while a glass surface might offer a sleek, modern look.
- Personalisation: It’s not just about the furniture and decor. It’s about creating an environment that helps you focus and get things done. Add personal touches that make the space uniquely yours:
- Artwork and Decor: Hang art that inspires you or display items that have personal significance.
- Plants: Incorporate greenery to improve air quality and add a touch of nature.
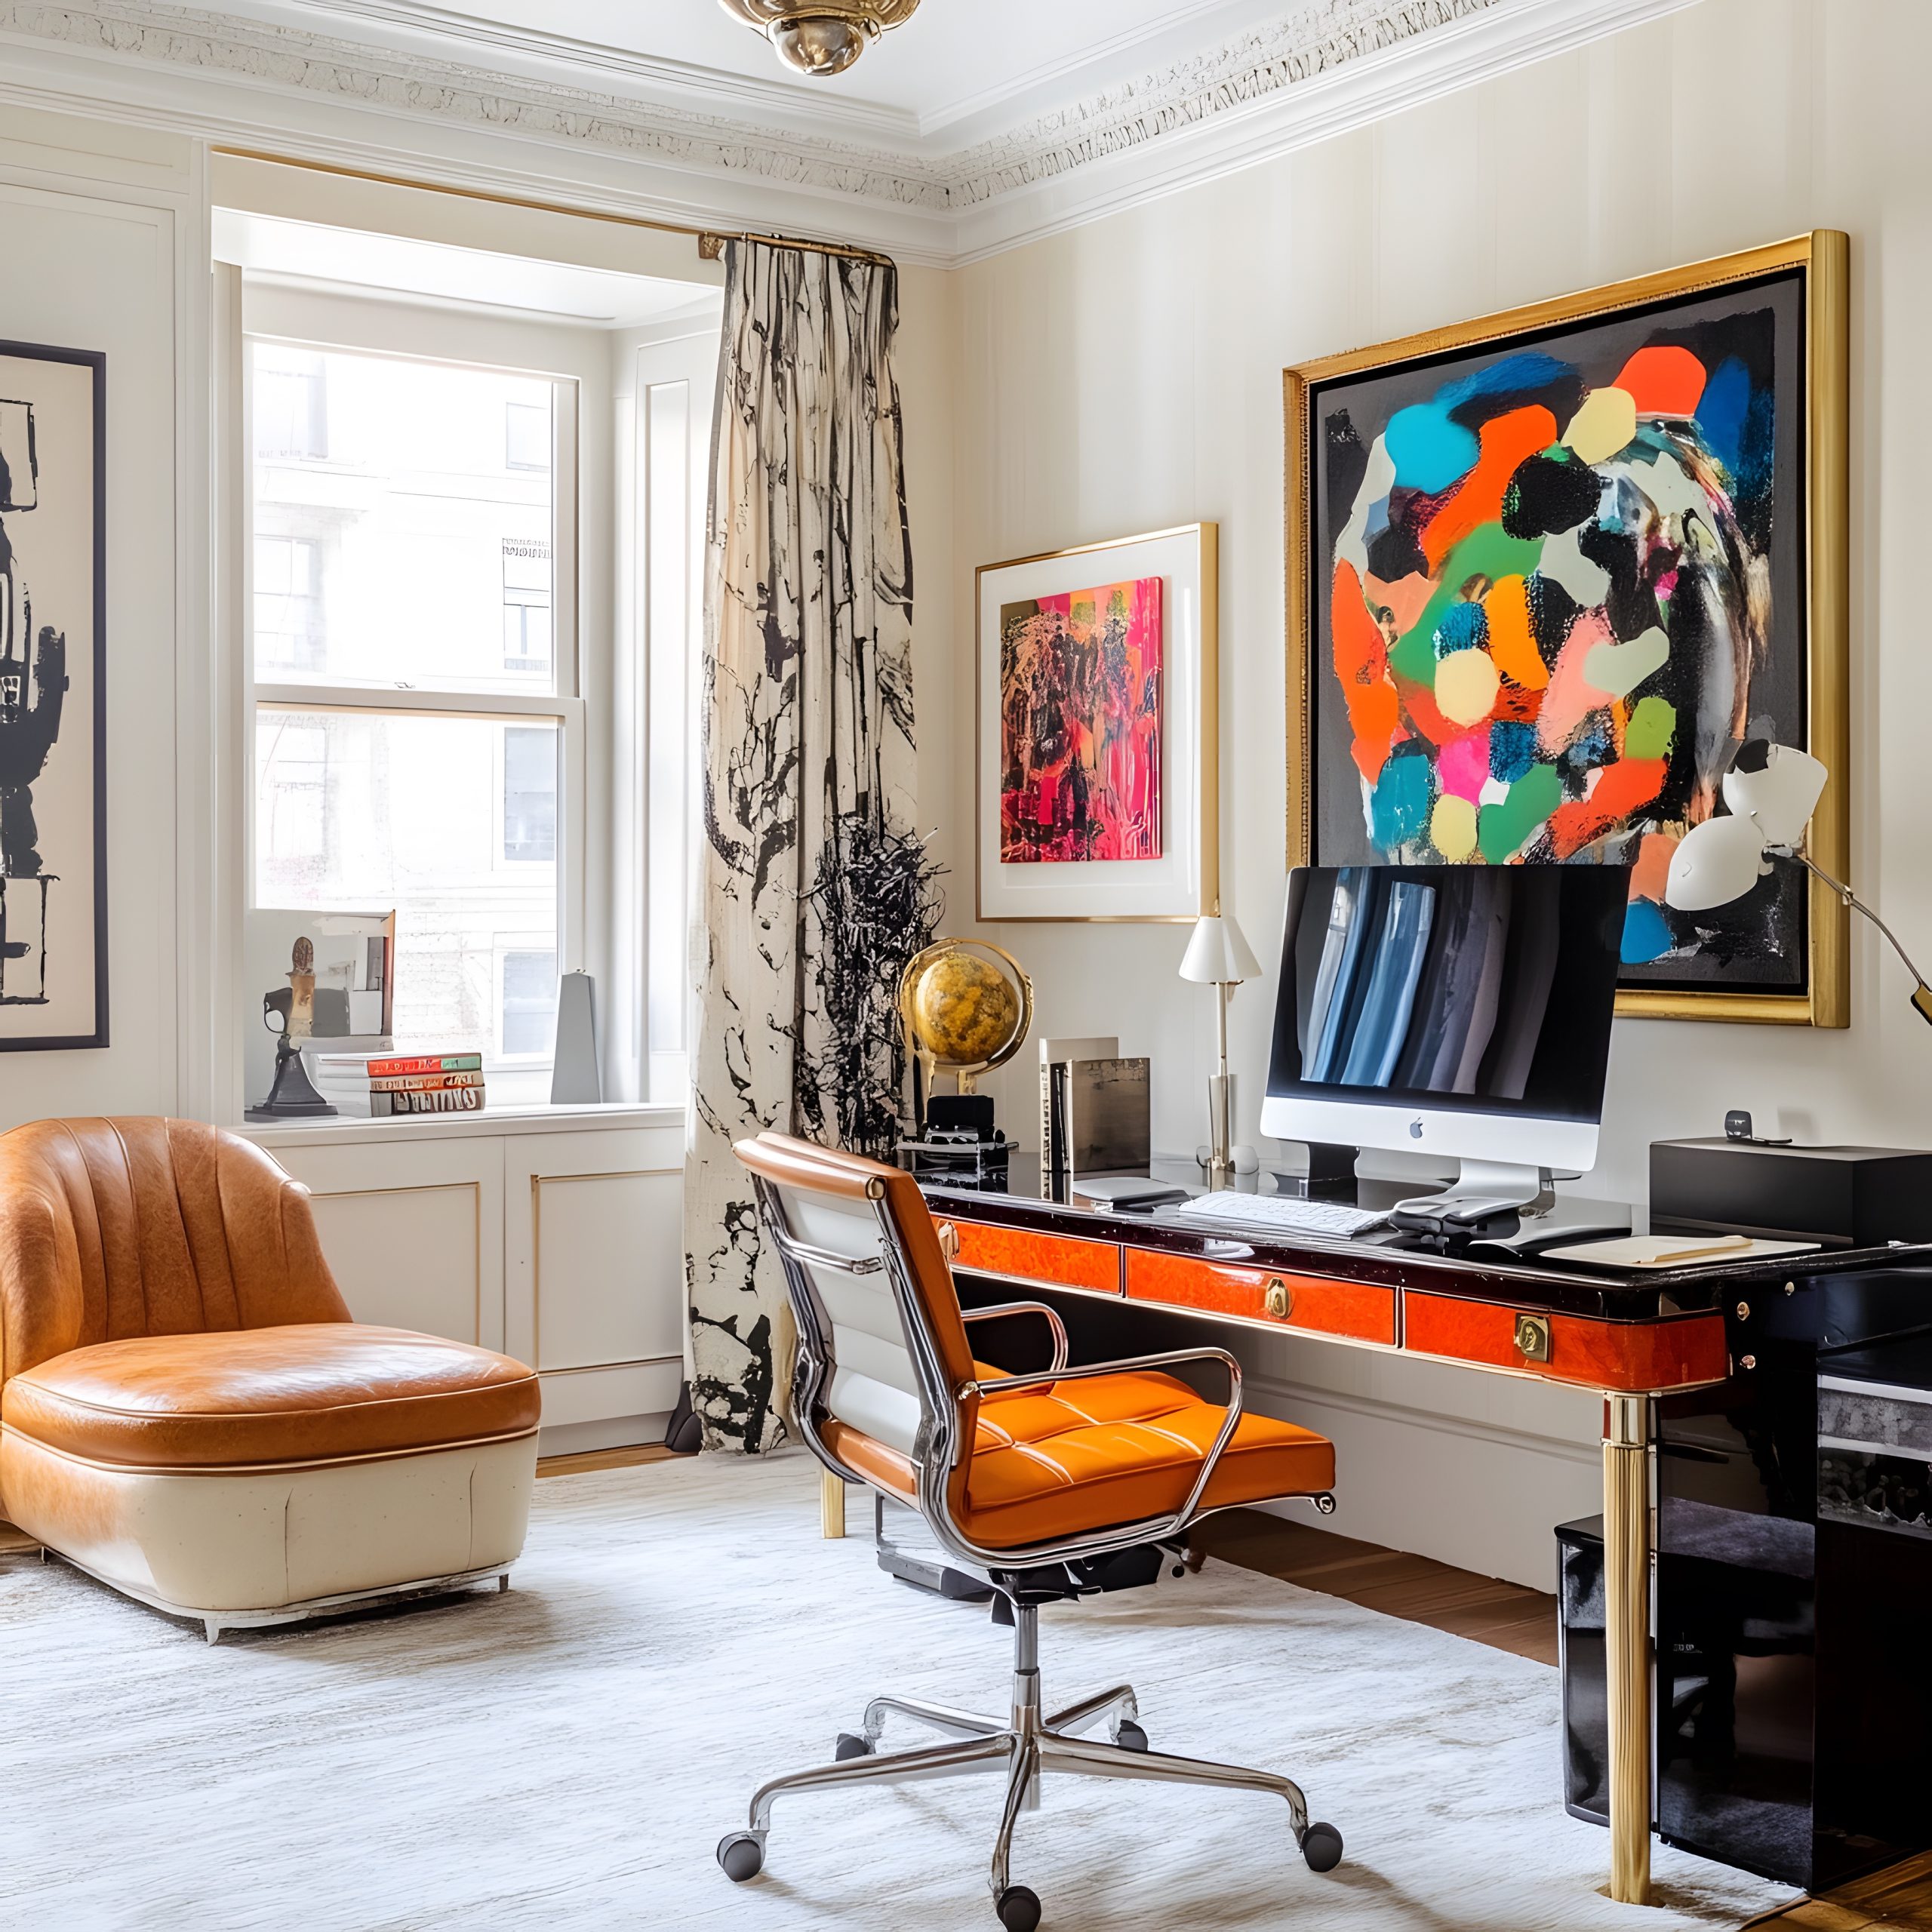
By understanding these basics, you can start to create a productive home office design that not only looks great but also enhances your work performance. Now, let’s move on to choosing the right location for your home office.
2. Choosing the Right Location
Selecting the perfect spot for your home office is a crucial step in achieving a productive home office design. The location can significantly impact your focus and efficiency, so here’s what to consider:
- Assess Your Space: Look around your home and identify potential areas for your office. Consider:
- Natural Light: Spaces with ample natural light can boost your mood and energy levels. Try to position your desk near a window if possible.
- Quietness: Choose a location away from high-traffic areas to minimise distractions. A spare room or a quiet corner can work wonders.
- Space Availability: Ensure there’s enough room for your desk, chair, and any additional furniture or equipment you might need.
- Potential Locations: Depending on your home’s layout, here are some ideas:
- Spare Room: If you have an extra room, it can be transformed into a dedicated office space.
- Living Room Corner: Utilise a corner of your living room with a compact desk setup.
- Converted Closet: A larger closet can be converted into a cosy office nook with some creative shelving and lighting.
- Considerations for Shared Spaces: If you’re sharing your workspace with others, think about:
- Privacy: Use room dividers or screens to create a sense of separation.
- Noise Control: Invest in noise-cancelling headphones or soundproofing materials to maintain focus.
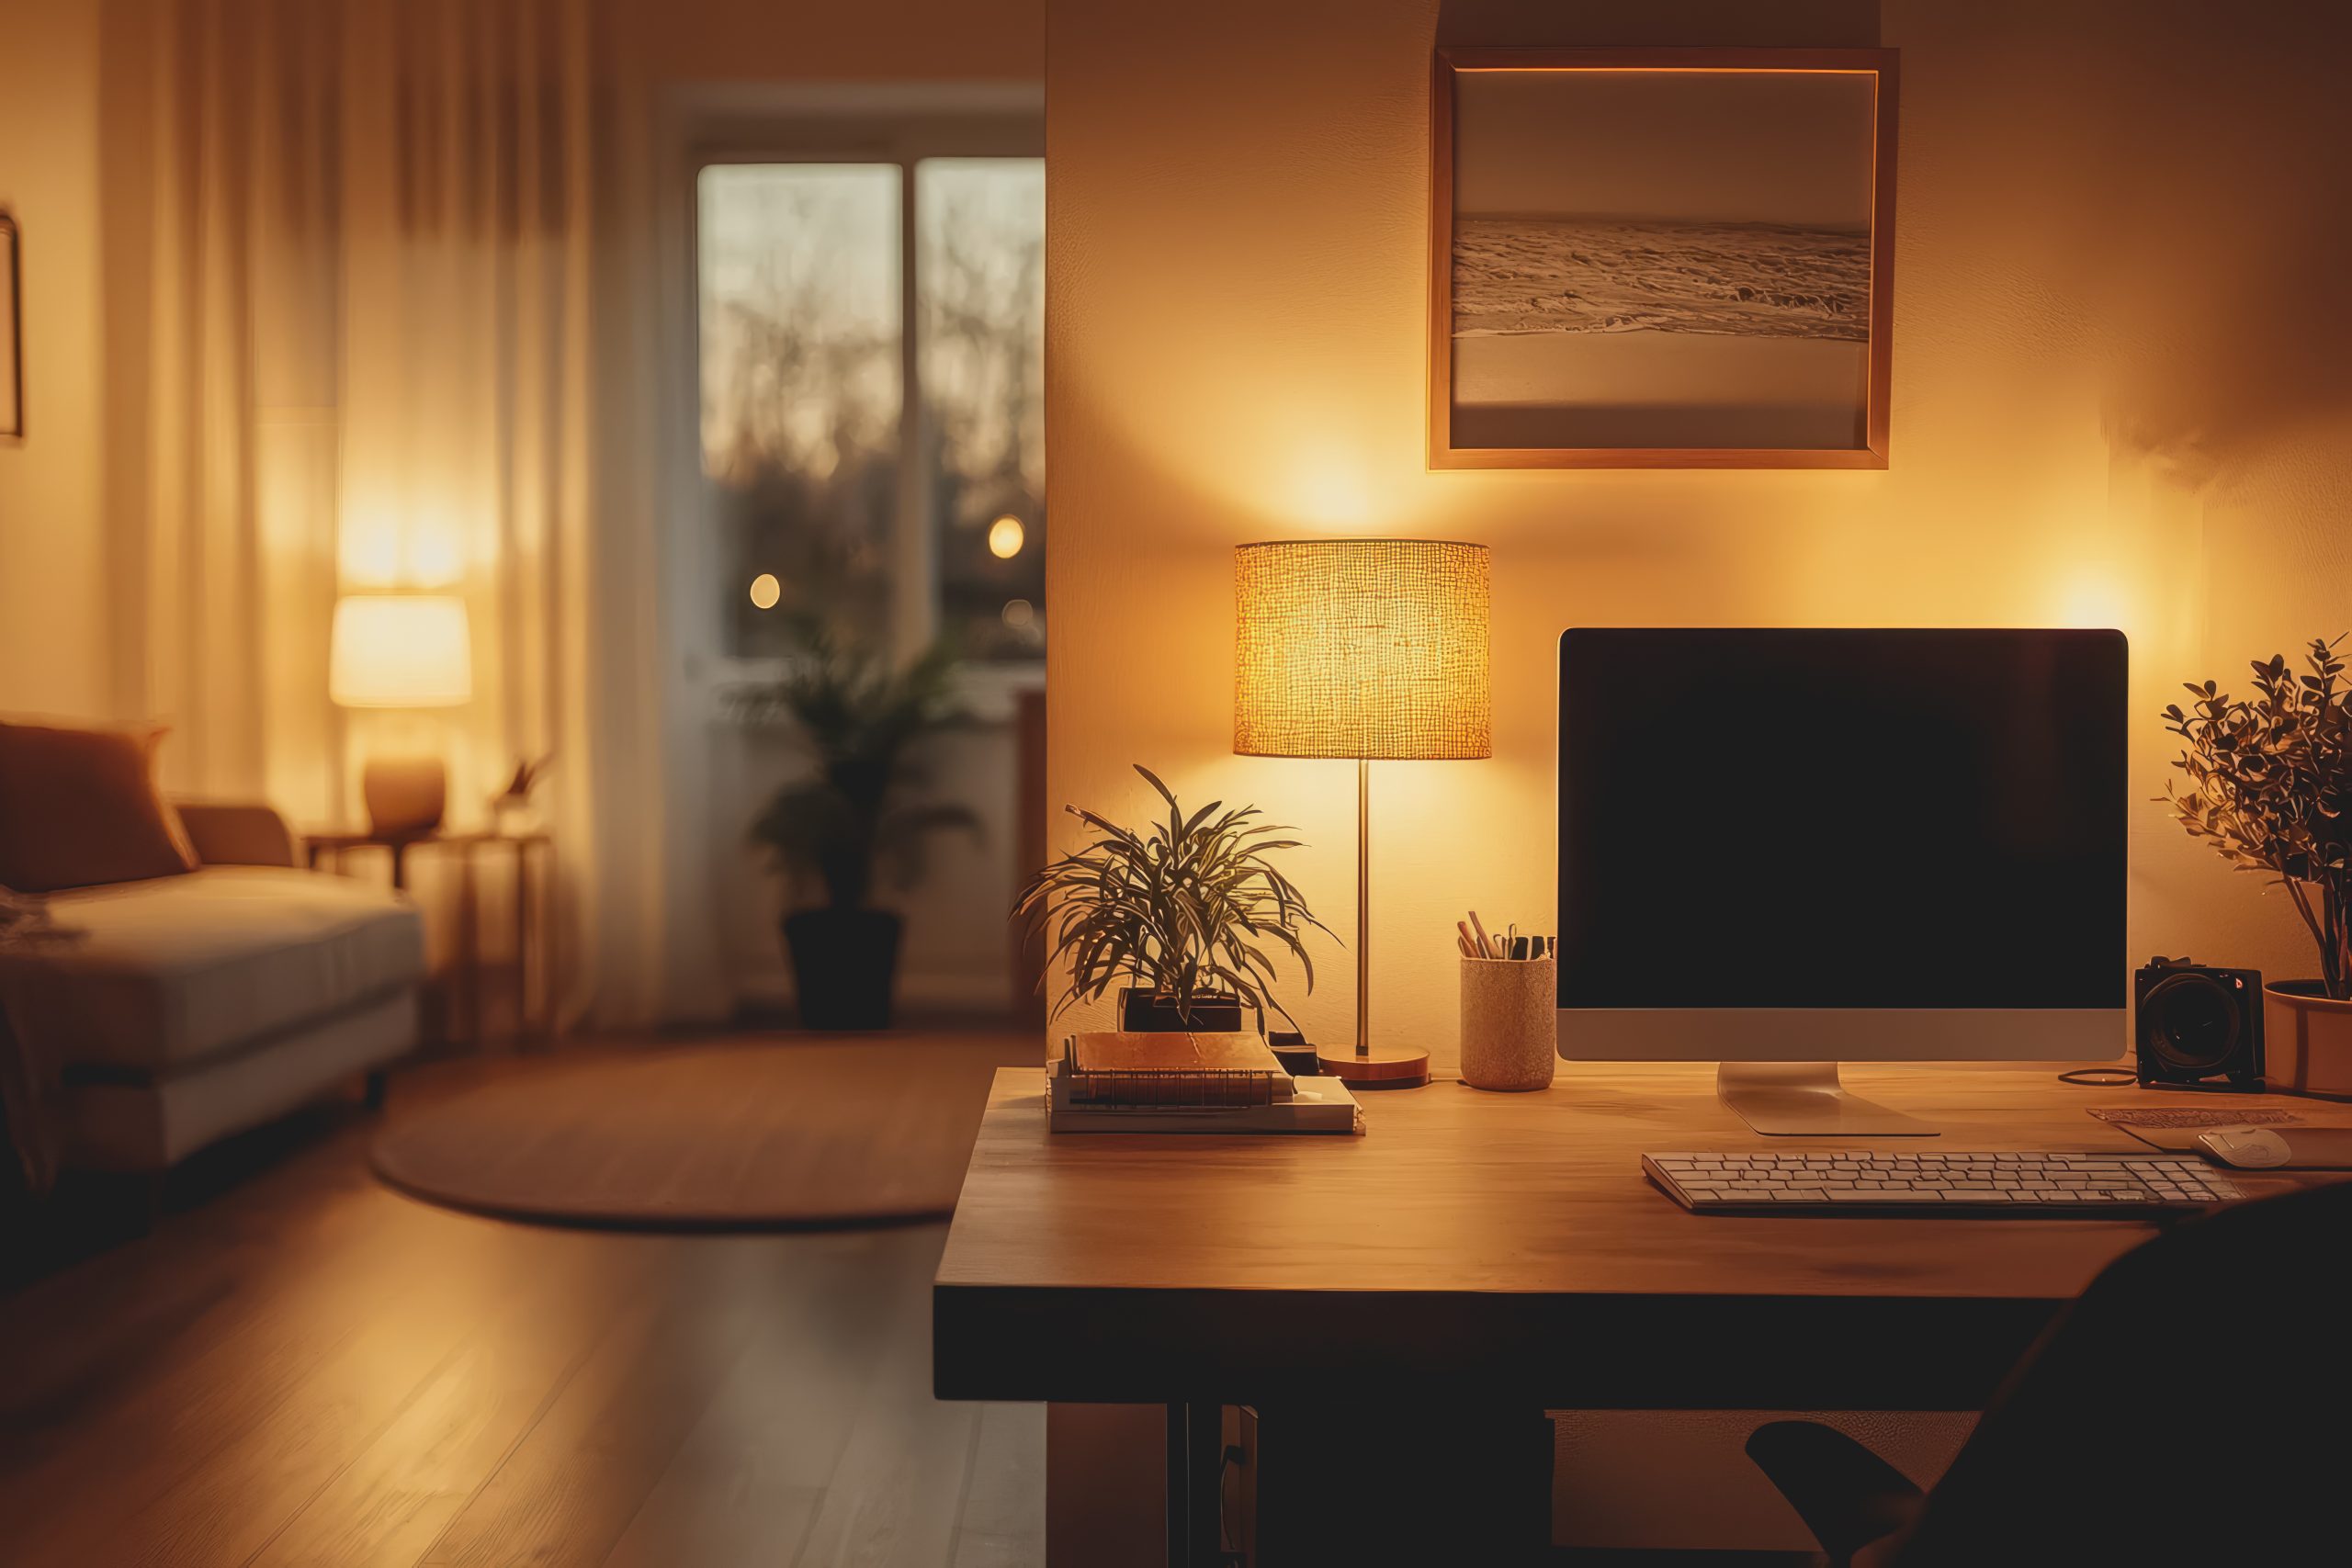
Choosing the right location is foundational to a productive home office design. Once you’ve found your spot, it’s time to think about the furniture that will support your work.
3. Ergonomic Furniture Selection
Ergonomic furniture is essential for maintaining comfort and productivity throughout your workday. Here’s how to choose the right pieces for your productive home office design:
- Desk Selection: Your desk is the centrepiece of your office, so choose wisely:
- Size and Shape: Ensure your desk fits comfortably in your space and provides enough surface area for your work essentials.
- Adjustability: Consider a height-adjustable desk to switch between sitting and standing, promoting better posture and circulation.
- Chair Considerations: A good chair is crucial for long hours of work:
- Support and Comfort: Look for chairs with lumbar support and adjustable features to fit your body’s needs.
- Material and Design: Choose a chair with breathable fabric and a design that complements your office aesthetic.
- Additional Furniture and Accessories:
- Footrests and Arm Supports: These can help reduce strain and improve comfort.
- Storage Solutions: Incorporate shelves, cabinets, or drawers to keep your workspace organised and clutter-free.
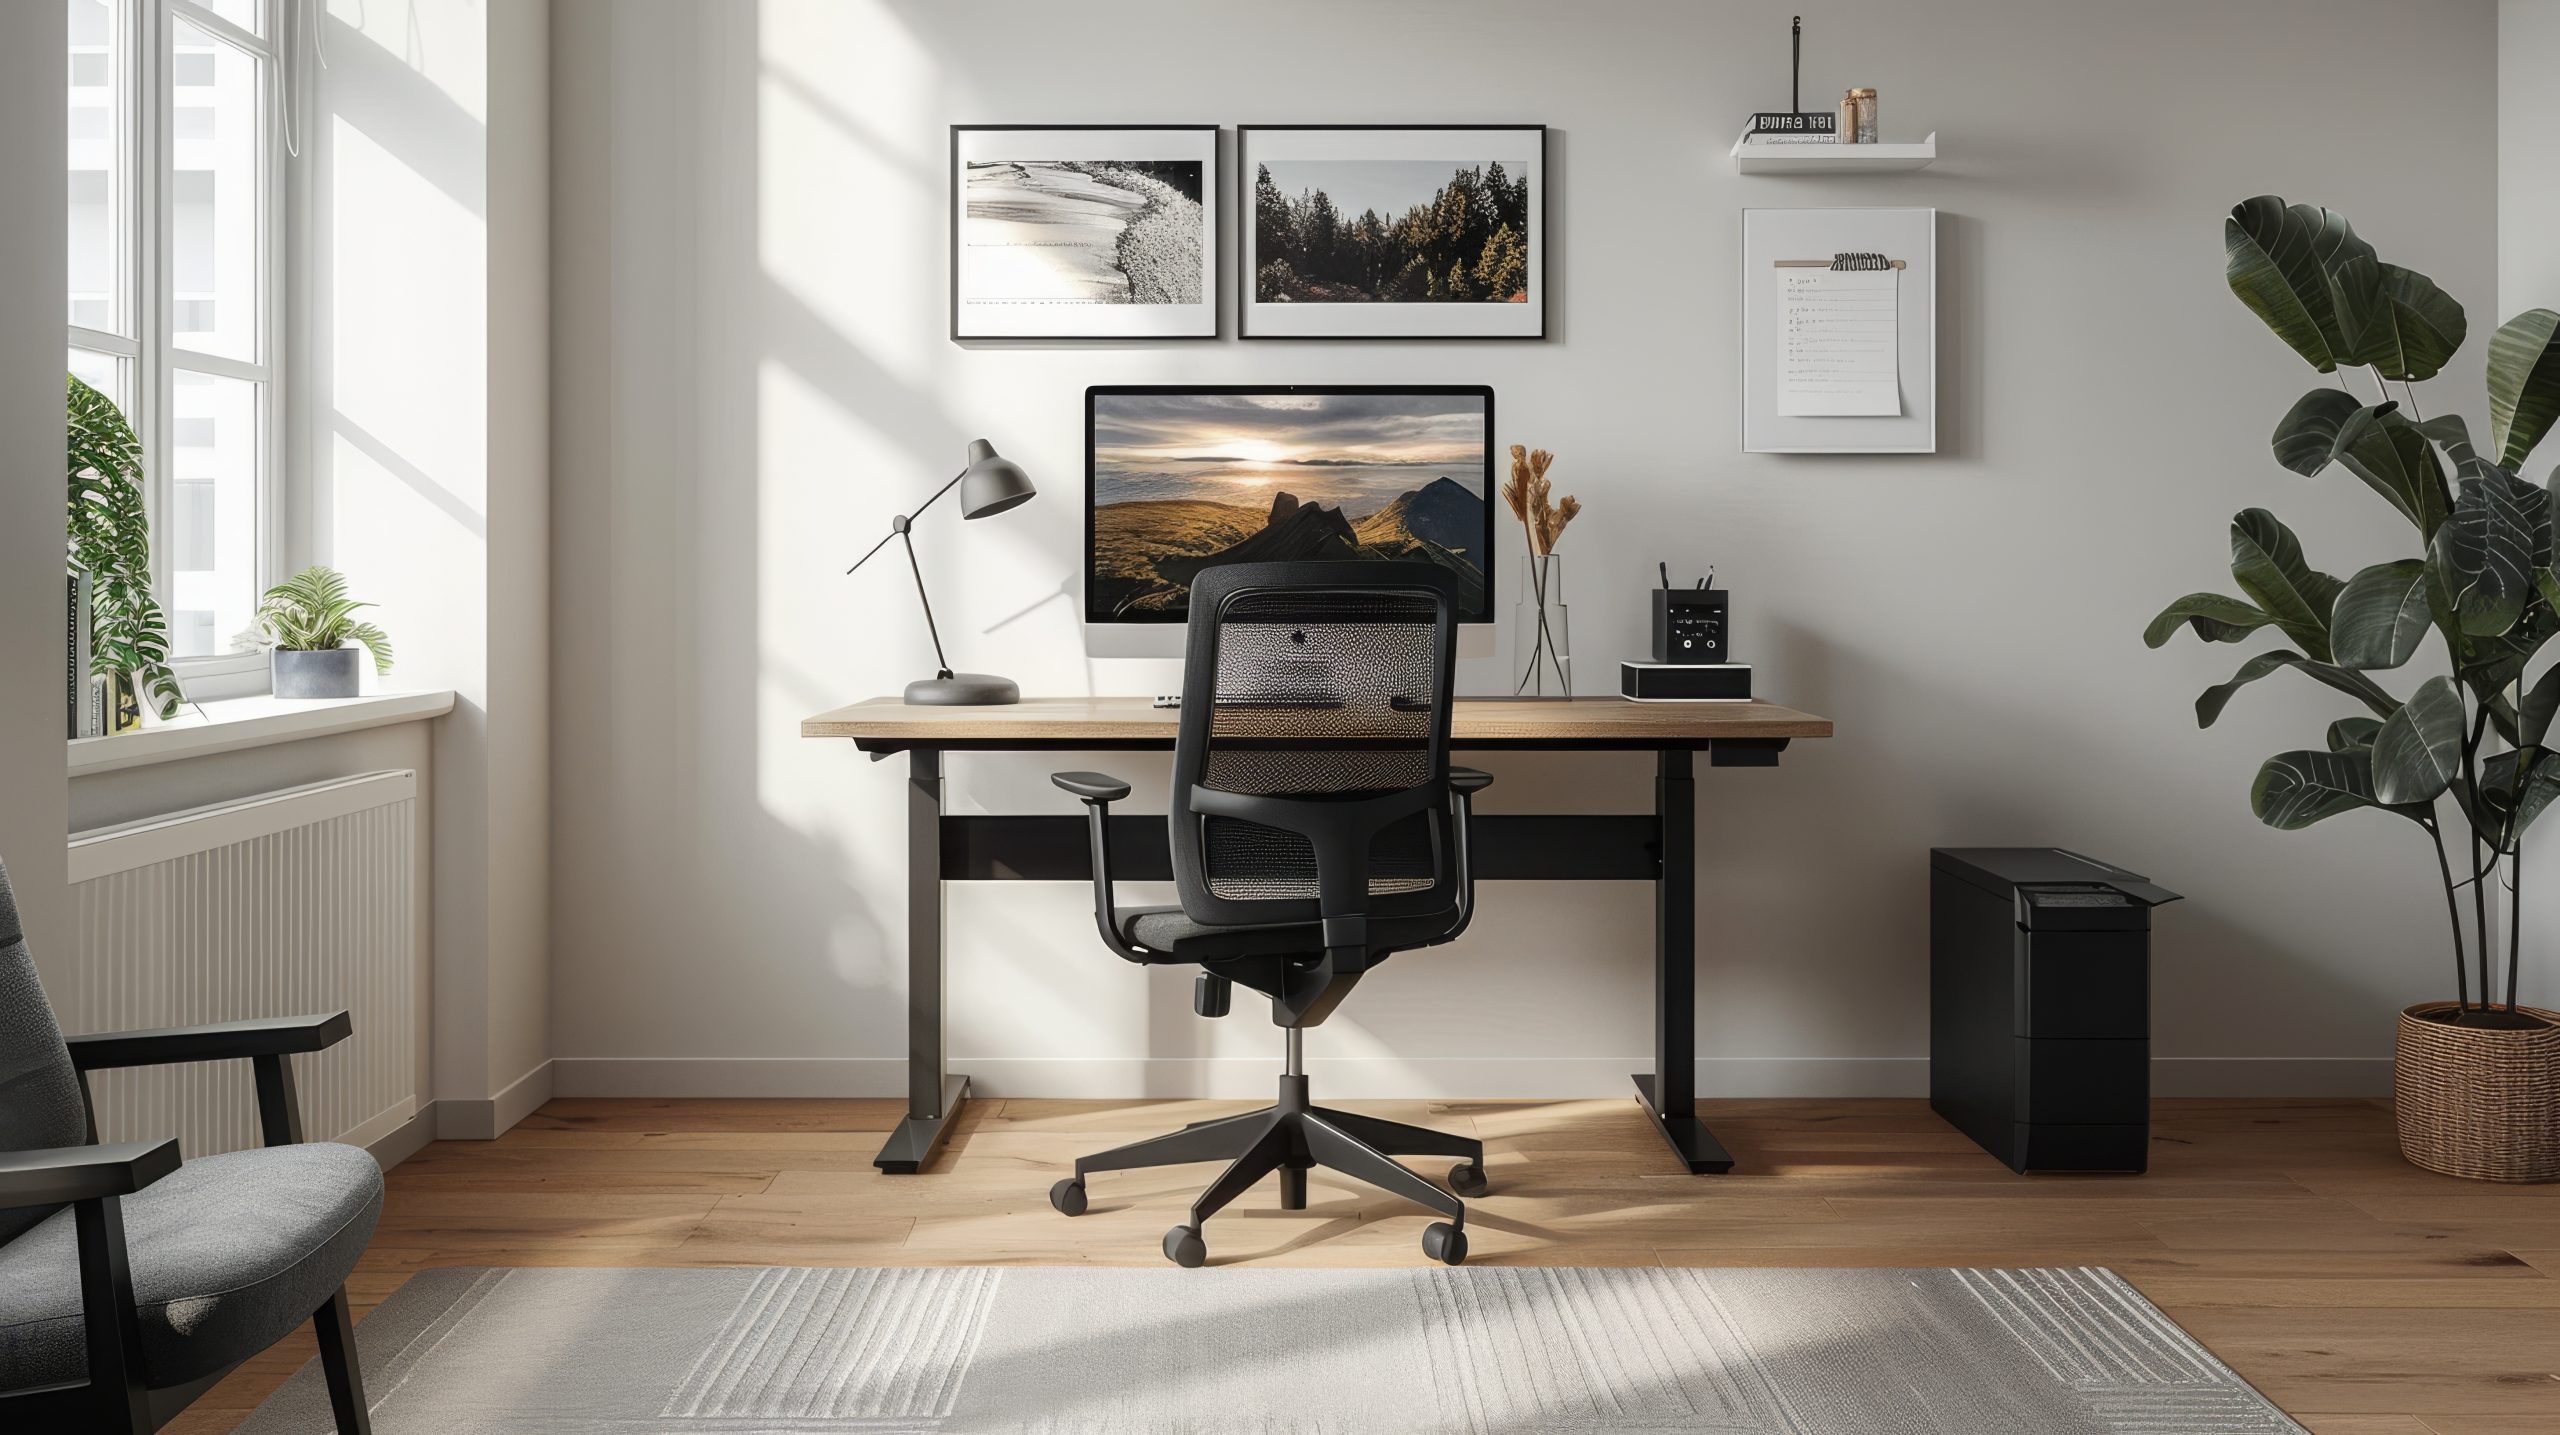
Investing in ergonomic furniture is a key component of a productive home office design. It ensures that you can work comfortably and efficiently, reducing the risk of strain or injury. Next, let’s explore how lighting can further enhance your workspace.
4. Optimising Lighting for Productivity
Lighting plays a pivotal role in creating a productive home office design. The right lighting can enhance your mood, reduce eye strain, and improve overall productivity. Here’s how to optimise your office lighting:
- Maximise Natural Light:
- Positioning: Place your desk near a window to take advantage of natural light, which can boost your mood and energy.
- Window Treatments: Use sheer curtains or blinds to control glare while still allowing light to filter through.
- Artificial Lighting Options:
- Task Lighting: Invest in a good desk lamp with adjustable brightness to focus light where you need it most.
- Ambient Lighting: Use overhead lights or floor lamps to provide general illumination and reduce shadows.
- Adjustable Lamps: Consider lamps with adjustable arms and dimmable features to customise lighting based on the time of day and task.
- Lighting Tips for Different Times of Day:
- Morning: Use bright, cool-toned lights to energise and wake up.
- Afternoon: Natural light should be maximised, supplemented with task lighting as needed.
- Evening: Switch to warmer, softer lighting to help wind down and reduce eye strain.
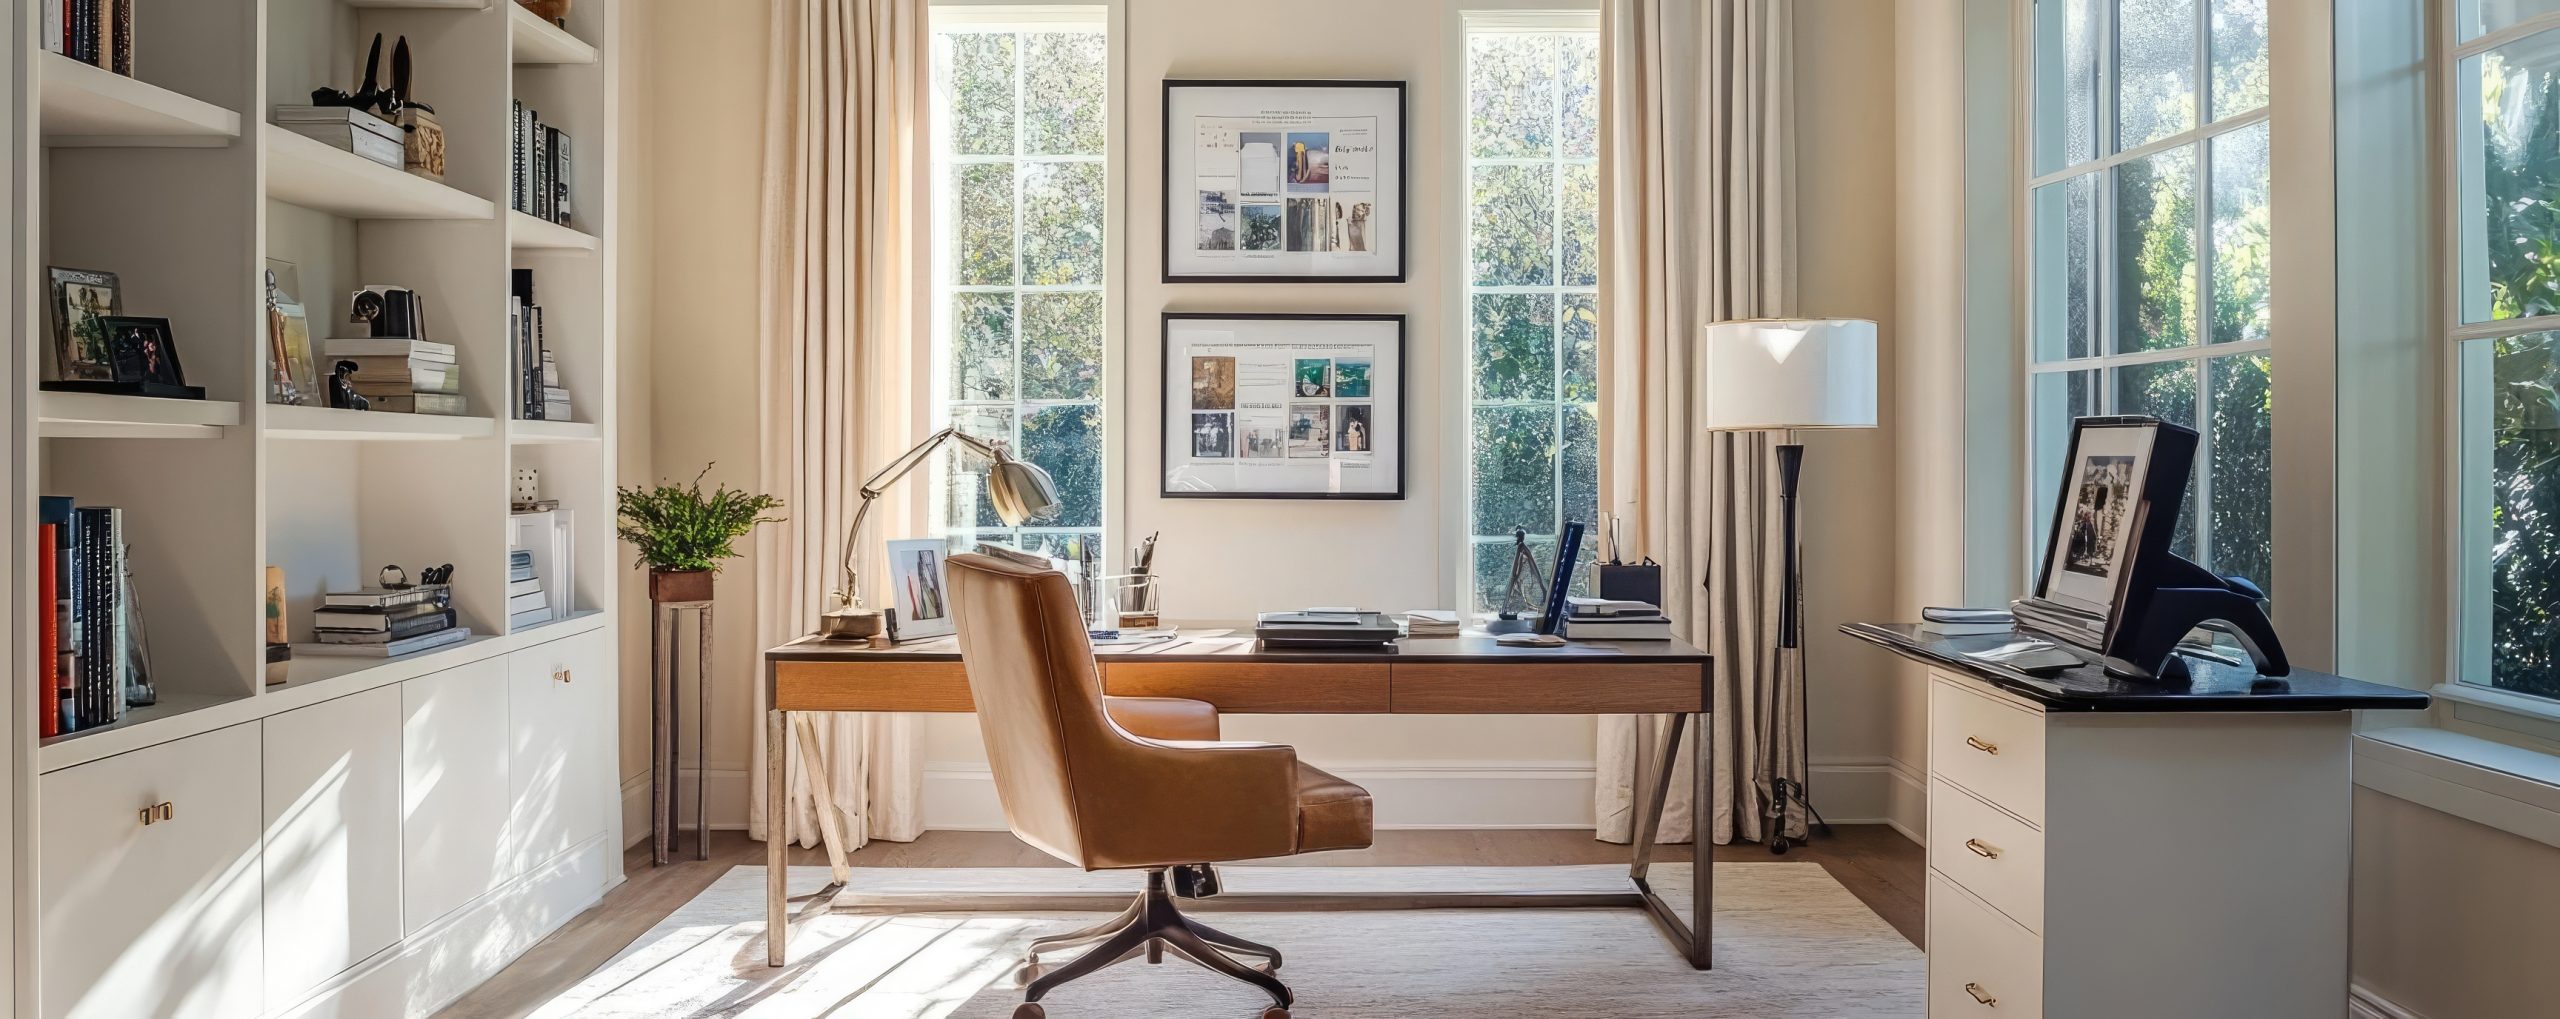
Optimising your lighting setup is essential for a productive home office design. It not only enhances visibility but also creates a comfortable and inviting atmosphere. Now, let’s look at how organisation can further boost your productivity.
5. Organising for Efficiency
An organised workspace is a cornerstone of a productive home office design. It helps minimise distractions and keeps you focused on your tasks. Here’s how to achieve an efficient setup:
- Declutter Your Space:
- Regular Clean-ups: Schedule regular decluttering sessions to keep your workspace tidy.
- Essential Items Only: Keep only the items you use daily on your desk to avoid unnecessary clutter.
- Utilise Storage Solutions:
- Shelves and Cabinets: Install shelves or cabinets to store books, files, and office supplies neatly.
- Desk Organisers: Use trays, bins, and drawer organisers to keep small items in order.
- Digital Organisation:
- File Management: Use digital tools and cloud storage to organise and back up important documents.
- Task Management Apps: Implement apps to keep track of tasks and deadlines, reducing paper clutter.
- Personalised Systems:
- Labelling: Clearly label storage areas to make finding items easier.
- Colour Coding: Use colour-coded systems for files and folders to quickly identify categories.

By organising your workspace efficiently, you create a productive home office design that supports your workflow and reduces stress. Next, we’ll explore how personalising your workspace can inspire creativity and motivation.
6. Personalising Your Workspace
Personalising your workspace is a vital aspect of a productive home office design. It not only makes the space feel more inviting but also boosts your creativity and motivation. Here’s how to add personal touches to your office:
- Incorporate Personal Style:
- Artwork and Decor: Hang art pieces that inspire you or display personal photos and mementos that bring joy.
- Colour Schemes: Choose colours that resonate with you and enhance your mood. Whether it’s calming blues or energising yellows, let your personality shine through.
- Add Greenery:
- Plants: Introduce indoor plants to improve air quality and add a touch of nature. Consider low-maintenance options like succulents or snake plants.
- Planters and Pots: Use decorative planters that complement your office decor.
- Create a Vision Board:
- Inspiration and Goals: Pin up images, quotes, and goals that inspire you and keep you focused on your aspirations.
- Rotating Content: Update your board regularly to keep the inspiration fresh and relevant.
- Comfort and Cosiness:
- Textiles: Add cushions, throws, or a cosy rug to make the space more comfortable.
- Scented Candles or Diffusers: Use scents that help you relax and concentrate, like lavender or citrus.
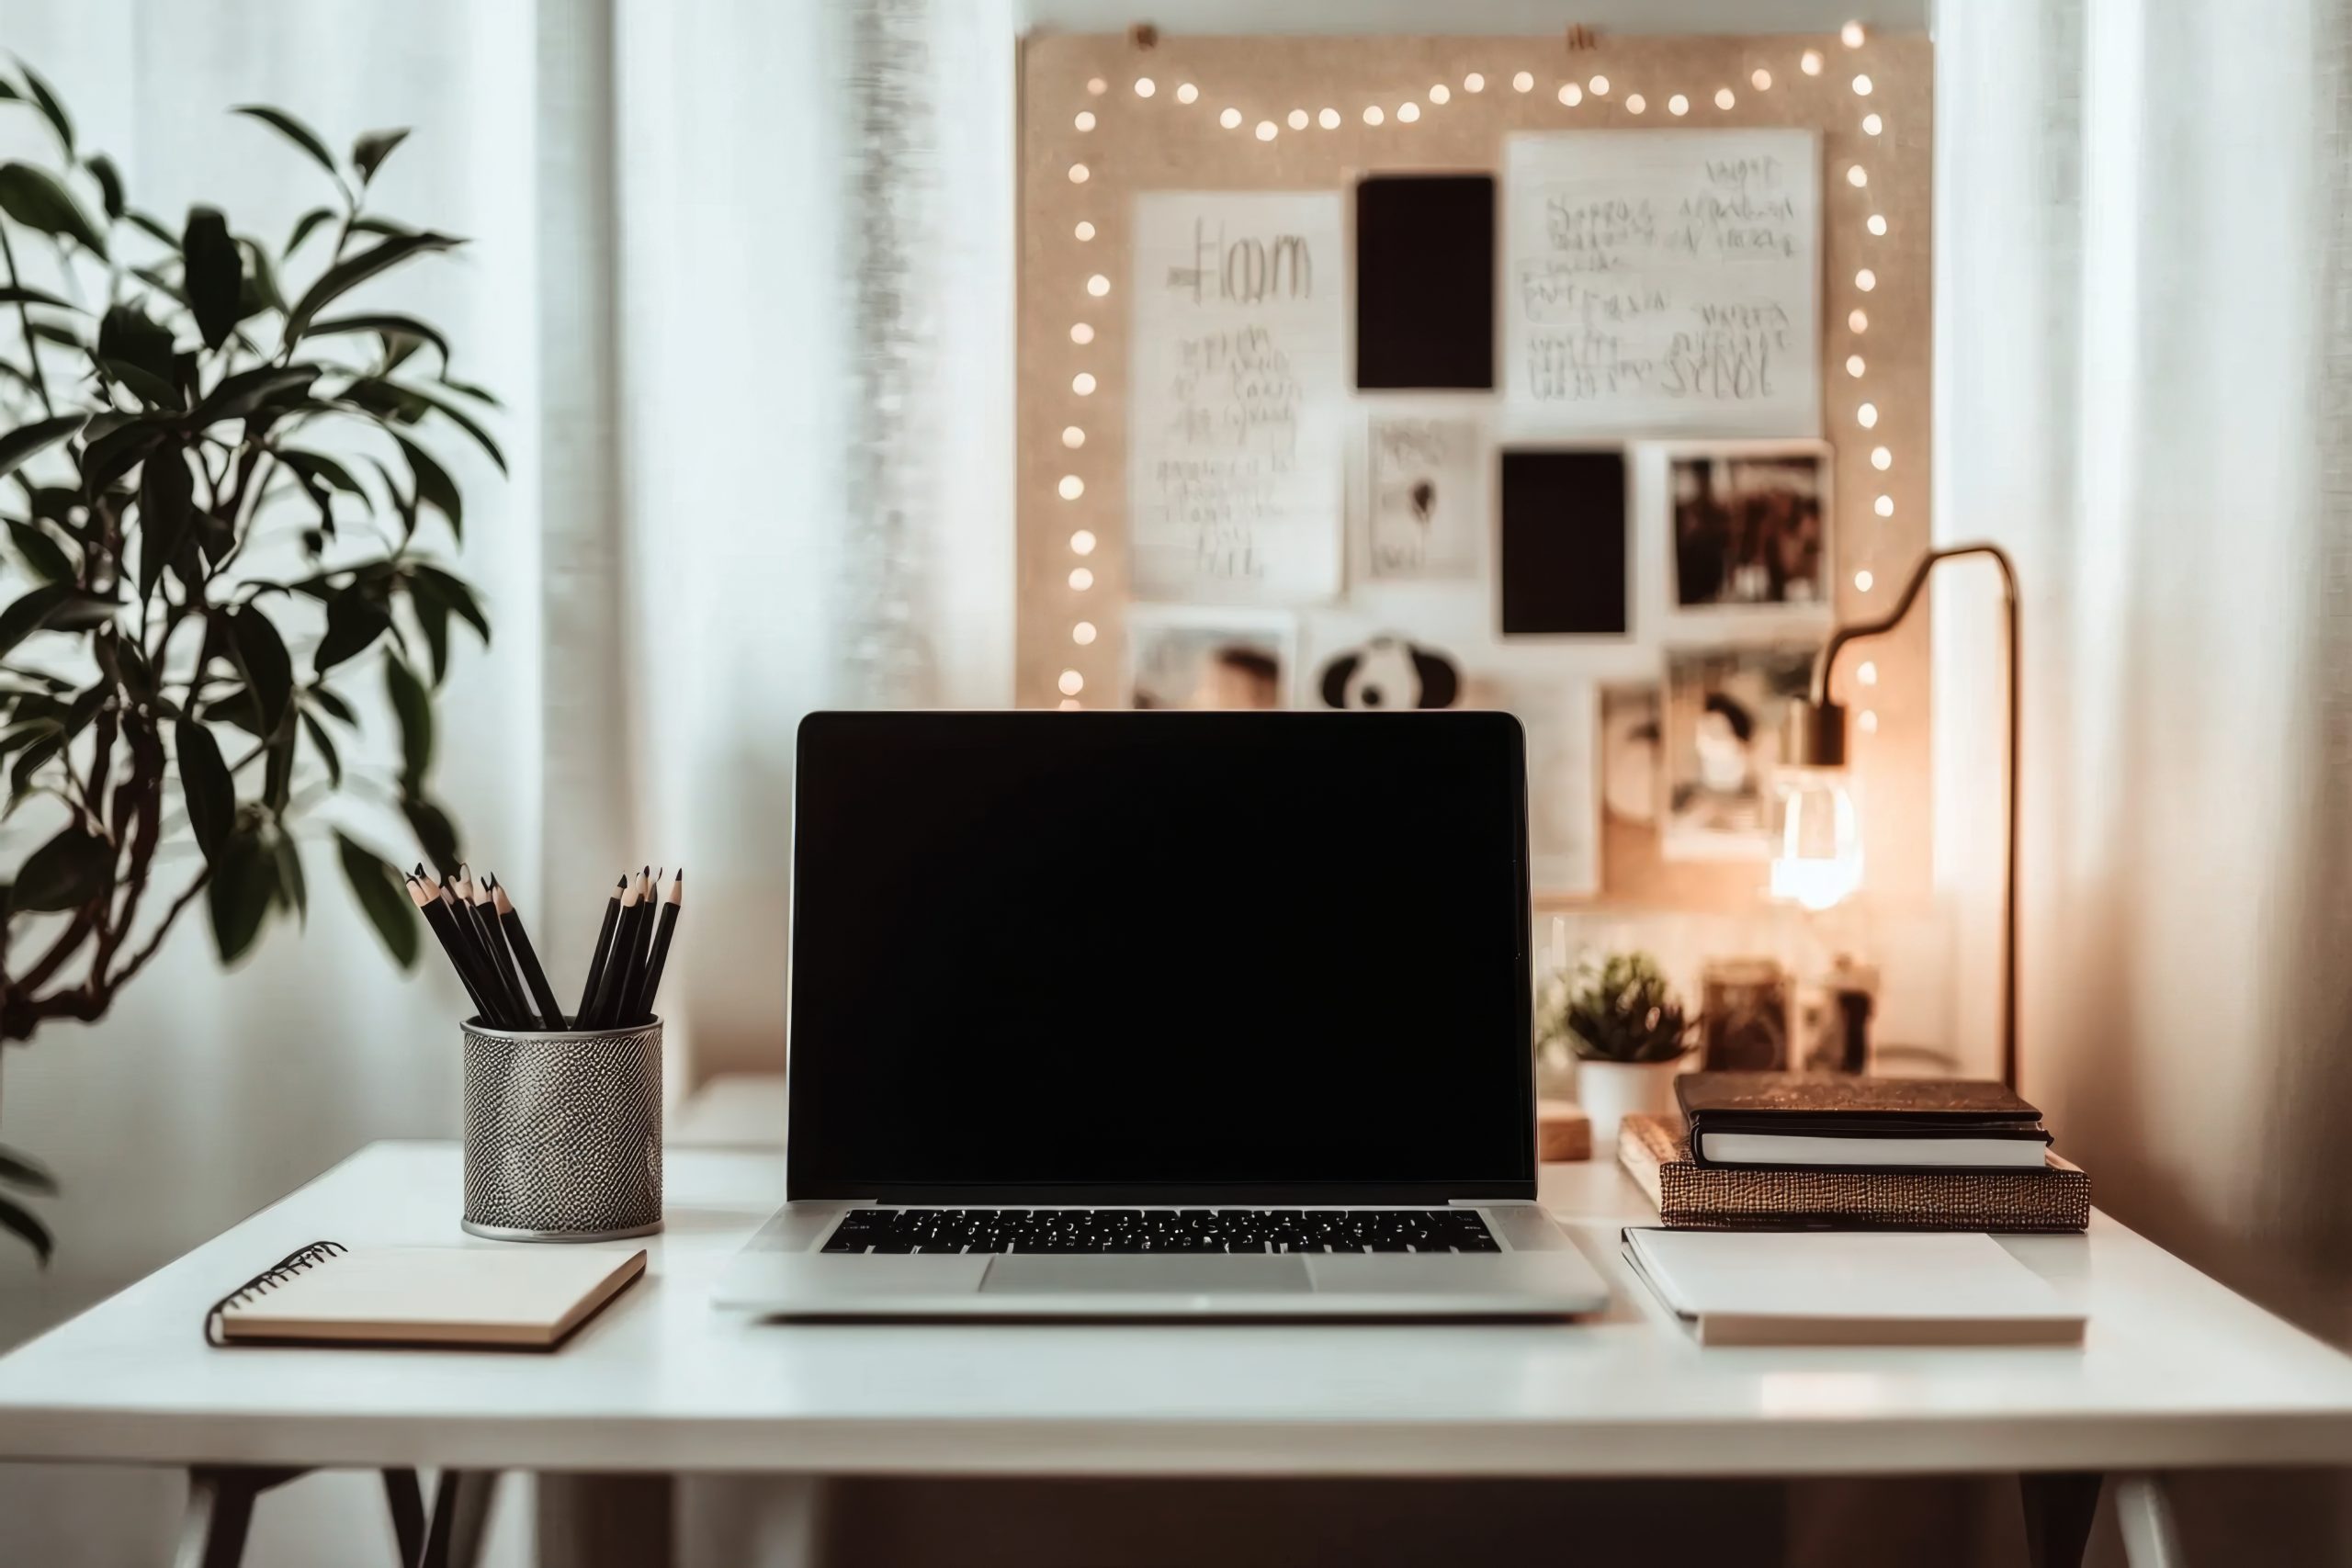
Personalising your workspace is about making it a place where you feel comfortable and inspired. It’s a key element of a productive home office design that reflects who you are. Now, let’s discuss how to seamlessly integrate technology into your office setup.
7. Incorporating Technology and Connectivity
In today’s digital age, technology is an integral part of a productive home office design. Ensuring seamless connectivity and efficient tech integration can significantly enhance your workflow. Here’s how to do it:
- Reliable Internet Connection:
- Router Placement: Position your router centrally to ensure strong Wi-Fi coverage throughout your office.
- Wired Connections: Consider using Ethernet cables for a more stable and faster internet connection.
- Tech Integration:
- Cable Management: Use cable organisers or clips to keep cords tidy and out of sight, reducing visual clutter.
- Charging Stations: Set up a dedicated area for charging devices, keeping them organised and easily accessible.
- Essential Tech Accessories:
- Monitors and Stands: Invest in a quality monitor and adjustable stand to improve ergonomics and reduce eye strain.
- Peripherals: Choose a comfortable keyboard and mouse that suit your work style.
- Smart Office Solutions:
- Voice Assistants: Use smart speakers or assistants to set reminders, control lighting, or play music.
- Automation Tools: Implement software that automates repetitive tasks, freeing up time for more important work.
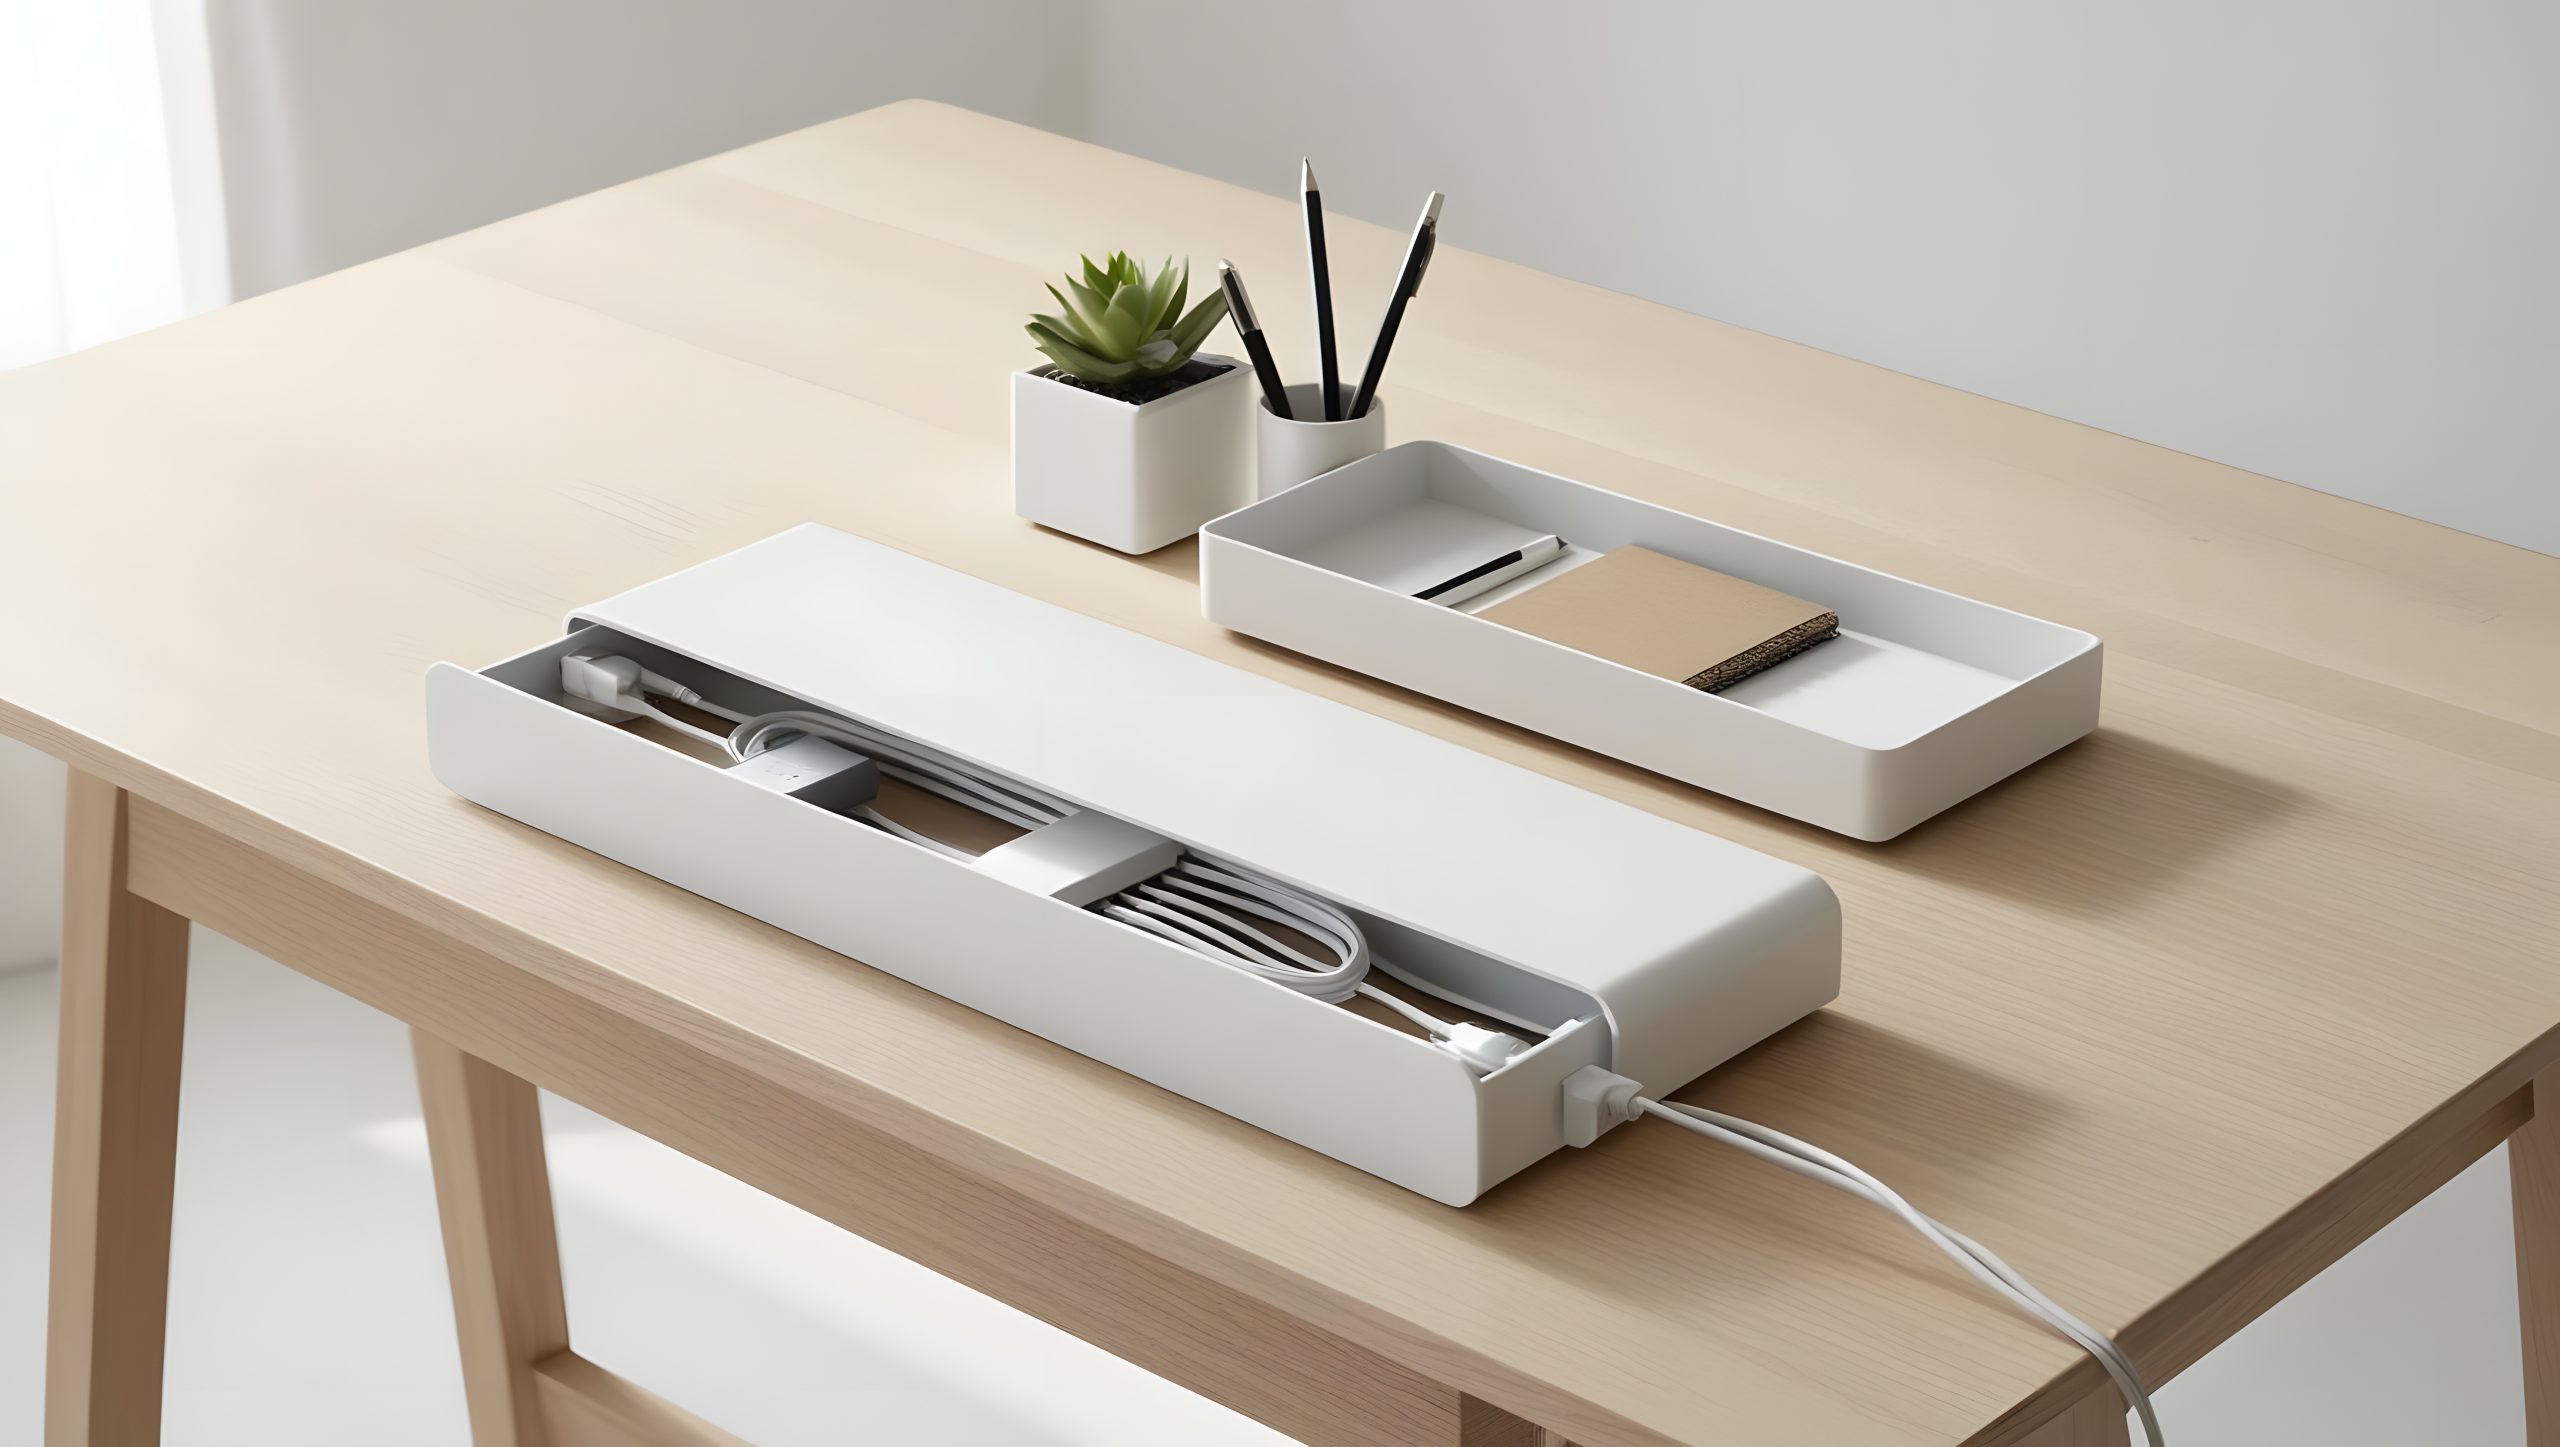
Incorporating technology effectively is crucial for a productive home office design. It ensures that your workspace is equipped to handle your daily tasks efficiently. Finally, let’s explore how to maintain a productive atmosphere in your home office.
8. Maintaining a Productive Atmosphere
Creating a productive home office design is just the beginning; maintaining a productive atmosphere is key to long-term success. Here are some strategies to keep your workspace conducive to productivity:
- Establish a Routine:
- Consistent Schedule: Set regular work hours to create a sense of structure and discipline.
- Breaks and Downtime: Schedule short breaks to recharge and prevent burnout. Consider techniques like the Pomodoro Technique to manage time effectively.
- Minimise Distractions:
- Noise Control: Use noise-cancelling headphones or white noise machines to block out distractions.
- Digital Boundaries: Limit social media and non-work-related browsing during work hours to stay focused.
- Refresh Your Workspace:
- Regular Updates: Periodically change up your decor or rearrange your furniture to keep the space feeling fresh and inspiring.
- Seasonal Adjustments: Adapt your workspace to the seasons, such as adding a cosy blanket in winter or fresh flowers in spring.
- Promote Well-being:
- Mindfulness Practices: Incorporate mindfulness or meditation practices into your routine to reduce stress and enhance focus.
- Healthy Habits: Keep water and healthy snacks nearby to stay hydrated and energised throughout the day.
- Set Boundaries:
- Work-Life Balance: Clearly define the boundaries between work and personal time, especially if your office is in a shared space.
- Family and Roommates: Communicate your work schedule to those you live with to minimise interruptions.

Maintaining a productive atmosphere is an ongoing process that requires attention and adaptation. By implementing these strategies, you can ensure that your productive home office design continues to support your work and well-being.
To wrap things up, a productive home office design is all about creating a space that not only looks great but also supports your work habits and personal style. From choosing the right location and furniture to optimising lighting and incorporating technology, each element plays a crucial role in enhancing your productivity. Remember, your workspace should be a reflection of you—comfortable, inspiring, and efficient.
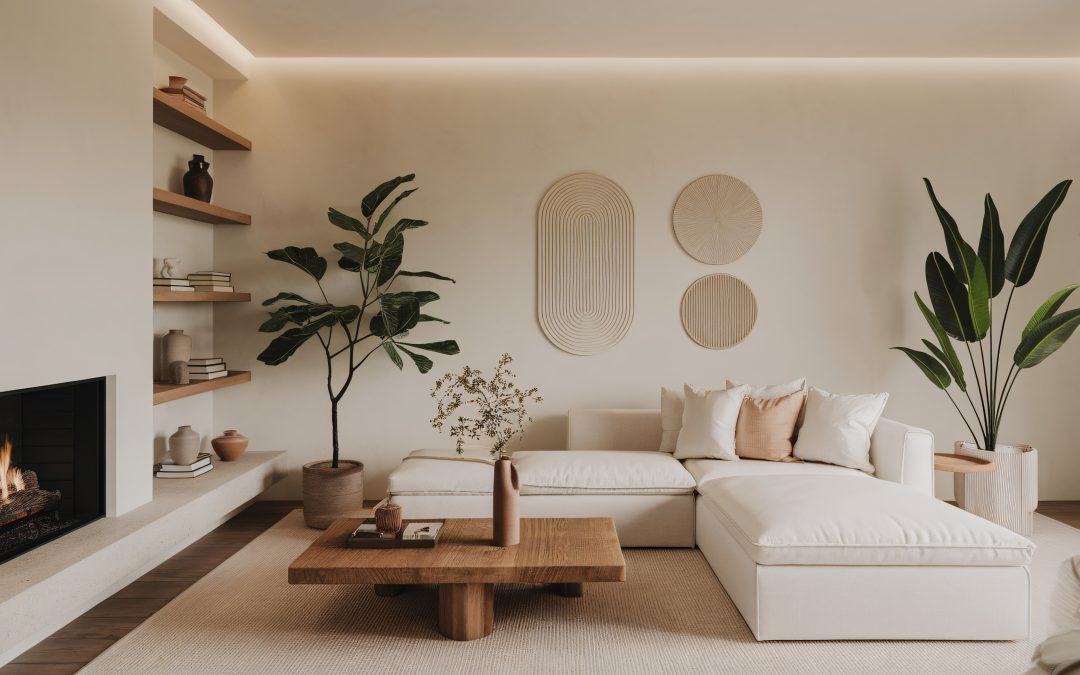
by Kesaa Interiors | DECOR & DIY, DESIGN GUIDES, Furniture & Layout Guides, Living Room, ROOMS, Small Space Hacks
Looking for tips to take your cozy living room decor in your small apartment to the next level? You have come to the right place!
Living in a small apartment doesn’t mean you have to sacrifice style or comfort. In fact, creating cozy living room decor in a small apartment can be a really fun challenge! It’s all about making smart choices and getting creative with your space.
I’m excited to share some of my favorite tips and tricks for maximizing every square inch and creating a stylish and inviting living room, perfect for those of us dealing with limited square footage. Get ready to transform your small space into a cozy haven!
The Best Cozy Living Room Decor for Small Apartment!

Furniture that Fits Your Footprint
When it comes to cozy living room decor for a small apartment, choosing the right furniture is absolutely crucial. It’s easy to get carried away with a beautiful sofa or a comfy armchair, but if it’s too big for your space, it’s going to make your living room feel cramped and cluttered. Here’s how to choose furniture that will make your small living room feel bigger and more inviting:
-
Scale is Key: Before you even start looking at furniture, grab a measuring tape and get to work! Seriously, measuring your living room is the first and most important step in creating cozy living room decor for a small apartment. This will help you determine the maximum size of furniture you can comfortably fit without overwhelming the space. Think apartment-sized sofas, loveseats instead of large sectionals, and slimline chairs. For example, a standard sofa might be 84 inches long, but a loveseat is typically around 60 inches, saving you valuable floor space. Choosing appropriately scaled furniture is the foundation for successful cozy living room decor in a small space.
-
Multi-Functional Marvels: In a small apartment, every piece of furniture needs to pull its weight. Look for pieces that serve double duty, like a sofa bed with built-in storage underneath for bedding. This is a game-changer for overnight guests! An ottoman with a hidden compartment for blankets and pillows is another great way to sneak in extra storage without sacrificing style. A coffee table that lifts to become a dining table is another fantastic option for maximizing functionality in a small apartment living room, especially if you don’t have a separate dining area. Think creatively about how each piece can serve multiple purposes.
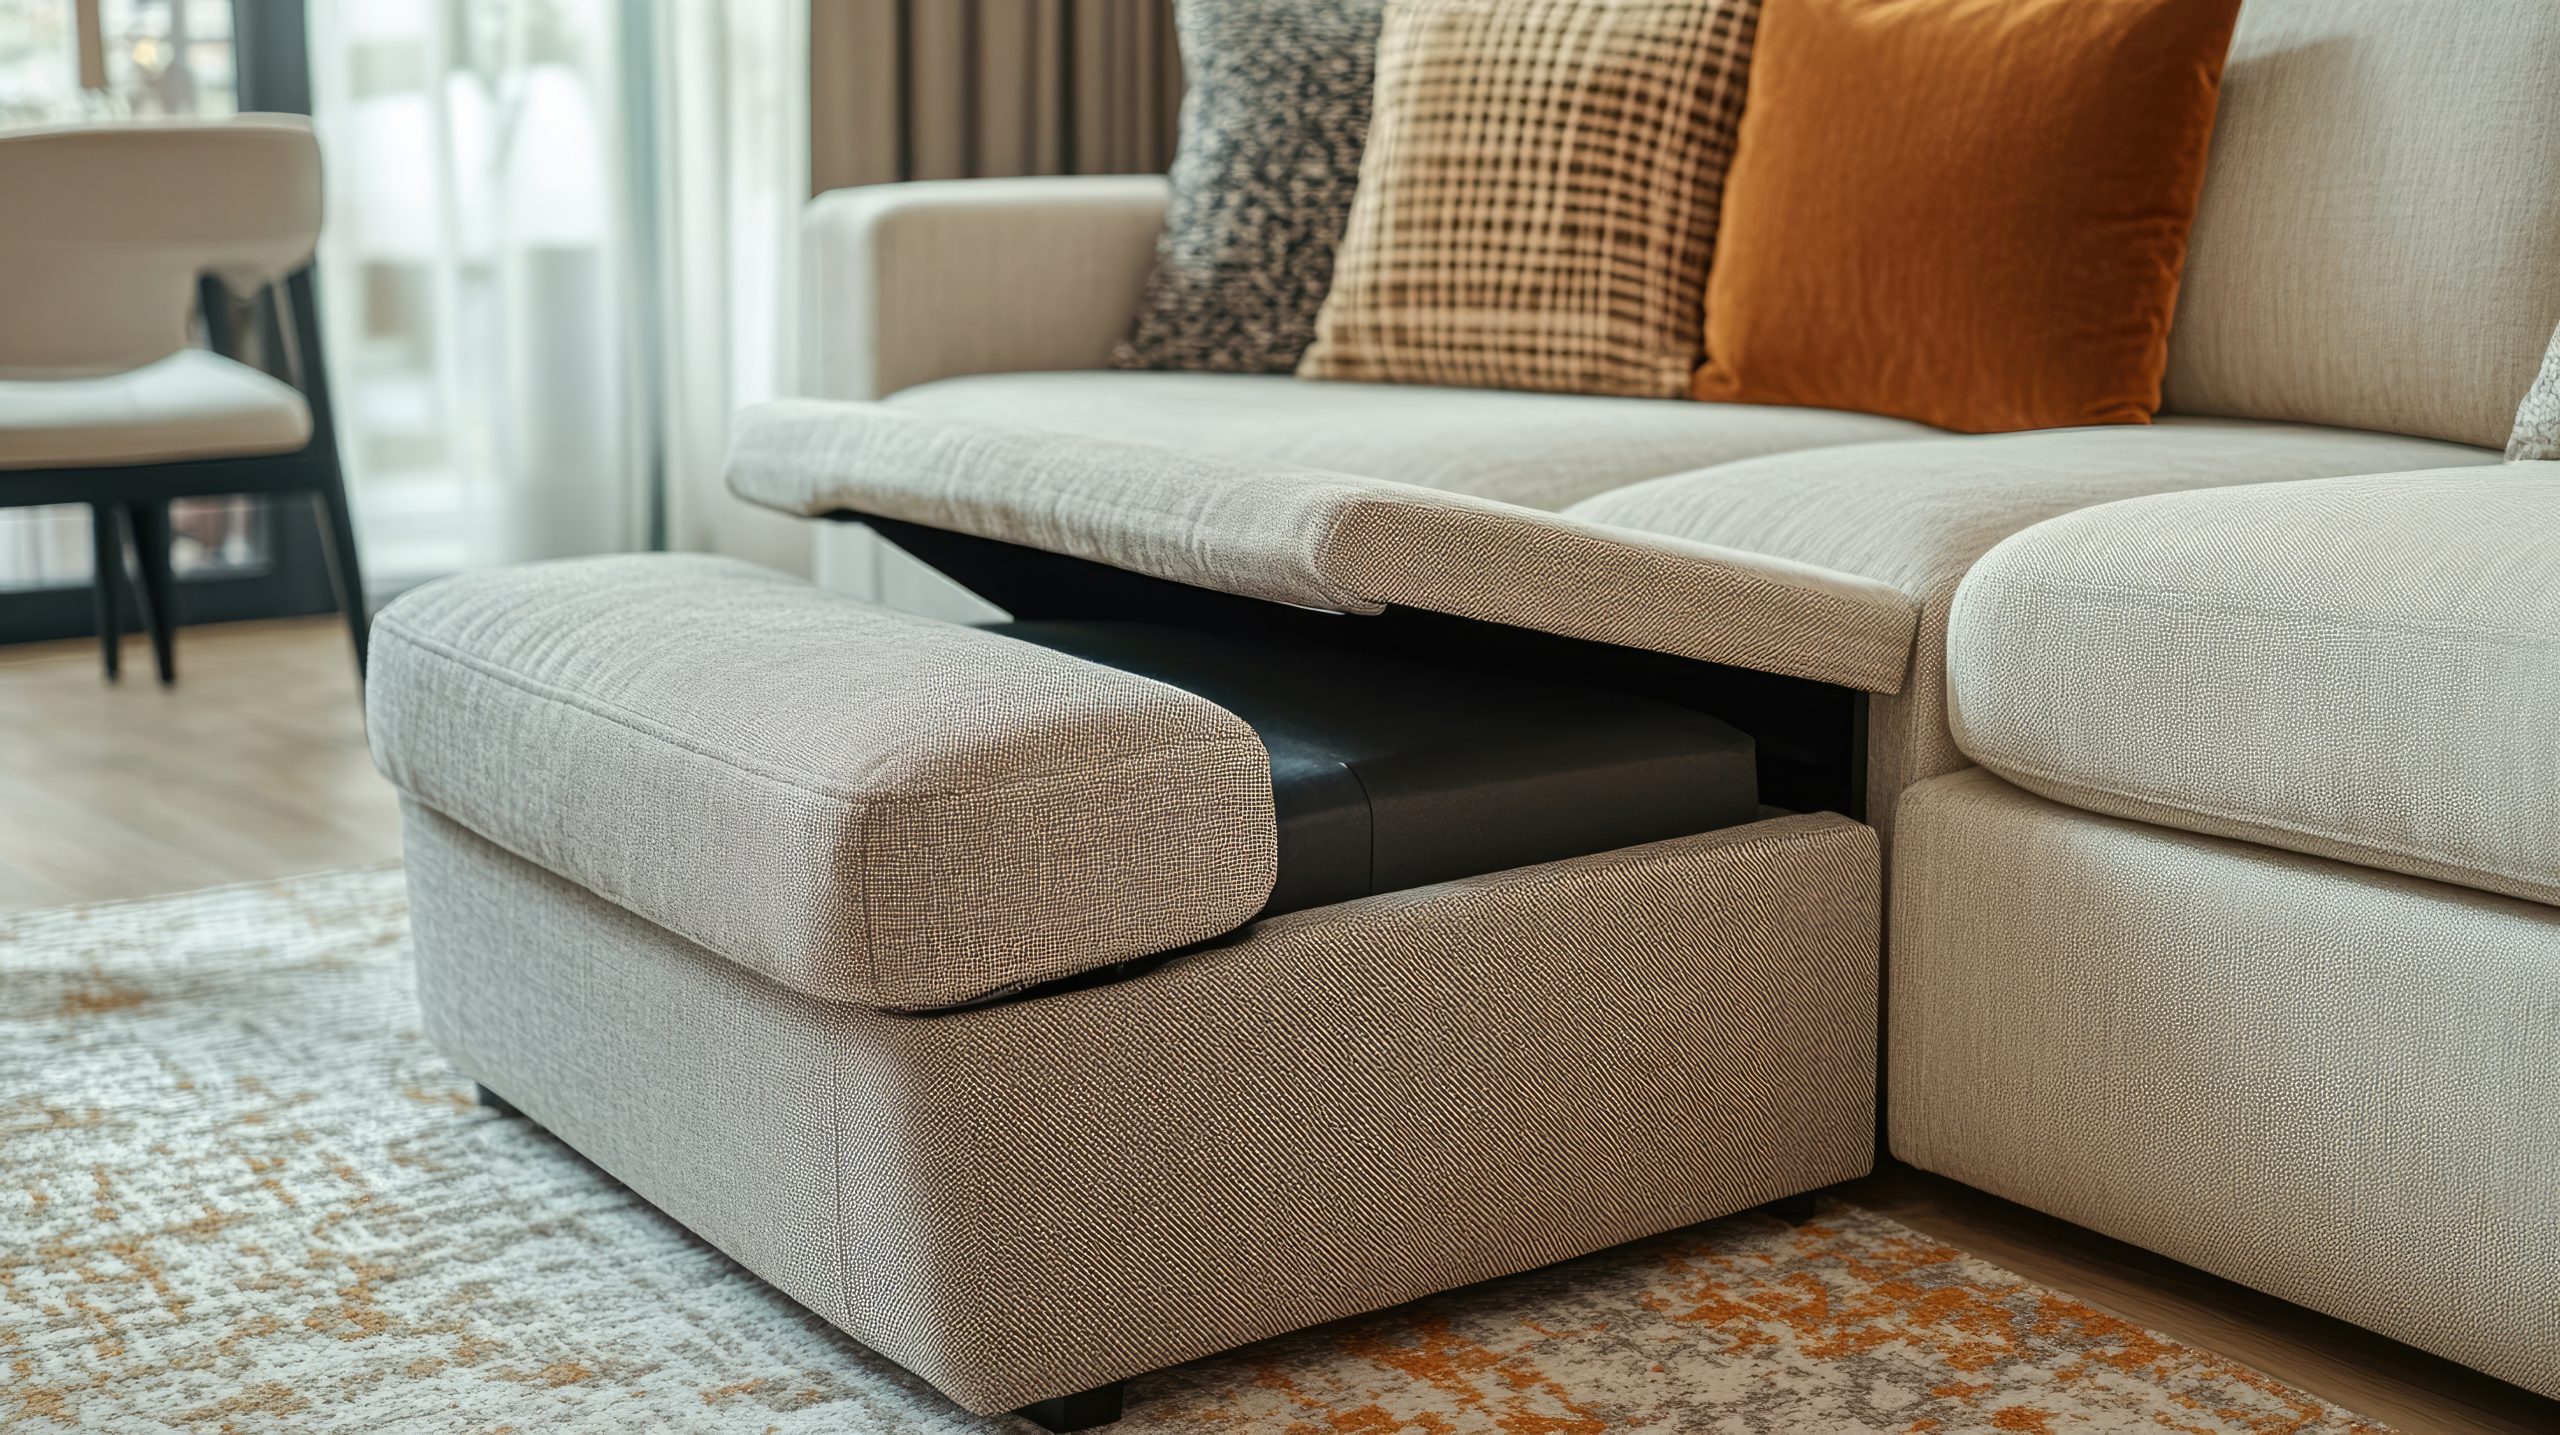
-
Measure Twice, Buy Once: I can’t stress this enough – measure your space before you buy any furniture! It’s so much easier to measure than to try and squeeze a too-large sofa through your apartment door, trust me! Creating a simple floor plan sketch can also be incredibly helpful when planning your living room decor. You can even use online tools or apps to create a virtual floor plan and experiment with different furniture arrangements.
-
Leggy Looks: Furniture with legs creates a sense of airiness and visual space, which is essential in a small living room. The light can flow underneath the furniture, making the room feel less cluttered and more open. When you’re aiming for cozy living room perfection, consider opting for sofas, armchairs, and coffee tables with raised legs. Even a small elevation can make a big difference in how spacious your living room feels. Think sleek, tapered legs for a modern look, or ornately carved legs for a more traditional feel.
- Vertical Space is Your Best Friend: Don’t forget to look up! In a small living room, vertical space is prime real estate. Tall, narrow bookshelves or wall-mounted units are a great way to add storage and display decorative items without taking up valuable floor space. Styling these shelves with a mix of books, plants, and personal items can really elevate your living room decor. Consider using wall-mounted shelves to display artwork or create a mini indoor herb garden – it’s a great way to add personality and functionality to your space.
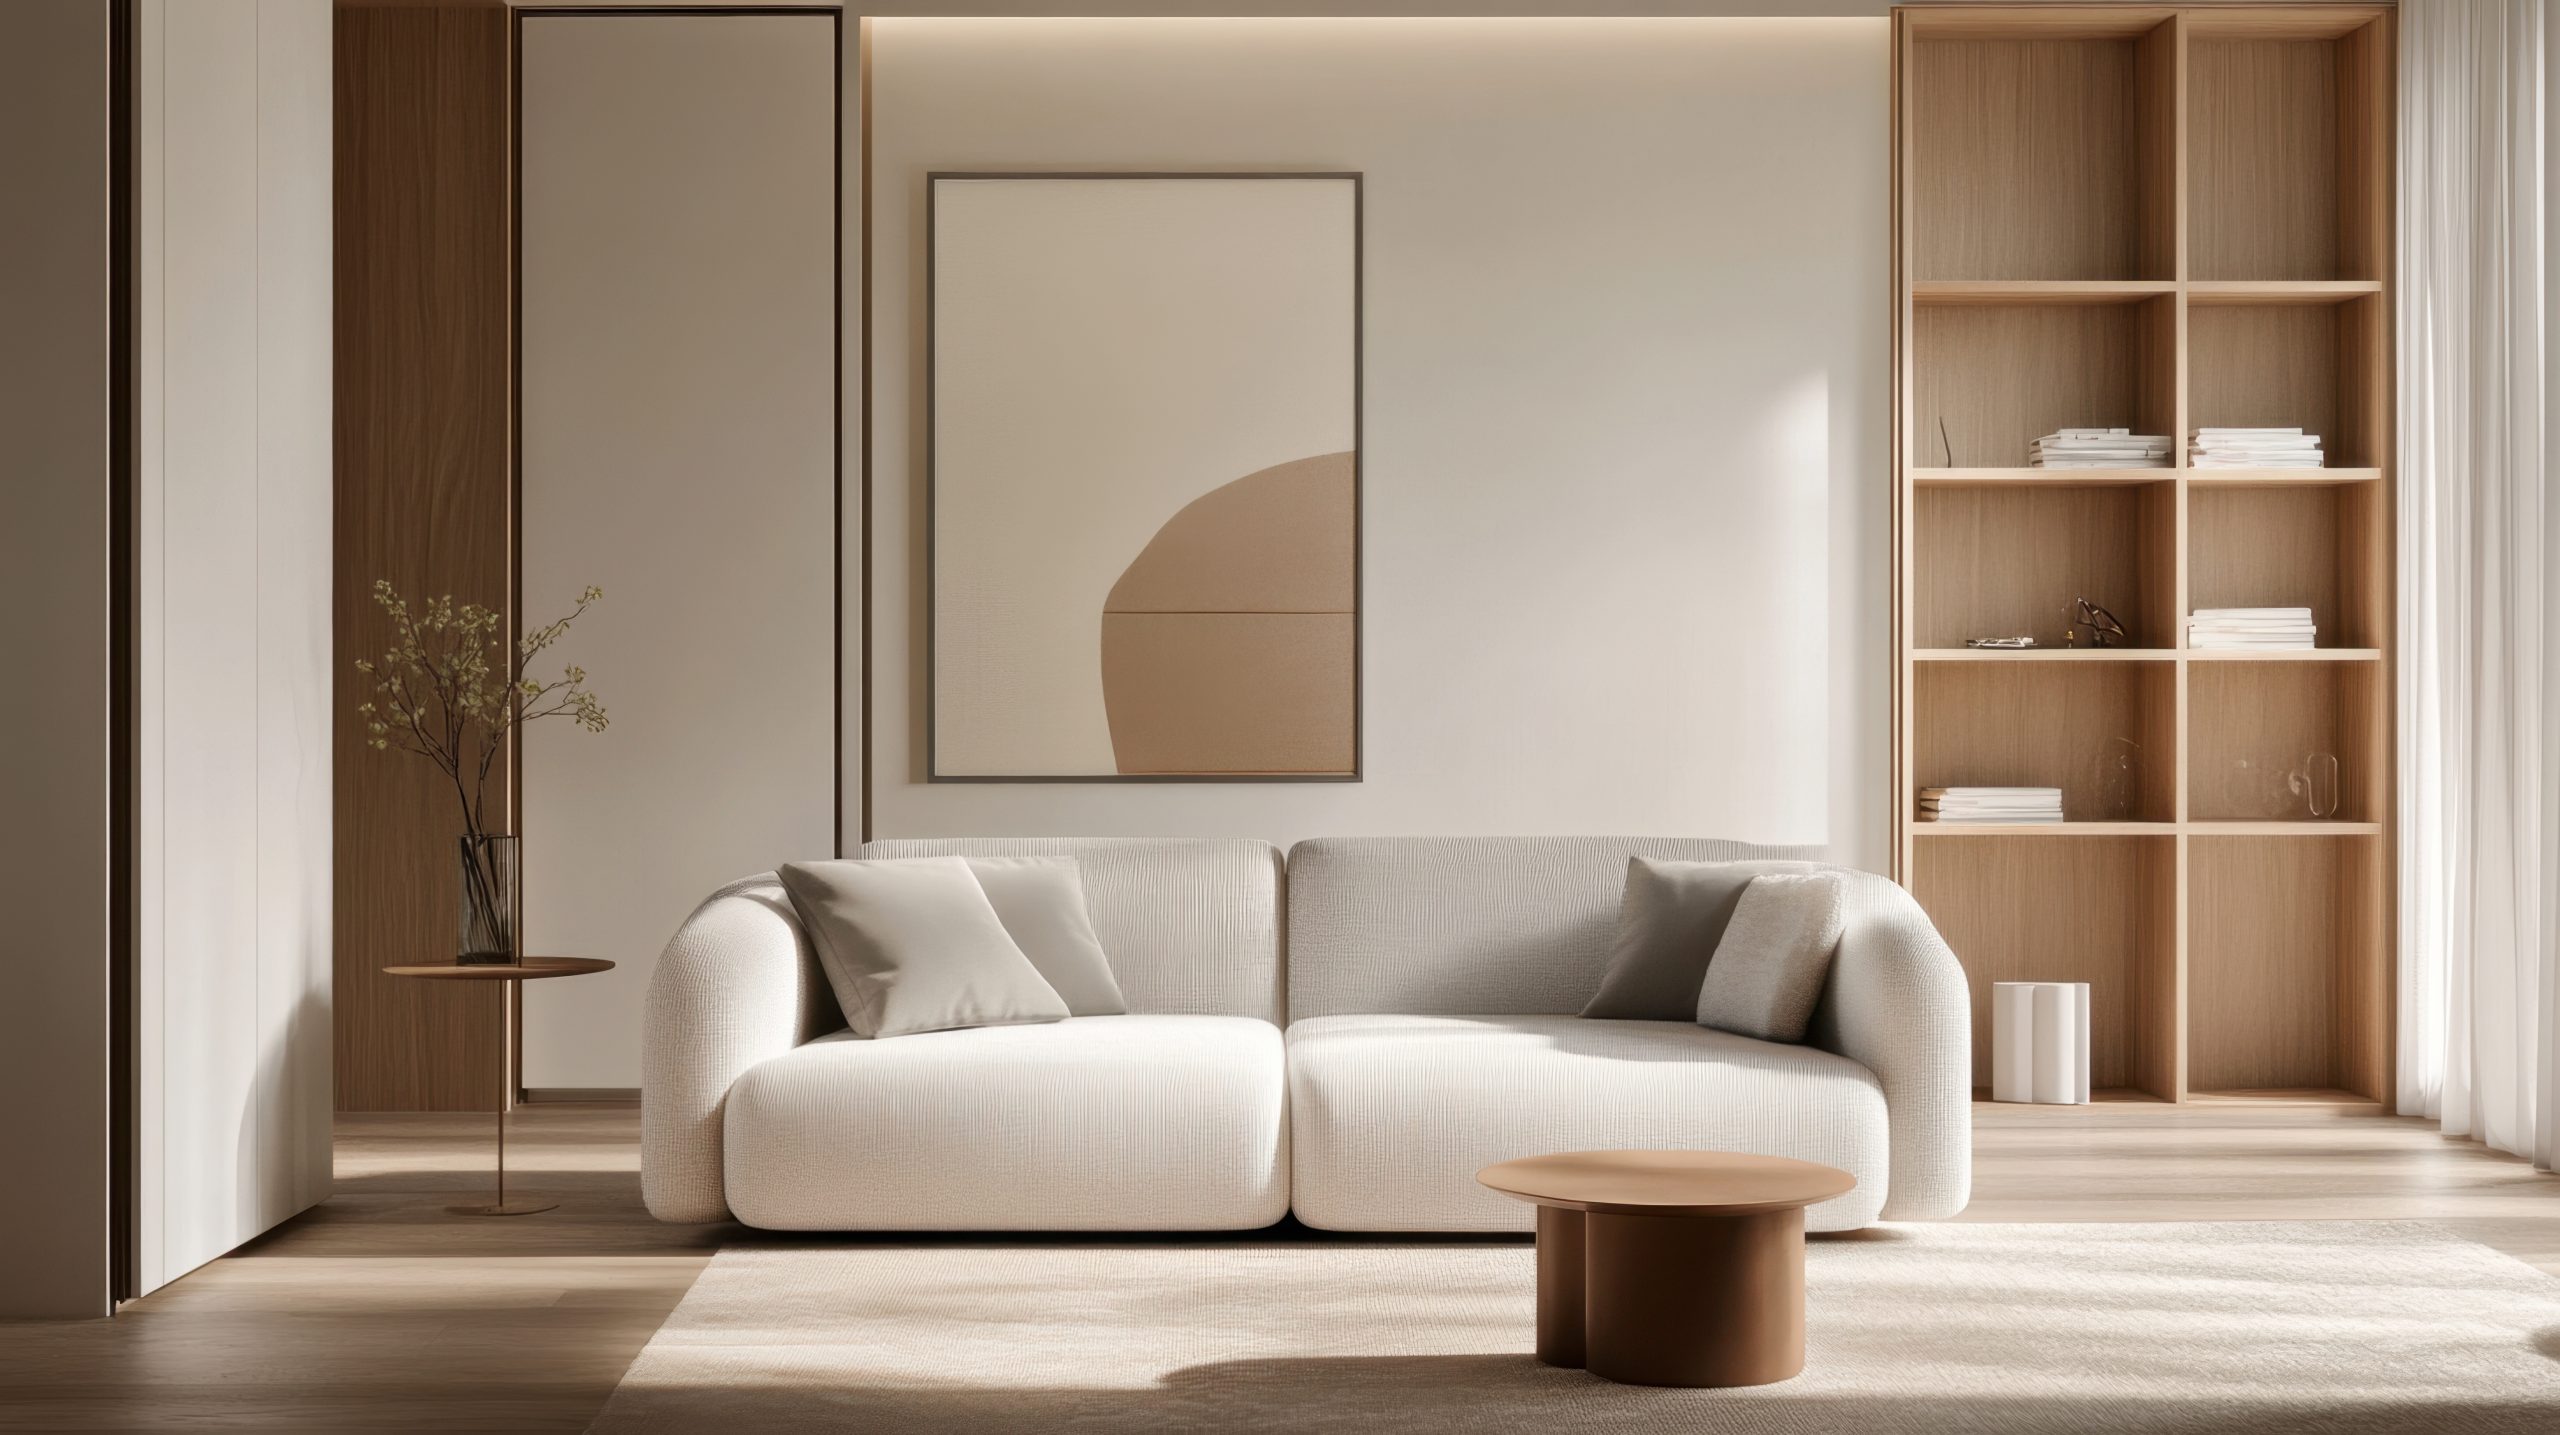
-
Clear the Clutter: Less is definitely more in a small space. Be mindful of how much furniture you bring into your living room. Avoid overcrowding the space, and focus on a few key pieces that are both functional and stylish. A minimalist approach can work wonders for creating a cozy living room in a small apartment. Regularly decluttering and getting rid of items you no longer need or use will help keep your living room feeling open and inviting. Consider incorporating stylish storage solutions, like baskets and decorative boxes, to keep clutter at bay. A clutter-free space is key to achieving a truly cozy and relaxing atmosphere.
Creating a Cozy Atmosphere with Textiles
Textiles are the secret weapon for creating a truly cozy living room, especially in a small apartment. They add warmth, texture, and personality, transforming a plain space into a welcoming haven. When considering cozy living room decor, small apartment style, think beyond just functionality – textiles offer a powerful way to enhance the ambiance and express your personal style.
-
Texture is King: In a small living room, texture is paramount. It adds depth and dimension, fooling the eye and making the space feel larger and more inviting. Think beyond smooth surfaces and incorporate a variety of tactile elements. A chunky knit throw draped over the arm of your sofa instantly adds a sense of warmth and comfort. Plush velvet cushions invite you to sink in and relax. A soft, shaggy rug underfoot creates a luxurious and inviting feel. Don’t be afraid to mix and match different textures – a nubby wool throw paired with a smooth velvet cushion creates a dynamic and interesting look. Consider the seasons too – lighter, breathable linens for summer and heavier wools and faux furs for winter can enhance the cozy factor.
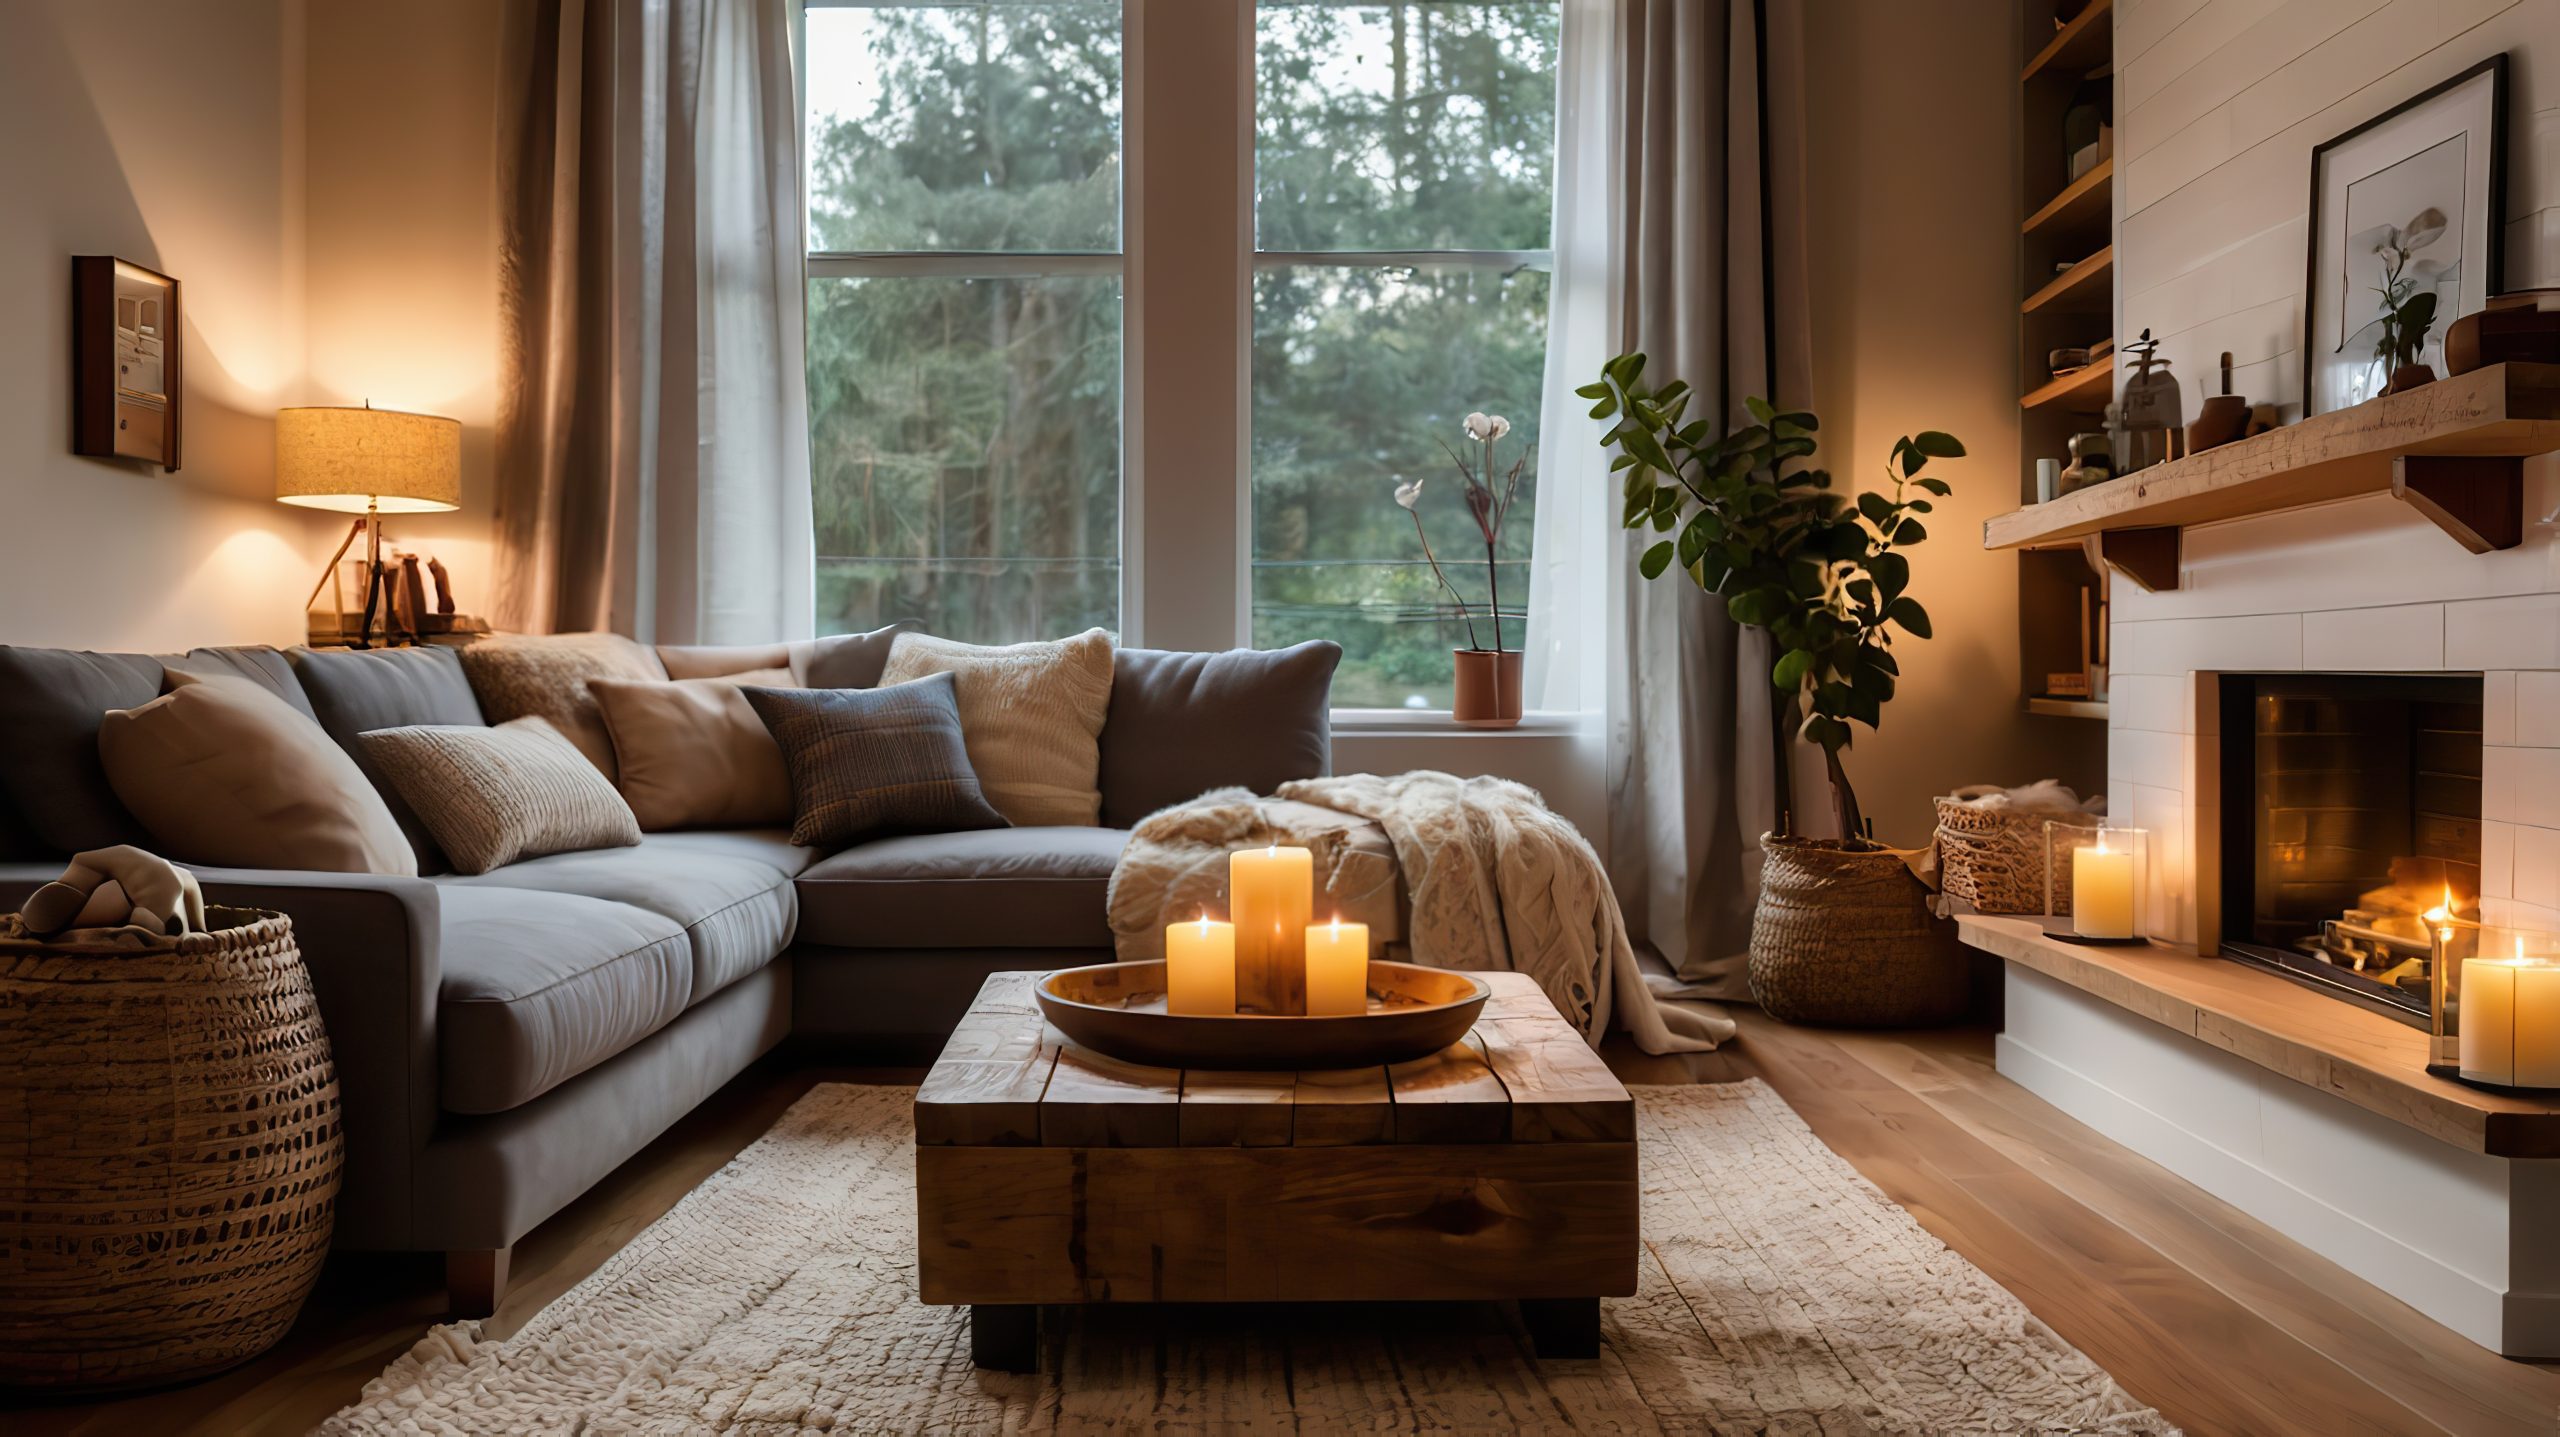
-
Natural Beauty: Natural materials like wool, cotton, and linen are not only soft and comfortable against the skin, but they also offer inherent breathability, which is crucial in a small apartment. These materials also bring a touch of organic elegance to your living room decor. A chunky hand-knit wool throw draped over the back of your sofa adds a touch of rustic charm, while a crisp linen cushion introduces a sense of understated sophistication. Look for natural fiber rugs like jute or sisal to add texture and warmth underfoot.
-
Color Psychology: Color has a profound impact on mood and atmosphere. For a cozy living room decor in a small apartment, lean towards warm, inviting colors that create a sense of intimacy and comfort. Soft neutrals like cream, beige, and gray provide a calming backdrop, while earthy tones like terracotta, olive green, and warm brown evoke a sense of groundedness and tranquility. Rich jewel tones like emerald green, sapphire blue, or ruby red can add a touch of opulence and warmth without overwhelming the space. Consider using a color palette of two or three complementary colors to create a cohesive and harmonious look.
-
Layering for Depth: Layering textiles is a designer’s trick for adding visual interest and depth to a small living room. Start with a base layer, like a rug, and then build upon it with throws, cushions, and even curtains. Don’t be afraid to mix and match different patterns and textures – a geometric patterned rug paired with a solid-colored throw and a textured cushion creates a dynamic and inviting look. Layering also allows you to easily change the look and feel of your living room by swapping out different textiles with the seasons or your changing tastes.
-
Rugs Define the Space: In a small apartment, a rug is essential for visually defining the living area and adding warmth underfoot. Choose a rug that is large enough to anchor the main furniture pieces, such as the sofa and armchairs, but not so large that it overwhelms the room. Ideally, the front legs of your furniture should rest on the rug, creating a sense of connection and cohesion. A rug can also introduce a pop of color or pattern to your cozy small living room decor, tying the space together and adding personality.

Lighting Up Your Small Space
Lighting is a critical element in any cozy living room decor for a small apartment. It sets the mood, enhances functionality, and can even make the space feel larger. Here’s how to light up your small living room for maximum coziness:
-
Natural Light is Your Friend: Natural light is a precious commodity in a small apartment. Maximize it by keeping window treatments light and airy. Sheer curtains or blinds allow natural light to filter through while still providing privacy. Avoid heavy drapes or blinds that block light and make the space feel smaller. Consider using mirrors strategically to reflect natural light deeper into the room.
-
Layered Lighting Magic: Creating a warm and inviting atmosphere relies on layered lighting. Combine ambient lighting (general overhead lighting), task lighting (for reading or working), and accent lighting (to highlight specific features) for a well-lit and functional space. A floor lamp next to your reading chair provides focused light for reading, while a table lamp on a side table creates a soft, ambient glow. Pendant lights over the coffee table add a touch of style and provide focused light for conversations or games. Dimmer switches allow you to adjust the brightness of your lighting to suit different moods and activities.
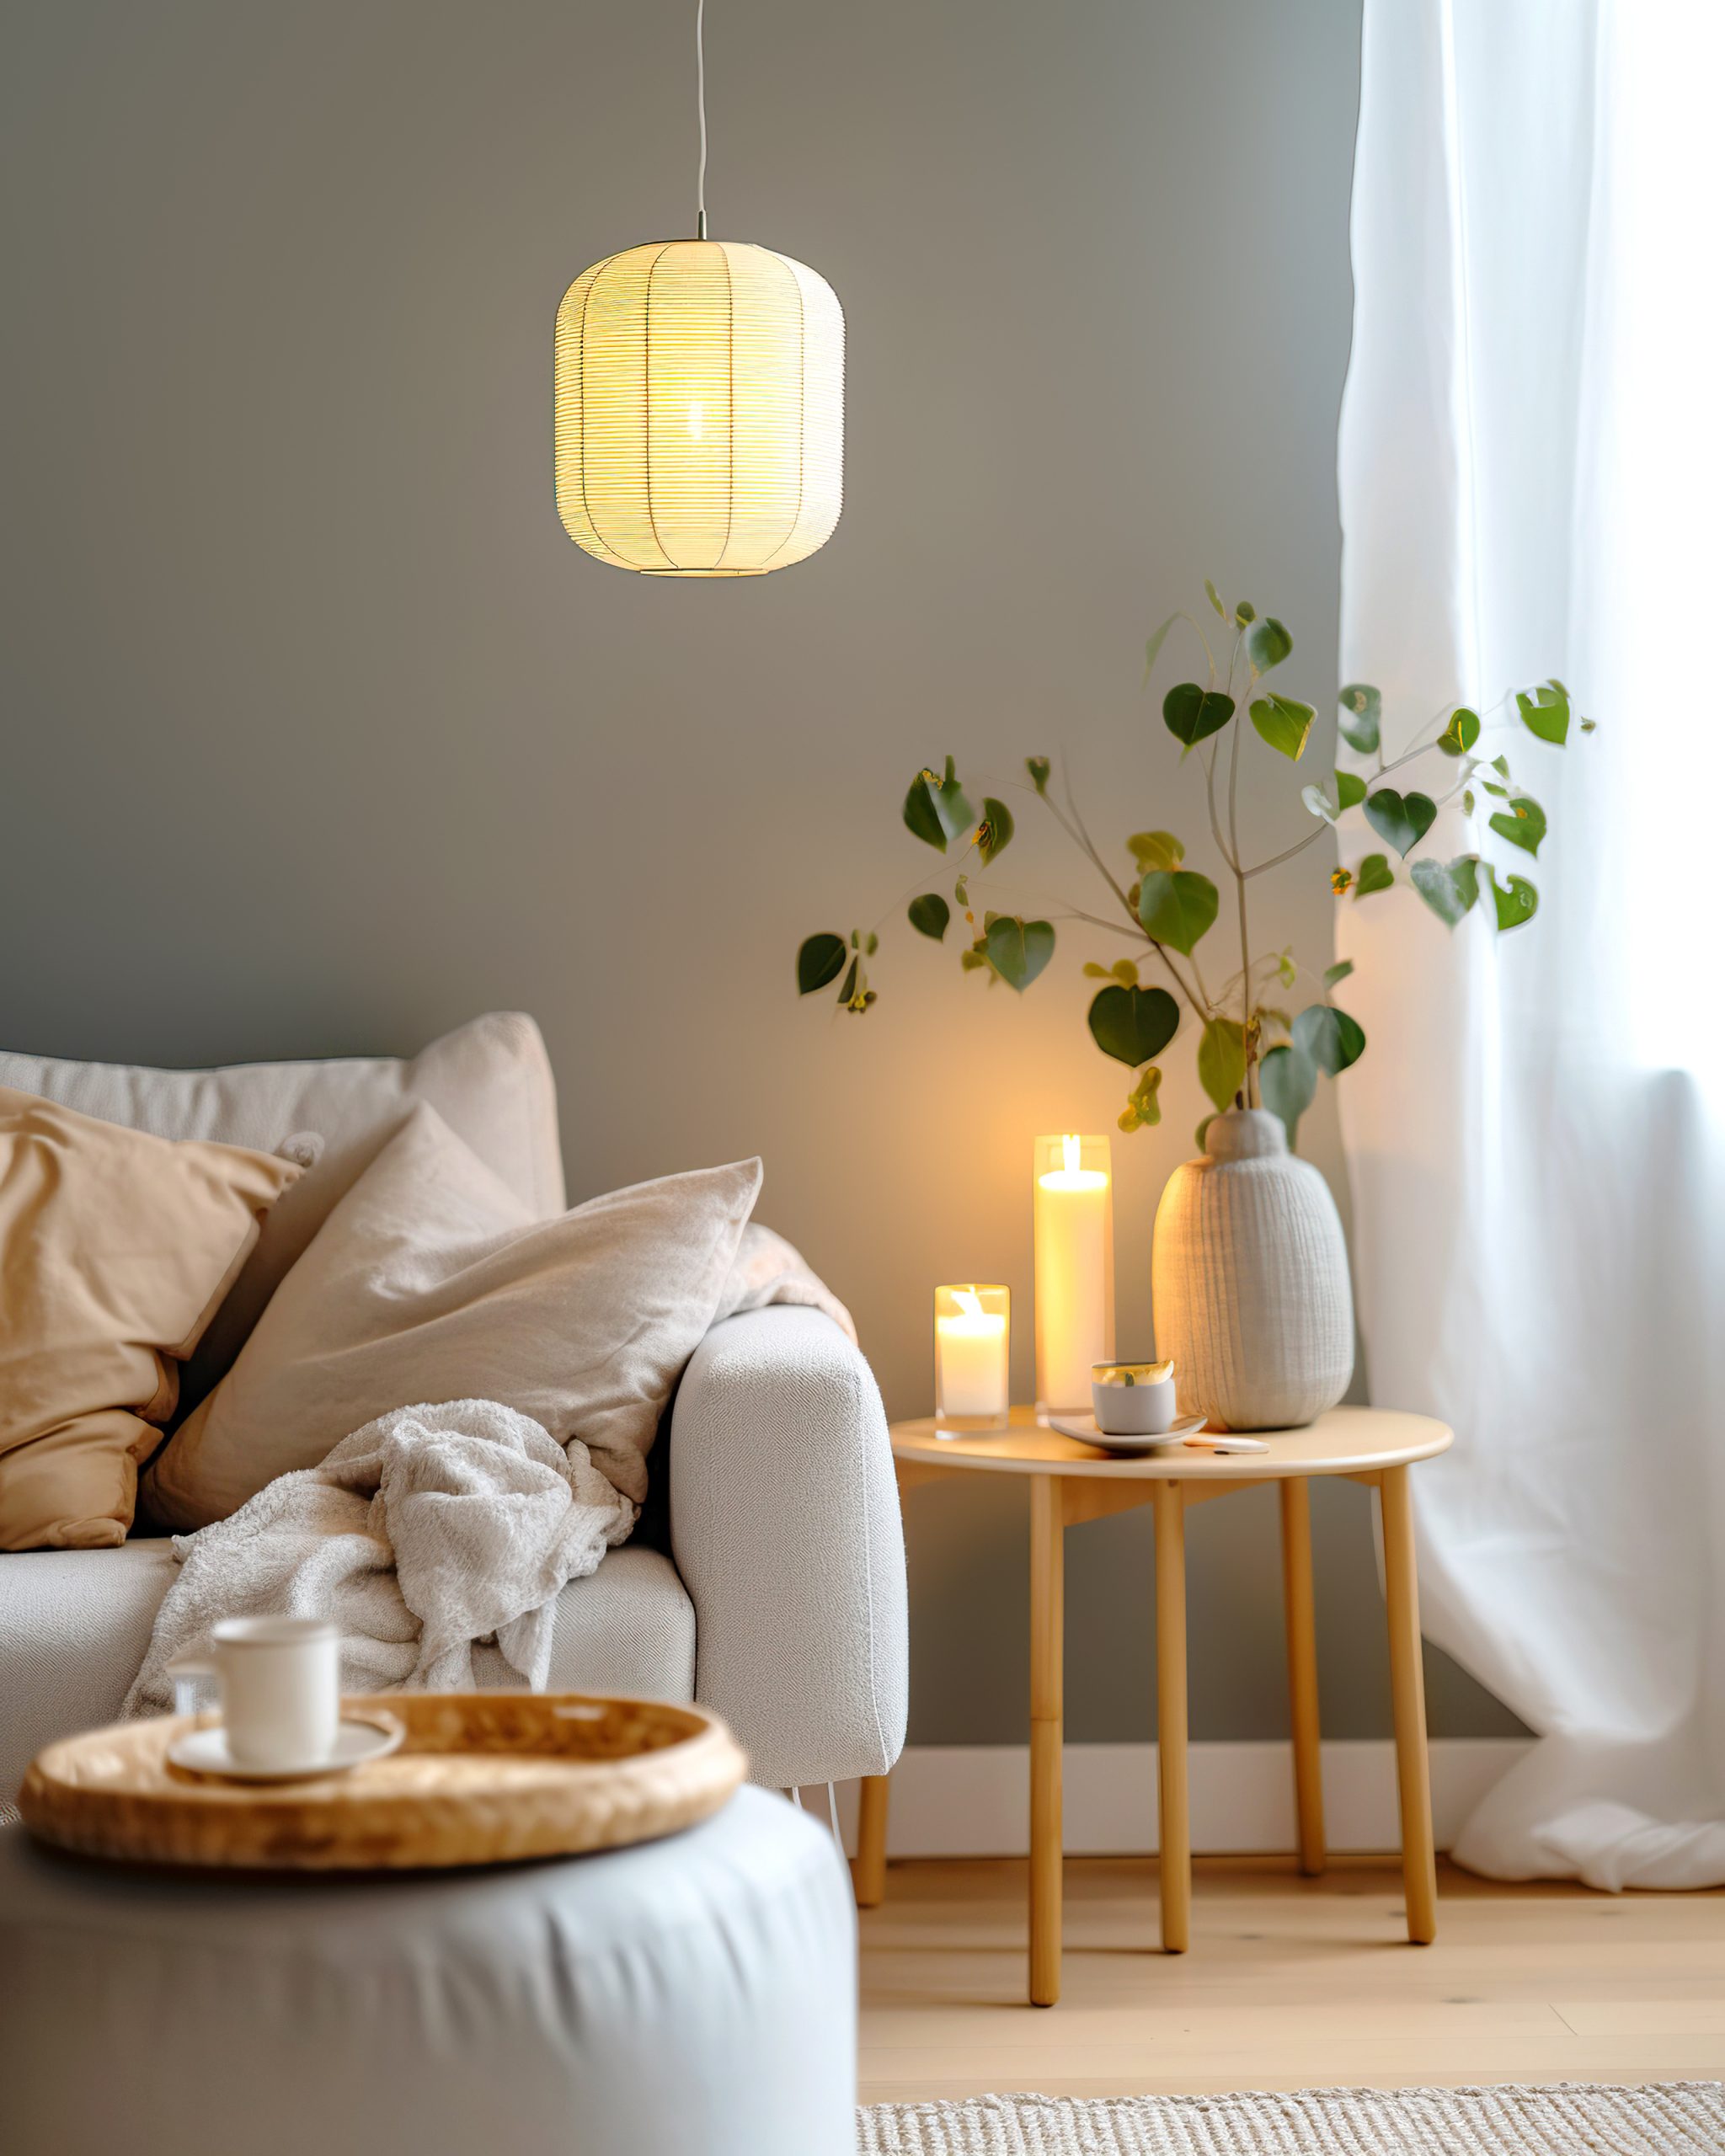
-
Light and Bright Color Schemes: Light and bright wall colors can significantly impact how spacious your small living room feels. Opt for shades of white, cream, or light gray to create a neutral backdrop that reflects light and makes the space feel open and airy. You can then add pops of color with your textiles and accessories. A light and airy color scheme is essential for successful cozy living room decor in a small apartment.
-
Statement Lighting Fixtures: A statement light fixture can be the jewelry of your living room, adding personality and style without taking up valuable floor space. Choose a fixture that complements your overall decor and provides adequate lighting for the space. A unique pendant light over the coffee table or a stylish chandelier can become a focal point and elevate the entire room. Consider the scale of the fixture – a large, oversized fixture can overwhelm a small space, while a smaller, more delicate fixture can add a touch of elegance without feeling overpowering.
- Mirror, Mirror on the Wall: Mirrors are a small space decorator’s best friend. They reflect light, creating the illusion of more space and making your living room feel larger and brighter. A large statement mirror above the sofa can visually double the size of the room, while a gallery wall of smaller mirrors adds a touch of eclectic style and reflects light from multiple angles. Consider placing a mirror opposite a window to maximize natural light reflection.
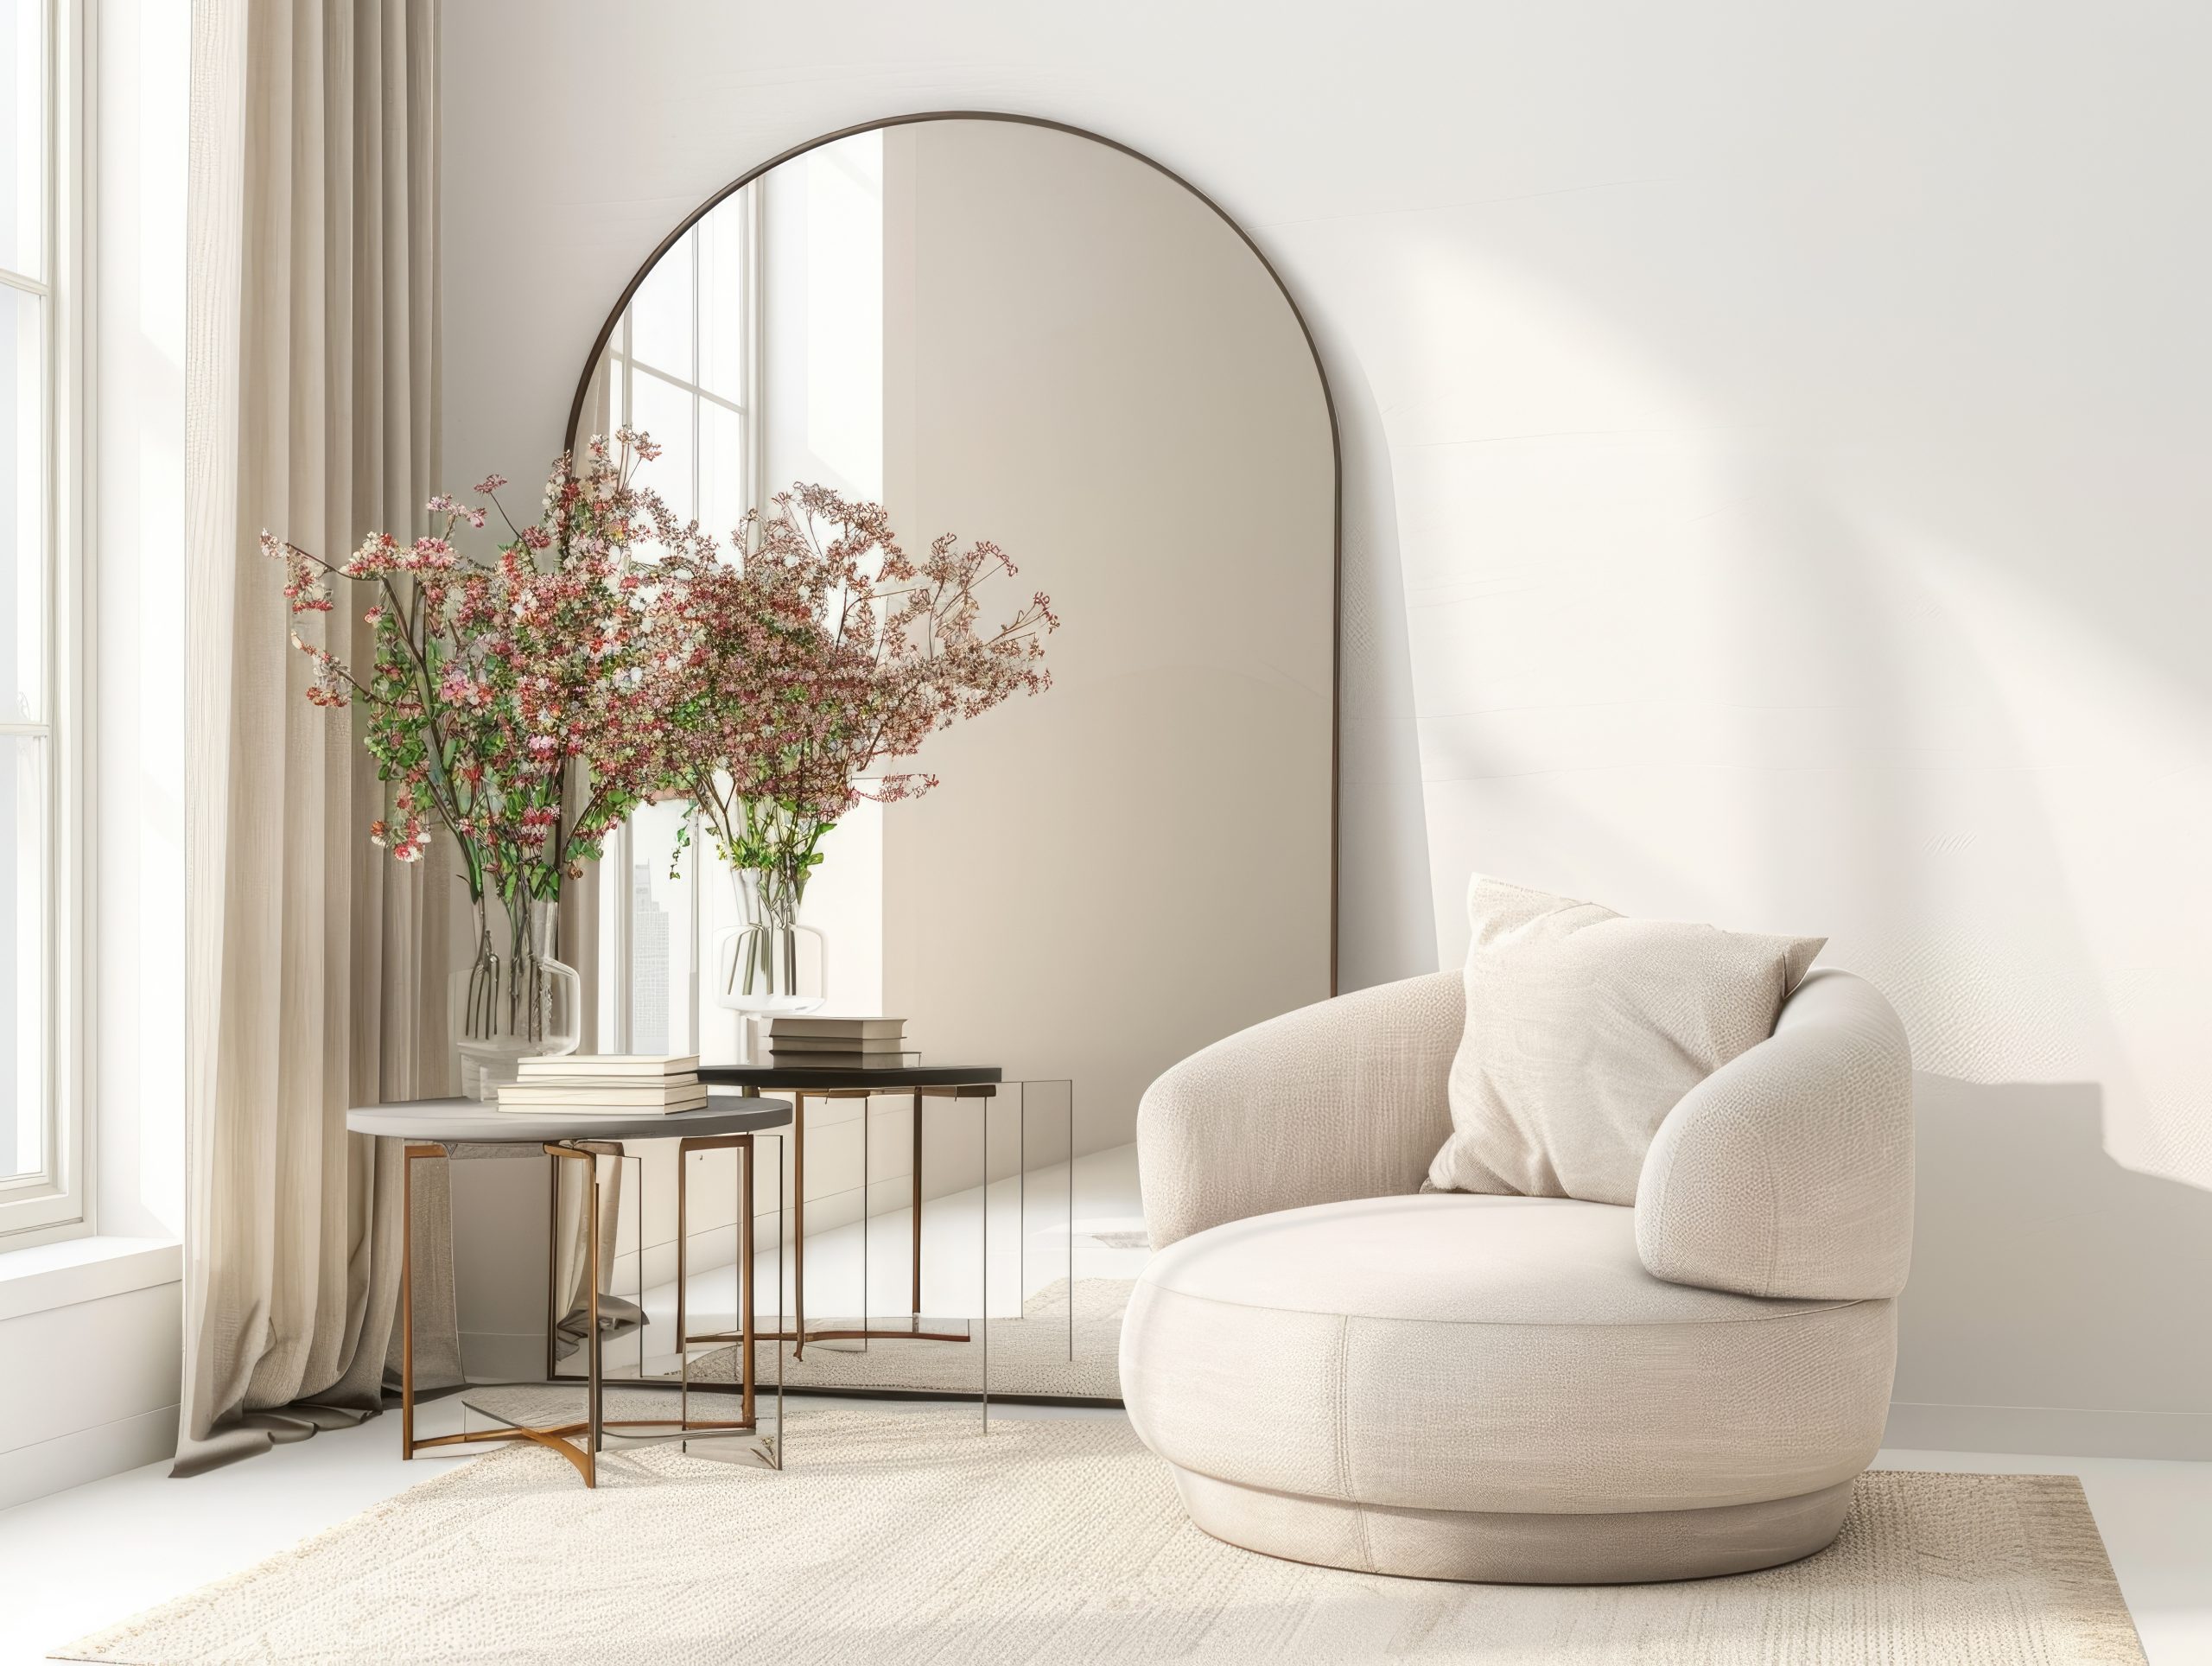
Decorative Touches for a Stylish Space
Decorative touches are what truly personalize your space and make it feel like home. In a small apartment, it’s important to be selective and intentional with your decor choices to avoid cluttering the space. Here’s how to add style and personality to your cozy living room decor:
-
Curated Collections: Resist the urge to fill every surface with decorative objects. Instead, choose a few carefully curated pieces that you truly love and that reflect your personal style. This could include a collection of vintage books, a grouping of framed family photos, a few treasured travel souvenirs, or a small display of handcrafted pottery. Grouping similar items together creates a more impactful visual statement than scattering individual items around the room. Consider using trays or decorative bowls to display smaller items and keep surfaces looking organized.
-
Focal Point Focus: Every living room needs a focal point – a visual anchor that draws the eye and gives the space a sense of purpose. In a small living room, the focal point can be a fireplace, a piece of statement art, a gallery wall, a large window with a beautiful view, or even a striking piece of furniture. Once you’ve identified your focal point, arrange your furniture and decor to highlight it. For example, if your focal point is a fireplace, arrange your seating area to face it.
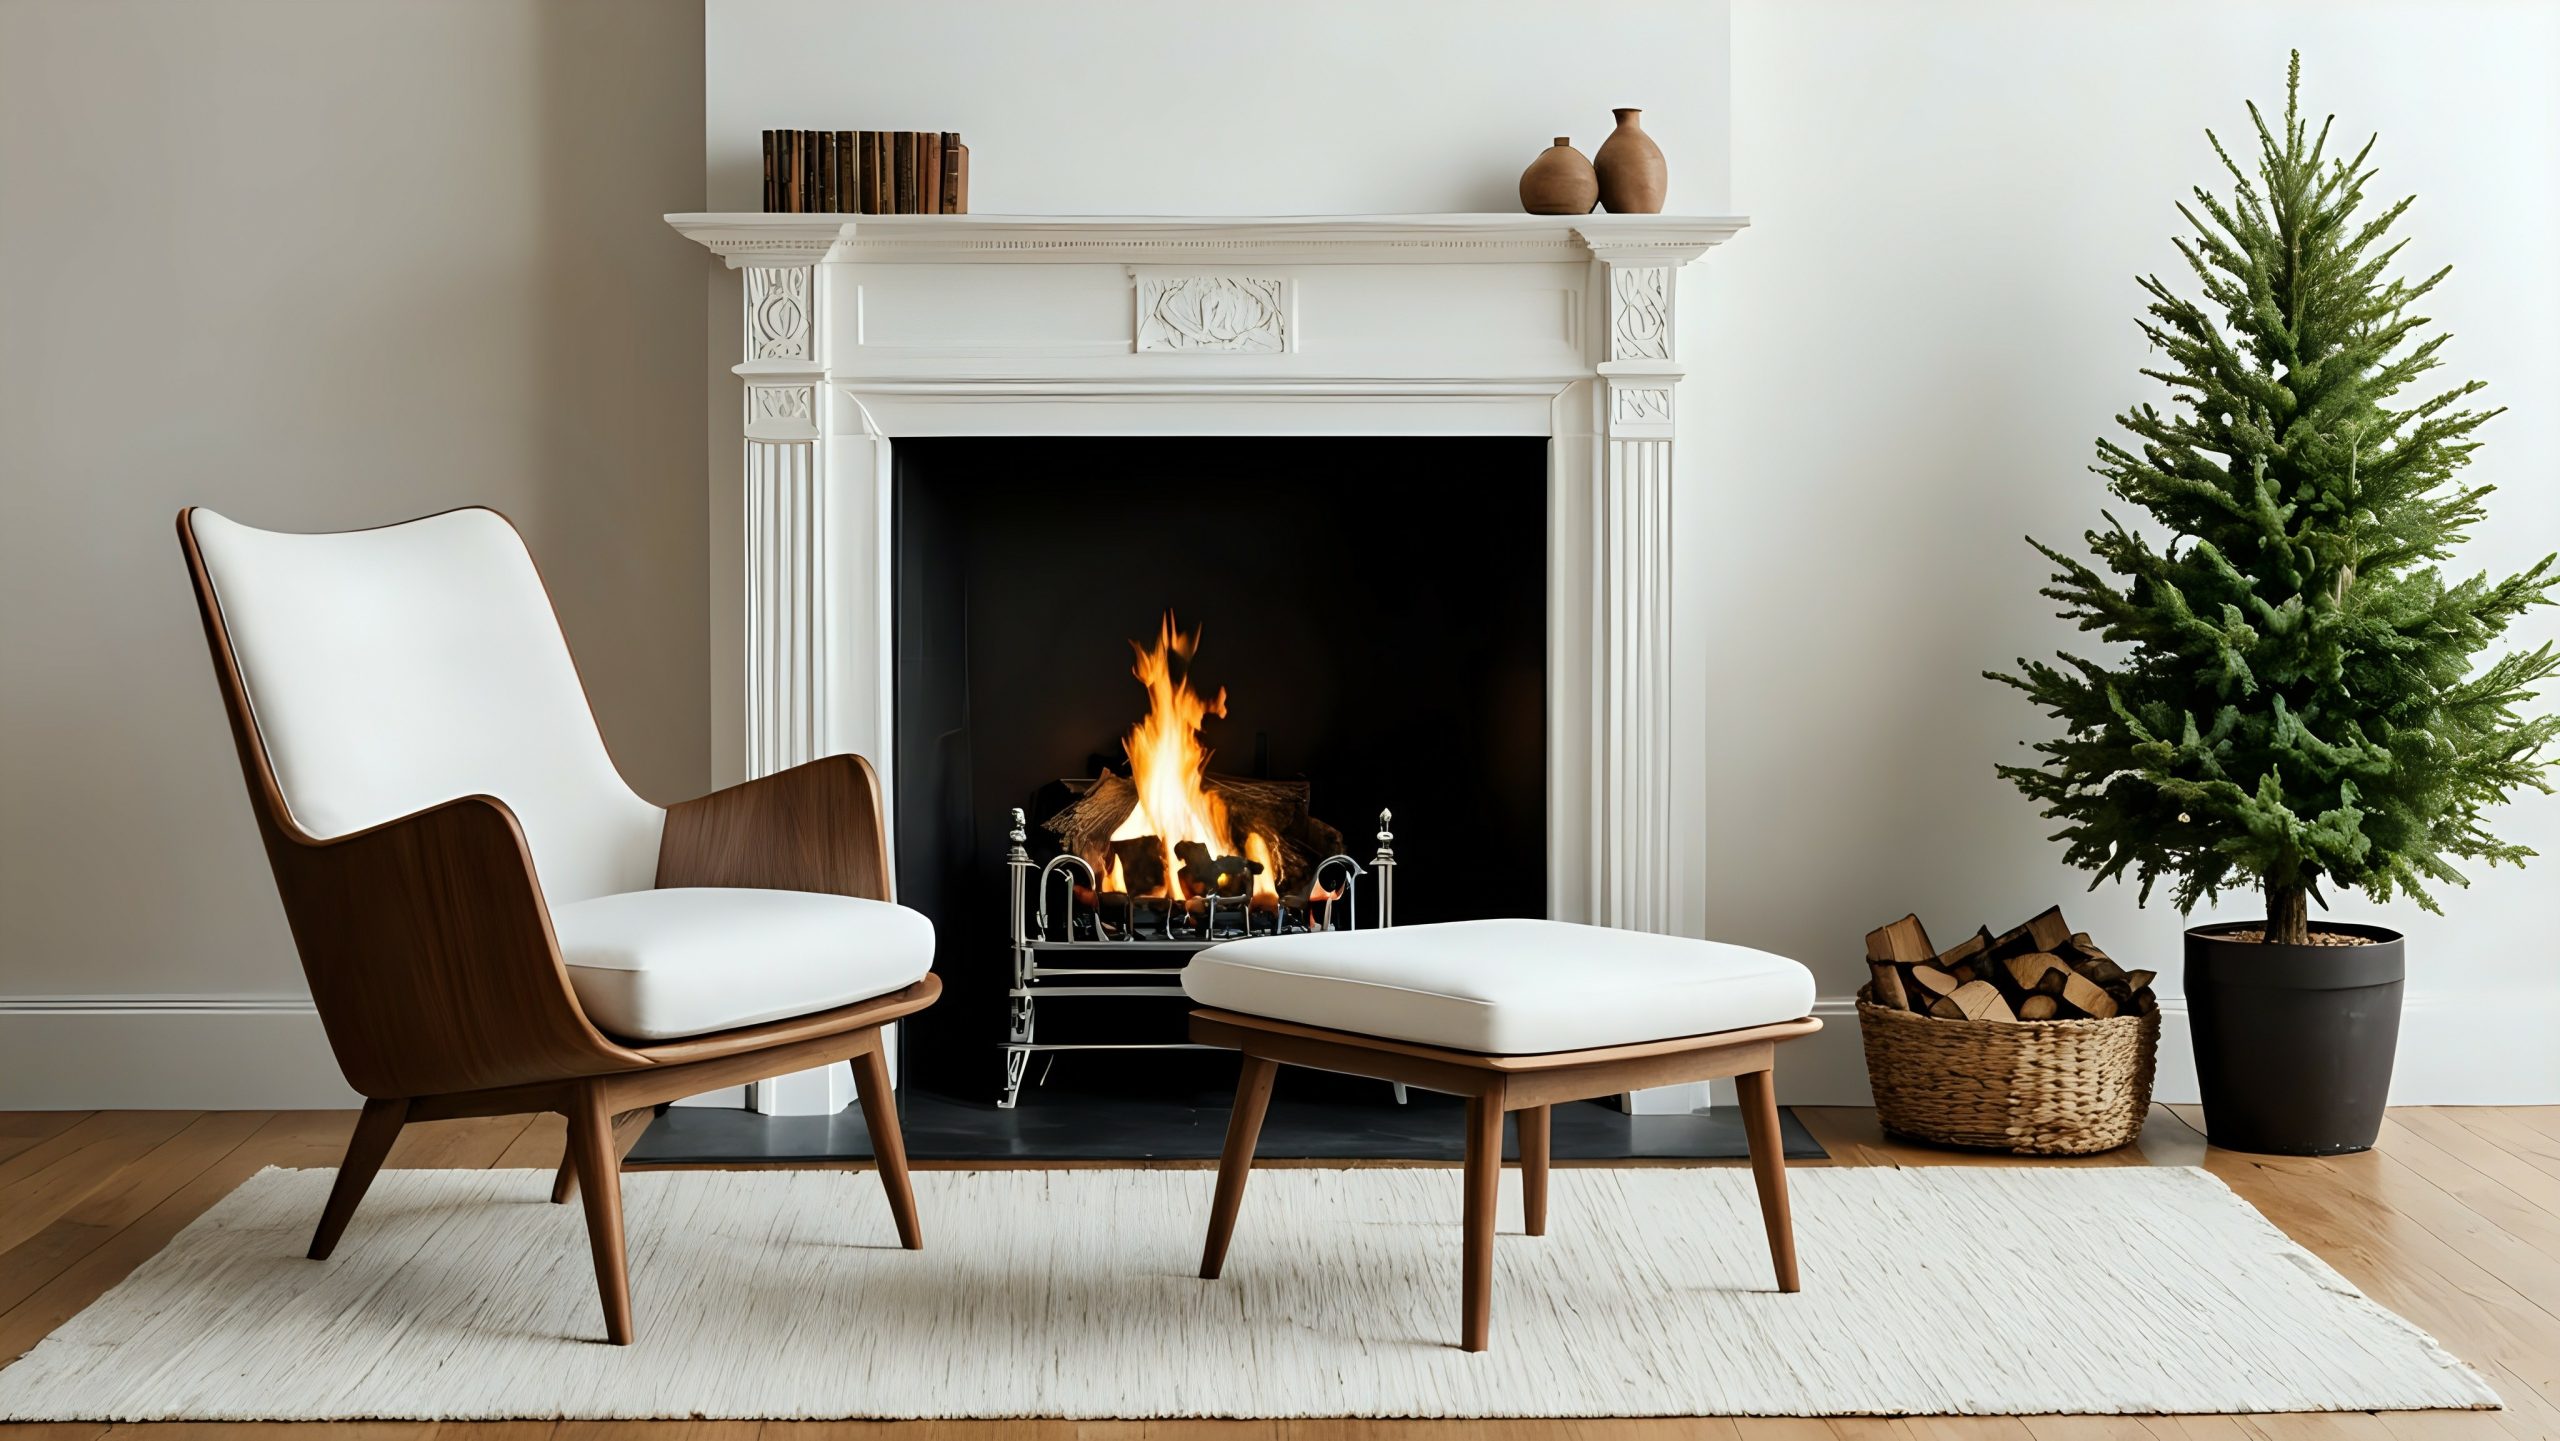
-
Decluttering is Key: Clutter is the enemy of coziness, especially in a small apartment. Regularly declutter your living room, getting rid of anything you no longer need, use, or love. A clutter-free space feels more open, airy, and inviting. Invest in stylish storage solutions, such as baskets, decorative boxes, and ottomans with hidden storage, to keep clutter contained and out of sight. Make decluttering a regular habit to maintain a sense of calm and order in your living room.
-
Greenery Brings Life: Plants add a touch of life and vibrancy to any space, and they’re especially beneficial in a small living room. They can help to purify the air, improve indoor air quality, and create a more calming and inviting atmosphere. Choose low-maintenance plants that thrive in indoor environments, such as snake plants, pothos, or spider plants. Place plants strategically around the room to add pops of color and texture. A tall, leafy plant in a corner can visually expand the space, while a small succulent on a coffee table adds a touch of natural beauty.
-
Personal Touches: The most important decorative touches are the ones that reflect your personality and make your space feel like home. Don’t be afraid to display items that have special meaning to you, whether it’s a collection of vintage postcards, a framed concert ticket, or a handmade quilt from your grandmother. These personal touches are what truly make your space unique and special.
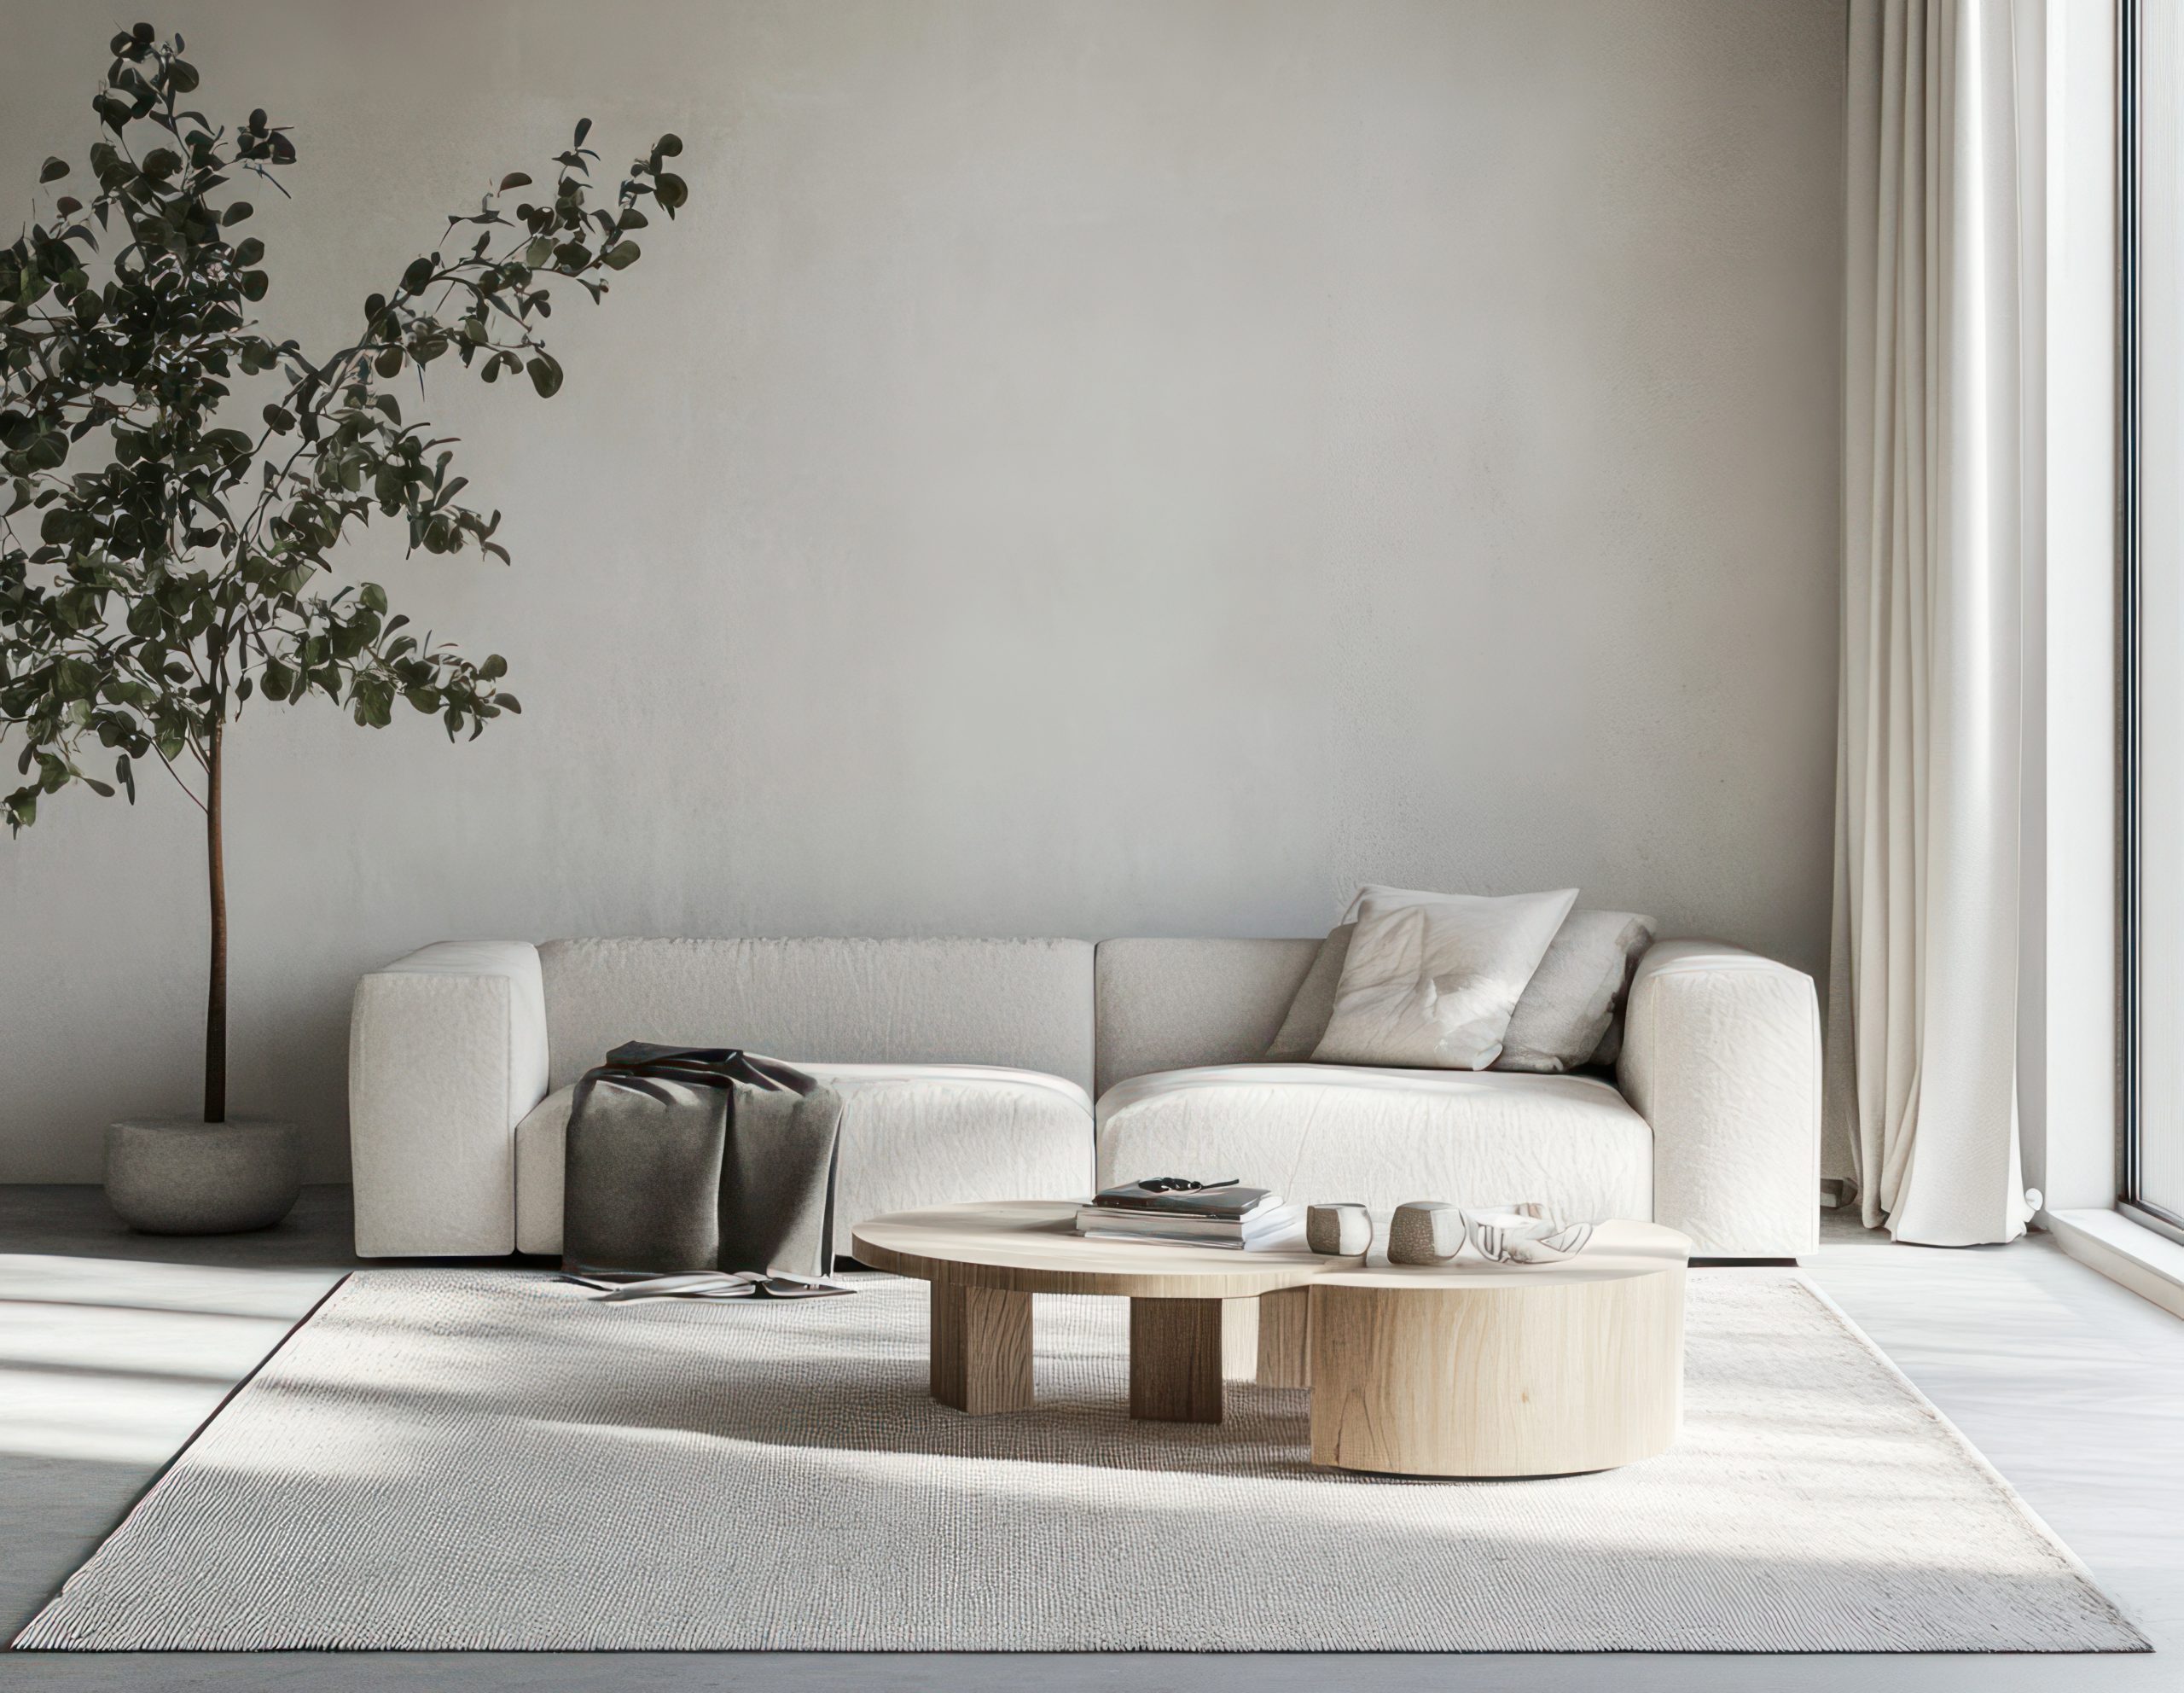
Making the Most of Vertical Space
In a small apartment, maximizing vertical space is essential for creating a functional and stylish living room. Think upwards and utilize every inch of wall space to your advantage. Here’s how to make the most of your vertical real estate:
-
Think Vertical: Train your eye to look up! Before adding furniture or decor, consider how you can utilize the vertical space in your living room. This might involve installing shelves, hanging artwork, or using tall furniture to draw the eye upwards and create the illusion of height.
-
Floating Shelves: Floating shelves are a versatile and stylish way to add storage and display decorative items without taking up valuable floor space. Install them above the sofa, next to the TV, or in any other awkward corner. Use floating shelves to display books, plants, framed photos, or small decorative objects. Arrange items in a visually appealing way, leaving some negative space to avoid a cluttered look.
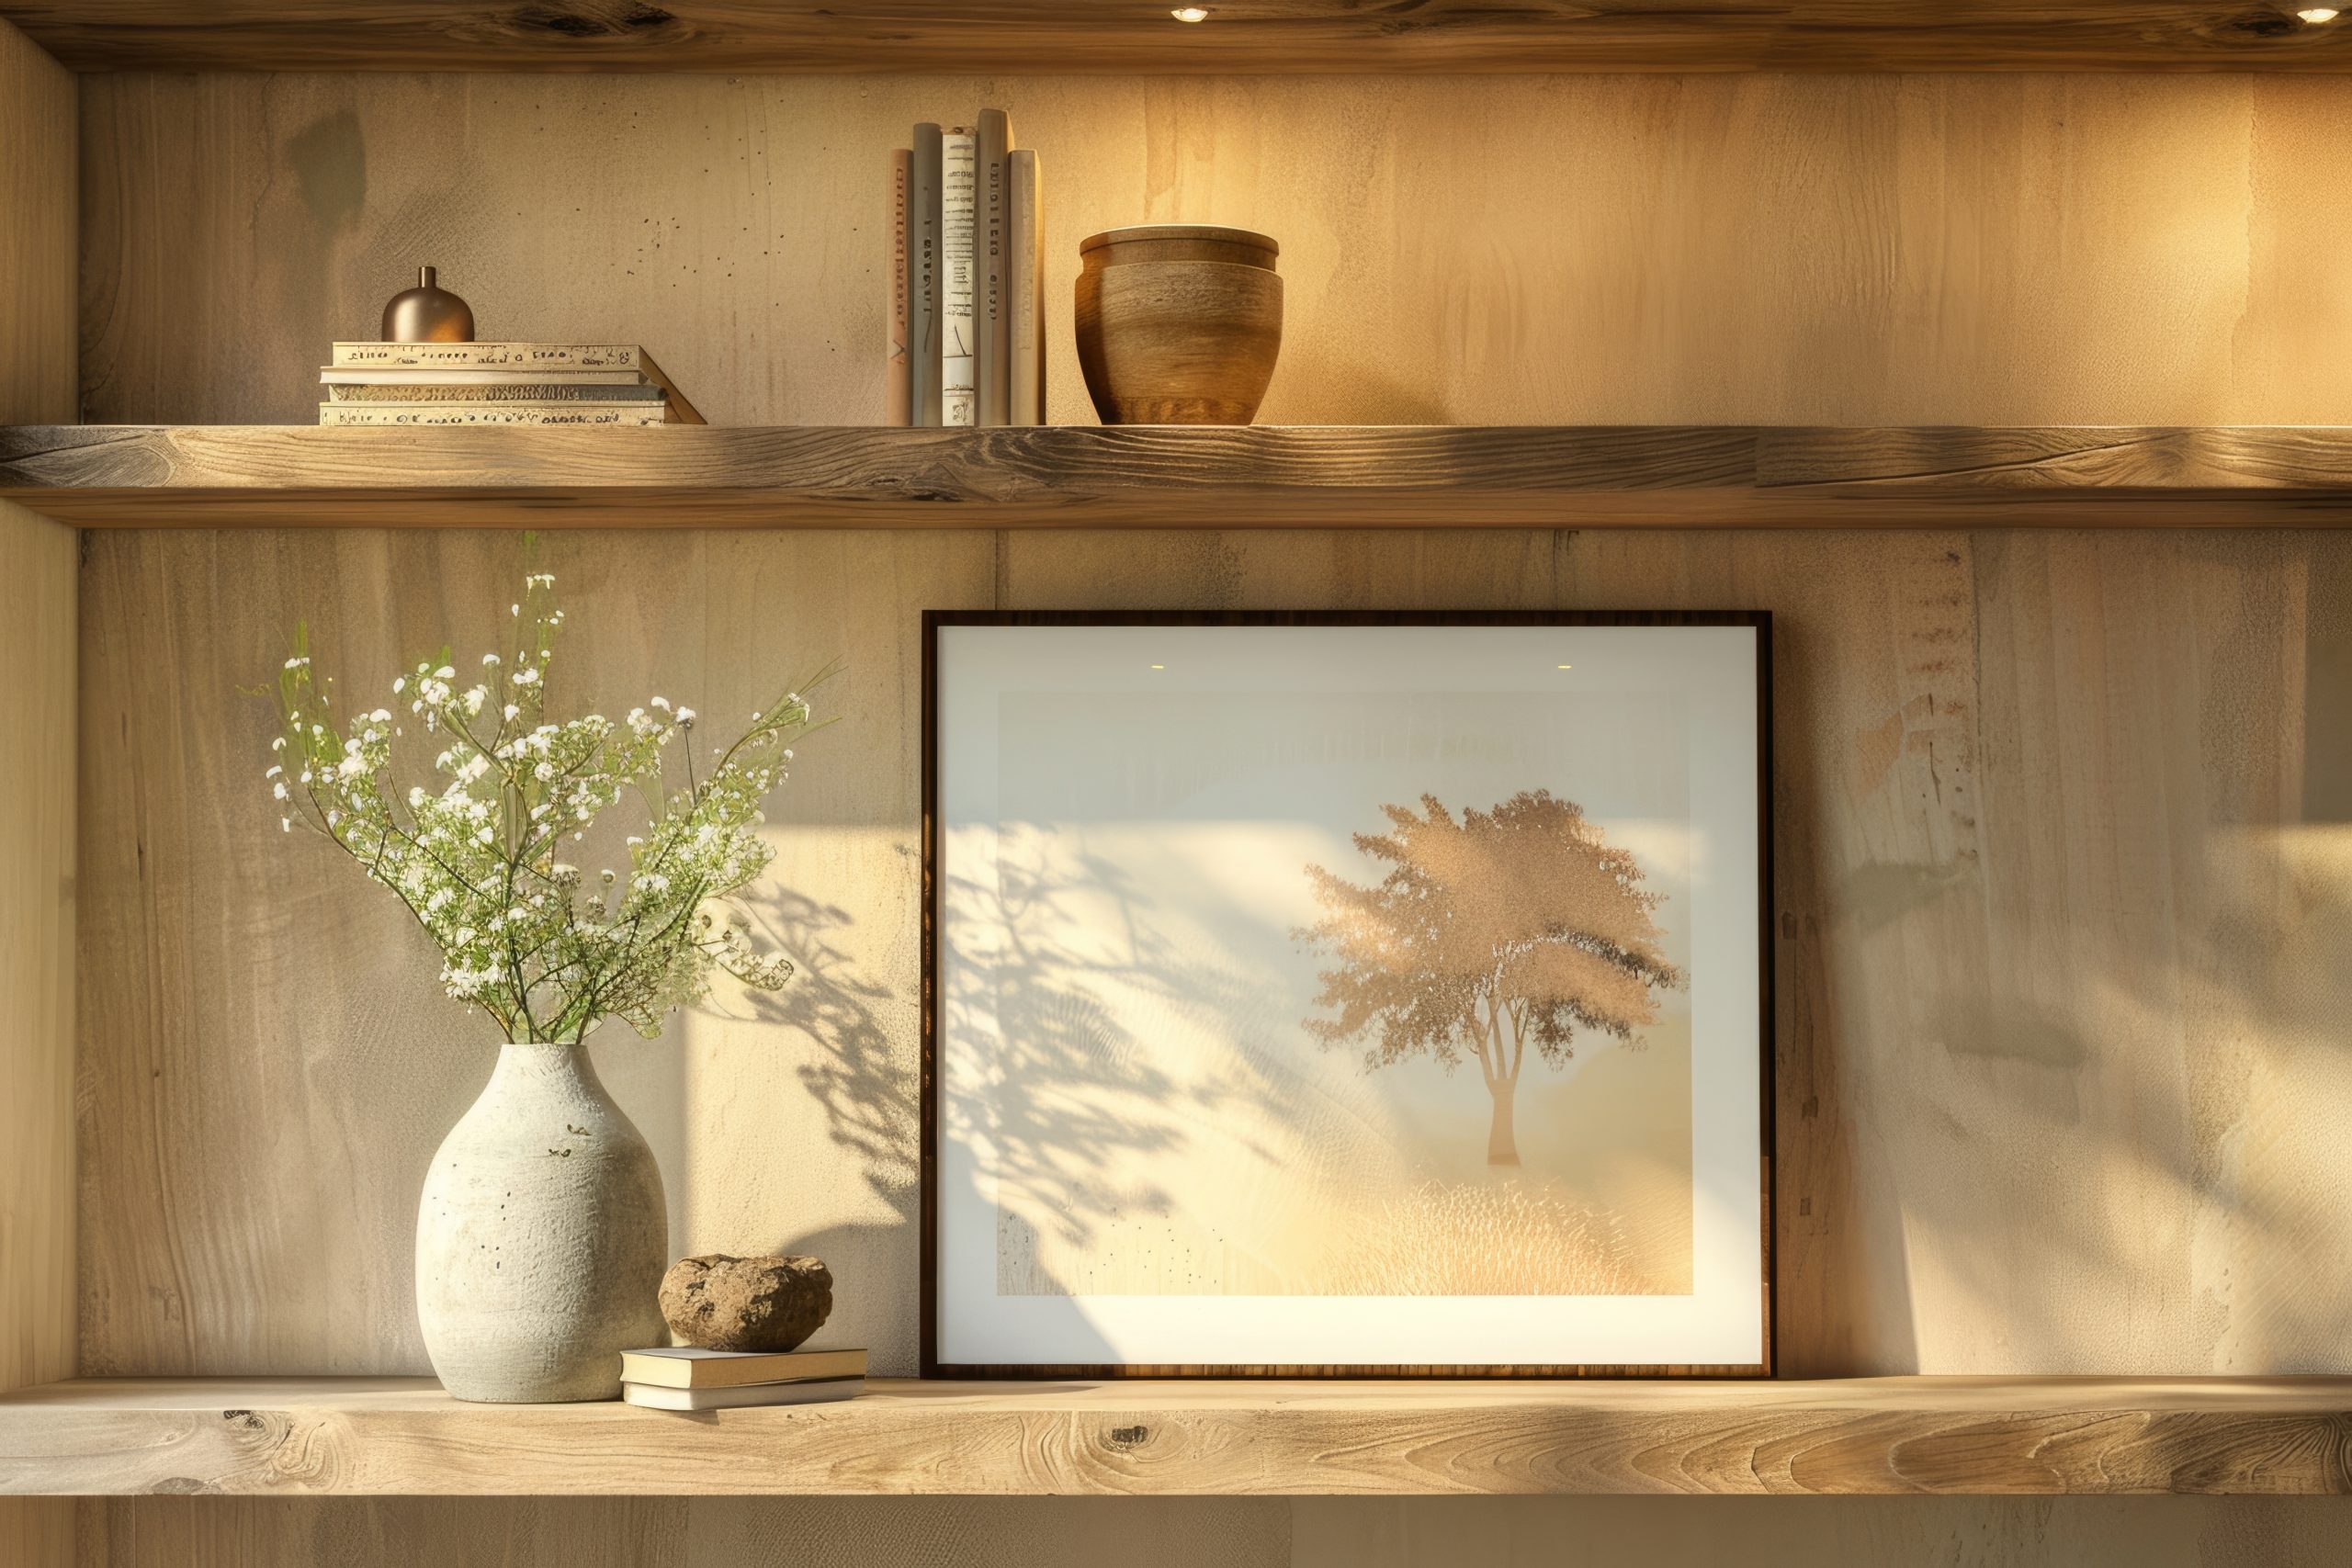
-
Bookcase Bliss: Tall, narrow bookcases are a classic way to maximize storage and display books, decorative objects, and even small plants. They can also add a touch of elegance and sophistication to your living room. Choose a bookcase that complements your existing furniture and decor. Arrange books and objects in a visually appealing way, mixing horizontal and vertical stacks to create visual interest.
-
Wall-Mounted Magic: Explore other wall-mounted options beyond shelves and bookcases. Hanging planters can add a touch of greenery without taking up floor space. Wall-mounted sconces provide ambient lighting and free up valuable surface area on tables and shelves. Hanging artwork or a large mirror can create a focal point and add personality to your space. Consider mounting your TV on the wall to also free up space on a media console.
-
Vertical Stripes: Incorporating vertical stripes, whether in wallpaper, rugs, or curtains, can visually elongate the room and make your ceilings appear higher. This is a subtle but effective trick for maximizing visual space in a small living room. Choose a stripe pattern that complements your existing decor and doesn’t overwhelm the space. Vertical stripes can add a touch of classic elegance or a more modern, graphic feel, depending on the color and width of the stripes.
By following these tips and focusing on maximizing space, incorporating cozy textiles, layering lighting, adding personal touches, and utilizing vertical space, you can transform your small apartment living room into a stylish and inviting sanctuary. Remember, cozy living room decor for a small apartment is all about creating a space that feels comfortable, personal, and perfectly suited to your needs and aesthetic.
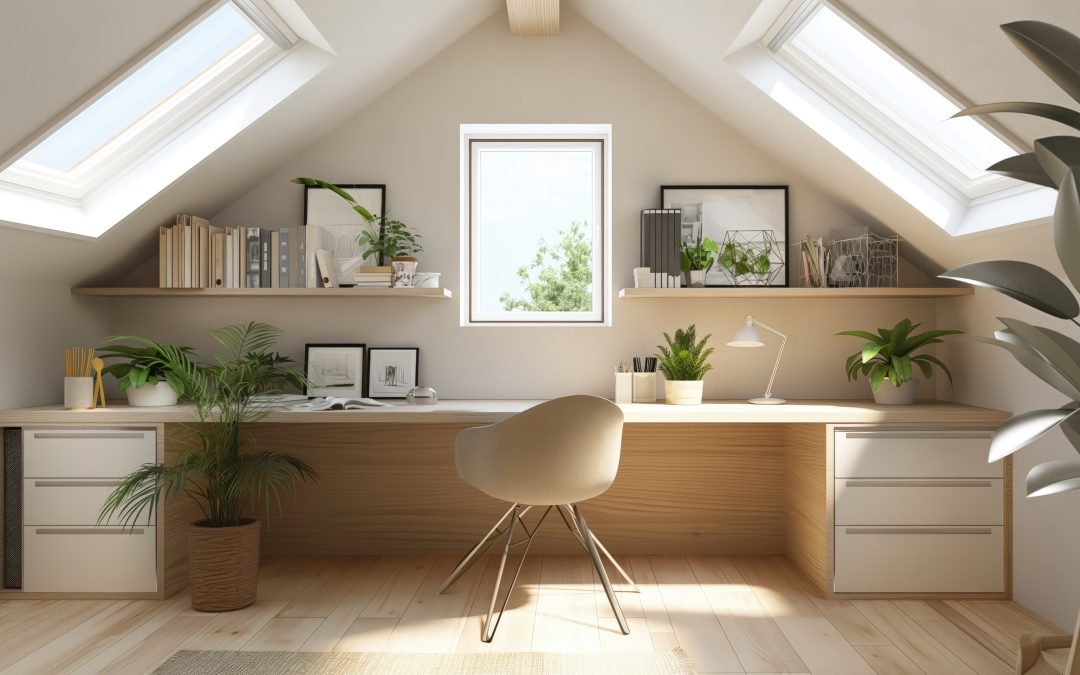
by Kesaa Interiors | DECOR & DIY, DESIGN GUIDES, DIY Projects, Furniture & Layout Guides, Home Office, ROOMS
Want to know how to create the perfect ergonomic home office? You have come to the right place!
With more and more of us embracing the work-from-home lifestyle, the need for a dedicated and productive workspace has never been greater. But simply having a desk and chair isn’t enough. To truly thrive while working remotely, you need an ergonomic home office – a space designed to support your physical well-being and boost your productivity.
This post will guide you through creating an ergonomic home office that not only feels fantastic but looks stunning too. We’ll cover everything from choosing the right furniture to incorporating stylish décor, ensuring your workspace is a haven of both comfort and inspiration.
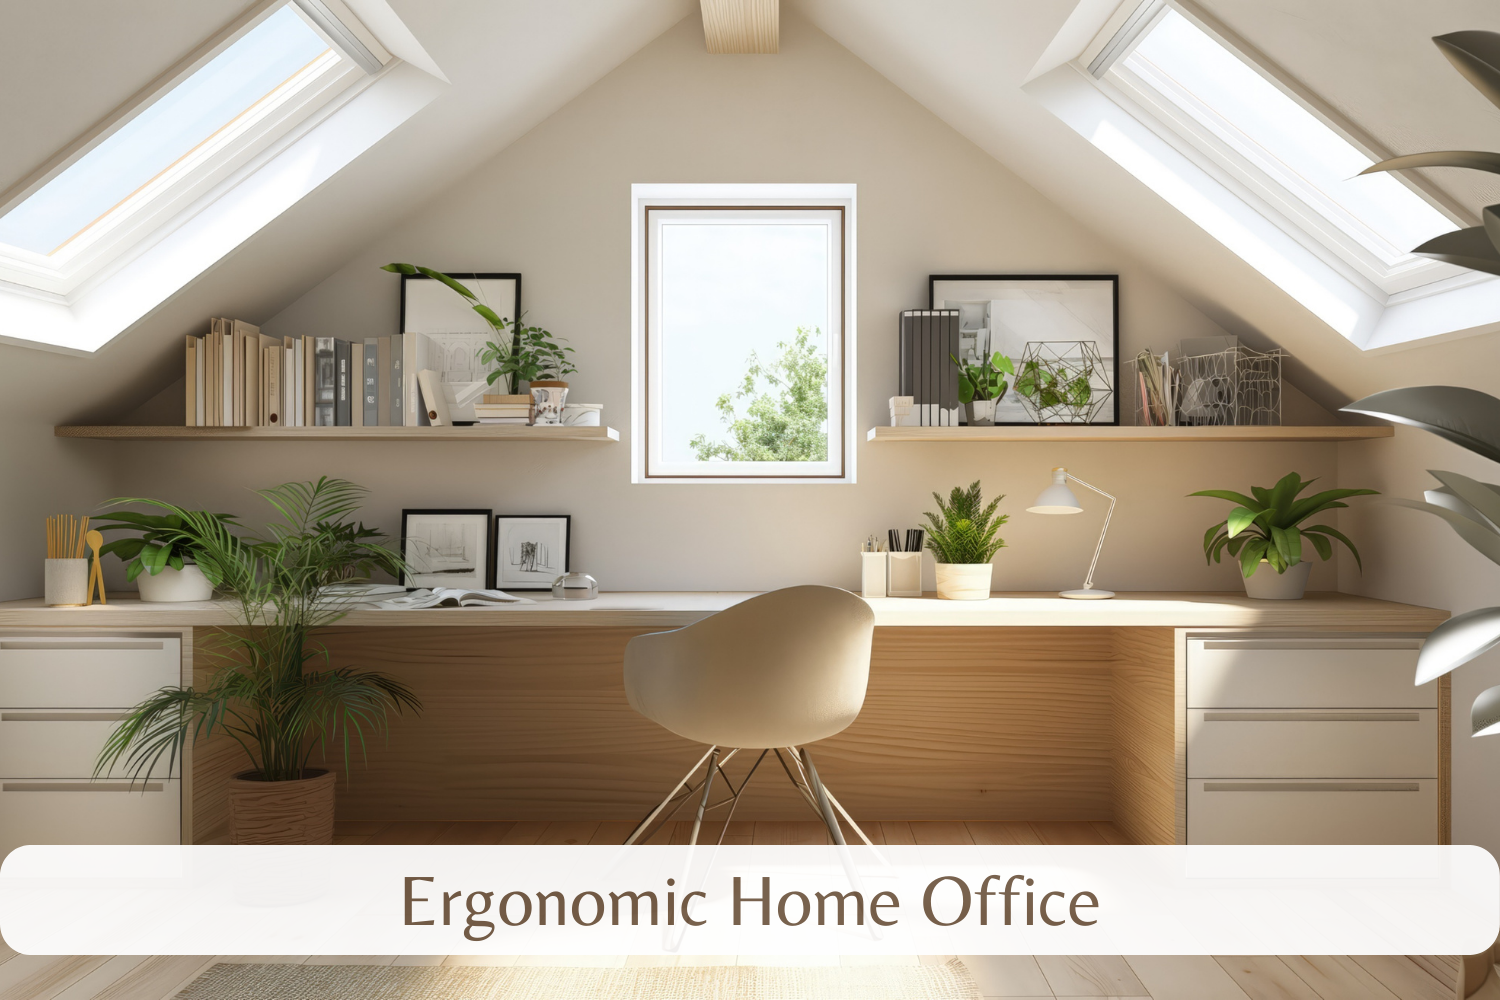
Best Ergonomic Home Office Tips!
Location, Location, Location: Choosing the Right Spot for Your Ergonomic Home Office
Creating the perfect ergonomic home office starts with selecting the right location. Where you choose to set up shop can significantly impact your focus, comfort, and overall productivity. Consider these key factors when deciding on the optimal spot for your ergonomic home office:
- Natural Light: Positioning your ergonomic home office near a window allows you to harness the power of natural light. Natural light not only reduces eye strain but also boosts mood and energy levels, contributing to a more positive and productive work experience.
- Noise Levels: Minimize distractions by choosing a location that’s relatively quiet. If your home is bustling with activity, consider a room away from high-traffic areas or invest in noise-cancelling headphones to maintain focus in your ergonomic home office.
- Privacy: A dedicated workspace free from interruptions is crucial for concentration. If possible, select a room with a door that can be closed to create a private and productive ergonomic home office environment. Even a strategically placed room divider can help establish a sense of separation and minimize distractions.
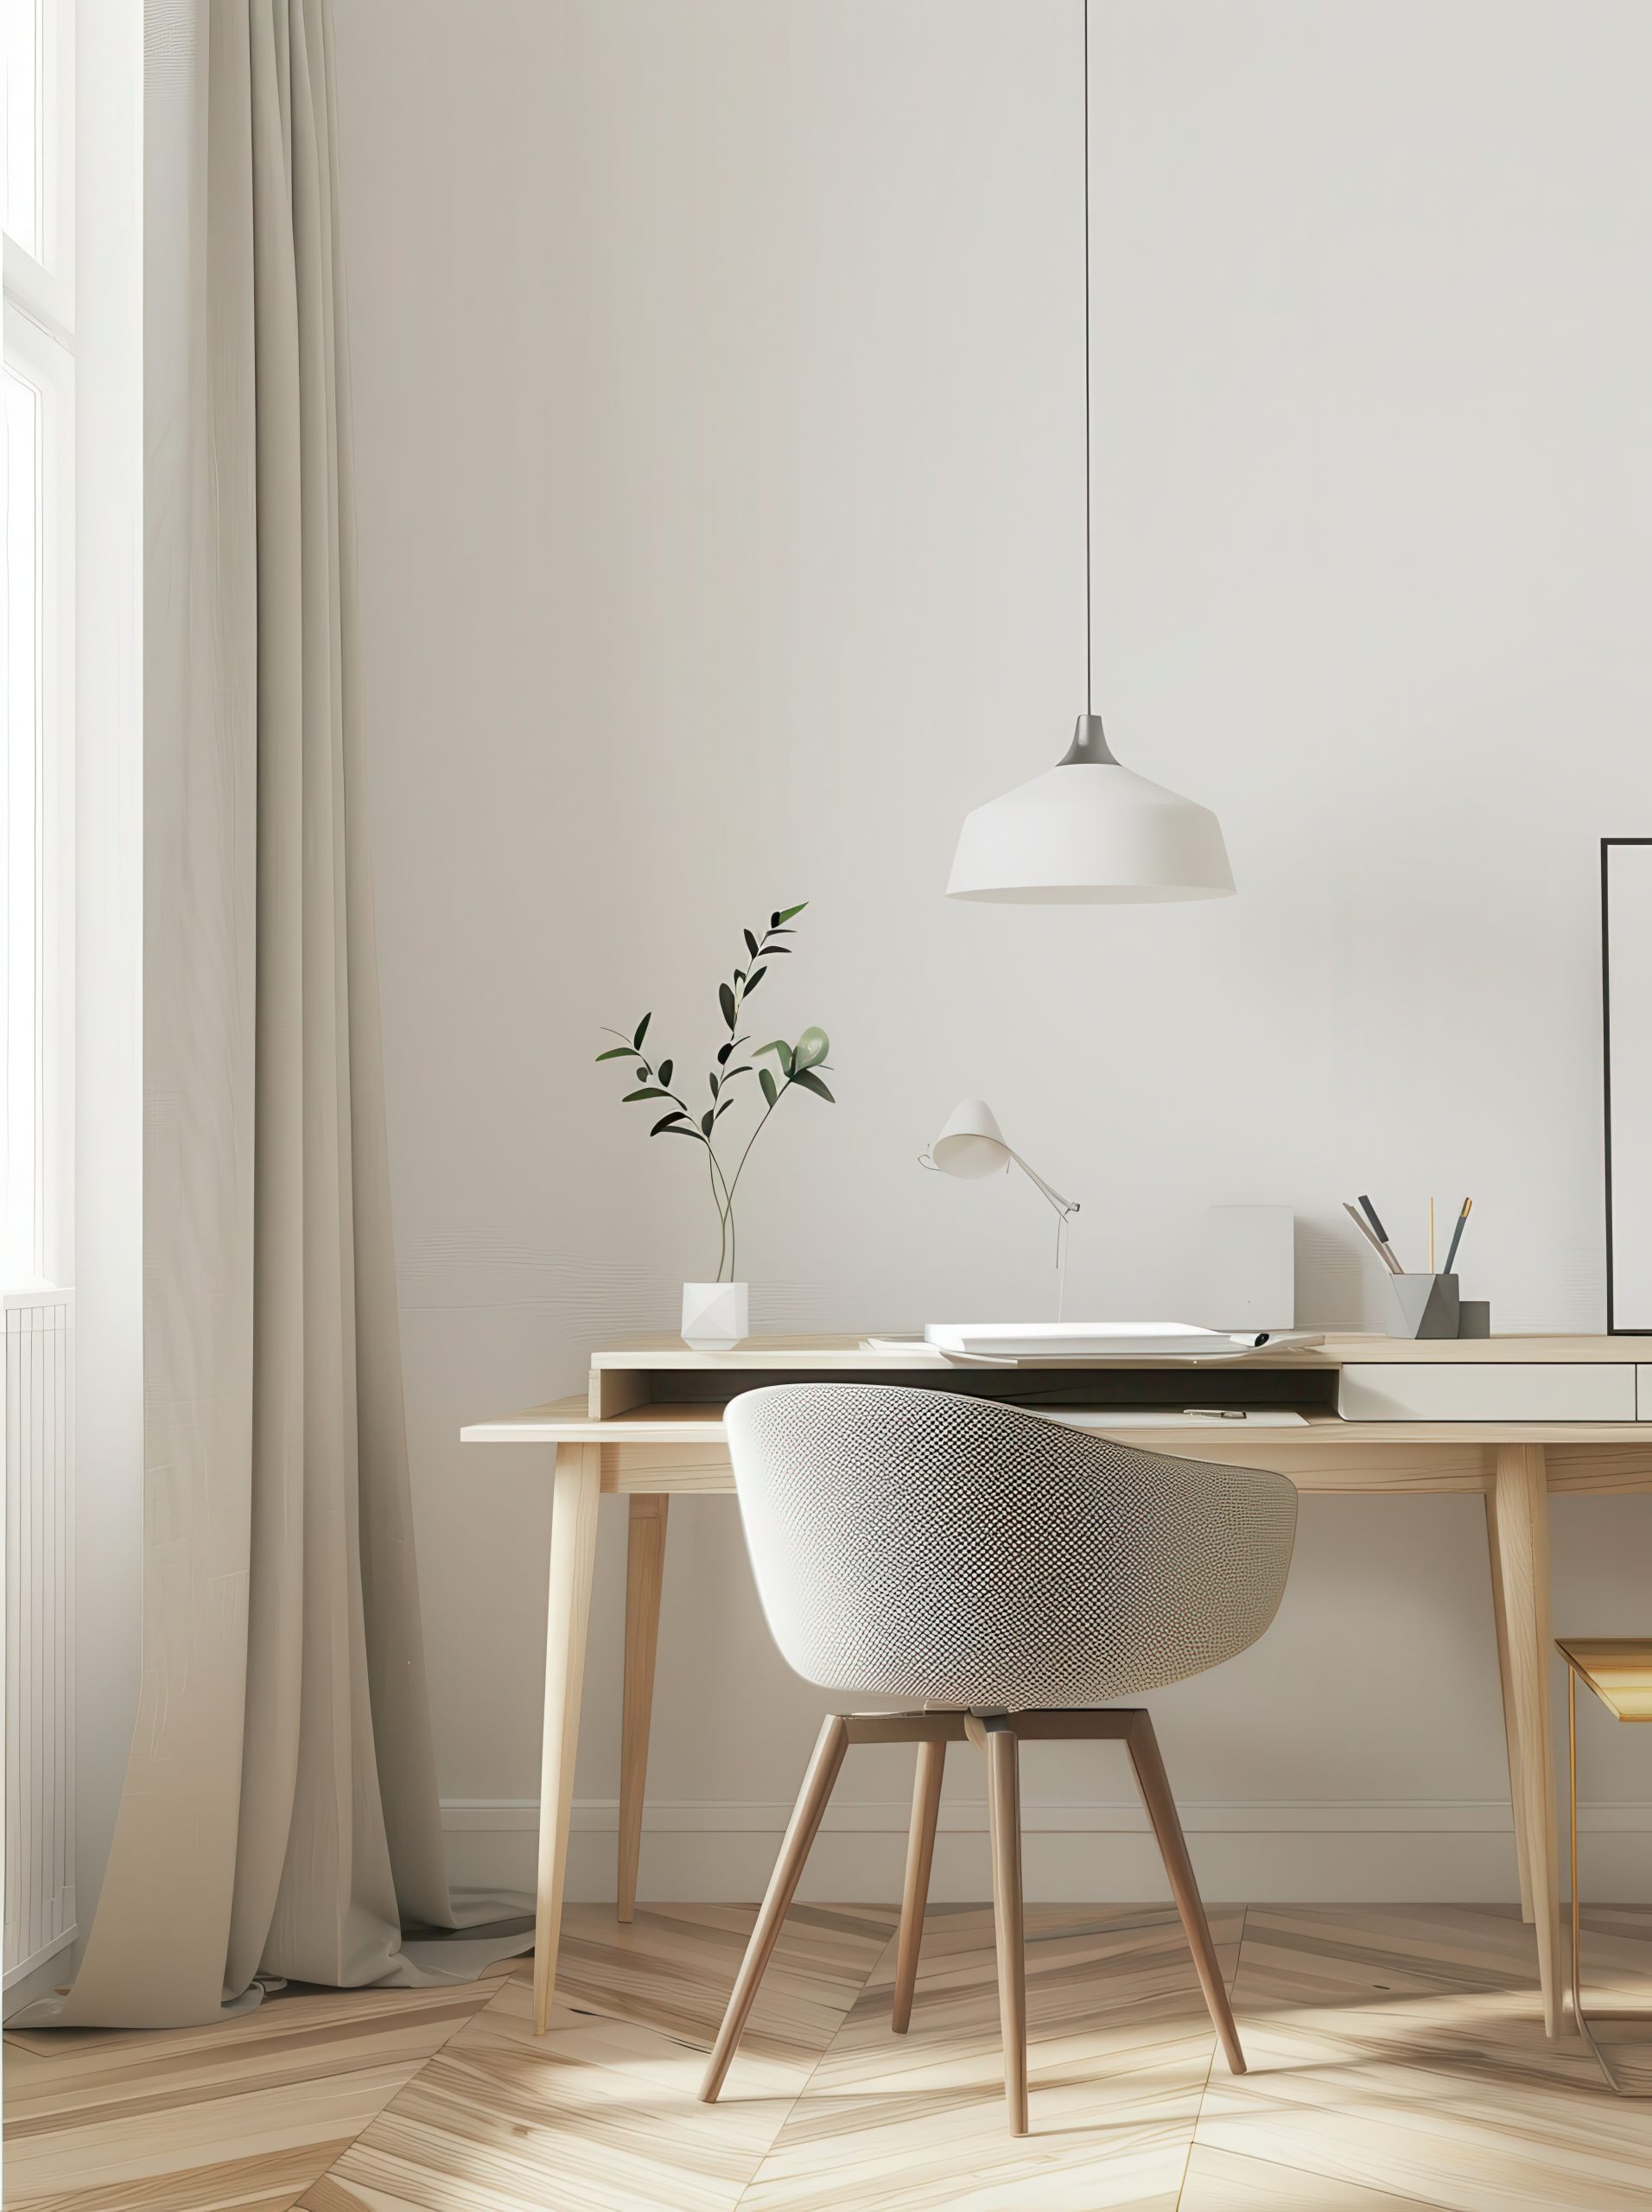
Space Planning: Maximizing Your Home Office Footprint for an Ergonomic Setup
Once you’ve chosen the perfect location for your ergonomic home office, it’s time to optimize the space itself. Careful planning is essential for creating a functional and comfortable work environment. Here’s how to maximize your home office footprint:
- Measure and Map: Before purchasing any furniture, meticulously measure your available space. This will help you determine the appropriate size and scale of furniture pieces, ensuring a comfortable fit and avoiding a cramped or cluttered ergonomic home office. Sketching a floor plan can be invaluable in visualizing the layout and optimizing traffic flow.
- Designated Zones: Consider dividing your ergonomic home office into distinct zones for different activities. For example, you might have a primary work zone centered around your desk, a secondary zone for reading or brainstorming, and a storage zone for files and supplies. This helps maintain organization and promotes efficient workflow.
- Traffic Flow: Ensure there’s ample space to move around comfortably within your ergonomic home office. Avoid placing furniture in a way that obstructs pathways or creates tight squeezes. Easy movement contributes to a more comfortable and less stressful work environment.
- Future Growth: While planning your ergonomic home office layout, anticipate future needs. Consider whether you might need to accommodate additional equipment, storage, or even another workspace down the line. Planning for potential expansion can save you headaches and remodeling efforts in the future.

The Ergonomic Chair: Your Throne of Productivity in Your Ergonomic Home Office
Investing in a high-quality ergonomic chair is arguably the most crucial step in creating a truly ergonomic home office. You’ll be spending a significant amount of time seated, so a chair that supports your body and promotes good posture is essential for your long-term health and well-being. Look for these key features when choosing your new chair:
- Adjustable Height: The ability to adjust the seat height is paramount. Your feet should rest flat on the floor with your knees bent at a 90-degree angle. An adjustable height ensures proper posture and reduces strain on your legs and back.
- Lumbar Support: Adequate lumbar support is crucial for maintaining the natural curve of your spine. Look for a chair with adjustable lumbar support that can be customized to fit your individual needs. This helps prevent back pain and promotes a healthy posture while working in your home office.
- Armrests: Adjustable armrests are another important feature. They should allow your arms to rest comfortably at your sides with your elbows bent at a 90-degree angle. This reduces strain on your shoulders and neck.
- Seat Depth and Width: The seat should be deep enough to support most of your thighs while leaving a small gap behind your knees. The width should allow you to sit comfortably without feeling restricted.
- Material and Breathability: Choose a chair with breathable fabric to prevent overheating and discomfort during long work sessions. Consider materials like mesh or high-quality fabric upholstery.
Desk Duty: Selecting the Perfect Desk for Your Ergonomic Home Office
The right desk is just as important as the right chair in your ergonomic home office setup. It provides the foundation for your workspace and significantly impacts your comfort and productivity. Here’s a breakdown of different desk types and how to choose the perfect one for your needs:
- Standing Desks: Standing desks have gained immense popularity for their health benefits. They allow you to alternate between sitting and standing, promoting better circulation, reducing back pain, and boosting energy levels. If you opt for a standing desk, ensure it’s height-adjustable to accommodate both sitting and standing positions within your home office.
- Adjustable Height Desks (Sit-Stand Desks): These desks offer the best of both worlds, allowing you to seamlessly transition between sitting and standing throughout the day. They are a great investment for creating a truly flexible and ergonomic home office.
- Traditional Desks: If you prefer a traditional desk, ensure it’s the correct height for your stature. Your elbows should be at a 90-degree angle when typing, and your wrists should be straight. Consider using a keyboard tray to achieve the optimal ergonomic position in your ergonomic home office.
- Desk Size and Shape: Choose a desk size and shape that accommodates all your essential equipment and provides ample workspace. Consider an L-shaped desk for maximizing corner space or a U-shaped desk for a more expansive work area within your home office.
- Material and Style: Select a desk material and style that complements your overall home office décor. Options range from classic wood to modern glass and metal.
Storage Solutions: Taming the Clutter Monster in Your Ergonomic Home Office
A clutter-free workspace is essential for a productive and ergonomic home office. Disorganization can lead to distractions, stress, and wasted time. Implement these storage solutions to keep your home office tidy and efficient:
- Vertical Storage: Maximize vertical space with shelves, drawers, and filing cabinets. This keeps items off your desk surface, freeing up valuable workspace and contributing to a cleaner, more home office environment.
- Desk Organizers: Utilize desk organizers for pens, pencils, paperclips, and other small items. This keeps your desktop tidy and prevents clutter from accumulating.
- Cable Management System: Implement a cable management system to keep cords and wires organized and out of sight. This not only improves the aesthetics of your home office but also prevents tripping hazards.
- Hidden Storage: Utilize hidden storage solutions, such as ottomans with storage compartments or drawers under your desk, to maximize space and maintain a clean, minimalist look in your home office.
- Labeling: Labeling drawers, shelves, and boxes makes it easy to find what you need quickly, saving you time and reducing frustration in your home office.
- Regular Decluttering: Schedule regular decluttering sessions to purge unnecessary items and maintain an organized and efficient home office.
Monitor Placement: Protecting Your Precious Eyesight in Your Ergonomic Home Office
Correct monitor placement is crucial for preventing eye strain, neck pain, and headaches, all of which can significantly impact your productivity and well-being in your ergonomic home office. Follow these guidelines for optimal monitor placement:
- Arm’s Length Distance: Position your monitor an arm’s length away from your eyes. This reduces eye strain and allows for a comfortable viewing distance.
- Eye Level or Slightly Below: The top of your monitor should be at or slightly below eye level. This prevents you from craning your neck upwards, which can lead to discomfort and pain. Proper monitor placement is a cornerstone of a truly ergonomic home office.
- Center Your Monitor: Center your monitor directly in front of you to avoid twisting your neck or body. This promotes a neutral posture and reduces strain.
- Angle for Glare Reduction: Angle your monitor slightly upwards to minimize glare from overhead lights or windows. Glare can cause eye strain and make it difficult to focus, hindering your productivity.
- Multiple Monitors: If you use multiple monitors, arrange them in a slight curve around you to maintain a comfortable viewing angle for each screen in your setup.
Keyboard and Mouse: Small Adjustments, Big Impact on Your Ergonomic Home Office
While seemingly minor, the positioning of your keyboard and mouse plays a significant role in your overall comfort and the ergonomics of your home office. Incorrect placement can lead to wrist pain, carpal tunnel syndrome, and other repetitive strain injuries. Follow these tips for optimal keyboard and mouse positioning:
- Keyboard Placement: Position your keyboard directly in front of you, ensuring your elbows are bent at a 90-degree angle and your wrists are straight. Avoid reaching or twisting to access your keyboard. This central placement is key for working efficiently.
- Mouse Placement: Place your mouse next to your keyboard, close enough to avoid reaching. Keep your wrist straight and avoid resting your wrist on hard surfaces.
- Ergonomic Keyboard and Mouse: Consider investing in an ergonomic keyboard and mouse. Ergonomic keyboards are designed to promote a more natural wrist position, while ergonomic mice reduce strain on your hand and wrist. These are valuable additions to any ergonomic home office.
- Mouse Pad with Wrist Support: A mouse pad with wrist support can provide additional cushioning and help maintain a neutral wrist position.
- Micro-breaks: Take frequent micro-breaks to stretch your hands and wrists. Even short breaks can help prevent stiffness and discomfort.

Lighting: Illuminating Your Workspace for Productivity in Your Ergonomic Home Office
Proper lighting is essential for a productive and comfortable home office. Poor lighting can lead to eye strain, headaches, and fatigue, hindering your ability to focus and work effectively. Follow these tips to optimize your home office lighting:
- Natural Light is King: Maximize the use of natural light by positioning your desk near a window. Natural light is not only beneficial for your eyesight but also boosts mood and productivity. It’s a key element of a truly ergonomic home office.
- Layer Your Lighting: Combine natural light with artificial light sources for optimal illumination. Use a combination of ambient lighting (general lighting for the room), task lighting (focused light for specific tasks), and accent lighting (decorative lighting to enhance the ambiance) to create a balanced and comfortable lighting scheme in your home office.
- Task Lighting: A desk lamp with an adjustable arm is ideal for task lighting. Position the lamp so it illuminates your work surface without creating glare on your monitor.
- Avoid Harsh Overhead Lighting: Harsh overhead lighting can cause glare and shadows, leading to eye strain. Opt for softer, diffused lighting or use a dimmer switch to control the intensity.
- Color Temperature: Choose light bulbs with a color temperature that promotes focus and productivity. Cool white or blue light is generally recommended for workspaces, while warm white light is better suited for relaxation areas. Consider the impact of color temperature when designing your ergonomic home office.
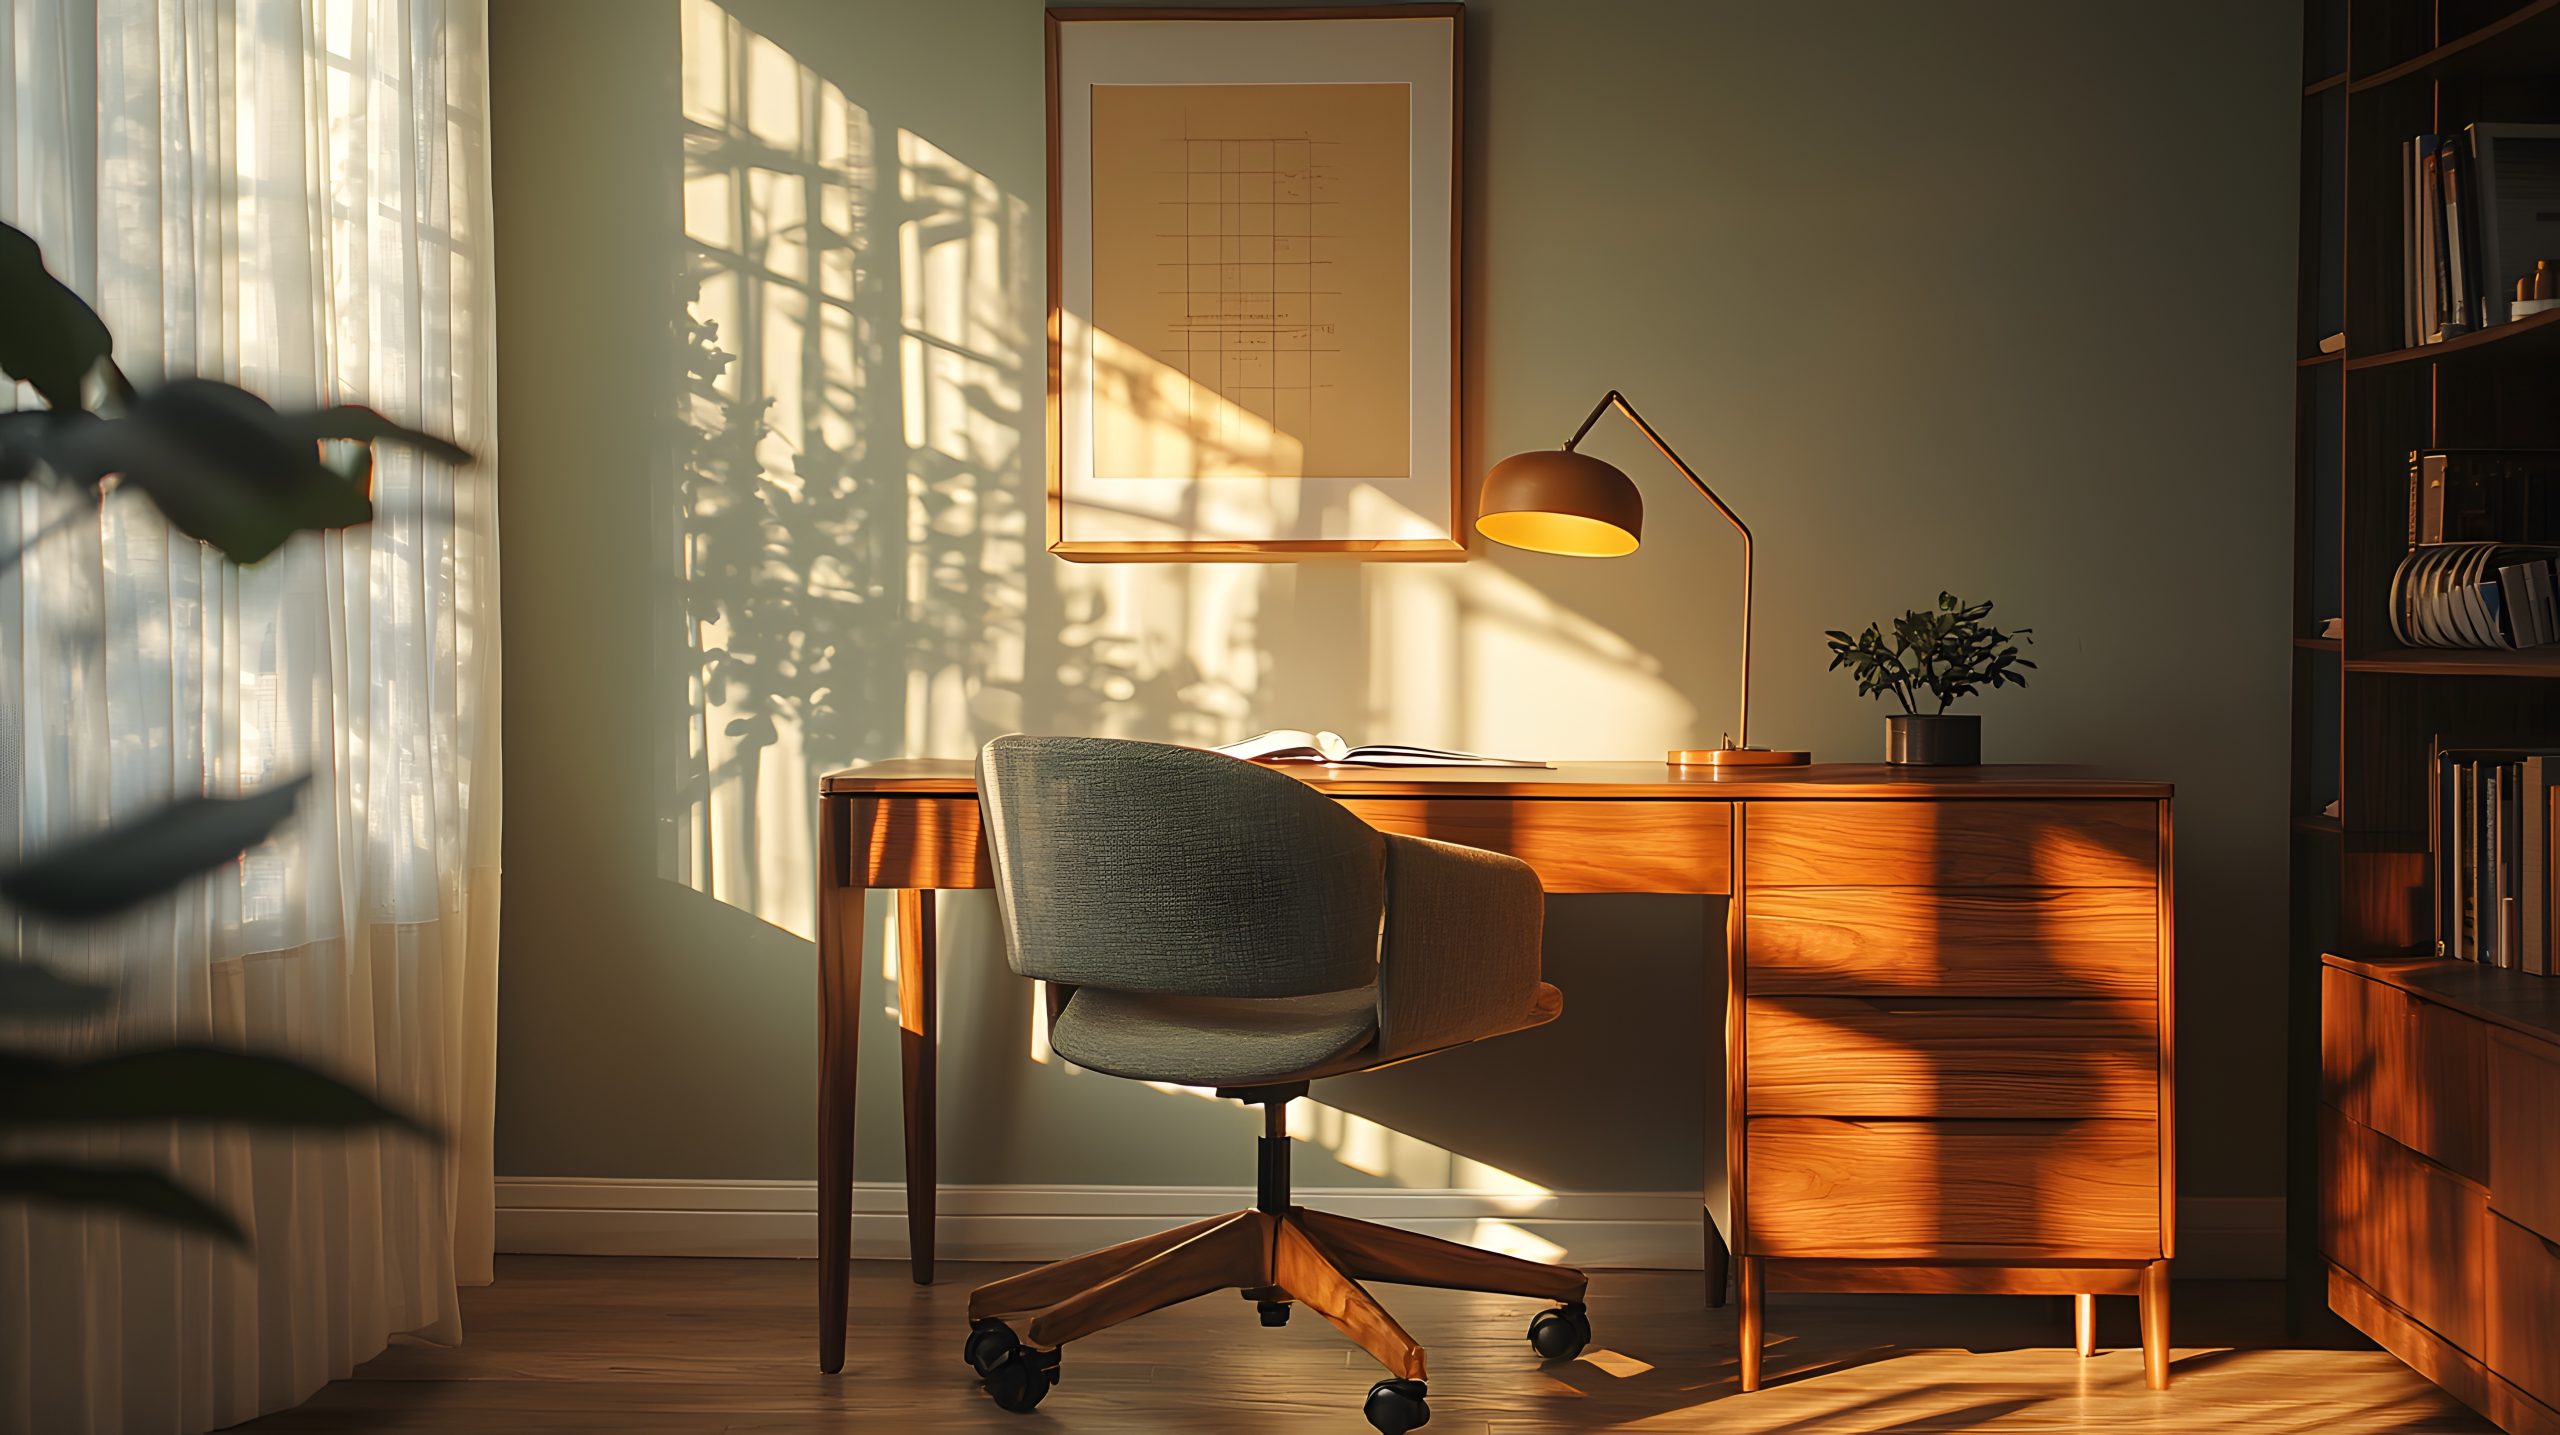
Styling Your Space: Infusing Personality into Your Ergonomic Home Office
Creating an ergonomic home office doesn’t mean sacrificing style. In fact, a visually appealing and inspiring workspace can boost your mood, creativity, and productivity. Here’s how to infuse personality into your home office while maintaining functionality:
- Color Psychology: Consider the impact of color on mood and productivity. Blues and greens are known for their calming and focusing effects, while yellows and oranges can spark creativity. Incorporate these colors strategically into your ergonomic home office design.
- Plants: Introduce plants into your workspace to bring life and vibrancy to your home office. Plants not only purify the air but also create a more calming and inviting atmosphere.
- Artwork and Accessories: Personalize your space with artwork, photographs, and decorative accessories that reflect your interests and style. These personal touches can make your home office feel more inviting and inspiring.
- Textiles: Add warmth and texture with rugs, curtains, and cushions. Choose fabrics and patterns that complement your overall design scheme.
- Wall Decor: Utilize wall space to display artwork, inspirational quotes, or even a vision board. This can add personality and motivation to your home office.
- Balance: Strive for a balance between functionality and aesthetics. While incorporating decorative elements, ensure they don’t clutter your workspace or interfere with your workflow.
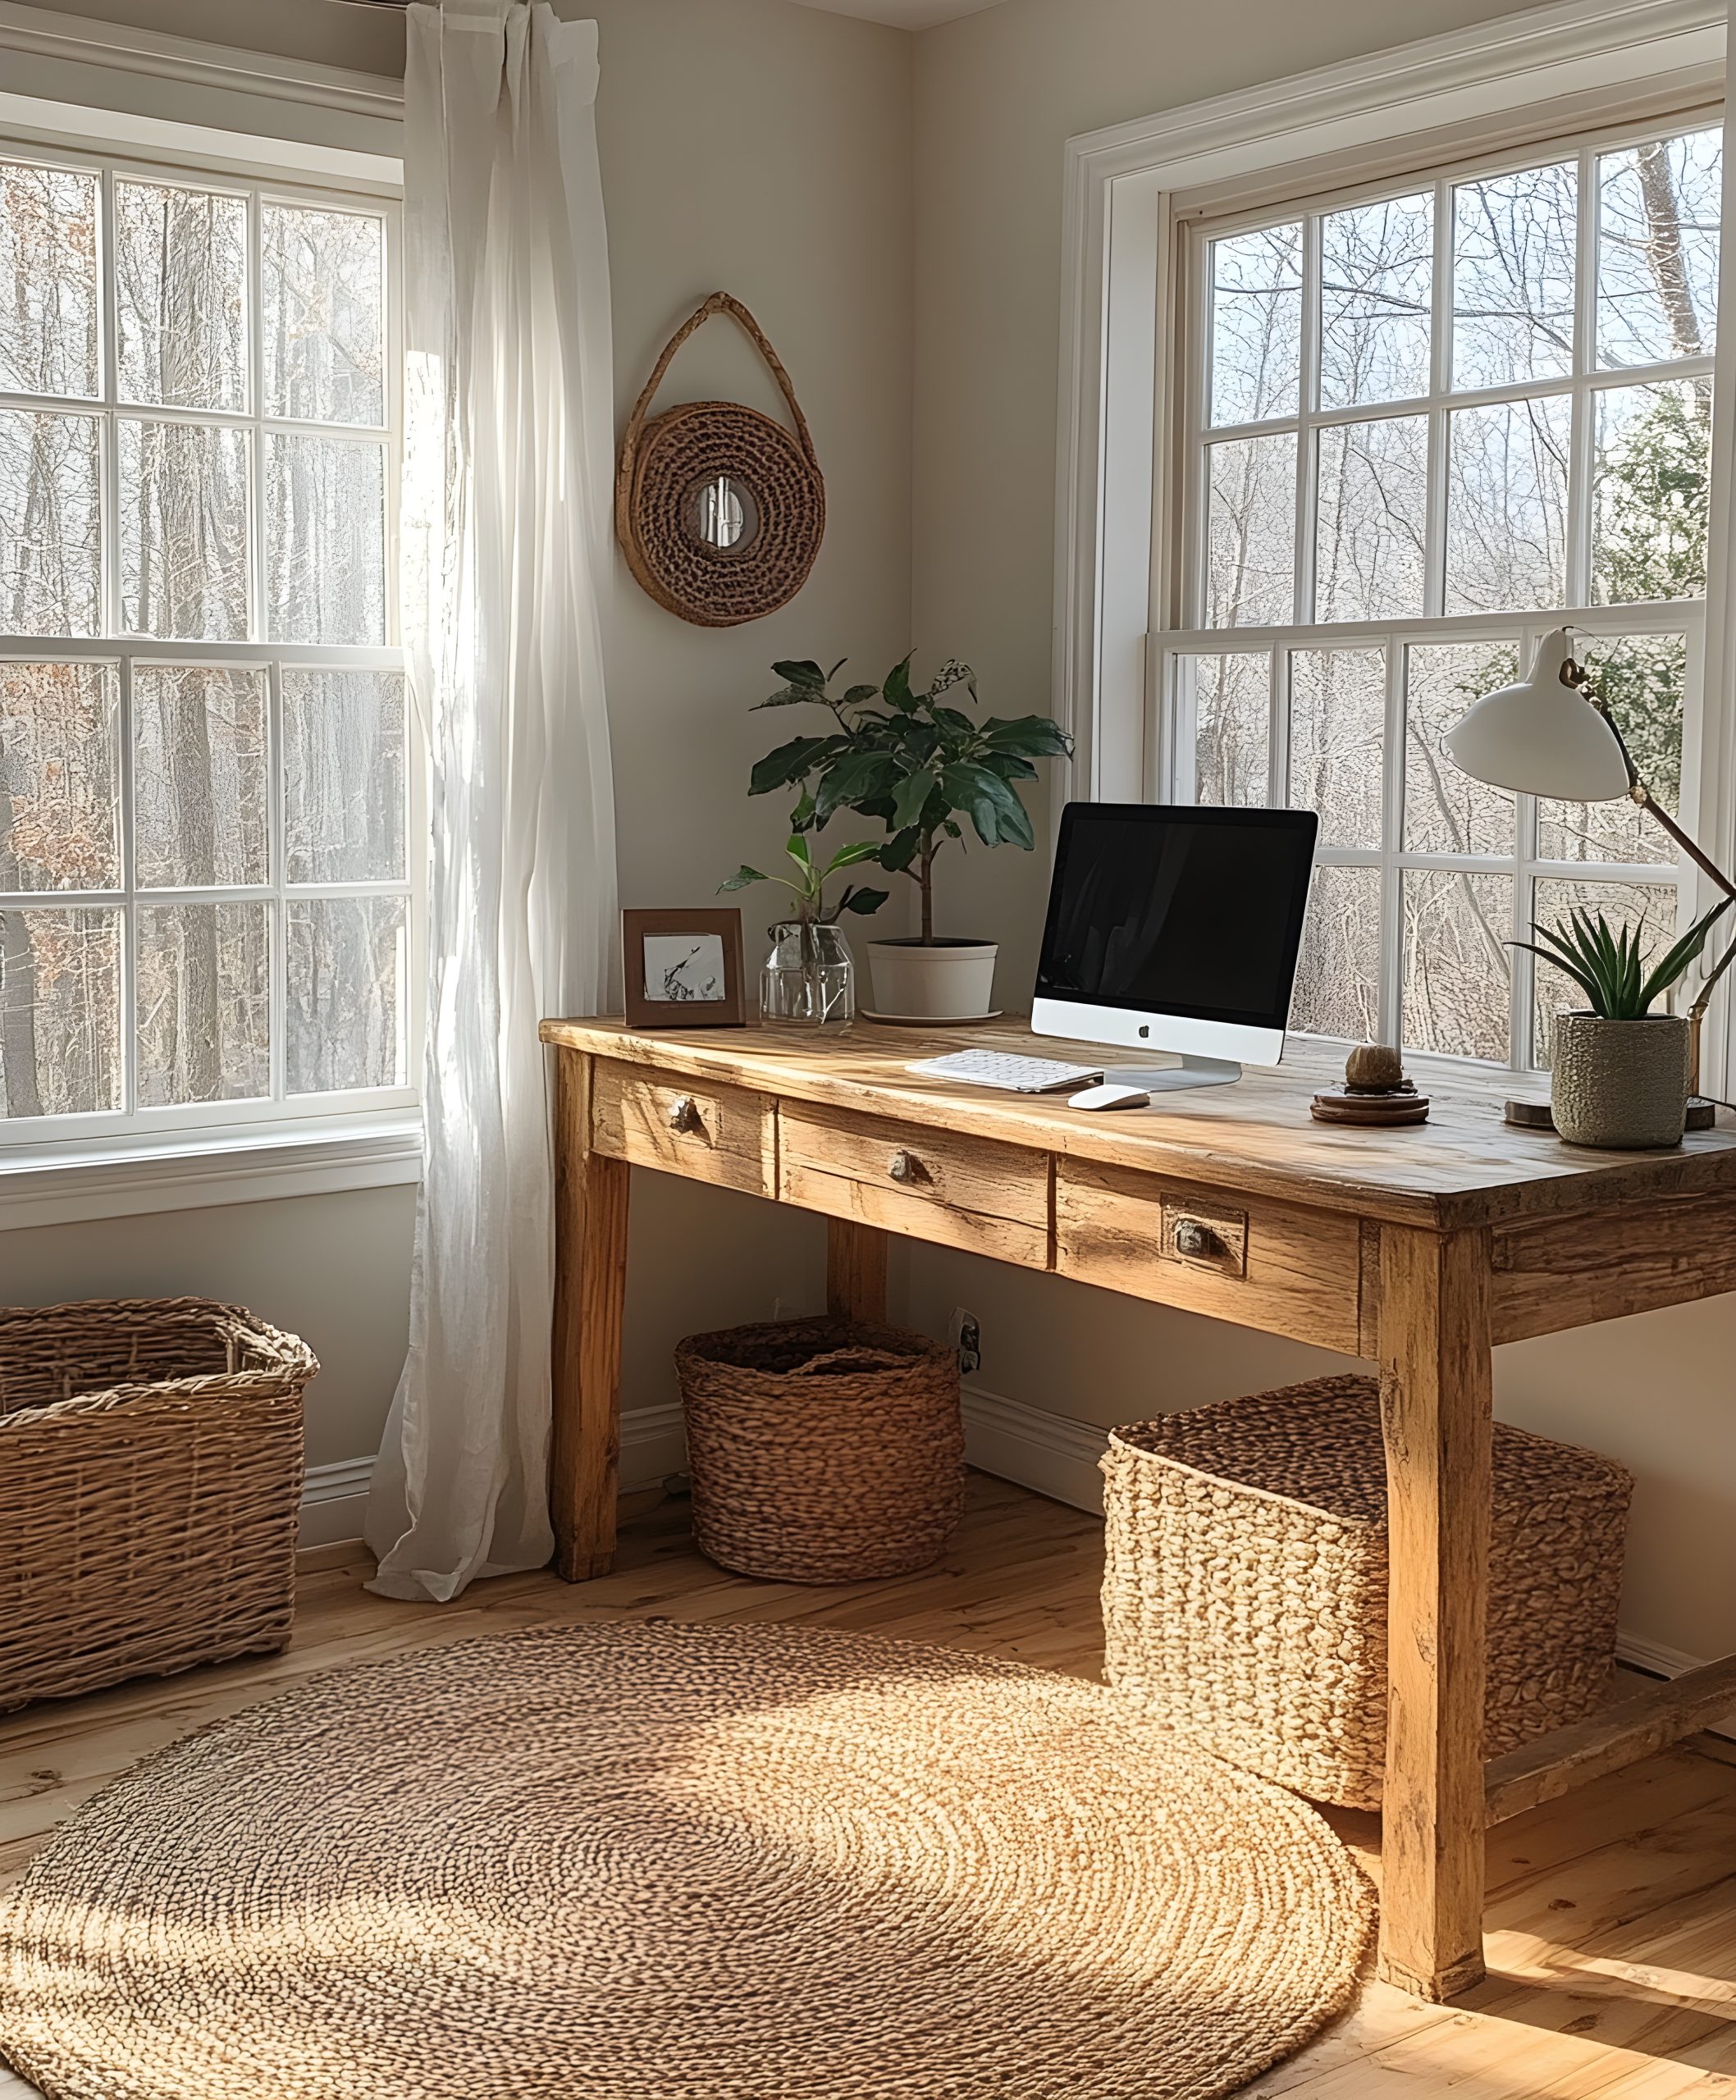
Cable Management: Hiding the Digital Jungle in Your Ergonomic Home Office
Tangled cables and wires can quickly turn a tidy home office into a chaotic mess. Effective cable management not only improves the aesthetics of your workspace but also prevents tripping hazards and makes it easier to clean. Implement these strategies to tame the digital jungle:
- Cable Ties and Clips: Use cable ties or clips to bundle cords together and keep them organized. This prevents them from tangling and creates a cleaner look.
- Cable Trays and Sleeves: Conceal cables under your desk or along walls using cable trays or sleeves. This keeps them out of sight and creates a more streamlined appearance.
- Wireless Devices: Whenever possible, opt for wireless devices such as keyboards, mice, and printers. This minimizes the number of cables cluttering your home office.
- Designated Power Strip: Use a designated power strip to plug in all your electronic devices. This keeps cords organized and makes it easier to manage power consumption.
- Labeling: Label your cables to identify which device they belong to easily. This is especially helpful if you need to troubleshoot or disconnect a specific device.
- Regular Maintenance: Regularly check your cable management system and make adjustments as needed. This prevents cables from becoming tangled and maintains a tidy home office space.
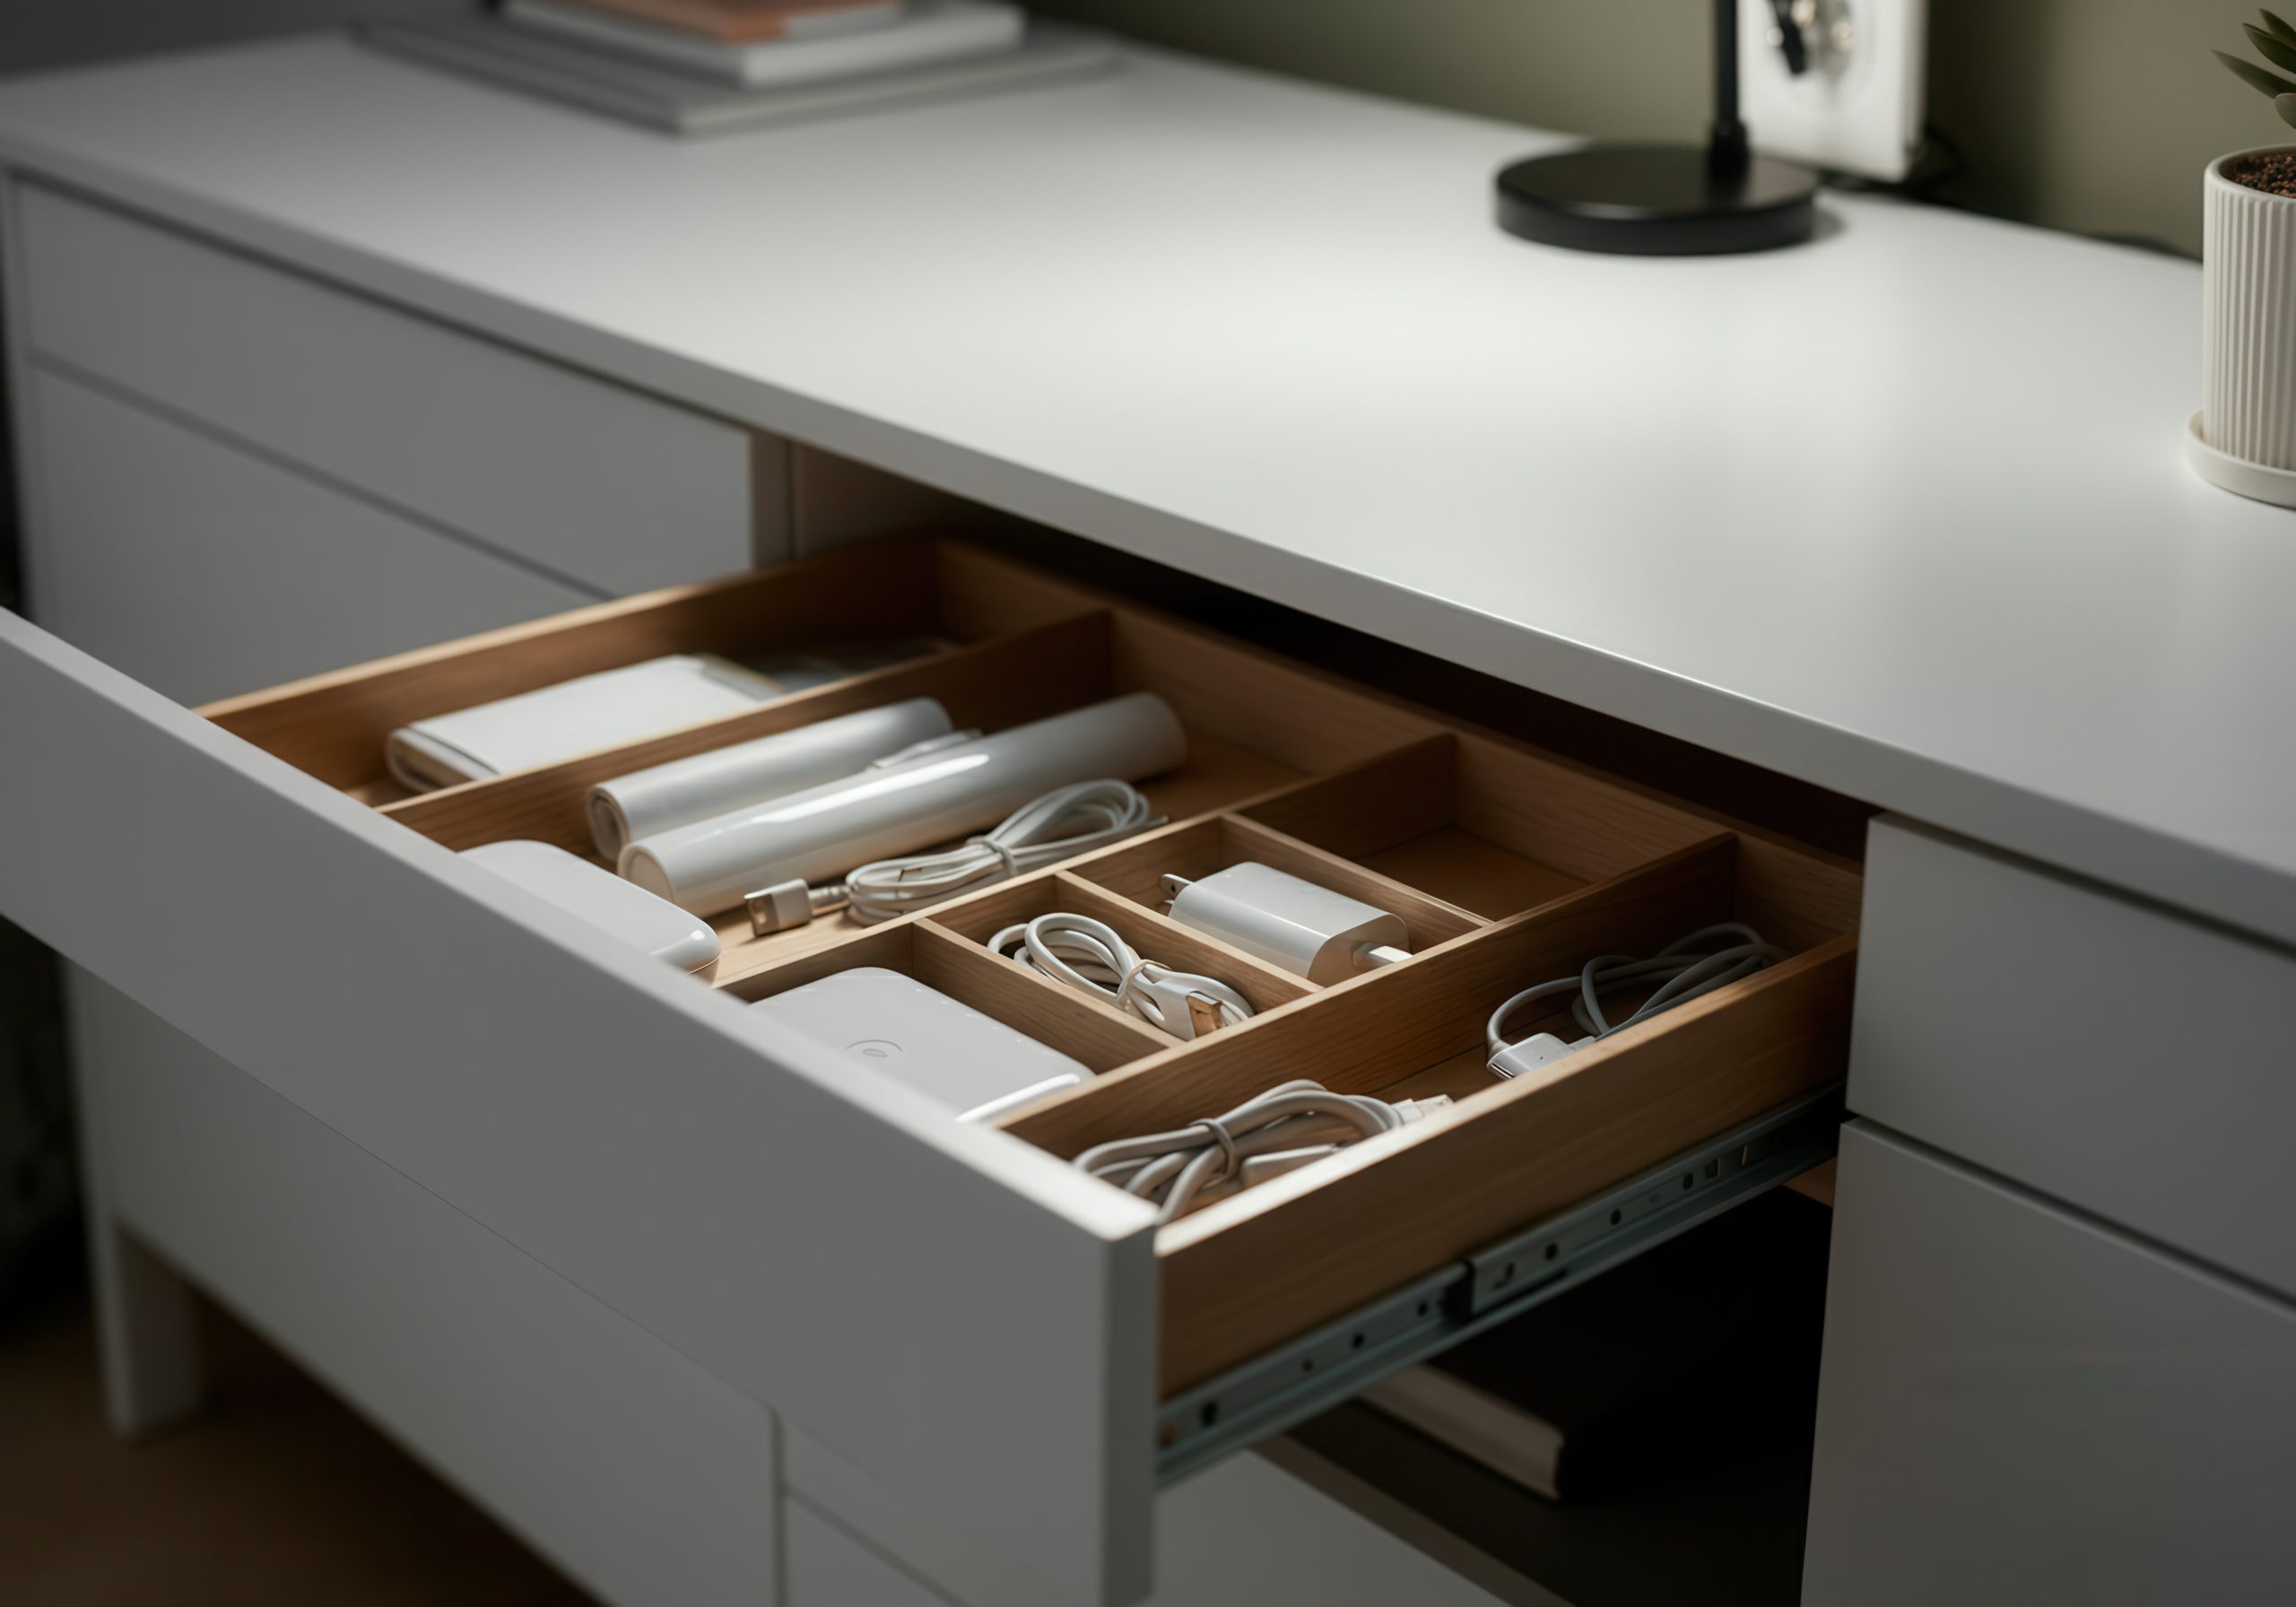
Maintenance: Keeping Your Ergonomic Haven in Tip-Top Shape
Creating an ergonomic home office is an ongoing process, not a one-time event. Regular maintenance is essential for ensuring your workspace remains comfortable, functional, and conducive to productivity. Here are some key maintenance tips:
- Regular Breaks: Take frequent breaks throughout the day to stretch, move around, and rest your eyes. This helps prevent stiffness, fatigue, and eye strain, all crucial for maintaining a truly ergonomic home office. Set reminders to ensure you take breaks regularly.
- Cleaning and Dusting: Regularly clean and dust your workspace to maintain a healthy and hygienic environment. Dust can accumulate on keyboards, monitors, and other surfaces, impacting both the aesthetics and functionality of your home office.
- Equipment Check-ups: Periodically check your equipment for wear and tear. Ensure your chair, desk, keyboard, and mouse are functioning properly and providing adequate support. Addressing issues promptly helps maintain the ergonomics of your home office.
- Re-evaluate Your Setup: As your needs and work habits evolve, re-evaluate your ergonomic home office setup. Make adjustments to your chair, desk, monitor placement, and other elements to ensure they continue to support your comfort and productivity.
- Organization: Regularly declutter and organize your workspace to prevent clutter from accumulating. A tidy and organized ergonomic home office promotes focus and efficiency.

Creating an ergonomic home office that is both functional and aesthetically pleasing is an investment in your well-being and productivity. By implementing the tips outlined in this post, you can transform your workspace into a haven of comfort and inspiration.
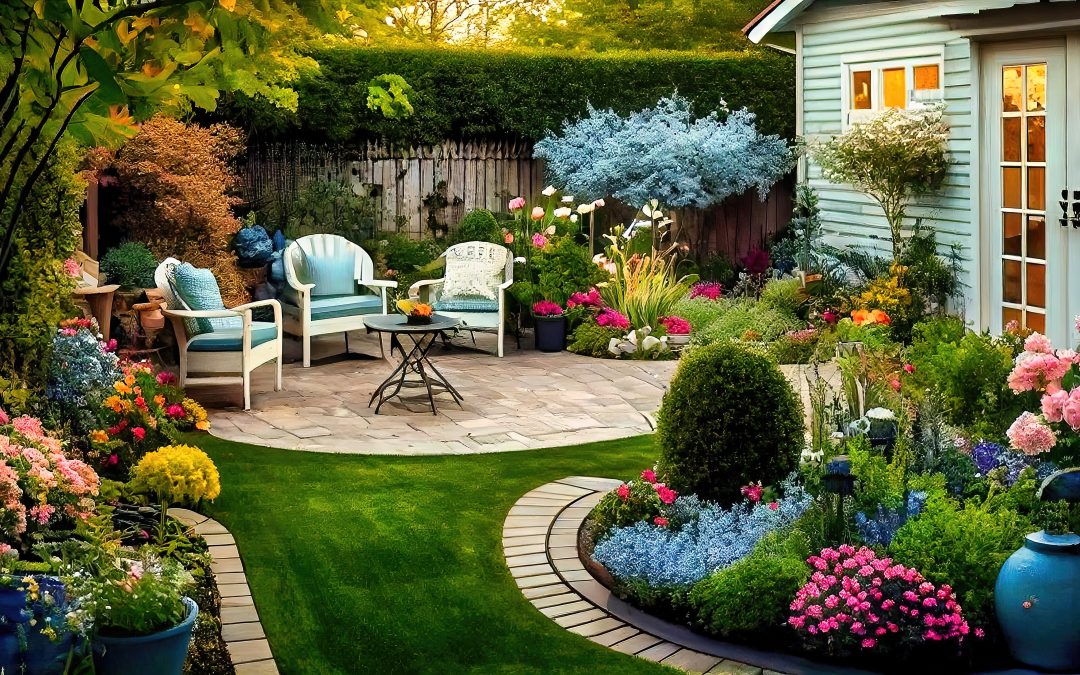
by Kesaa Interiors | Backyard & Patio, Beginner Design Guides, DESIGN GUIDES
Read along for the ultimate garden planning guide.

Imagine stepping into your backyard and being greeted by a vibrant oasis of colour and fragrance. A well-designed garden can be a source of immense joy, providing a peaceful retreat and a connection to nature. But achieving this idyllic scene doesn’t happen by chance. Effective garden planning is the key to transforming your outdoor space into the beautiful yard you’ve always dreamed of.
This comprehensive guide will equip you with the knowledge and tools you need to embark on your garden planning journey, covering everything from assessing your space to choosing the right plants and maintaining your garden’s beauty for years to come.
The Best Garden Planning Tips!
1: Assessing Your Space and Resources for Effective Garden Planning
Understanding Your Canvas
Before you even consider picking up a trowel, the first step in garden planning is to thoroughly assess your existing space and resources. Understanding your yard’s unique characteristics will lay the foundation for a successful and thriving garden. This initial phase of garden planning might seem tedious, but it’s crucial for making informed decisions down the line.
Begin by analysing the sunlight exposure in different areas of your yard. Some plants thrive in full sun, while others prefer shade. Observe how the sunlight moves across your yard throughout the day. A simple sun map can be incredibly helpful during the garden planning process.
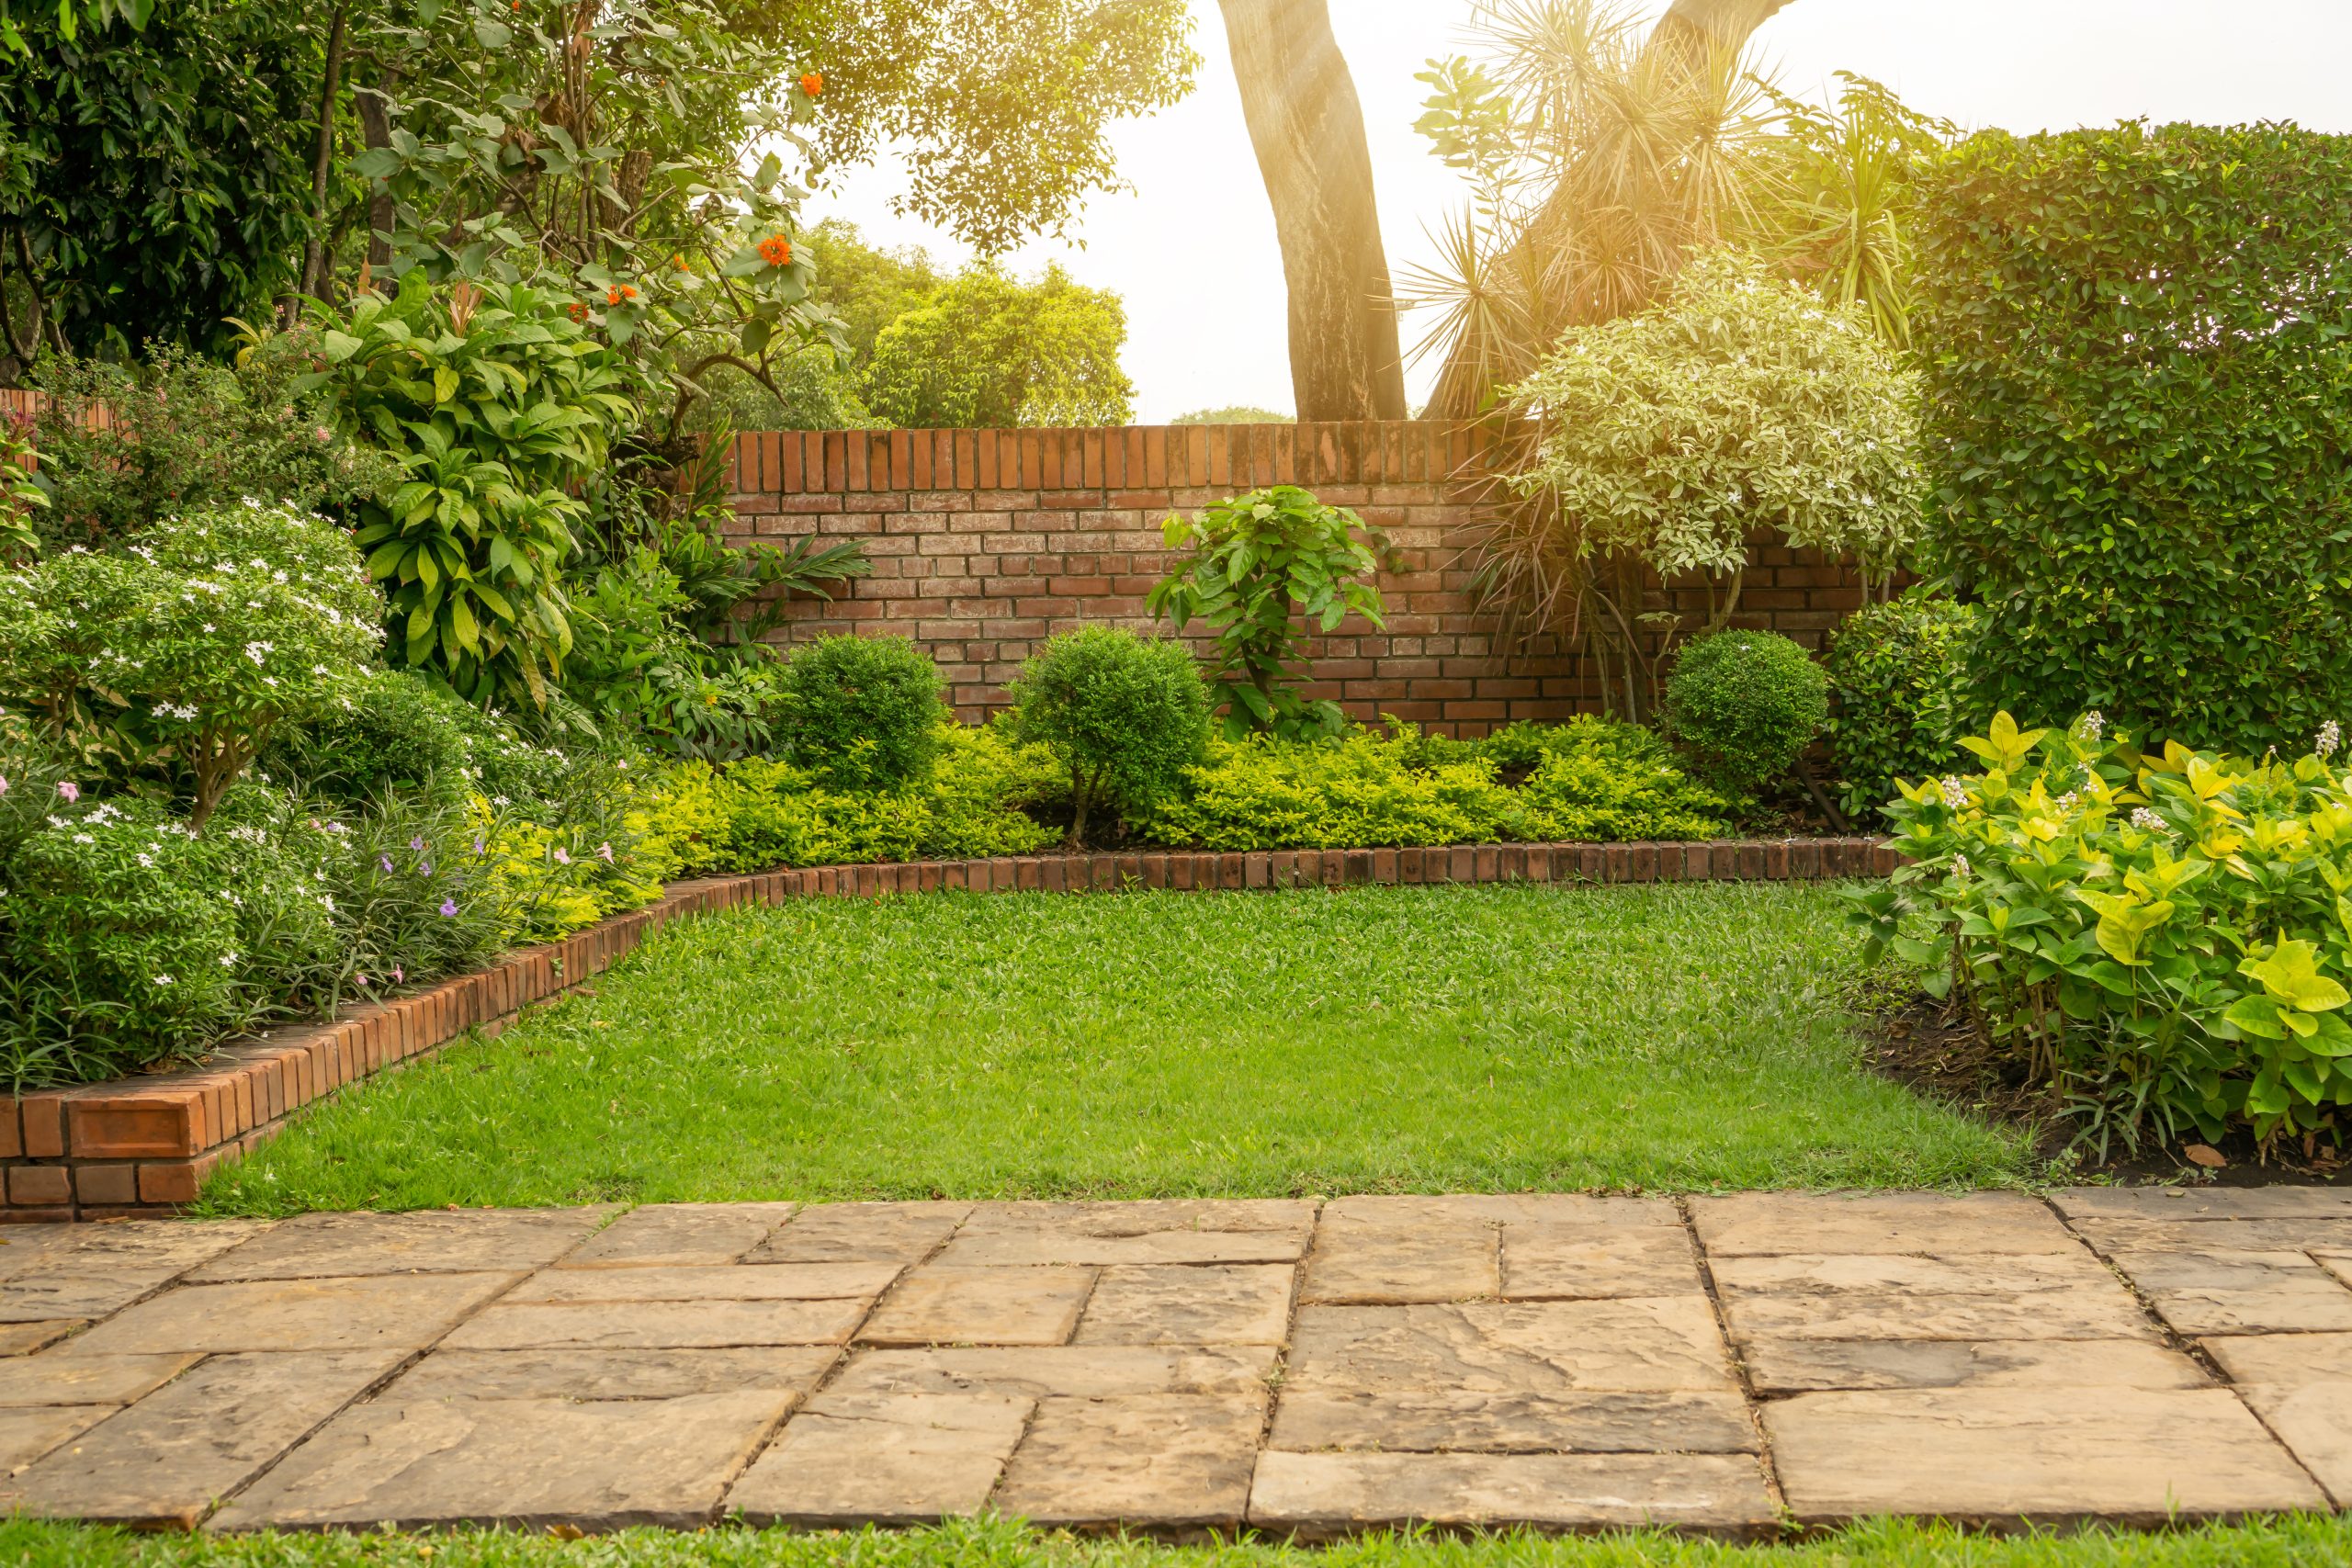
Next, evaluate your soil type and drainage. Different plants have different soil preferences. Is your soil sandy, clay-like, or loamy? Does the water pool after rain, or does it drain quickly? Knowing the answers to these questions will guide your plant selection and garden planning decisions.
Accurate measurements are essential for effective garden planning. Measure the available space for planting, taking into account existing features like trees, fences, and structures. This will help you determine how many plants you can accommodate and how to arrange them effectively.
Finally, consider your budget and available time for garden maintenance. Garden planning should be realistic. Choose plants that fit your lifestyle and resources. A low-maintenance garden might be ideal if you have limited time. Careful garden planning from the outset will prevent frustration and ensure a garden you can enjoy for years to come.
2: Defining Your Garden Style and Purpose
Visualising Your Dream Garden
With a clear understanding of your yard’s characteristics, the next stage of garden planning involves defining your garden’s style and purpose. This is where you let your creativity bloom and envision the garden of your dreams. What kind of atmosphere do you want to create? What do you hope to achieve with your garden?
Explore different garden styles to find one that resonates with you. Do you prefer the structured elegance of a formal garden, the charming informality of a cottage garden, or the clean lines of a contemporary garden? Researching various styles will provide inspiration and help you narrow down your preferences.
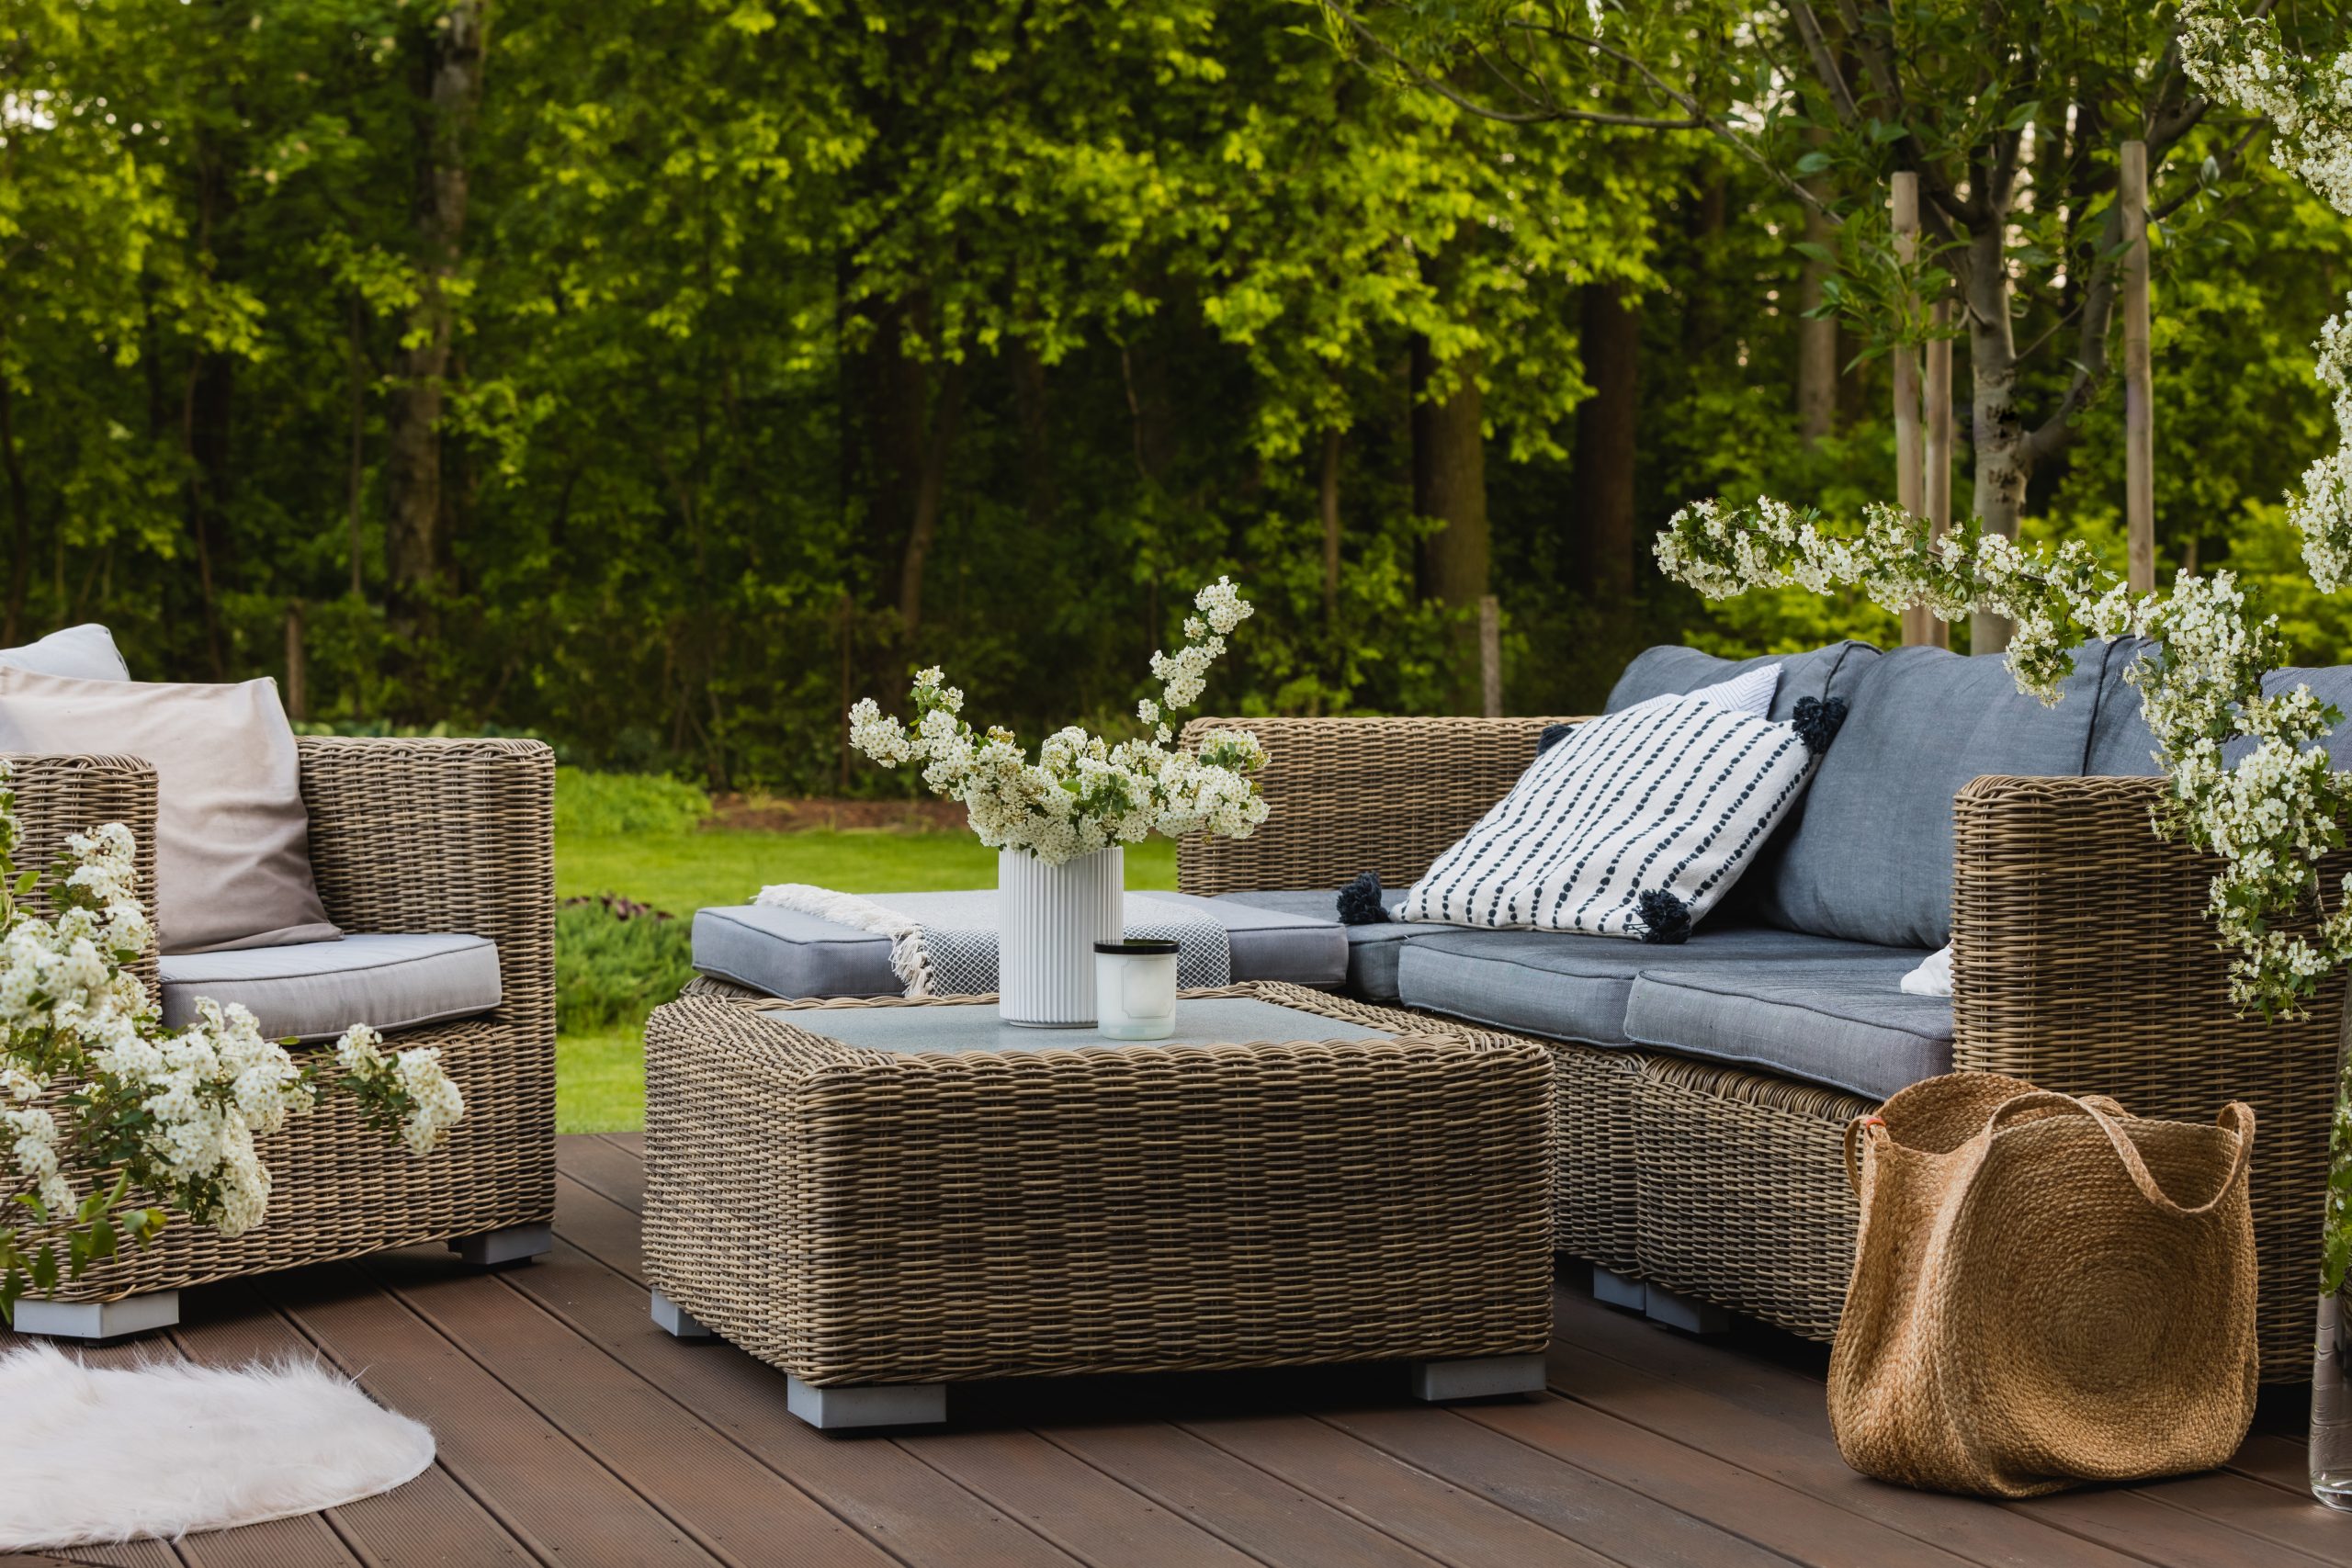
Consider the primary purpose of your garden. Are you primarily interested in growing colorful flowers for visual appeal? Do you envision a bountiful vegetable garden to provide fresh produce for your table? Or perhaps you seek a tranquil retreat for relaxation and contemplation? Defining your garden’s purpose is a crucial element of garden planning.
Your personal preferences and lifestyle should also play a significant role in your garden planning process. Do you enjoy spending time outdoors tending to your plants, or do you prefer a low-maintenance garden? Think about how you plan to use your garden space. Will it be a place for entertaining guests, or a private sanctuary for quiet enjoyment? Effective garden planning aligns your garden with your individual needs and desires.
3: Choosing the Right Plants for Your Garden Plan
Selecting Your Green Companions
Now comes the exciting part of garden planning: choosing the plants that will bring your vision to life! With countless plant varieties available, it’s essential to select plants that are well-suited to your specific climate, soil conditions, and garden style.
Thorough research is key to successful garden planning. Consult local gardening resources, nurseries, or online databases to identify plants that thrive in your region. Consider factors such as average temperatures, rainfall, and frost dates. Choosing plants adapted to your local climate will significantly increase their chances of survival and minimise the need for extensive care.
When selecting plants, pay attention to their size, growth habit, and flowering season. Do you want tall, stately plants or low-growing groundcovers? Do you prefer plants with vibrant blooms or interesting foliage? Consider the timing of their flowering periods to ensure a continuous display of colour throughout the growing season.
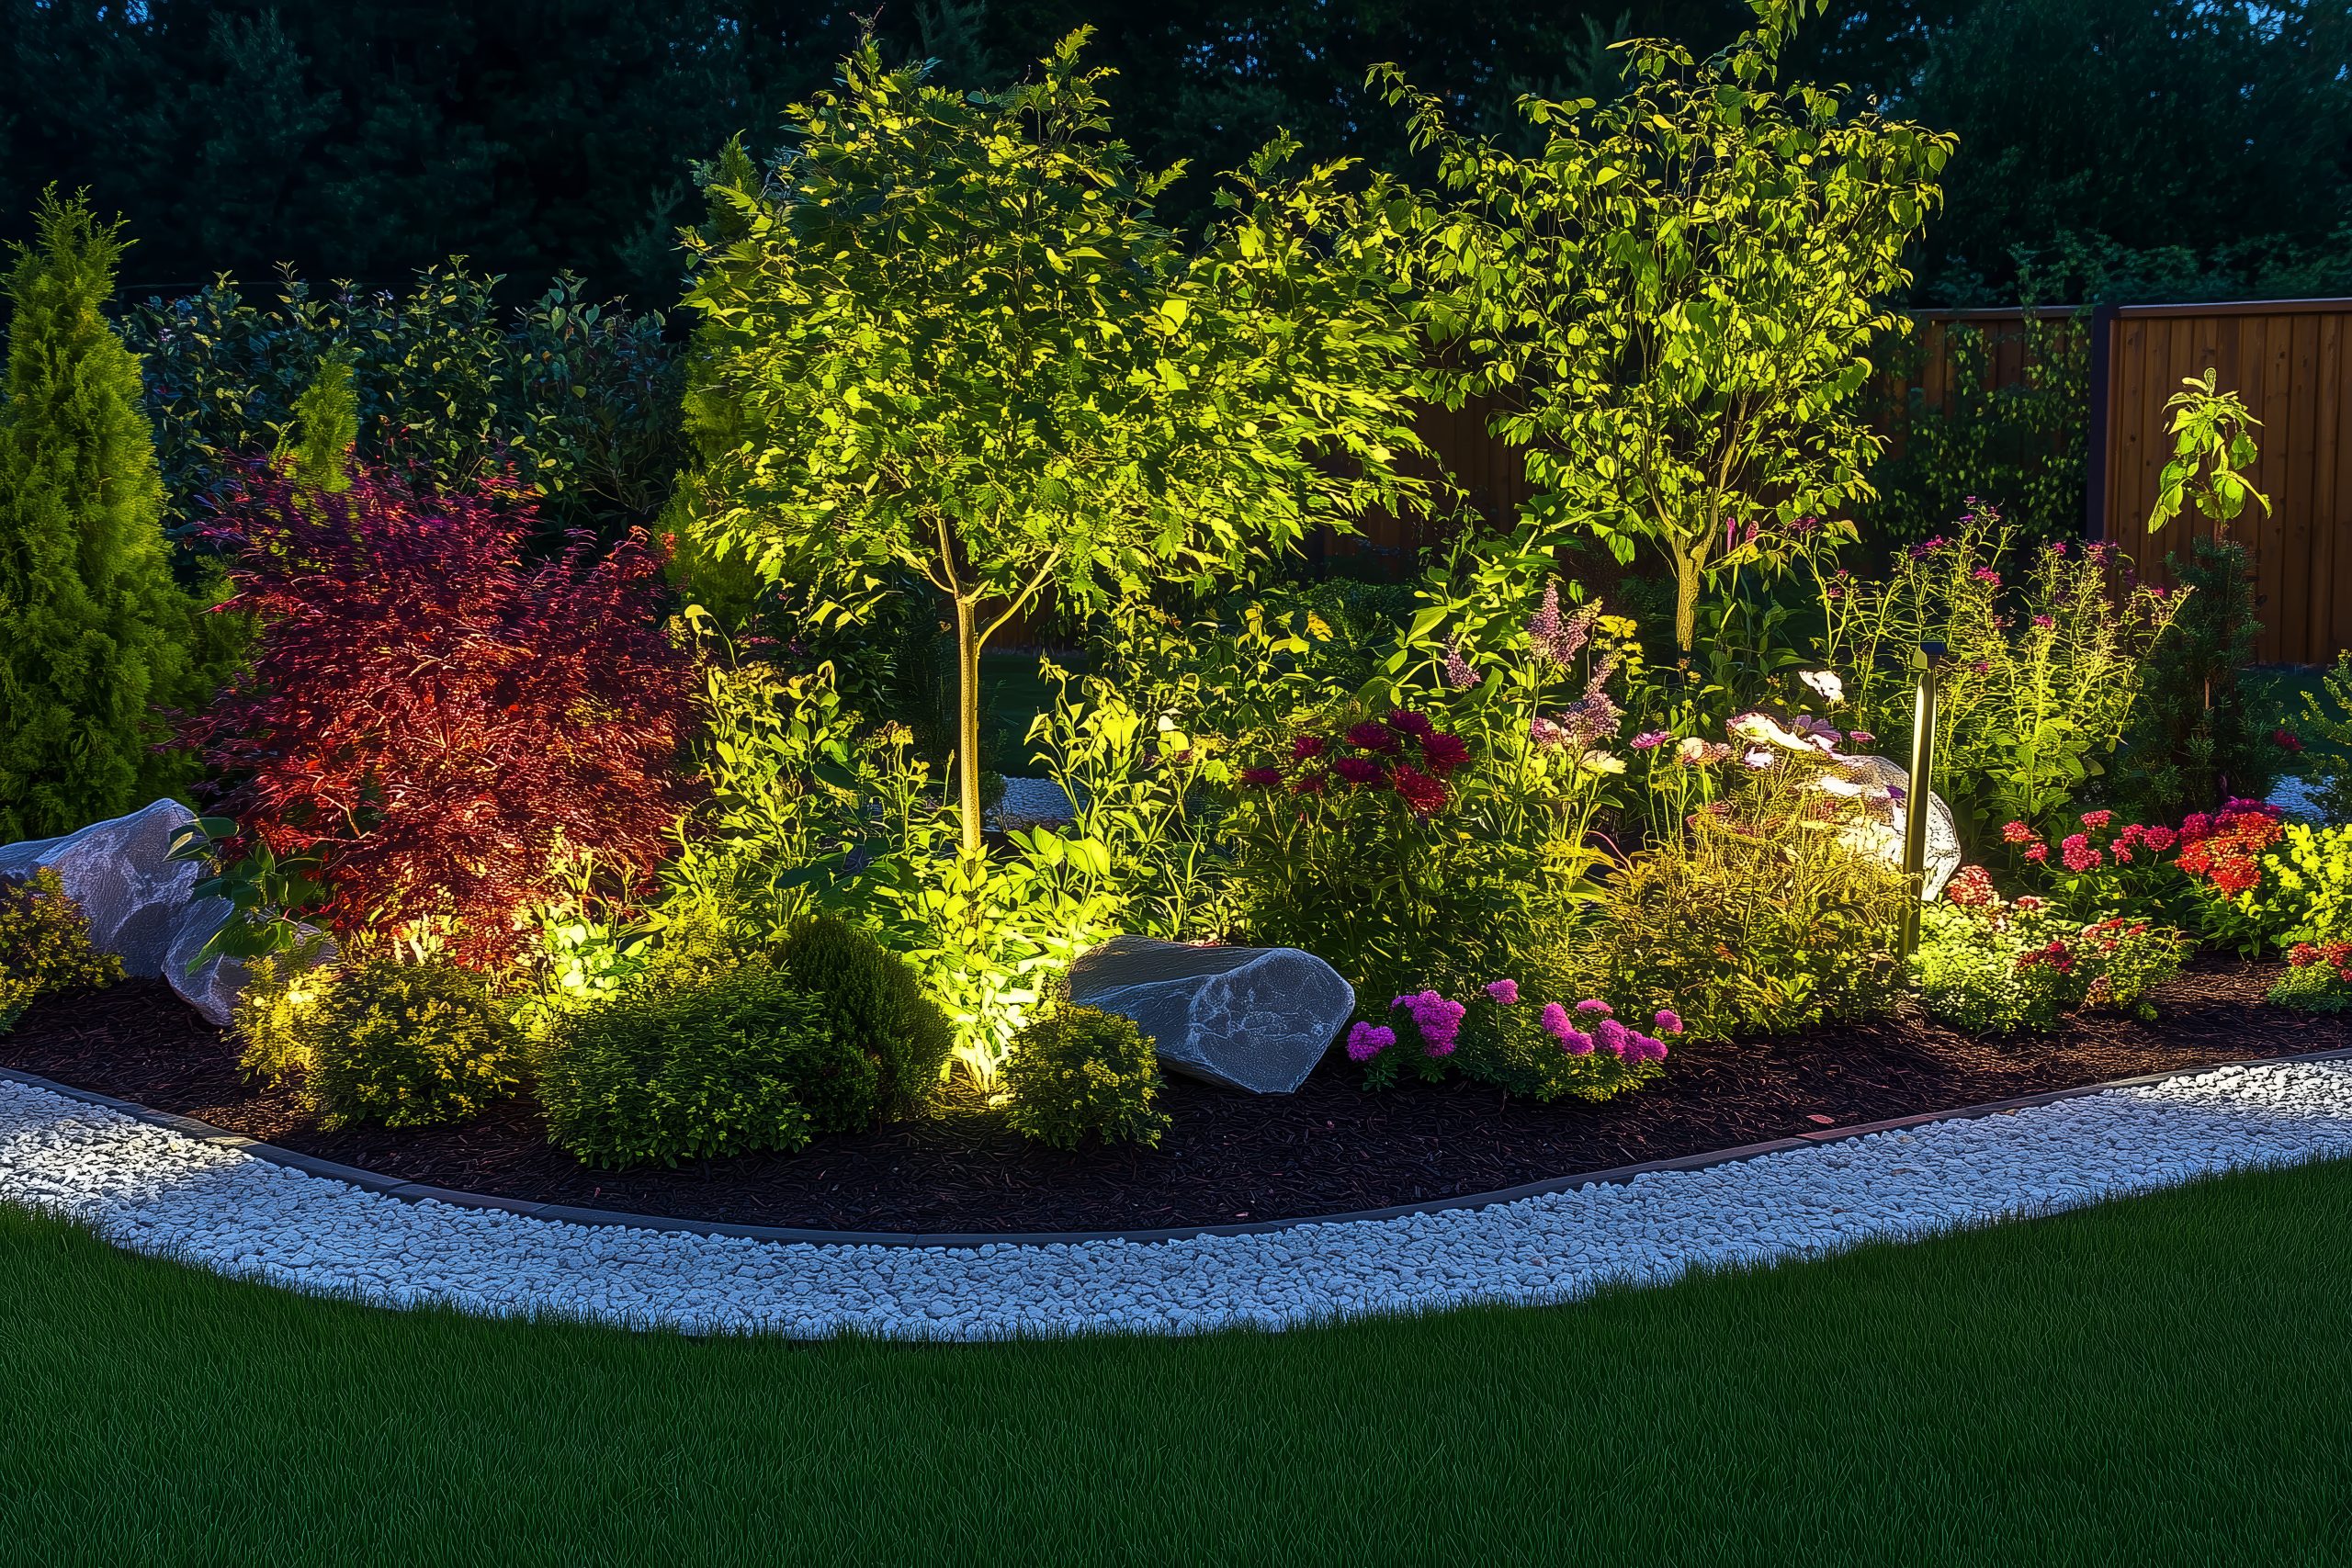
A diverse selection of plants is essential for a healthy and visually appealing garden. Incorporating a variety of species not only adds interest but also promotes biodiversity and resilience. Think about companion planting, a technique where certain plants are grown together to benefit each other. Some combinations can deter pests, improve soil health, or even enhance the flavor of vegetables. Successful garden planning involves considering these ecological interactions.
4: Creating a Functional and Aesthetic Garden Layout
Designing Your Garden’s Blueprint
With your plant selection finalised, the next phase of garden planning involves creating a functional and aesthetically pleasing layout. This is where you’ll determine the precise placement of each plant and other elements within your garden space.
Start by sketching a garden plan on paper or using online garden planning tools. This visual representation will help you organise your thoughts and ensure that all the elements work together harmoniously. Indicate the location of existing features like trees, fences, and structures, and then begin placing your chosen plants within the available space.
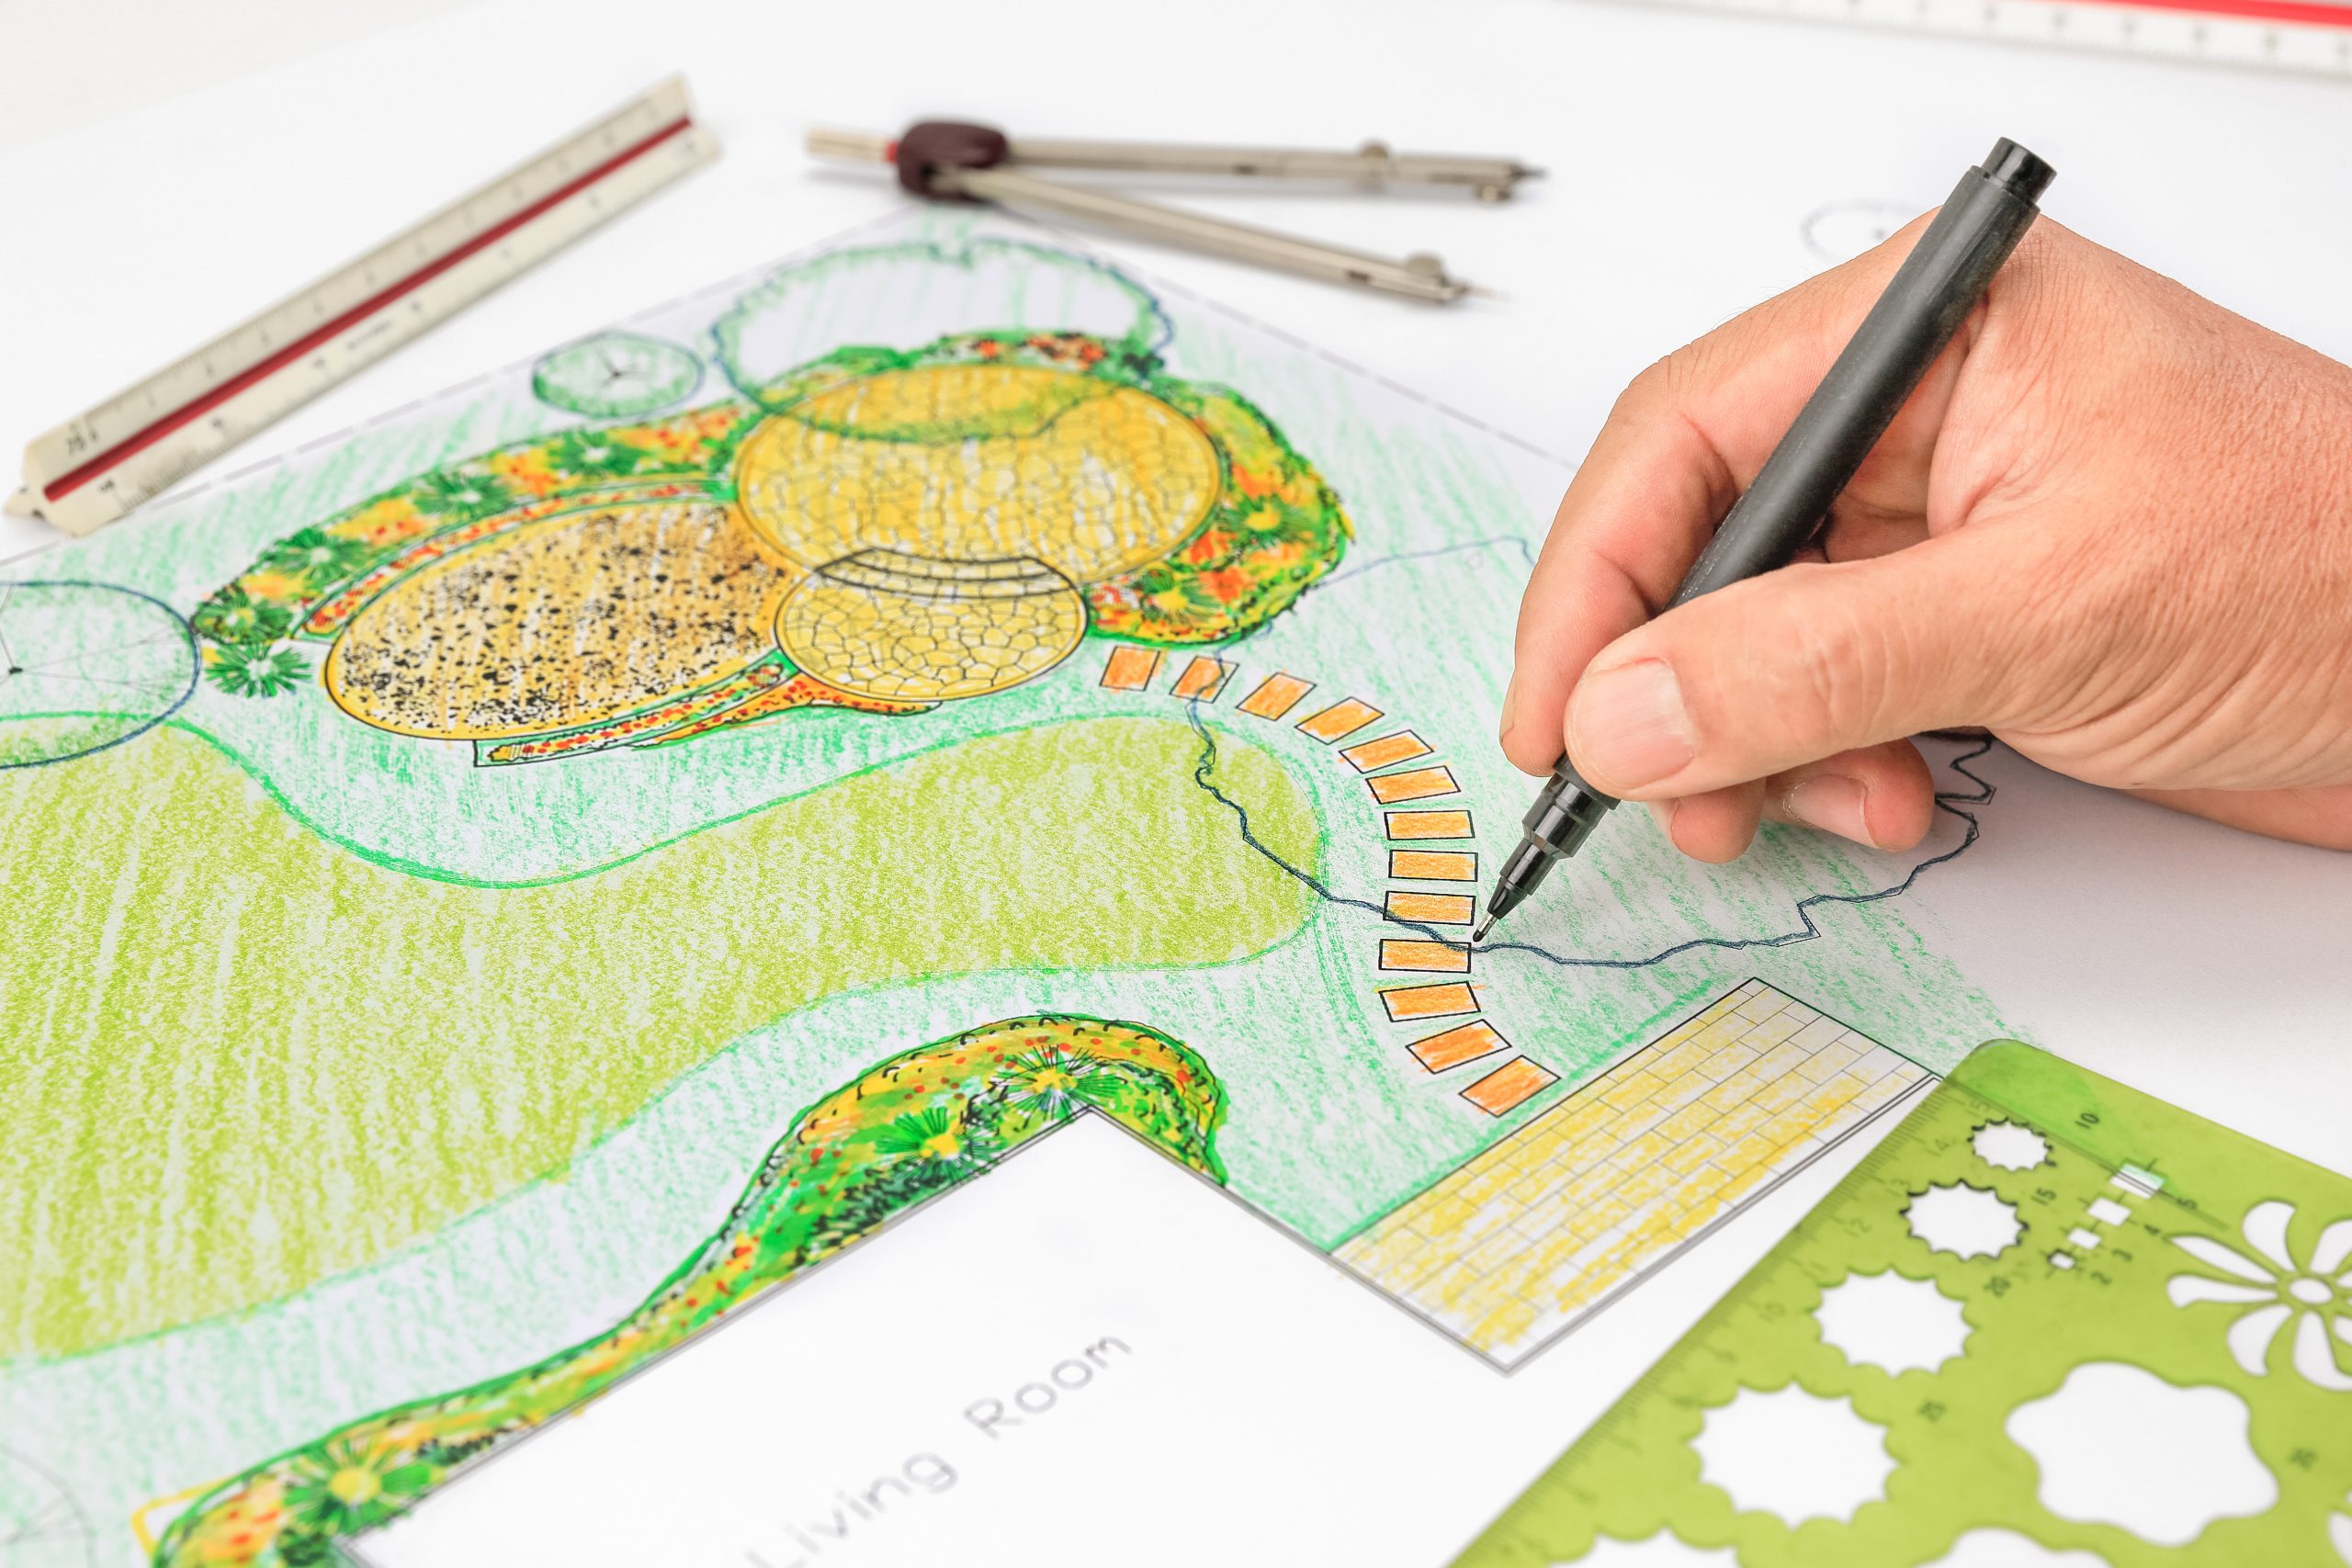
Consider the flow and accessibility of different areas within your garden. Create pathways that allow you to easily navigate through the space and access different sections for maintenance. Think about how you want to move through the garden and where you might want to pause and enjoy the scenery.
Focal points and visual pathways are essential elements of effective garden planning. A focal point can be a striking plant, a sculpture, or a water feature that draws the eye and creates a sense of visual interest. Visual pathways, created through the arrangement of plants and hardscaping elements, guide the eye through the garden and create a sense of depth and perspective.
Hardscaping elements such as paths, patios, and retaining walls play a crucial role in defining the structure and functionality of your garden. These features not only enhance the aesthetic appeal but also provide practical benefits like improved drainage and erosion control. Incorporate hardscaping elements strategically into your garden plan to create distinct areas and enhance the overall design.
5: Preparing the Soil and Planting Your Garden
Bringing Your Garden to Life
With your garden plan in place, it’s time to get your hands dirty and start preparing the soil for planting. This crucial step in garden planning ensures that your plants have the best possible start and sets the stage for healthy growth.
Amend the soil with compost or other organic matter to improve its structure, fertility, and drainage. This is a fundamental aspect of garden planning, as healthy soil is the foundation of a thriving garden. Spread a layer of compost over the planting area and work it into the existing soil using a garden fork or tiller.

Follow proper planting techniques for different plant types. Some plants prefer to be planted in shallow holes, while others require deeper planting. Pay attention to the spacing recommendations for each plant to avoid overcrowding and ensure adequate air circulation.
Water thoroughly after planting to help the roots establish themselves in the new soil. Consistent watering is especially important during the first few weeks after planting. Mulch around plants to retain moisture, suppress weeds, and regulate soil temperature. Mulching is a valuable garden planning technique that reduces maintenance and promotes healthy plant growth.
6: Maintaining Your Garden’s Beauty
Nurturing Your Garden’s Growth
Once your garden is planted, ongoing maintenance is essential for preserving its beauty and ensuring its long-term health. This final stage of garden planning involves developing a regular routine to provide your plants with the care they need to thrive.
Develop a watering schedule based on plant needs and weather conditions. Some plants require frequent watering, while others are more drought-tolerant. Monitor the soil moisture regularly and adjust your watering schedule accordingly.
Fertilise plants regularly to provide them with the nutrients they need for optimal growth. Choose a fertiliser that is appropriate for the types of plants in your garden. Follow the instructions on the fertiliser packaging carefully to avoid over-fertilising, which can harm your plants.
Prune plants to maintain their shape, encourage flowering, and remove dead or diseased branches. Pruning is an important aspect of garden planning, as it helps to keep your plants healthy and looking their best.
Regularly monitor your garden for pests and diseases. Early detection is key to preventing widespread infestations or infections. Take appropriate action if you notice any signs of pests or diseases, such as using organic pest control methods or removing affected plant parts. Ongoing garden planning is essential for long-term success.
7: Adapting Your Garden Plan Over Time
Embracing the Evolution of Your Garden
One of the most important things to remember about garden planning is that gardens are dynamic and ever-changing. As your plants grow and mature, your garden will evolve, and your garden planning should evolve along with it. Embrace this process of change and be prepared to adapt your garden plan over time.
Acknowledge that some plants may grow larger than anticipated, while others may not perform as well as expected. Be prepared to relocate plants, divide overgrown perennials, or even remove plants that are not thriving. Flexibility is key to successful long-term garden planning.
Consider the seasonal changes and adapt your maintenance accordingly. Different seasons require different approaches to watering, fertilising, and pest control. Incorporate seasonal tasks into your garden planning, such as preparing your garden for winter or planting spring bulbs.

Don’t be afraid to experiment with new plants and design ideas. As you gain experience with garden planning, you may discover new plants that you love or develop new design preferences. Be open to trying new things and incorporating them into your garden plan. A garden is a living canvas, and garden planning is an ongoing process of learning and experimentation.
Creating a beautiful and thriving garden is a rewarding journey that begins with careful garden planning. By following the steps outlined in this guide, you can transform your outdoor space into a haven of beauty and tranquility. Remember that successful garden planning involves understanding your space, choosing the right plants, creating a functional layout, and providing ongoing maintenance.
