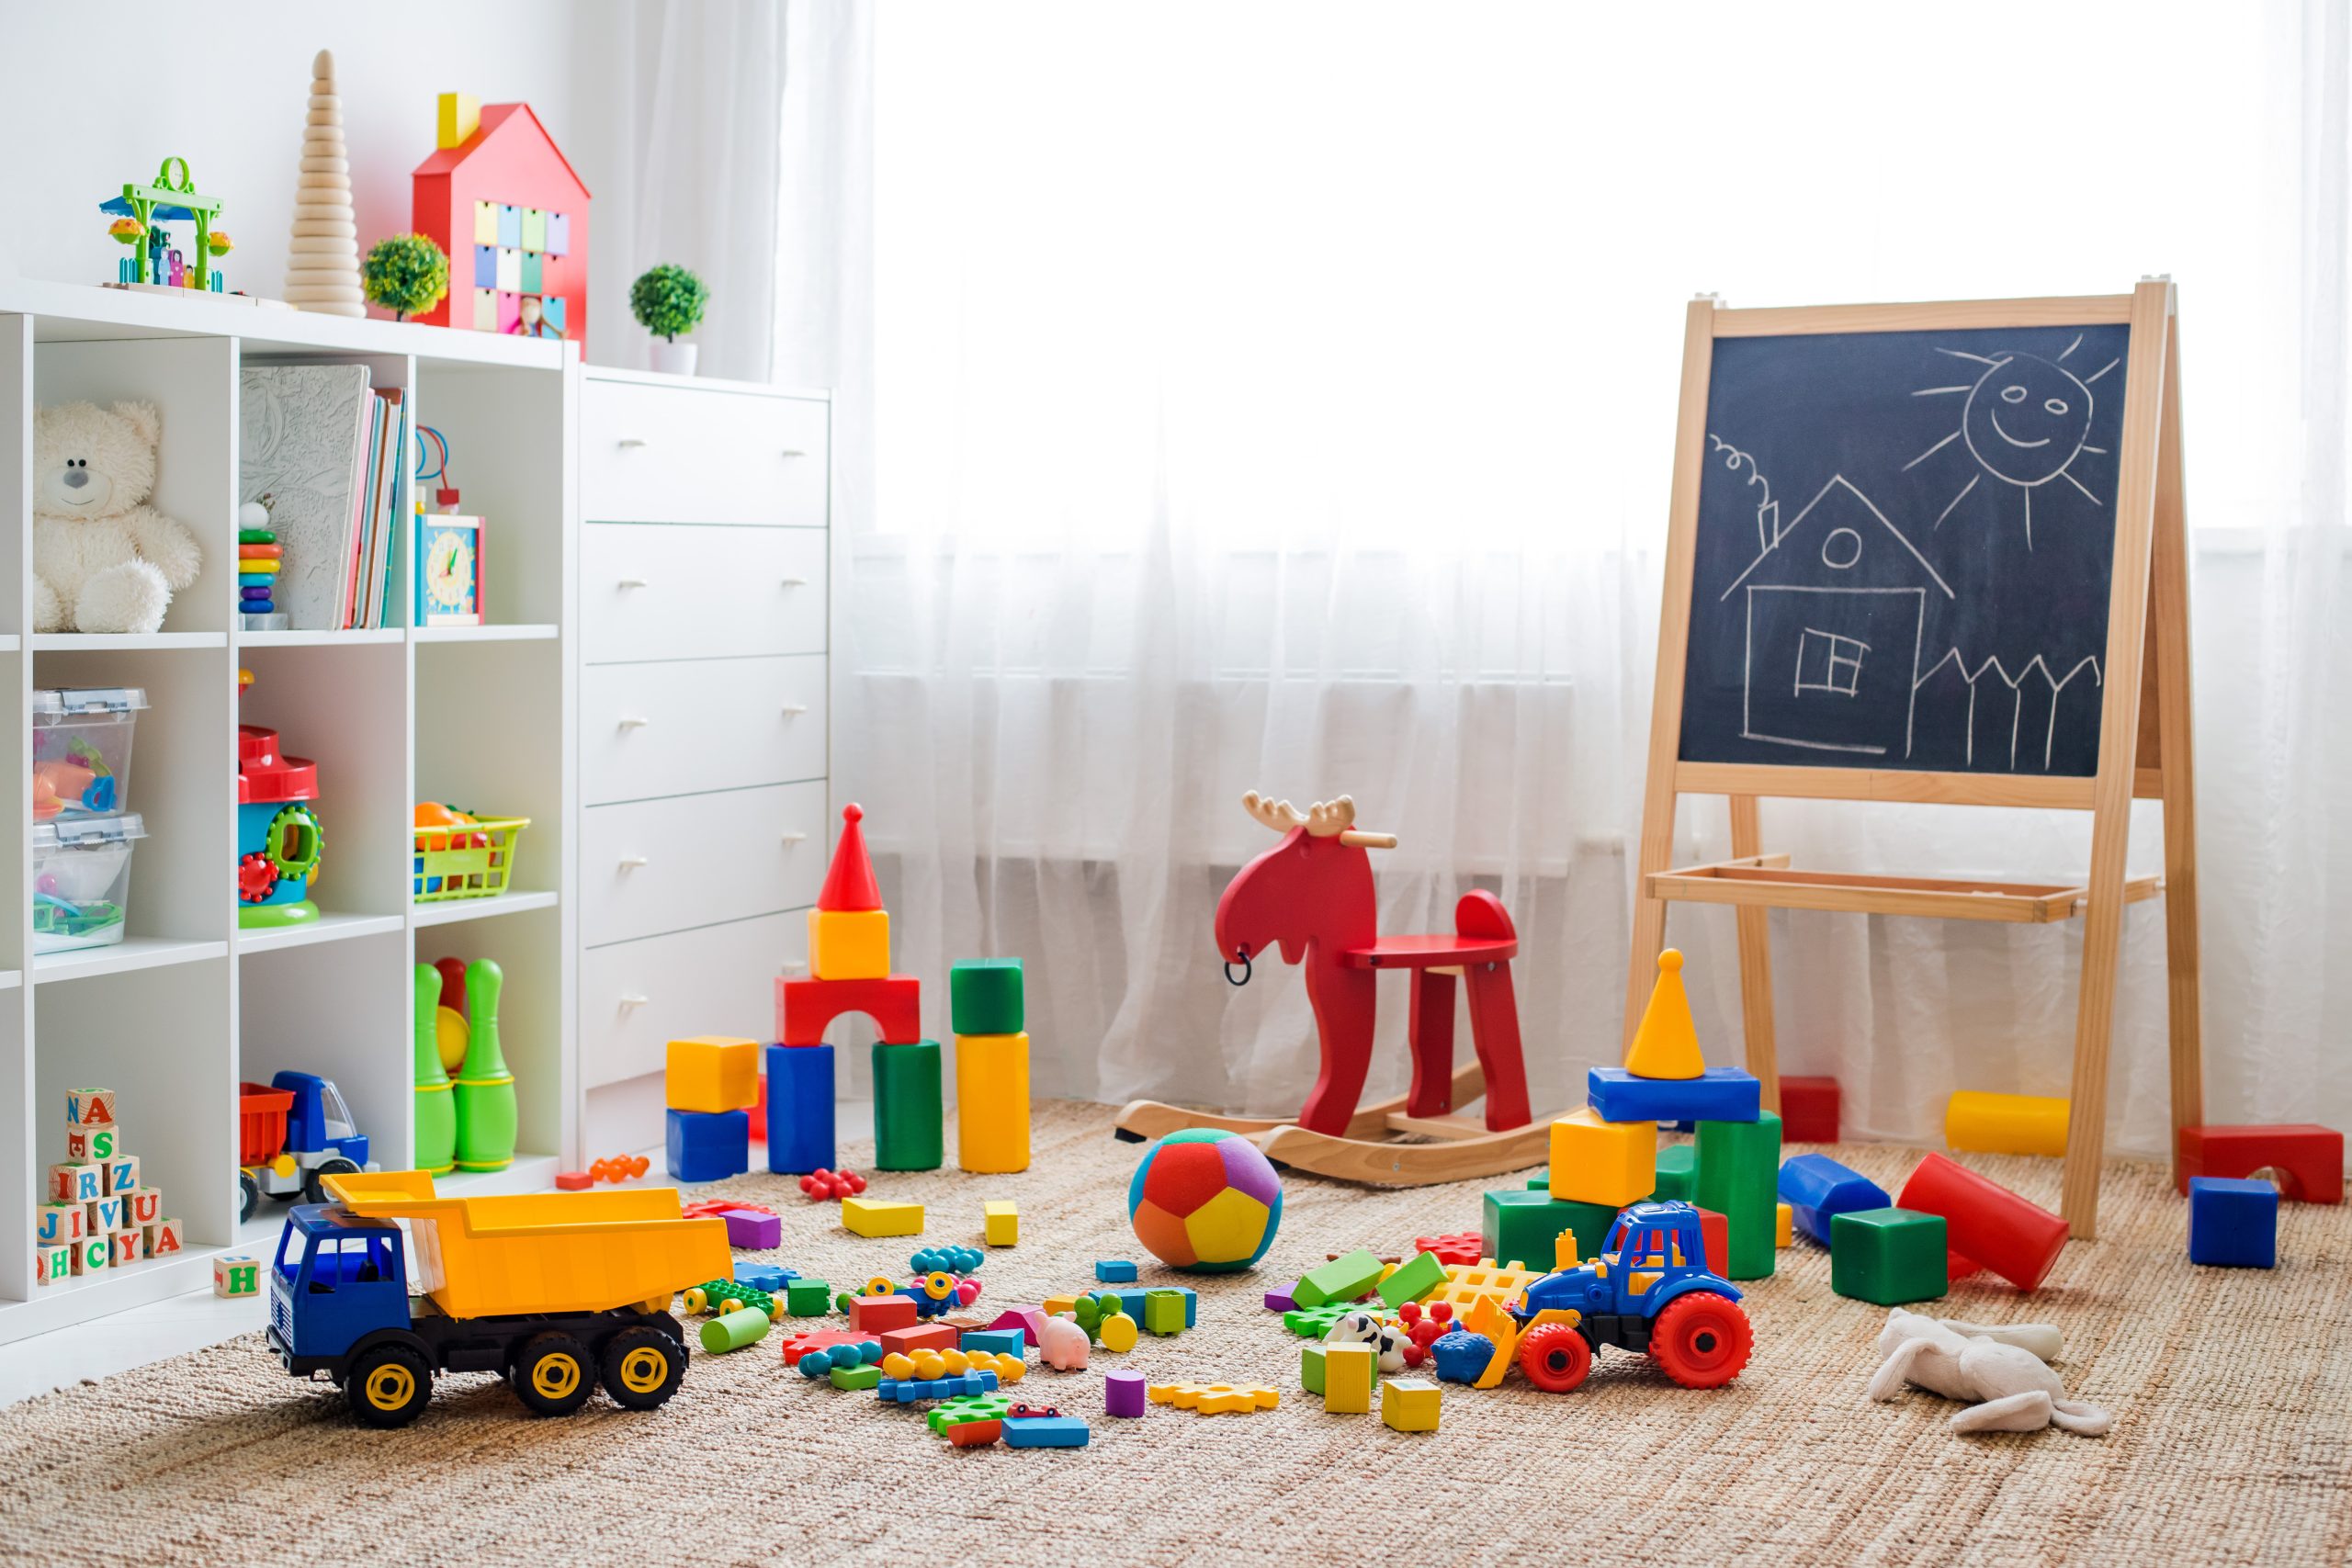
by Kesaa Interiors | DECOR & DIY, Kids & Nursery, ROOMS, Storage & Organisation
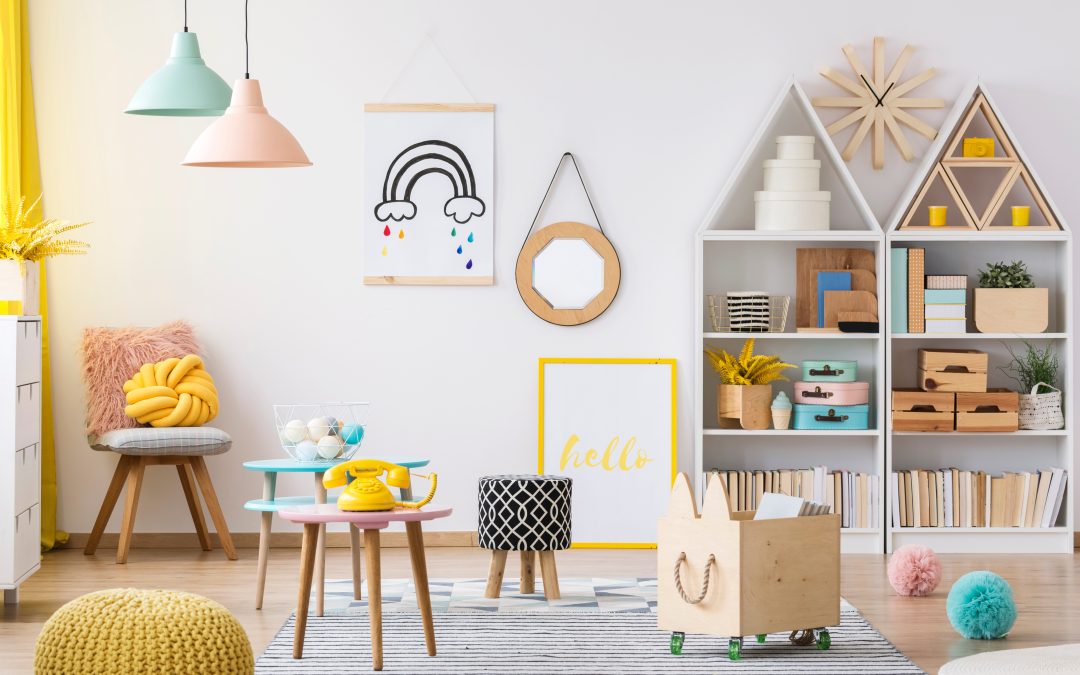
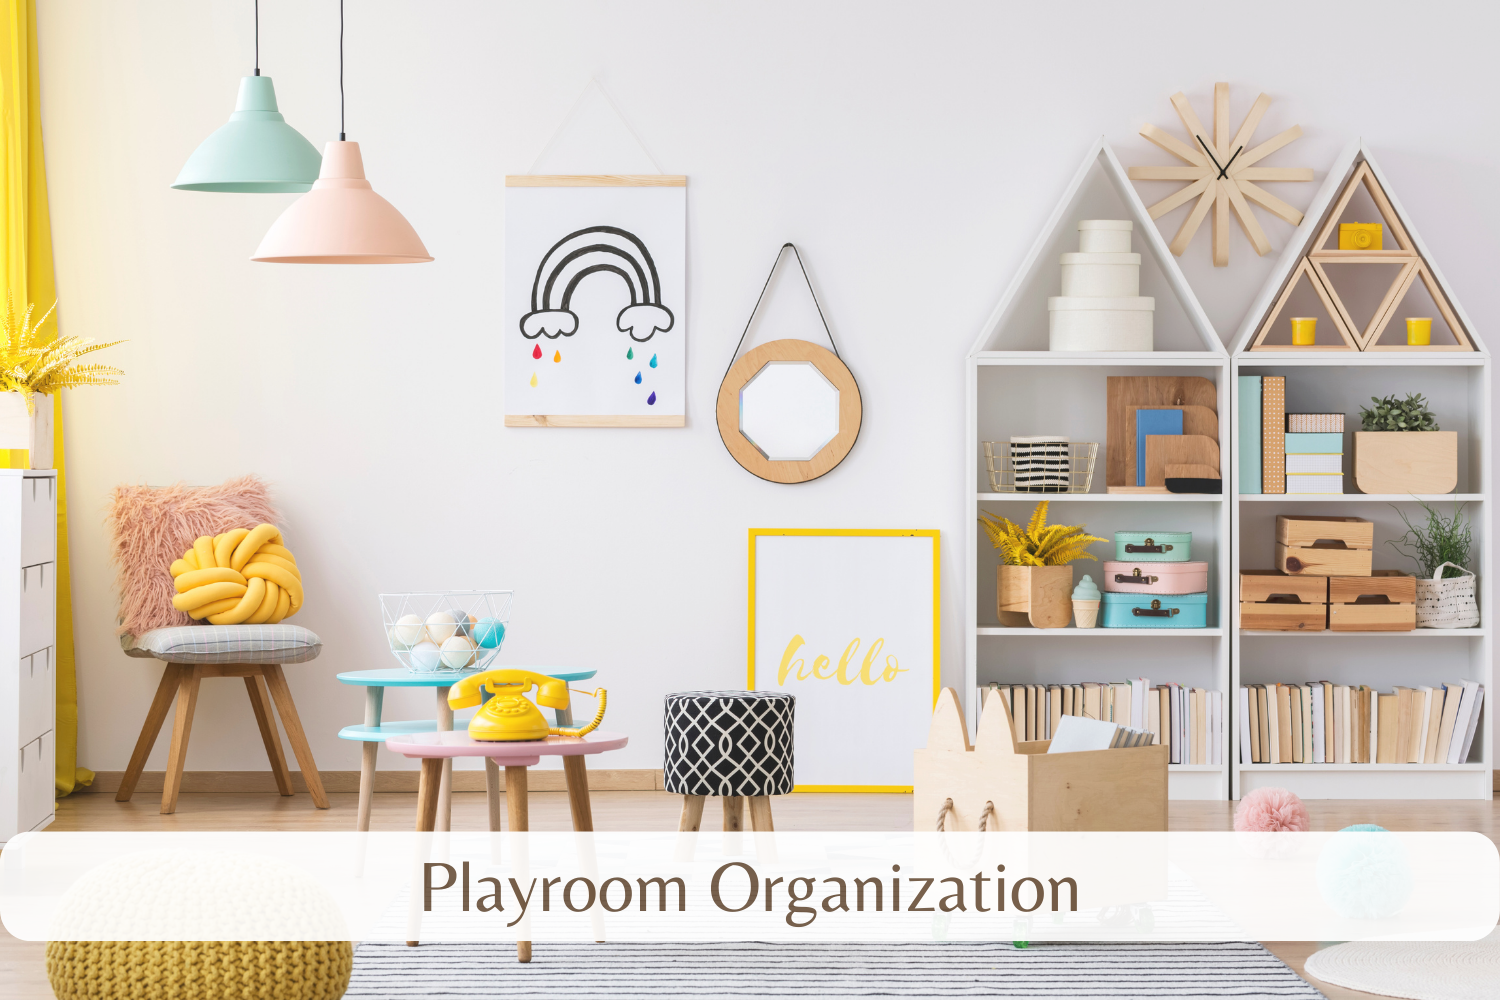
Best playroom organization ideas to keep your house organized.
Let’s be honest, keeping a playroom organized can feel like a never-ending battle, especially for busy families. Toys seem to multiply overnight, and what starts as a tidy space quickly transforms into a chaotic landscape of building blocks, dolls, and art supplies.
But don’t worry, achieving and maintaining playroom organization isn’t an impossible dream. This post is packed with practical playroom organization ideas designed to make cleanup quick, easy, and even fun for both kids and parents. Get ready to transform your playroom from a source of stress into a haven of fun and creativity!
Best Playroom Organization Tips!
Declutter Before You Organize
The First Step: Decluttering Your Playroom
Before diving into bins, baskets, and labels, there’s one crucial step that will make all your playroom organization efforts significantly more effective: decluttering. It might seem counterintuitive to add another task to your to-do list but trust us, this is the foundation of successful playroom organization. A clutter-free space is much easier to organize and maintain in the long run. So, how do you tackle the mountain of toys?
Start by sorting through everything. Be honest with yourself – are there toys your children have outgrown? Are there broken toys that can’t be repaired? Are there duplicates or toys that rarely get played with? Create three piles: one for donating, one for selling (if you’re feeling ambitious), and one for discarding. This process not only improves playroom organization but also teaches children valuable lessons about letting go and appreciating what they have. Once you’ve decluttered, you’ll have a much clearer picture of what needs to be organized and what storage solutions will work best for your family.

Zoning for Defined Play Areas
Create Zones for Different Activities
Now that you’ve decluttered and have a clearer view of your play space, it’s time to implement one of the most effective playroom organization ideas: zoning. Zoning involves dividing your playroom into designated areas for different types of play. This not only helps with playroom organization by containing specific toys in their designated areas, but it also encourages more focused and imaginative play.
Think about the types of activities your children enjoy. Do they love building elaborate structures with blocks? Do they have a passion for arts and crafts? Is there a budding bookworm in the family? Based on their interests, you can create zones such as a building block area, an arts & crafts station, a reading nook, a dress-up corner, or a board game area.
Clearly defining these zones makes it easier for children to find what they’re looking for and, more importantly, makes cleanup a breeze. When it’s time to tidy up, they know exactly where each toy belongs, reducing the overwhelming feeling and making playroom organization a much less daunting task. For example, all the building blocks go back to the block area, art supplies return to the art station, and books go back to the reading nook. This simple strategy can dramatically improve the overall playroom organization and create a more harmonious and functional play space.
Storage Solutions: Bins, Baskets, and Beyond
Clever Storage Solutions for Maximum Playroom Organization
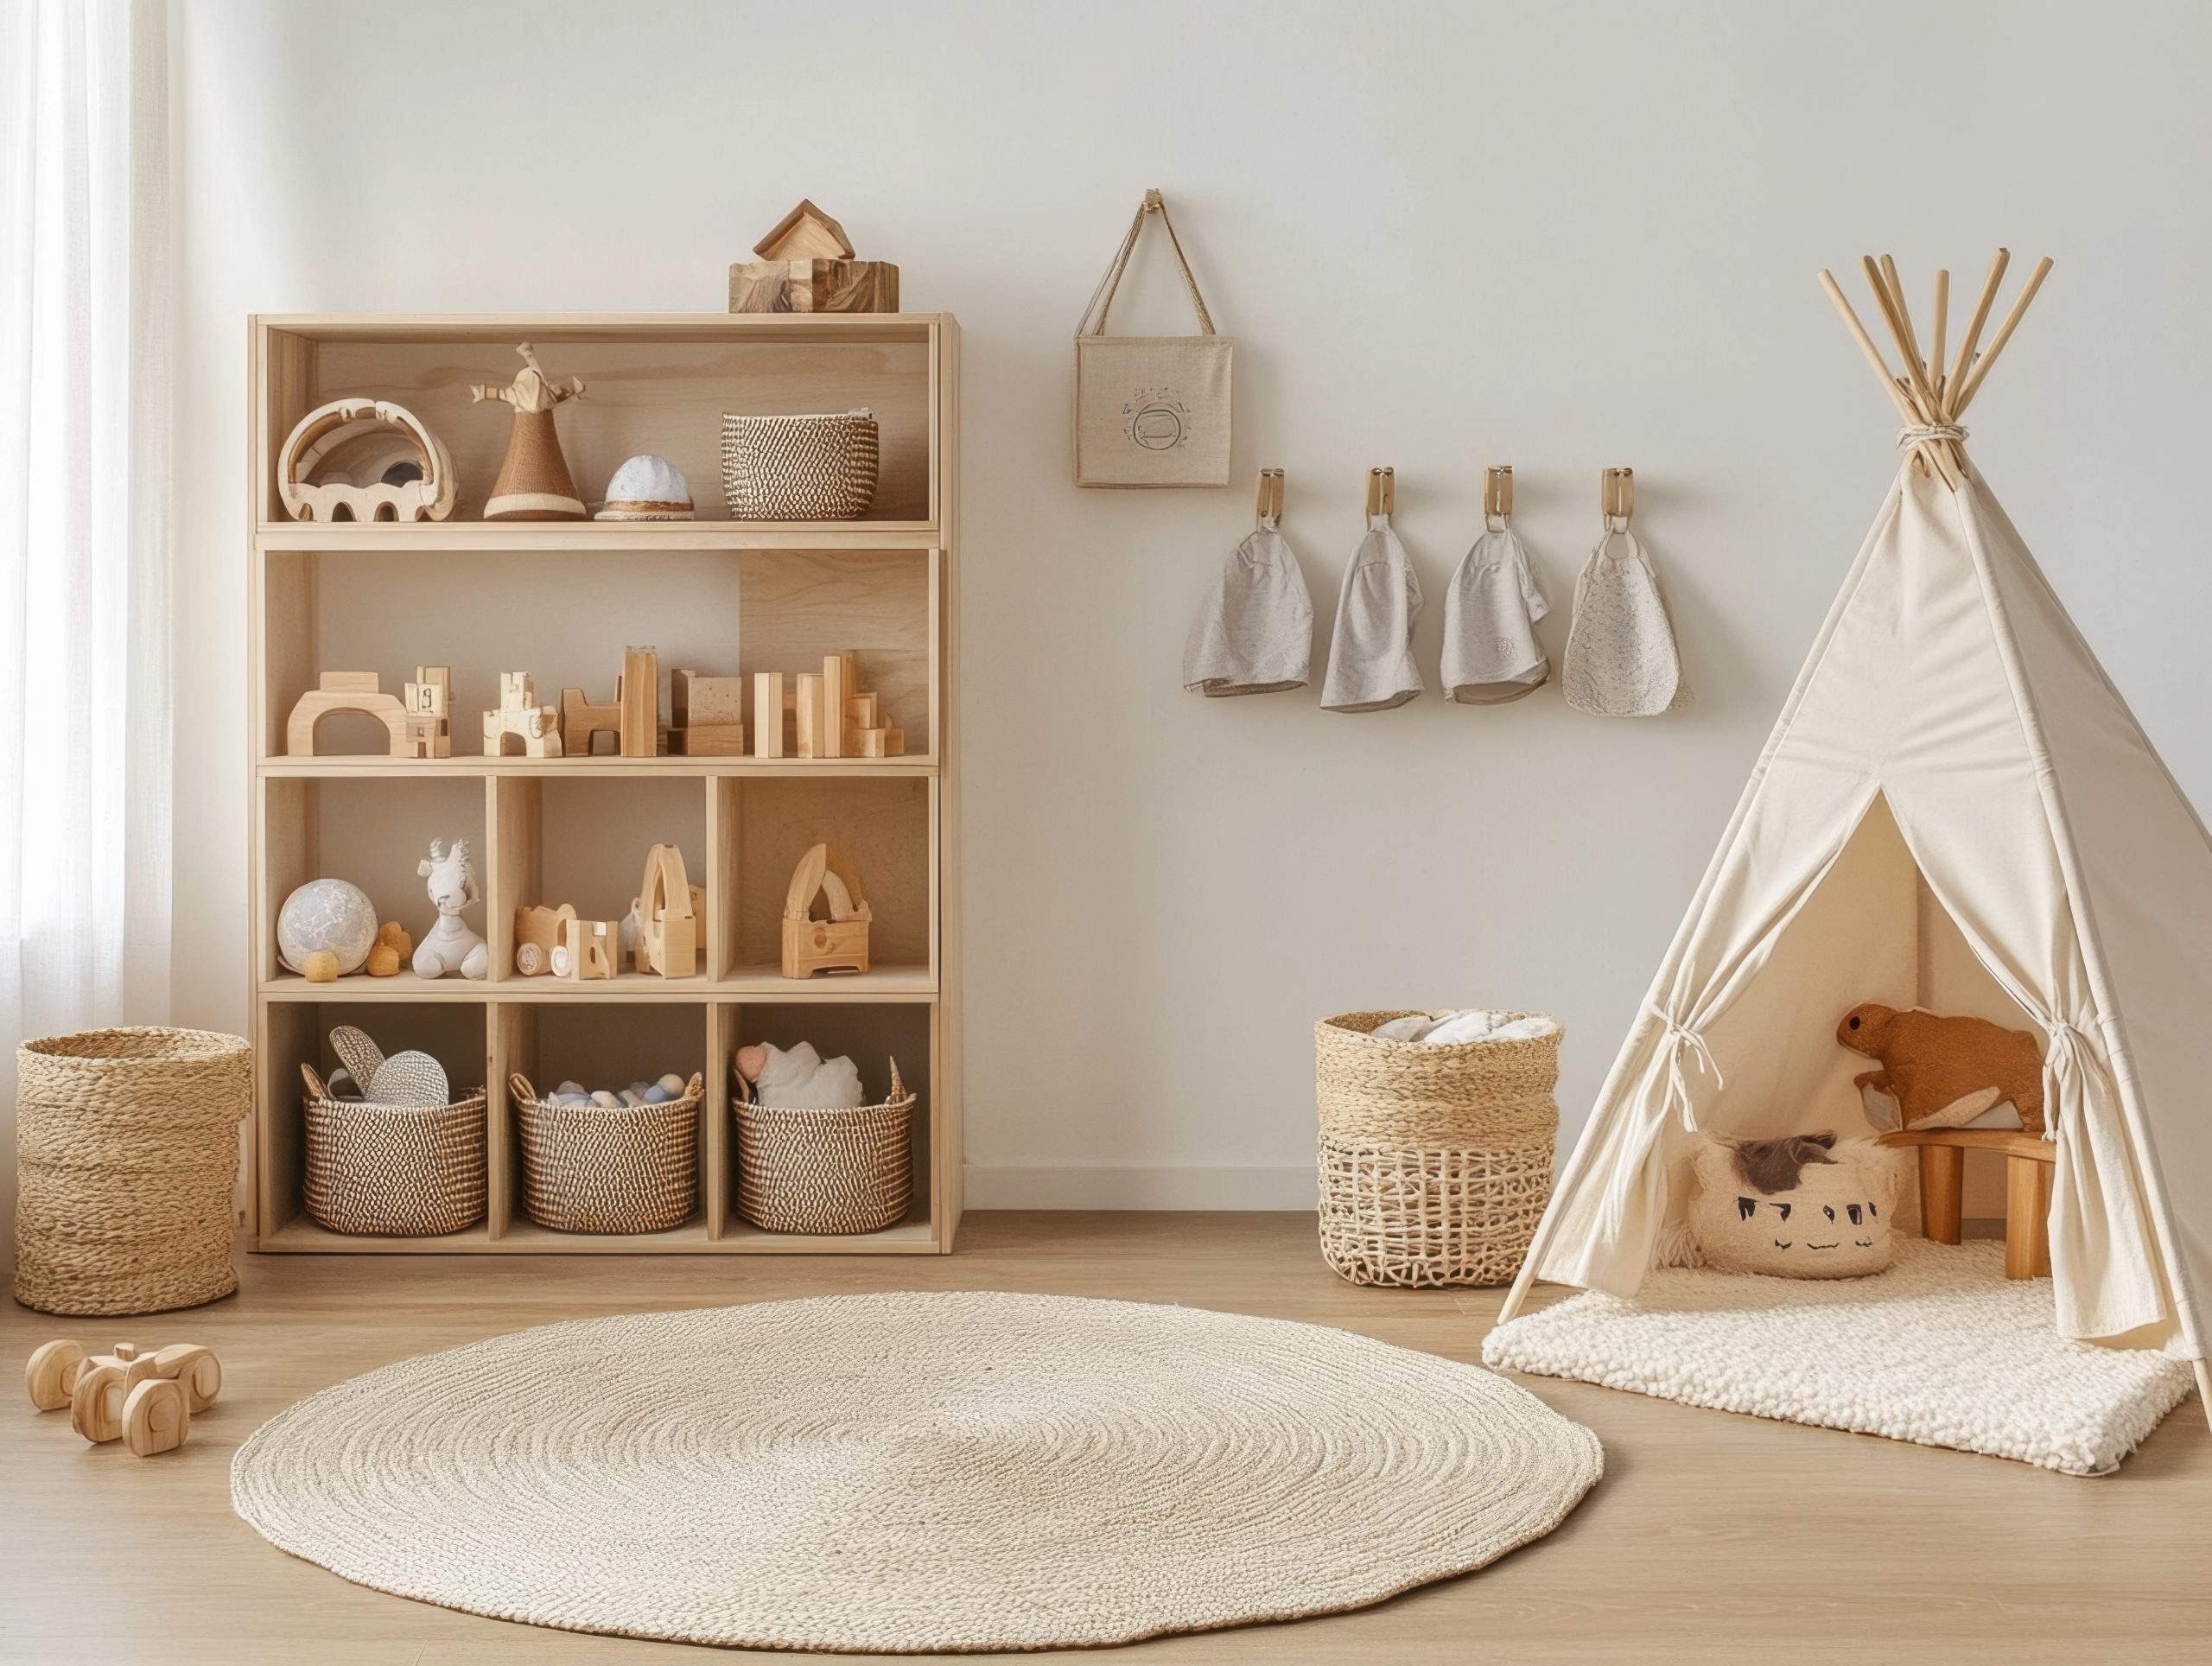
With your playroom zoned and ready for action, it’s time to tackle the next essential element of playroom organization: storage. Choosing the right storage solutions can make or break your efforts to maintain a tidy and functional play space. The key is to select options that are both practical and accessible for little hands.
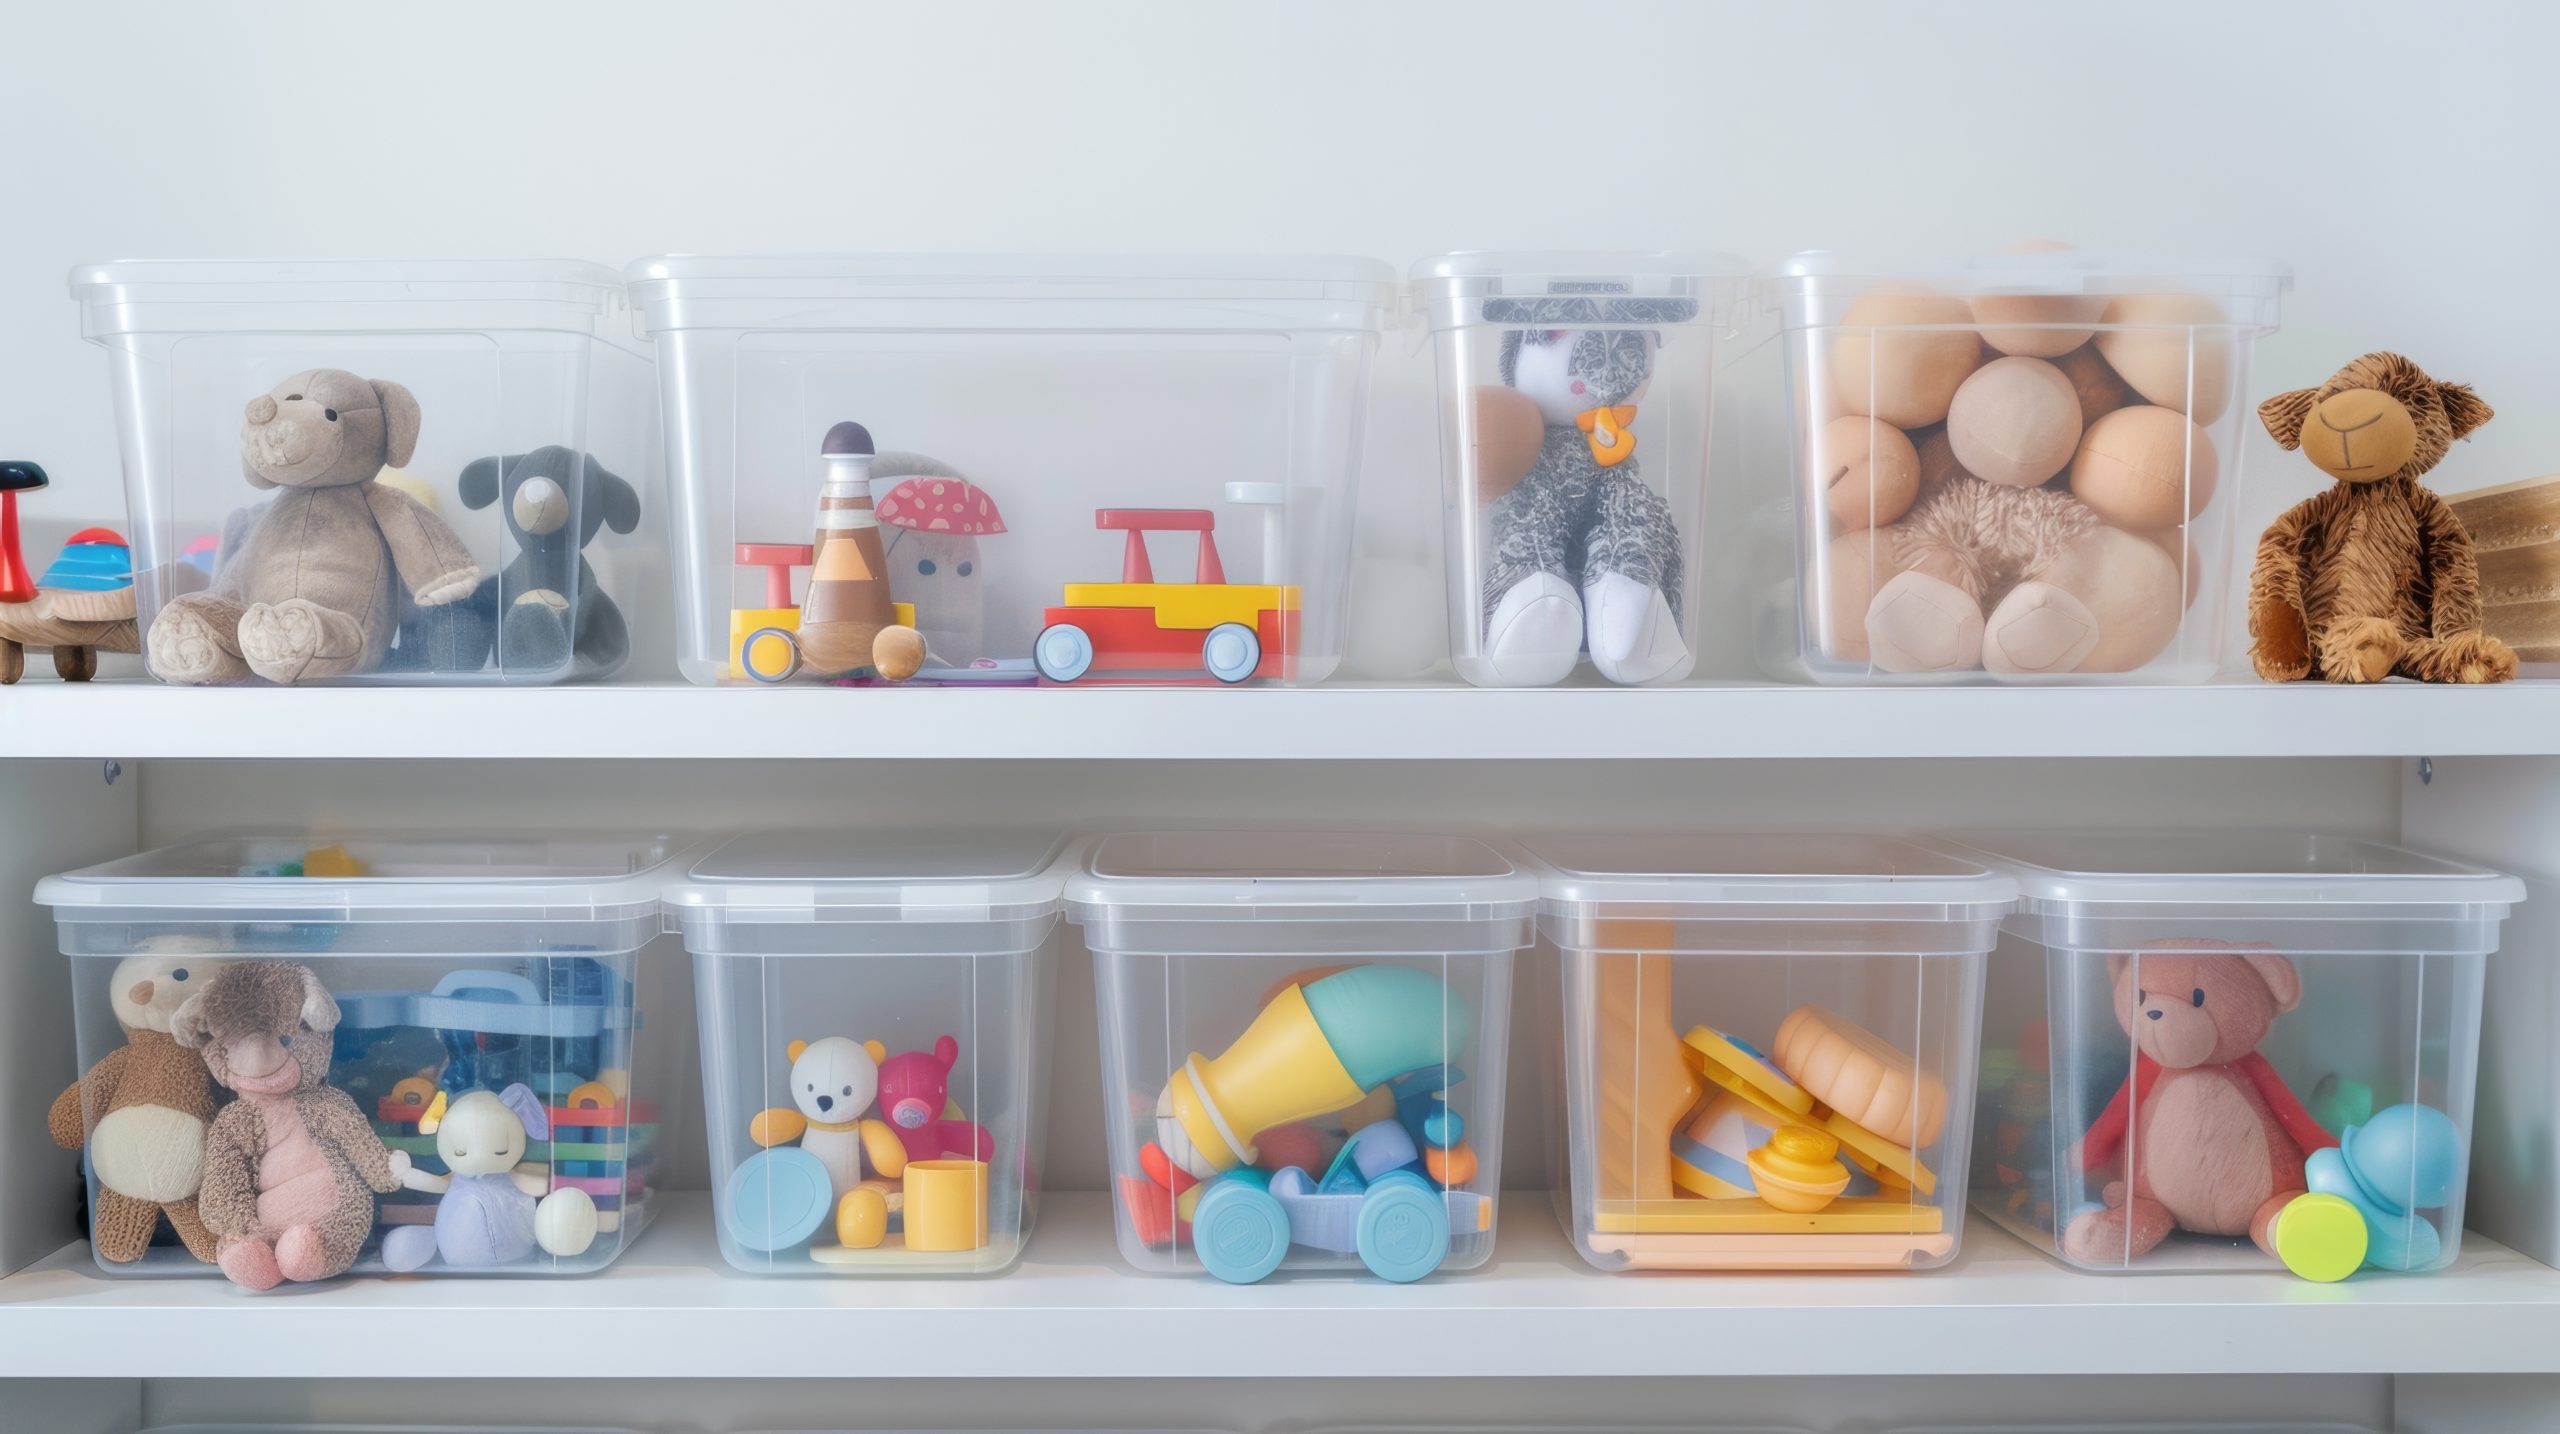
Bins, baskets, and containers are your best friends when it comes to playroom organization. Clear bins are particularly helpful as they allow children to easily see what’s inside, eliminating the need to rummage and create a mess. For younger children, labelling bins with both pictures and words can further enhance playroom organization and encourage them to put things away independently. Categorise toys by type – building blocks, dolls, cars, art supplies – and assign a designated bin or basket for each category. This makes it simple for children to find what they’re looking for and just as easy to put away when they’re finished. Consider using different coloured bins for different zones to add an extra layer of visual organization to your playroom. Beyond bins and baskets, explore other storage options like drawers, cubbies, and hanging organizers to maximize space and keep everything neatly tucked away. Remember, effective storage is the backbone of a successful playroom organization.
Vertical Space: Reaching New Heights of Organization
Utilizing Vertical Space for Efficient Playroom Organization
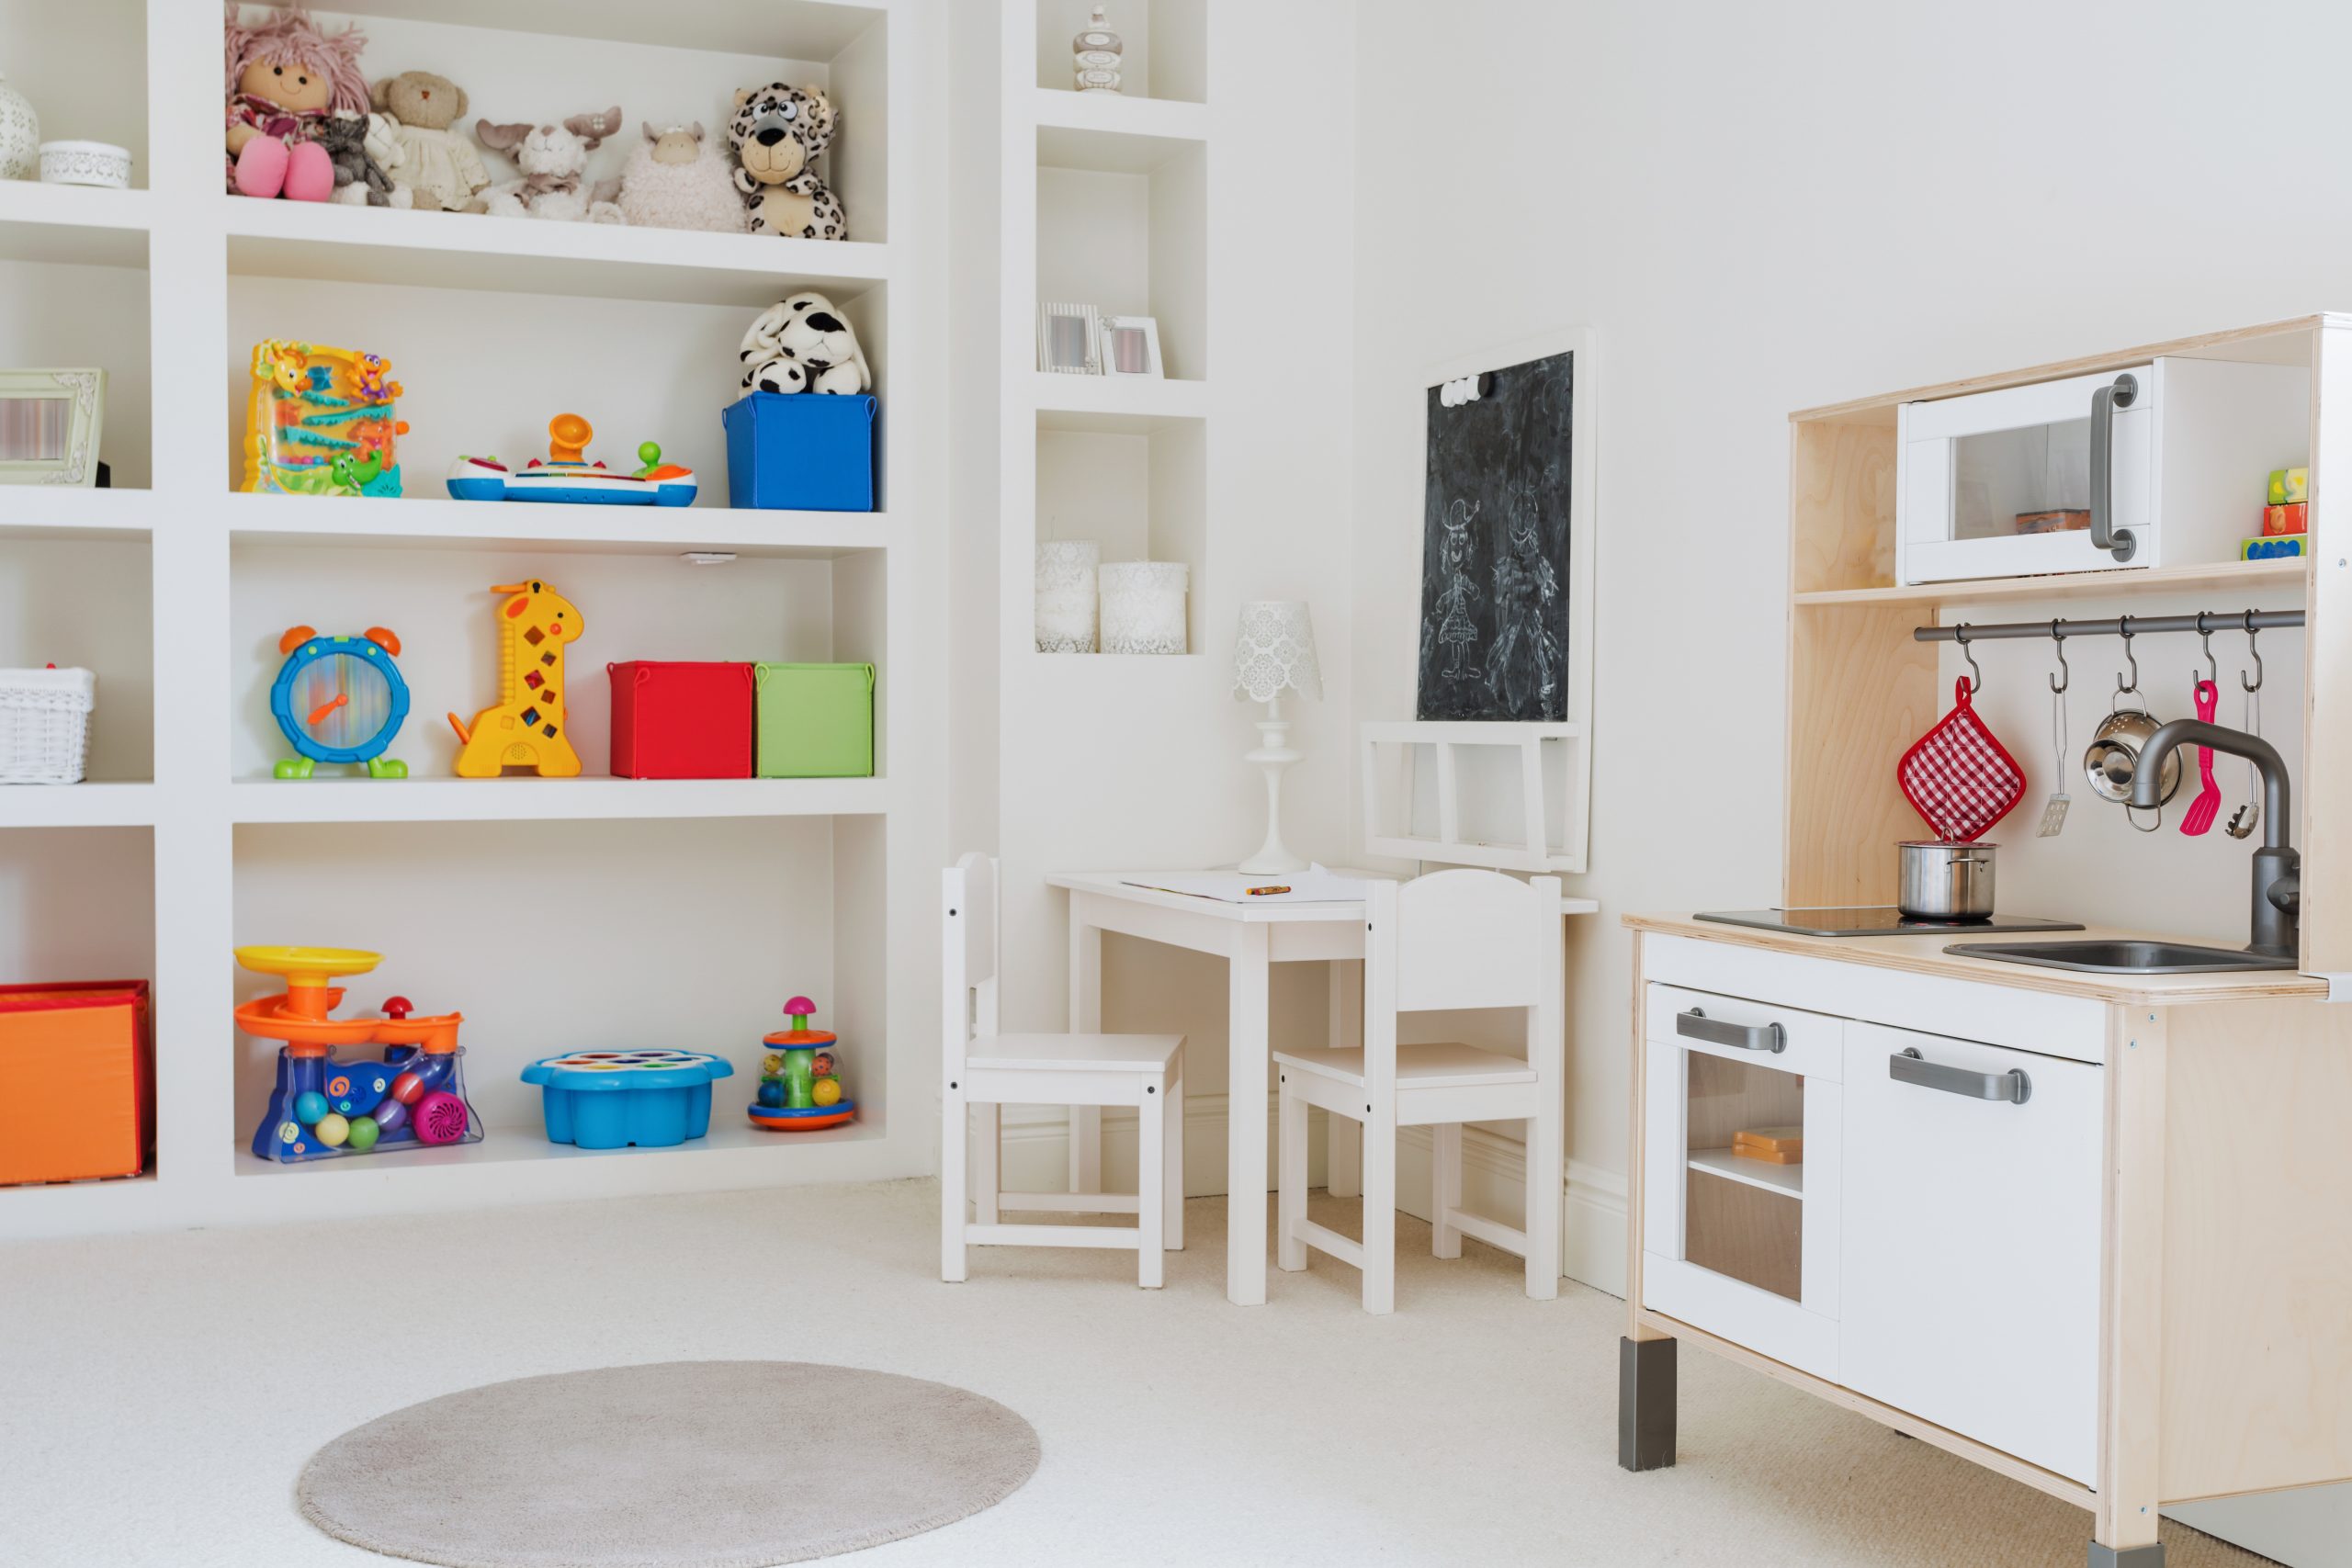
When it comes to playroom organization, don’t forget to look up! Utilizing vertical space is a game-changer, especially in smaller playrooms. Walls offer valuable real estate for storage and can significantly enhance your playroom organization efforts.
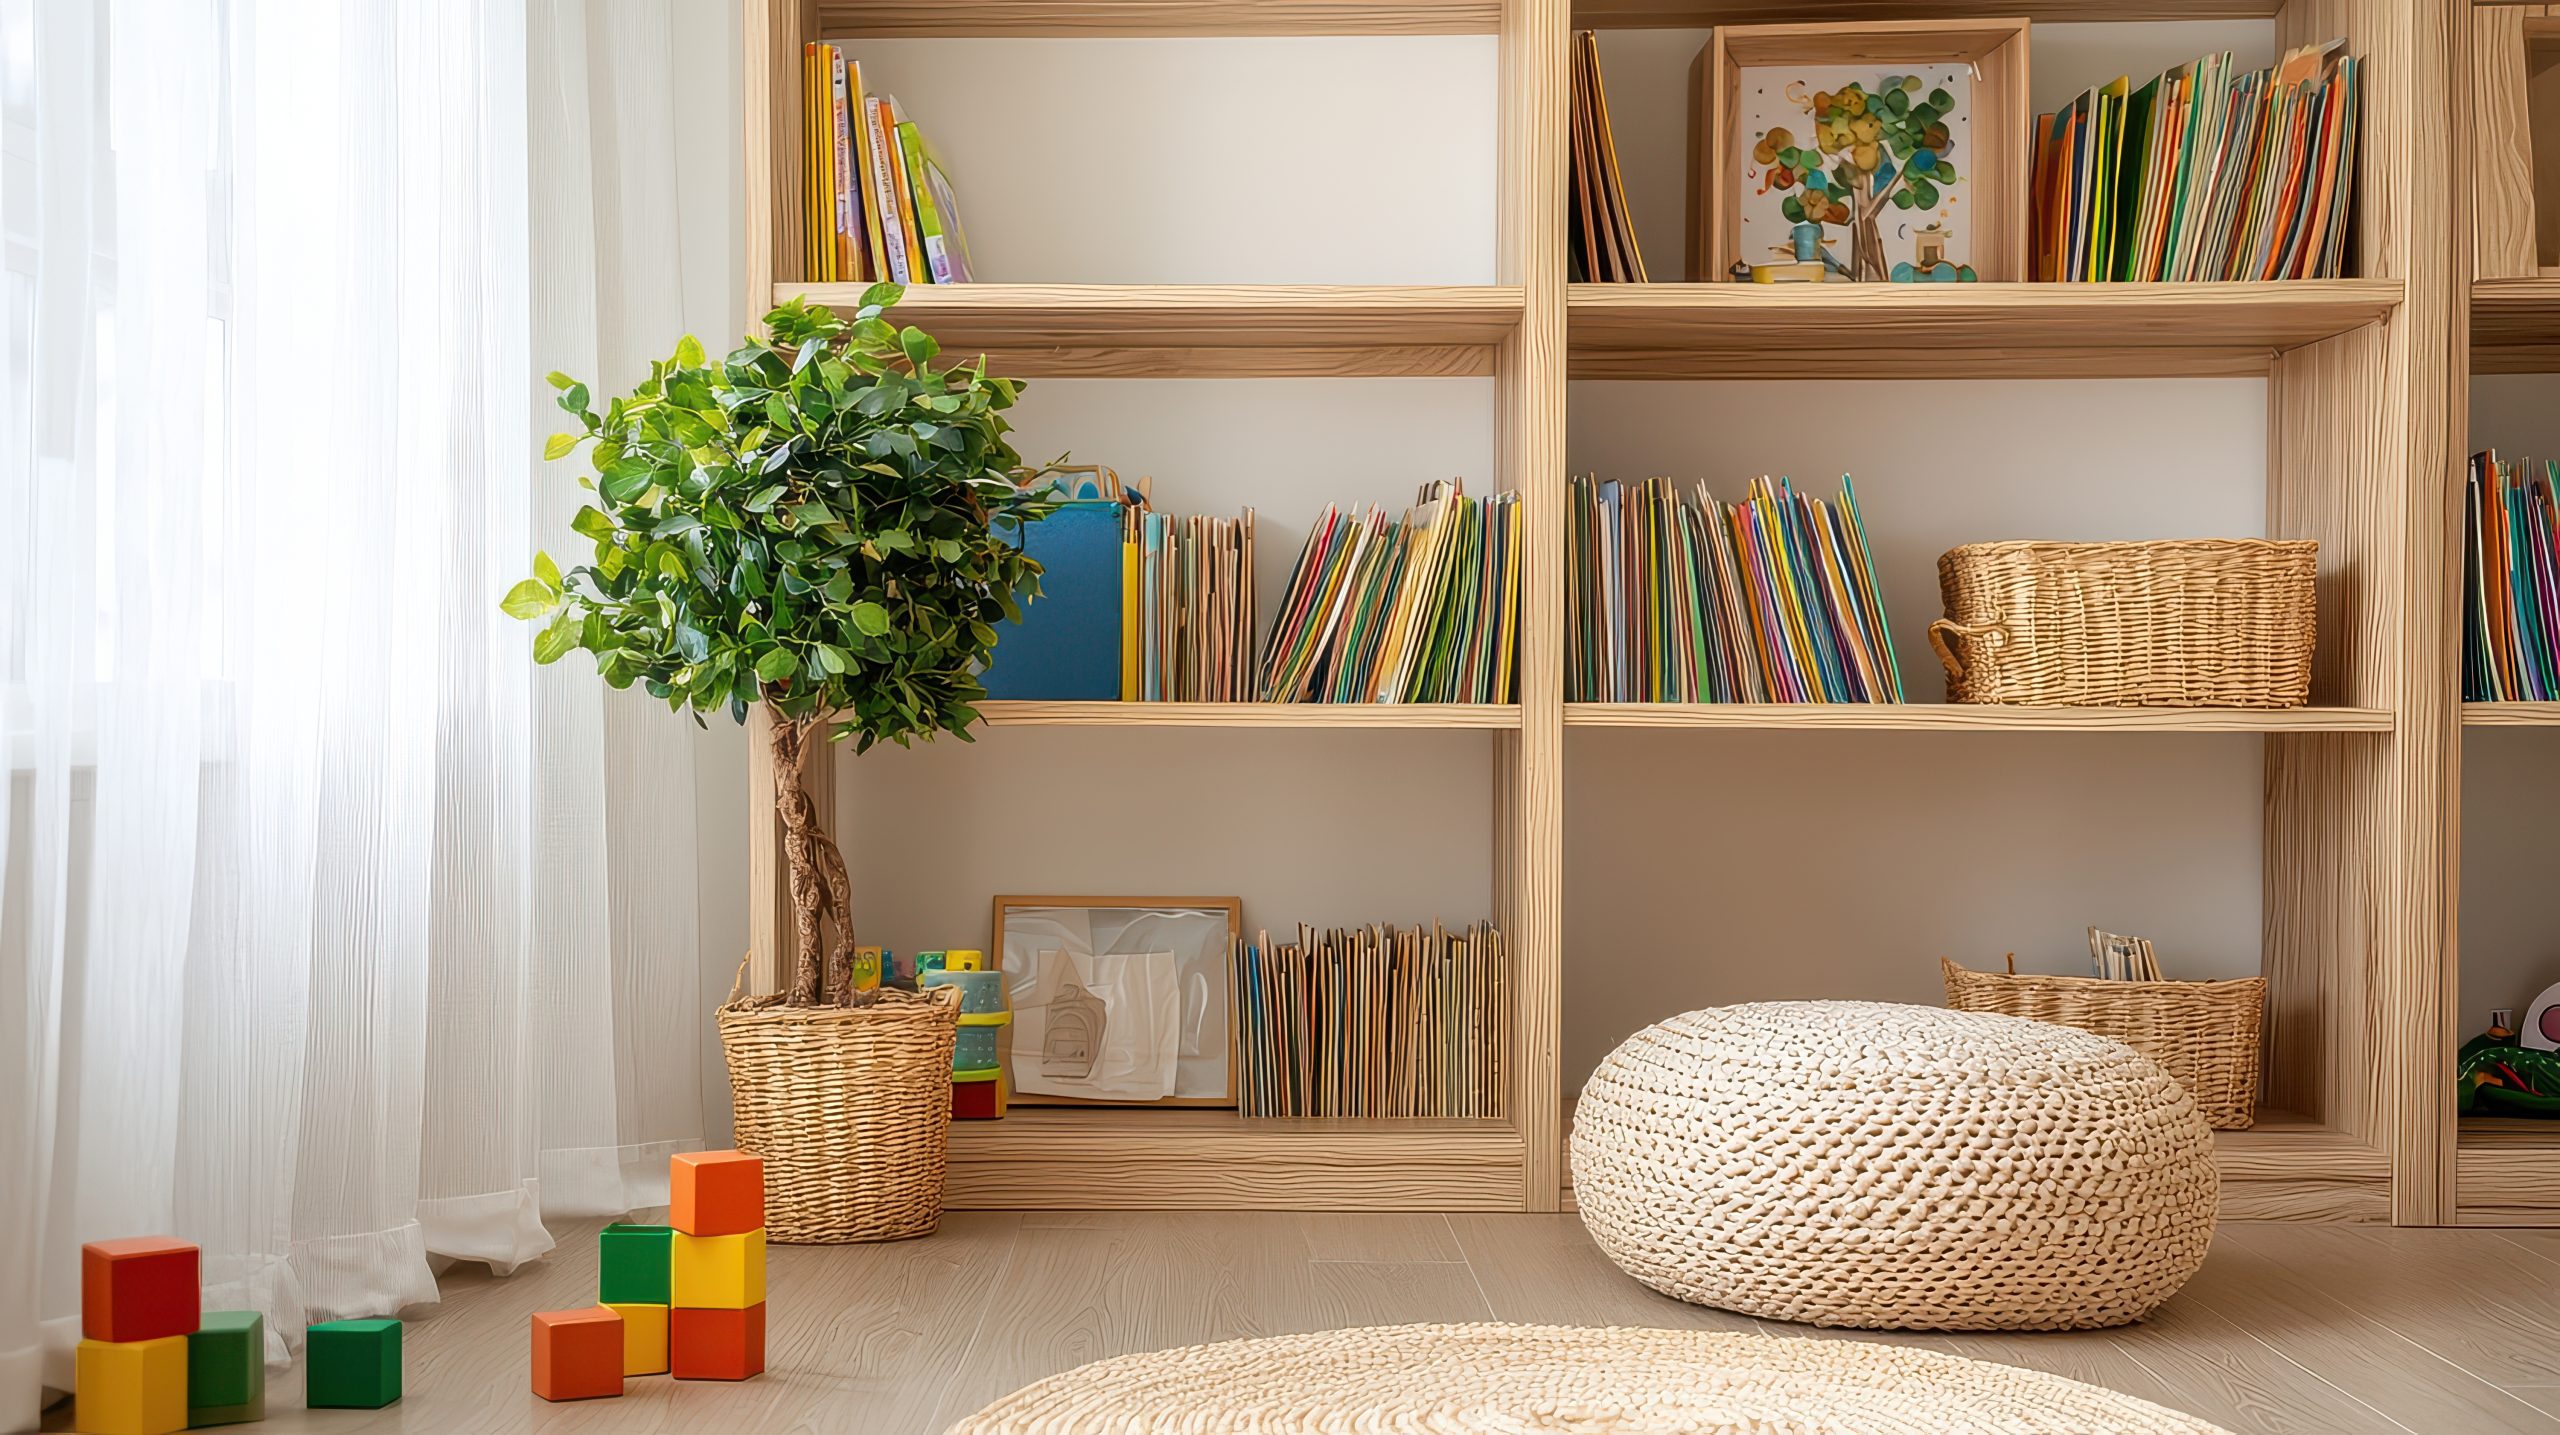
Install wall shelves to display books, showcase favourite toys, and store smaller items in attractive baskets or containers. Choose shelves that are sturdy and appropriately sized for the items you plan to store. Floating shelves are a great option for a modern look, while traditional bookcases offer ample storage space. For younger children, ensure that lower shelves are within easy reach so they can access their toys independently. Consider using wall-mounted organizers for art supplies, dress-up clothes, or even sports equipment. These organizers not only maximize vertical space but also keep items neatly contained and off the floor, contributing to a more organized and functional playroom. By thinking vertically, you can free up valuable floor space for play and create a more visually appealing and efficiently organized playroom.
Furniture that Works as Hard as You Do
Choosing the Right Furniture for Playroom Organization and Functionality
The furniture you select for your playroom can play a significant role in its overall organization. Opt for pieces that not only look good but also work hard to maximize storage and functionality. This is a key element of effective playroom organization.
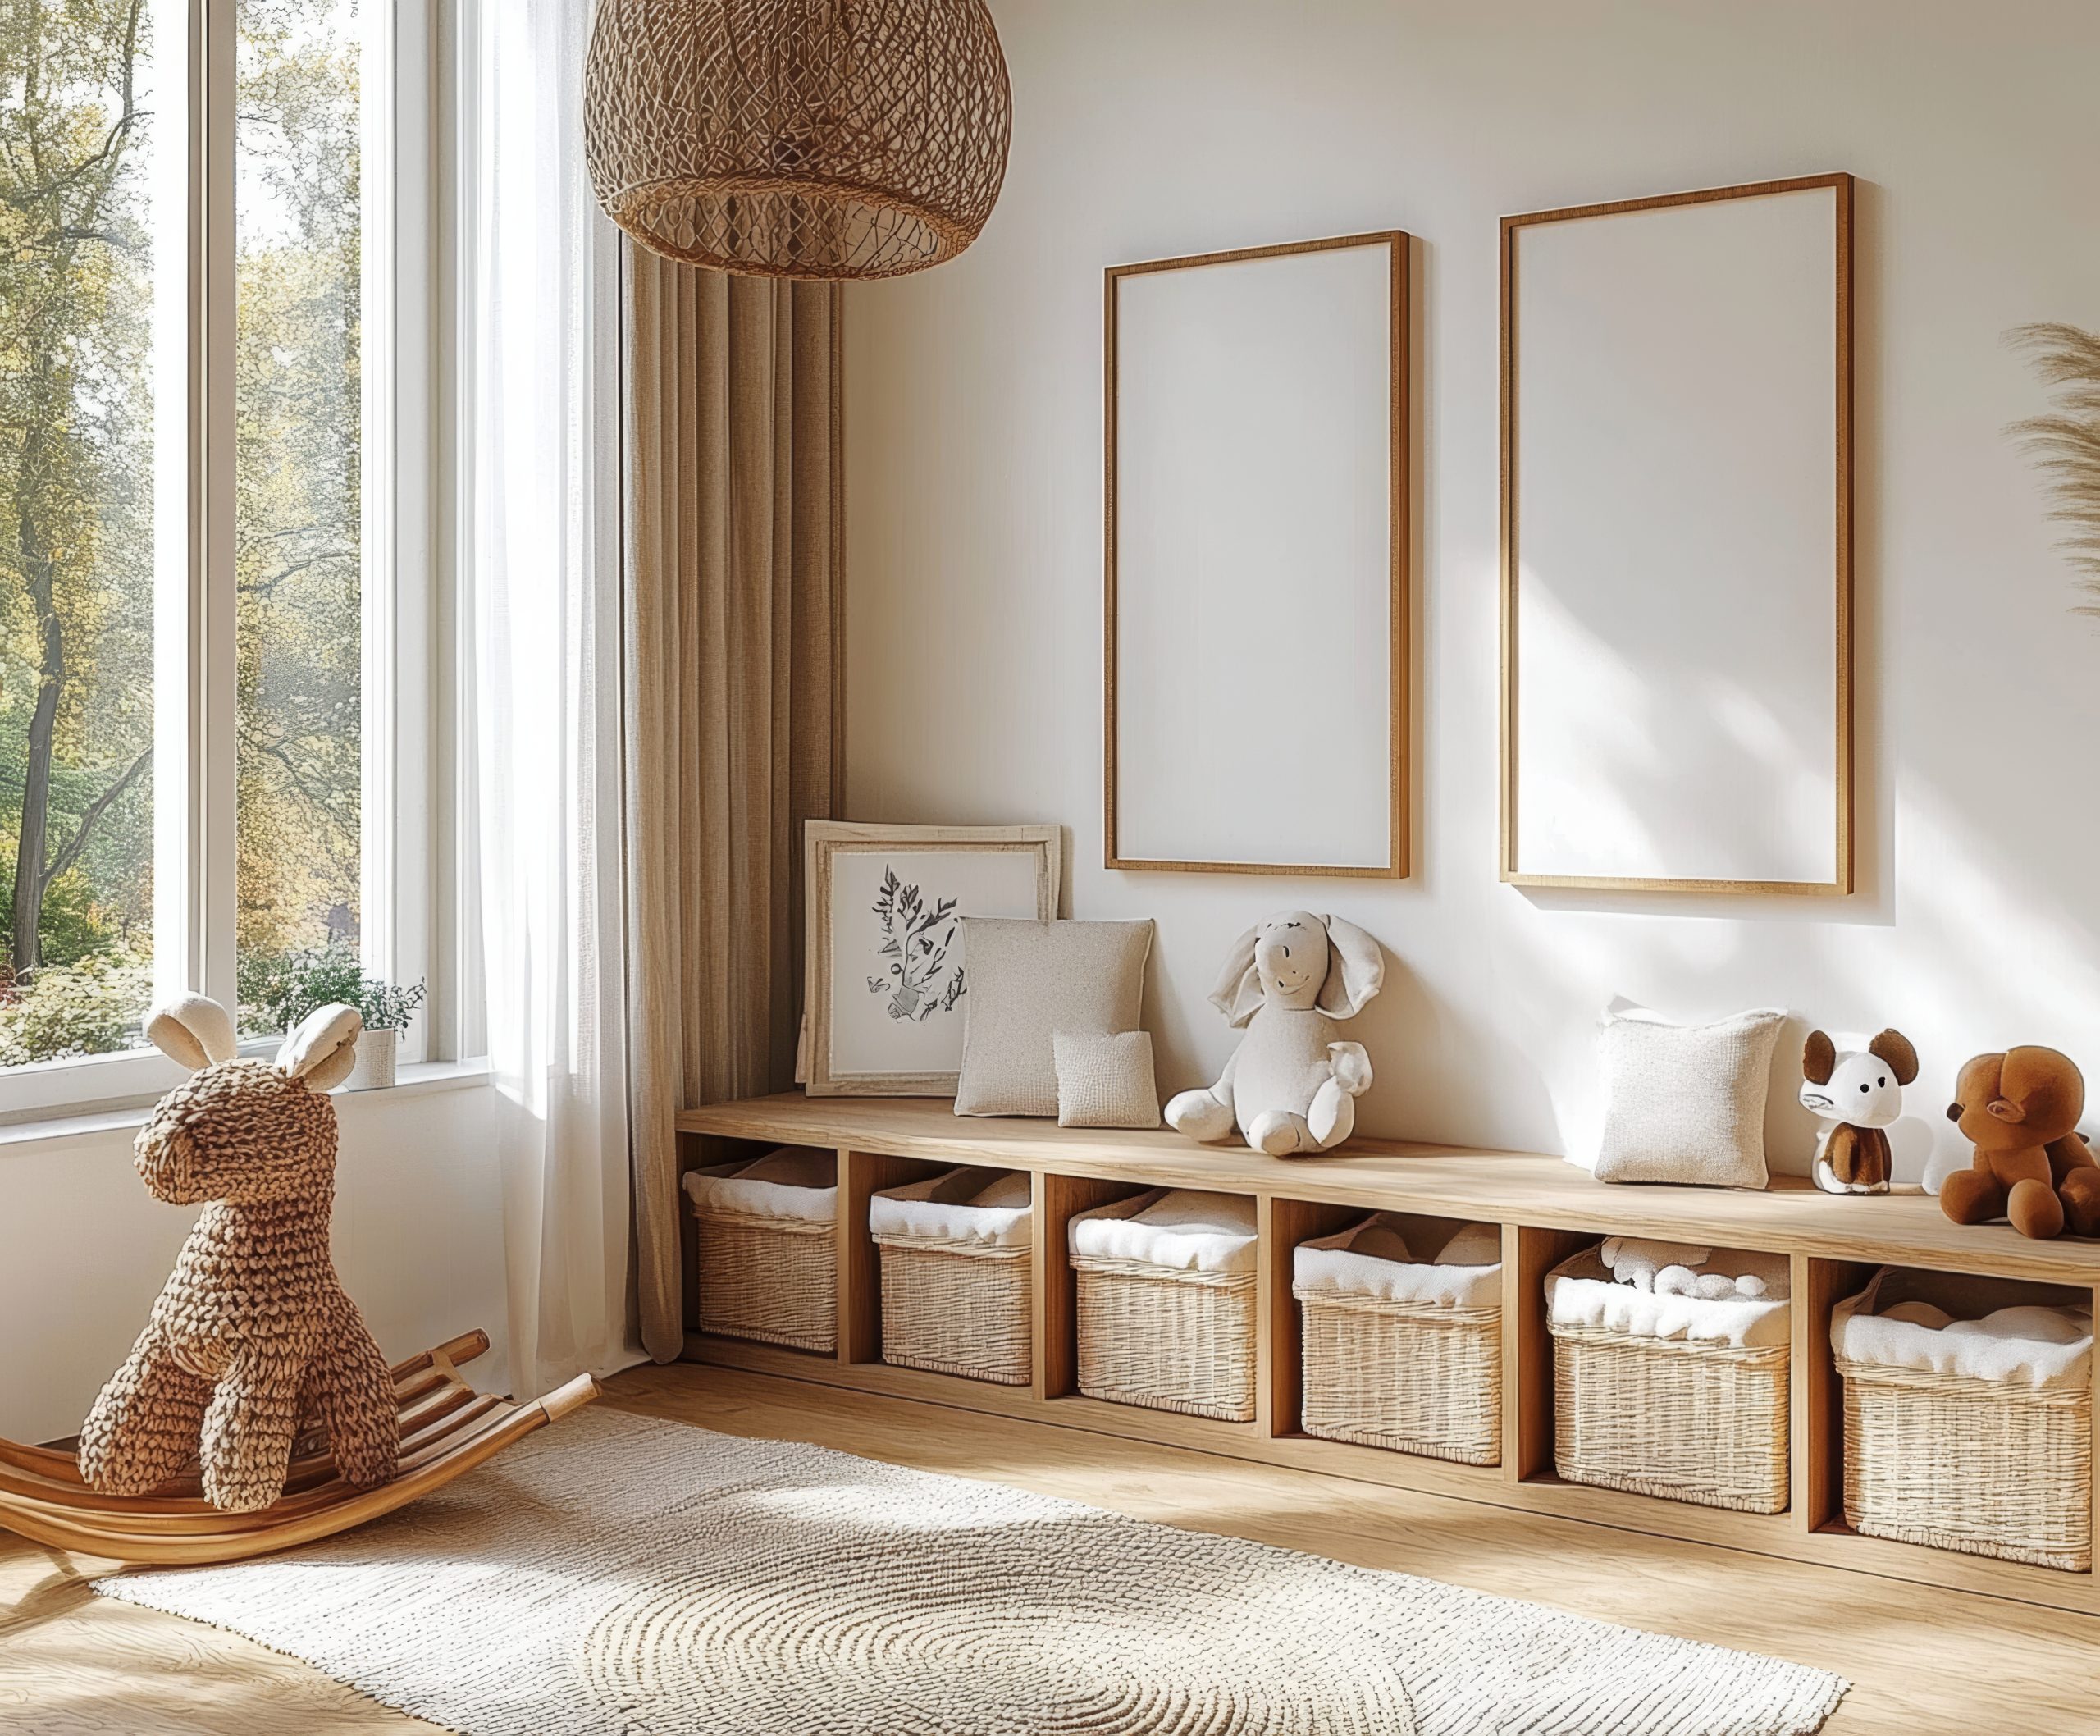
Multi-purpose furniture is a must-have for any well-organized playroom. Look for ottomans with hidden storage compartments, benches with built-in drawers, or play tables with storage underneath. These clever pieces provide valuable storage space while also serving their primary function. A storage bench, for example, can provide seating while also concealing toys, blankets, or games. A play table with drawers can store art supplies, building blocks, or other small toys, keeping them within easy reach during playtime. When selecting furniture, consider the size and layout of your playroom. Choose pieces that are appropriately scaled and don’t overwhelm the space. Child-sized furniture is also a great option, as it allows children to access their toys and belongings independently, fostering a sense of ownership and responsibility in maintaining playroom organization.
Toy Rotation: Keeping it Fresh and Engaging
Toy Rotation: A Secret Weapon for Playroom Organization and Engagement
Even the most organized playroom can start to feel stale if children are constantly surrounded by the same toys. This is where toy rotation comes in – a brilliant strategy for both playroom organization and keeping kids engaged and excited about their toys.
The concept is simple: instead of having all toys available at all times, store a portion of them away in labelled bins or boxes. Every few weeks or months, swap out the toys, bring out the stored toys and put away the ones that have been in regular rotation. This not only reduces the visual clutter in the playroom, contributing to a more organized and less overwhelming environment, but it also reintroduces toys that may have been forgotten, sparking renewed interest and extending their lifespan. Toy rotation is a fantastic way to manage the sheer volume of toys many children accumulate, making playroom organization more manageable and playtime more exciting. It also encourages more focused play, as children are presented with a smaller, more curated selection of toys at any given time. This simple strategy can be a game-changer for maintaining a tidy and engaging playroom.
Cleanup Strategies: Making it Easy and Fun
Easy Cleanup Strategies for a Stress-Free Playroom
Maintaining playroom organization isn’t just about having the right storage solutions; it’s also about establishing routines and strategies that make cleanup a manageable and even enjoyable part of the day. After all, even the most organized playroom will eventually succumb to the inevitable tide of toys if cleanup isn’t a regular practice.
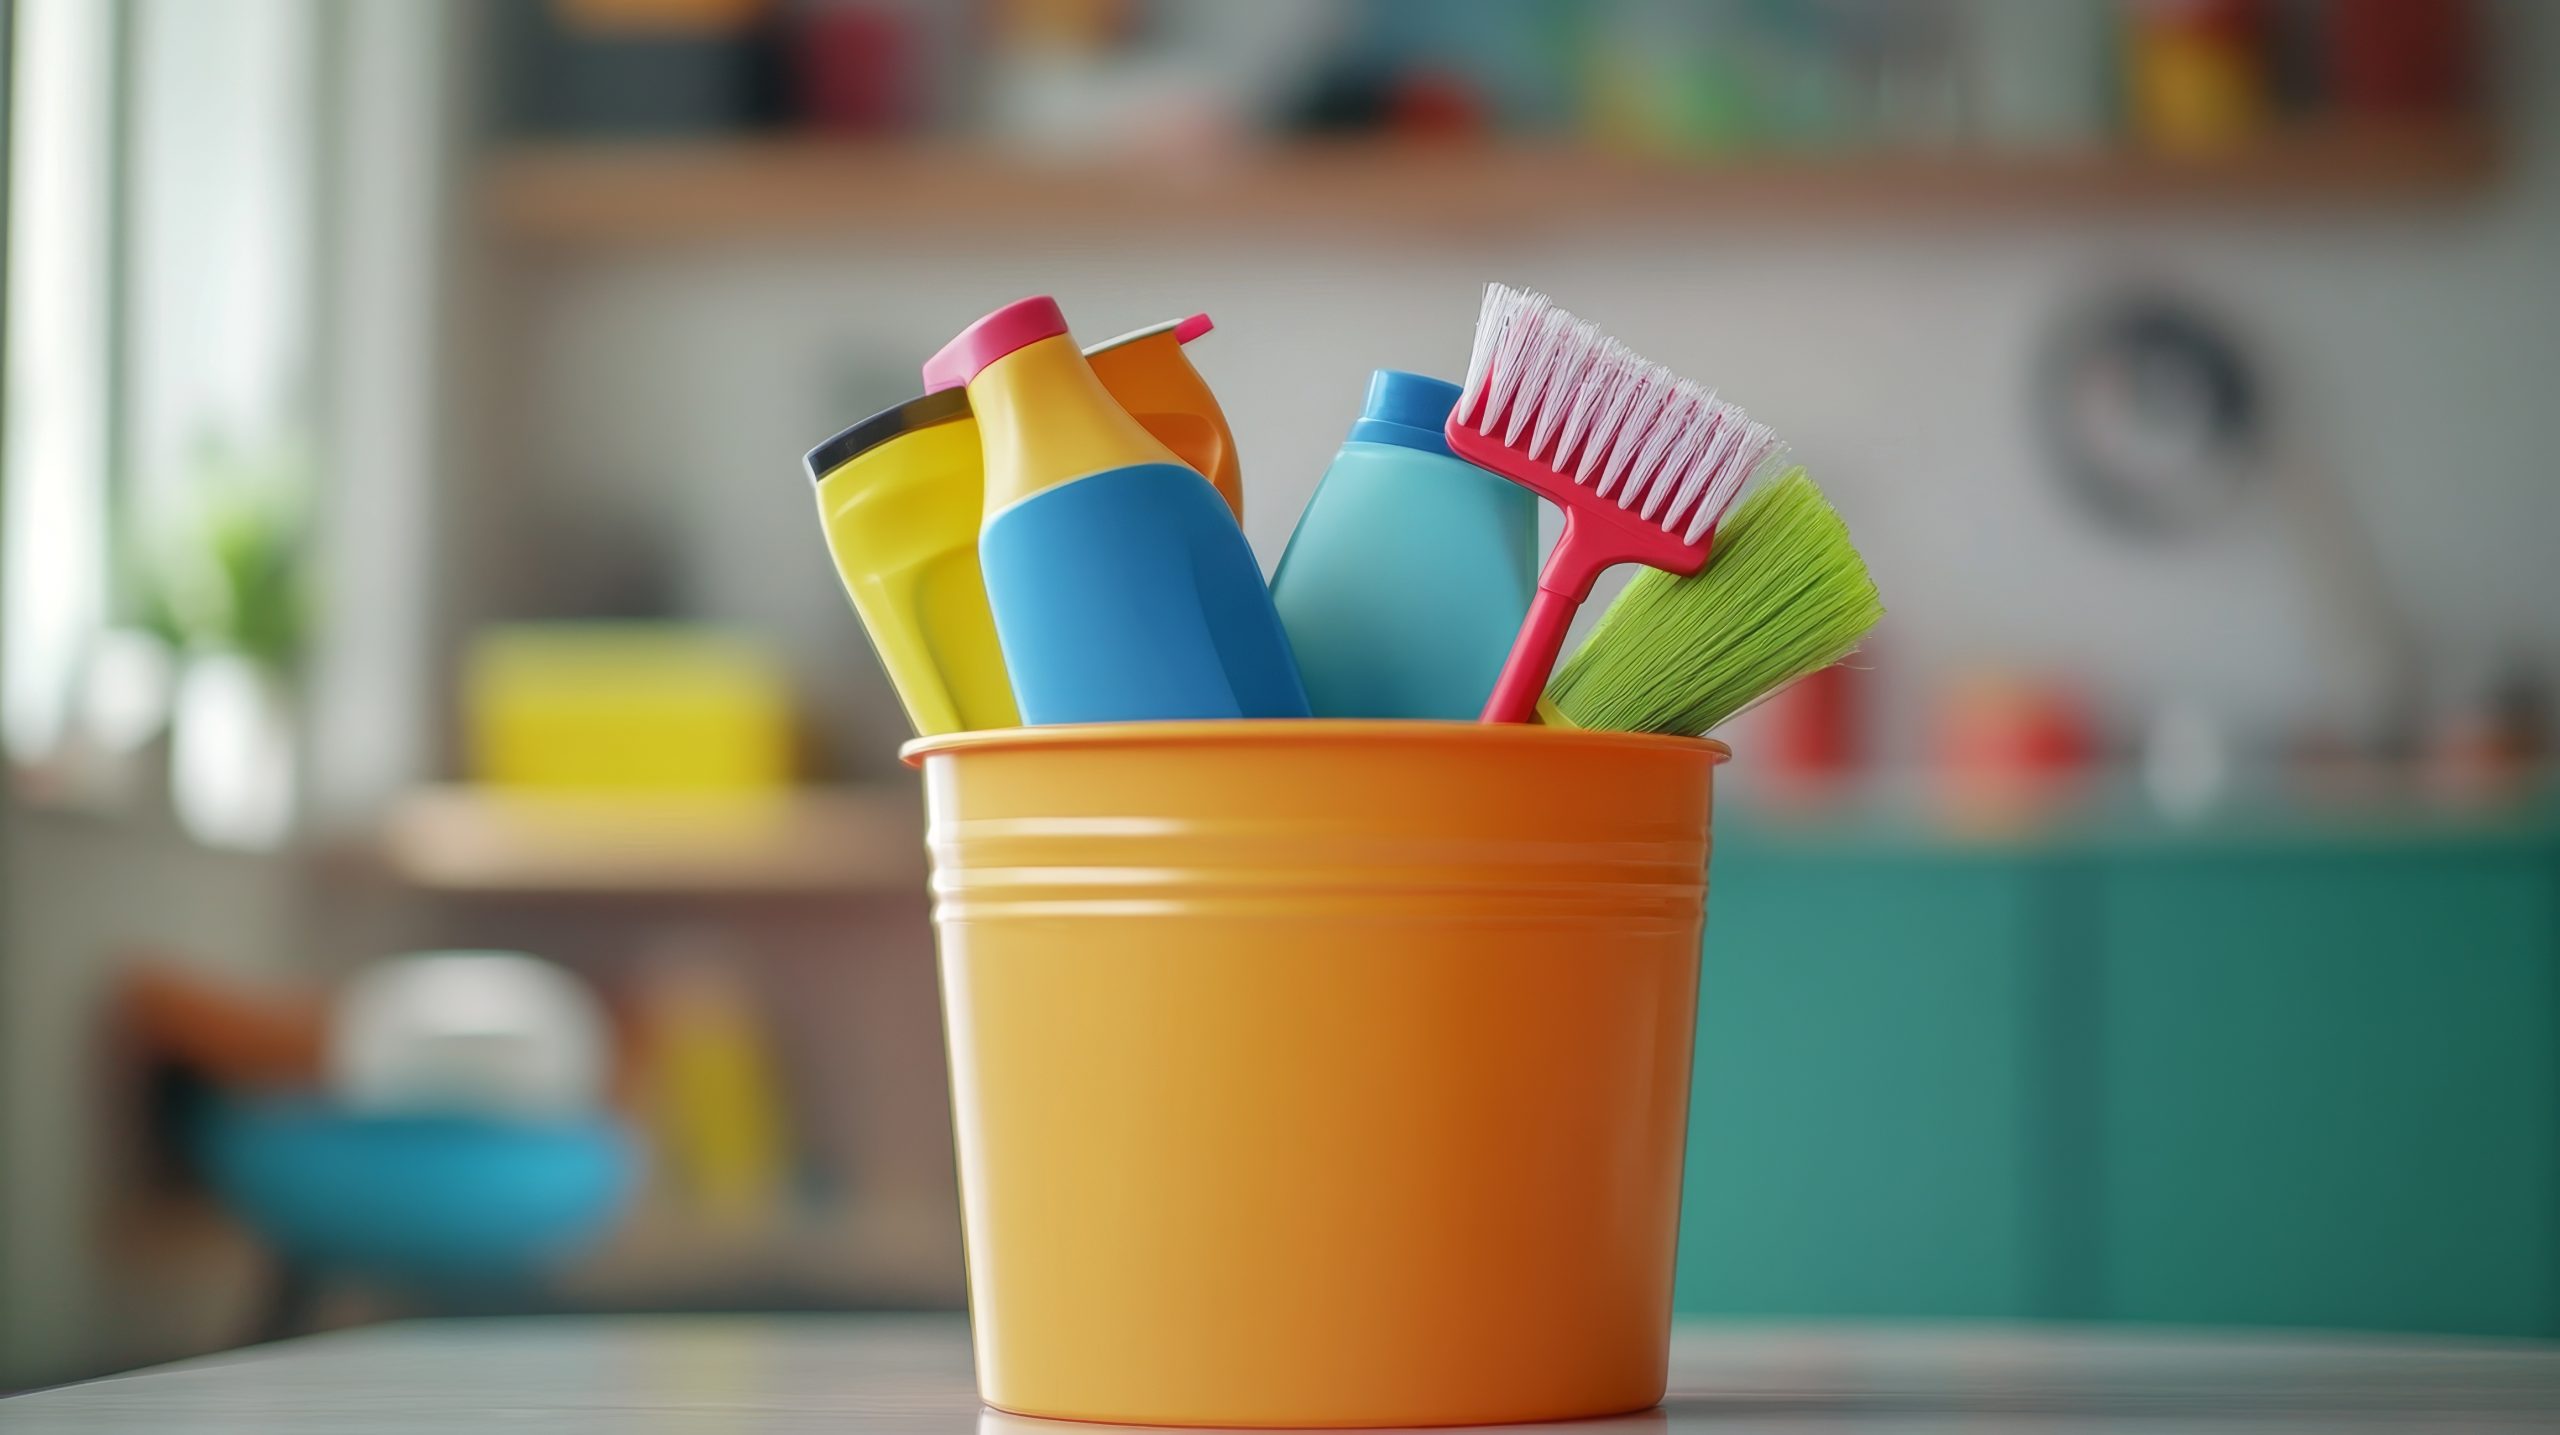
One of the most effective playroom organization strategies is to establish designated cleanup times. This could be before dinner, before bedtime, or any other time that works well for your family’s schedule. Making cleanup a regular part of the routine helps children understand that it’s an expected part of playtime. But cleanup doesn’t have to be a chore. In fact, it can be an opportunity for fun and learning! Try turning cleanup into a game. Set a timer and see how quickly everyone can put their toys away. Play some upbeat music to make it more energetic. Or create a reward system for a consistently tidy playroom. Visual cues can also be incredibly helpful for playroom organization, especially for younger children. Label bins and shelves with pictures and words so children know exactly where each toy belongs. Colour coding can also be a fun and effective way to help children identify where things go. By making cleanup a regular, engaging activity, you can maintain playroom organization and teach children valuable life skills at the same time.
Creating and maintaining a well-organized playroom is a worthwhile investment for any busy family. Effective playroom organization not only reduces stress and clutter but also fosters a more positive and productive play environment for children.
By implementing these playroom organization ideas – from decluttering and zoning to utilizing clever storage solutions and establishing consistent cleanup routines – you can transform your playroom from a chaotic mess into a haven of fun and creativity. Remember, a well-organized playroom benefits the entire family, creating a more harmonious and enjoyable home environment.
by Kesaa Interiors | DECOR & DIY, DESIGN GUIDES, How-To Guides
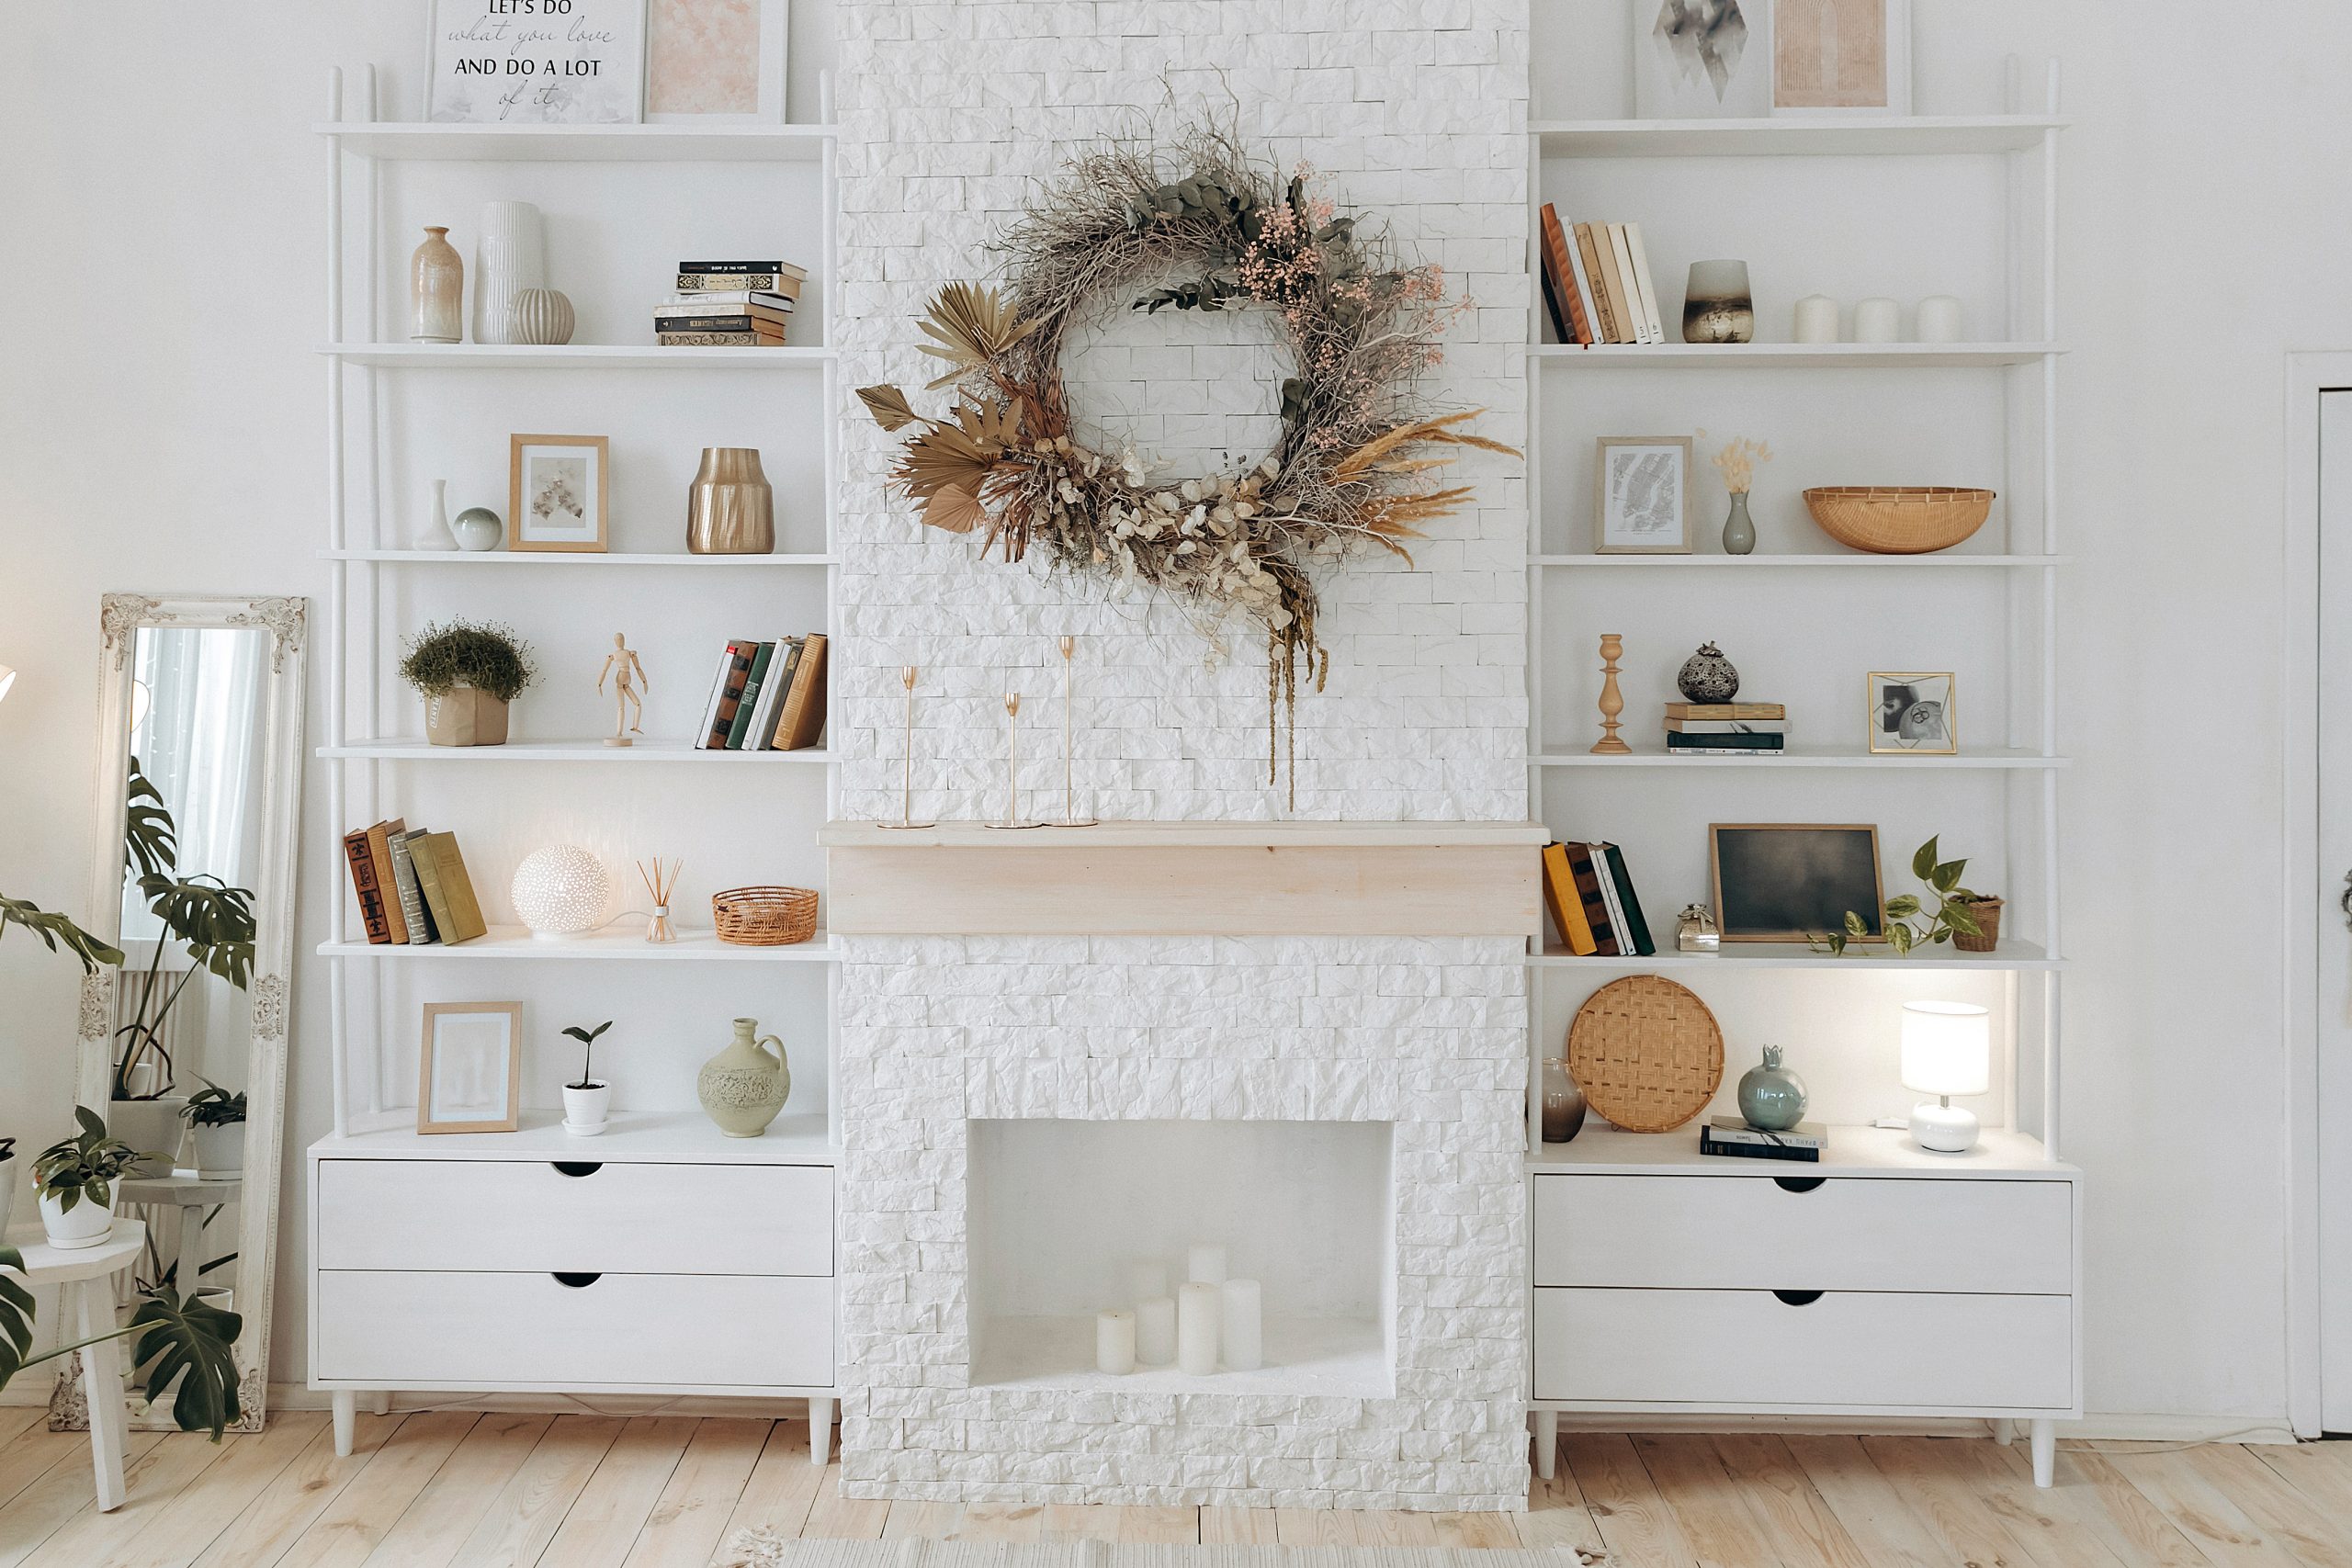
Learn how to style your shelf to elevate and transform your space. 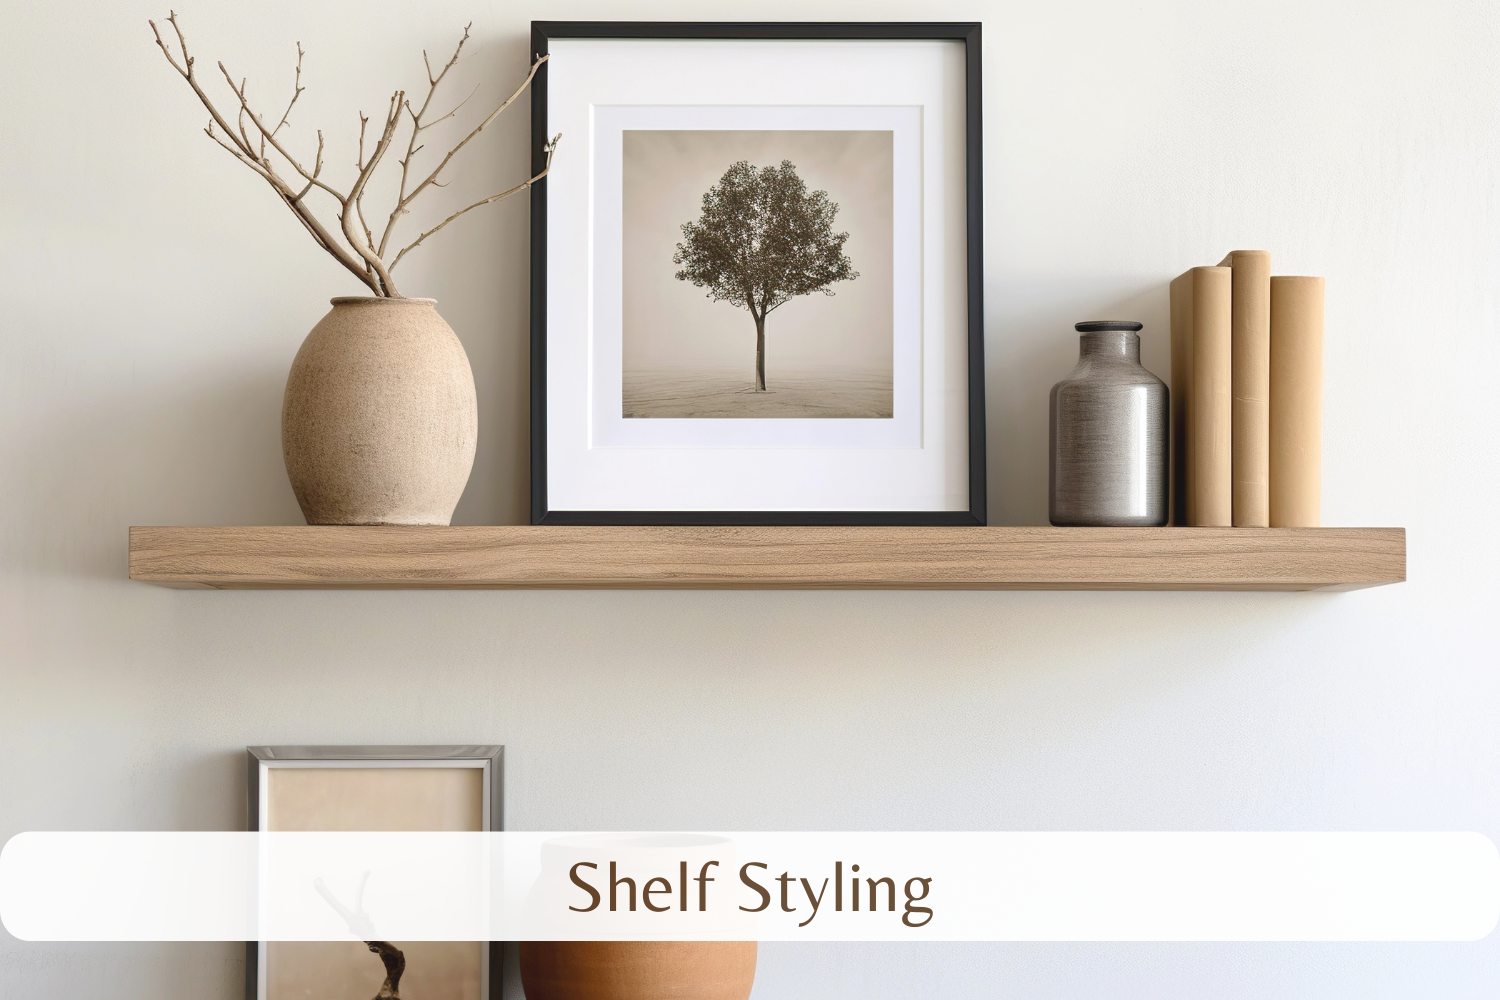
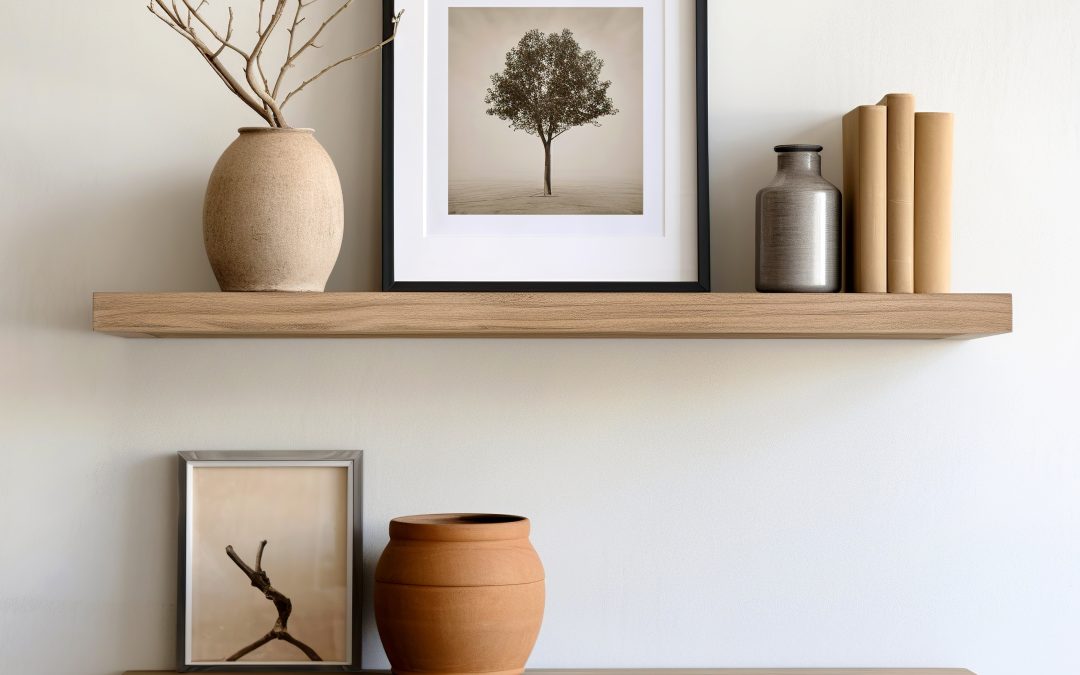
Tired of staring at bare shelves? Shelf styling can dramatically transform a room, taking it from bland to grand. It’s more than just placing objects on a surface; it’s about creating a visual story that reflects your personality and enhances your space.
This guide will equip you with expert shelf styling tips to help you curate stunning displays and elevate your interior design. Get ready to turn those empty shelves into captivating focal points!
Best Shelf Styling Tips and Tricks.
Know Your Canvas: Evaluating Your Shelf Space for Optimal Styling
Before diving into the exciting world of shelf styling, take a moment to assess your “canvas.” Understanding your shelf space is crucial for creating a successful display. Effective shelf styling starts with knowing the dimensions and characteristics of your shelves. Consider the following:
- Size and Shape: Are your shelves long and narrow, or short and wide? Are they square, rectangular, or a unique shape? The size and shape will dictate the types and number of items you can display. Large shelves offer more flexibility, while smaller shelves require a more curated approach to shelf styling.
- Depth: How deep are your shelves? This will determine how far forward you can place items and how much layering you can achieve. Deep shelves allow for more dynamic arrangements, while shallow shelves benefit from a more streamlined shelf styling approach.
- Height: Are your shelves tall enough to accommodate larger items, or are they better suited for smaller objects? The height of your shelves will influence the overall visual balance of your shelf styling. Taller shelves can handle taller objects and create a sense of grandeur, while shorter shelves require careful consideration of height variations.
- Location and Surroundings: Where are your shelves located in the room? Are they in a prominent spot or a more secluded corner? Consider the surrounding décor and how your shelf styling can complement the overall aesthetic. Shelf styling should integrate seamlessly with the rest of your room’s design.
By carefully considering these factors, you’ll be well-equipped to make informed decisions about the types of items you choose and how you arrange them. This initial assessment is the foundation for effective shelf styling, ensuring a cohesive and visually appealing display.
Styling with Intention: Defining Your Design Goal
Now that you’ve assessed your shelves, it’s time to define your shelf styling vision. Just like any design project, having a clear goal in mind is essential for achieving a cohesive and impactful result. Shelf styling shouldn’t be a random assortment of objects; it should tell a story and reflect your personal style. Ask yourself:
- What overall mood or atmosphere do I want to create? Do you envision a calming and serene space, a vibrant and energetic display, or a cosy and inviting corner? Your shelf styling should contribute to the overall ambiance of the room.
- What is the existing style of my room? Is it modern, minimalist, bohemian, farmhouse, or eclectic? Your shelf styling should complement the existing décor and enhance the overall aesthetic. Consider the colours, textures, and materials already present in the room. For example, if your room has a minimalist design, your shelf styling should follow suit with clean lines and a limited colour palette.
- What specific style am I aiming for with my shelves? Do you want to create a minimalist display with a few carefully chosen objects, a maximalist arrangement with a curated collection of treasures, or something in between? Defining your shelf styling style will guide your choices and ensure a cohesive look. Some popular shelf styling themes include:
- Minimalist: Clean lines, simple objects, limited colour palette.
- Bohemian: Eclectic mix of textures, patterns, and global influences.
- Maximalist: Layered and abundant displays, showcasing collections and personal items.
- Rustic: Natural materials, earthy tones, vintage or antique accents.
- Modern: Sleek and contemporary, with a focus on geometric shapes and bold colors.
By defining your shelf styling vision, you’ll create a roadmap for your project. This will help you choose the right items and arrange them in a way that reflects your personal style and enhances your space. Effective shelf styling is about creating a cohesive and intentional display that adds personality and visual interest to your room.
The Art of Curation: Selecting Items that Tell a Story

With your shelf styling vision in mind, it’s time to gather the items that will bring your shelves to life. This is where the fun begins! Curation is key to successful shelf styling. It’s not about randomly placing objects on a shelf; it’s about carefully selecting items that reflect your personality, interests, and style. Think of your shelves as a mini-gallery where you can showcase your favorite treasures and create a visual narrative.
Consider incorporating a variety of items to add depth and interest to your shelf styling:
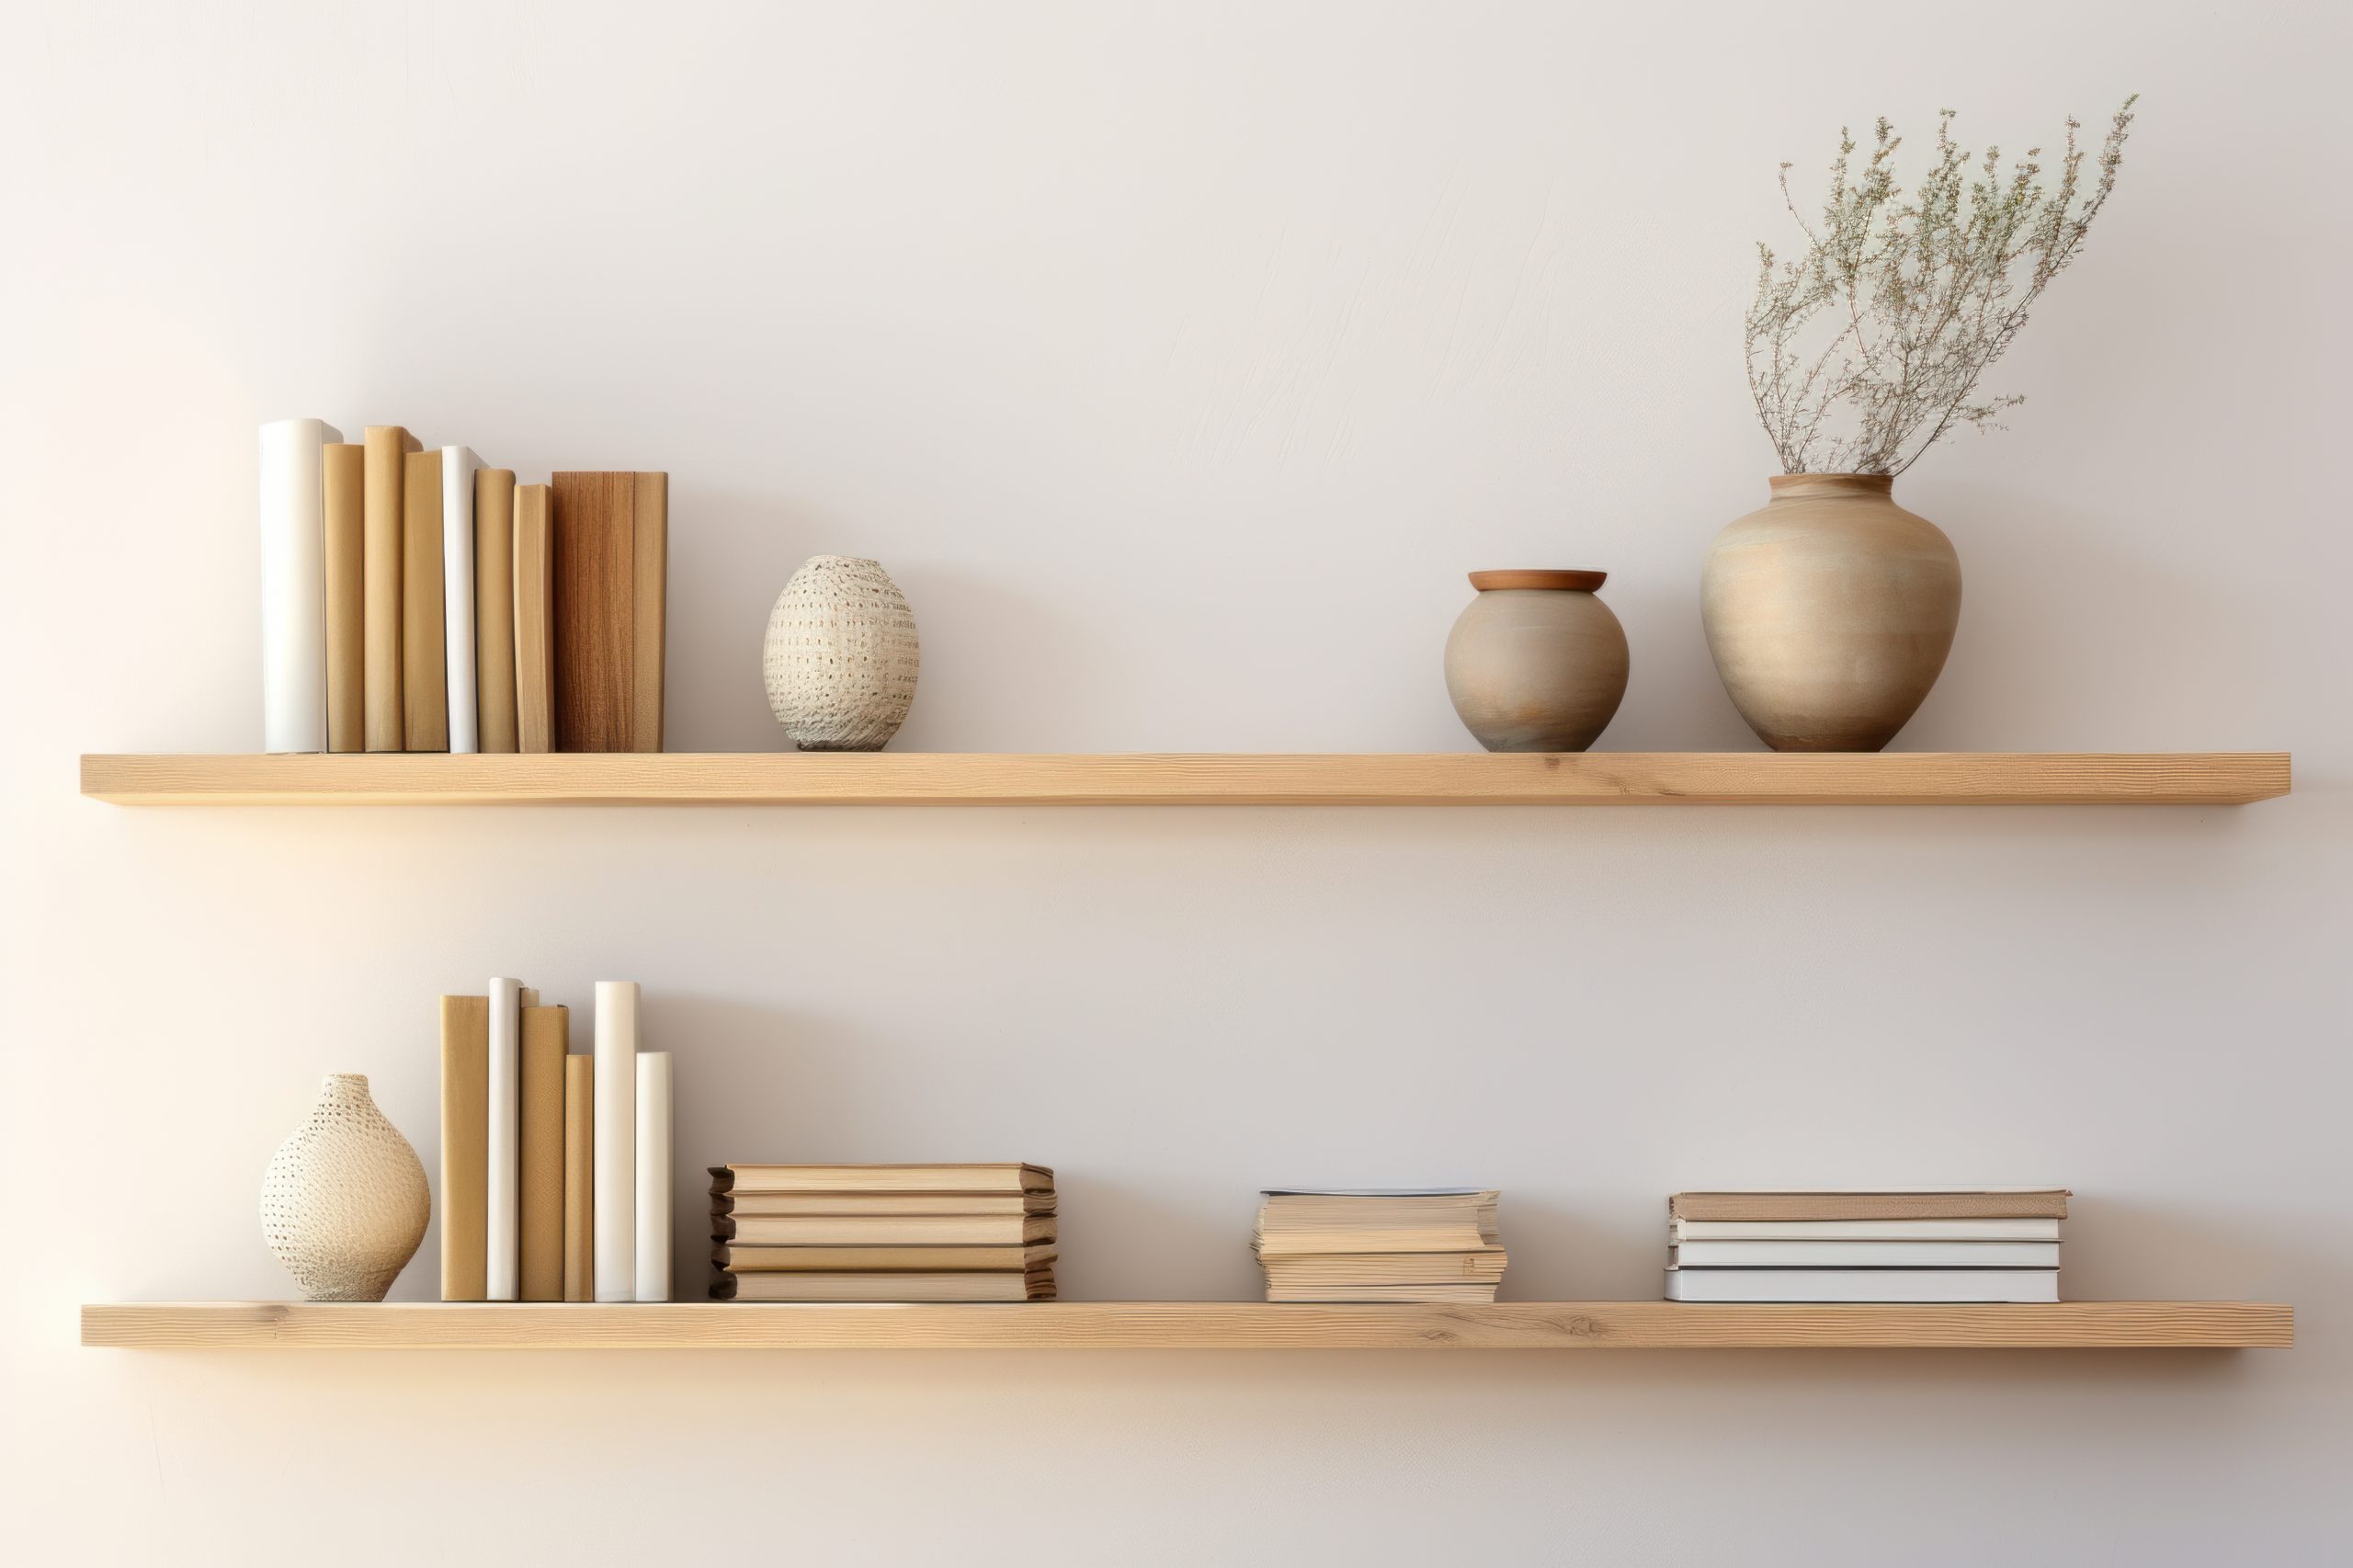
- Books: Books are a staple in shelf styling. They add height, texture, and personality. Arrange them both vertically and horizontally to create visual interest. Choose books with covers that complement your color scheme or showcase your interests. Don’t be afraid to use books as decorative elements, even if you haven’t read them all!
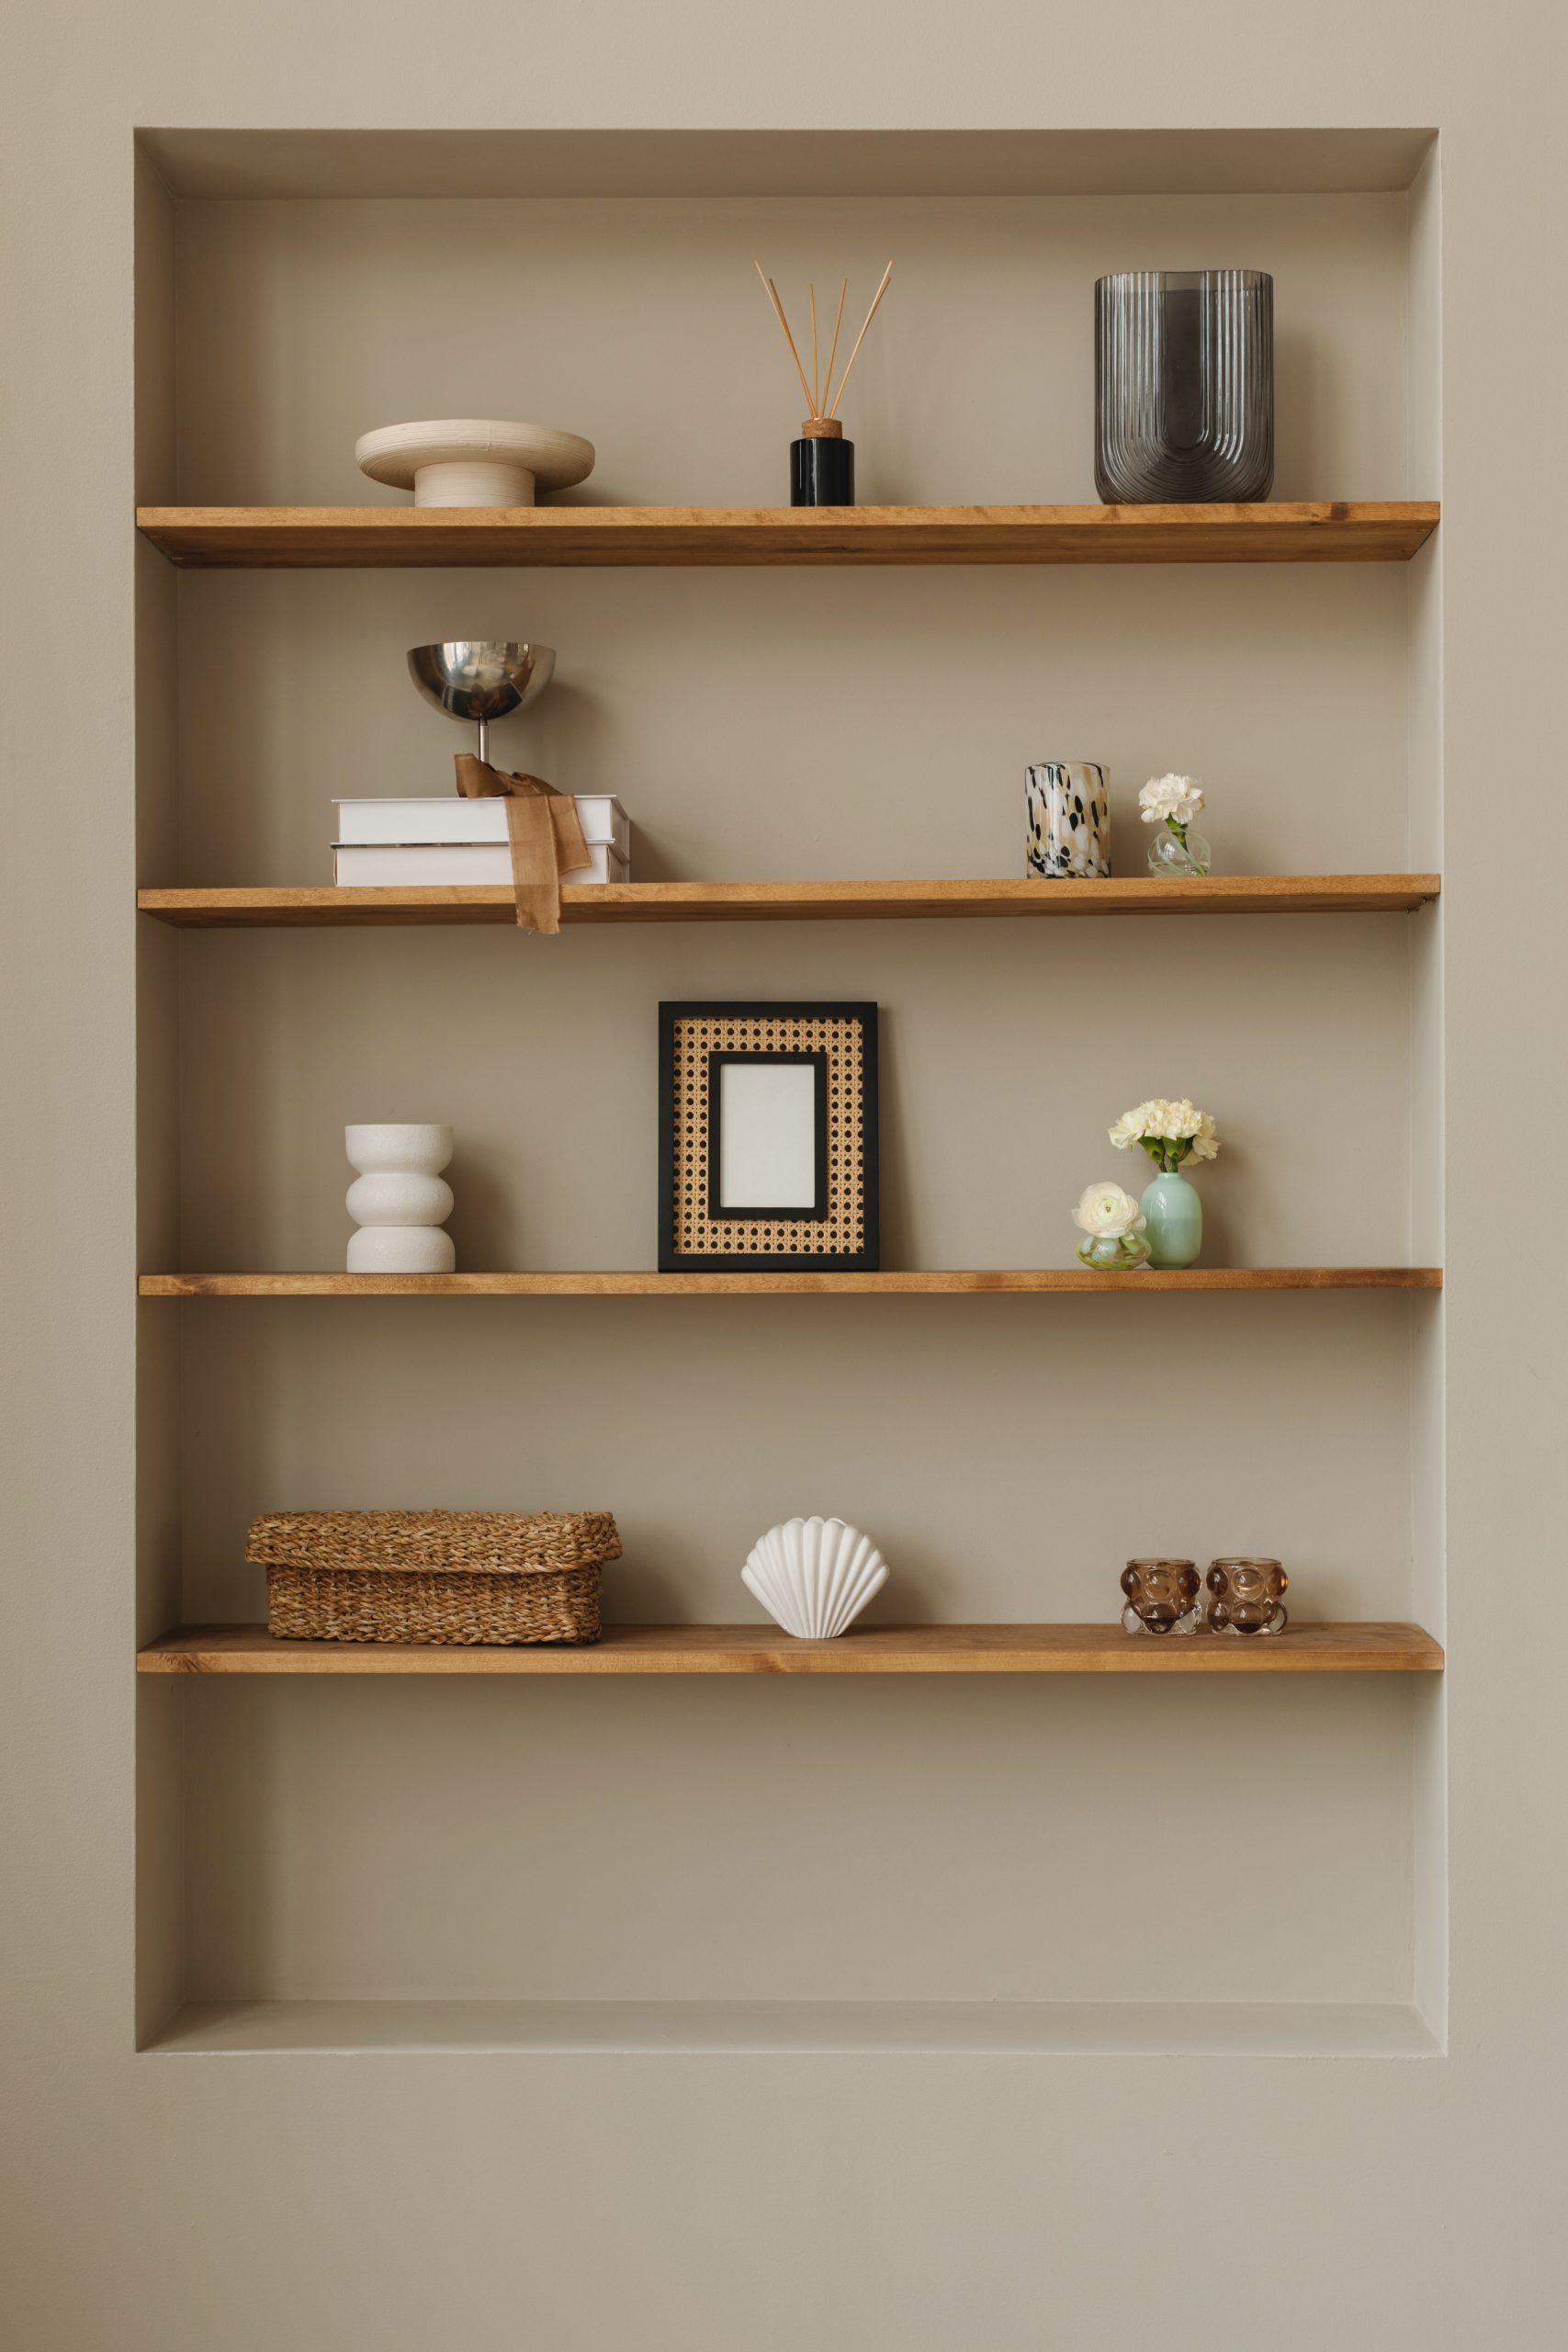
- Decorative Objects: Vases, sculptures, bowls, candlesticks, and other decorative objects can add personality and visual appeal to your shelves. Choose items that complement your chosen style and colour palette. Look for unique pieces that spark joy and tell a story.
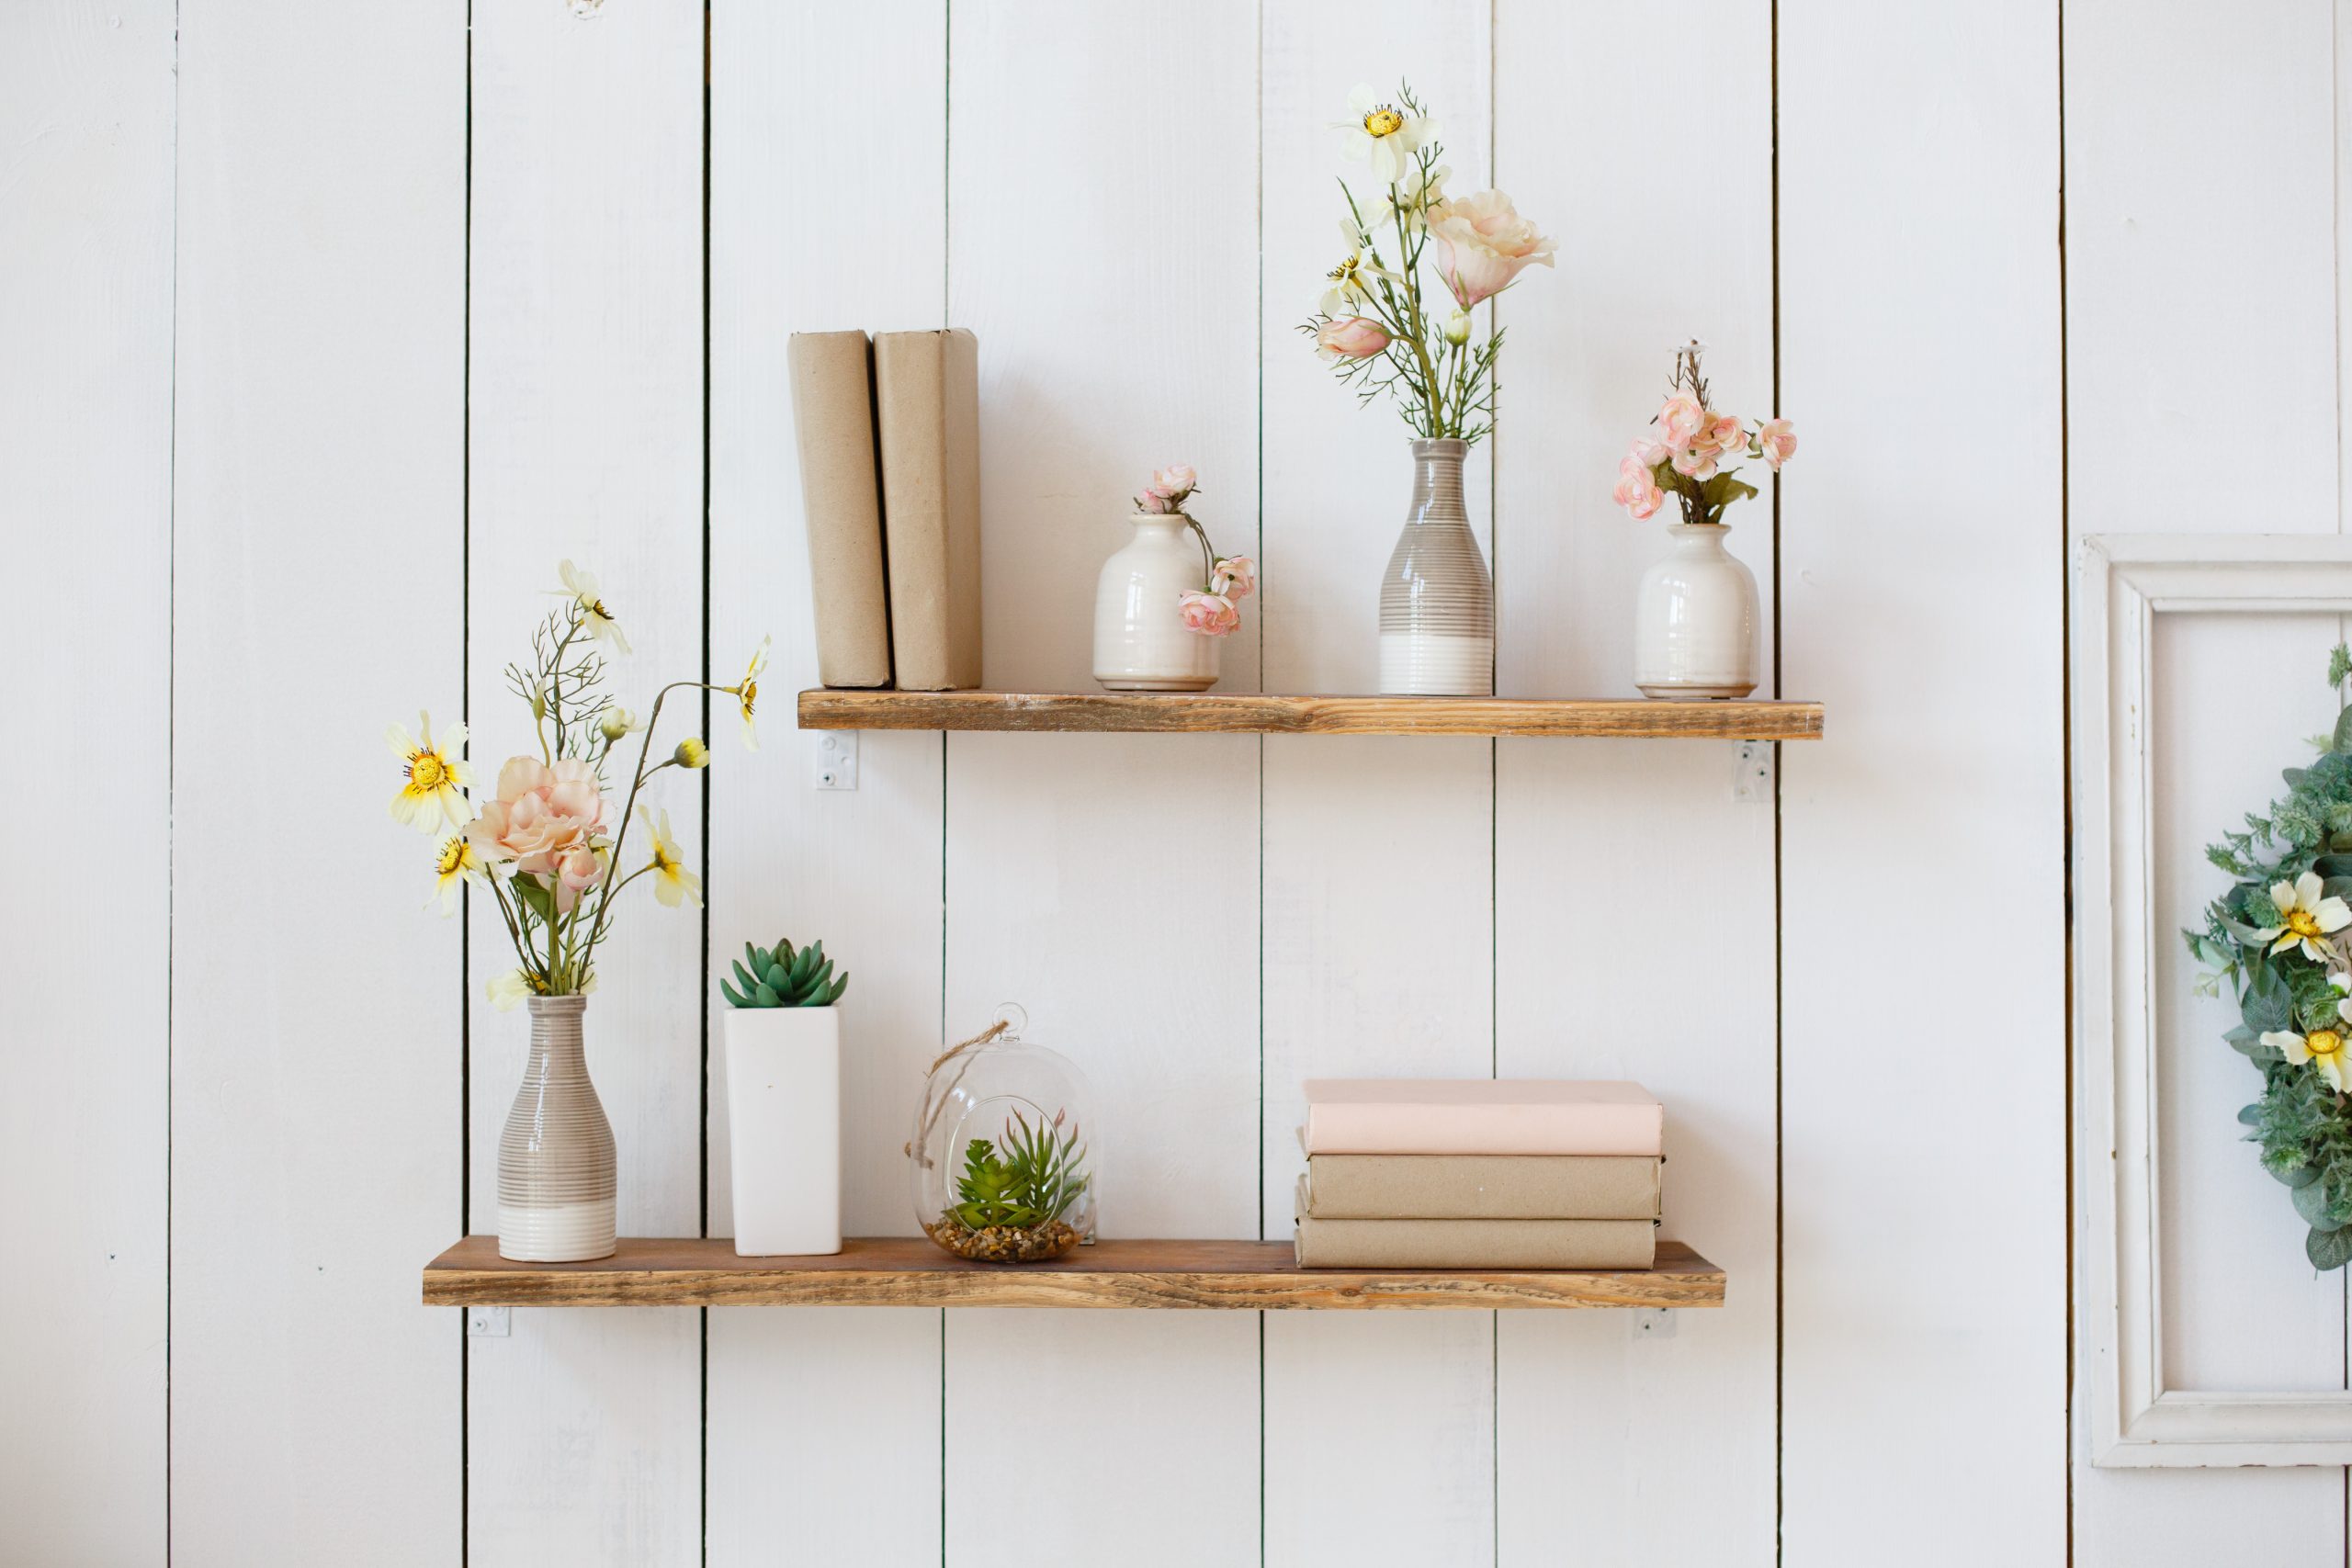
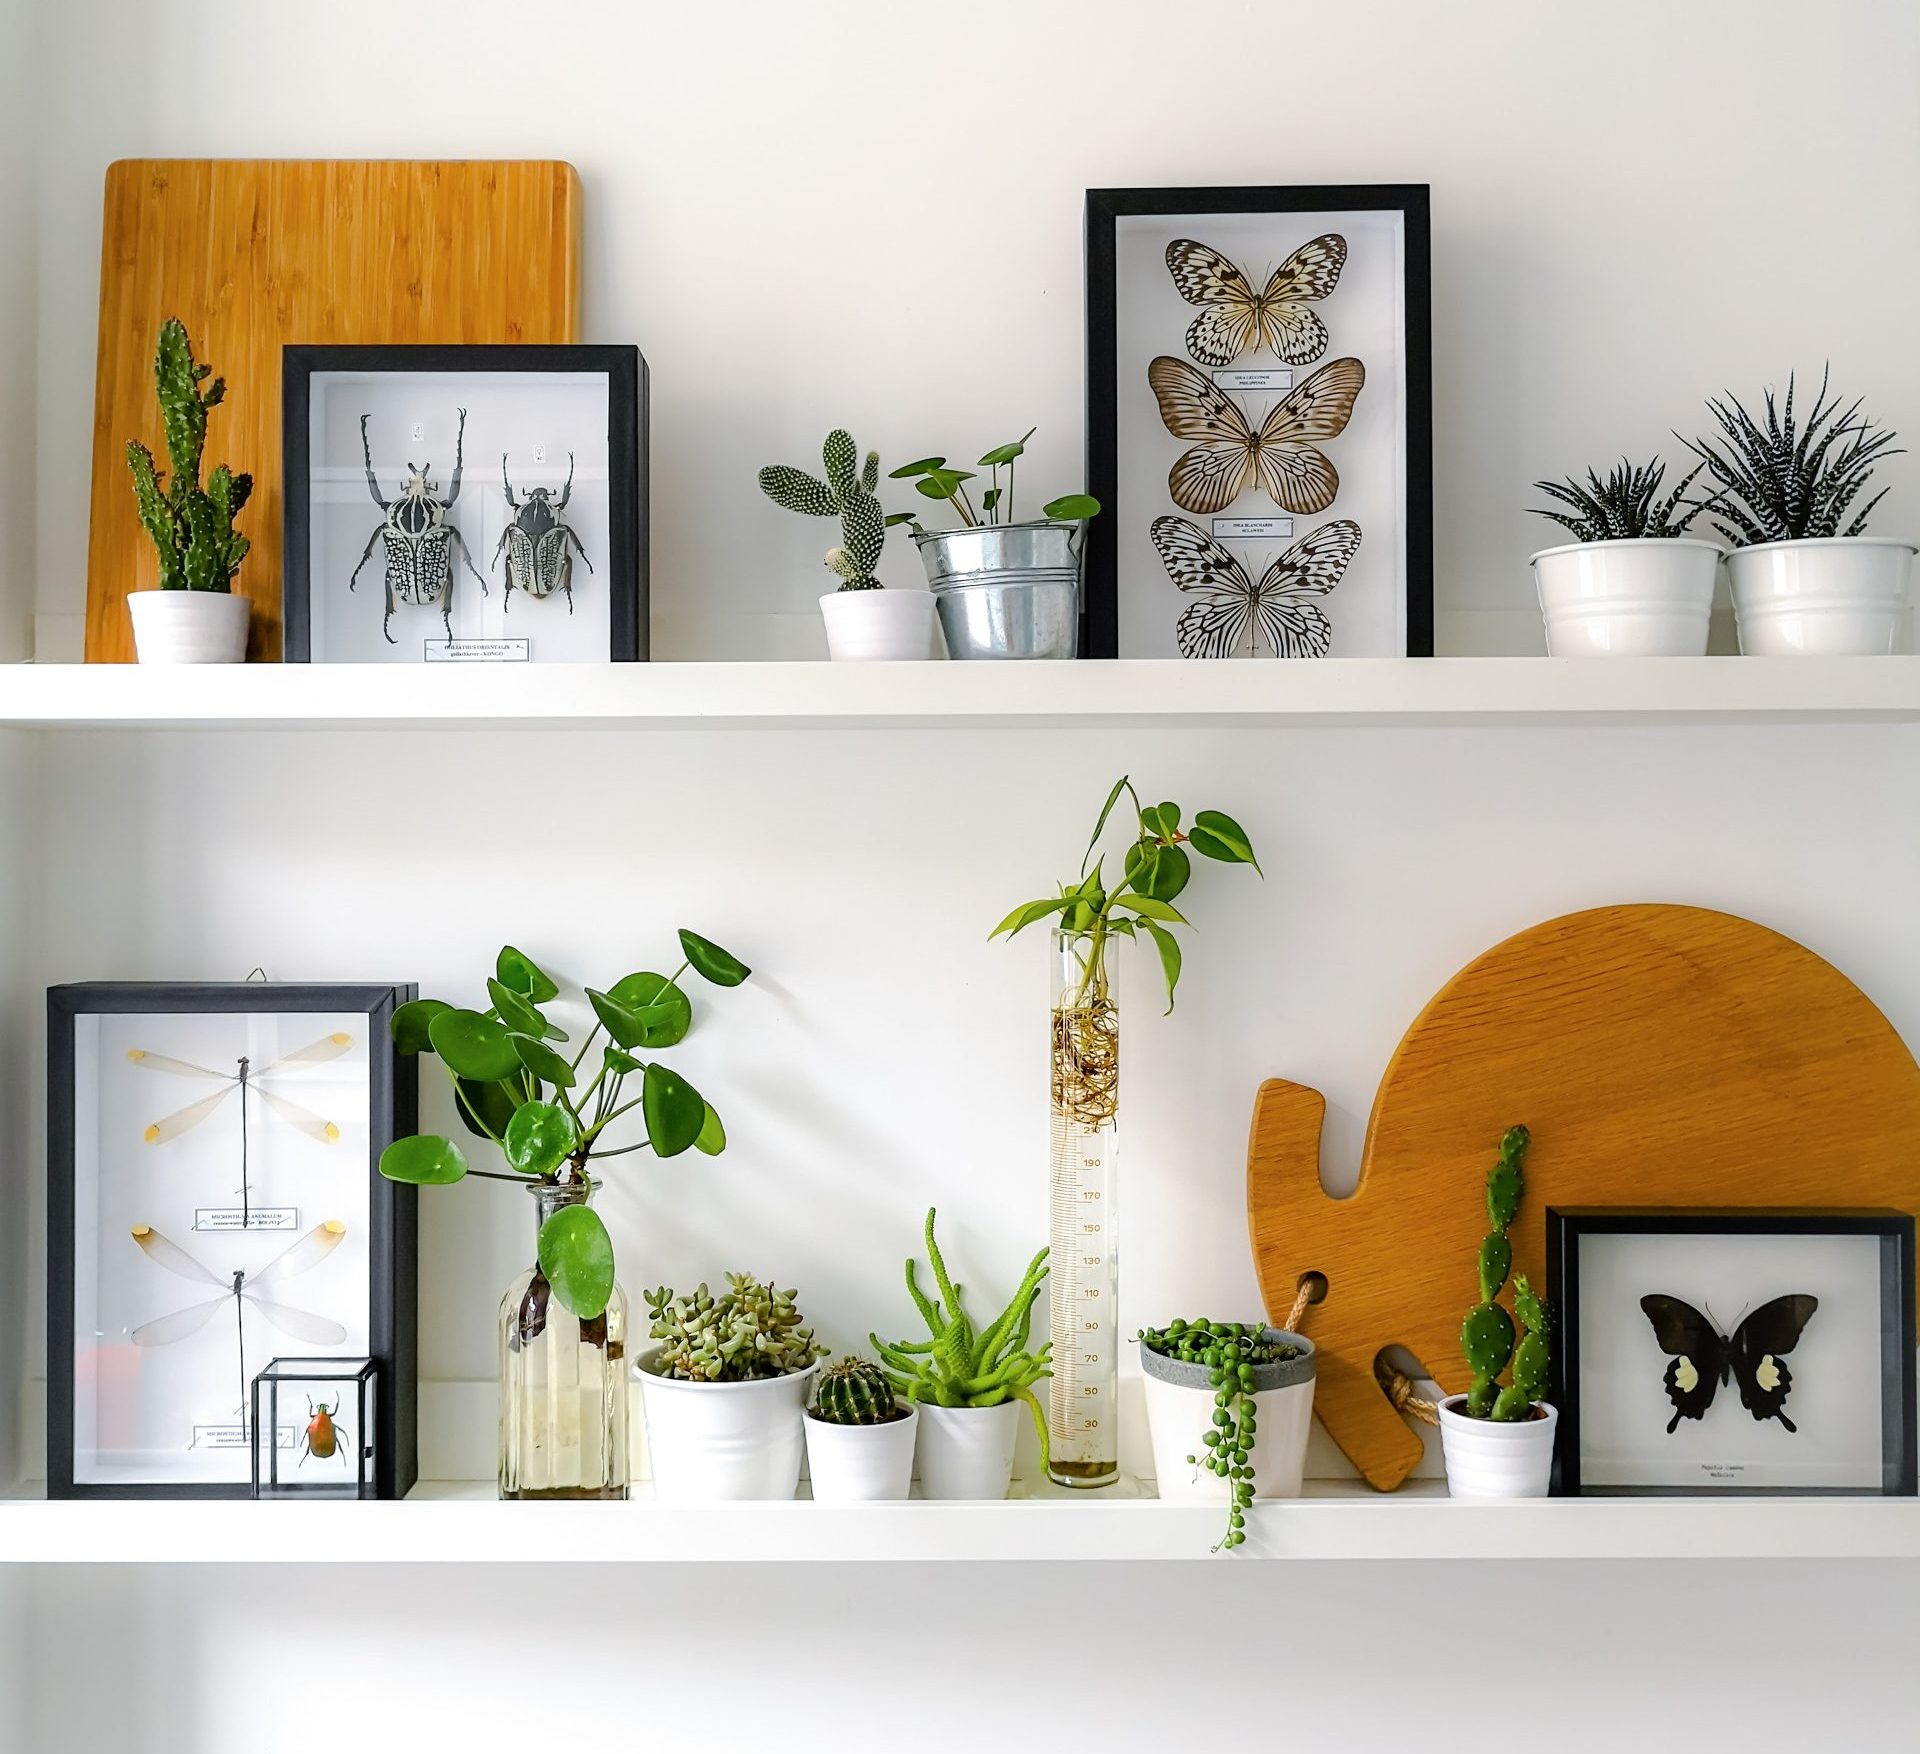
- Plants: Greenery adds life and vibrancy to any space, including your shelves. Incorporate small potted plants, trailing vines, or dried botanicals to add a touch of nature. Choose plants that thrive in the lighting conditions of your shelves.
- Personal Mementos: Shelf styling is a great opportunity to display cherished mementos and travel souvenirs. These items add a personal touch and tell a story about your life and experiences. Frame photos, display travel trinkets, or showcase handmade items.
- Art and Prints: Framed art prints, photographs, or even small canvases can add a pop of color and personality to your shelves. Choose pieces that complement your overall style and colour scheme.
Remember, thoughtful curation is key to successful shelf styling. Don’t be afraid to experiment with different combinations of items until you find an arrangement that you love. The goal is to create a display that reflects your unique style and enhances your space.
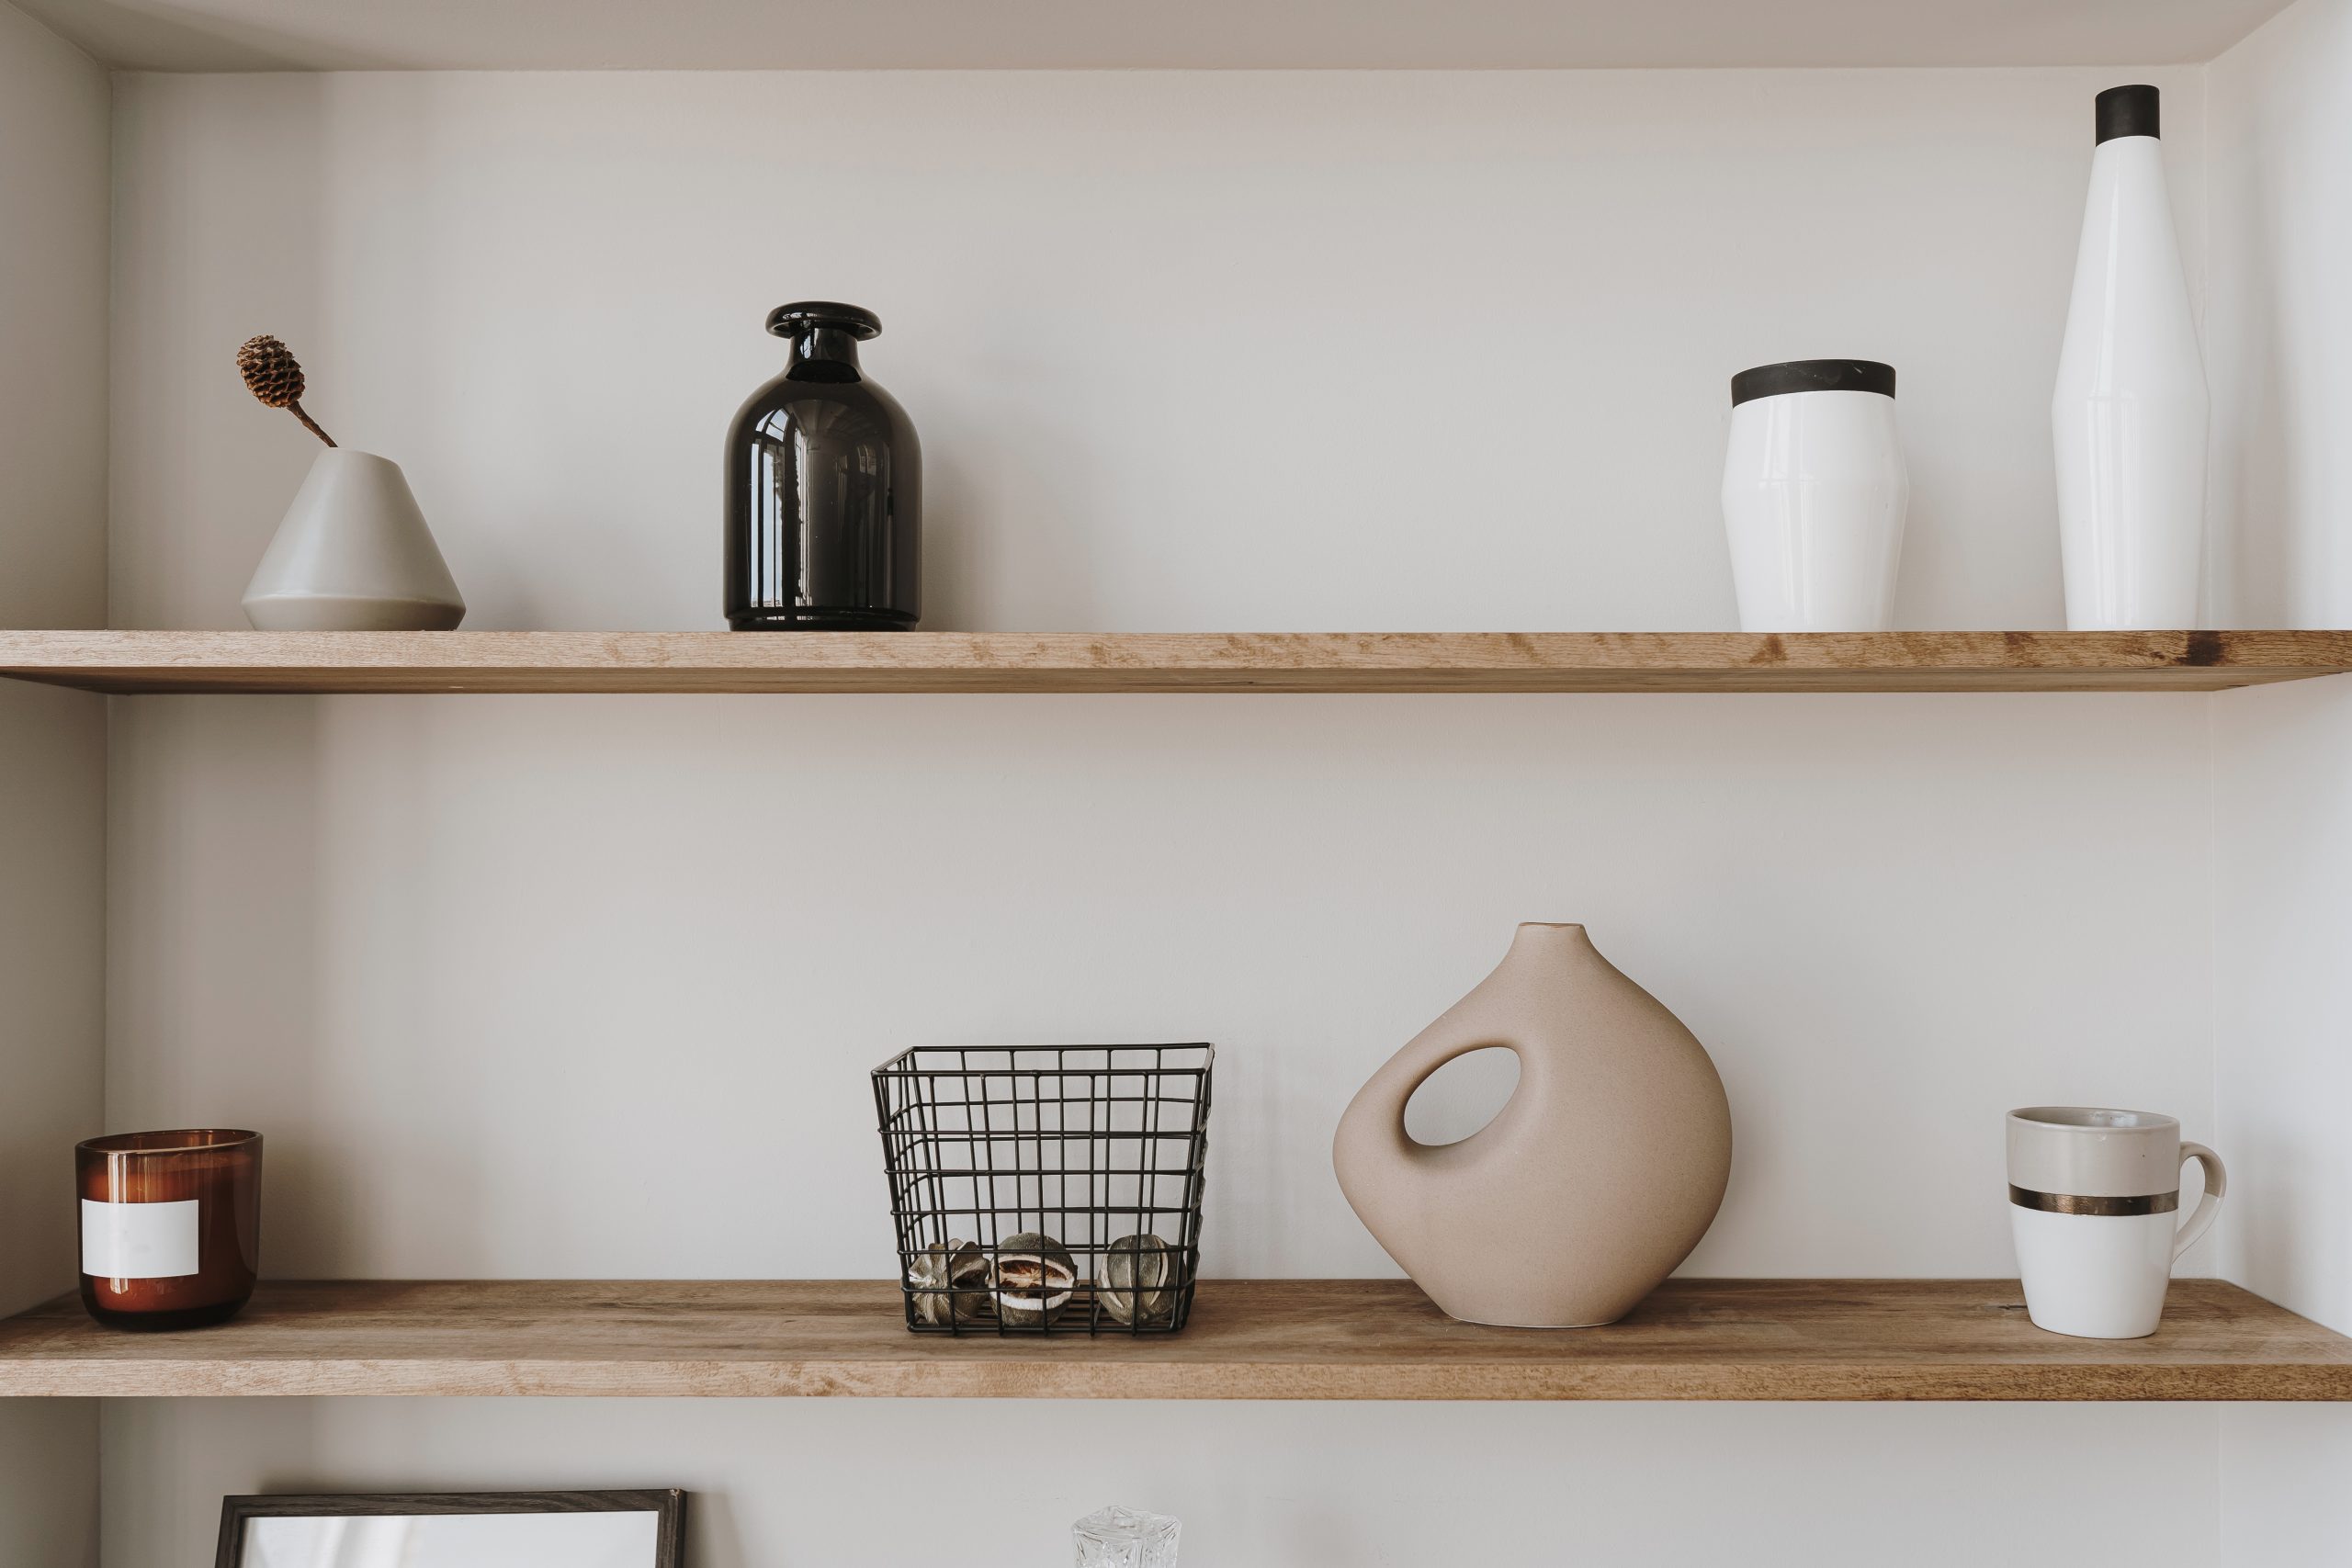
Texture Play: Incorporating a Variety of Materials for Visual Interest
Once you’ve gathered your shelf styling treasures, it’s time to start thinking about how to arrange them. One of the key elements of successful shelf styling is incorporating a variety of textures and materials. This adds depth, dimension, and visual interest to your shelves, preventing them from looking flat or one-dimensional.
Consider the following textures and materials when styling your shelves:
- Wood: Wood adds warmth and natural beauty to your shelves. Incorporate wooden boxes, trays, bowls, or sculptures. Different types of wood, such as light oak, dark walnut, or rustic reclaimed wood, can create different moods and styles.
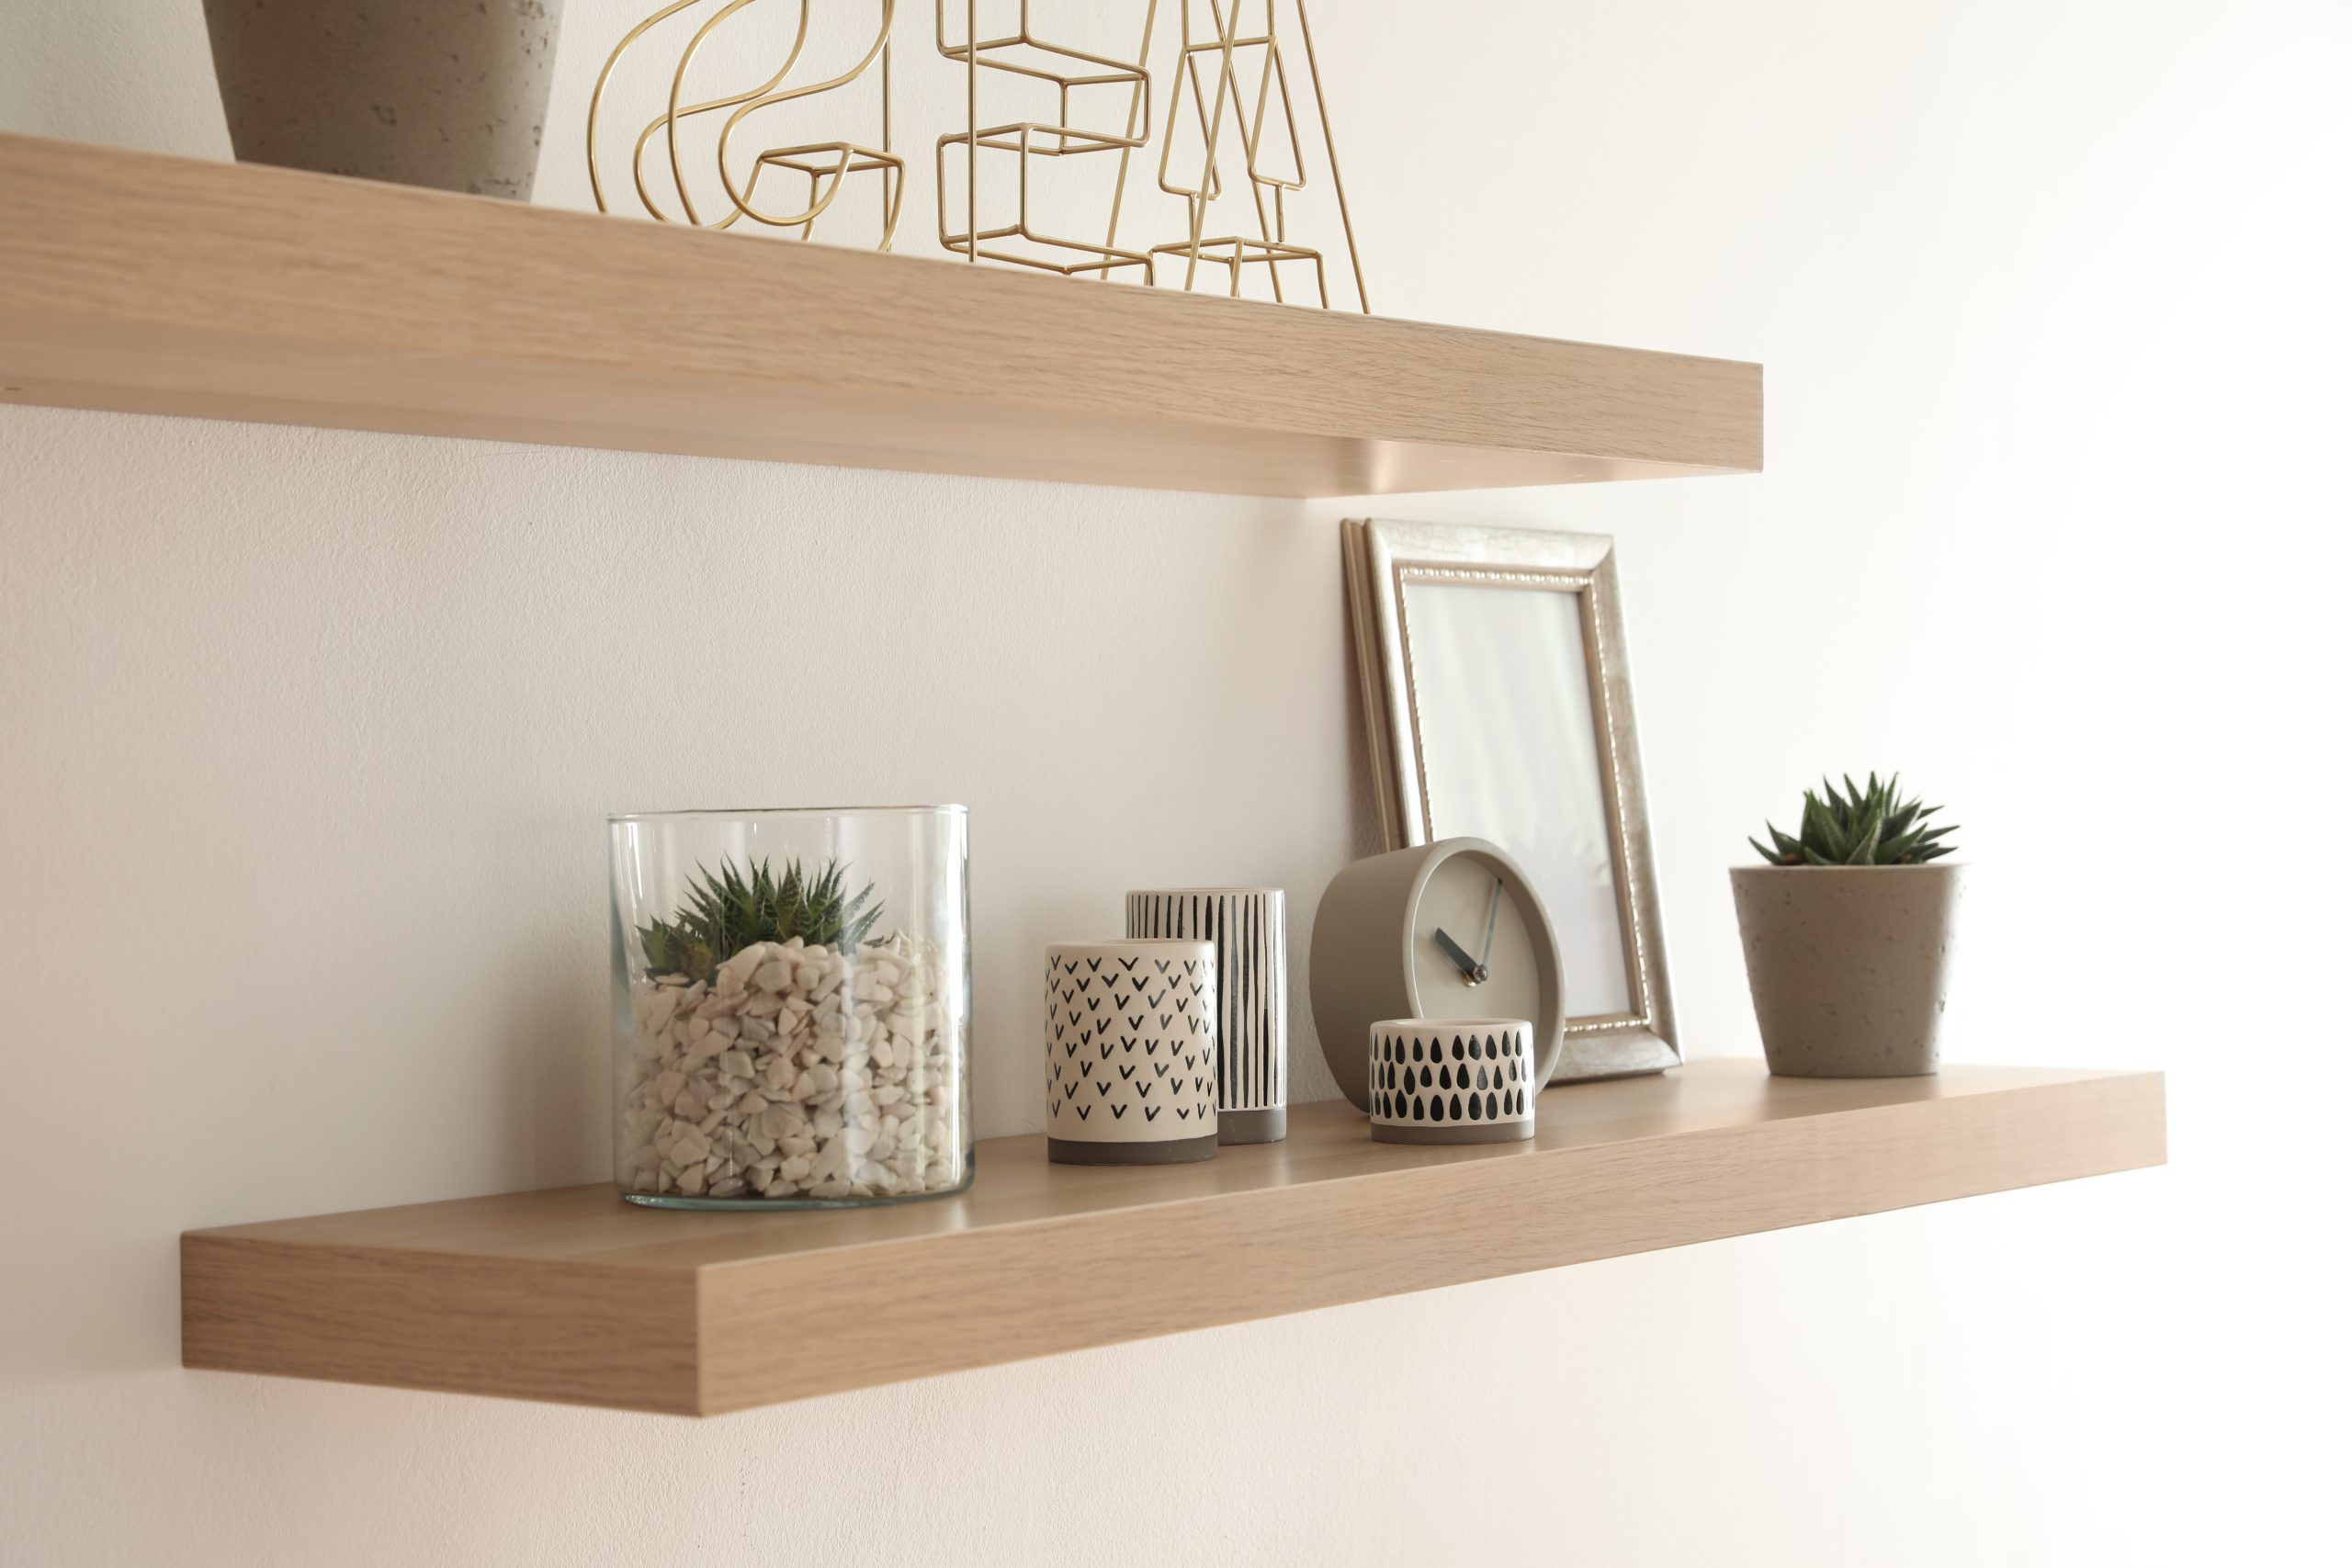
- Metal: Metallics add a touch of glamour and shine. Incorporate brass, copper, silver, or gold accents through candle holders, frames, or decorative objects. Metallics can also create a modern or industrial feel.
- Ceramic: Ceramic pieces, such as vases, bowls, or figurines, add a touch of artistry and craftsmanship. Consider using ceramics with different glazes and finishes to add variety.
- Glass: Glass adds a touch of elegance and reflectivity. Incorporate glass vases, jars, or decorative objects. Clear glass can create a sense of airiness, while colored glass can add a pop of color.
- Textiles: Textiles add softness and warmth. Incorporate woven baskets, small rugs, or decorative pillows. Textiles can also add pattern and colour to your shelves.
- Natural Elements: Incorporate natural elements such as shells, stones, or driftwood to add an organic touch. These elements can create a calming and grounding effect.
By mixing and matching different textures and materials, you’ll create a visually dynamic and engaging display. Don’t be afraid to experiment with different combinations until you find a balance that you love. Effective shelf styling is about creating a layered and textured look that draws the eye and adds personality to your space. Remember, the goal is to enhance your shelf styling by creating a visually rich and tactile experience.
Size Matters: Creating Visual Dynamics with Varying Heights and Scales
Varying the heights and sizes of your objects is another crucial element of successful shelf styling. A monotonous display of similarly sized items can look static and uninteresting. By incorporating objects of different heights and scales, you create visual interest, depth, and a sense of movement. Here’s how to play with heights and sizes for impactful shelf styling:
- Stacking: Stack books both vertically and horizontally to create different levels and add height. You can also stack boxes or other decorative objects to achieve a similar effect. Stacking adds visual weight and creates a sense of stability.
- Using Risers: Use books, boxes, or small stands as risers to elevate smaller objects and create varying heights. This allows smaller items to be seen and prevents them from getting lost among larger items. Risers also add depth and dimension to your shelf styling.
- Visual Triangles: Imagine drawing invisible triangles connecting the tallest items on your shelves. This technique, known as creating visual triangles, helps to guide the eye and create a sense of balance and harmony. Vary the heights of the triangle peaks to keep the display dynamic.
- Layering: Place smaller items in front of larger ones to create depth and layers. This prevents the display from looking flat and adds visual interest. Layering also allows you to showcase a greater number of items without overcrowding the shelves.
- Balancing Act: Avoid placing all the tall items on one side and all the short items on the other. Distribute heights and sizes evenly across your shelves to create visual balance. This prevents the display from feeling lopsided or unbalanced.
By playing with heights and sizes, you can transform your shelves from static displays into dynamic and engaging focal points. This technique adds visual interest, depth, and a sense of movement to your shelf styling, making it more appealing and captivating. Remember, effective shelf styling is about creating a visually balanced and harmonious display that draws the eye and enhances your space.
Styling Secrets: Techniques to Transform Your Shelves
Now that you understand the importance of texture, height, and scale, let’s delve into some specific styling techniques that will bring your shelves to life. These shelf styling tips will help you arrange your curated collection in a way that is both visually appealing and reflects your personal style.
- The Rule of Thirds: Just like in photography, the rule of thirds can be applied to shelf styling. Imagine dividing your shelf into thirds both horizontally and vertically. Placing objects at the intersection of these lines creates a more visually appealing and balanced arrangement. This technique helps to avoid placing items directly in the center, which can look static.
- Visual Balance: Strive for visual balance by distributing visual weight evenly across your shelves. Balance can be achieved through symmetry, asymmetry, or radial balance. Symmetrical arrangements create a formal and traditional look, while asymmetrical arrangements are more dynamic and modern. Radial balance involves arranging items around a central point.
- Creating Depth and Layers: Layering objects adds depth and dimension to your shelves. Place smaller items in front of larger ones, and use books or boxes to create different levels. This technique prevents the display from looking flat and adds visual interest. Layering also allows you to showcase a greater number of items without overcrowding the shelves.
- Incorporating Greenery: Plants add life and vibrancy to any space, including your shelves. Incorporate small potted plants, trailing vines, or dried botanicals to add a touch of nature and freshness. Choose plants that thrive in the lighting conditions of your shelves and complement your overall style. Greenery softens the hard lines of shelves and adds a touch of organic beauty.
- Negative Space: Don’t be afraid to leave some empty space on your shelves. Negative space, also known as white space, is just as important as the objects themselves. It allows the eye to rest and prevents the display from looking cluttered. Negative space gives your curated items room to breathe and stand out.
By implementing these shelf styling techniques, you can create a display that is both visually appealing and reflects your personal style. Remember, shelf styling is an art form, so don’t be afraid to experiment and have fun with it! These techniques will help you achieve a polished and professional look, transforming your shelves into captivating focal points.
Styling Slip-Ups: Common Mistakes to Avoid
Even with the best intentions, it’s easy to make a few missteps when styling shelves. Being aware of these common shelf styling mistakes can help you avoid them and create a more polished and professional-looking display. Here are some pitfalls to watch out for:
- Overcrowding: One of the most common shelf styling mistakes is overcrowding. Too many items crammed onto a shelf can create a cluttered and chaotic look. Remember the importance of negative space. Give your objects room to breathe and allow the eye to rest. Edit ruthlessly and prioritise quality over quantity. A few well-chosen items will have a greater impact than a cluttered mess.
- Neglecting the Back of the Shelf: The back of the shelf is often overlooked, but it’s a valuable opportunity to add depth and visual interest. Consider painting the back of the shelf a contrasting colour, adding wallpaper, or using a mirrored back to create an illusion of depth. This simple step can elevate your shelf styling and make it more visually appealing.
- Lack of Cohesion and Theme: A cohesive look is essential for successful shelf styling. Avoid randomly placing items on the shelf without any thought to their relationship to each other. Choose a theme or colour palette to tie the items together and create a sense of unity. This could be a specific style, such as minimalist or bohemian, or a colour scheme that complements the room’s décor.
- Ignoring Scale and Proportion: Using items that are all the same size and scale can create a monotonous and uninteresting display. Vary the heights and sizes of your objects to create visual interest and depth. Use the visual triangle technique and incorporate risers to elevate smaller items.
- Forgetting Functionality: While aesthetics are important, don’t forget about functionality. If you’re styling shelves in a high-traffic area, make sure the items are arranged in a way that is practical and accessible. Avoid placing fragile items in unstable positions.
By avoiding these common shelf styling mistakes, you can create a display that is both beautiful and functional. Remember, shelf styling is about creating a cohesive and visually appealing arrangement that enhances your space and reflects your personal style. Avoiding these pitfalls will help you achieve a polished and professional look.
Style Showcase: Bringing Your Shelf Styling Vision to Reality
You’ve assessed your shelves, defined your vision, curated your collection, mastered styling techniques, and learned to avoid common mistakes. Now it’s time to put it all together and create a shelf styling masterpiece that truly reflects your personal style. This is where your creativity shines!
Here’s a recap of the key elements to keep in mind as you bring your shelf styling vision to reality:
- Balance: Strive for visual balance by distributing visual weight evenly across your shelves. Use the rule of thirds and visual triangle techniques to achieve a harmonious arrangement.
- Variety: Incorporate a variety of textures, materials, heights, and sizes to create a dynamic and visually interesting display. Mix and match different elements to add depth and dimension.
- Cohesion: Choose a theme or colour palette to tie the items together and create a sense of unity. This will ensure that your shelves look cohesive and intentional, rather than random and cluttered.
- Personality: Don’t be afraid to inject your personality into your shelf styling. Display items that you love and that tell a story about you. This is your chance to showcase your unique style and create a space that truly feels like home.
- Experimentation: Shelf styling is an art form, so don’t be afraid to experiment and have fun with it! Try different arrangements, move things around, and see what works best for you. There’s no right or wrong way to style a shelf, as long as you love the result.
With these expert shelf styling tips, you’re well-equipped to transform your shelves into stunning focal points. Remember, shelf styling is an ongoing process. As your style evolves and you acquire new treasures, don’t be afraid to refresh your shelves and create new displays. Embrace the opportunity to express your creativity and make your space truly your own.
Transforming your living space with stylish shelves is an achievable goal with the right guidance. From assessing your shelf space and curating a captivating collection to mastering styling techniques and avoiding common pitfalls, you now possess the knowledge to elevate your home décor. Remember, shelf styling is more than just placing objects on a surface; it’s an opportunity to express your personality, tell your story, and create a visually stunning focal point.
by Kesaa Interiors | Bathroom, DECOR & DIY, ROOMS, Small Space Hacks
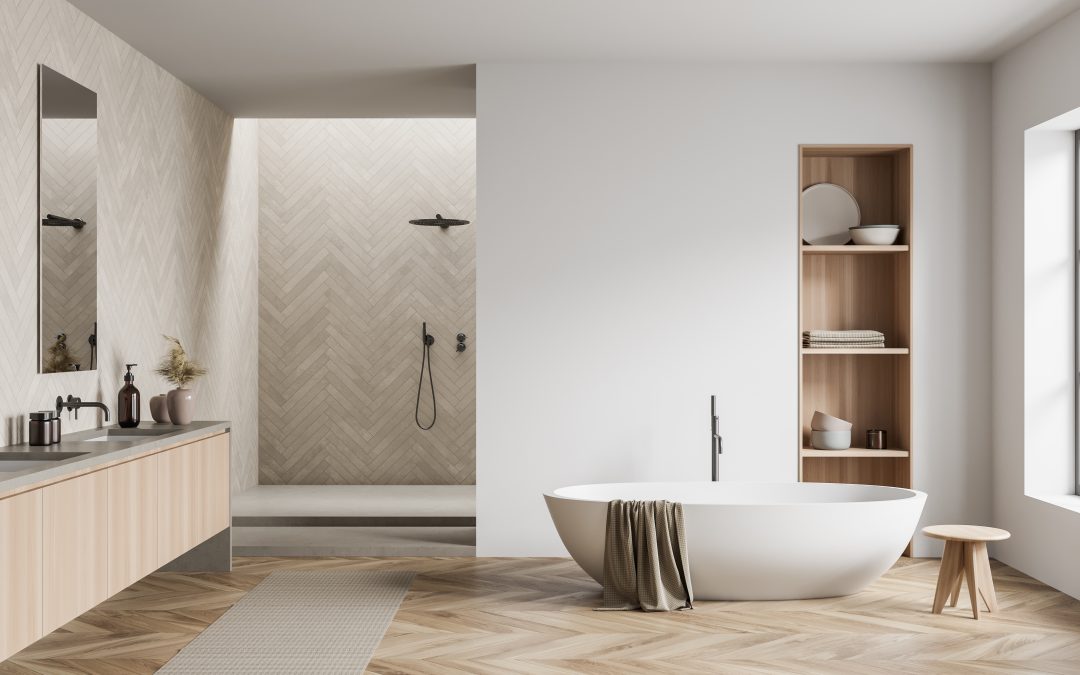
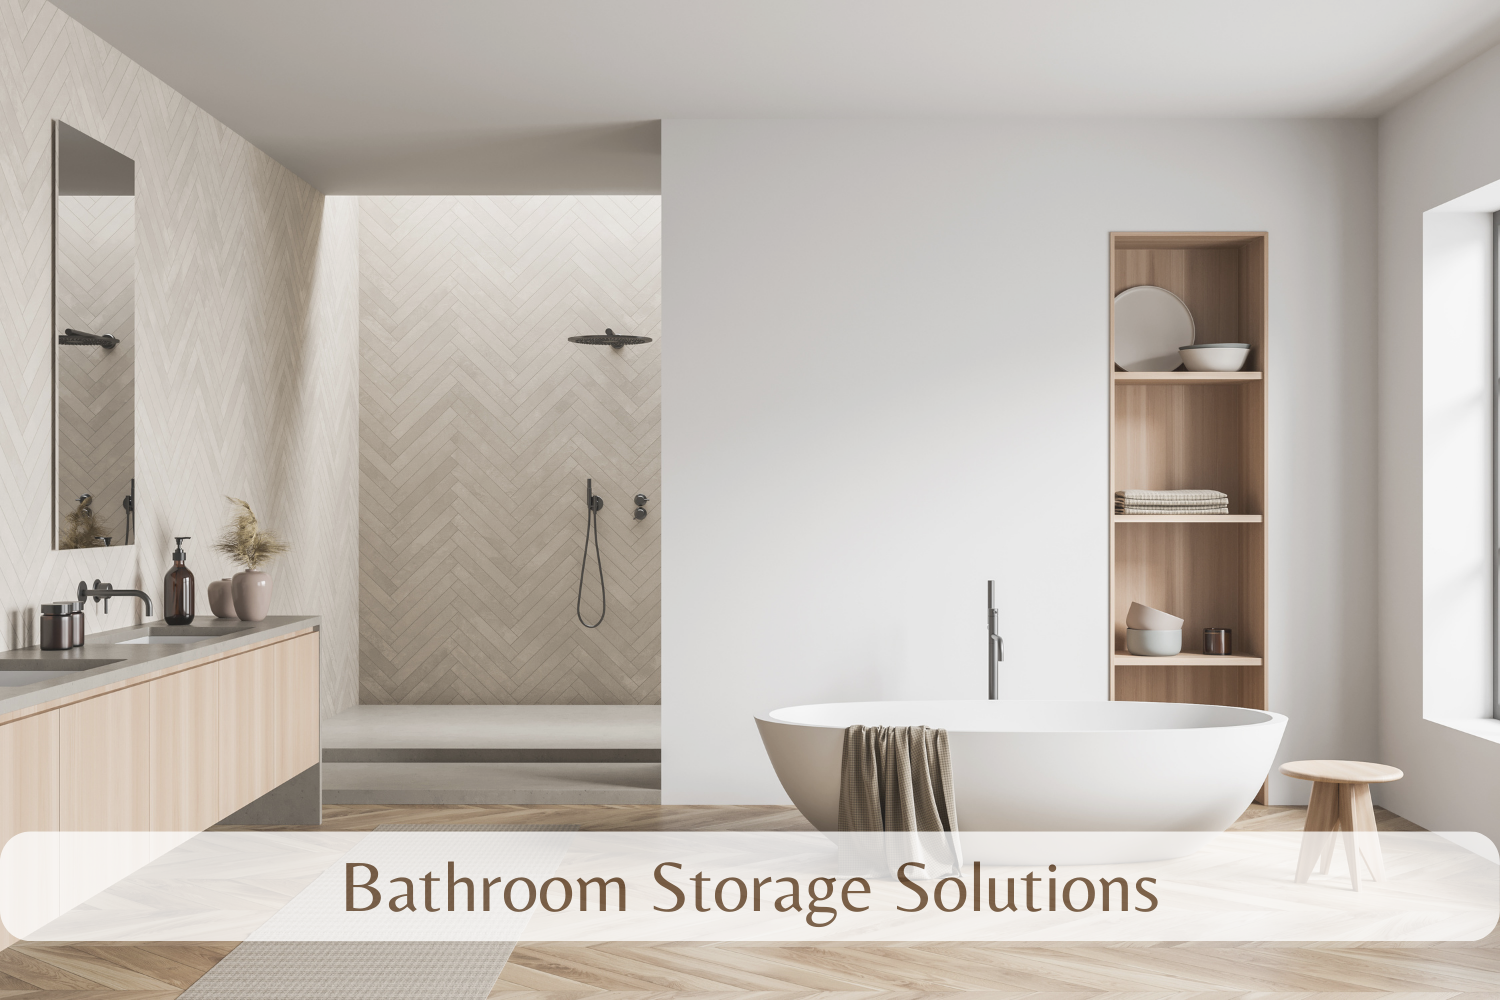
Looking For Bathroom Storage Solutions? You have come to the right place
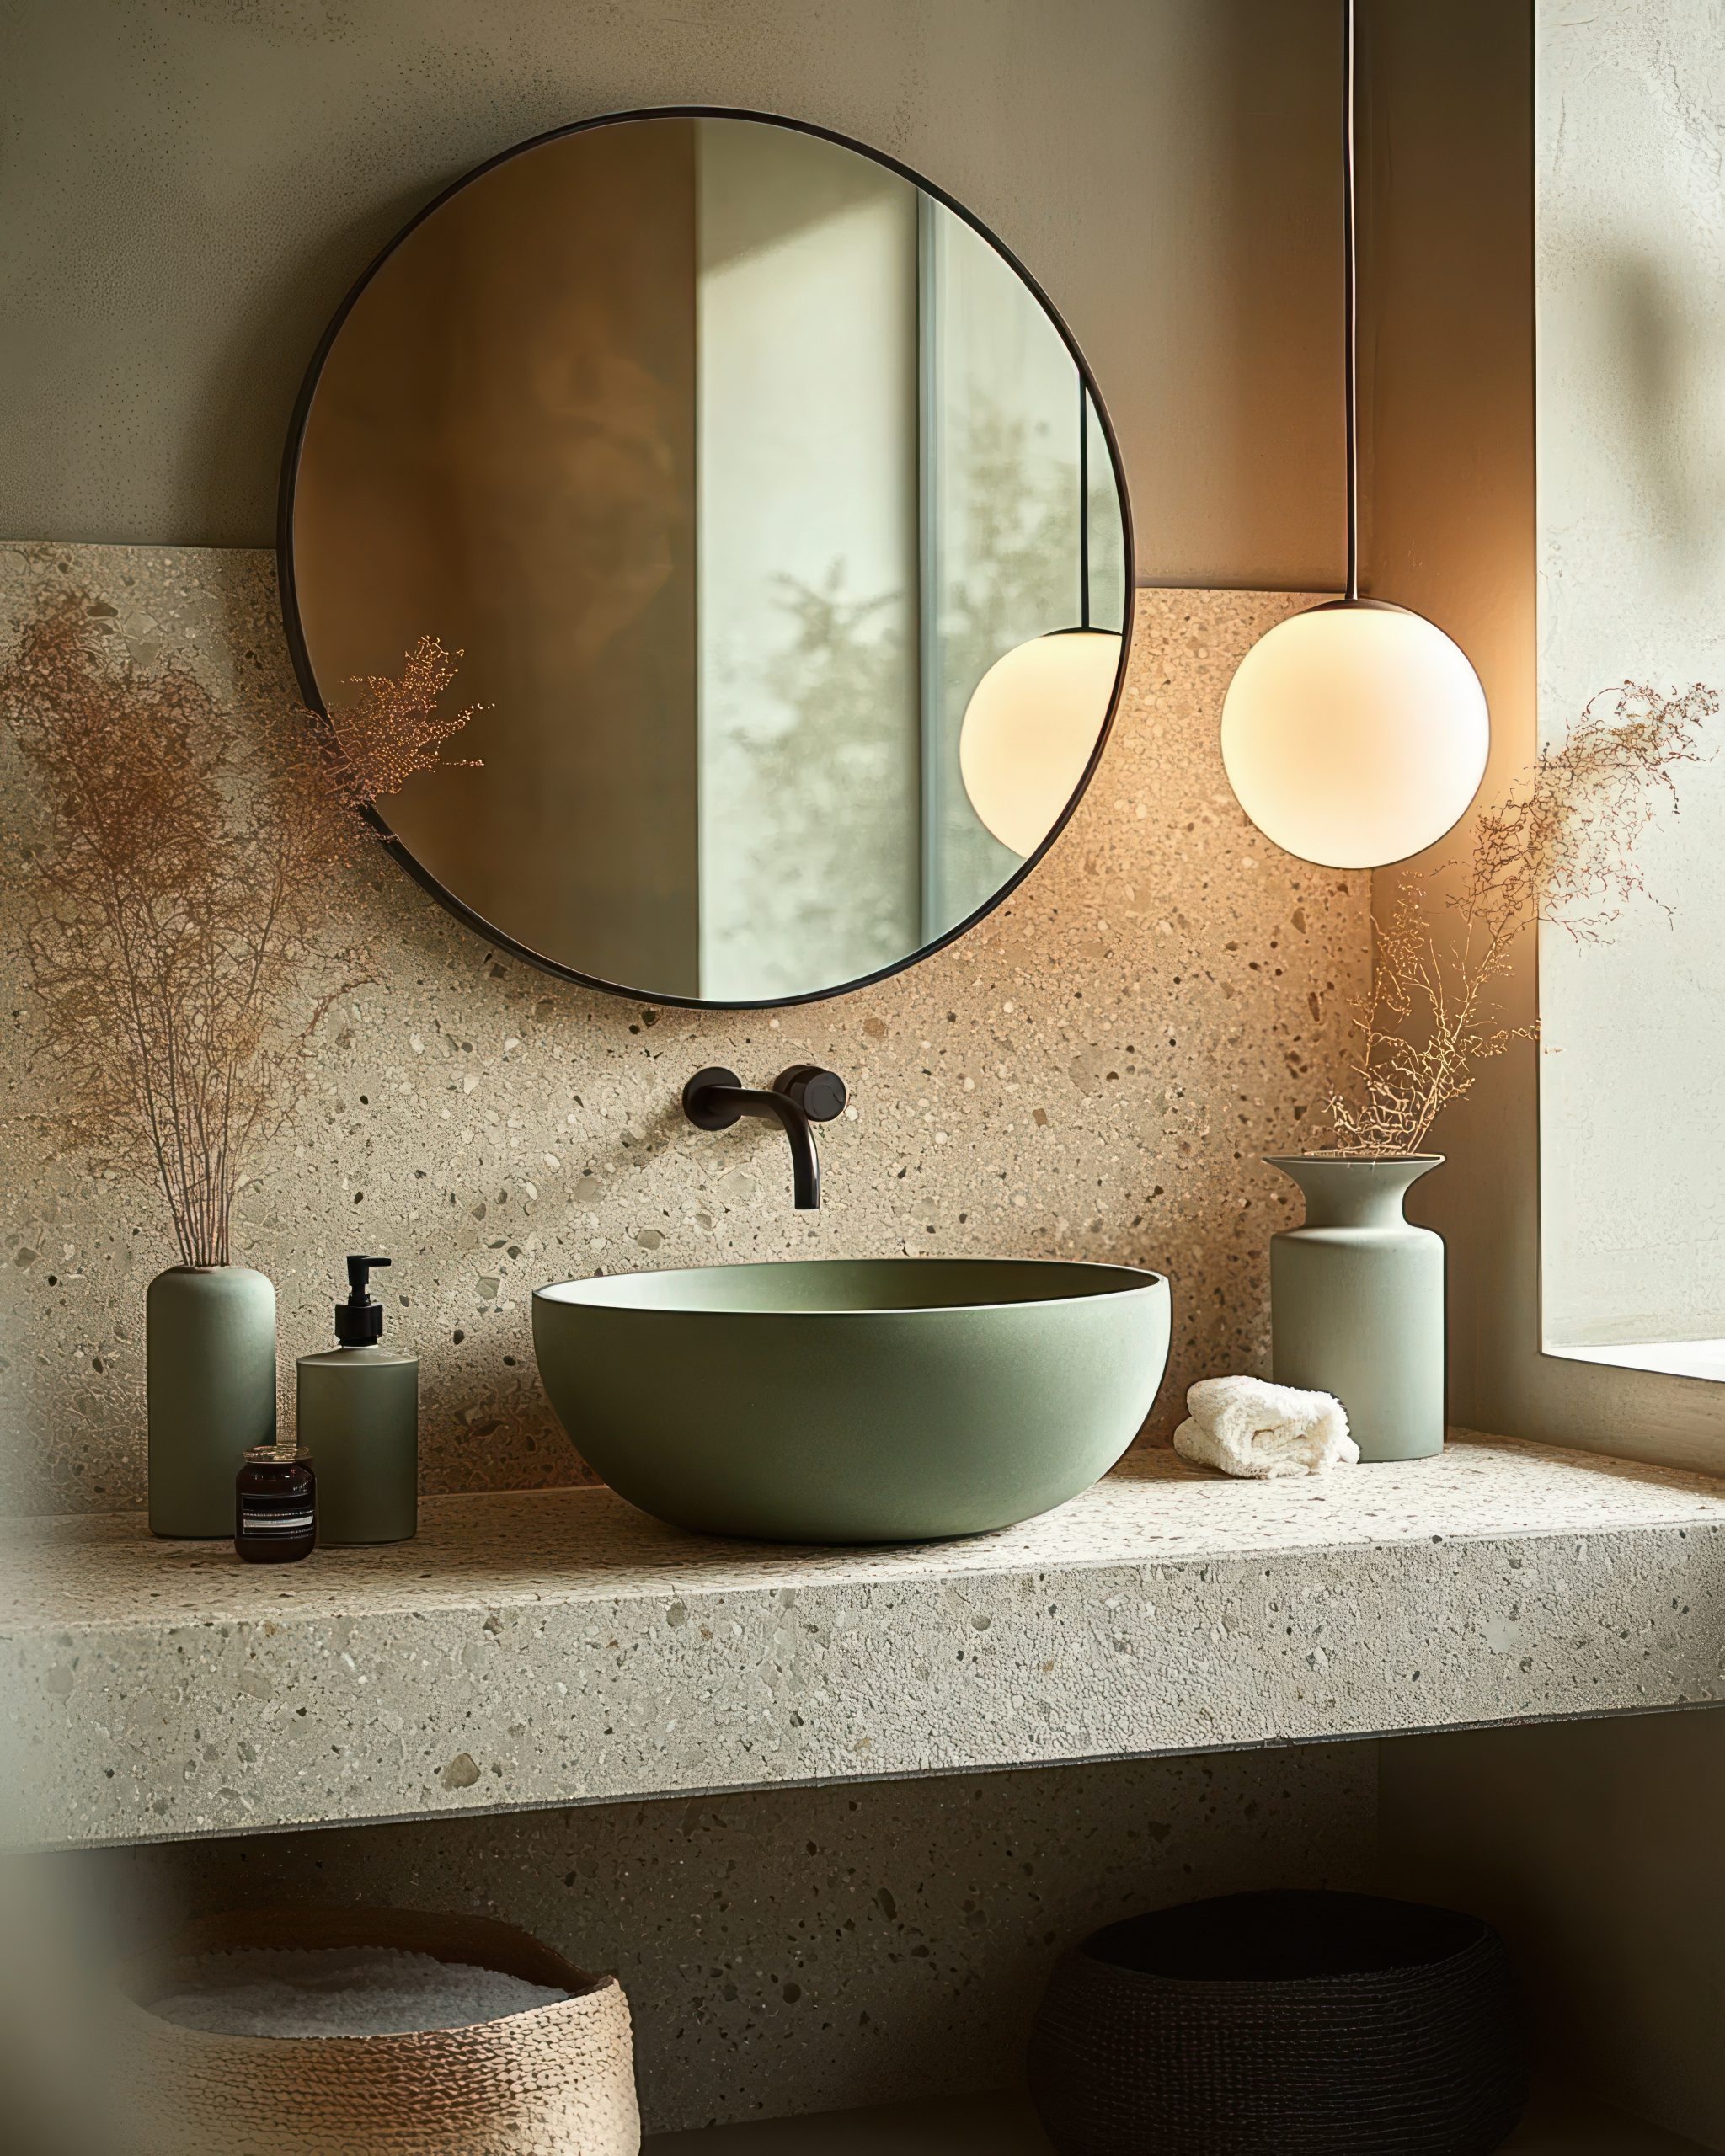
Is your bathroom feeling more like a battlefield of bottles than a serene sanctuary? Squeezing into a cramped space filled with clutter is a daily struggle for many. Finding smart bathroom storage solutions can transform even the smallest spaces into organised havens.
From clever vertical storage ideas to innovative organisational hacks, we’ve compiled a list of genius bathroom storage solutions to help you maximise every inch and conquer bathroom chaos. This guide provides actionable ideas to implement fantastic bathroom storage solutions without breaking the bank.
Best Bathroom Storage Solutions!
Vertical Storage Solutions: Look Up!
When floor space is limited, looking up is key to discovering effective bathroom storage solutions. Vertical storage takes advantage of unused wall space, transforming it into a functional and visually appealing storage area. These innovative approaches can drastically declutter your bathroom and make it feel significantly larger.
-
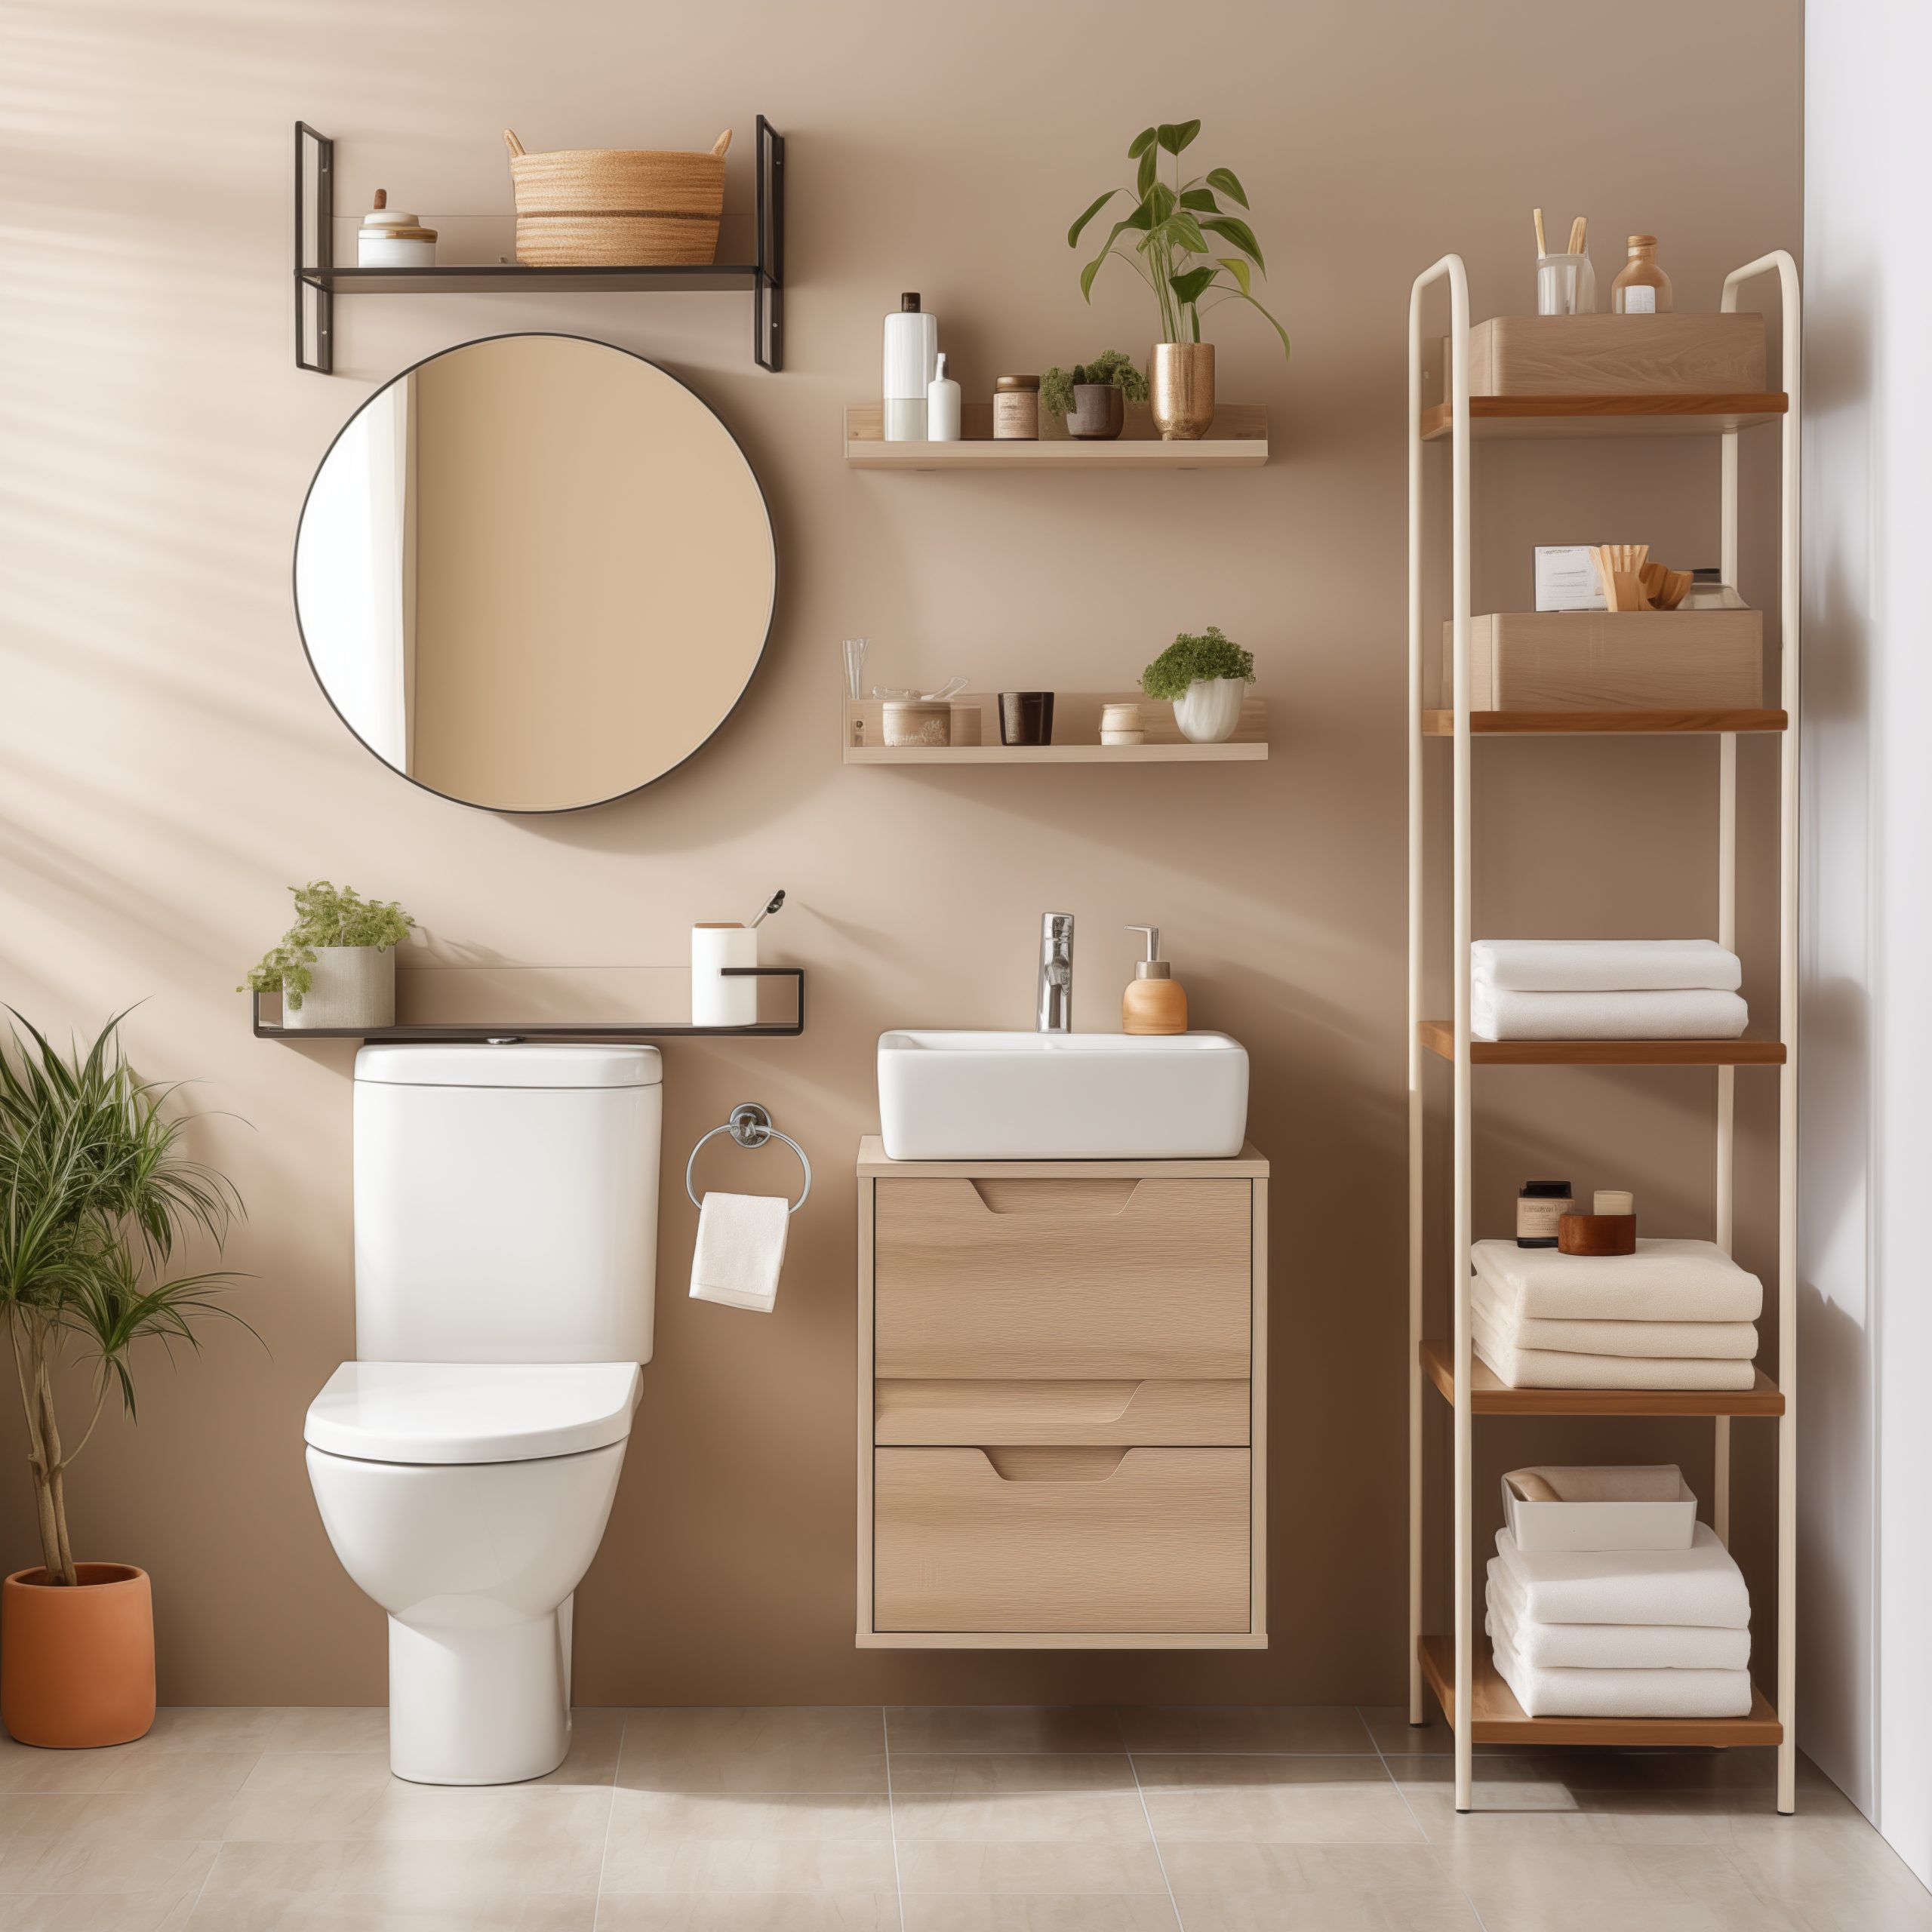
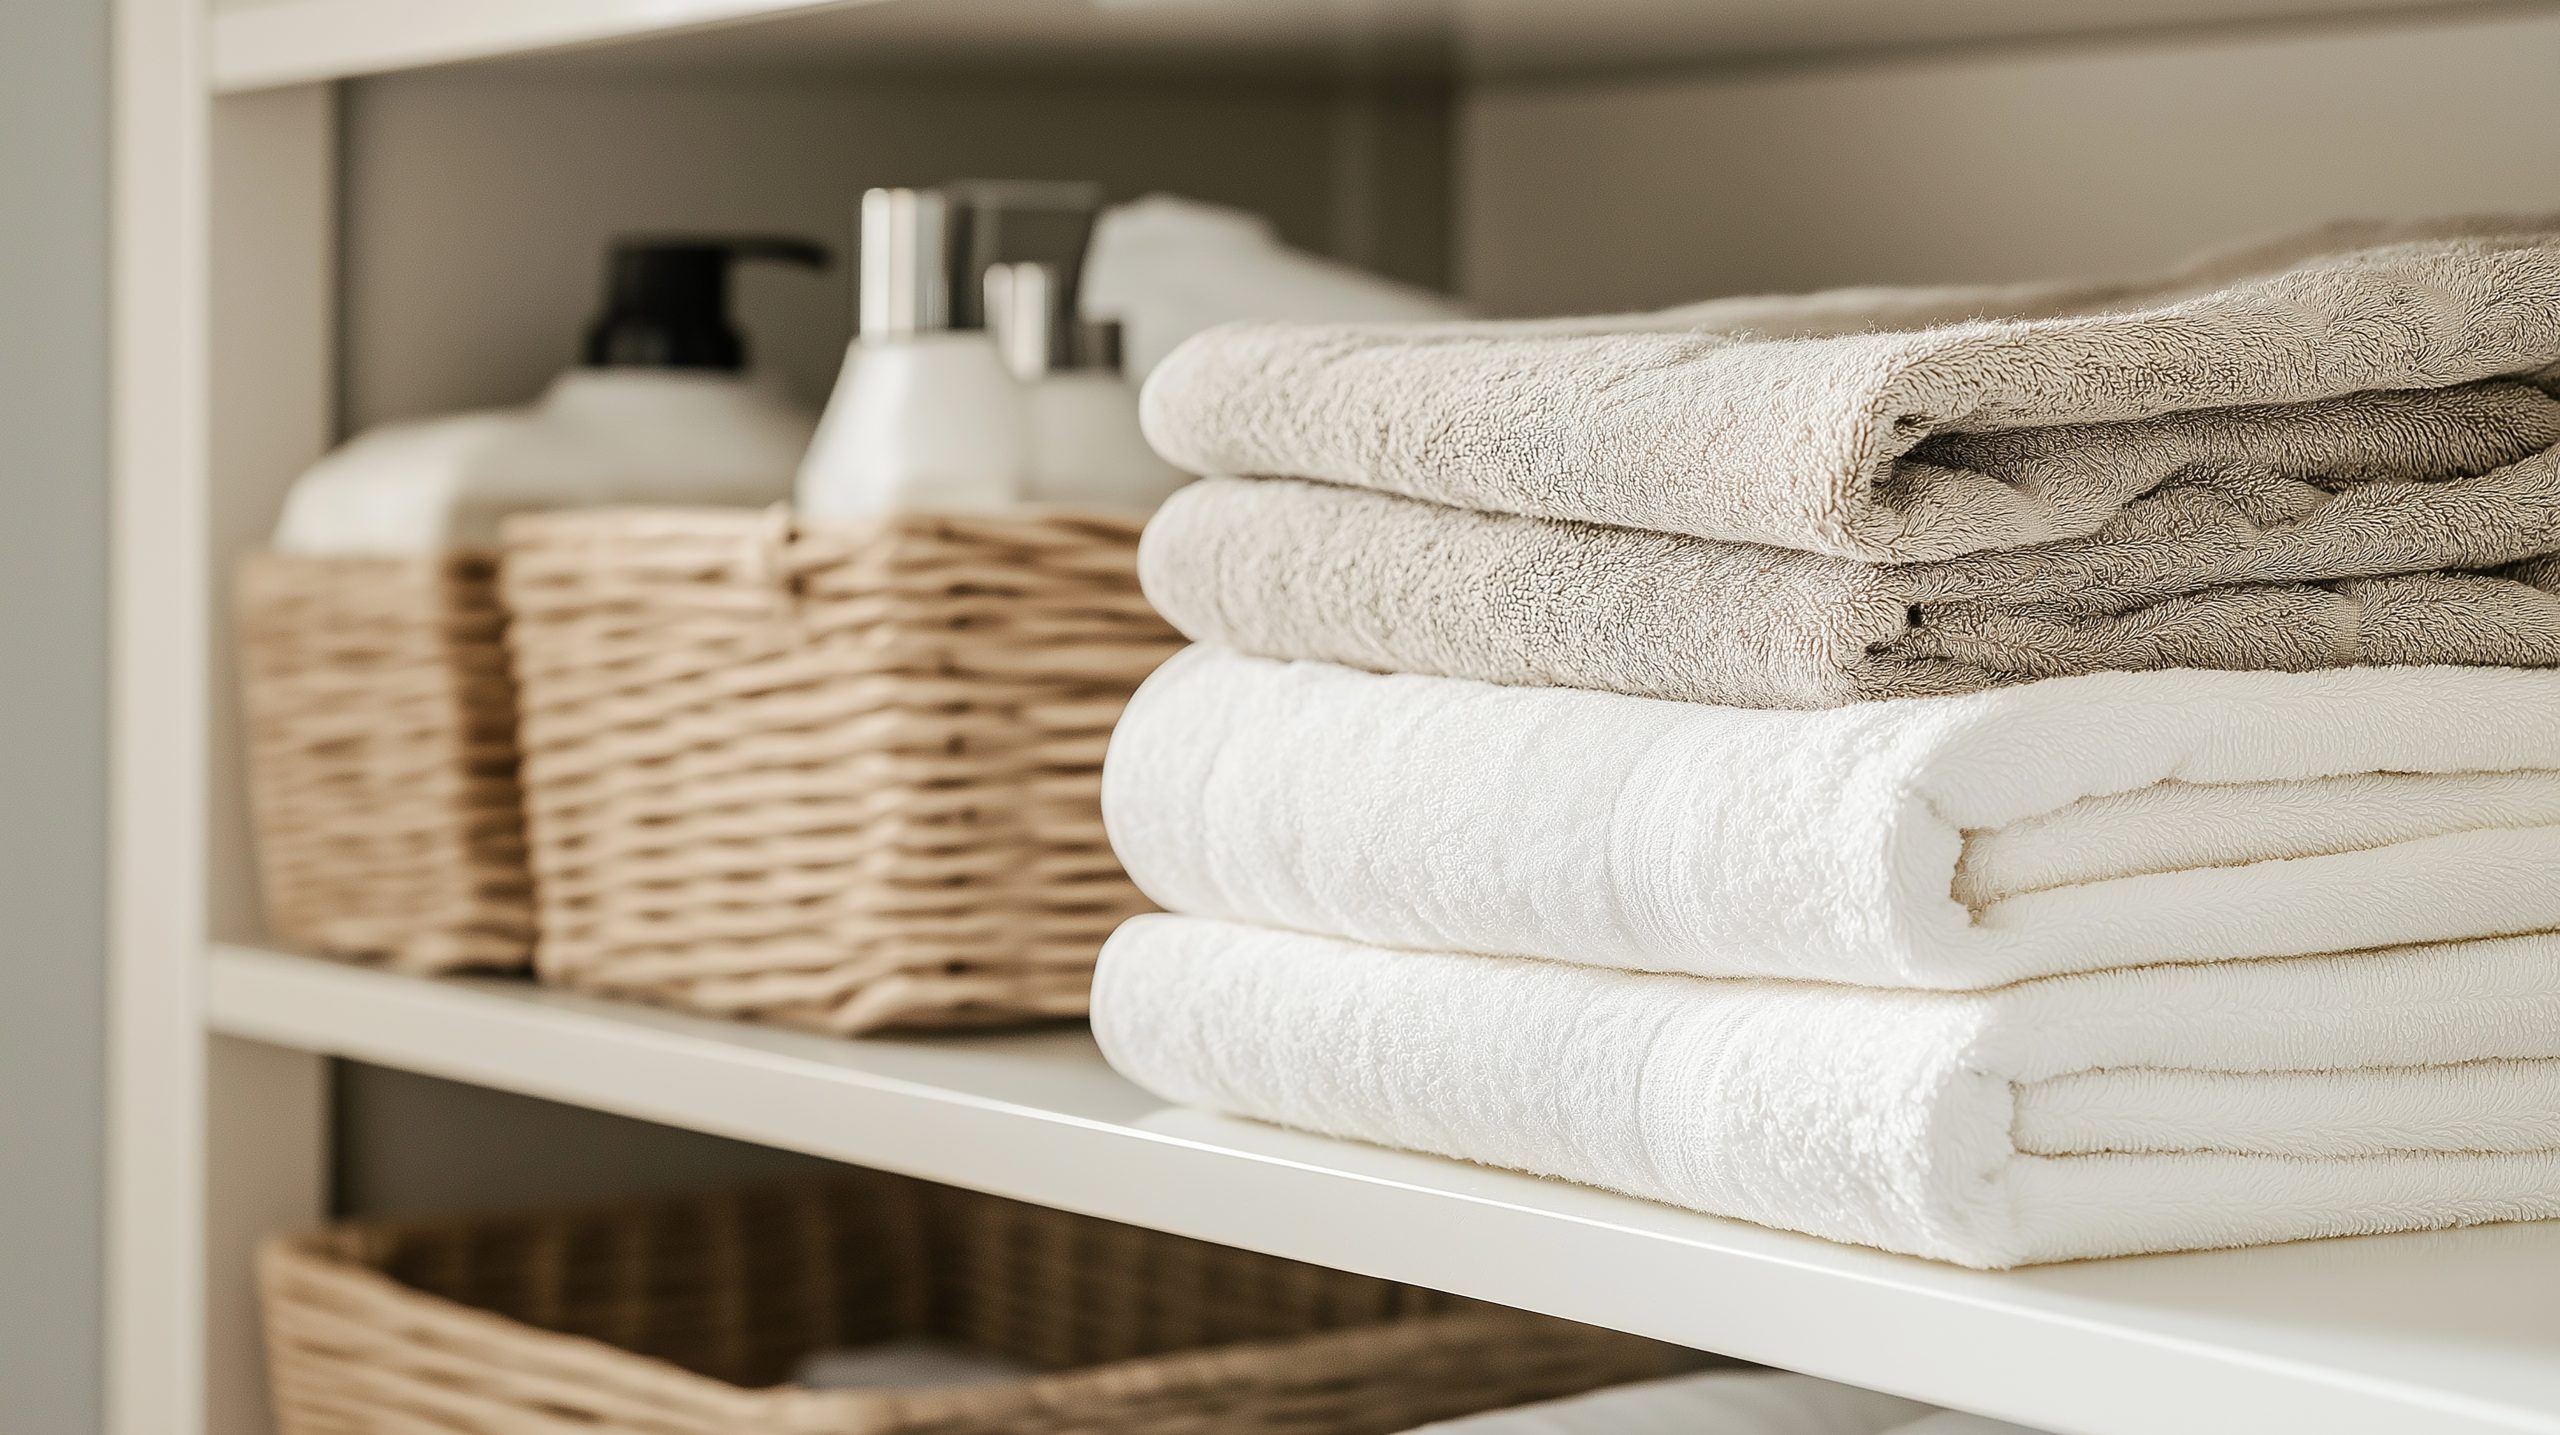
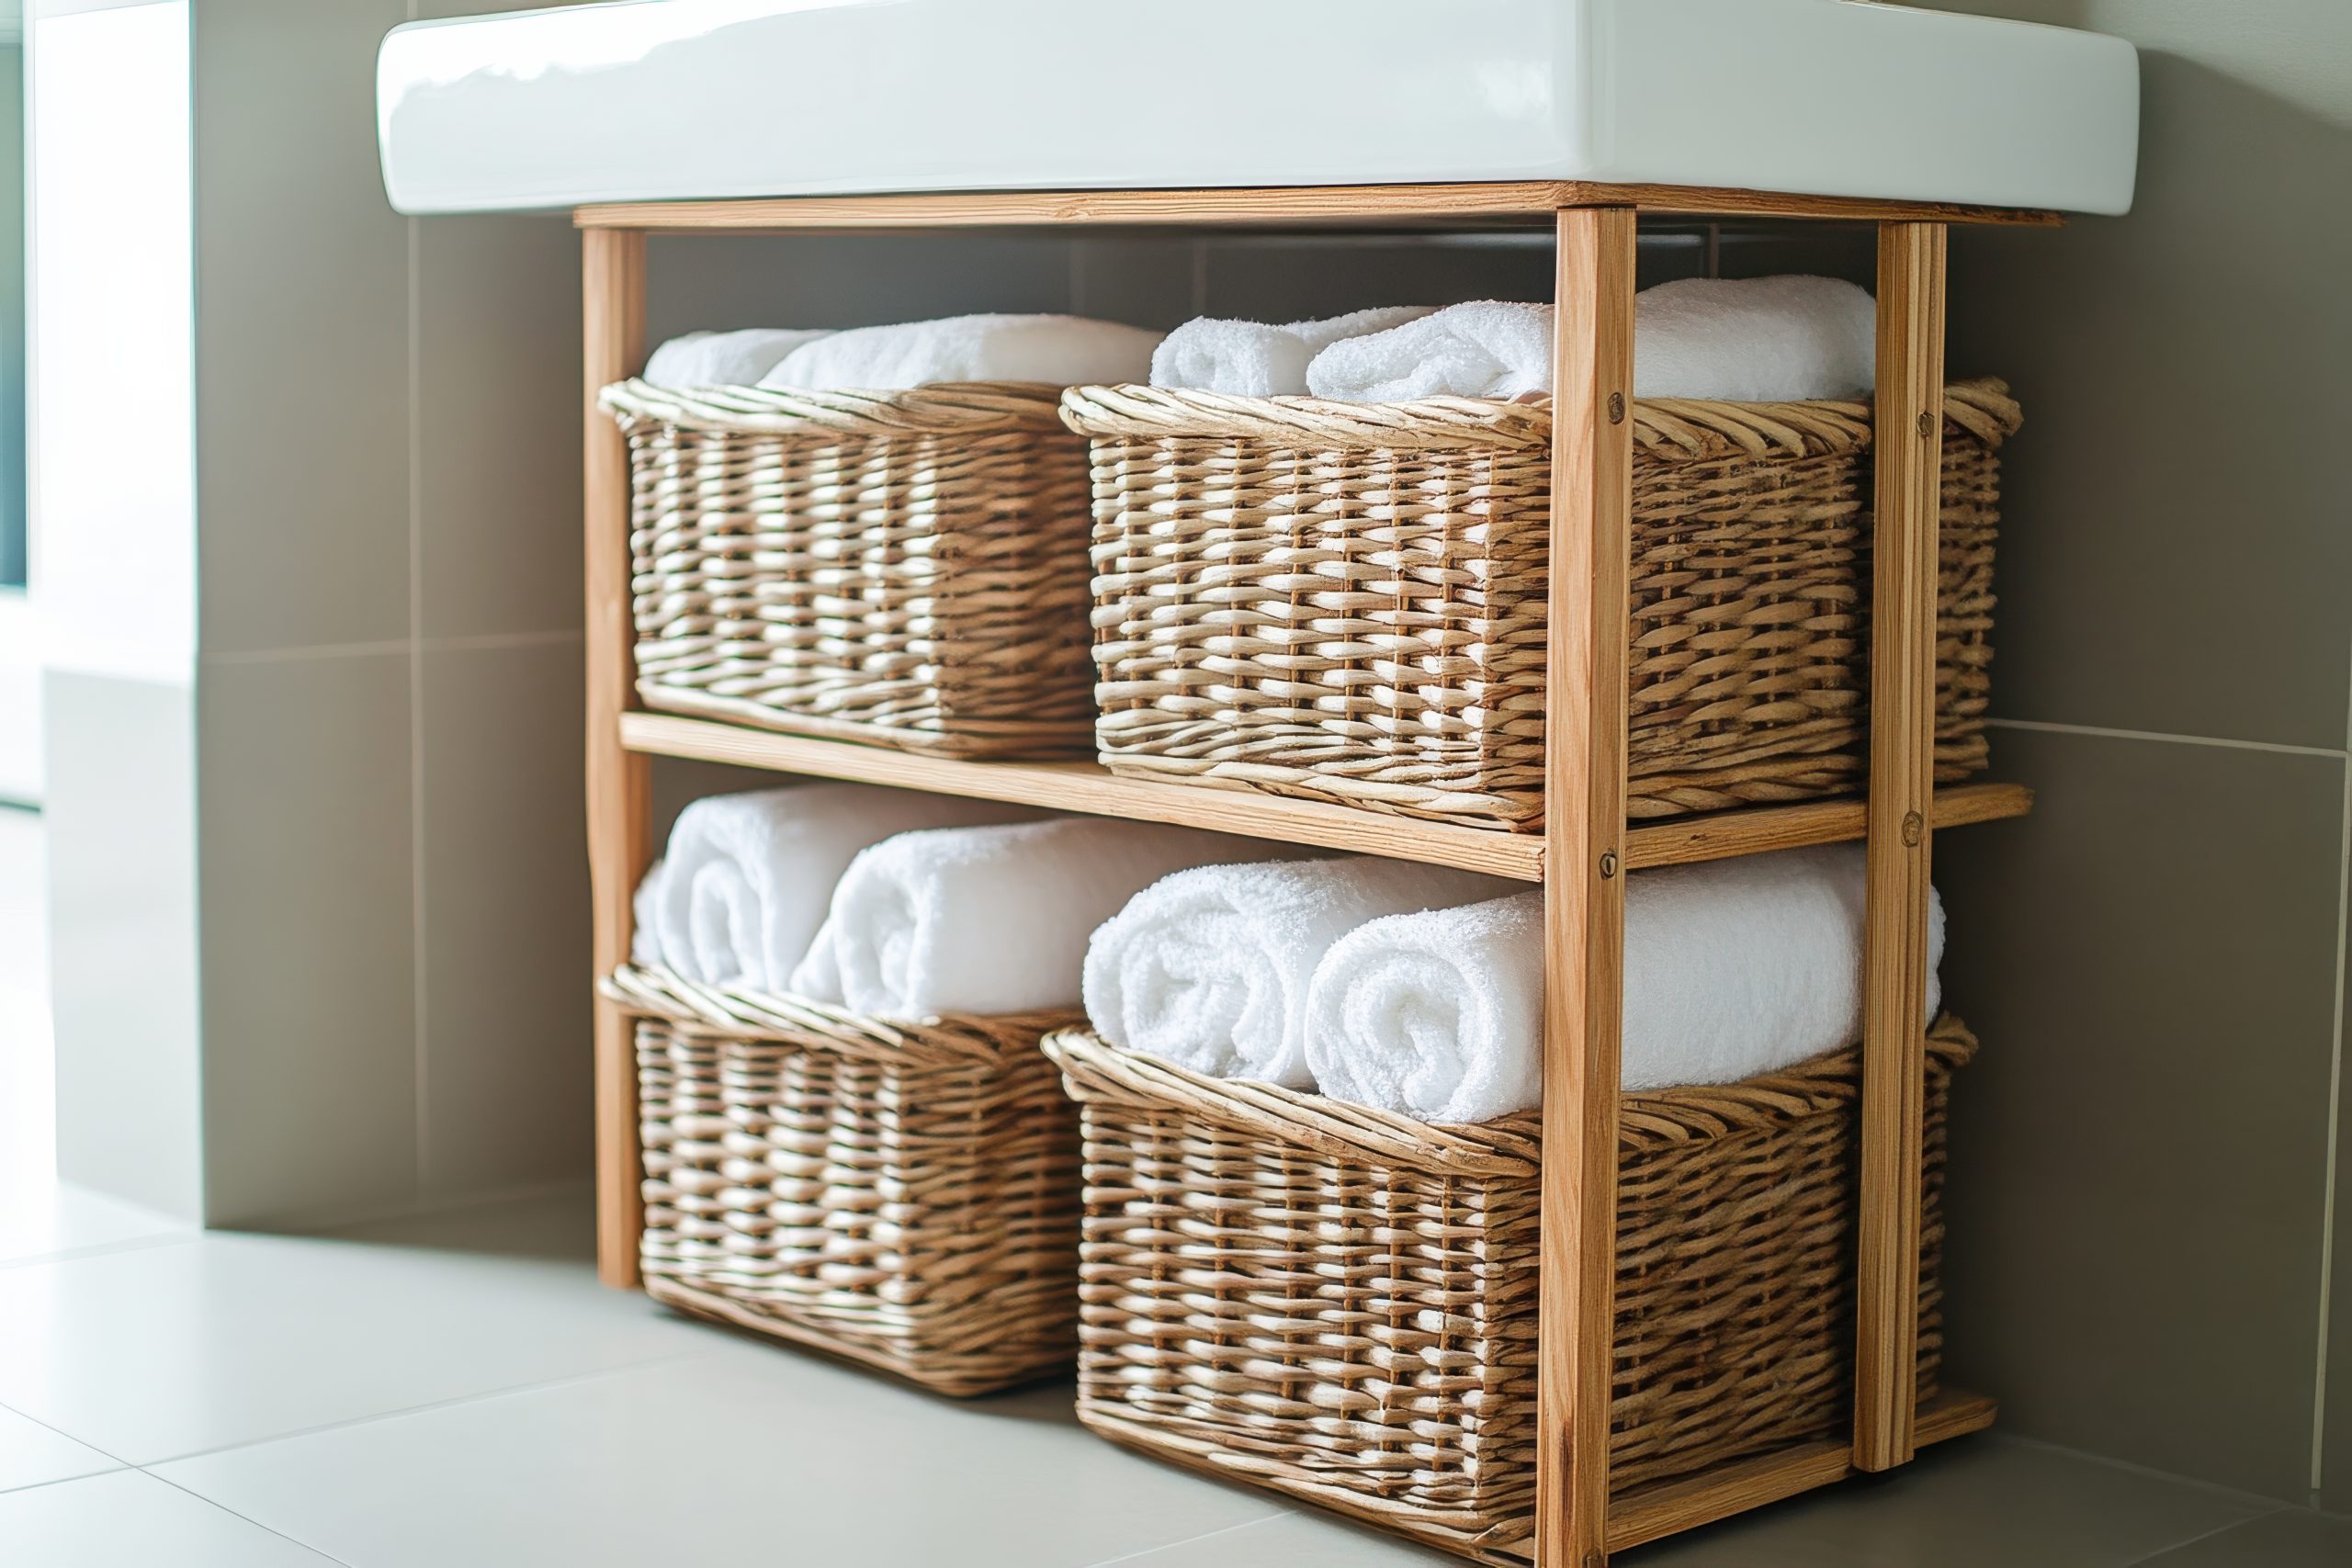
Open Shelving: Simple, affordable, and undeniably stylish, open shelving is a go-to for readily accessible items. Displaying beautifully organised baskets and neatly arranged toiletries transforms functional storage into an attractive decorative element. Keep the look consistent by using matching containers. Open shelving works best for items you use regularly, making it a fantastic element to add to your bathroom storage solutions.
-
Towel Ladders: More than just a place to hang towels, towel ladders are a clever blend of functionality and décor. Available in various styles, from rustic wood to modern metal, a towel ladder can add a touch of personality while providing ample storage space. Use towel ladders as a part of your bathroom storage solutions.
-
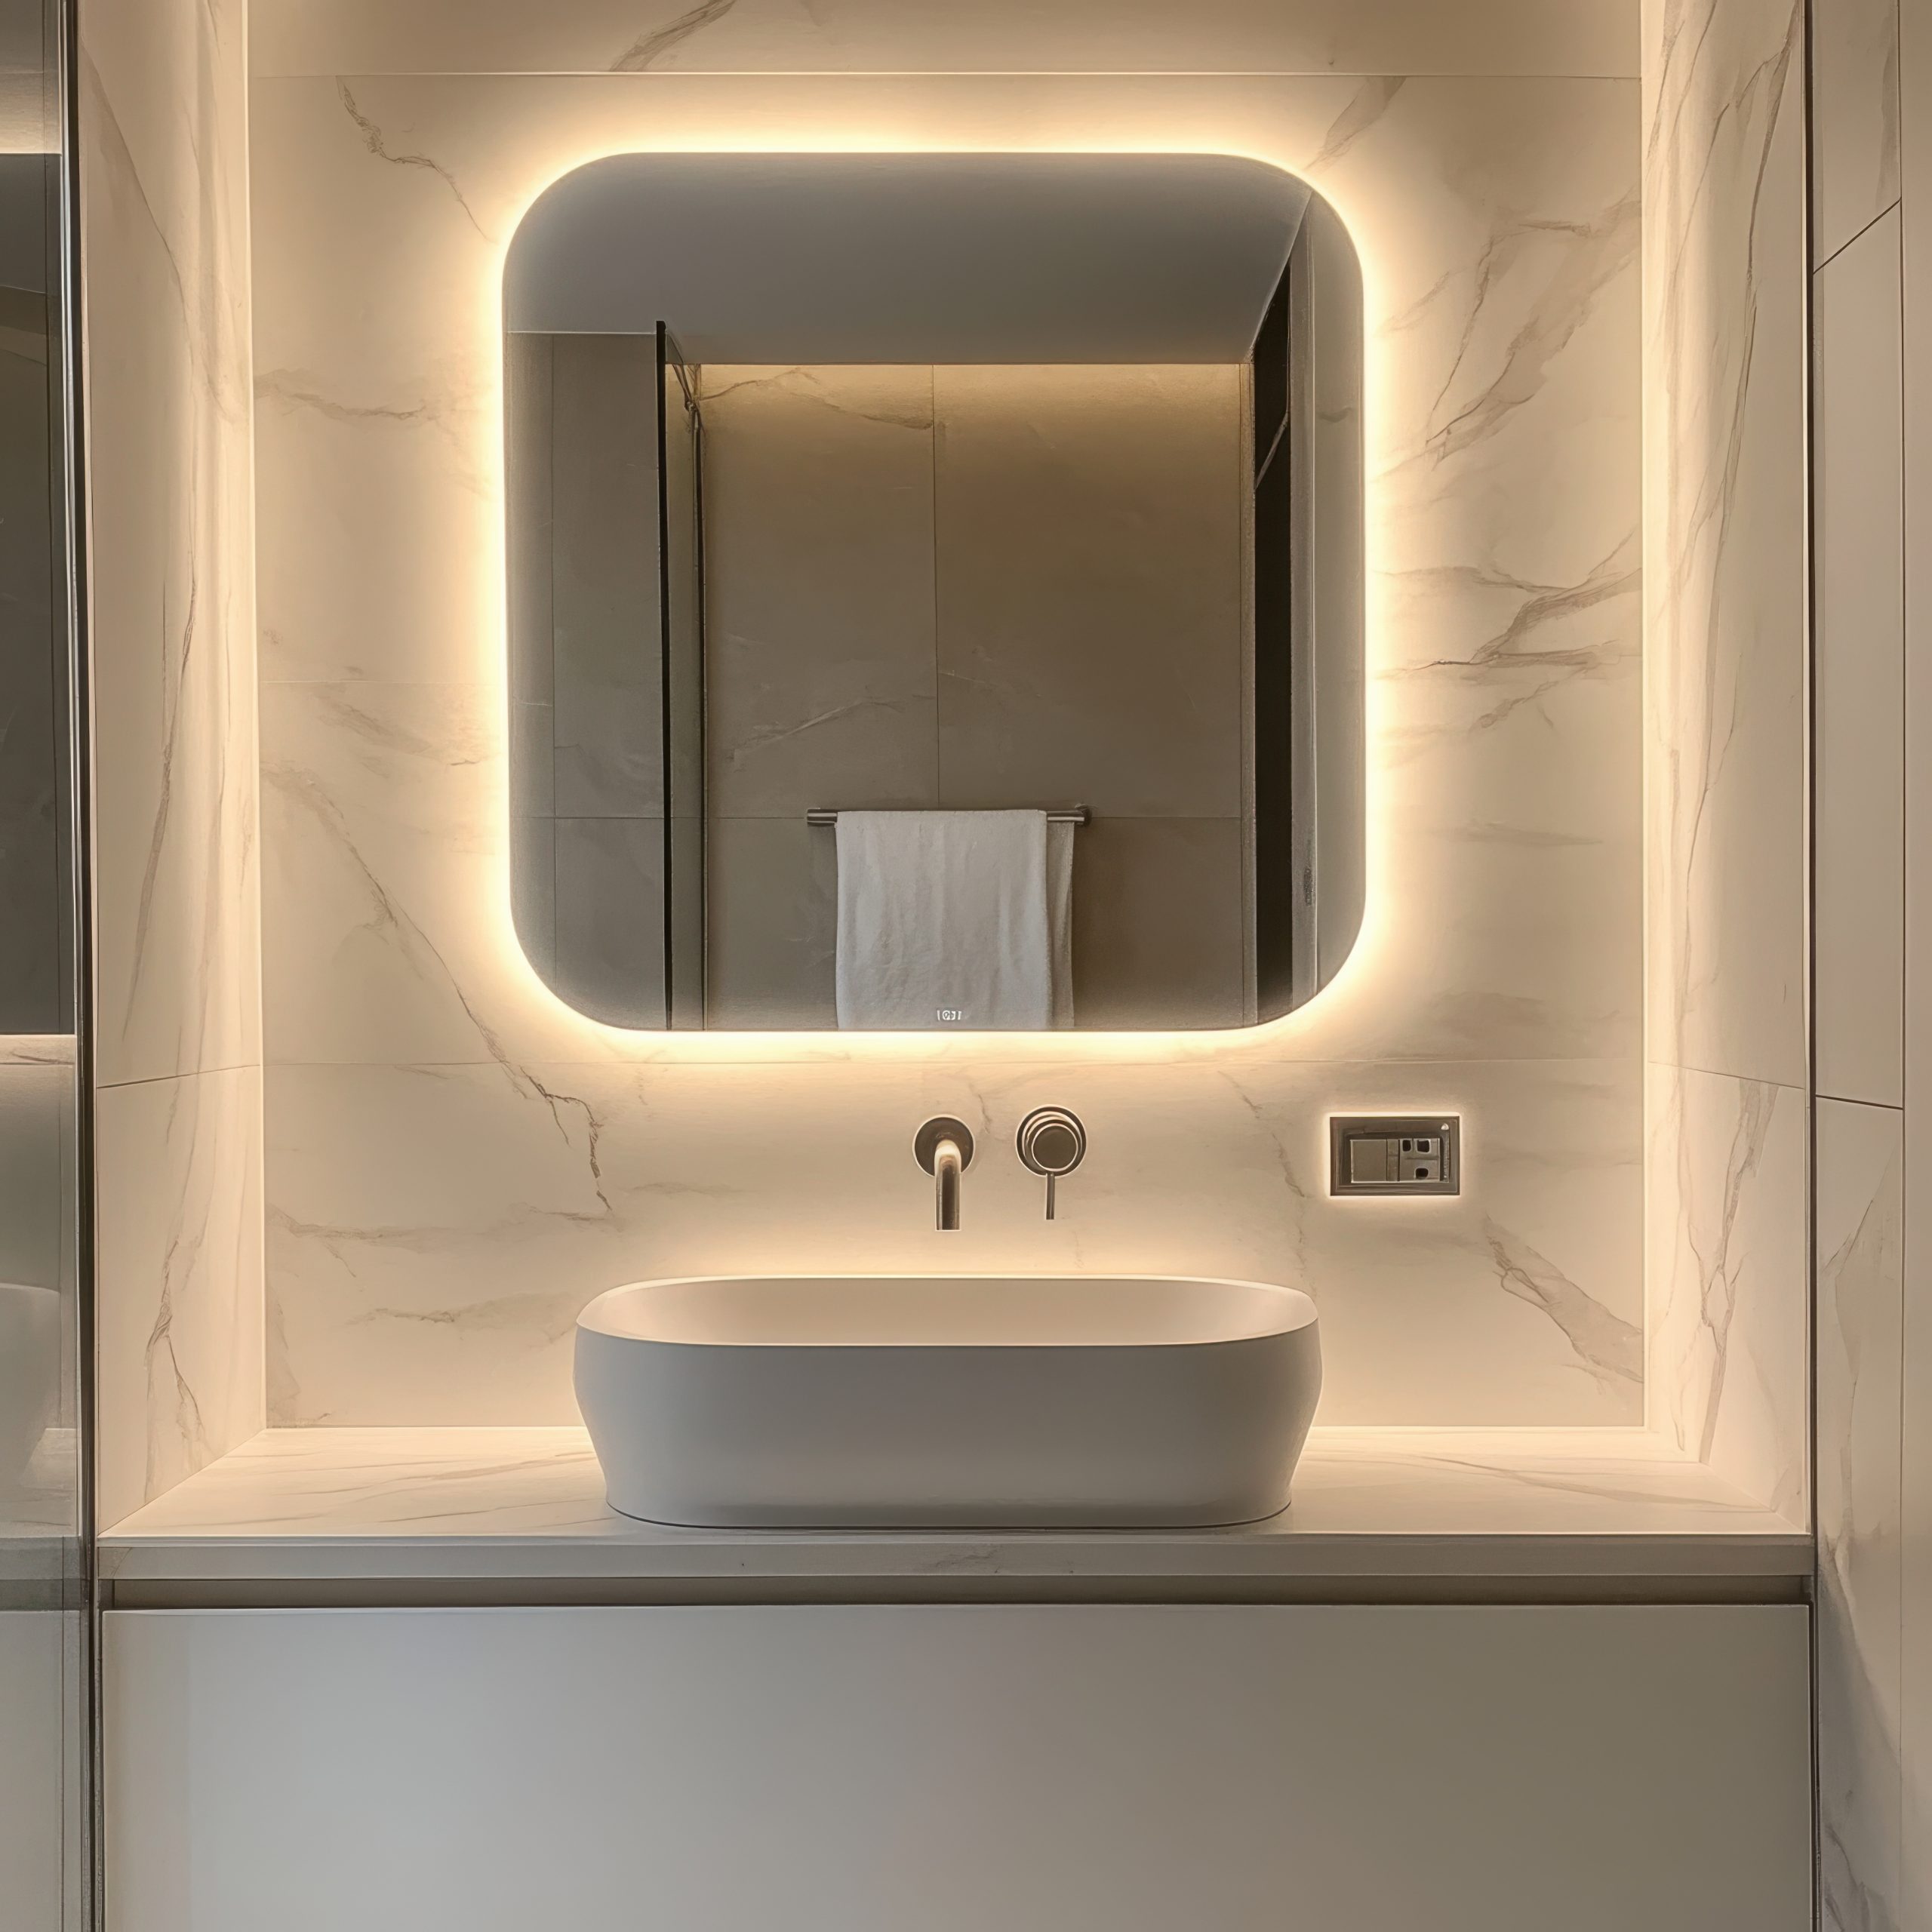
Wall-Mounted Cabinets (above toilet, sink, or door): Often underutilised, the space above the toilet, sink, or even the door offers prime real estate for discreet bathroom storage solutions. Wall-mounted cabinets are excellent for storing medications, extra toiletries, or other items you prefer to keep out of sight. Consider opting for mirrored cabinets for added functionality, turning them into double duty pieces.
-
Tall, Narrow Storage Towers: Ideal for fitting into tight spaces, these towers are a smart addition to a small bathroom lacking sufficient storage. Opt for a unit with adjustable shelves to accommodate different-sized items, and choose between open shelving for frequently used products or closed cabinets for a more concealed look.
By embracing verticality, you can unlock hidden storage potential and significantly improve your bathroom’s overall organisation. Start maximising your bathroom space today with these vertical bathroom storage solutions.
Under-Sink Solutions: Making the Most of Hidden Space
The area under the sink is often a forgotten zone, yet it presents a wealth of opportunity for clever bathroom storage solutions. Transforming this usually cluttered space into an organised haven will significantly reduce bathroom chaos. These under-sink strategies are key to unlocking the full potential of your bathroom’s storage capabilities.
-
Under-Sink Organisers with Sliding Drawers: Maximise access to even the deepest corners of your under-sink cabinet with pull-out drawers. These organisers ensure that you’re not fumbling around in the dark for what you need, and they keep items neatly contained, making them fantastic bathroom storage solutions. Look for adjustable models to fit around plumbing fixtures.
-
Shelf Risers: If you’re not ready for a full organiser system, simple shelf risers can instantly double the vertical space within your under-sink cabinet. Use them to stack cleaning supplies, create separate zones for different product categories, or elevate smaller items for easier access. It’s a simple yet effective element of your bathroom storage solutions.
-
Door-Mounted Baskets or Hooks: Take advantage of the often-unused space on the inside of your under-sink cabinet doors. Mount baskets to hold hair dryers, styling tools, or cleaning supplies. Hooks are perfect for hanging small towels or sponges. It is a unique twist to bathroom storage solutions.
-
Customised Shelving: For the seriously DIY-inclined, building custom shelving specifically tailored to your plumbing configuration allows you to create the most efficient and personalised bathroom storage solutions. Measure carefully and design shelving that maximises every inch of available space while accommodating pipes and drains.
Countertop Strategies: Combating Clutter
A cluttered countertop can instantly make a bathroom feel smaller and more chaotic. Implementing smart countertop strategies is essential for achieving a clean and organised space. These bathroom storage solutions focus on minimising visual clutter while keeping essential items within easy reach.
-
Tiered Trays: These multi-level wonders not only keep frequently used items accessible but also add a touch of elegance to your countertop. Organise makeup brushes, skincare products, perfumes, and other daily essentials in a stylish and easily accessible way. It’s also a stylish addition to bathroom storage solutions.
-
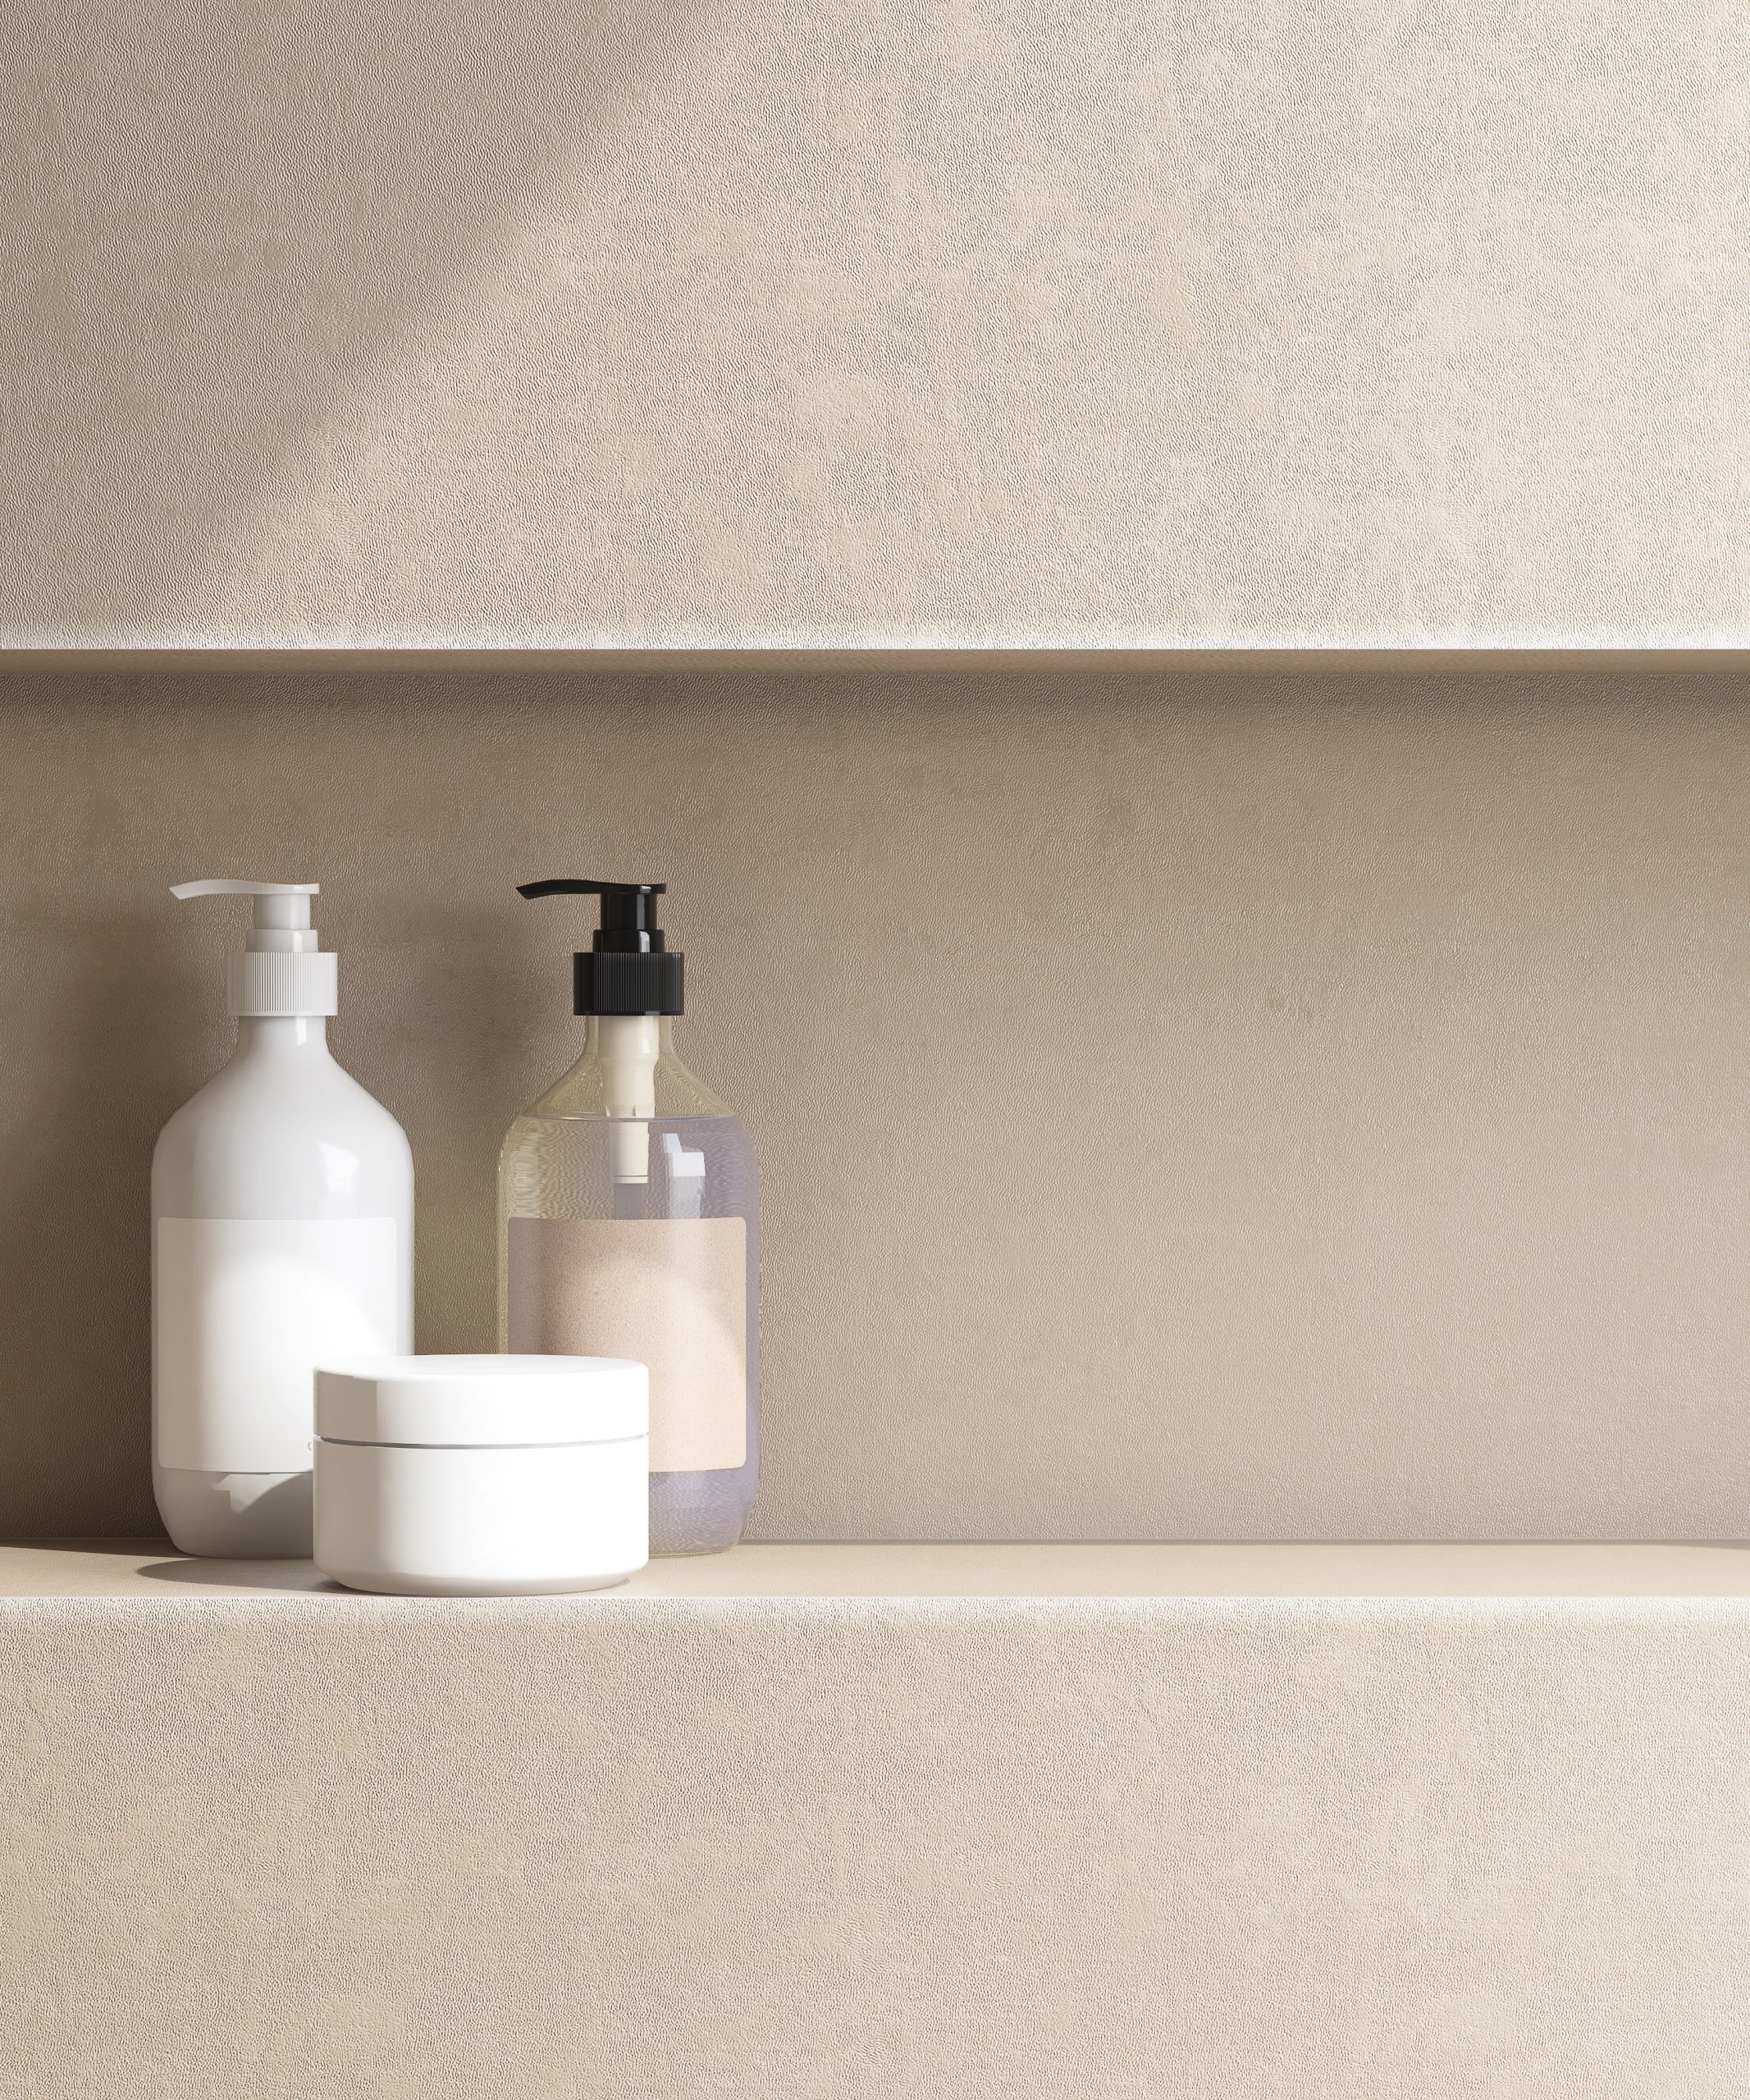
Matching Containers: Organise cotton swabs, cotton balls, and other small items into aesthetically pleasing jars or containers. Not only does this streamline the look of your countertop, but it also makes it easier to see what you have on hand. This easy change could provide a boost to your bathroom storage solutions.
-
Toothbrush Holders and Soap Dispensers: Elevate these everyday essentials by opting for coordinated or stylish versions. Having designated spots for your toothbrush and soap instantly creates a sense of order. This is a fantastic twist in bathroom storage solutions to try.
-
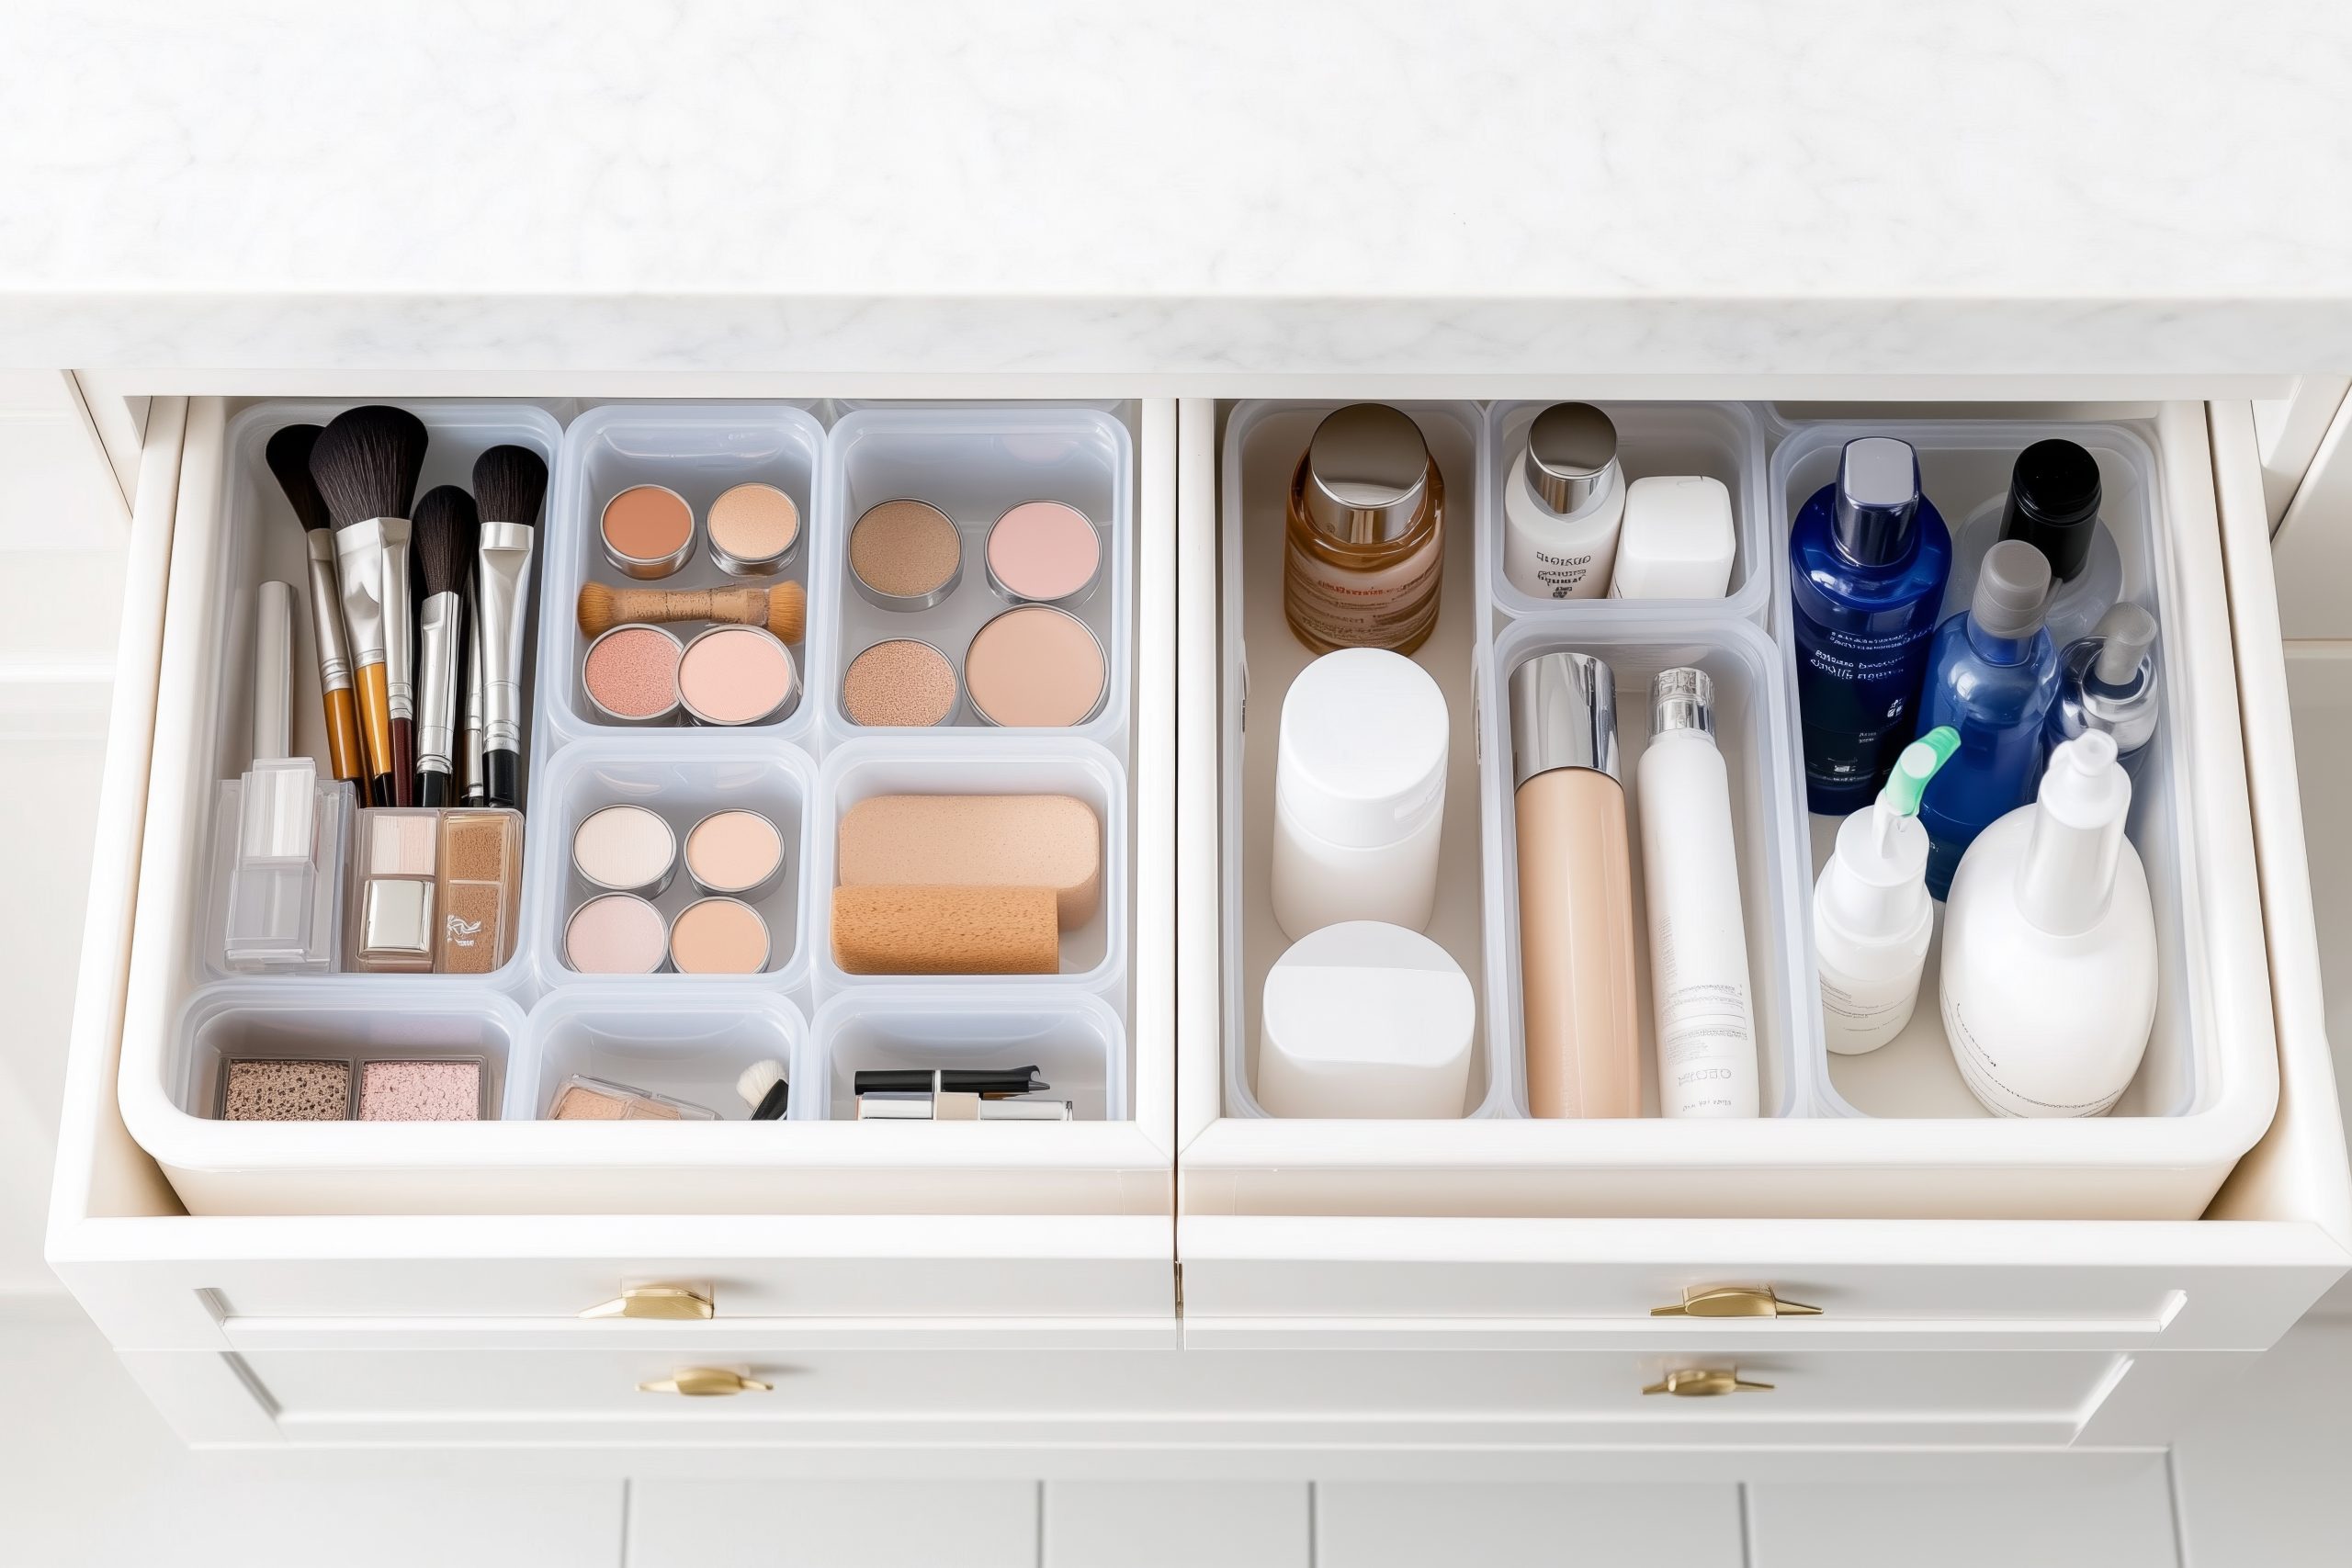
Makeup Organisers: Keep your makeup collection neatly arranged and easily accessible with a clear or compartmentalised makeup organiser. Opt for acrylic organisers that allow you to see everything at a glance, or choose a tiered organiser to maximise vertical space.
-
Small Storage Cabinets: Even a small cabinet is a convenient storage spot, but they offer more hidden storage, such as makeup or brushes. If you’re a minimalist who values functionality, a cabinet may be right up your alley for creating bathroom storage solutions.
Behind-the-Door Magic: Maximise Unused Surfaces
Don’t overlook the often-forgotten potential of the back of your bathroom door! This simple surface provides a surprisingly versatile opportunity to implement clever bathroom storage solutions, helping you squeeze extra storage out of your existing space without taking up precious square footage. This space is a particularly valuable asset in smaller bathrooms where every inch counts.
-
Over-the-Door Organisers: Available in a variety of styles—clear plastic pockets, fabric organizers, or metal racks—over-the-door organisers are ideal for stashing toiletries, cleaning supplies, or small accessories. They’re perfect for shared bathrooms or families with a lot of product clutter.
Tips & Considerations: When choosing an over-the-door organiser, pay attention to the material and weight capacity. A sturdy organiser with deep pockets will be more effective for heavier items. Clear pockets allow you to quickly see what’s inside, while fabric organisers offer a more discreet look. Make sure the hooks are properly padded to avoid scratching the door. Some also have adjustable height settings for a truly customised approach.
-
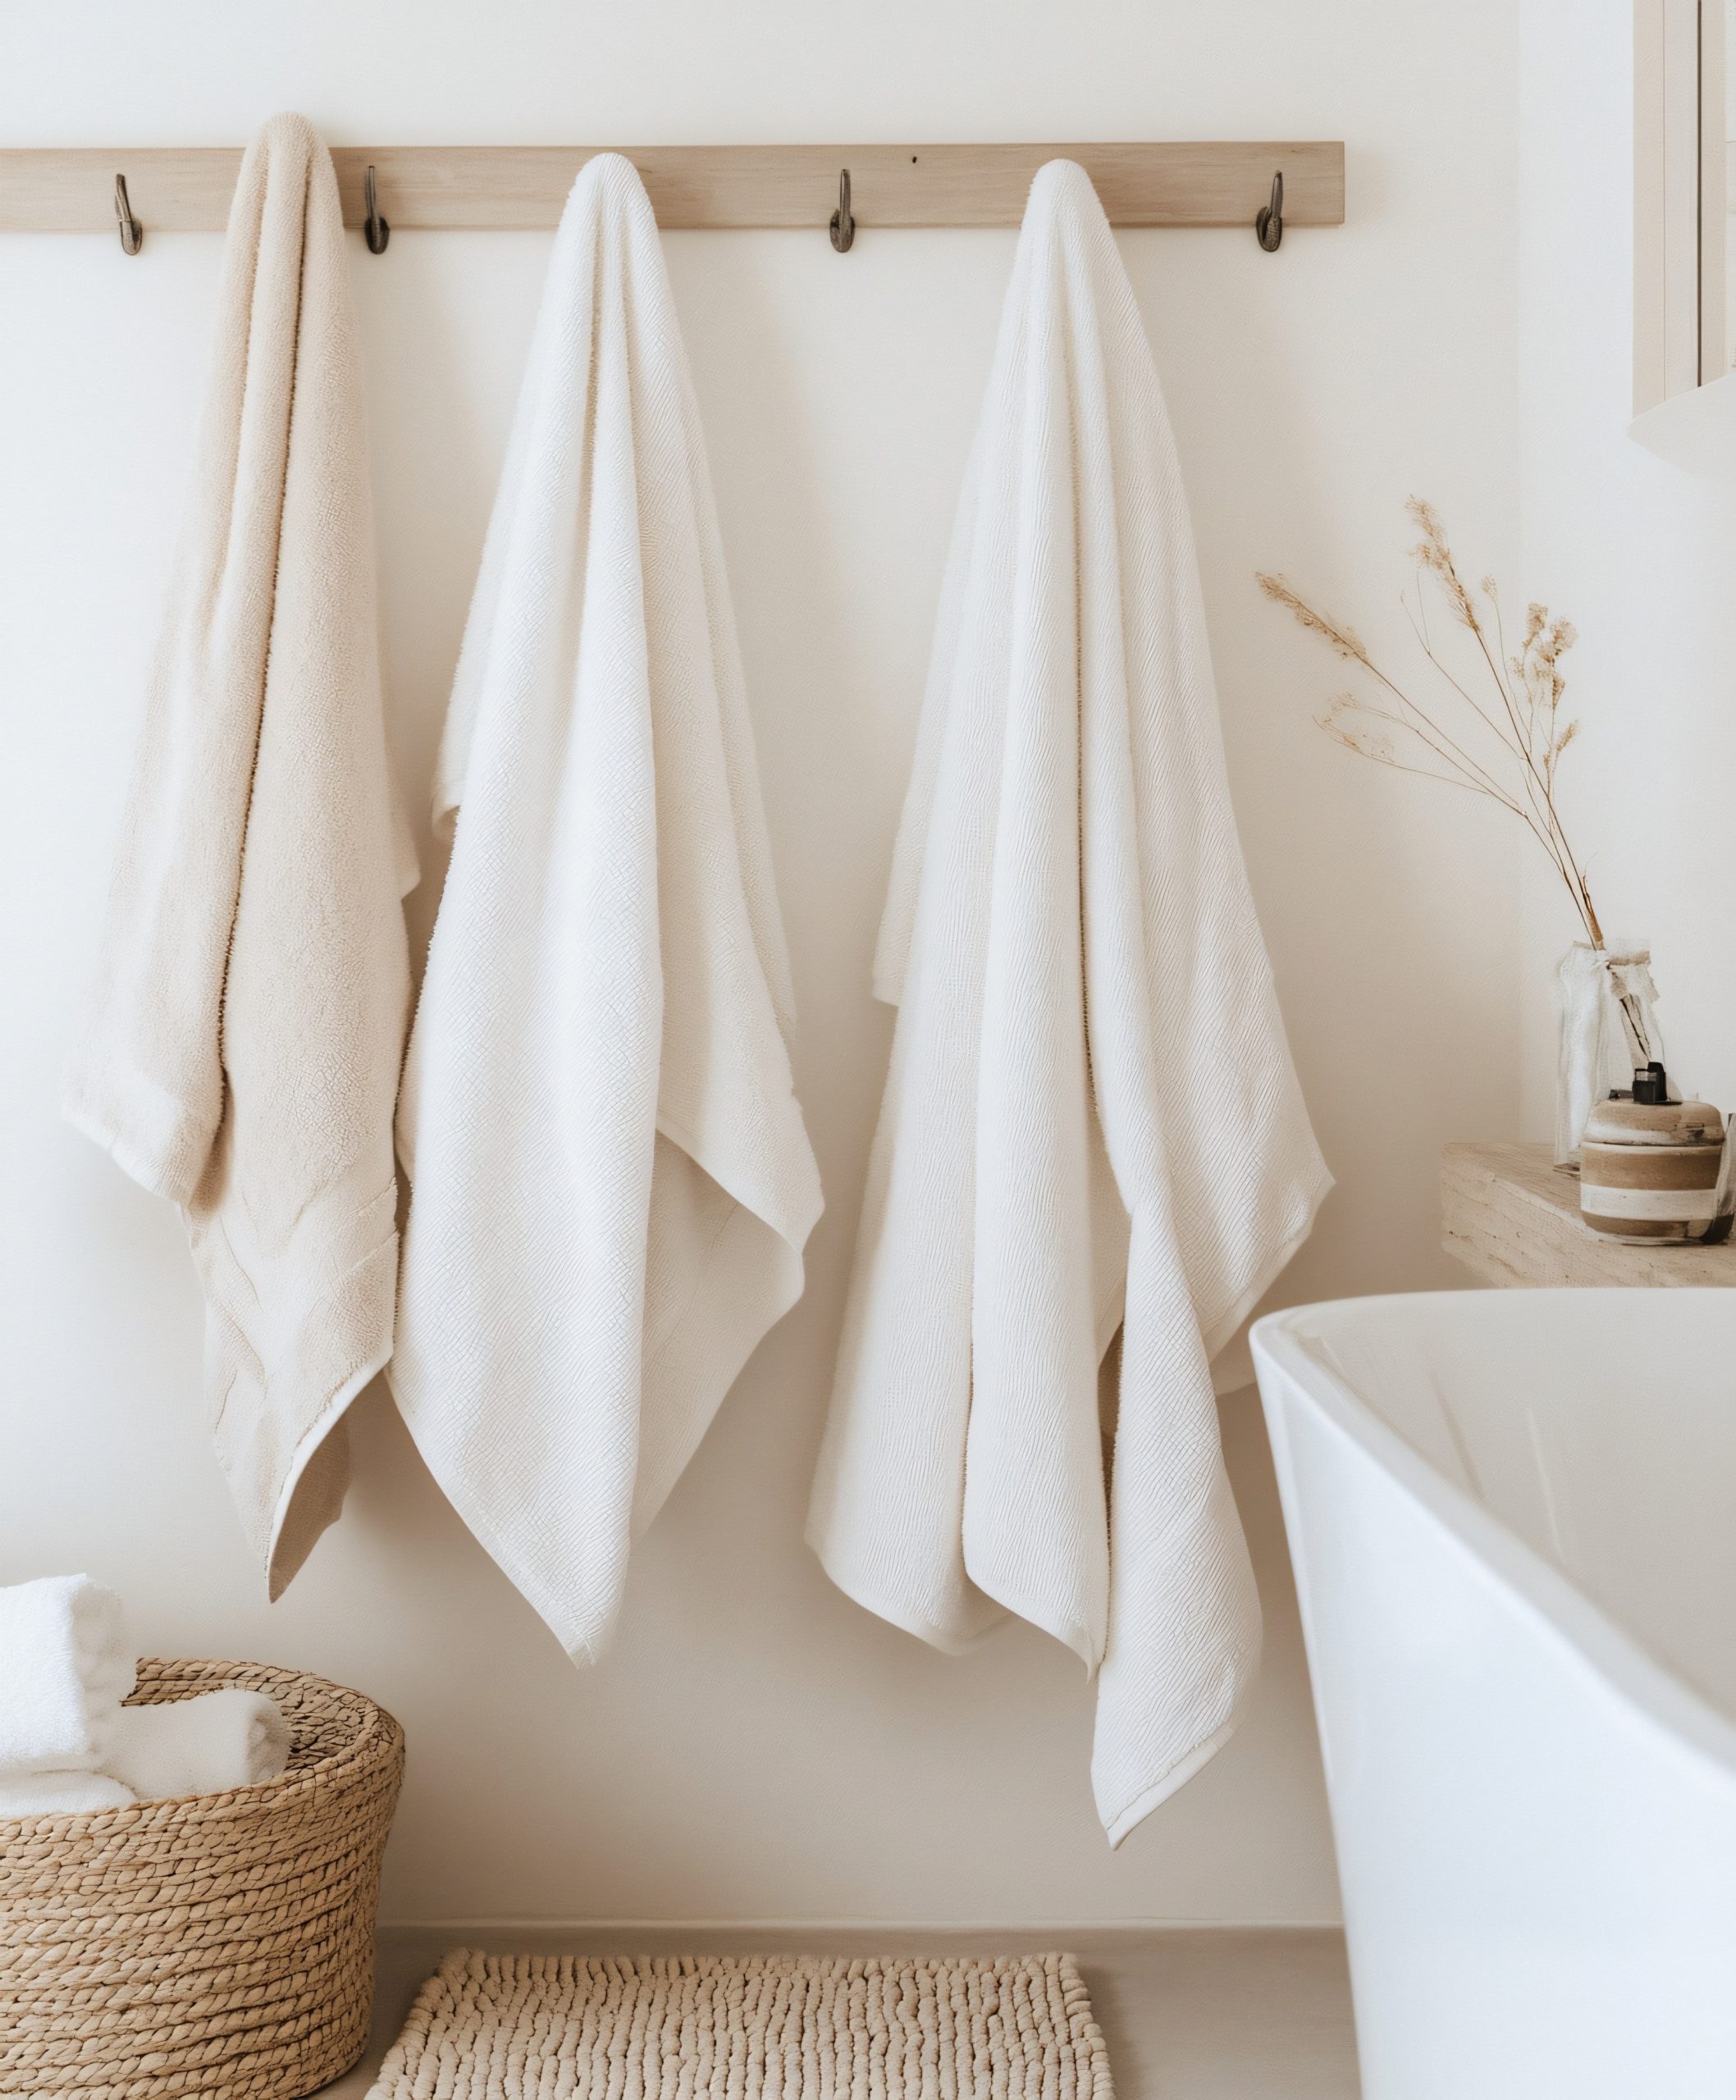
Towel Hooks: A simple but powerful solution. Install multiple hooks to maximise hanging space for towels, robes, or even loofahs. Choose hooks that complement your bathroom décor for a cohesive look.
Tips & Considerations: Opt for hooks that are sturdy and well-suited for the weight of the items you intend to hang. Consider different styles like single hooks, double hooks, or even decorative wall-mounted towel racks that offer multiple hanging points. Position hooks at various heights to accommodate different items and users, this also optimises bathroom storage solutions.
By tapping into this often-ignored space, you’ll uncover practical and affordable bathroom storage solutions, bringing a sense of calm and order to your bathroom!
DIY Bathroom Storage Solutions on a Budget
Effective bathroom storage solutions don’t have to break the bank! With a little creativity, resourcefulness, and maybe a touch of elbow grease, you can create stylish and functional storage using repurposed materials and budget-friendly supplies. These DIY options allow you to customise your storage to fit your specific needs and aesthetic, all while keeping costs down.
-
Repurpose Jars and Containers: Turn old candle jars, food containers (think mason jars, glass pasta sauce jars), or glass bottles into stylish storage containers for cotton swabs, cotton balls, makeup brushes, or small toiletries.
Tips & Considerations: Clean them thoroughly and remove any labels. For a cohesive look, paint the lids or rims with matching colors. Add labels to each jar to identify its contents. Decorate the jars with twine, ribbon, lace, or paint for a personalised touch. These creative jars create fantastic bathroom storage solutions.
-
Floating Shelves from Salvaged Wood: Add a touch of rustic charm and unique character to your bathroom by creating floating shelves from reclaimed or salvaged wood. This is a great way to reuse materials and create a unique piece of storage that matches your personal style.
Tips & Considerations: Sand and seal the wood thoroughly to protect it from moisture. Choose sturdy brackets that can support the weight of the shelves and the items you intend to store. Measure carefully and use a level to ensure the shelves are mounted evenly. You’ll want sturdy walls for mounting.
-
Upcycled Crates or Baskets: Give old wooden crates or woven baskets a new lease on life by using them as decorative and functional storage containers. They can hold towels, rolled-up washcloths, extra toilet paper, or even potted plants.
Tips & Considerations: Paint them to match your bathroom décor or leave them with their natural finish for a rustic look. Stack crates on the floor to create open shelving or mount baskets on the wall for extra storage. Line the baskets with fabric to protect delicate items from snagging. They’re flexible when it comes to your design plan, and they also provide bathroom storage solutions.
Bathroom Storage Furniture: Additional Space and Decor
When built-in storage falls short, strategically placed furniture can make all the difference. These pieces not only provide extra space for your essentials but can also elevate the overall aesthetic of your bathroom, turning it from purely functional to stylishly organised. Careful selection will add to your bathroom storage solutions.
-
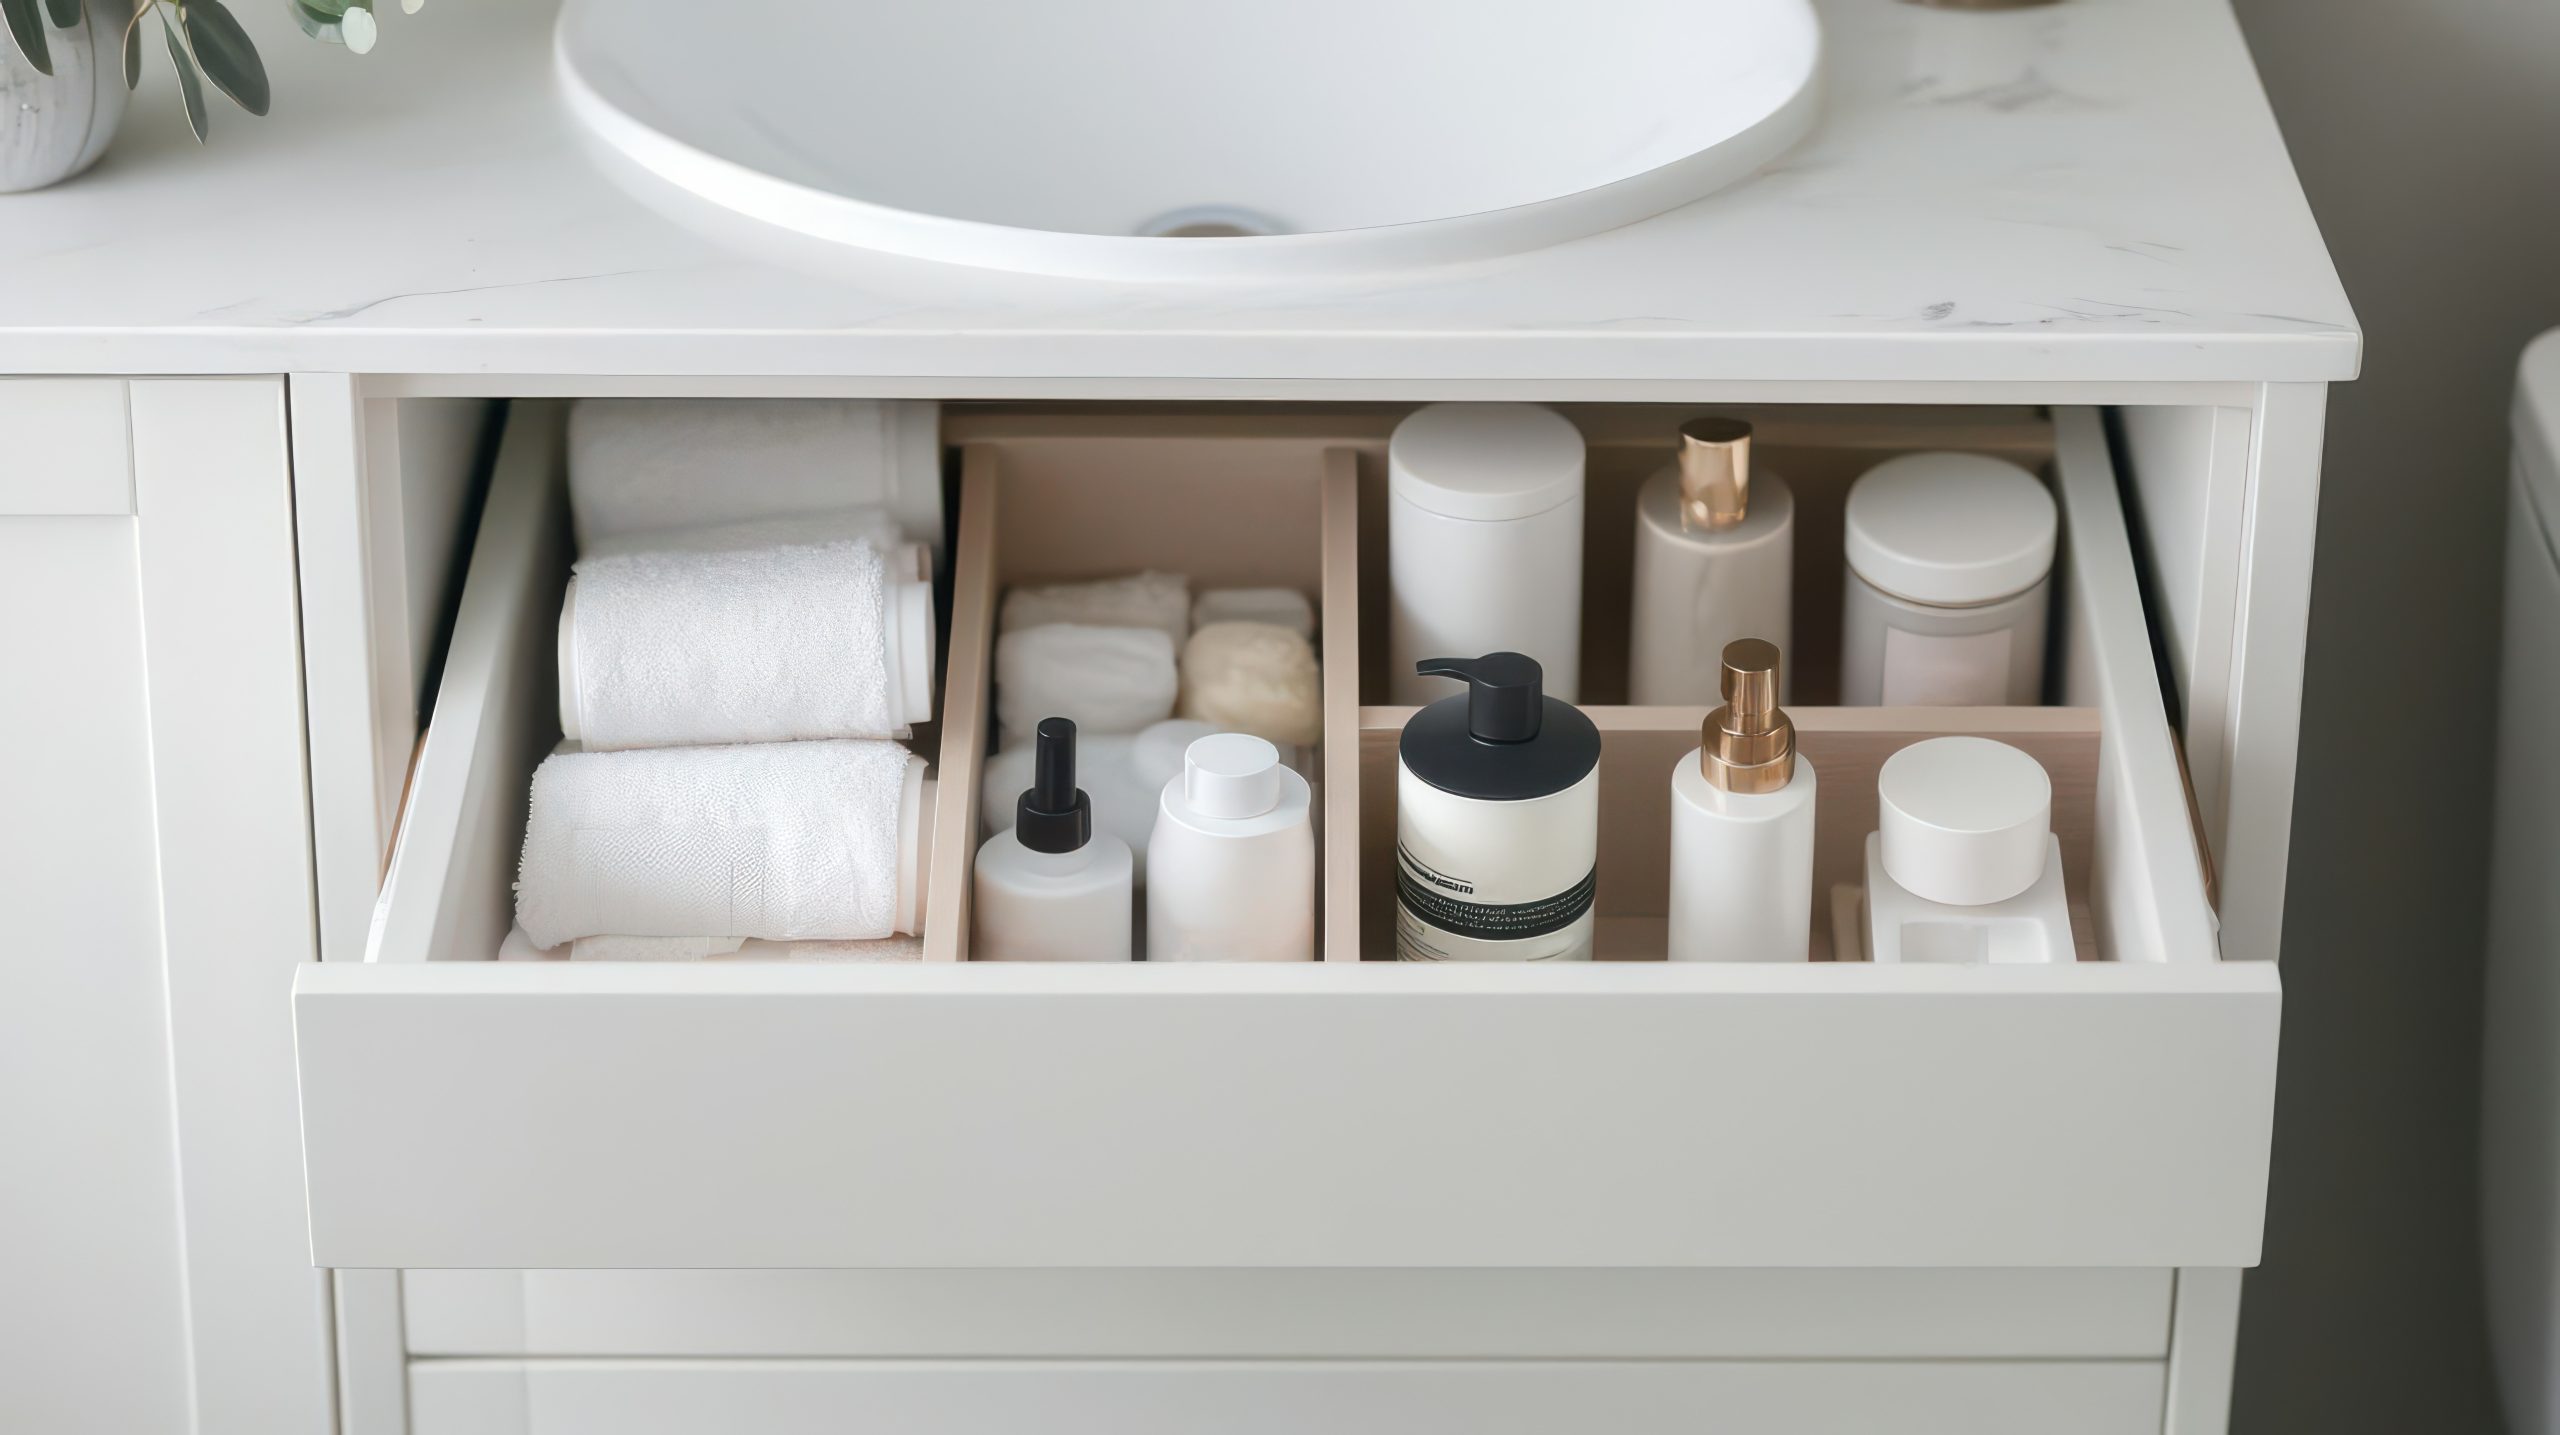
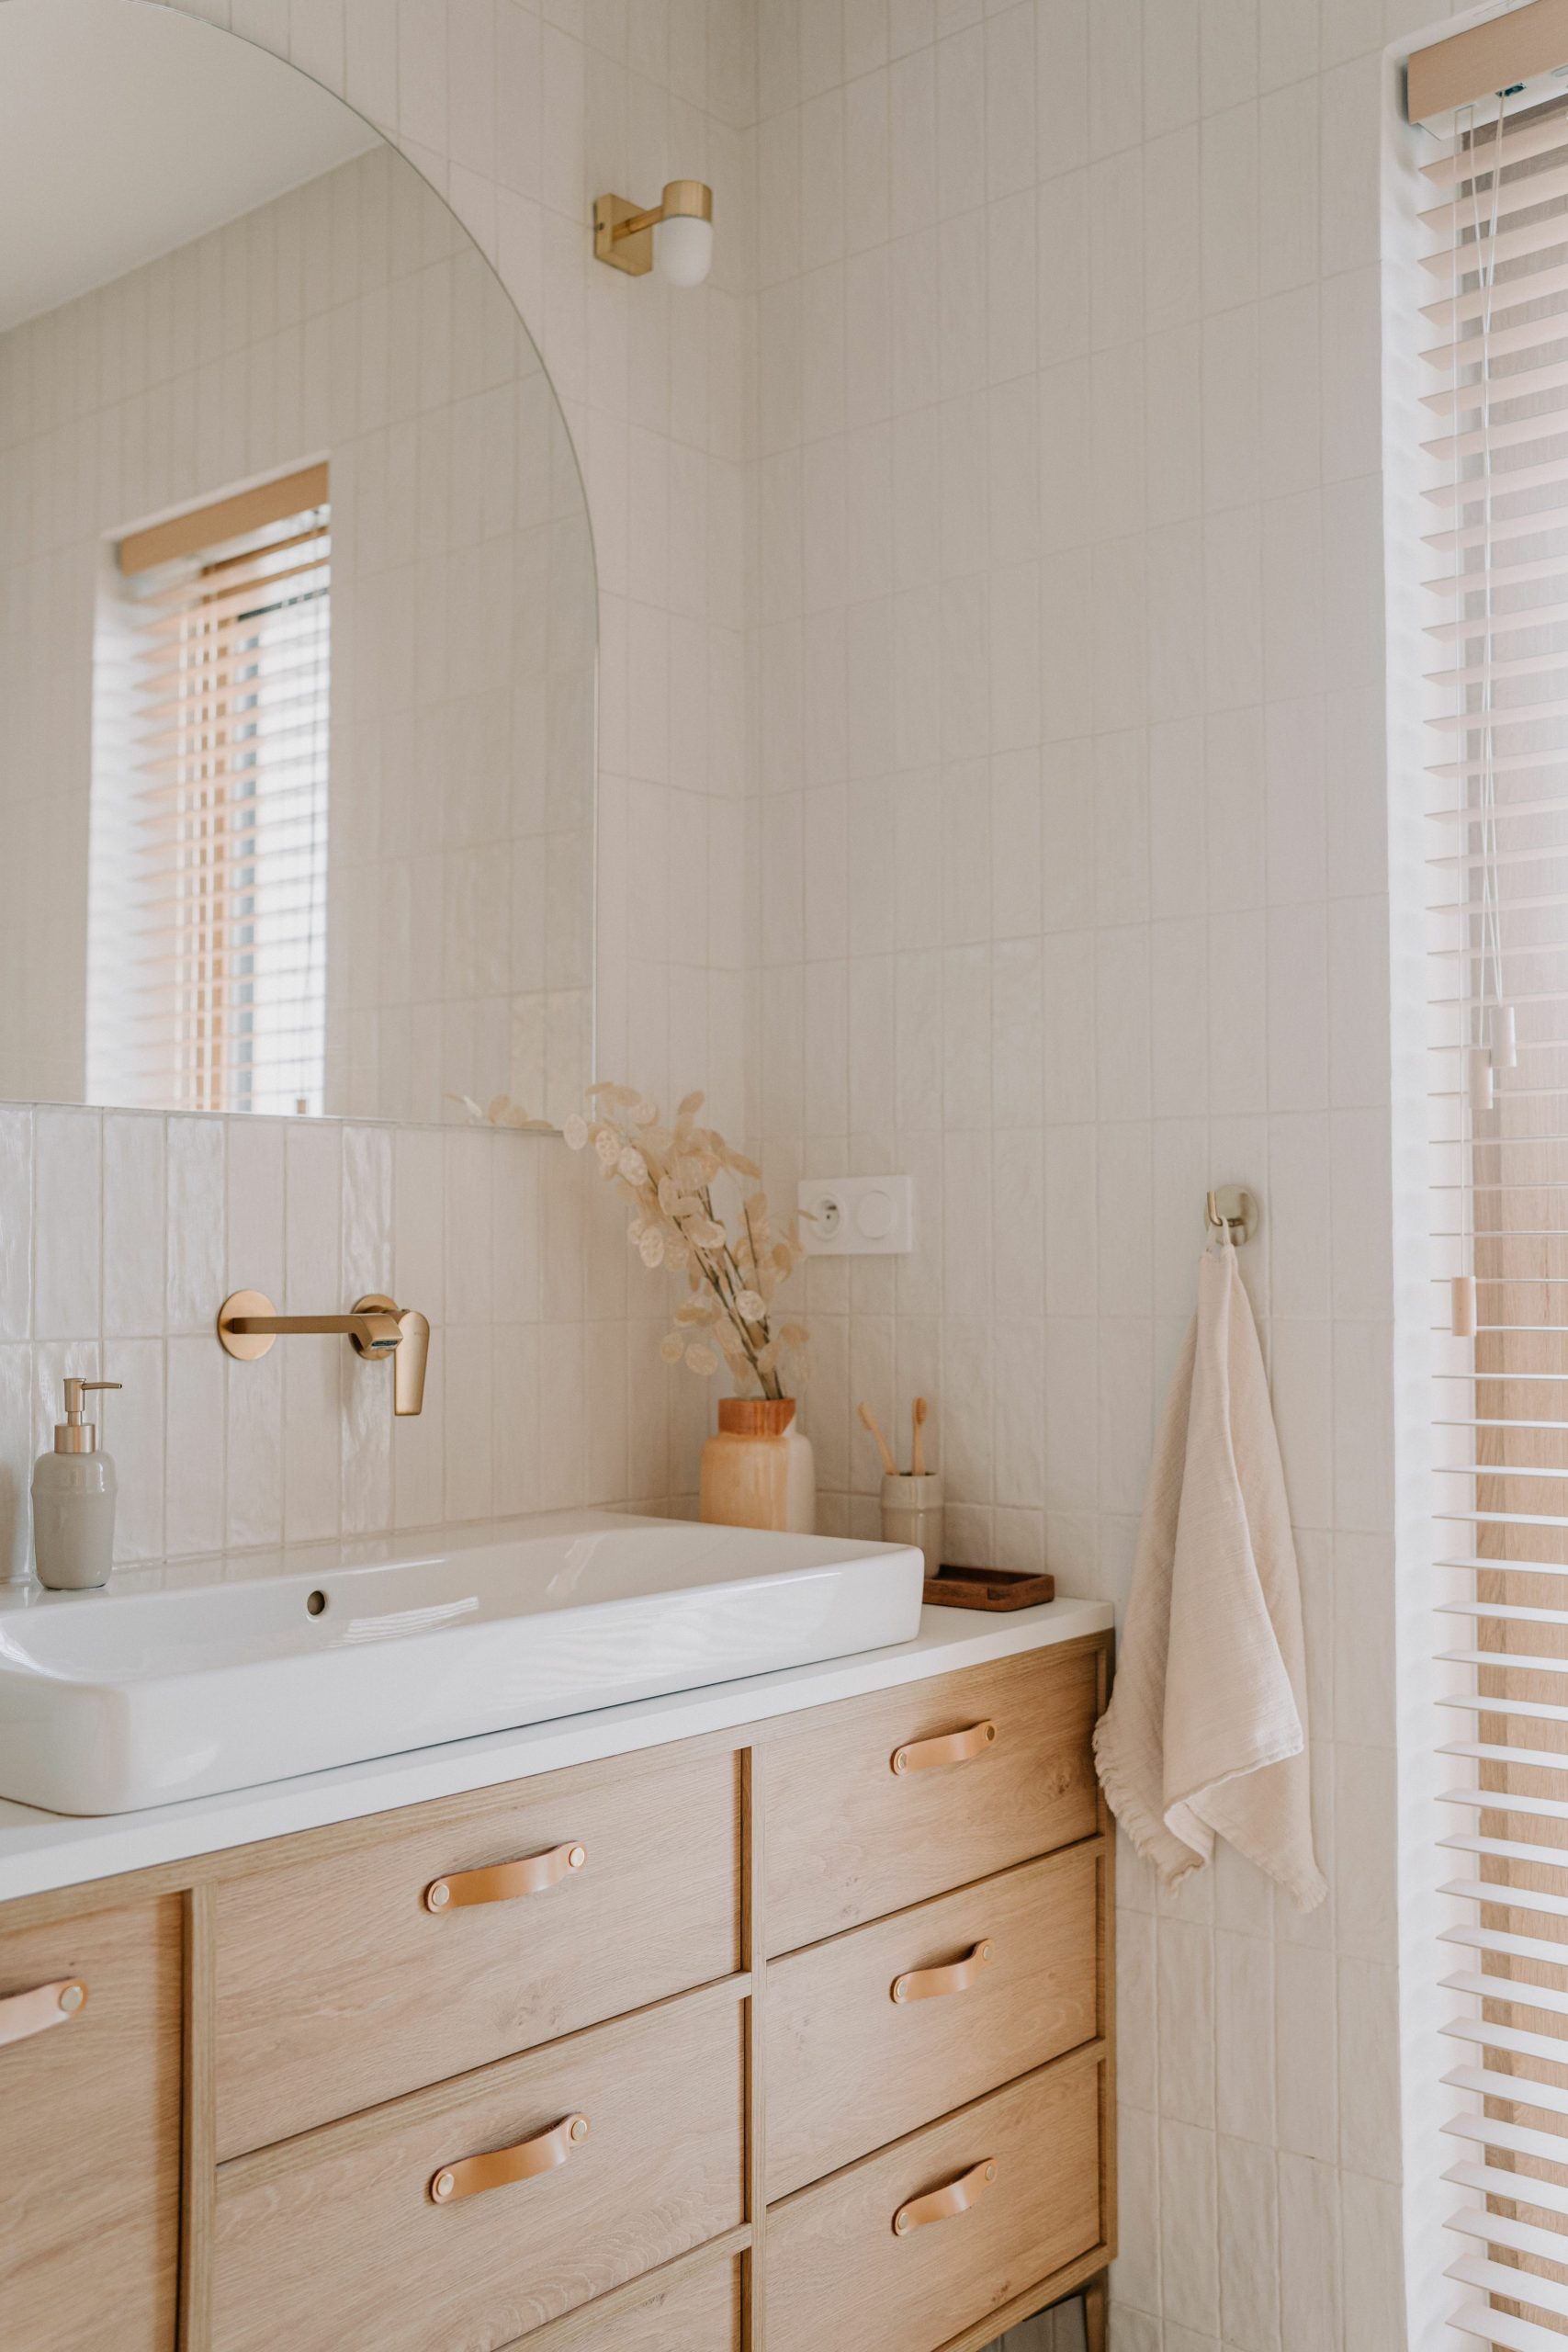
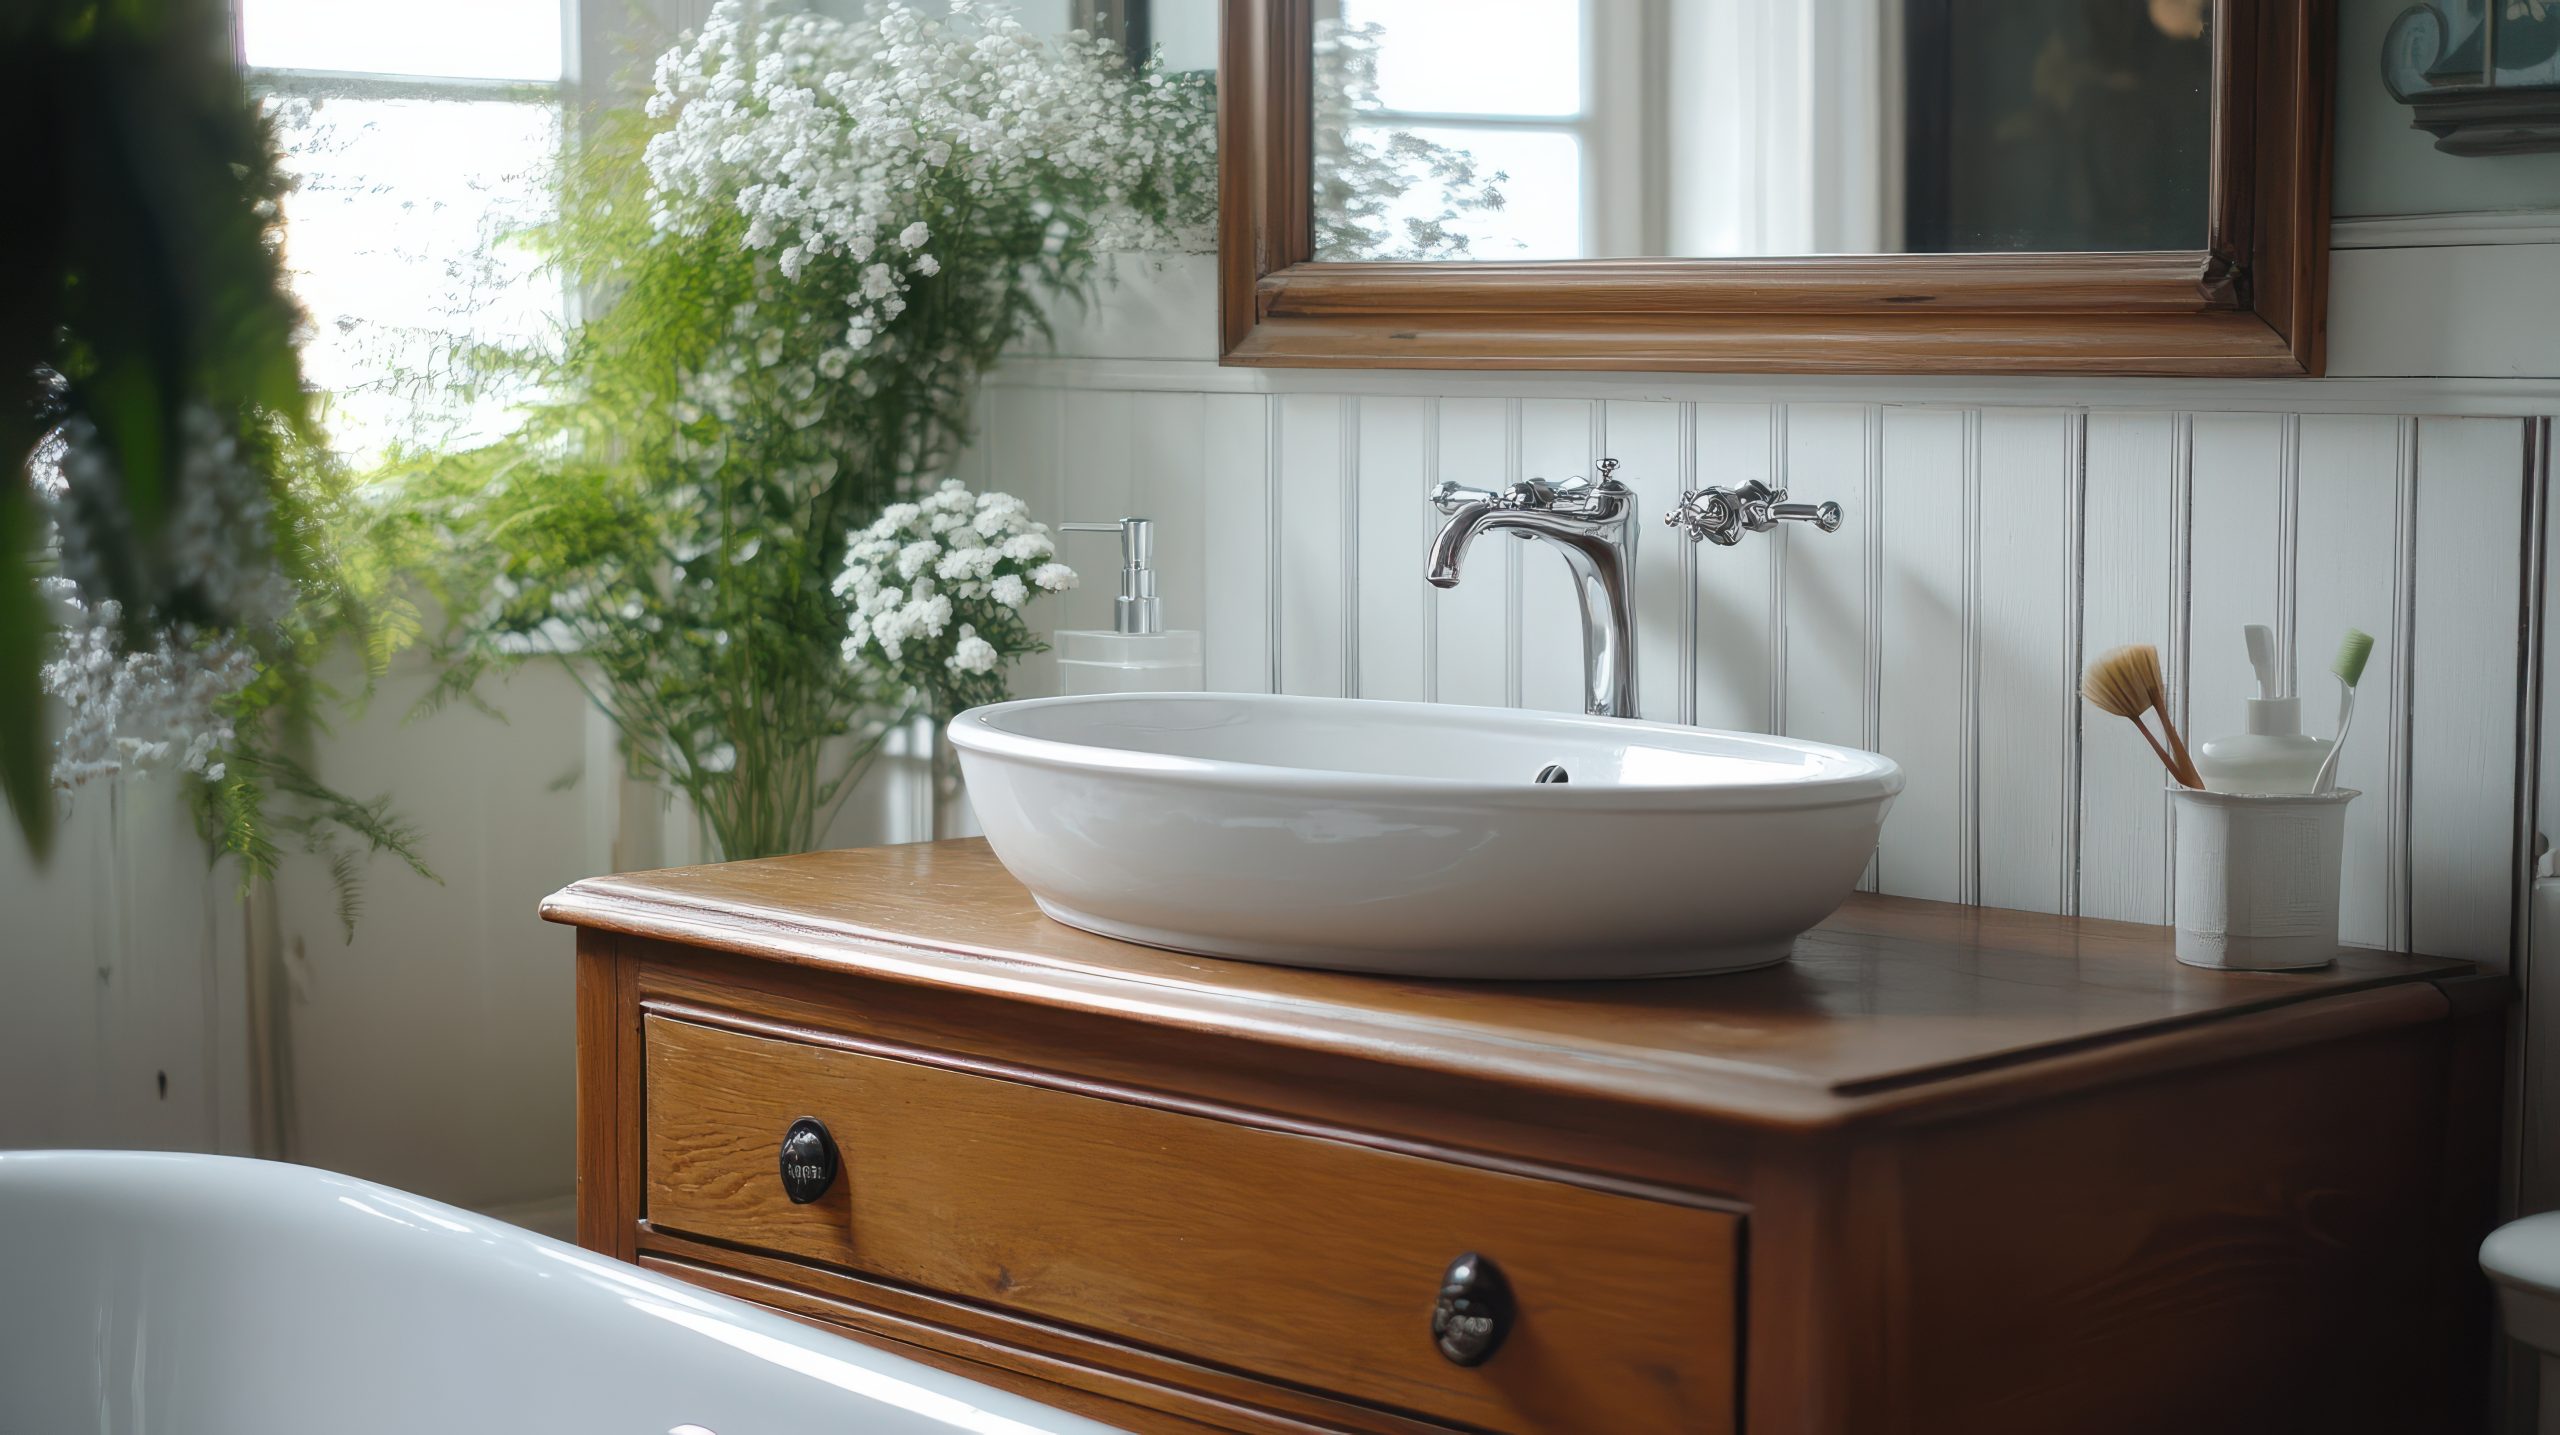
Bathroom Vanities: A stylish and functional bathroom vanity not only provides a surface for your sink but also offers a wealth of storage space beneath. It’s a central piece that combines utility with visual appeal.
Tips & Considerations: Look for vanities with drawers, cabinets, or a combination of both to accommodate all your toiletries and essentials. Consider the style and finish to ensure it complements the rest of your bathroom décor. Measure the space carefully to ensure the vanity fits comfortably and allows for adequate clearance around it.
-
Shower Caddies: Transform a stall in your bathroom for soaps and body wash in all sizes and styles. With a caddie, this provides easier access while having all the items that are a necessity.
-
Rolling Cart/Trolley: Offering portability and flexibility, a rolling cart or trolley is a versatile addition to any bathroom. It can be used to store towels, washcloths, toiletries, or even styling tools.
Tips & Considerations: Choose a cart with multiple shelves or compartments for maximum organisation. Opt for a model with wheels that lock for stability. Use the cart to create a mini spa station, complete with essential oils, lotions, and a cosy robe.
Utilising Drawer Dividers: Organise Inside, Optimise Outside
While having enough drawers is a good start, the real organisational magic happens on the inside! Drawer dividers are game-changing bathroom storage solutions that transform chaotic piles into neatly arranged compartments. They help maximise every square inch of drawer space and ensure that everything has its designated place, creating a sense of calm and order whenever you open a drawer.
-
Adjustable Drawer Dividers: The beauty of adjustable dividers lies in their flexibility. These dividers often feature spring-loaded tension or interlocking designs, allowing you to customise the size and configuration of each compartment to perfectly fit your items.
Tips & Considerations: Look for dividers with padded ends to protect the drawer walls and prevent slipping. Measure the height of your drawers to ensure the dividers fit properly. Use them to create zones for different categories of items, such as makeup, skincare, or hair accessories. This also creates fantastic bathroom storage solutions.
-
Fixed Compartment Dividers: Offering a more permanent organisation solution, these drawer inserts feature fixed compartments tailored to specific items. You might find inserts designed specifically for makeup brushes, lipstick, jewelry, or even neatly folded washcloths and cotton swabs.
Tips & Considerations: Before purchasing a fixed compartment divider, carefully assess the items you want to store and choose a divider with appropriately sized compartments. Consider using different dividers for different types of items to create a truly customised organisational system. Use velvet-lined dividers for delicate jewelry to prevent scratching.
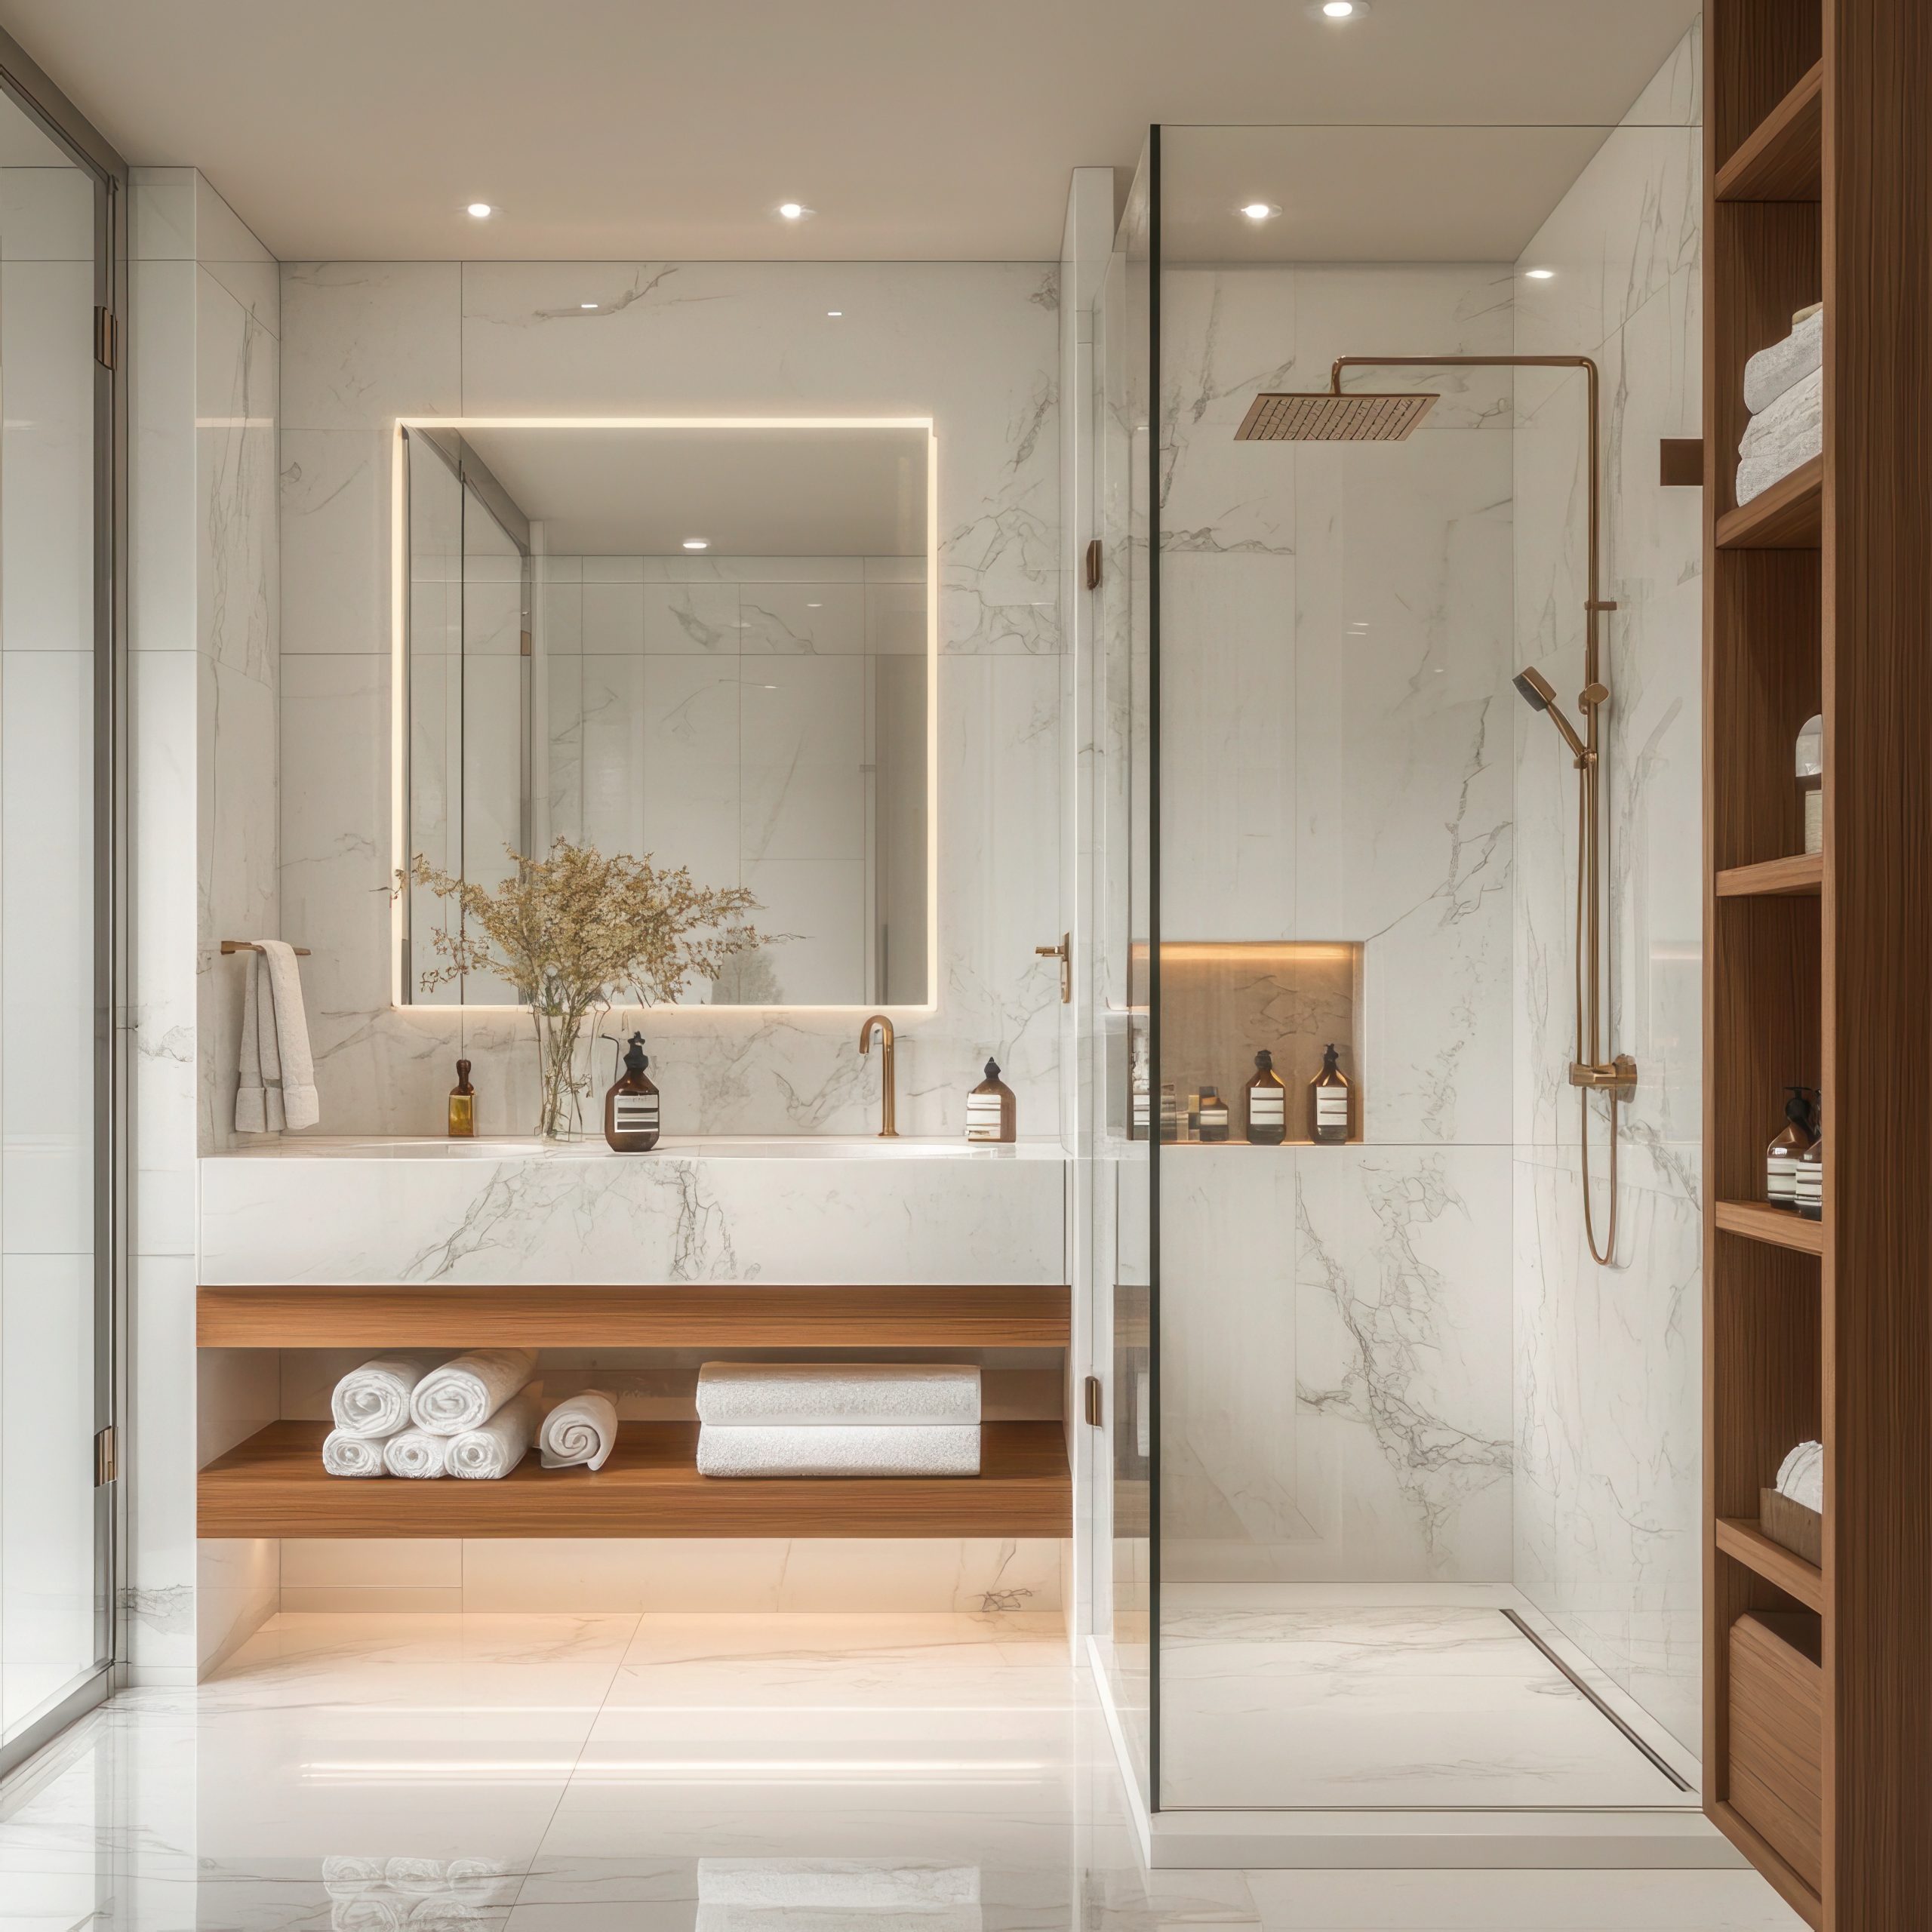
Shower Niches: Seamless, Built-in Storage for Your Shower Essentials
Say goodbye to precarious shampoo bottles teetering on the edge of your bathtub! Shower niches offer sleek and seamless built-in bathroom storage solutions directly within your shower enclosure. These recessed shelves provide a dedicated and easily accessible spot for your soaps, shampoos, conditioners, shaving cream, and other shower essentials, creating a clutter-free and spa-like showering experience.
-
Built-in Shower Niches: During a bathroom remodel, incorporating a built-in niche is the ultimate way to maximise space, eliminate clutter, and create a streamlined, modern look. Niches can be designed in a variety of sizes and shapes to accommodate your specific needs and preferences. From a single, large niche to multiple smaller ones, the possibilities are endless.
Planning and Considerations:
-
Placement: Carefully consider the placement of your niche. Ideally, it should be located at a comfortable height and in a spot that’s easily accessible while showering. Avoid placing it directly in the path of the showerhead spray to prevent water from splashing out.
-
Waterproofing: Proper waterproofing is essential to prevent water damage behind the niche. Ensure the contractor uses high-quality waterproofing membranes and seals to protect the surrounding walls.
-
Tiling: Tiling the niche with the same tile as the shower walls creates a cohesive and elegant aesthetic. You can also use a contrasting tile or mosaic to create a focal point. Consider adding a decorative accent, like a border or small shelf. The perfect spot and tiling for bathroom storage solutions.
-
Lighting: Adding a small LED light within the niche can enhance the ambiance and make it easier to see your shower products.
-
Slope: Design the shelves within the niche with a slight downward slope to allow water to drain effectively and prevent buildup. That brings a plus into designing a space that provides bathroom storage solutions.
Transforming your bathroom from chaotic to calm is achievable with the right bathroom storage solutions. From clever vertical strategies and under-sink organizers to DIY projects and stylish furniture, there’s a solution for every space and every budget. The key is to assess your needs, analyze your space, and implement the strategies that best suit your lifestyle.
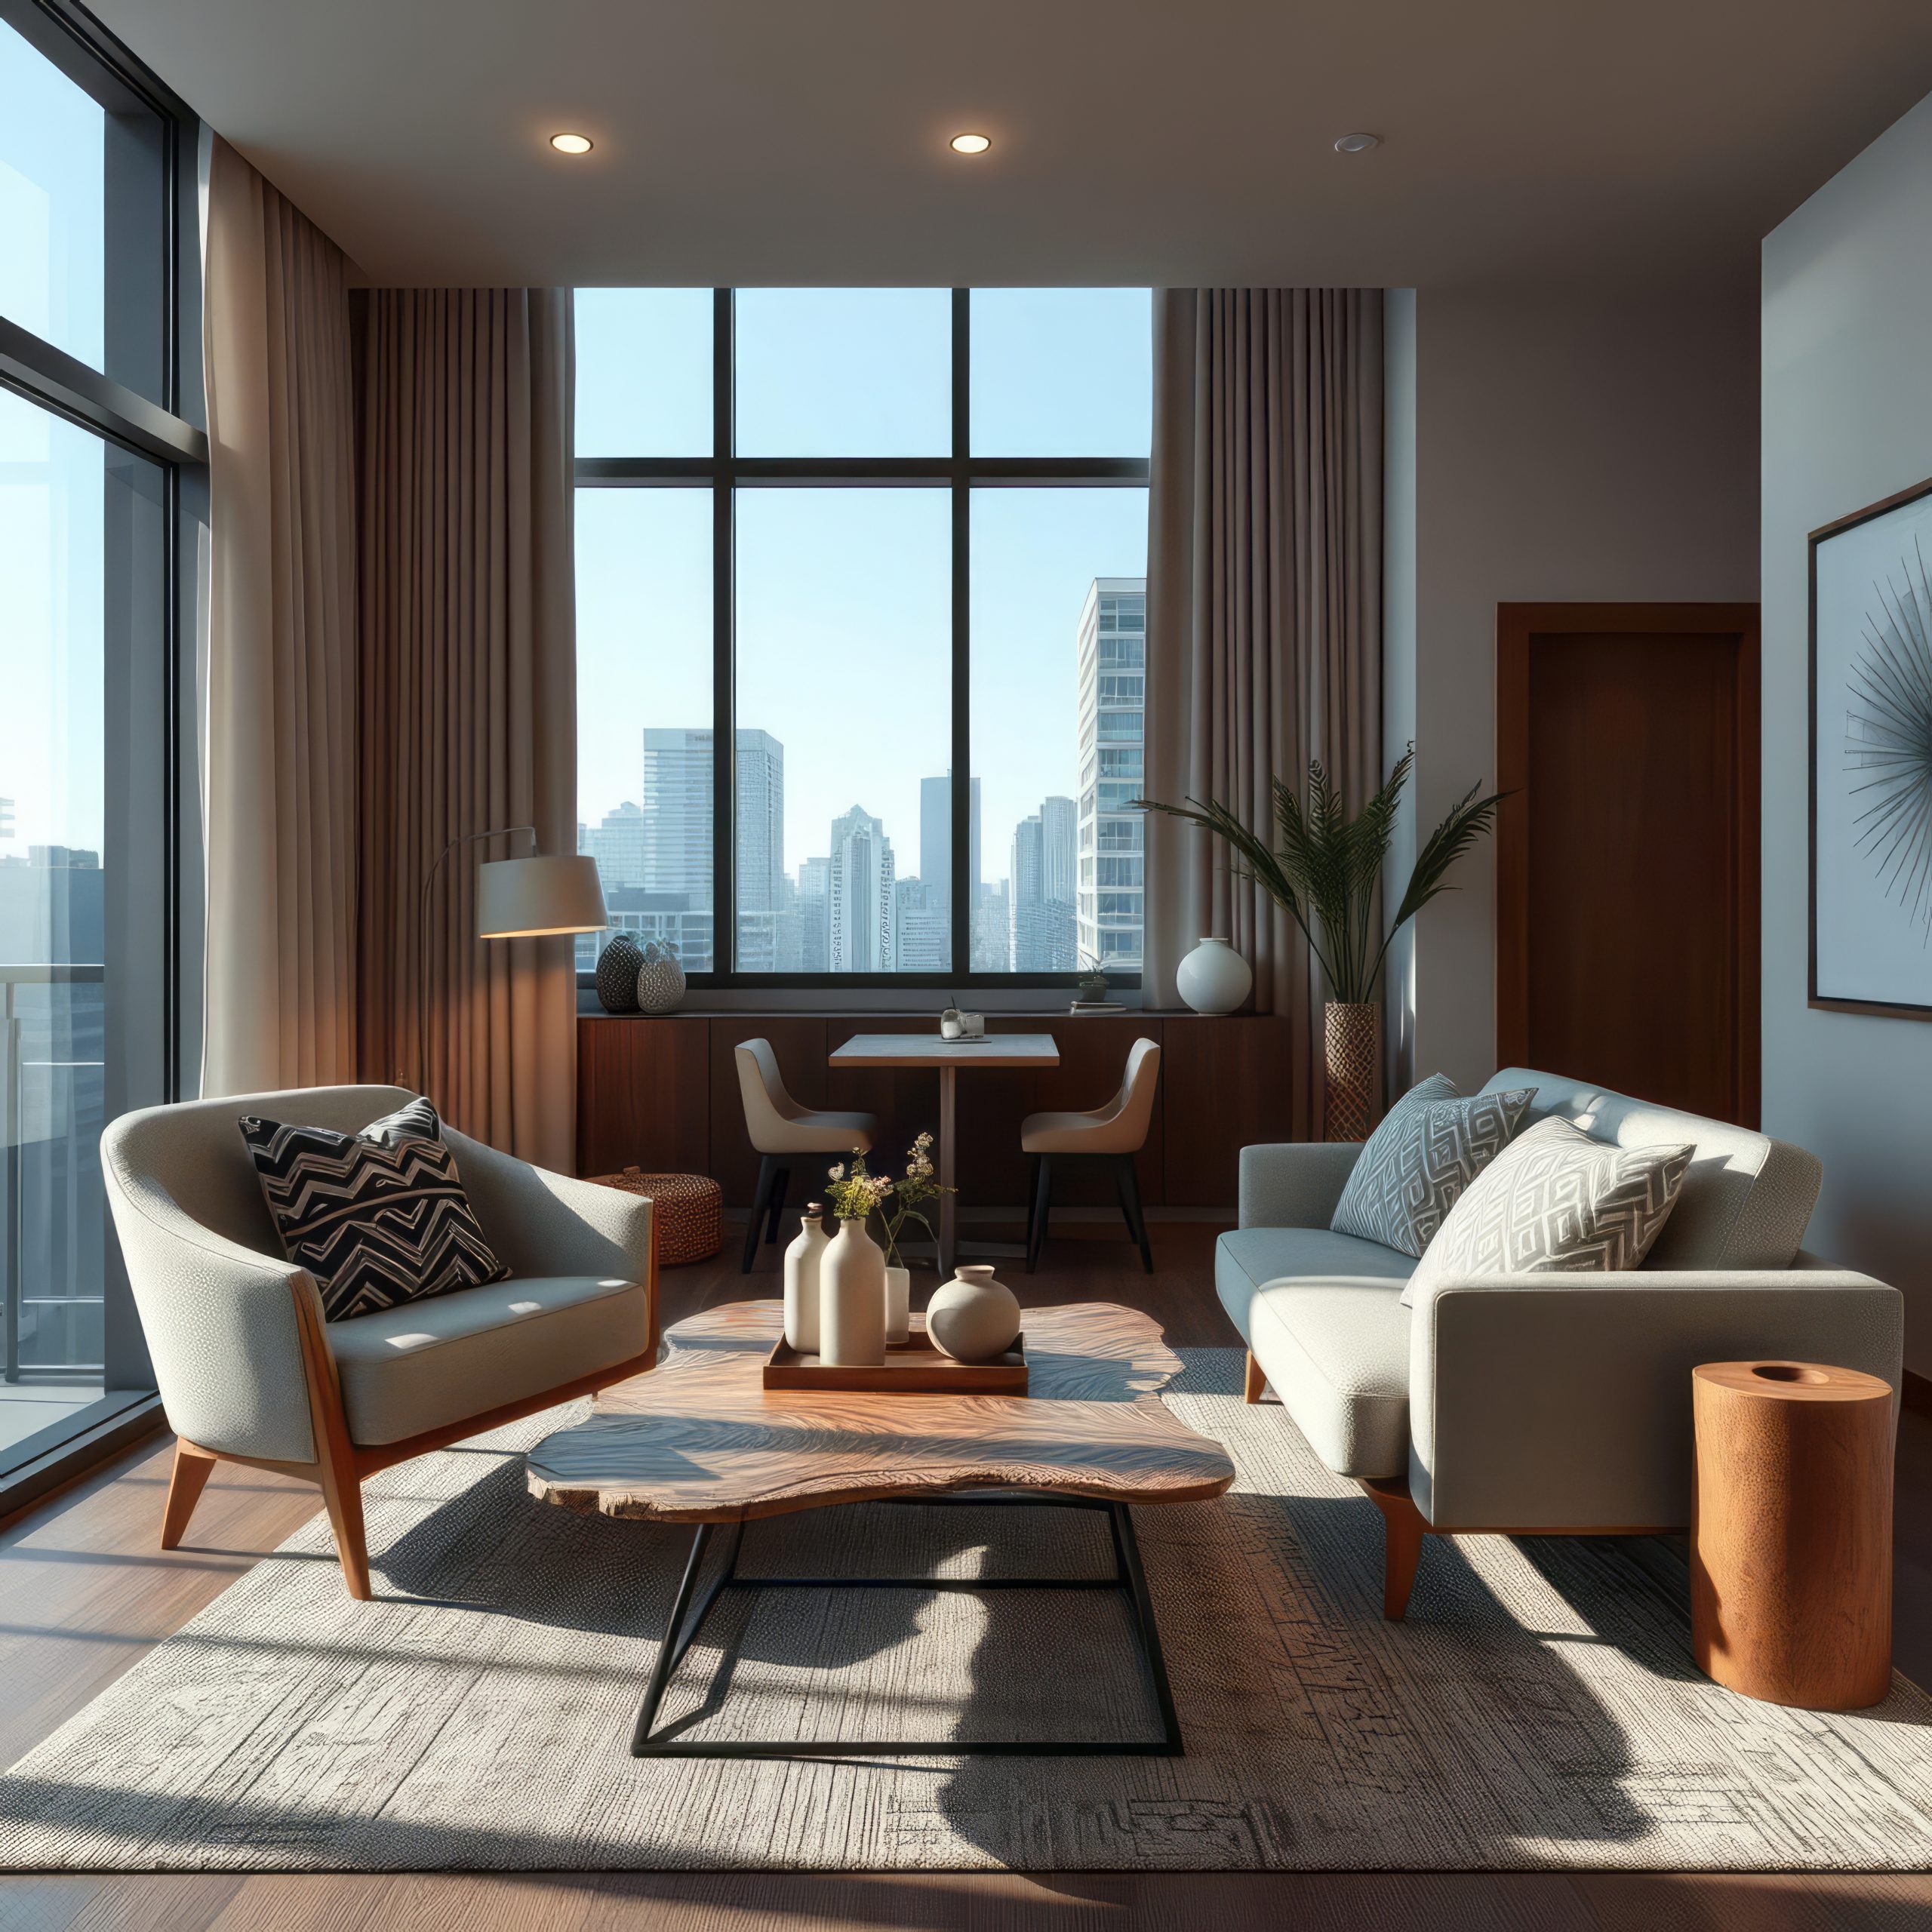
by Kesaa Interiors | DECOR & DIY, Living Room, ROOMS, Small Space Hacks
This post is all about Small Living Room Layout.
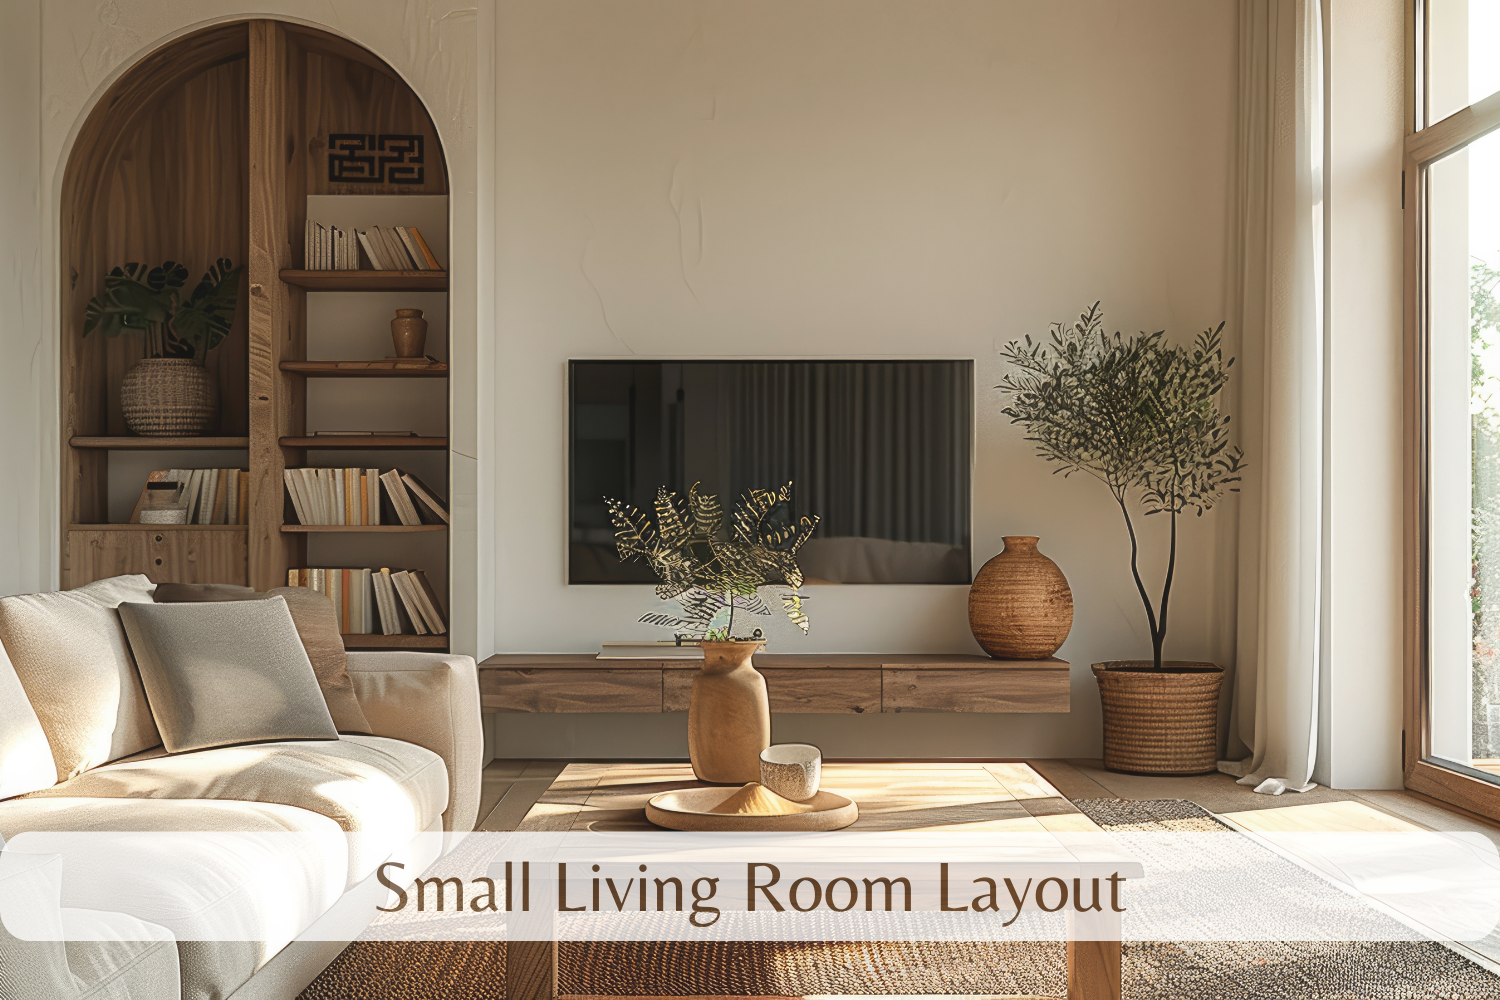
Feeling cramped in your small living room? Don’t give up! It’s a common design challenge, but even the most space-challenged living rooms can be transformed into stylish and functional havens. You can maximise your space with clever layouts and smart design choices.
A small living room layout can often feel limited, but it doesn’t mean sacrificing style or functionality. The key lies in strategic planning and maximising every square inch. This post will provide tips and tricks to transform your small living room layout into a functional and inviting space.
From furniture selection to clever spatial tricks, get ready to unlock the potential of your cosy corner. So ditch the cramped feeling, because transforming your small living room layout into a place where you feel relaxed is definitely achievable!
Best Small Living Room Layout Ideas.
Understanding Your Space
The first step in designing a successful small living room layout is to understand the space you’re working with truly. This goes beyond simply knowing the room’s dimensions; it’s about considering your needs, prioritising functionality, and recognising the inherent opportunities (and limitations) of the space.
- Assess Your Needs and Priorities:
What do you need your living room to be? Is it a place for cosy movie nights with the family, a sophisticated space for entertaining guests, a home office nook during the day, or a multi-purpose space for work and play? Identifying your primary uses will directly inform your layout choices.
Think carefully about how you currently use the space and how you wish to use it. Do you need ample seating for gatherings? Or do you prioritise open floor space for kids to play? Are you a bookworm needing a reading nook? Once you pinpoint these needs, designing an efficient small living room layout becomes significantly easier.
- Measure Everything:
Don’t skip this step! Accurate measurements are crucial when planning a small living room layout. Grab your measuring tape and meticulously record the length, width, and height of your room. Note the placement of windows and doors, since these will influence furniture placement. Don’t forget to measure the location of outlets and radiators!
Creating a floor plan – either hand-drawn on graph paper or using a simple online tool – will give you a visual representation of the space and help you avoid costly mistakes. Furthermore, it allows for strategic decisions when improving your small living room layout. Remember to measure any existing furniture you plan to keep and always measure potential new pieces before bringing them home.
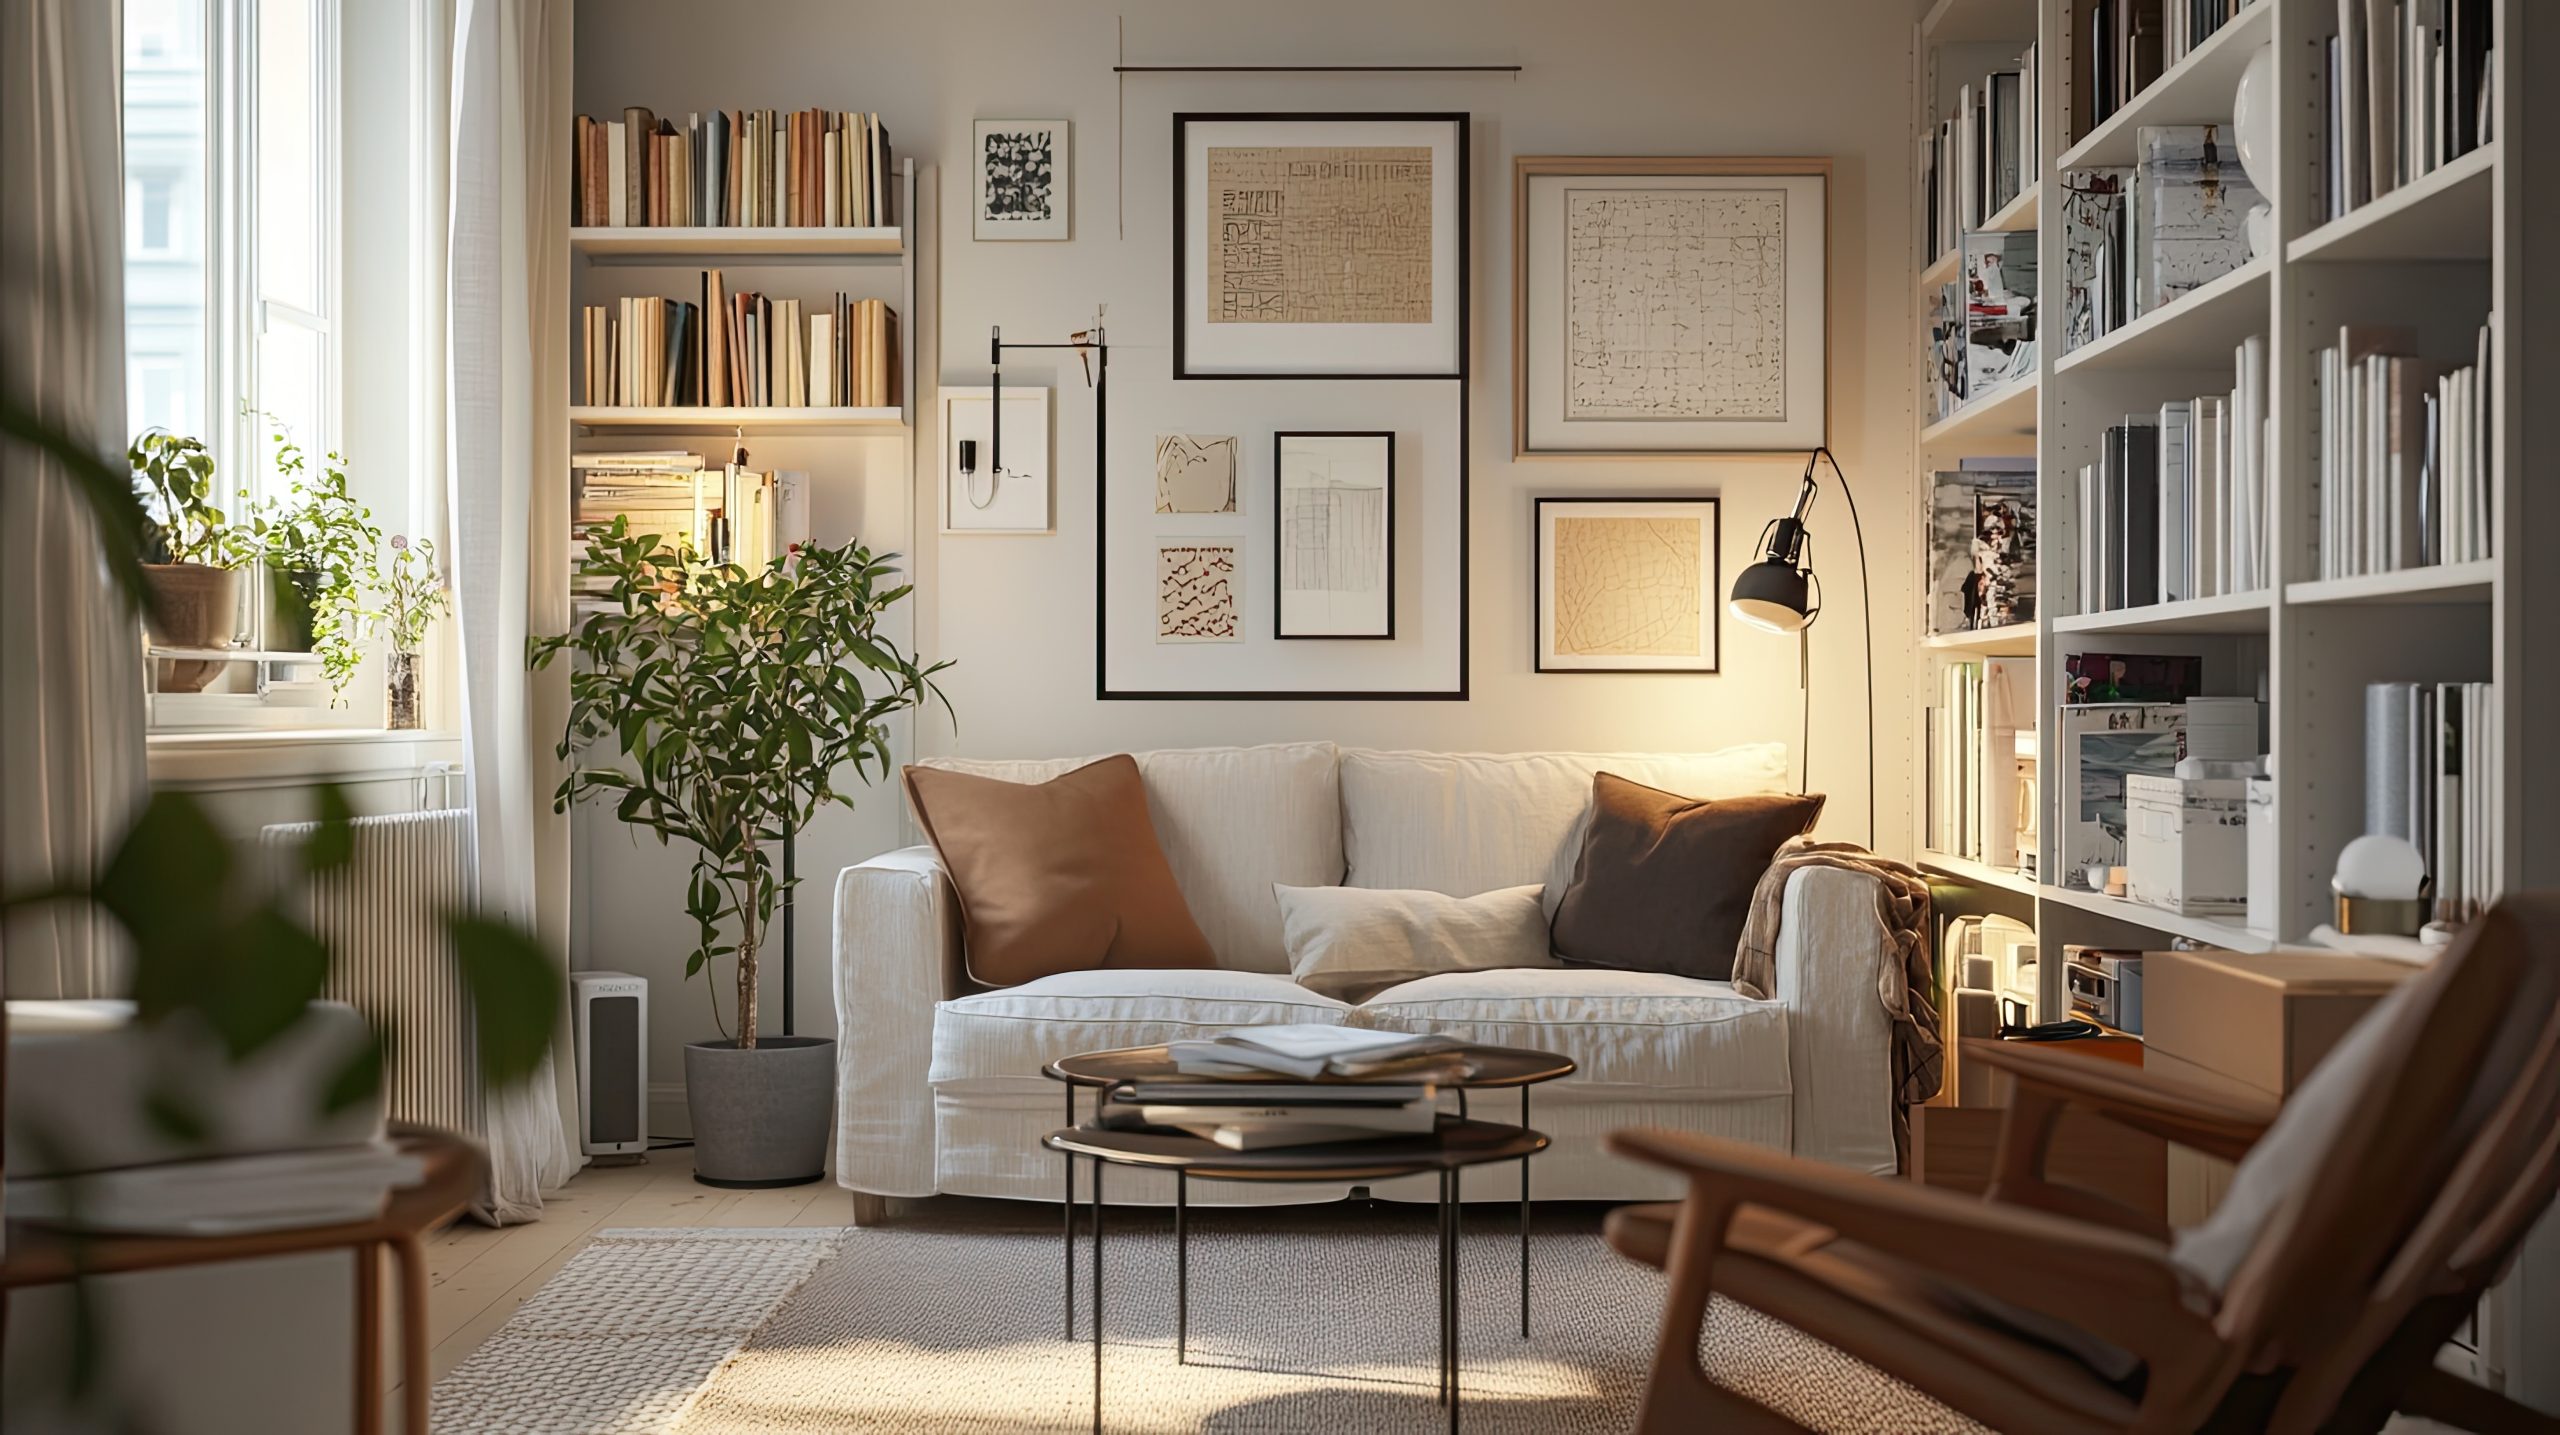
- Identify Focal Points:
Every living room benefits from a focal point – a natural area that draws the eye and anchors the space. In many rooms, the focal point is obvious: a large window with a stunning view, a cosy fireplace, or even a wall-mounted television. However, if your room lacks a clear focal point, you can easily create one.
Consider incorporating an eye-catching piece of artwork, a statement rug, or even creating a gallery wall to serve as your room’s centrepiece. A proper small living room layout relies heavily on the selection of a natural focal point to draw people into the space and add definition to what would otherwise be a drab and claustrophobic area. Once you’ve identified or created your focal point, arrange your furniture around it to create a balanced and inviting seating arrangement.
Layout Strategies for Small Living Rooms
Now that you’ve assessed your needs, measured your space, and identified a focal point, it’s time to delve into layout strategies that will truly transform your small living room layout. There’s no one-size-fits-all approach, but understanding these techniques will empower you to create a space that is both functional and stylish.
- The Floating Furniture Arrangement:
Often, the instinctive reaction when decorating a small space is to push all the furniture against the walls. However, this can actually make a room feel more cramped! A “floating” furniture arrangement, where pieces are positioned away from the walls, can create a sense of spaciousness and improve flow.
This technique involves pulling your sofa and chairs a few inches away from the wall. The sliver of open space behind the furniture visually breaks up the room and creates the illusion of more depth. Define the seating area by placing a rug underneath the front legs of your sofa and chairs. The best small living room layout will strategically play with space to optimise the feeling of openness. Using floating furniture to achieve this helps to avoid the visual feeling of being “trapped” by being hugged along every single corner of your room.
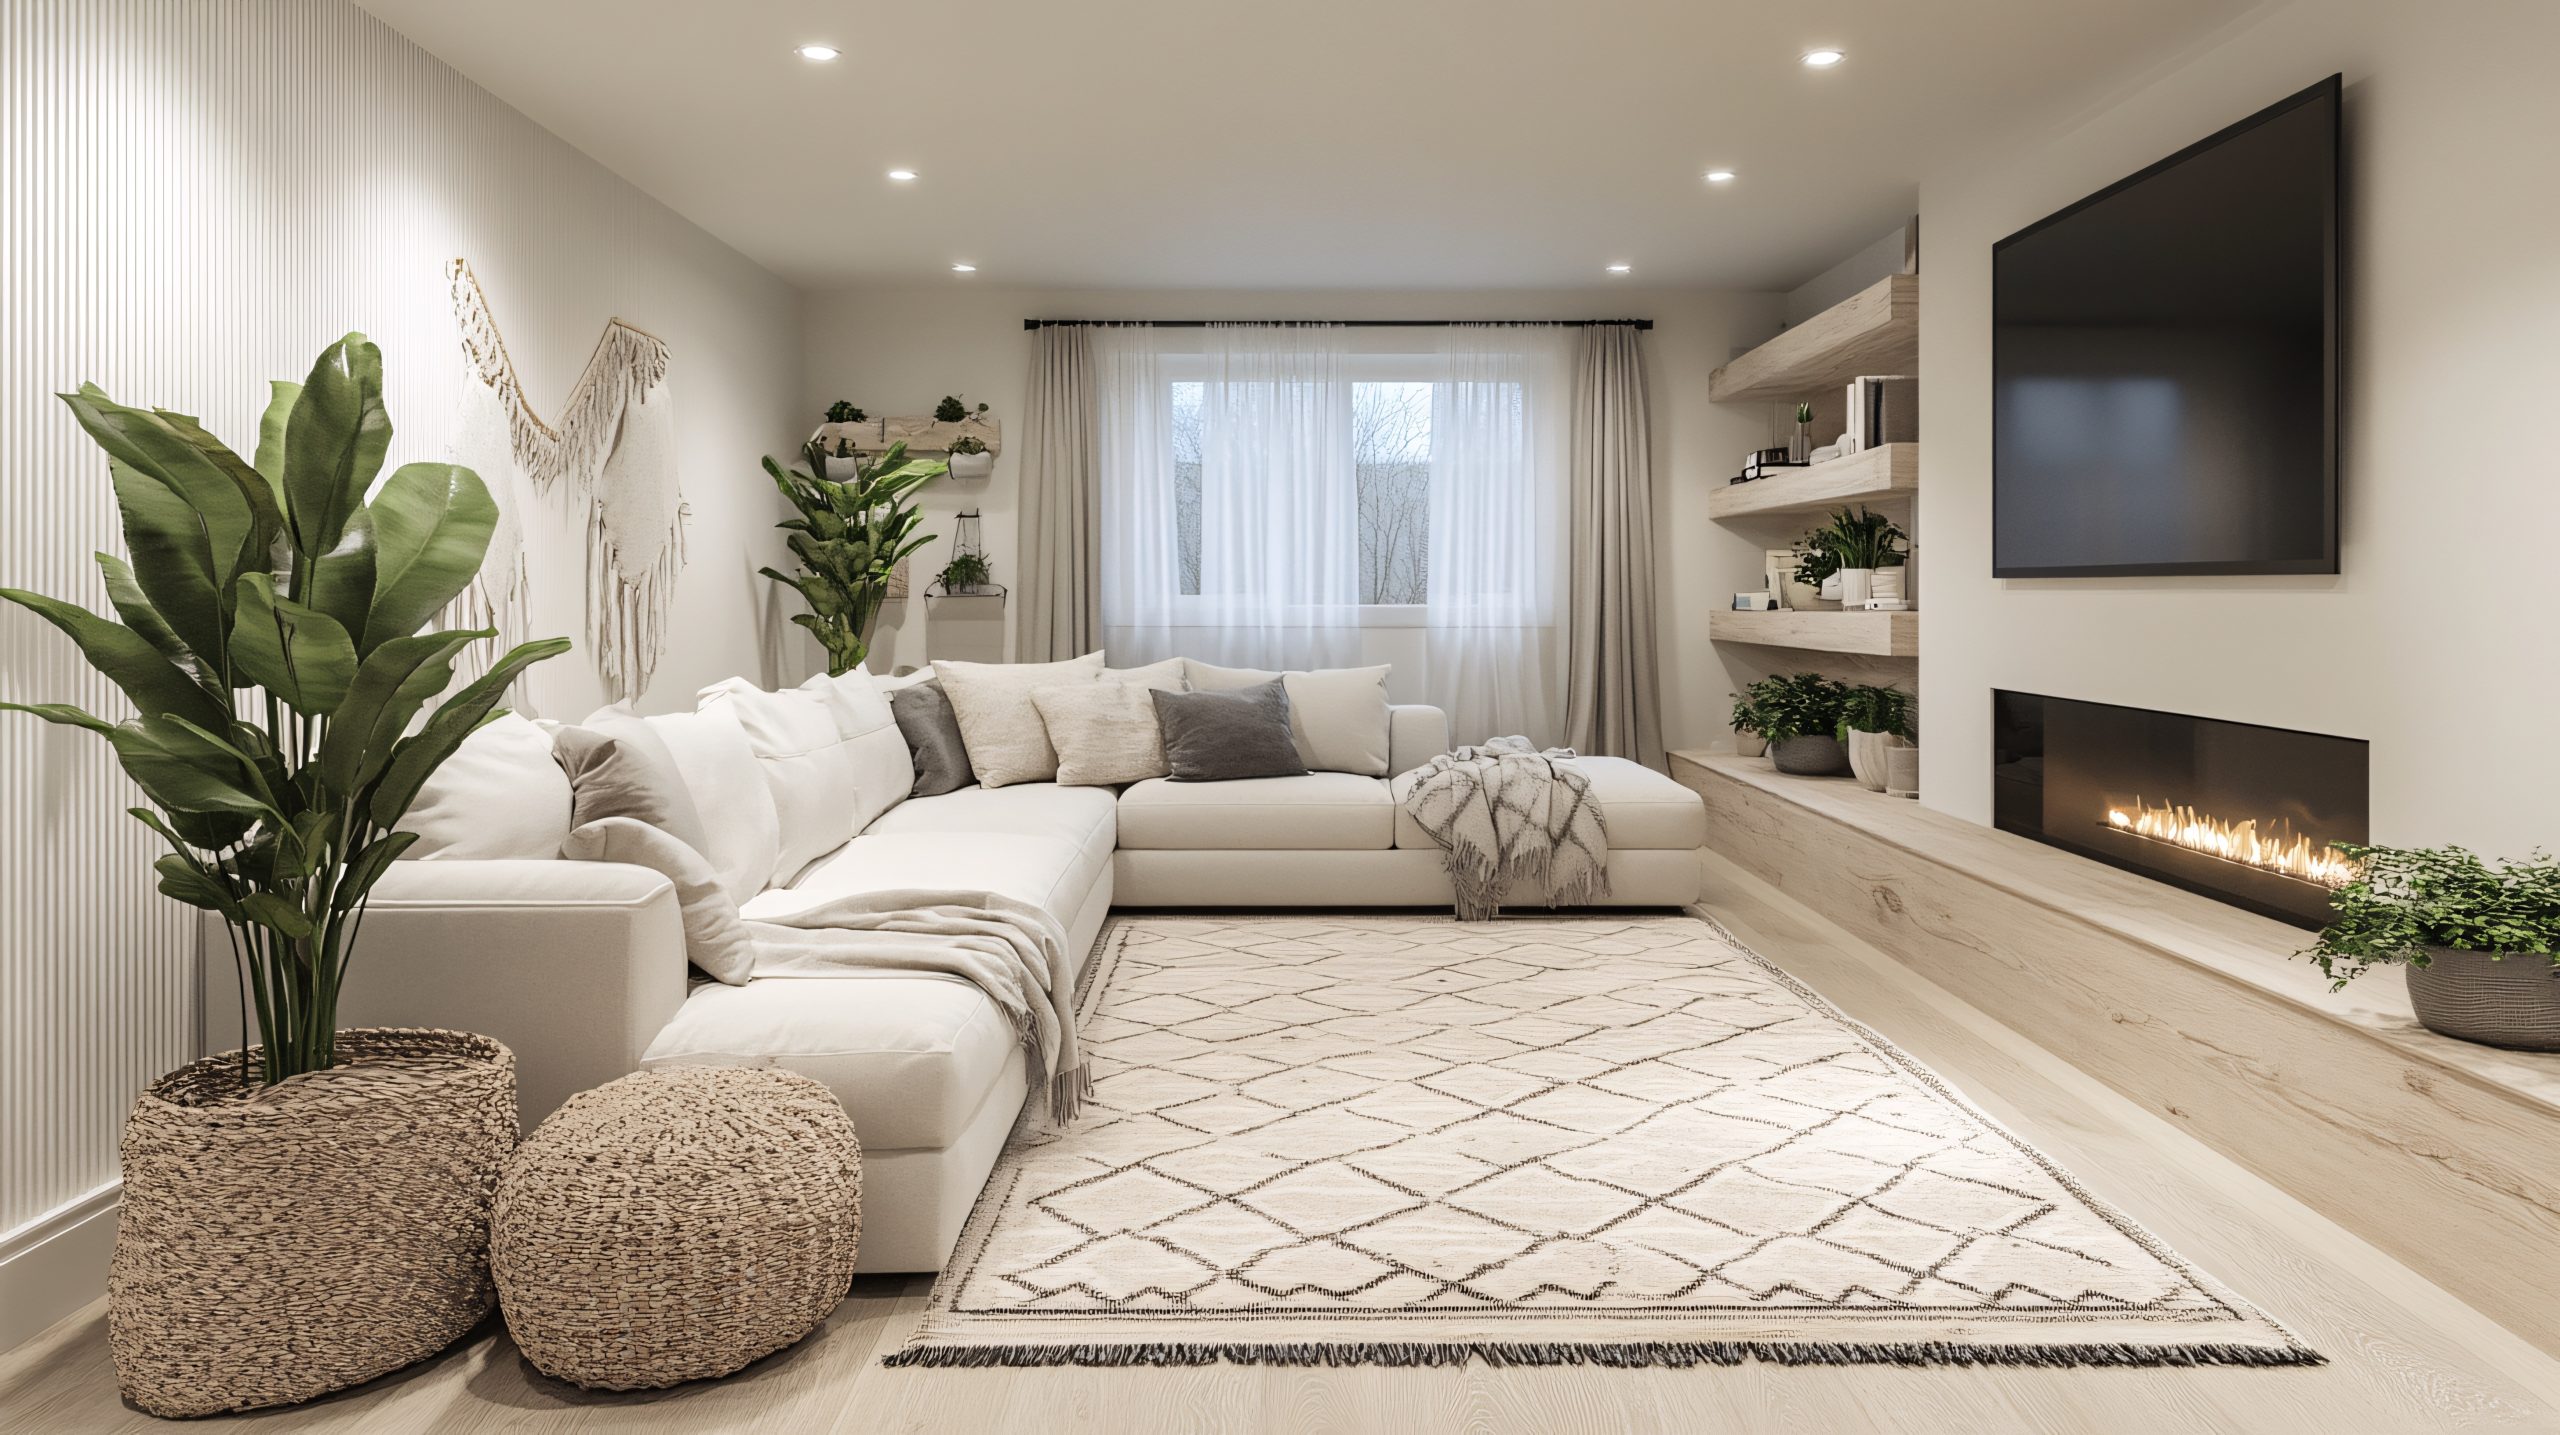
- The Corner Arrangement:
If maximising seating is a top priority for your small living room layout, the corner arrangement might be the perfect solution. This strategy involves utilising the corners of your room to create a cosy and conversational seating area.
Consider using a sectional sofa or arranging two sofas in an L-shape to make the most of the corner space. Add a comfortable armchair and an ottoman to create a complete and inviting setting. Corner arrangements are particularly effective in small rooms because they consolidate the seating area, leaving more open floor space for circulation. A good small living room layout relies on the selection of space-saving strategies to create the maximum amount of functionality, without compromising comfort or personal aesthetic expression.
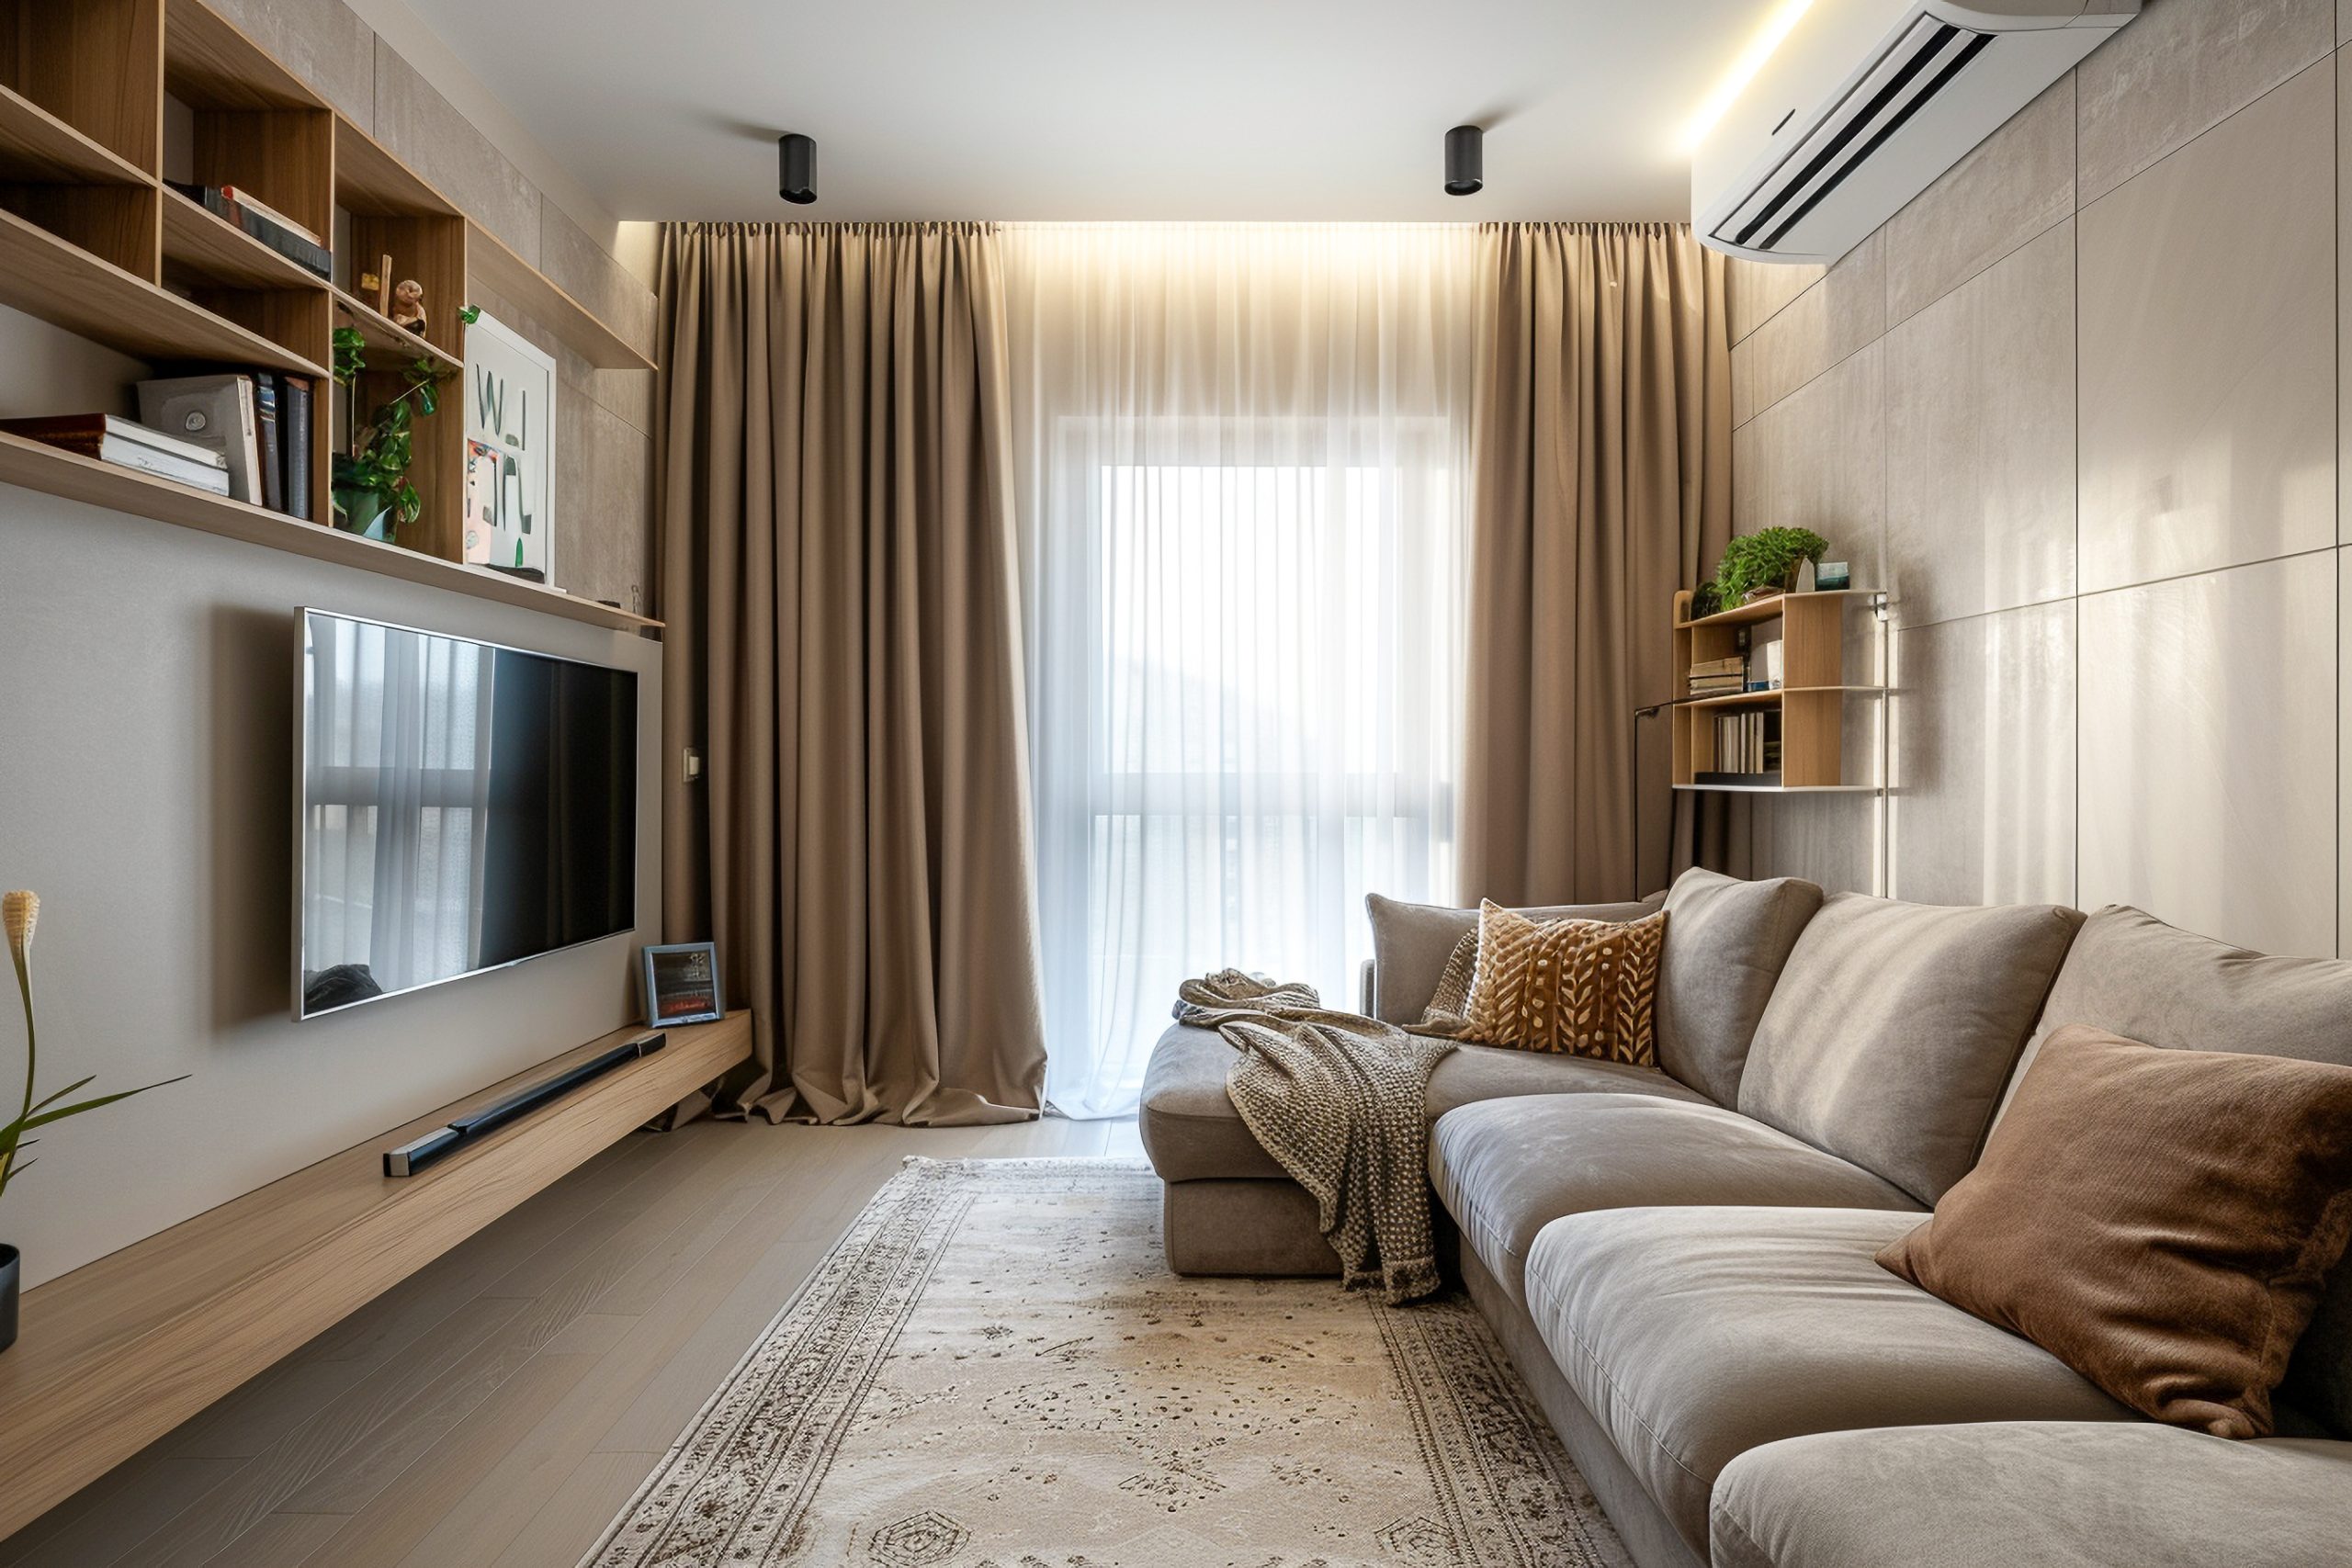
- The Multi-Functional Layout:
Often, small living rooms are tasked with serving multiple purposes. Perhaps you need a dedicated workspace, a small dining area, or a play space for children. Integrating these functions seamlessly into your small living room layout requires careful planning and strategic furniture selection.
Consider using room dividers (like screens or bookcases) to create distinct zones within the living room. If you need to maintain privacy and functionality, dividing up the living area for dual or even multiple uses is essential to a good layout design. For a workspace, try a small desk tucked into a corner or a console table that doubles as a work surface. Choose furniture that serves multiple purposes: a sofa bed for overnight guests, a coffee table with lift-top storage, or an ottoman that can be used as a footrest, a coffee table, or extra seating. Implementing multi-functional components when strategising your small living room layout can make a huge improvement in overall usability and visual perception of added space.
Furniture Choices for Small Spaces
Choosing the right furniture is paramount when crafting a successful small living room layout. Bulky, oversized pieces will quickly overwhelm a small space, while lighter, more streamlined options will create a more open and airy feel. The key is to prioritise functionality, scale, and visual weight.
- Prioritize Multi-Functional Furniture:
In a small living room, every piece of furniture needs to work hard. Opting for multi-functional pieces is a game-changer for maximising space and minimising clutter. This is truly essential if you are going to establish an effective small living room layout.
Think about sofa beds that can transform into guest accommodations, ottomans with hidden storage for blankets and pillows, coffee tables with lift-top surfaces for dining or working, and nesting tables that can be pulled out when needed and tucked away when not in use. Choose pieces that offer built-in storage or that can be easily repurposed. Every piece of furniture needs to provide functional utility in your small living room layout.
- Scale Down Furniture Sizes:
Resist the urge to purchase that enormous sectional sofa! In a small space, smaller-scale furniture will always be a better choice. Opt for a loveseat instead of a full-sized couch, and choose sleek accent chairs instead of bulky armchairs. Consider furniture with exposed legs or open frames, which allow light to pass through and create a sense of lightness.
To improve the efficiency of your small living room layout, try downsizing and using furniture pieces that work with, not against, your space requirements. Think small scale in every purchase: lamps, coffee tables, ottomans and shelves, or anything you want to use, the selection of “lite” in smaller quarters makes a large impact. Remember to consider your overall dimensions to scale correctly, or you could miss what small actually is!
- Vertical Storage Solutions:
When floor space is limited, the only way is up! Taking advantage of vertical storage solutions is crucial for maximizing space and keeping clutter at bay in your small living room layout. By integrating storage space onto the walls, or above the eye line with overhead storage units, an entire additional layer can be applied for function in your space.
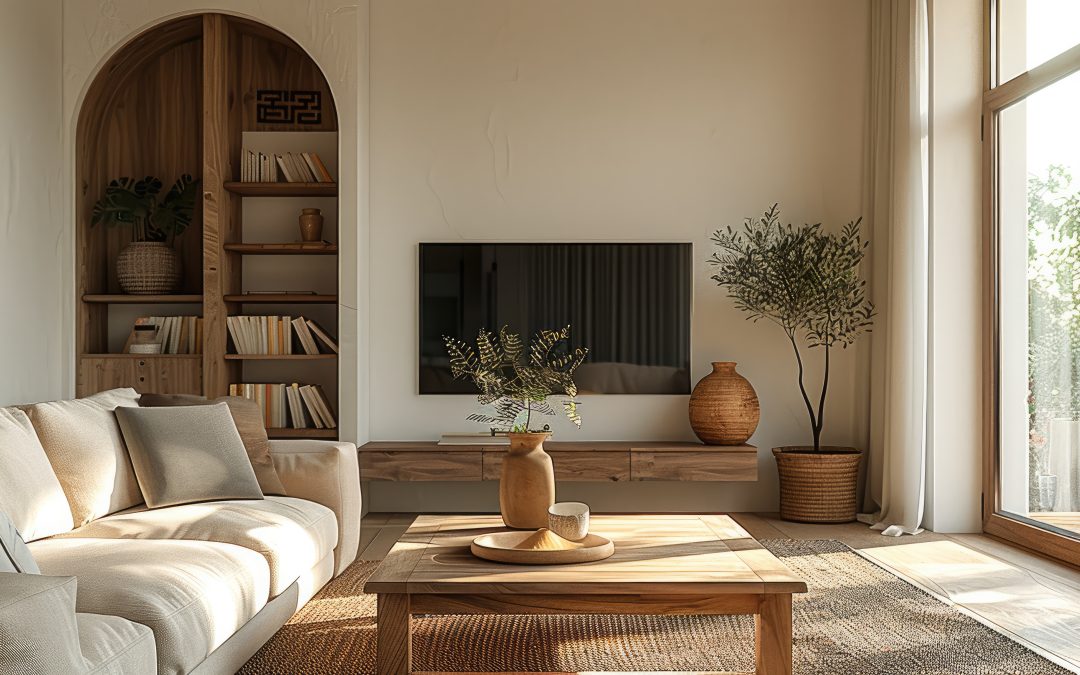
Install bookshelves that reach the ceiling, use wall-mounted cabinets to store media equipment and books, or create a gallery wall with floating shelves. Not only does vertical storage provide practical functionality, but it can also add visual interest to your room. Don’t allow dead space! Consider vertical display cabinets, glass cases, and wall shelves for storage options to support an aesthetic but also function in your small living room layout. Think of it as your secret space management power!
Making the Room Feel Bigger
Beyond choosing the right furniture and layout, there are several visual tricks you can put into place to make your small living room layout feel more spacious and open. These techniques play with light, colour, and perception to create an illusion of added square footage.
- Lighting is Key:
Lighting is a powerful tool in interior design, and it’s especially crucial in small spaces. Maximizing natural light is always the first priority. If possible, avoid heavy curtains that block sunlight and opt for sheer or light-filtering curtains instead. Let that sunshine in!
Layering artificial light is equally important. Combine ambient lighting (like an overhead fixture or recessed lighting) with task lighting (reading lamps) and accent lighting (wall sconces, art lighting). Avoid dark corners – strategically place lamps to brighten the space and create a more inviting atmosphere. With the effective application of both natural and artificial light, improving your small living room layout will open up a huge number of possibilities with decorating options and utility as well.
- Embrace Mirrors:
Mirrors are a designer’s best friend when it comes to creating the illusion of space. Place a large mirror on a wall opposite a window to reflect light and views, effectively doubling the perceived size of the room.
You can also use smaller mirrors to create a gallery wall or add a decorative touch. Experiment with different shapes and sizes to find the perfect fit for your space. Just be mindful of what the mirror is reflecting – avoid reflecting clutter or unflattering views! Careful placement is a high-impact decision when executing a small living room layout effectively using reflective practices.
- Colour and Texture:
The colours you choose for your walls, floors, and furniture can significantly impact the perceived size of your small living room layout. Lighter, brighter colours reflect more light, making the room feel more open and airy.
Stick to a neutral colour palette for your walls and floors, and then add pops of colour through accessories like pillows, throws, and artwork. Incorporating textures (like woven baskets, plush rugs, or patterned fabrics) can also add visual interest and depth to the space, preventing it from feeling flat or sterile. A small living room layout doesn’t have to compromise on expressing an individual or stylistic aesthetic, despite limited square footage. You can use a range of texture applications and lighter colours to really create a sense of warmth and homeliness.
Declutter and Organise
No matter how well-designed your small living room layout is, it will always feel cramped and uncomfortable if it’s cluttered and disorganised. A clutter-free space is essential for maximising functionality and creating a sense of calm and relaxation. Getting rid of all excess junk is probably the most critical first step to a successful small area.
- Regular Purging:
Make it a habit to regularly declutter your living room and remove any items you no longer need, use, or love. Be honest with yourself – if you haven’t used something in the past year, chances are you don’t need it. A successful small living room layout benefits greatly from the art of “less is more”.
Donate unwanted items to charity, sell them online, or simply toss them in the trash. The goal is to create a space that is free from unnecessary belongings, allowing you to fully enjoy the room. Consider making it a goal to run through the things and find the clutter spots at least quarterly.
- Smart Storage Solutions:
Effective storage is essential for keeping clutter at bay. Utilise baskets, bins, and decorative boxes to conceal everyday items like remote controls, magazines, and toys. Make use of furniture with built-in storage, such as ottomans, coffee tables, and console tables with drawers or shelves. This adds some extra functionality when used to support your small living room layout!
By creating designated storage areas for all of your belongings, you’ll keep your living room tidy and organised. Creating and enforcing good habits is the first step to the benefits that come from organising with small living room layout. With strategic decluttering and careful planning, the small space will allow for functional as well as fun enjoyment.

You can totally transform the cramped spaces! Planning a brilliant small living room layout is definitely doable. By strategically considering needs, measuring your space, choosing furniture pieces and arrangements carefully, the small space will provide joy, and comfort and style to those who live with its design! So get the plans flowing, come up with the optimal layout and see the changes that can come with putting some work and inspiration!
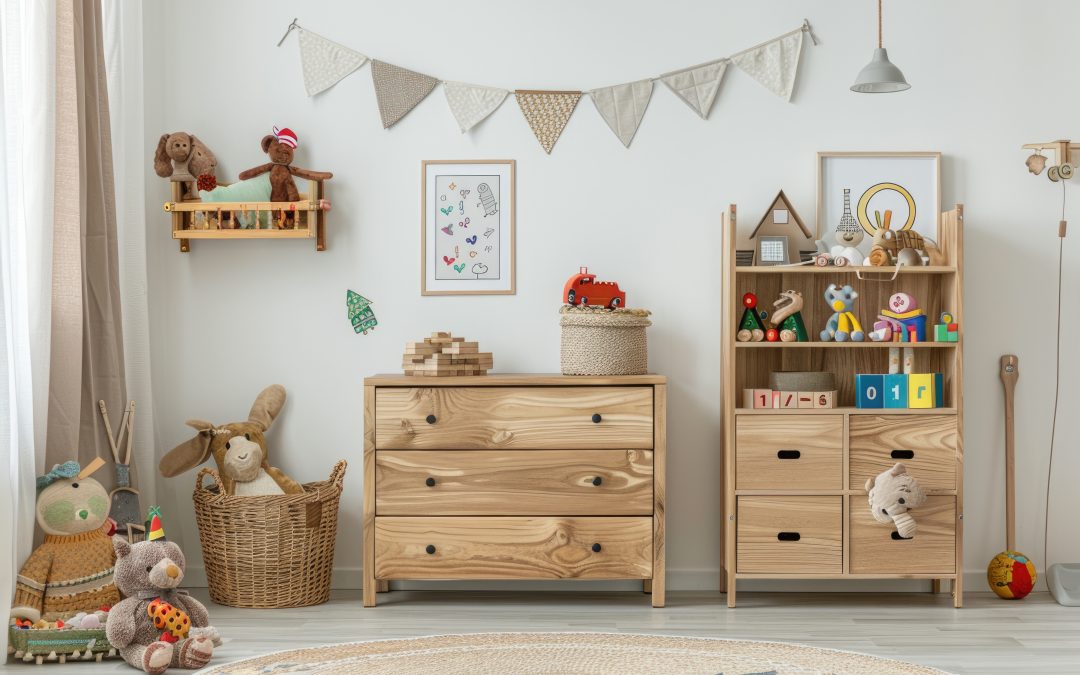
by Kesaa Interiors | DECOR & DIY, Kids & Nursery, ROOMS, Storage & Organisation
This post is all about Kids Room Storage.

Is your child’s room more of a toy explosion than a peaceful space? You’re not alone! The never-ending cycle of toy piles, scattered clothes, and misplaced art supplies can turn any parent into a decluttering machine. This constant chaos isn’t just stressful; it can also create safety hazards and make it nearly impossible to find that one specific Lego piece when you need it most! But there’s hope.
This post is your guide to unlocking the secrets of organized kids room storage, making your life easier and your child’s space more enjoyable. Finding the right kids room storage solutions can be a game-changer, transforming a chaotic space into a functional and inviting environment where your child can play, learn, and thrive. Let’s ditch the overwhelm and dive into some practical and creative strategies!
Best Kids Room Storage Solutions.
1. Before You Buy: Assessing Your Kids Room Storage Needs & Decluttering Like a Pro
Before you even think about browsing the Container Store, the key to truly effective kids room storage lies in understanding what needs to be stored and, most importantly, getting rid of the excess! Skipping this crucial step is like trying to fit an elephant into a shoebox – it just won’t work.
Inventory is Key: The first step is to take a thorough inventory of everything that currently resides in your child’s room. Consider breaking down your search by these common room occupant items;
-
Toys: Sort toys by category – large (ride-ons, playhouses), small (action figures, miniature cars), plush toys, building blocks (Legos, Duplo), puzzles, and games.
-
Books: Picture books, chapter books, board books, workbooks.
-
Clothing: Current season, outgrown items, dress-up clothes, shoes.
-
Art Supplies: Crayons, markers, paint, paper, construction paper, modeling clay.
-
Bedding: Sheets, blankets, comforters, pillows.
-
Other: Unique to your child’s interests (e.g., musical instruments, sports equipment, collections).
Decluttering is Key: The beauty of less is truly displayed when you think about the organization of your kids room storage situation. Fewer items to store = a significant boost to any existing setup.
-
Less Stuff, Less Stress: The more you purge, the less you need to organize, making the entire process less overwhelming. It’s like clearing a path to easier mornings and calmer bedtimes.
-
Finding Items with Ease: Less clutter means items are more readily and easily accessible. You can encourage your child’s independence by allowing them to easily find items from the start.
-
Make It A Game (Age Appropriate): Try to involve your child with age-appropriate instructions in your decluttering process. Donate old stuffed toys and find new homes, your child will feel like a giving person from the get go!
Categorize & Prioritize: Next, organize those items into easily labeled categories! Group similar items together. Toys will be grouped with each other, art supplies too! Determine what your child uses the most, keep these easily accessible and at an arms reach. This can keep play time quick and cleanup easy too!
Measure & Map: Grab your measuring tape! Don’t even think about ordering storage bins without knowing the dimensions of your closet, the space under the bed, or that awkward corner in the room. Before investing in any new kids room storage, make a simple floor plan of the room. Note the dimensions of key storage areas and existing furniture. This helps visualize what will fit and avoid costly mistakes.
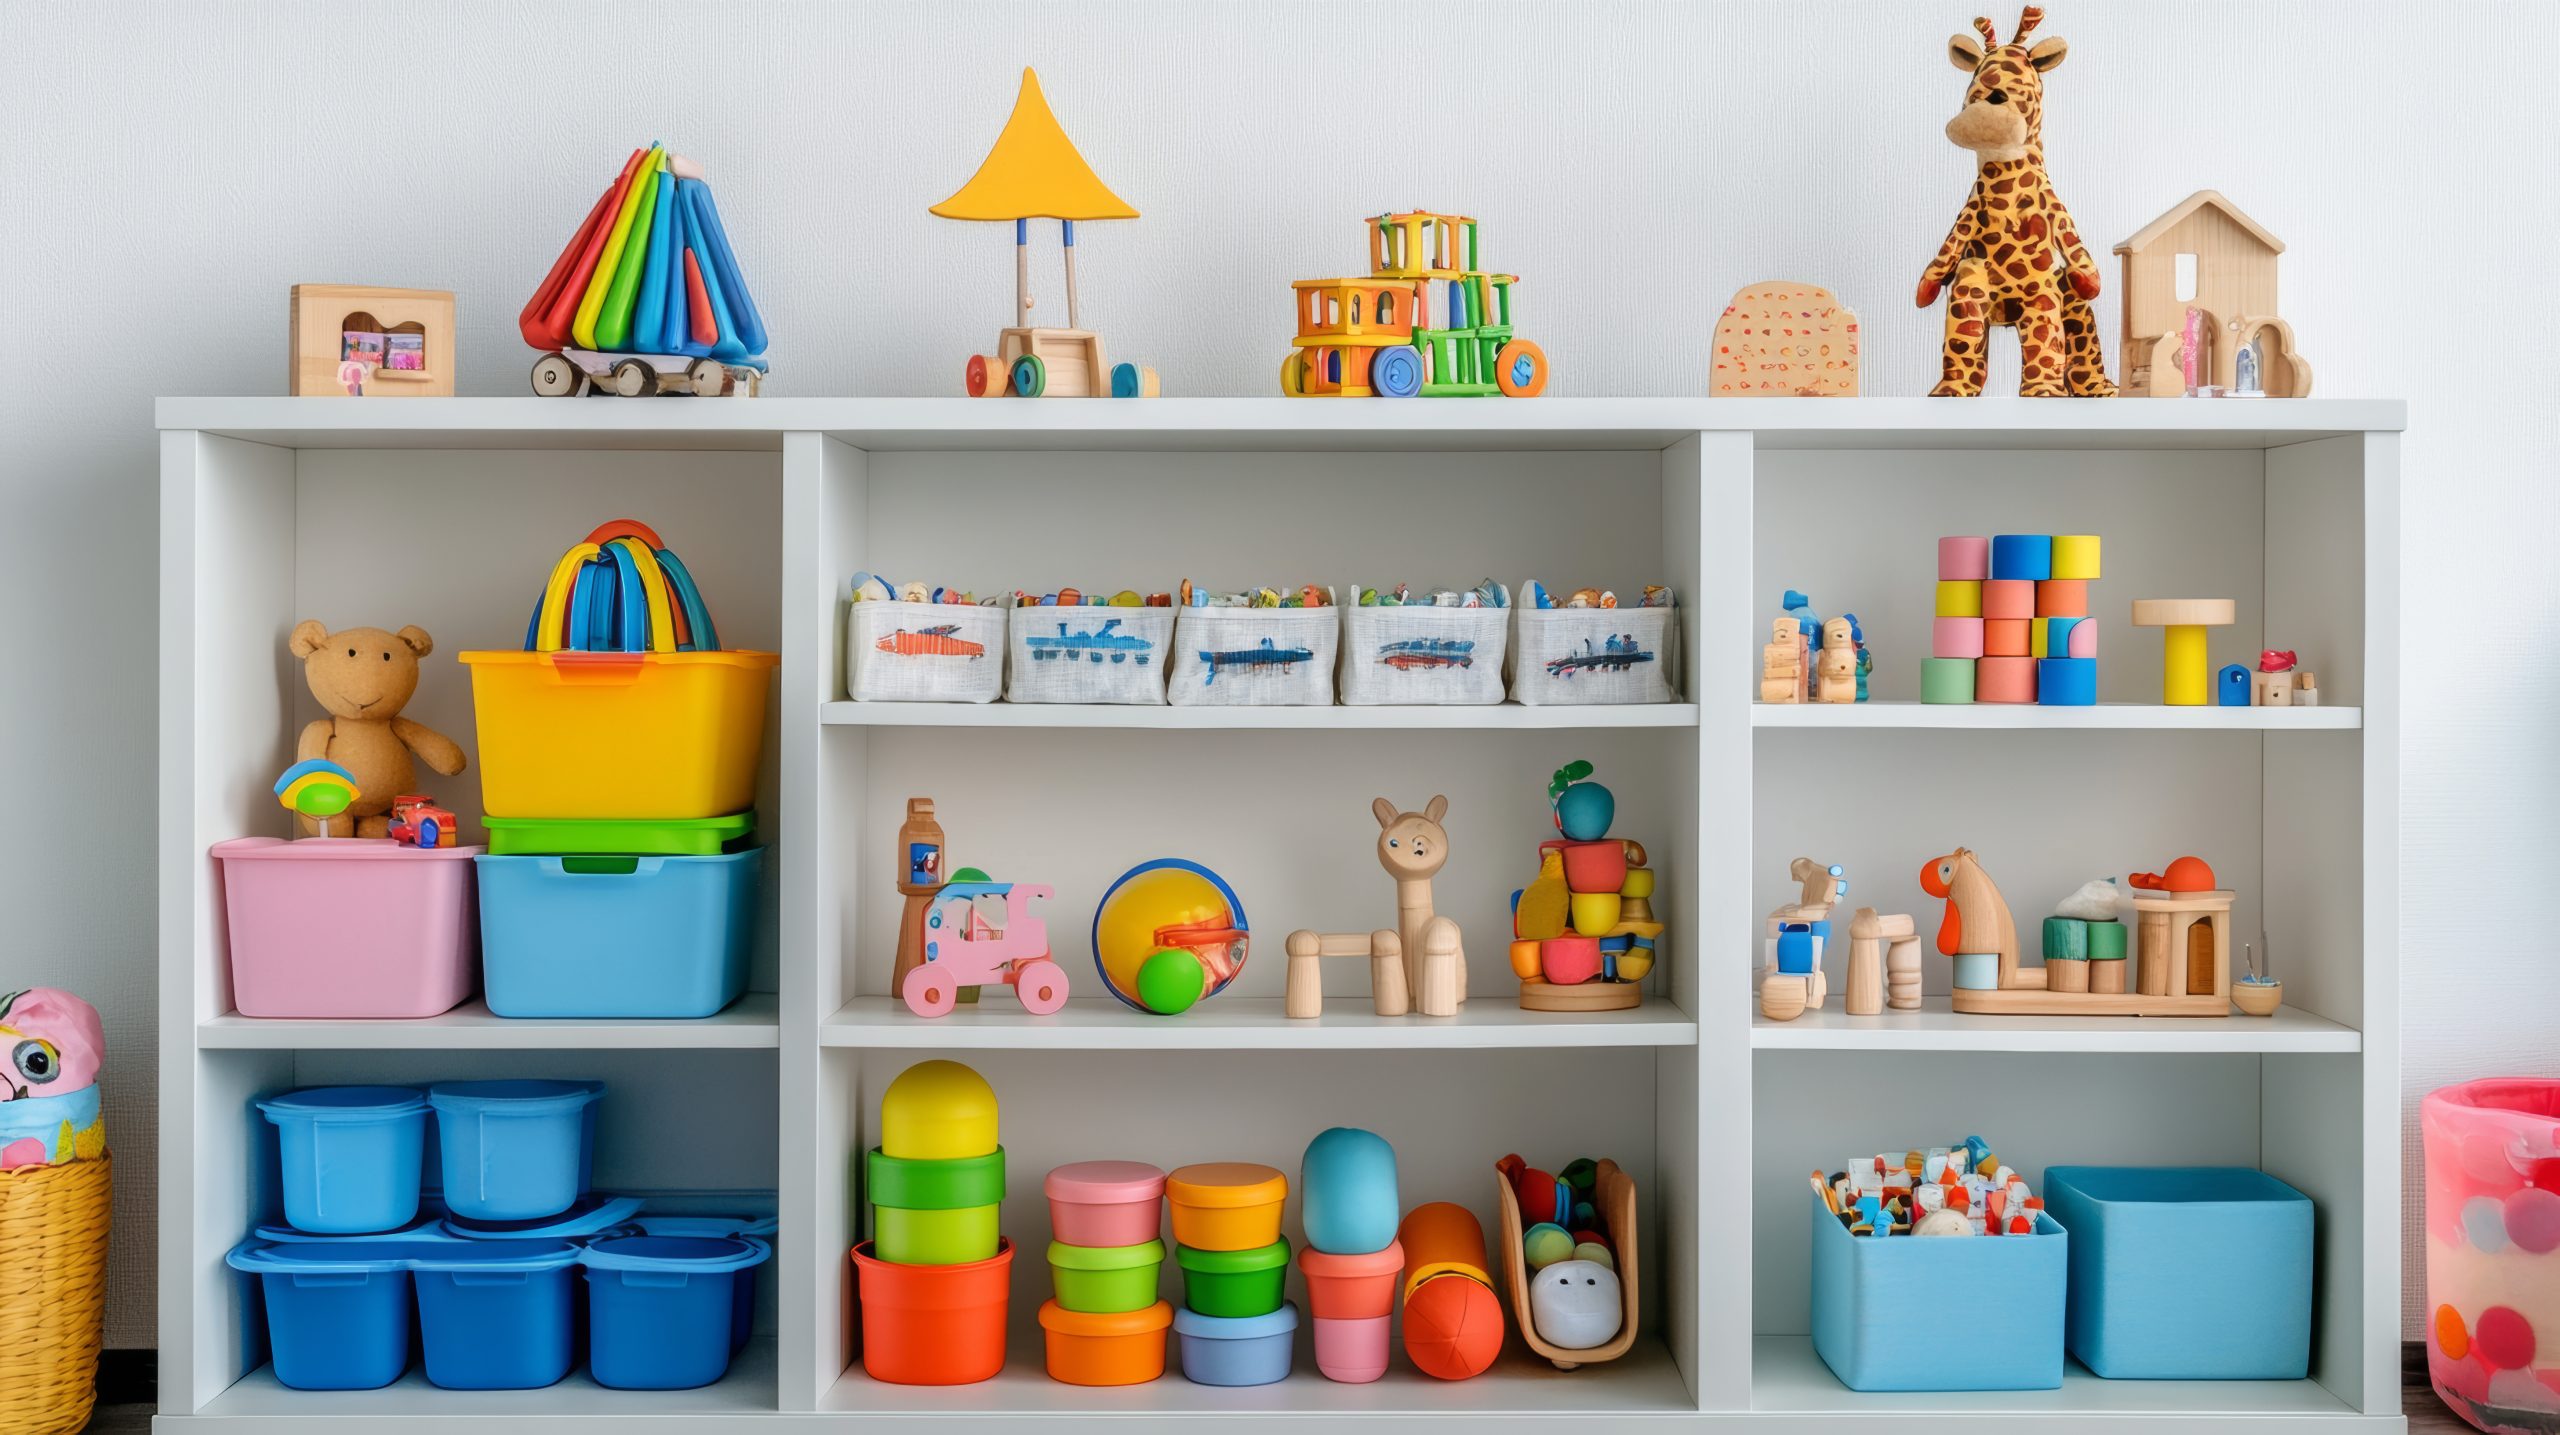
2. Conquer Clutter Zone by Zone: Kids Room Storage Ideas for Every Space
Now that you’ve decluttered and assessed your needs, it’s time to get strategic! Different areas of a kids room storage benefit from different storage solutions. Let’s break down some ideas zone by zone:
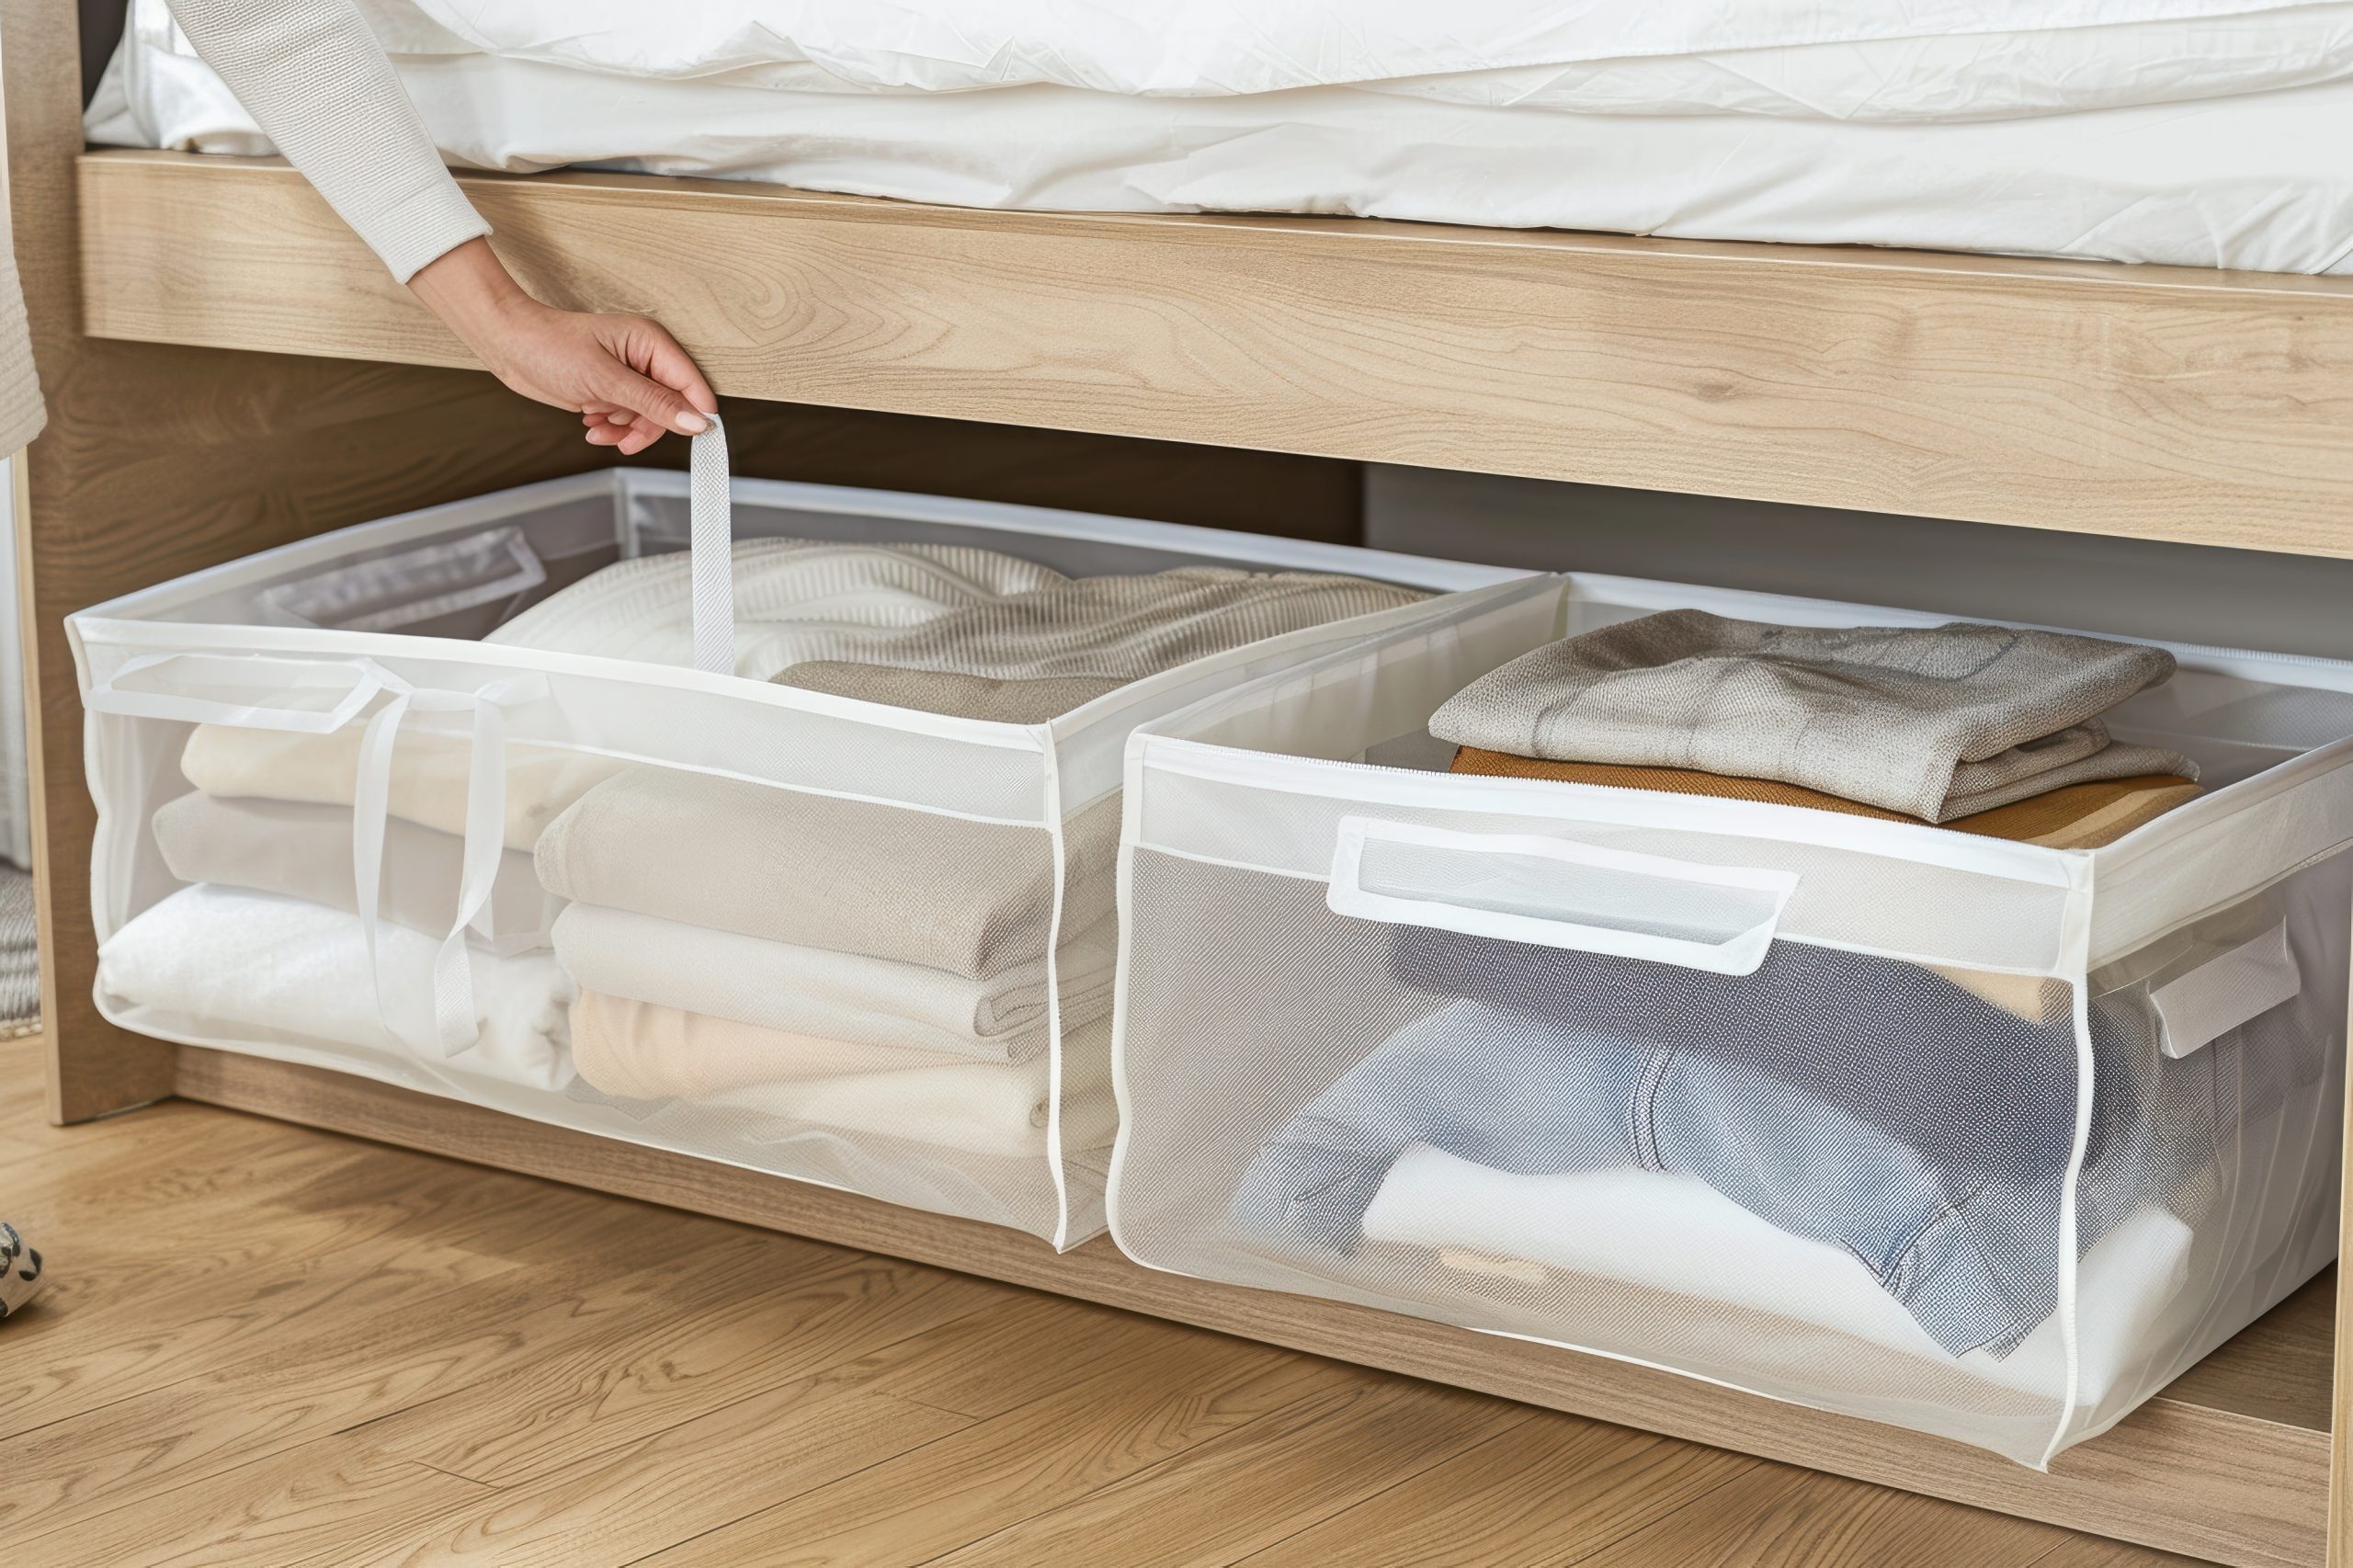
A. Under-Bed Storage:
Taming the vast expanse beneath the bed is a classic strategy for discreet kids room storage. It’s especially helpful for items that aren’t used every day, like seasonal clothing, extra bedding, or larger toys.
-
Types of Under-Bed Storage:
-
Rolling Drawers: Pre-made drawers on wheels slide easily in and out, perfect for frequently accessed items like toys or blankets.
-
Shallow Bins with Lids: Ideal for storing folded clothes, shoes, or smaller toys. Look for clear bins for easy visibility.
-
Vacuum-Sealed Bags: Best for storing off-season clothing or bulky bedding to maximize space and protect against dust and pests.
-
DIY Options: Repurpose sturdy cardboard boxes, adding wheels and a decorative cover for a budget-friendly solution.
-
Considerations: Pay attention to the height of your bed and the clearance underneath. Measure carefully before purchasing any under-bed storage. Also, consider the floor type (carpet vs. hardwood) as it may affect the ease of sliding the storage containers. Regularly check under-bed storage for dust.
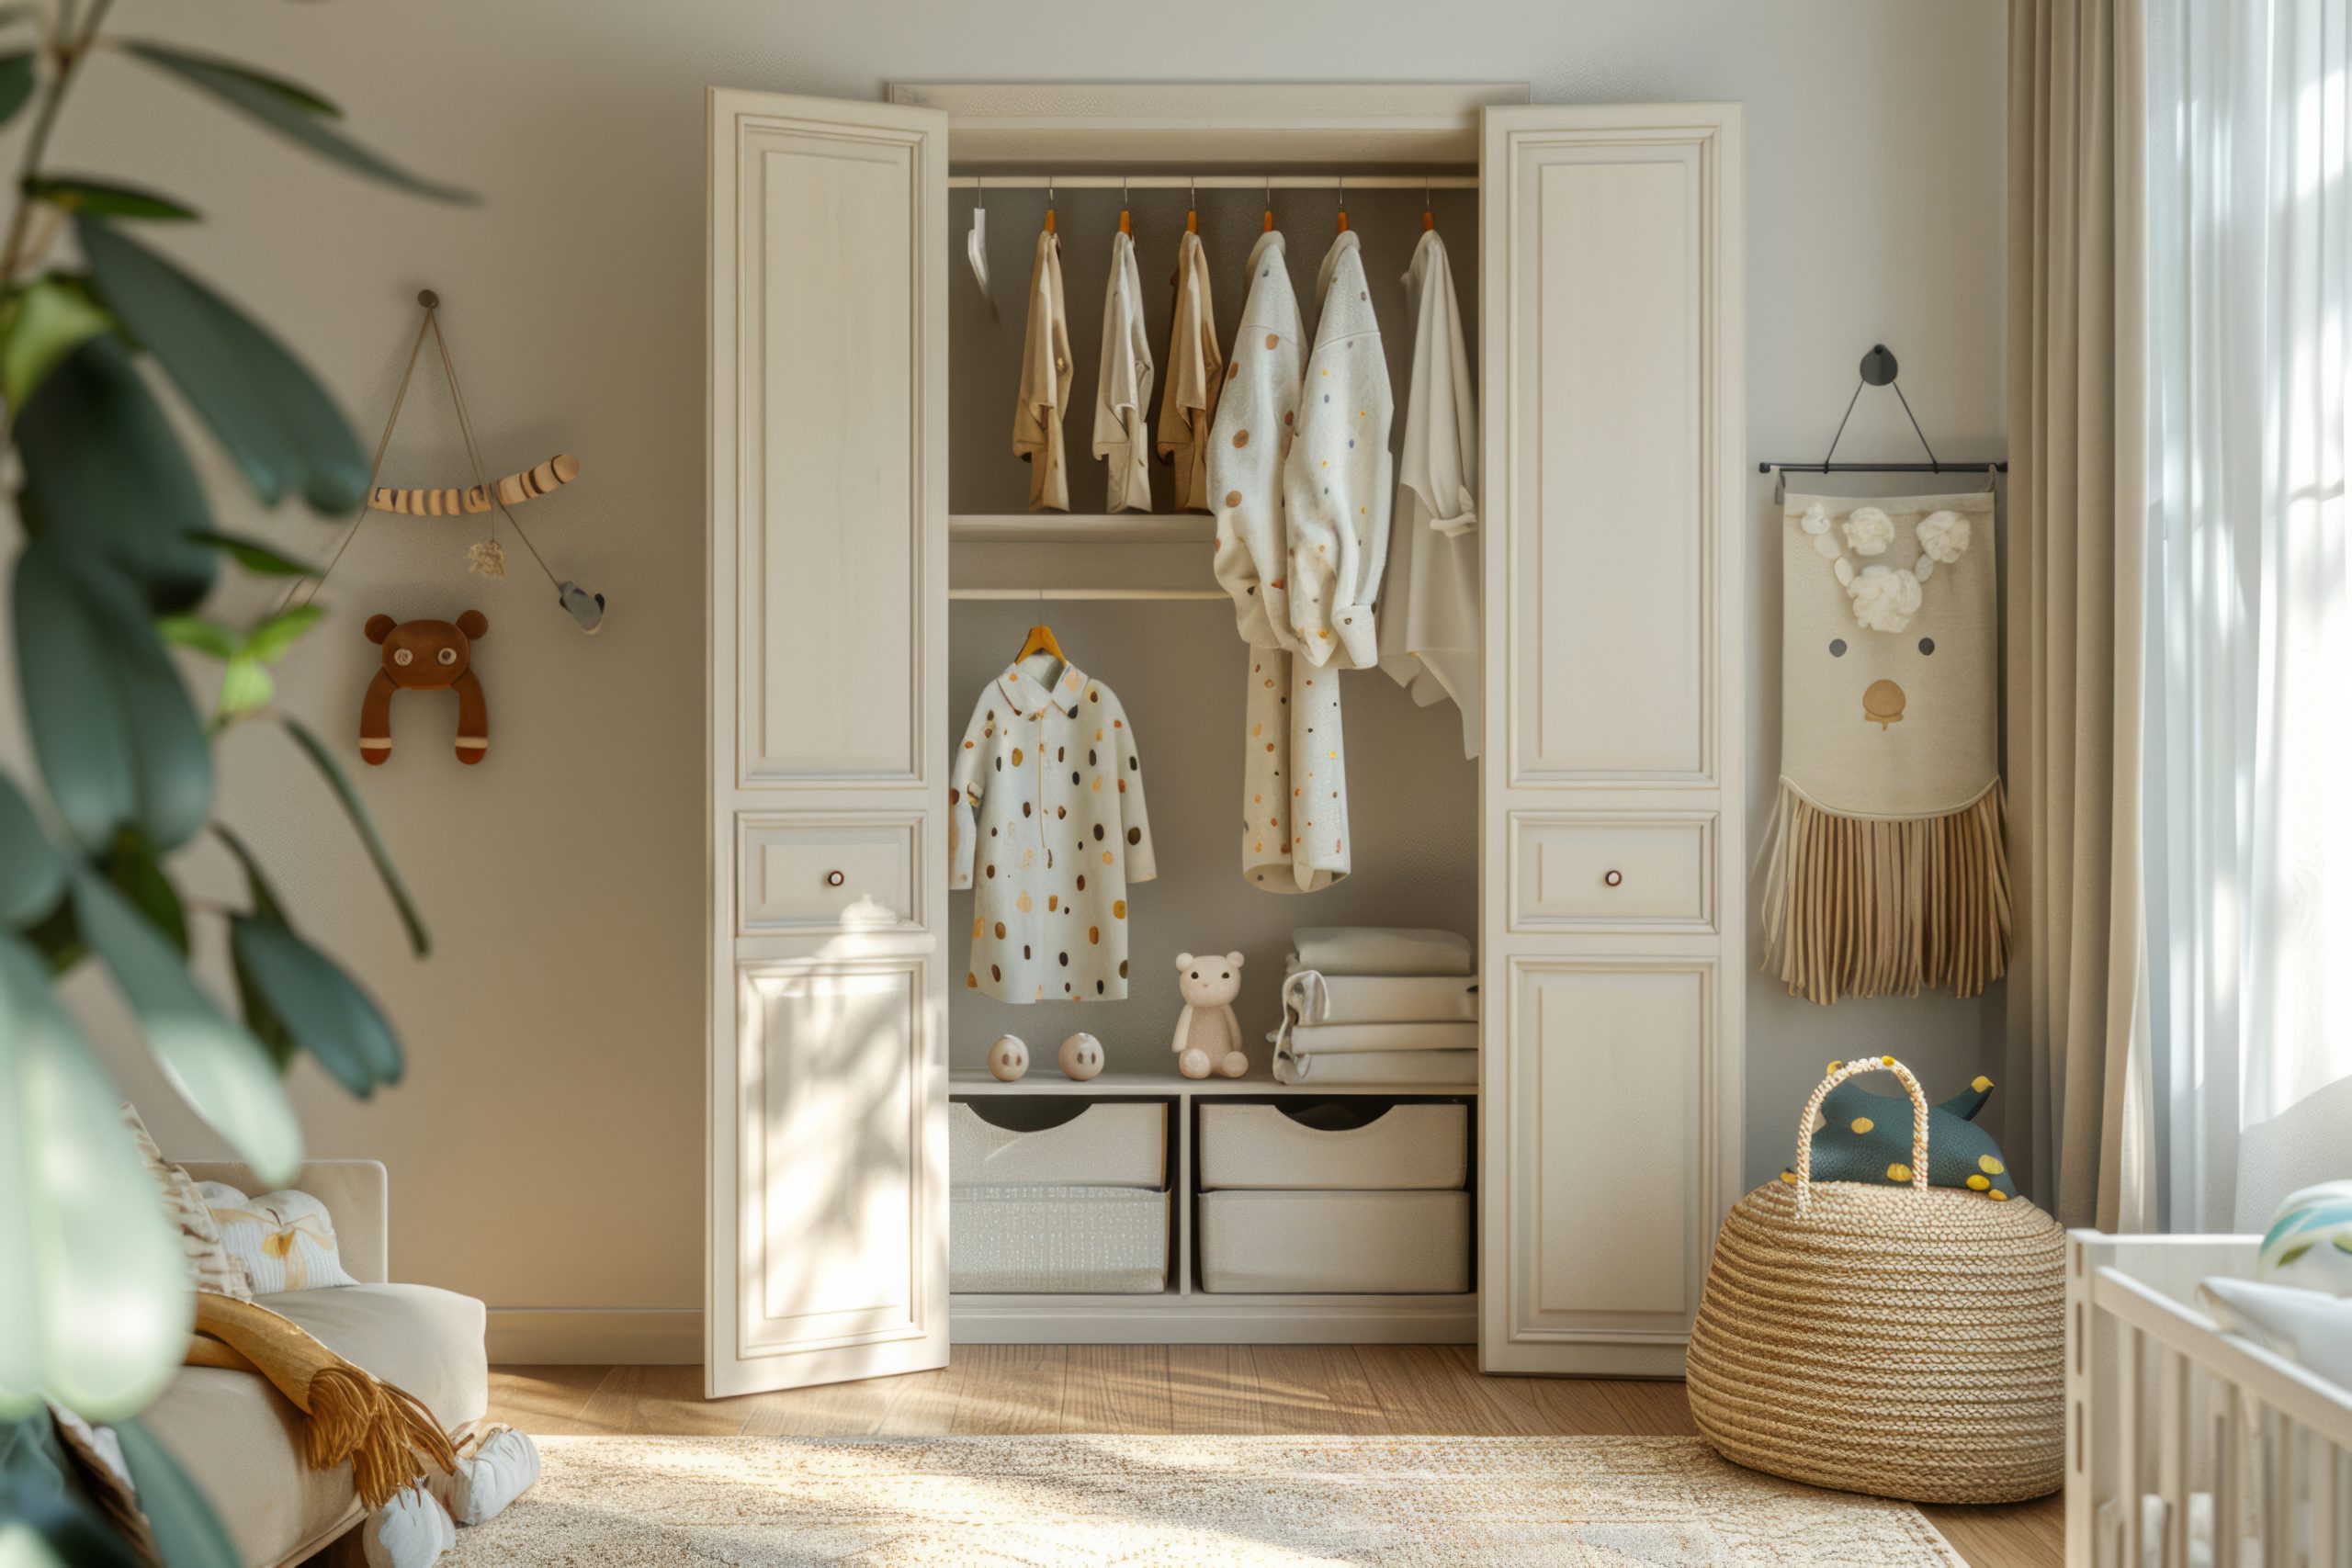
B. Closet Organization:
The closet can quickly become a black hole if left unorganized. Effective kids room storage in the closet is key to managing clothing, shoes, and other essentials.
-
Maximize Vertical Space:
-
Adjustable Shelving and Rods: Invest in a closet system with adjustable shelves and rods to accommodate clothing of different lengths and sizes. As your child grows, you can adjust the shelves accordingly.
-
Hanging Organizers: Utilize hanging shoe organizers for storing small toys, craft supplies, or accessories. Sweater organizers can hold folded clothes or out-of-season items.
-
Baskets and Bins: Use baskets and bins on shelves to keep smaller items contained and organized. Label the bins clearly for easy identification.
-
Make it Kid-Friendly:
-
Lower Rods & Shelves: Lower the hanging rod (if possible) or add a second rod at a lower height so your child can reach their own clothes.
-
Small Step Stool: Keep a small, sturdy step stool nearby to help your child reach upper shelves or hanging items safely.
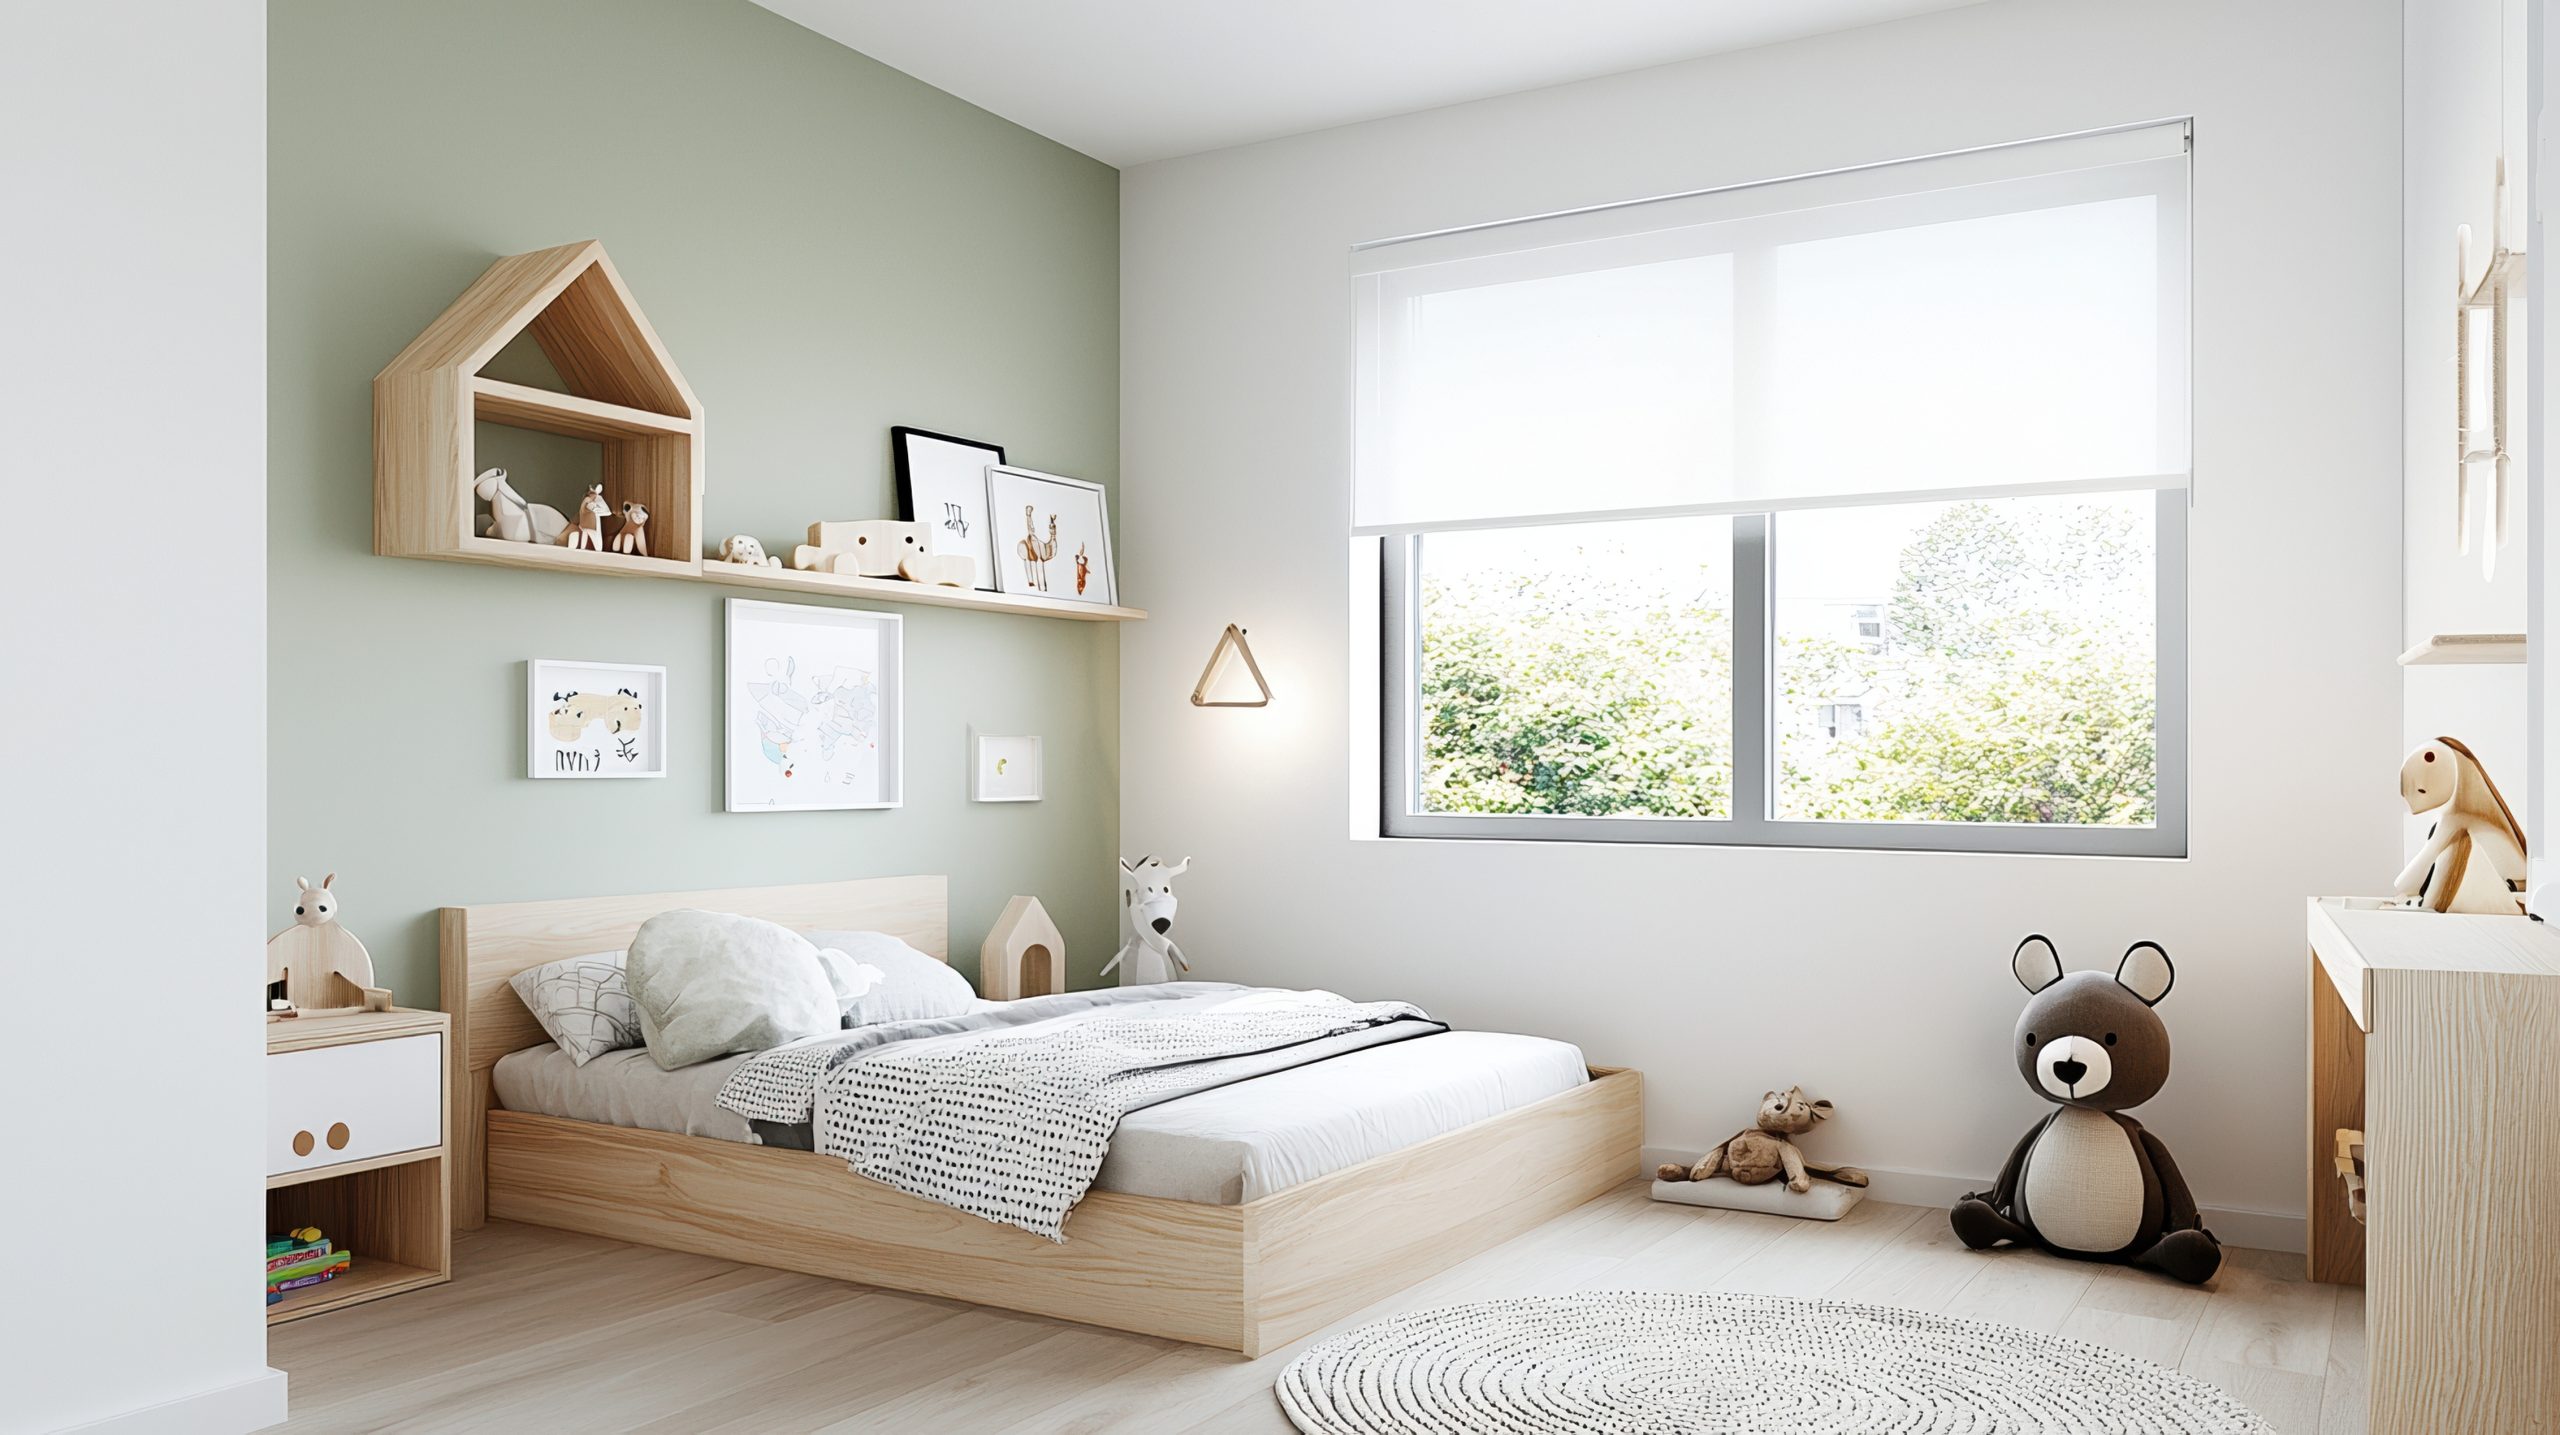
C. Wall Storage:
Don’t underestimate the power of vertical space! Utilizing walls for kids room storage can free up valuable floor space and keep items off the ground, reducing clutter and creating a more visually appealing room.
-
Shelf Strategies:
-
Floating Shelves: Provide a clean, modern look and are perfect for displaying books, toys, or decorative items. Be sure to mount them securely, especially if storing heavier items.
-
Bookshelves: Choose a bookshelf that is the appropriate size for your child’s room. Consider one with adjustable shelves for maximum flexibility.
-
Baskets and Hooks:
-
Wall-Mounted Baskets: Great for storing art supplies, small toys, or even stuffed animals.
-
Pegboards with Hooks: Highly customizable and versatile, pegboards allow you to create a storage system tailored to your specific needs. Use hooks to hang everything from art supplies to backpacks.
- Keep things accessible:
º Mount storage shelves within reach, and keep items your child may need within immediate access while setting anything else out of reach to encourage self-dependency.
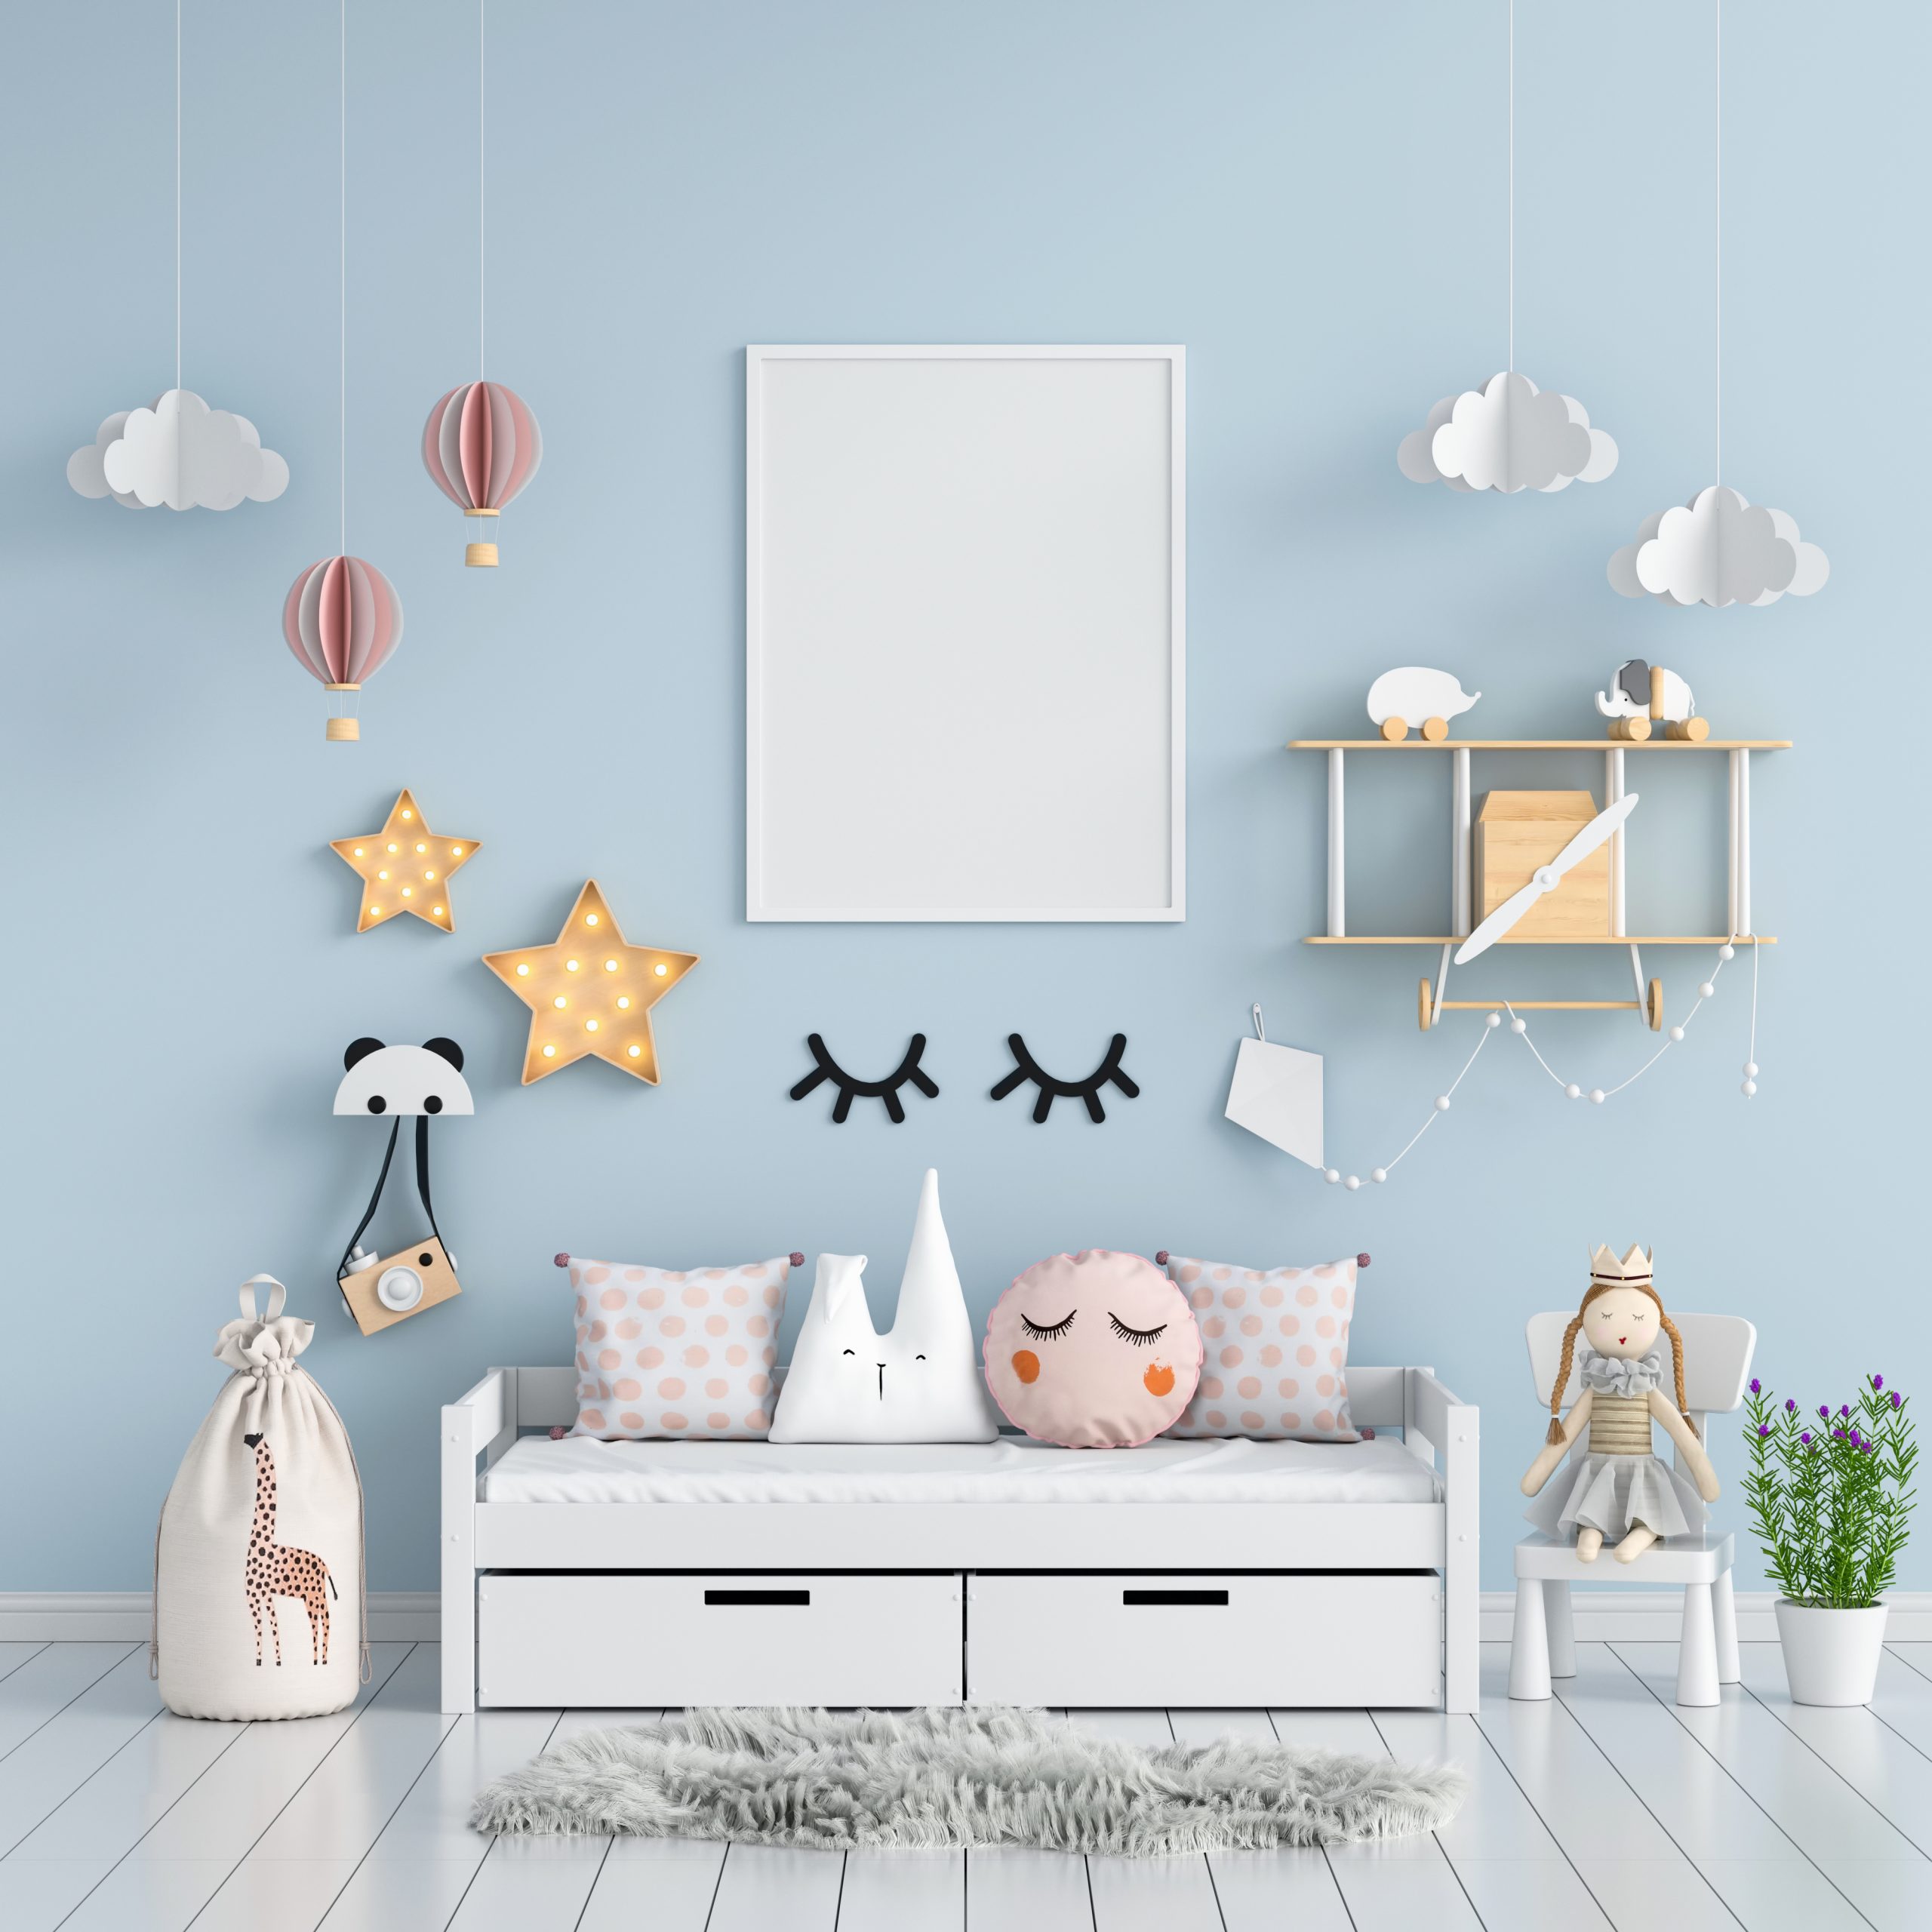
3. Thinking Outside the Box: Unique and Multifunctional Kids Room Storage
Sometimes the most effective kids room storage solutions are the ones that are a bit unexpected! Embracing multifunctionality and thinking creatively can unlock hidden potential and make your space work even harder.
-
Furniture with Built-in Storage: Investing in furniture pieces that double as storage is a game-changer, particularly in smaller spaces.
-
Beds with Drawers Underneath: A practical solution for storing clothing, toys, or extra bedding. Beds with built-in drawers often come in platform and Captains’ designs, maximizing every inch of space beneath the mattress.
-
Ottomans with Storage Inside: Stylish and functional, storage ottomans provide a hidden space for toys, blankets, or board games while adding seating to the room.
-
Benches with Storage: Ideal for entryways or playrooms, storage benches provide a comfortable place to sit while concealing toys, shoes, or other items. A storage bench can also act as a window seat adding comfort while decluttering.
-
Desks with Storage: Desks with drawers, shelves, or built-in cubbies help keep school supplies and art materials organized and within easy reach.
-
Repurposed Items: Get creative by transforming ordinary items into unique and charming storage solutions!
-
Old Suitcases as Toy Storage: Vintage suitcases stacked on a shelf or the floor add a whimsical touch while providing storage for dolls, action figures, or other small toys.
-
Ladder as a Blanket Rack: Lean an old wooden ladder against the wall to create a rustic and decorative blanket rack.
-
Dressers as Toy Stations: An old dresser can be repurposed as a toy station. Give the dresser a fresh coat of paint or keep the original to display items and keep your child’s items away to declutter more.
-
DIY Storage Solutions: Don’t be afraid to roll up your sleeves and tackle some DIY storage projects!
-
Easy-to-Build Shelves: Simple wooden shelves can be easily constructed using basic materials and tools. Customize the shelves to fit your specific needs and decorate them with paint, wallpaper, or stencils.
-
Decorating Plain Bins: Add personality to plain plastic bins with paint, fabric scraps, or stickers. Label each bin clearly to ensure everyone knows what goes where.
-
Storage That Doubles as Décor: Functional storage doesn’t have to be boring! Choose storage solutions that are also visually appealing and contribute to the overall aesthetic of the room.
-
Baskets as Decorative Elements: Woven baskets in various shapes, sizes, and textures can add warmth and character to a room while providing stylish storage.
-
Color-Coded Storage: Use color-coded bins, baskets, or shelves to create a visually appealing and easy-to-understand storage system. Assign a specific color to each type of item (e.g., blue for toys, green for books, red for art supplies).
4. Keeping it Clean: Tips for Maintaining Your Organized Kids Room Storage System
Creating an organized kids room storage setup is just the first step! The real challenge is maintaining that organization over time. Without consistent effort, the clutter monster will inevitably creep back in.
-
Establish a Routine: Making clean-up a regular habit is crucial for long-term success. Designate a specific time each day (e.g., before dinner or bedtime) for tidying up the room. Involve your child in the routine, making it a shared responsibility. This also teaches the benefits of organization while becoming routine with time.
-
Label Everything: Clear and consistent labels on bins, baskets, shelves, and drawers are essential. Labels help everyone (including kids!) know where things belong and encourage them to put items back in their designated spots.
-
Use Pictures for Younger Children: For children who cannot yet read, use picture labels alongside words to help them identify the contents of each storage container. Print or draw pictures of toys, clothes, or other items and attach them to the bins.
-
Teach Your Child to Sort and Put Away: Age-appropriate tasks that children can help with include toys or clothes! Encourage them to get involved to make cleaning a more routine process for themselves.
º Teach children what to put away in different areas to ensure children’s comprehension with cleanup
-
Regular Decluttering: Schedule regular decluttering sessions to purge unwanted or unused items. Set aside time every few months to go through the room and get rid of anything that is no longer needed or used. Involve your child in the decluttering process to teach them about giving back to the community.
-
Designate a “Home” for Everything: Ensure that every item in the room has a designated “home” – a specific spot where it belongs. This prevents items from ending up in random piles and makes it easier to find them when needed. Explain that every item goes back to its designated area, once that is understood by your child, everything goes smoothly after the fact.
Transforming a chaotic kids’ room into an organized and functional space may seem daunting, but by embracing a strategic approach and implementing clever kids room storage solutions, you can create a room that both you and your child will love. Remember the key principles: declutter first, understand your specific storage needs, choose solutions that maximize every area of the room, get creative with repurposed items, and establish consistent habits to maintain order.
By tackling this step-by-step, you’ll significantly reduce your stress, make finding items far easier, and even foster greater independence in your child.
by Kesaa Interiors | DECOR & DIY, Kitchen, ROOMS, Storage & Organisation
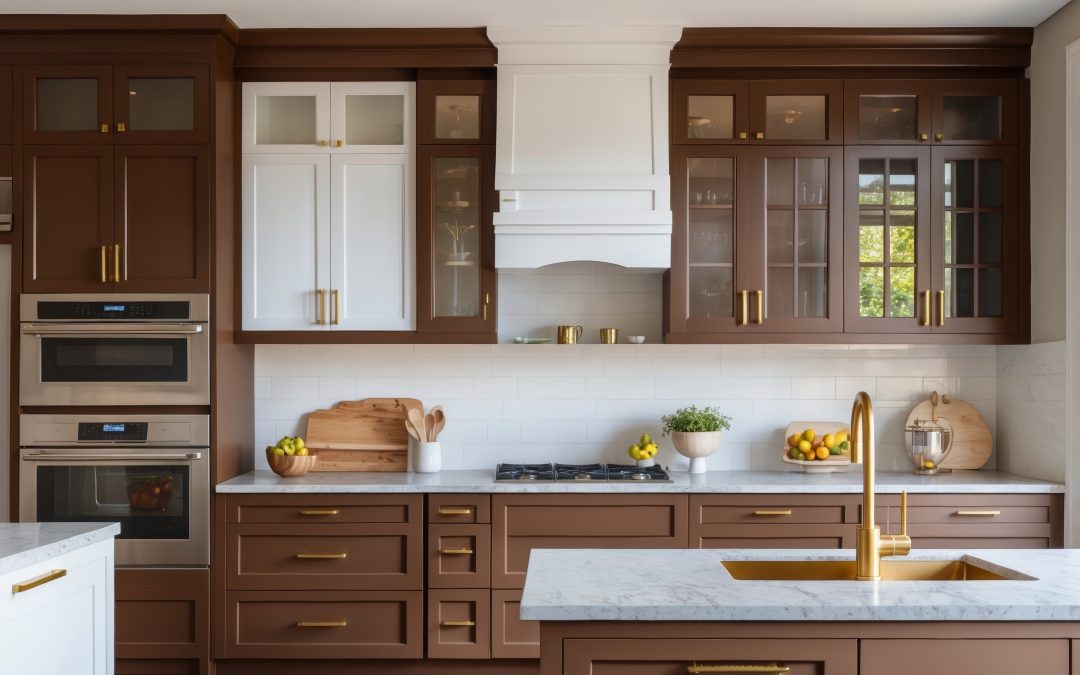
This post is all about Kitchen organisation ideas.
Is your kitchen more chaos than cooking? We get it! The heart of the home often becomes a battleground of overflowing drawers, mismatched containers, and countertops buried under clutter. It’s frustrating and time-consuming, and frankly, cooking and meal prep can feel more like a chore than a joy. Dreaming of a kitchen where everything has its place, where you can easily find that spice jar or the right-sized lid without a scavenger hunt?
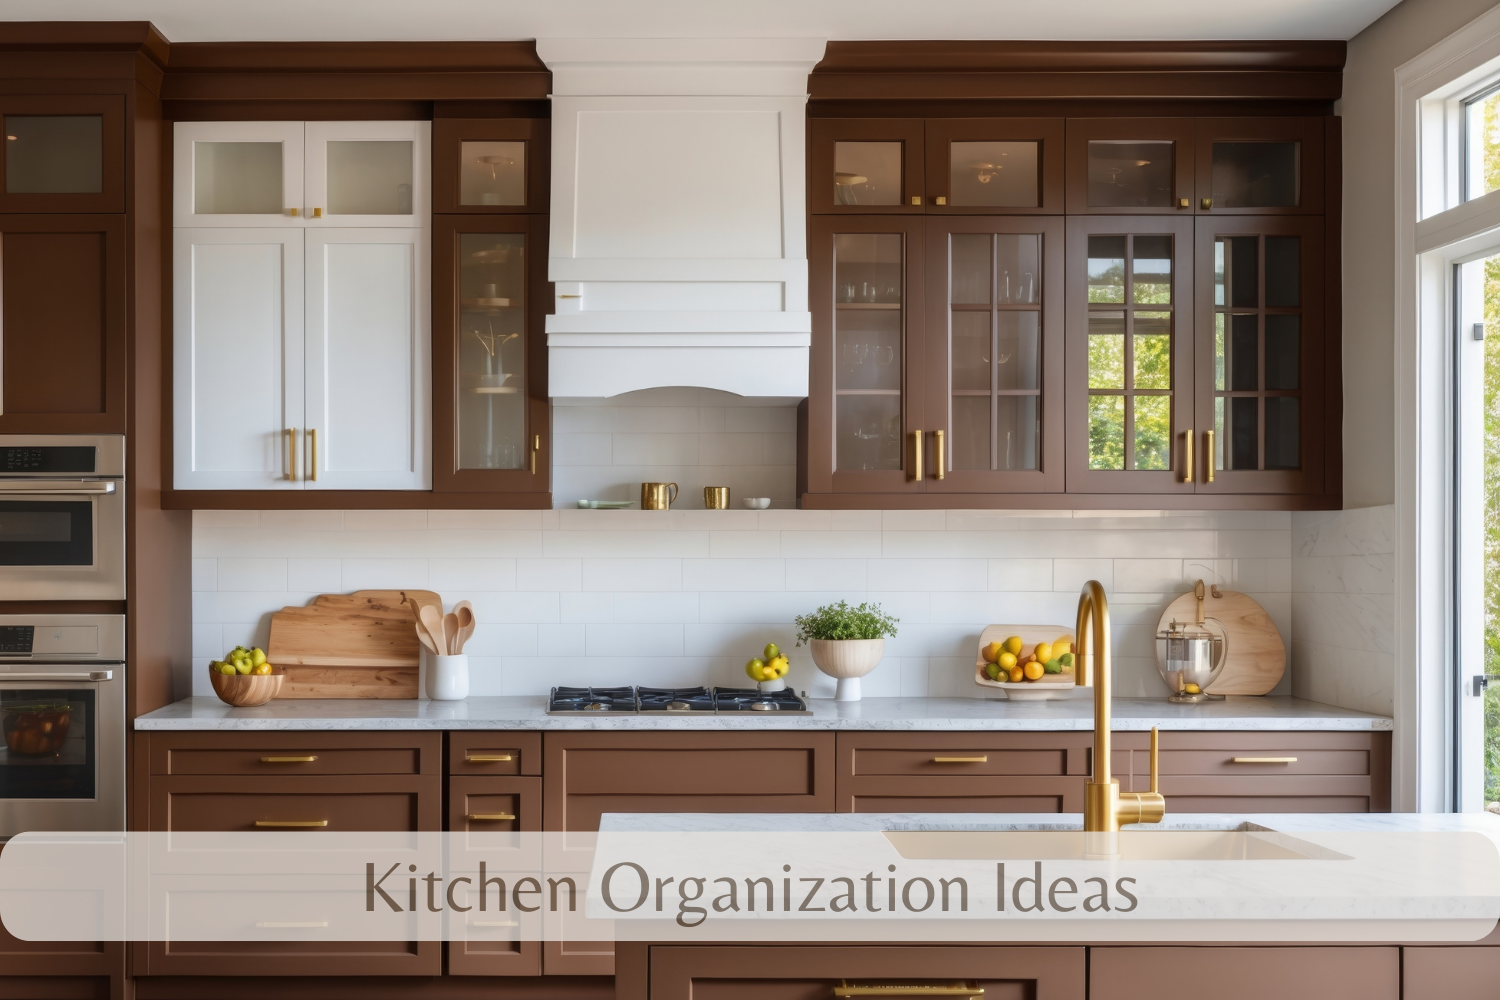
By the time you’re done reading this, you’ll have a toolbox of ideas and inspiration, ready to transform your kitchen into a well-organised space that will save you time, reduce frustration, and, ultimately, make your life a little bit easier. Ready to reclaim your kitchen? Let’s dive in!
Smart Kitchen Organisation Ideas
Ready to reclaim your kitchen? Let’s dive into 15 kitchen organisation ideas you can implement today to create a more functional and enjoyable space.
Drawer Dividers for Utensil Harmony
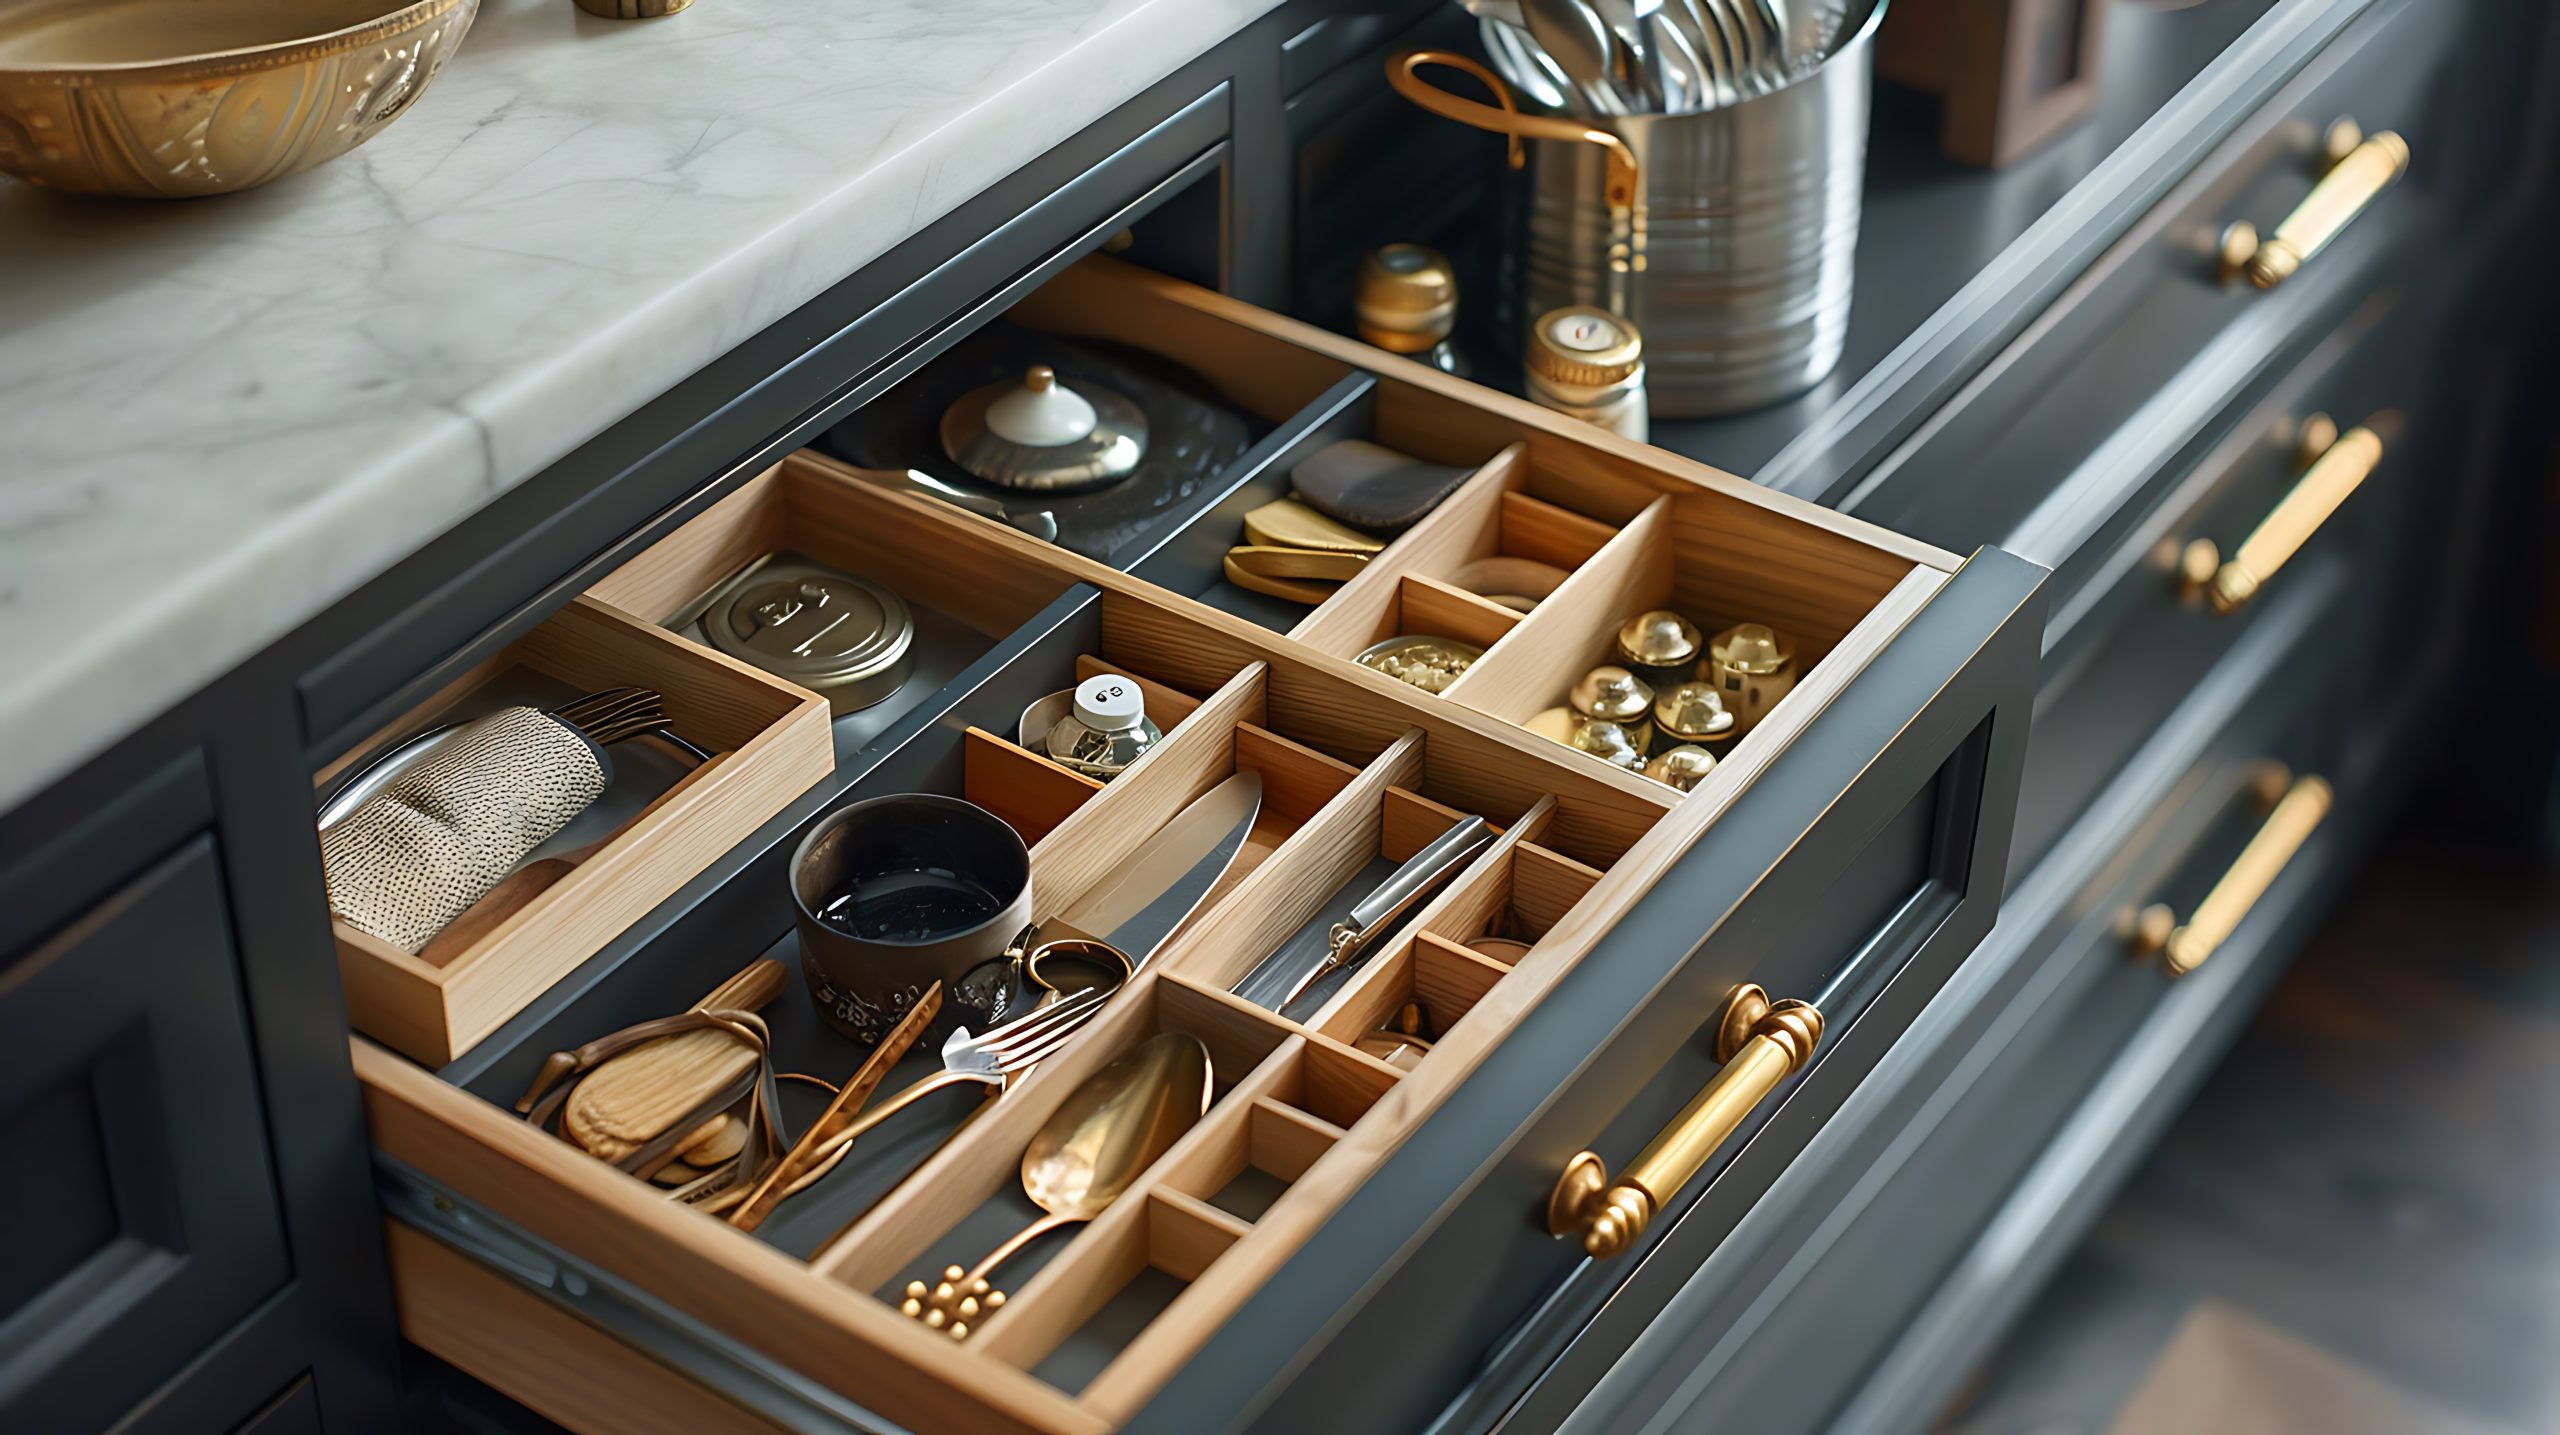
We’ve all been there – the utensil drawer that’s a chaotic jumble of spoons, spatulas, and that one whisk you can never seem to find. The simple solution? Drawer dividers! These handy tools are absolute game-changers when it comes to keeping things separate and easy to find. Not only does this help you locate what you need quickly and reduce clutter, but it also prevents your utensils from scratching and clanging against each other. Plus, when each item has a designated space, you’ll save time not having to dig around in messy drawers, keeping the kitchen cleaner and your stress levels lower! Think of it as giving each utensil its own tiny, perfectly-sized home.
For versatility and style, look for expandable dividers, preferably made from natural materials like bamboo, that can easily adjust to fit your drawers. The adjustability ensures a good fit, and bamboo will add an element of elegance, or if you’d rather a modern option, consider clear acrylic dividers to give it a clean feel.
Vertical Storage: Tiered Shelves and Risers
When it comes to kitchens, you might often find yourself limited on space, but using vertical space wisely is essential for maximising space and getting items up and out of the way. Tiered shelves and risers are your secret weapon for cabinets and countertops! They work by elevating items, allowing you to easily see and reach those things that get pushed to the back. These aren’t just for your pantry; try using them to organise spice jars on your countertop, or to make stacks of plates or cups more visible and easy to reach in your cabinets. This method makes use of that often-overlooked height, prevents items from becoming lost in the shuffle, and makes everything so much easier to grab. No more stacking and toppling – everything has its place.
Look for a tiered shelf or riser that will maximise the vertical space in your cabinets, with shelves spaced in ways that can store more items in them. Or choose ones made with durable materials that can help showcase some of your most-used kitchen tools and essentials on your counter.
Pull-Out Shelves in Cabinets
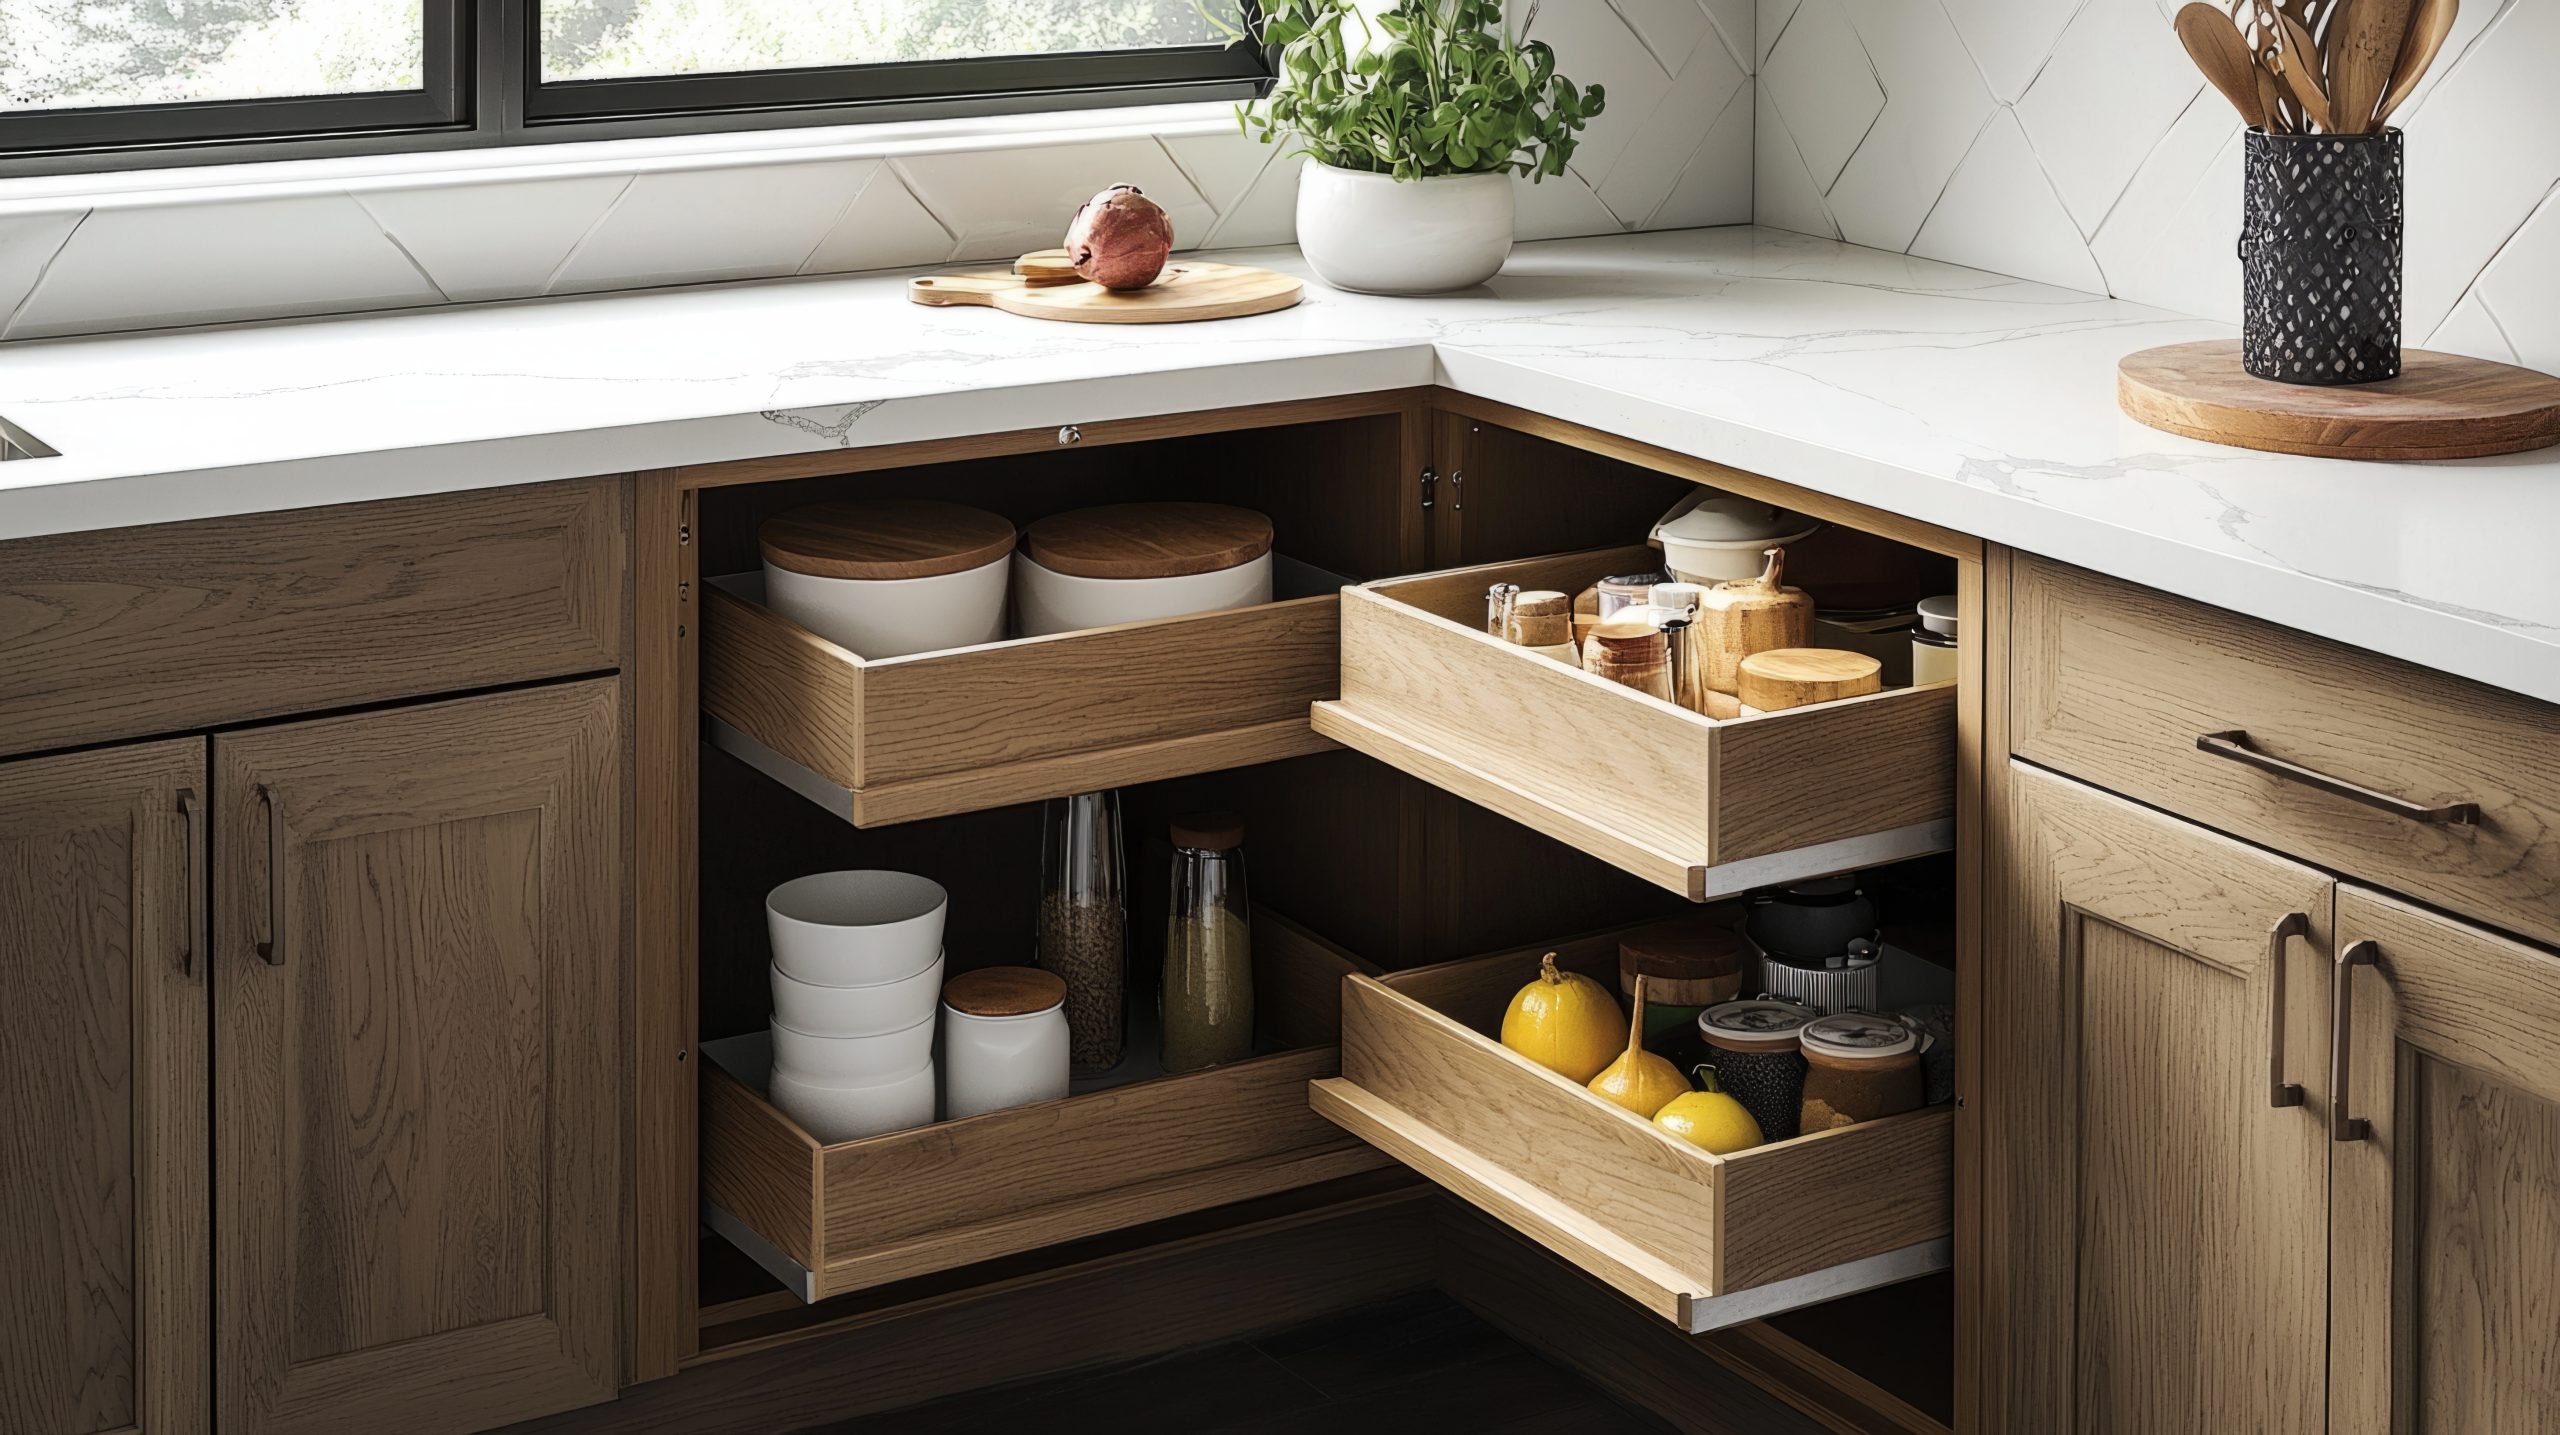
Reaching the items at the back of deep cabinets can often feel like a daunting task. But with pull-out shelves, those awkward spots suddenly become functional and easy to access. These shelves slide out smoothly, bringing everything right to you, saving you from the hassle of rummaging blindly. They’re particularly great for storing heavier pots, pans, or bulky items, preventing them from getting lost in the far corners.
By maximising storage space from the front to the back, it can help avoid double-storing the same things. Pull-out shelves will transform those frustrating areas into a more efficient and accessible storage solution. They are easy to install on any cabinet, and make sure your storage is not in vain, and nothing will ever be lost in the back of those hard-to-reach cabinets. While you don’t buy pull-out cabinets off the shelf, consider implementing a solution to easily slide them out to reach even the back of your kitchen cabinets.
Cabinet Door Organisers
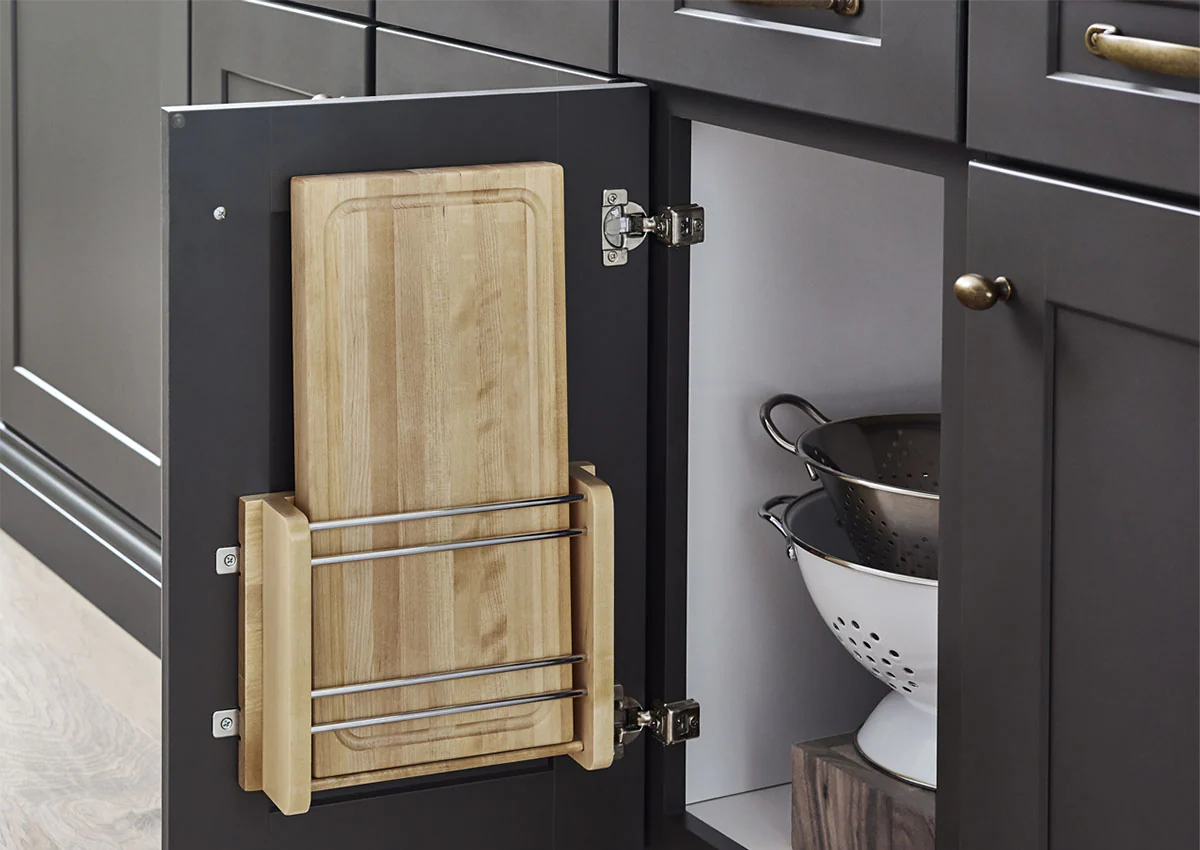
Don’t let that valuable real estate inside your cabinet doors go to waste! Cabinet door organisers are incredibly versatile, providing a place to store a variety of kitchen essentials you’d otherwise leave on the counter or stuffed into a drawer. They’re especially great for awkward, thin items like cutting boards, foil, wraps, or even cleaning supplies. By mounting organisers to your cabinet doors, you’re utilising unused space, keeping your items accessible but hidden away from the counter, which is helpful when keeping the kitchen more neat and tidy. Consider it as doubling your storage without taking up any more space!
For an all-around, versatile solution, we suggest an over-the-door organiser with multiple tiers and compartments. Look for a sturdy design with secure hooks to ensure it can hold its weight, as well as varied compartments to fit foil, wraps, and even cleaning supplies to ensure they stay in place while closed.
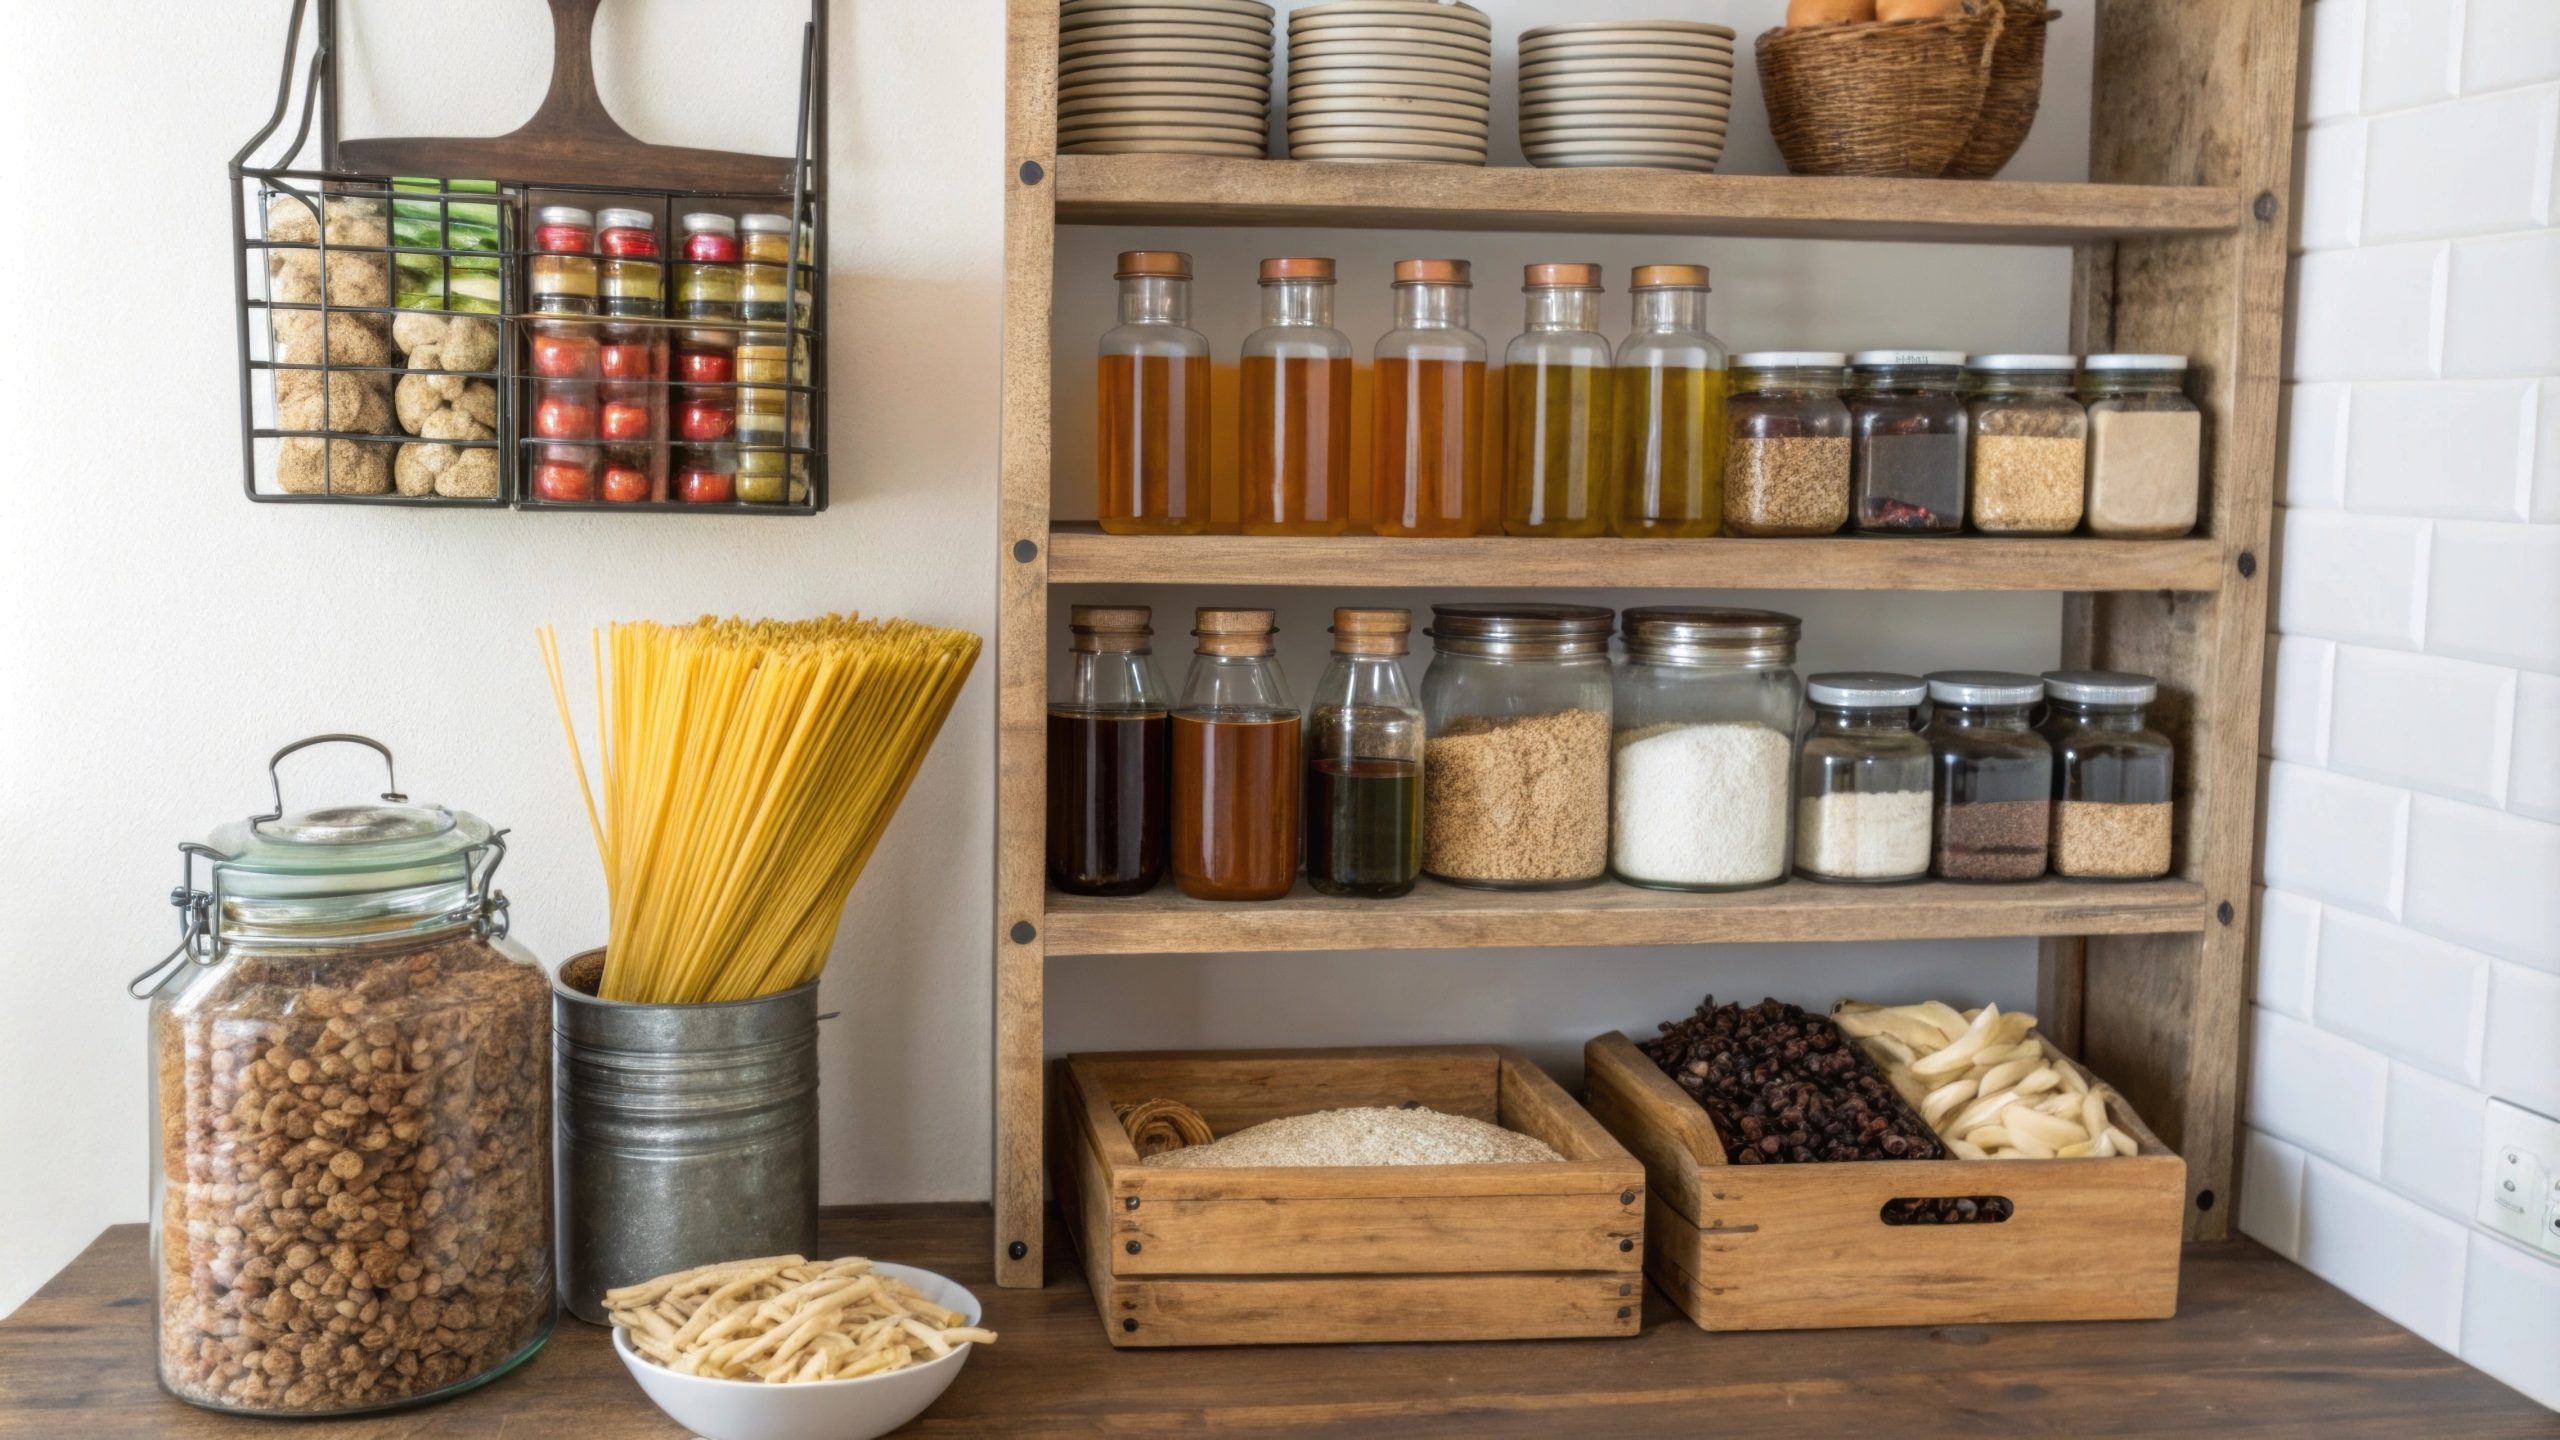
Utilise Clear Containers for Pantries and Fridges
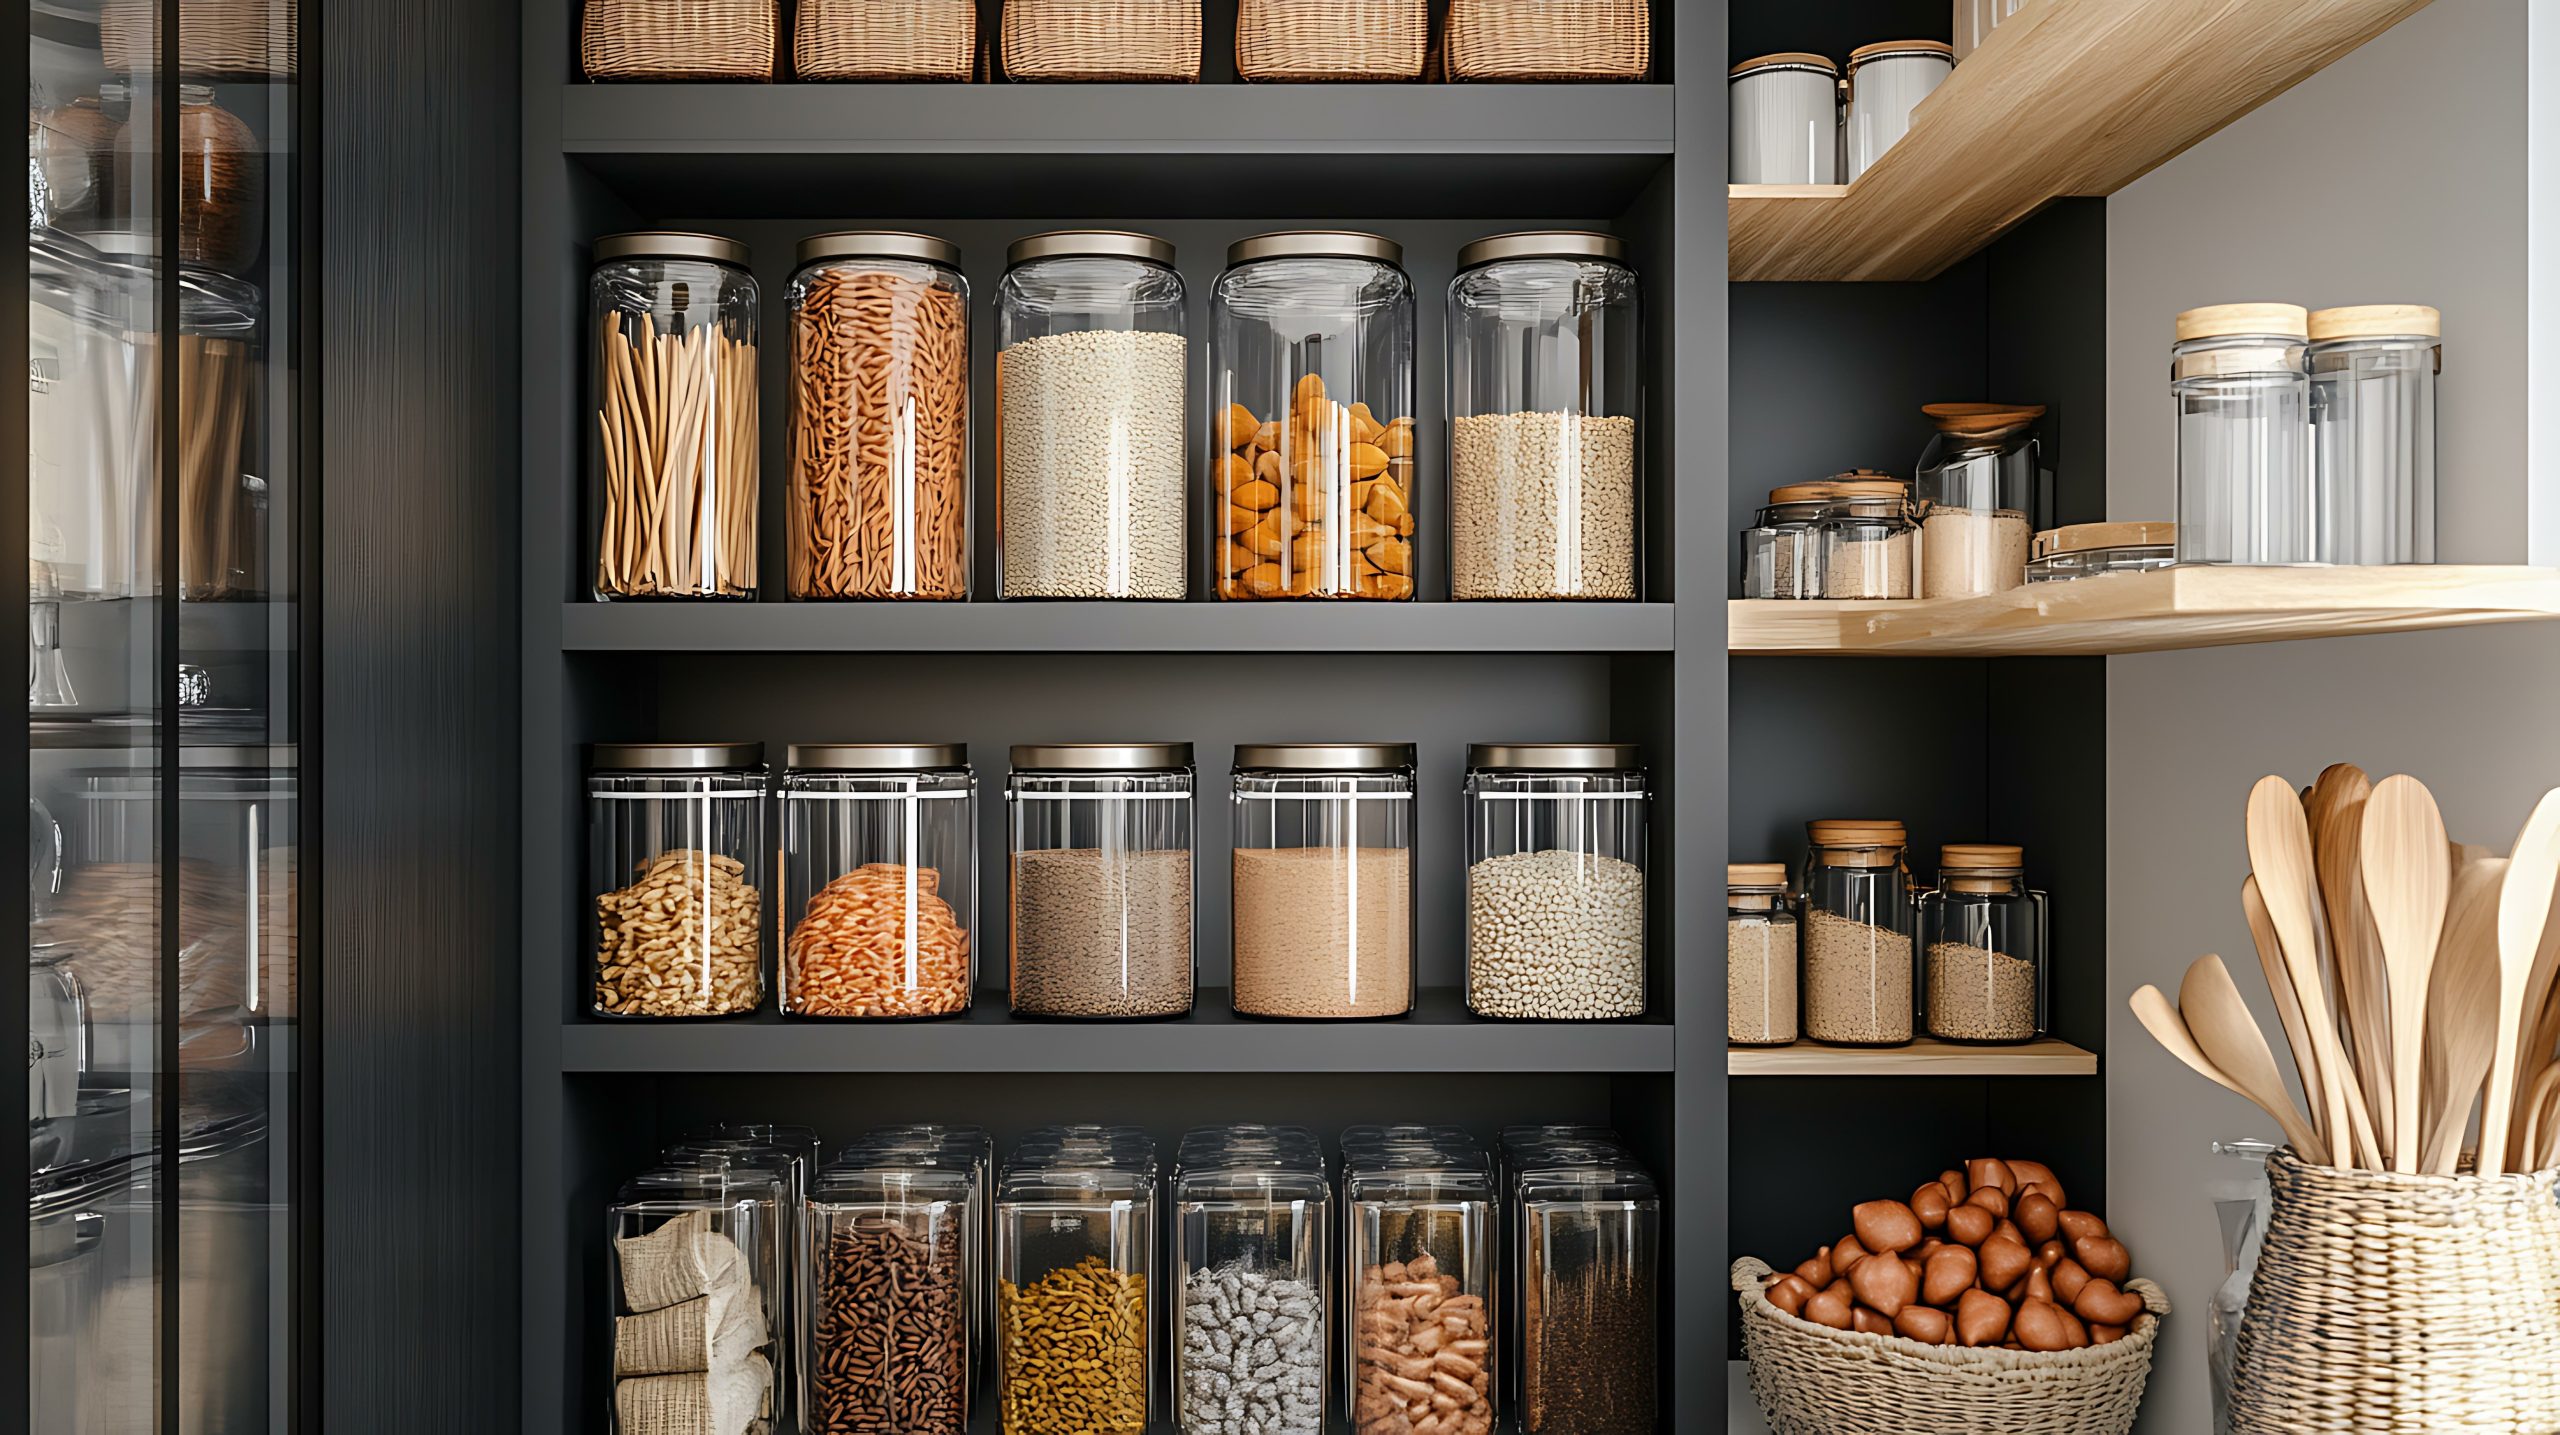
Transparency is key when it comes to effective kitchen organisation. Using clear containers for both your pantry and refrigerator allows you to instantly see what you have, preventing you from overbuying and letting food go to waste. Ditch the opaque packaging and swap to jars for your dry goods to maximise freshness and the visual of seeing the product, or consider organising produce using see-through bins for the refrigerator to better see what’s in there and group them by type. These clear containers not only help you see what needs to be used, but they also create a more uniform and visually appealing space. They bring a sense of calm to chaos and encourage you to eat what you have, ultimately reducing waste and saving you money. It’s about taking the guesswork out of the storage and having a visually organised look at your pantry.
For dry goods, we recommend using classic, well-sealing glass jars; they are beautiful and functional for storage, and if you choose a matching set of see-through bins in various shapes and sizes for your refrigerator and pantry, this will help maintain a clean and sophisticated look.
Label Everything Clearly
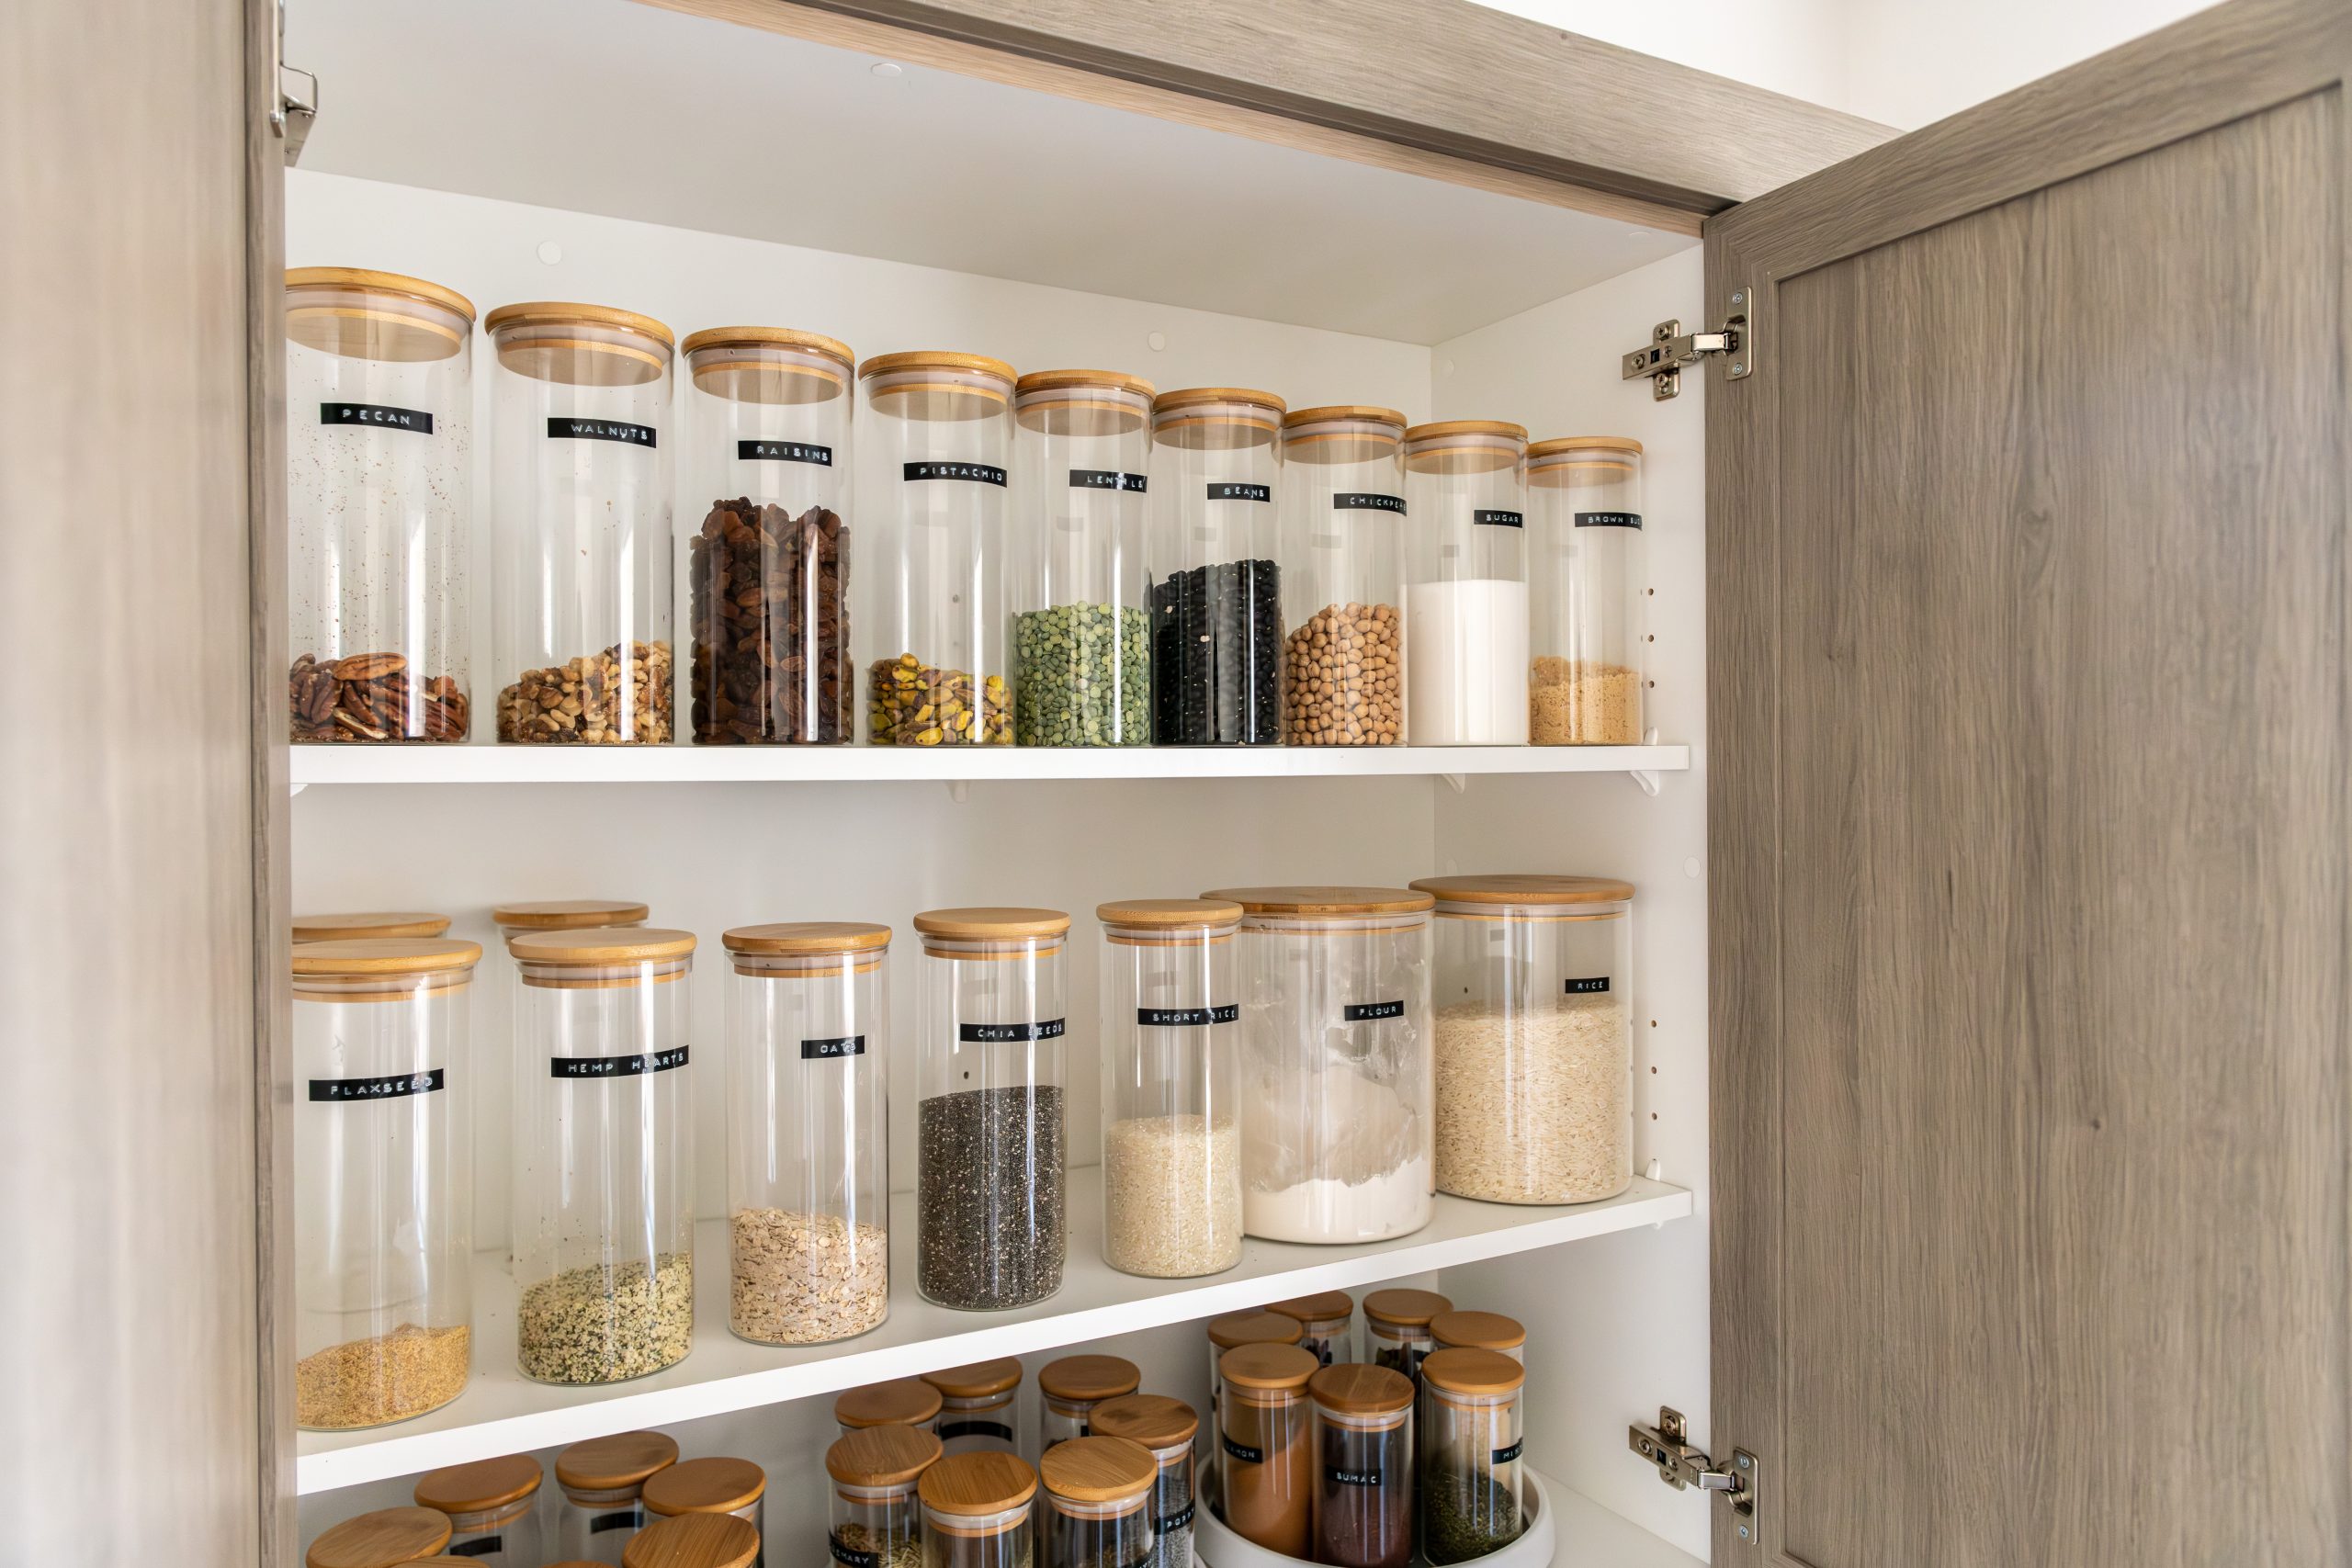
Even with the best intentions for clear containers and visible storage, it’s easy to lose track of what’s what in your kitchen, so labelling is absolutely vital for lasting organisation. Clearly labelling all of your containers, drawers, and bins ensures that the system doesn’t break down over time, and especially helps any additional help in the home to also participate in keeping the space tidy.
Whether it’s a simple waterproof label for identifying the spices or a handwritten label on storage jars with the date the item was purchased, having your storage organised is half the battle, but making sure the labelling is consistent can be the key to keeping a well-organised kitchen.
Utilise Wall Space: Hooks & Hanging Racks
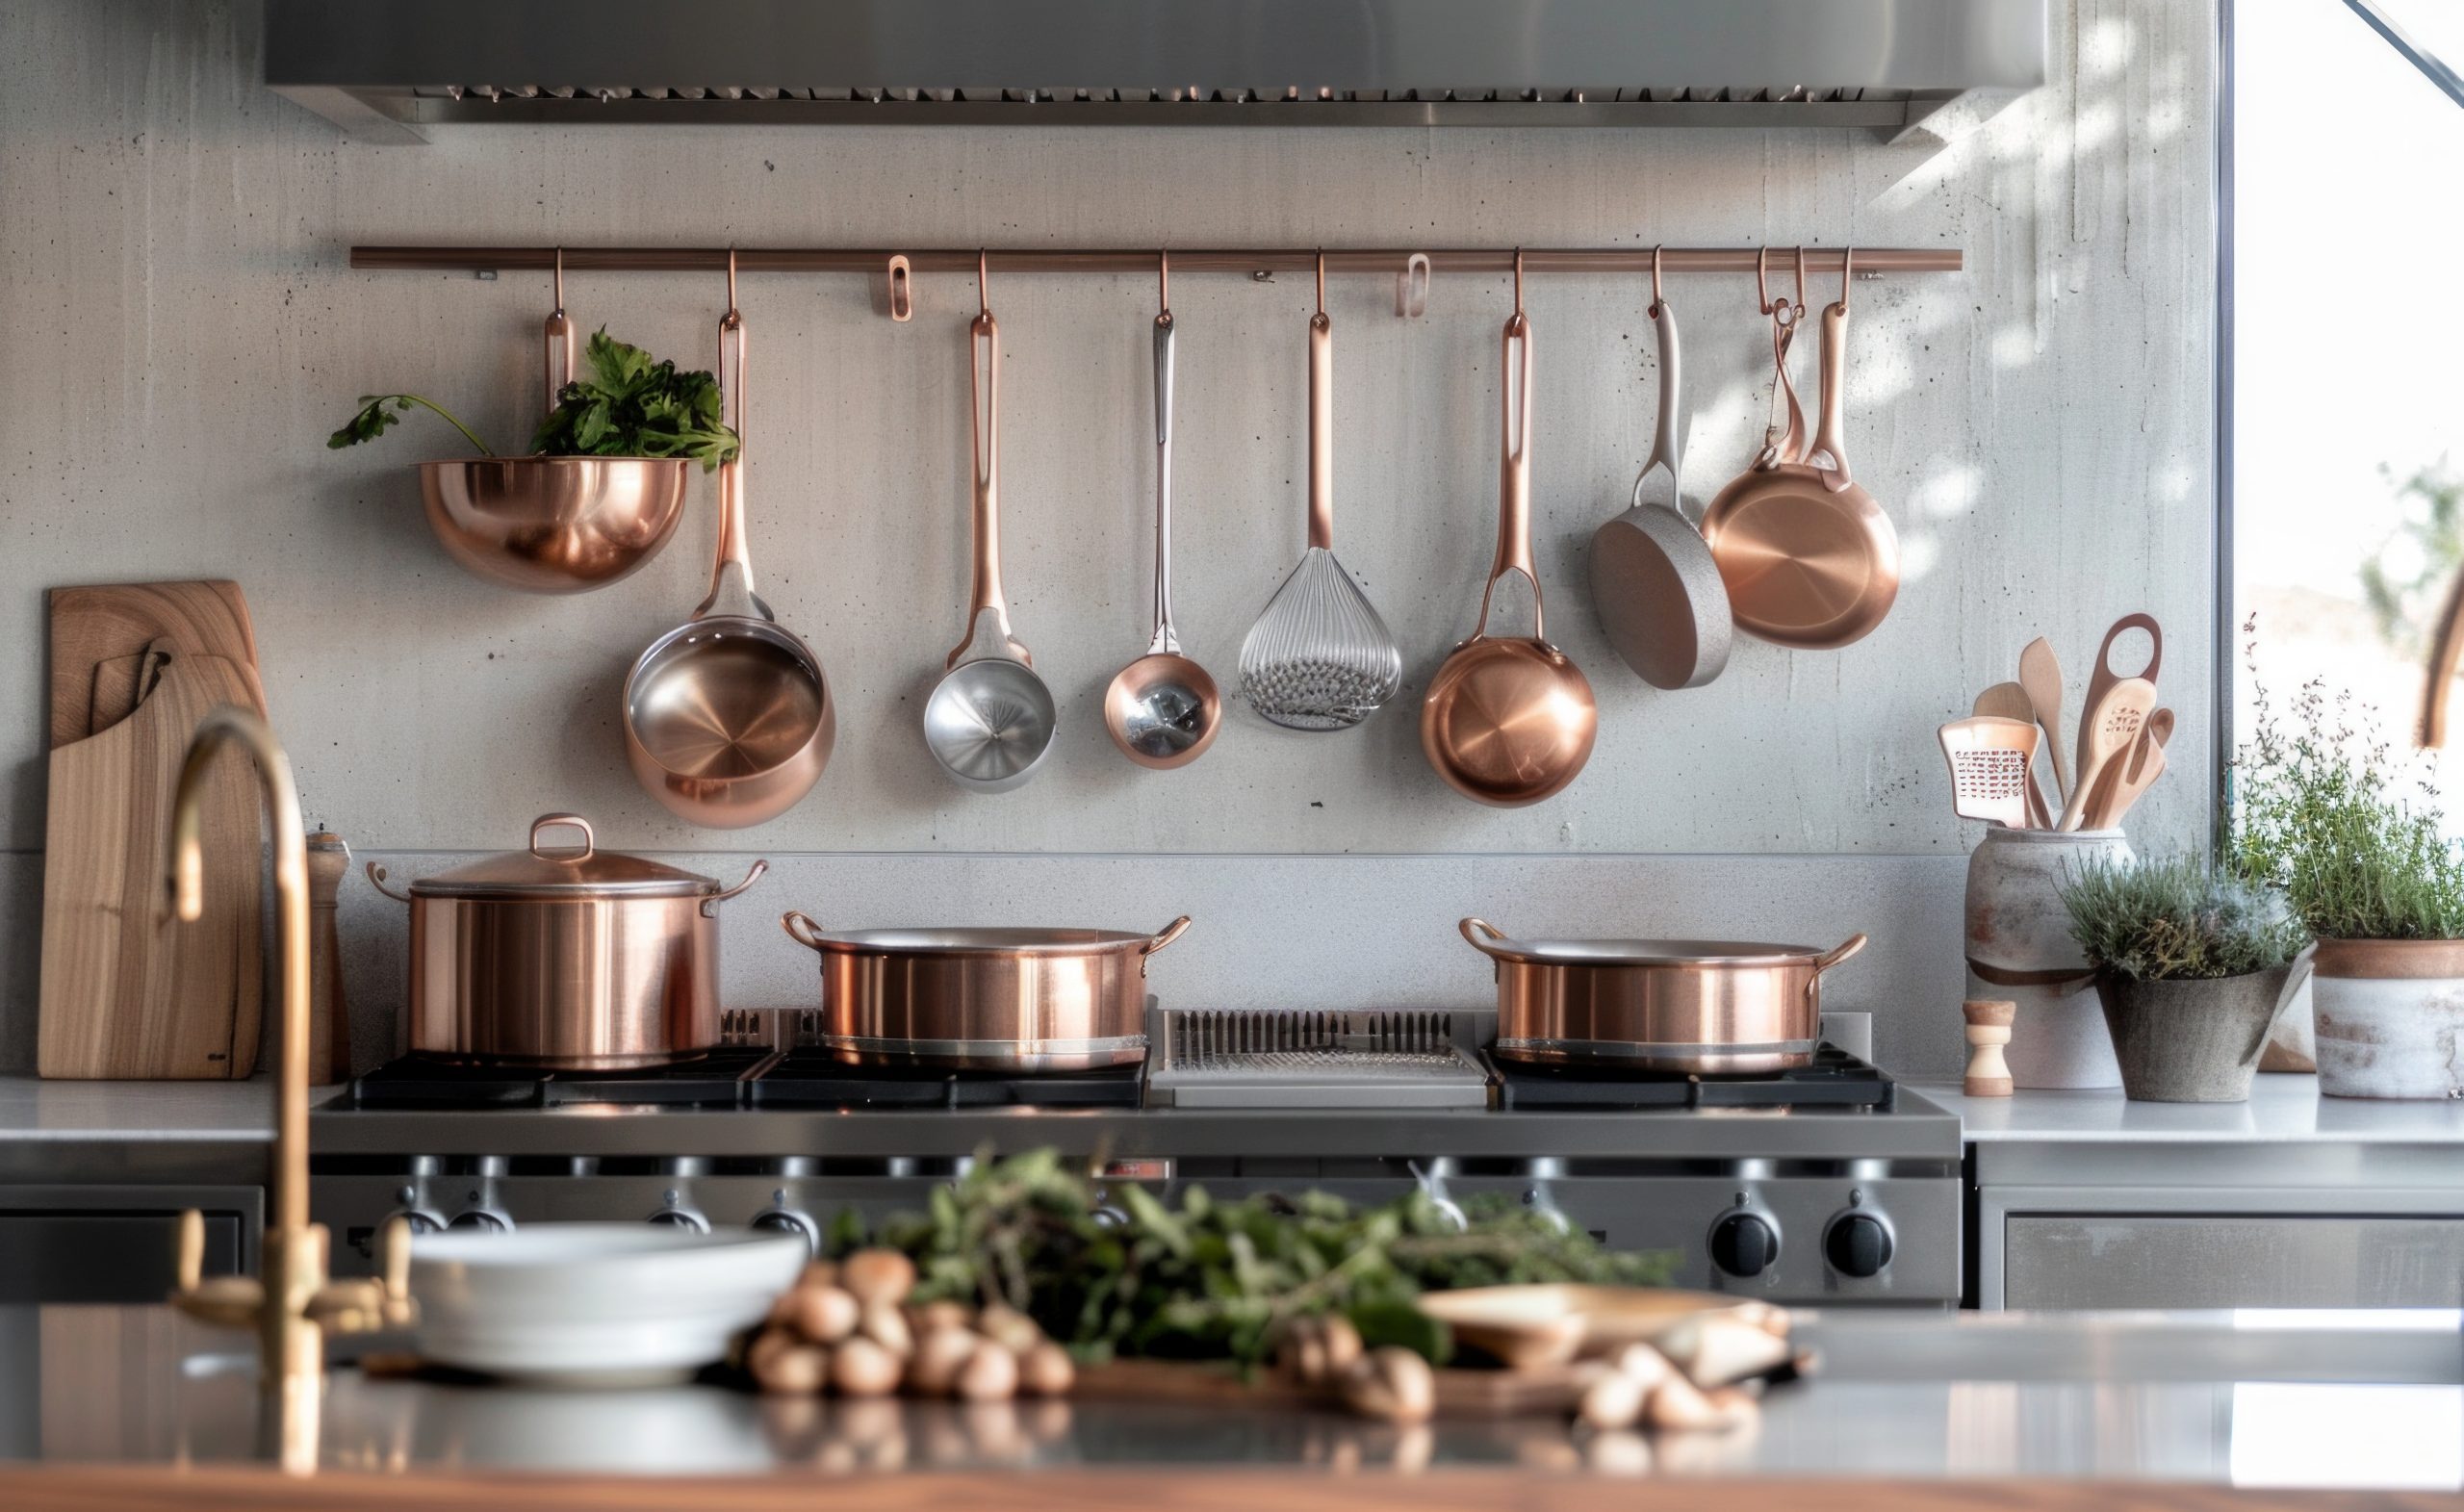
In many kitchens, wall space is often an underutilised resource. Why let your walls be blank when they can be the perfect place to keep utensils, pots, or even cutting boards within easy reach? Hooks and hanging racks can free up drawer and countertop space, providing you with convenient storage that’s not only functional but also adds character to your kitchen.
From sleek metallic racks for hanging your pots and pans to stylish hooks for your most-used utensils, utilising wall space allows you to see what you have and prevents items from being buried in drawers and cabinets. This also adds an element of charm and display to the functional kitchen space, so that your kitchen essentials are not only convenient but beautiful.
Rolling Cart Kitchen Storage
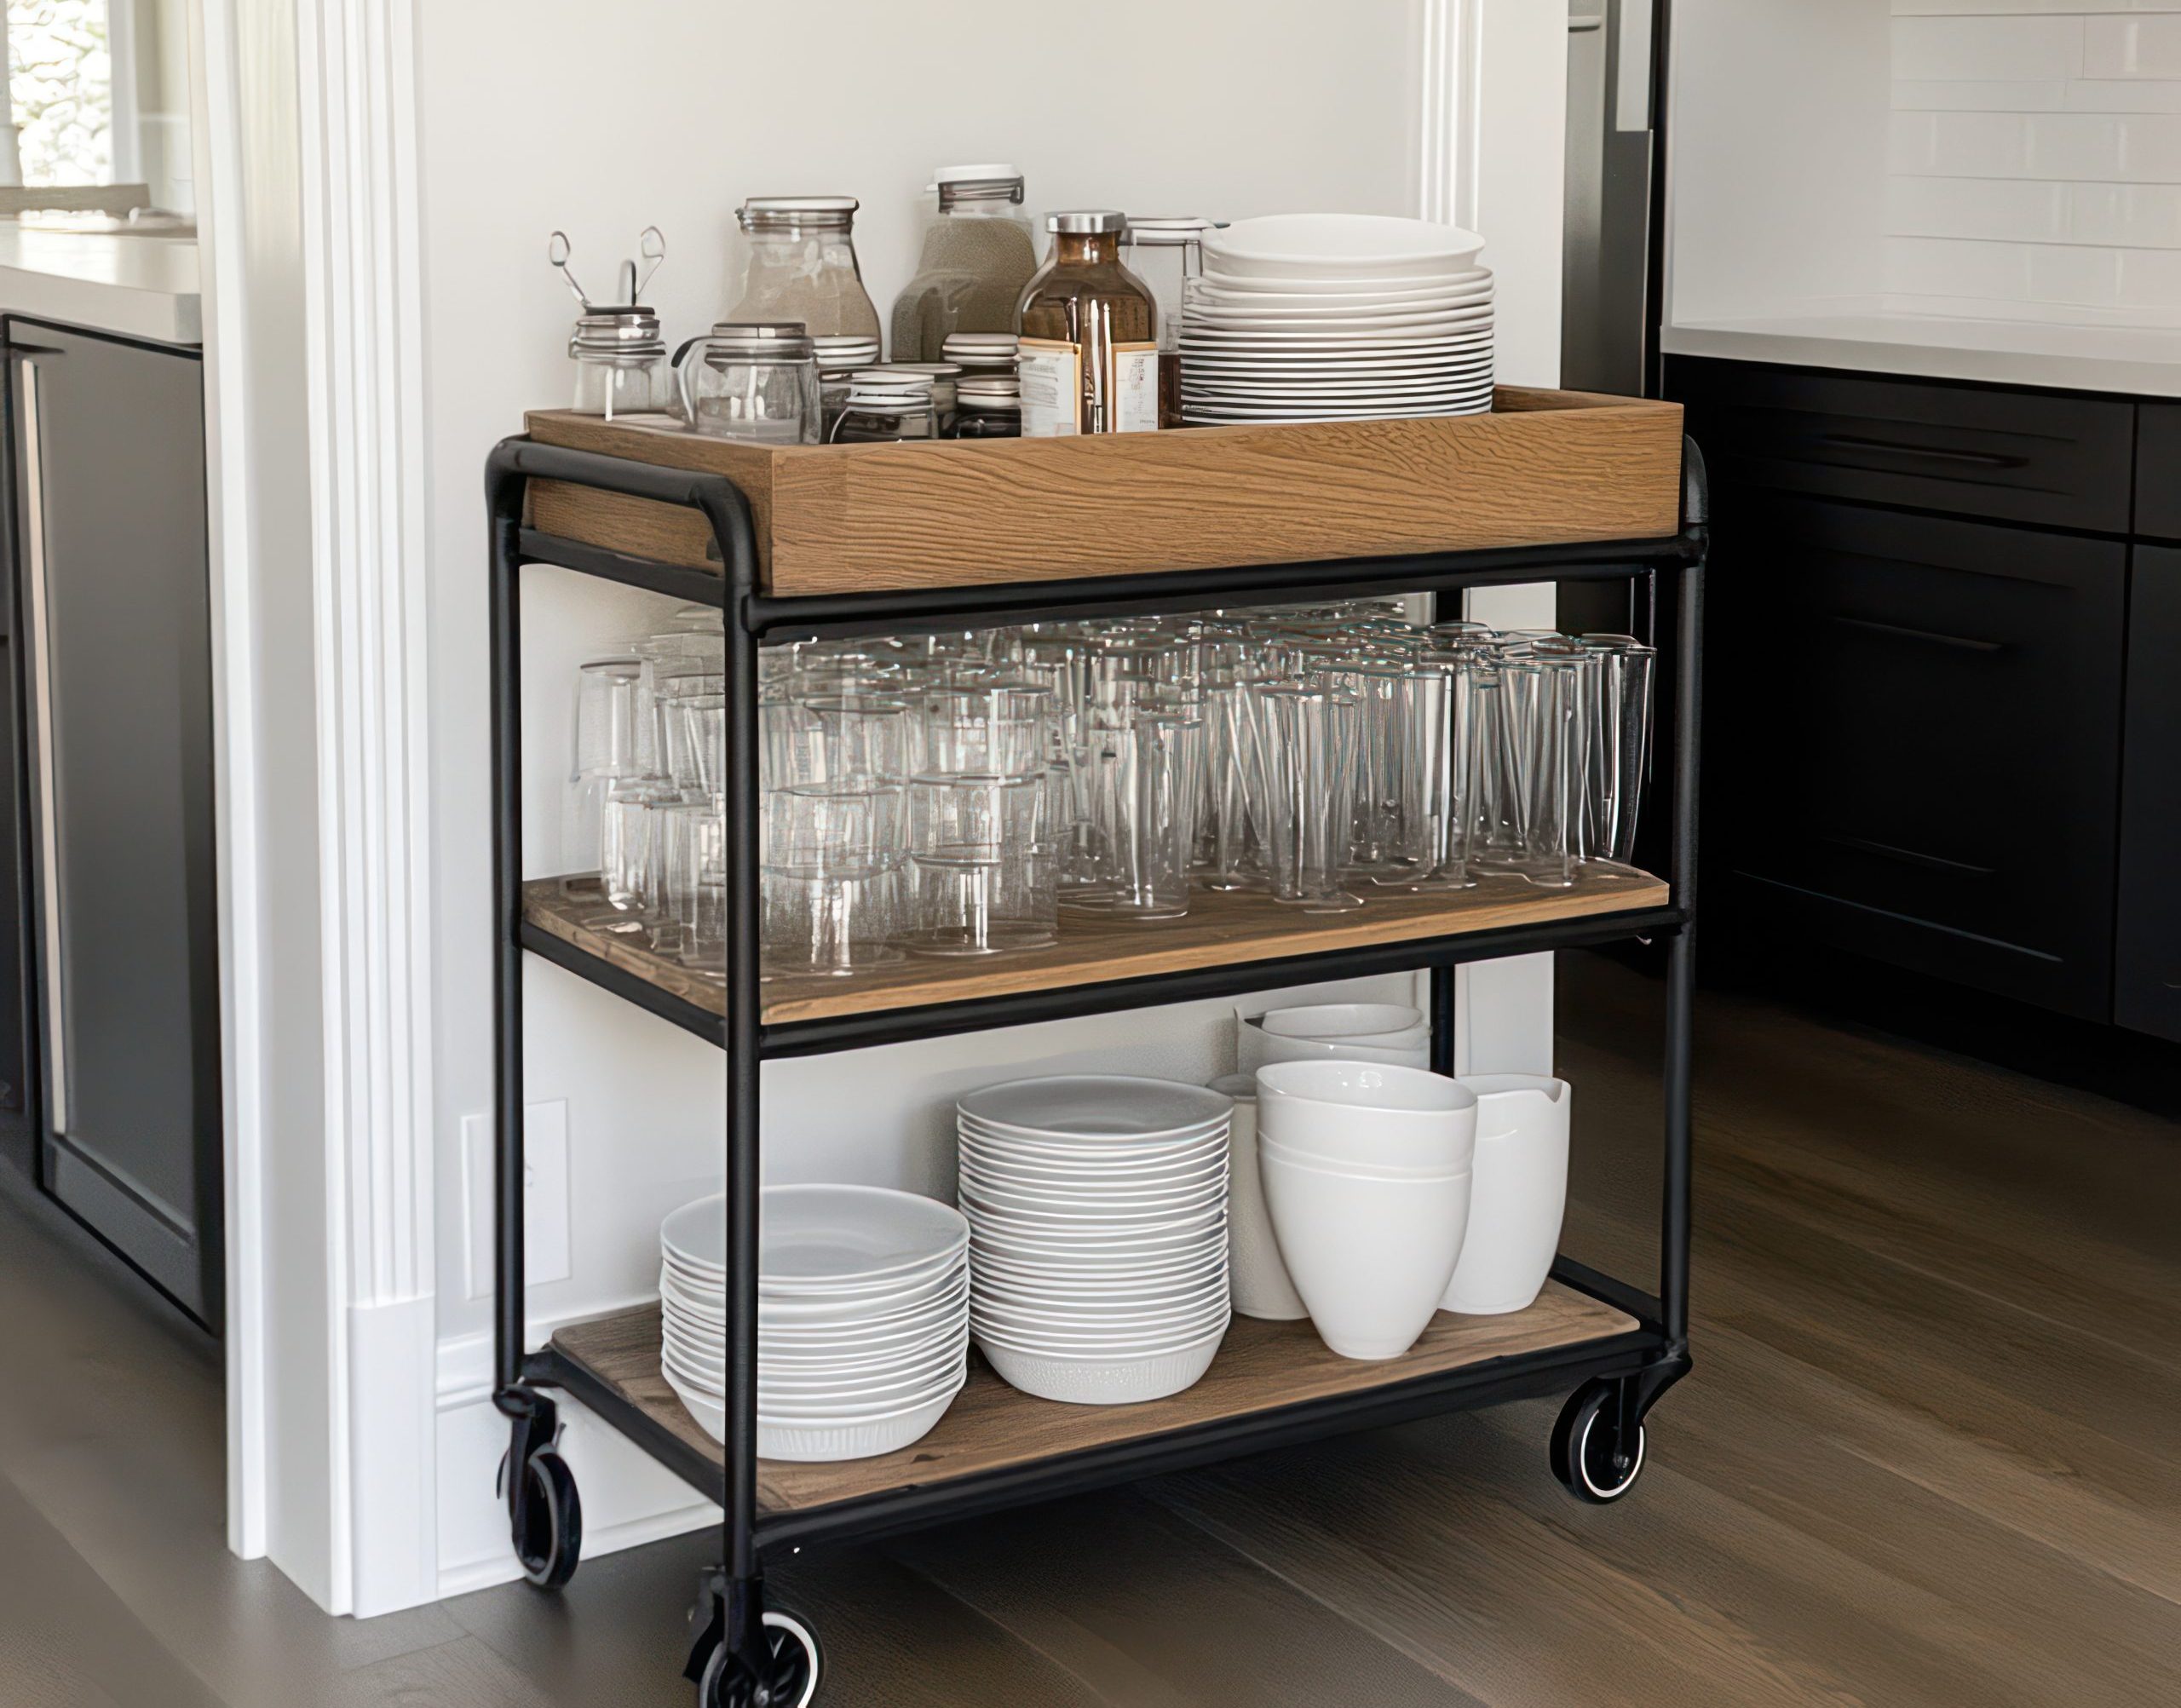
Need a little extra storage, but don’t want to commit to a permanent addition? Consider a rolling cart! This versatile piece is your flexible friend in the kitchen, providing extra storage wherever you need it, whenever you need it. Whether you need a temporary kitchen island for prep space, extra storage during gatherings, or just a handy place to keep your frequently-used items, a rolling cart provides an all-around movable and convenient solution. They’re perfect for small kitchens where space is limited, or can serve as a secondary prep area in larger kitchens. They’re also incredibly easy to customise with baskets and containers. It’s a convenient and effective option for a kitchen in a small space, or can serve as the perfect addition in a larger one, to provide even more storage to meet all your needs.
Look for a well-built cart that rolls easily and is suited to the aesthetic of your kitchen with sturdy shelves to handle your varying kitchen tools. For a sleek, modern aesthetic, metal rolling carts work wonderfully. Choose one based on its durability and what storage needs you may have for the kitchen space.
The Power of a Lazy Susan

Corner cabinets – the bane of many kitchen organisers! The items you put in the corners end up being forgotten, since they are harder to see and difficult to reach, but fear no more! The simple solution to corner storage is to bring in the Lazy Susan. This rotating turntable makes reaching anything that might be tucked into the back of your cabinet suddenly effortless. You can also place them on your countertops, and they also work great in the fridge for storing sauces or spices that often get forgotten. They bring everything to the front so you’re no longer blindly searching or losing items in the back of hard-to-reach cabinets or counter space. This will keep your items from being lost and forgotten about and ensure that you are getting the full use of your space.
Opt for a tiered or multi-level lazy susan, or try a variety of them for different uses. Bamboo is a stylish and sustainable option, while plastic is a great, durable and easy-to-clean pick. Consider your colour aesthetic and overall style when choosing a Lazy Susan to use, to be sure it matches with your existing kitchen pieces. You can find a great range at a store like the Container Store or Bed Bath & Beyond. Consider choosing a rotating tray based on where you might plan to store and use this kitchen storage.
Pot and Pan Lid Organiser
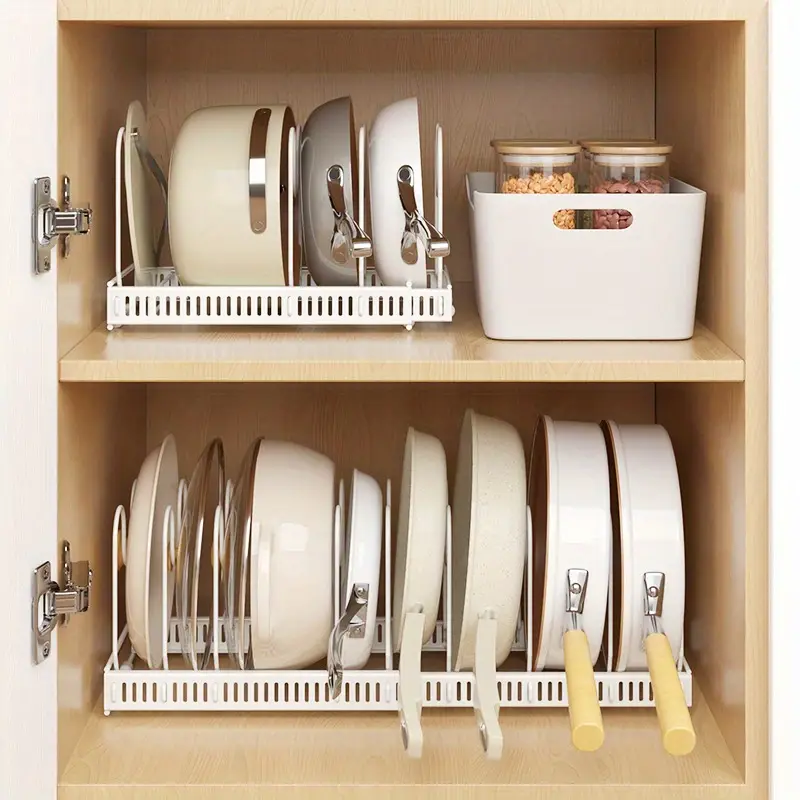
Let’s face it, pot and pan lids are the awkward items in our kitchens. They’re often stored haphazardly, creating a noisy, clanging mess in drawers or cabinets. They seem to pile up and make a dishevelled scene if left untamed. A dedicated pot and pan lid organiser can bring order and peace into this chaotic storage situation. These organisers keep your lids separated and neatly arranged, preventing scratches and making it easy to find the right one when you need it.
By having a specific place for these notoriously clumsy kitchen items, you’re optimising your space and making meal prep a much smoother and organised experience. This not only avoids damage but keeps those items from flying out every time the drawer or cabinet is opened. Look for adjustable organisers that can accommodate different lid sizes and thicknesses, or try using vertical racks to stand the lids up in the cabinet. Consider the spacing between the vertical bars to make sure it will properly hold and keep them in place without falling out
The Magic of the Dish Drying Rack
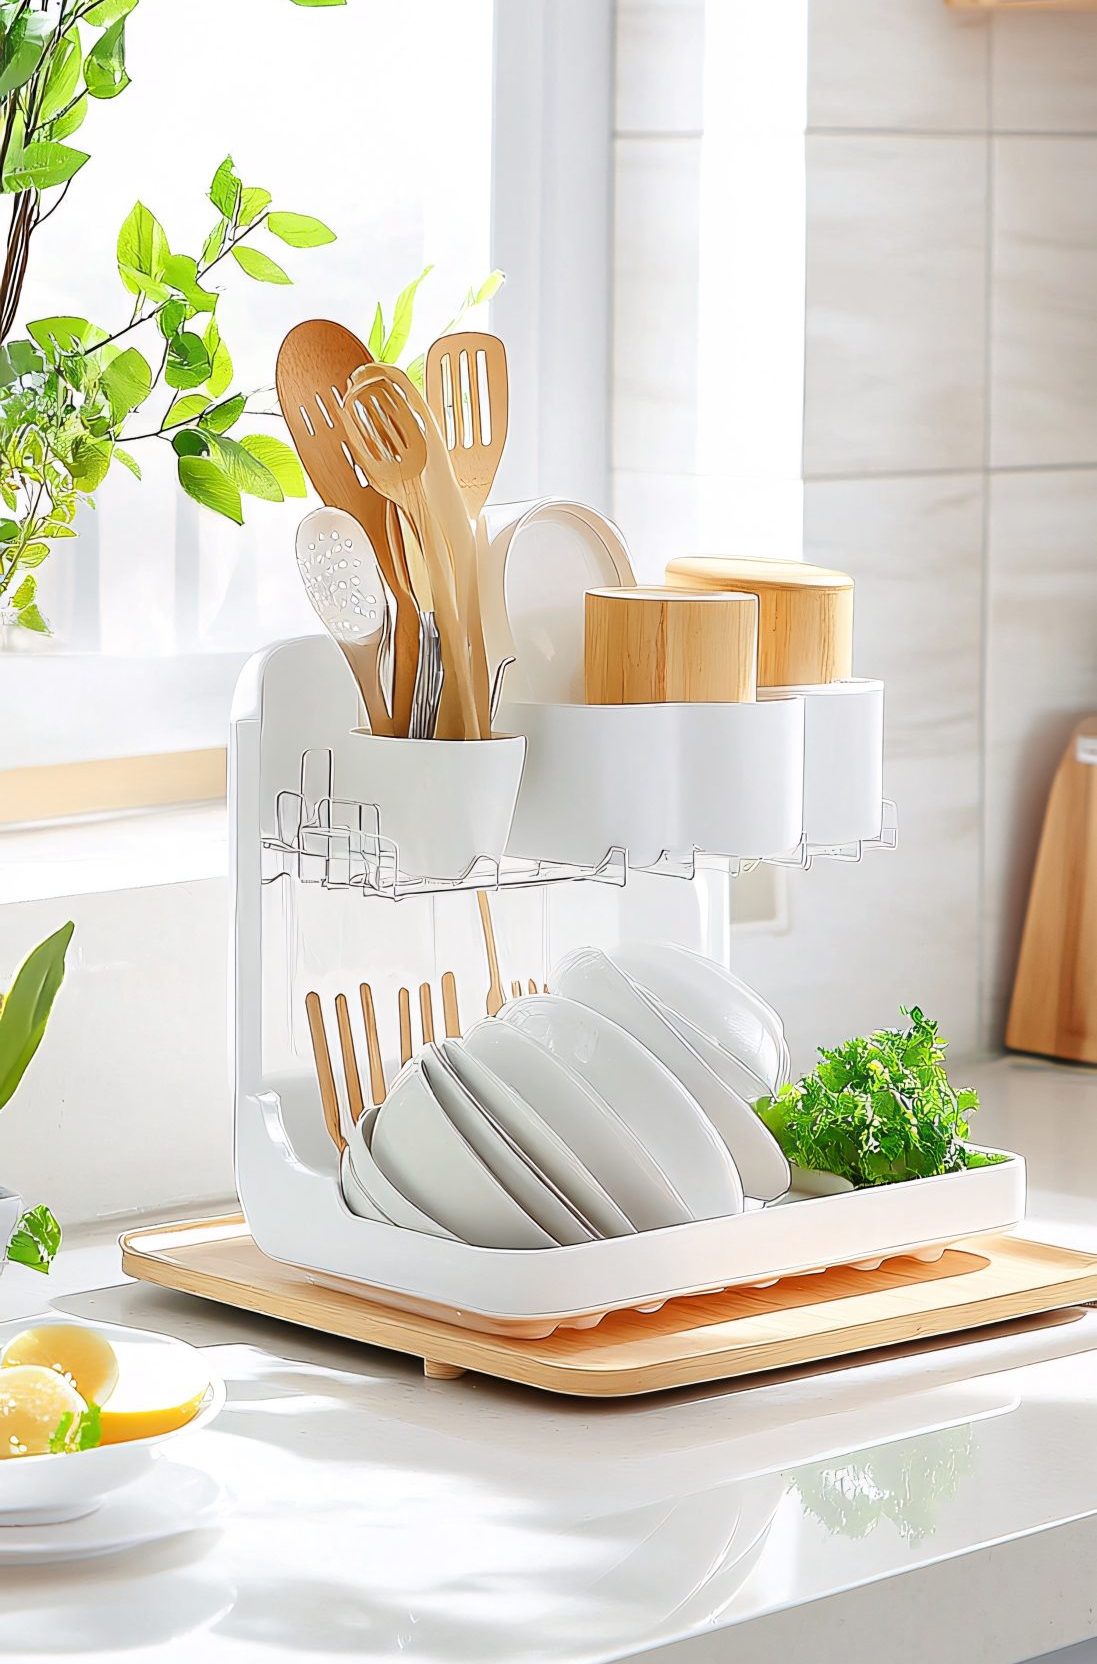
Leaving dishes to dry on the counter can be inconvenient and create a cluttered mess, and no one wants to deal with a wet countertop from soggy drying dishes. The simple solution? A stylish and efficient dish drying rack! This will provide an immediate and convenient solution to dry your dishes properly and efficiently, instead of having a chaotic array of wet dishes left on the counter to dry. This simple piece not only keeps the counter space free and tidy, but also makes the post-meal cleanup so much easier. Consider how often dishes are washed and if your drying solution is actually functional for your needs and your space, because a simple solution can help avoid a lot of clutter in the kitchen.
Consider what kind of drying rack fits into your style and space. If you’re limited on counter space, there are a variety of slim and efficient designs, such as foldable or roll-up drying racks that can be stowed away when not in use. For those with a more permanent need, a sleek dish rack with a built-in tray can create a contemporary style while efficiently keeping your dishes properly organised.
Under the Sink Organisation
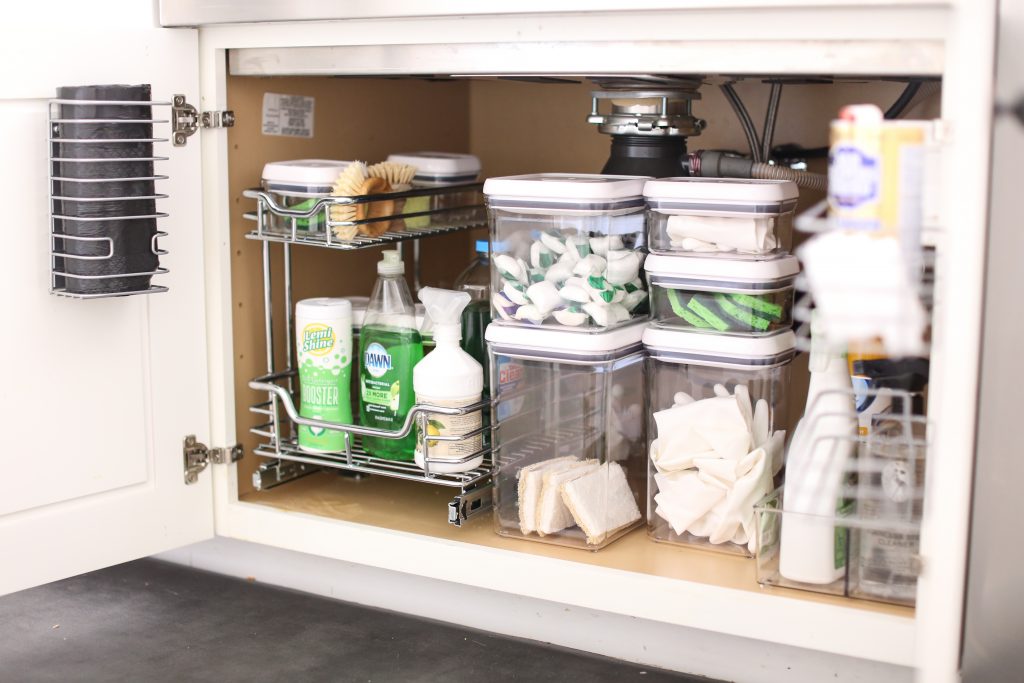
The space under the sink often ends up being a chaotic catch-all, a messy area that’s often neglected, but this area is one of the most crucial parts to get organised. From cleaning supplies, dish soap, and sometimes extra sponges and paper towels get haphazardly shoved under the sink, but it doesn’t have to be. Consider lining the bottom of your under-the-sink cabinet with a waterproof liner or tray to protect the cabinet from spills, and use caddies or organisers to neatly group similar items together, such as cleaning sprays, cloths, and dish soap. Adding a tiered organiser can maximise space by using the vertical height under the sink to bring smaller items forward so they are not lost in the back.
By adding small adjustments and creating organisation under your kitchen sink, you create a smooth, streamlined process of accessing your kitchen supplies to maintain a tidier kitchen. Look for sturdy, waterproof organisers with handles that make it easy to take supplies out of the cabinet, or consider a tiered organiser to make the most out of your vertical space. You can often find great caddy sets or drawers from the Container Store.
First in, First Out Pantry Rotation
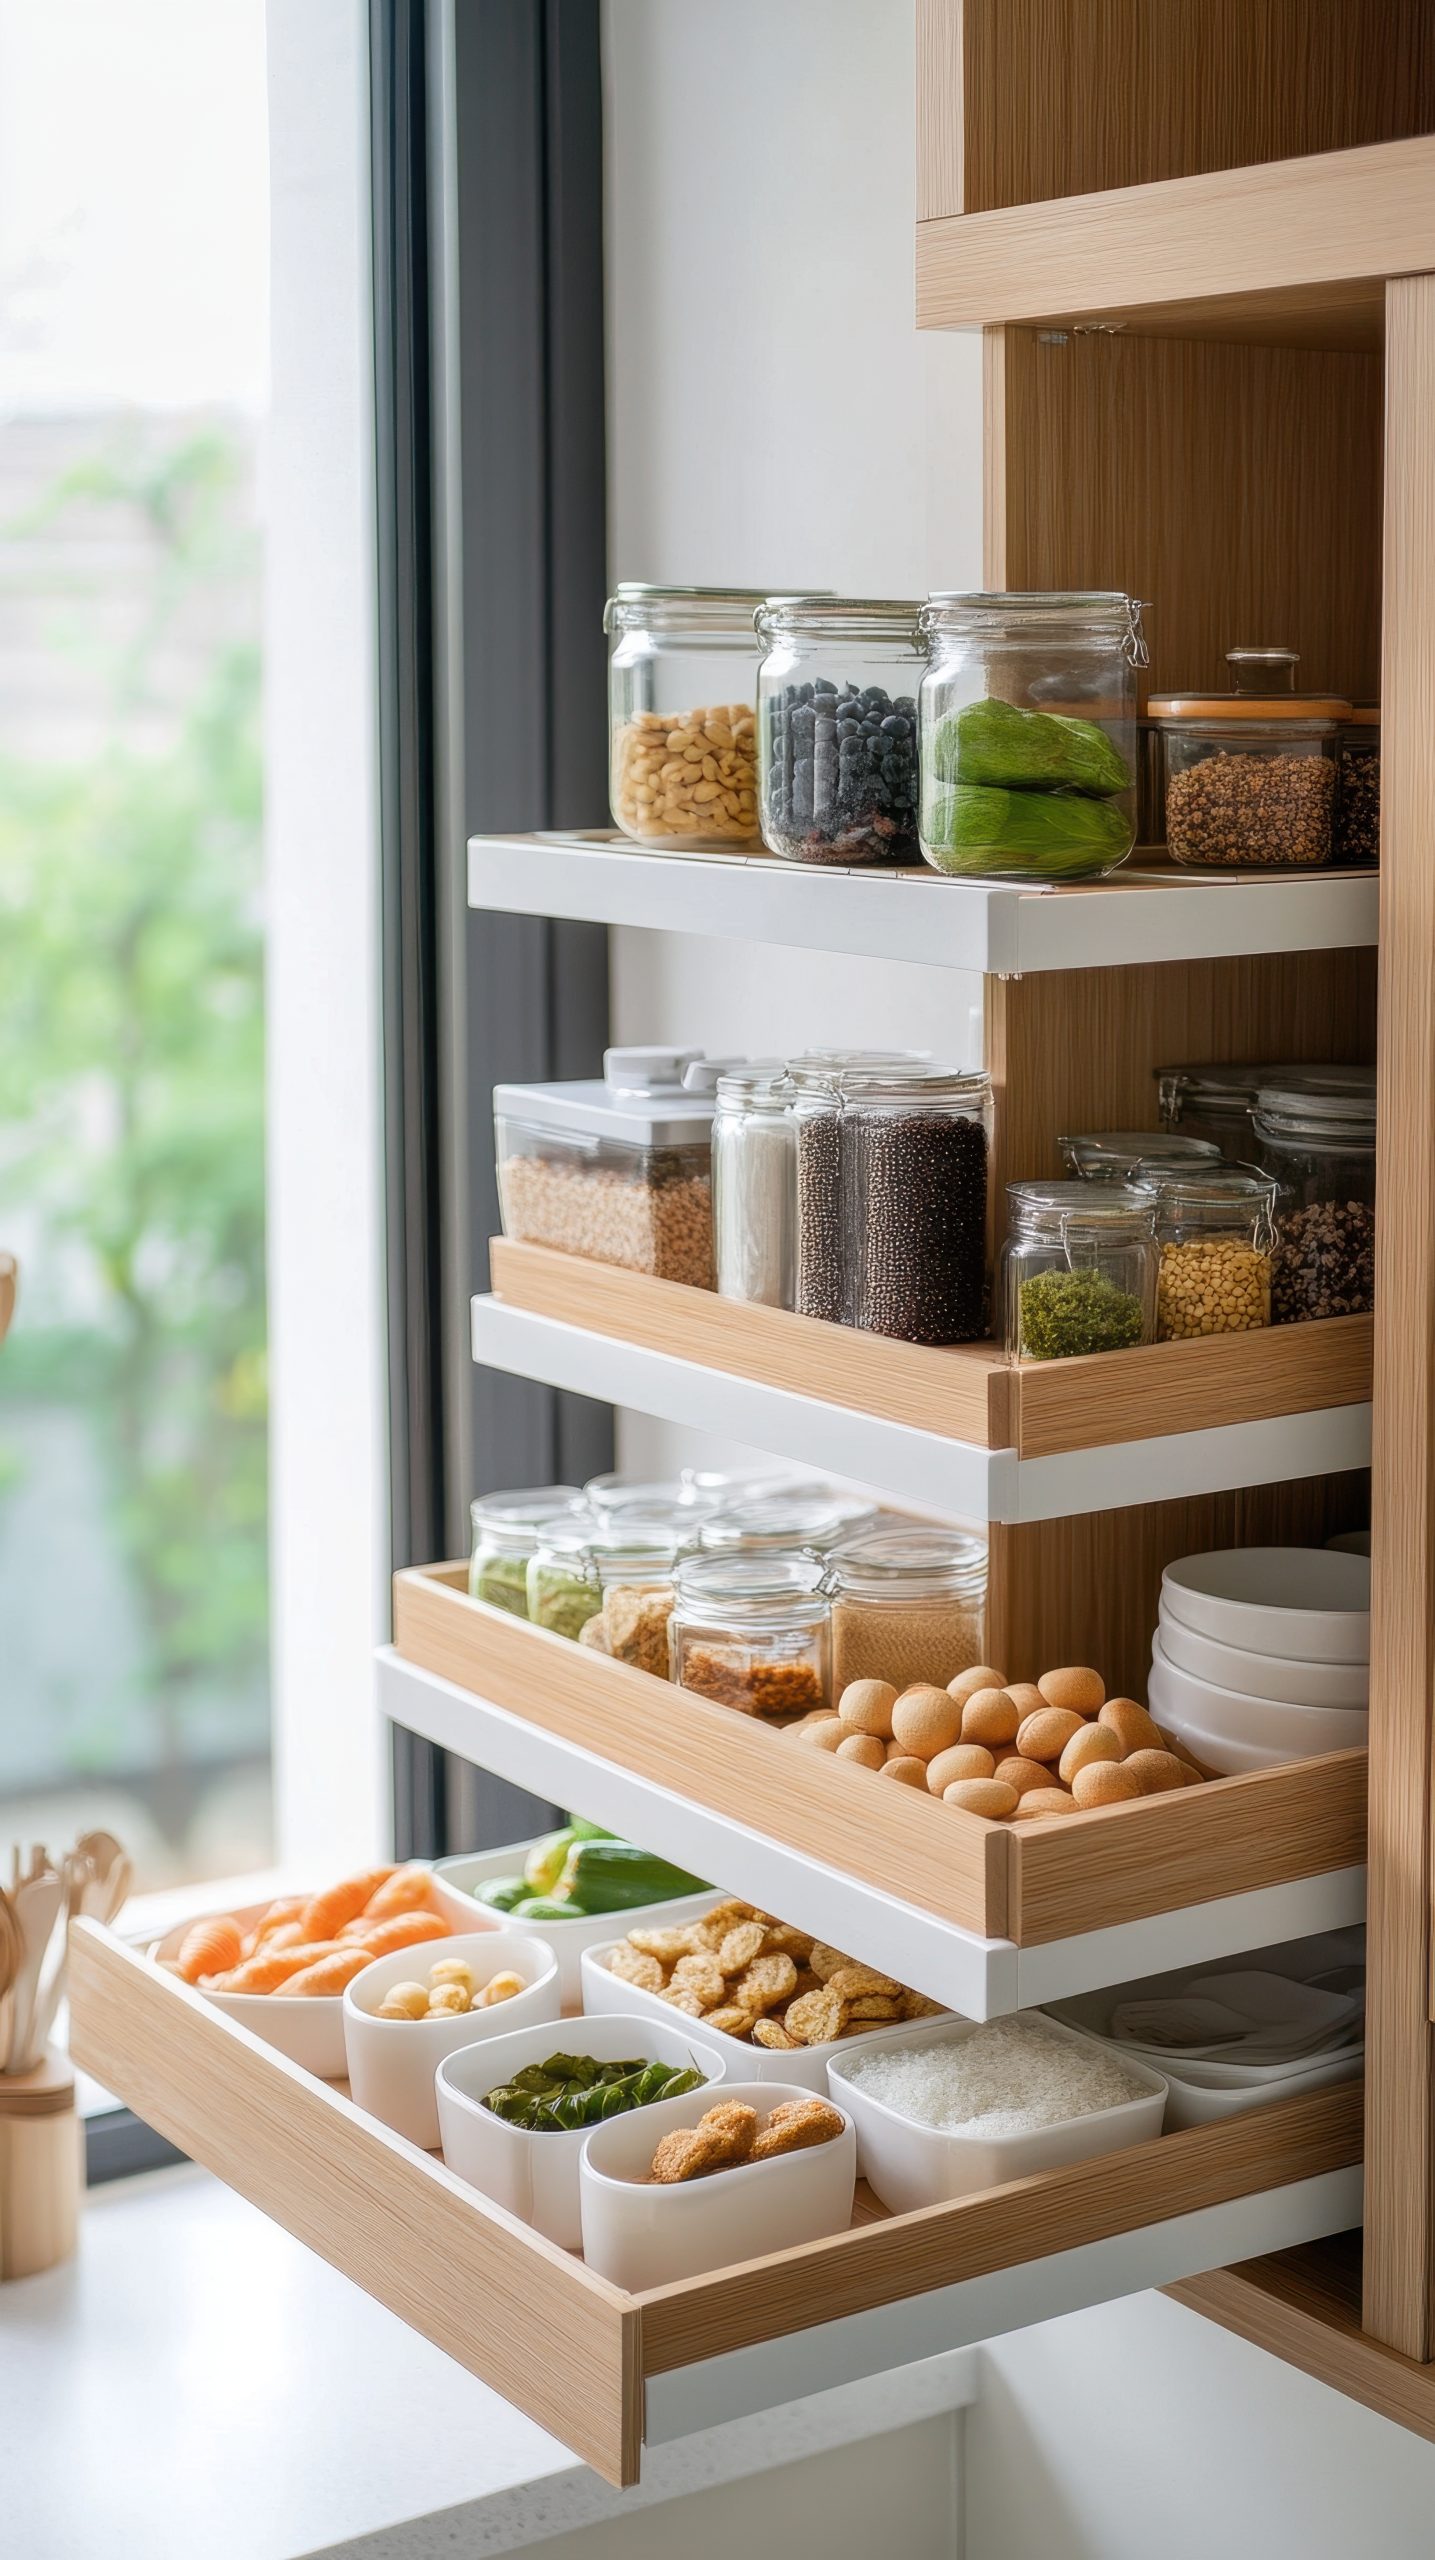
How often do you reach into the back of your pantry and find something expired? It’s a common issue when you just pile new items in front of the old ones, but the “First In, First Out” method (FIFO) can help to prevent that! This involves making a habit of using the oldest items first before reaching for the new ones. When you come back from the grocery store, always move your older products forward and put the newer purchases behind them. This can help to reduce food waste and save money by making sure food items don’t get lost and forgotten about in the back of the pantry. Implementing FIFO doesn’t have to be complicated; it’s just a matter of shifting your habits and adding new food purchases to the back, so that older items get used first and avoid expiry dates.
Create Zones
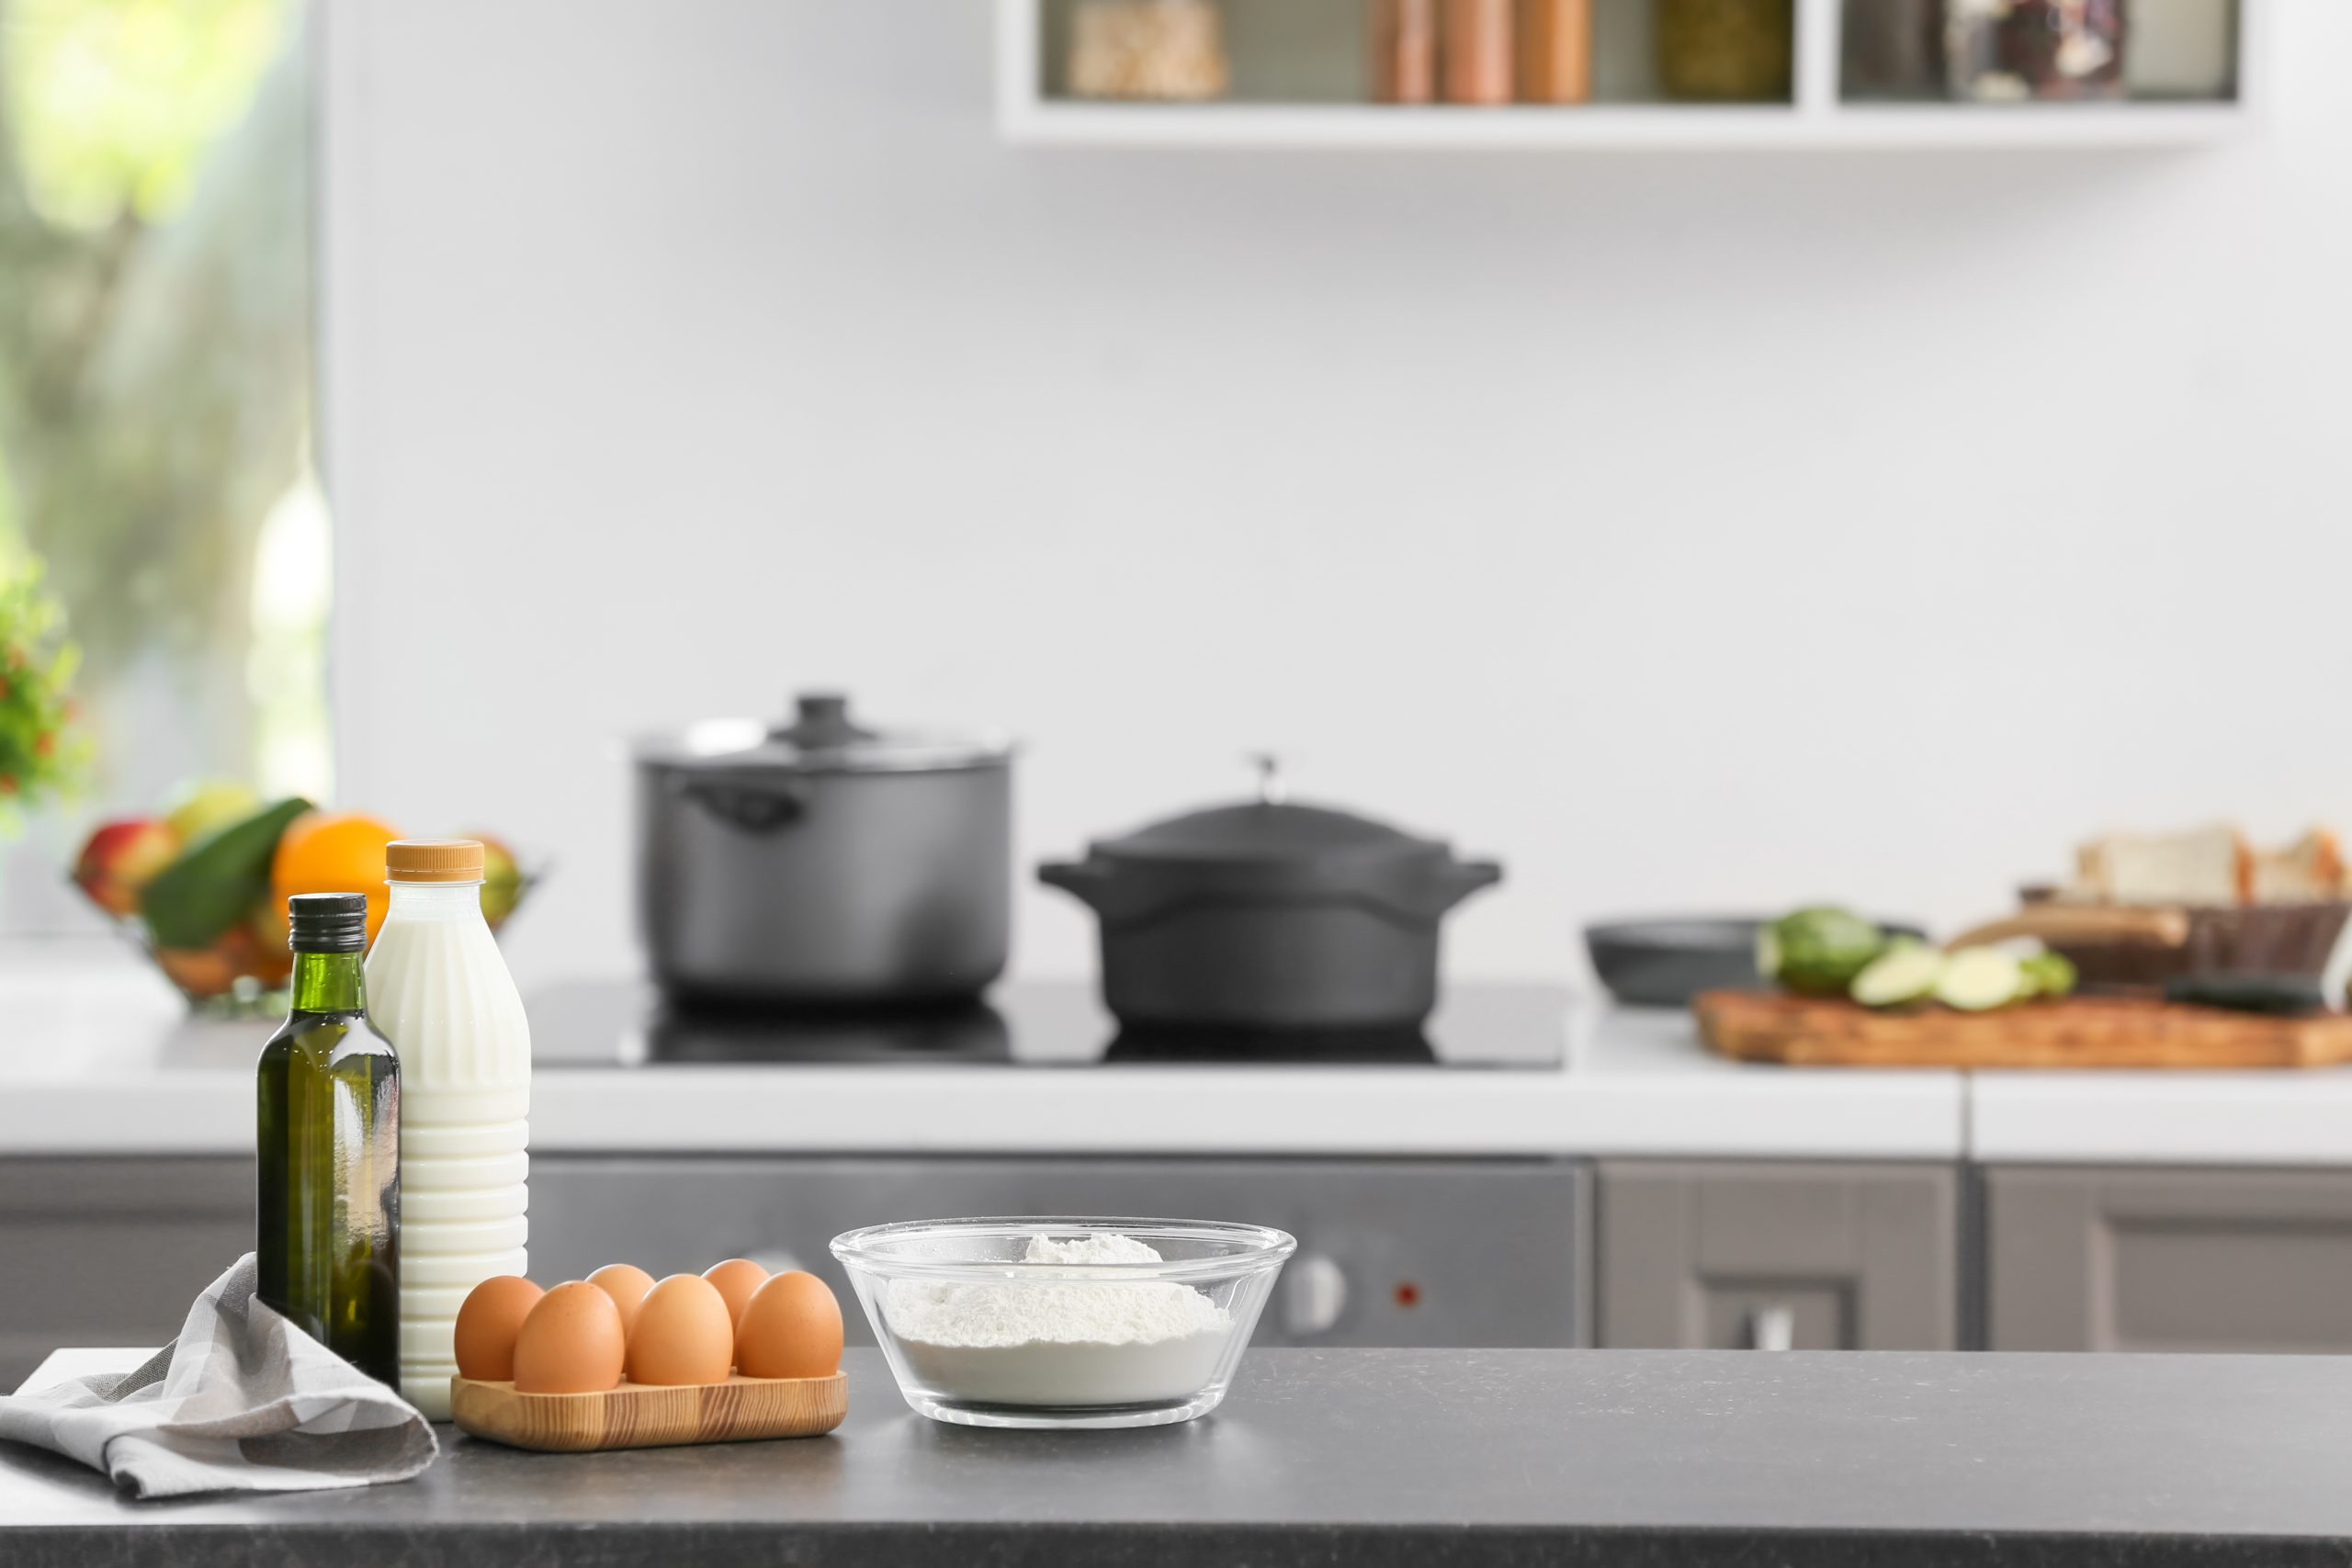
Thinking of your kitchen as a series of functional zones can be a game-changer for efficiency. Instead of scattered chaos, think of designating different parts of your kitchen to specific tasks: a baking zone, a coffee station, a prep zone, etc. Having these clearly defined zones can streamline how you navigate and use your kitchen for each specific need. Keep all your baking supplies in one area – measuring cups, flour, sugar – so they’re ready for any baking adventure you decide to embark on. Designating a specific spot for a particular need can help to prevent things from being misplaced, make meal prep easier, and keep everything organised since it always returns to the same spot. You’ll notice a huge difference when each zone is established and maintained.
Regularly Declutter
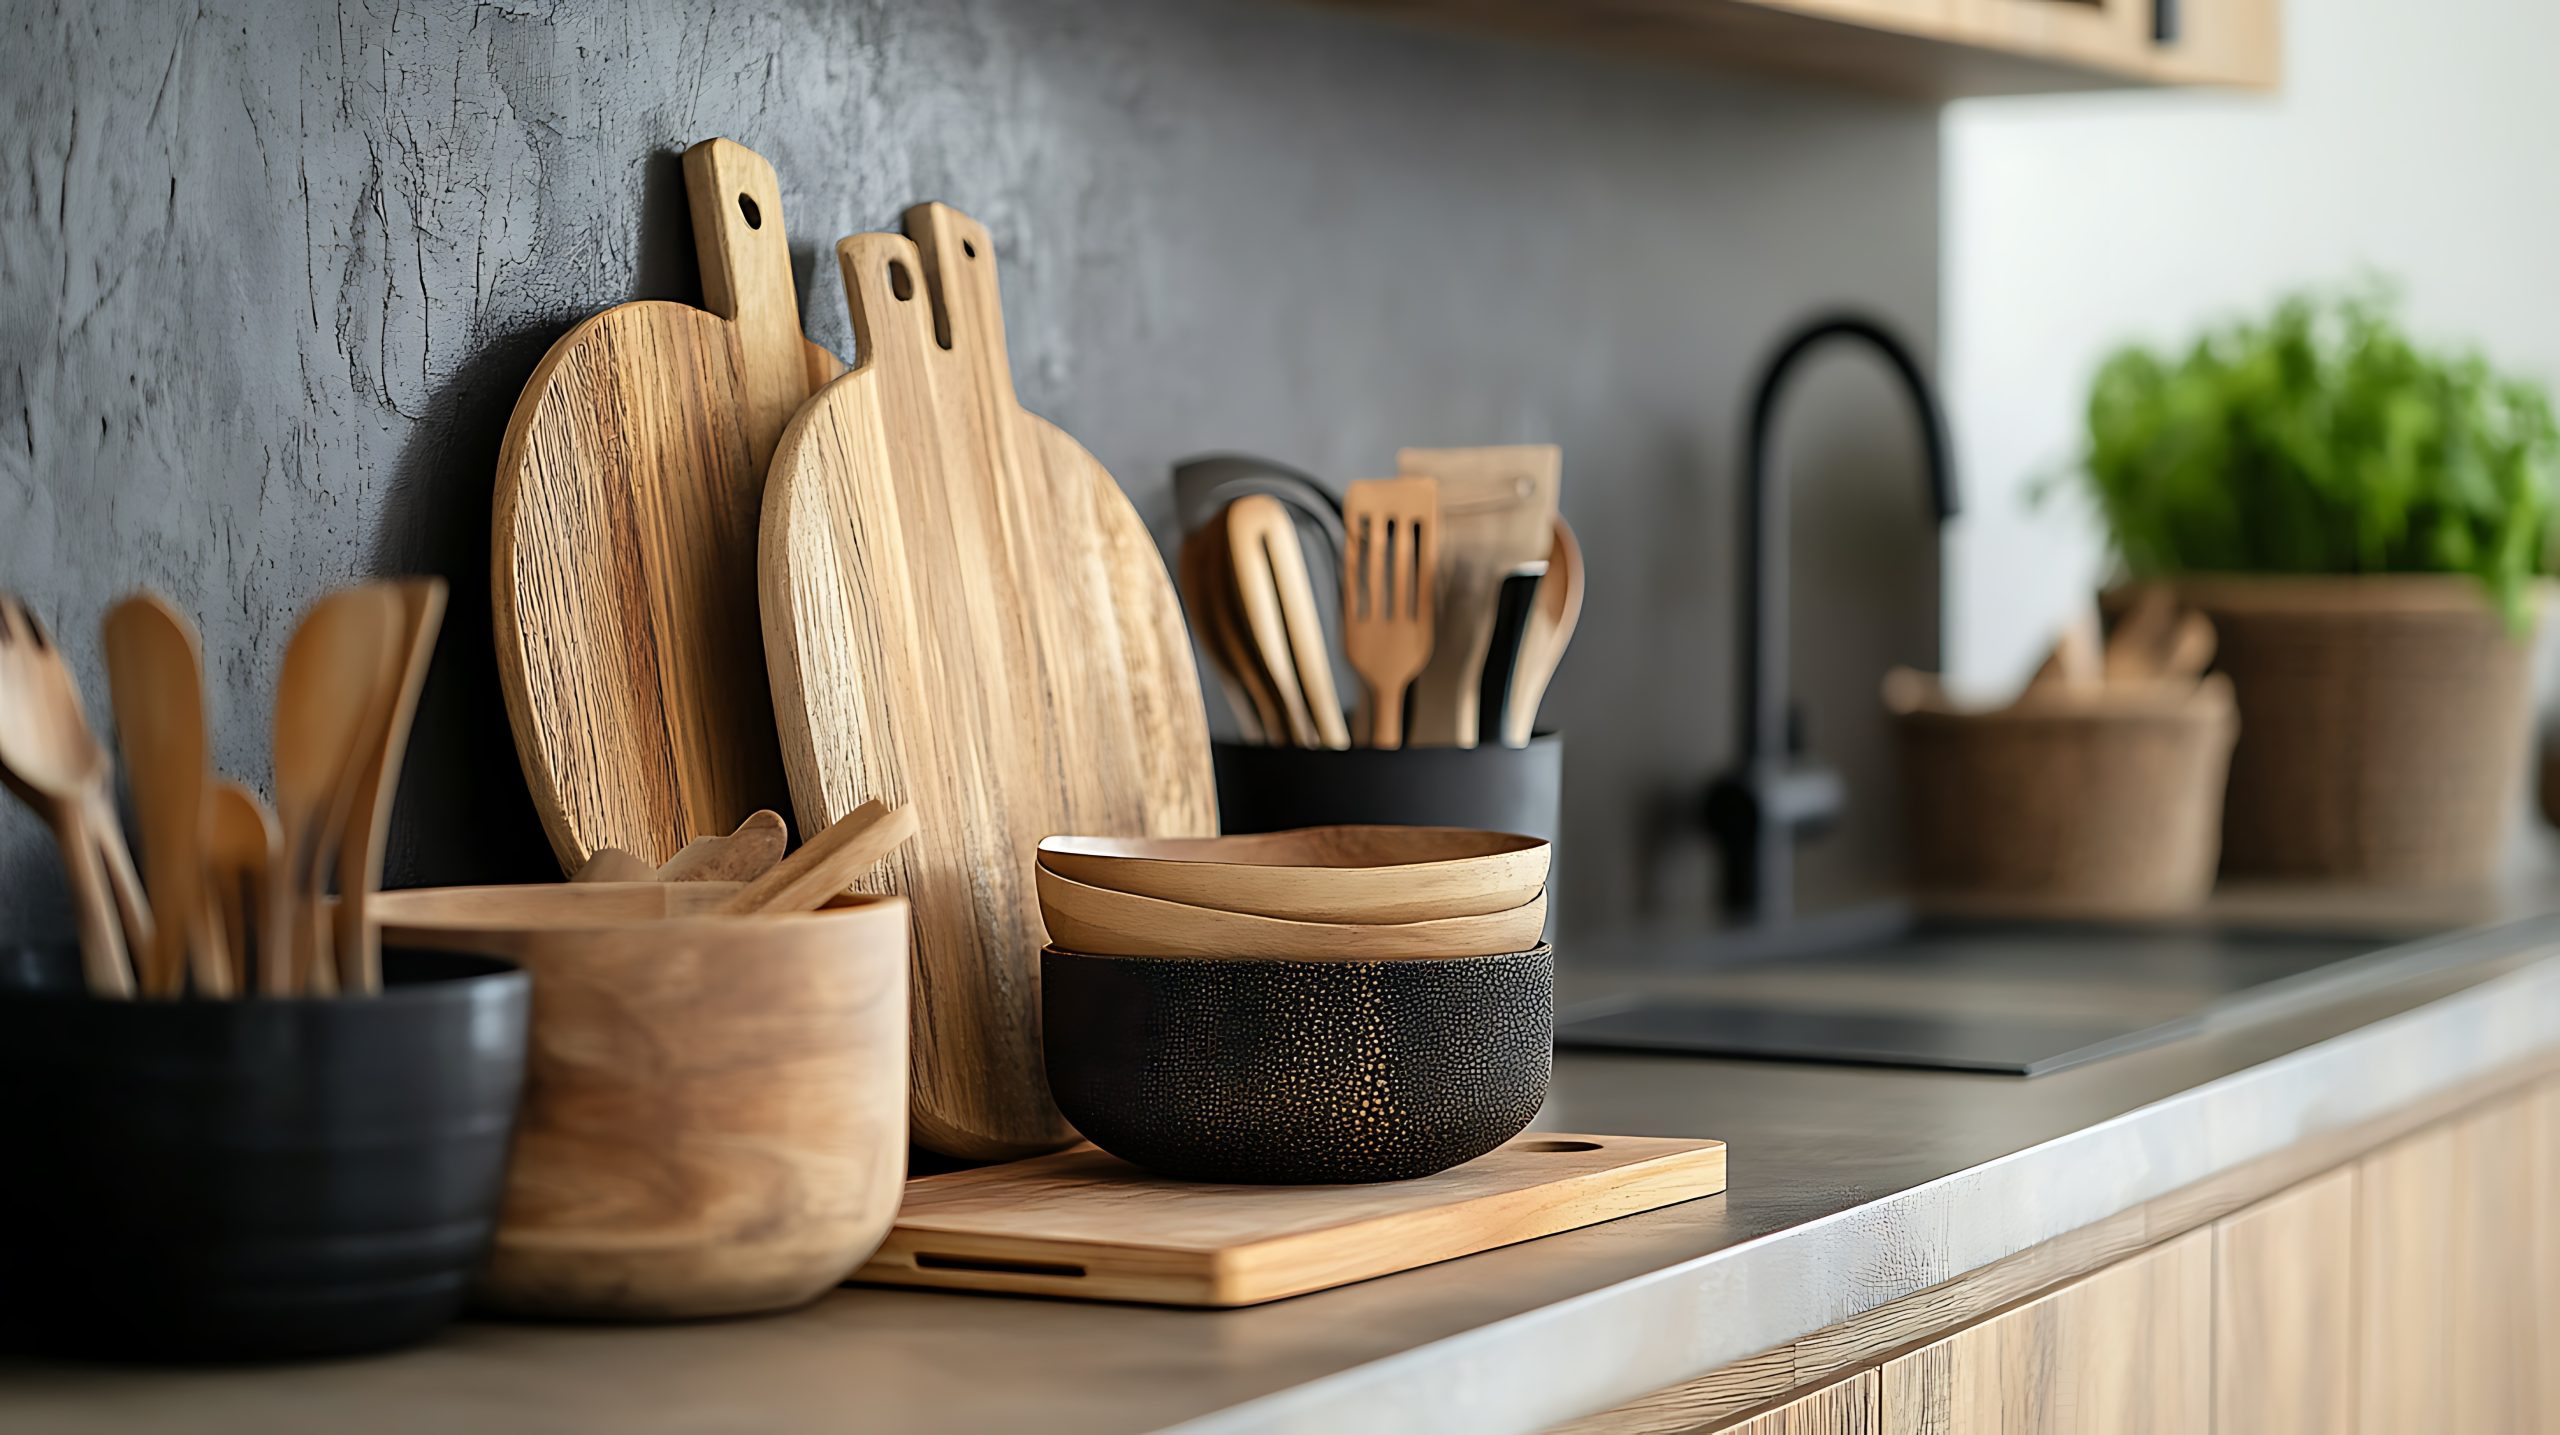
Finally, even the most organised kitchens need regular decluttering. It’s easy to accumulate items that you simply don’t use or need and to slowly forget about old items that start to take up valuable space. Take a few minutes regularly to purge out items that no longer have a purpose in your kitchen, whether that is a random utensil you never use, a mismatched container you forgot you owned, or old food that expired.
By doing this routinely, you prevent the build-up of clutter that can inevitably lead to a kitchen that’s no longer organised. Incorporate decluttering into a simple routine by using the FIFO system, or spend 10 minutes each week to quickly see if there’s anything you can let go of from the pantry, fridge, or your cabinets. A consistently decluttered space is key to a consistently organised kitchen and home.
By implementing these 15 kitchen organisation ideas, you can transform your space into a more functional and enjoyable environment. Remember, a well-organised kitchen is not just about aesthetics, but about making daily life easier and more efficient.
